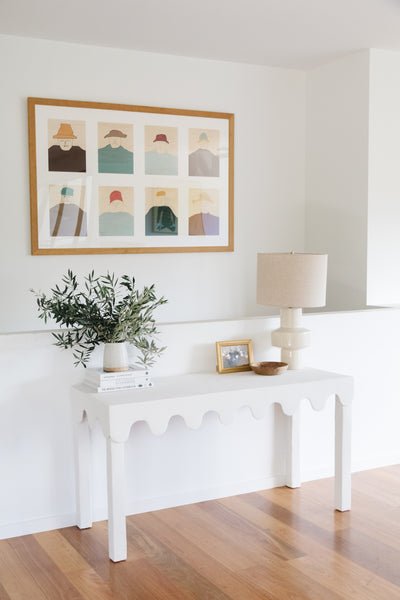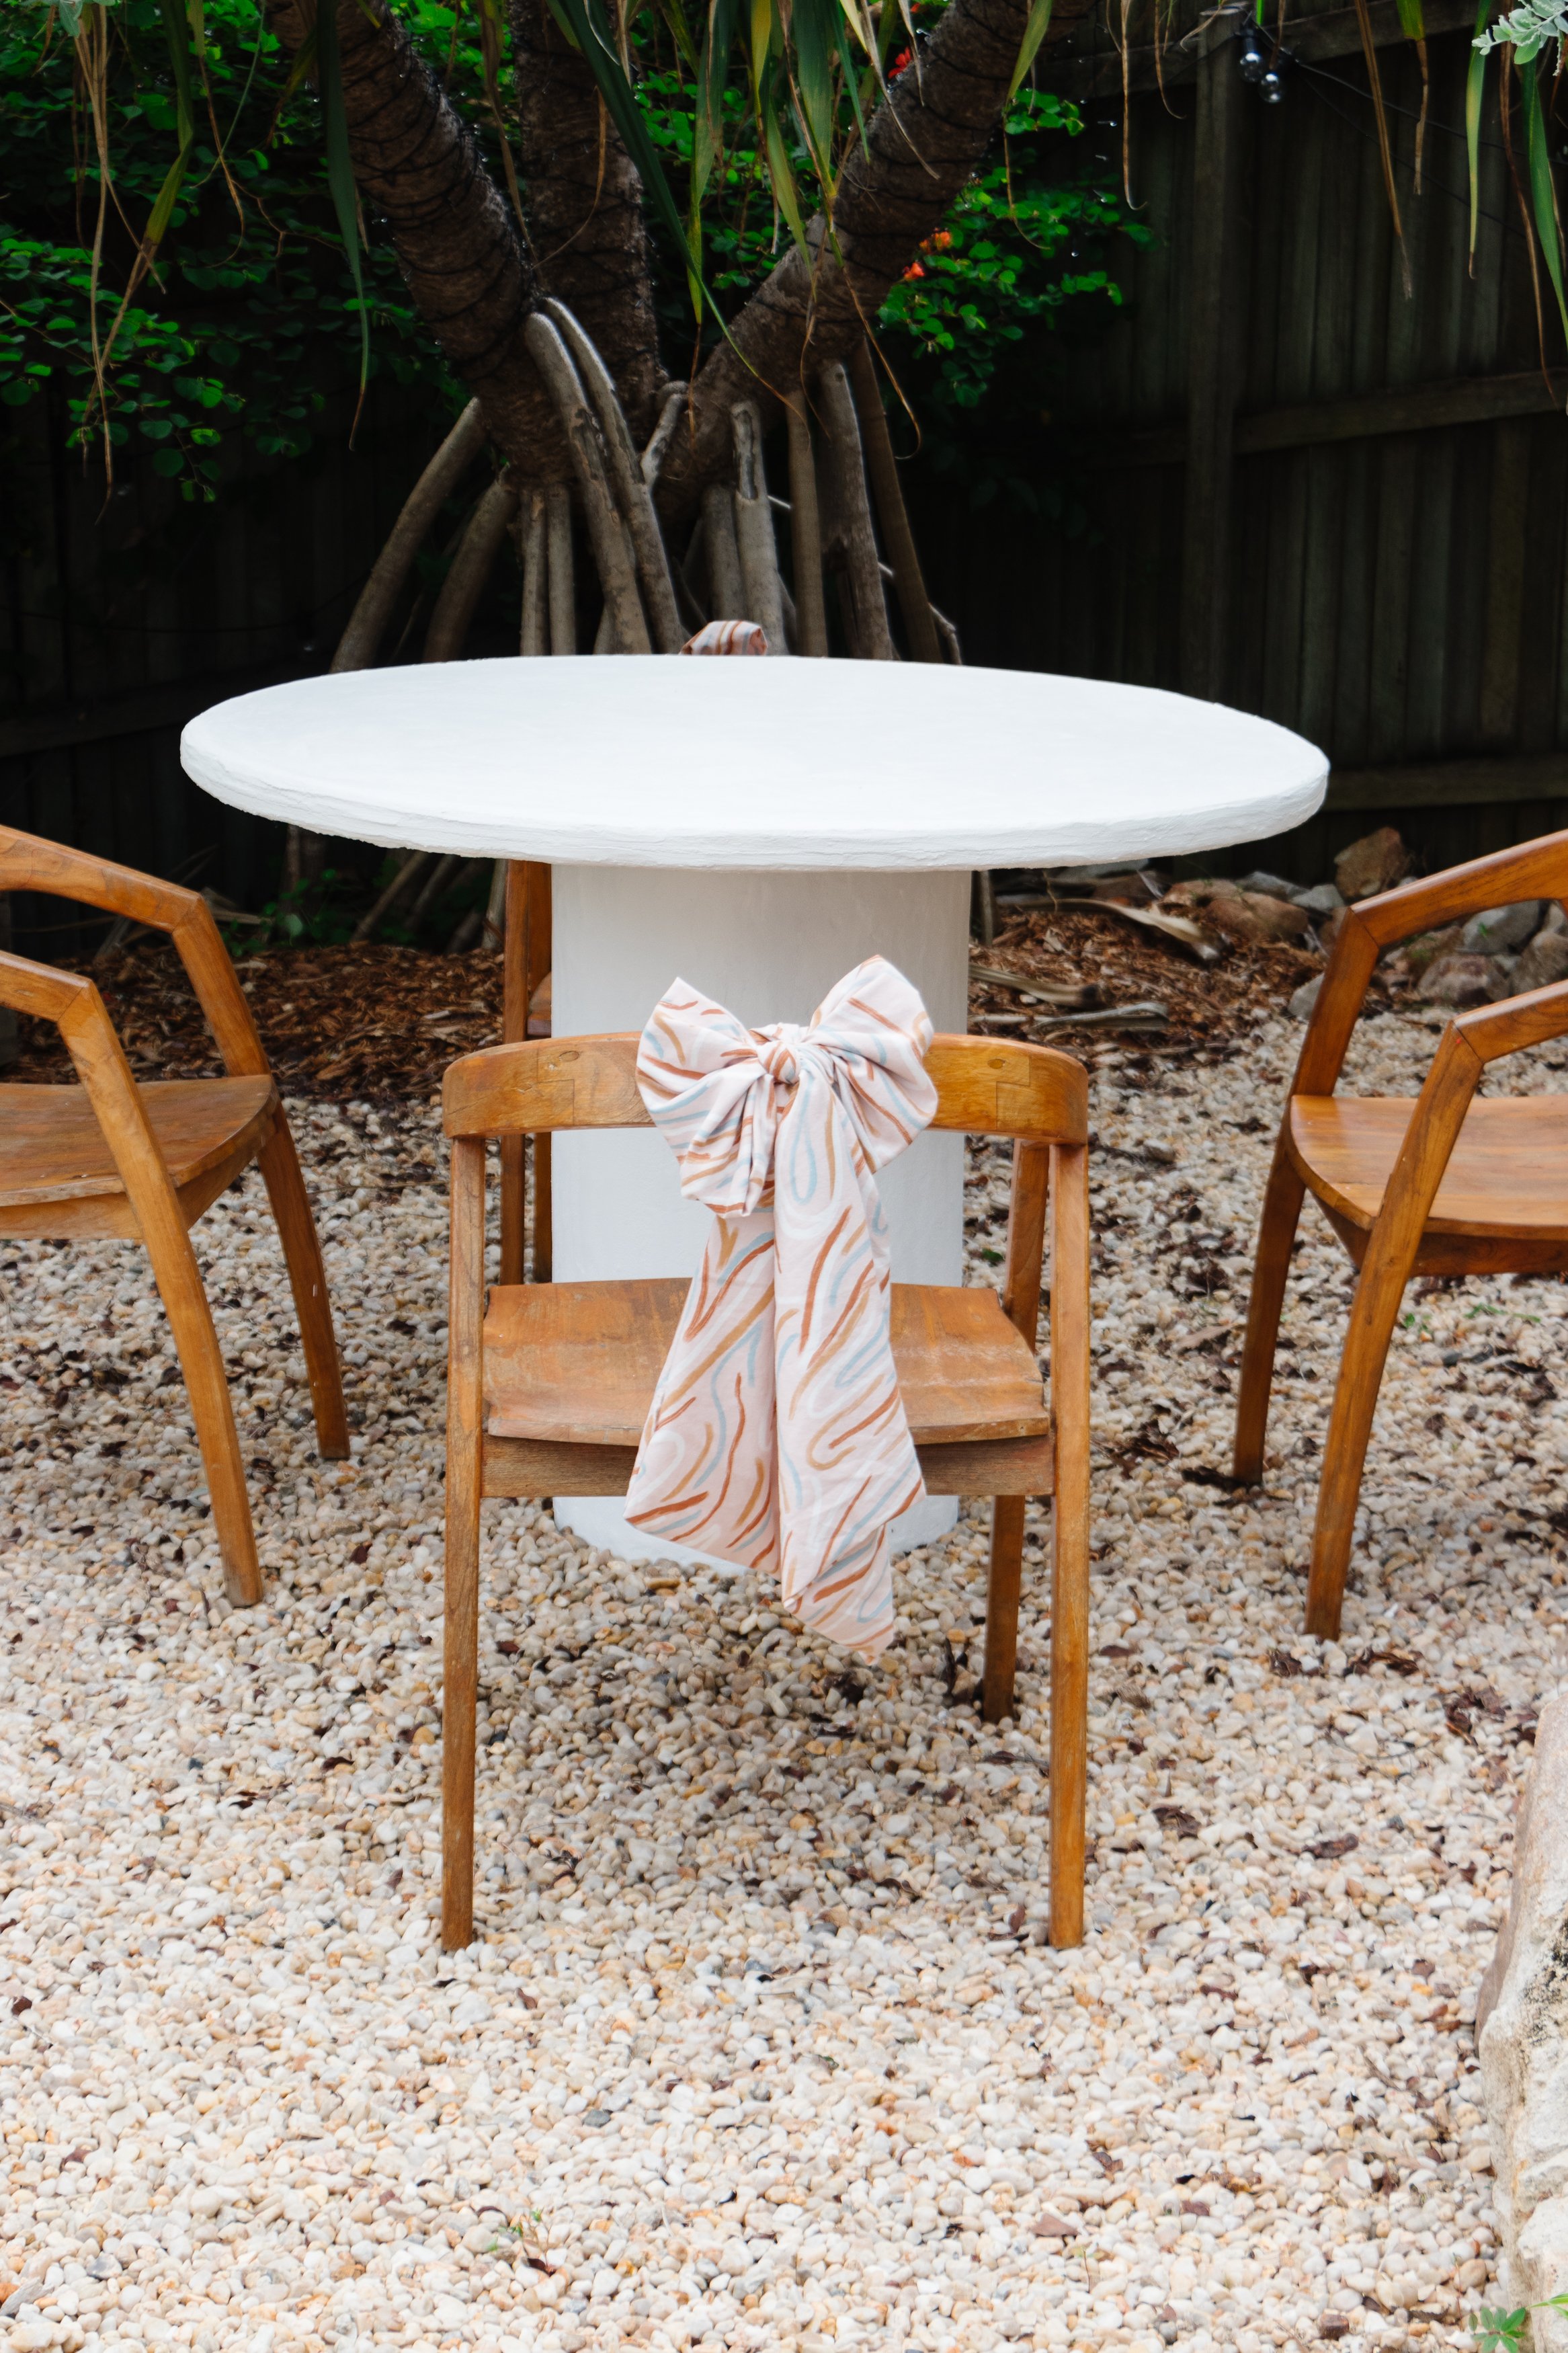
Upcycled Plaster Wavy Console Table
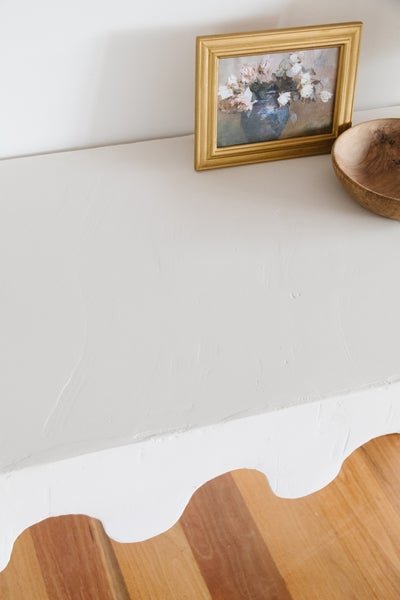
This is an upcycle I have been wanting to test out for months, literally. As you know I love anything curvy and because our home is straight edged and modern, being able to add wavy curves has completely softened our space. For the last few months I have been patiently searching for the right console table (the height and width had to be spot on) and I finally found the perfect one at Salvo's for $5 last week. I promptly replaced the tabletop, made a wavy edge, applied plaster to the table using smooth topping compound, and smoothed it down with my detail sander.
This upcycle brought me so much joy and satisfaction, and I absolutely love it! It's worth mentioning I've dabbled in rendering before (have you seen my DIY Rendered Coffee Table?) but this time I wanted to try something new. Instead of using grout or my go-to joint compound, which I used for my DIY Niche Side Table and DIY Niche Wall Shelf, I decided to use topping compound instead. It's very smooth and lush, shrinks very little, is easy to sand, and weighs about 35% less than joint compound. This upcycle turned out to be super easy and totally worth doing if you want a curved moment in your space. Like, I can't stop staring at it. It's as if it was always meant to be in our home. Read on to make your own Upcycled Plaster Wavy Table. And make sure you watch this video to see how it all came together. Hint: It was lots of fun!
Before & After
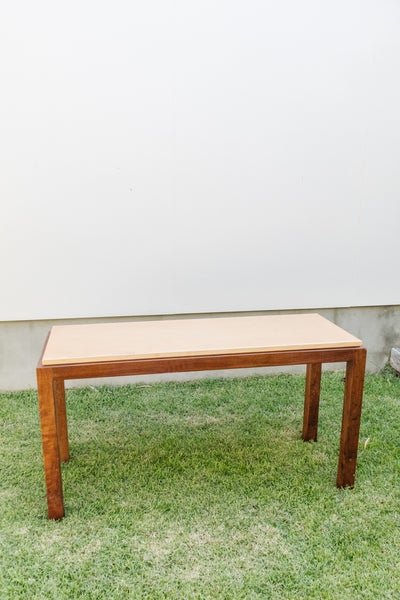

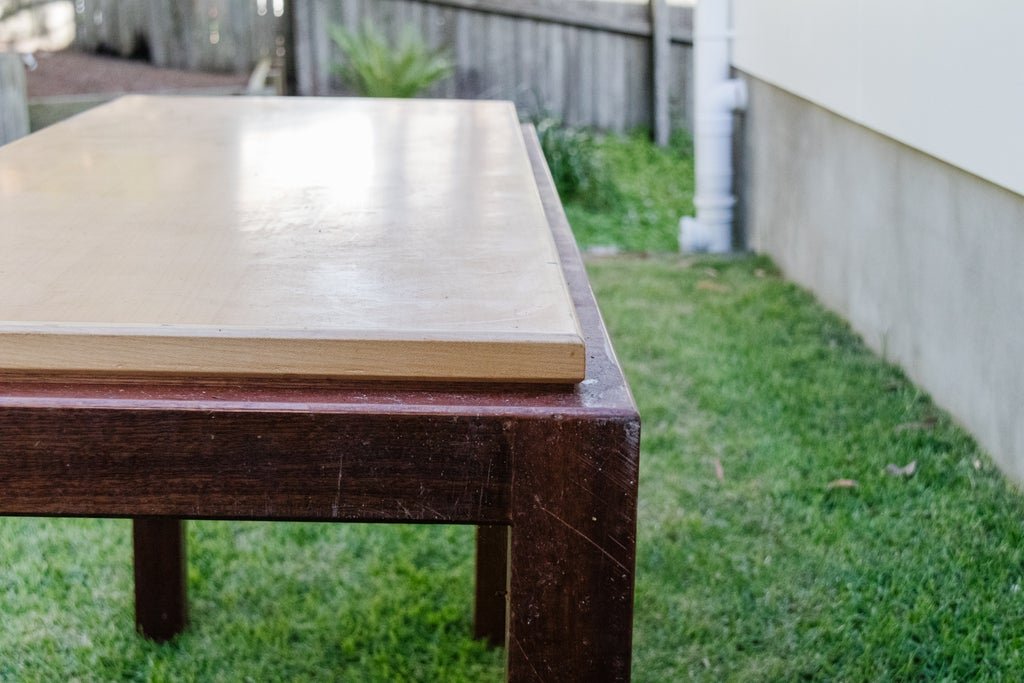
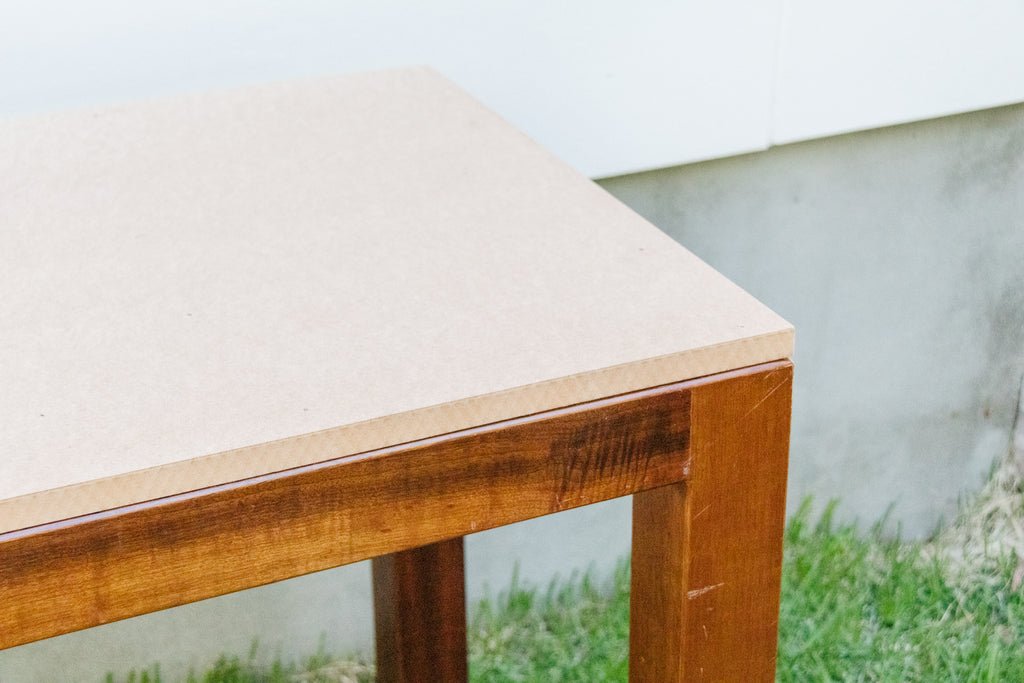
Before we get started, the table I picked up for $5 came with some issues. It had an unusual tabletop, which I had to remove and replace with a sheet of MDF - as per the two photos below. I highly doubt you will need to do the same, but if you do, head over to watch this video to see how I did it. So for the purpose of this tutorial, I won't be including these steps as you'll likely have an everyday table without the same issues.
Materials
Secondhand console table
Cup or bottle
Pen
Hammer
White primer paint
Gyprock Topping Compound (plaster)
Equipment/Tools
Table clamps
Jigsaw
Hammer
Paint roller
Joint tool (to spread the plaster)
Sander or sanding paper/sponge
How To
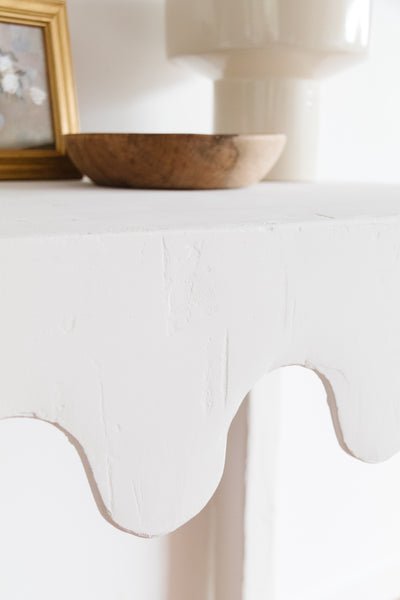
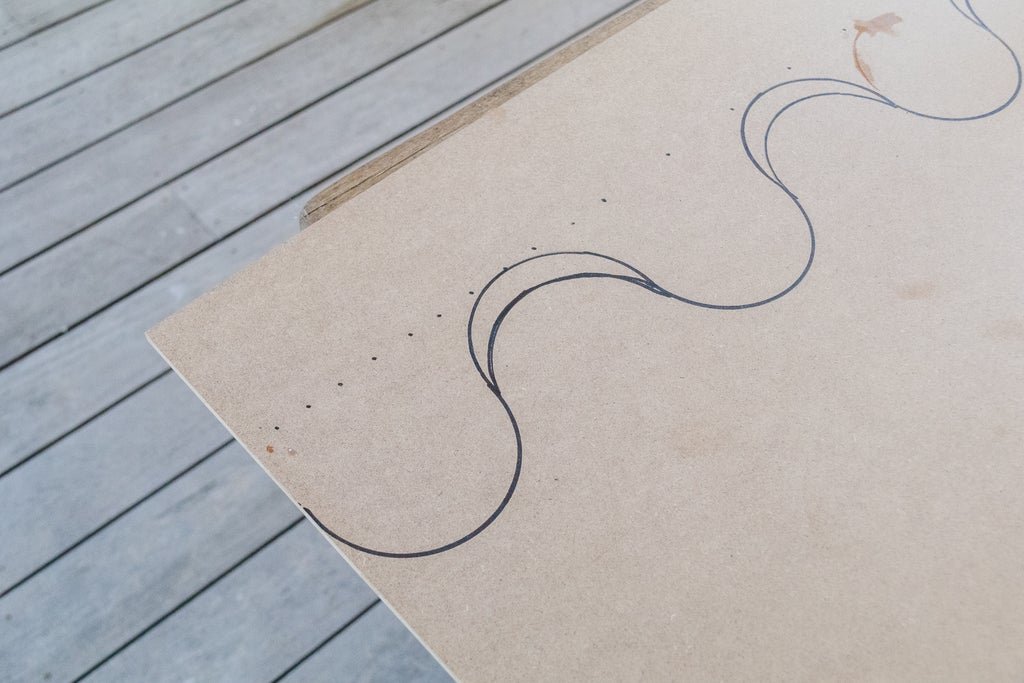
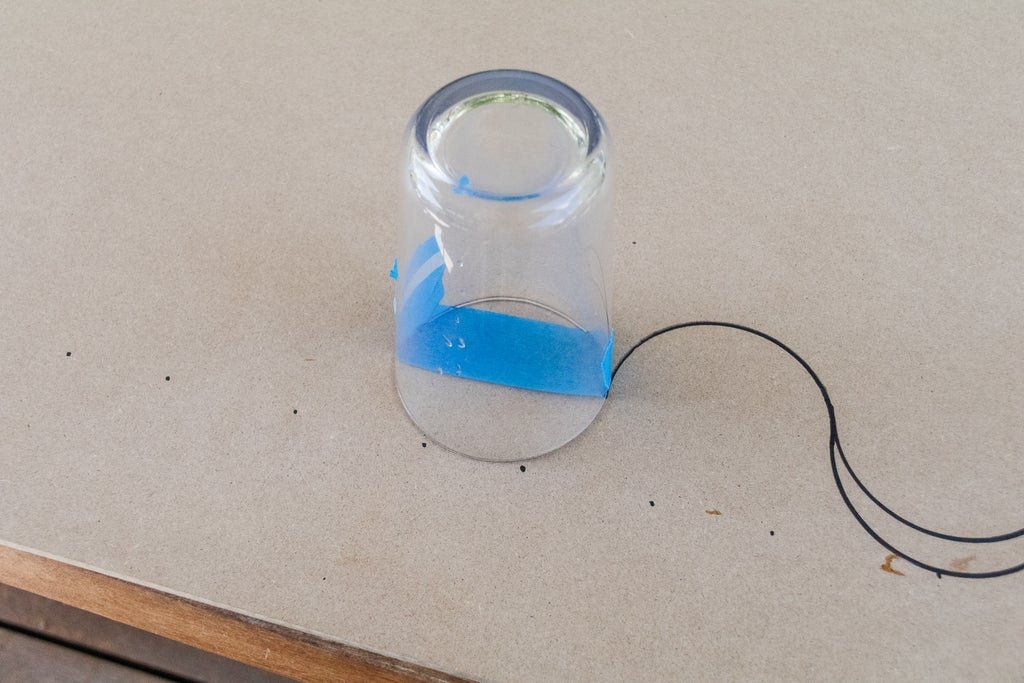
Begin by wiping down your table to remove dust and dirt. Sand the table thoroughly to rough up the material of the table, which will make it easier to paint and coat in topping compound later on. Mark out the wavy edge on the sheet of thin MDF using the top of a cup (or bottle) and a pen. Watch this video to see how I did this step.
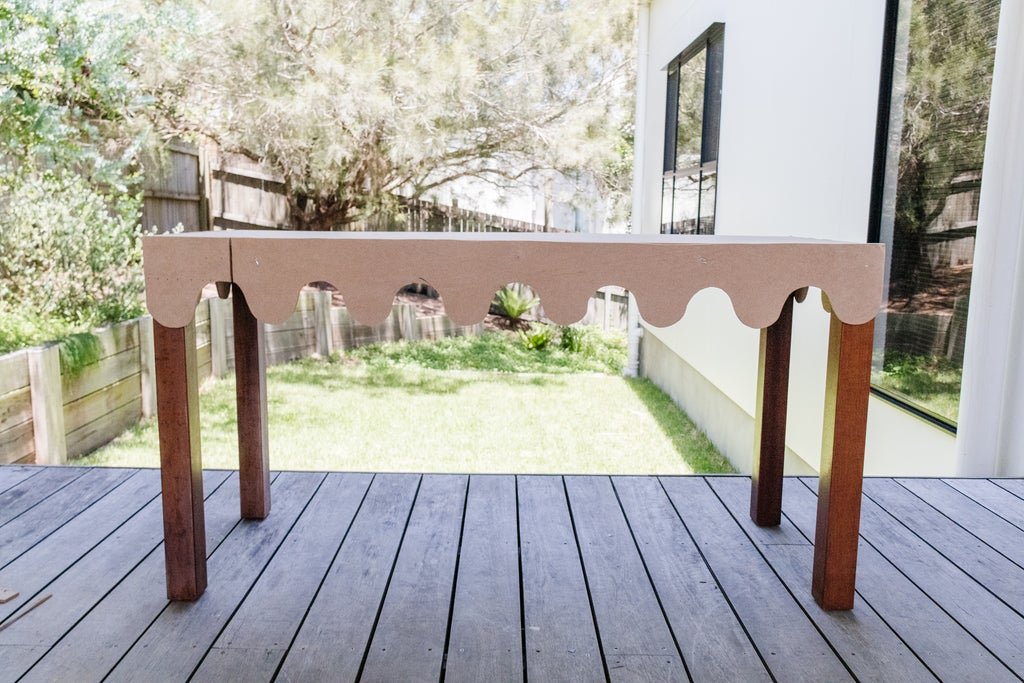
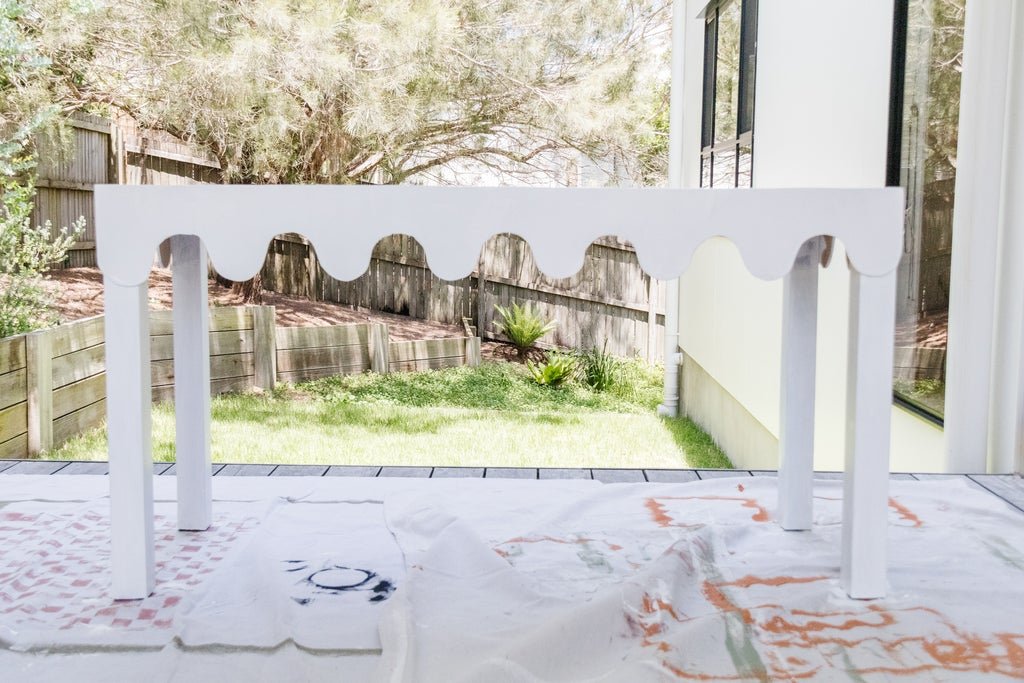
Firmly attach the MDF onto your work surface using clamps. Cut the wavy edge using a jigsaw. Measure the table and cut the wavy edge to fit along the 4 sides of your table. Using a hammer and brad nails, attach the wavy edges to the sides of your table.
NB. I not not apply a wavy edge to the back as the table will be pushed up against a wall in our home.
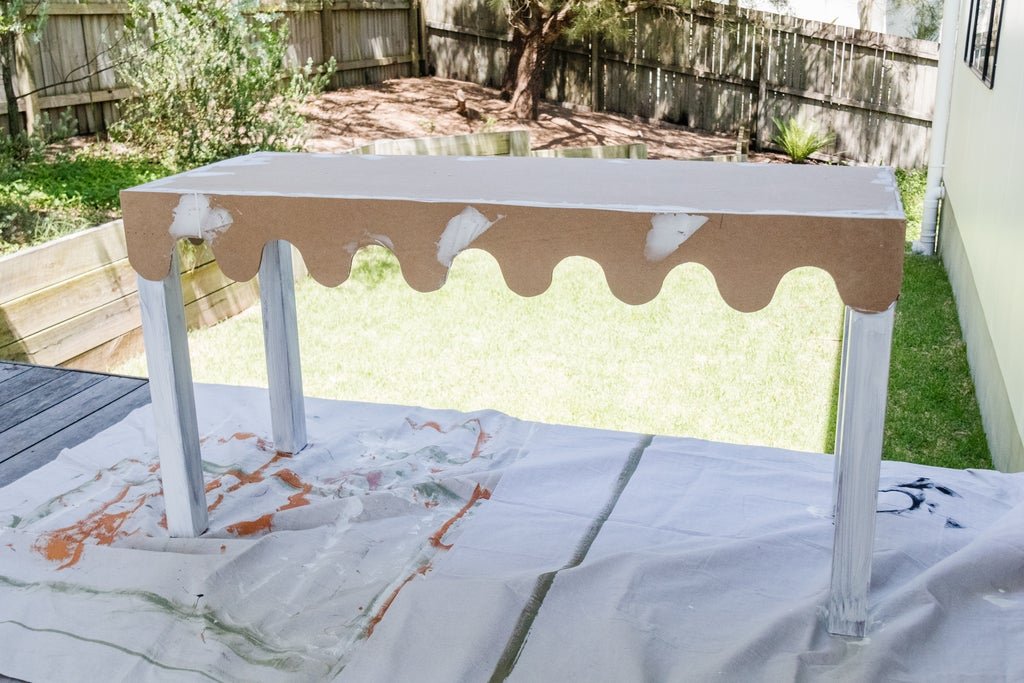
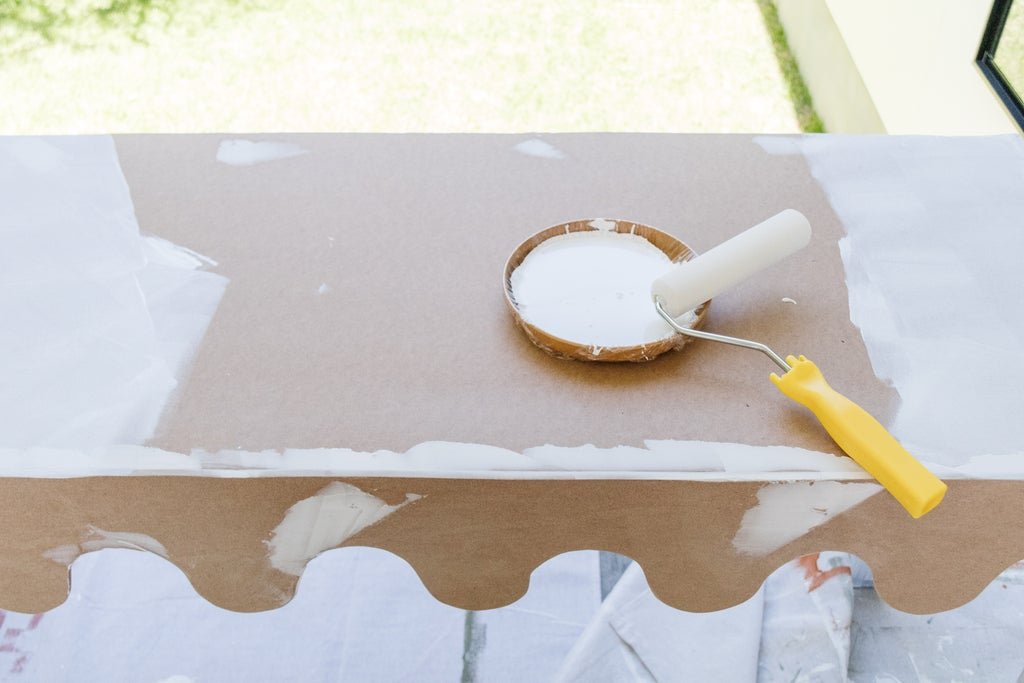
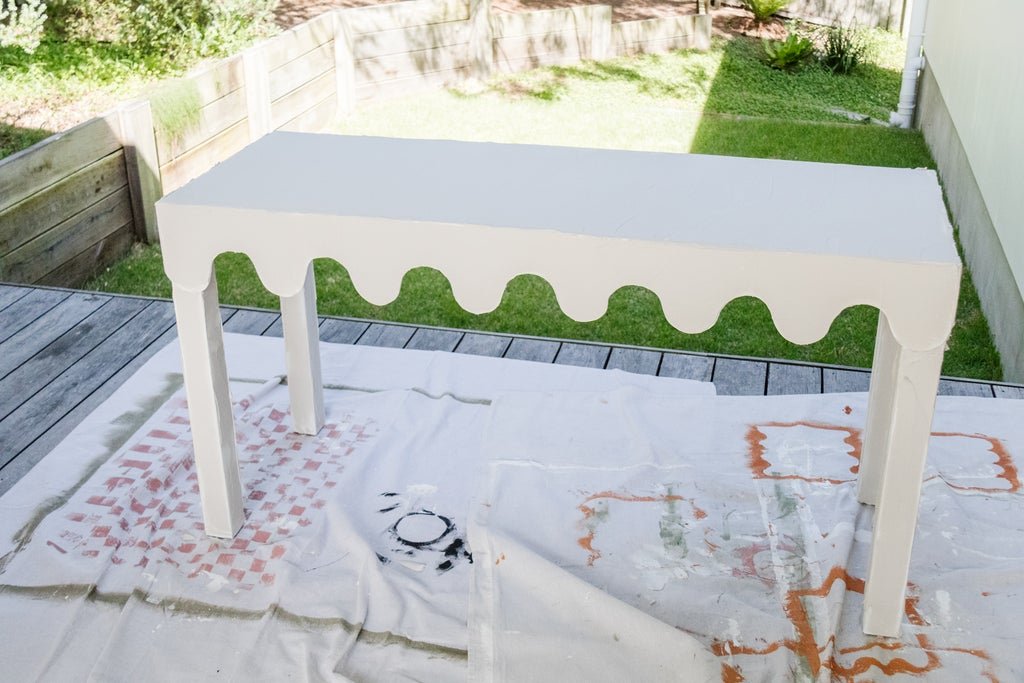
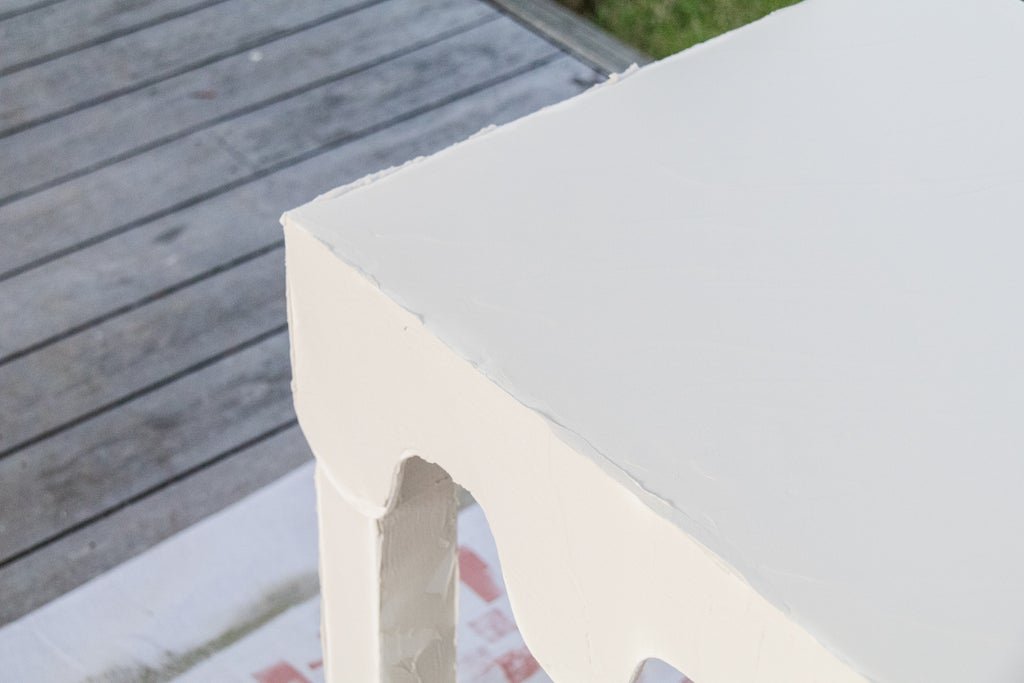
Fill in holes or gaps with multipurpose filler and a joint tool. Leave it to dry for at least 24 hours, then sand so the filler is smooth and even with the table. Paint the table completely using white primer paint. Leave to dry completely.

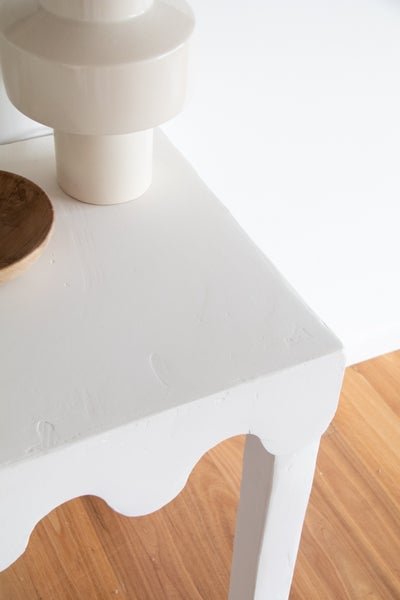
Apply the topping compound to the entire surface of the table, legs included, using the joint tool. You'll notice the compound has a lot of air bubbles, so work the compound thoroughly first to get rid of the air bubbles. Watch my videos here to see how I did it. Set aside to dry.
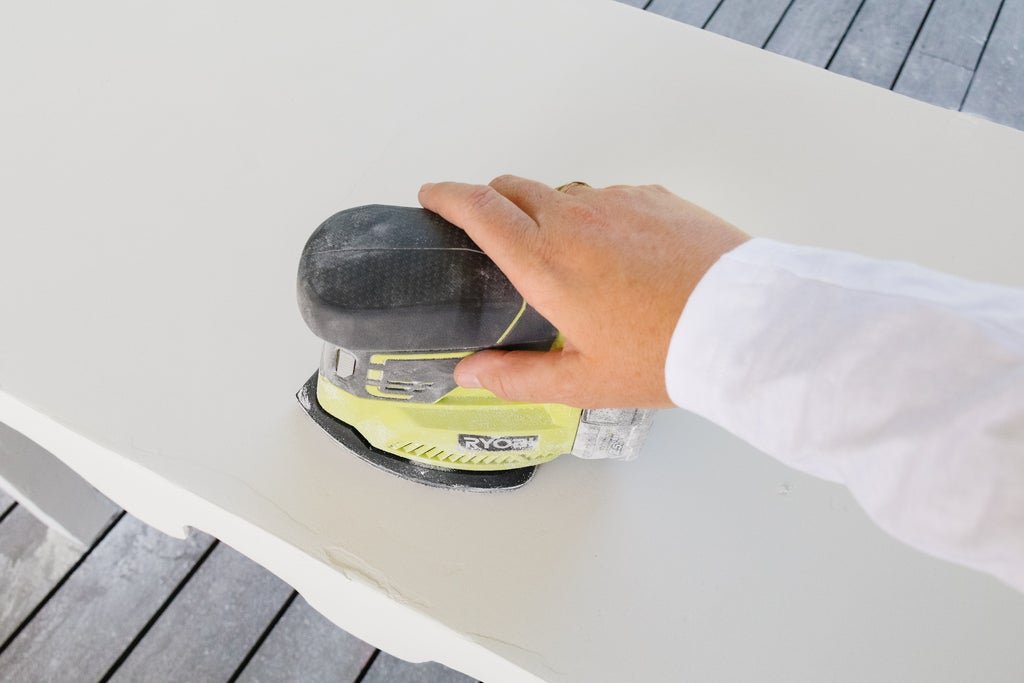
Once it’s completely dry, sand it all over using a fine grit sanding sheet. Dust off the plaster powder thoroughly then seal with Rust-Oleum Clear Coat spray and set aside to dry. If you don't love the raw colour of the plaster, paint it in your favourite colour!

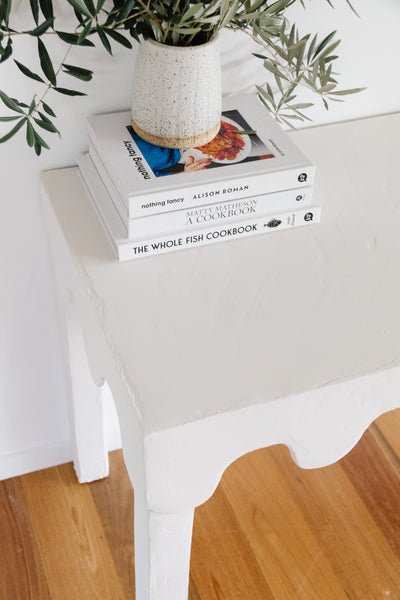
Ta daaaa! A rendered wavy table of my dreams, and hopefully yours too!
This project was so worth the wait. Even though it took a few months to find the perfect console table and I had to fix the tabletop before I could really dive in, I knew it would be worth it. This was so much fun and I am genuinely blown away by the finish. And while I had my heart set on painting the table a beautiful earthy colour, in the end plastering it was the best outcome, so I am thrilled I used topping compound as it was the perfect "Pan B" for this table.
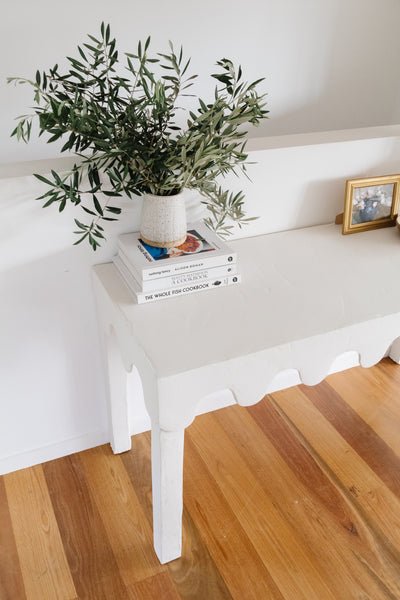
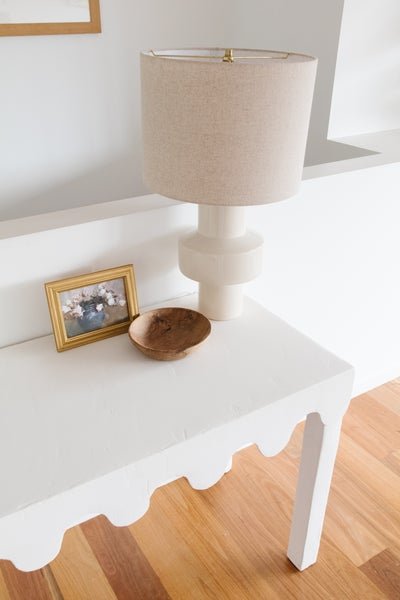
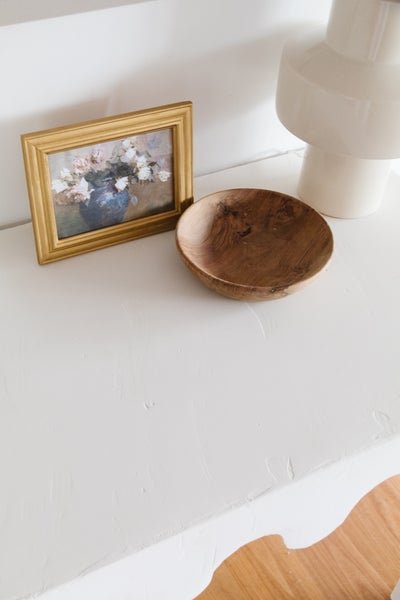
It looks and feels like a bespoke, one of a kind table and I am so happy about that. Since it's taken pride of place in our open plan living area, I have loved styling it, adding greenery, gilded framed art, books and other pieces of decor. And taking a step back to look at that wavy finish, it's definitely a technique and style that can be easily applied to a dining table, side table, coffee table, a bed head or a bedside table. The ideas I have right now are literally exploding out of my brain. Literally! Anyway, I really hope you give this upcycle a try. You'll have so much fun, and get to use some fun power tools while you're at it.