
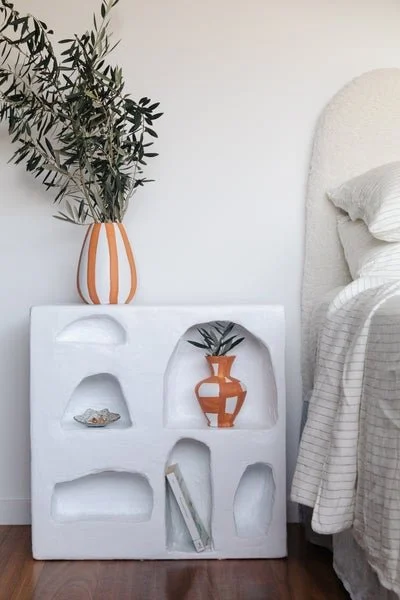
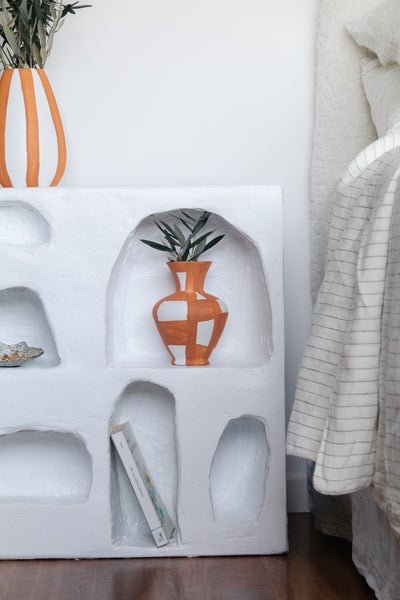
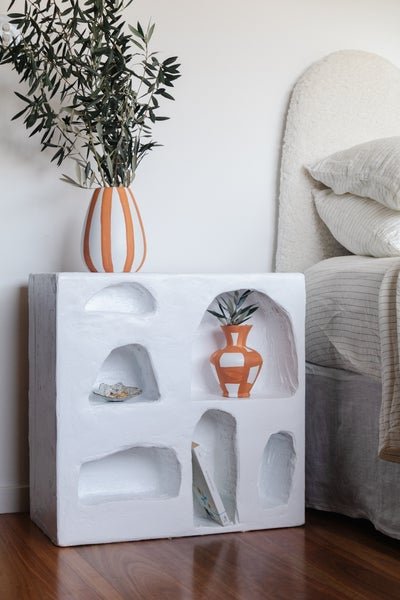
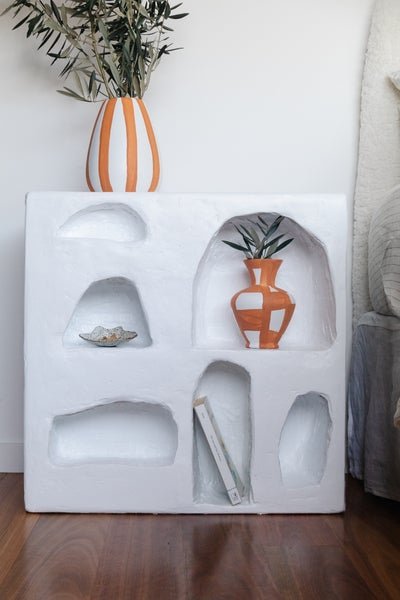
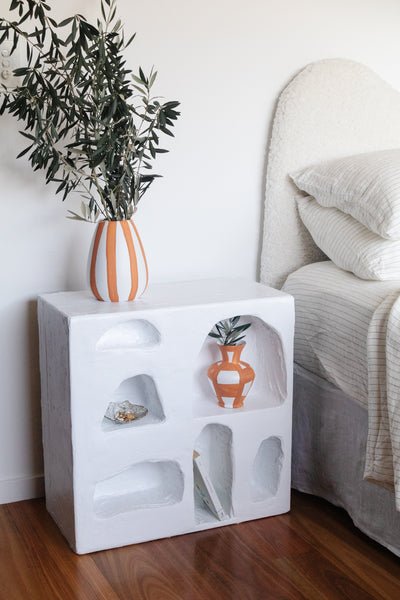
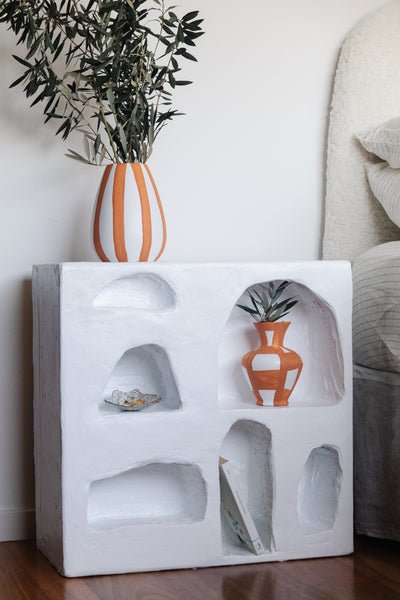
Before & After: DIY Niche Bedside Table
Welcome to the OG of home DIYs - the DIY Niche Bedside Table. If you have been following along over on Instagram, then you'll know for the last two weeks I have been transforming a beat up bookshelf into a Niche Bedside Table. I’ve had the idea of making my own Mediterranean slash Moroccan inspired niche for a few months and struck gold when I found a rickety old unloved bookshelf at my local tip shop. I knew it would be the perfect foundation for bringing this crazy idea to life. Call it blind faith or ignorant bliss, I just knew it would work, even when I had an expanding foam explosion. But when I started to doubt myself and I wasn't confident that people would get my vision, everyone over on Instagram pushed me to keep going. And I’m so glad they did. To see how this all came together, make sure you watch this video, and keeping reading on to find out how you can make your own DIY Niche Bedside Table. As always I have included all the materials with links and steps.
I also want to take this opportunity to say thank you to everyone on Instagram who messaged me about this project with words of support, encouragement and some confusion (lol) - I’m so glad you stuck by me. Thank you from the bottom of my heart for your kind words and encouragement for this project, it’s exciting being able to go on this wild ride with you all! I wonder what I’ll make next…
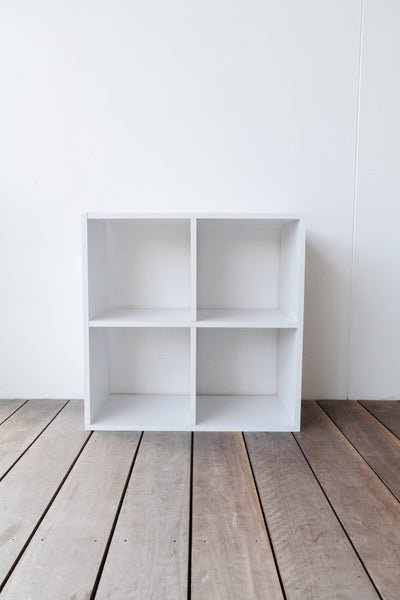
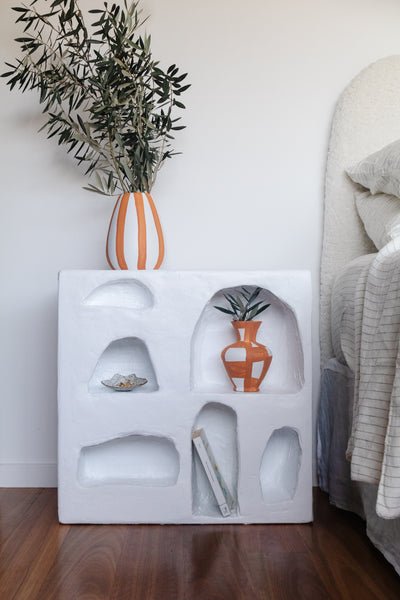
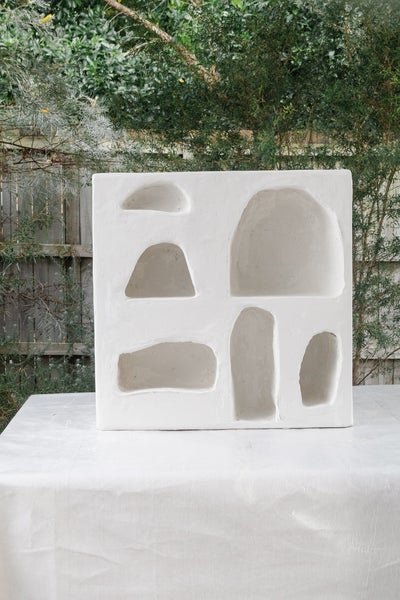
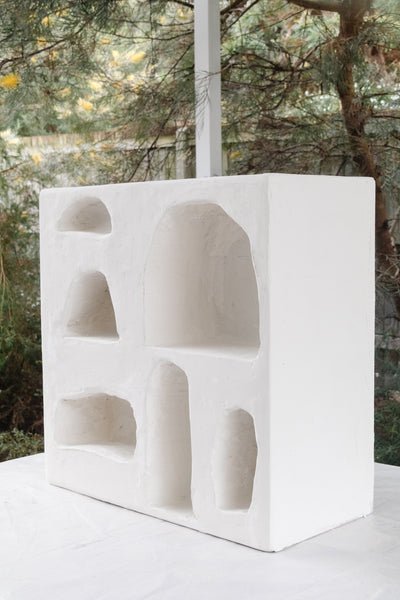
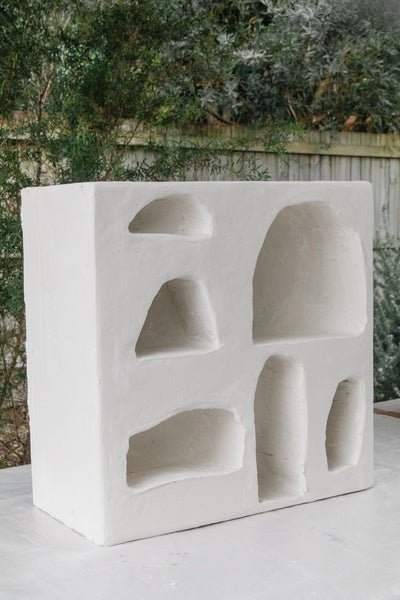
Before & After
Materials
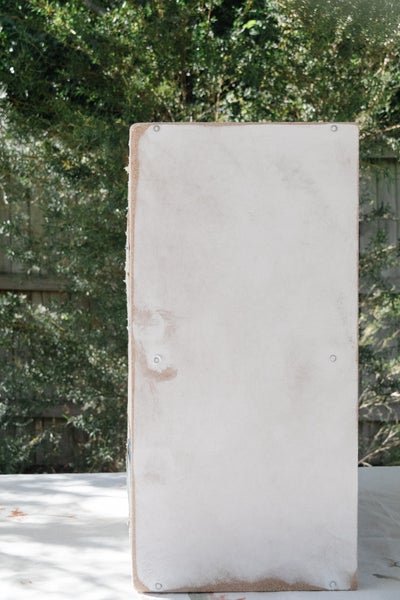
Bookshelf (you can get the same one I used from Kmart)
Cardboard boxes (old ones are great but you can also buy new ones from Bunnings or Officeworks)
Painters tape from Bunnings
2 x Rust Oleum Primer Spray Paint from Bunnings
Sika Expanding Foam from Bunnings or Packing Peanuts from Officeworks (preferable)
Electric hand sander from Bunnings
4.5kg joint compound from Bunnings
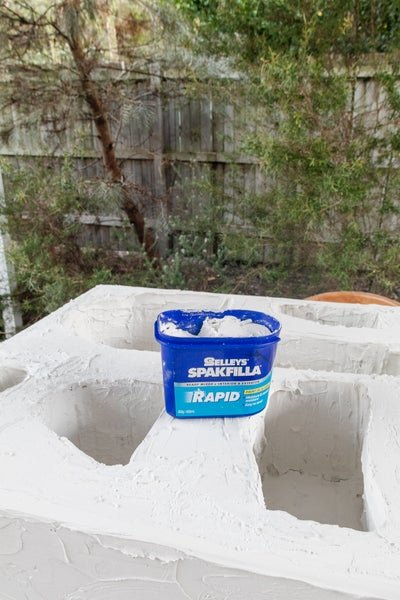
Selley's Spakfilla from Bunnings
Microfibre rolling brush from Bunnings
Paint brush (for corners) from Bunnings
White paint (I used Lexicon Quarter by Dulux, which is available at Bunnings)
Safety gloves, disposable gloves and a face mask
How To
1. Using the pen and paper, draw out the design of your Niche. I found this really helped visualise how I wanted this DIY Nice Bedside Table to look.
2. Fix the sheet of MDF to the back of the bookshelf using a table gun. You can also use a very strong glue if you'd like. The Selley's range is really good and has lots of great options.
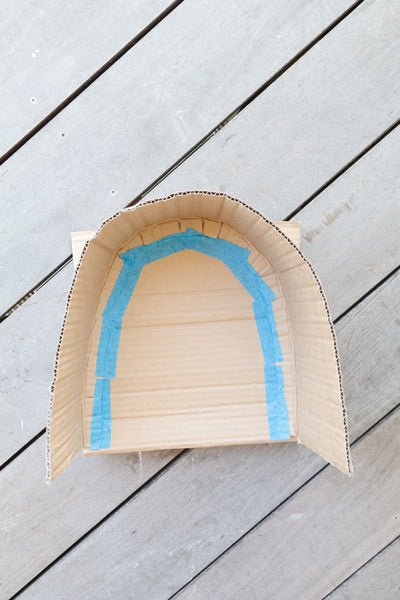
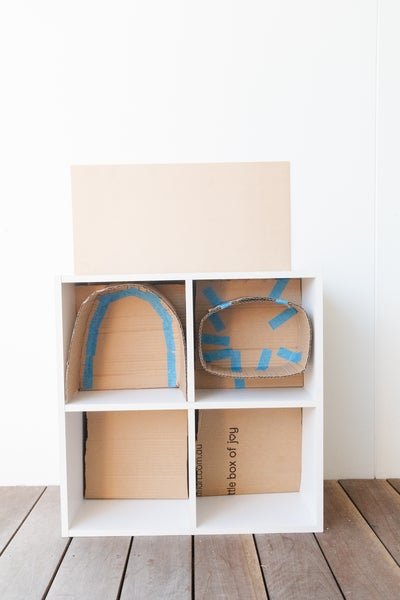
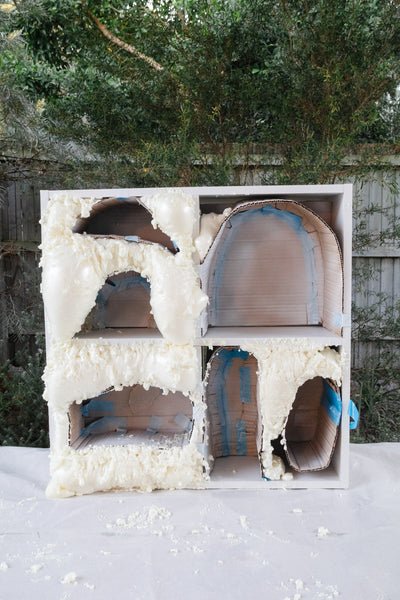
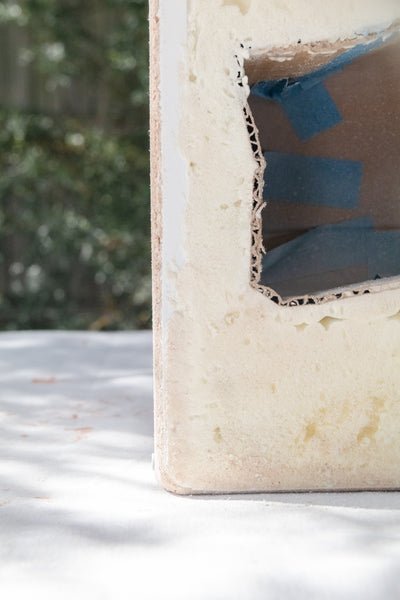
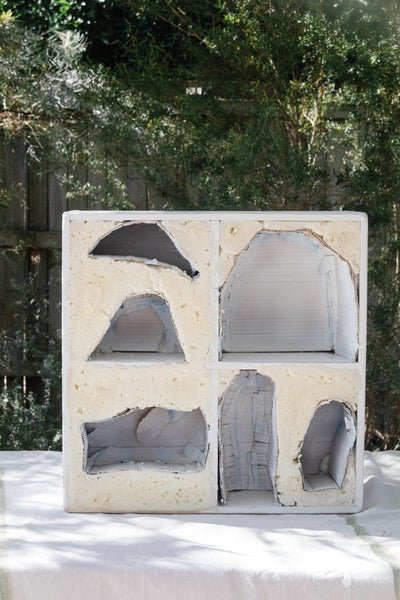
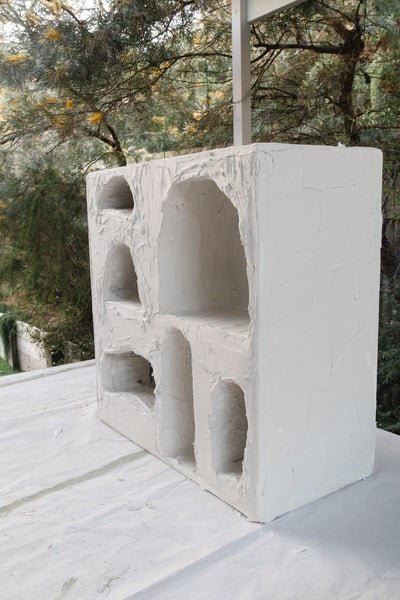
3. The depth of the bookshelf I used is quite deep. If you use the same bookshelf or your bookshelf is quite deep, create each niche mold with a backing using cardboard and painters tape. Push each mold halfway down each bookshelf section and secure with painters tape. Refer to this "How To" video.
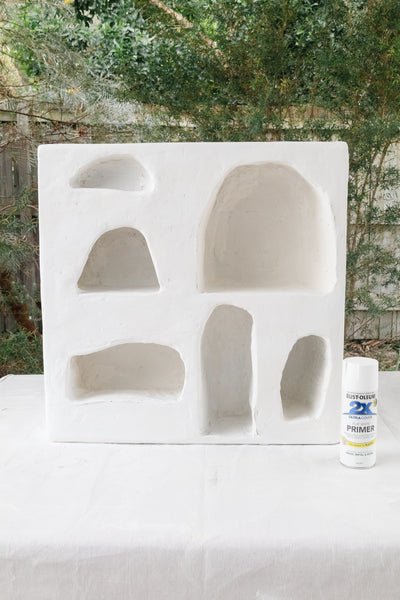
4. Lay a drop sheet over your work surface. Spray the entire bookshelf vigorously with primer paint. Set aside to dry. Please wear a face mask for this step.
5. Fill the outer gaps/voids of the niche with expanding foam or packing peanuts. Be careful not to use too much expanding foam as it literally doubles (in some areas I found it tripled) in size. Set aside to dry for at least 12 hours (as per the directions). I prefer packing peanuts and have used them for a much bigger Niche Shelf so if you can, use them instead of the expanding foam! Please wear a face mask and gloves for this step. Remove excess expanding foam using a hacksaw. Please wear safety gloves and a face mask for this step.
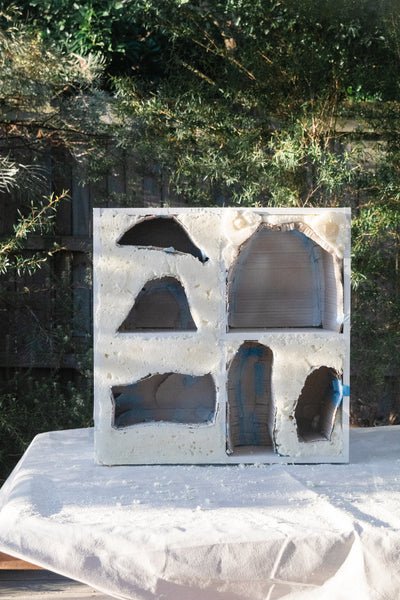
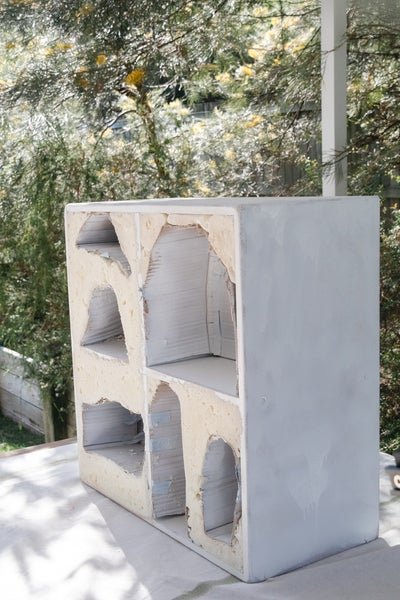
6. Sand the entire bookshelf (please wear safety gloves and a face mask for these steps):
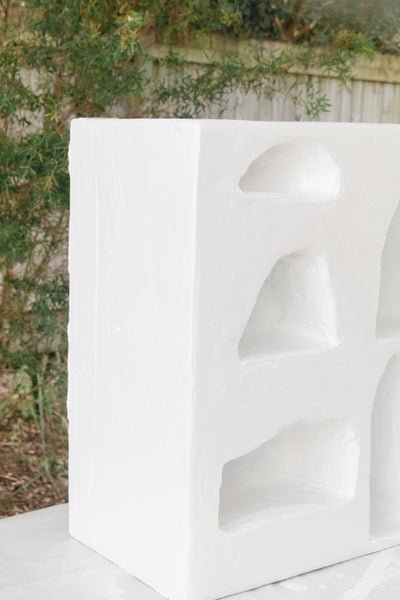
Sand the entire surface of the foam using an electric sander so it's nice and flat. Use the sander to create lovely curves on the edges of each niche. You are aiming for a lovely organic finish and this will really help.
Sand the sides and top of the bookshelf using the electric sander.
Round the edges of the bookshelf using the sander. Again, you are aiming for a lovely organic finish.

7. Spray the entire bookshelf vigorously with primer paint. Set aside to dry. Please wear a face mask for this step.
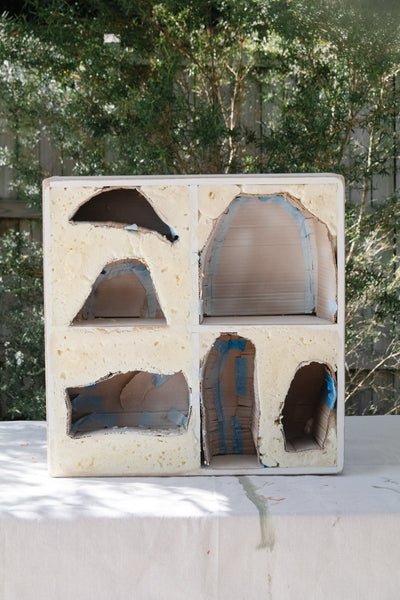
8. Cover the entire surface (not the back) with the joint compound using your hands (wear disposable gloves). Don't worry if it looks scary - you are going to sand it smoothly later on. Set aside to dry for at least 24 hours. The joint compound will dry faster if it's warm, and it'll dry slower if it's cold. Once the joint compound is dry, you may notice some cracks. This is totally ok. Put on some disposable gloves and use the Spakafilla with your hands to fill them in (I found pushing the filling in a diagonal direction worked best). Set aside to dry for at least 6 hours.
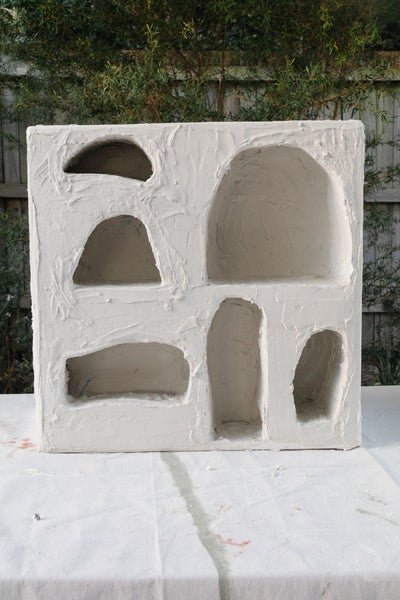
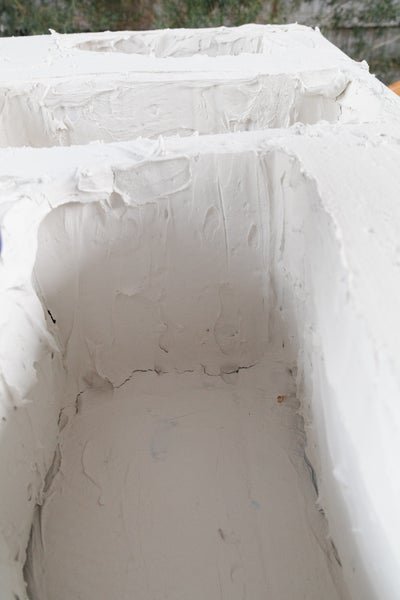
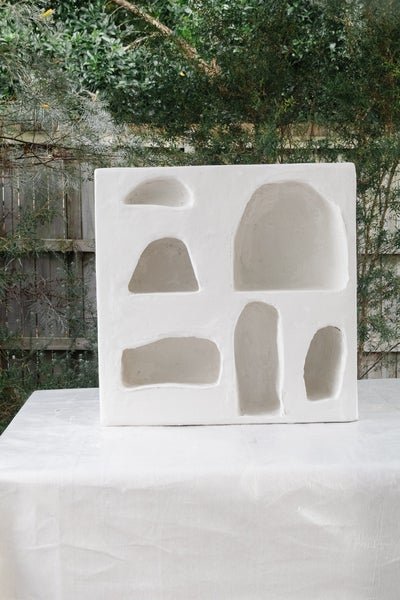
9. When the surface is completely dry, sand it smooth using the electric hand sander. Grab an old rag to wipe all the dust away; this will reveal if you need to smooth it out some more or not. Please wear a face mask for this step (I forgot to for this part so don't be silly like me!). To smooth out in the inside of each niche, you will need to use a coarse sanding sheet and your hands. Remove all the dust with an old dry cloth. I also found a duster really helped!
10. Prep the bedside table by spraying the entire surface with primer spray paint. Set aside to dry.

11. Paint one coat using the rolling brush and paint brush. Fill in any small holes or imperfections with a blob of paint. Set aside to dry. Paint the second and final coat. Set aside to dry.

And that's it!
A little note from me
Thank you so much for taking the time to read through this tutorial. I hope you enjoyed it and feel inspired to flip your own bookshelf into a DIY Niche Bedside Table! You can also stay in touch with me by following along on Instagram and Pinterest, or sending me an email at jaharn@smorkitchen.com. Happy DIY'ing!


