Upcycled Fluted Drawers
I have been wanting to upcycle chest of drawers for a really long time…
And that’s why I am so excited to share my latest furniture upcycle with you! Last month I stumbled across a vanity at a charity shop, complete with a mirror and drawers. I have been looking for drawers to upcycle for ages and I knew this would be perfect for an idea I’ve had in mind. I raced home to grab my drill, went back to the thrift store, removed the mirror and put both pieces in my car boot. Needless to say, I drove home with a big smile on my face. Two upcycles for one? Yes please!
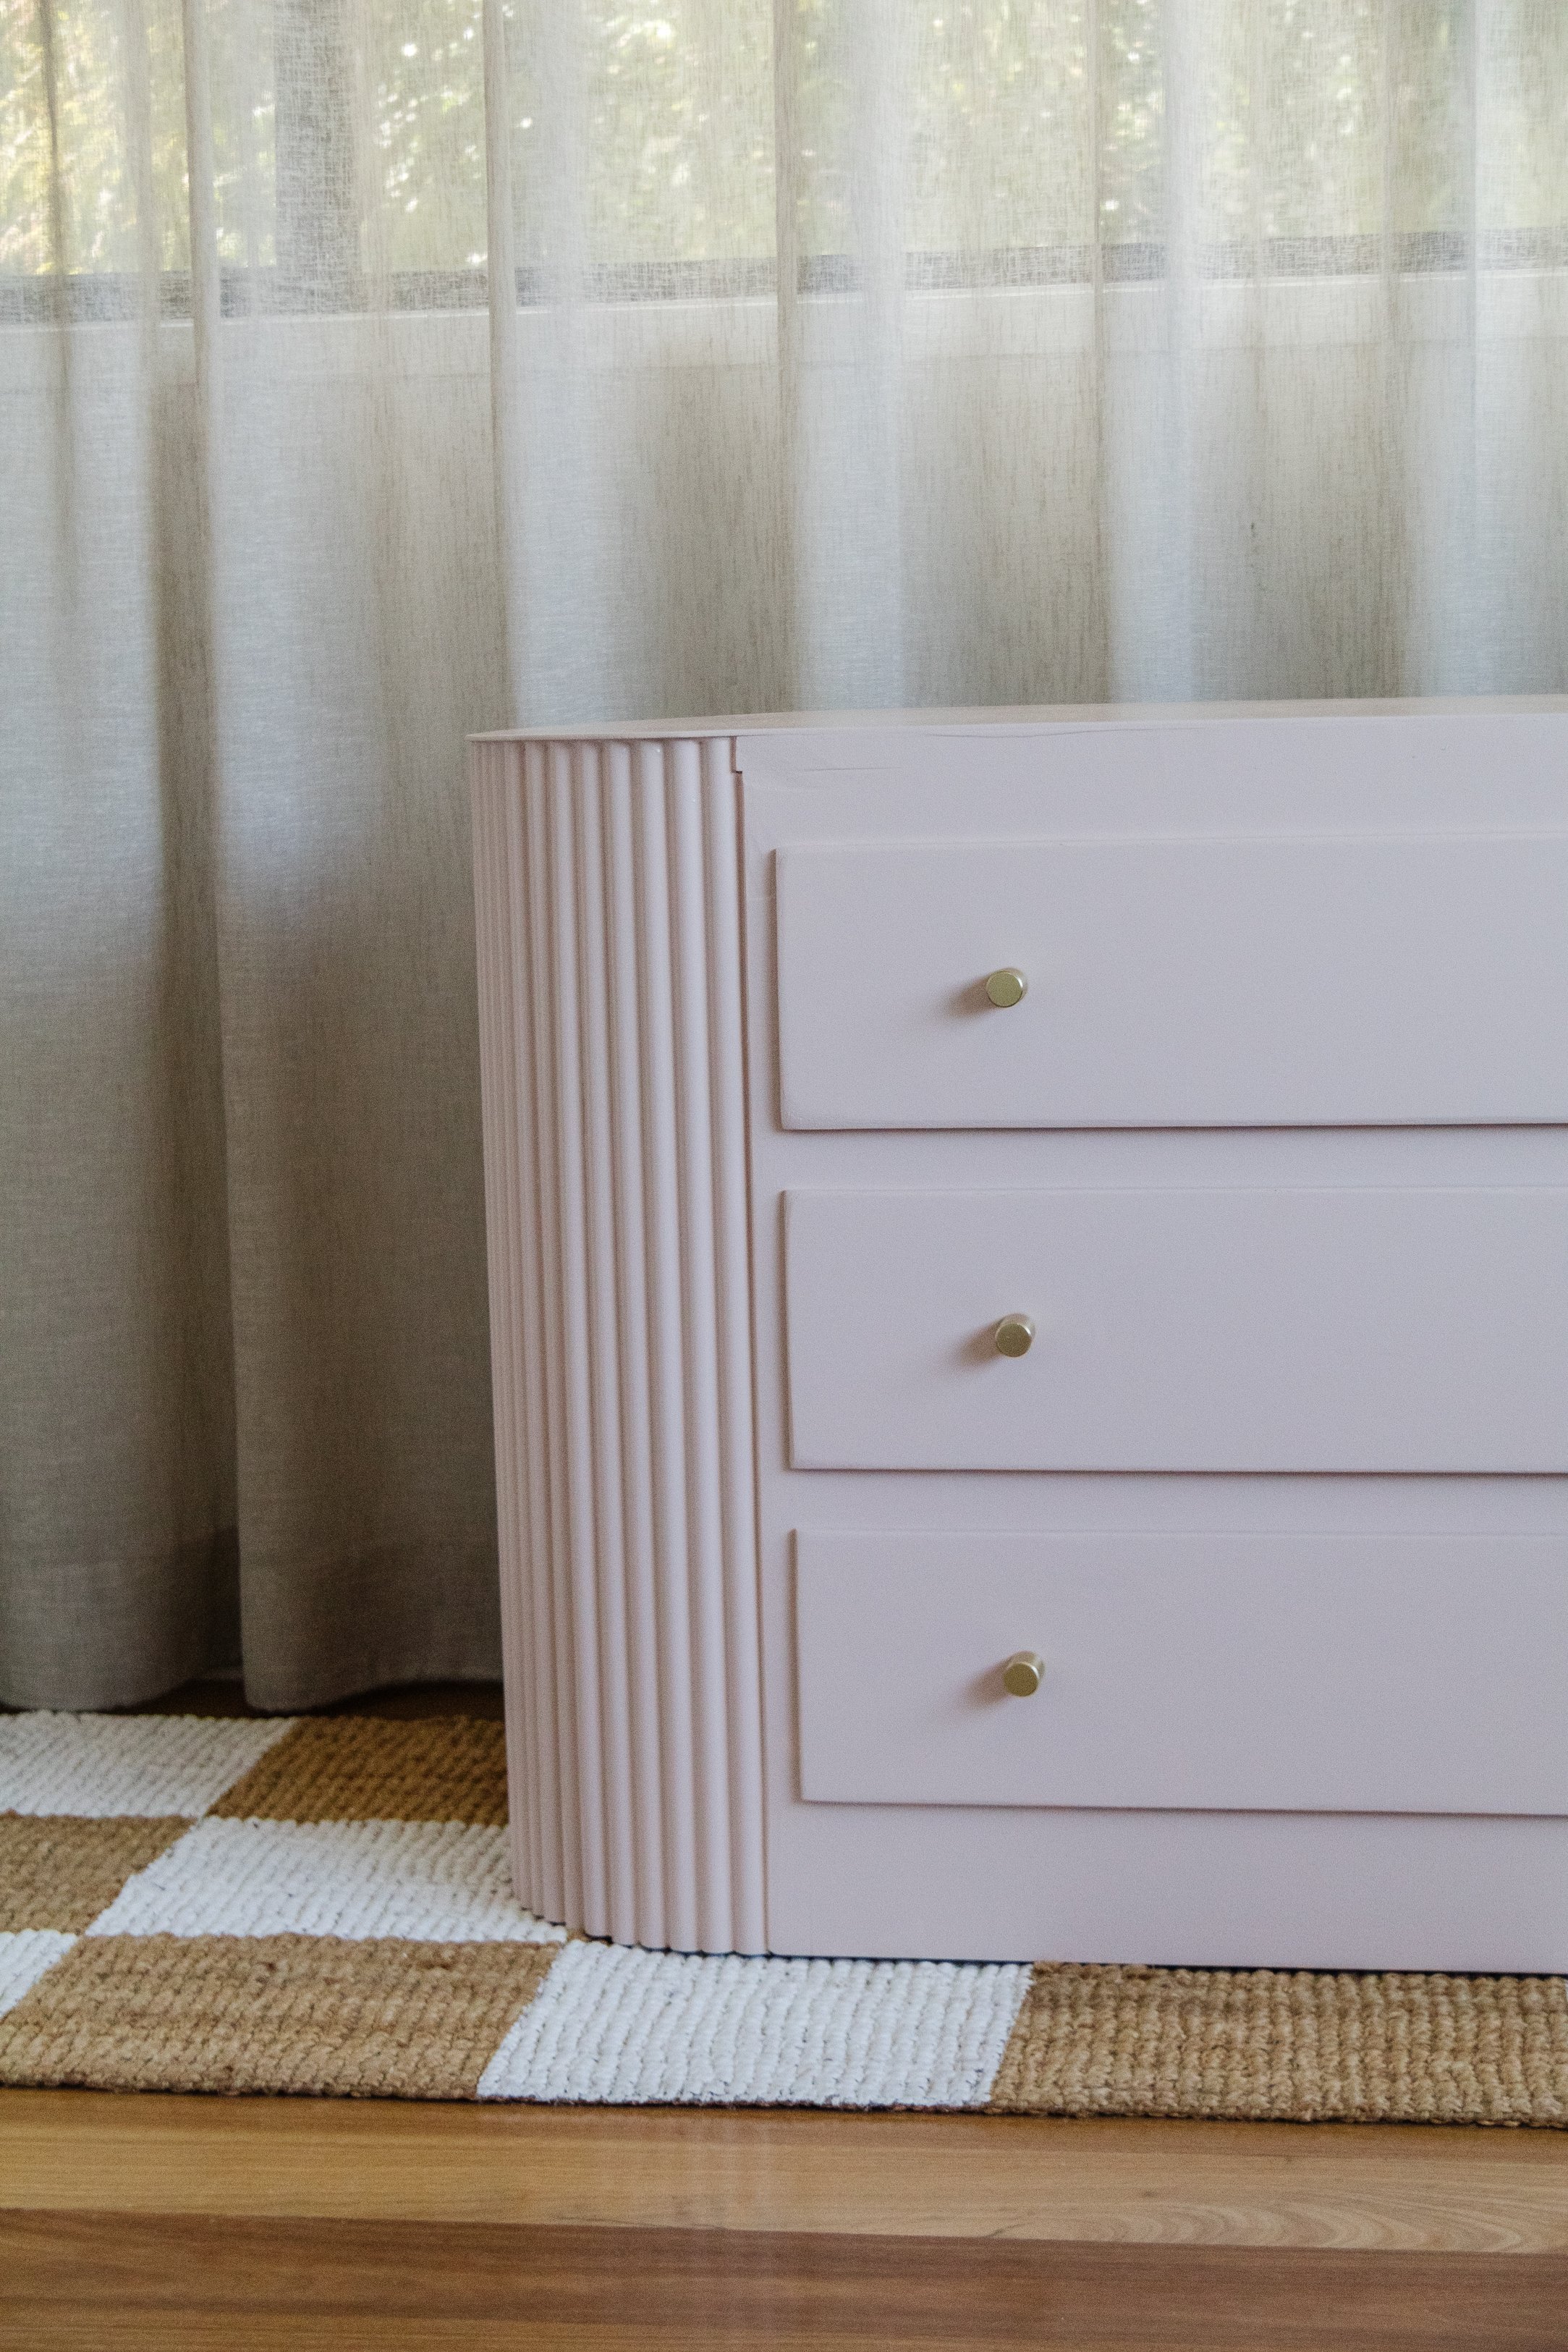
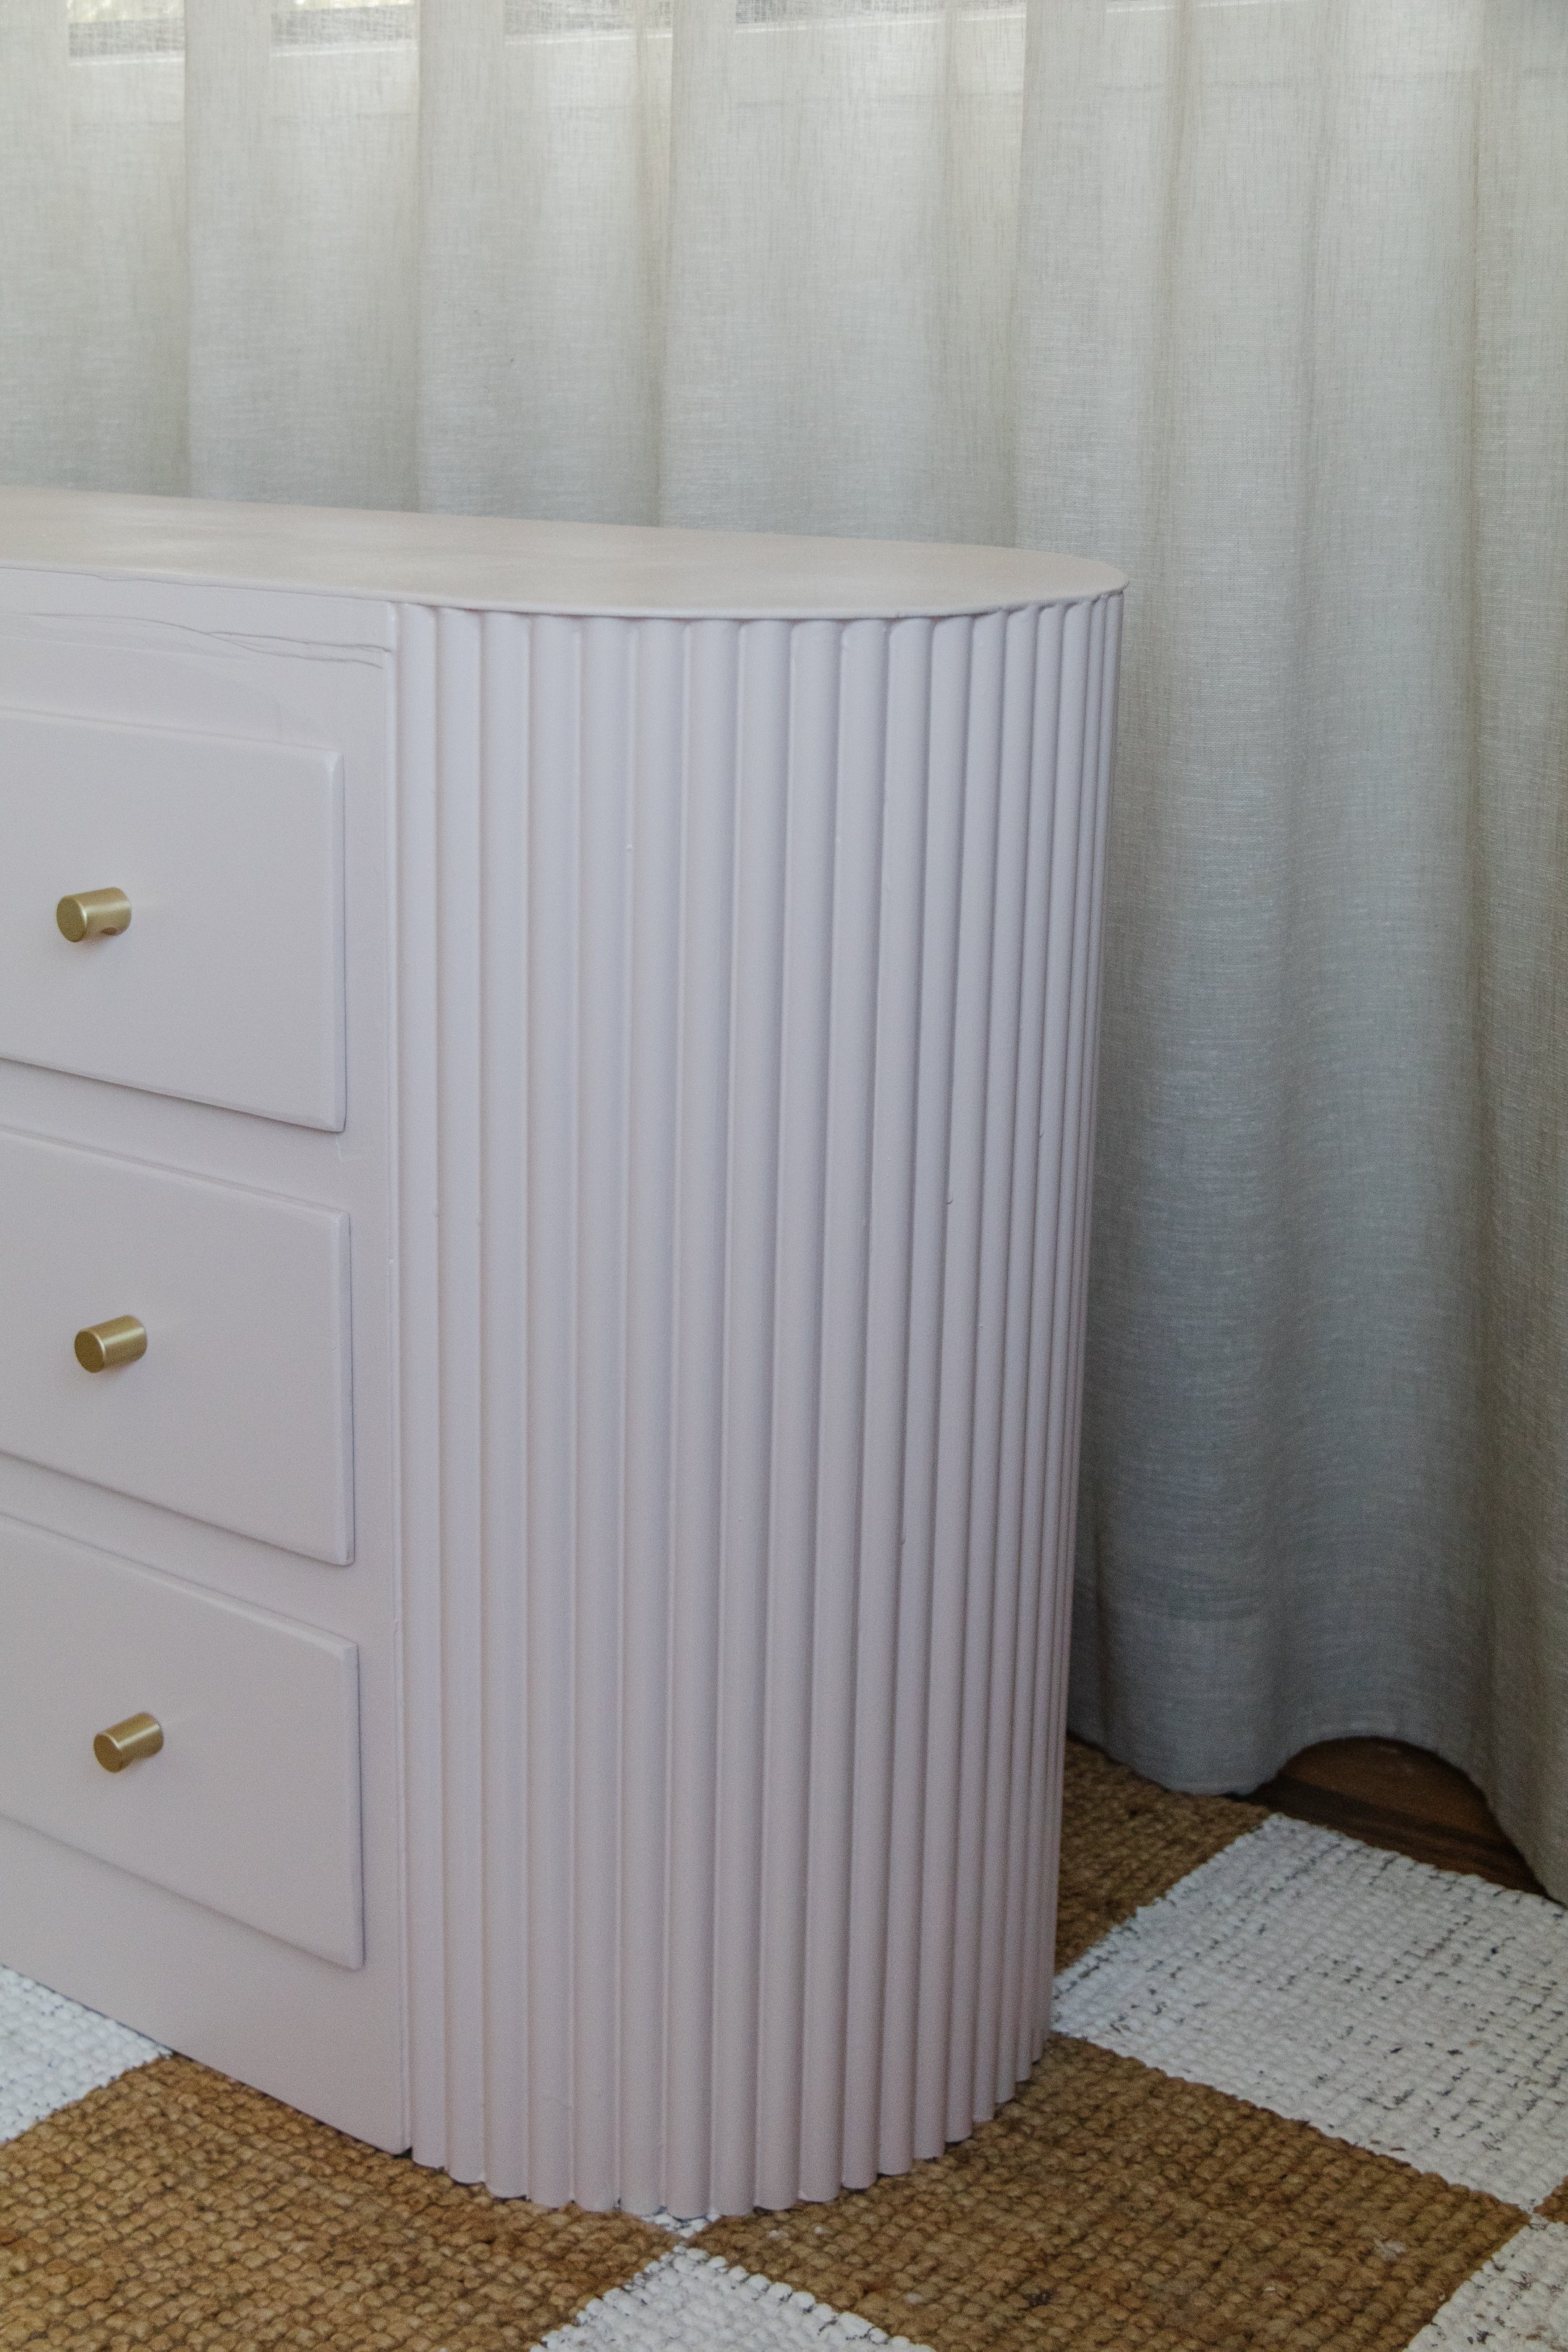
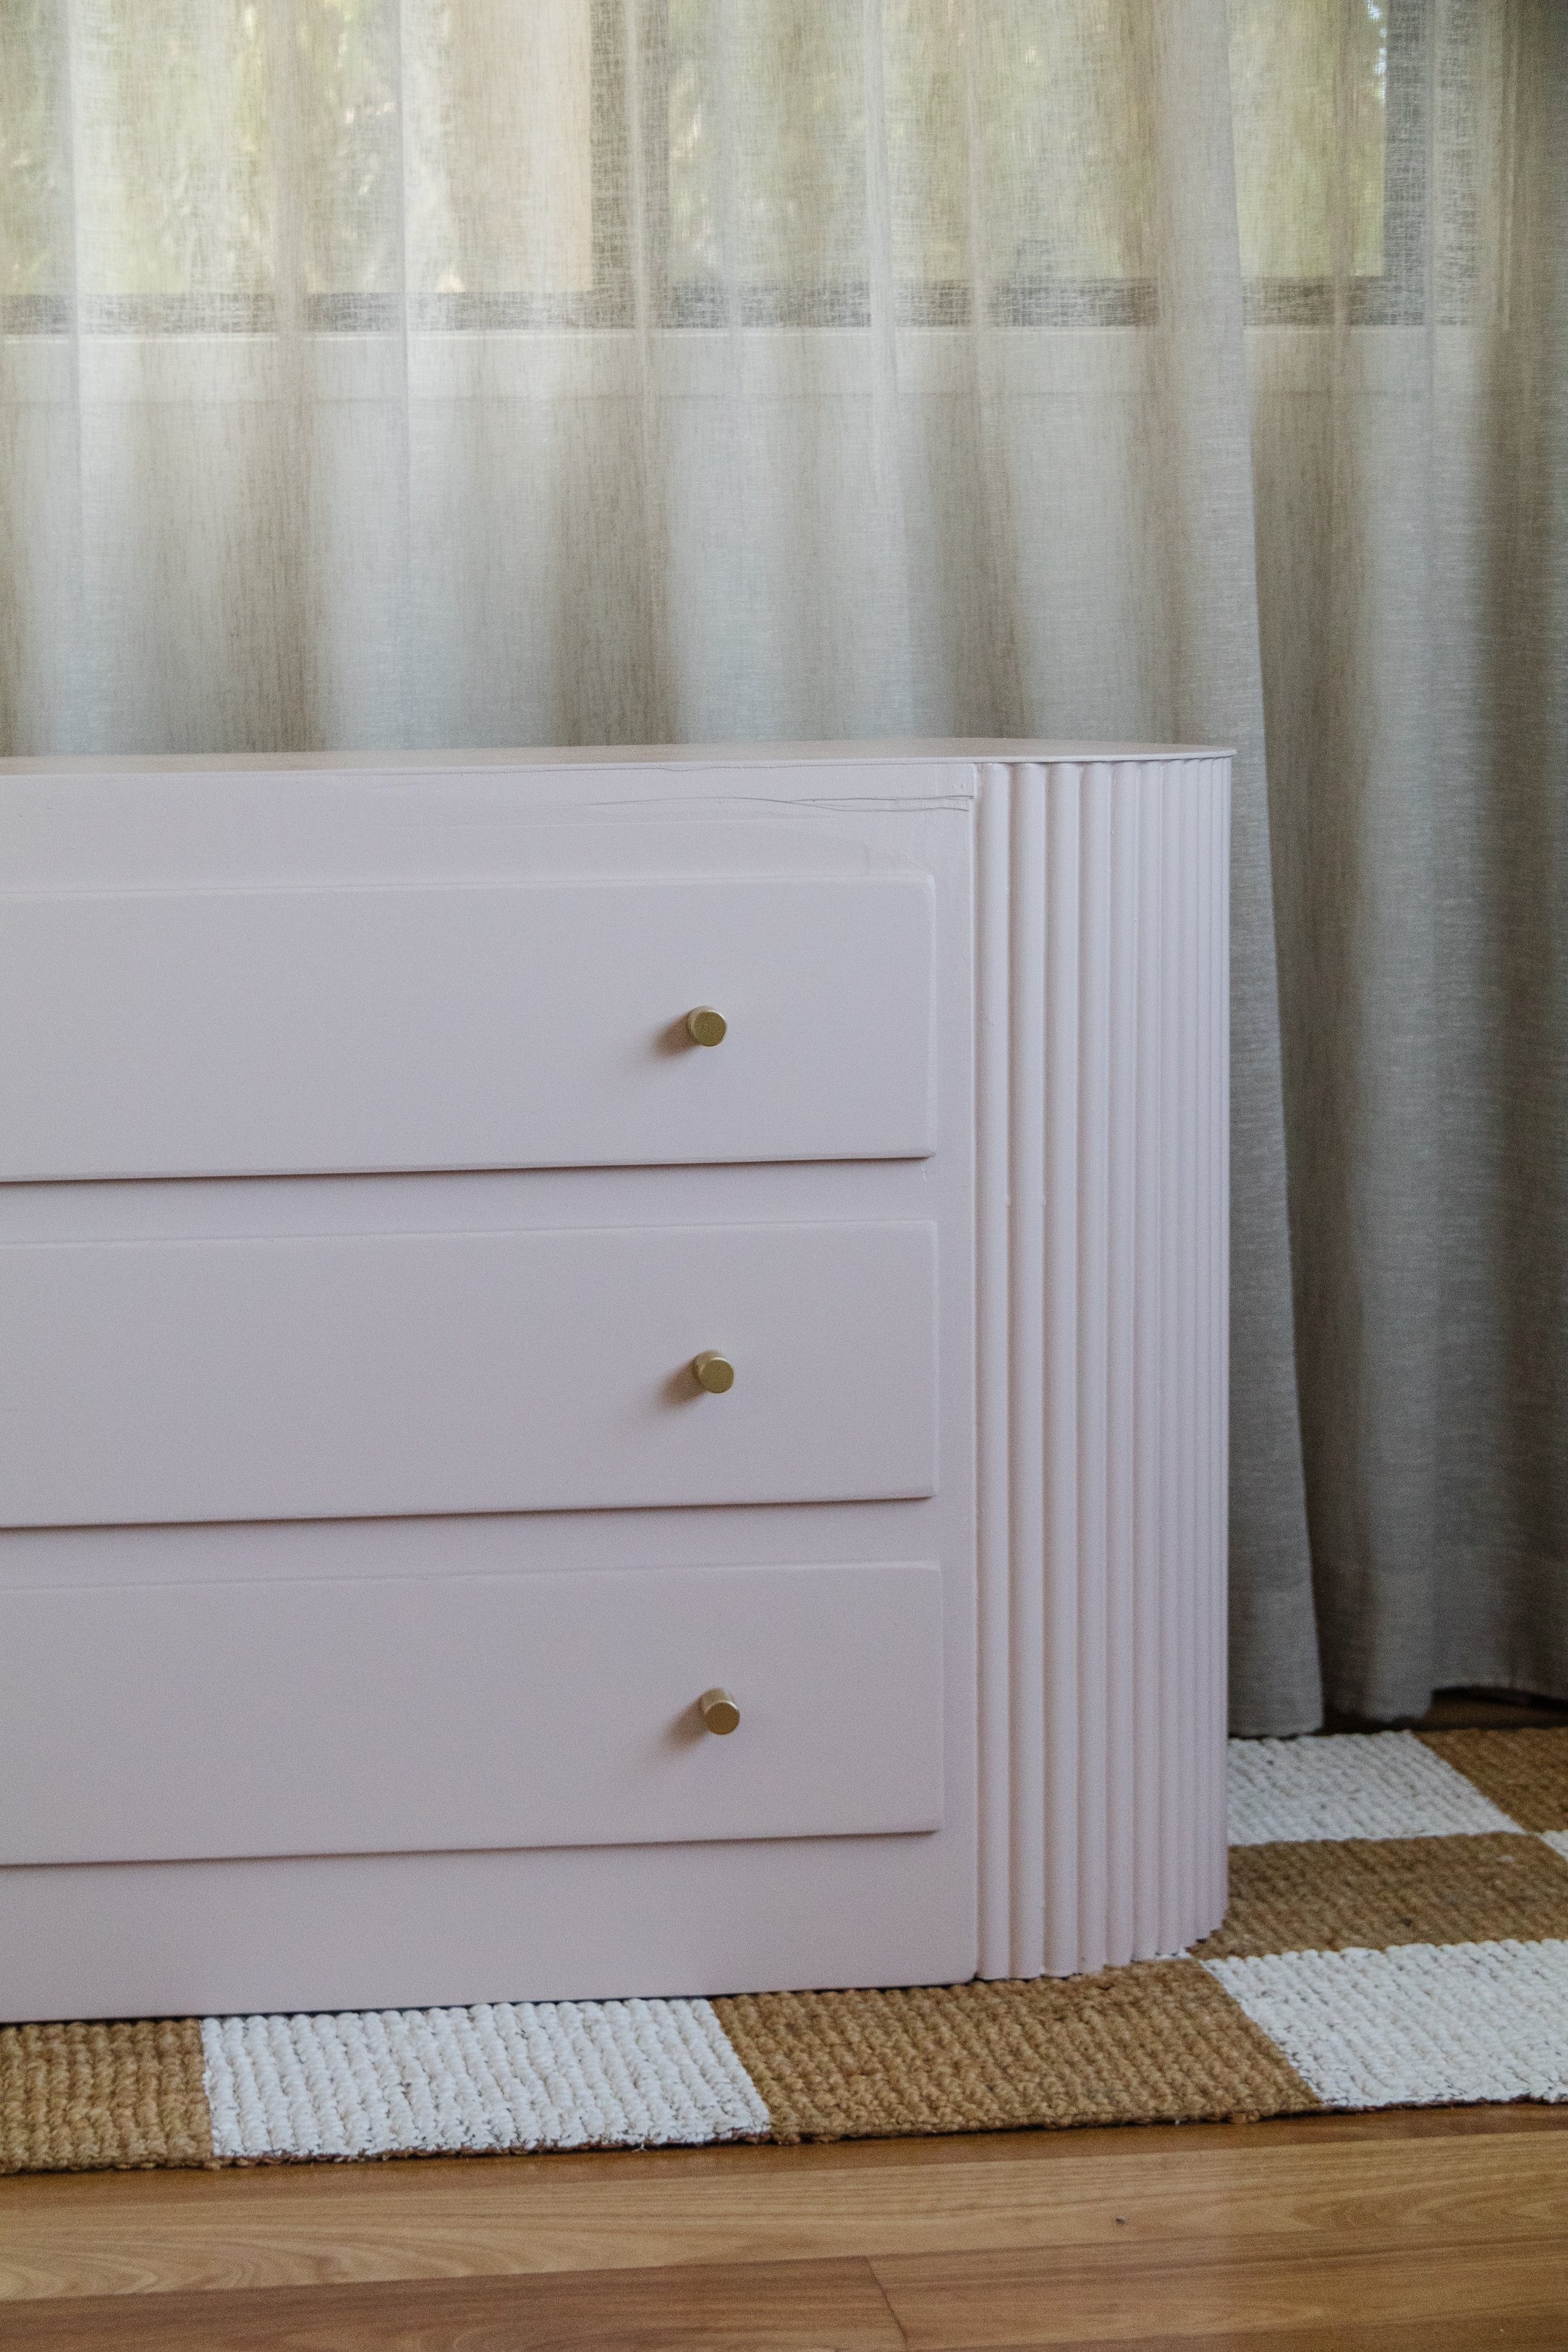
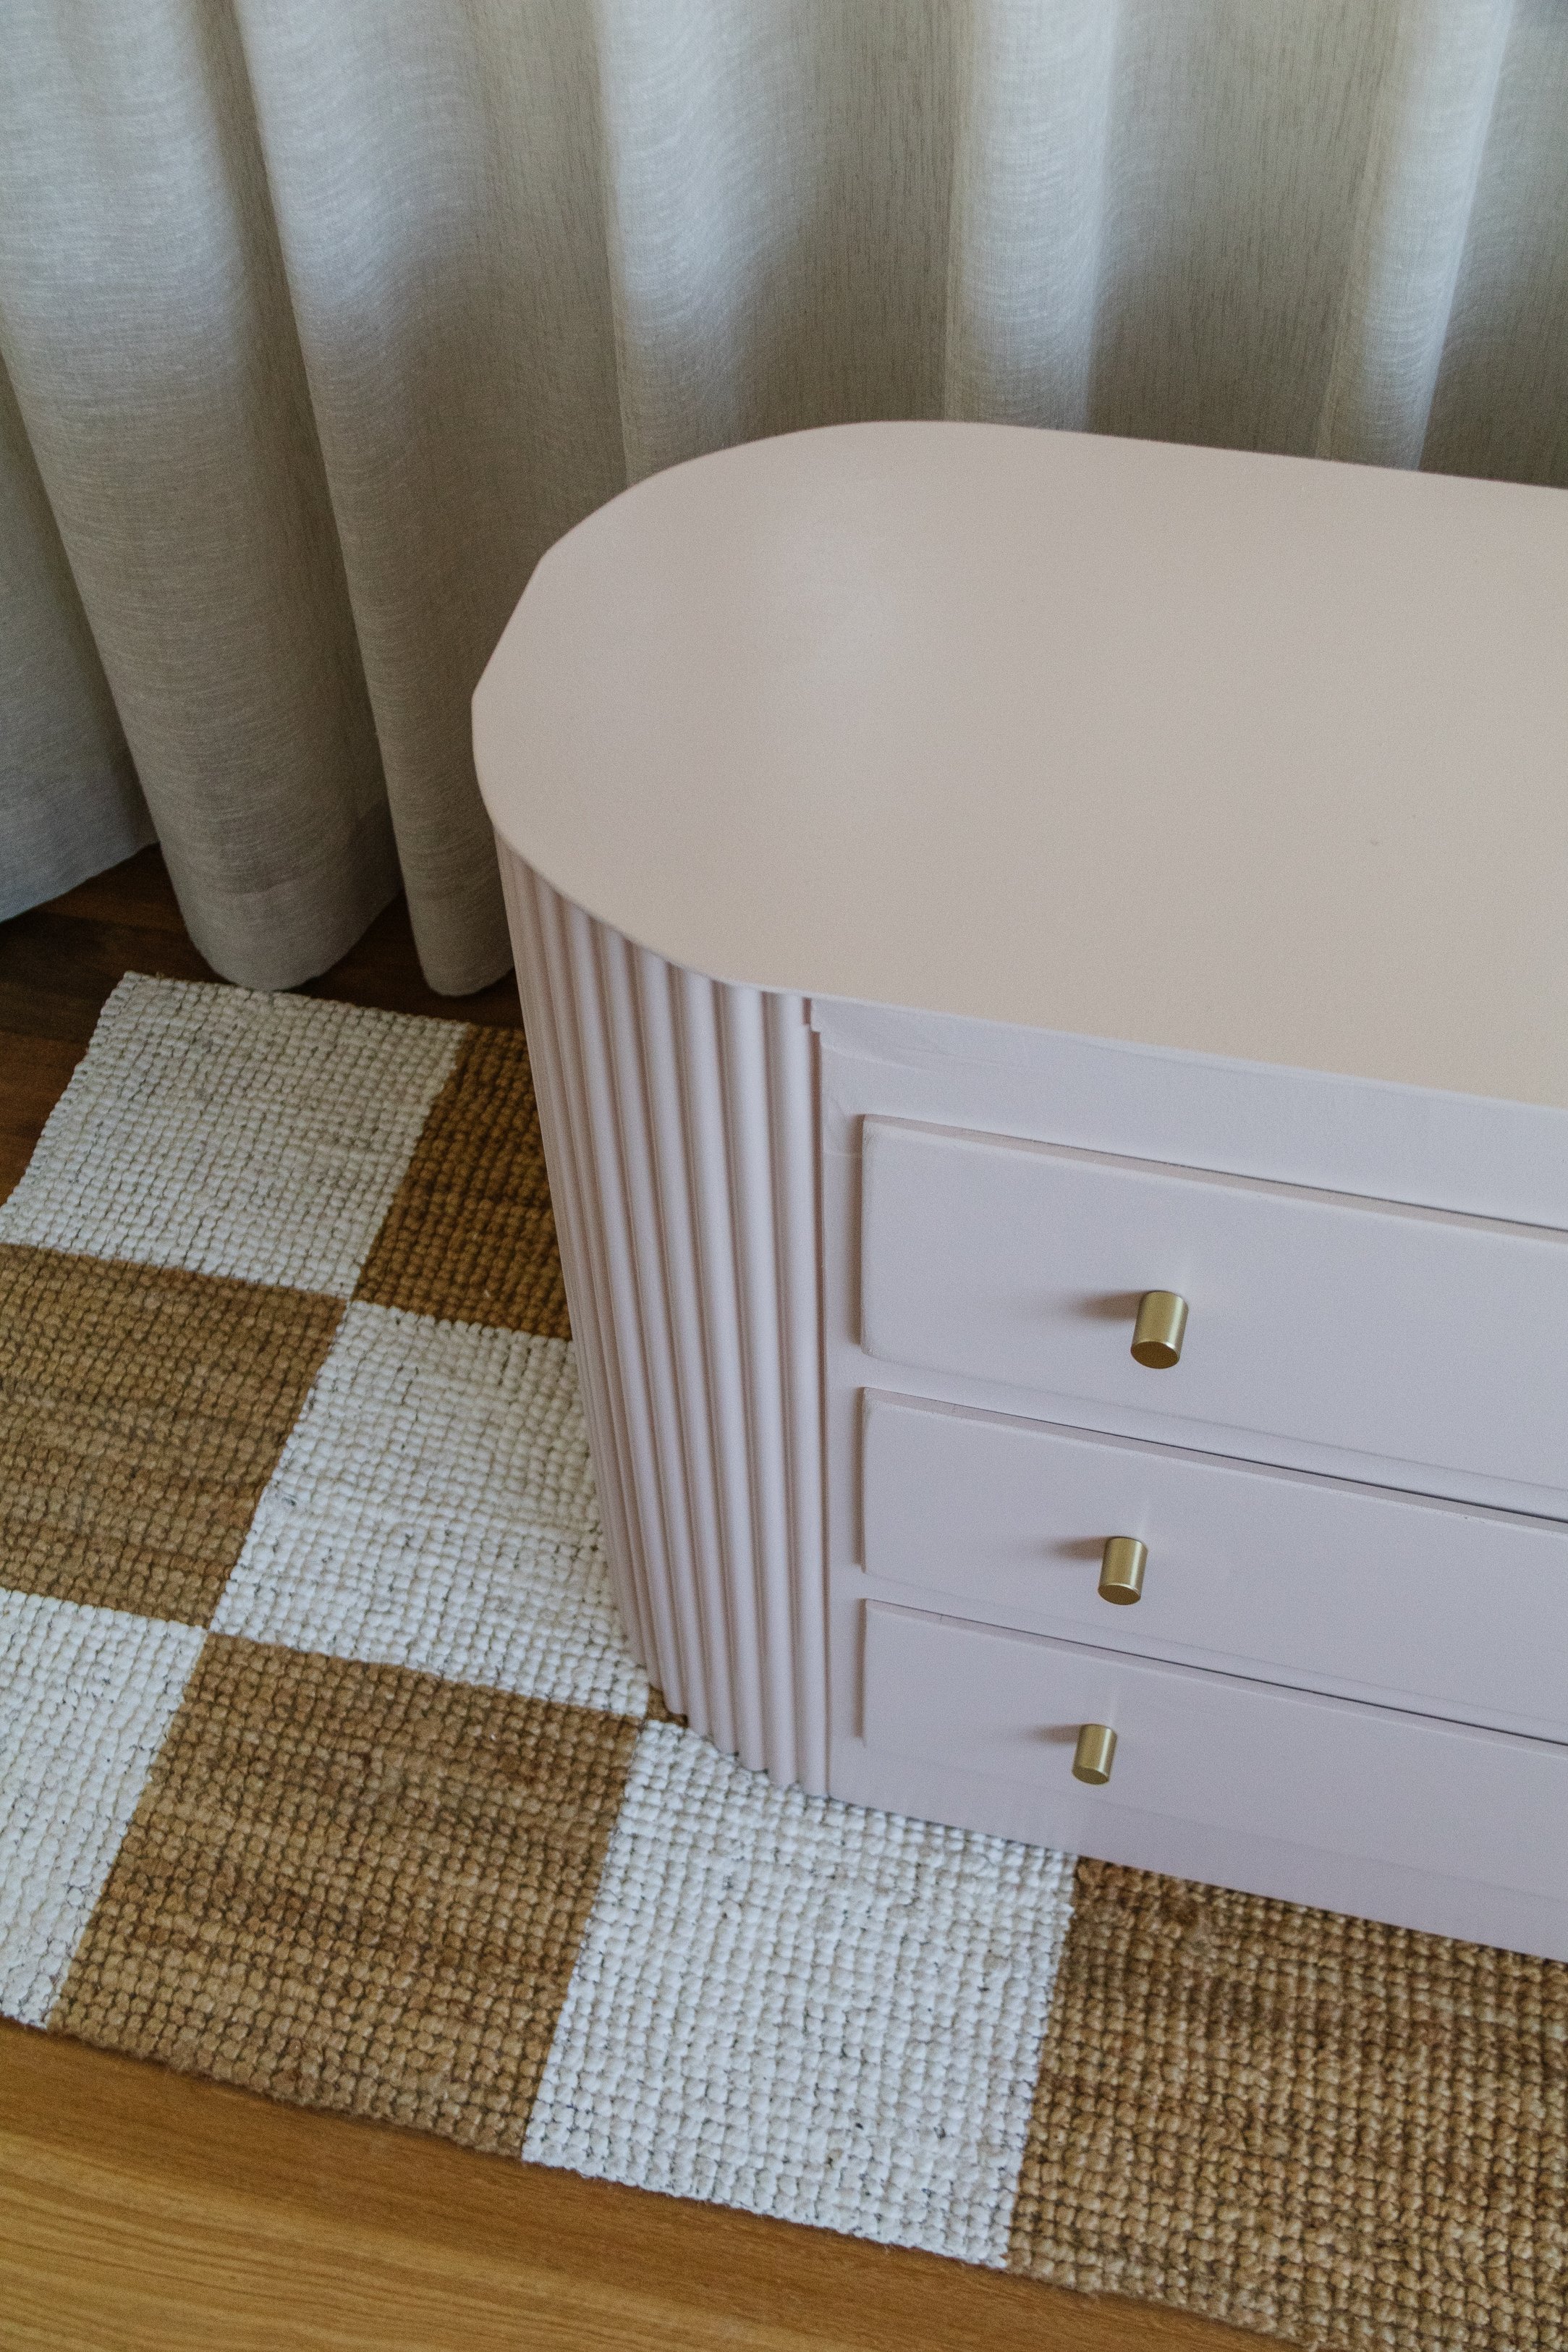
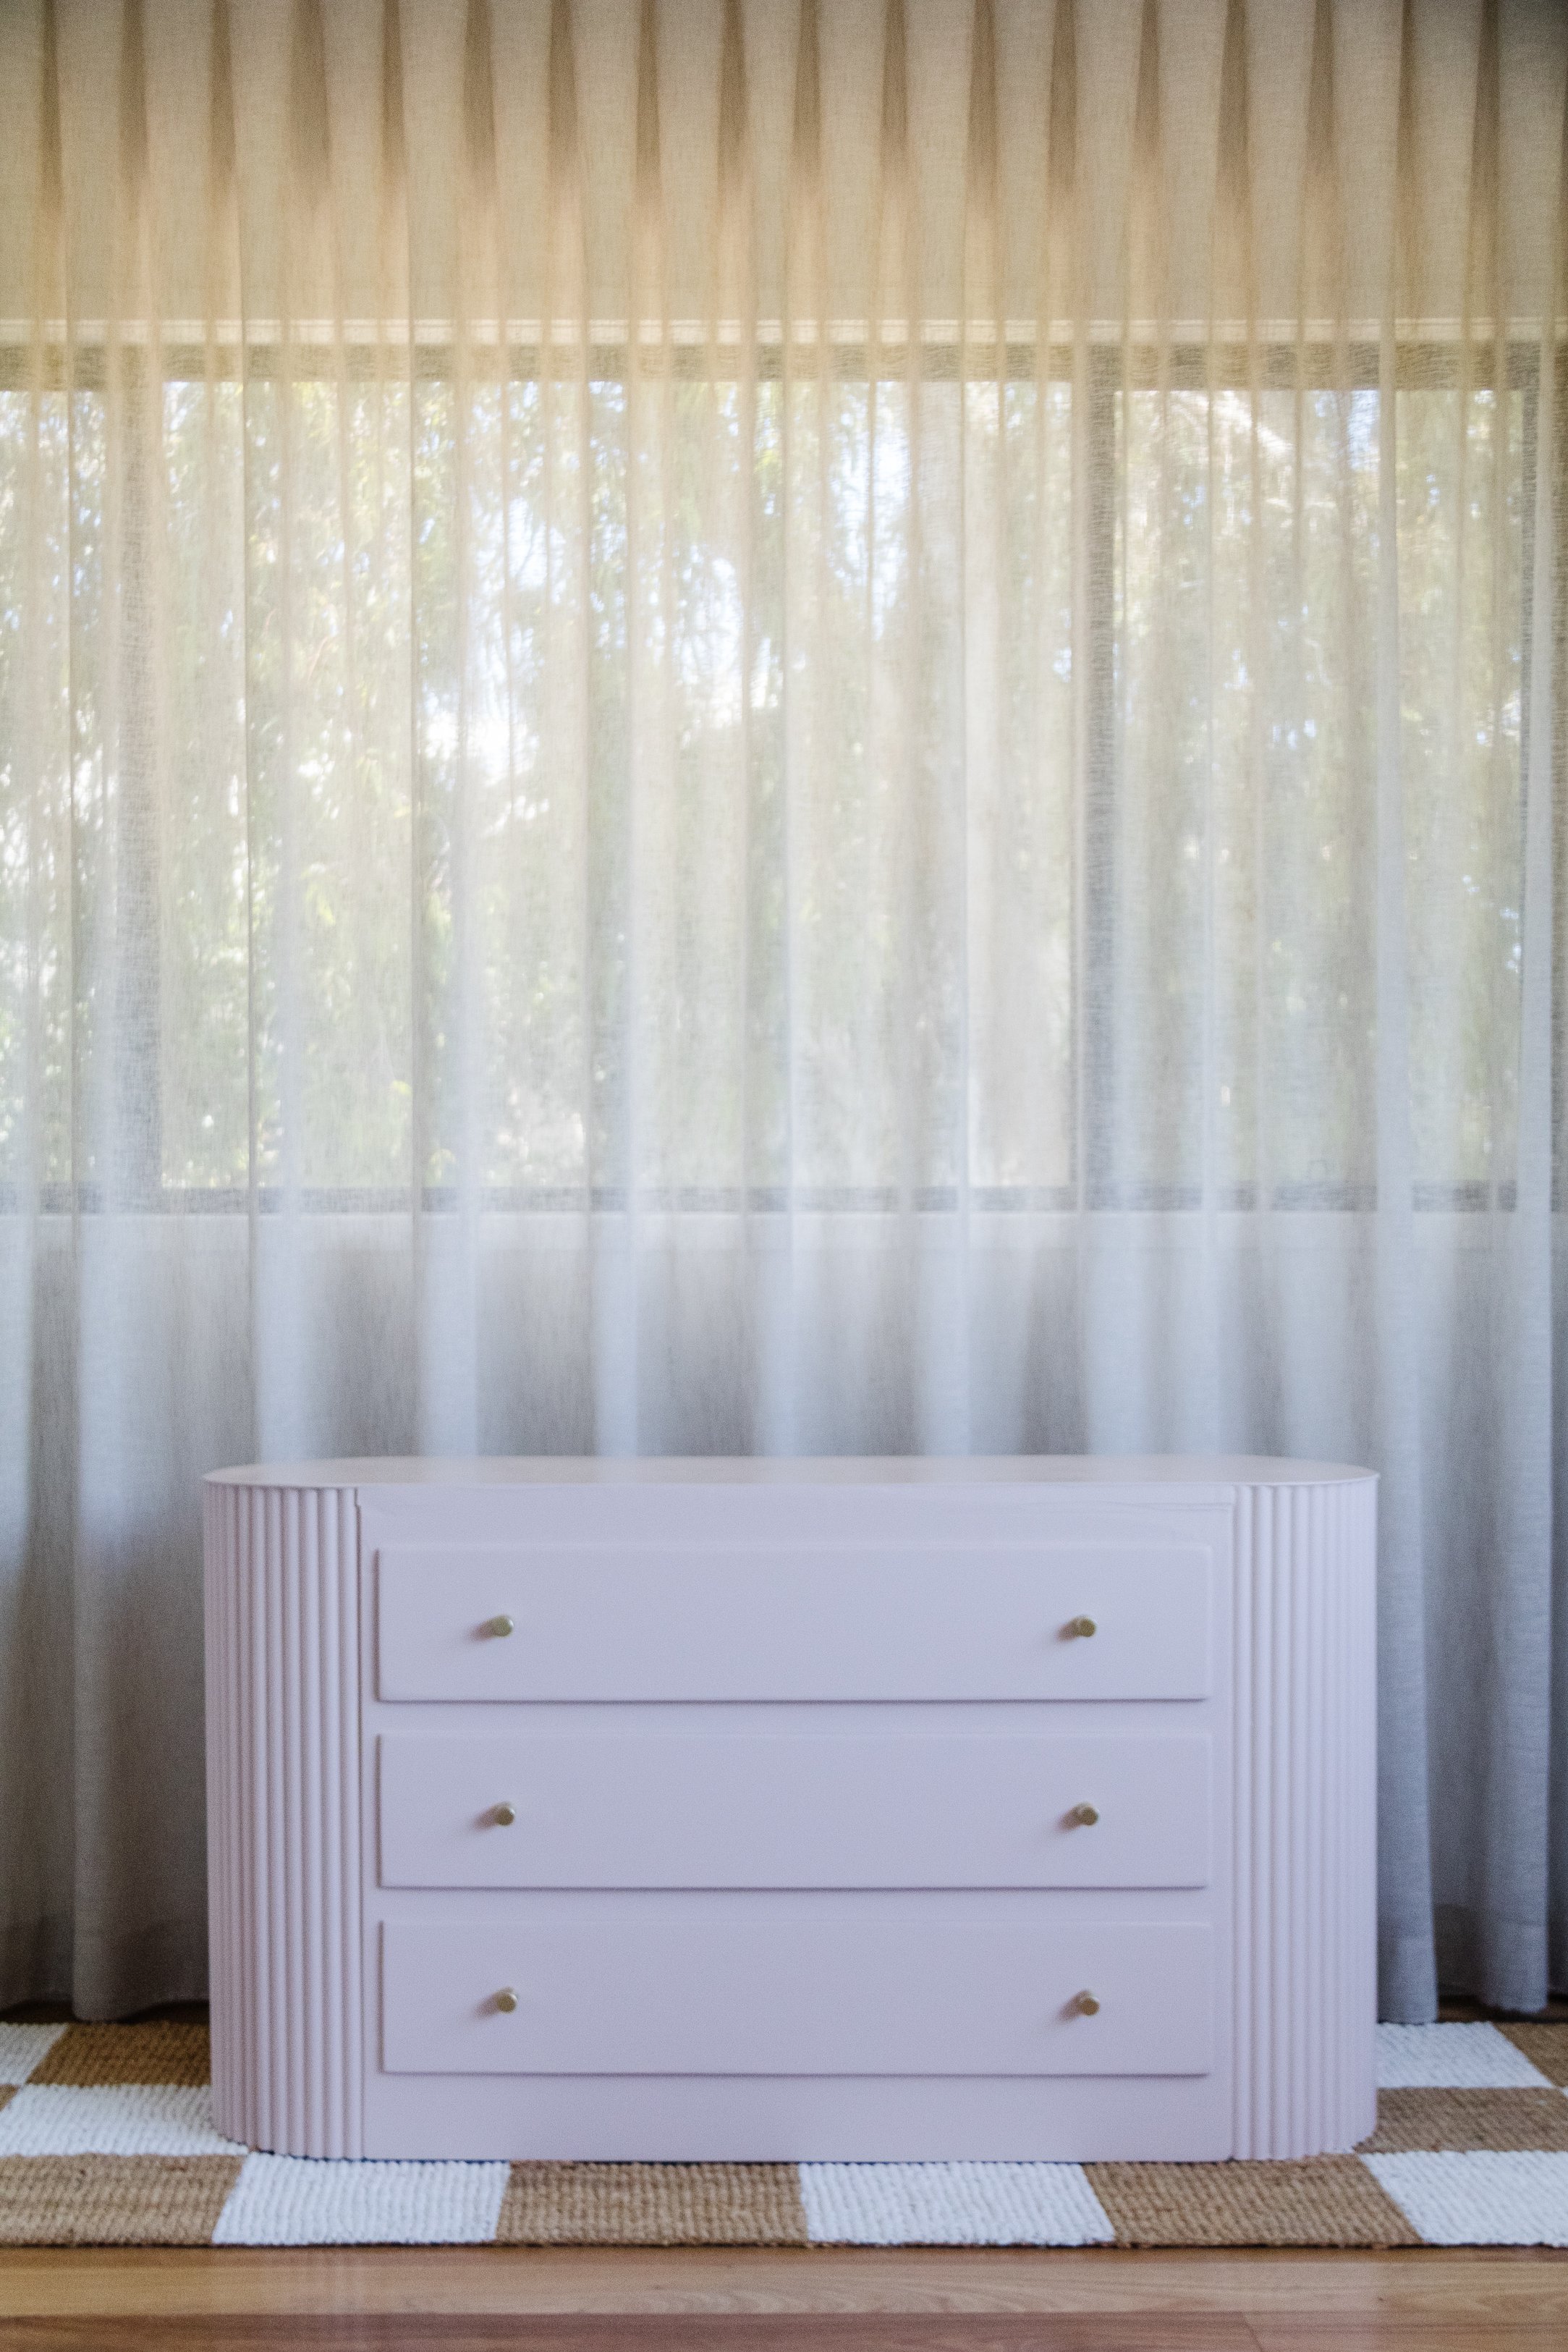
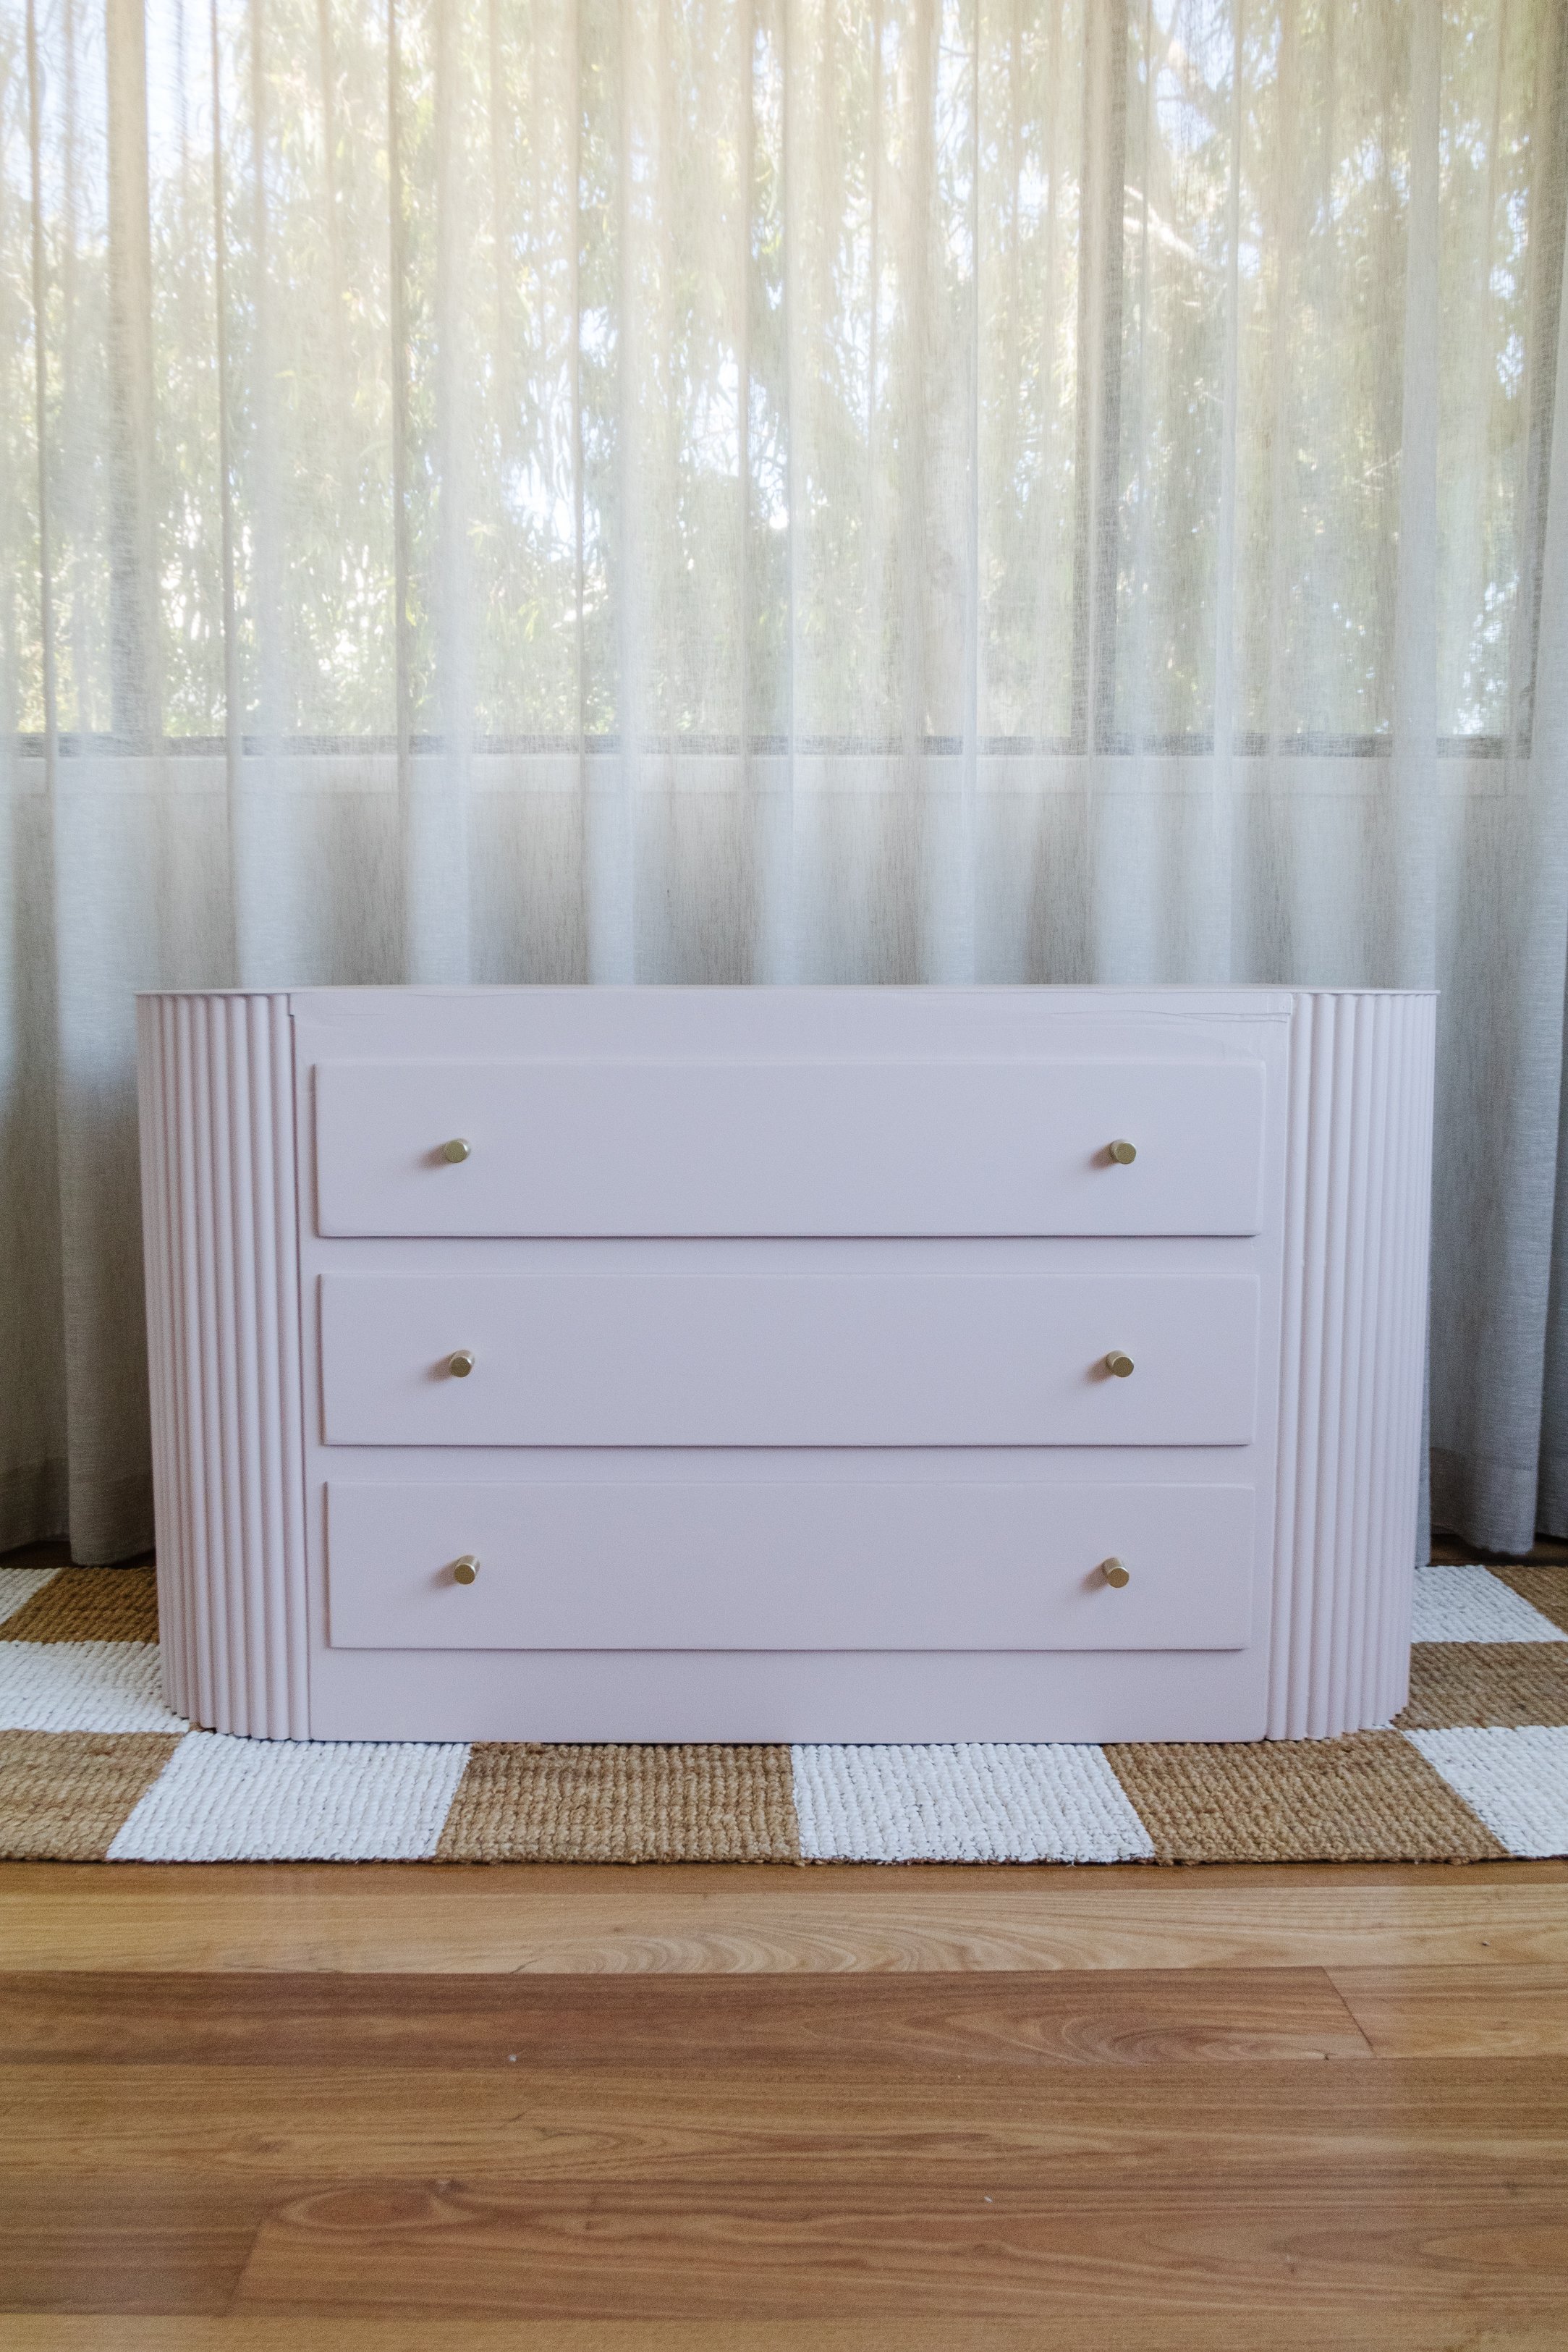
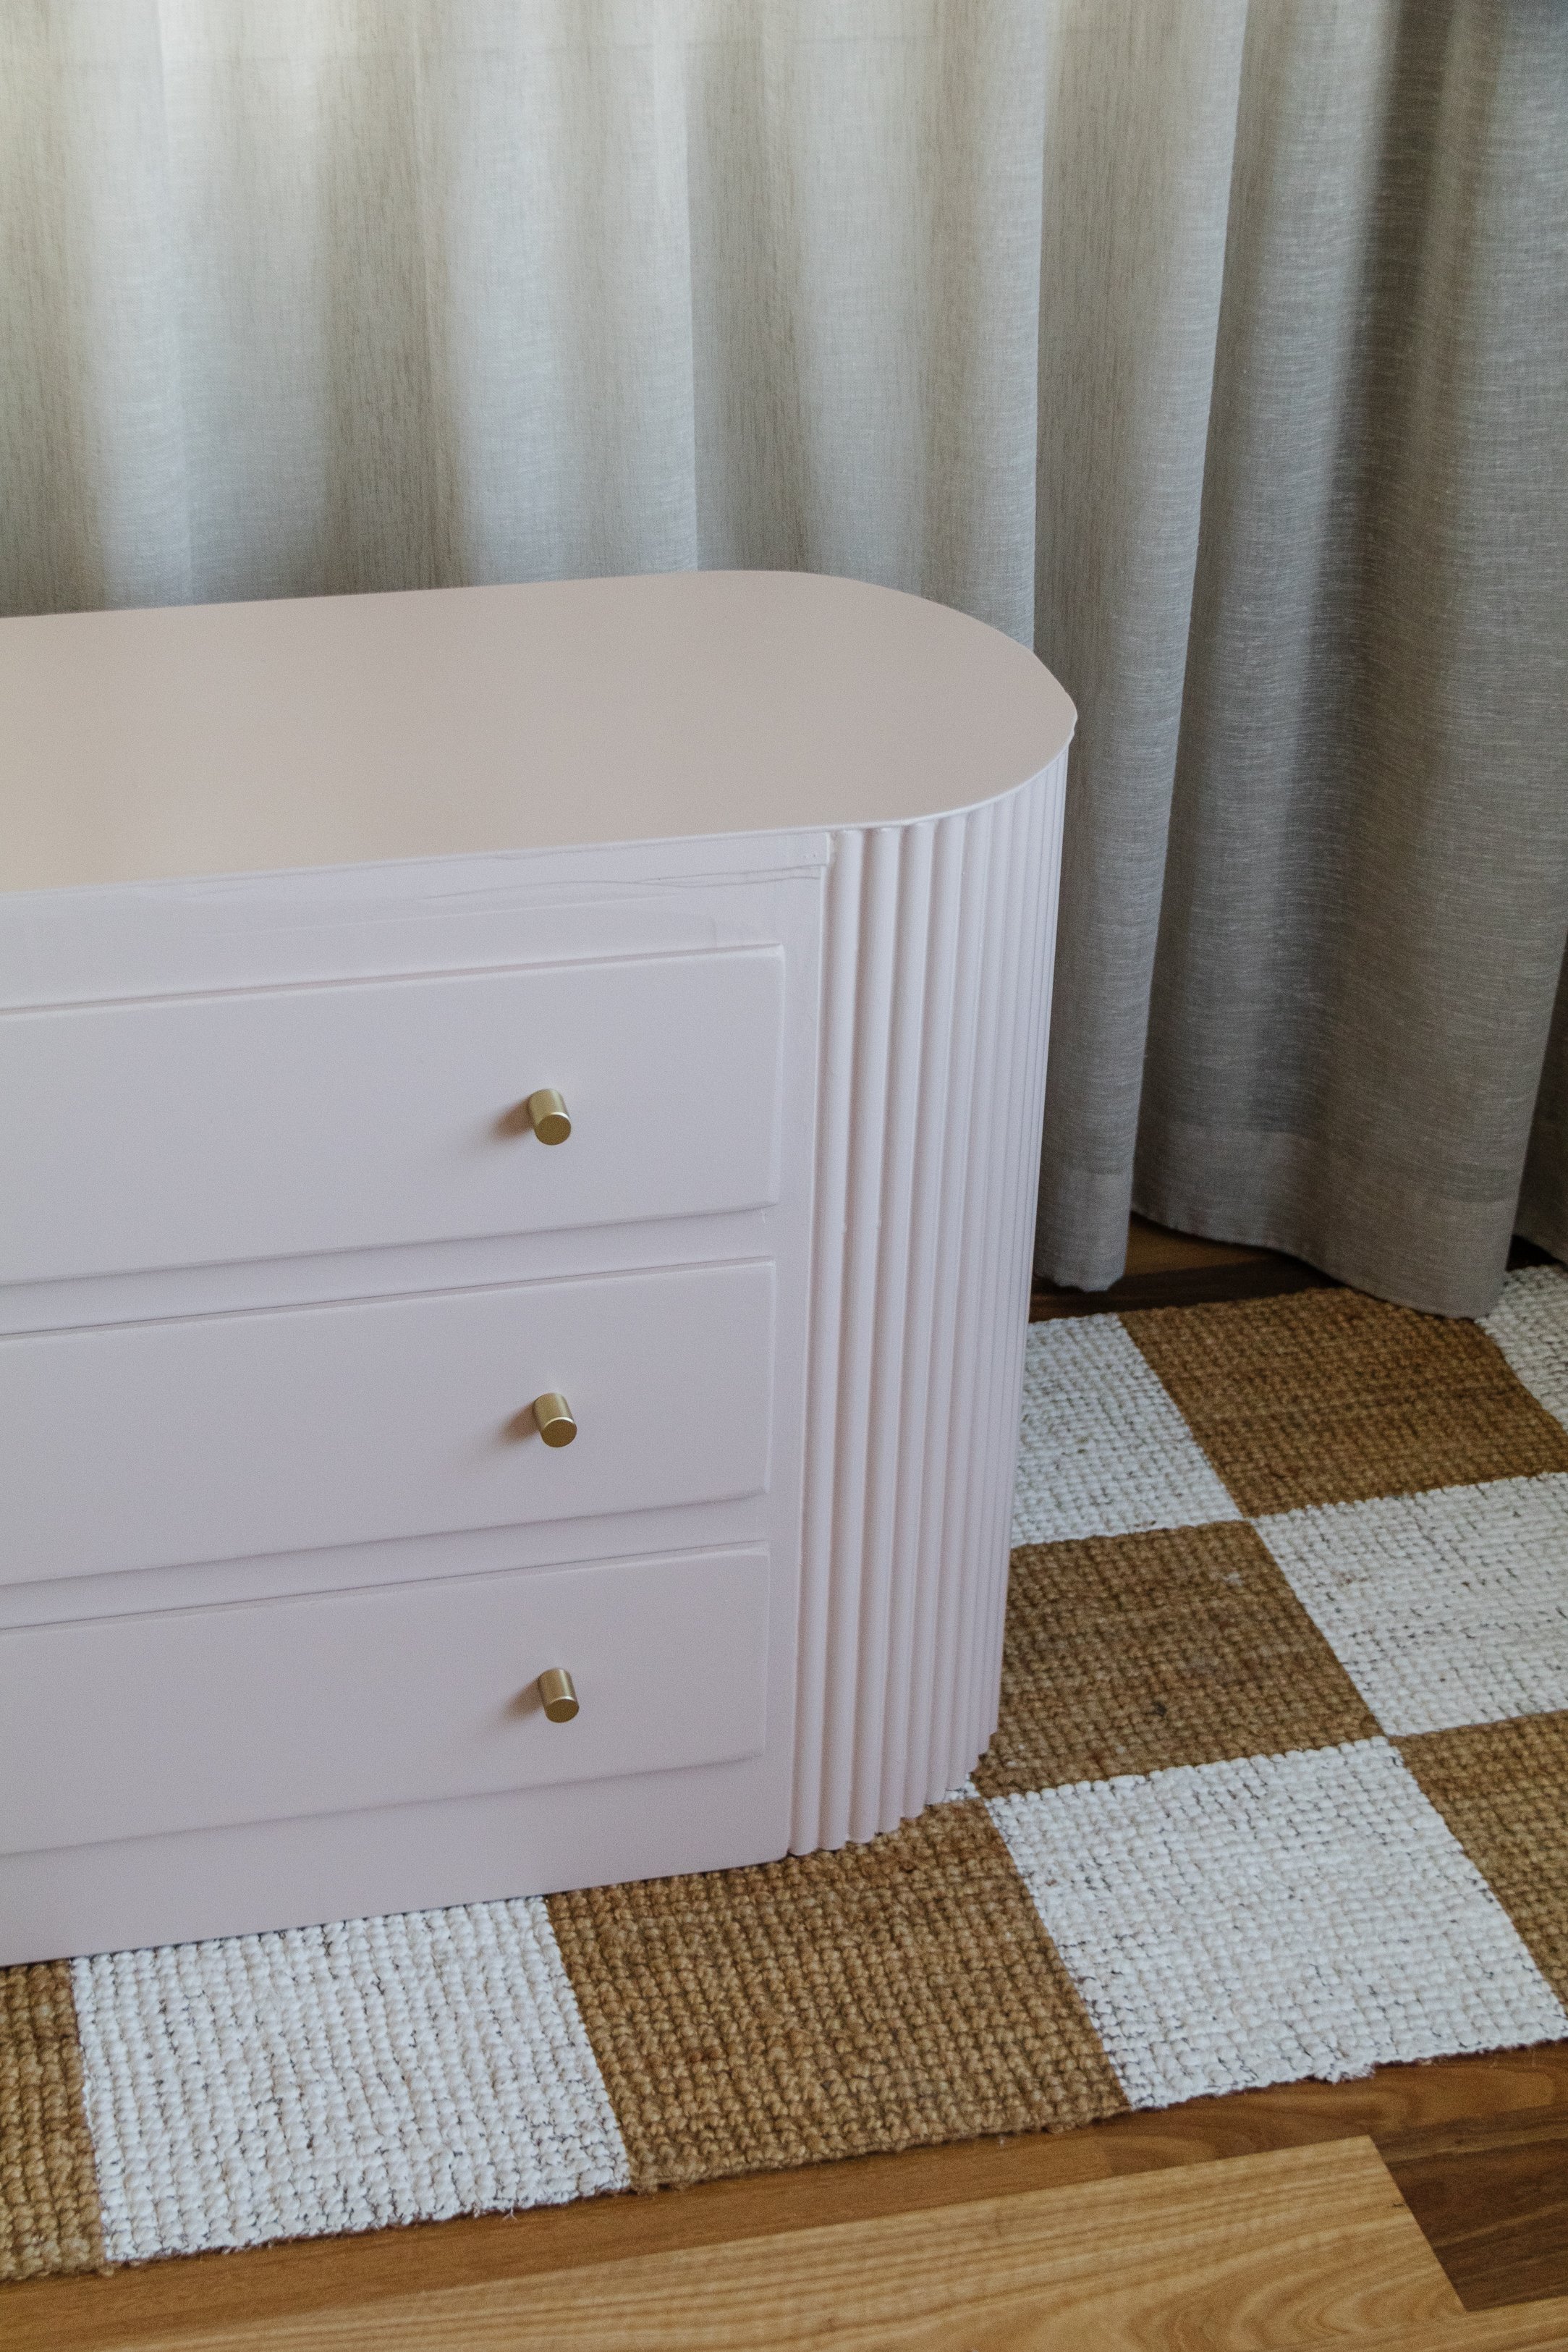
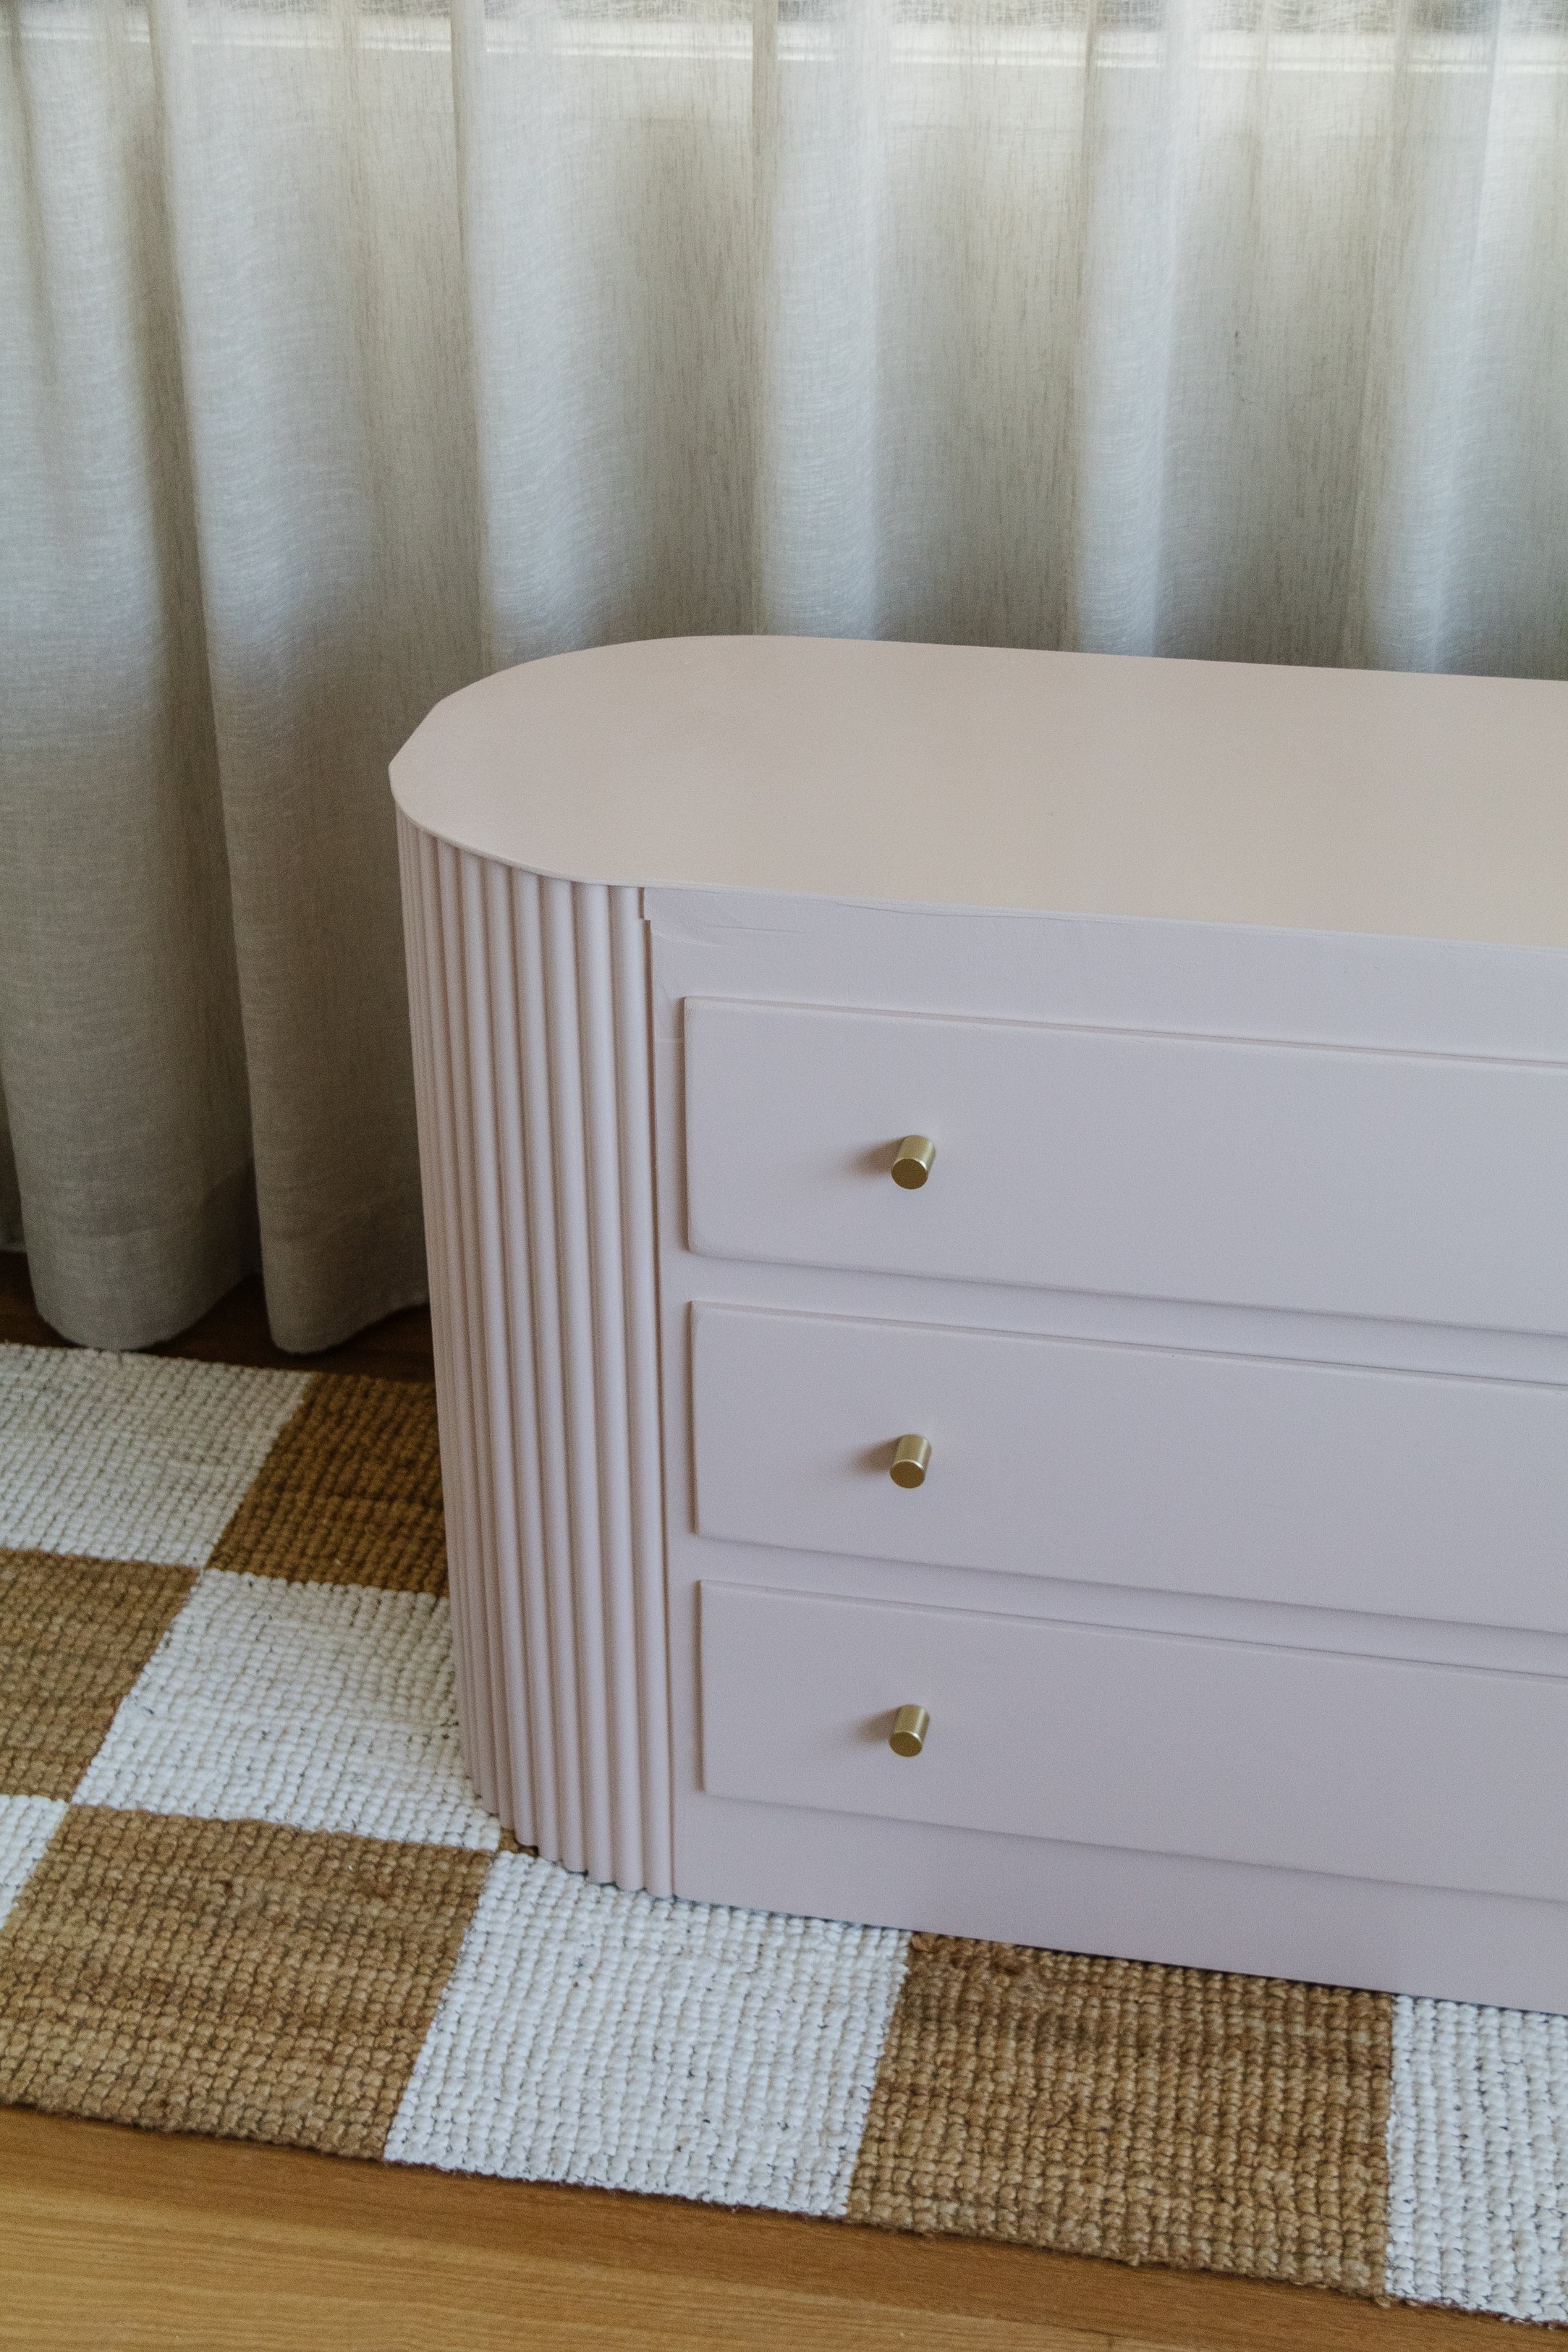
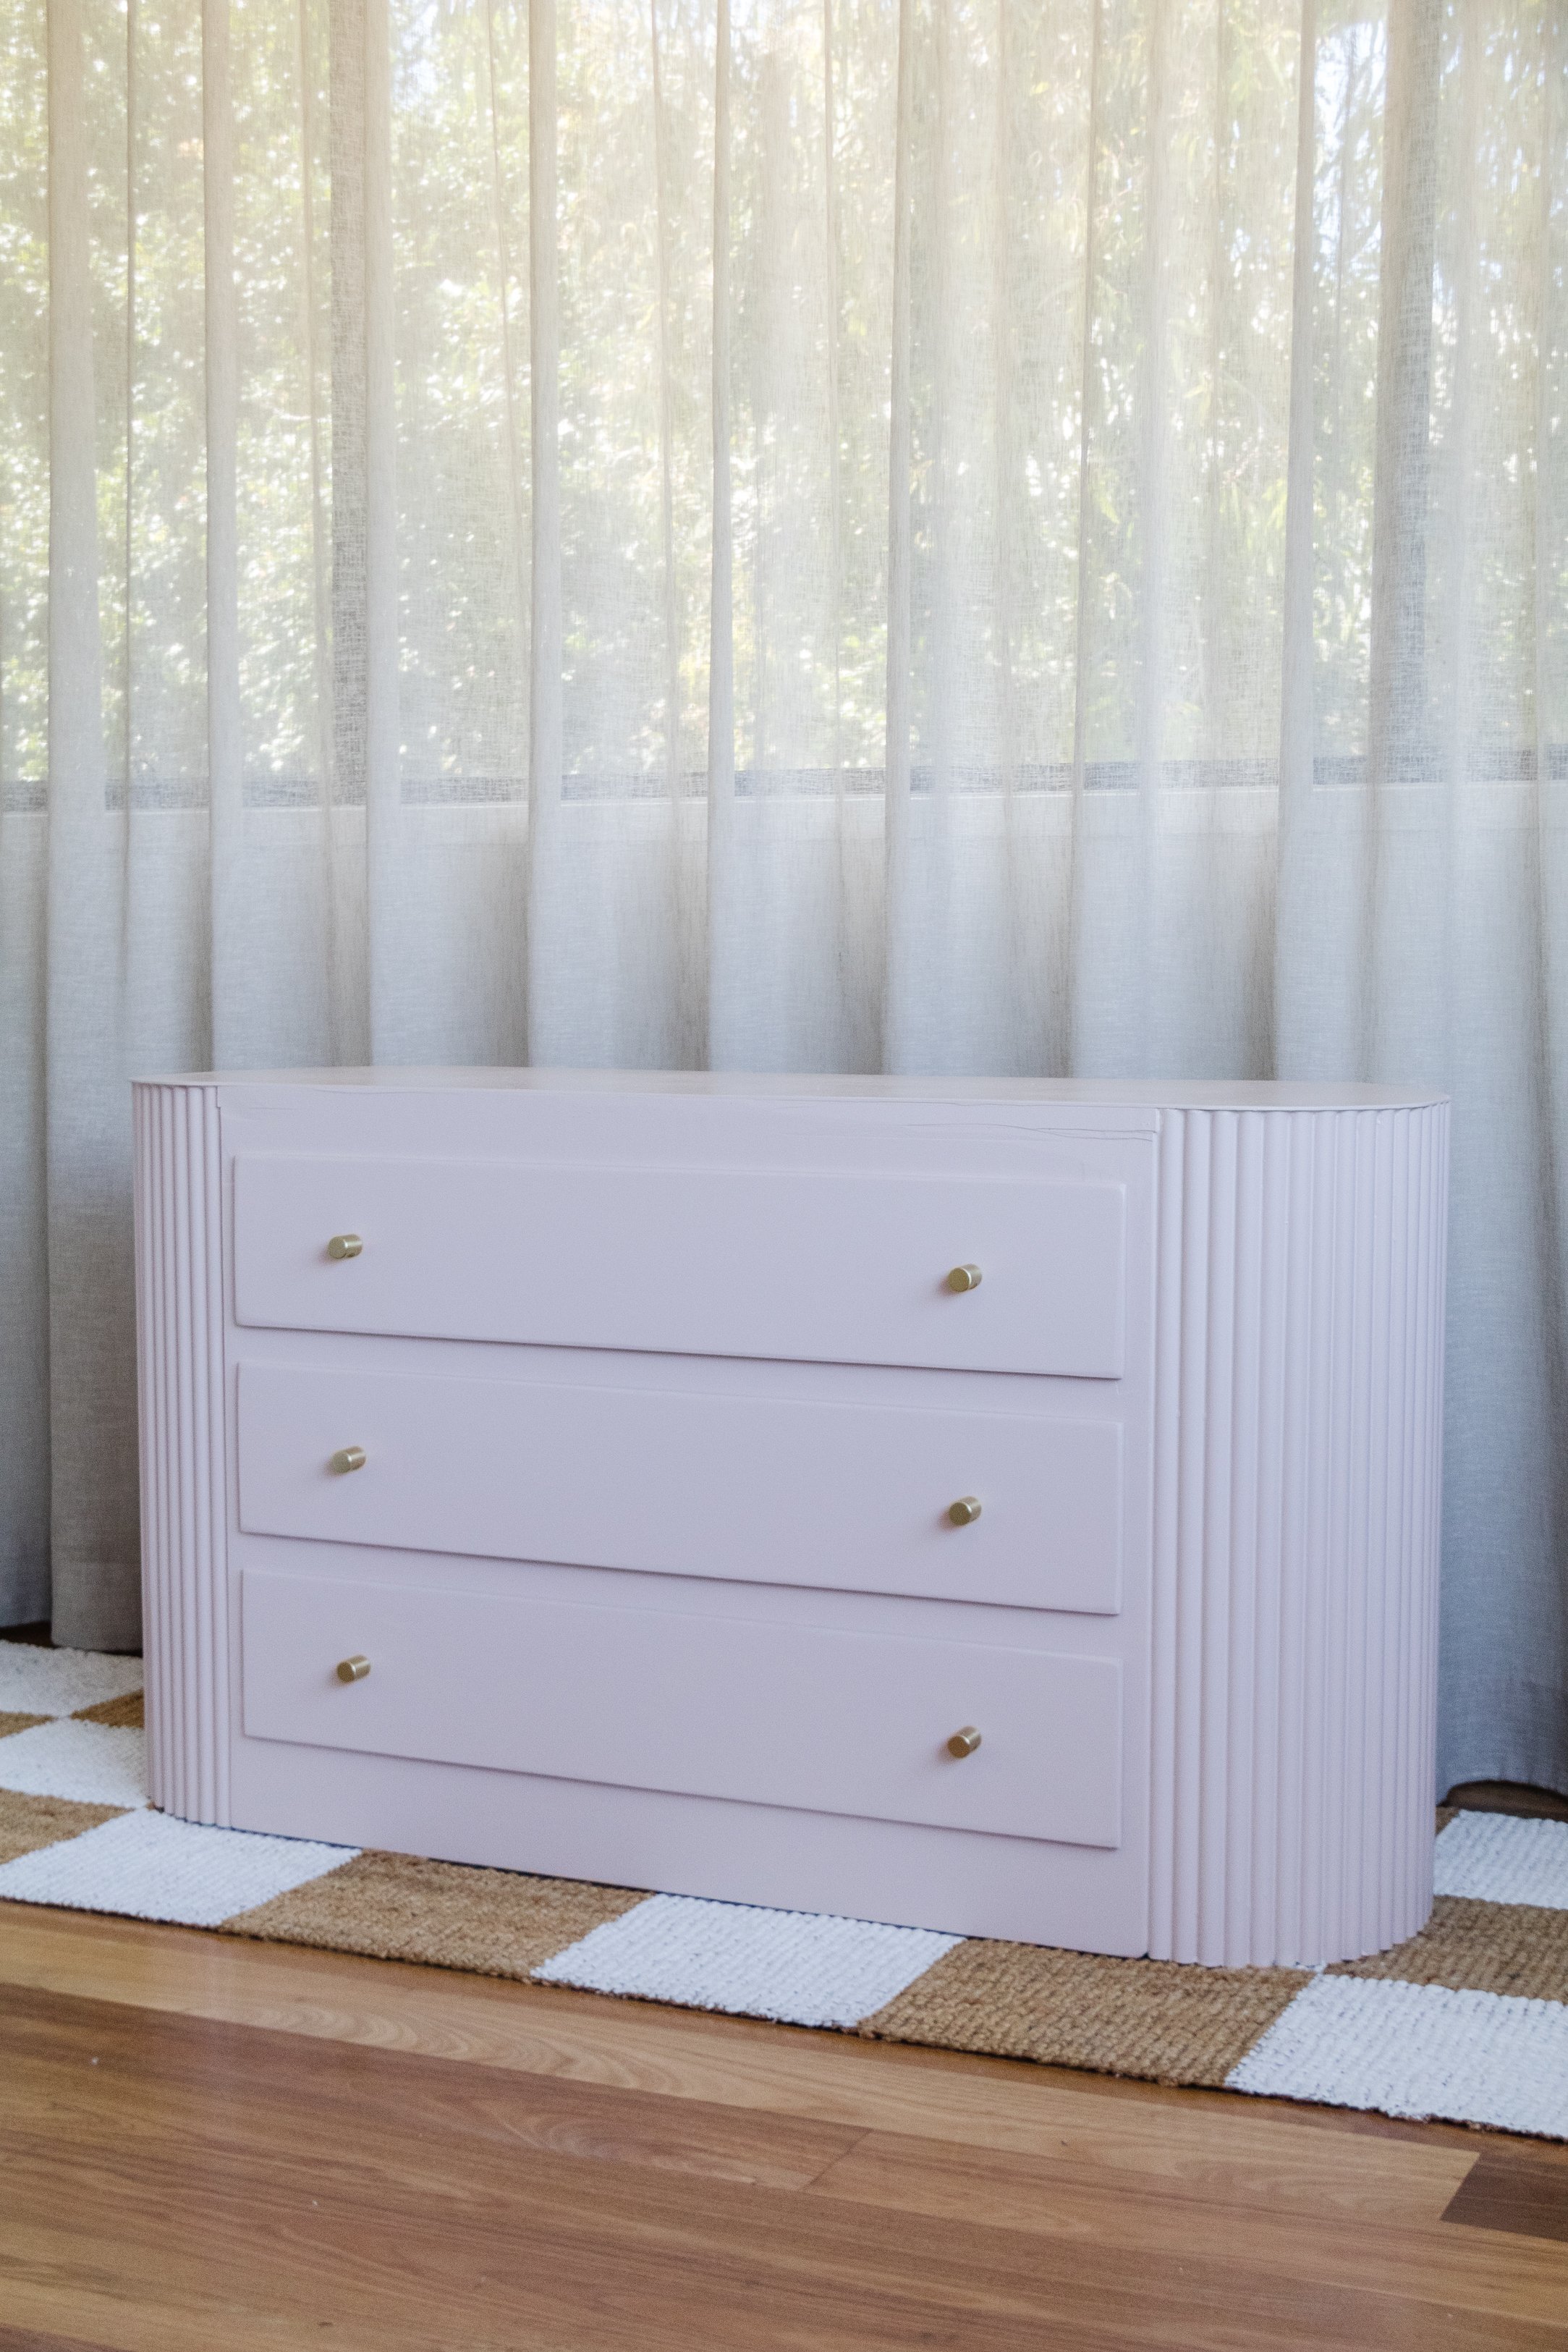
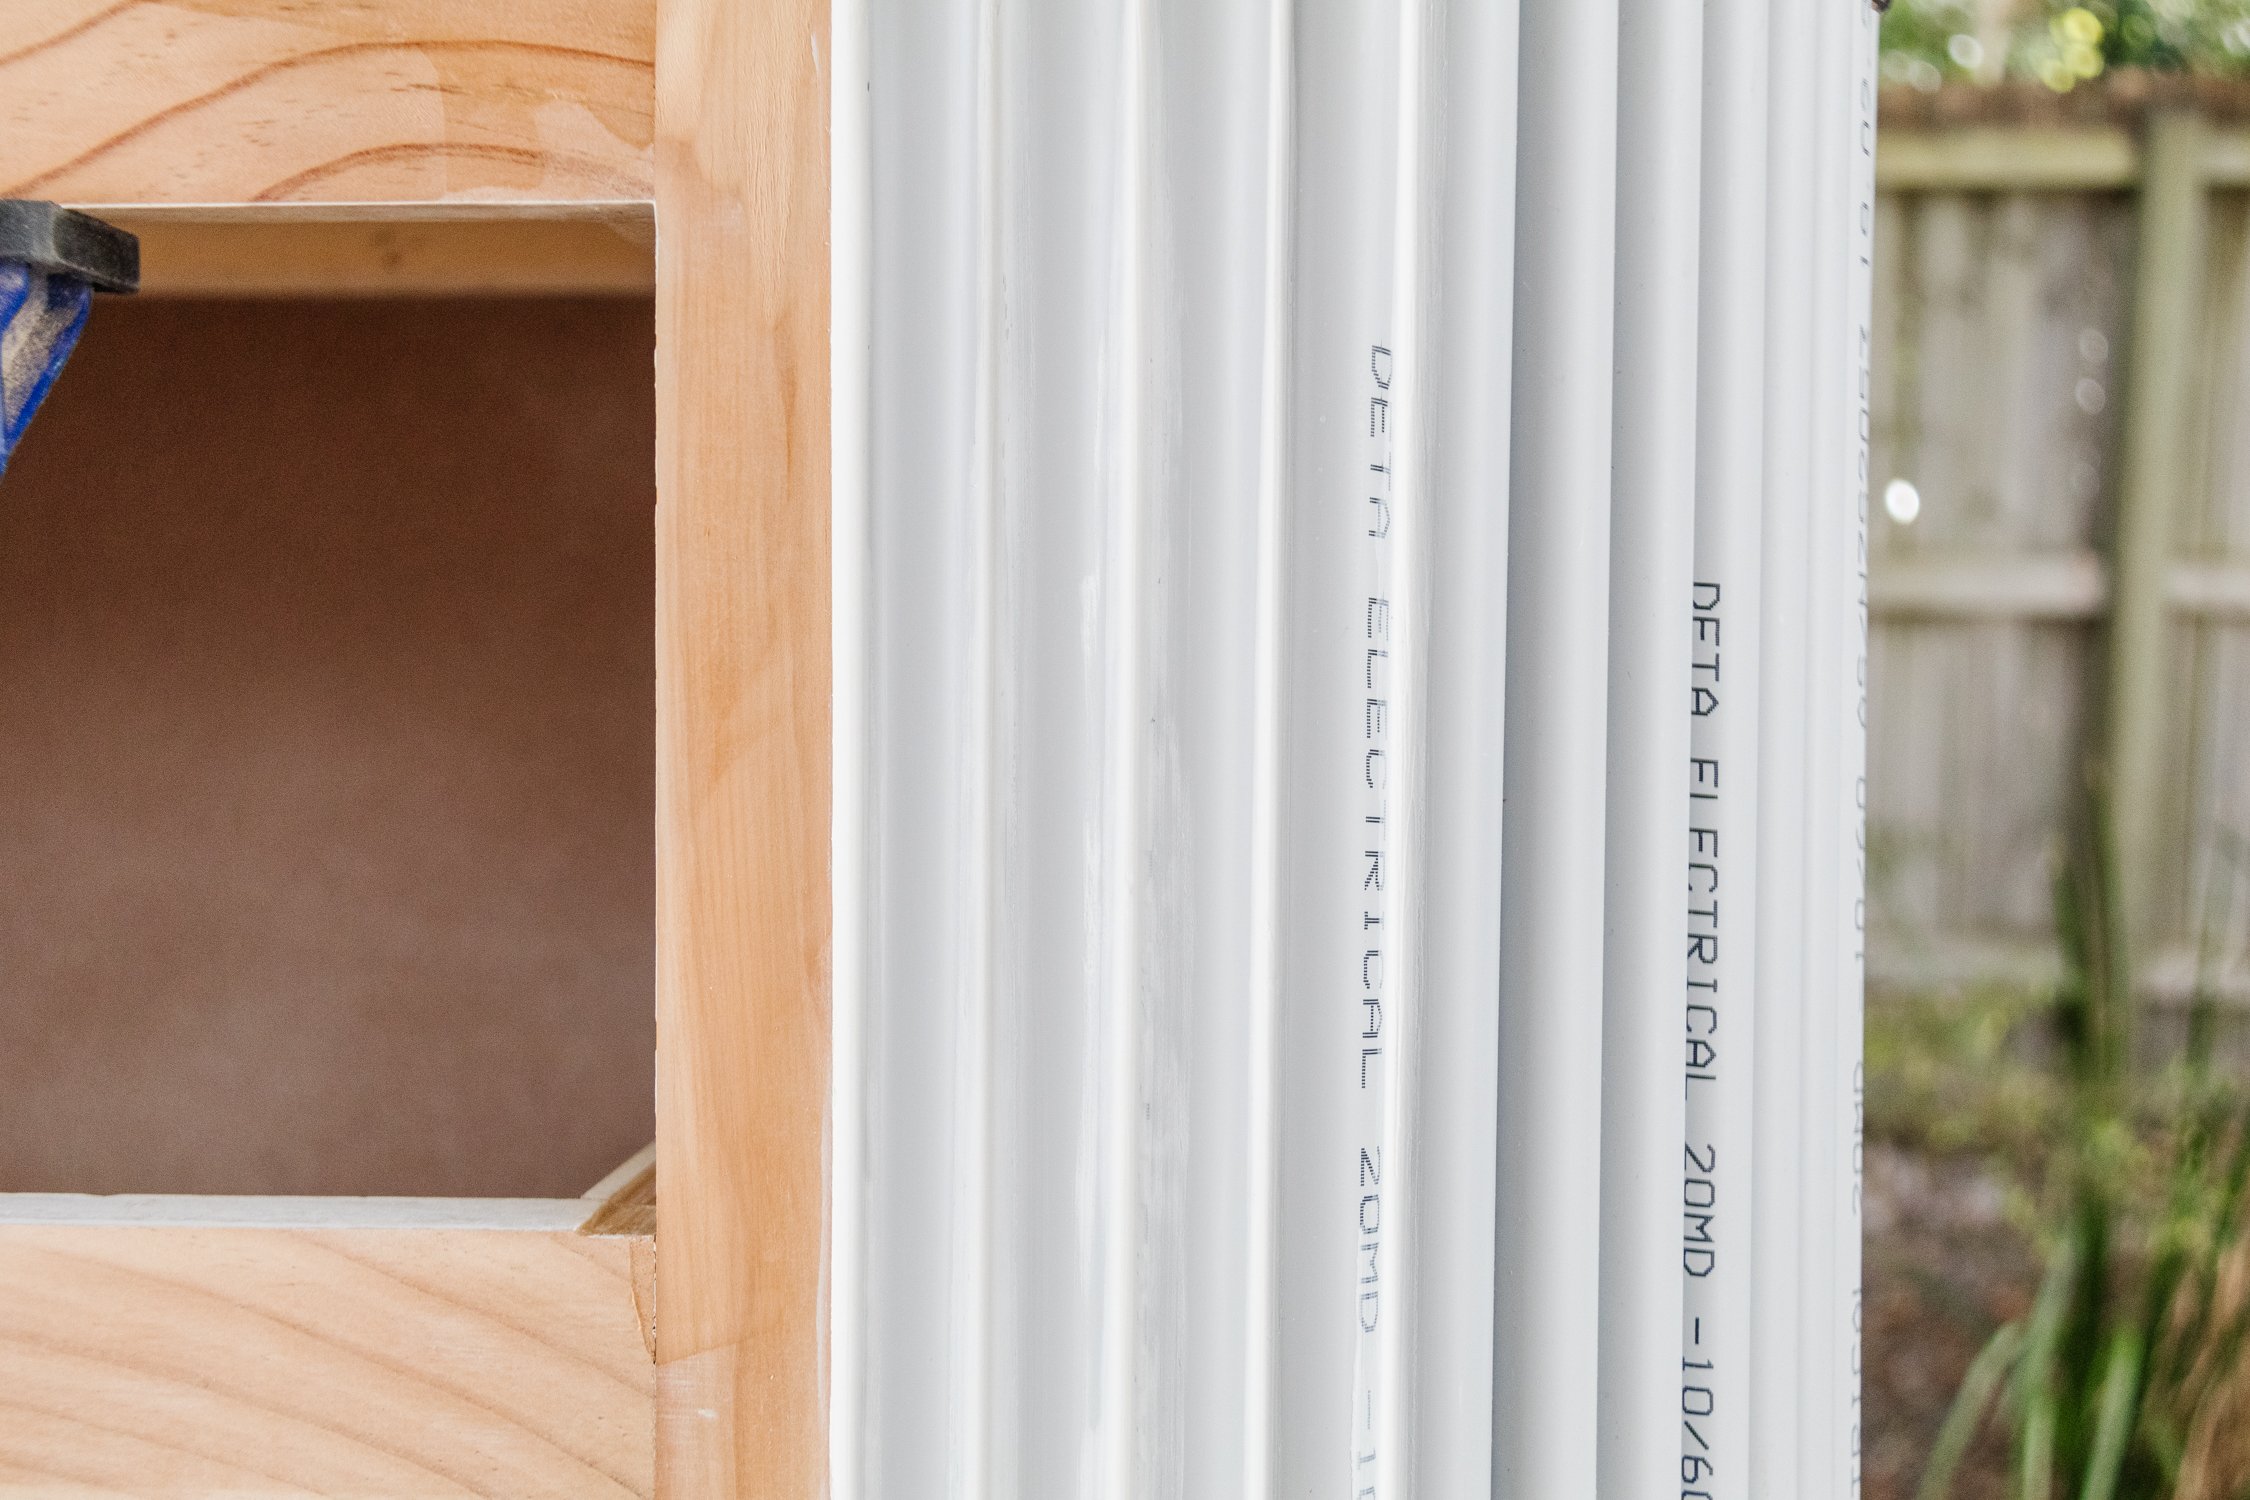
When I got home I realised the right side of the chest of drawers was broken, but I have been wanting to create a rounded fluted detail onto the side of a cabinet or chest of drawers for ages, so even though I knew I could keep it simple and glue a sheet of thin MDF over it, I wanted to elevate it because I knew it had so much potential! I went straight to Bunnings to pick up the materials I needed for this upcycle and I happened to discover inexpensive PVC pipes for $3.74 per 4m which would end up being so much cheaper than using timber half dowel - hurrah! Then I went home to get making. And I am obsessed - this may actually be my favourite upcycle to date!
Total project cost? $150, including the chest of drawers which is crazy considering I have seen similar cabinets costing anywhere between $500 and $1,200! Read on to learn how you can upcycle your own chest of drawers with a stunning fluted detail. And stay tuned for my mirror upcycle!
And to see how this Upcycled Fluted Drawers came together, make sure you check out this video!
Before & After


The Inspiration

Project Details
🕒 Project Time Estimate: 2 hours, not including glue and paint drying time
💰 Materials Cost: $150
⚒️ Power Tools: Mitre saw or handsaw, jigsaw, drill, sander
👷♀️ Skill Level: Beginner to intermediateDIYer
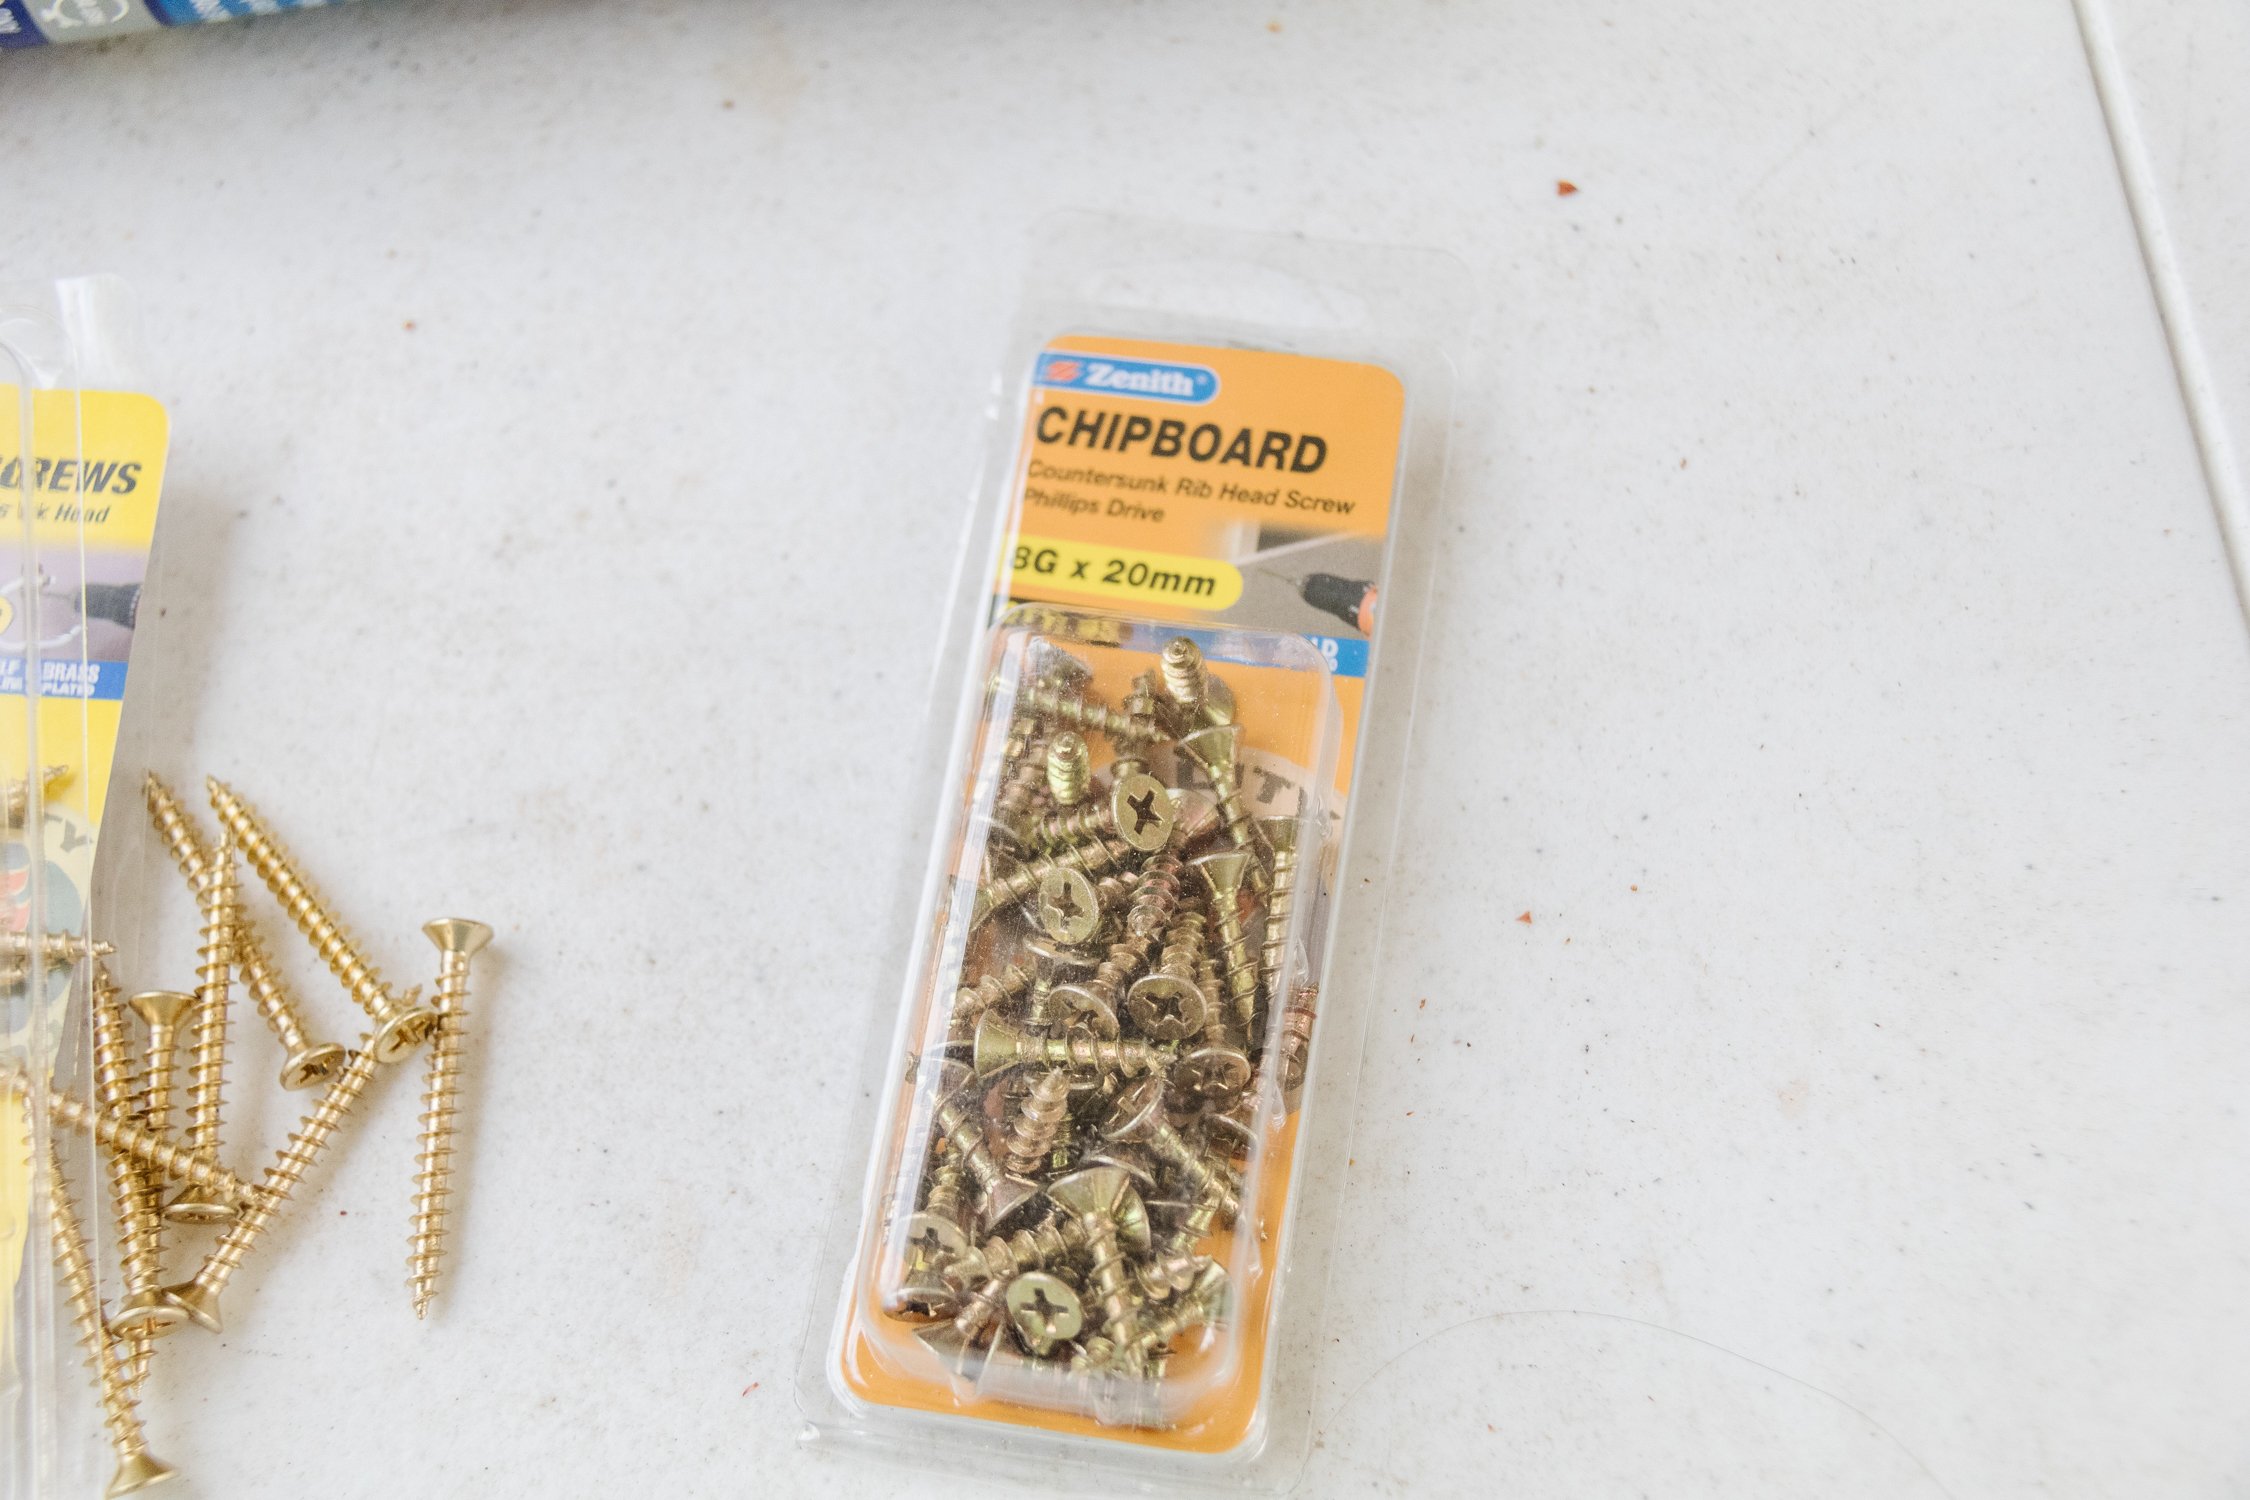
Materials
Secondhand chest of drawers (or a cabinet if you like!)
Pencil and string
3 x Brackets
Baby wipes
Microfibre roller and paint brush
White primer paint
“Mornington” by Dulux
Tools:
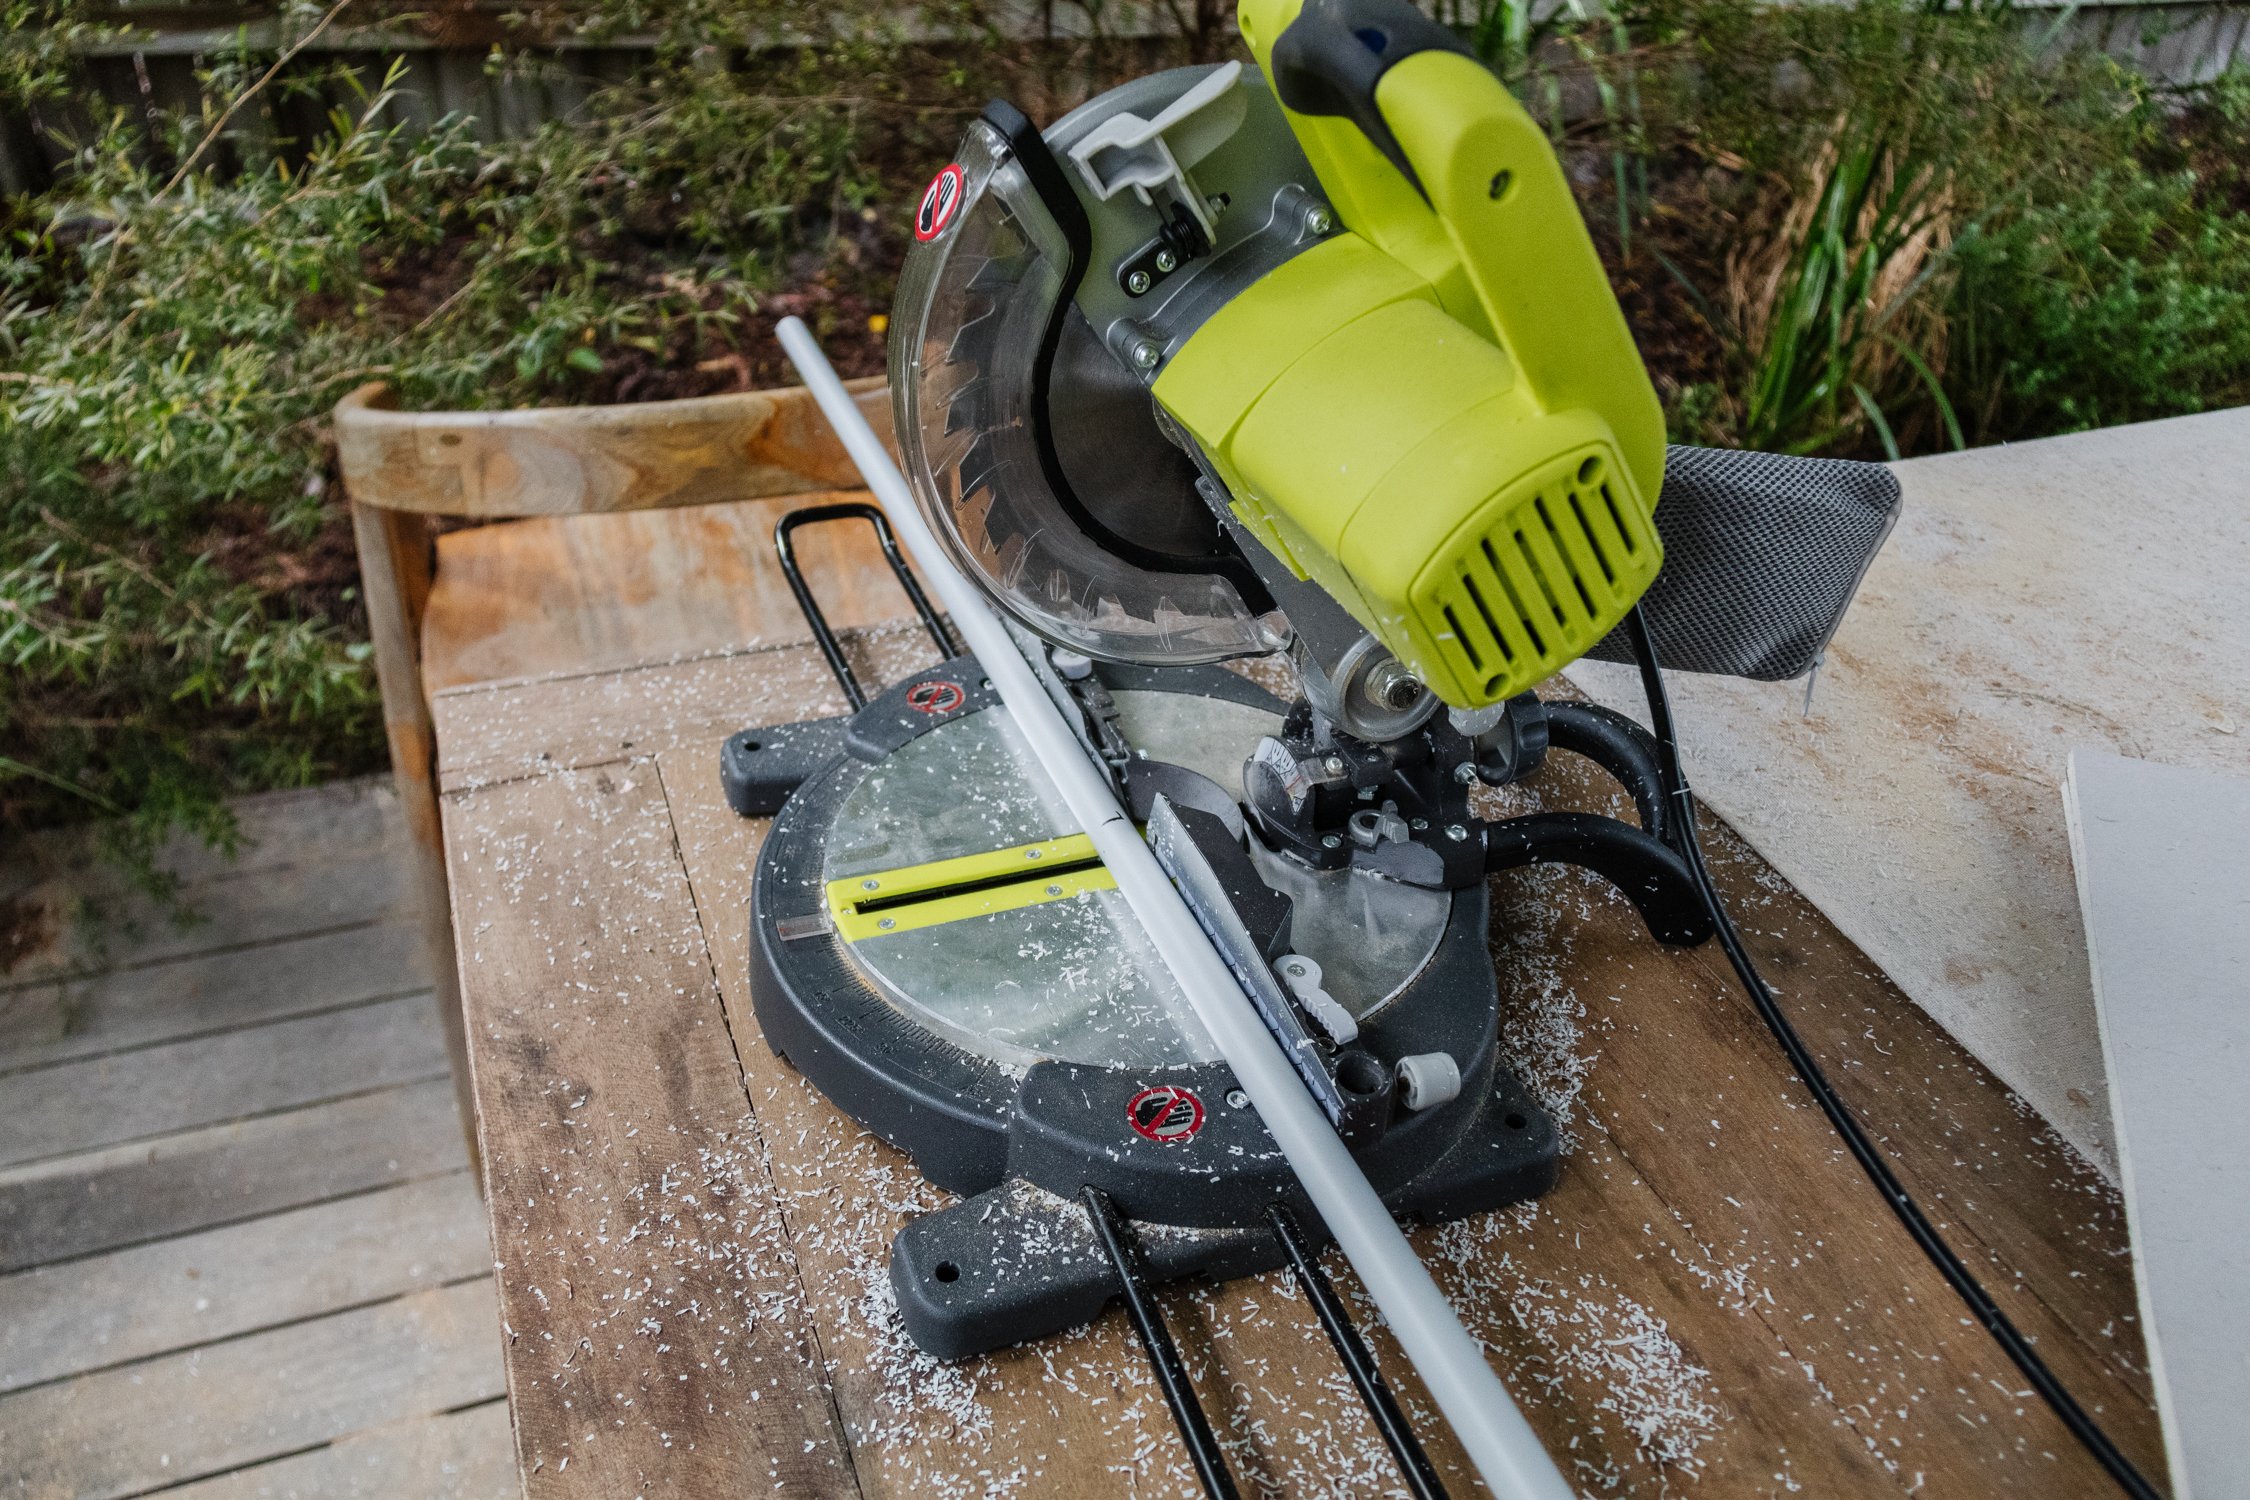
Mitre saw (you can use a jigsaw or a handsaw to cut the half dowel)
Optional: You can use a paint sprayer like I did for the primer and the final coat, if you like
Optional: You can seal the paint by using Cabots Cabothane Clear in Matte, Satin or Gloss
Optional: You can add furniture legs to the chest of drawers and I love these ones.
How To
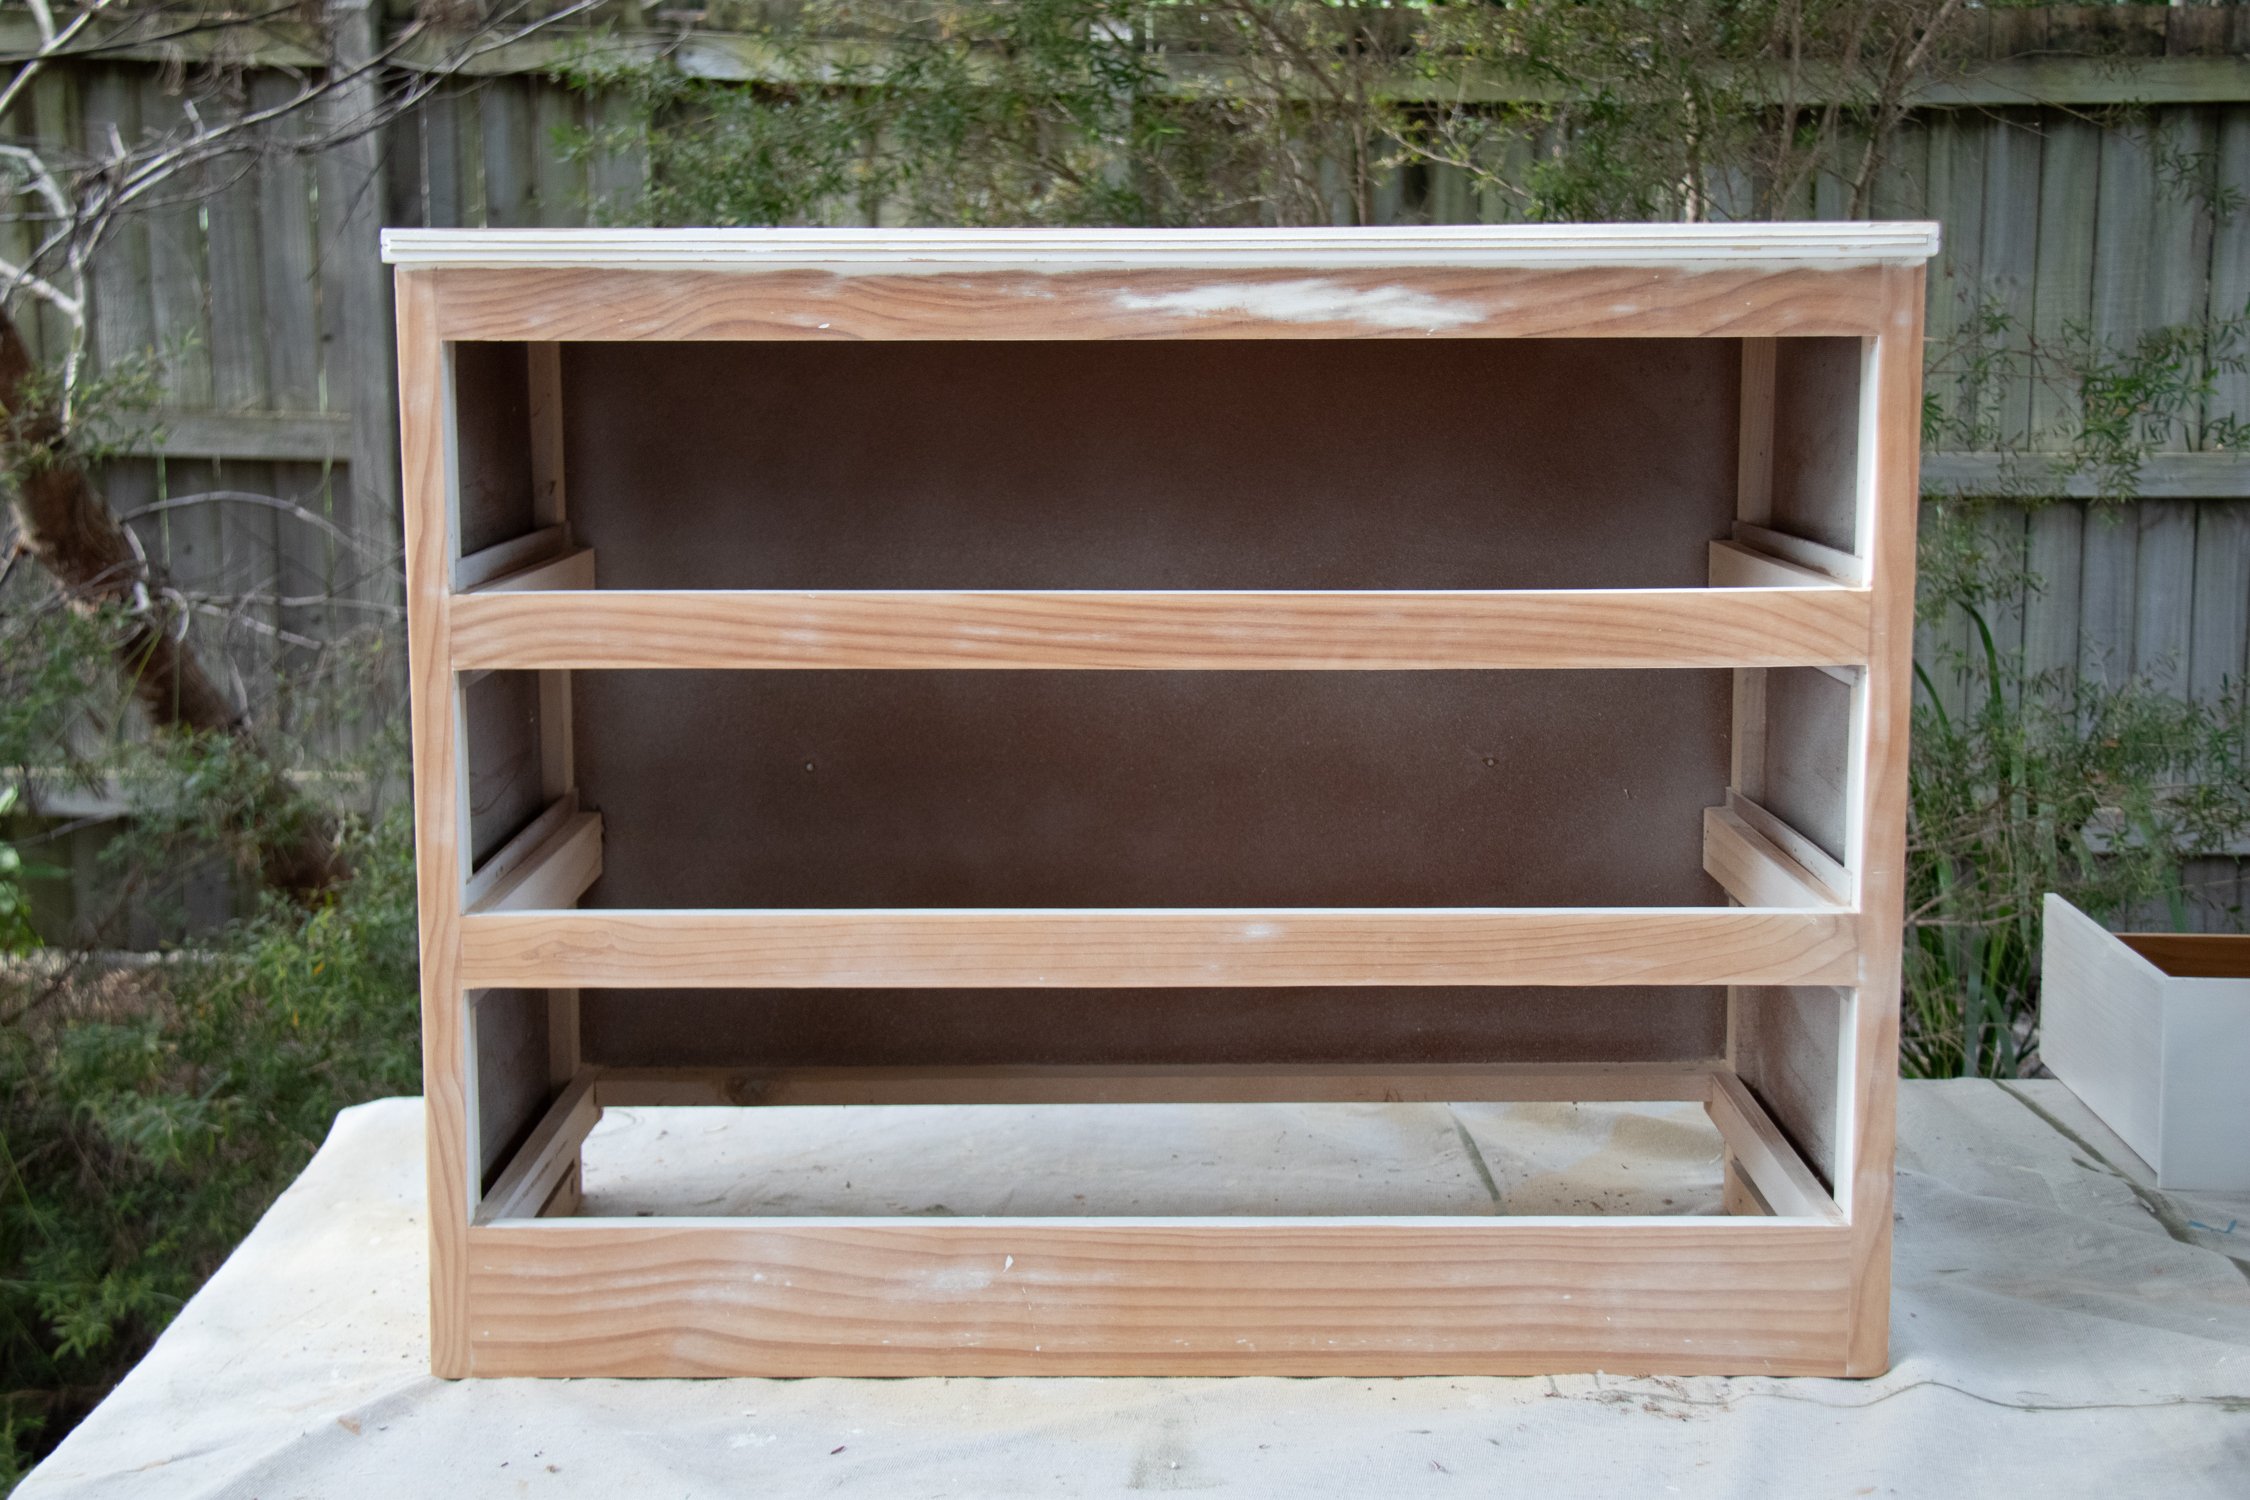
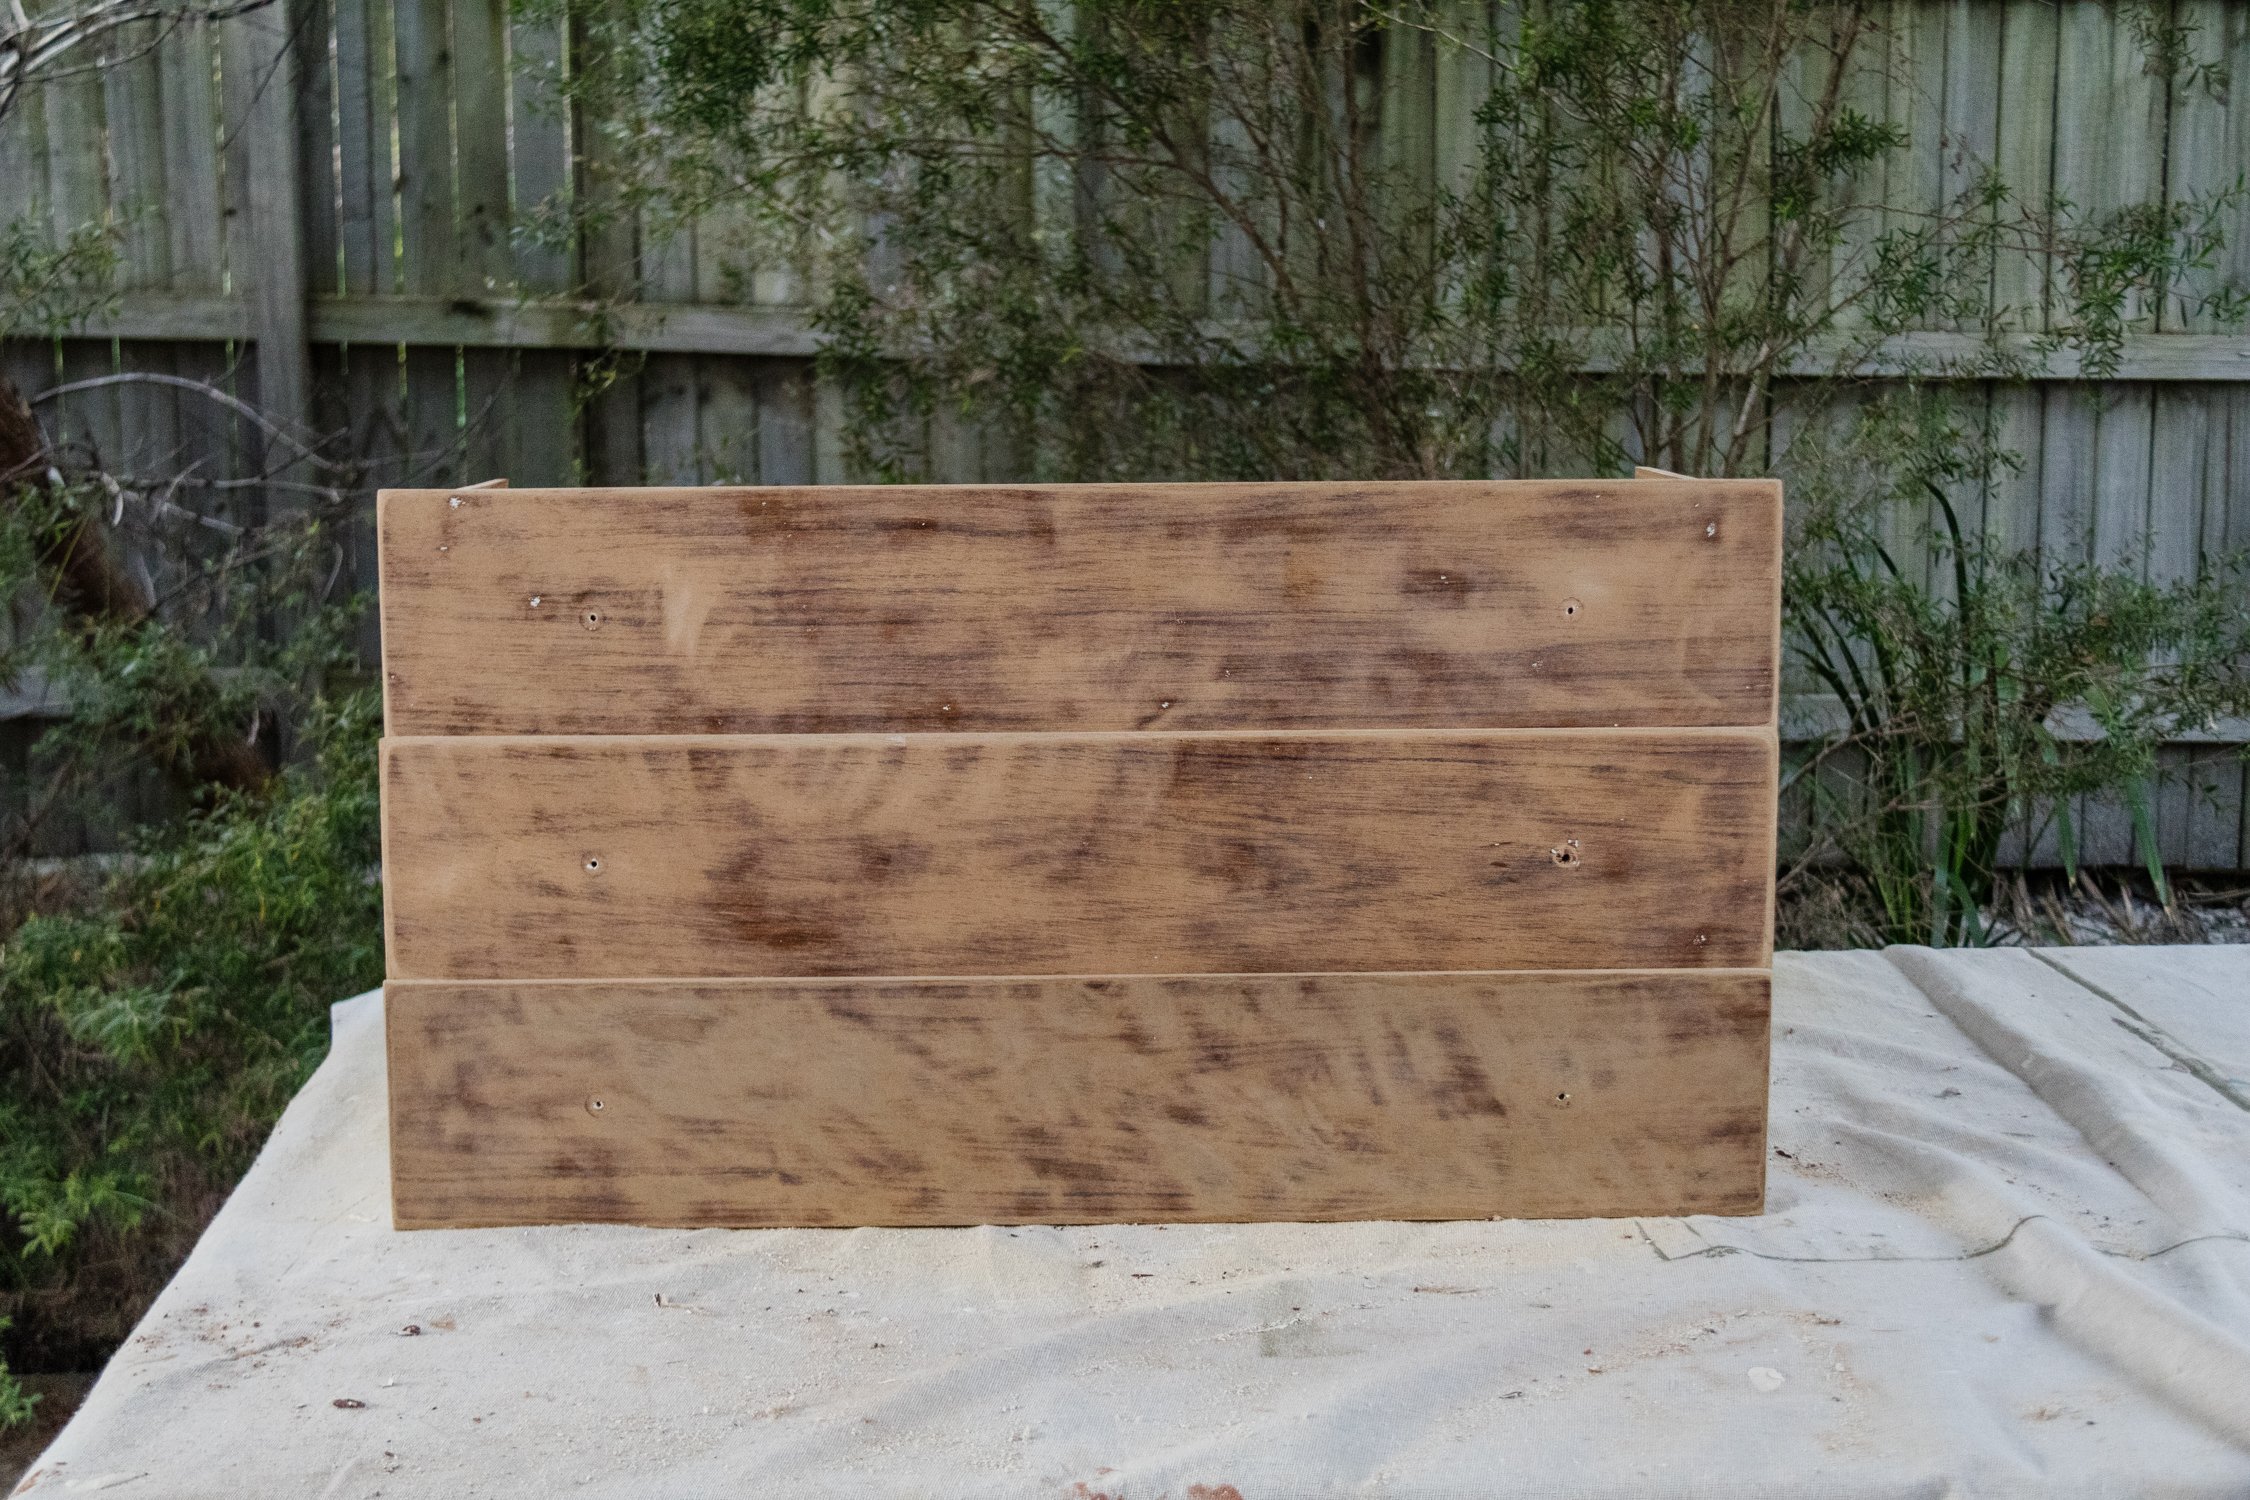
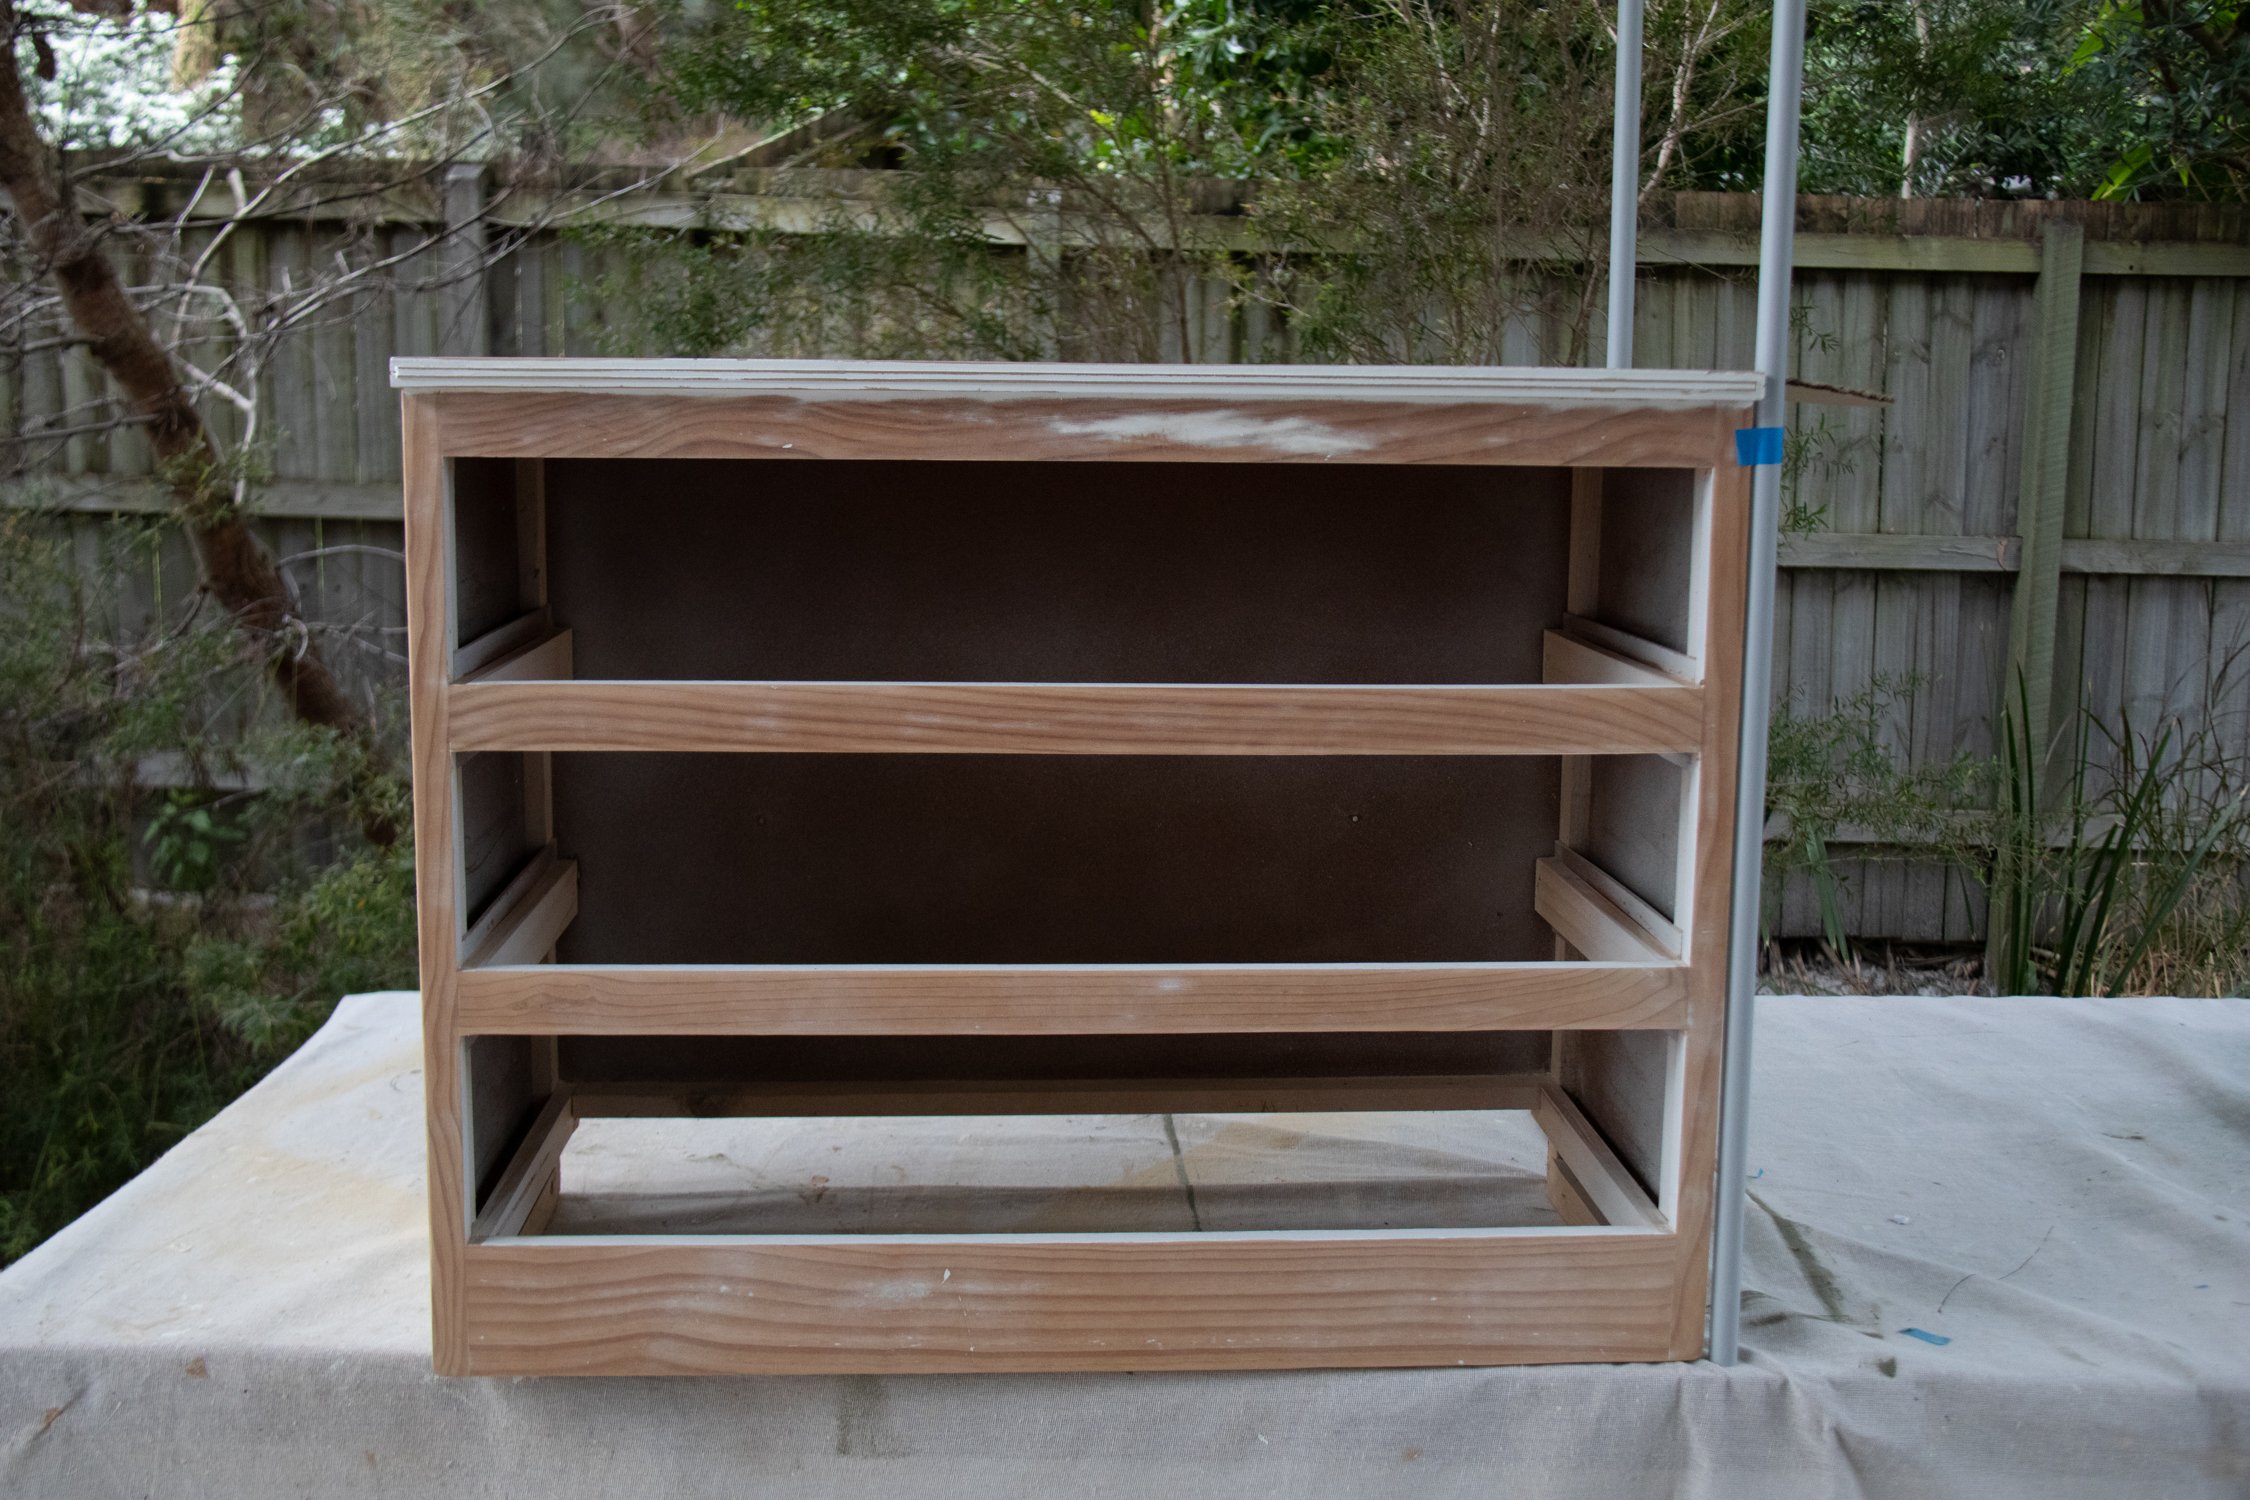
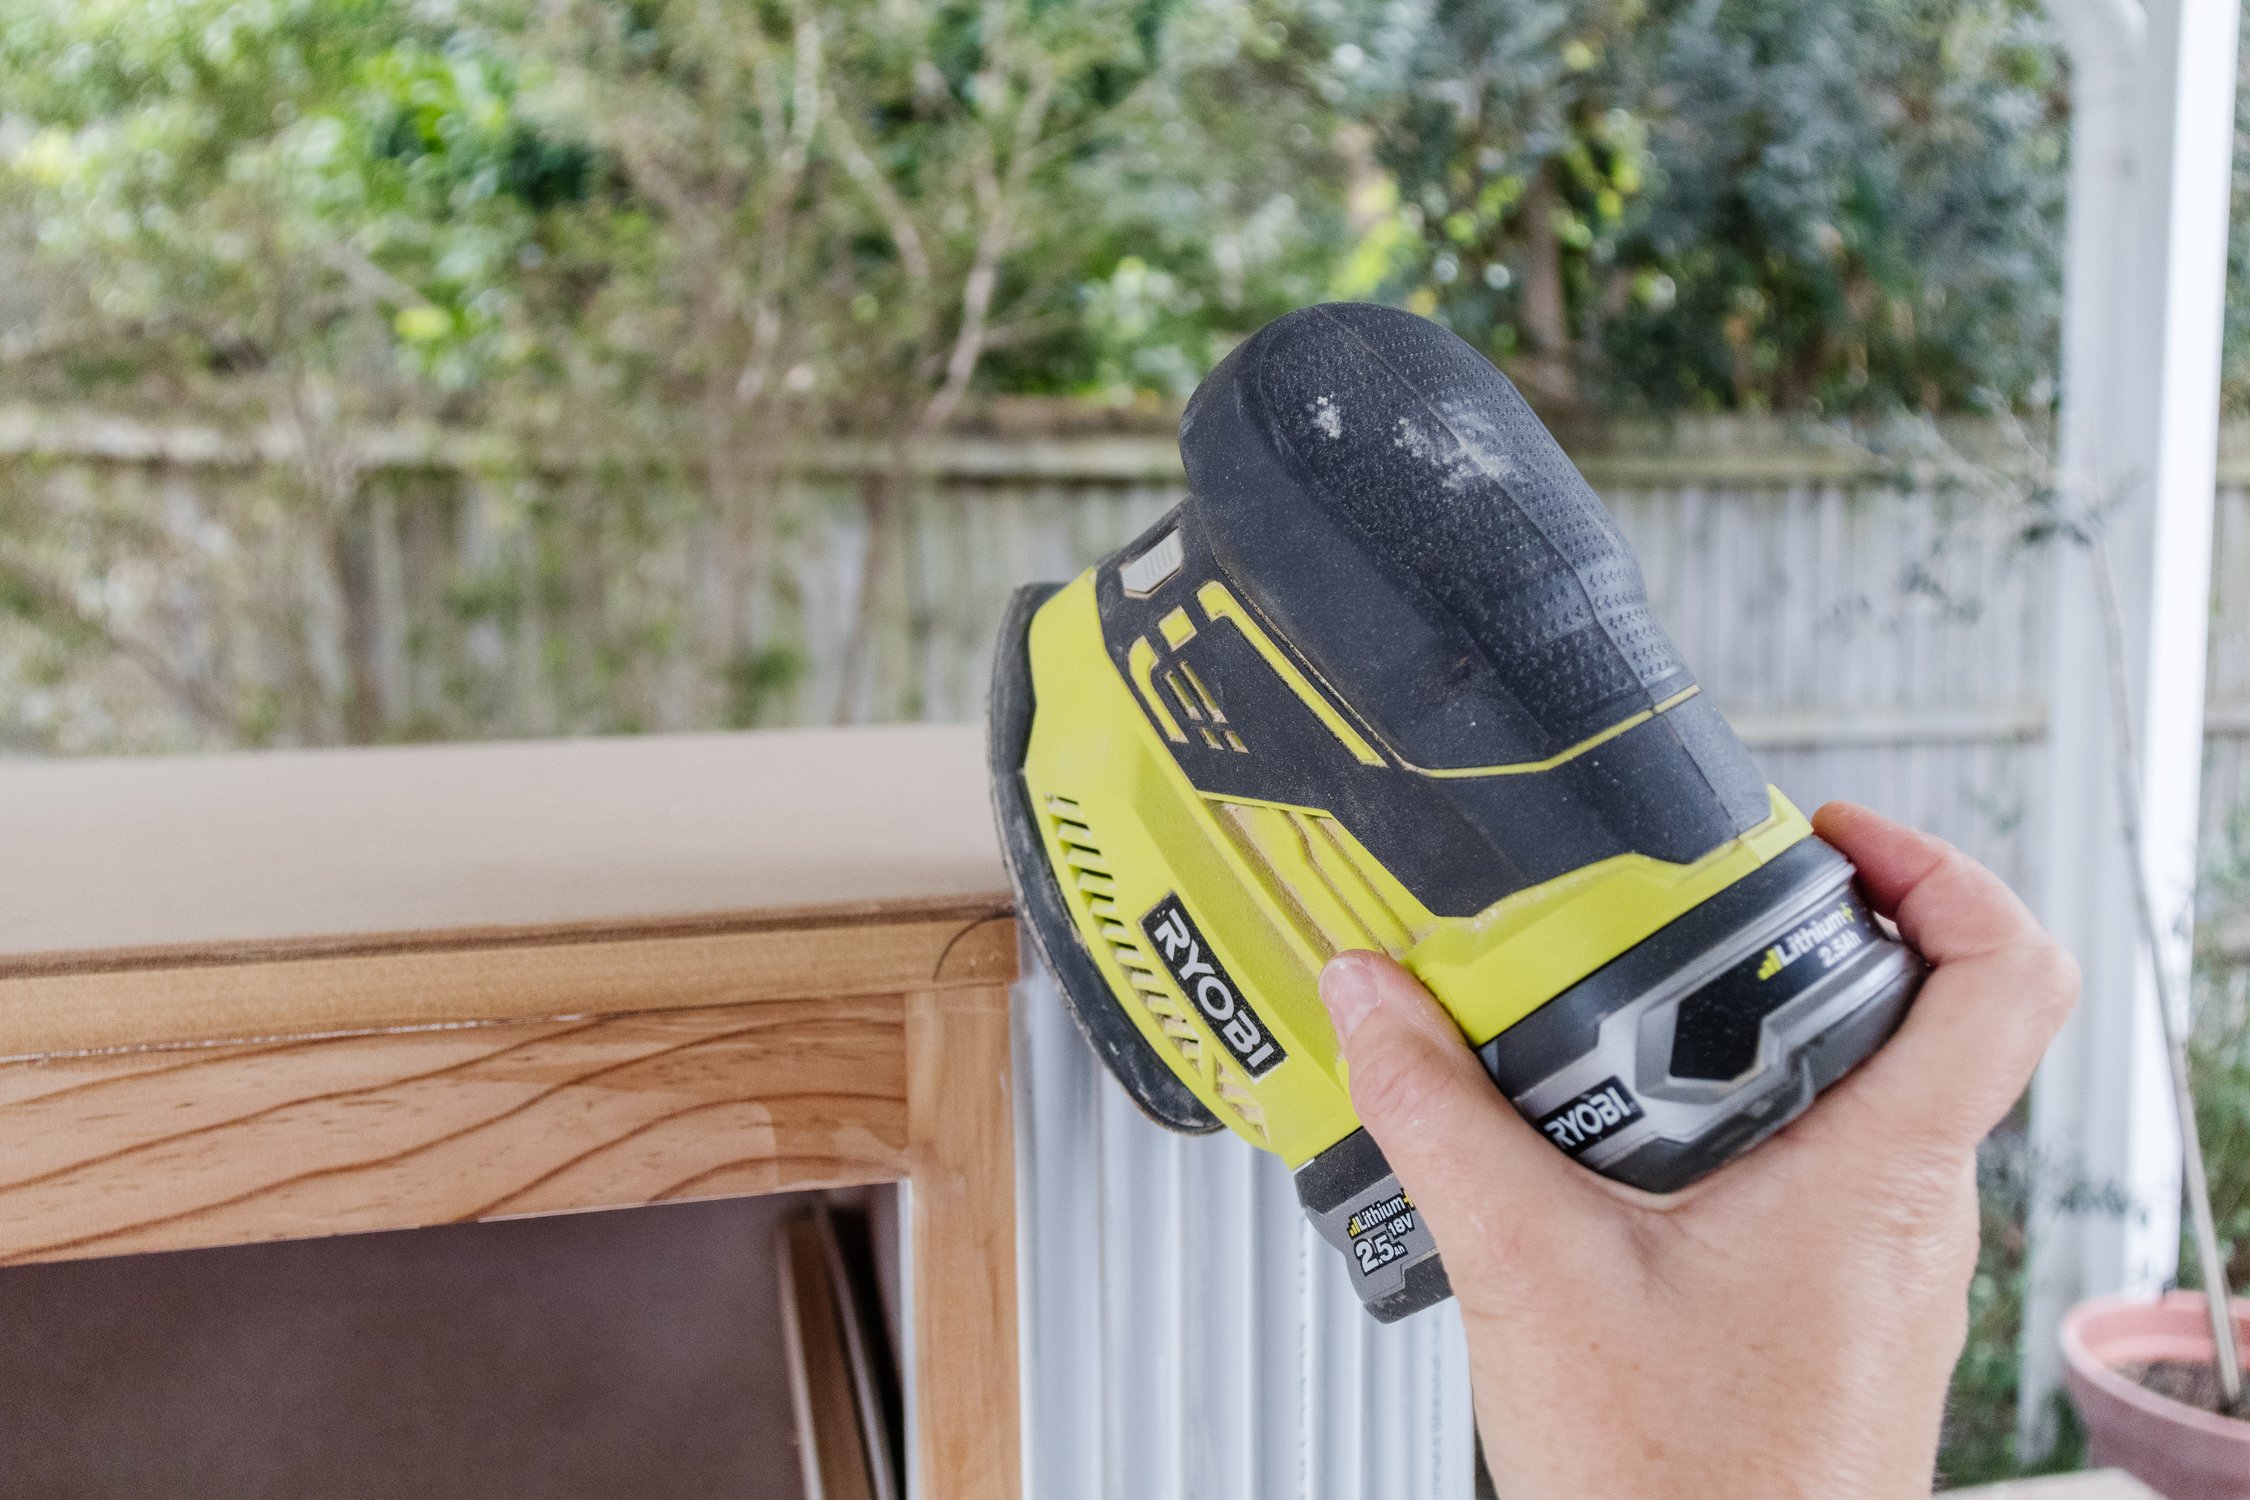
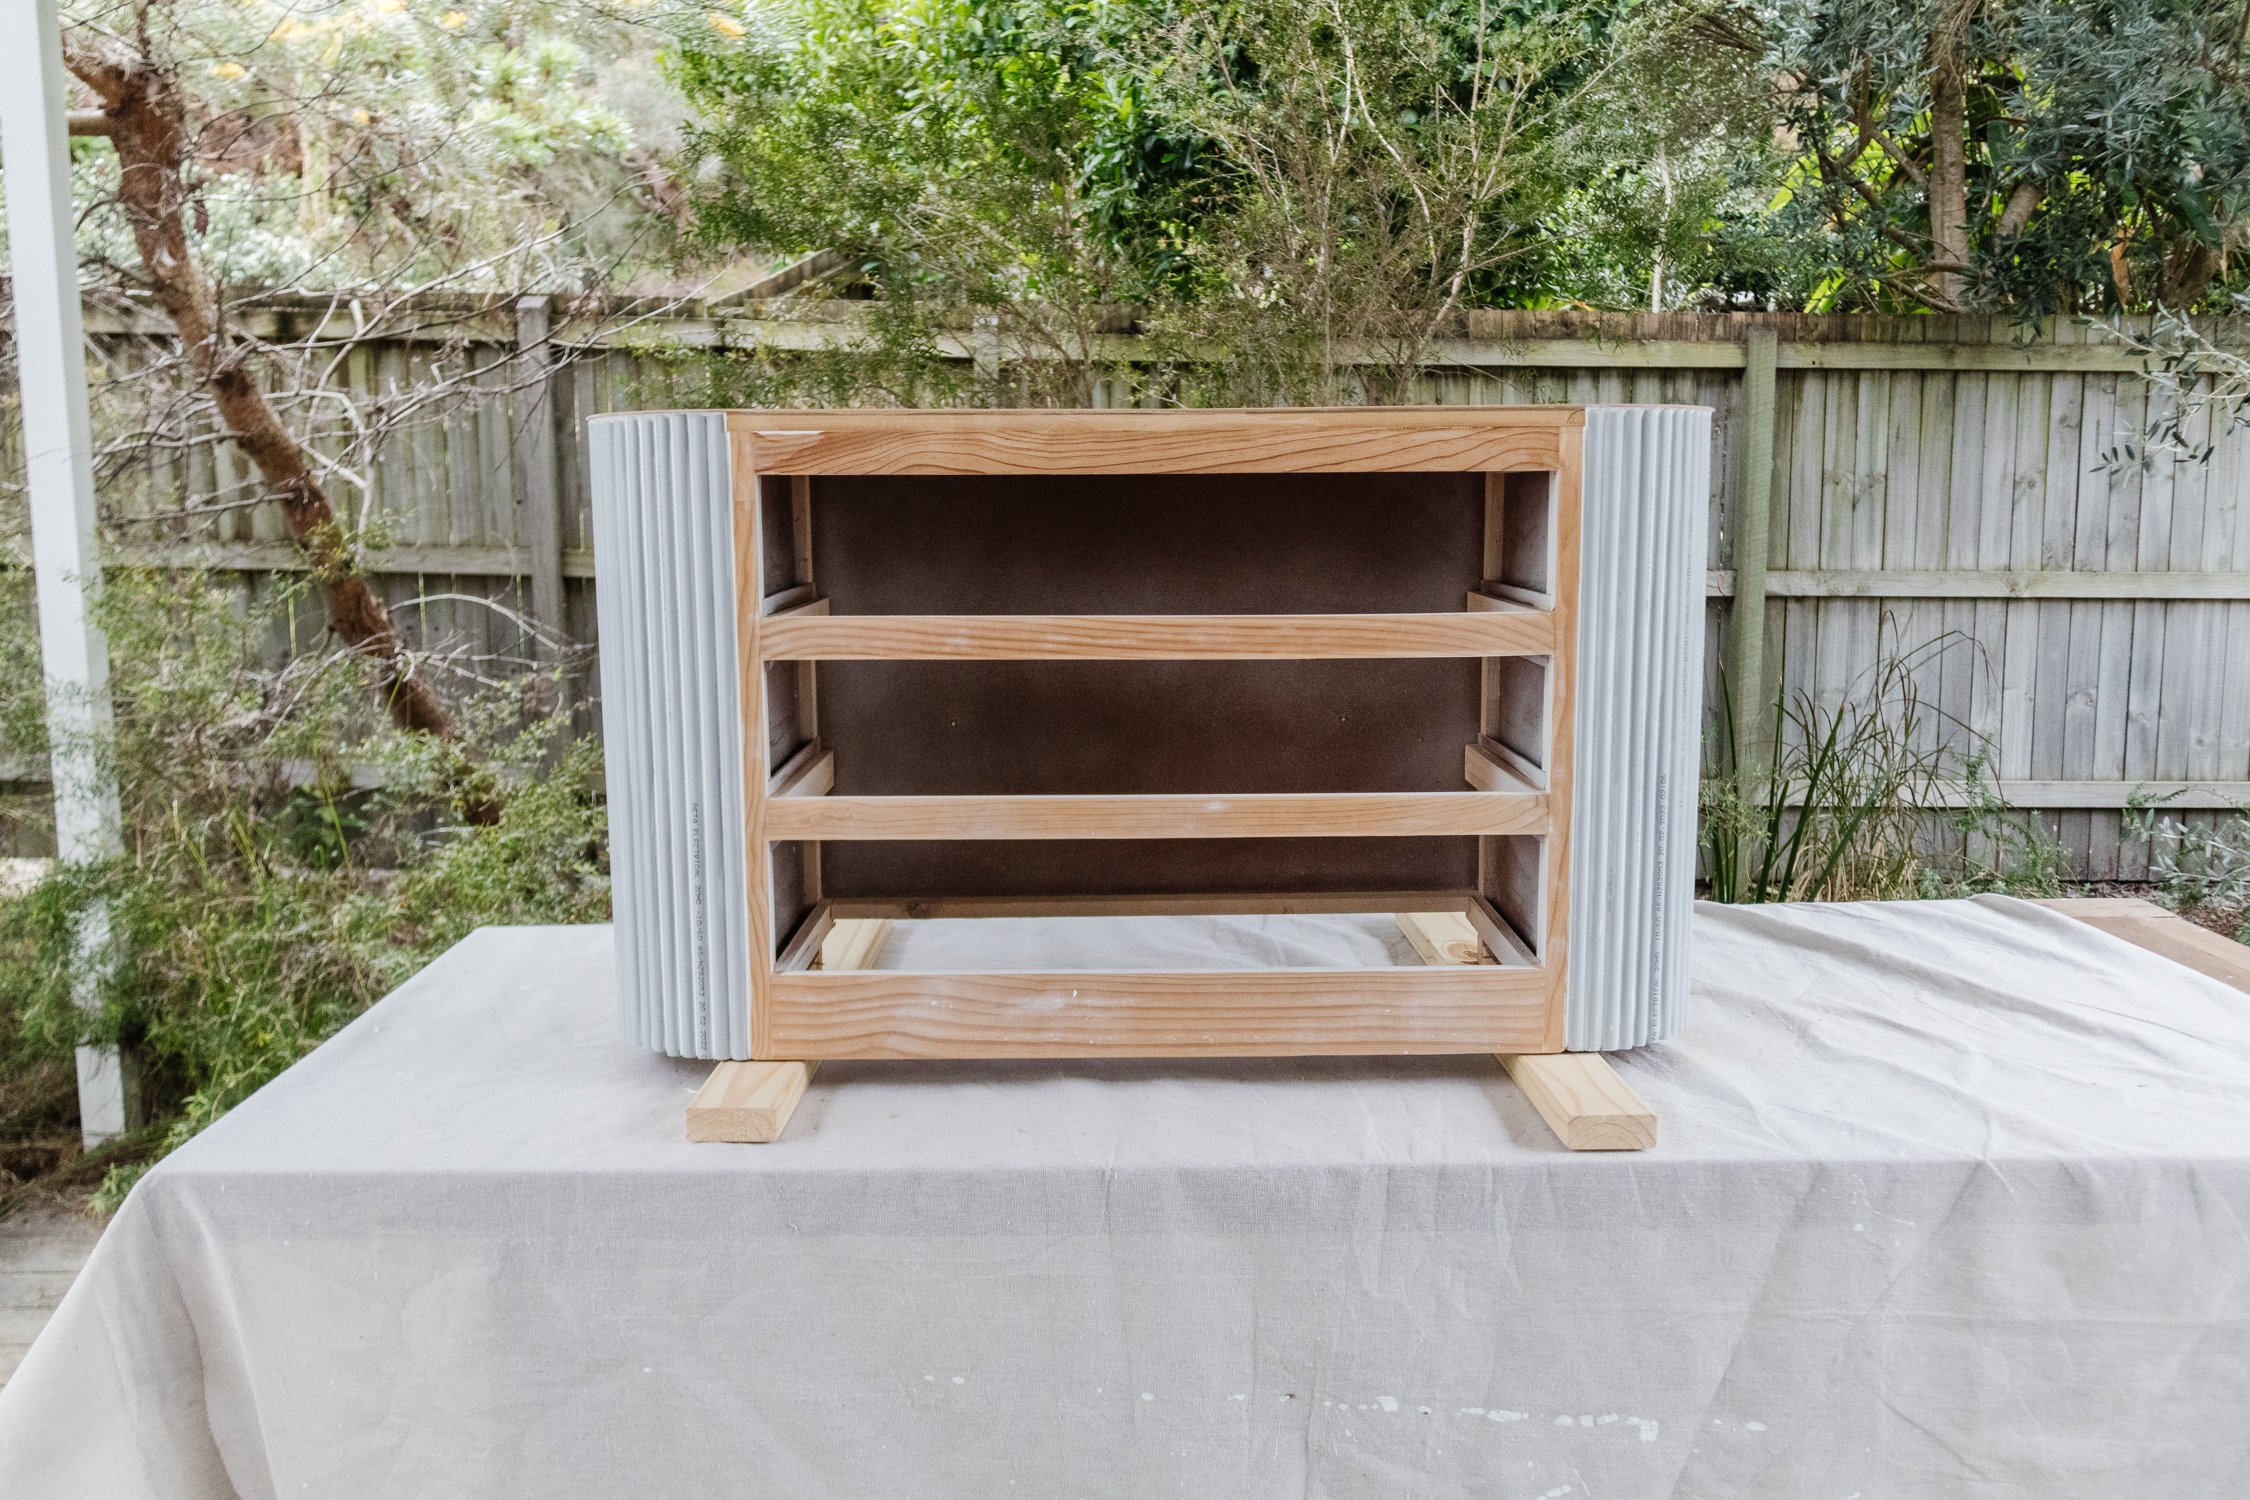
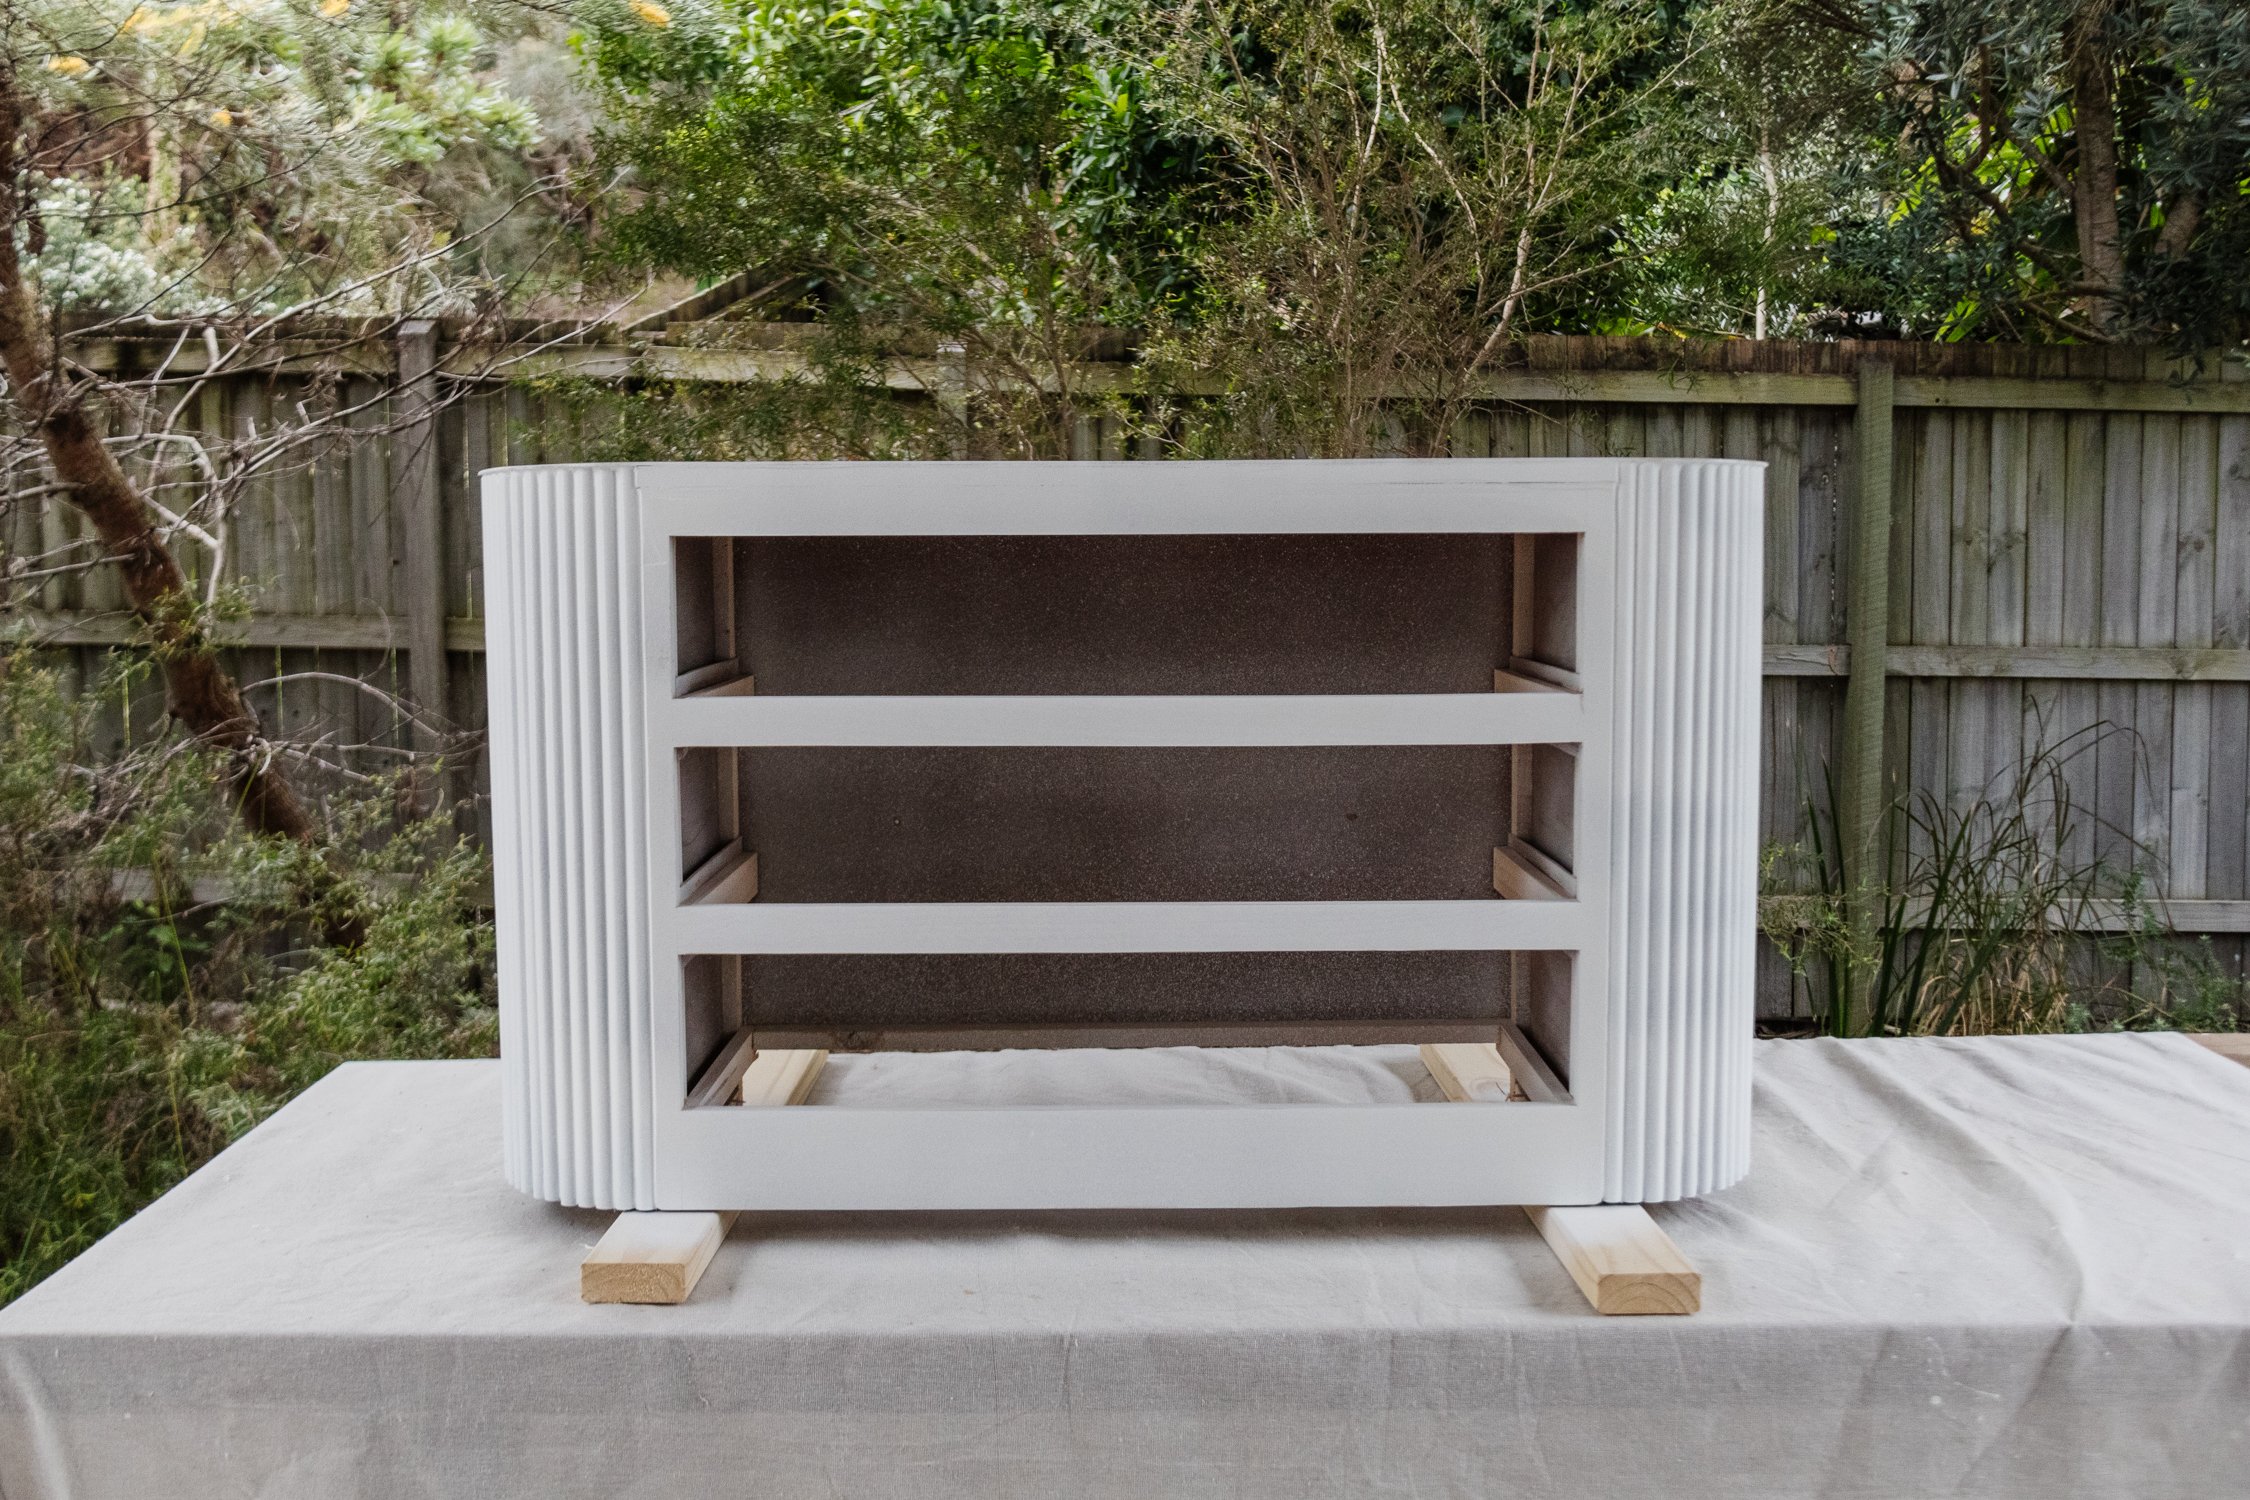
Step 1: I started by removing the cabinet knobs and giving the chest of drawers a light sand. Sadly one of the knobs broke so I wasn’t able to reuse them because I needed 6, but I have saved the other 5 and will definitely use them in the future. I sanded the surfaces of the chest of drawers, paying particular attention to the areas that wouldn’t be covered up by the fluted detail.
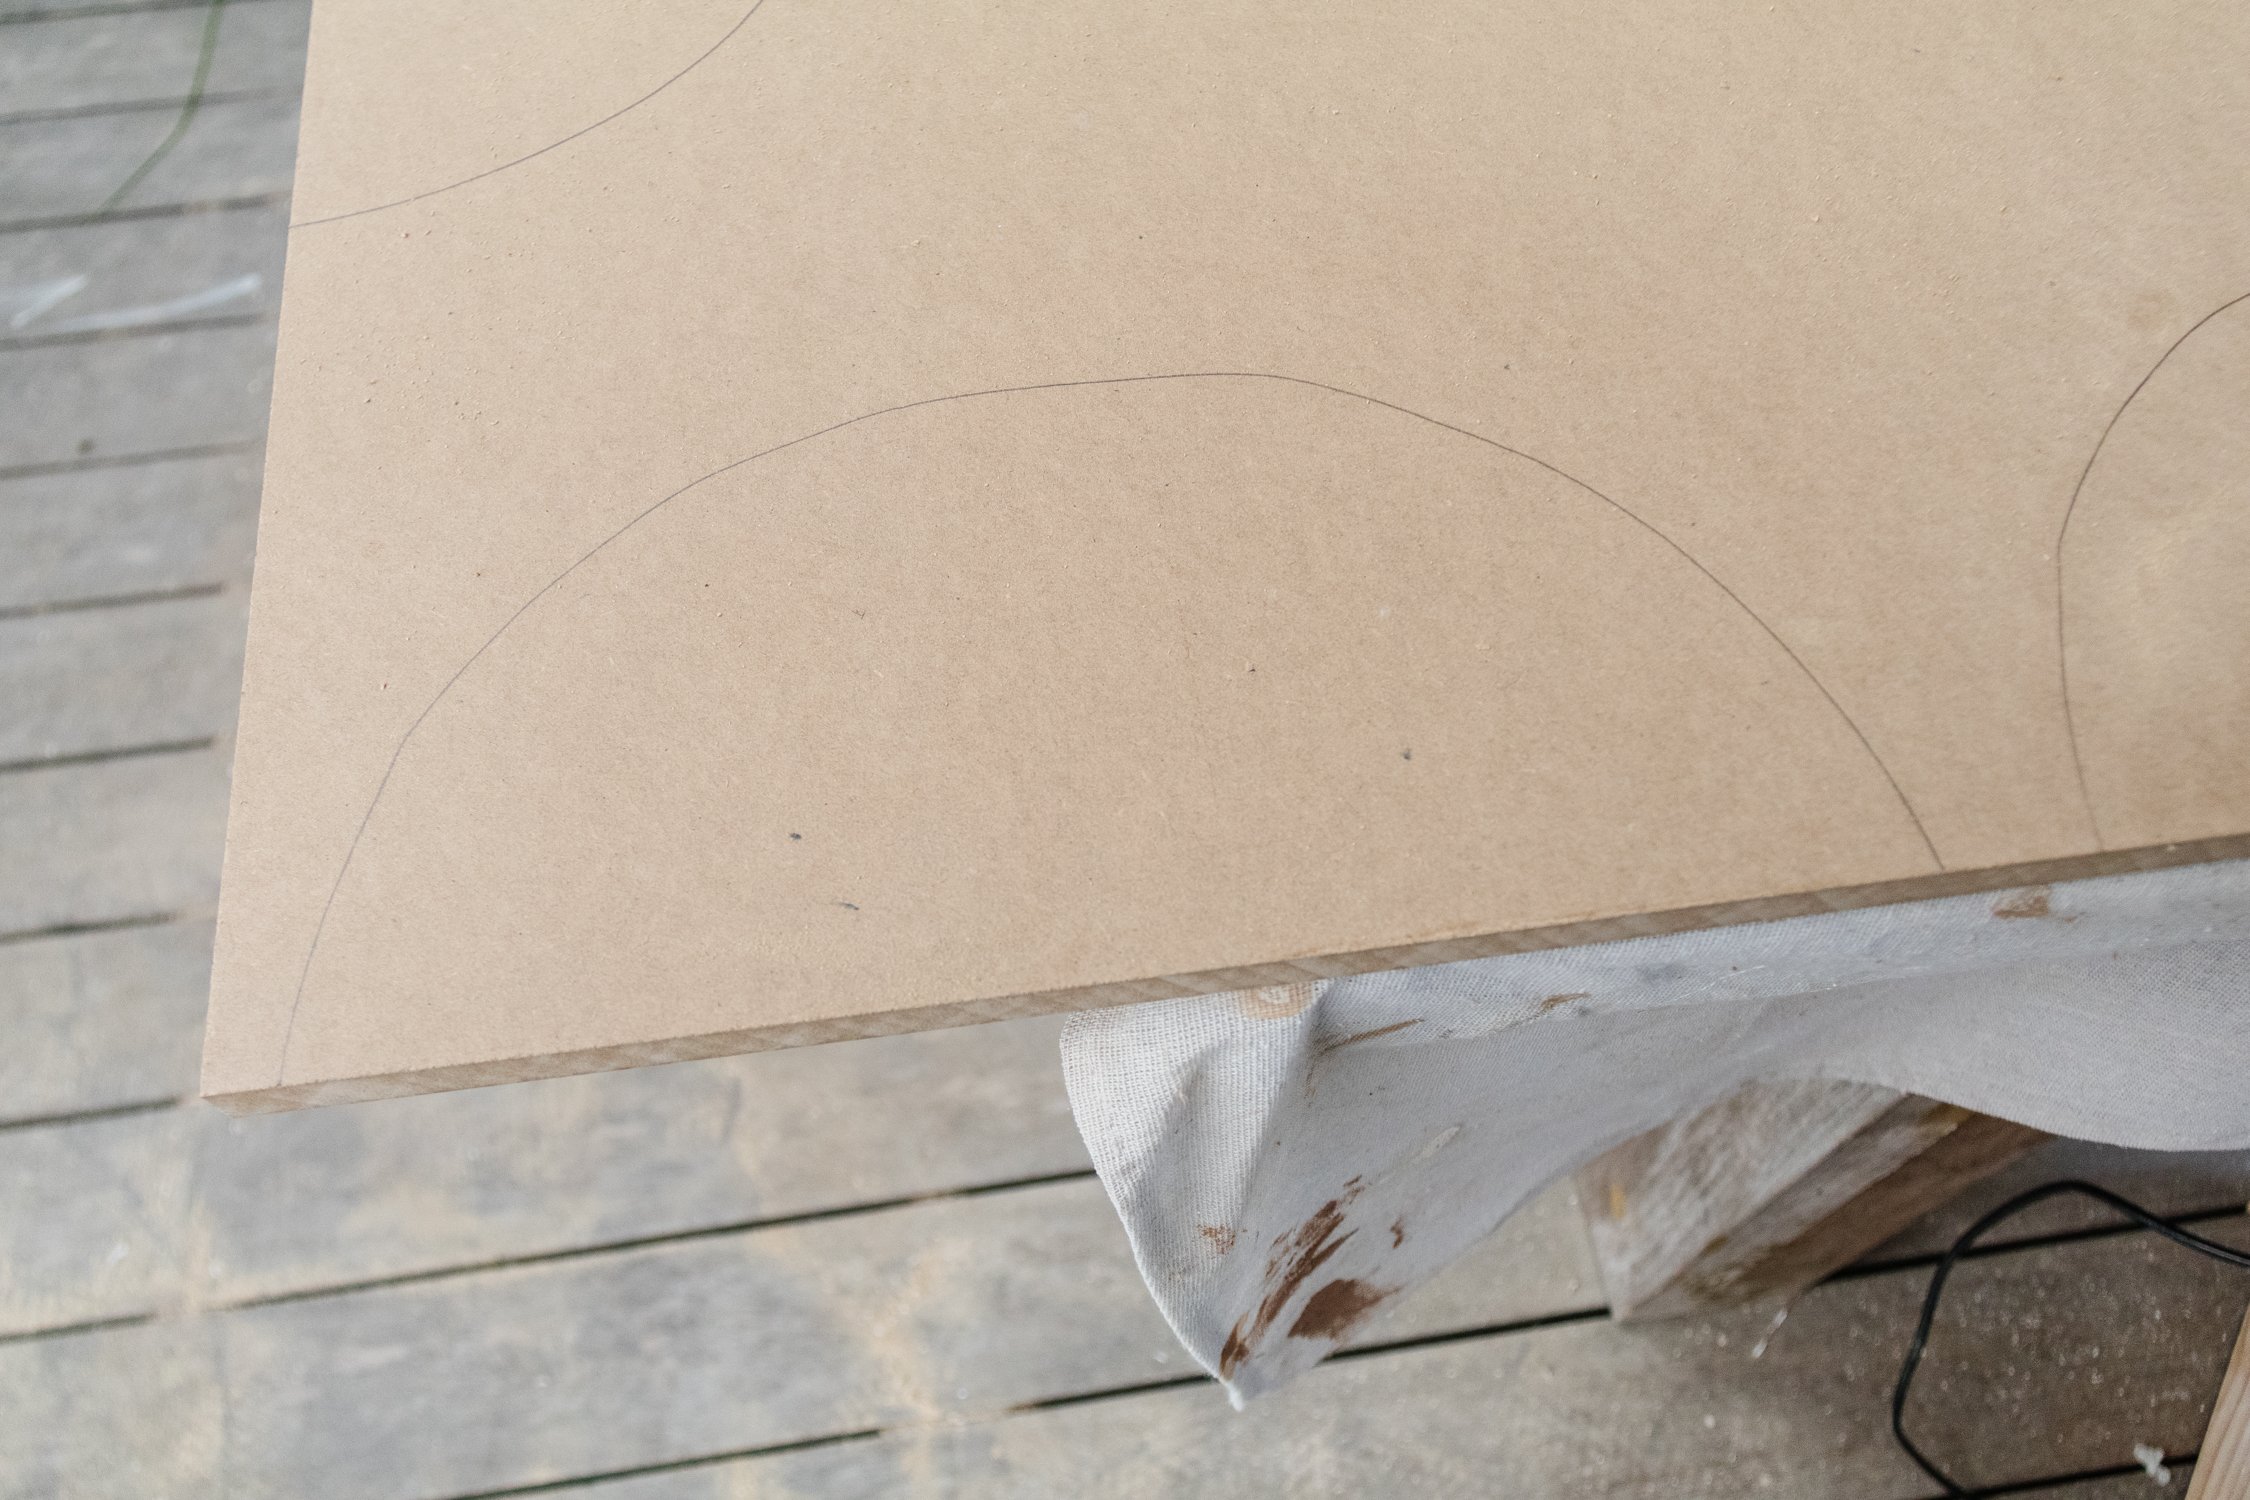
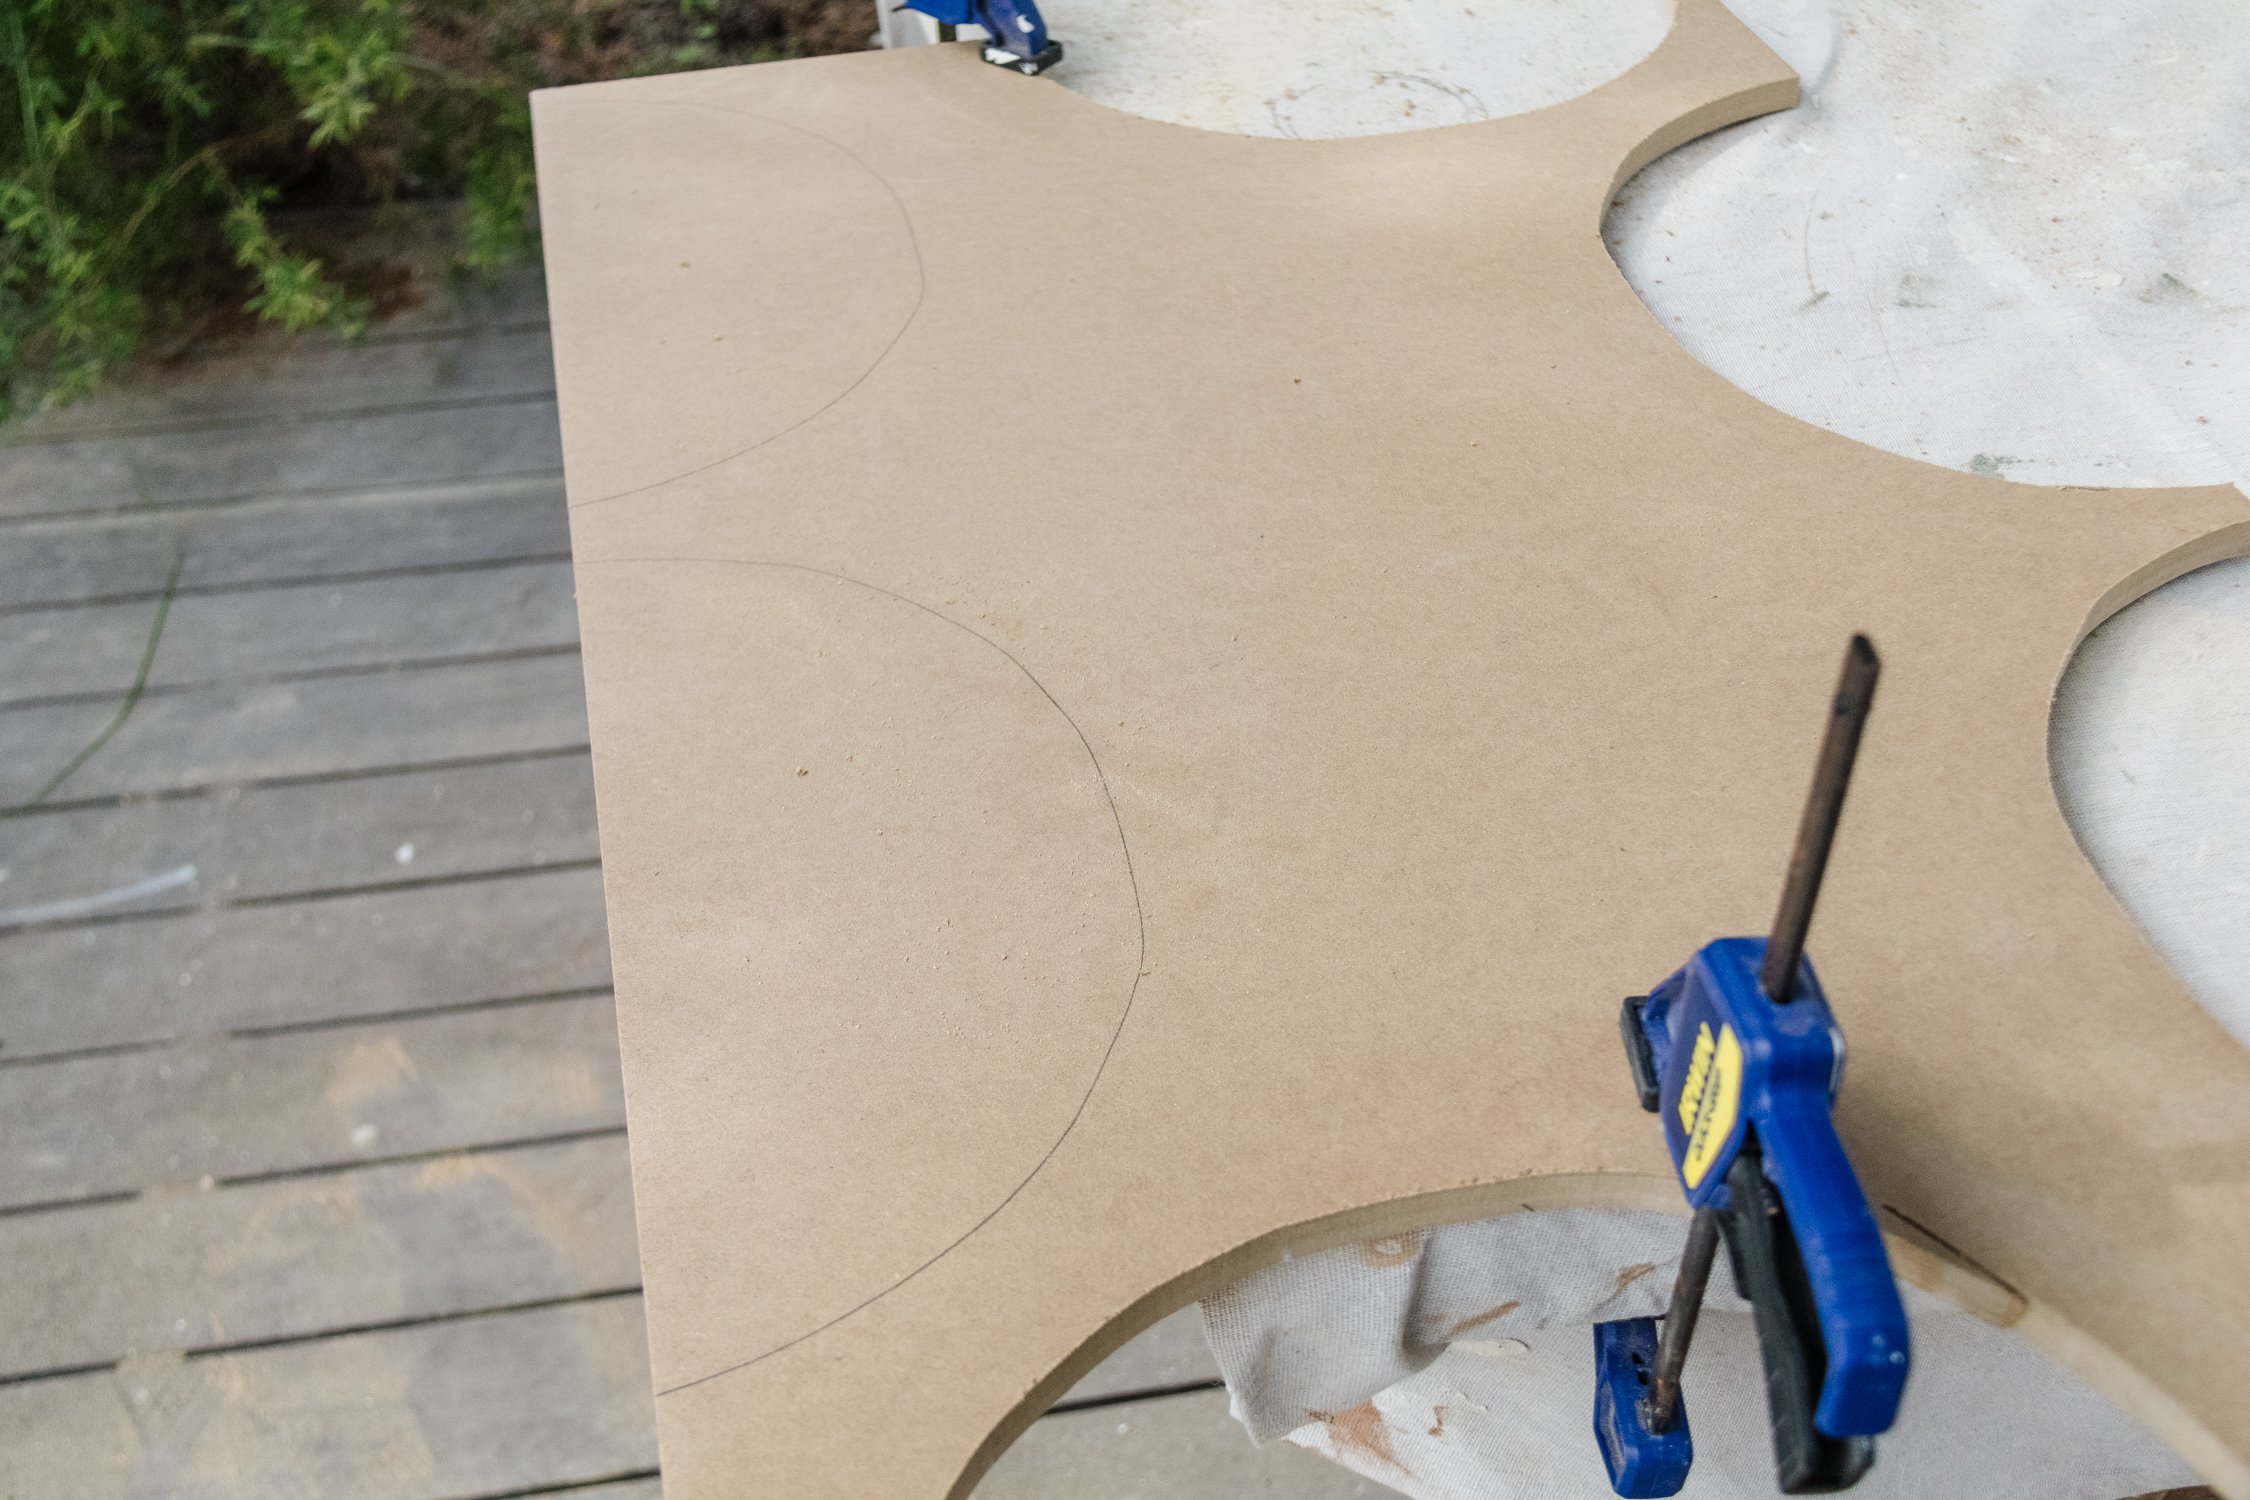
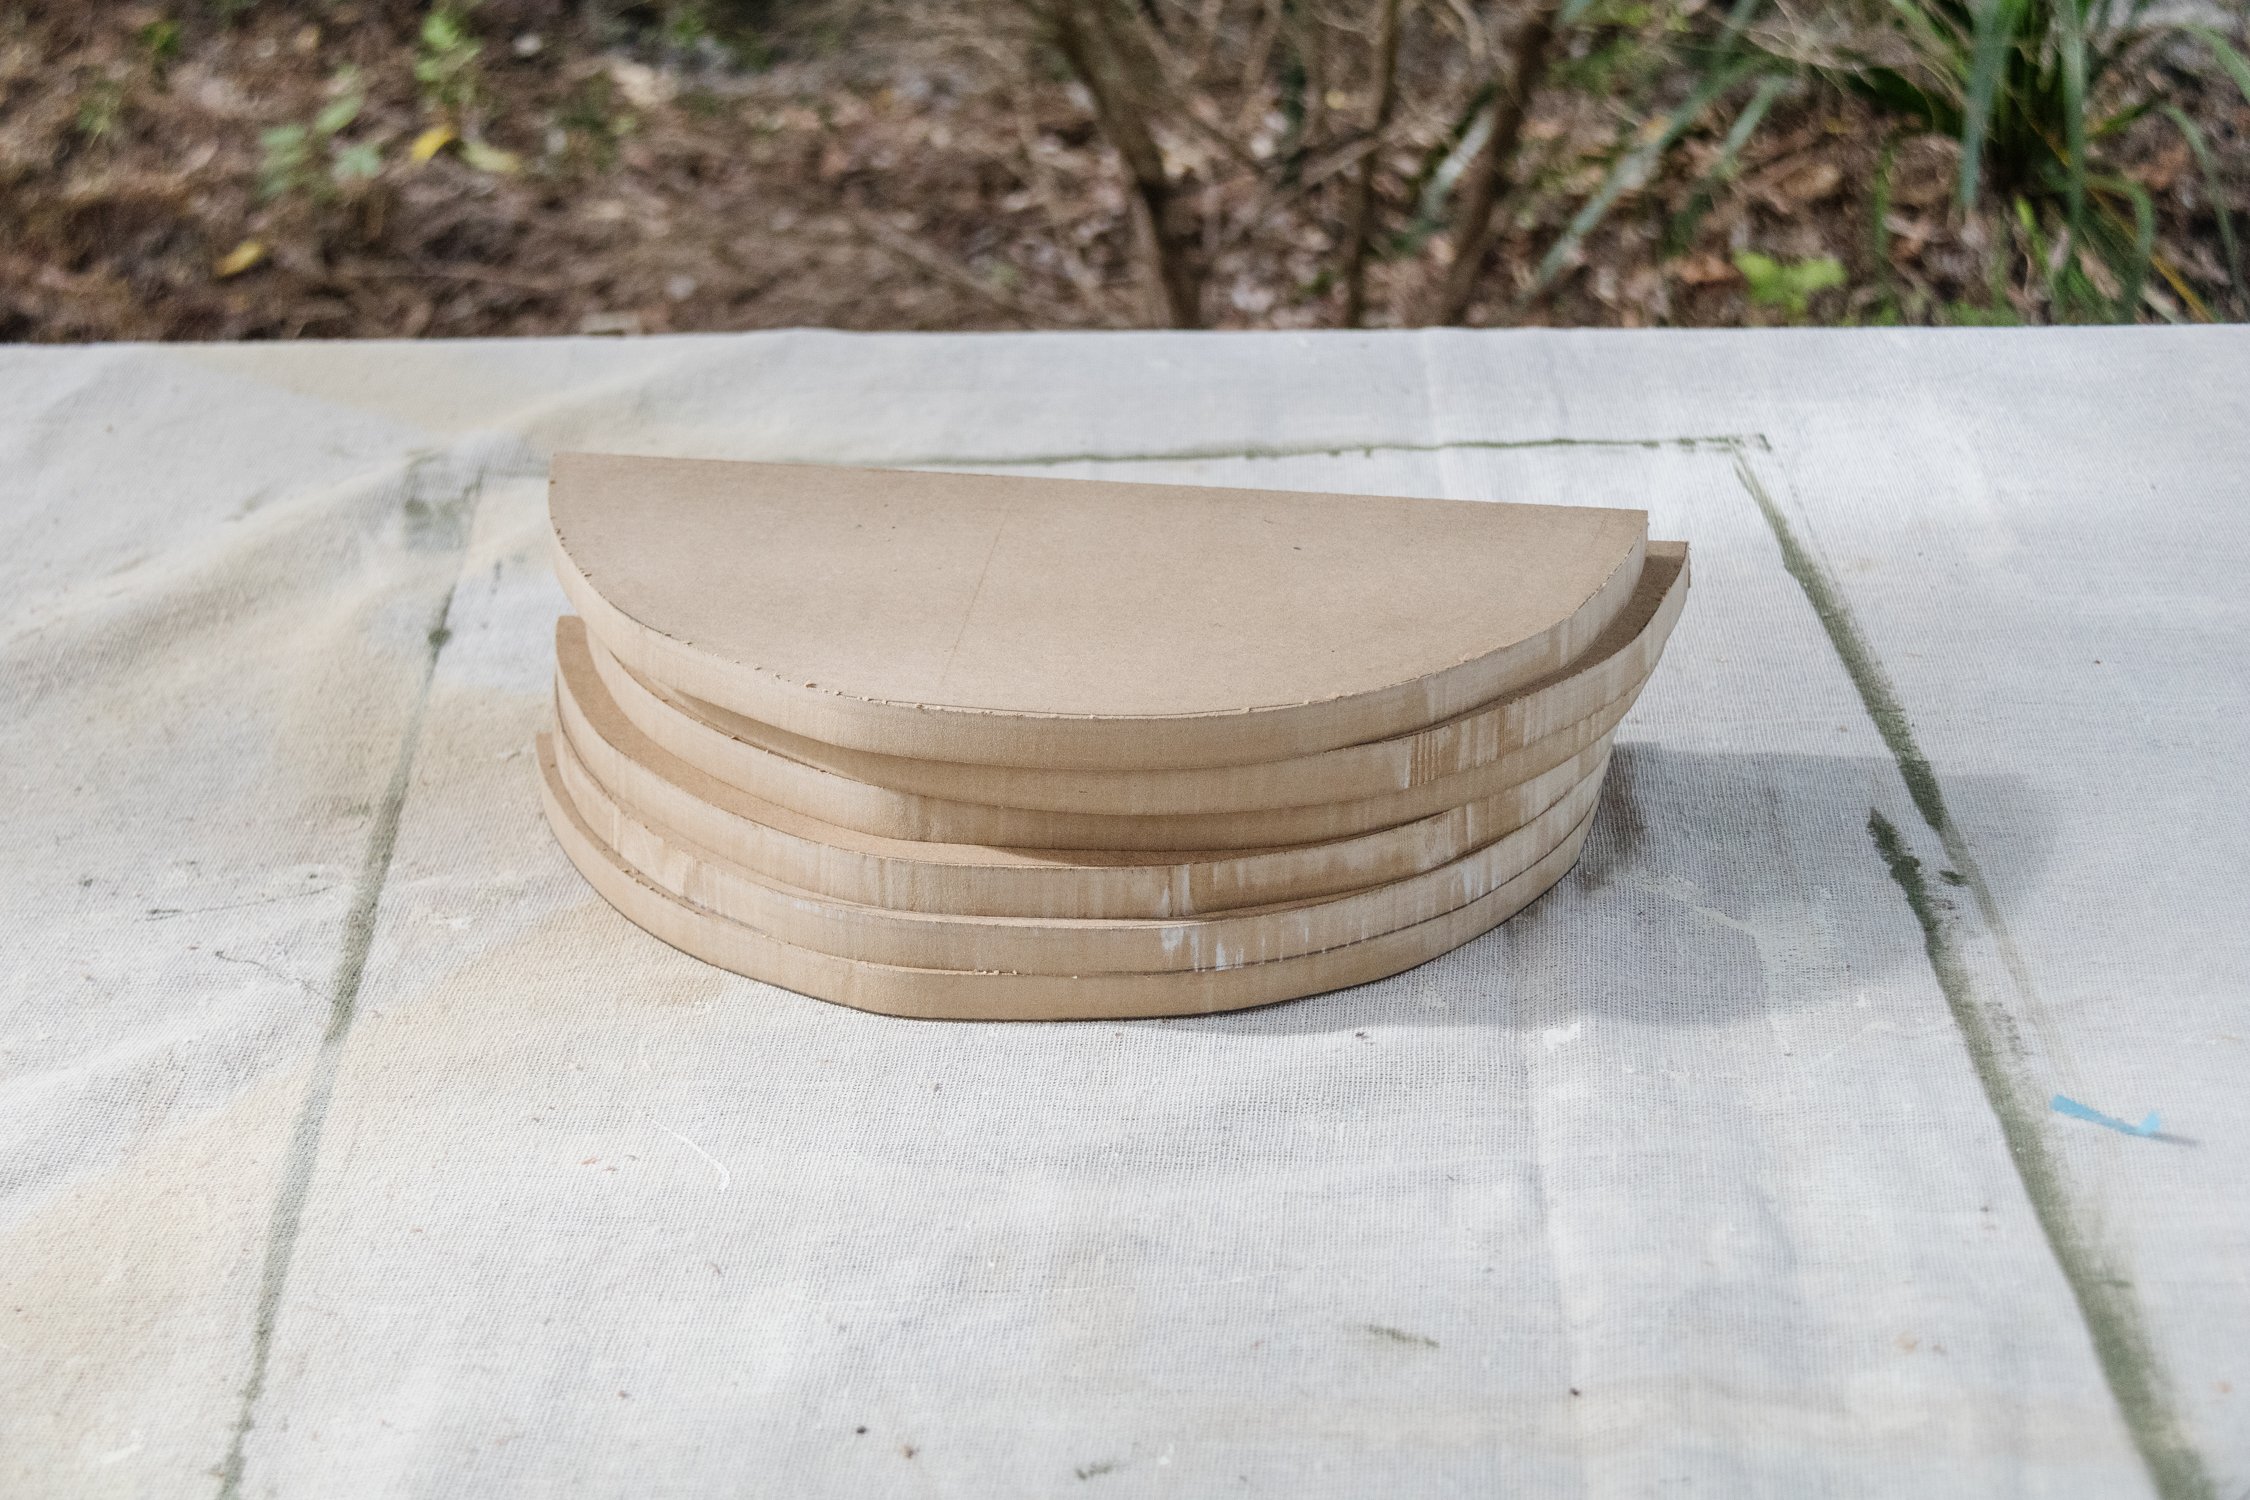
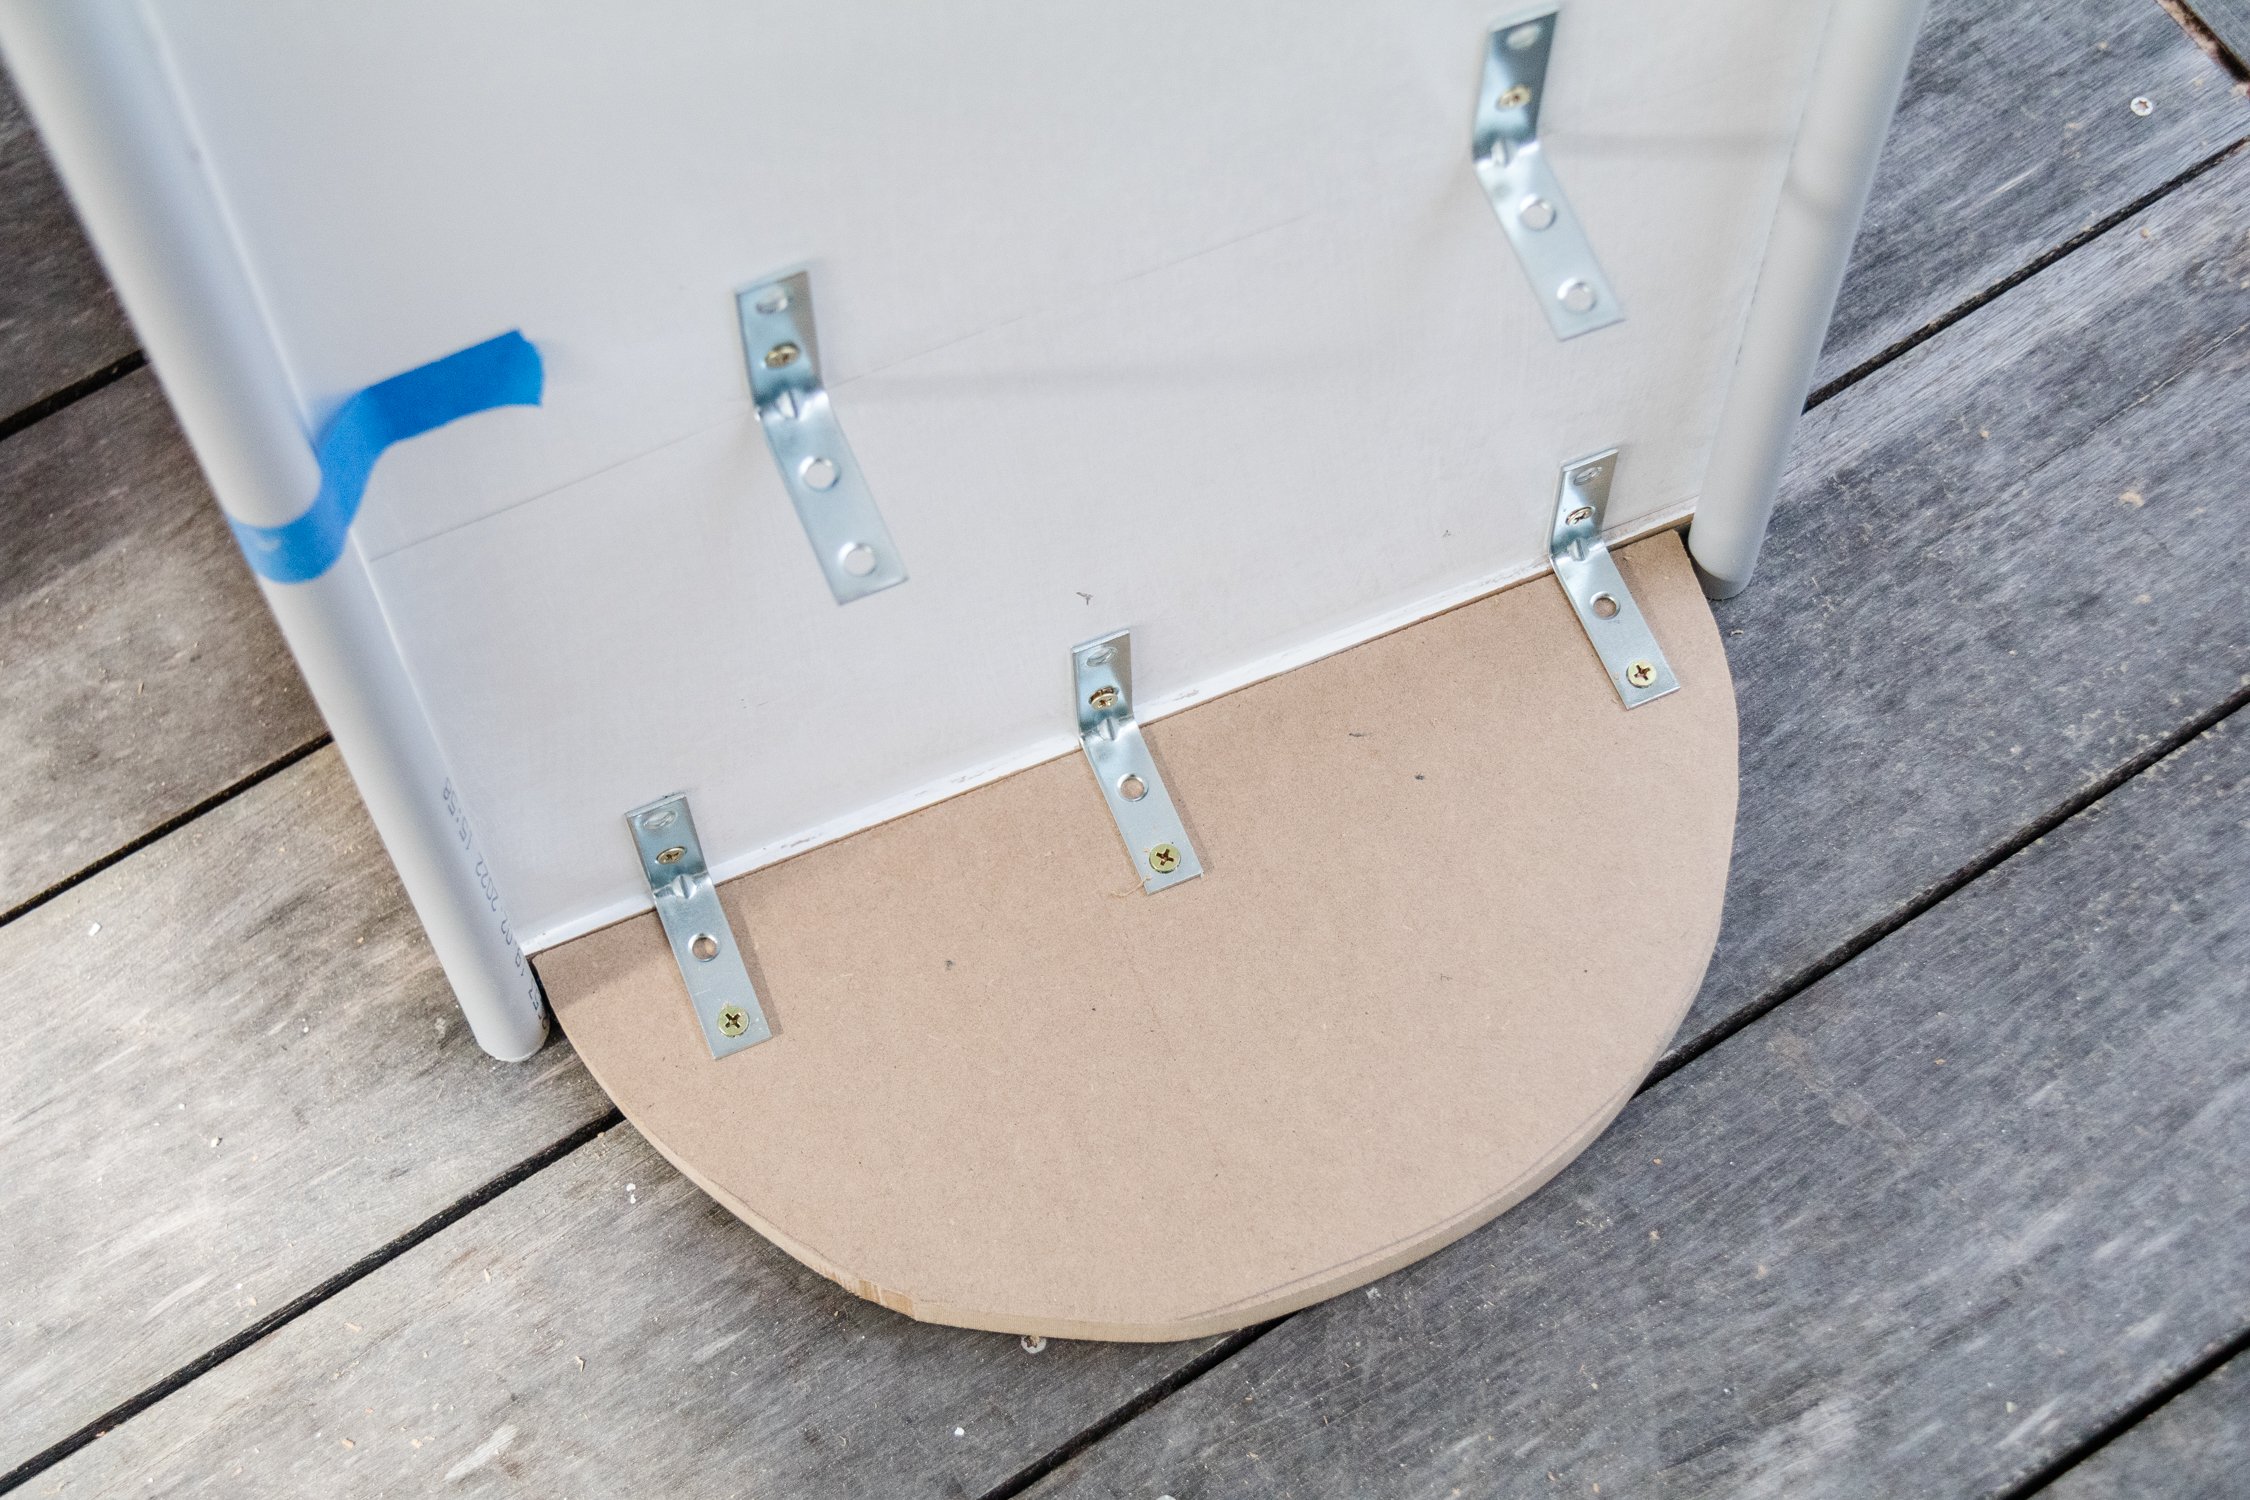
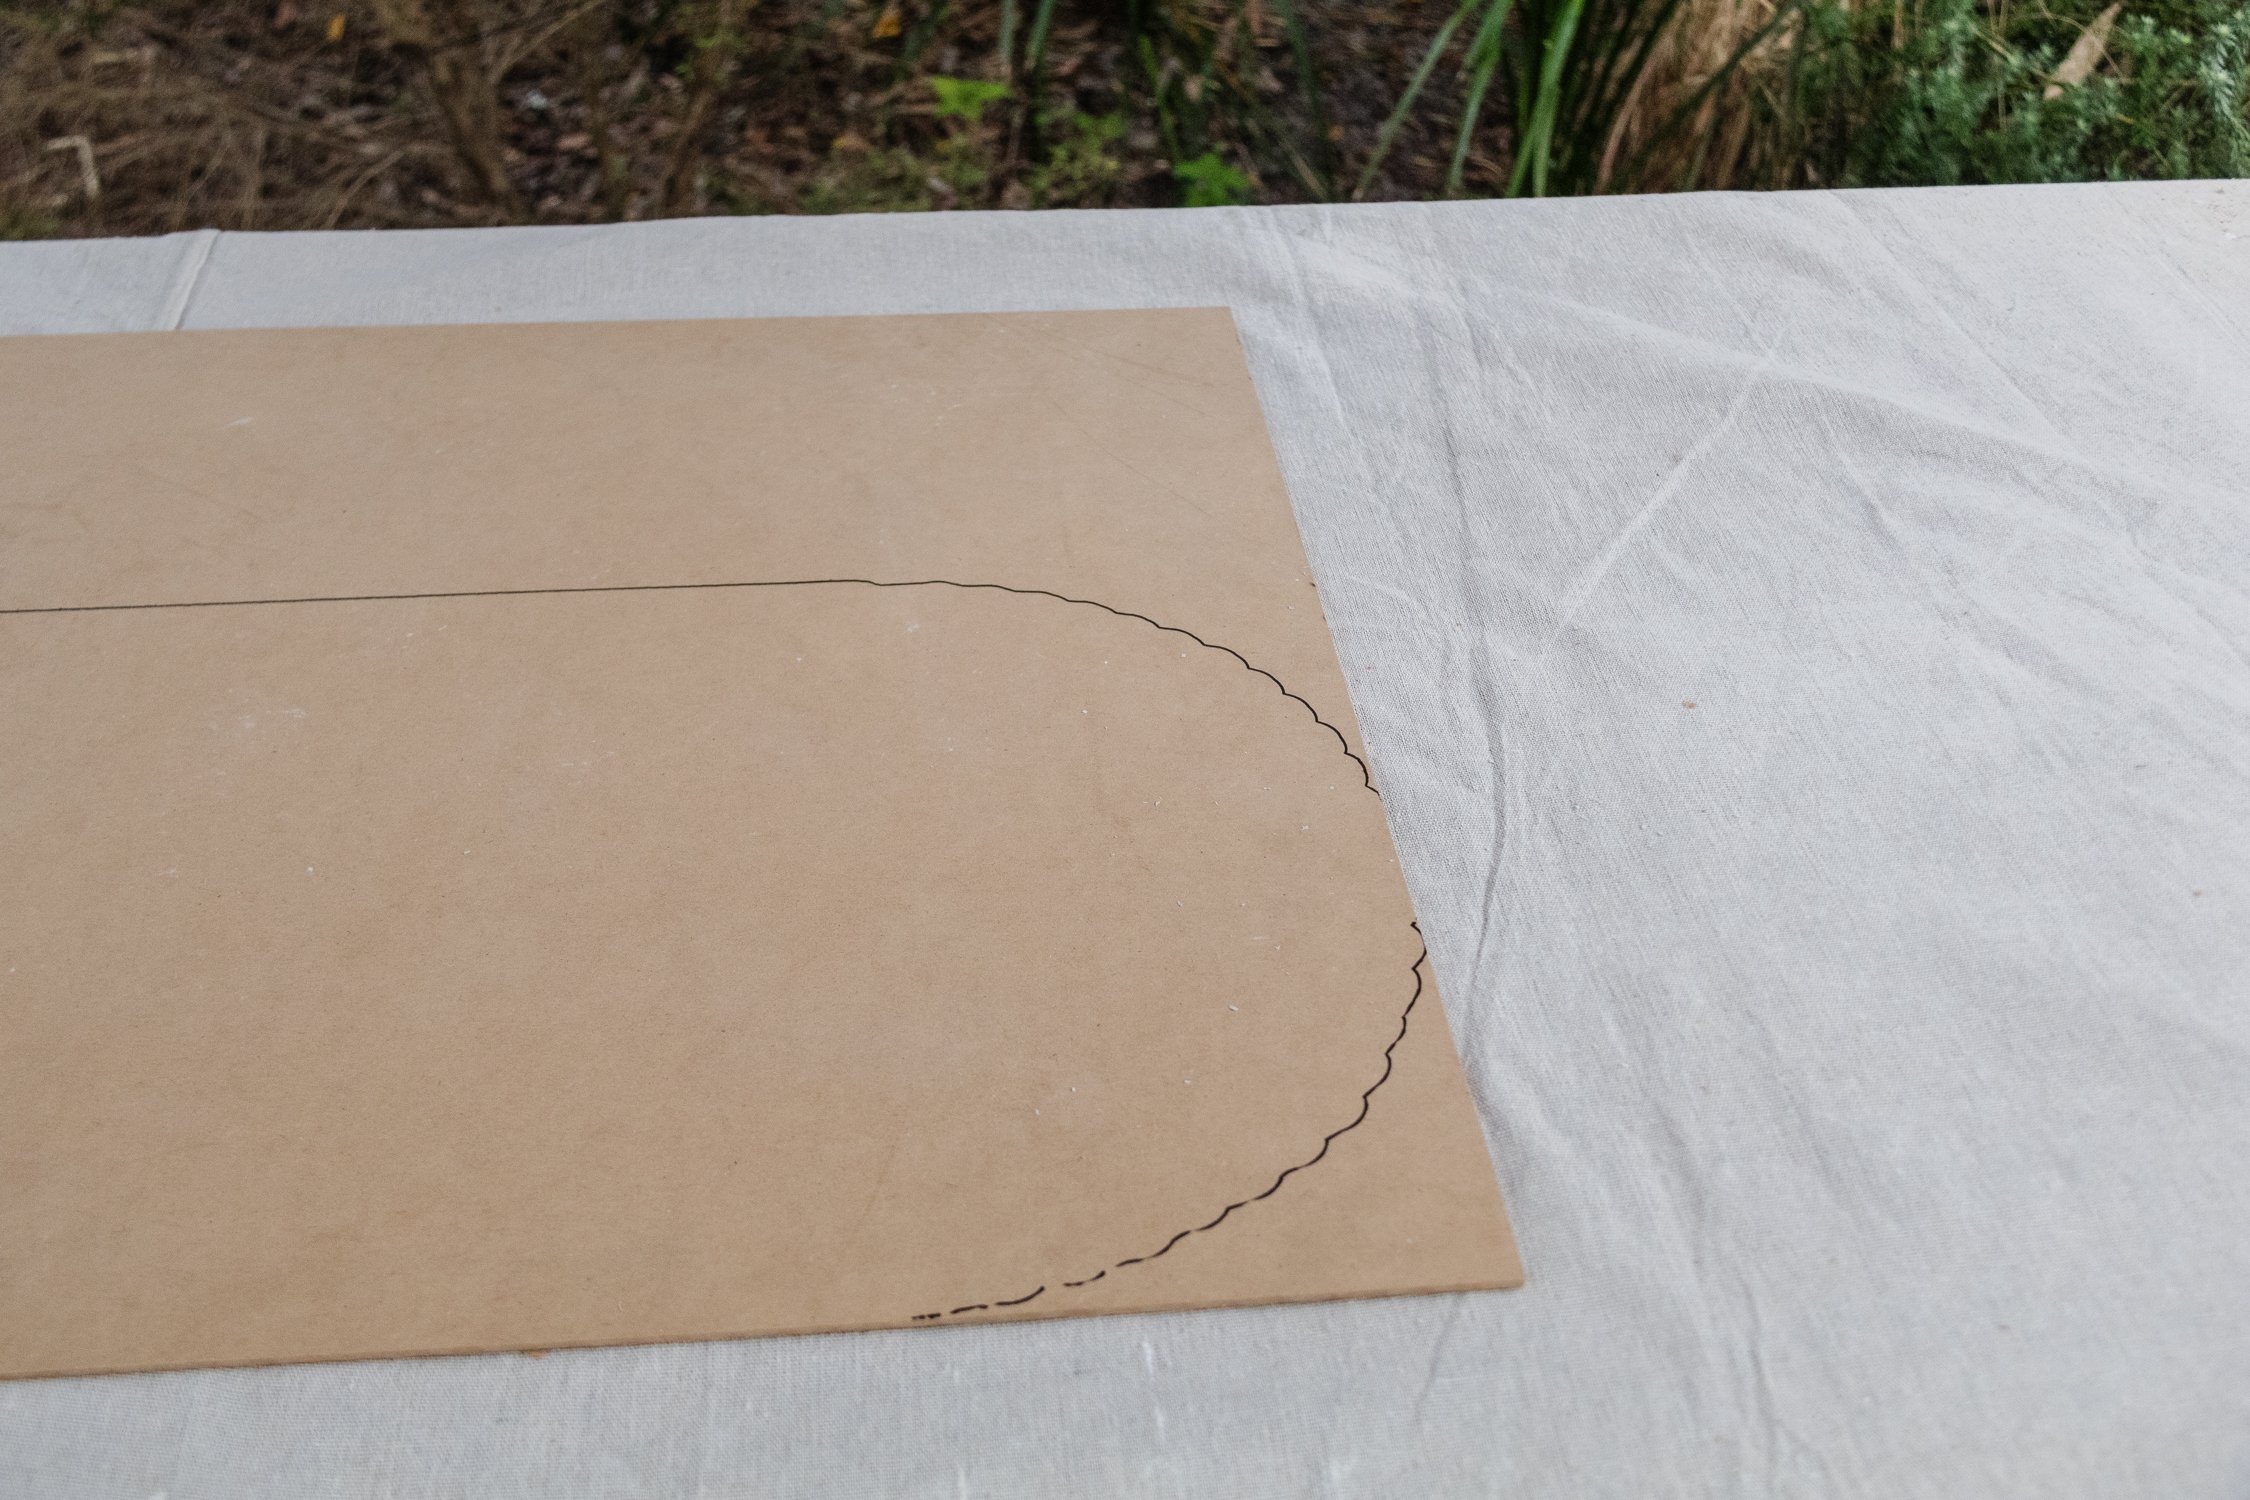
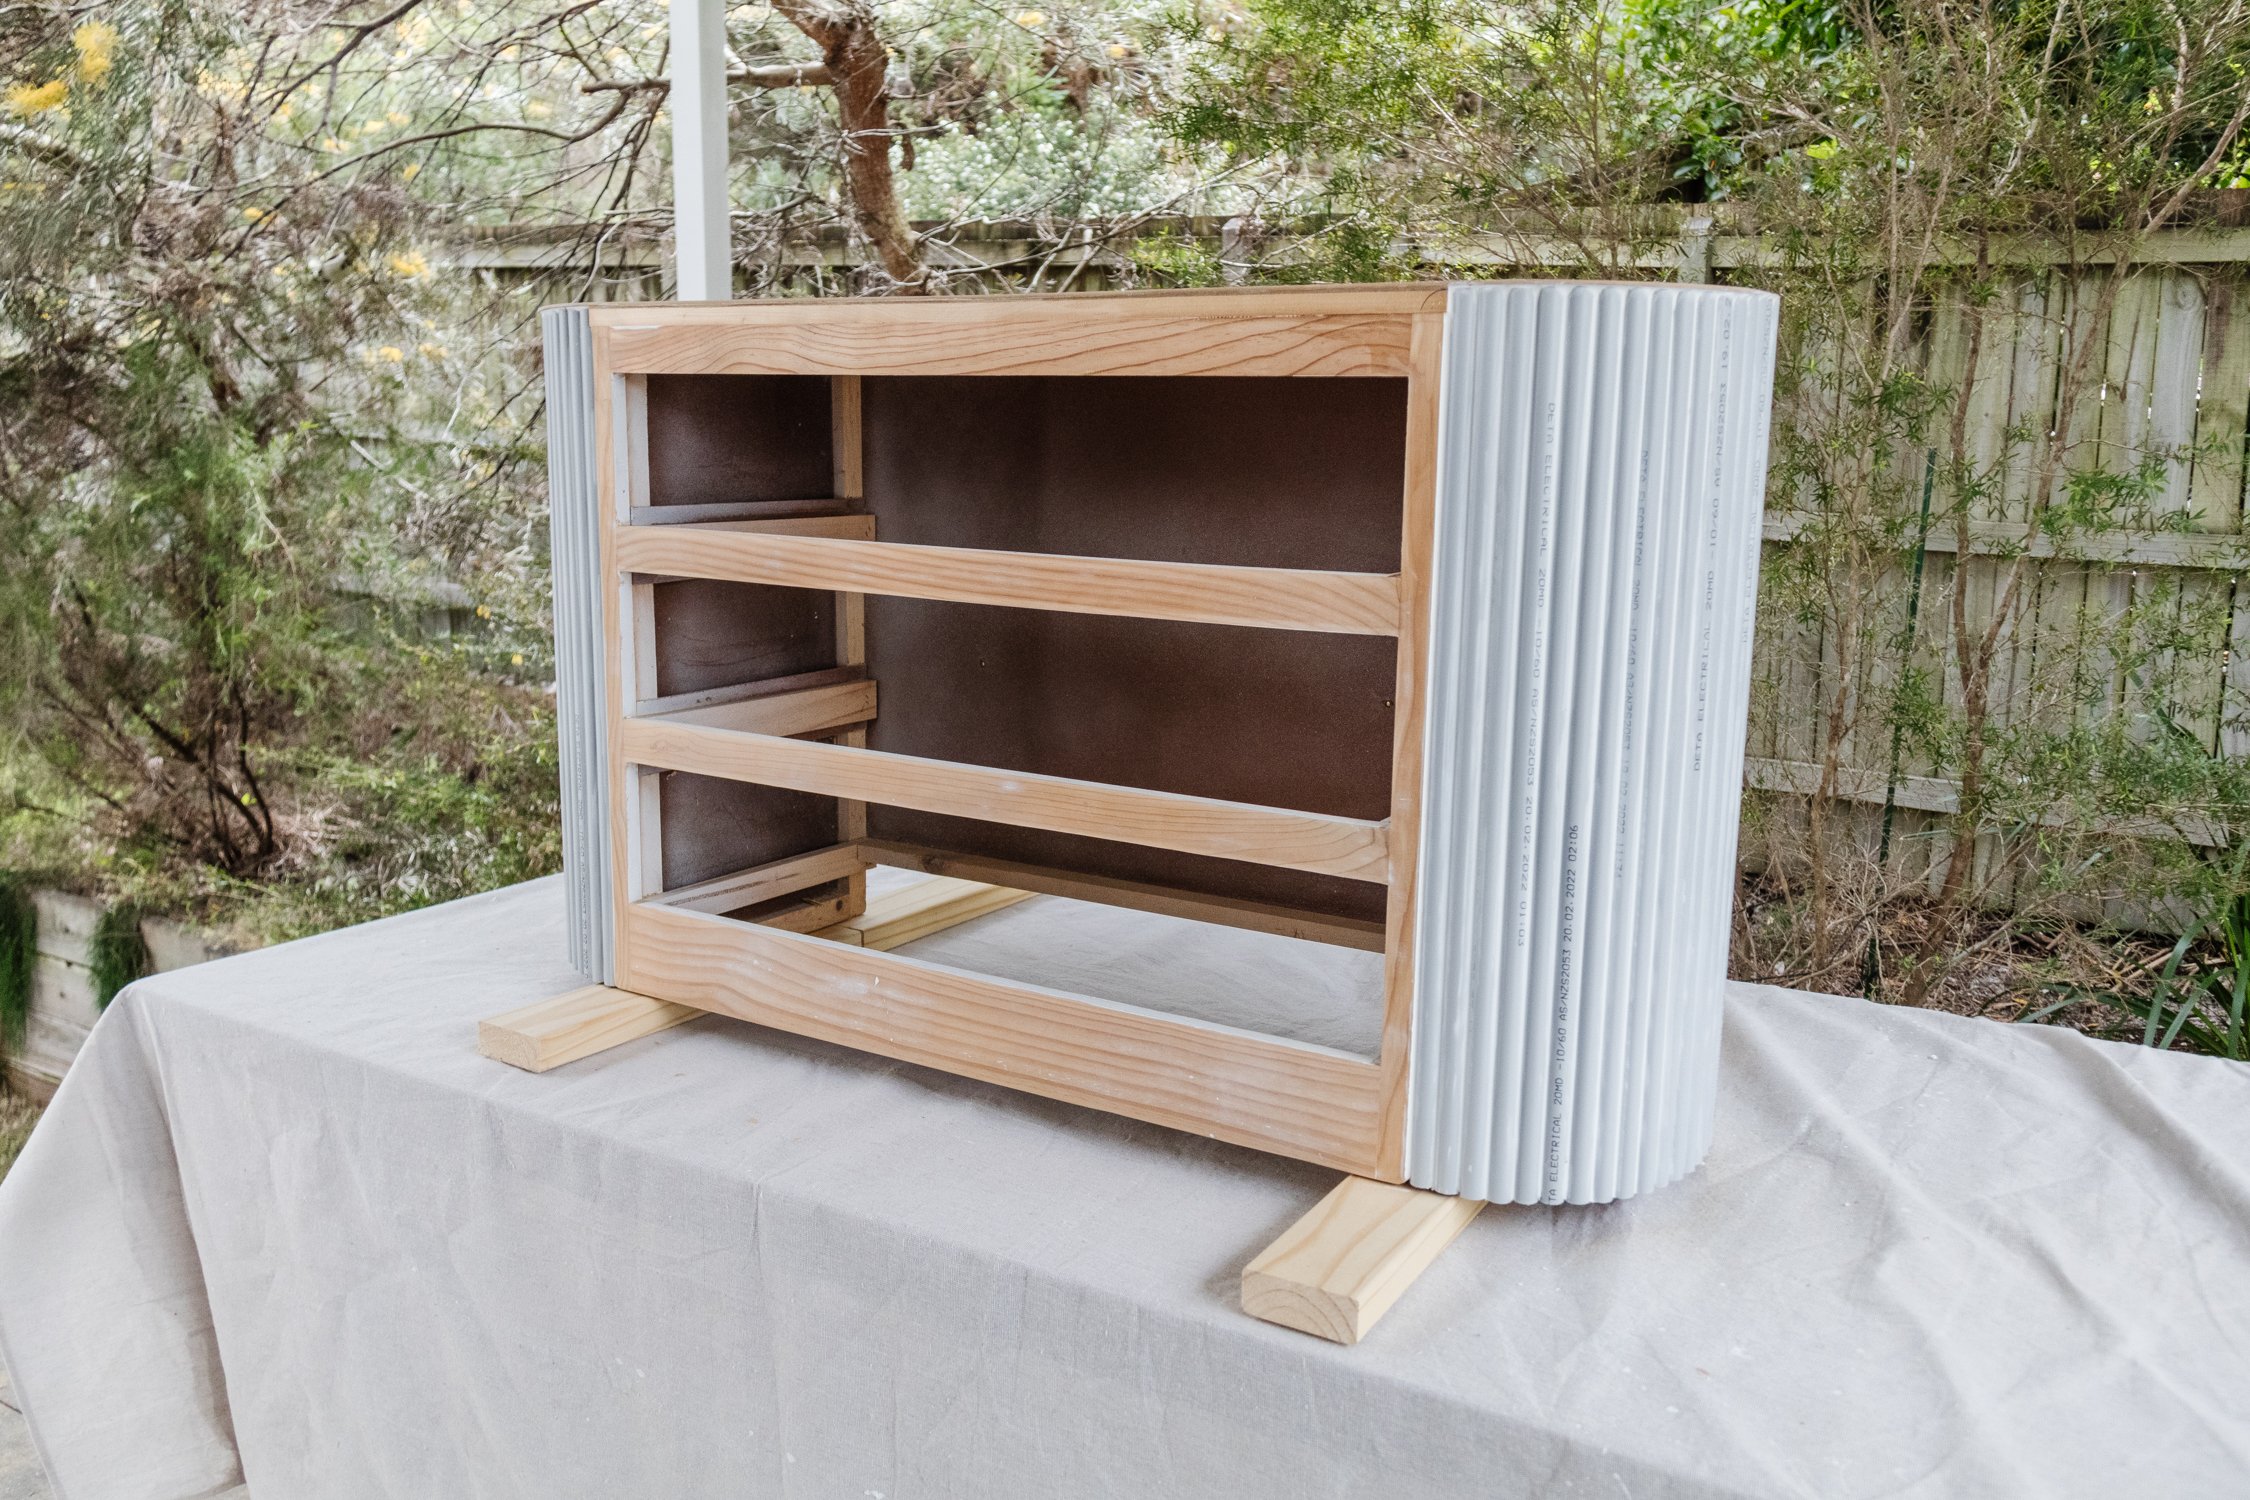
Step 2: I wanted the half dowel to be flush with the front and back of the drawers, so I created a prototype for the supports using a piece of cardboard. From here I was able to measure how long I would need to make 6 MDF semi circle supports. Once I had the cardboard semi circle cut to size, I traced around it onto a thick piece of MDF panel and I cut the first semi circle using my jigsaw and table clamps (to stabilise the MDF while cutting). I used the first cut MDF arch as a stencil to cut the remaining 5 semi circle supports.

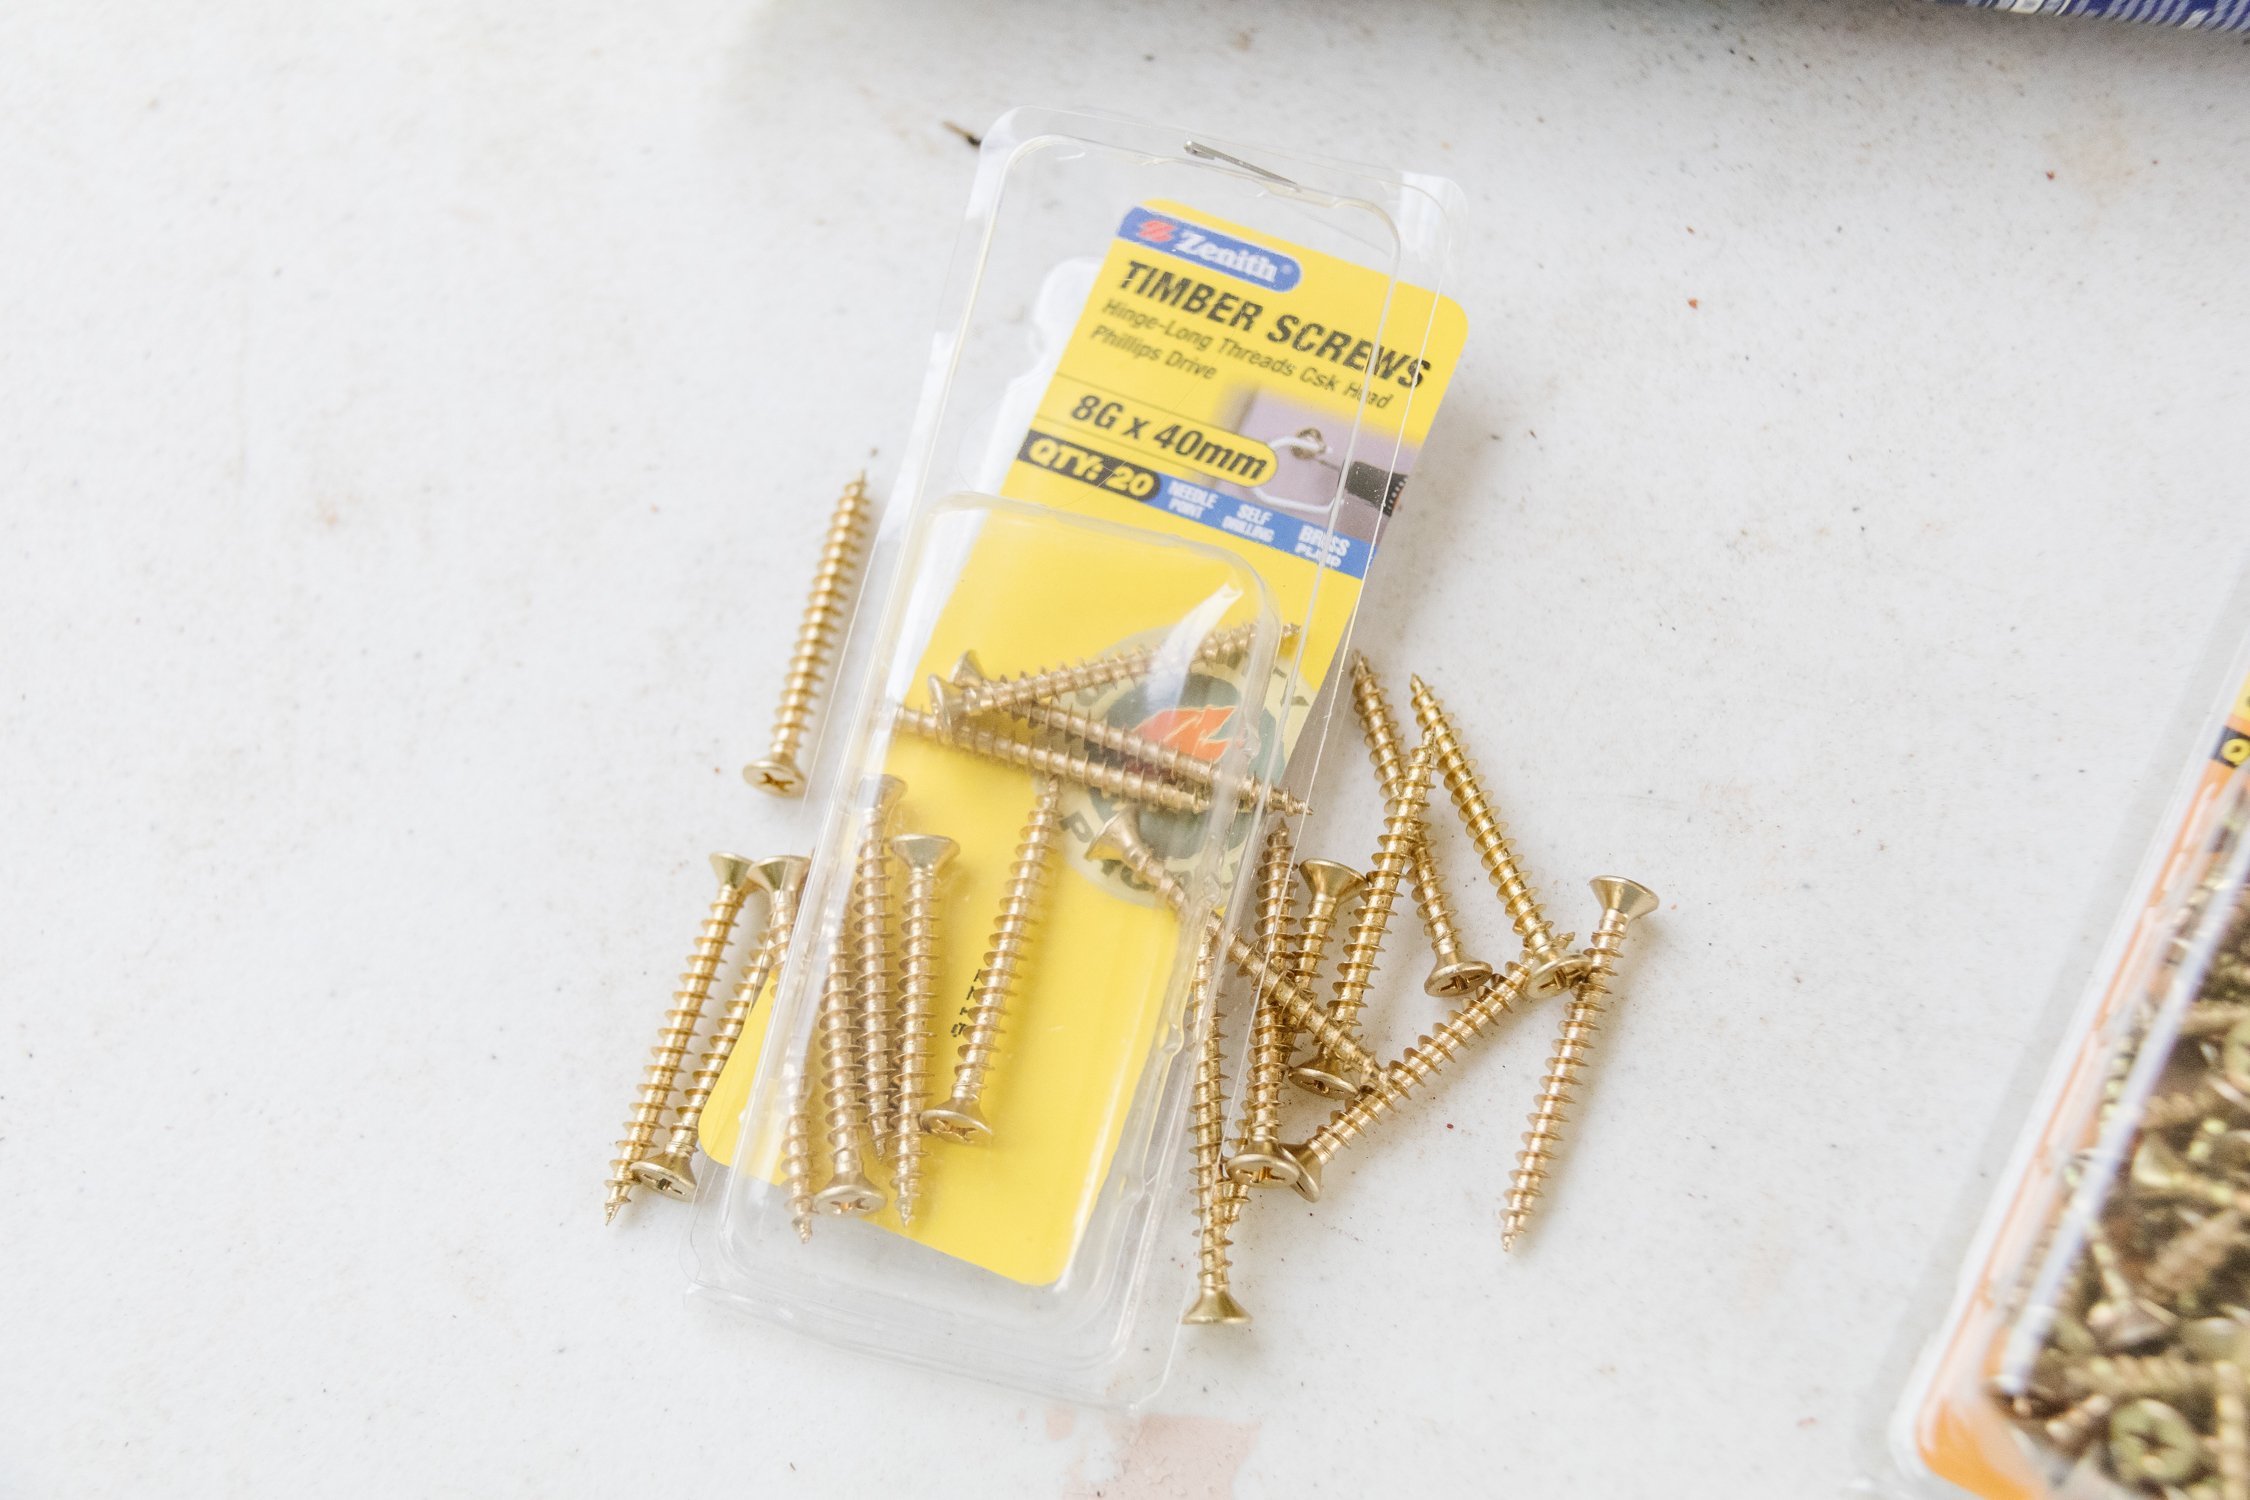
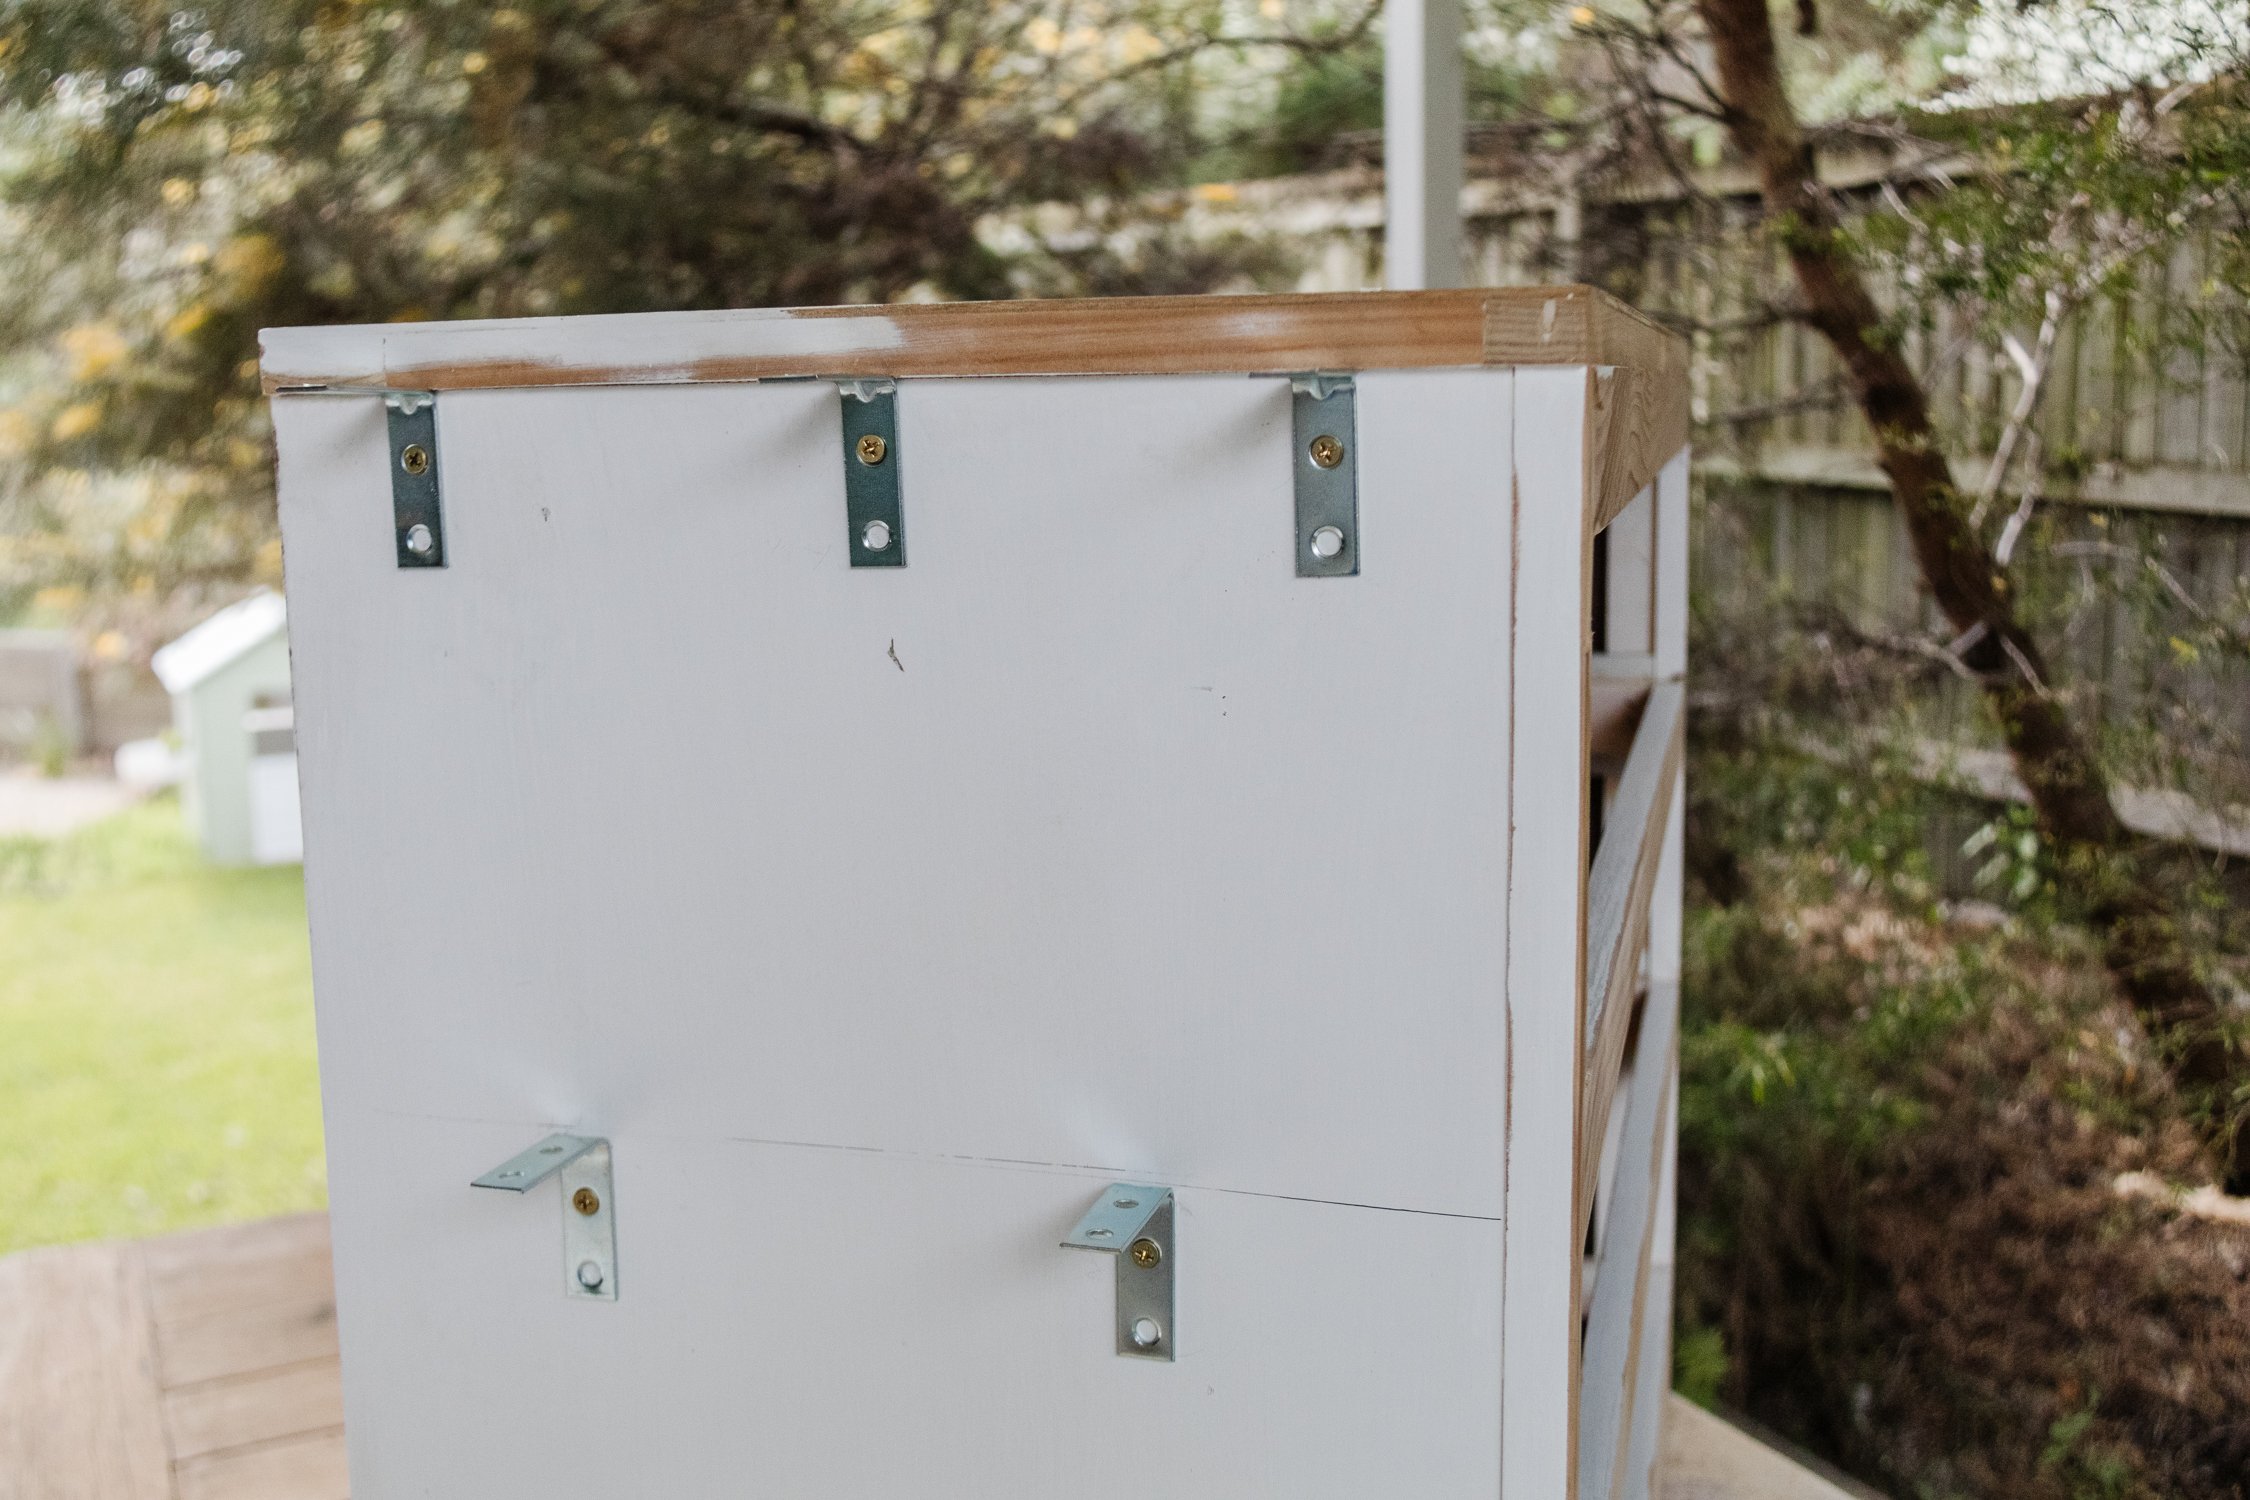
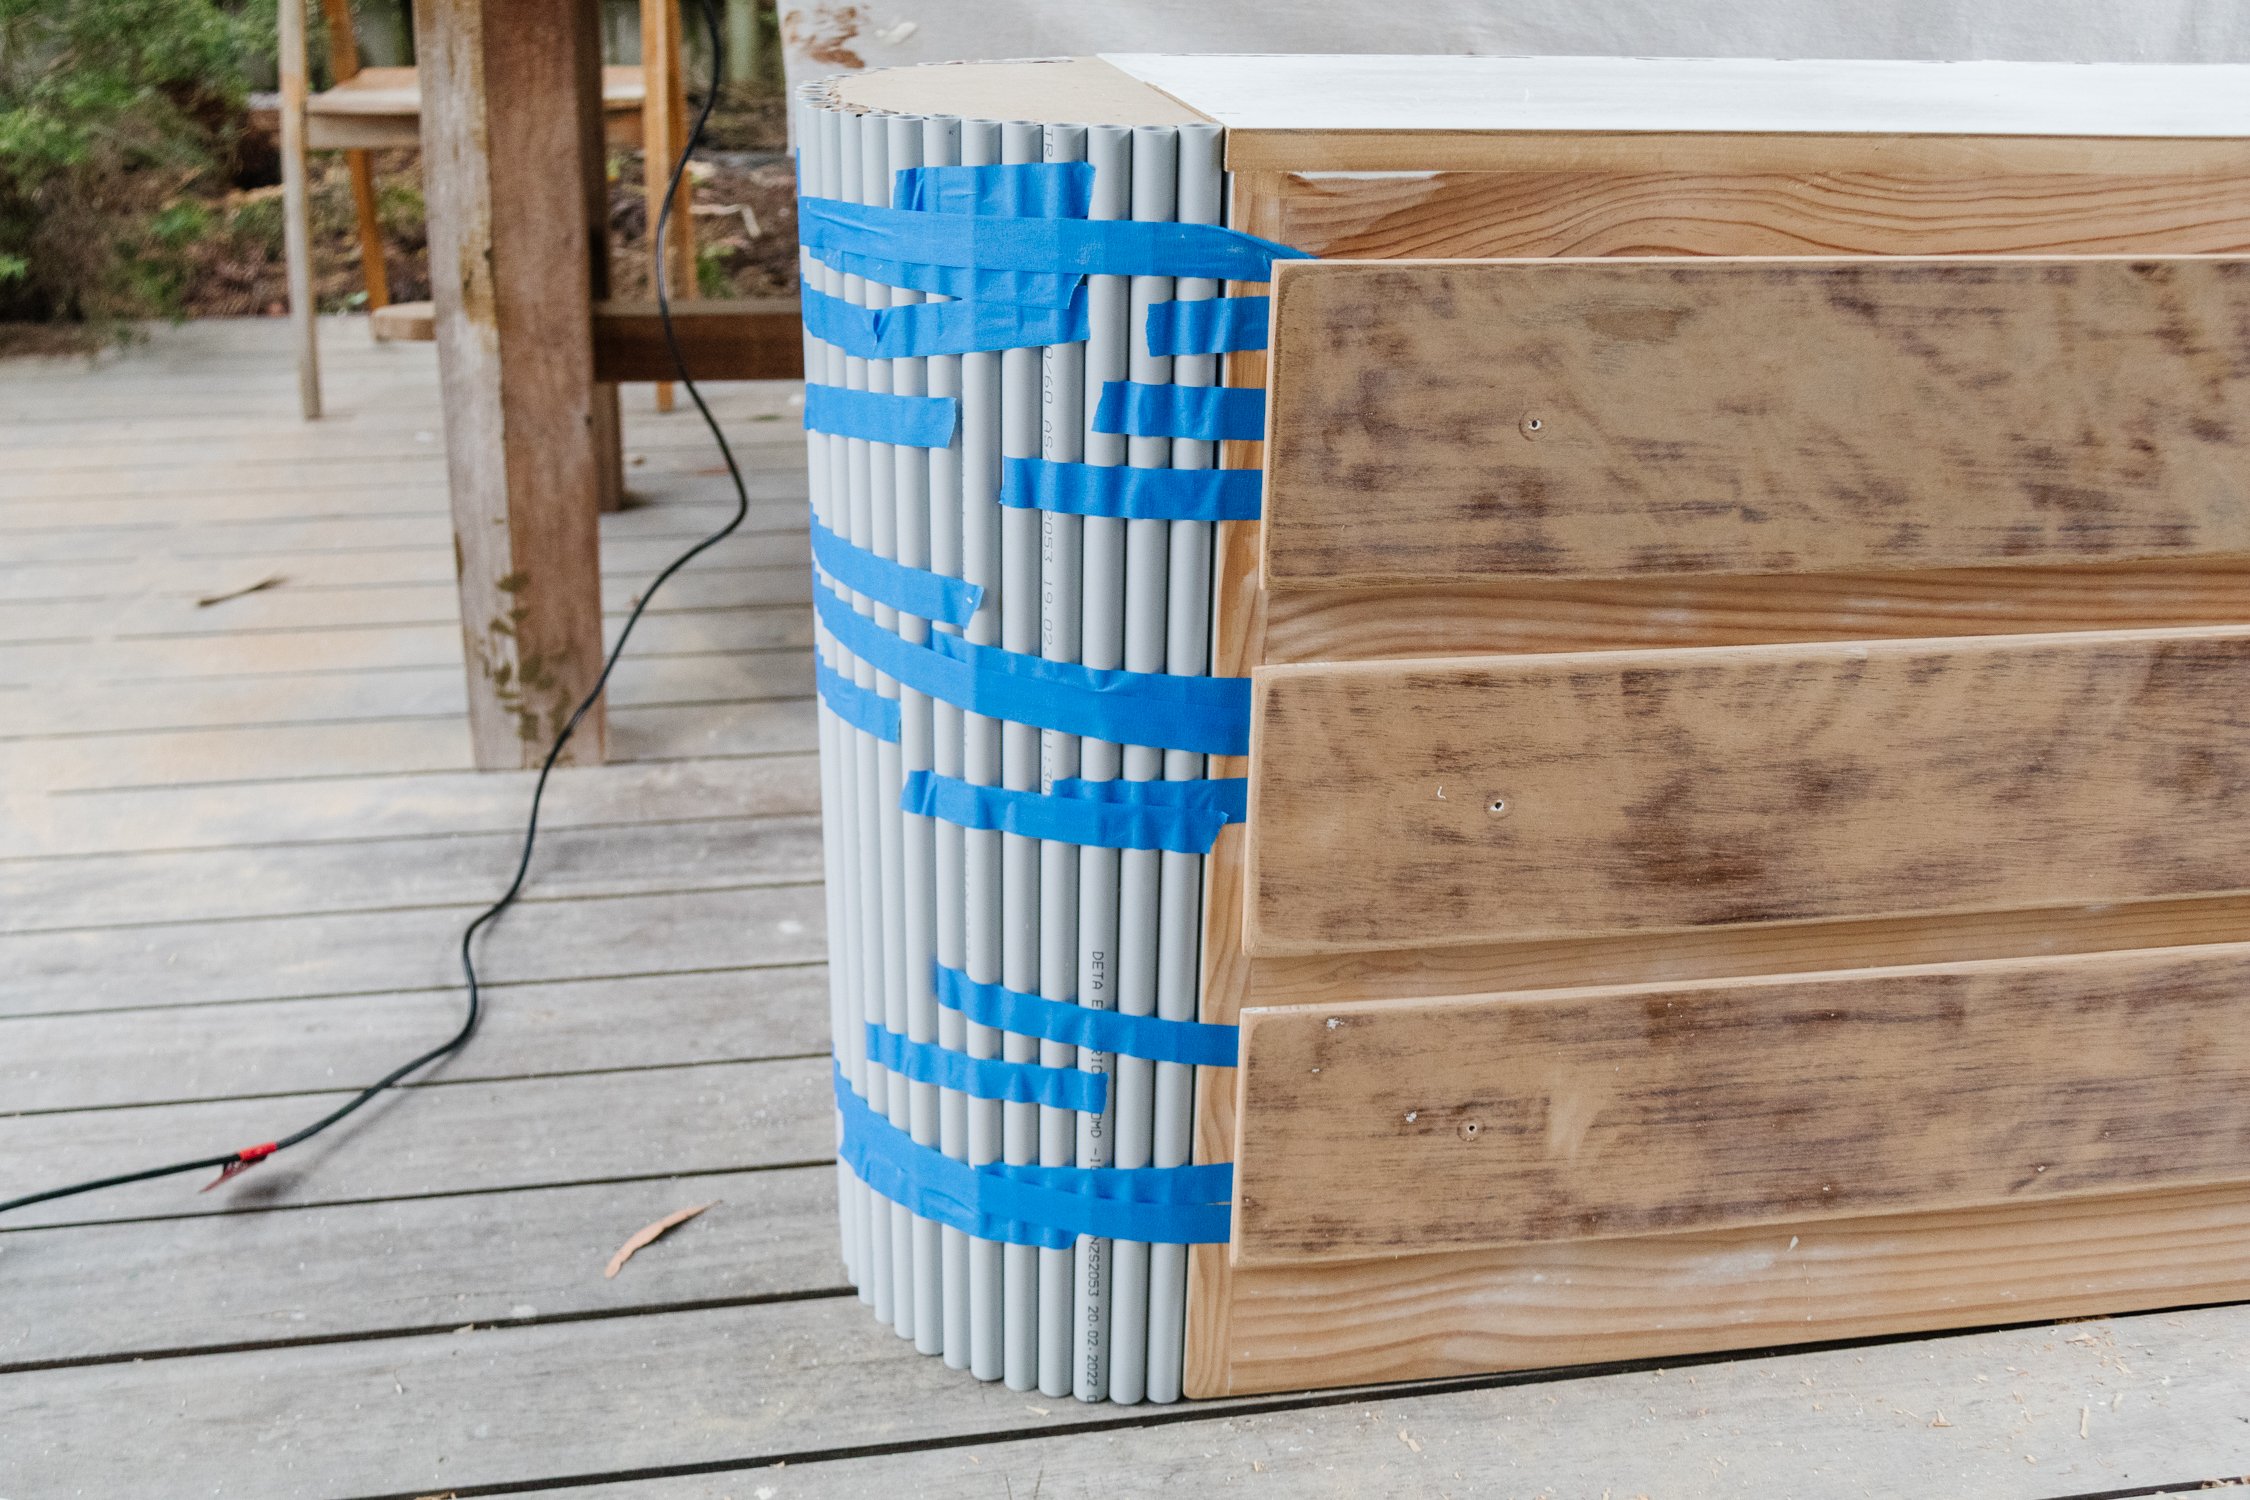
Step 3: I attached the arches to the sides of the chest of drawers using brackets, chipboard screws and timber screws.

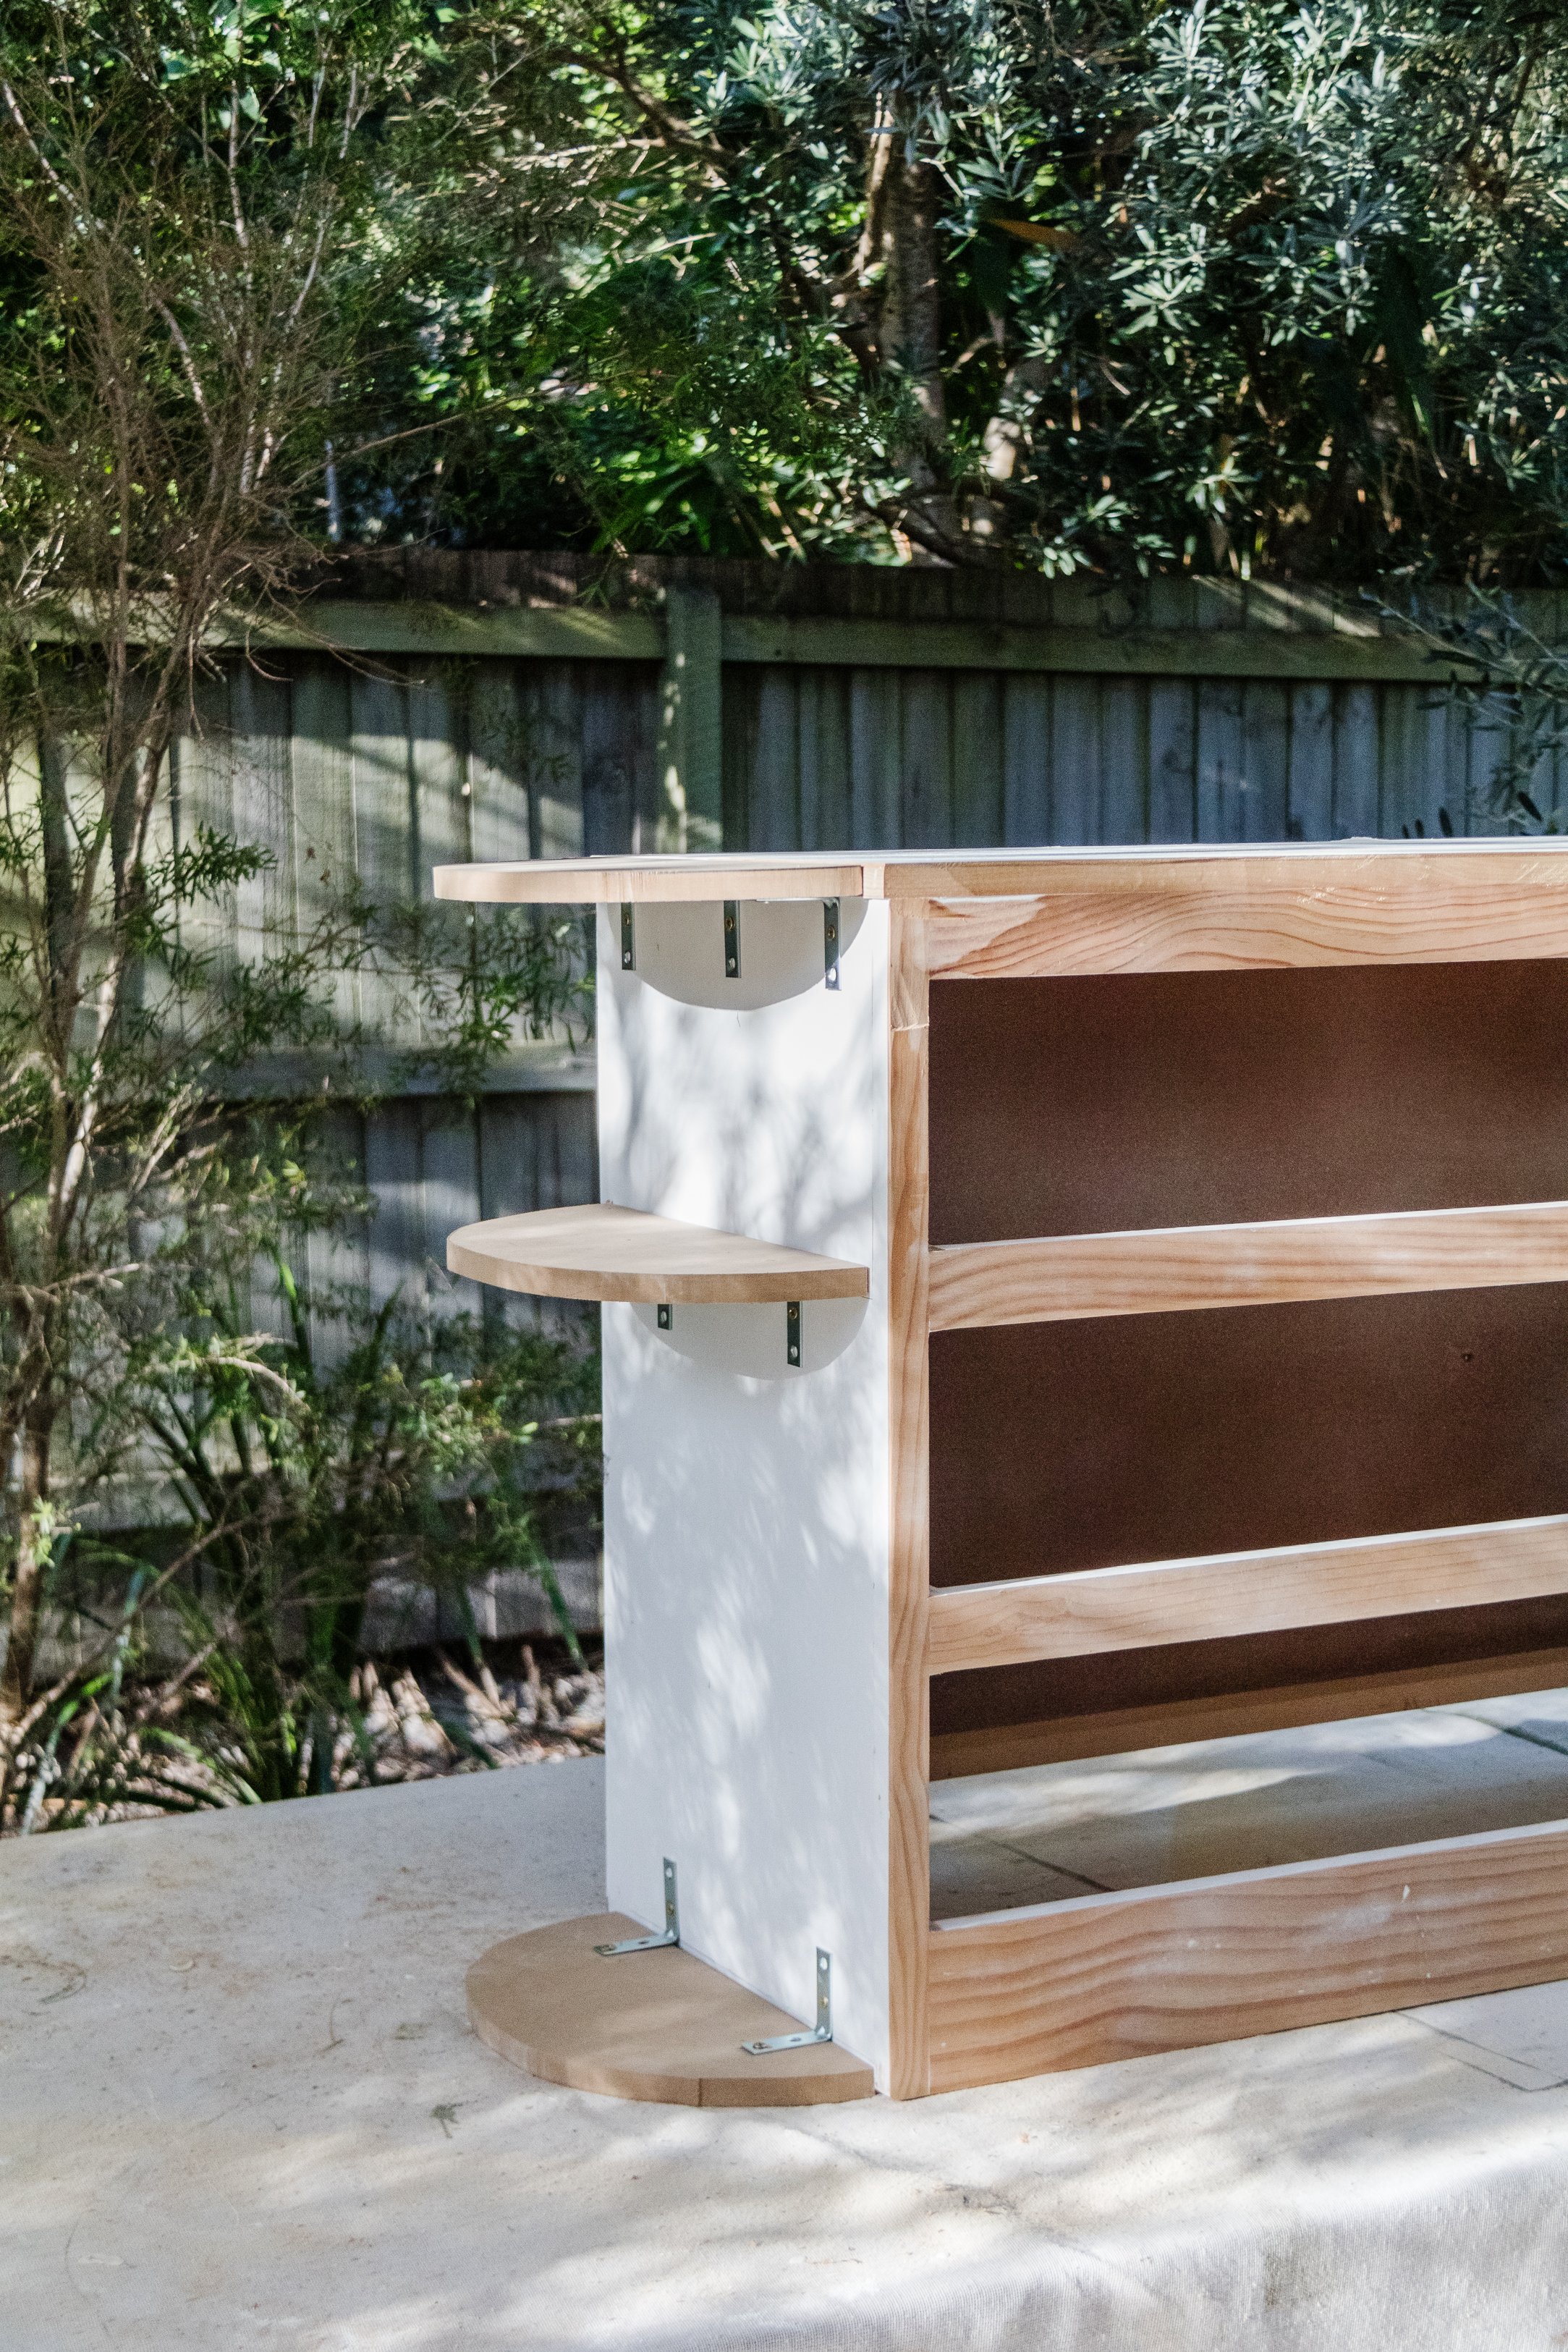
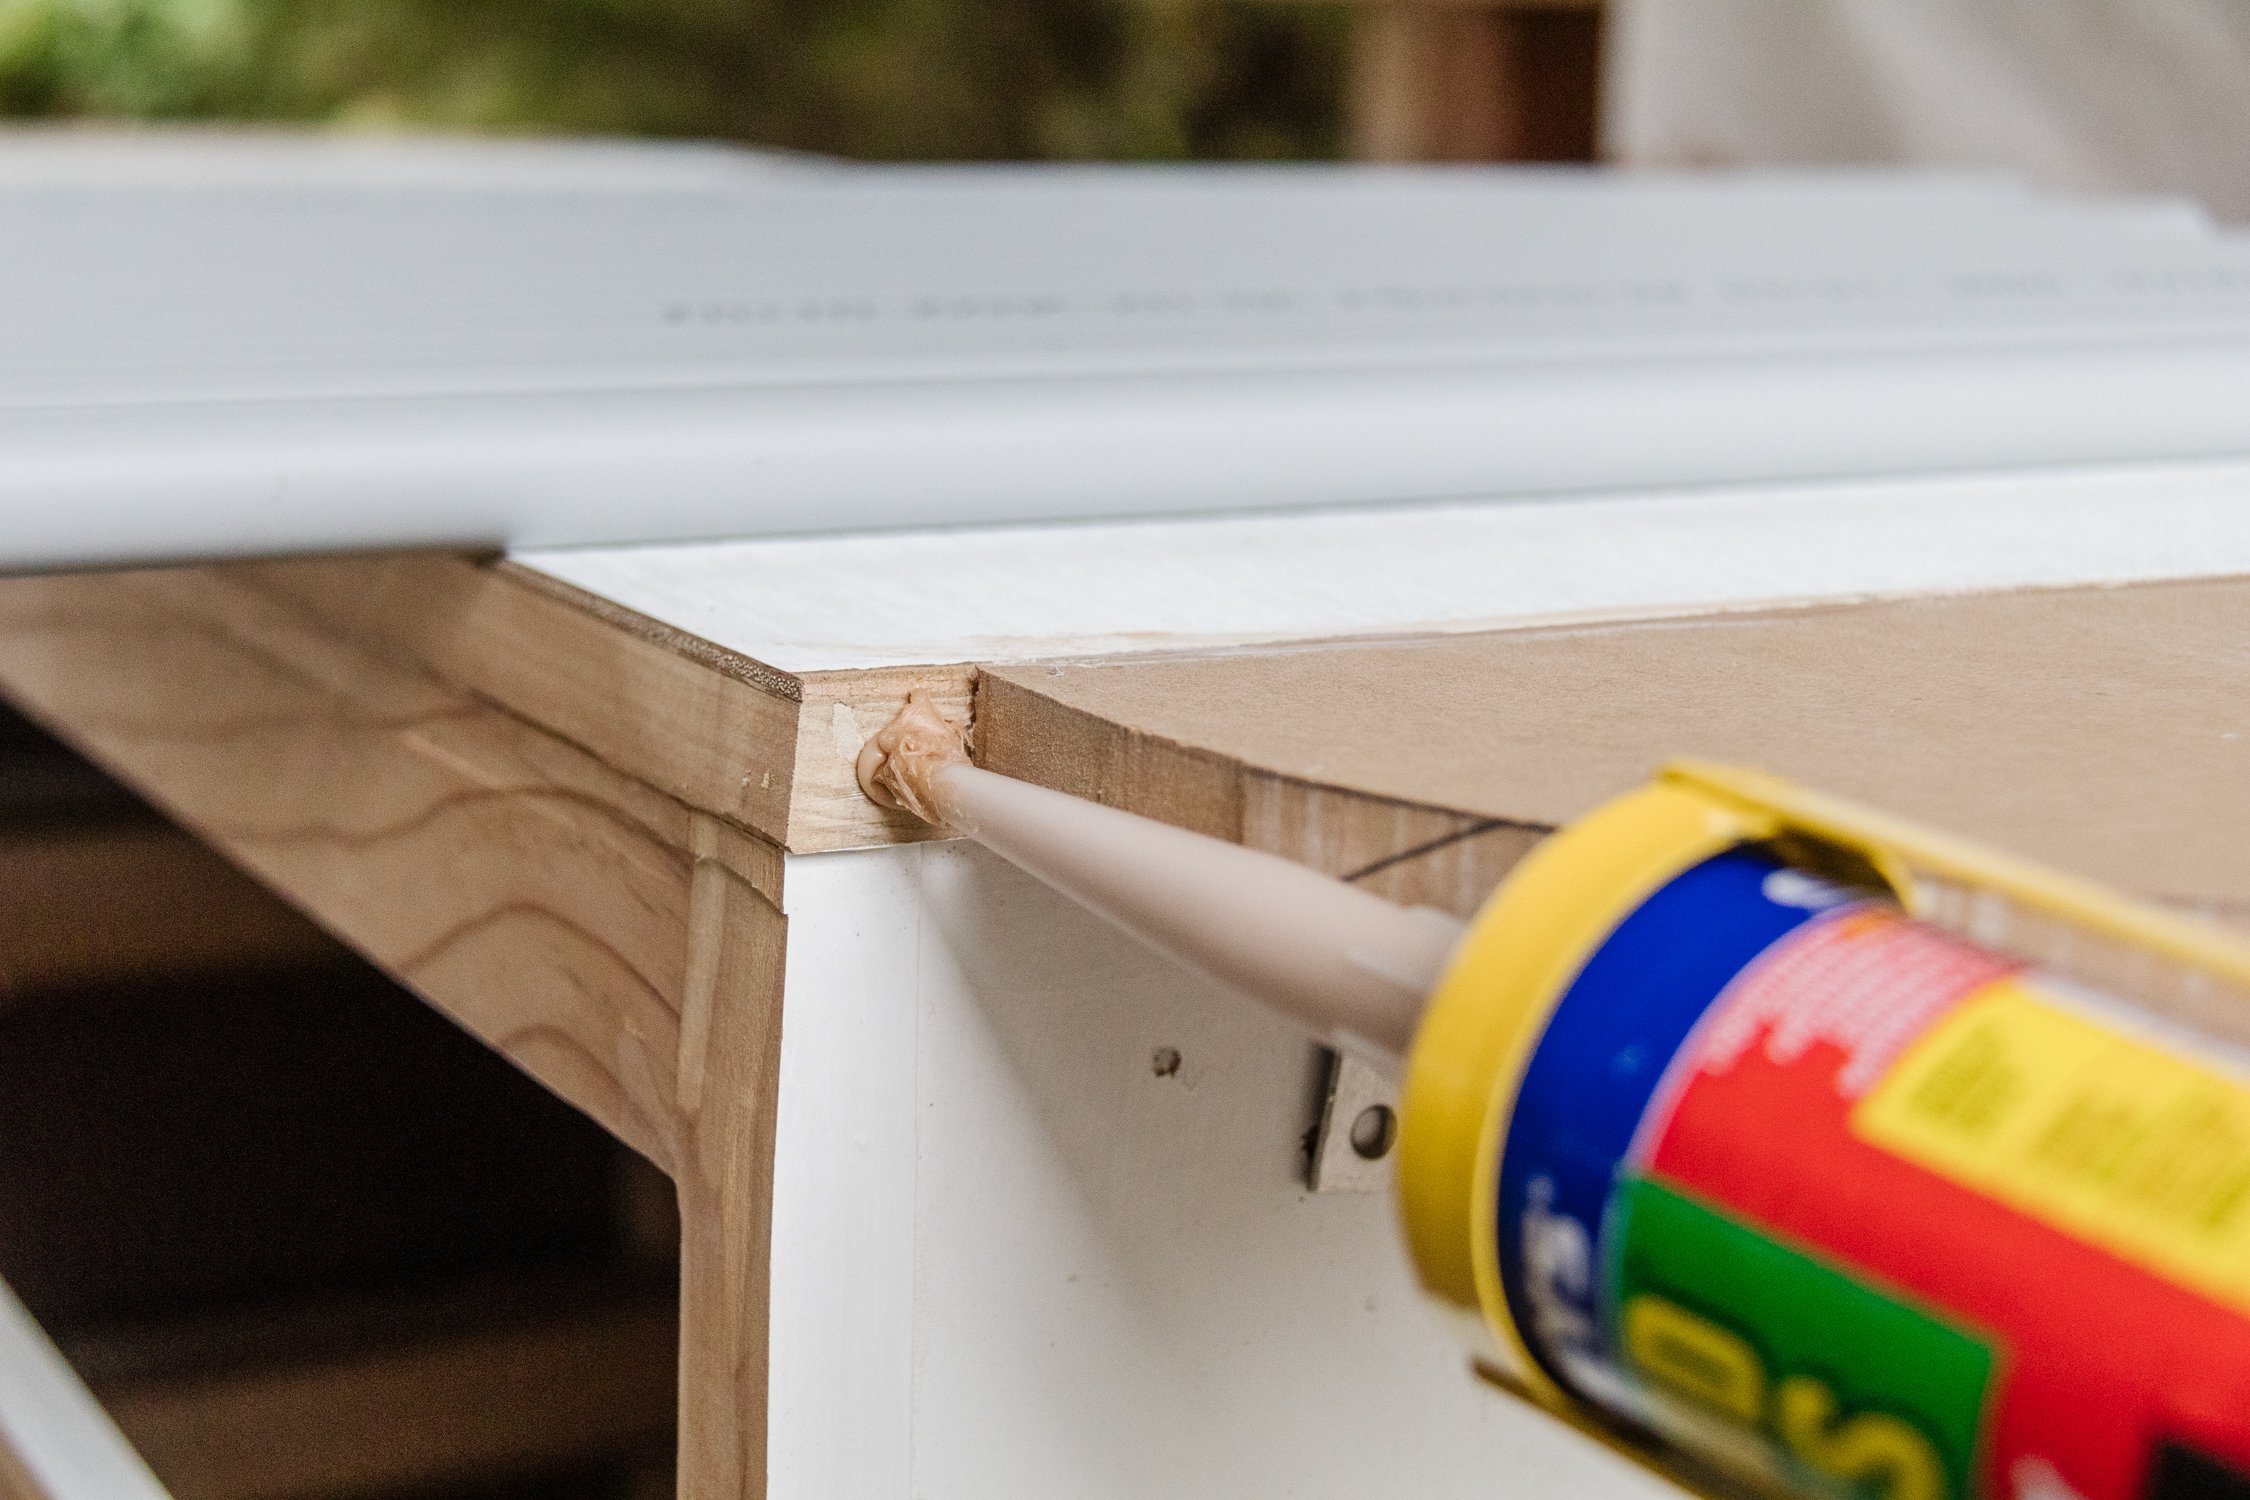
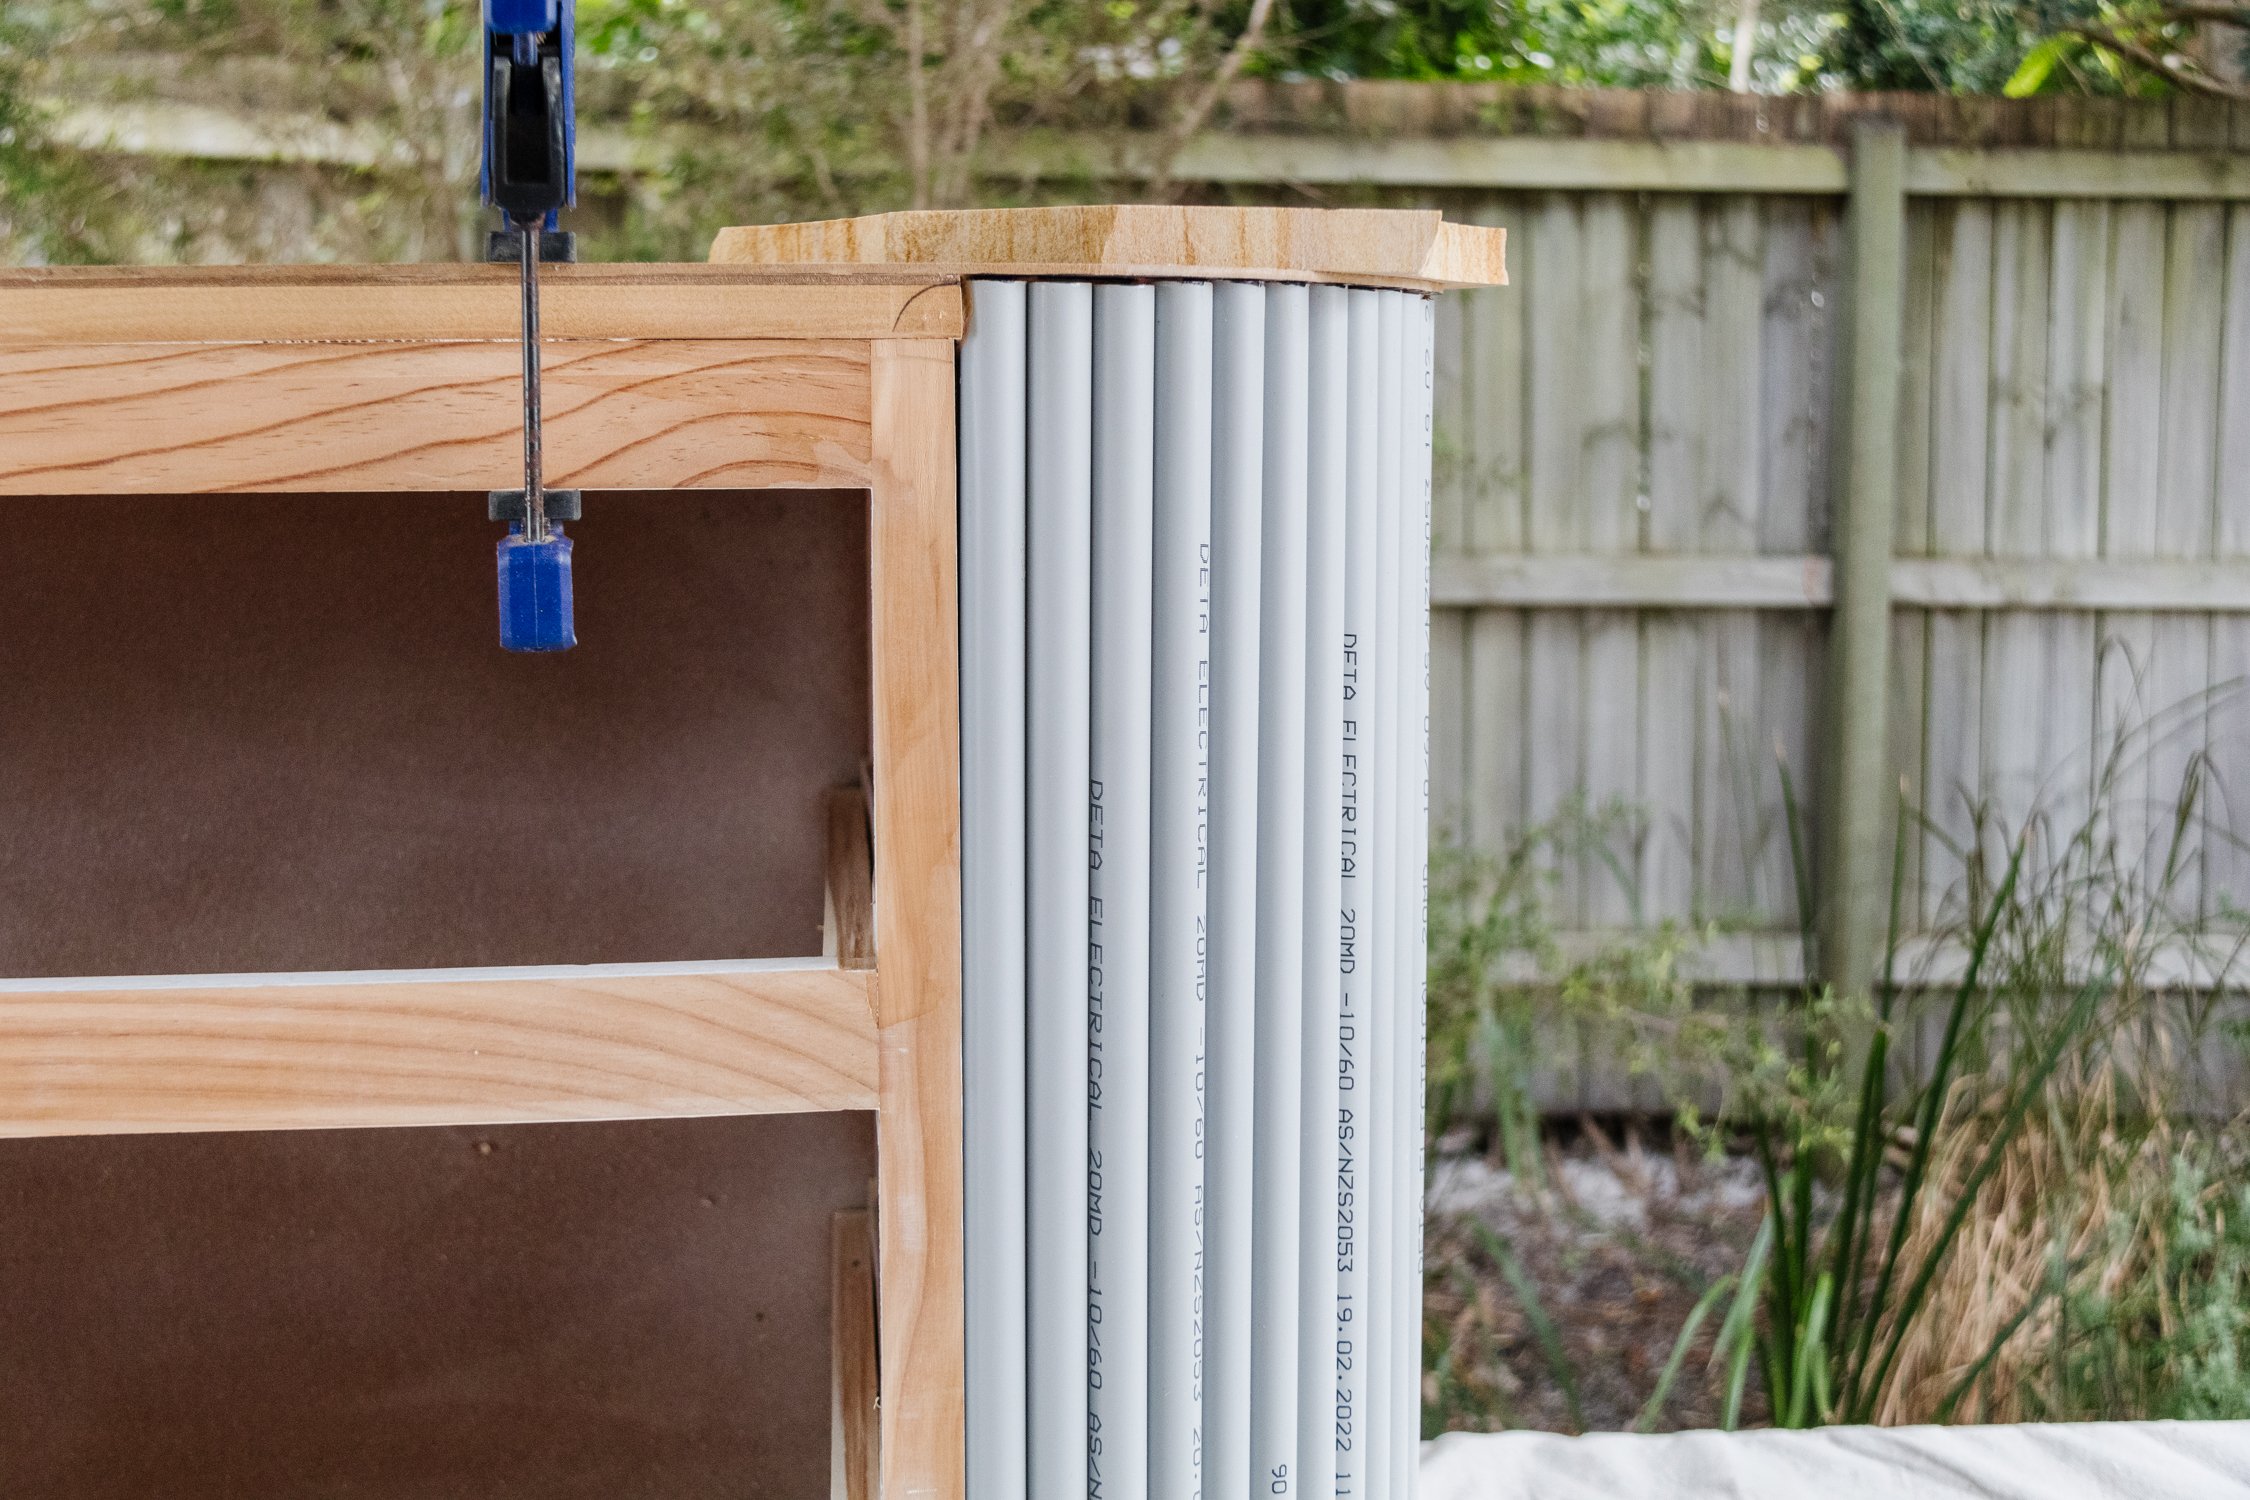
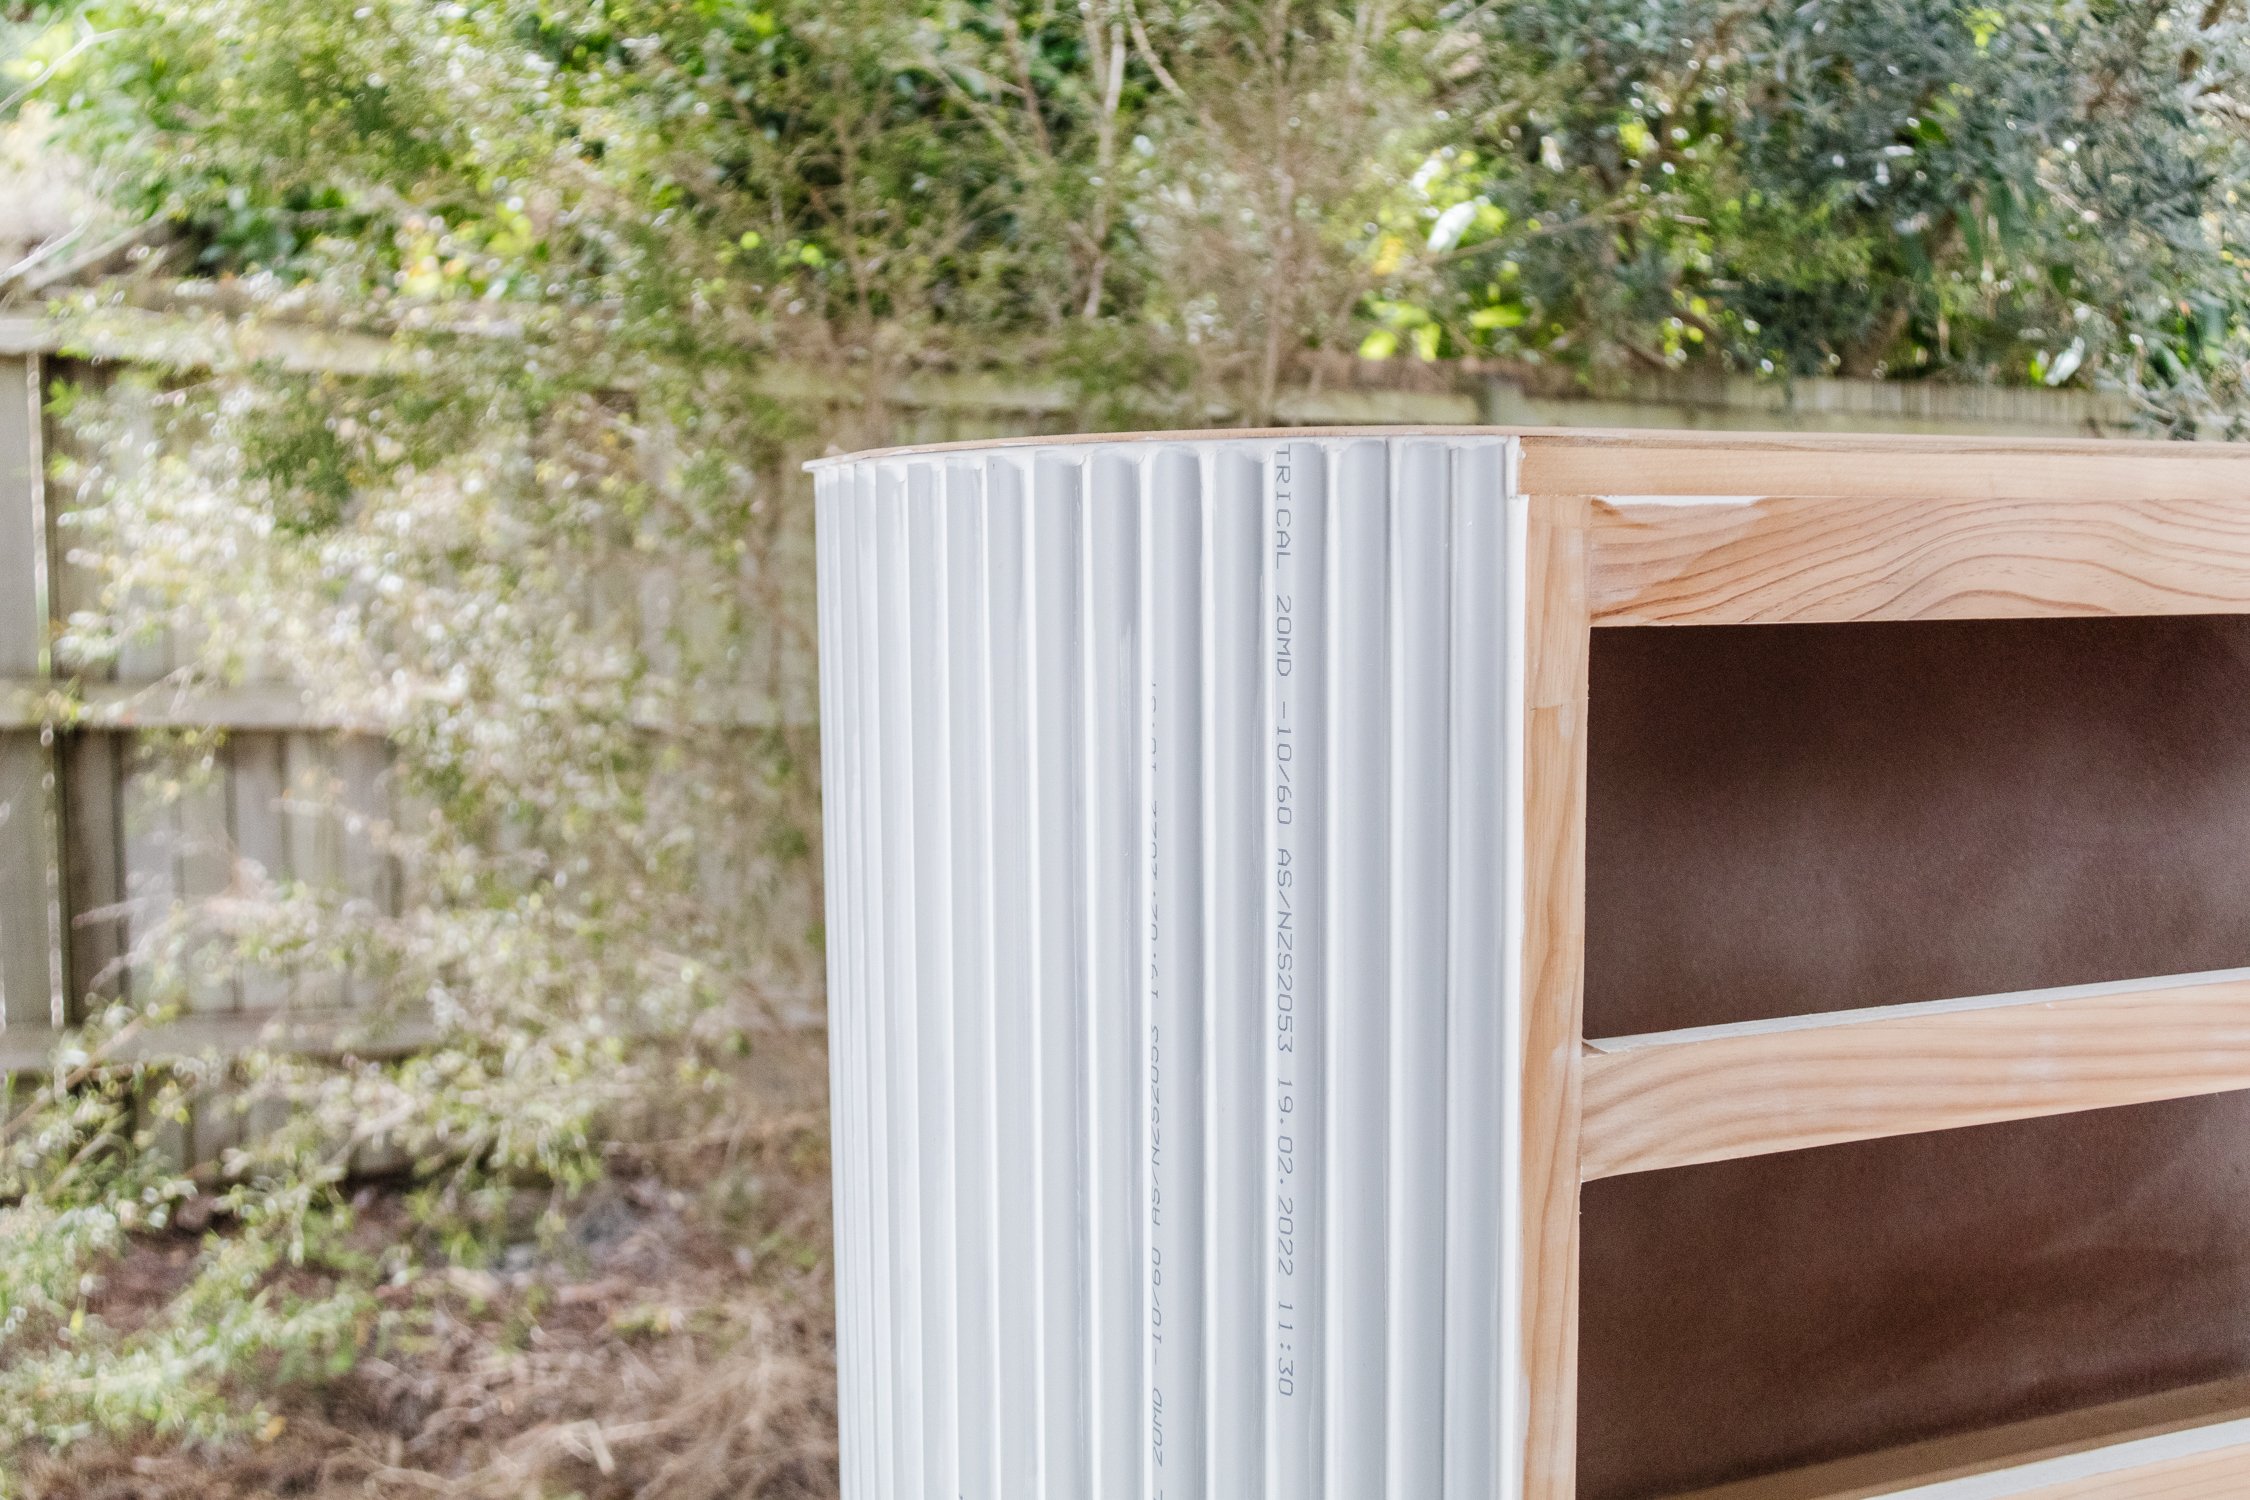
Step 4: Then I measured and cut the half dowel to size using my mitre saw (you can also use a hand saw for this as the PVC pipes are very easy to cut), and glued them onto the semi circle supports from the front to the back. I also used painters tape to hold the pipes nice and close to each other while the glue dried overnight.


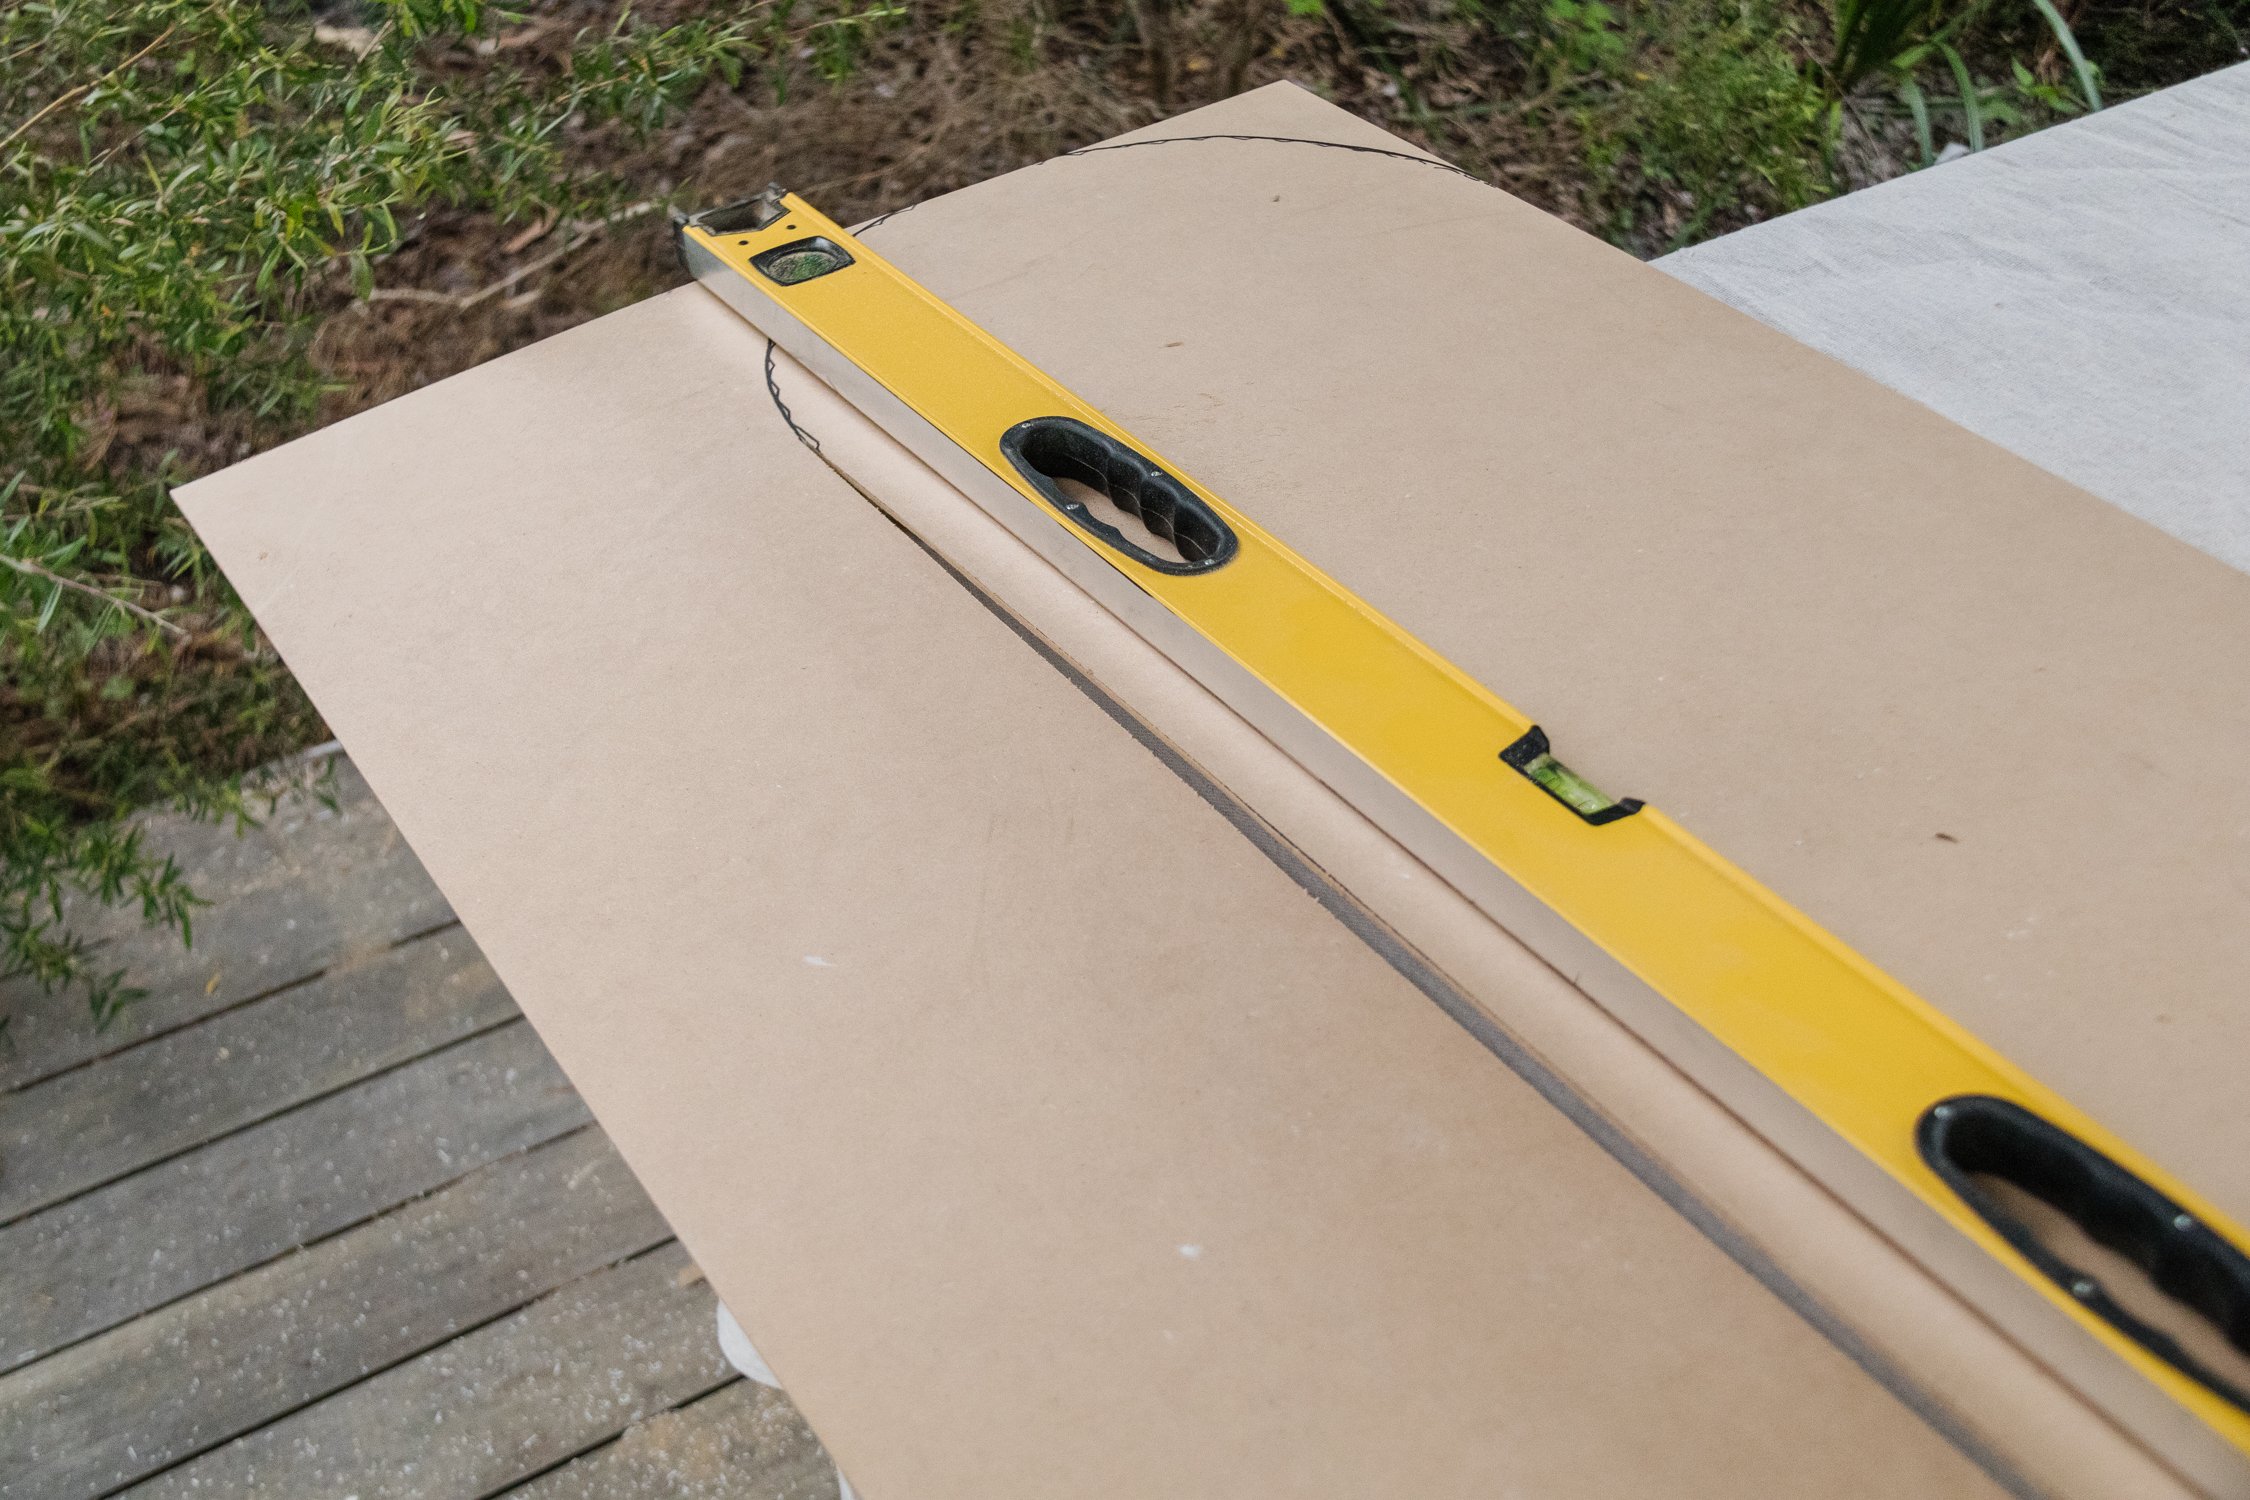
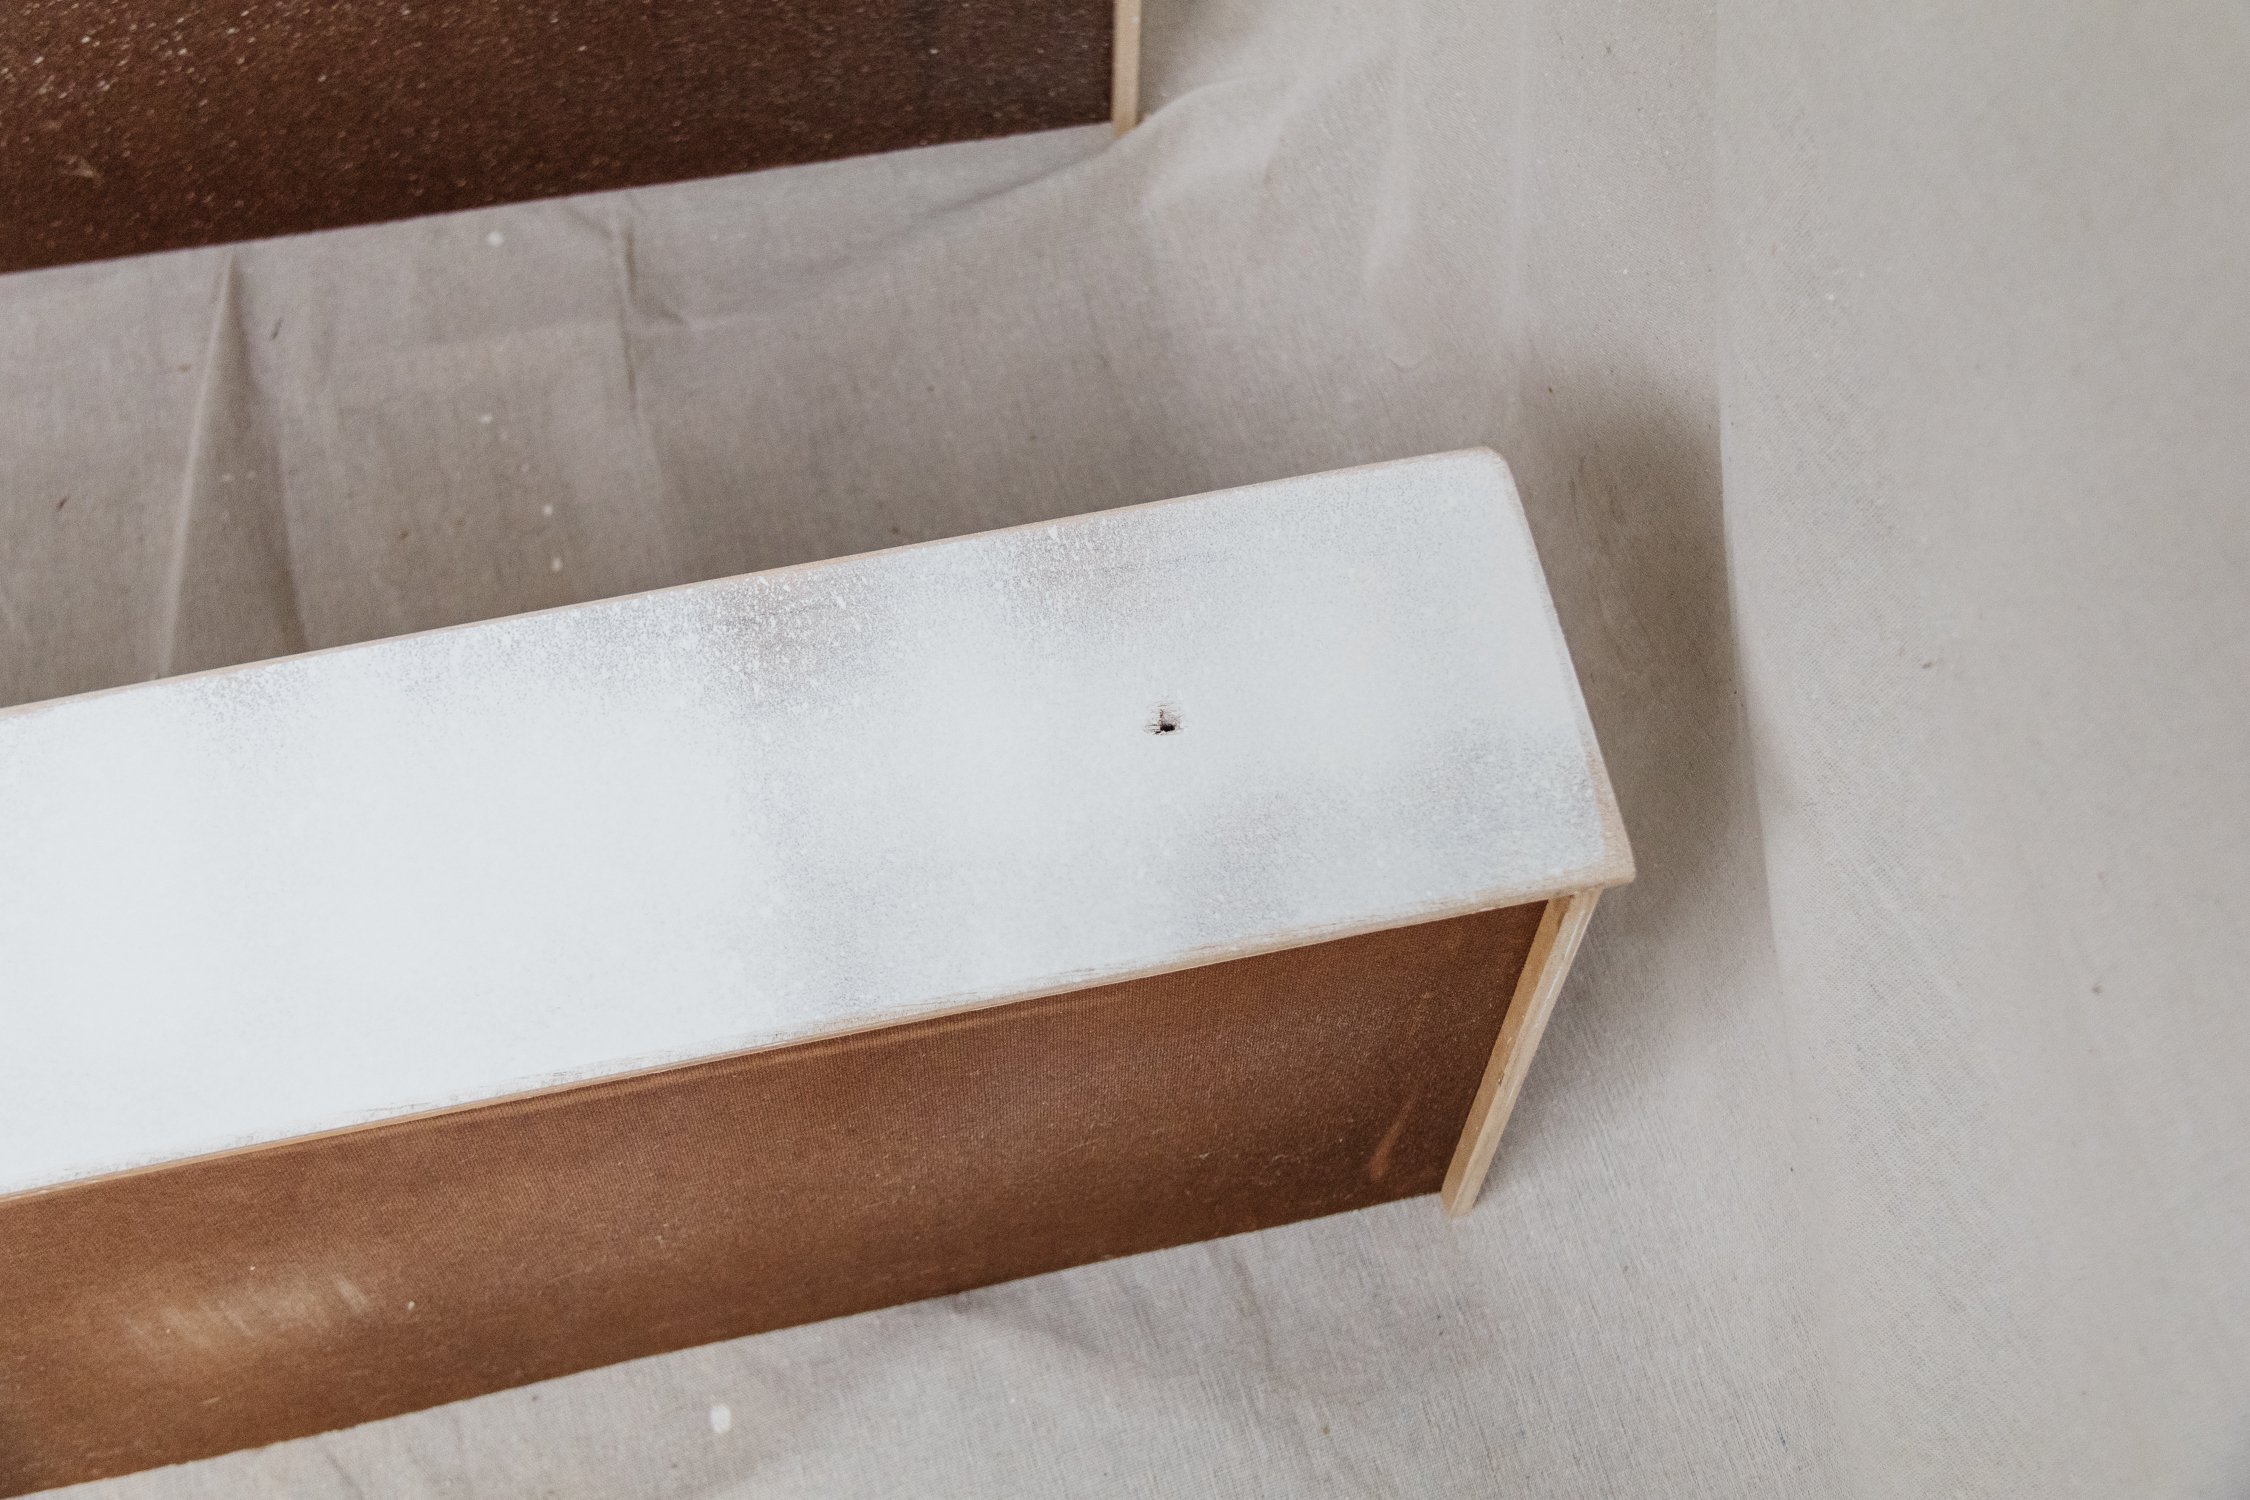
Step 5: I flipped the chest of drawers onto a thin sheet of MDF, traced around the edge with a Sharpie and cut the top using a jigsaw (and clamps). I flipped the chest of drawers back onto it’s bottom, and glued the MDF onto the top. I used clamps and a couple of pieces of broken sandstone to make sure the top glued nicely.
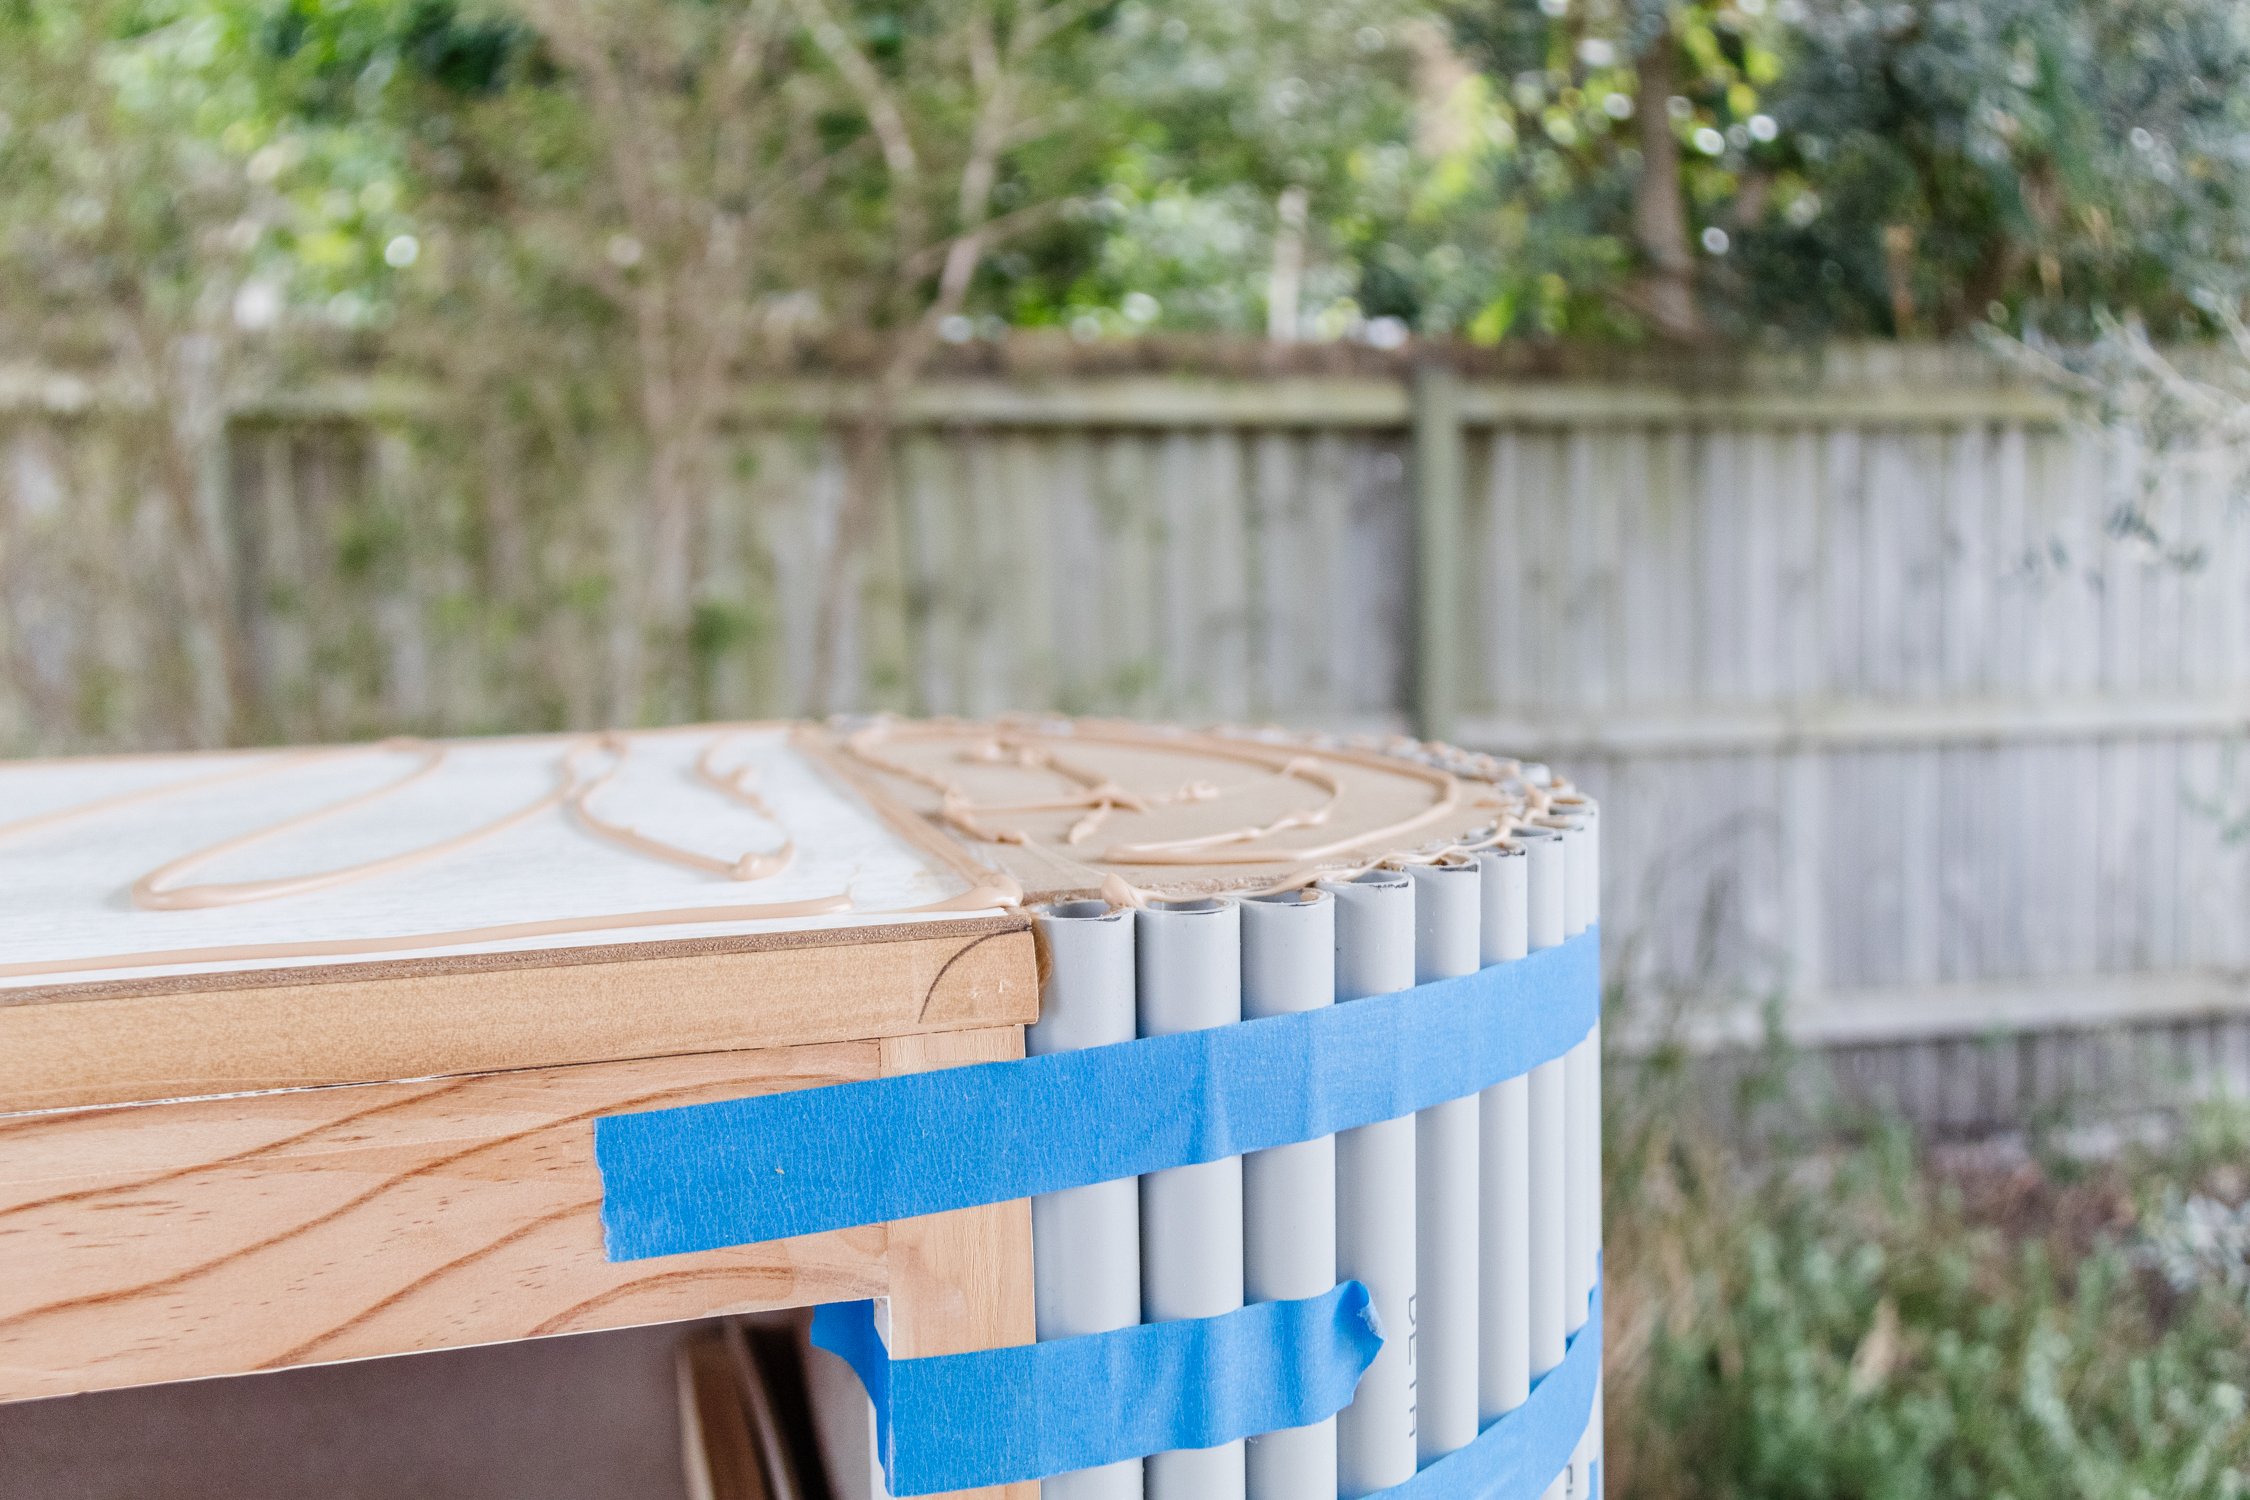
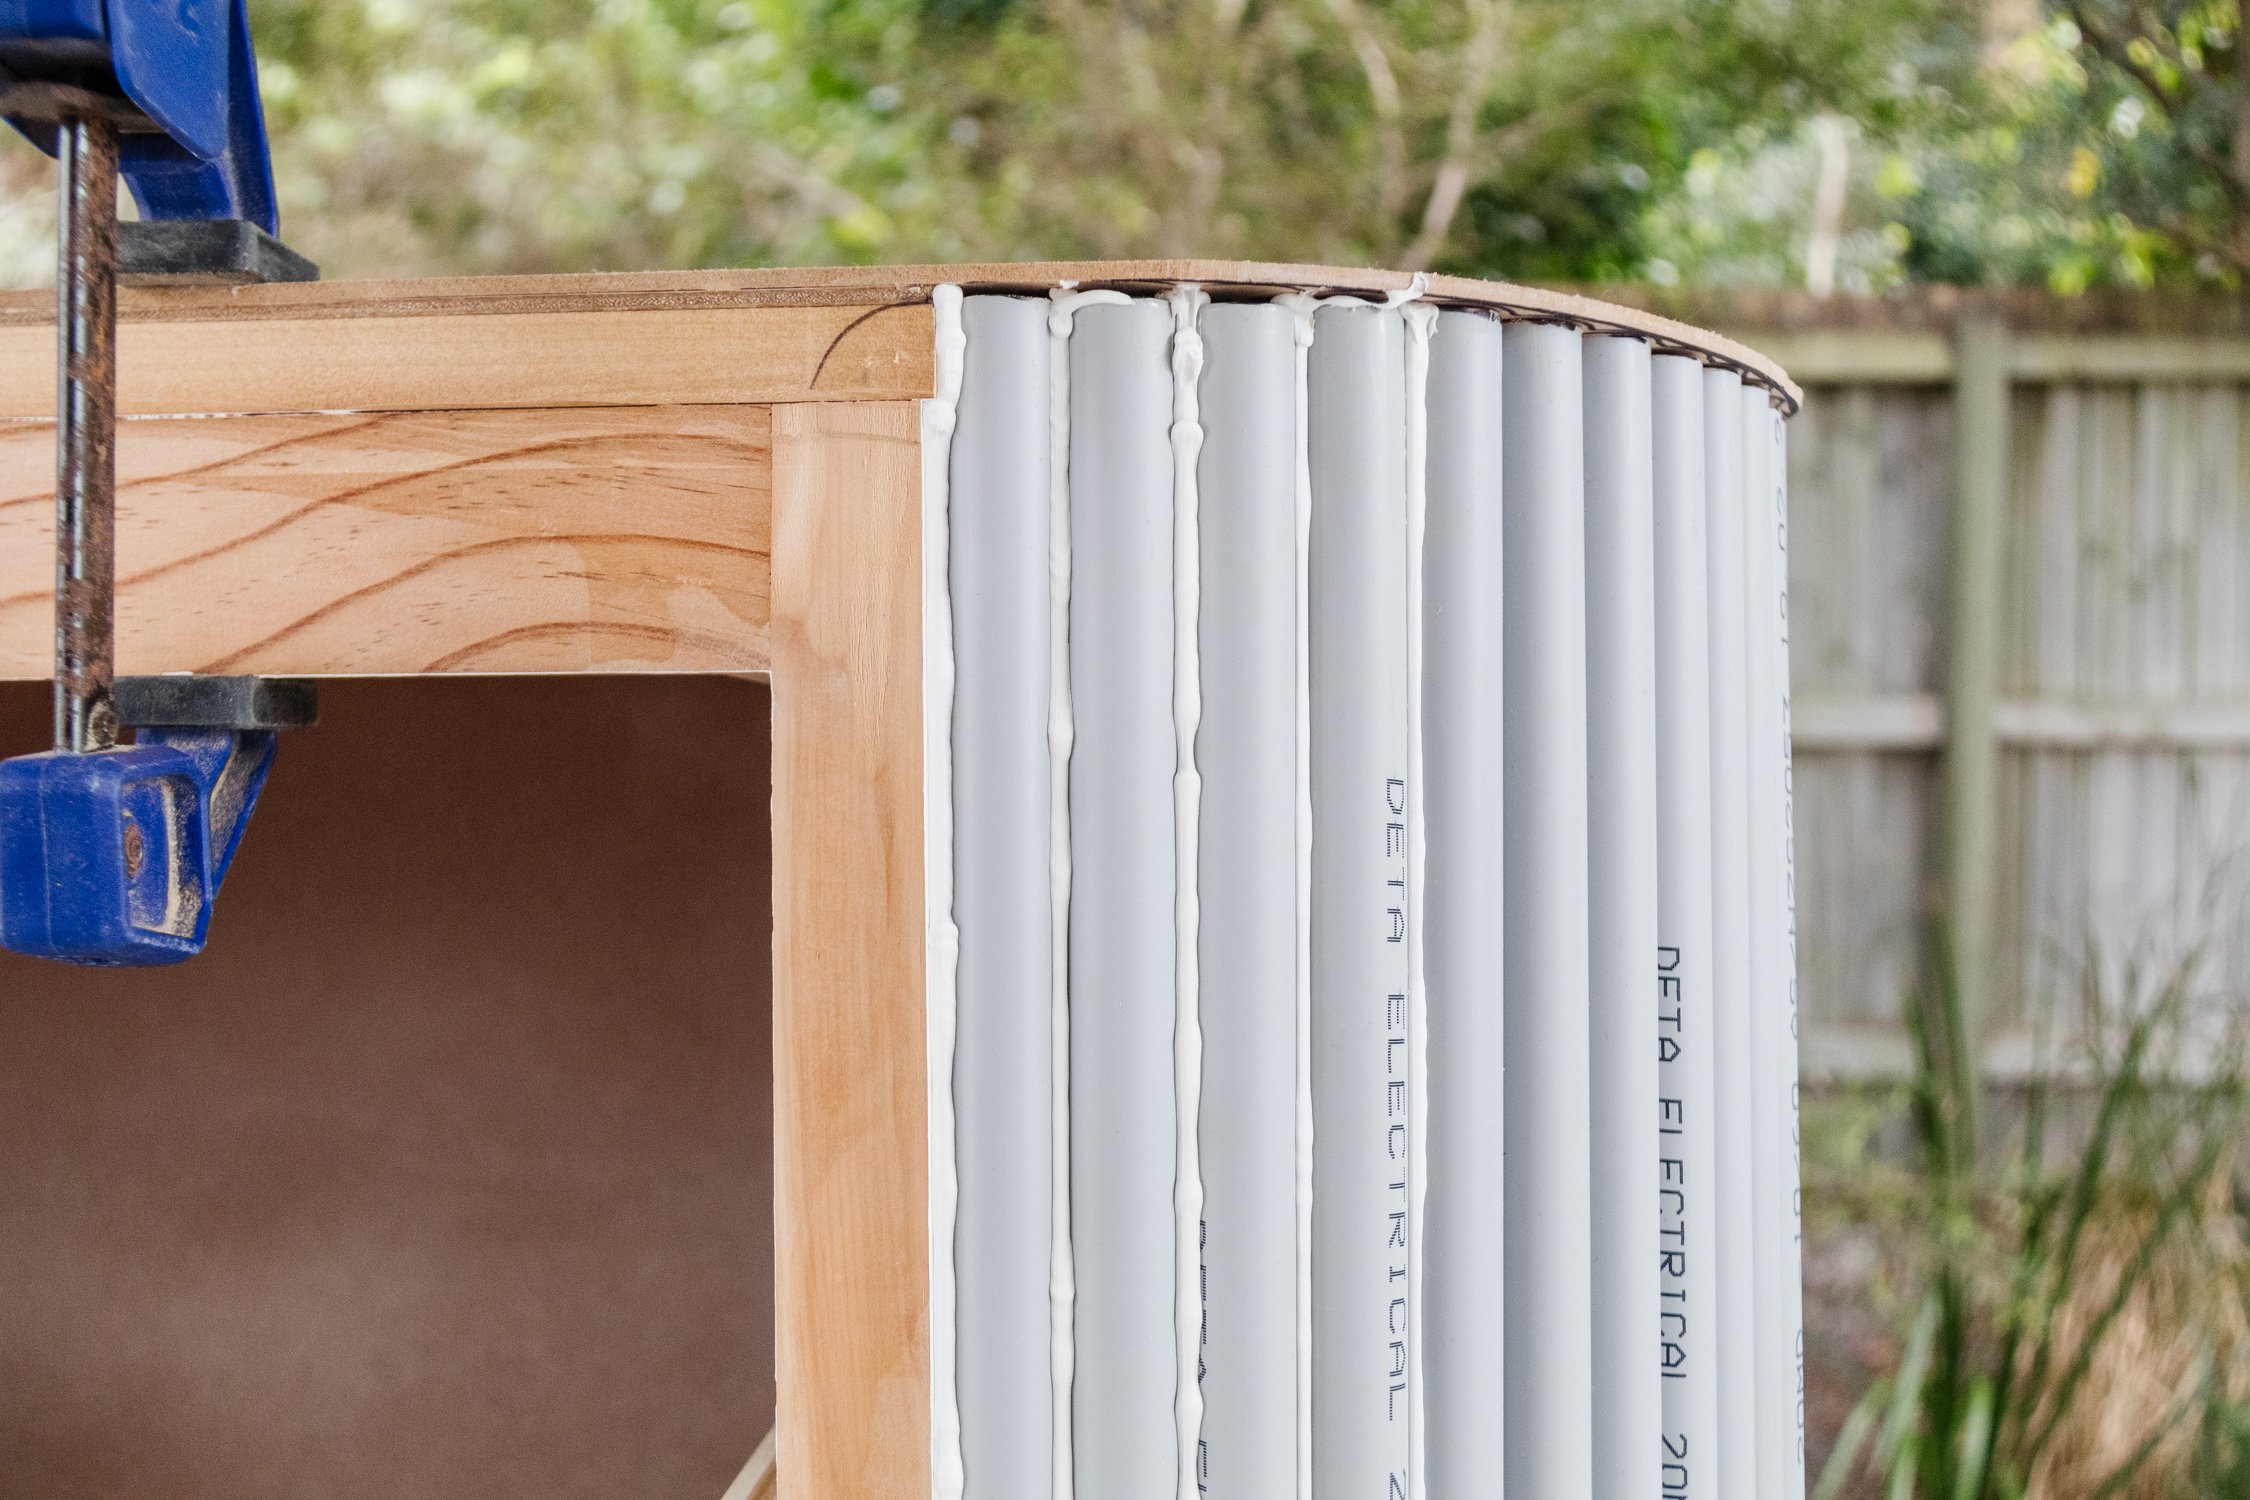
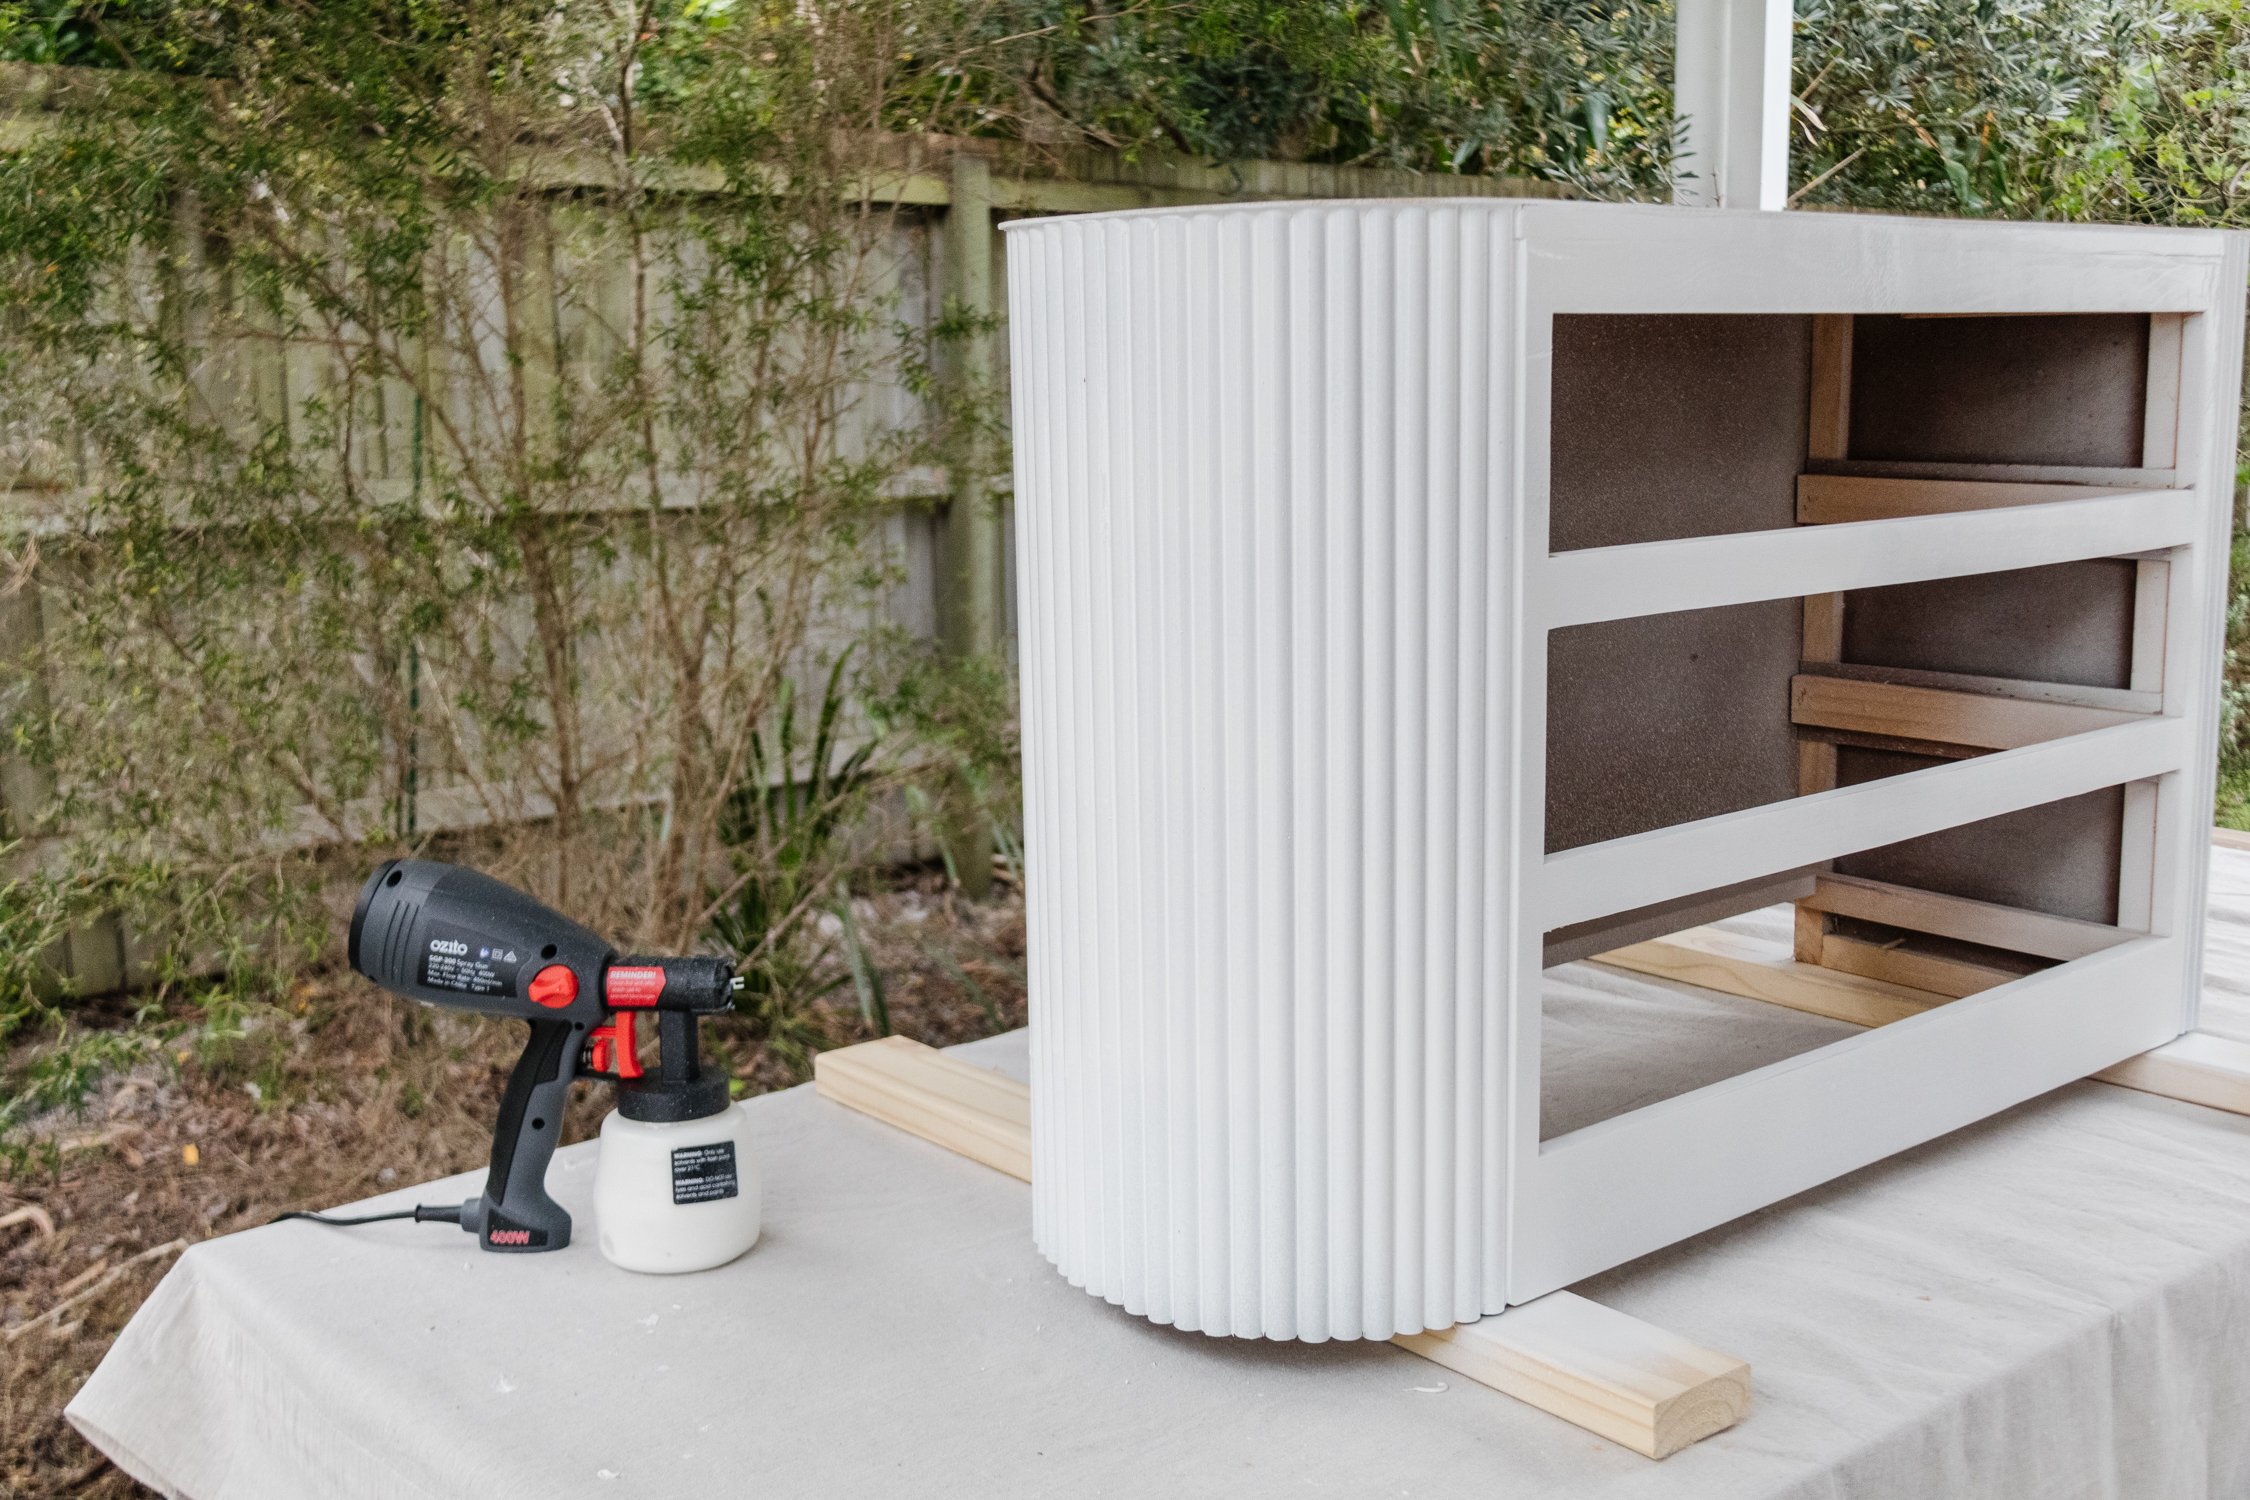
Step 6: Following this, I applied No More Gaps in between the pipes and smoothed them down with baby wipes. And then I sanded the edges of the top to make it nice and rounded.
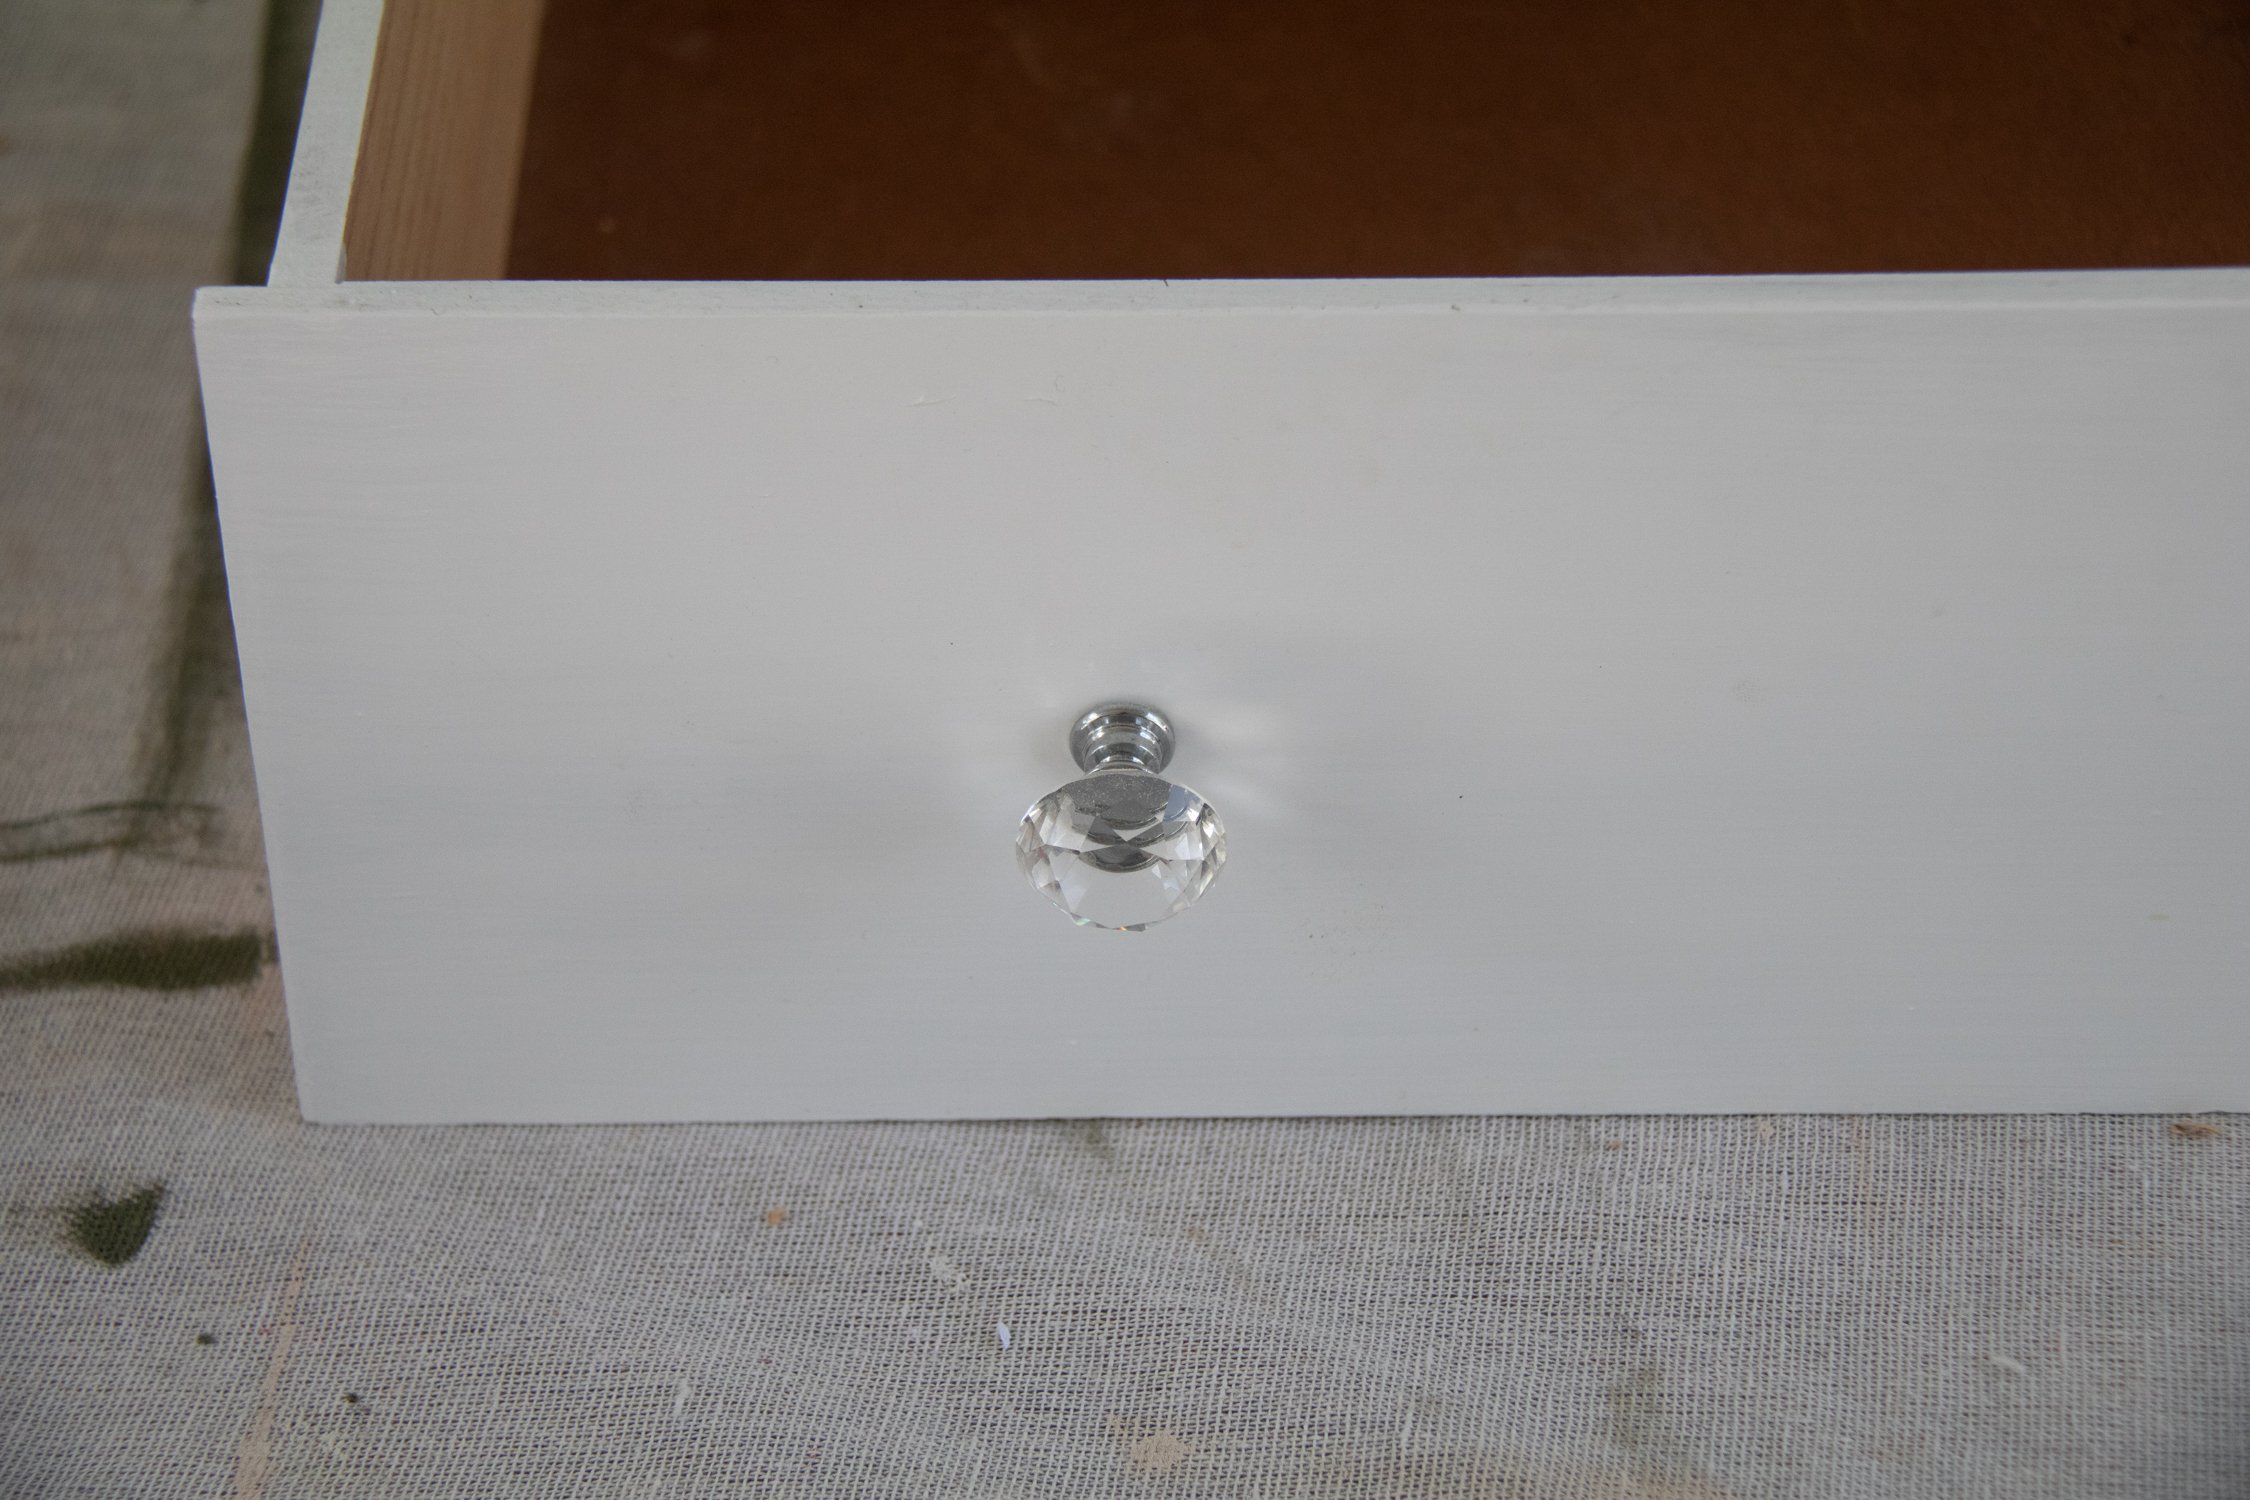
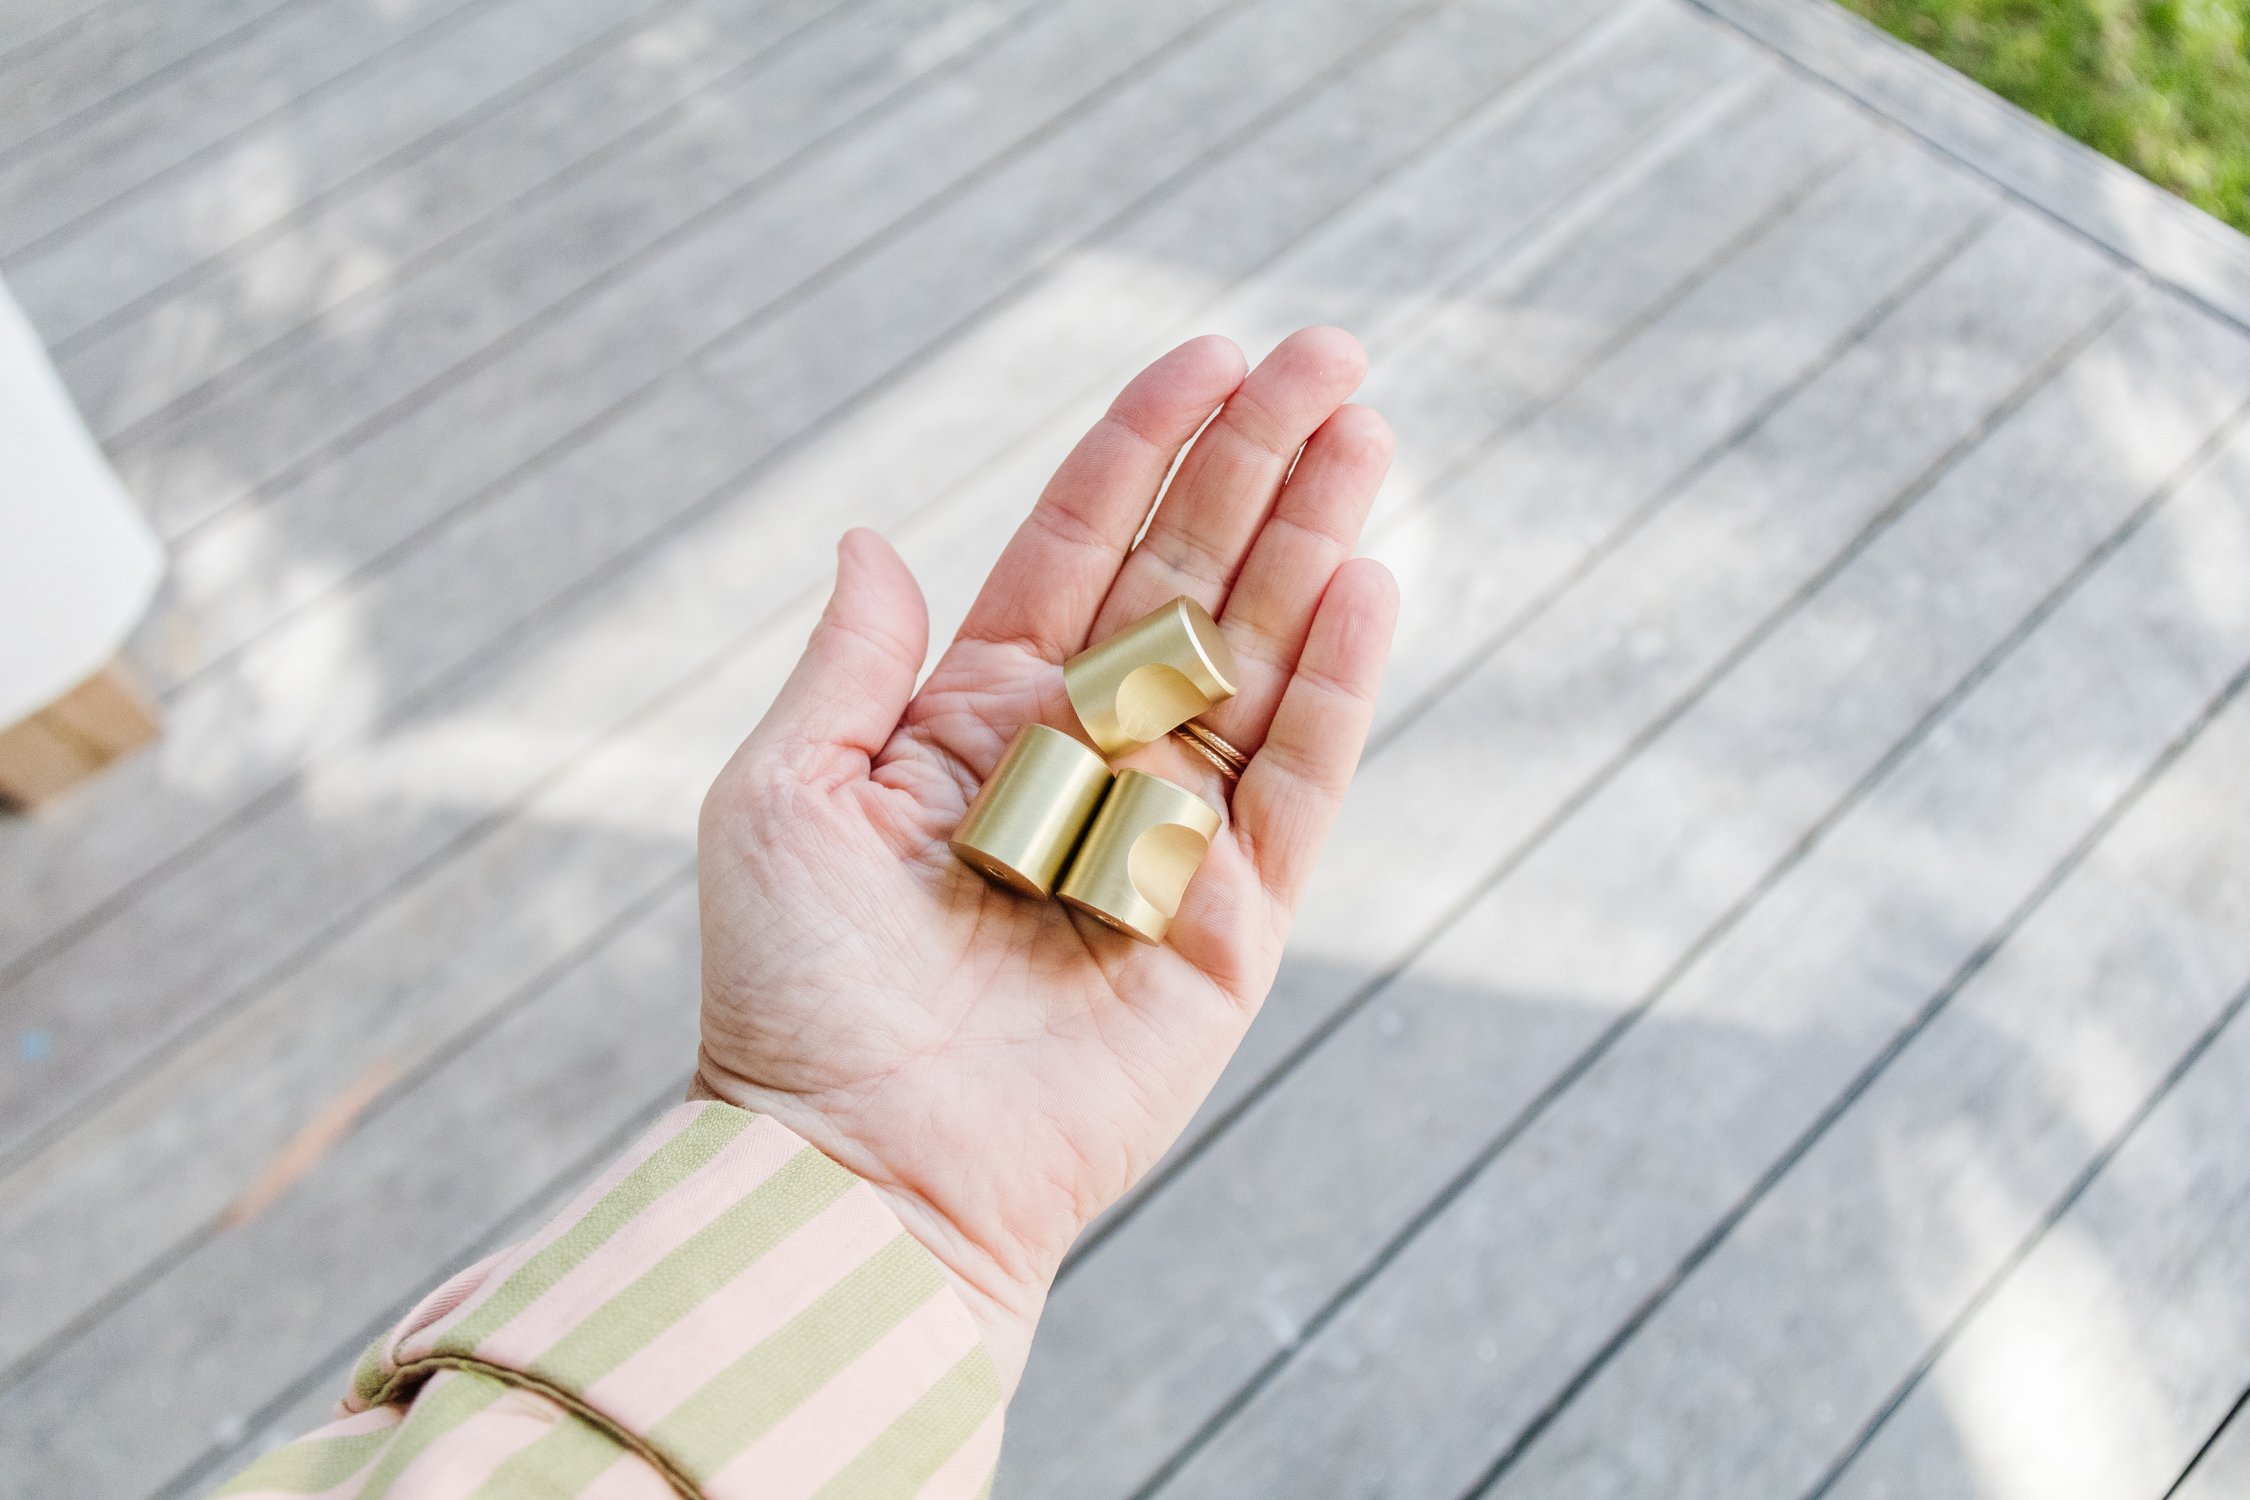
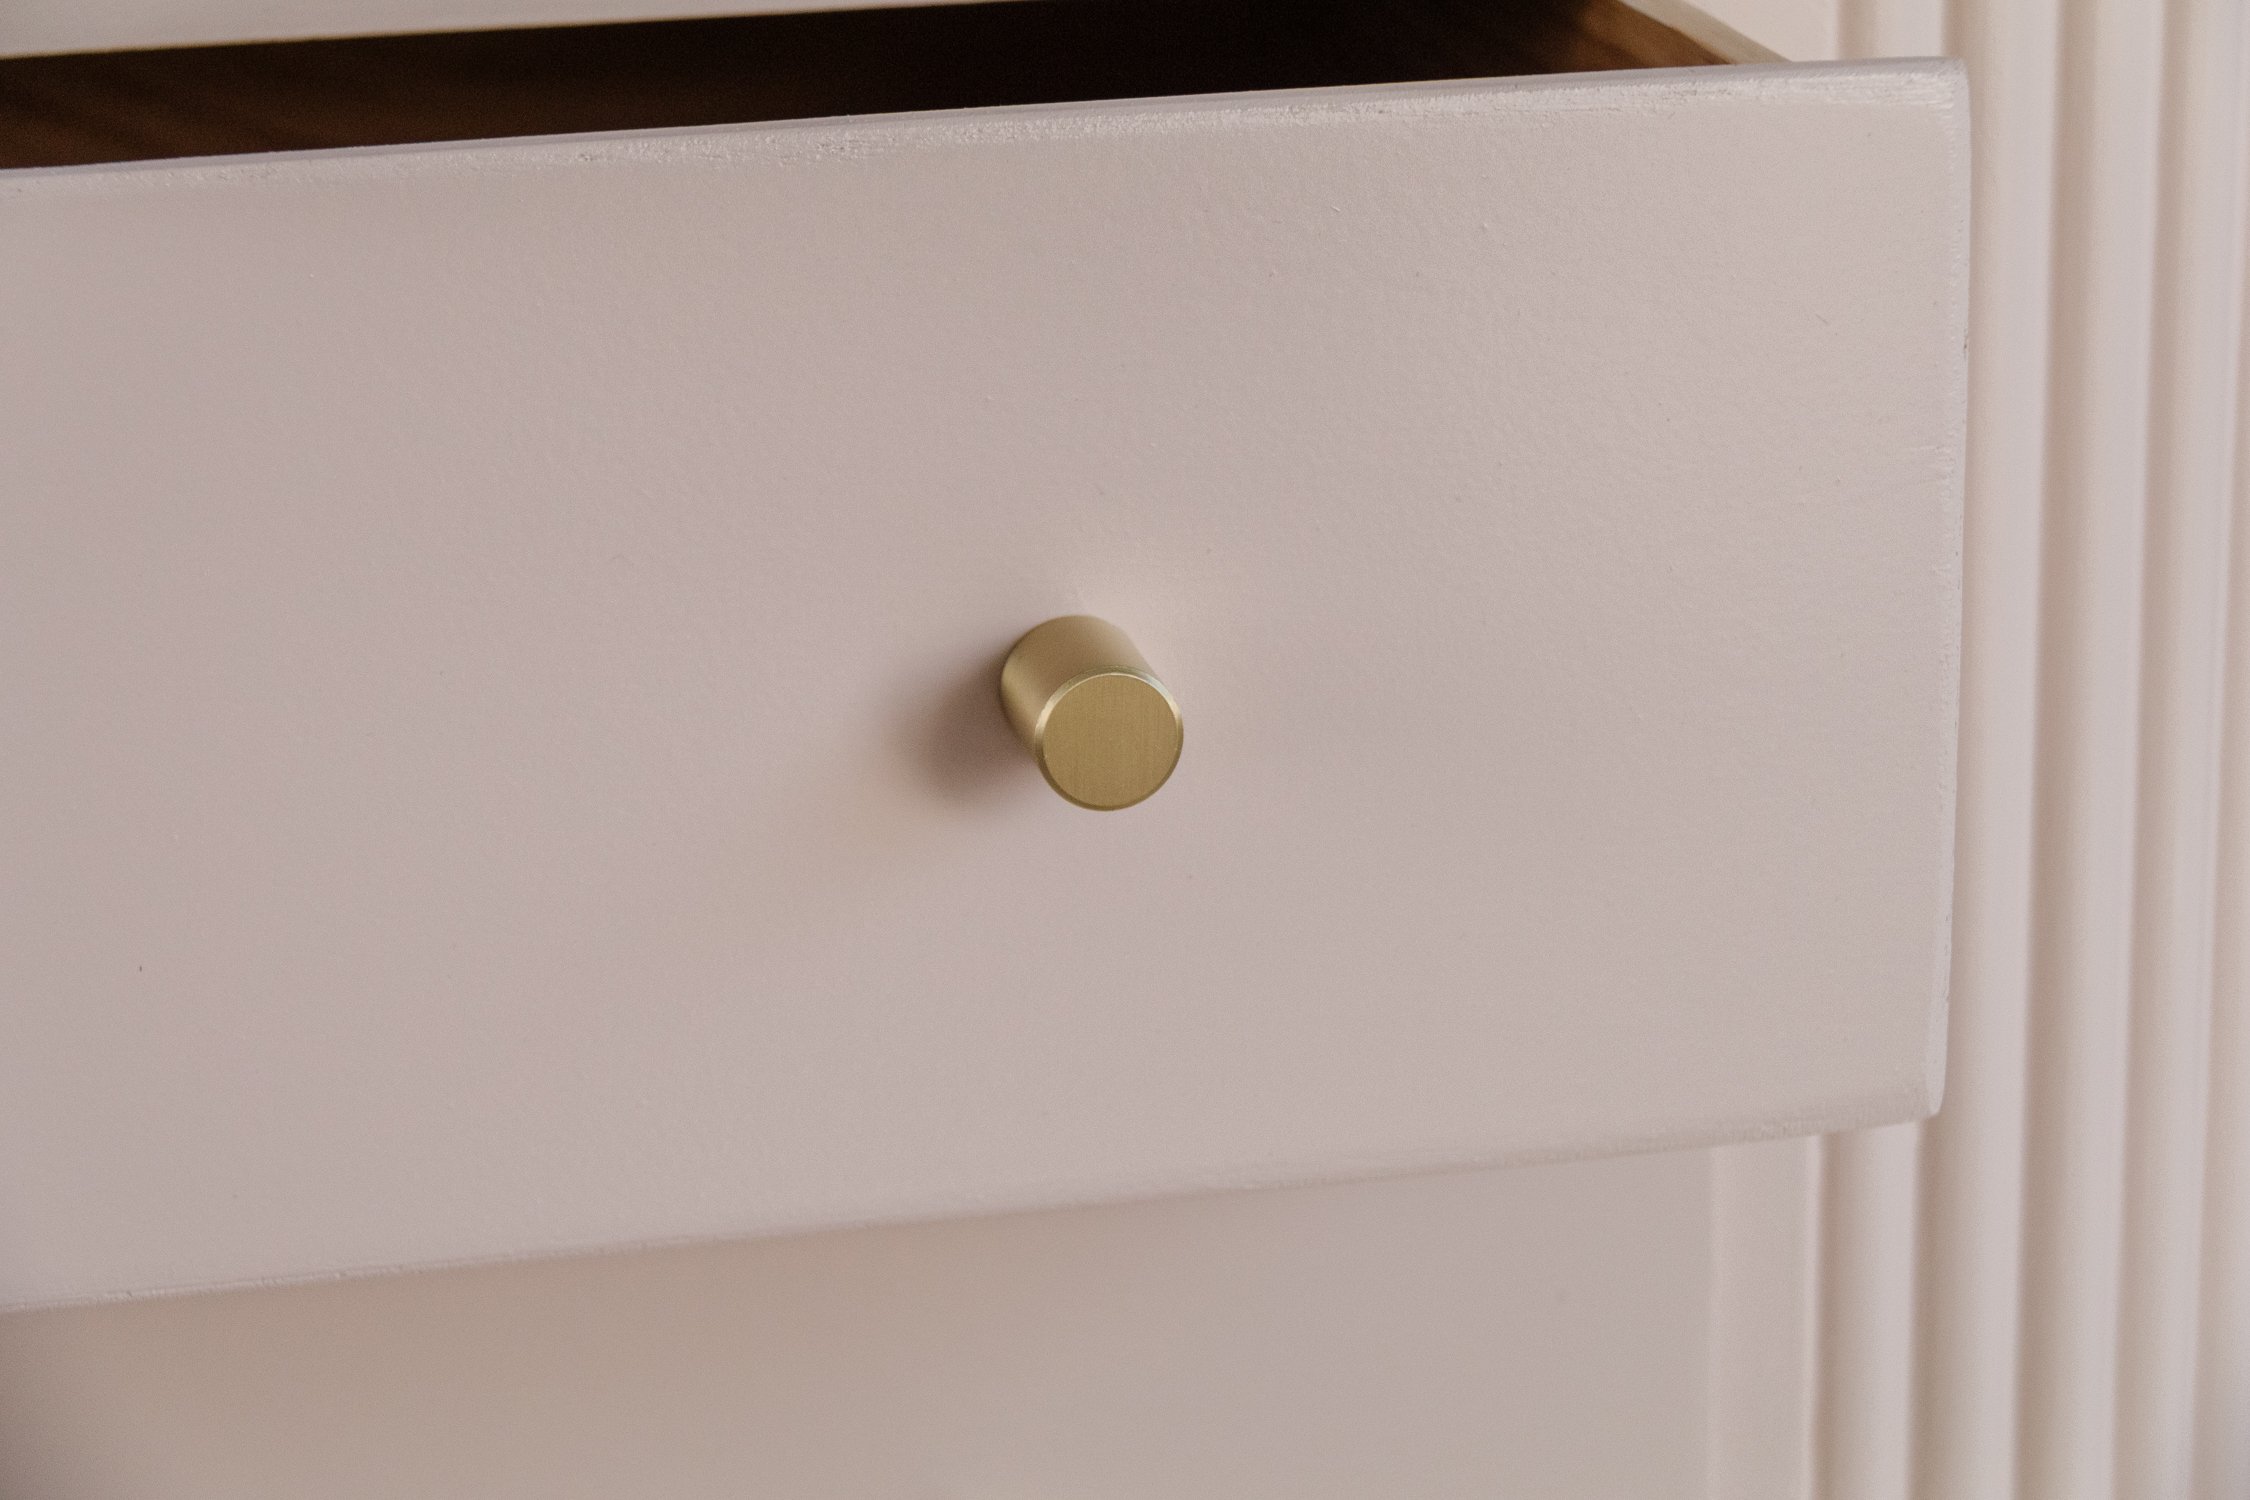
Step 7: I primed the entire surface with white primer using a paint sprayer (which was so much fun!) and when that dried, I applied two coats of “Mornington” by Dulux. When the paint had dried, I installed new brass handles and that’s it!
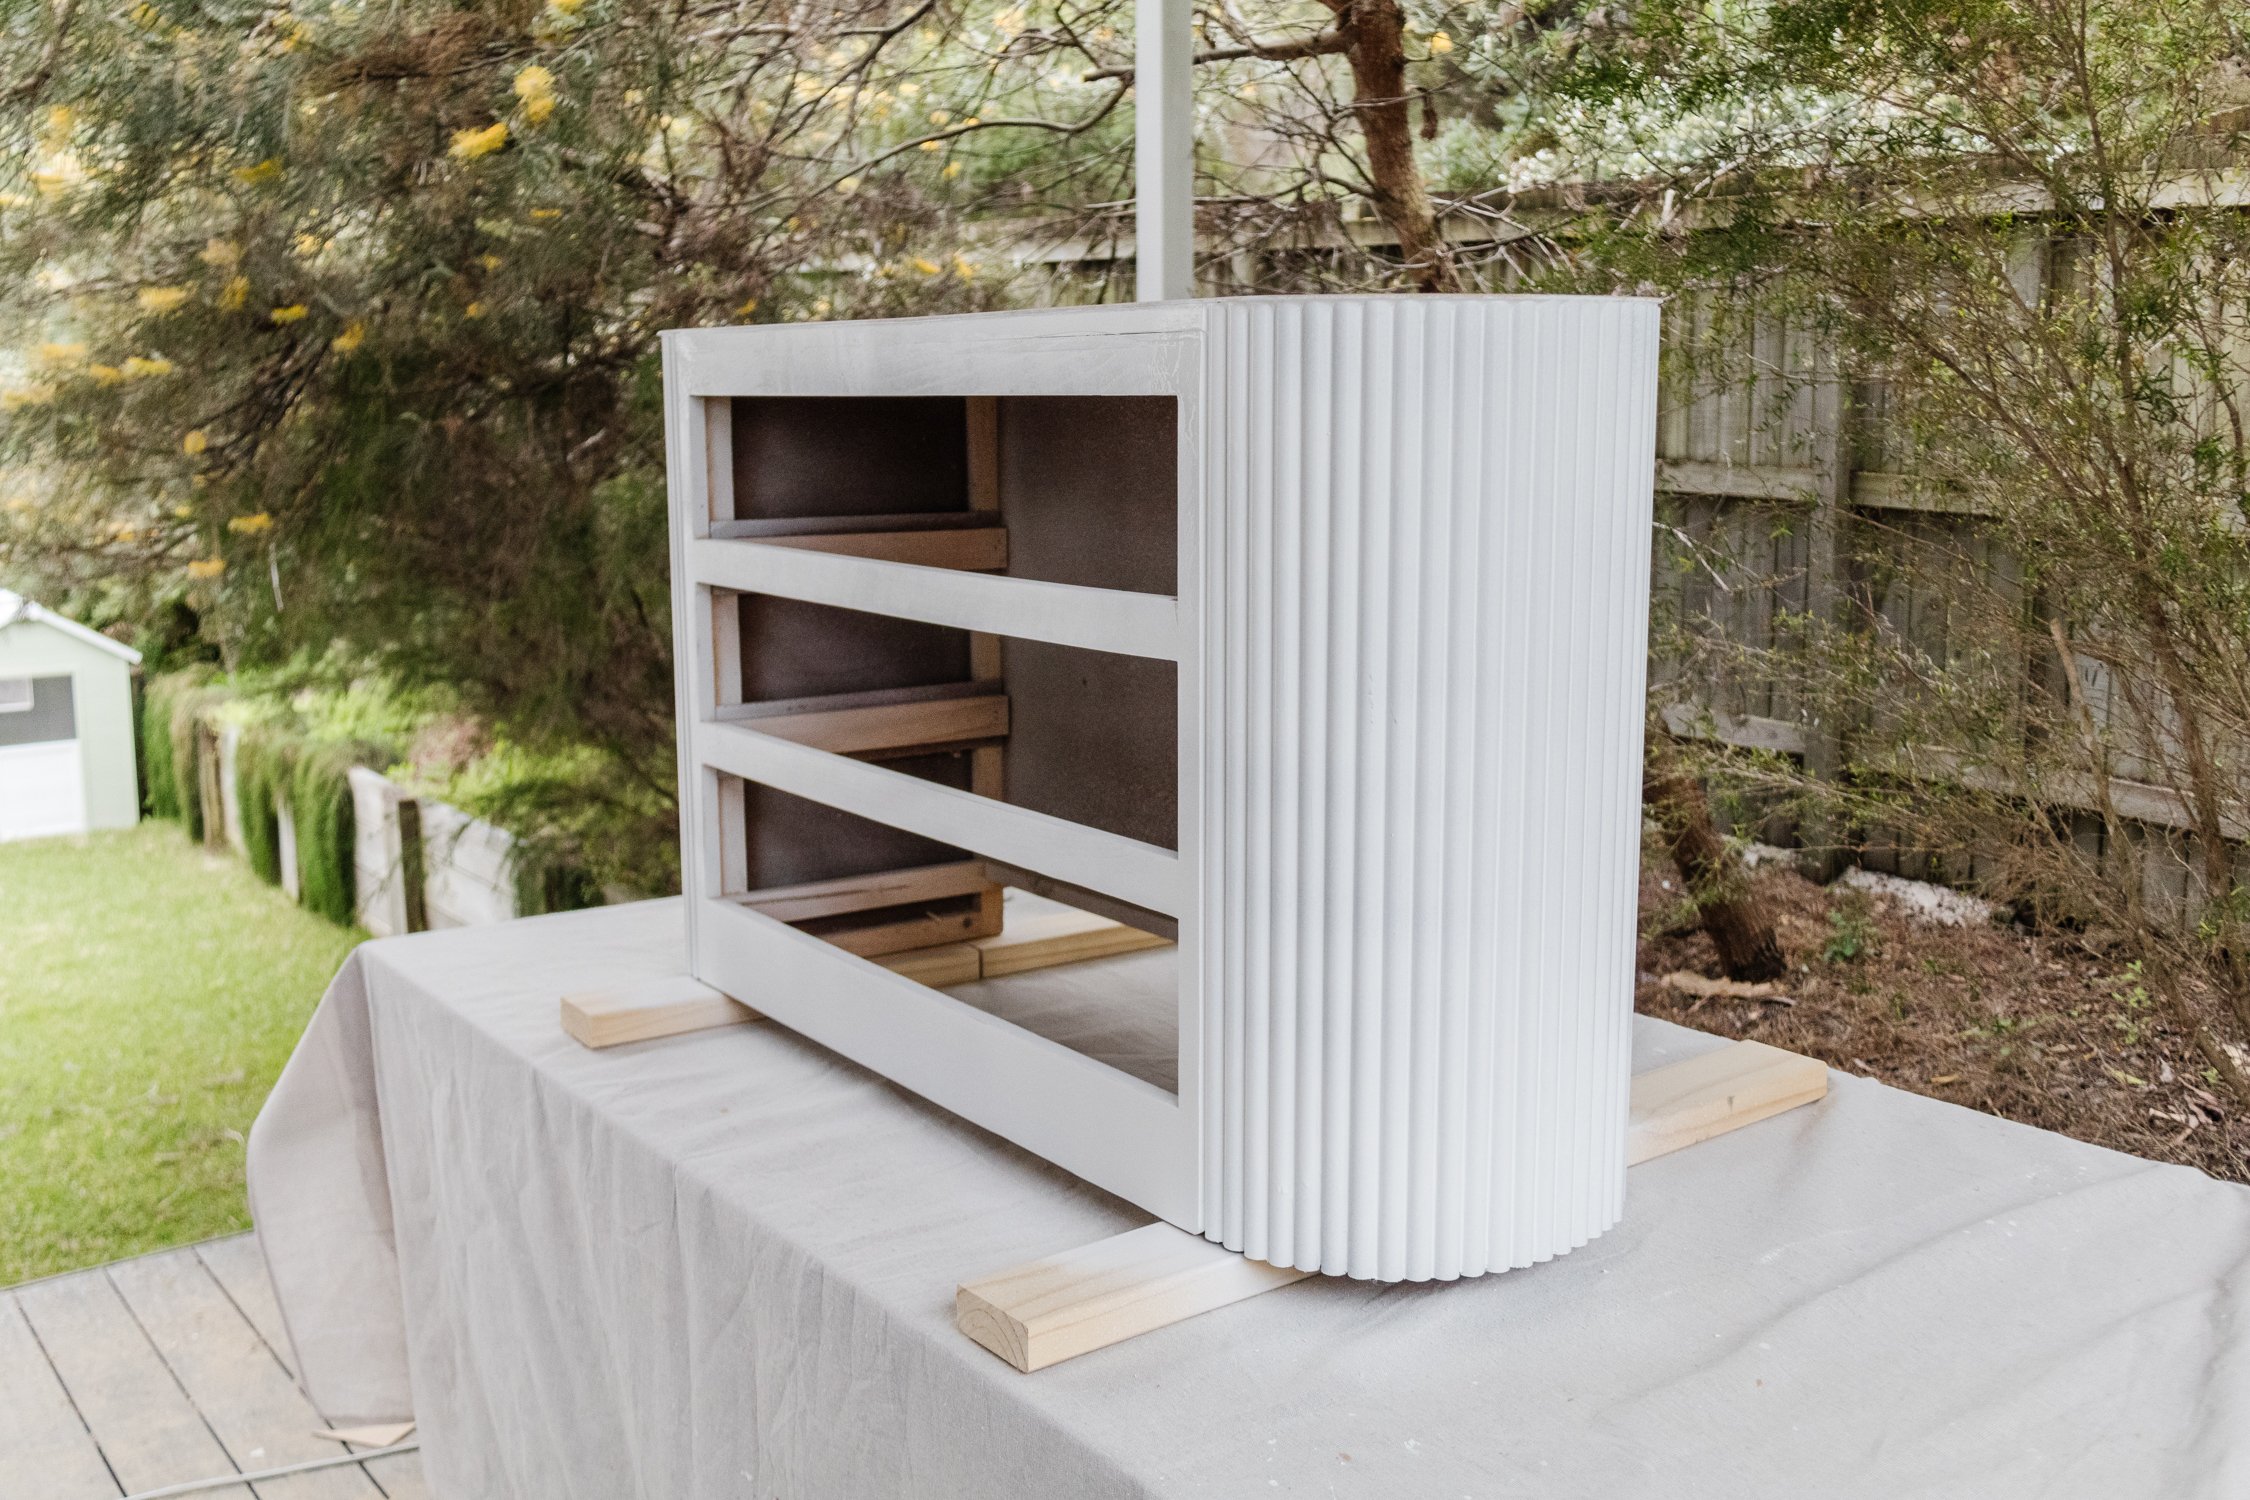
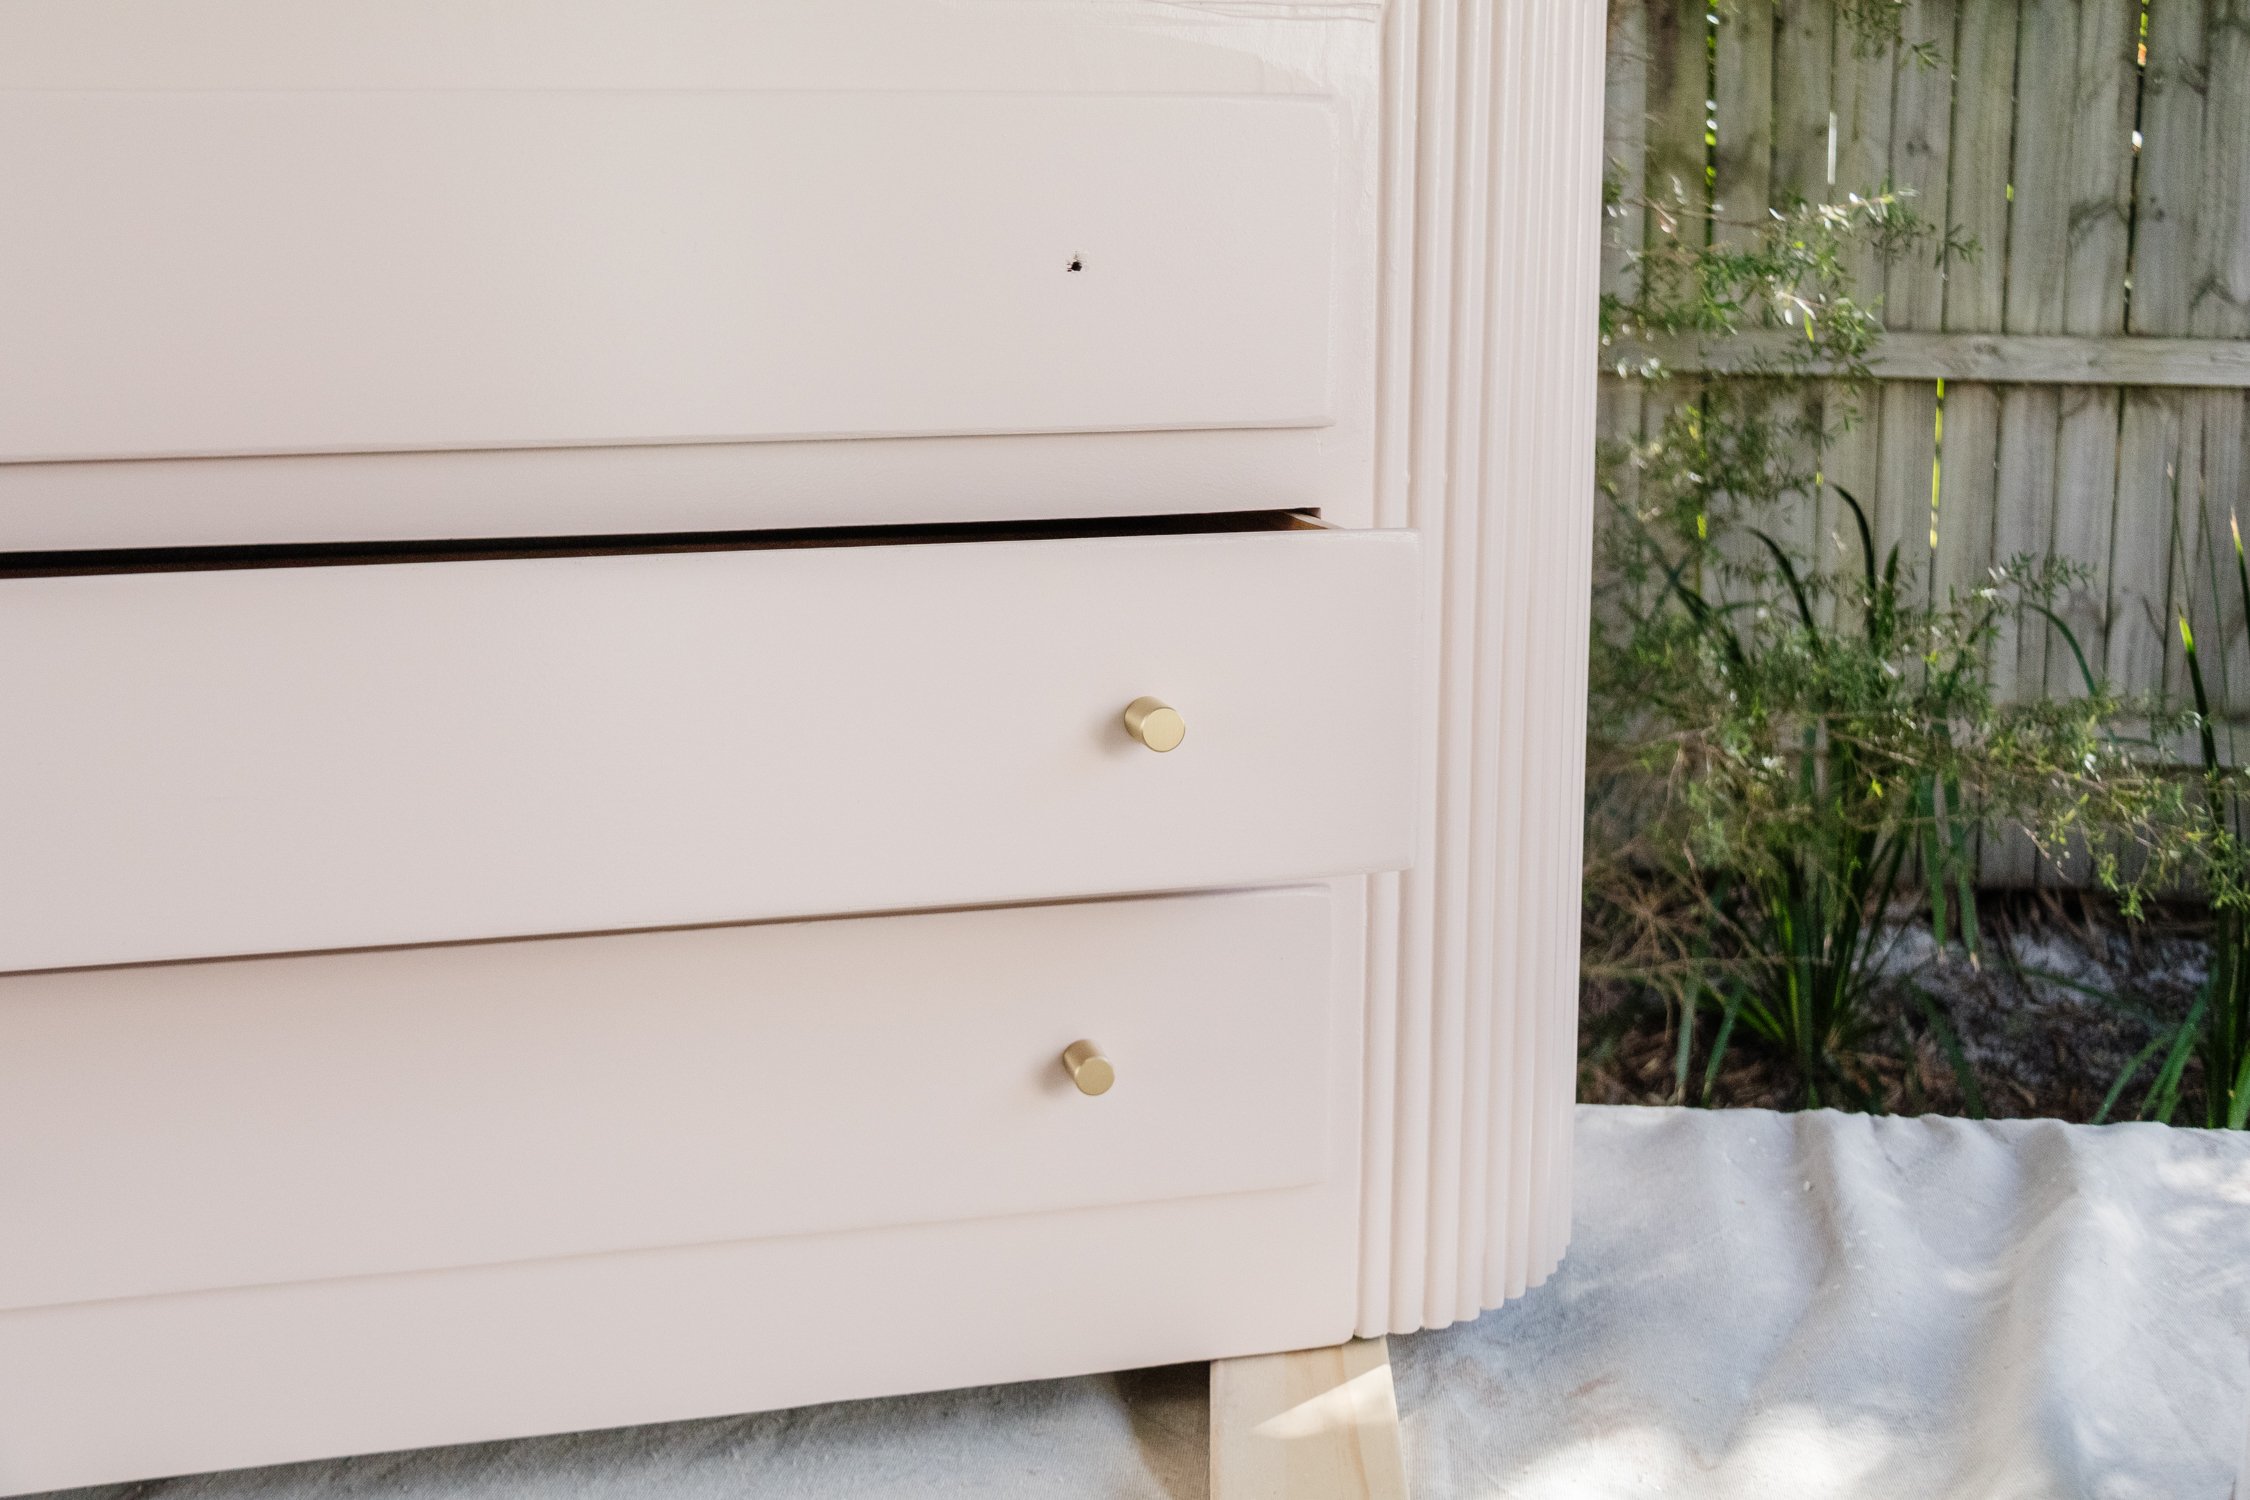
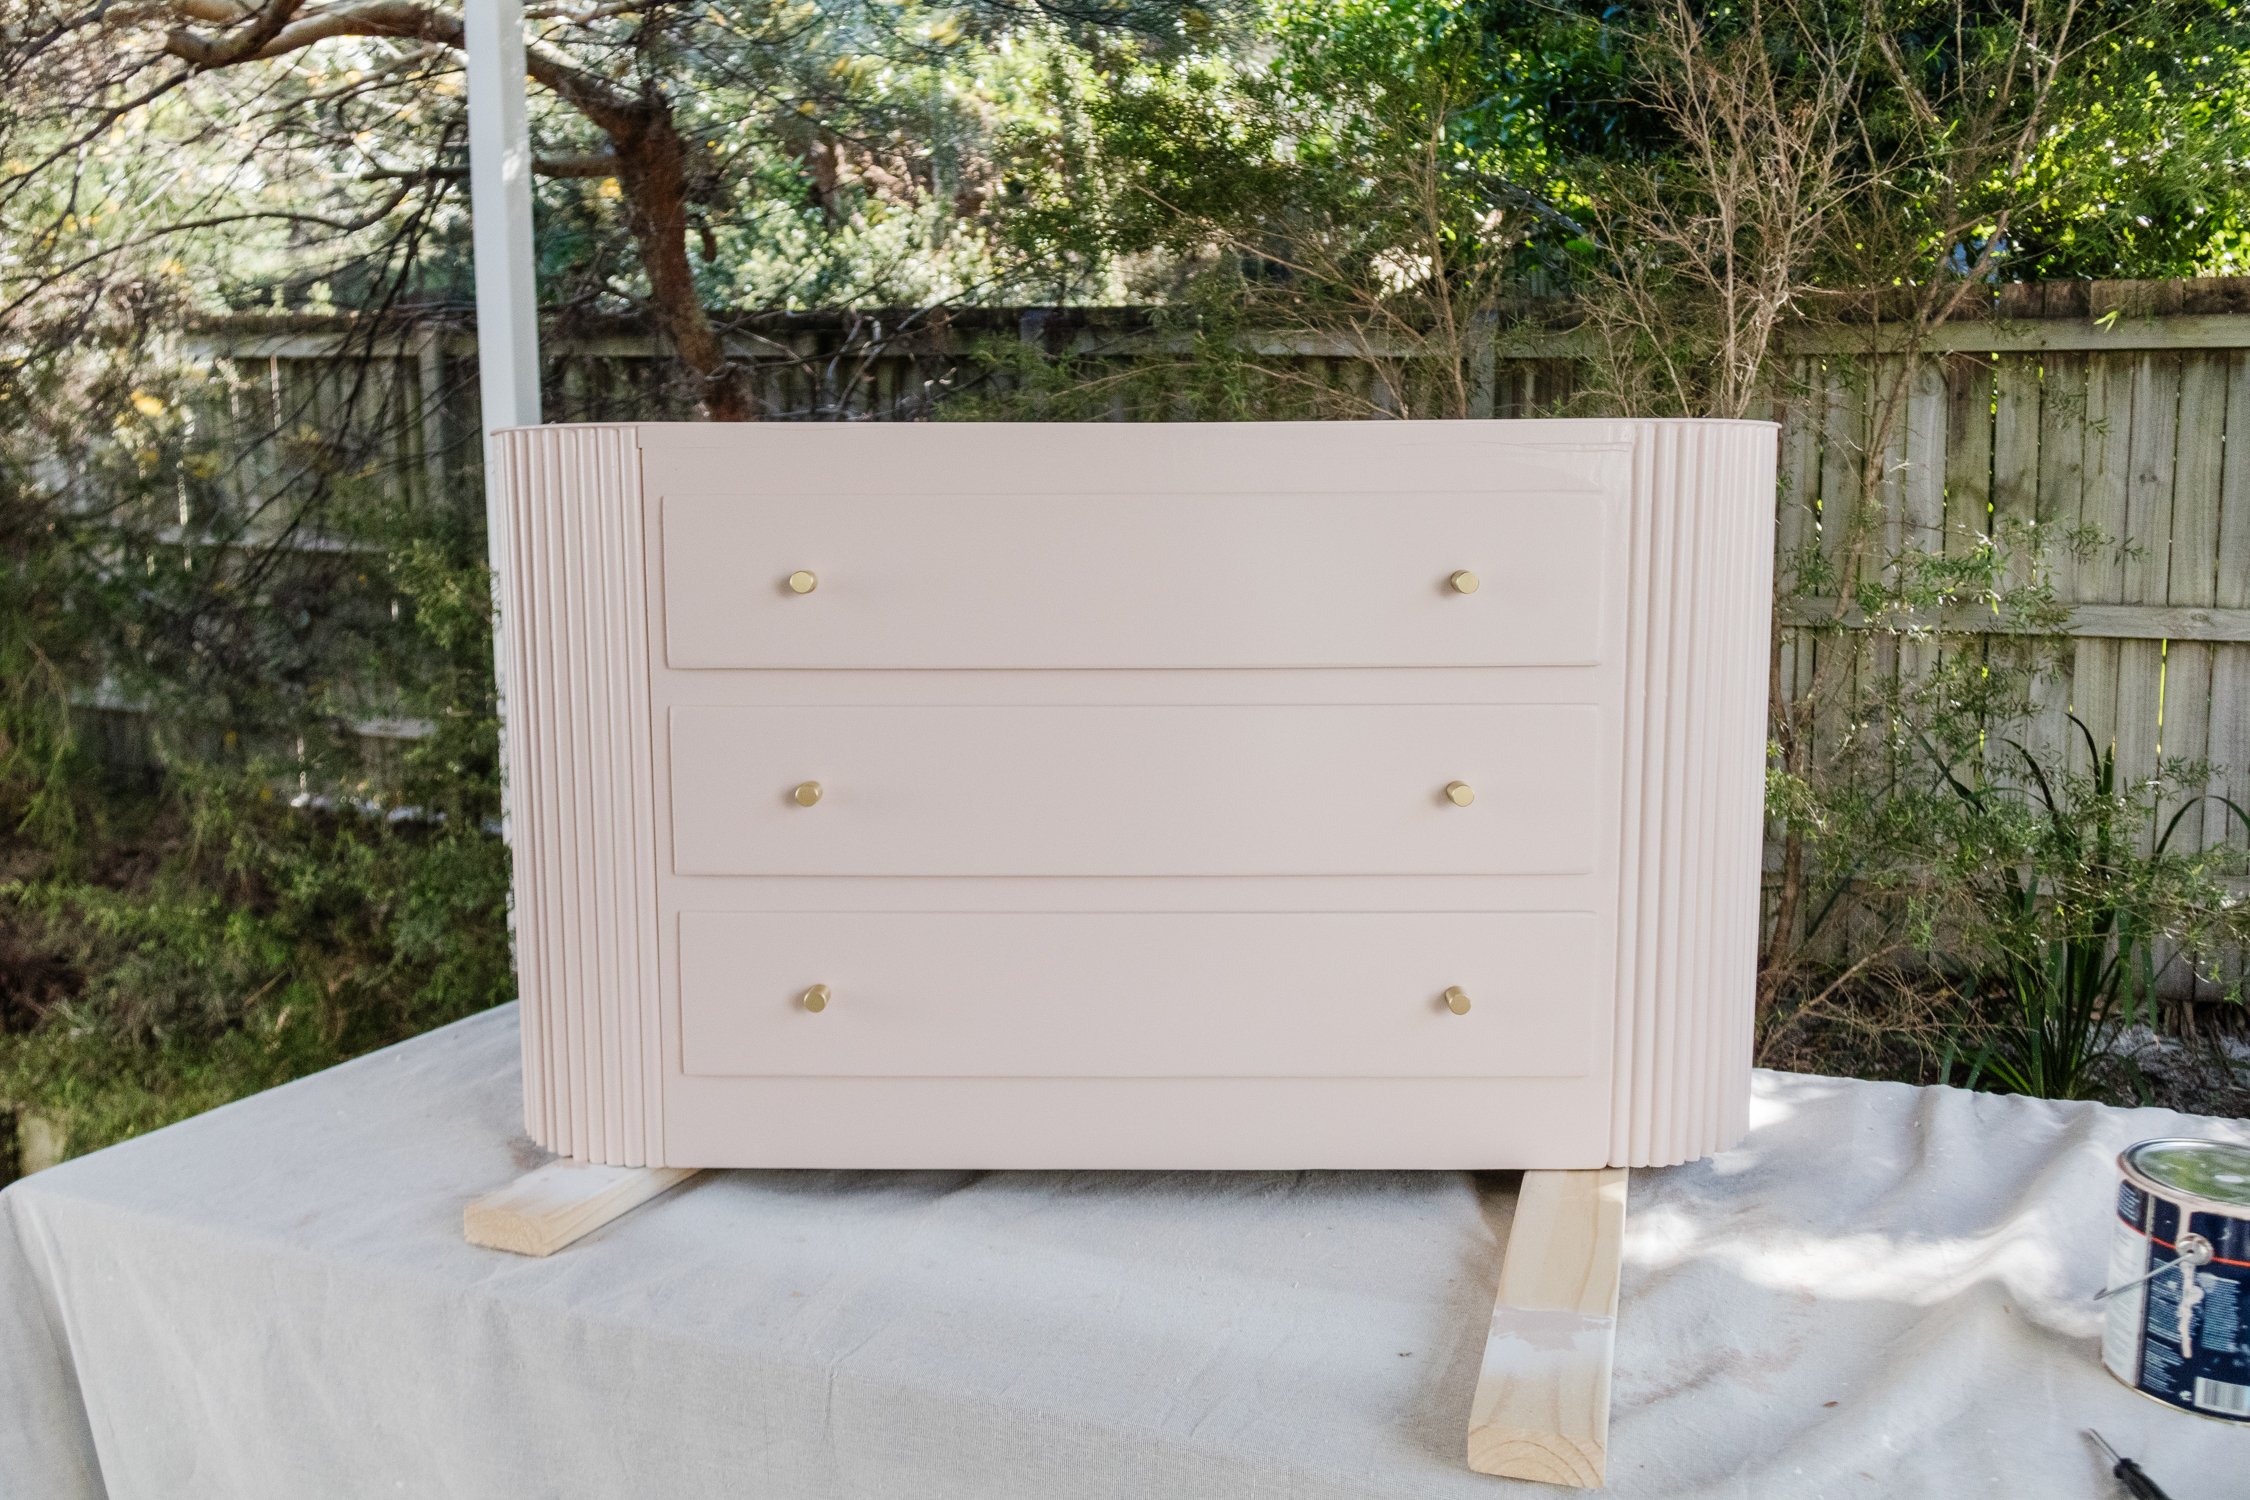

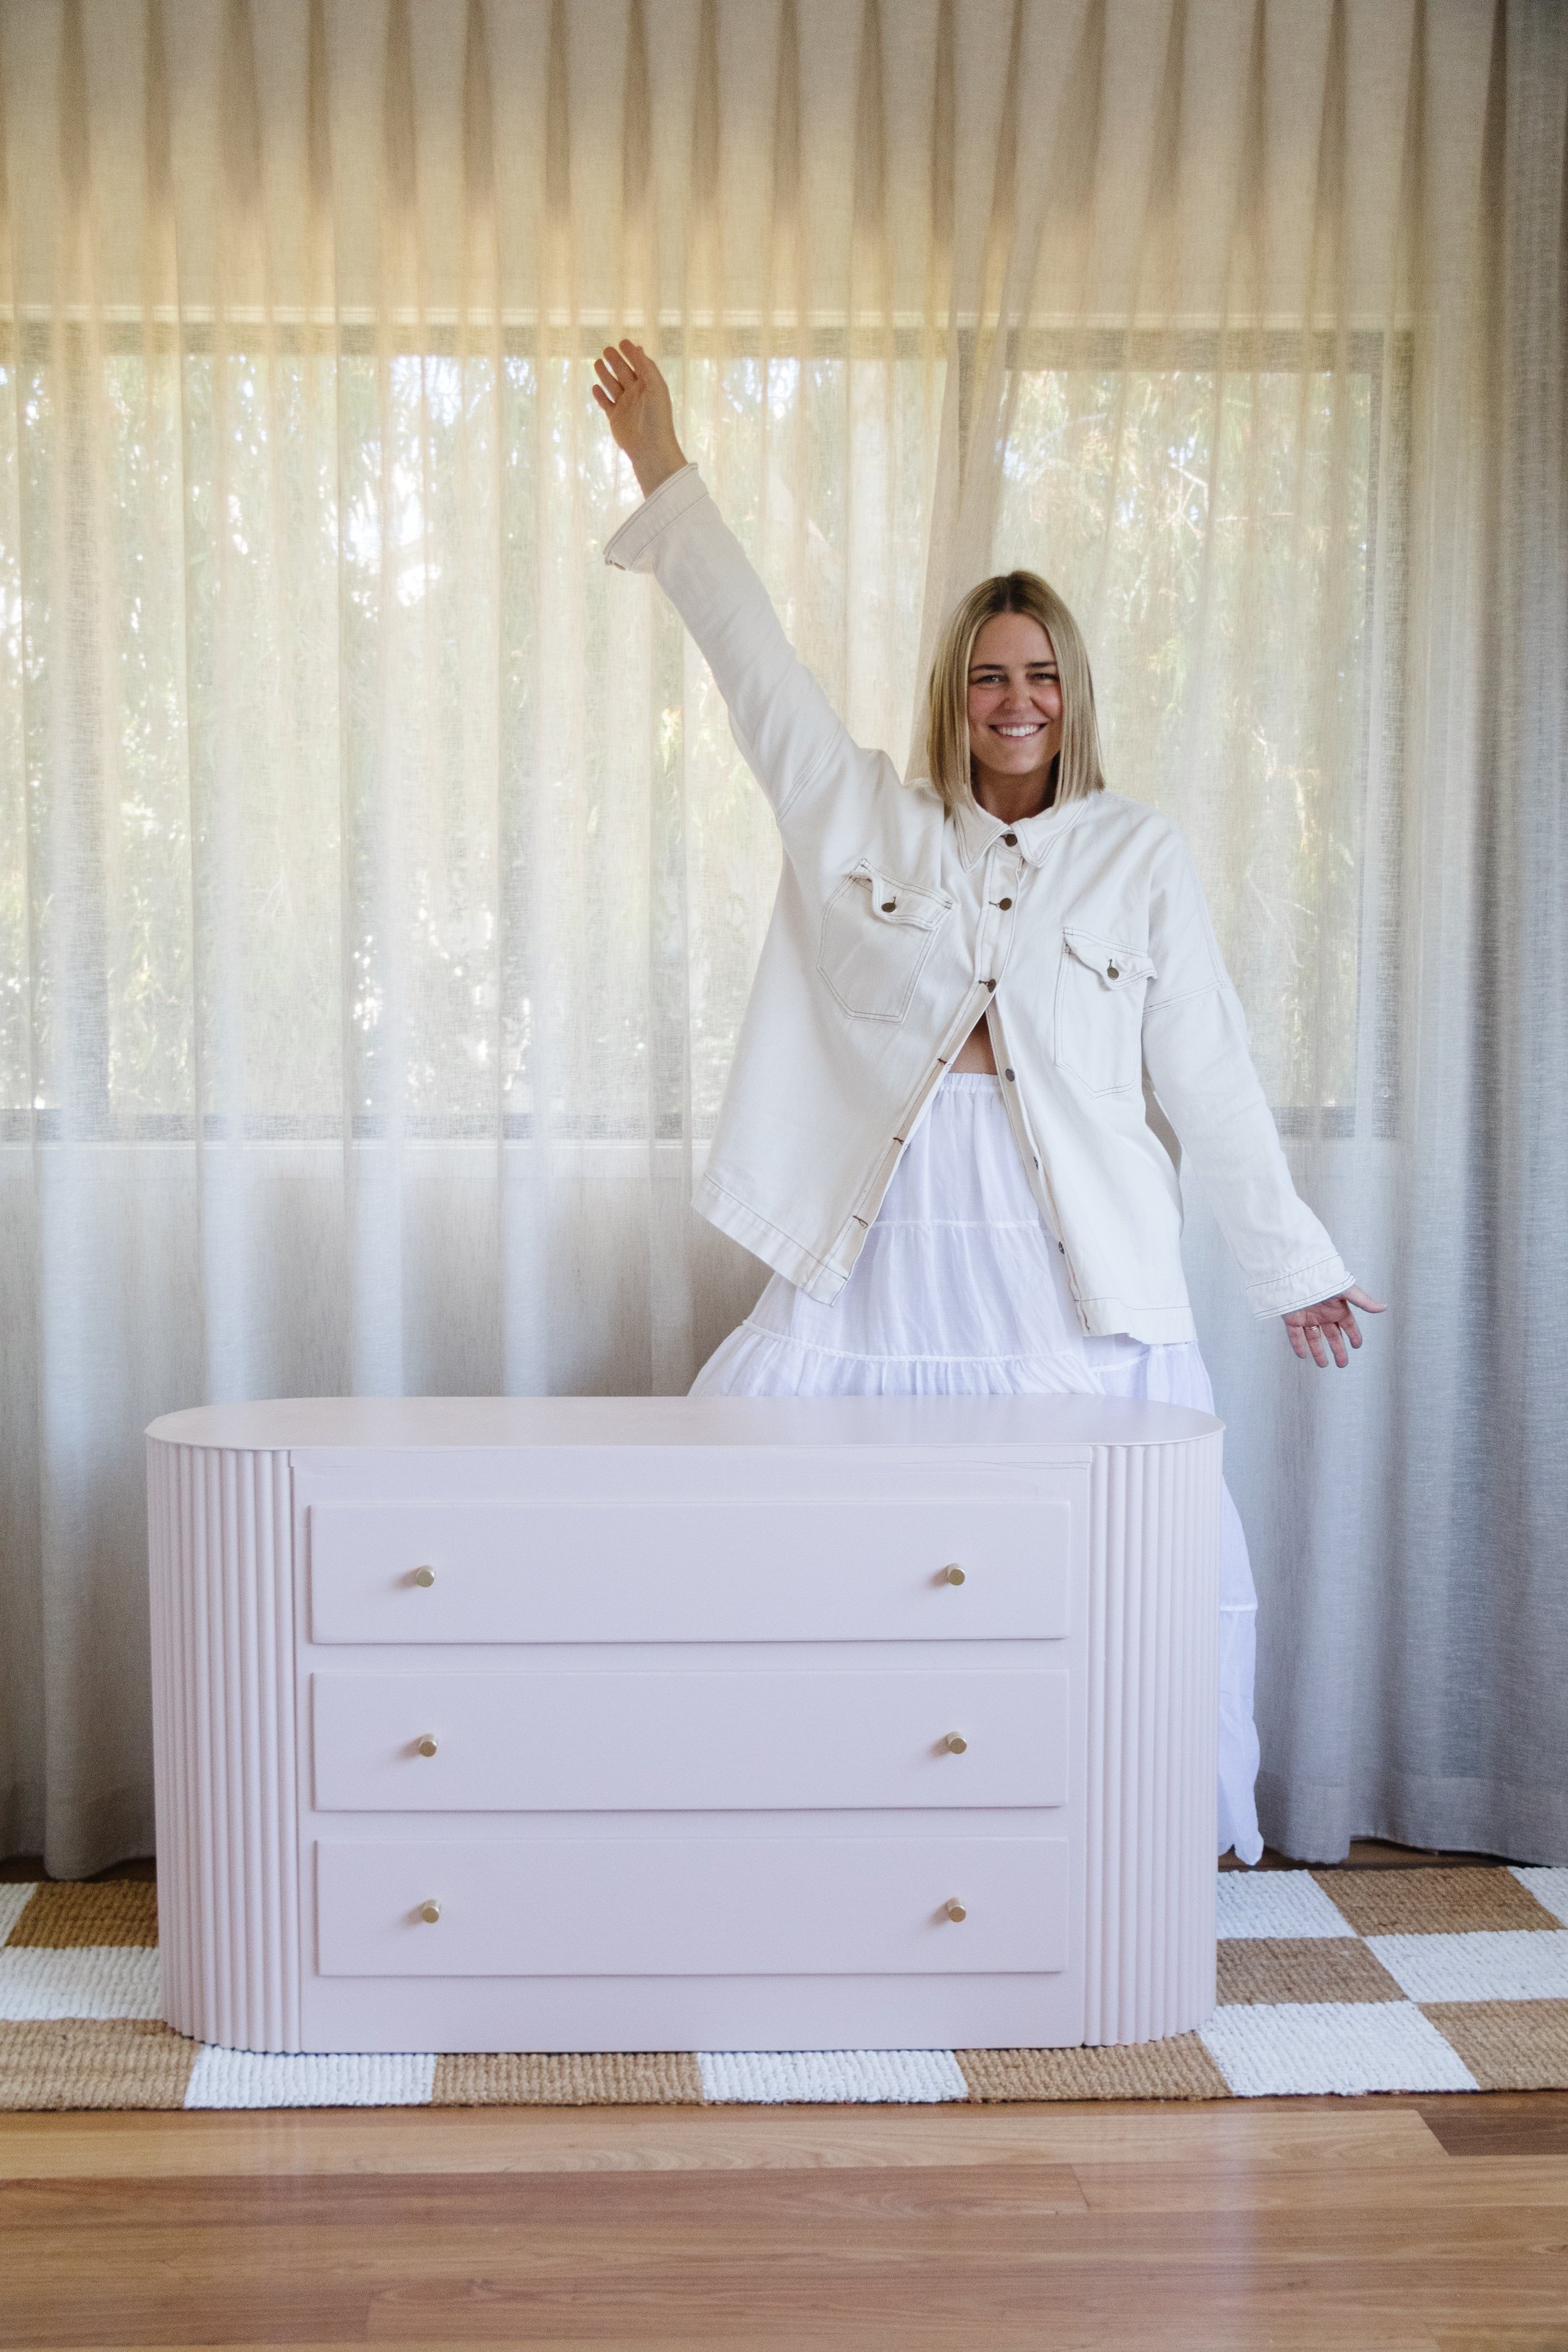
Ta daaaa! What a glow up - and for only $150!
I honestly cannot believe the transformation of this upcycle! I love creating a fluted finish and really enjoyed pushing ,myself to come up with an affordable alternative to using timber dowel, which in the end, meant I was able to keep the total project cost down. I took my time, absorbed myself in the process and loved flexing my creativity for this upcycle! And honestly, it never ceases to amaze me what you can create with a fluted detail! Speaking of which, make sure you check out these fluted projects:
And this is why I love what I do. I love helping you make your dream home for less. I hope this project inspires you to look at furniture for your home that’s out of your price range and think “how can I make it myself - for less?”.