DIY Texture Paint Vases
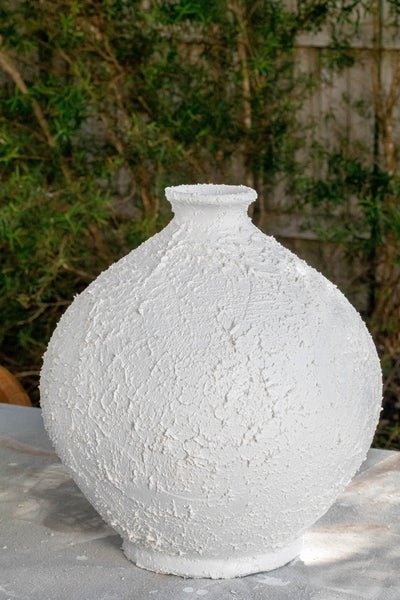
Hello! I am back again with another DIY project, my DIY Texture Paint Vases. I am always looks for unique ways to style our table at home and my love affair with transforming secondhand vases into something beautiful is still going strong. If you have been following along on Instagram, then you'll know I recently discovered Dulux's Texture Paint at Bunnings. I used it to finish the tabletop for my DIY Tiled Chubby Side Table and my DIY Wavy Mirror, so I couldn't resist seeing if it worked on a clay vase I had at home. It had a very ugly pattern etched onto one side and I always used to turn it around so you couldn't see it. I applied the Texture Paint, touched it up with a bit of spray paint and here we are! I love tis project because you don't need a lot of materials, it's fast and the final result is just gorgeous. You can also tint the colour of the Texture Paint by adding acrylic paint in a colour of your choice. So much fun! Read on to find out how you can create your own DIY Texture Paint Vases.
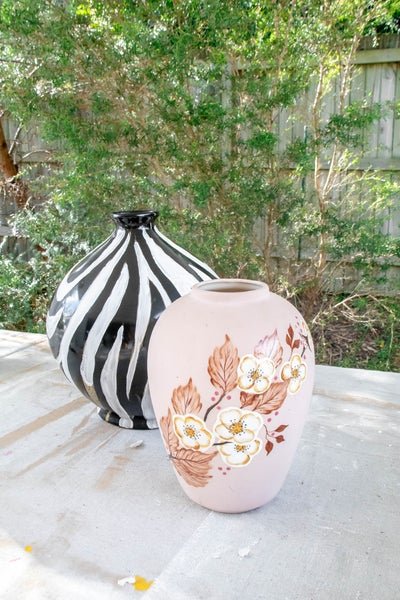
Before & After
Materials
Clean cloth
White spray paint
Dulux Texture Paint in Medium - available from Bunnings
Second hand vase (or a new one)
Paintbrush
How To
Wipe down the surface of the vase so it's clean.
Spray the entire surface of the vase with white spray paint. Set aside to dry.
Apply one layer of the texture paint all over the vase. Don't be scant with the paint, use as much as you like because it goes a long way. Set aside to dry.
Apply another layer of the texture paint and experiment with the brush strokes to get a finish you are satisfied with. Set aside to dry.
And there you have it!
This would have to be the easiest project I've ever done. And that's why I love it so much! You can use a vase lying around at home or hit up your local charity shops to see what you can find for a steal. This texture paint literally covers up anything, so don't be shy when buying the ugliest vase ever.
Extra Tips
I would apply one coat of white spray paint before you use the texture paint. This ensure you're completely covering the existing vase but also means if you decided to tint the texture paint with coloured acrylic paint, it'll really pop!
I have used the bucket of Dulux Texture Paint across several projects, including my DIY Wavy Mirror and my DIY Tiled Chubby Side Table, and I am not even close to finishing it. It really goes a long way so don't be put off by the price.
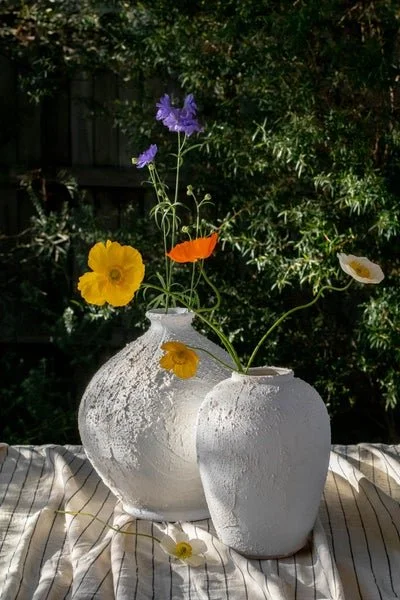
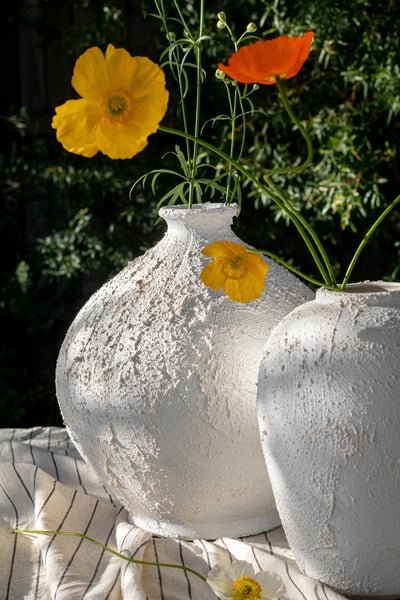
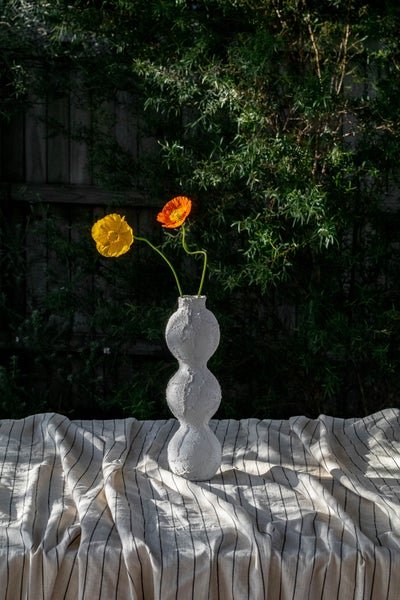
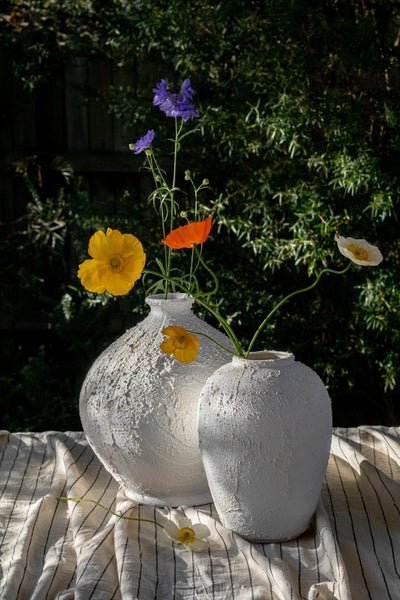
These vases are perfect for styling inside your home, your table and also your outdoor table.
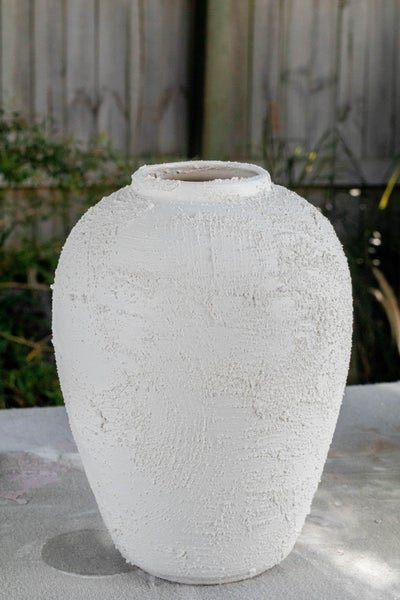
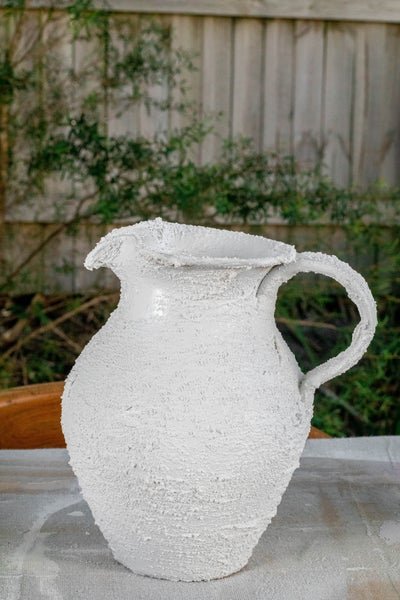
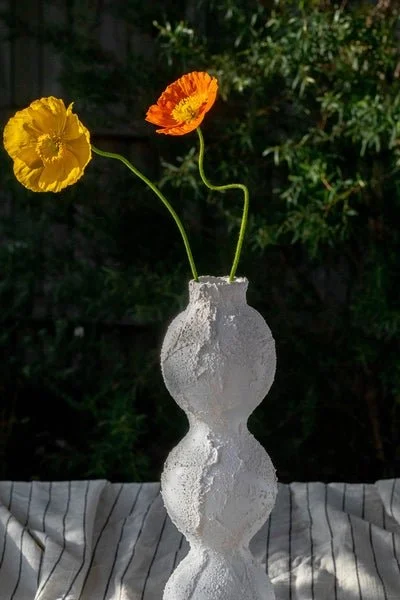
The Finishes
For this project I decided to experiment with different finishes and brush strokes - just for fun! I was surprised at how much different they looked. See below.
Left: Tapping the texture paint with the flat side of a paint brush.
Right: Quick strokes of the paint brush with lots of texture paint.
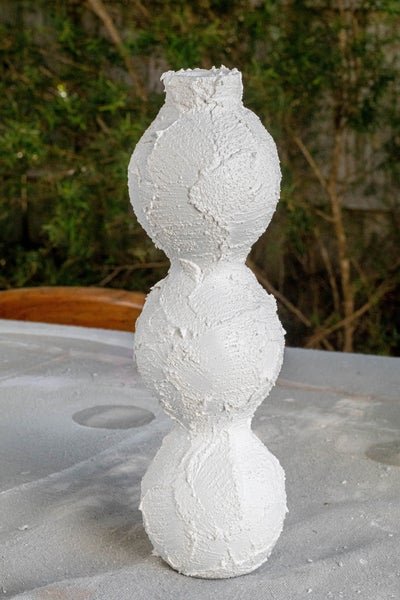
Left: Less texture paint used with long paint strokes.
Right: Lots of texture paint applied to the vase then patted with a sponge.