DIY Arched Wall Library
What do you do when dream of having an arched wall library in your home? You hack robe inserts from Bunnings and make it!
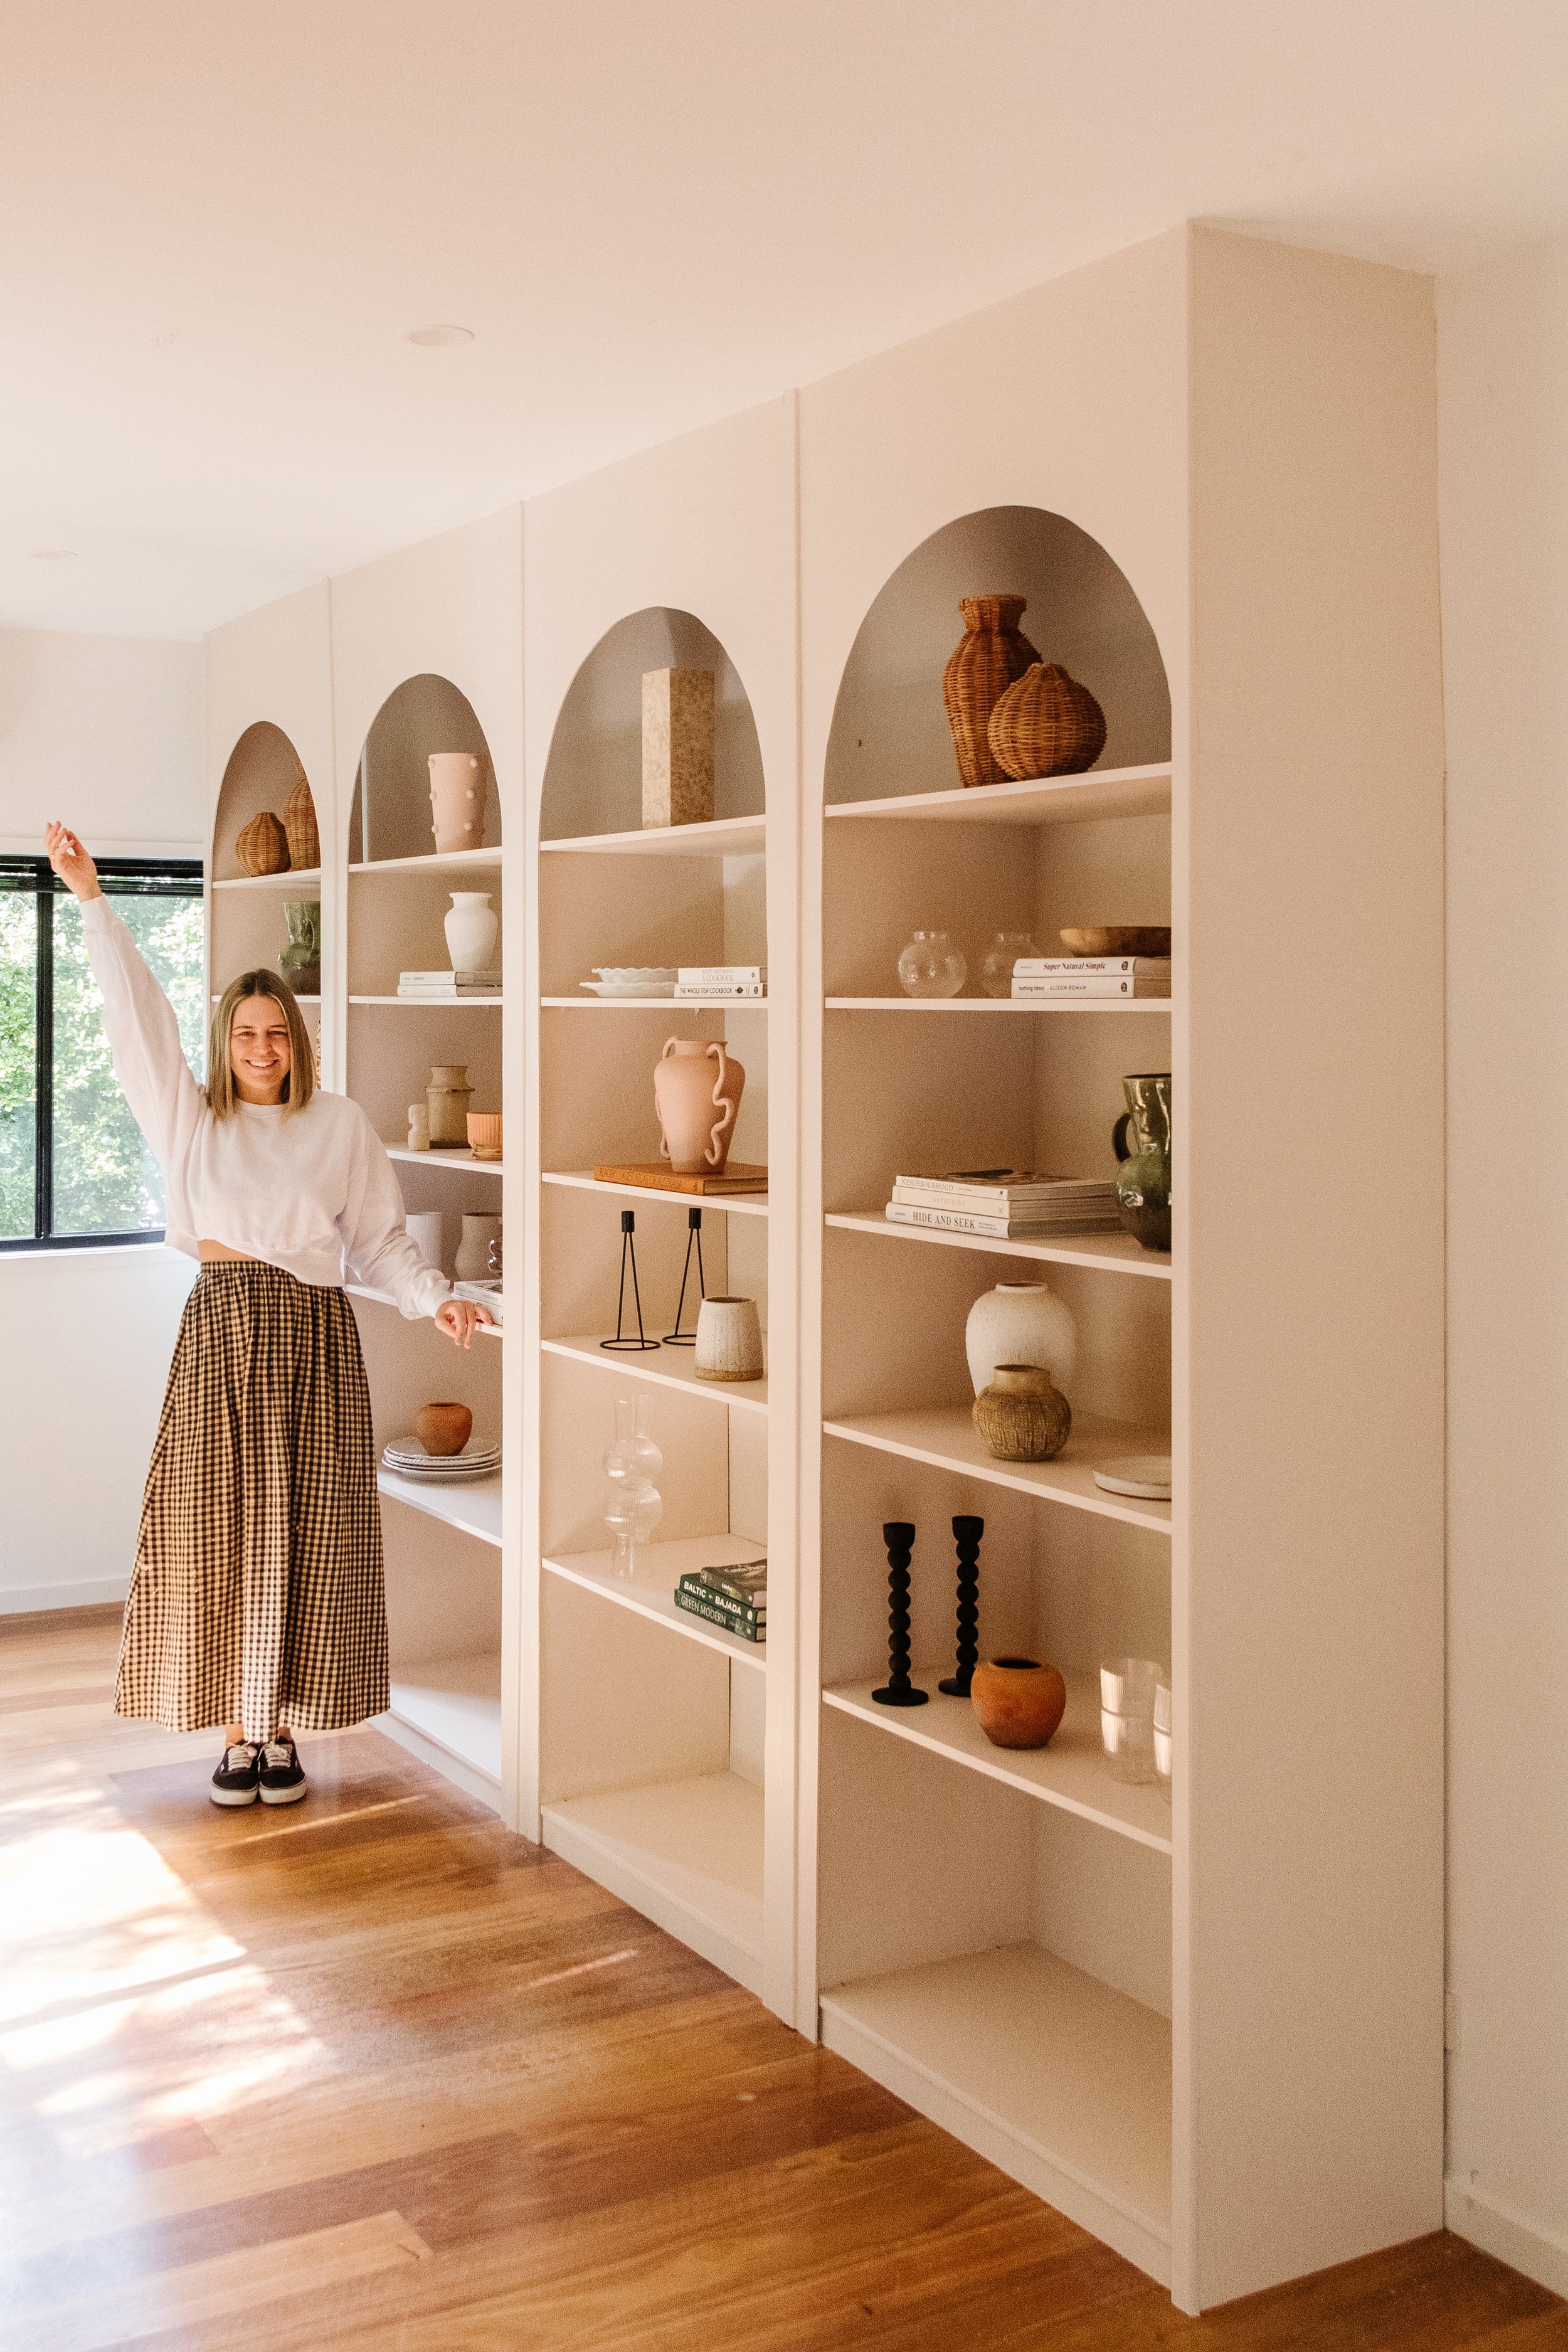
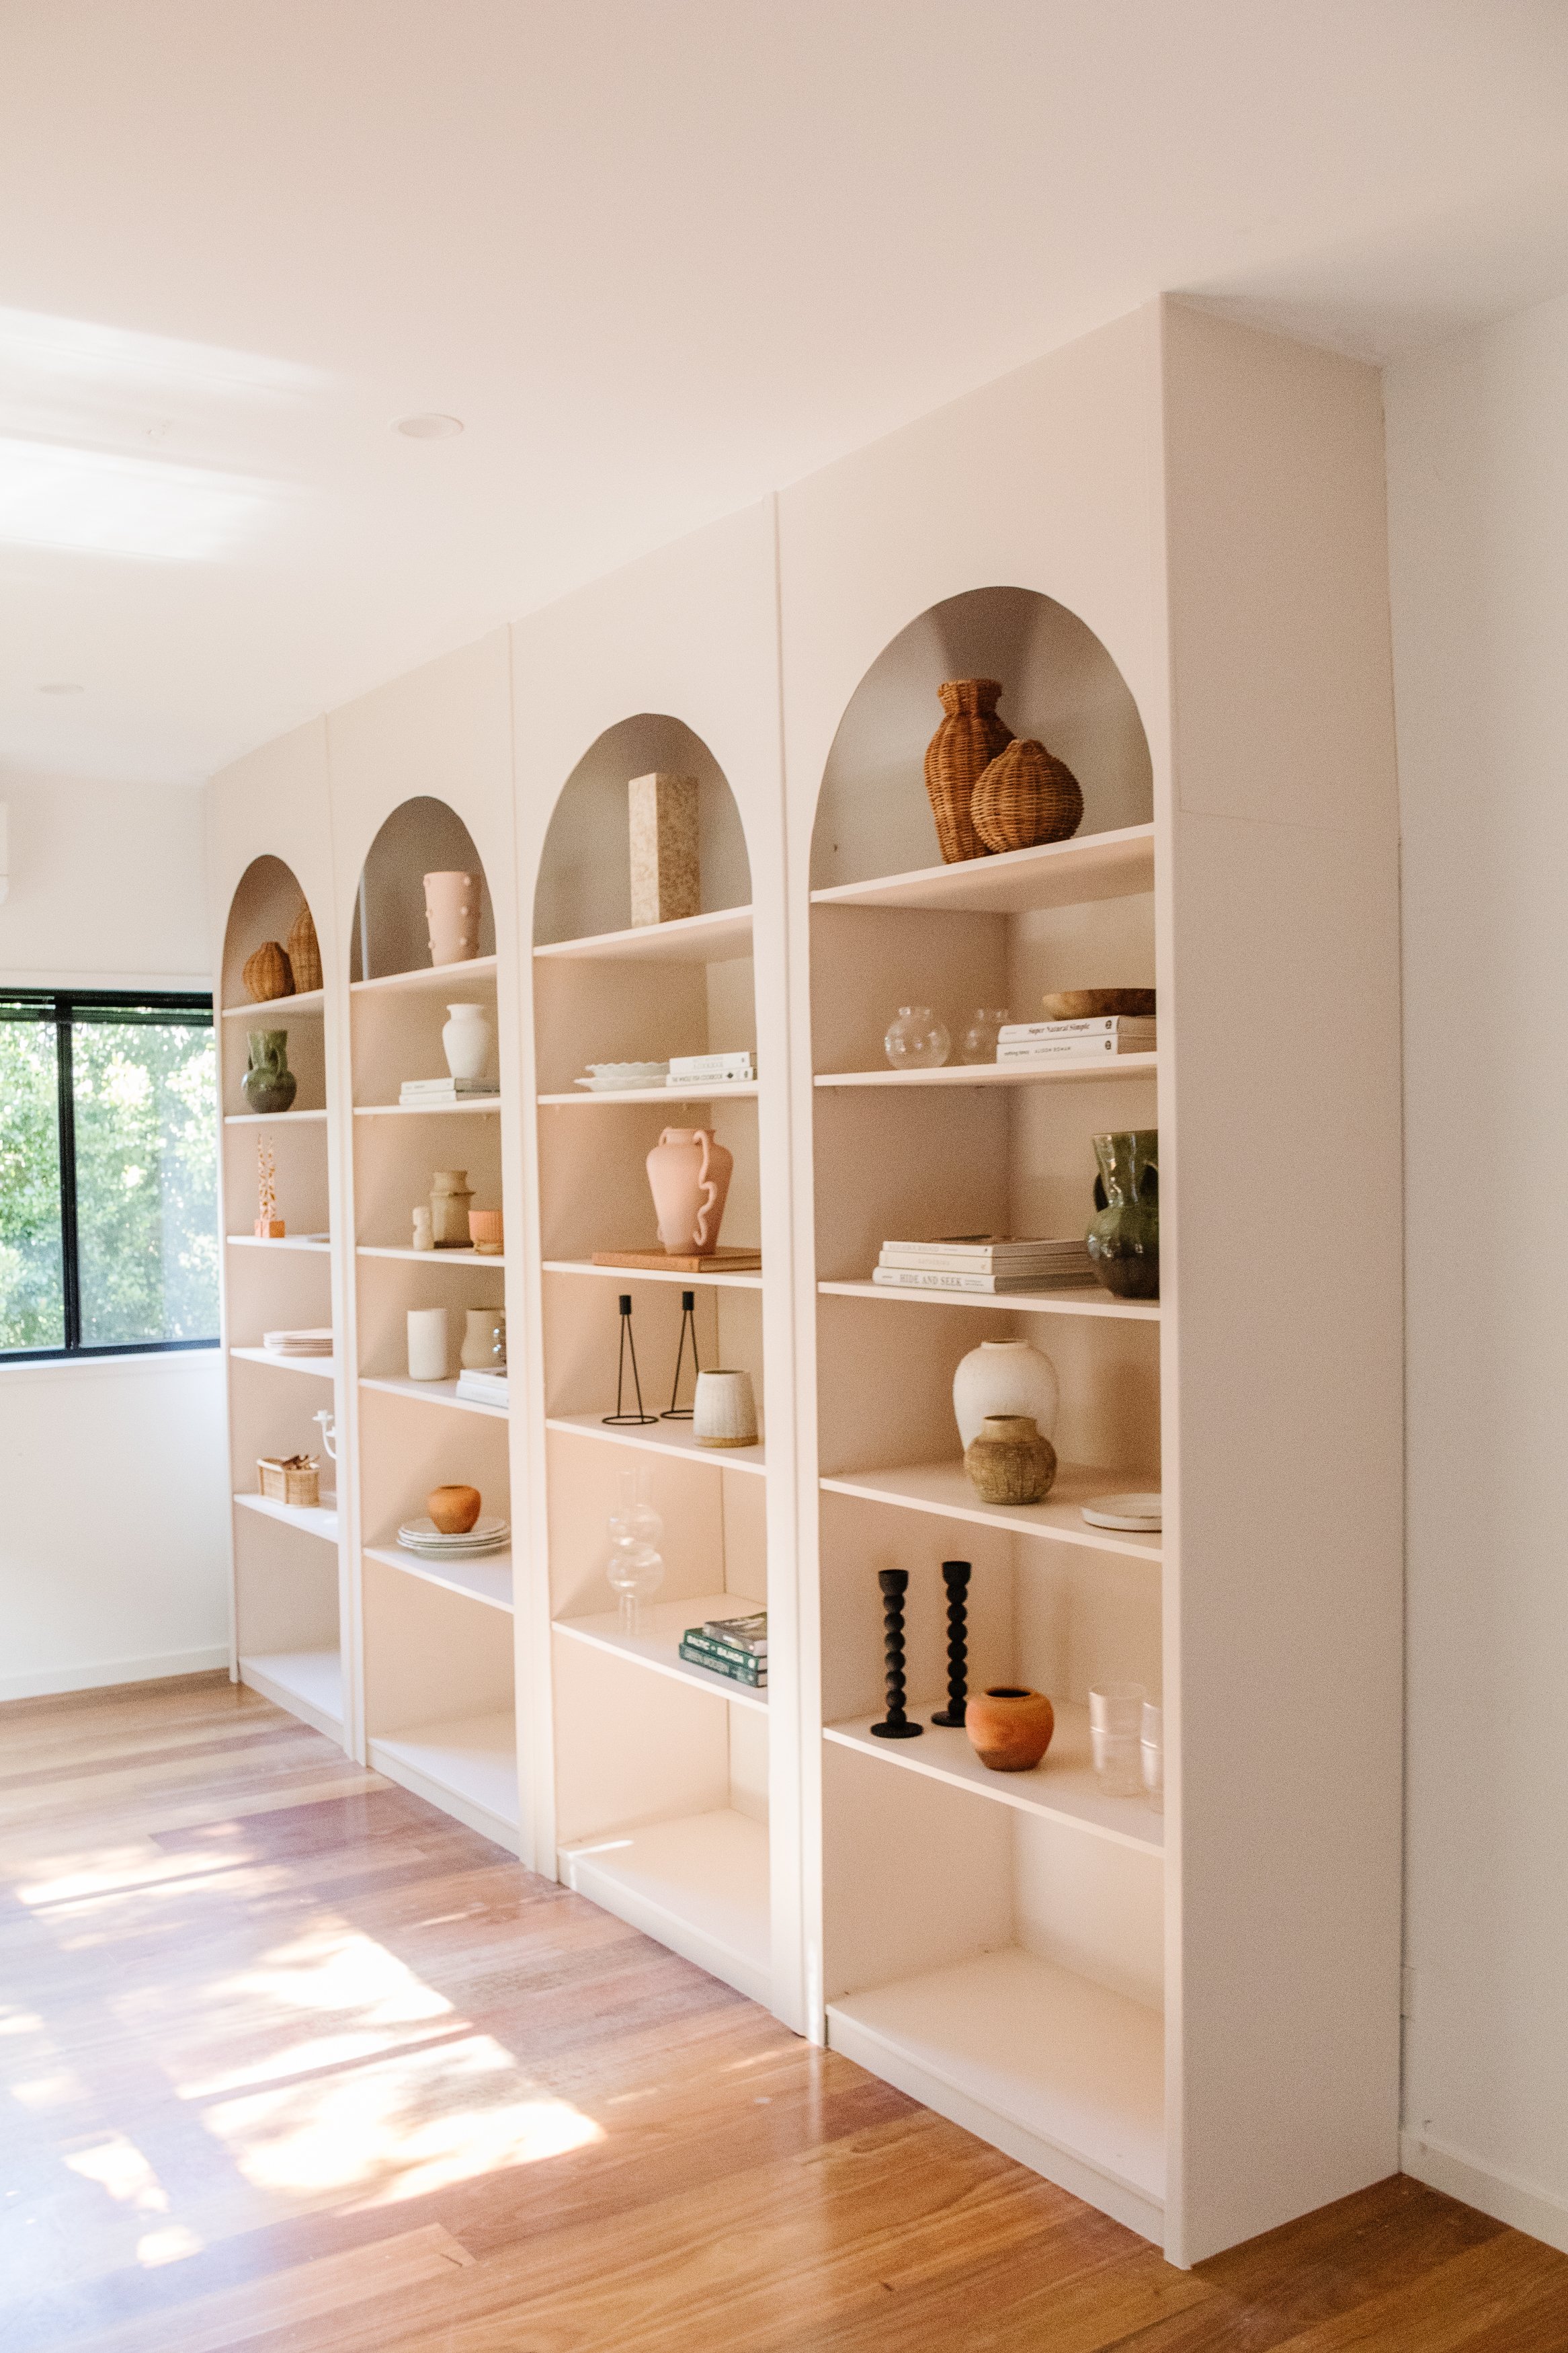
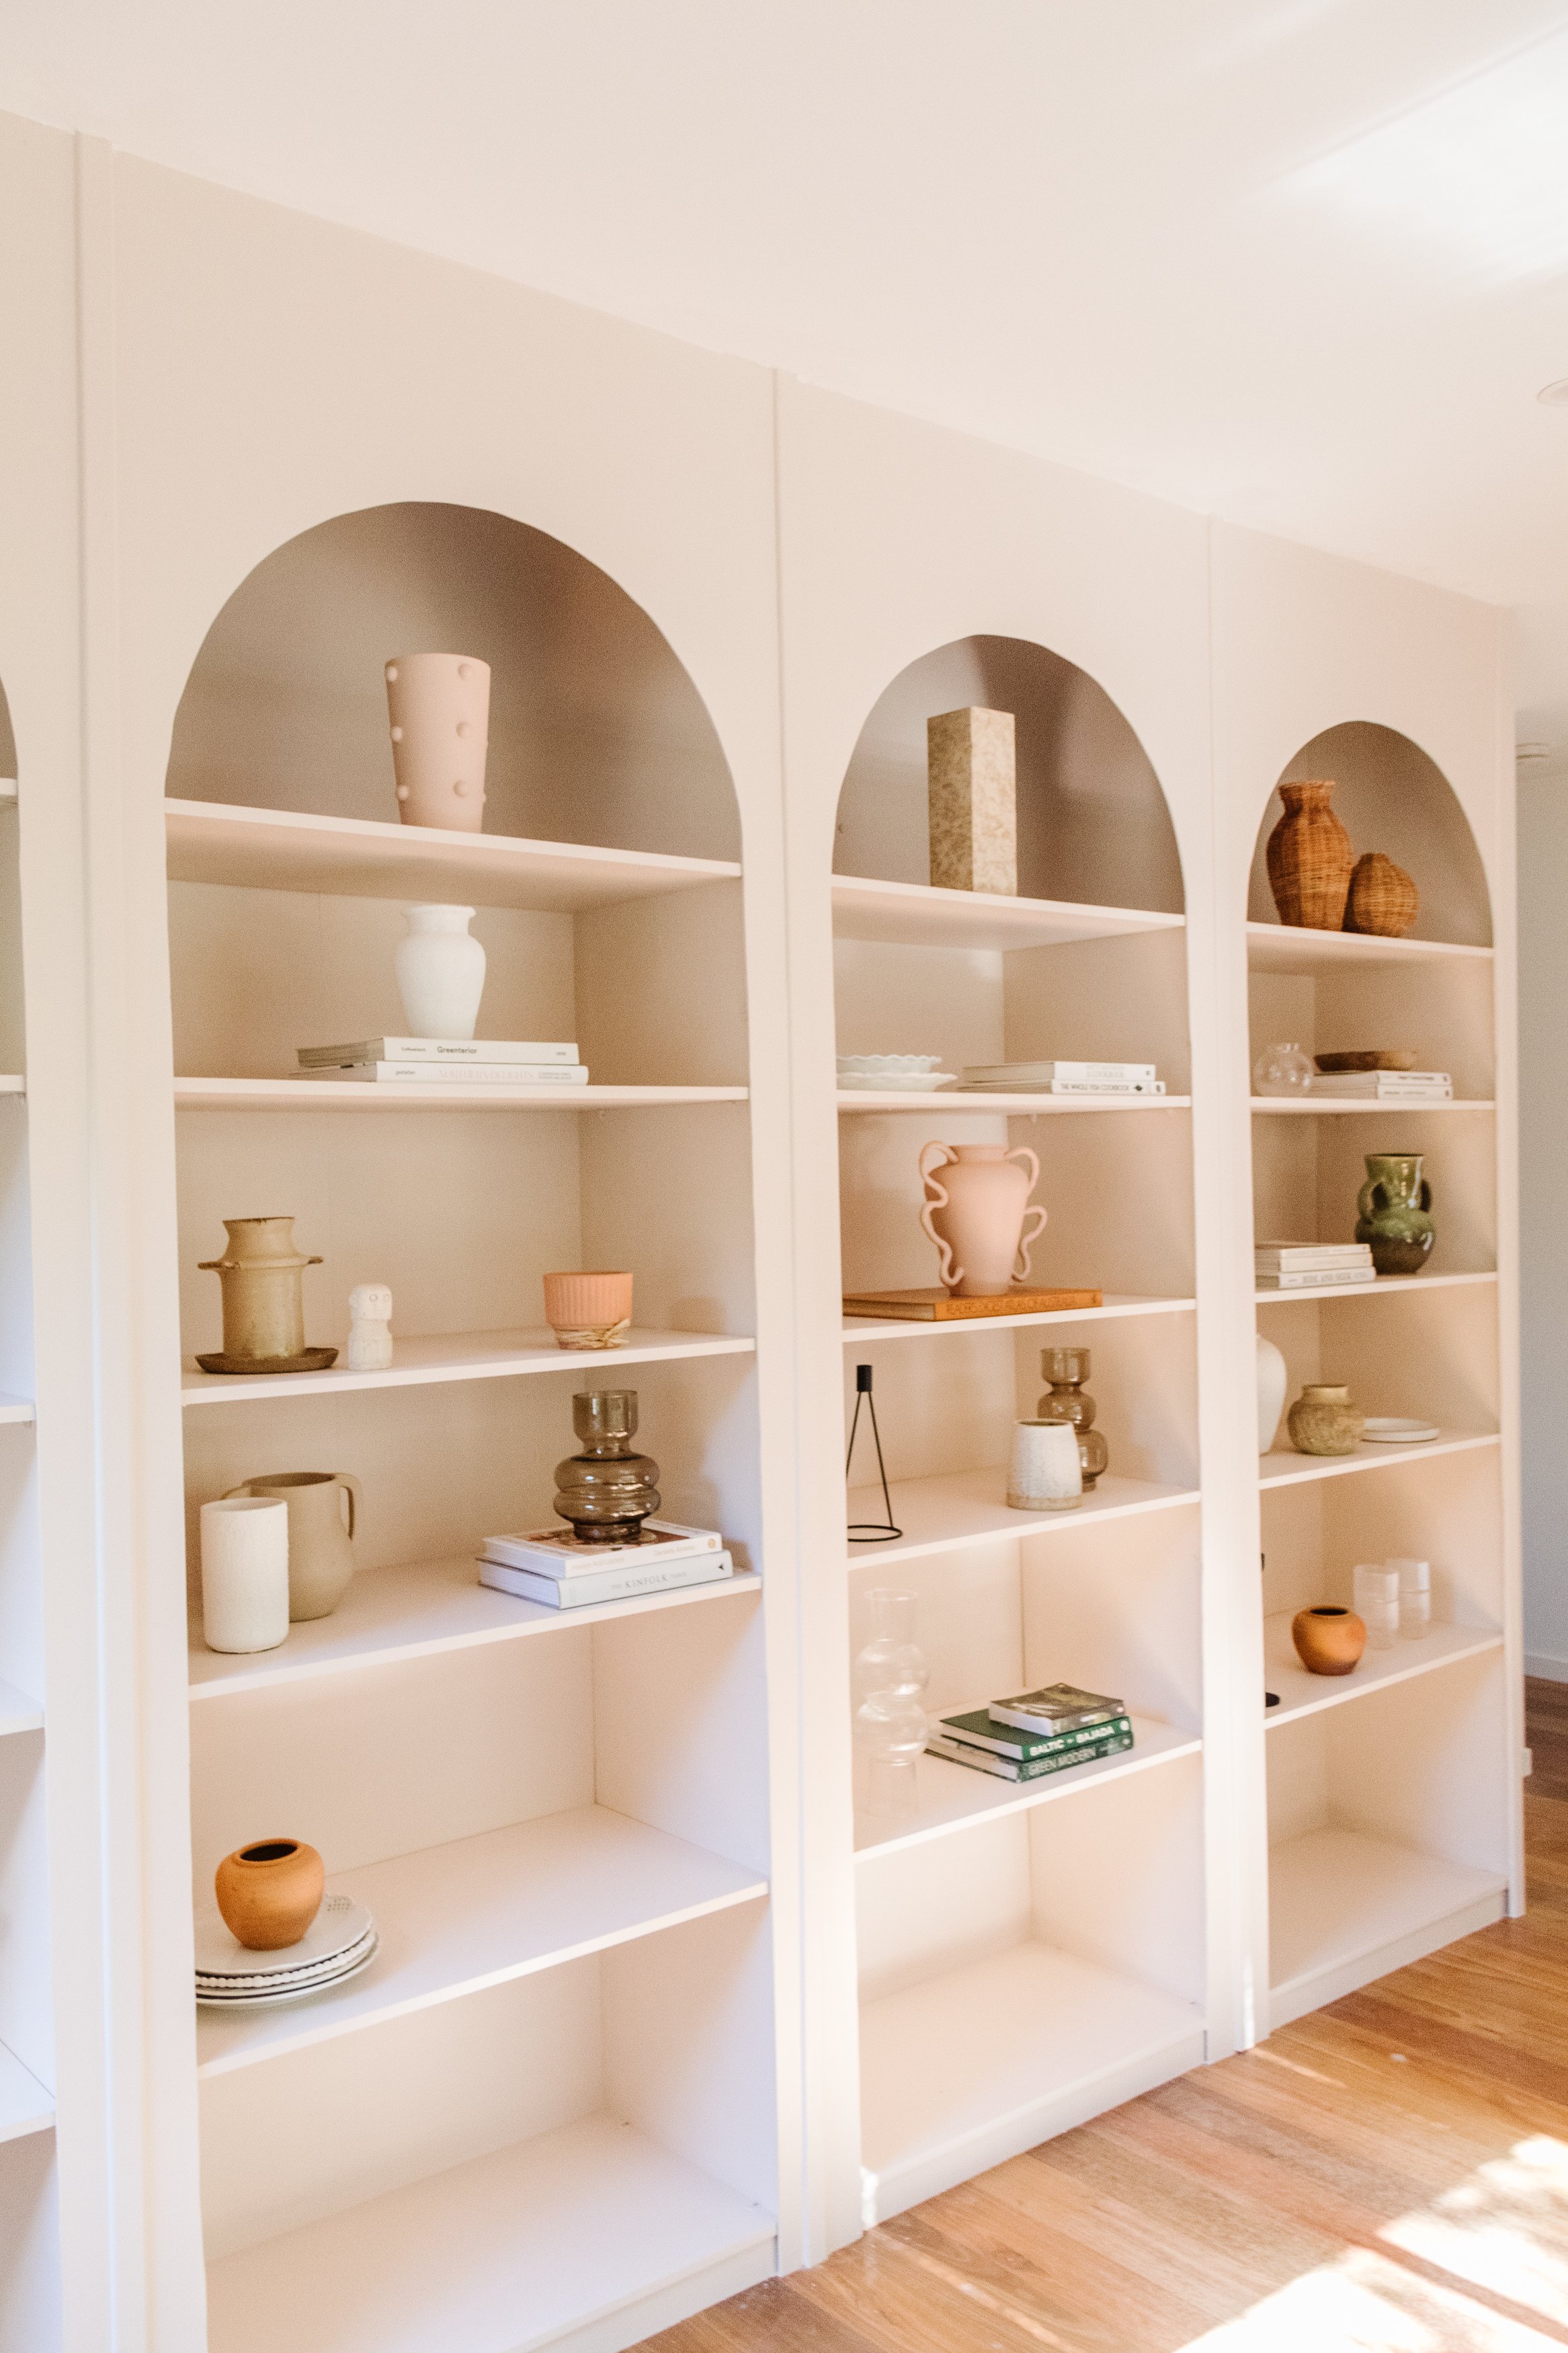
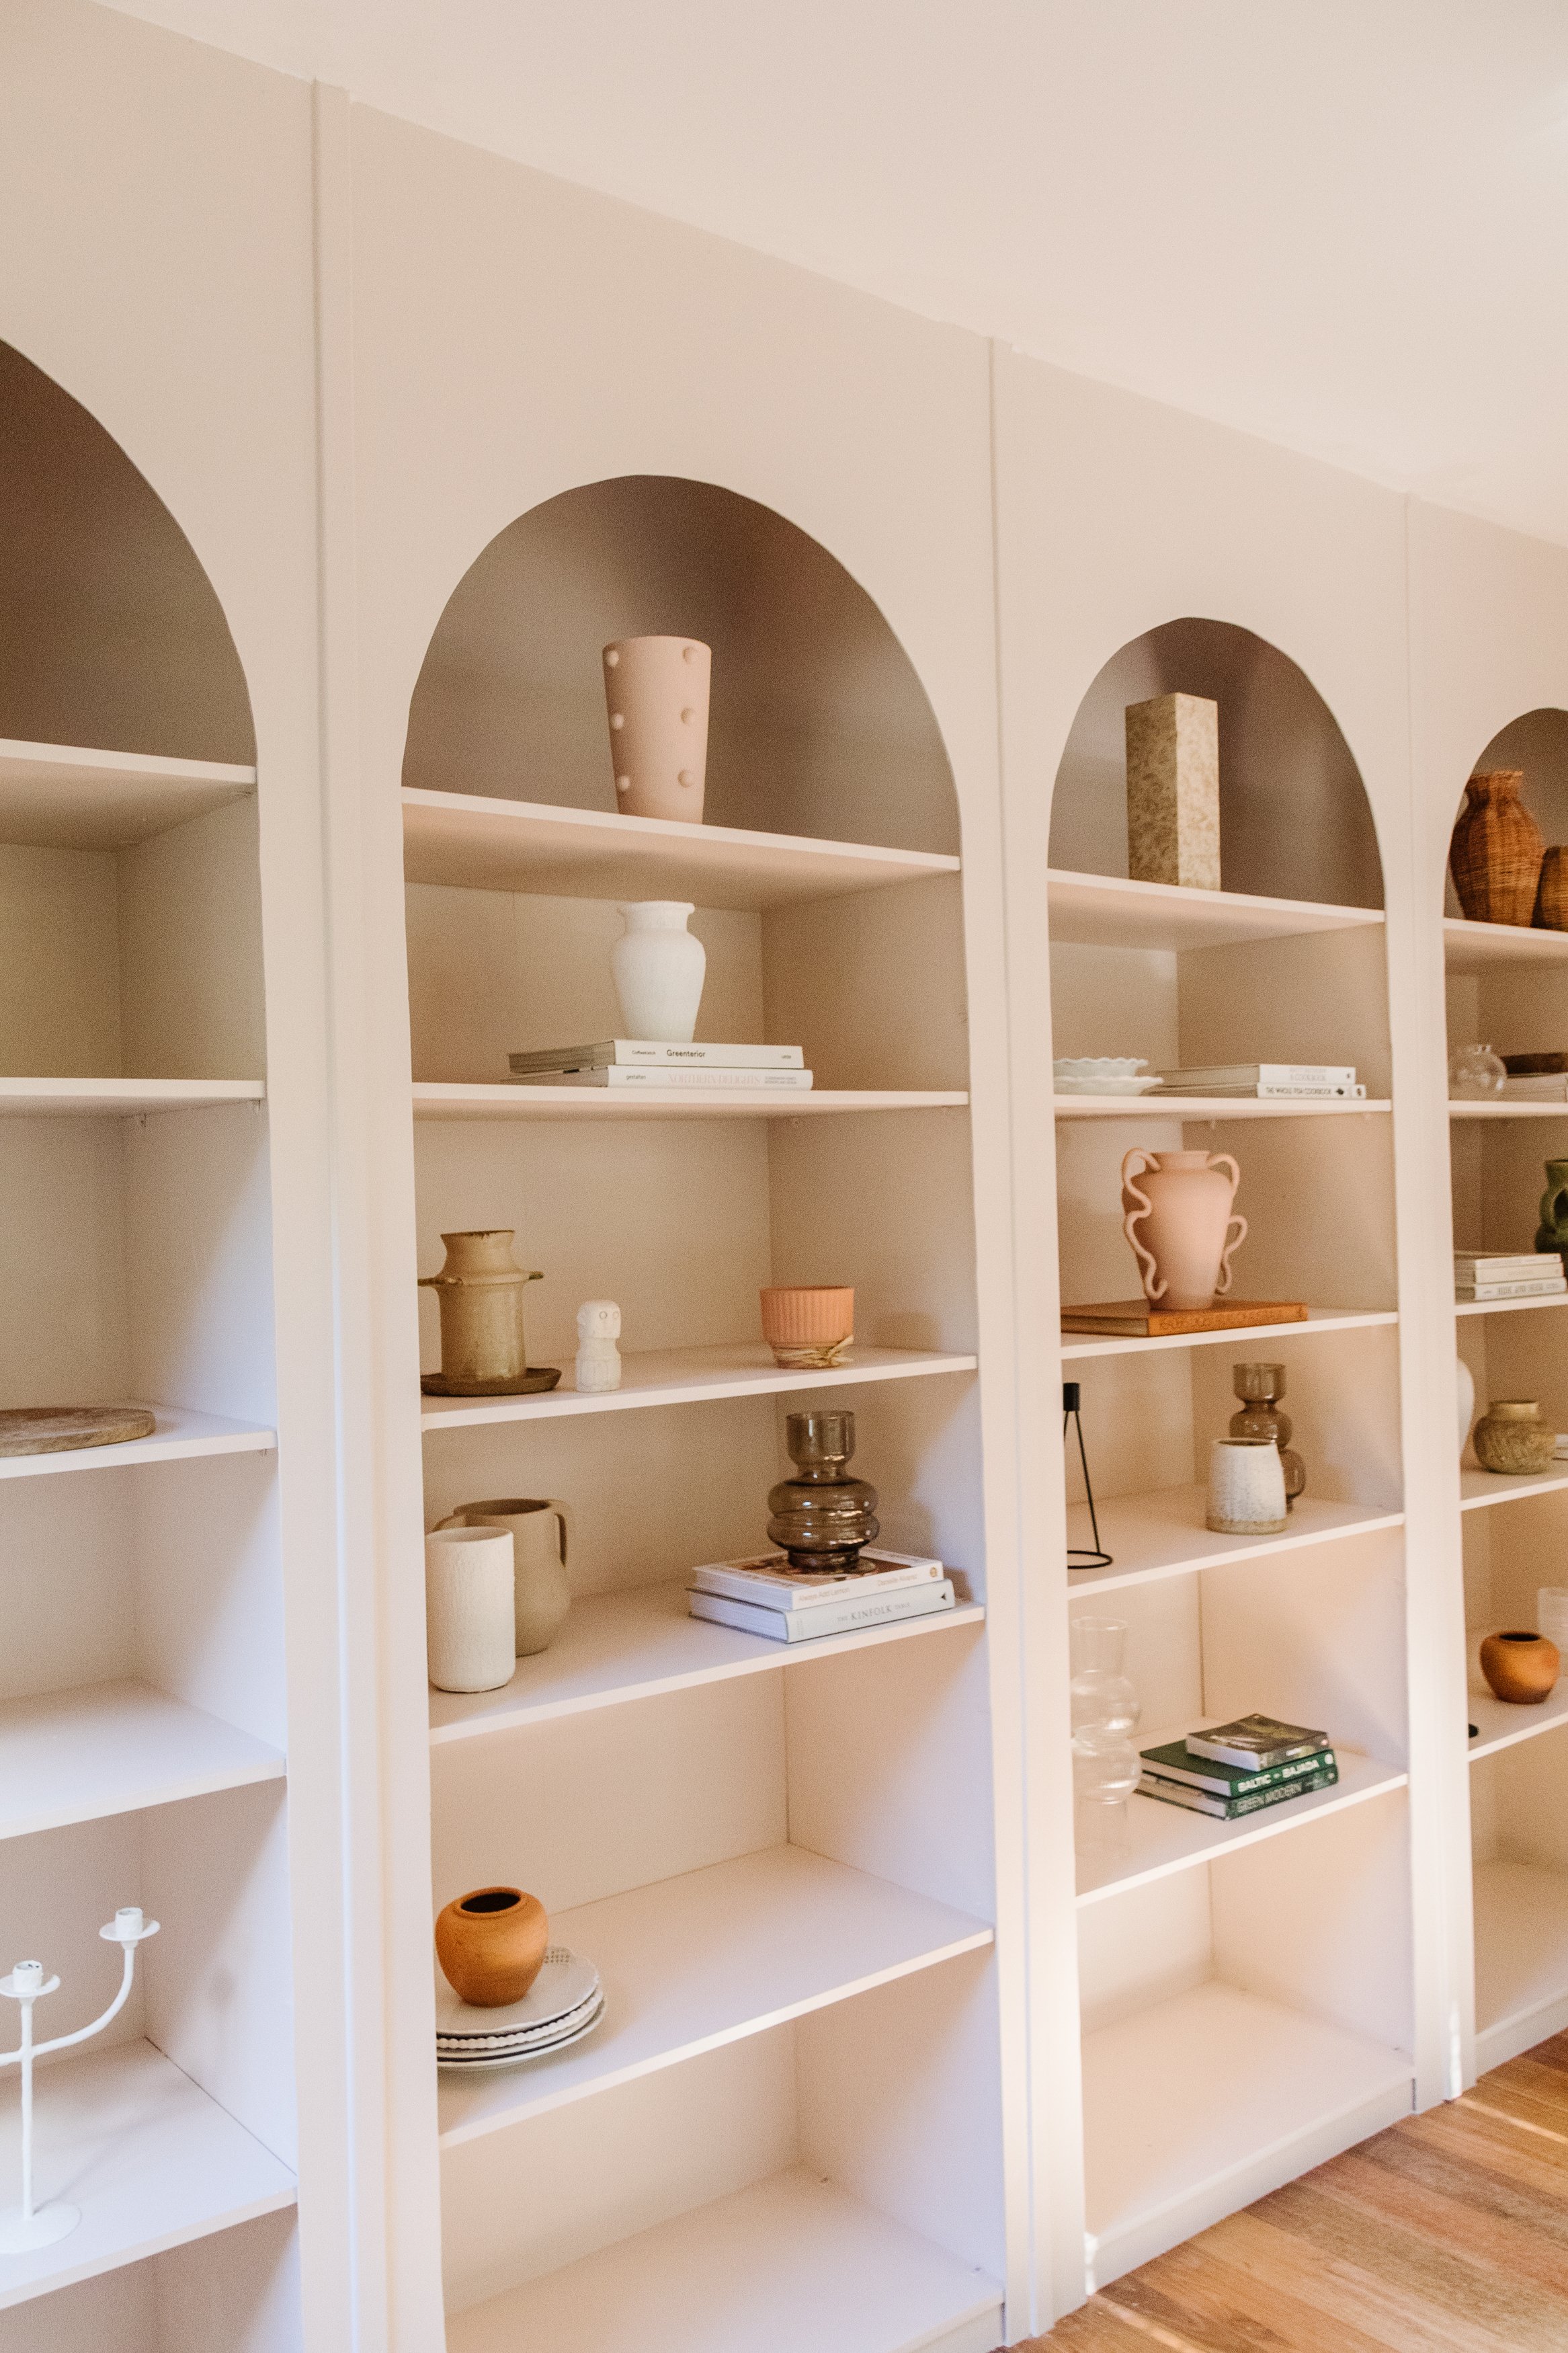
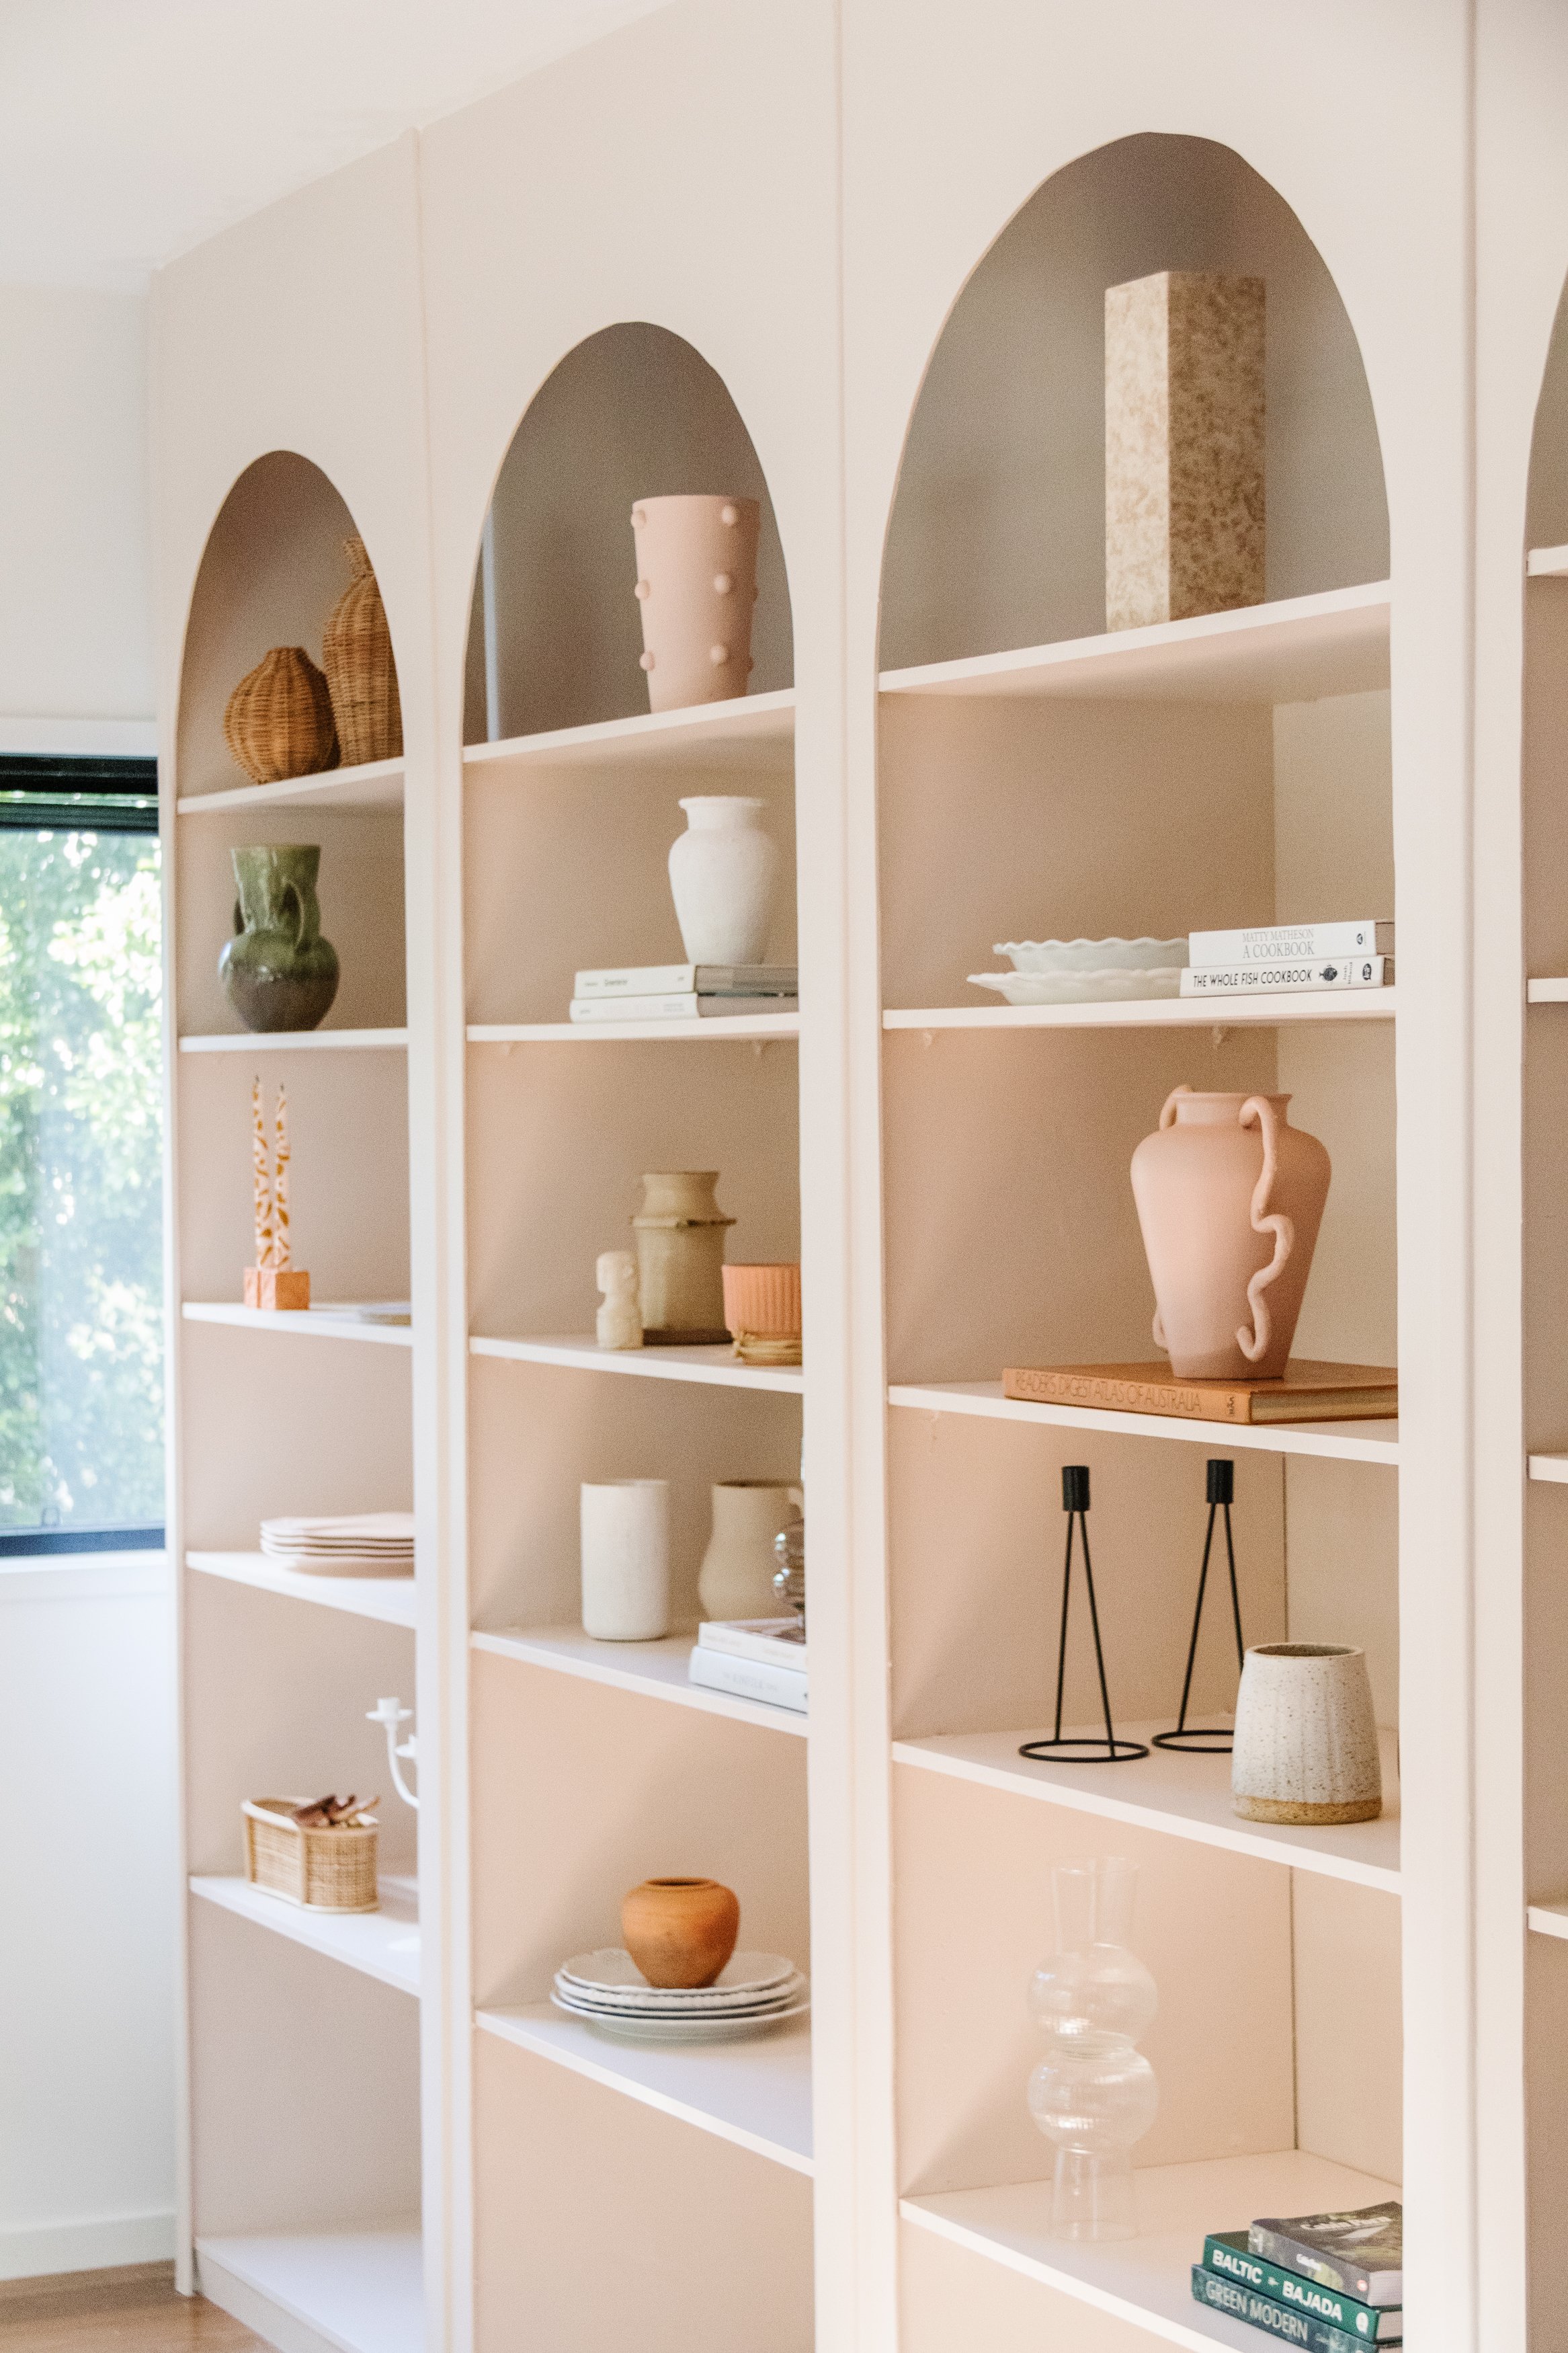
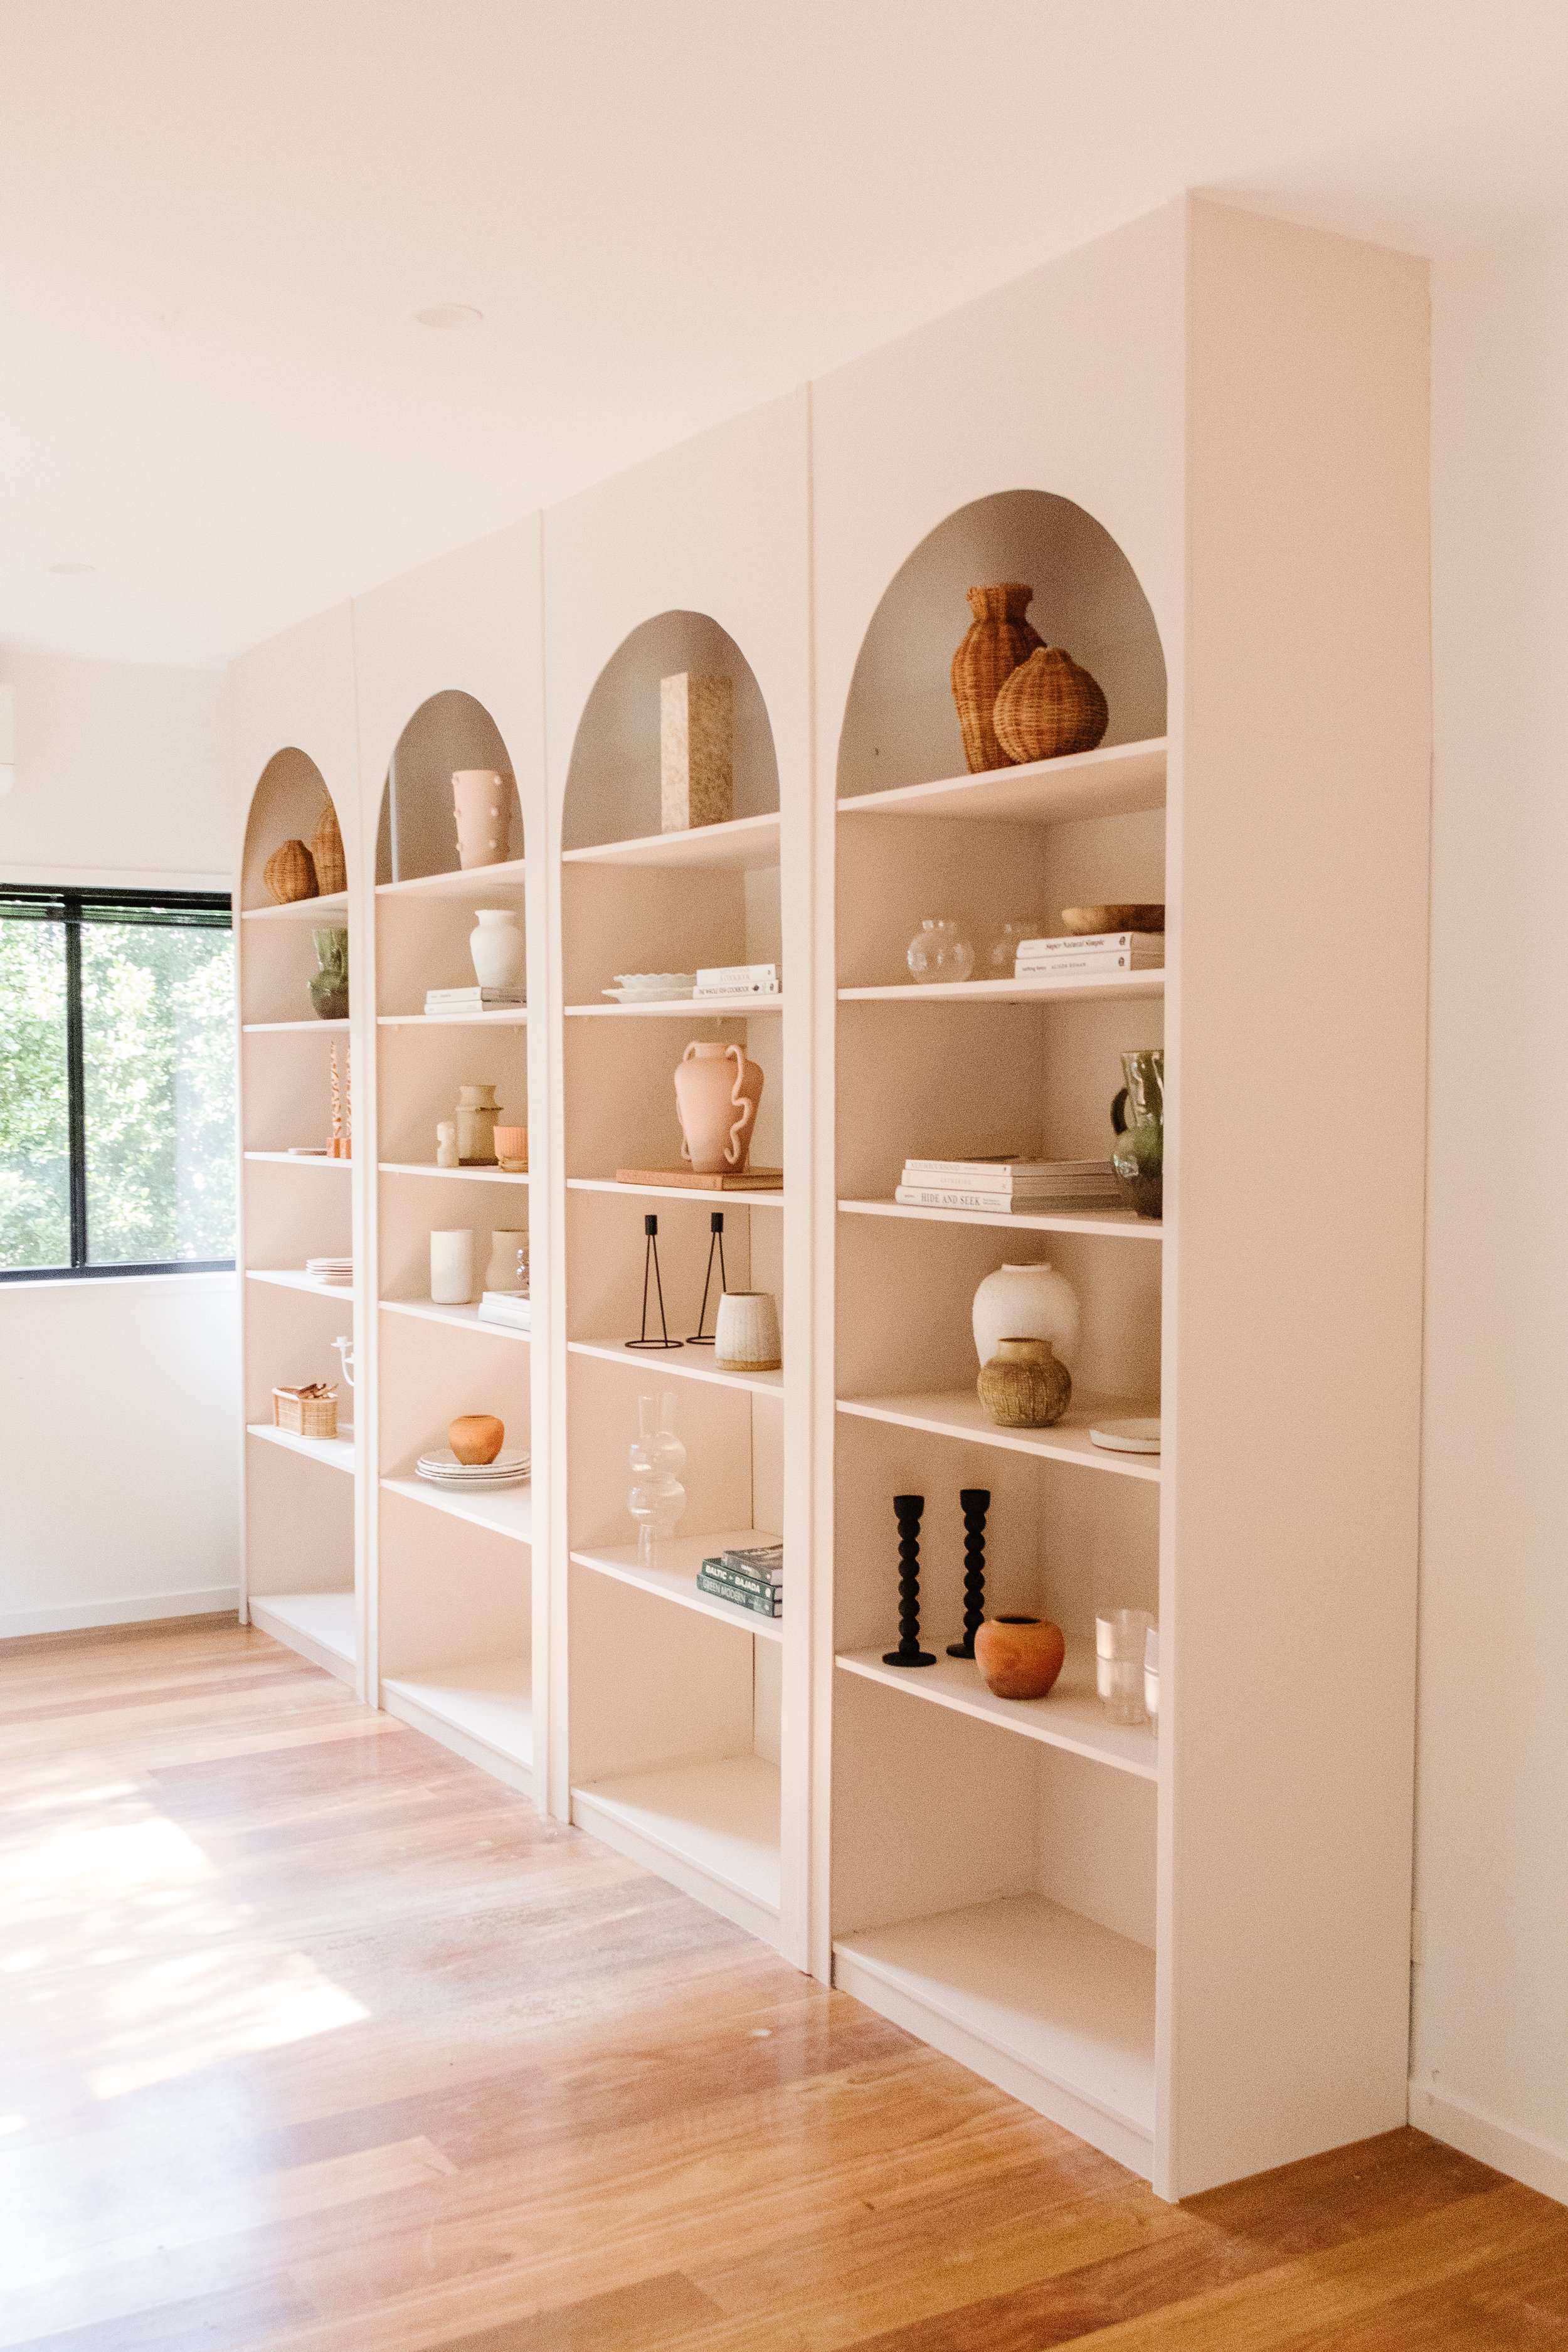
I am so excited to finally share my DIY Arched Wall Library! This project has been months in the making and I couldn’t be happier! Ever since we built our home, we have always regretted not adding a wall library. A row of bookshelves where we can beautifully store our books and keepsakes. We’ve been talking about it for years and I am so excited to be partnering with Bunnings to turn this dream into a realty!
This is without a doubt my biggest DIY project to date. I did heaps of research, spoke to the team at Bunnings and watched lots of YouTube tutorials (especially this one!) before diving headfirst into the project with gusto. I learned lots of new skills, including how to use a mitre saw and a brad nail gun and I am very proud I built this DIY Arched Wall Library with my own two hands. I’ve always wanted an arched wall library in our house and this has blown my expectations and dreams. This project was a total labour of love and every time I walk past my studio, I can’t help but smile. It looks so beautiful! And I hope you feel inspired to give it a try. Read on to learn how to make your own DIY Arched Wall Library, as always I have included the project details, materials with links and step by step instructions.
And to see how this DIY Arched Wall Library came together, make sure you check out this video!
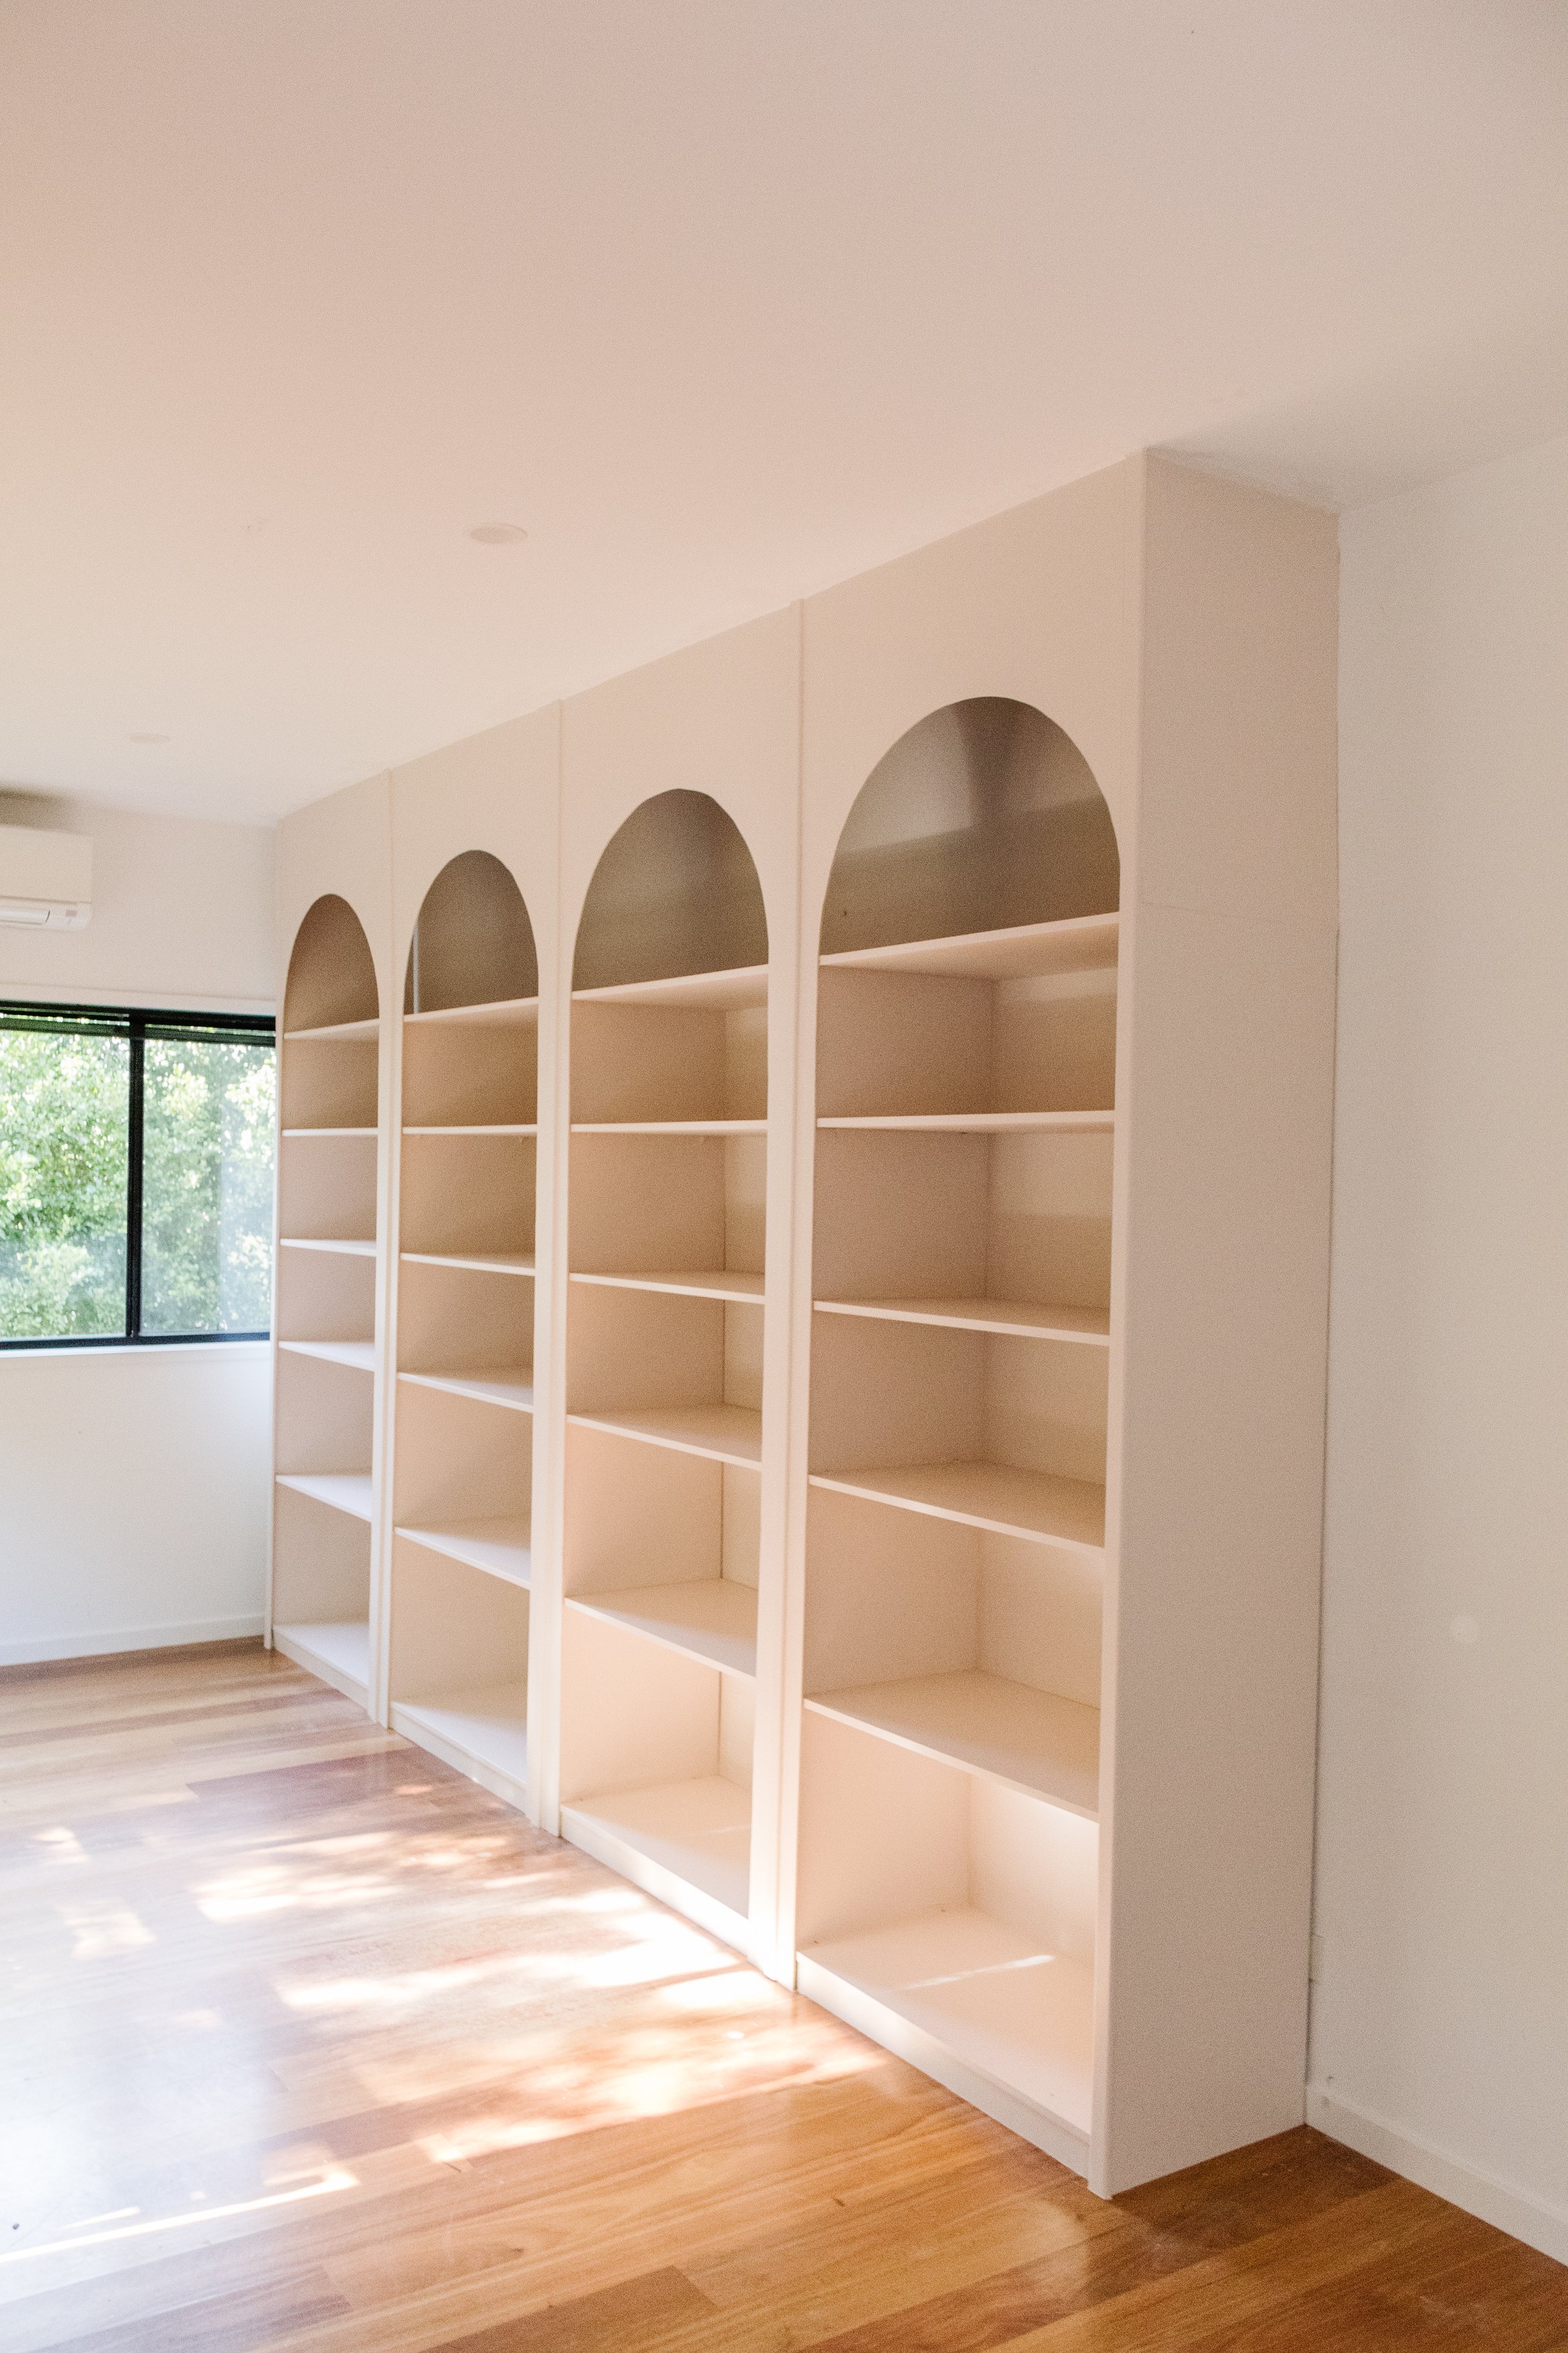
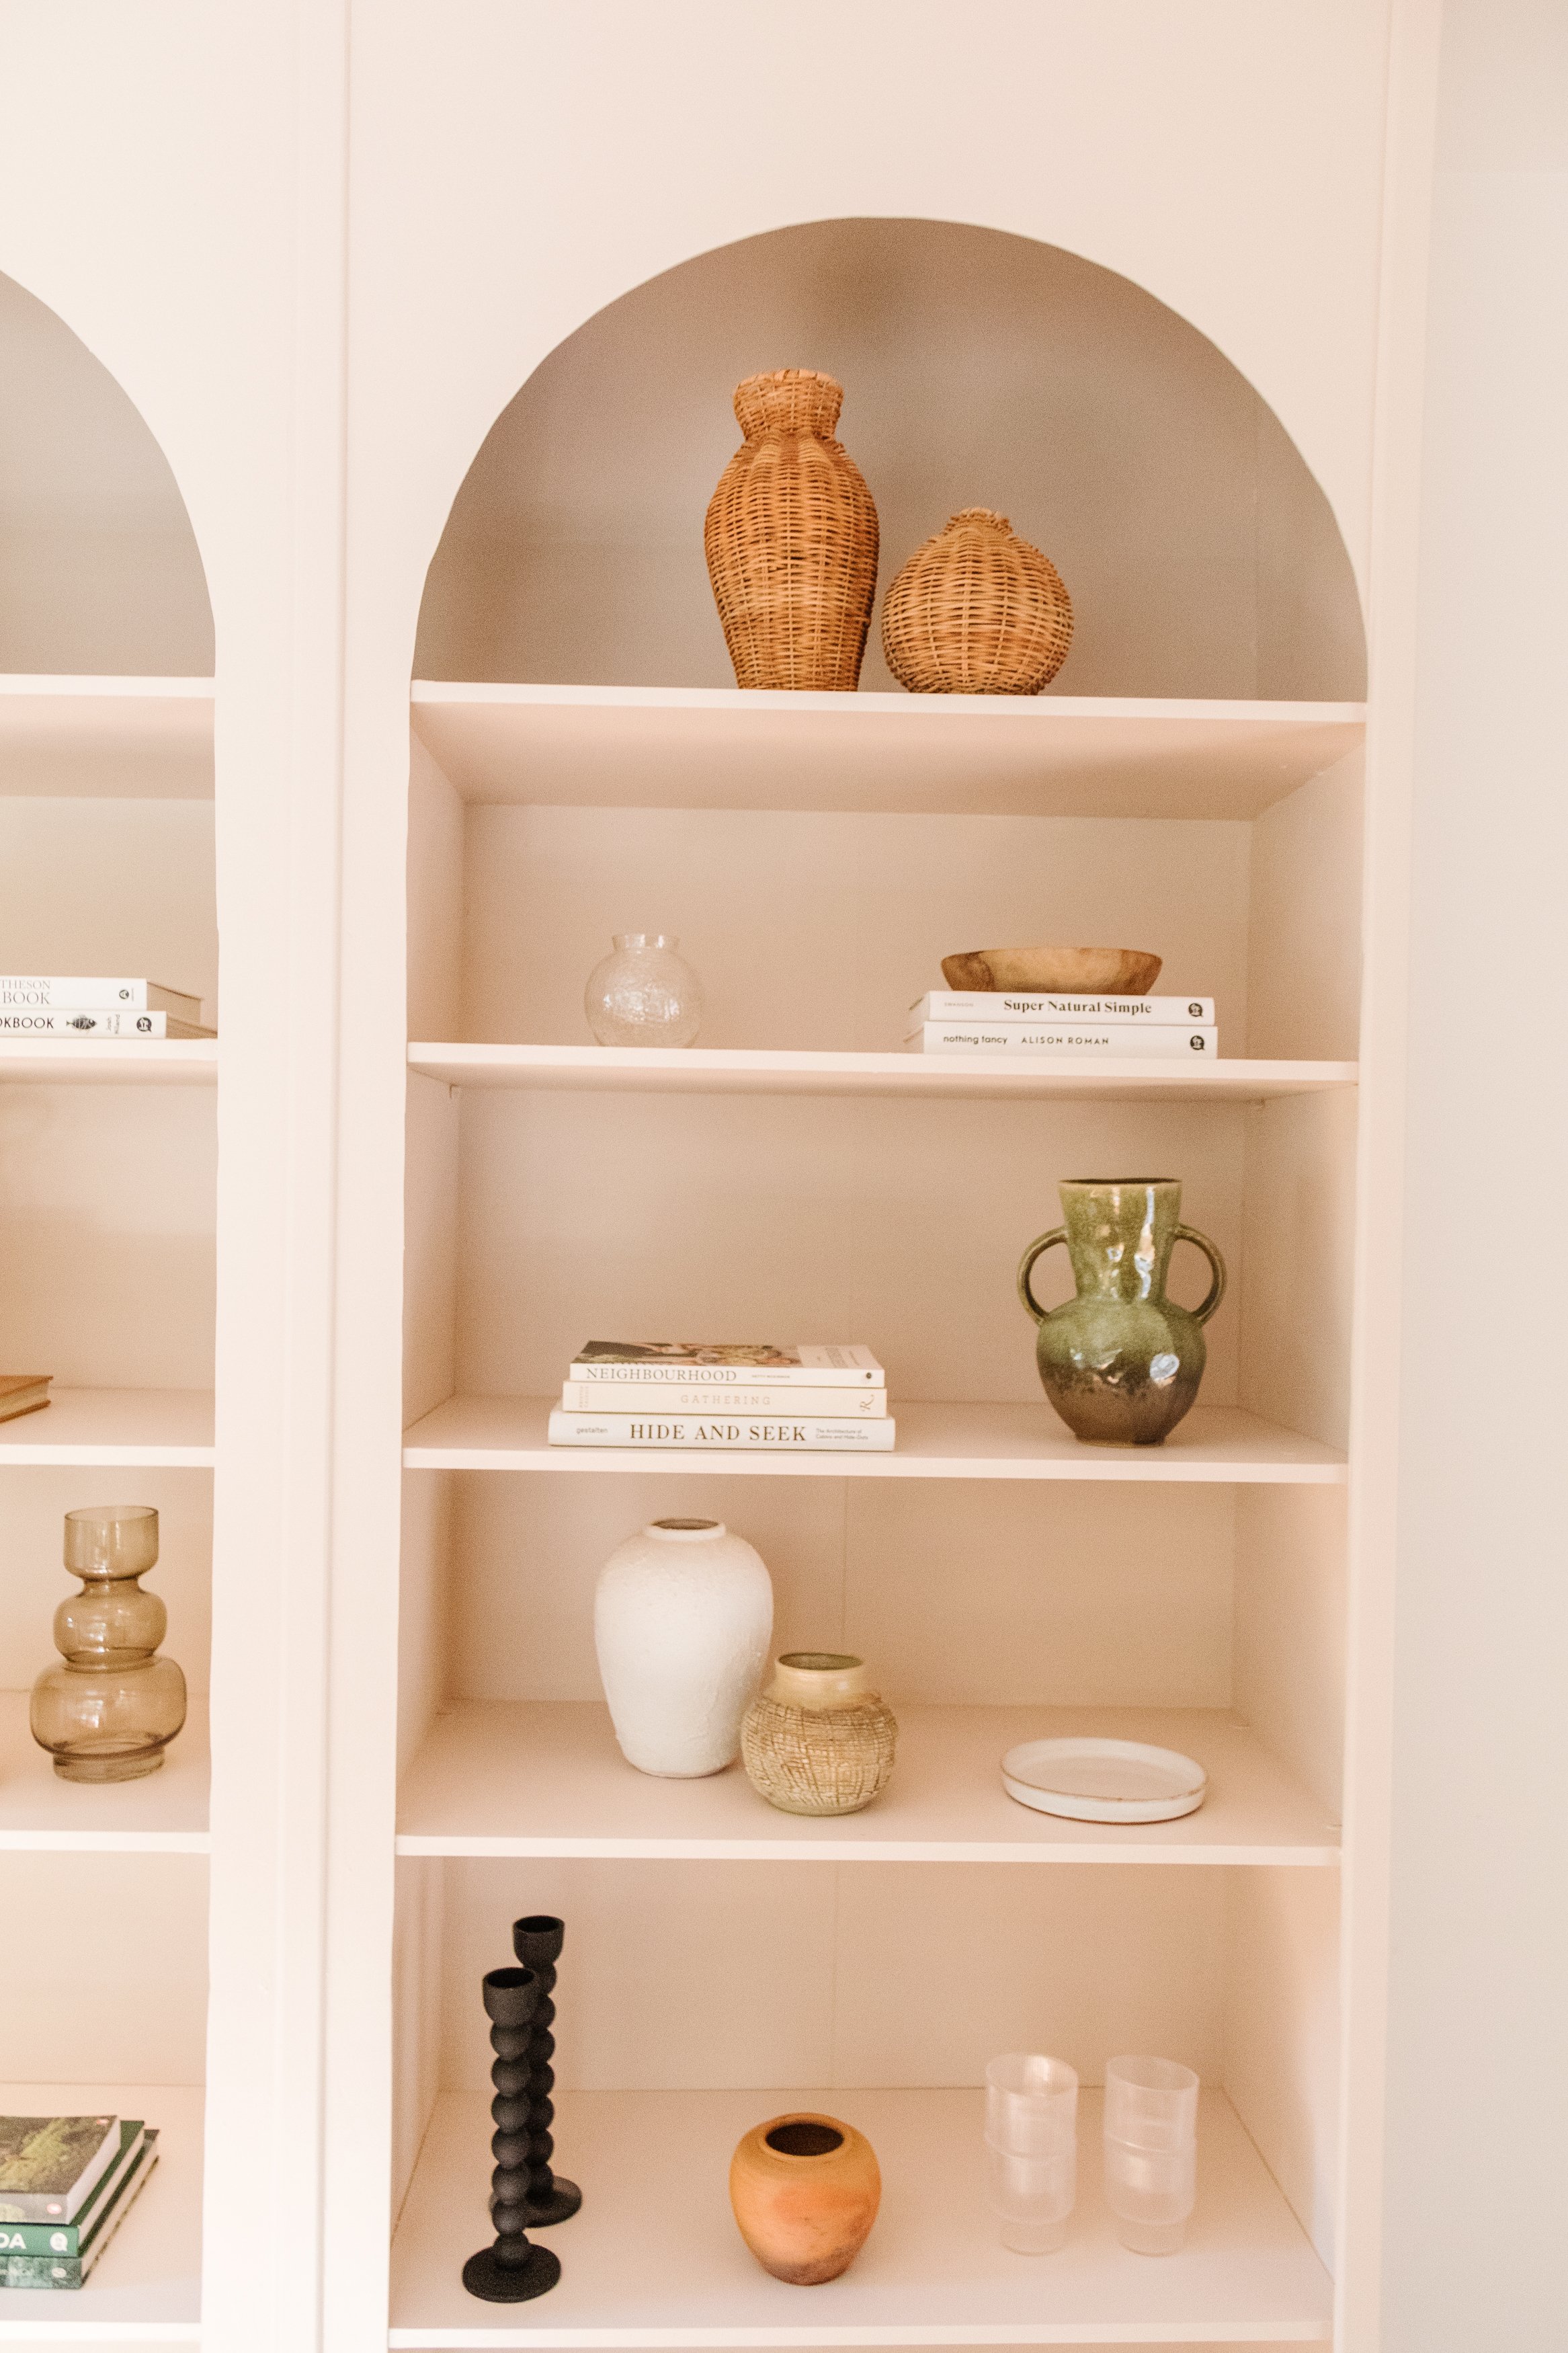
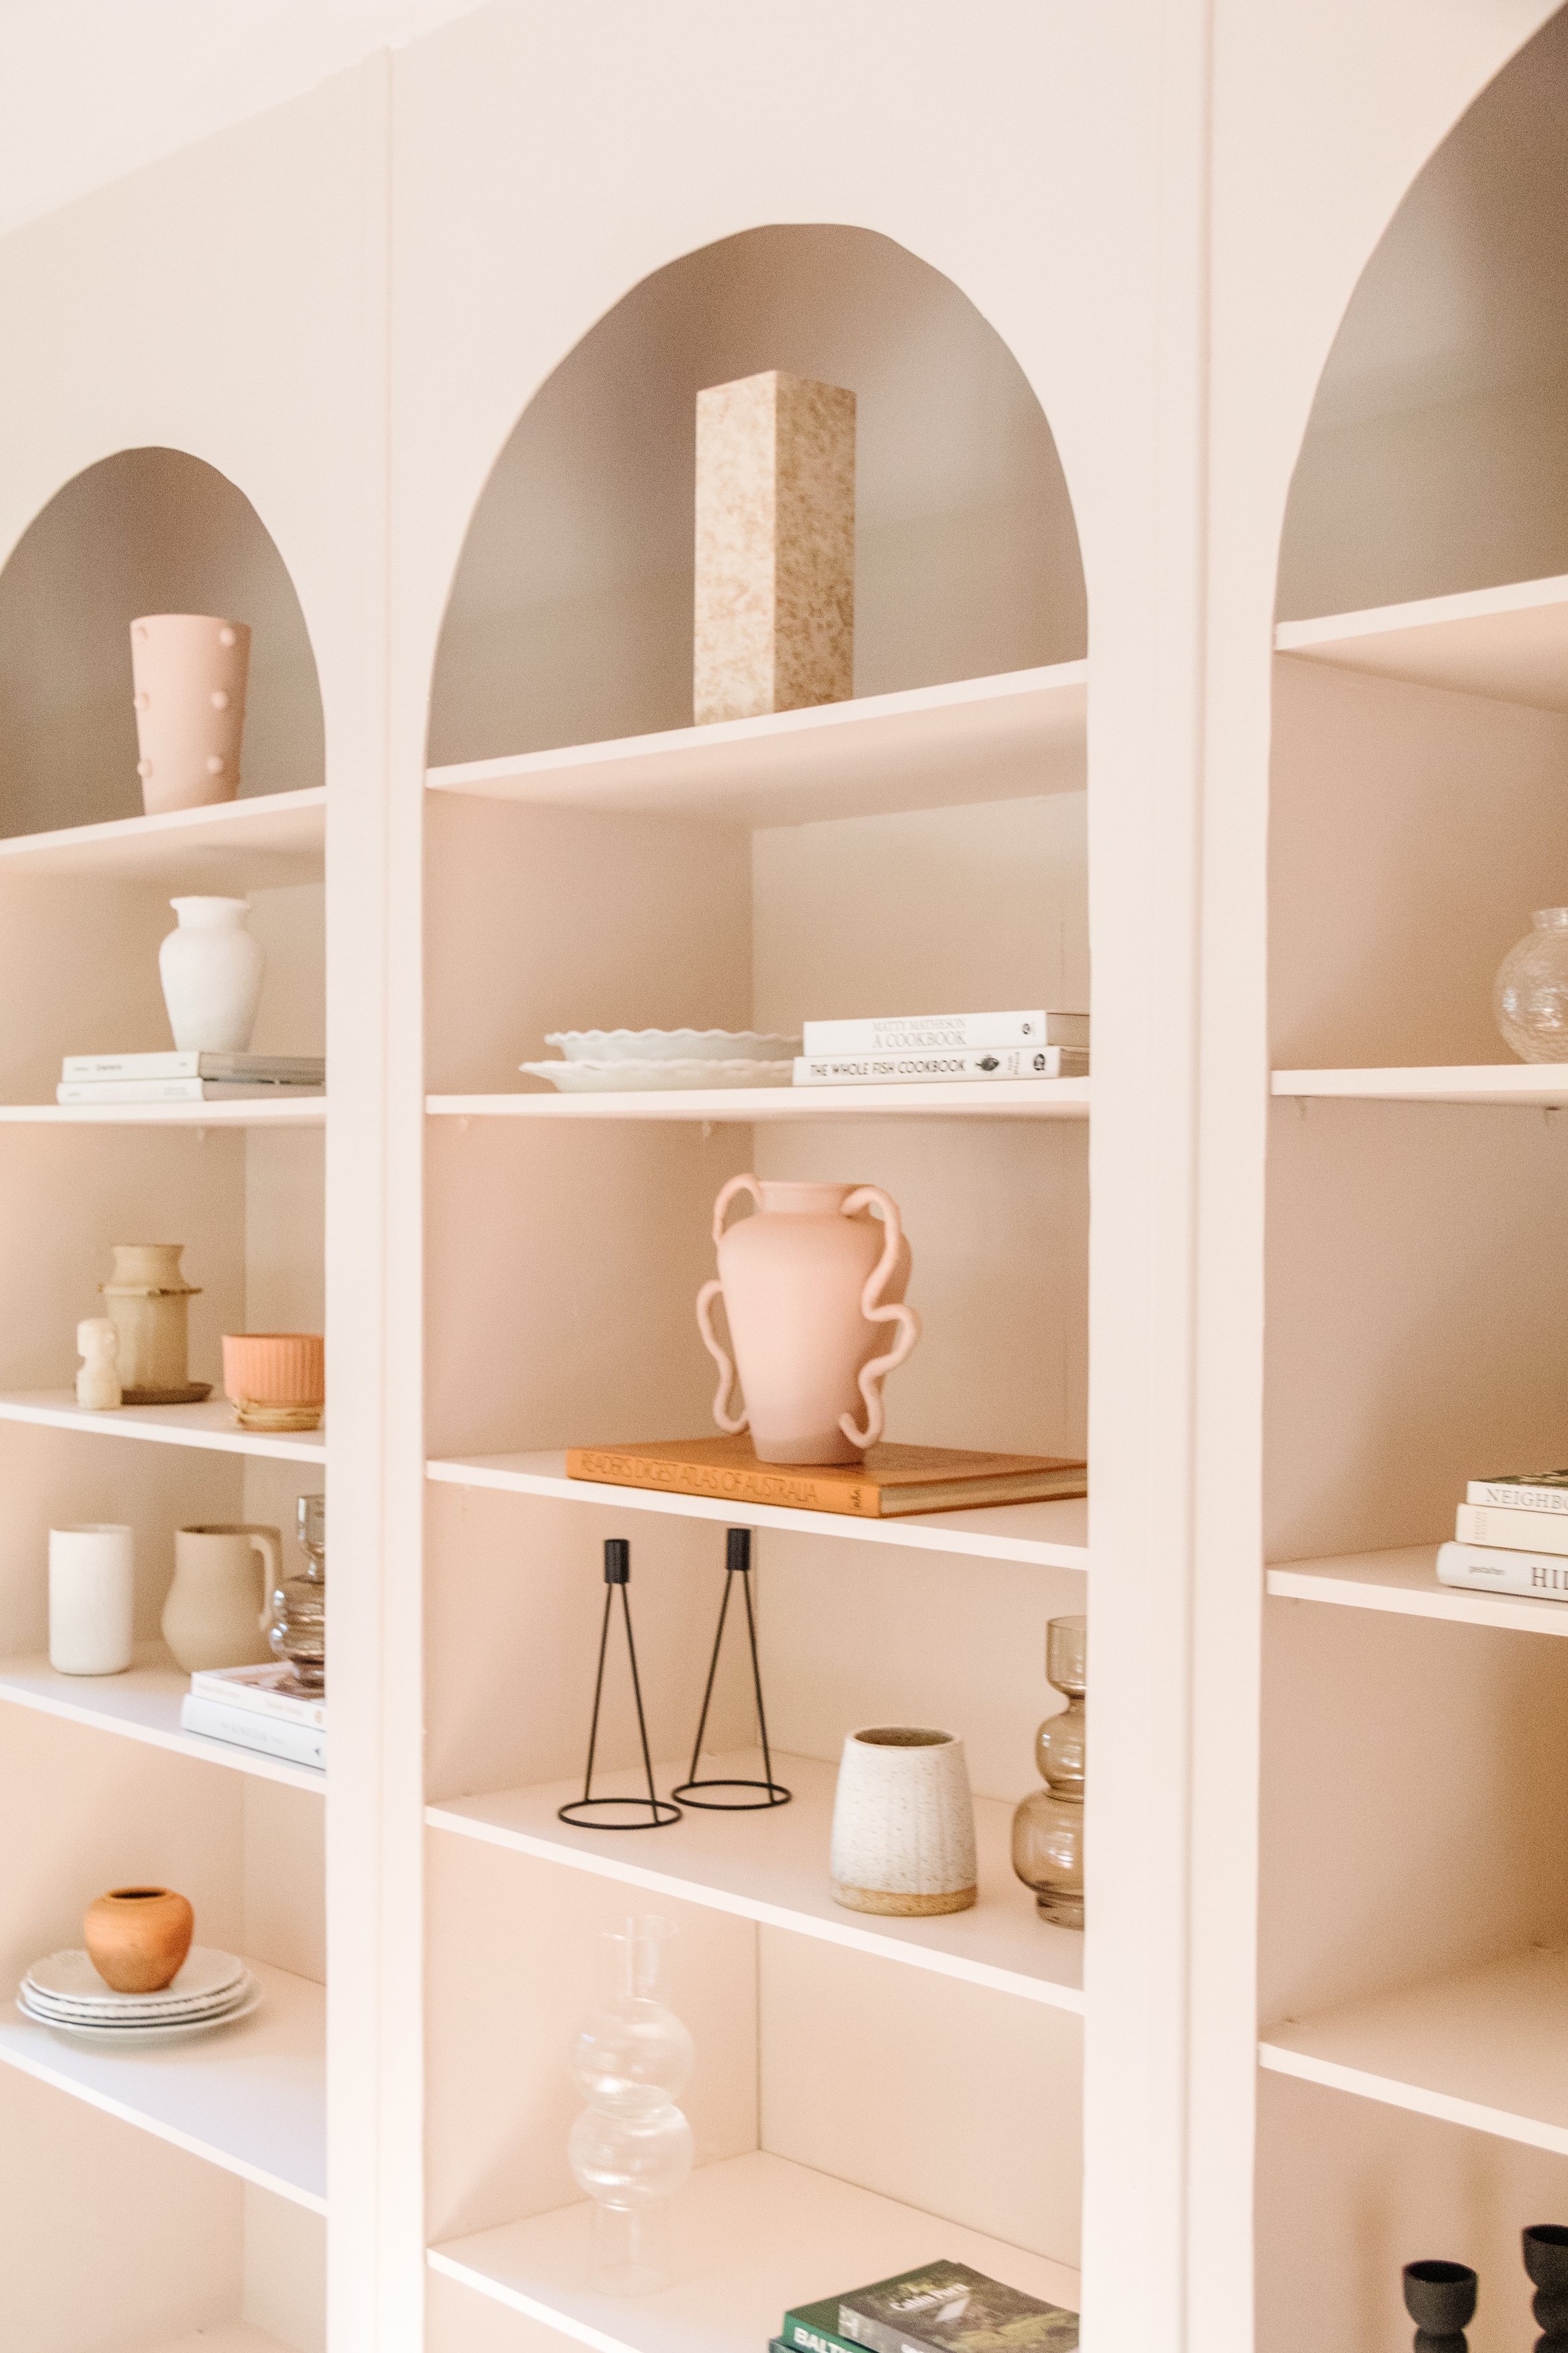
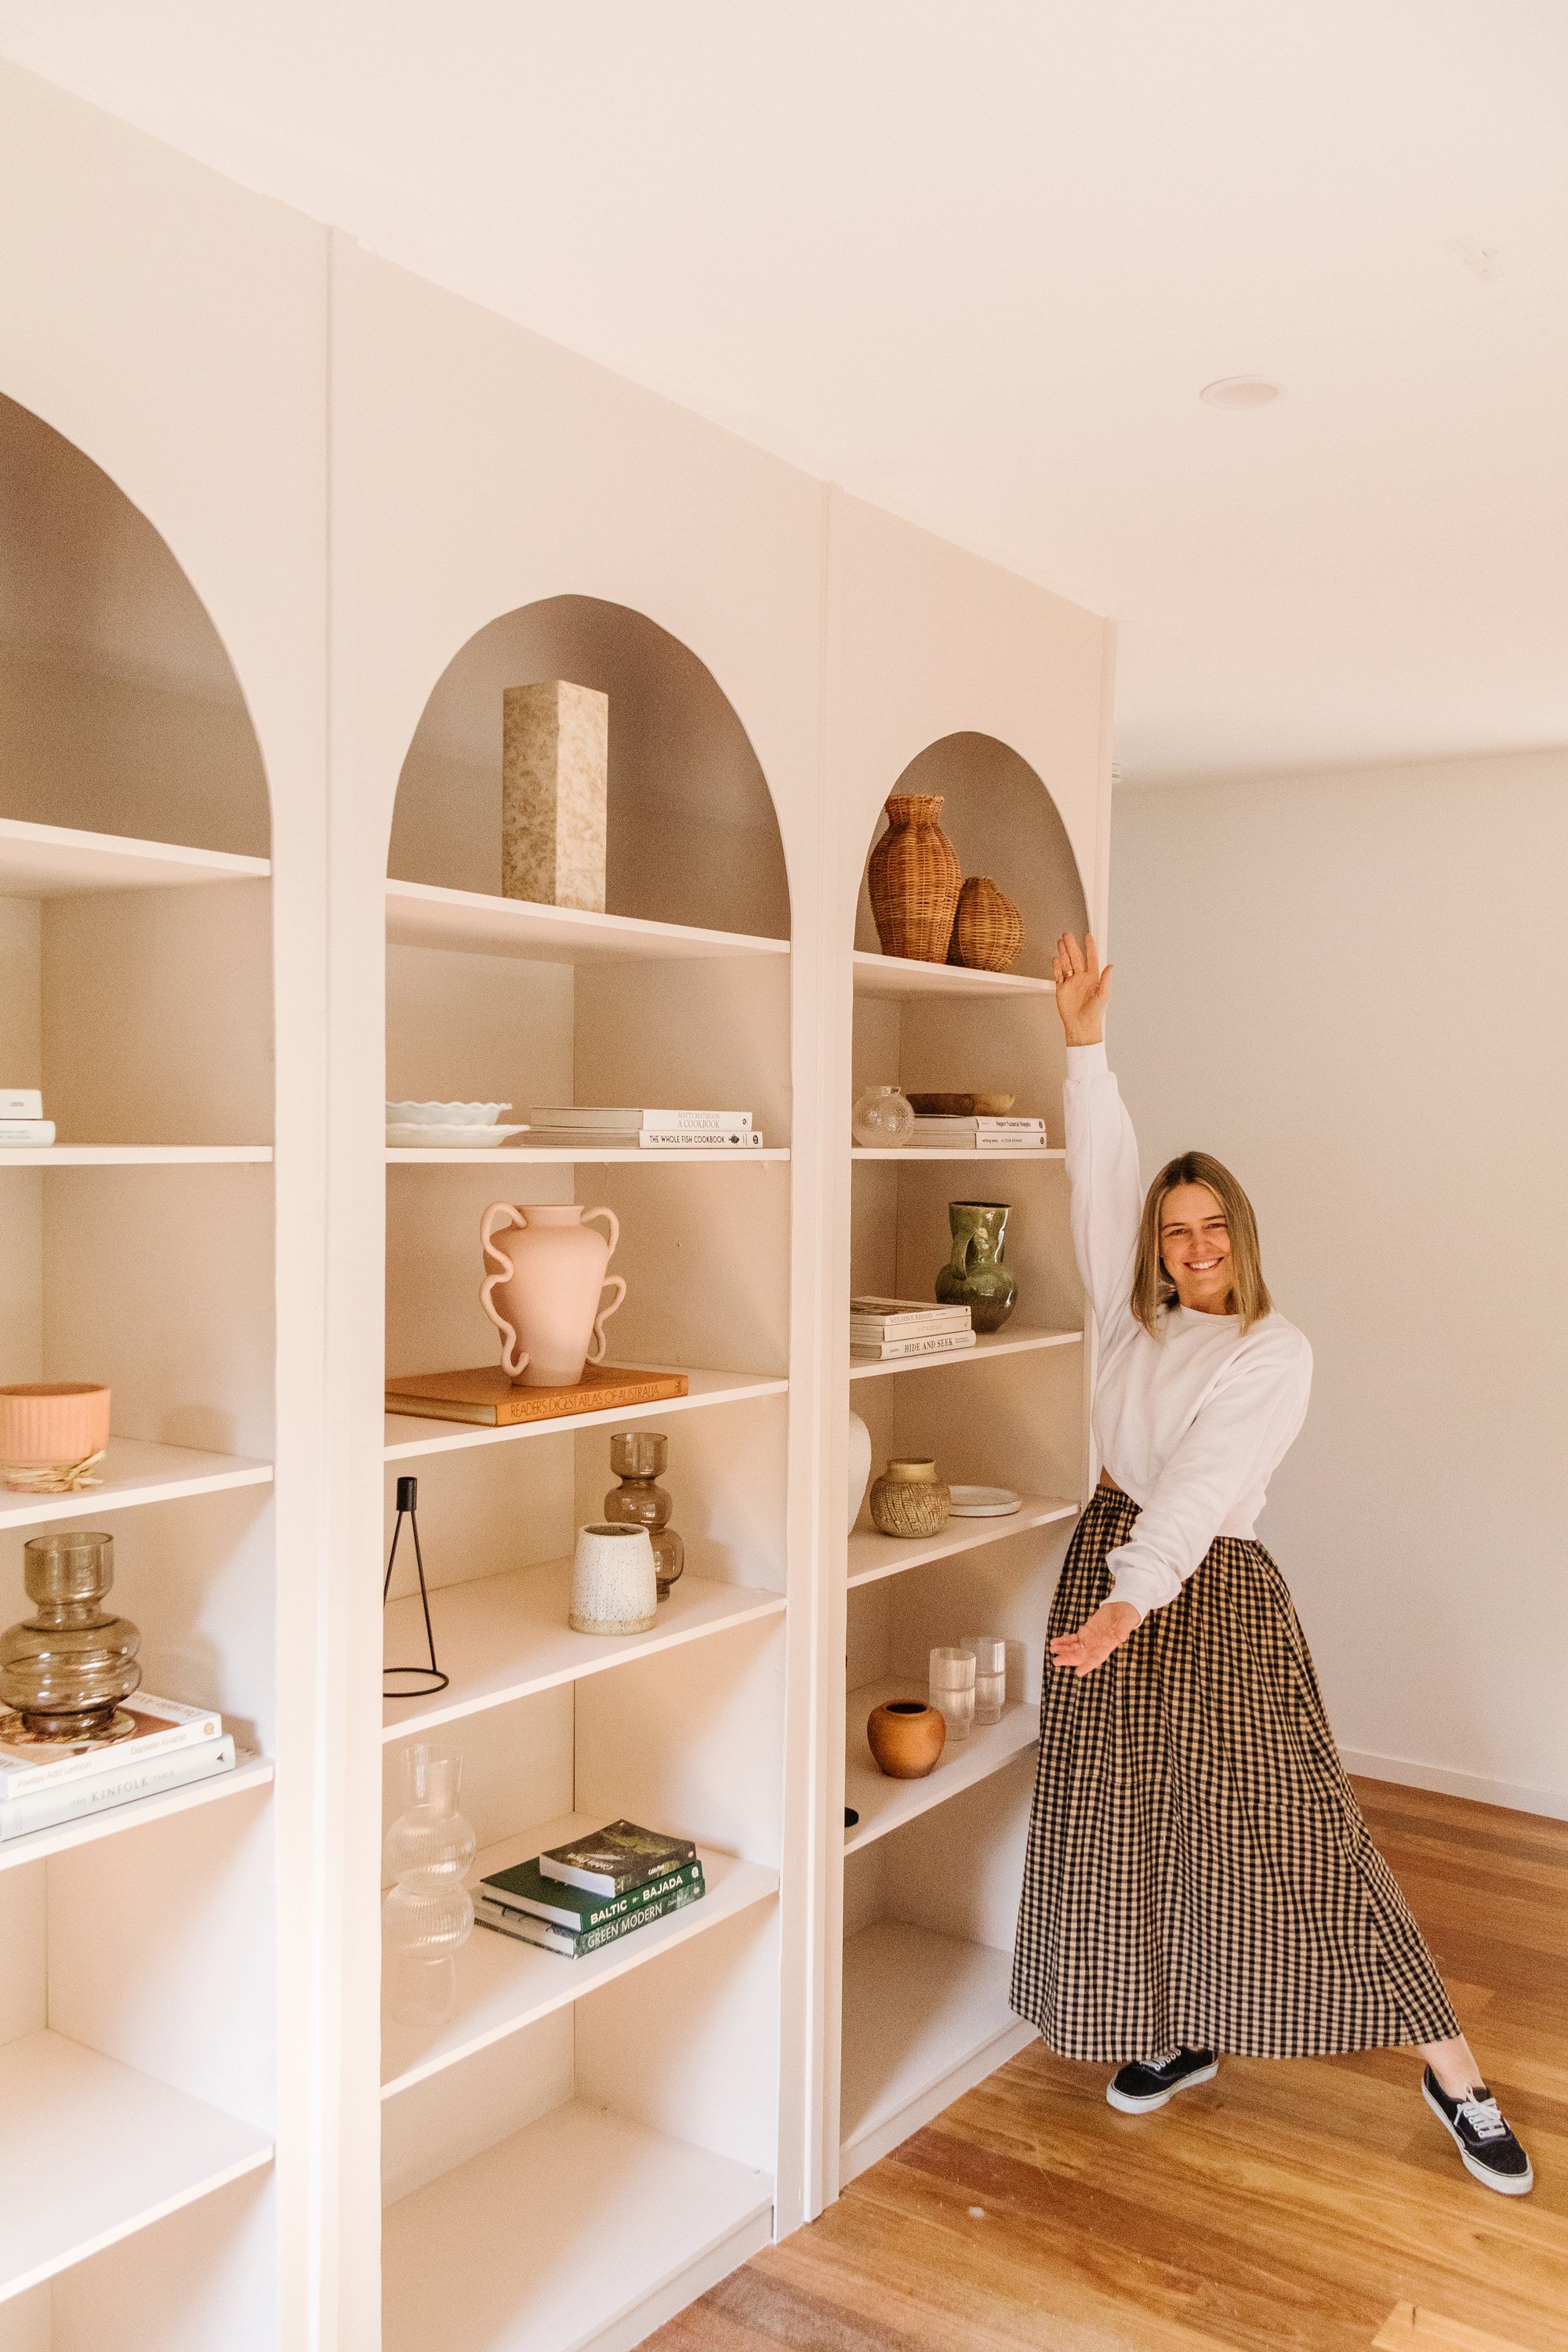
Before & After
Project Details
🕒 Project Time Estimate: 4 days, approximately 20 to 25 hours
💰 Materials Cost: Under $2,300 (not including power tools)
👷♀️ Skill Level: Intermediate to advanced DIYer
⚒️ Tools: Mitre saw, brad nail gun, detail sander and drill

Materials
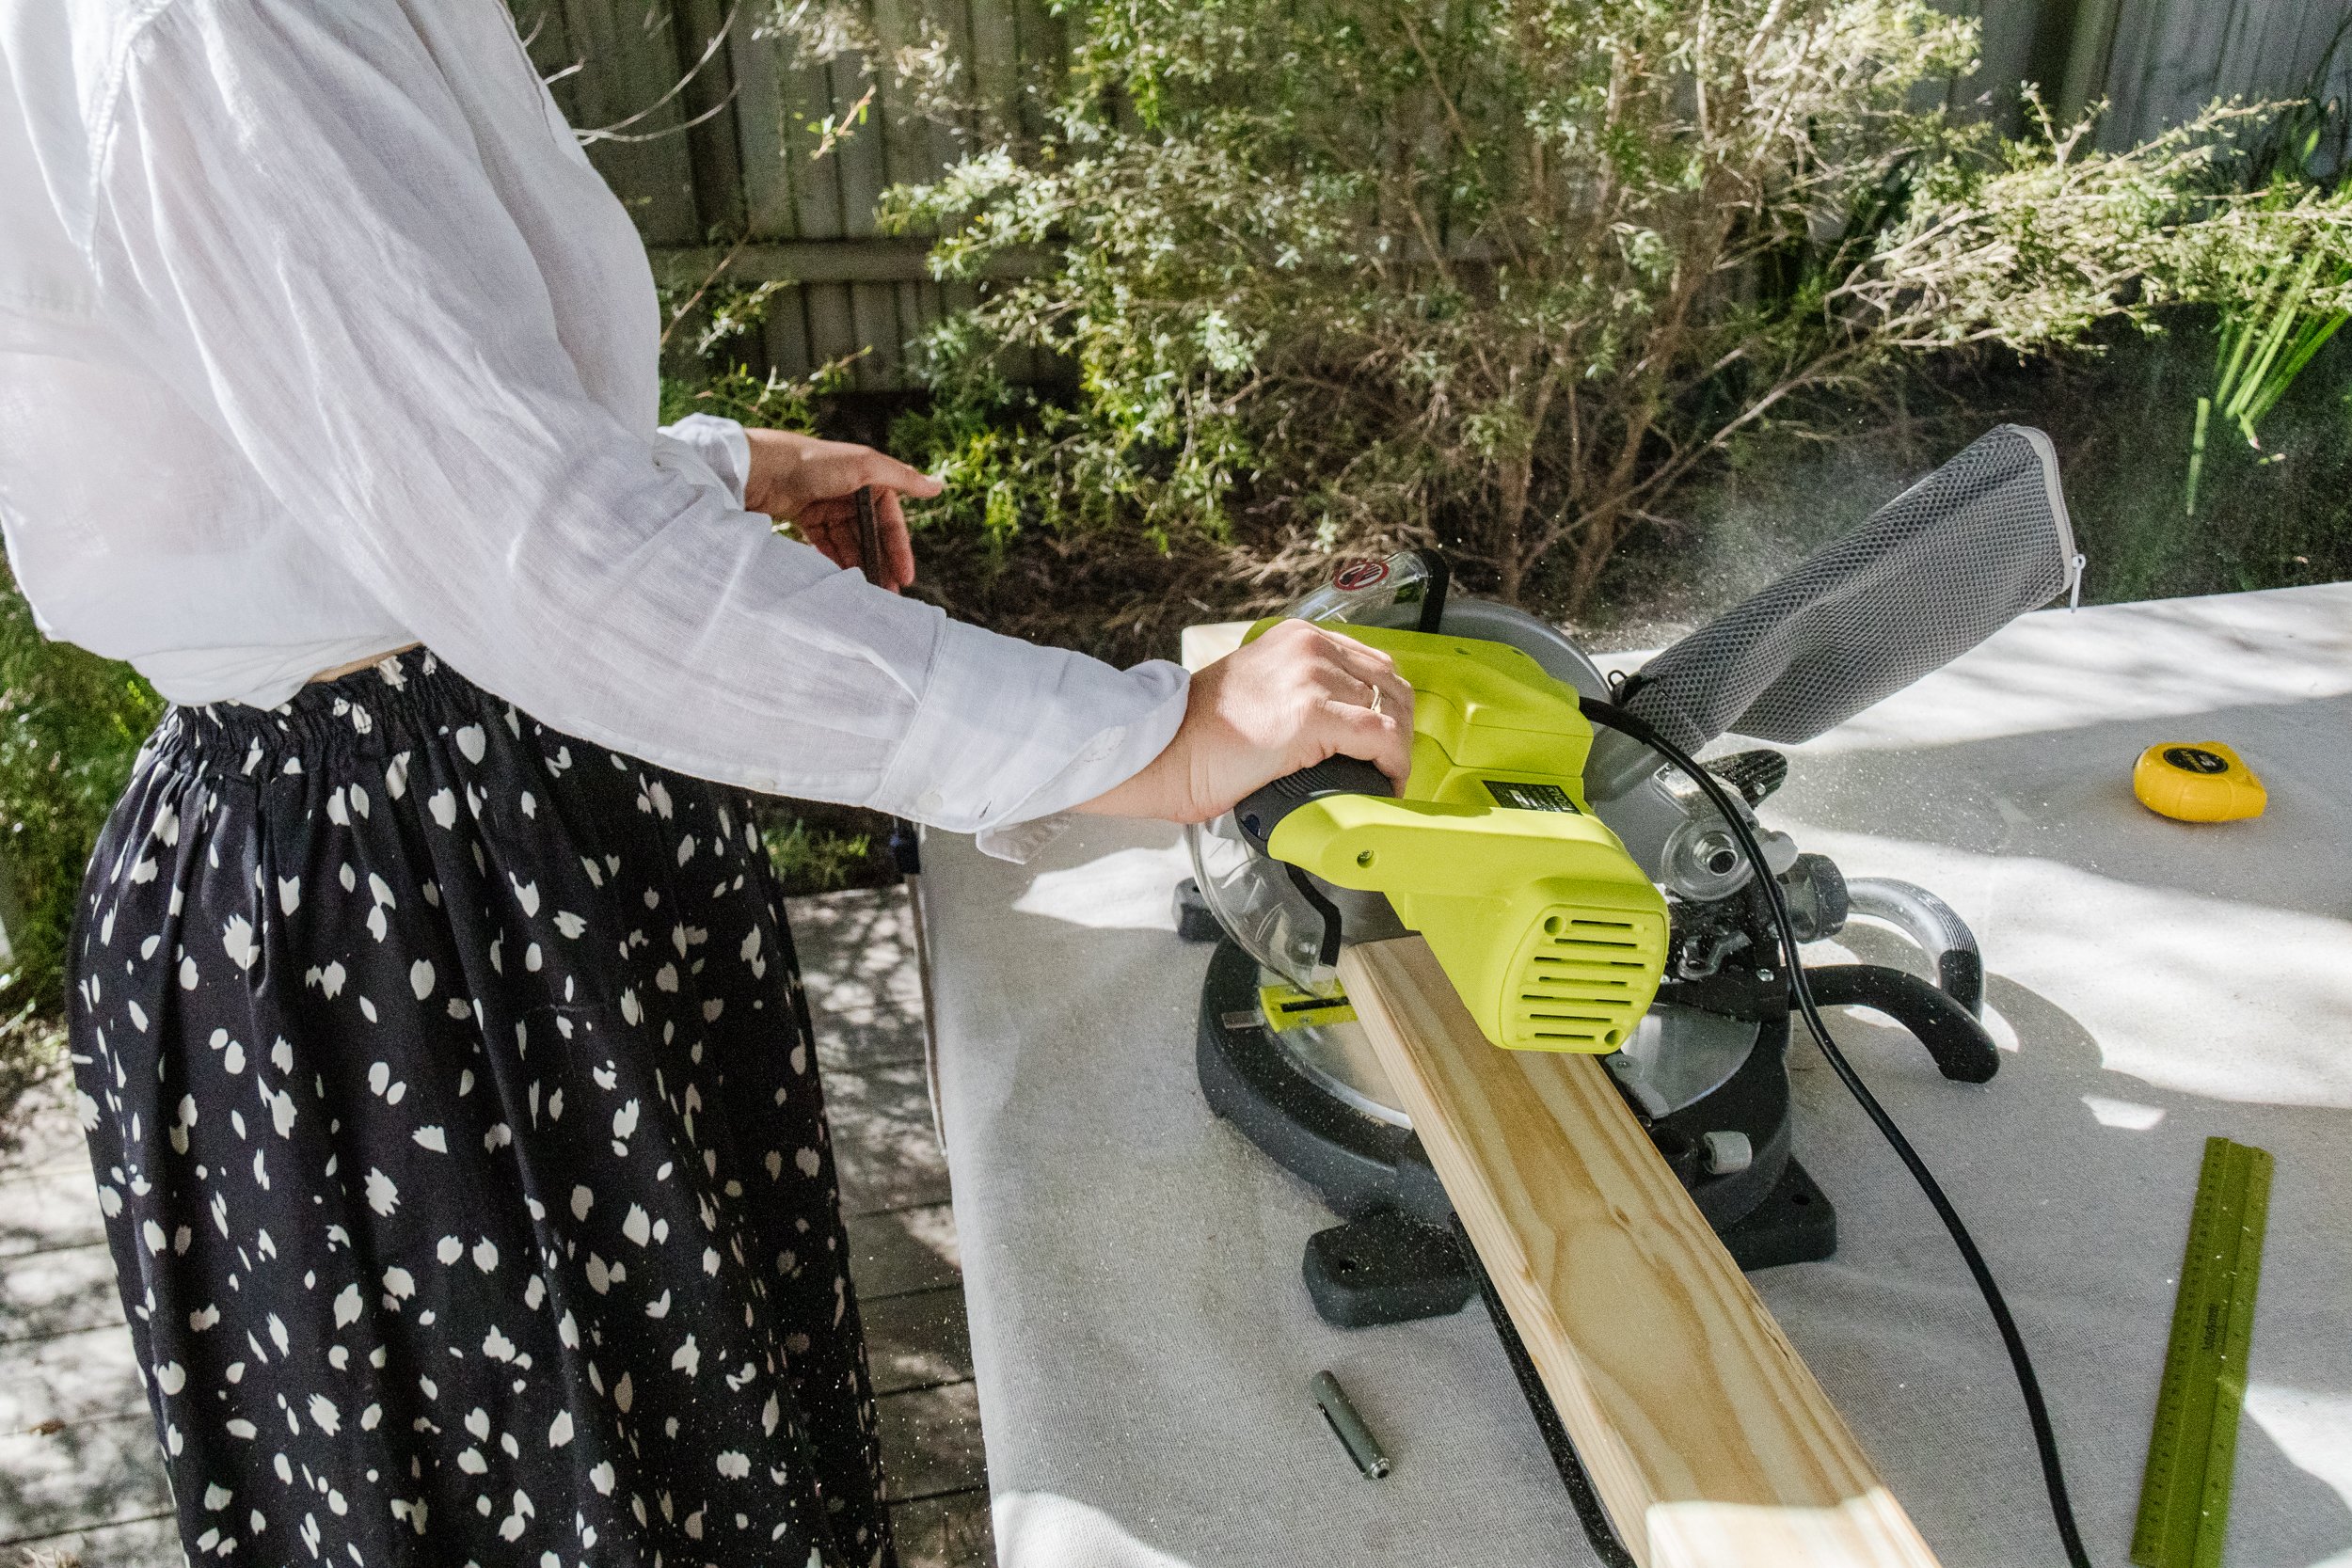
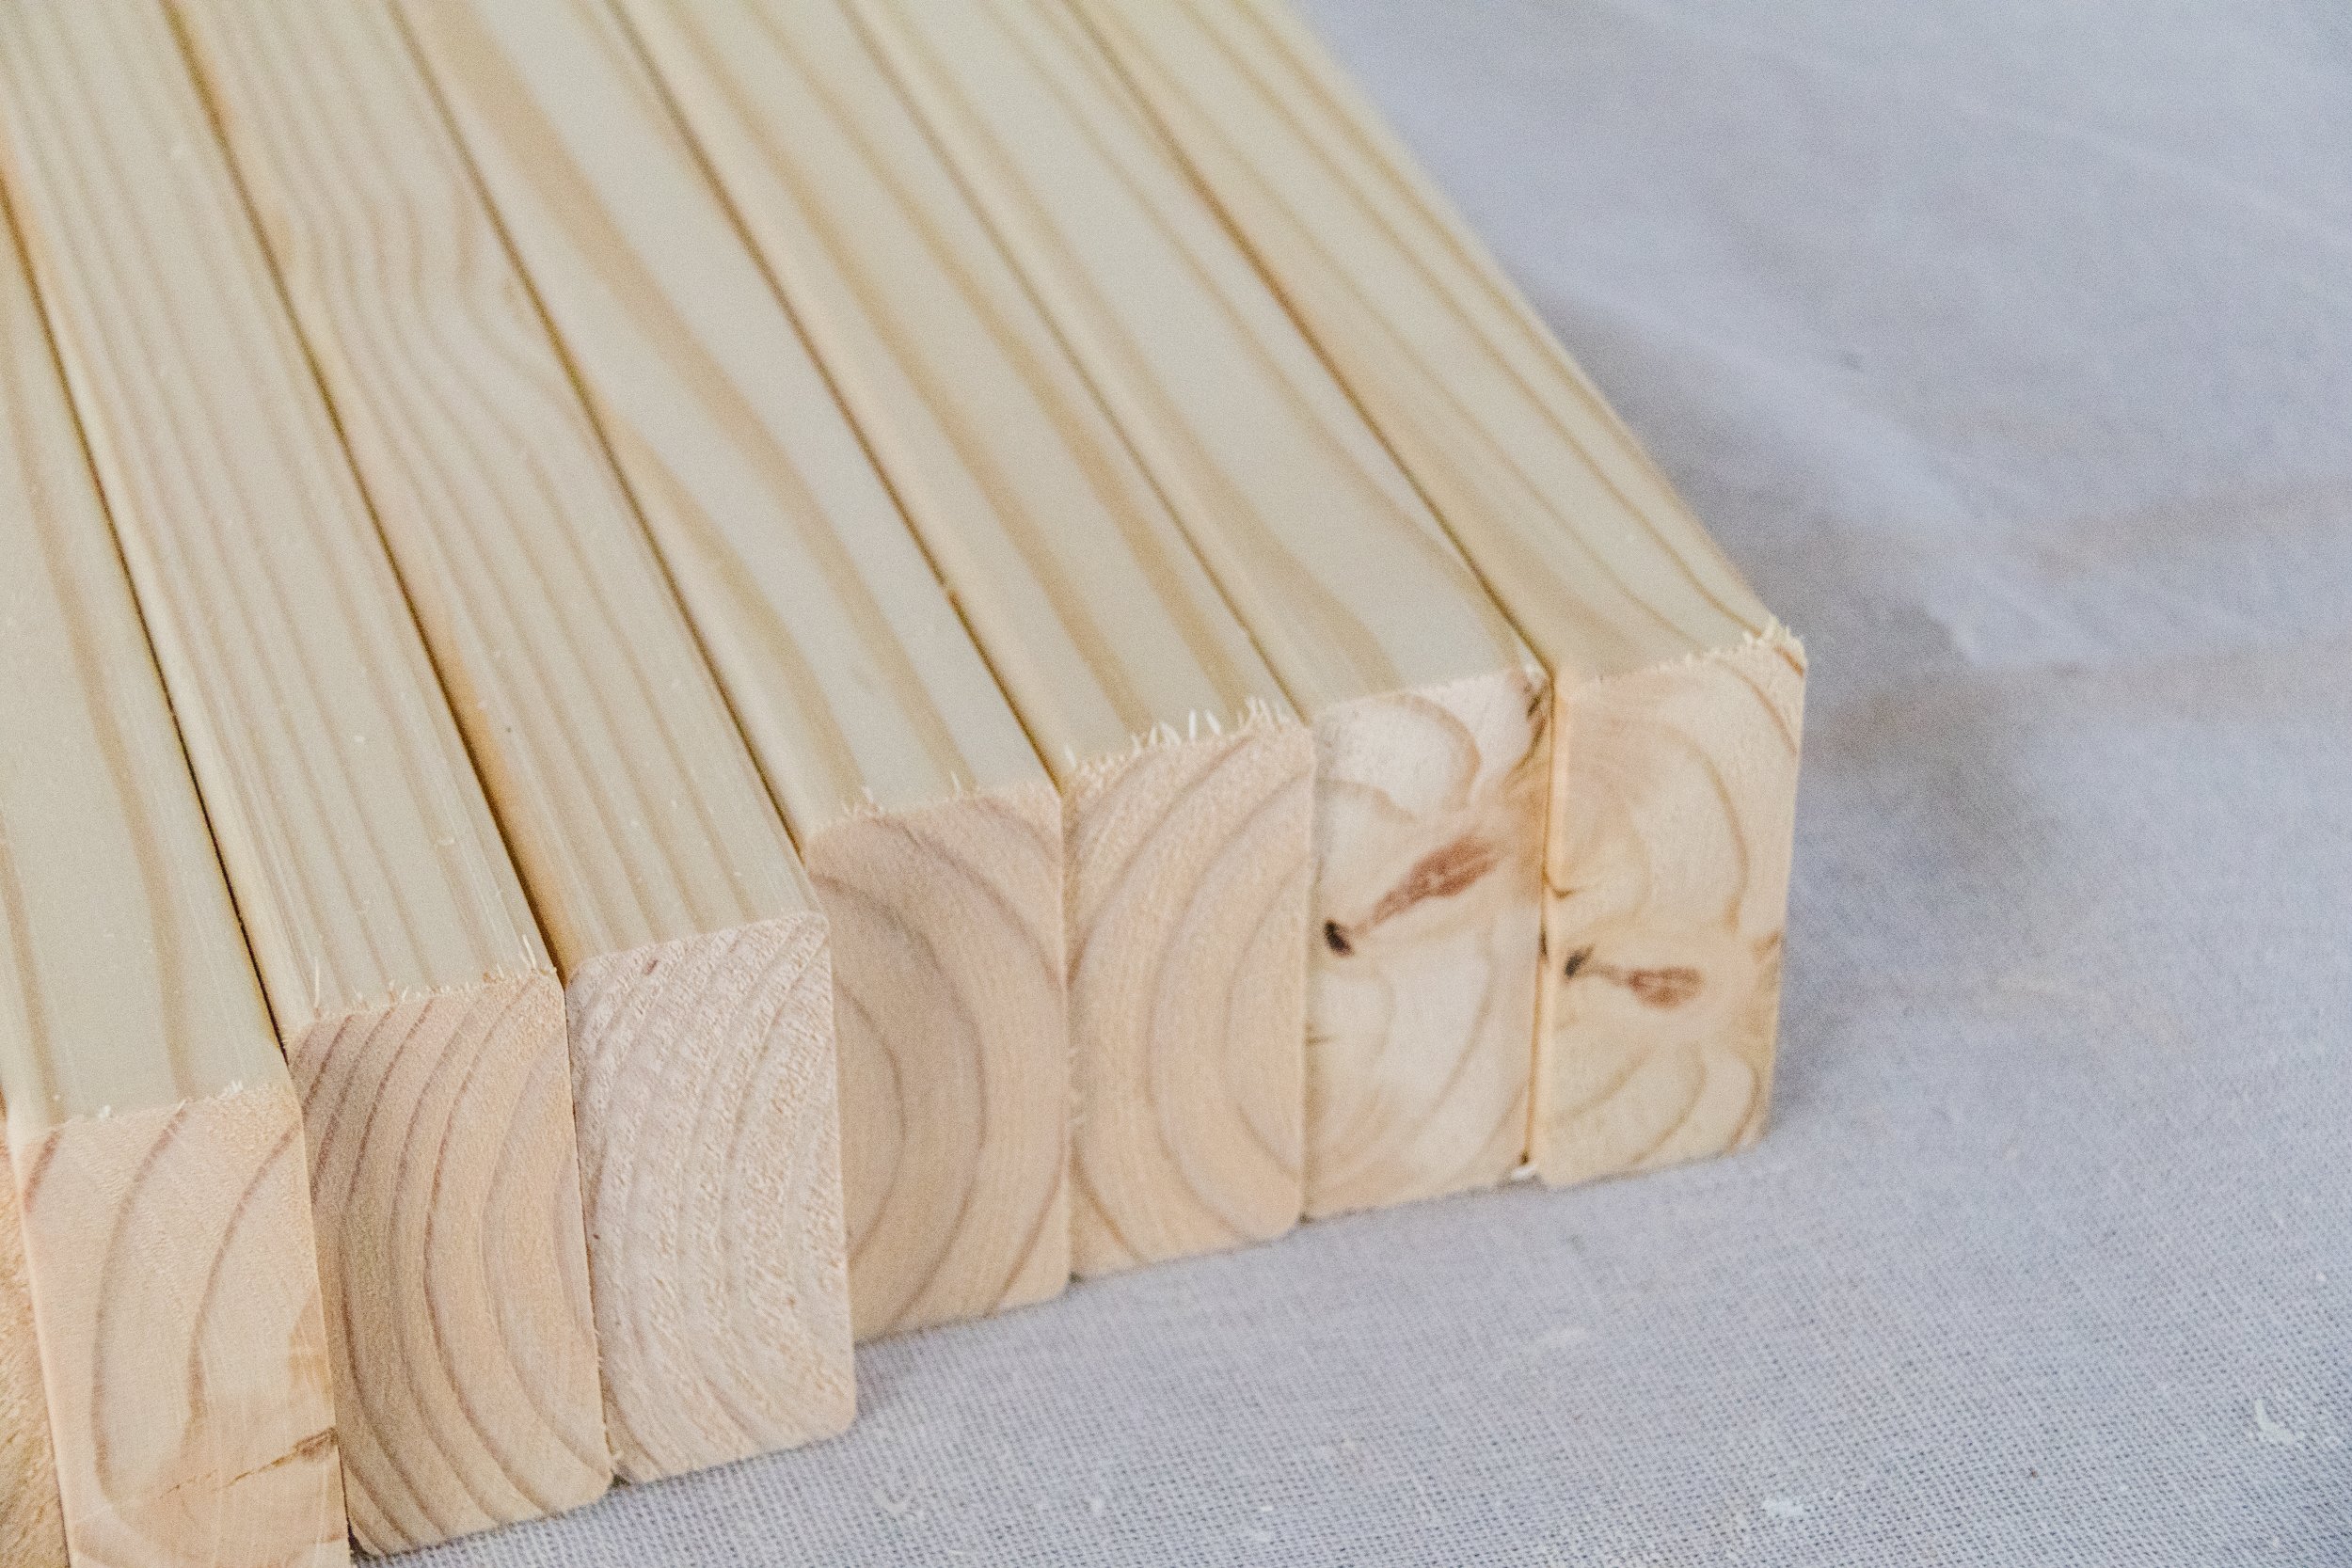
5 x Pieces of Short Pine, each piece cut in two using mitre saw or Bunnings cutting service
2 x Packets of Angle Brackets
Measuring tape, jute twine, ruler and pen
Drop sheet
Dulux 1Step Prep Primer, Sealer & Undercoat 2L in Lexicon Quarter
Dulux 4L Semi-Gloss Interior Paint in “Clay Pipe”
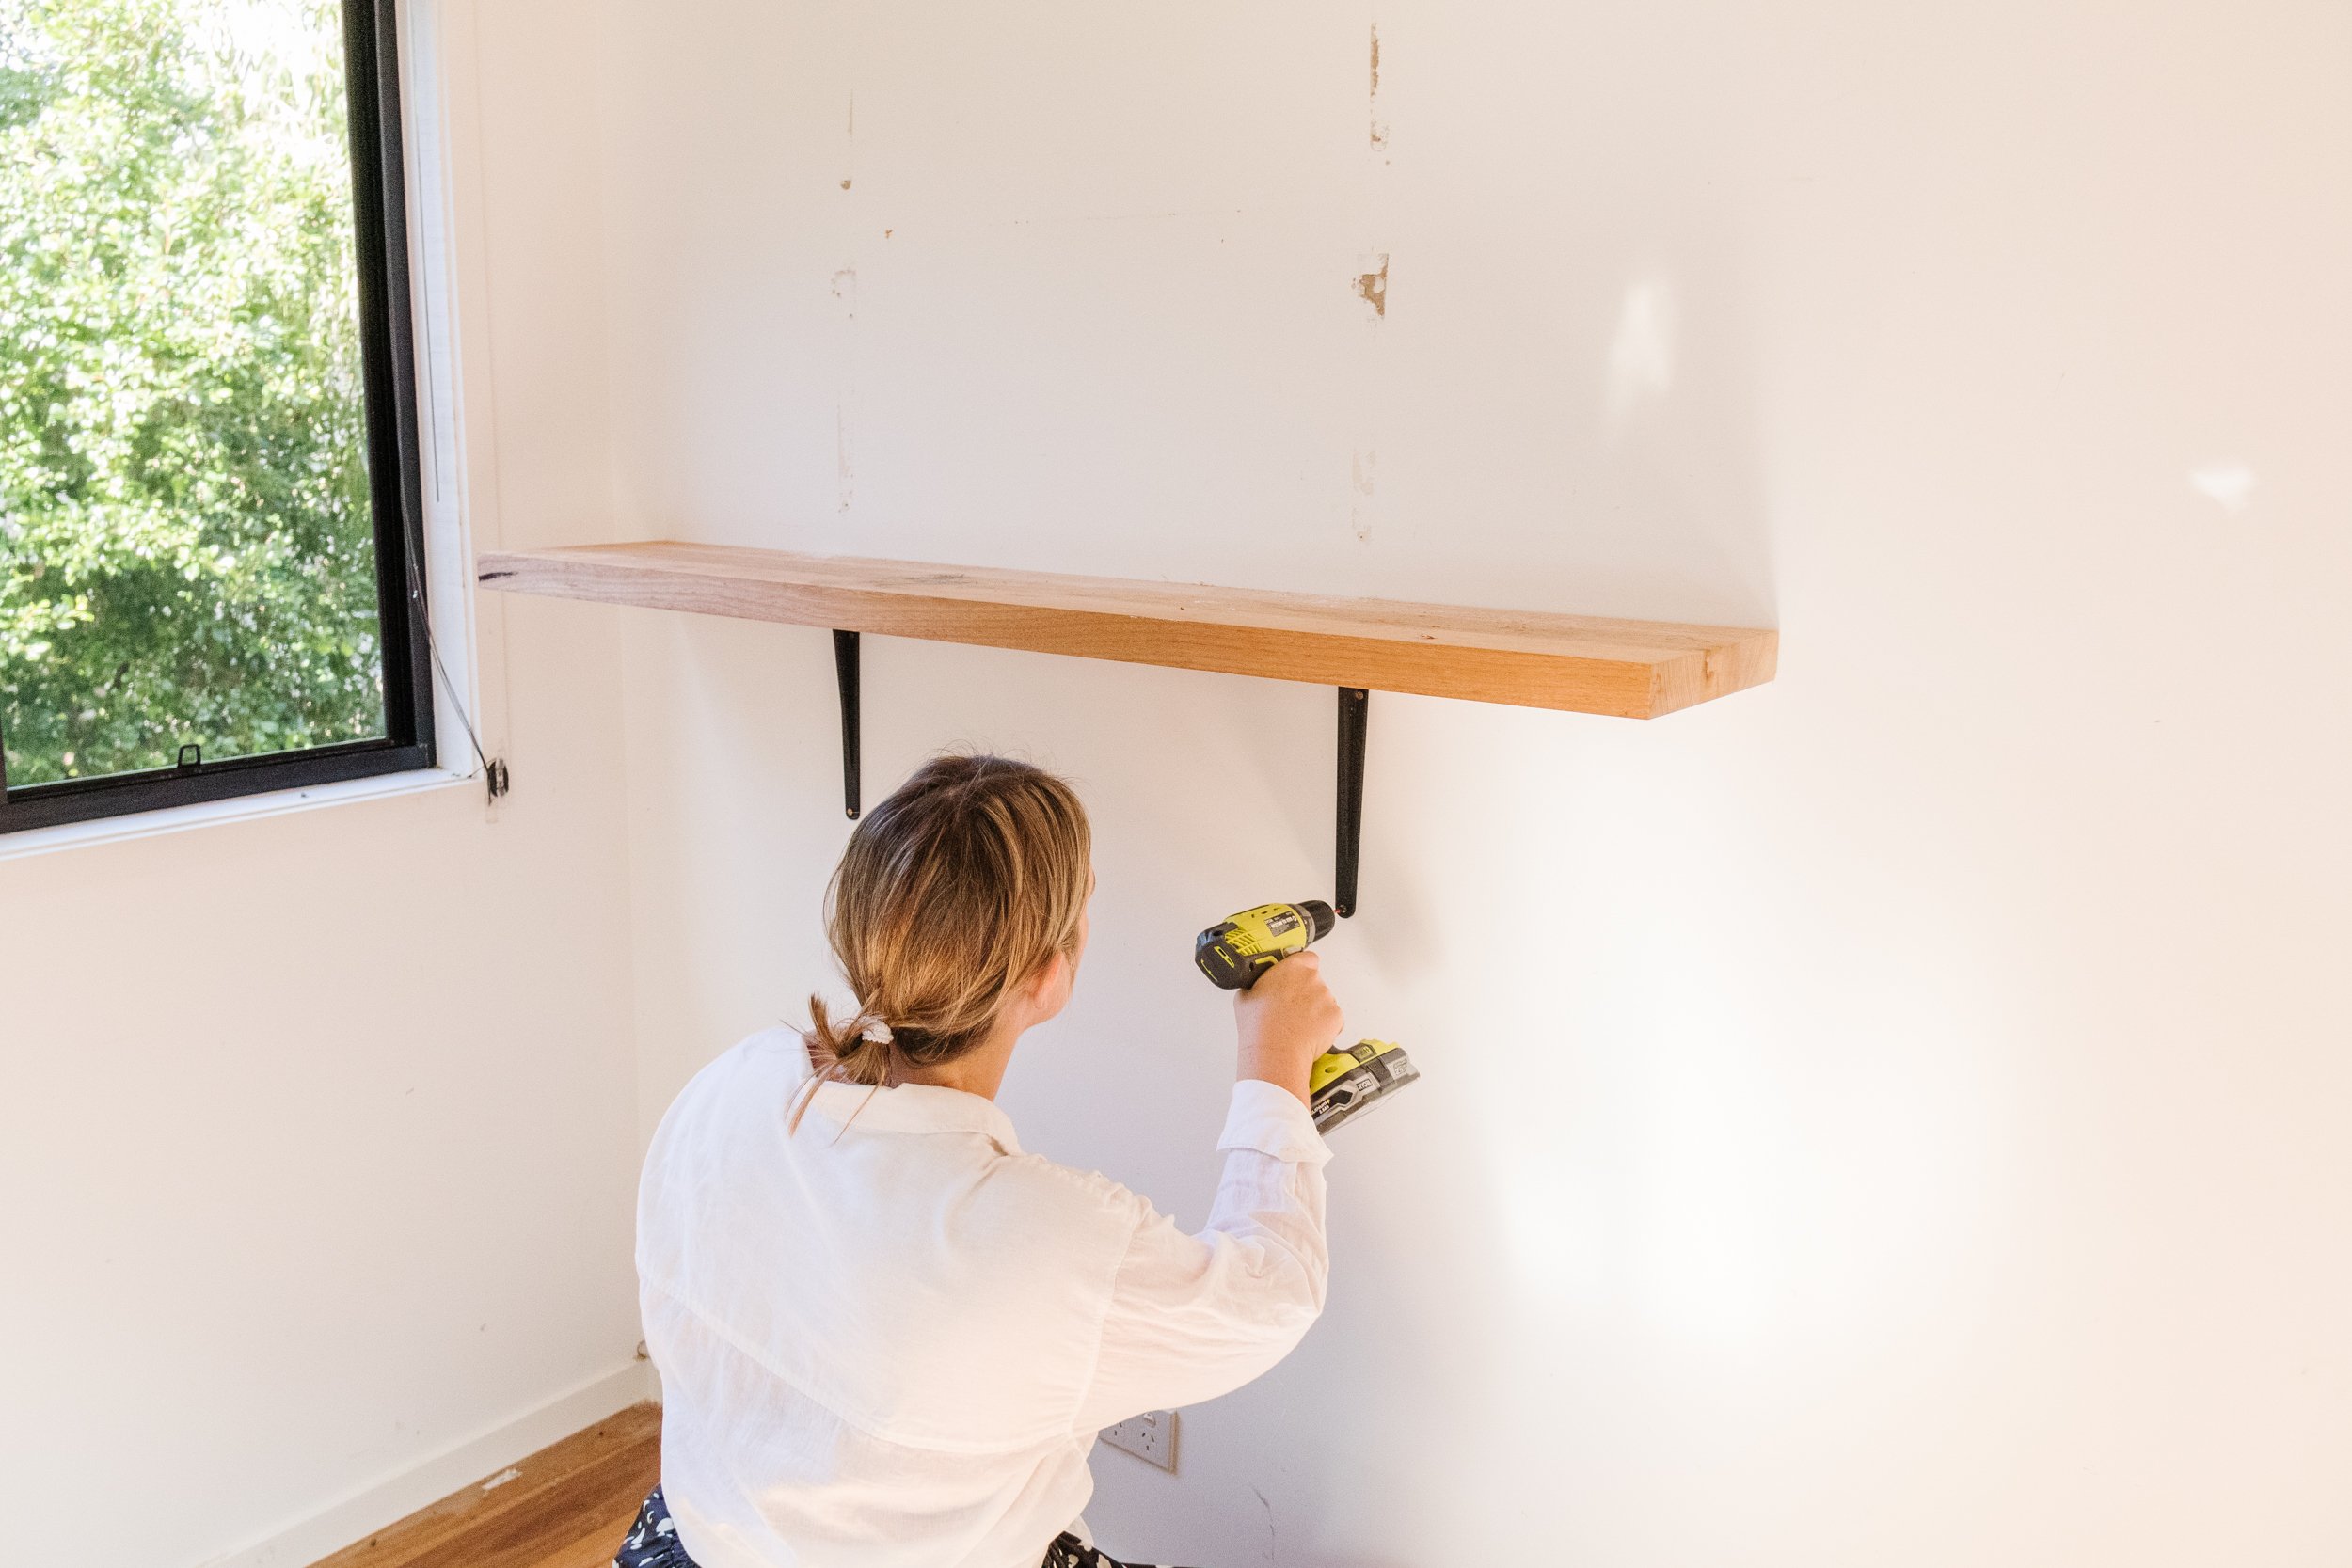
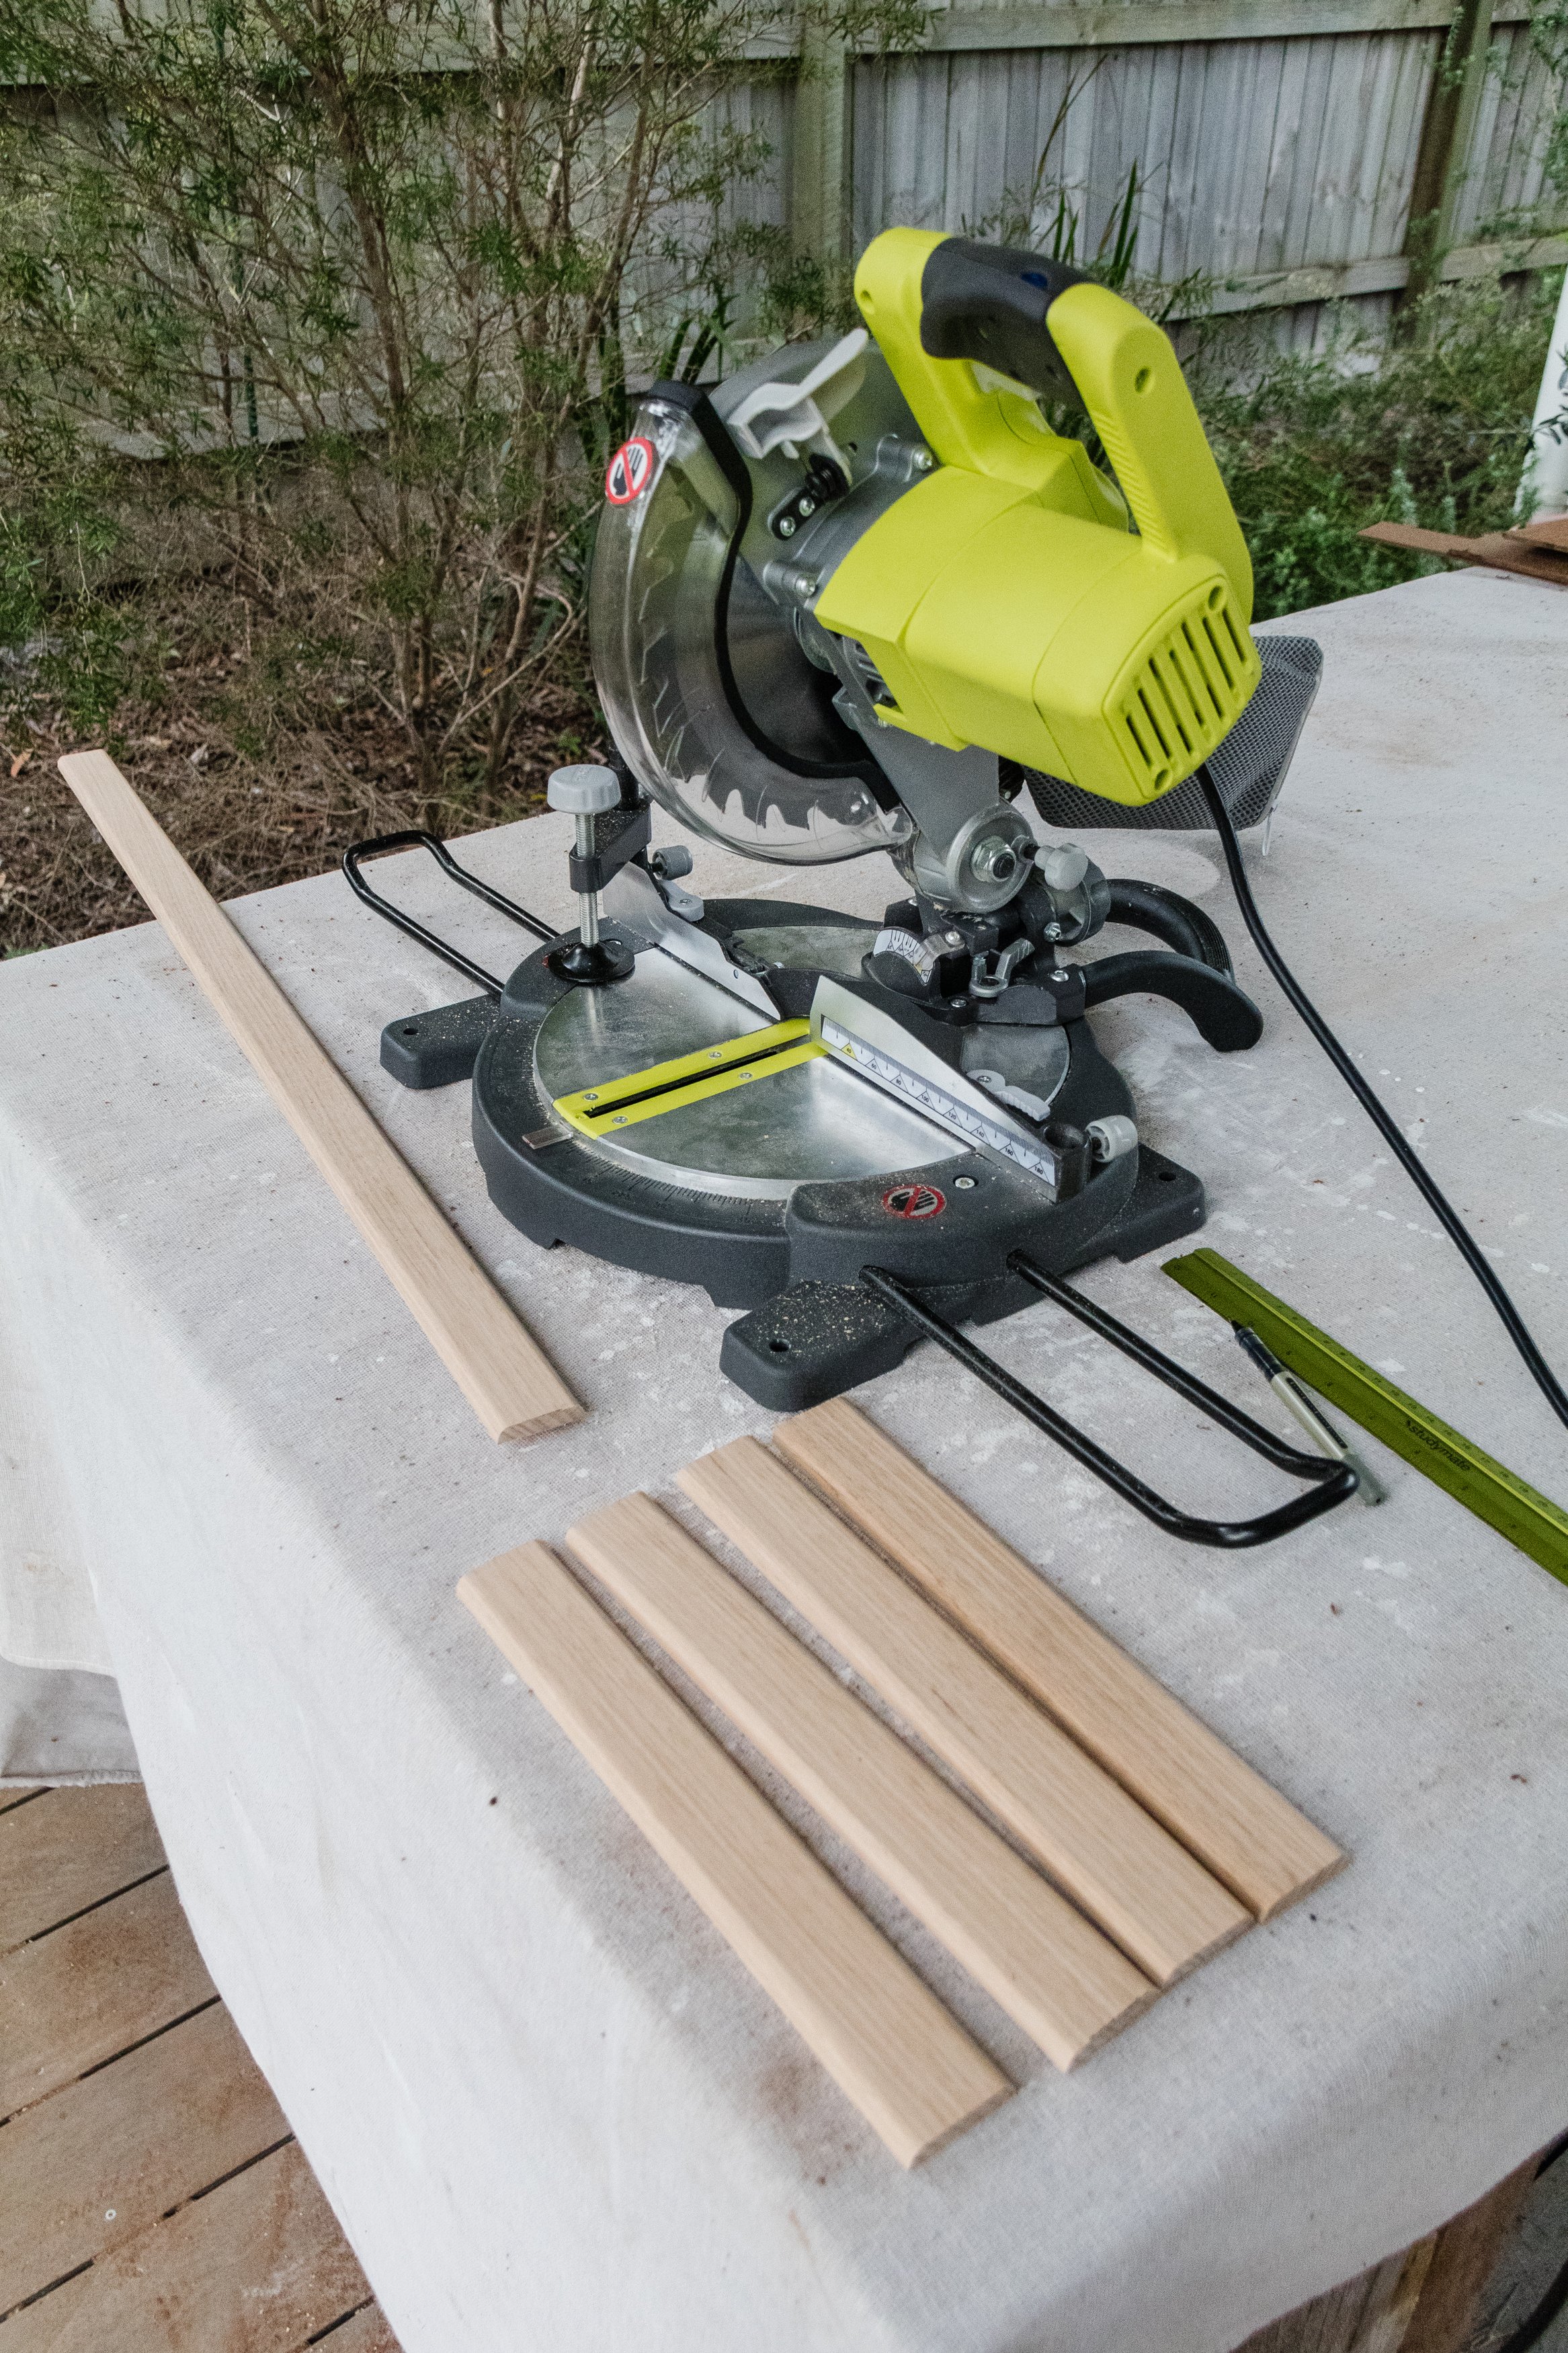
For this project I used my Ryobi Compound Mitre Saw (or you can ask Bunnings to cut the timber for you), jigsaw, Brad Nailer Gun, Ryobi Drill, Ryobi Detail Sander and Clamps. I also used safety glasses, protective mask and ear plugs while operating the mitre saw.
I also removed the fan in the studio as I have an air conditioning unit, and I got 6 downlights installed by the team at Diverse Electrical Group.
How To
DAY ONE - 4 hours
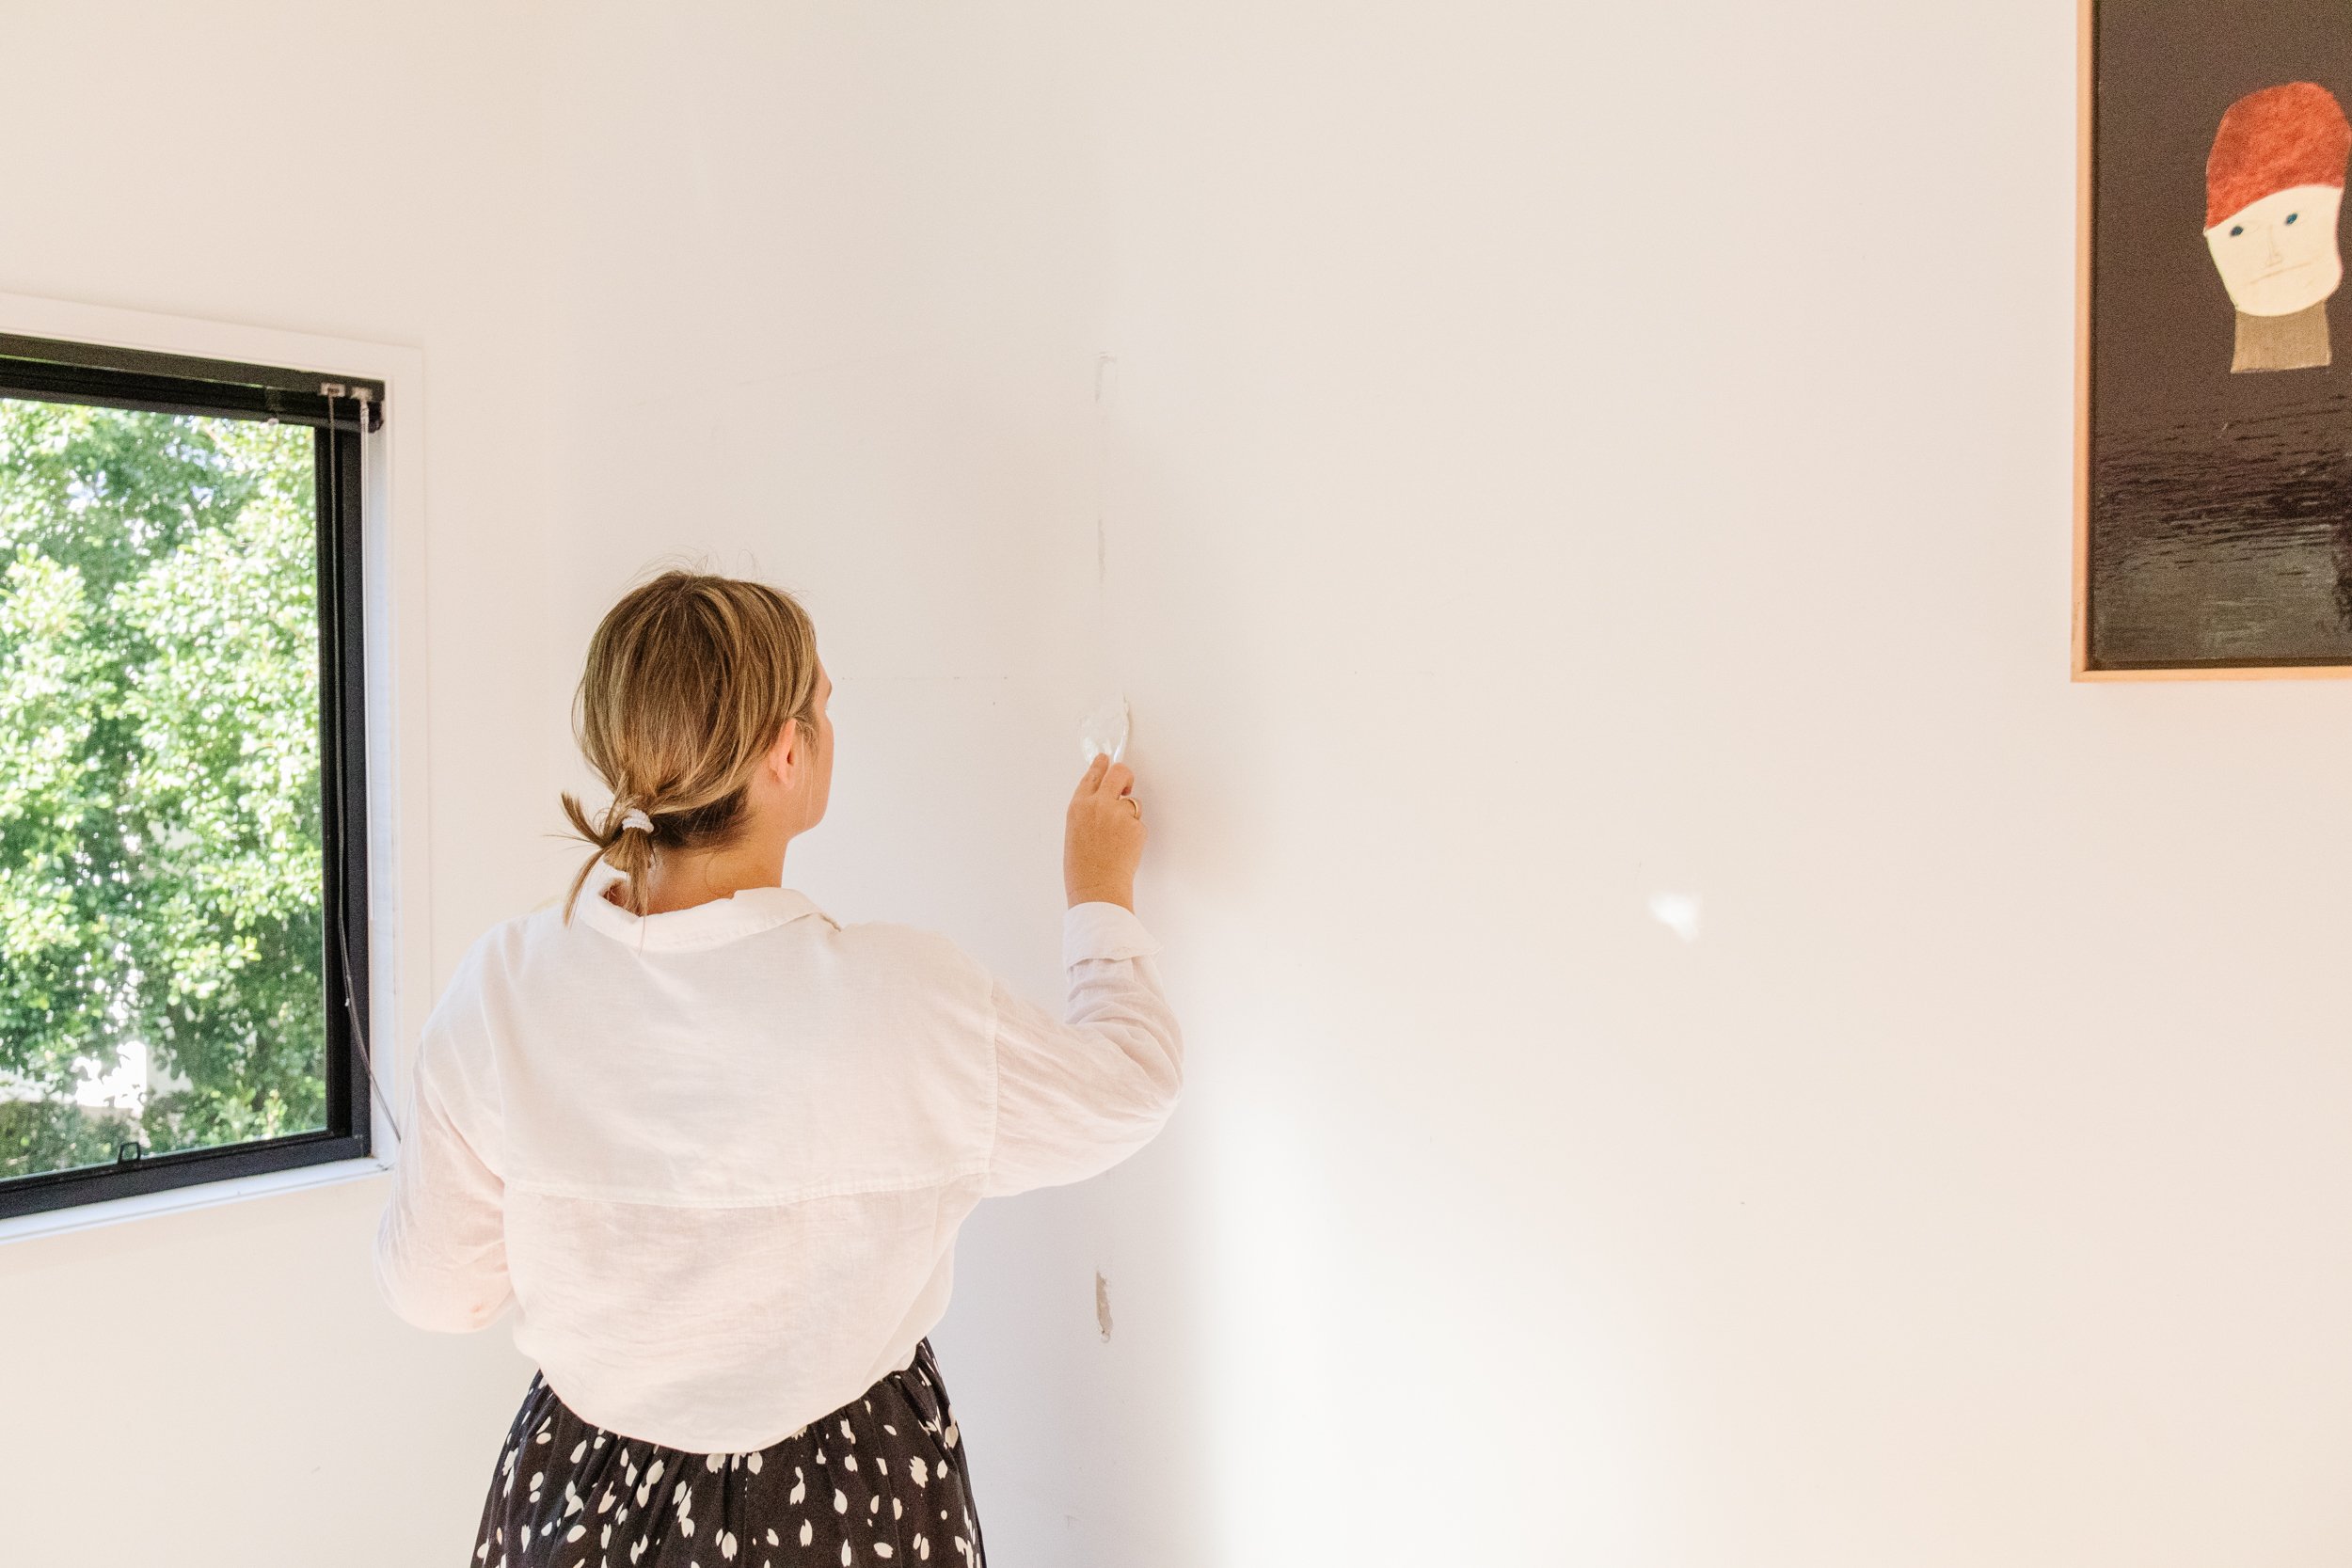
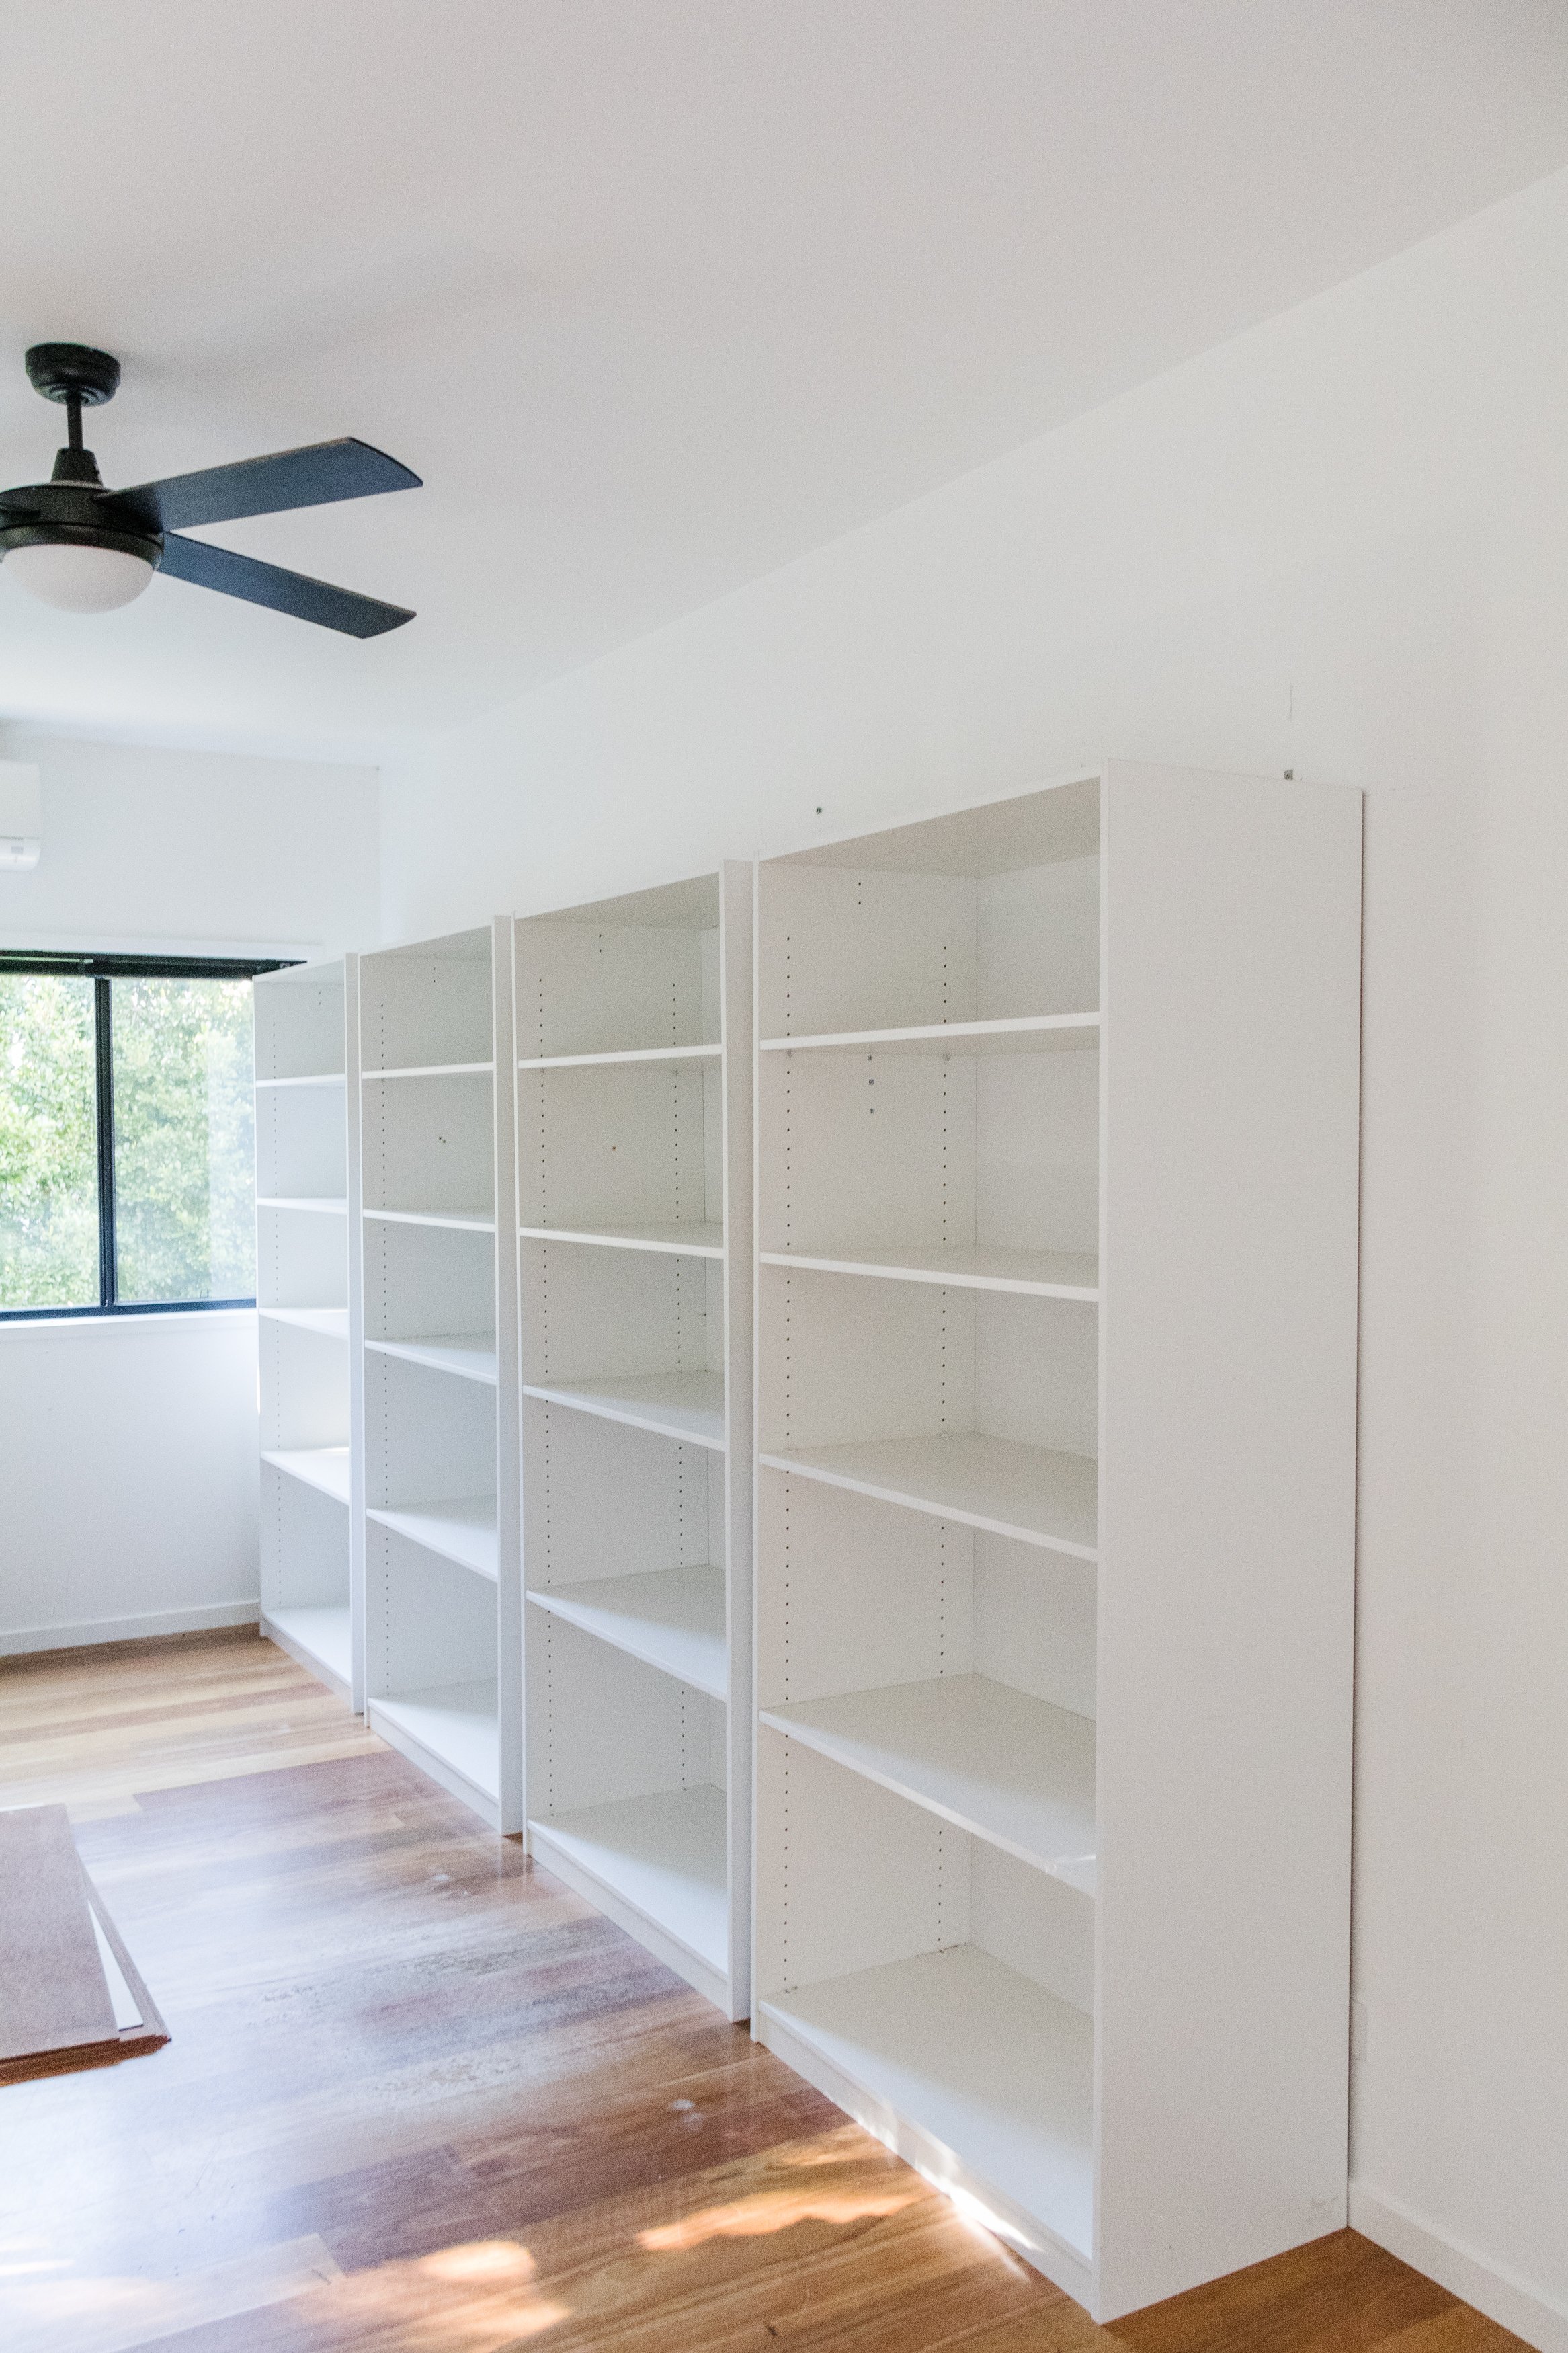
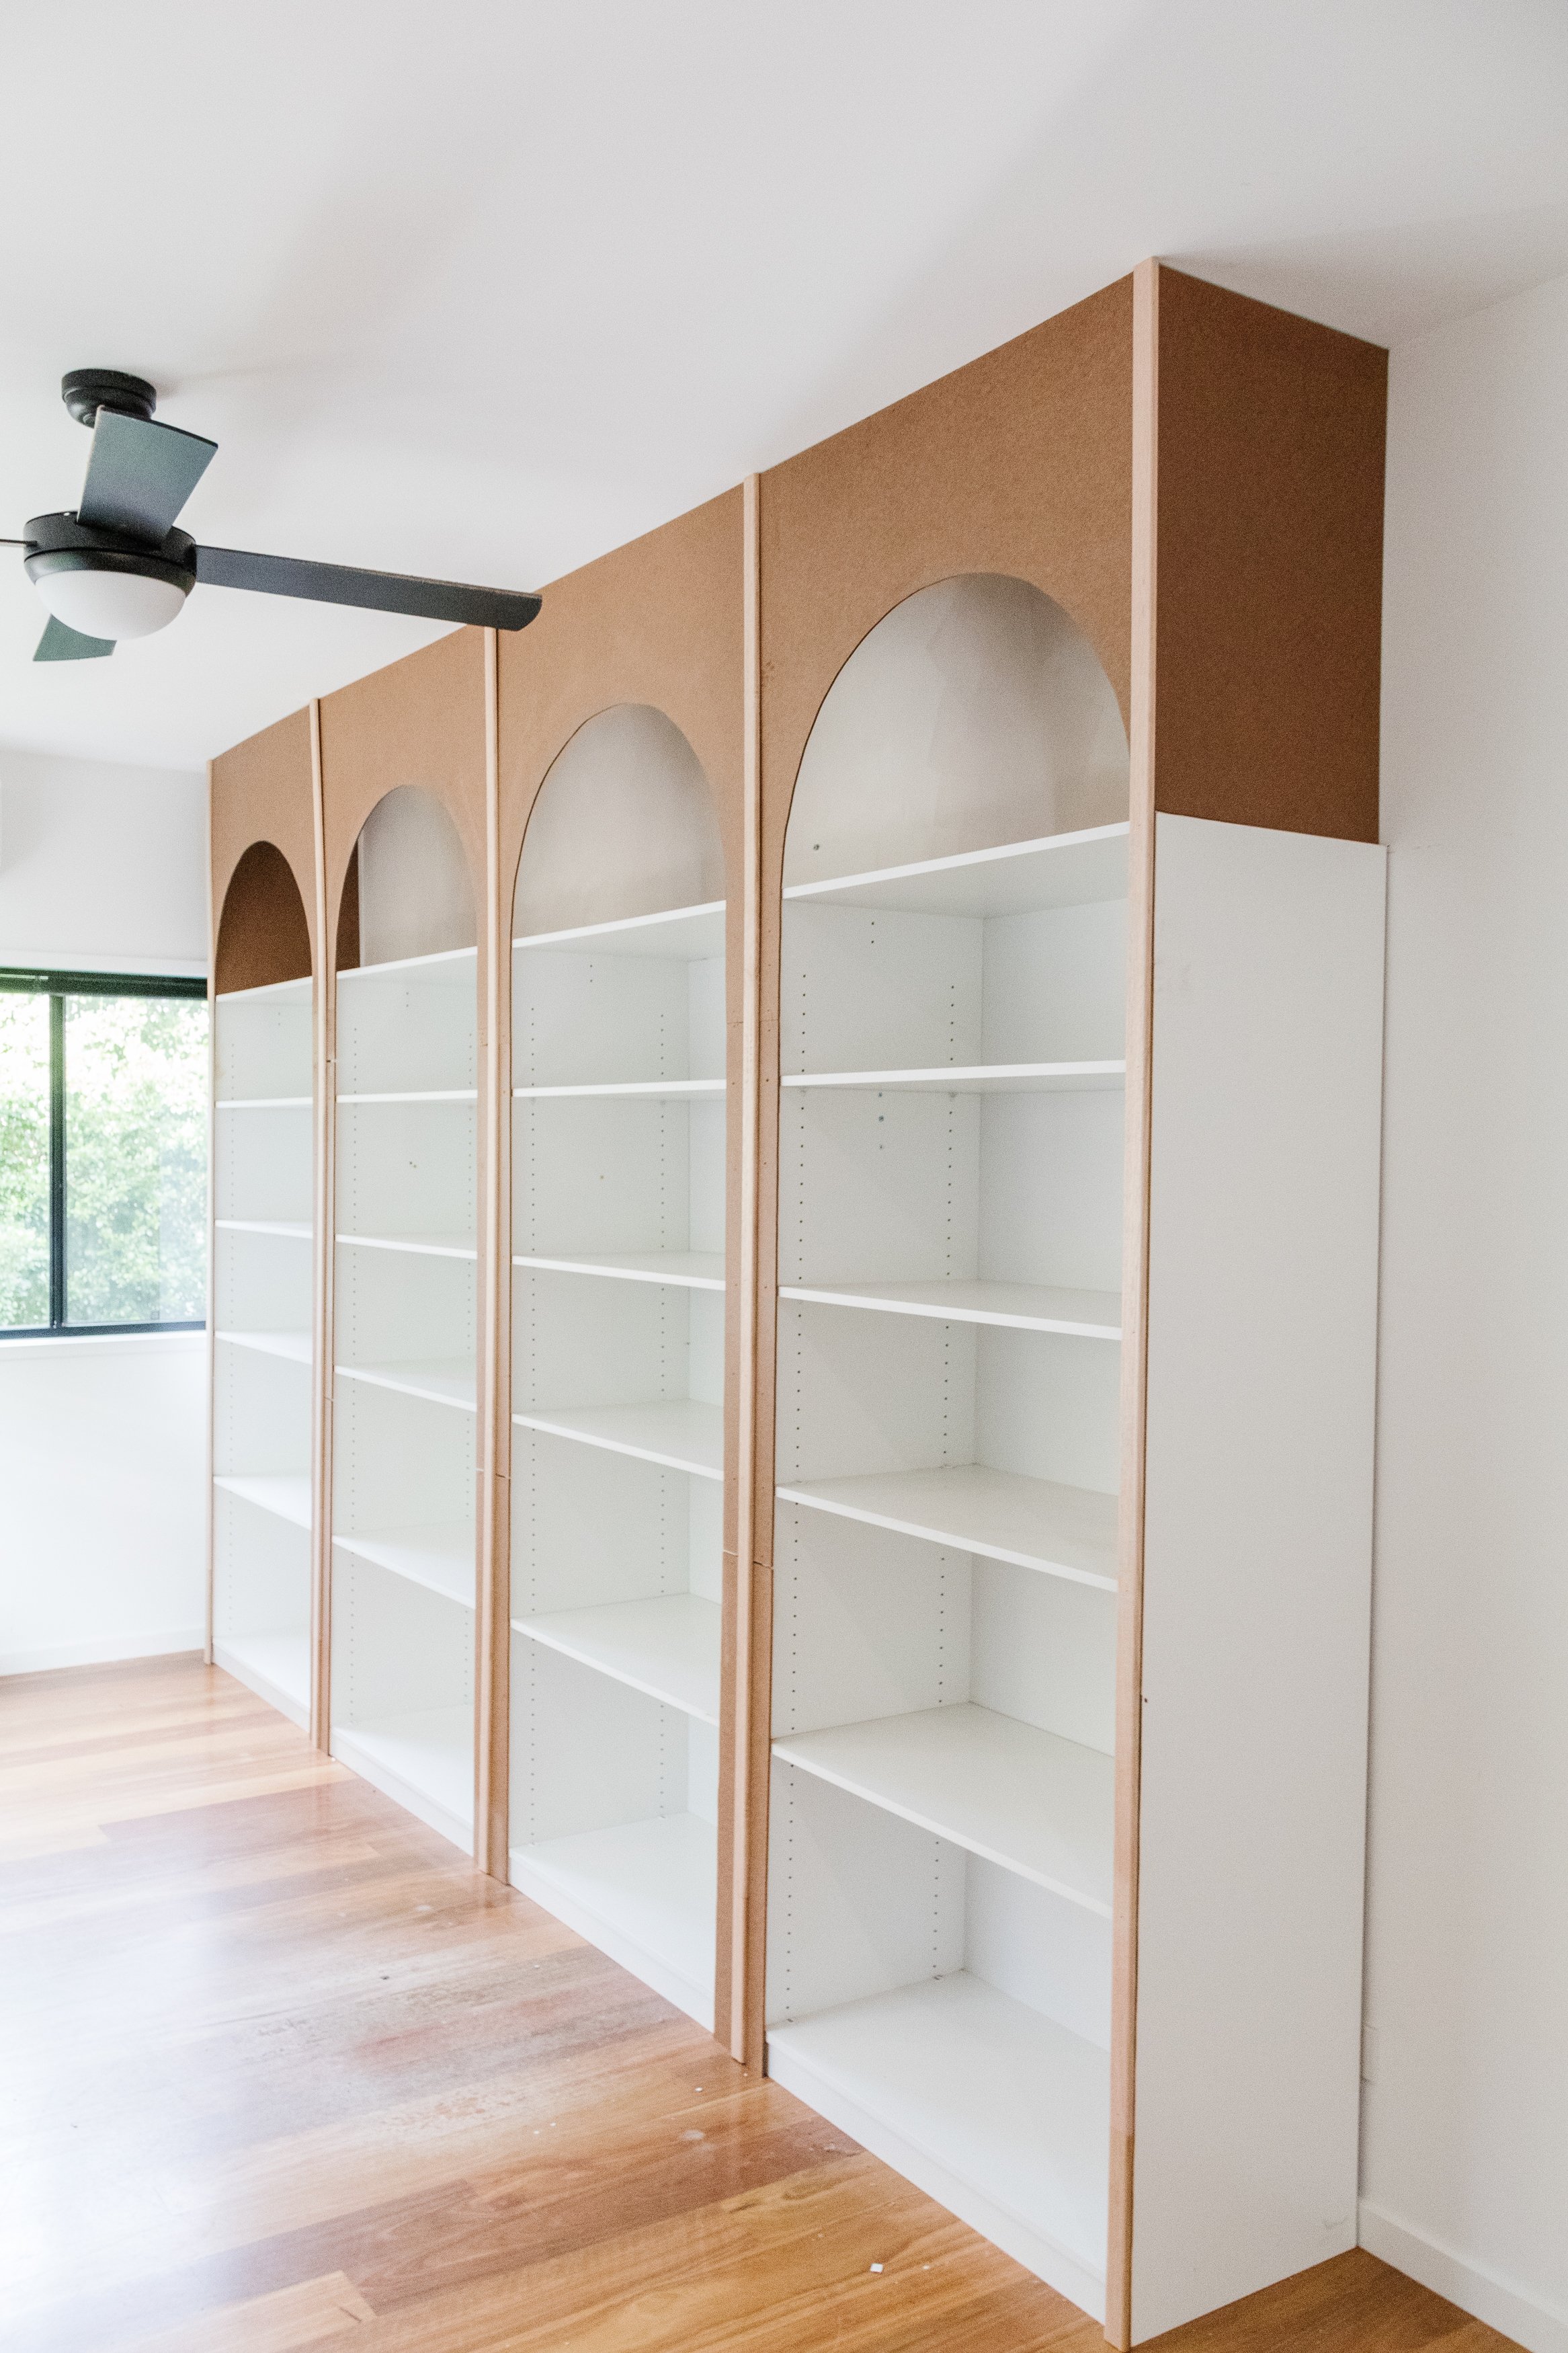
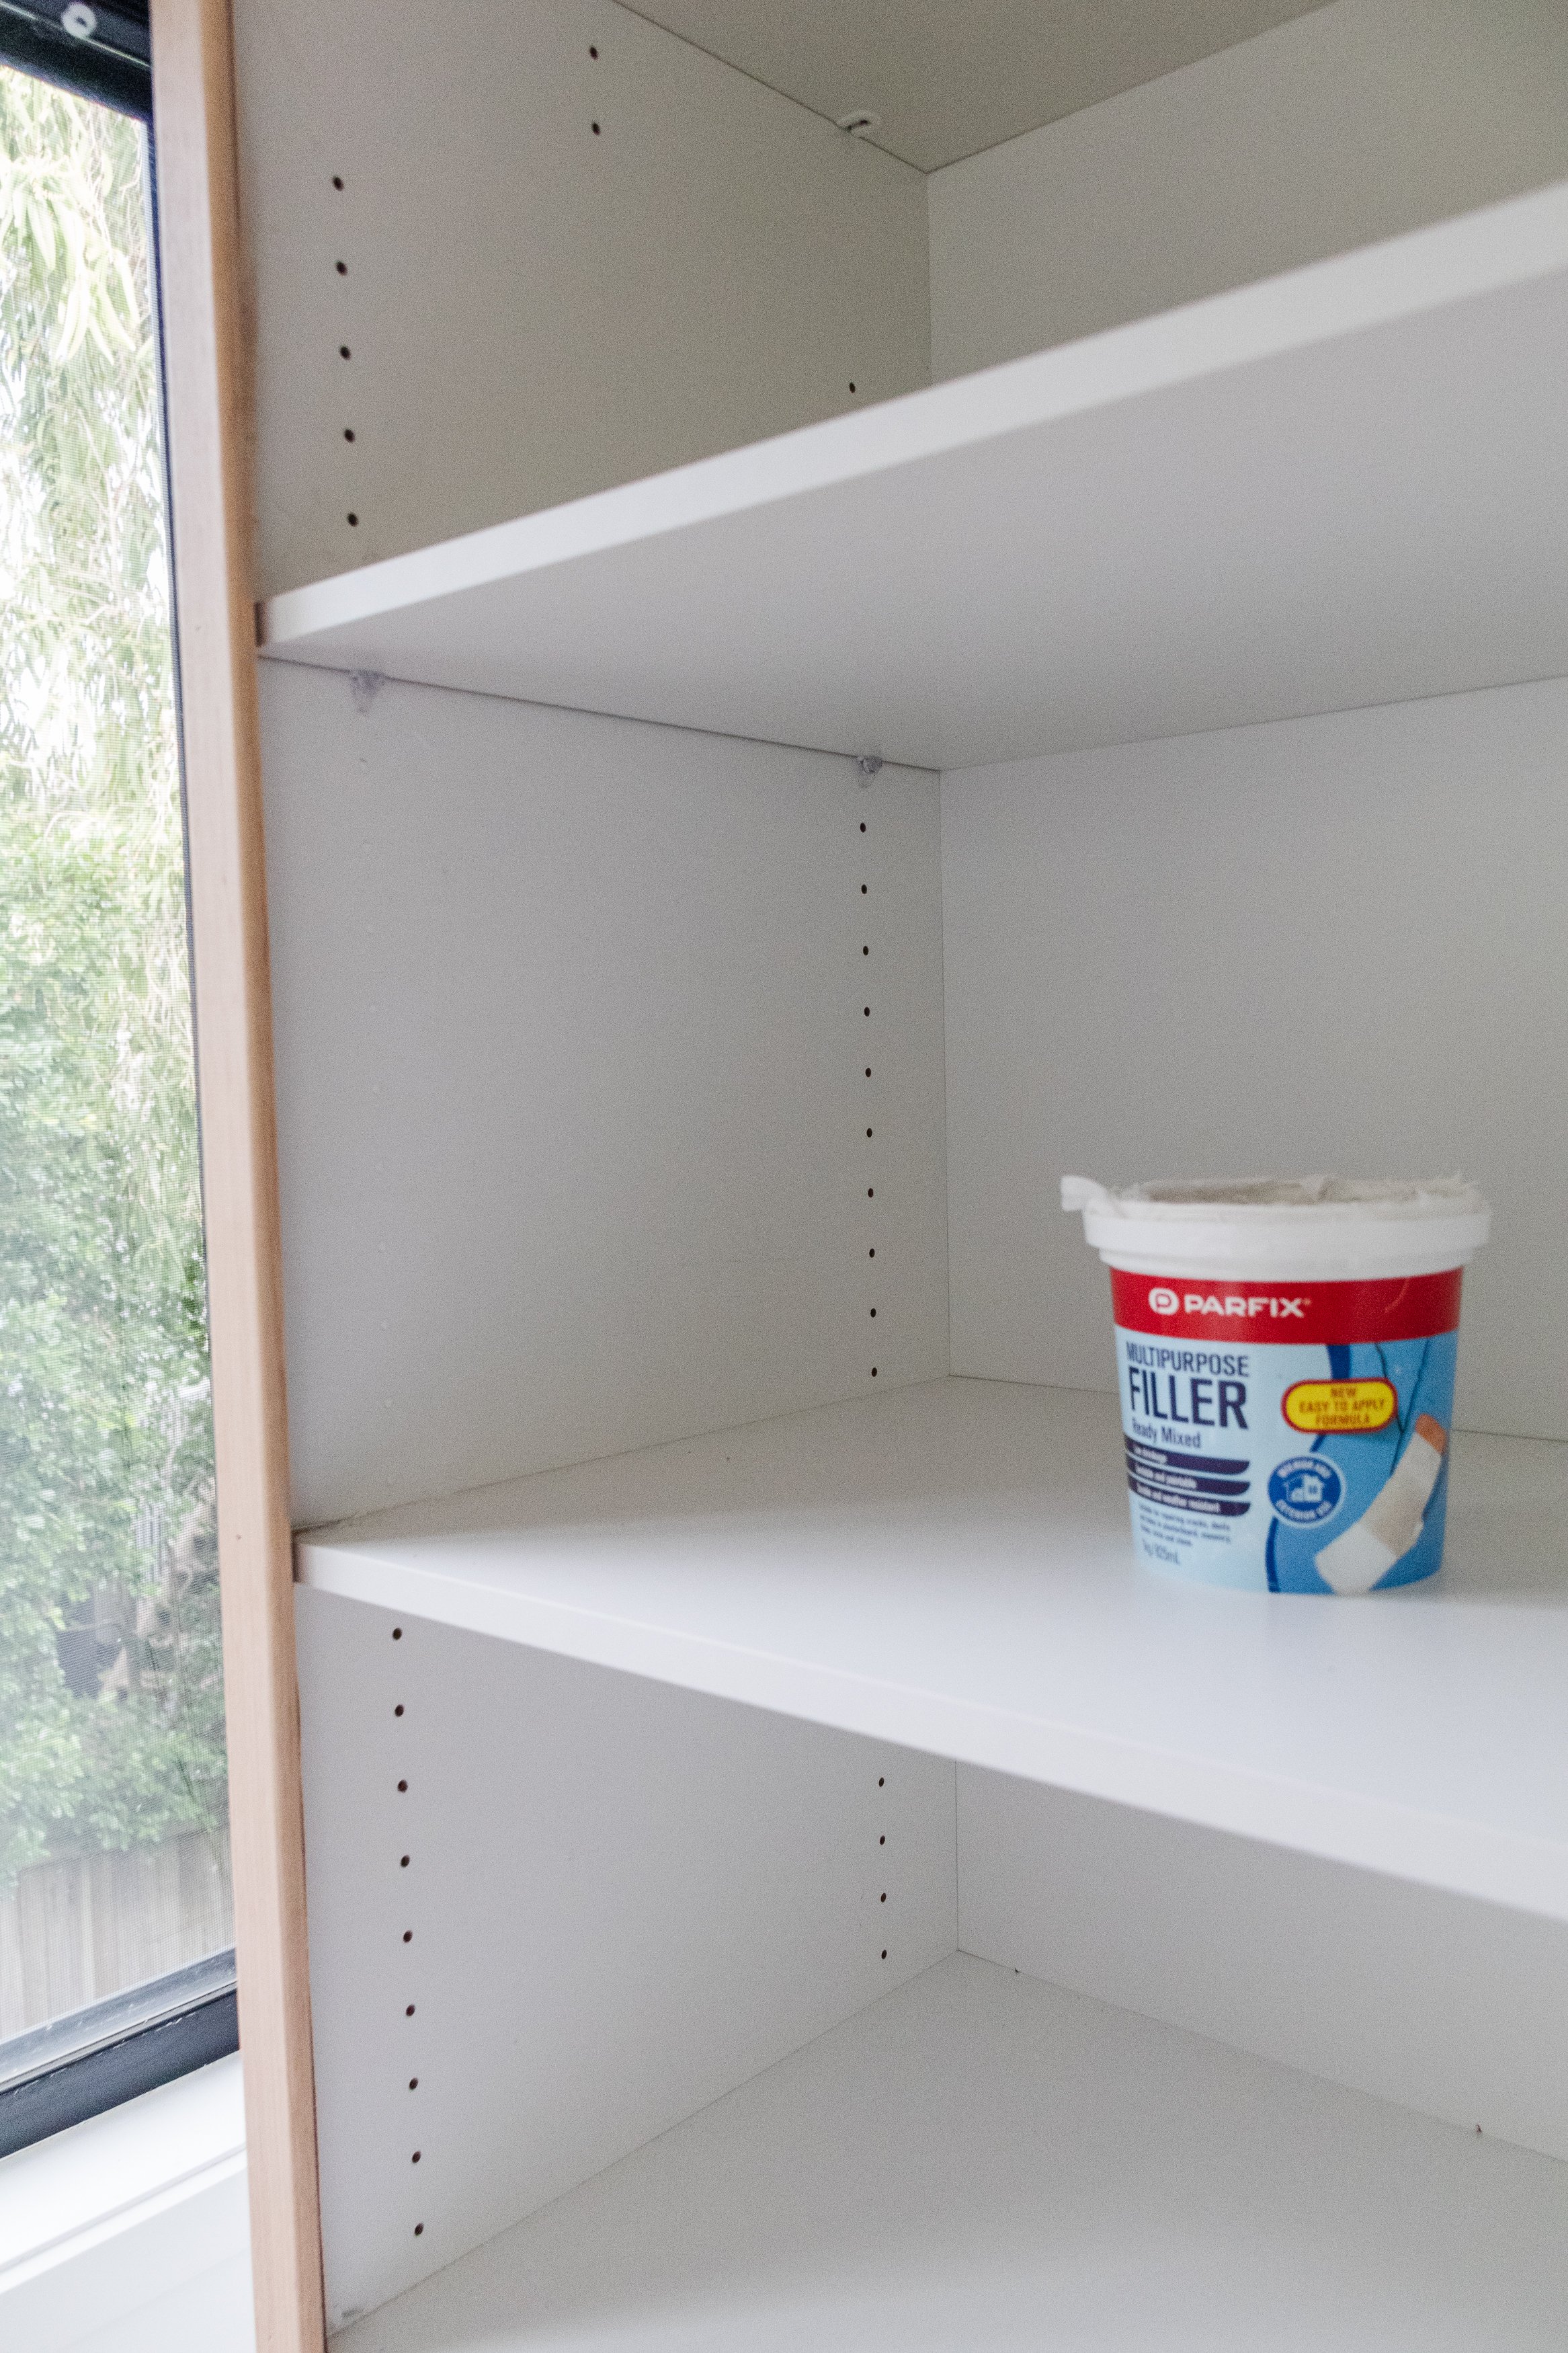
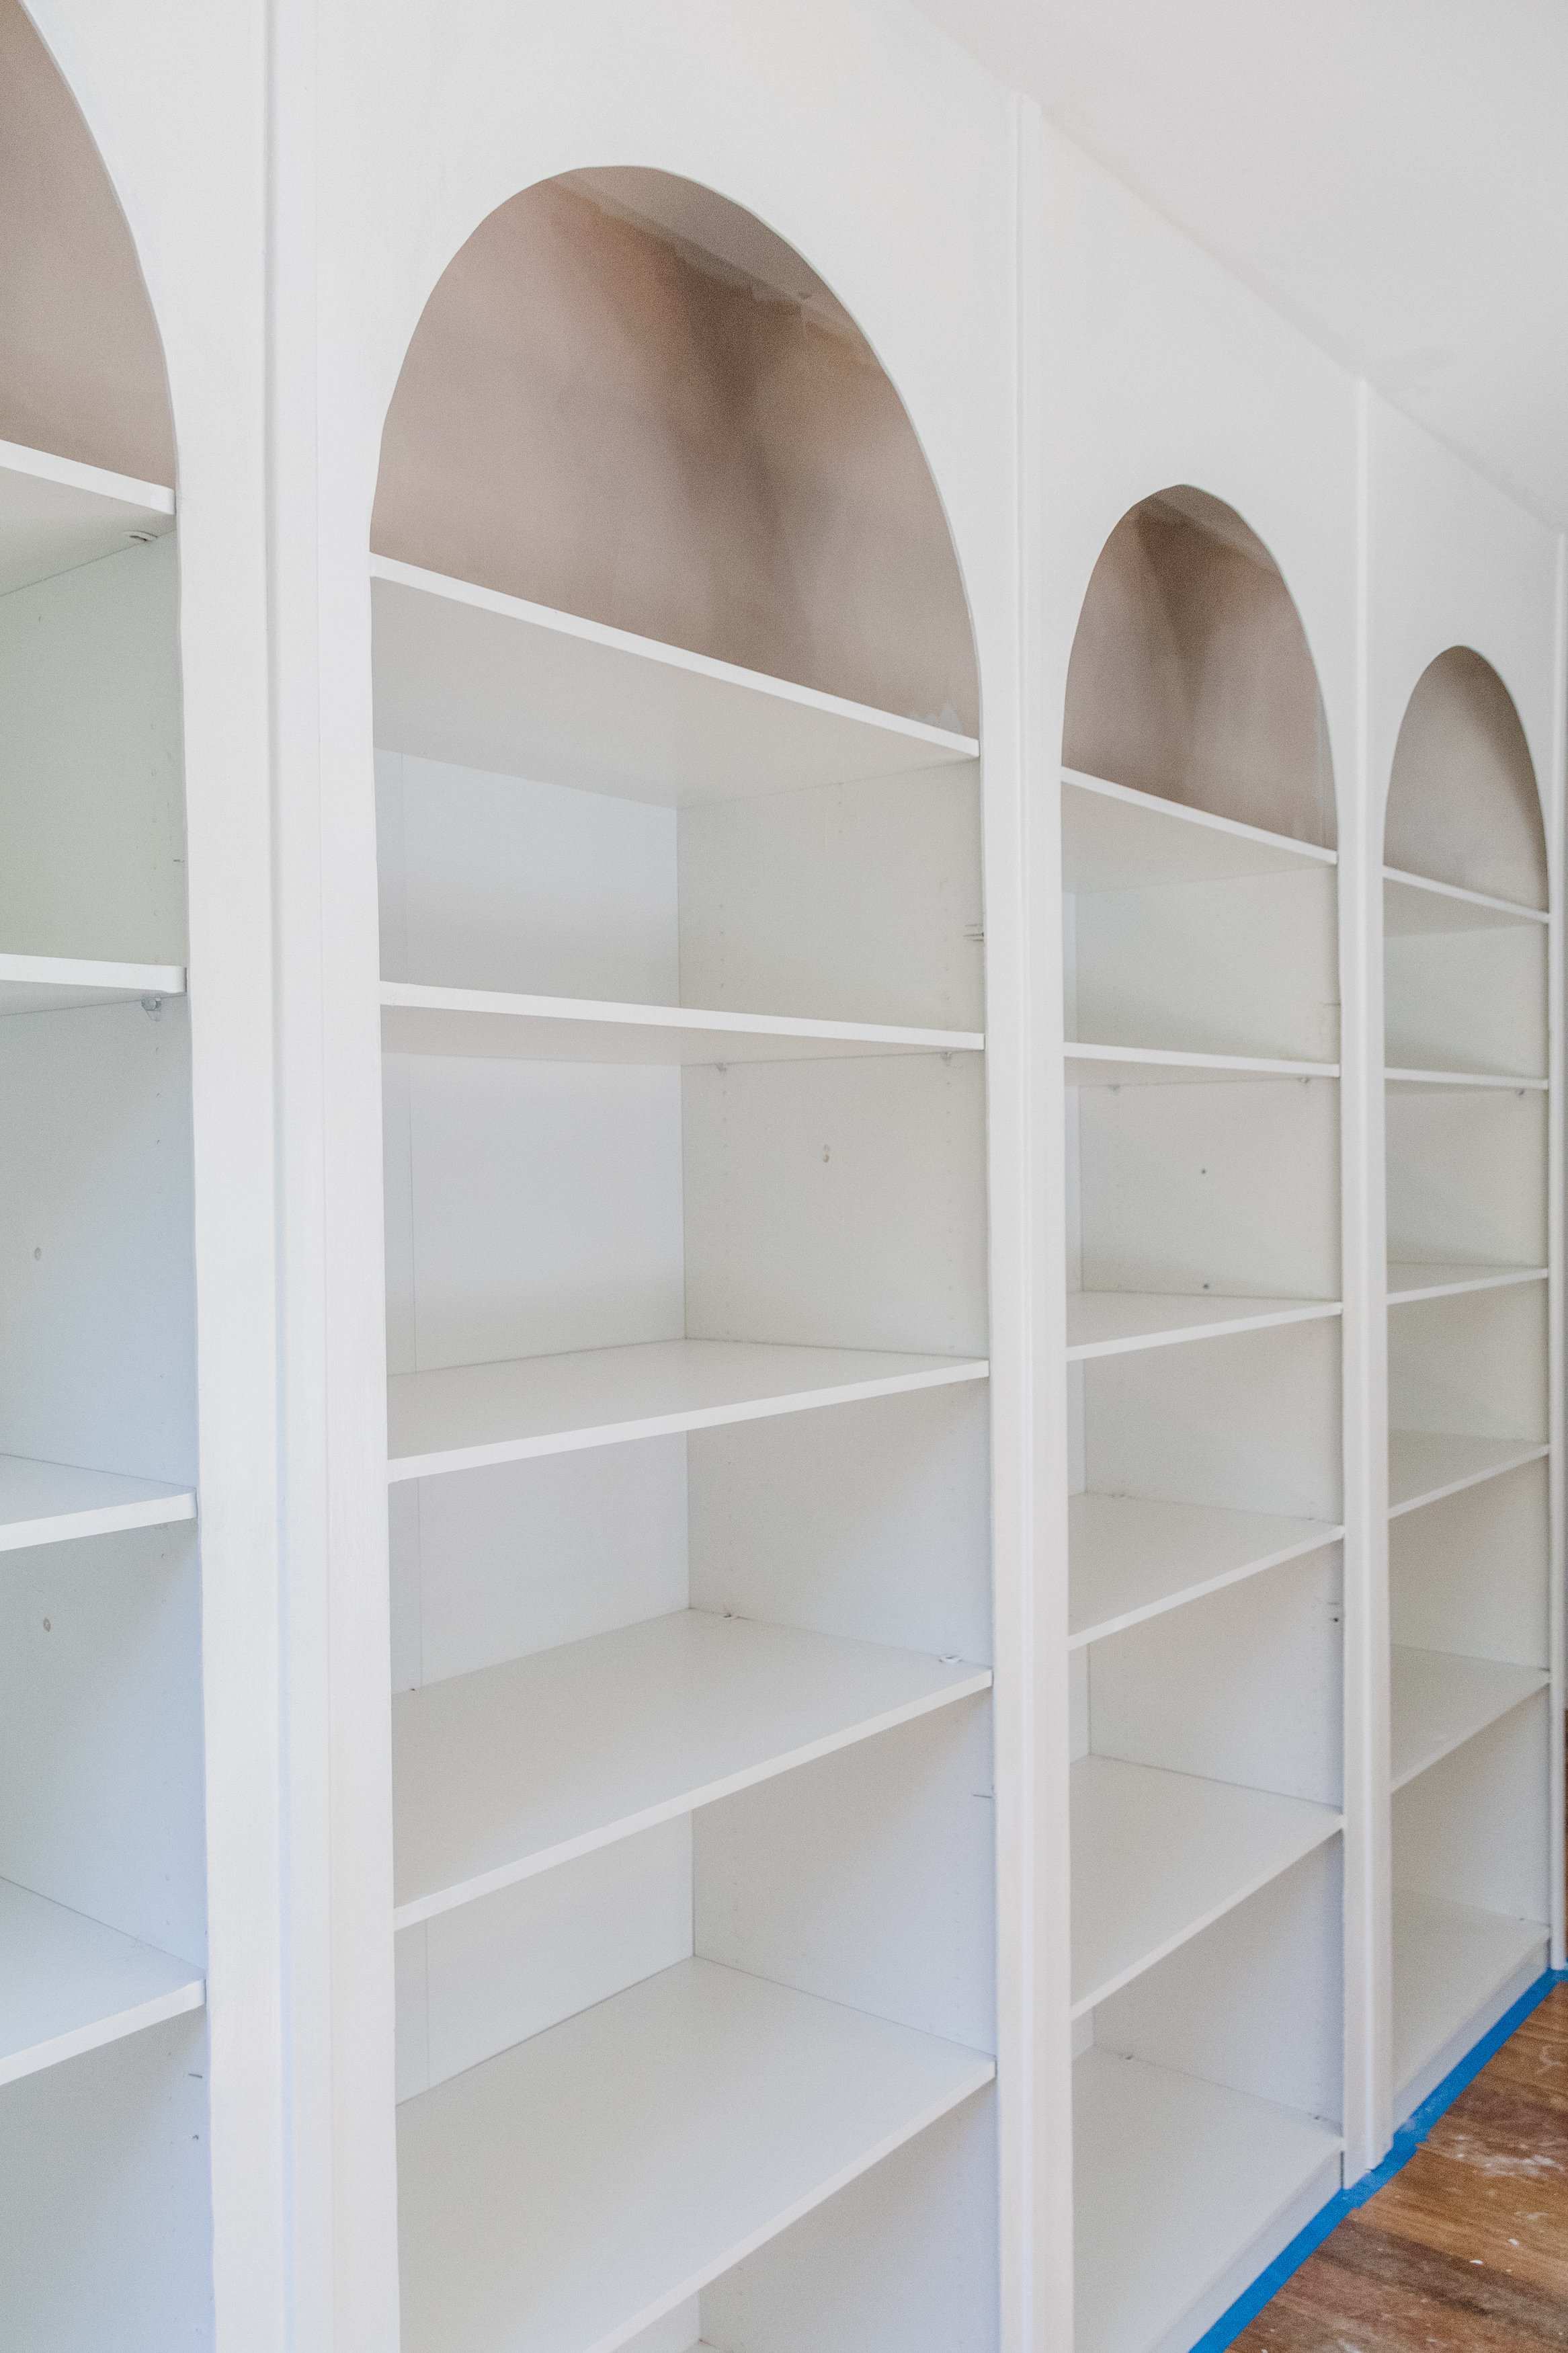
Start by clearing the wall of art, bookshelves and anything else that may be in the way. I had to remove existing bookshelves, which tore the plaster off the wall so I patched these spots up using multi-purpose filler. Sweep the floor and ensure the area is clear of furniture and debris.
The next step is to the assemble the robe inserts; this is a two person job and you will need a screwdriver. Line the bookshelves along the wall and mark where the wall studs are in the wall.
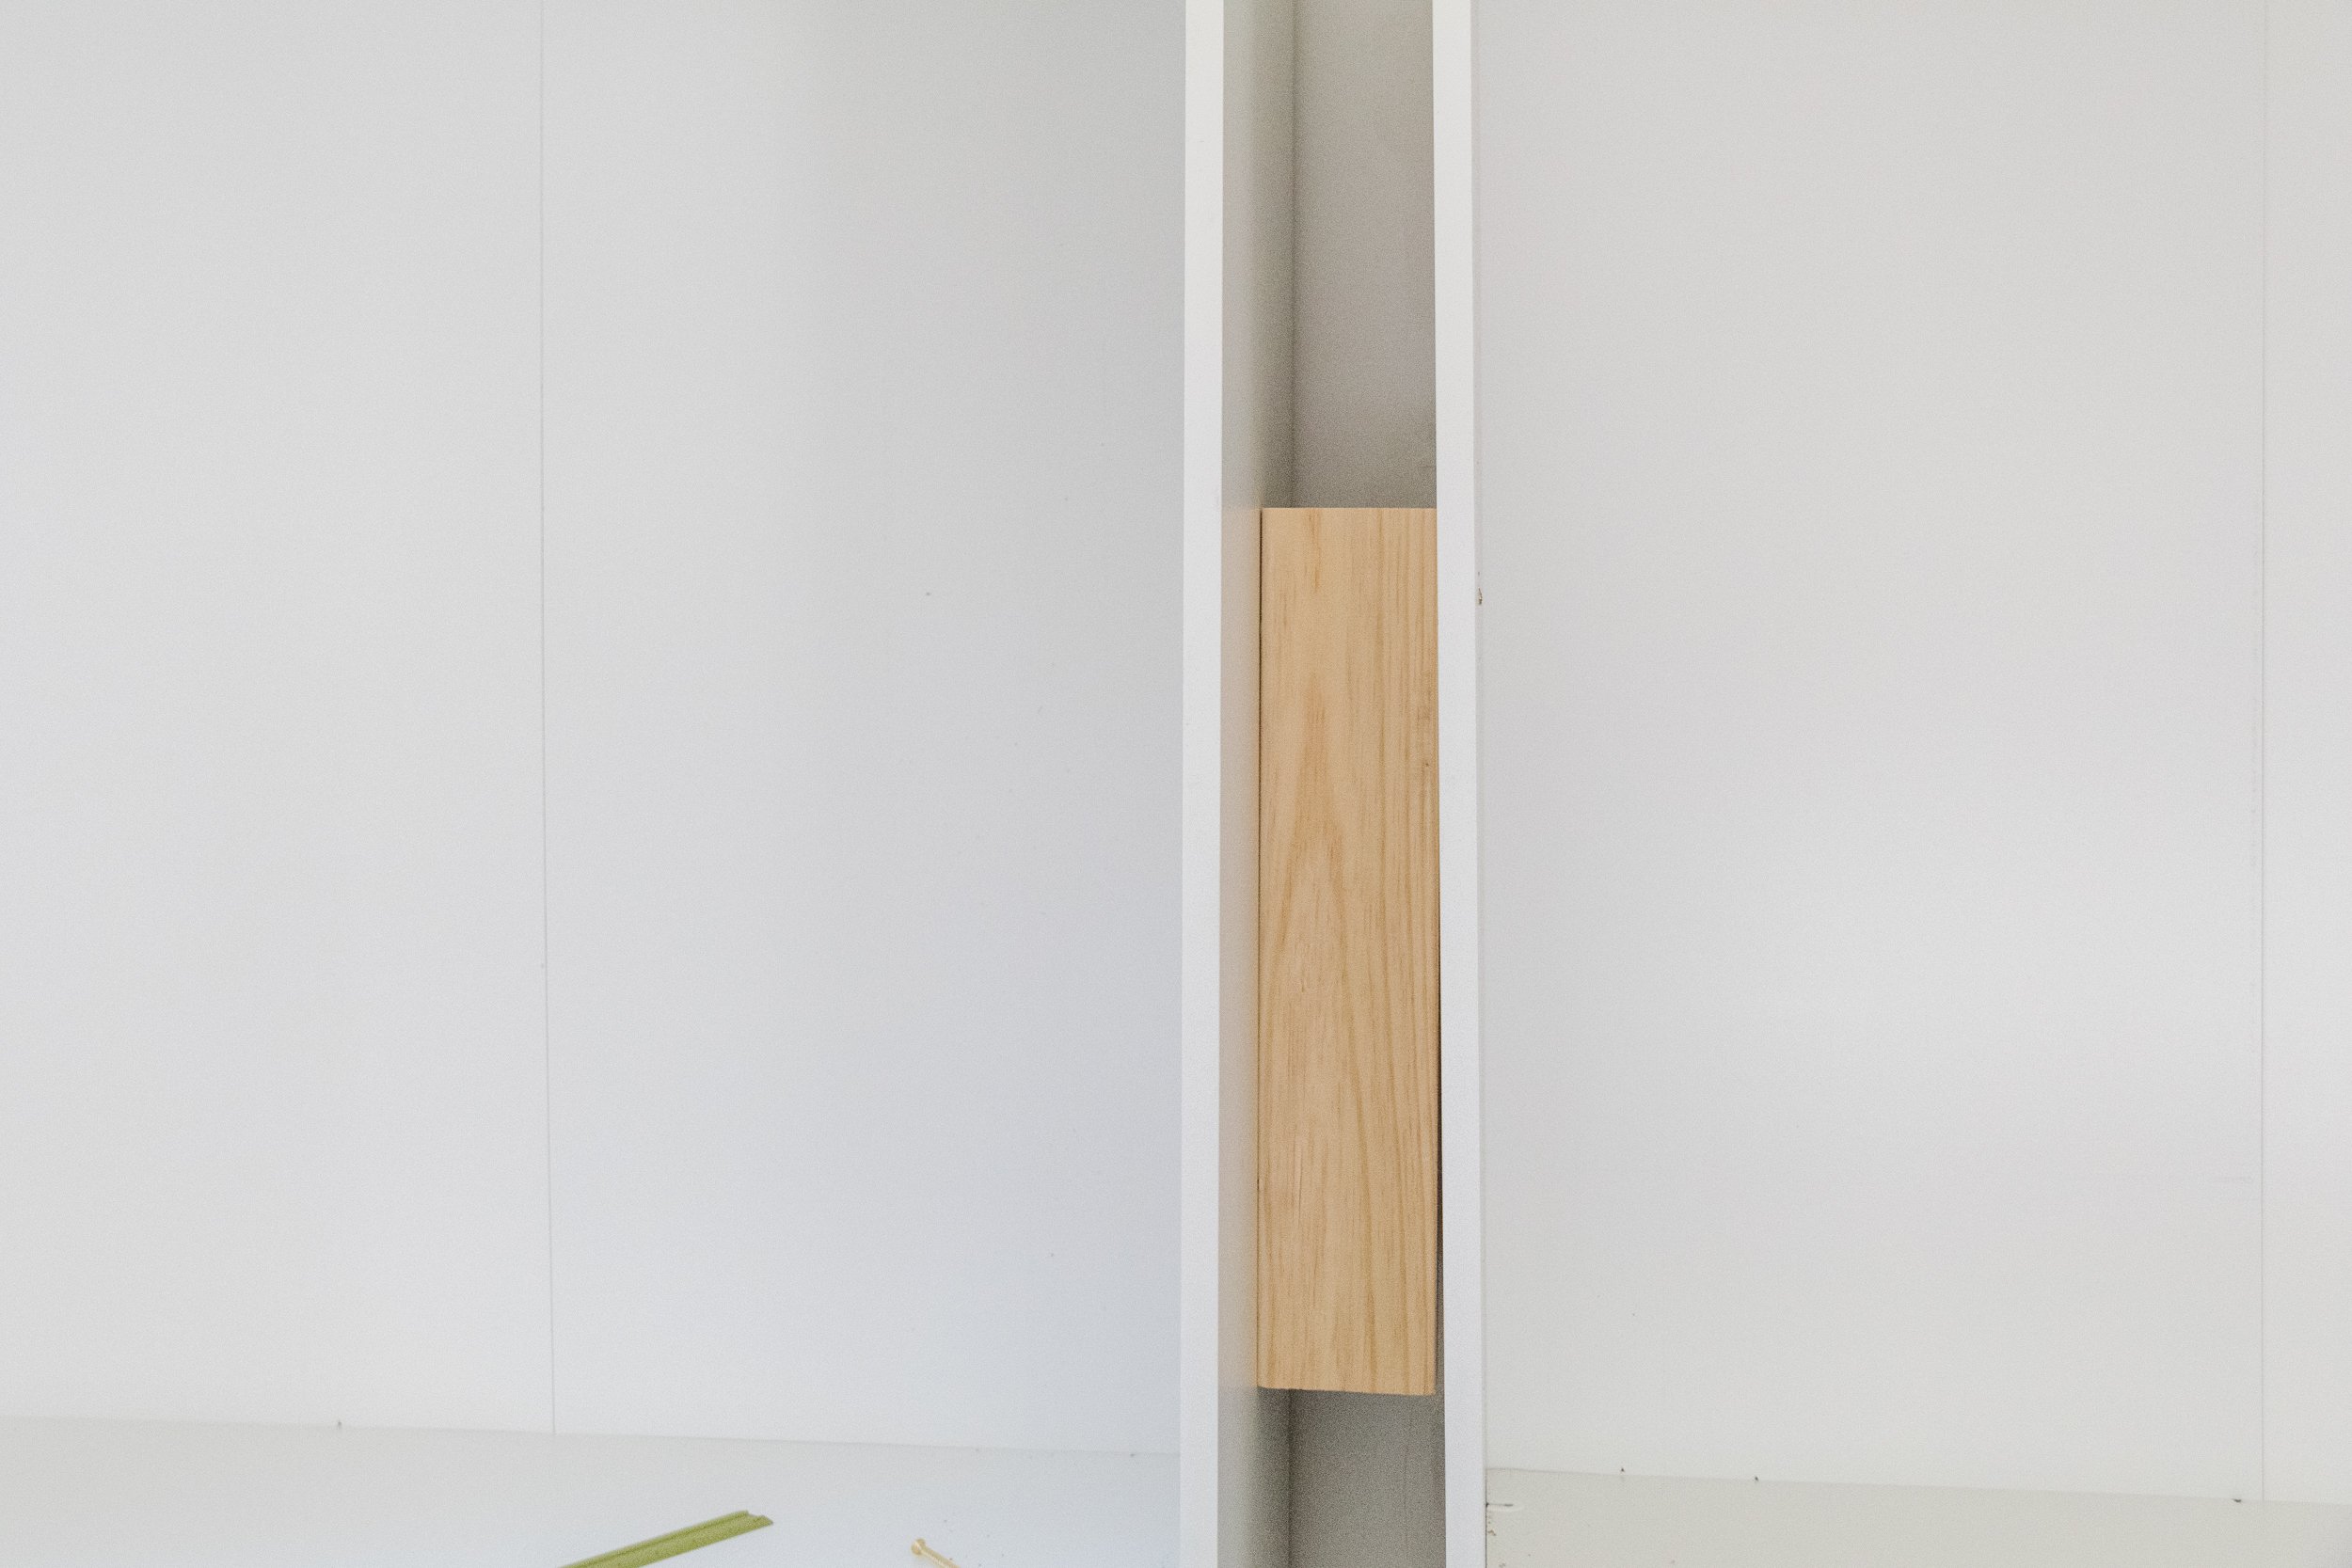
Position the first two robe inserts in place. Place a piece of cut pine in between the robe inserts and drill one screw into the timber from either side of the two robe inserts. Use a level to ensure the robe inserts are perfectly in line with each other. Secure the two robe inserts to the wall using the angle brackets.
Repeat along the robe inserts until they are all connected and secured to the wall. Paint the wall between the ceiling and the top of the robe inserts. This doesn’t have to be perfect but paint at least one coat as it’ll help later on.


DAY TWO - 8 hours
Hold one panel of hardboard above one robe insert (ensure it’s pushed up flush to the ceiling) and using a pen make the following marks below. If this sounds confusing, please head over to my Instagram Stories under “Arched Library” and watch how I did this step.
Please ensure the hardboard panel is pushed up flush to the ceiling before moving onto the next steps. You will need someone to help you with this.
Make a mark indicating the top of the shelf on the left side.
Make a mark noting where the side of the robe insert starts on the left side as well as the inside of the robe insert. Mark 2cm inwards from the inside mark. Repeat for the right side.
Then make another mark halfway between the first and second robe insert.
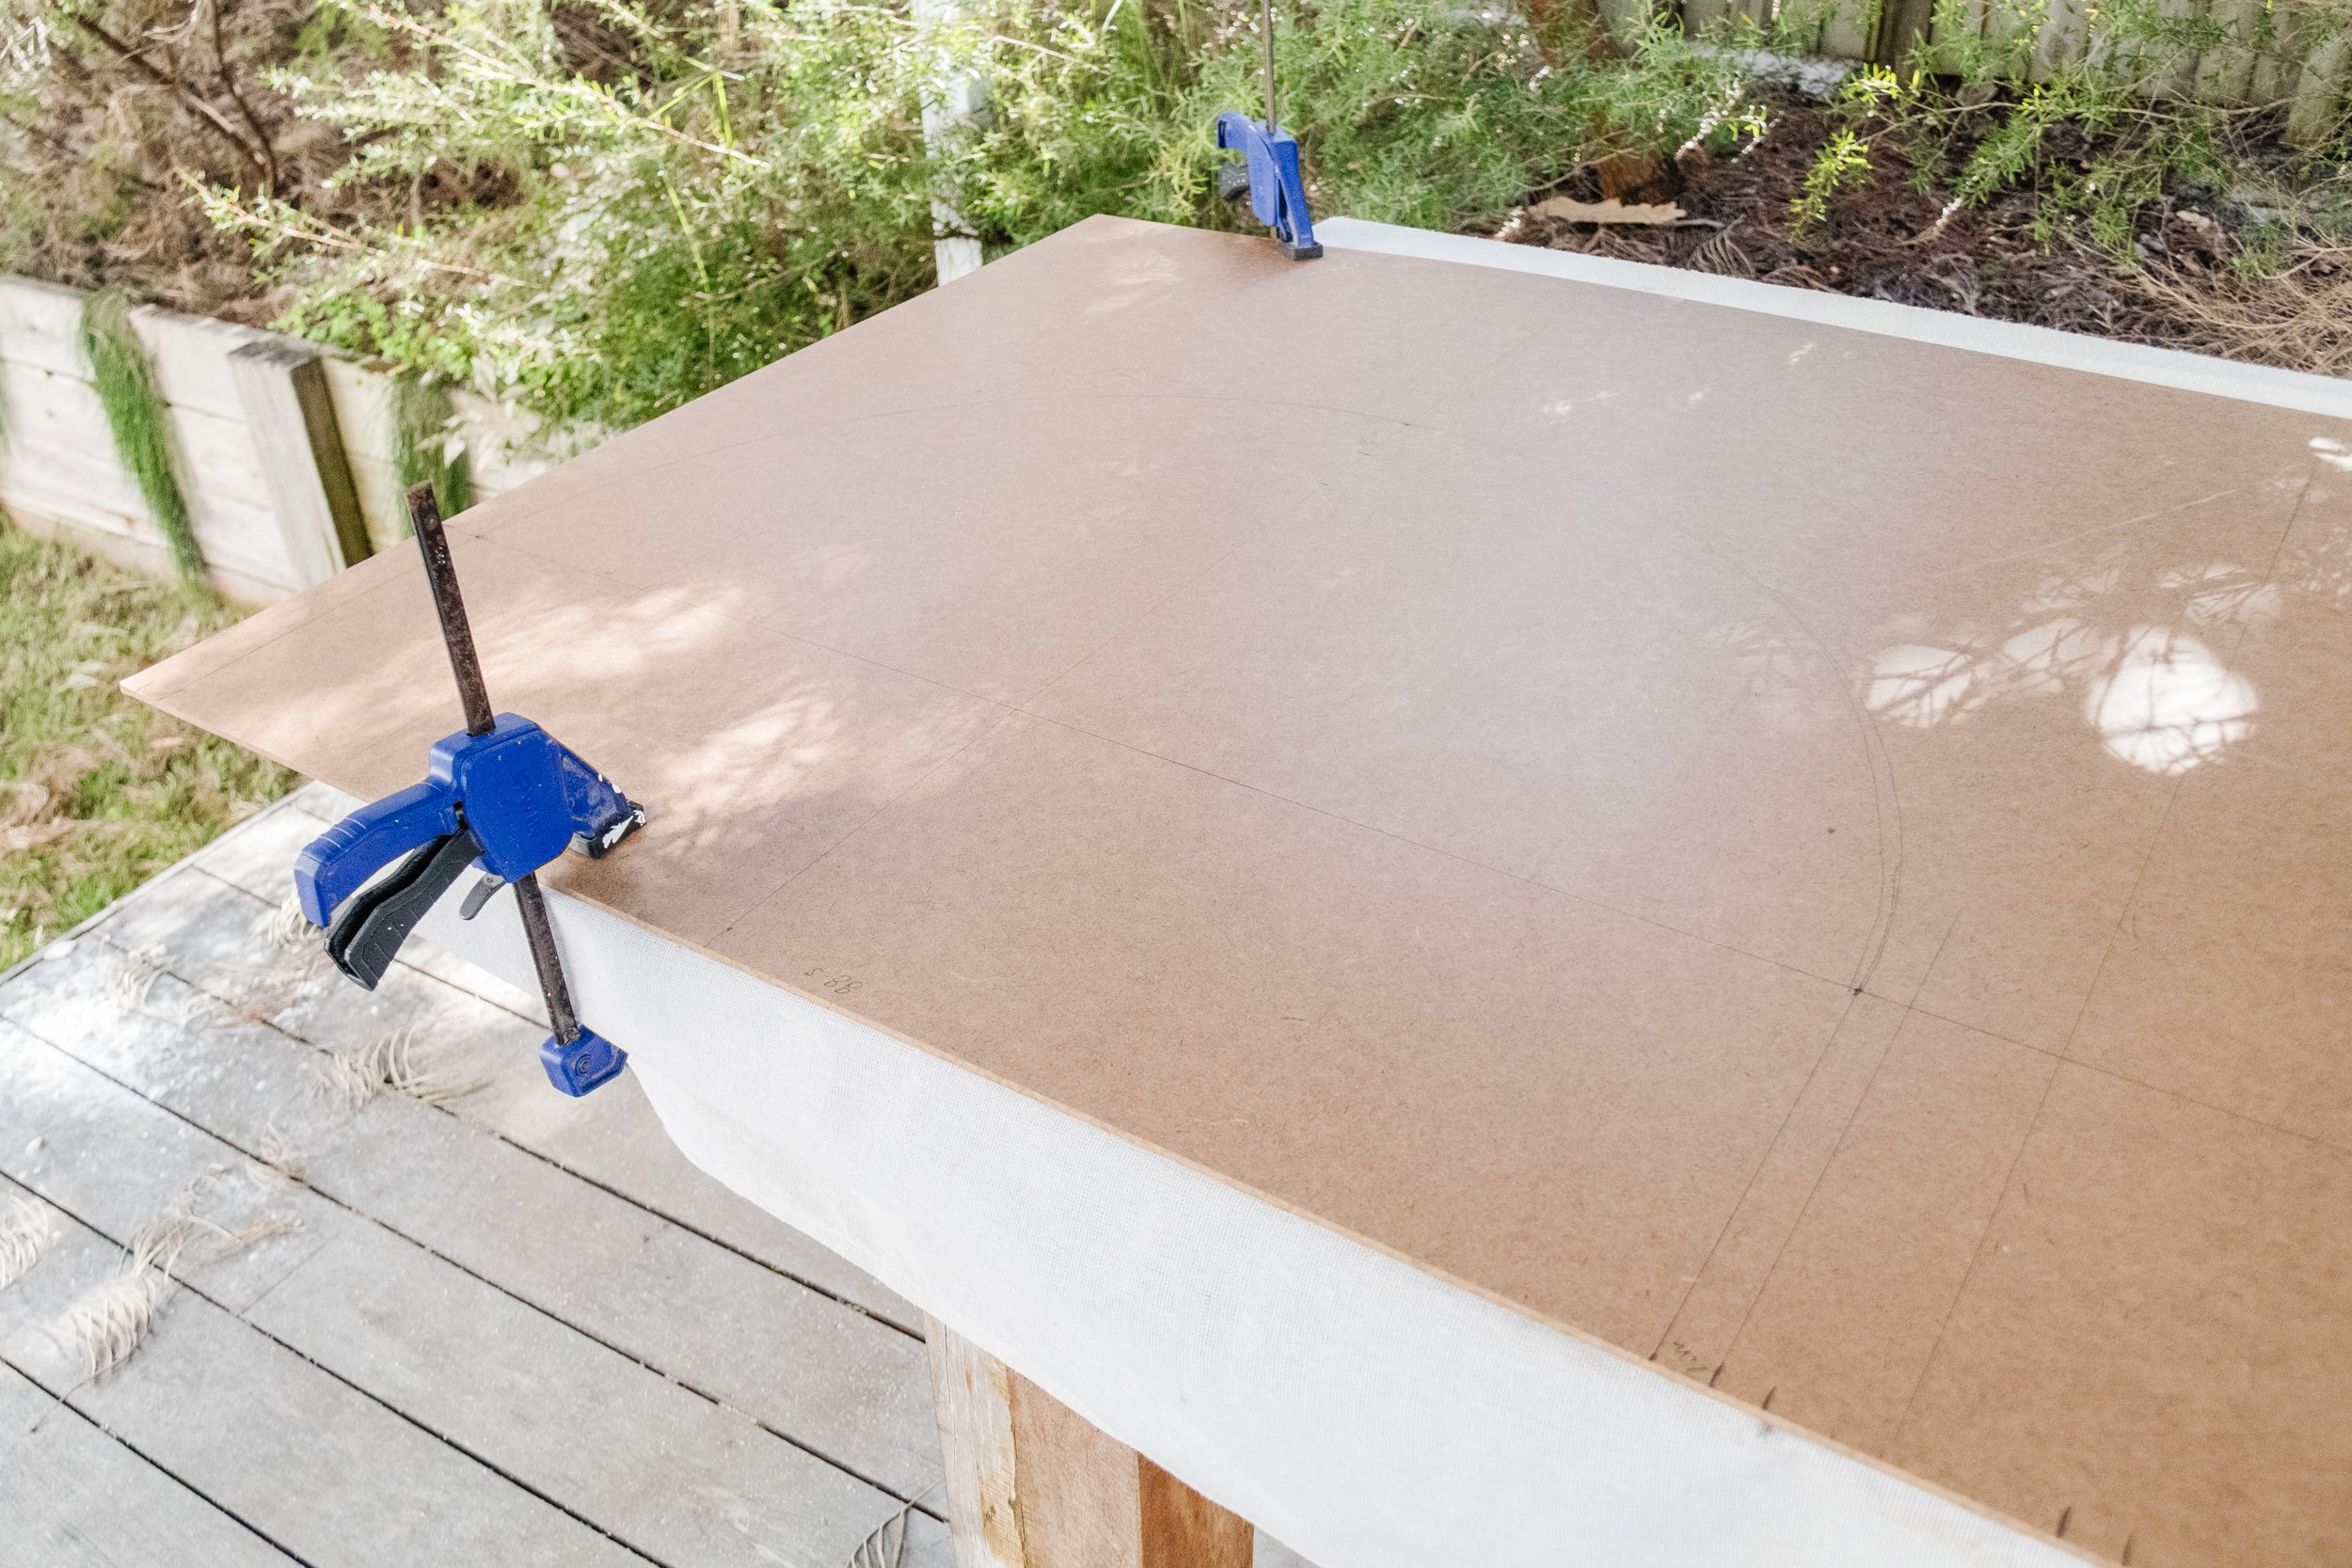
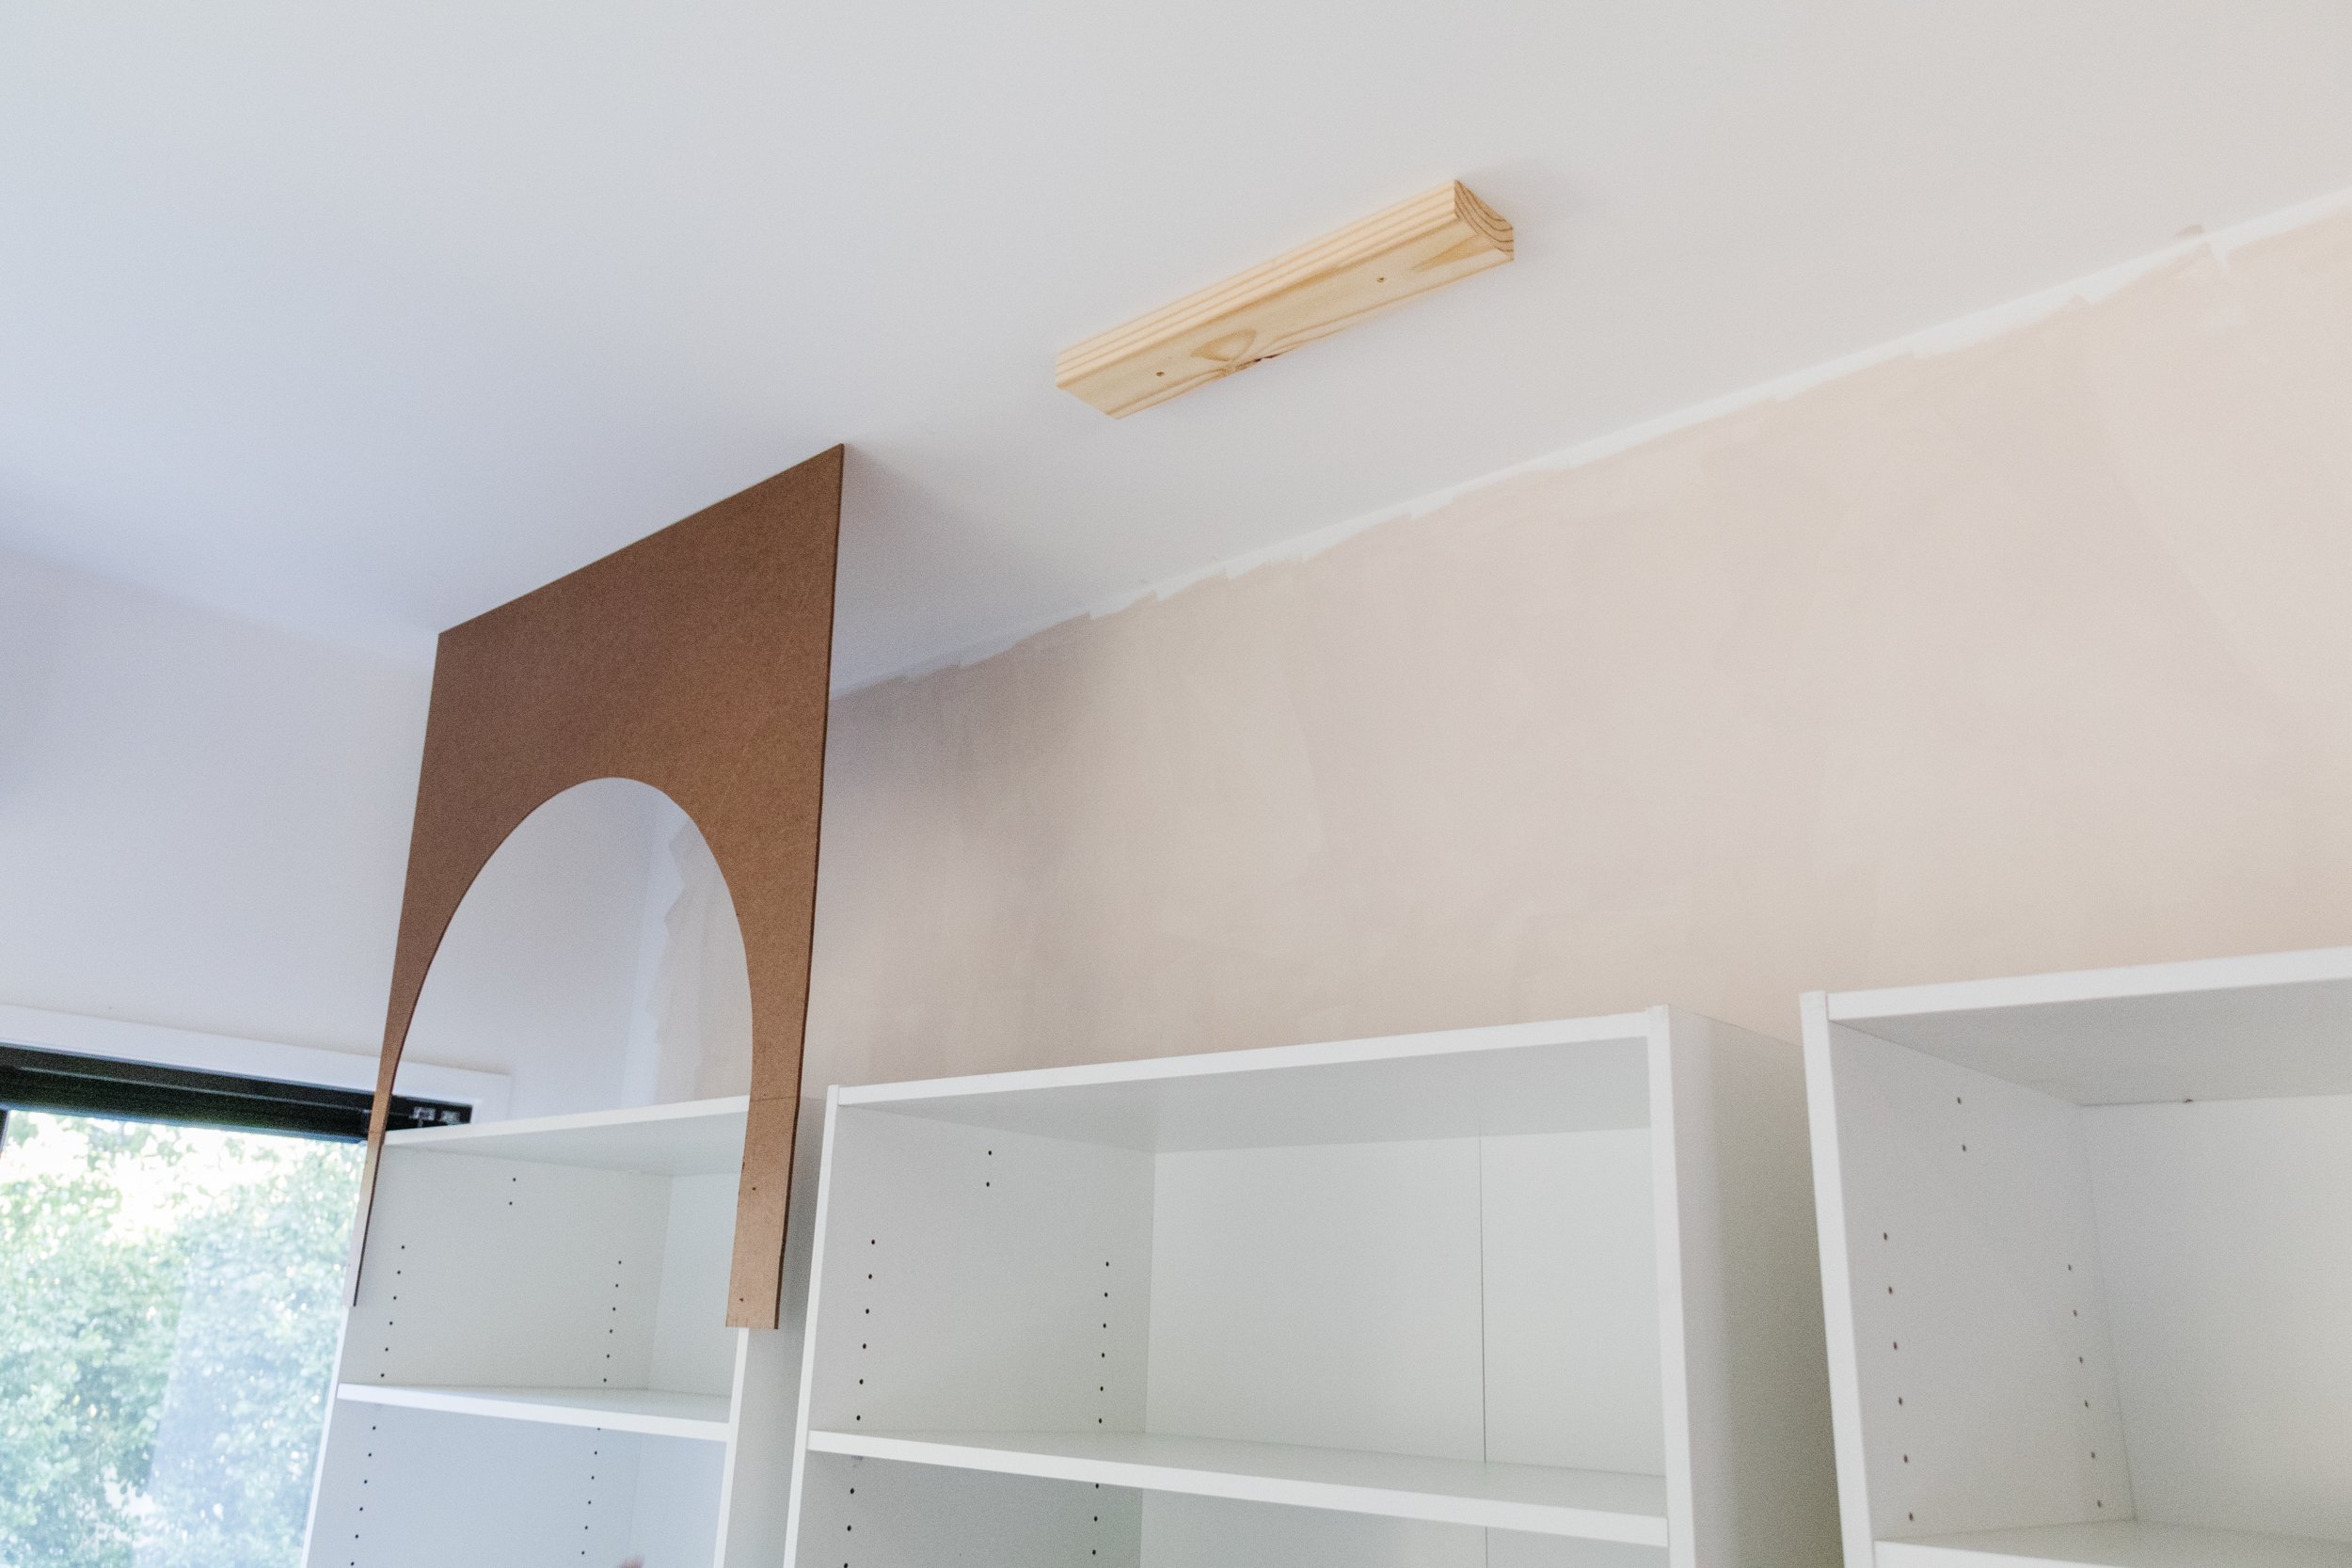
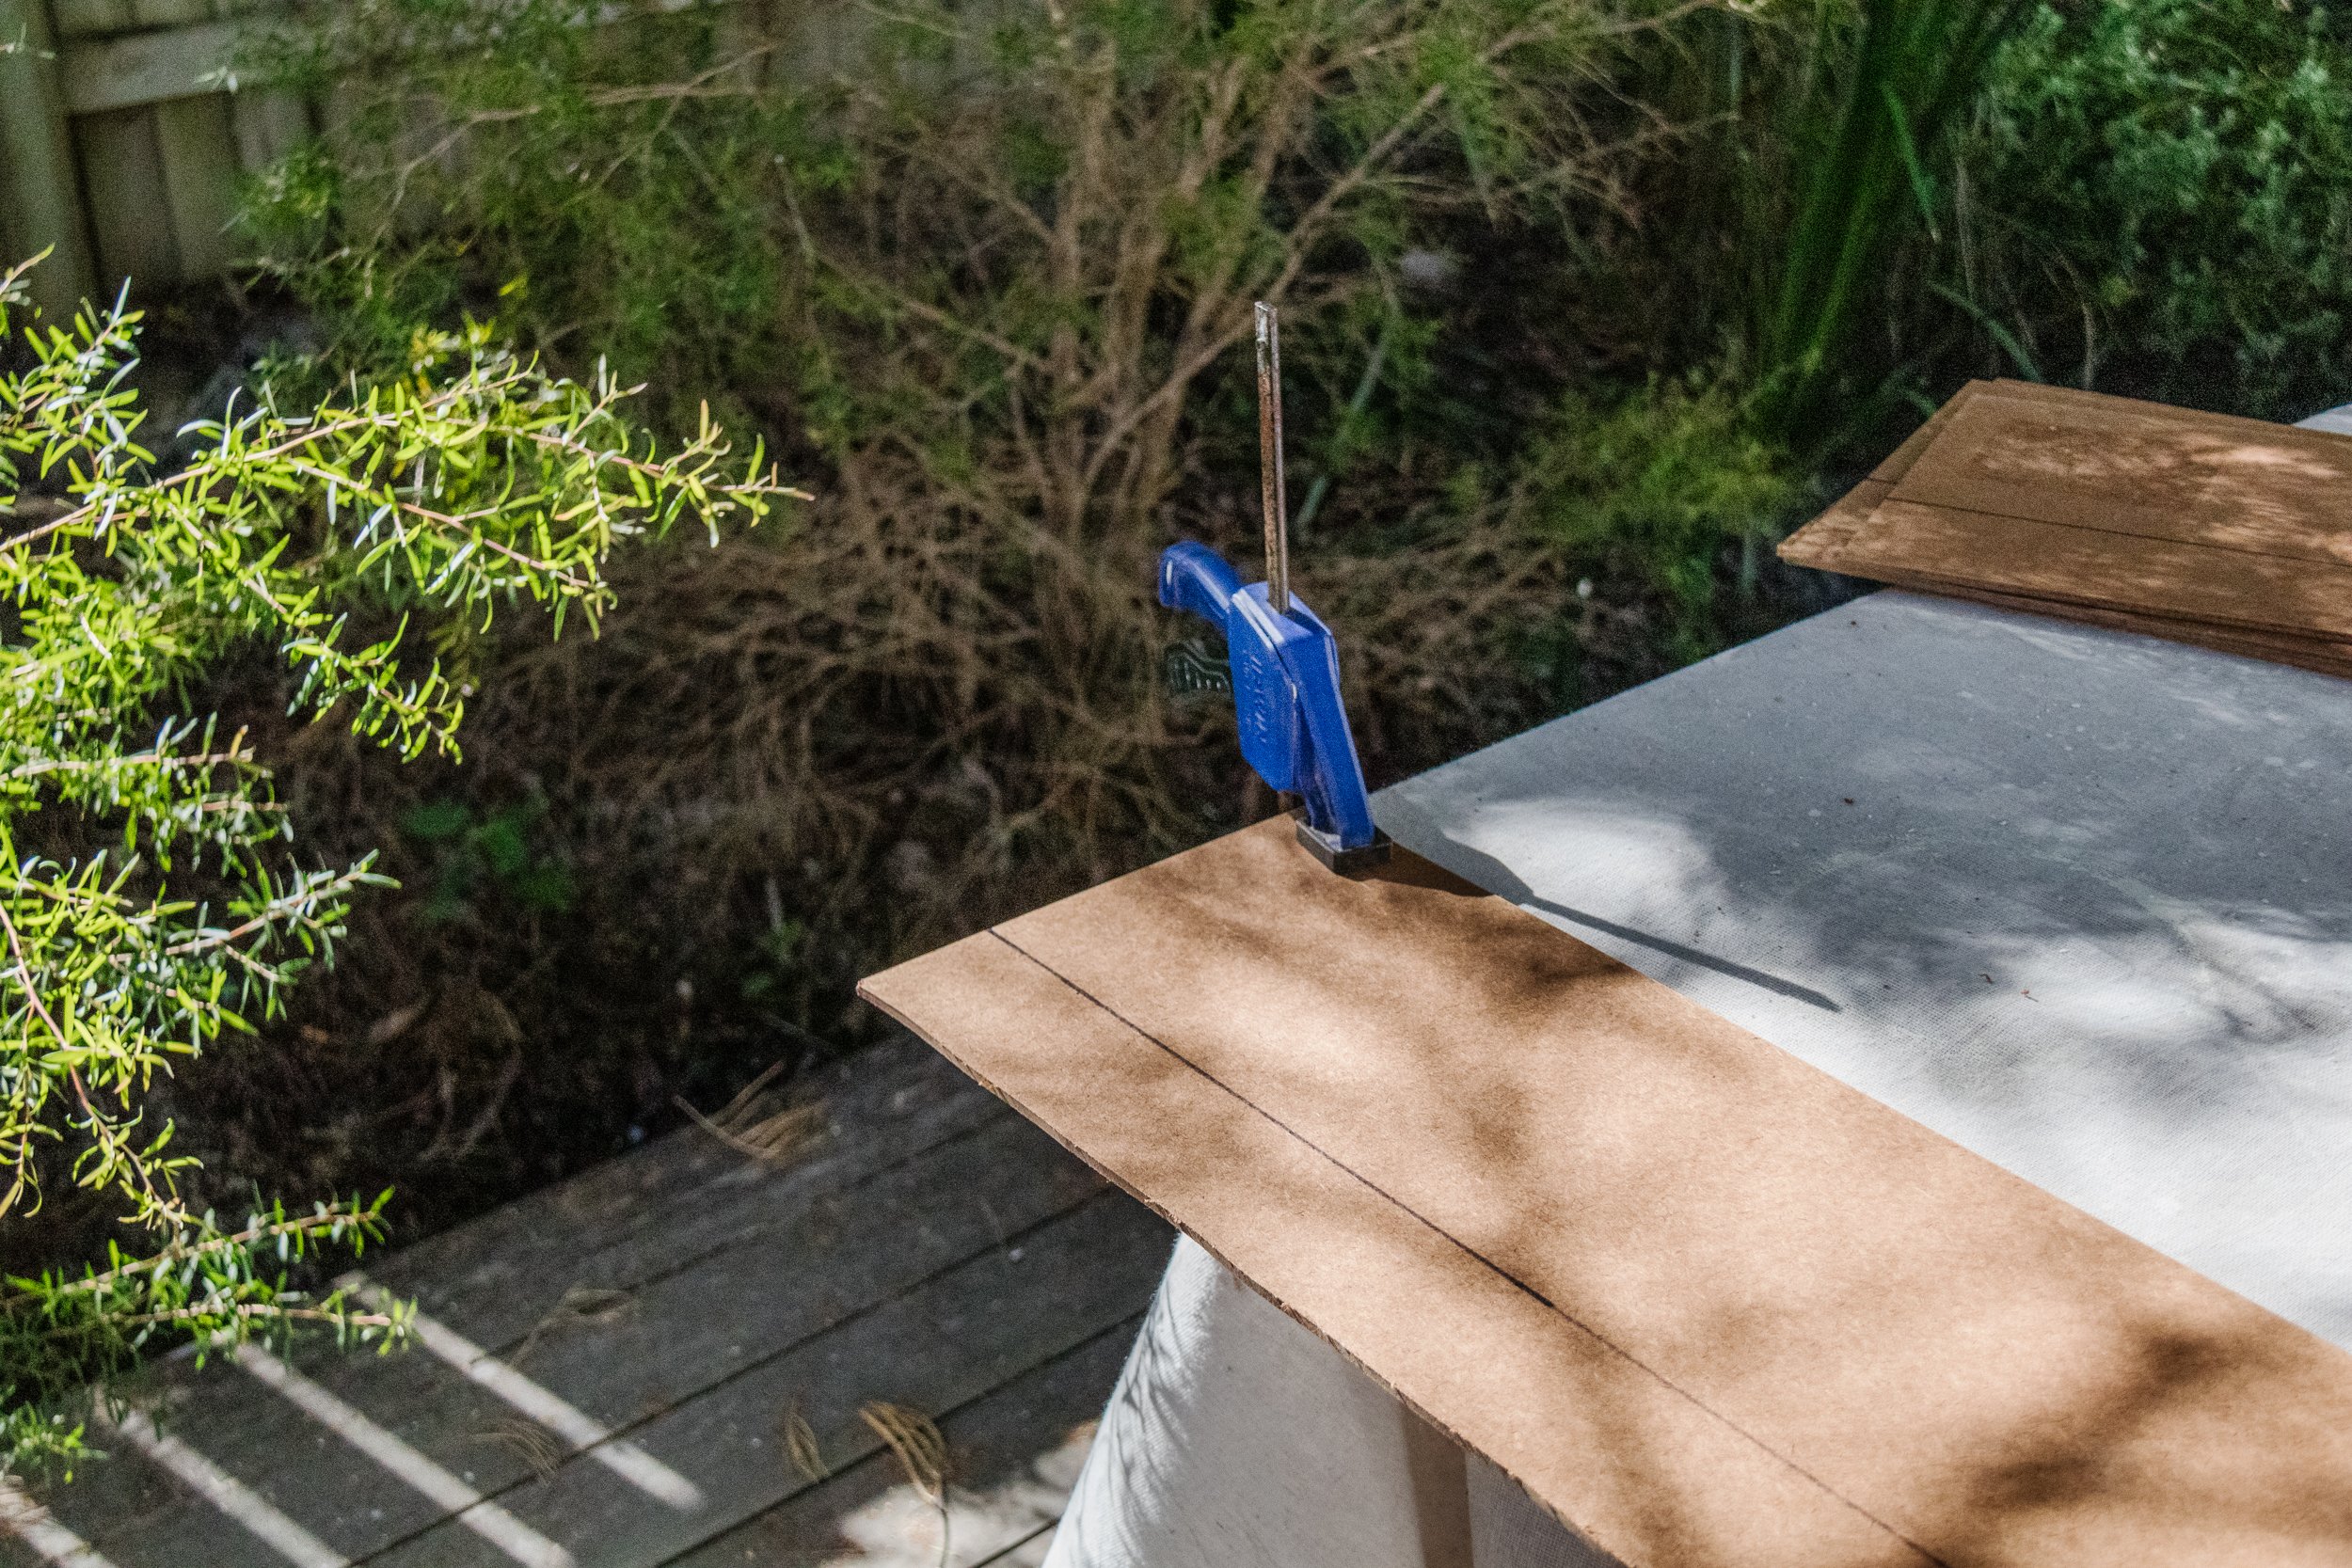
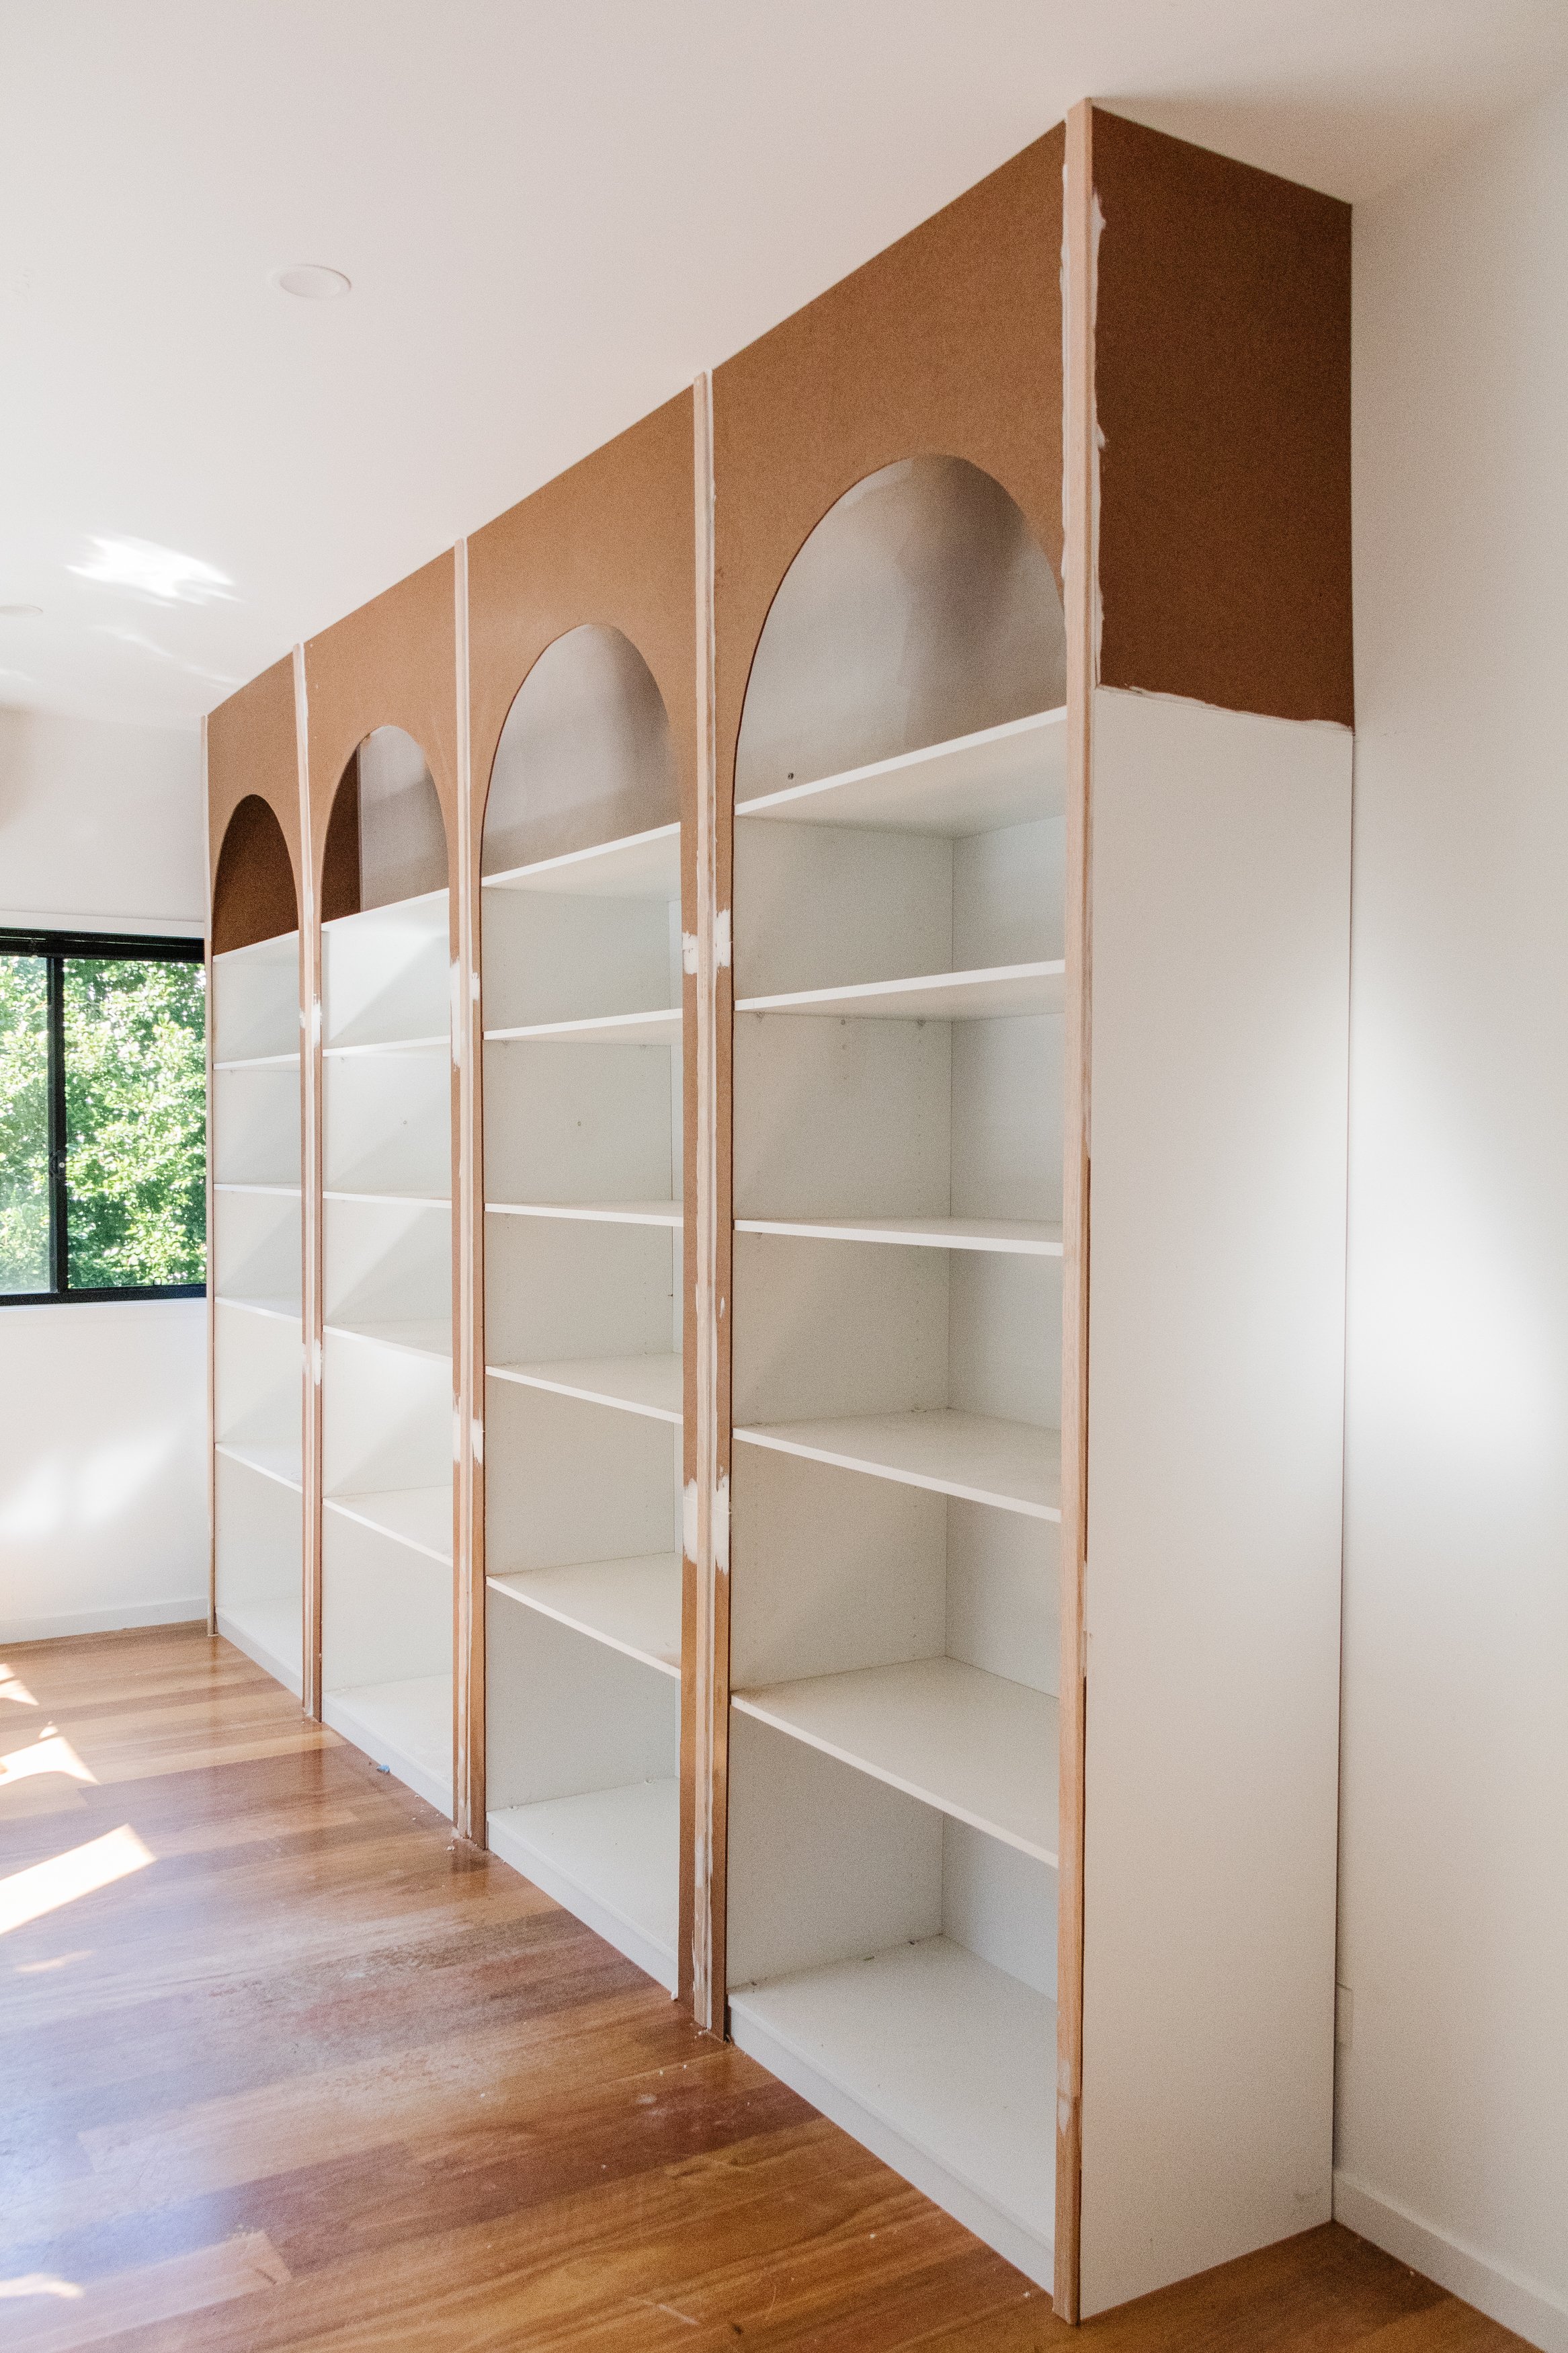
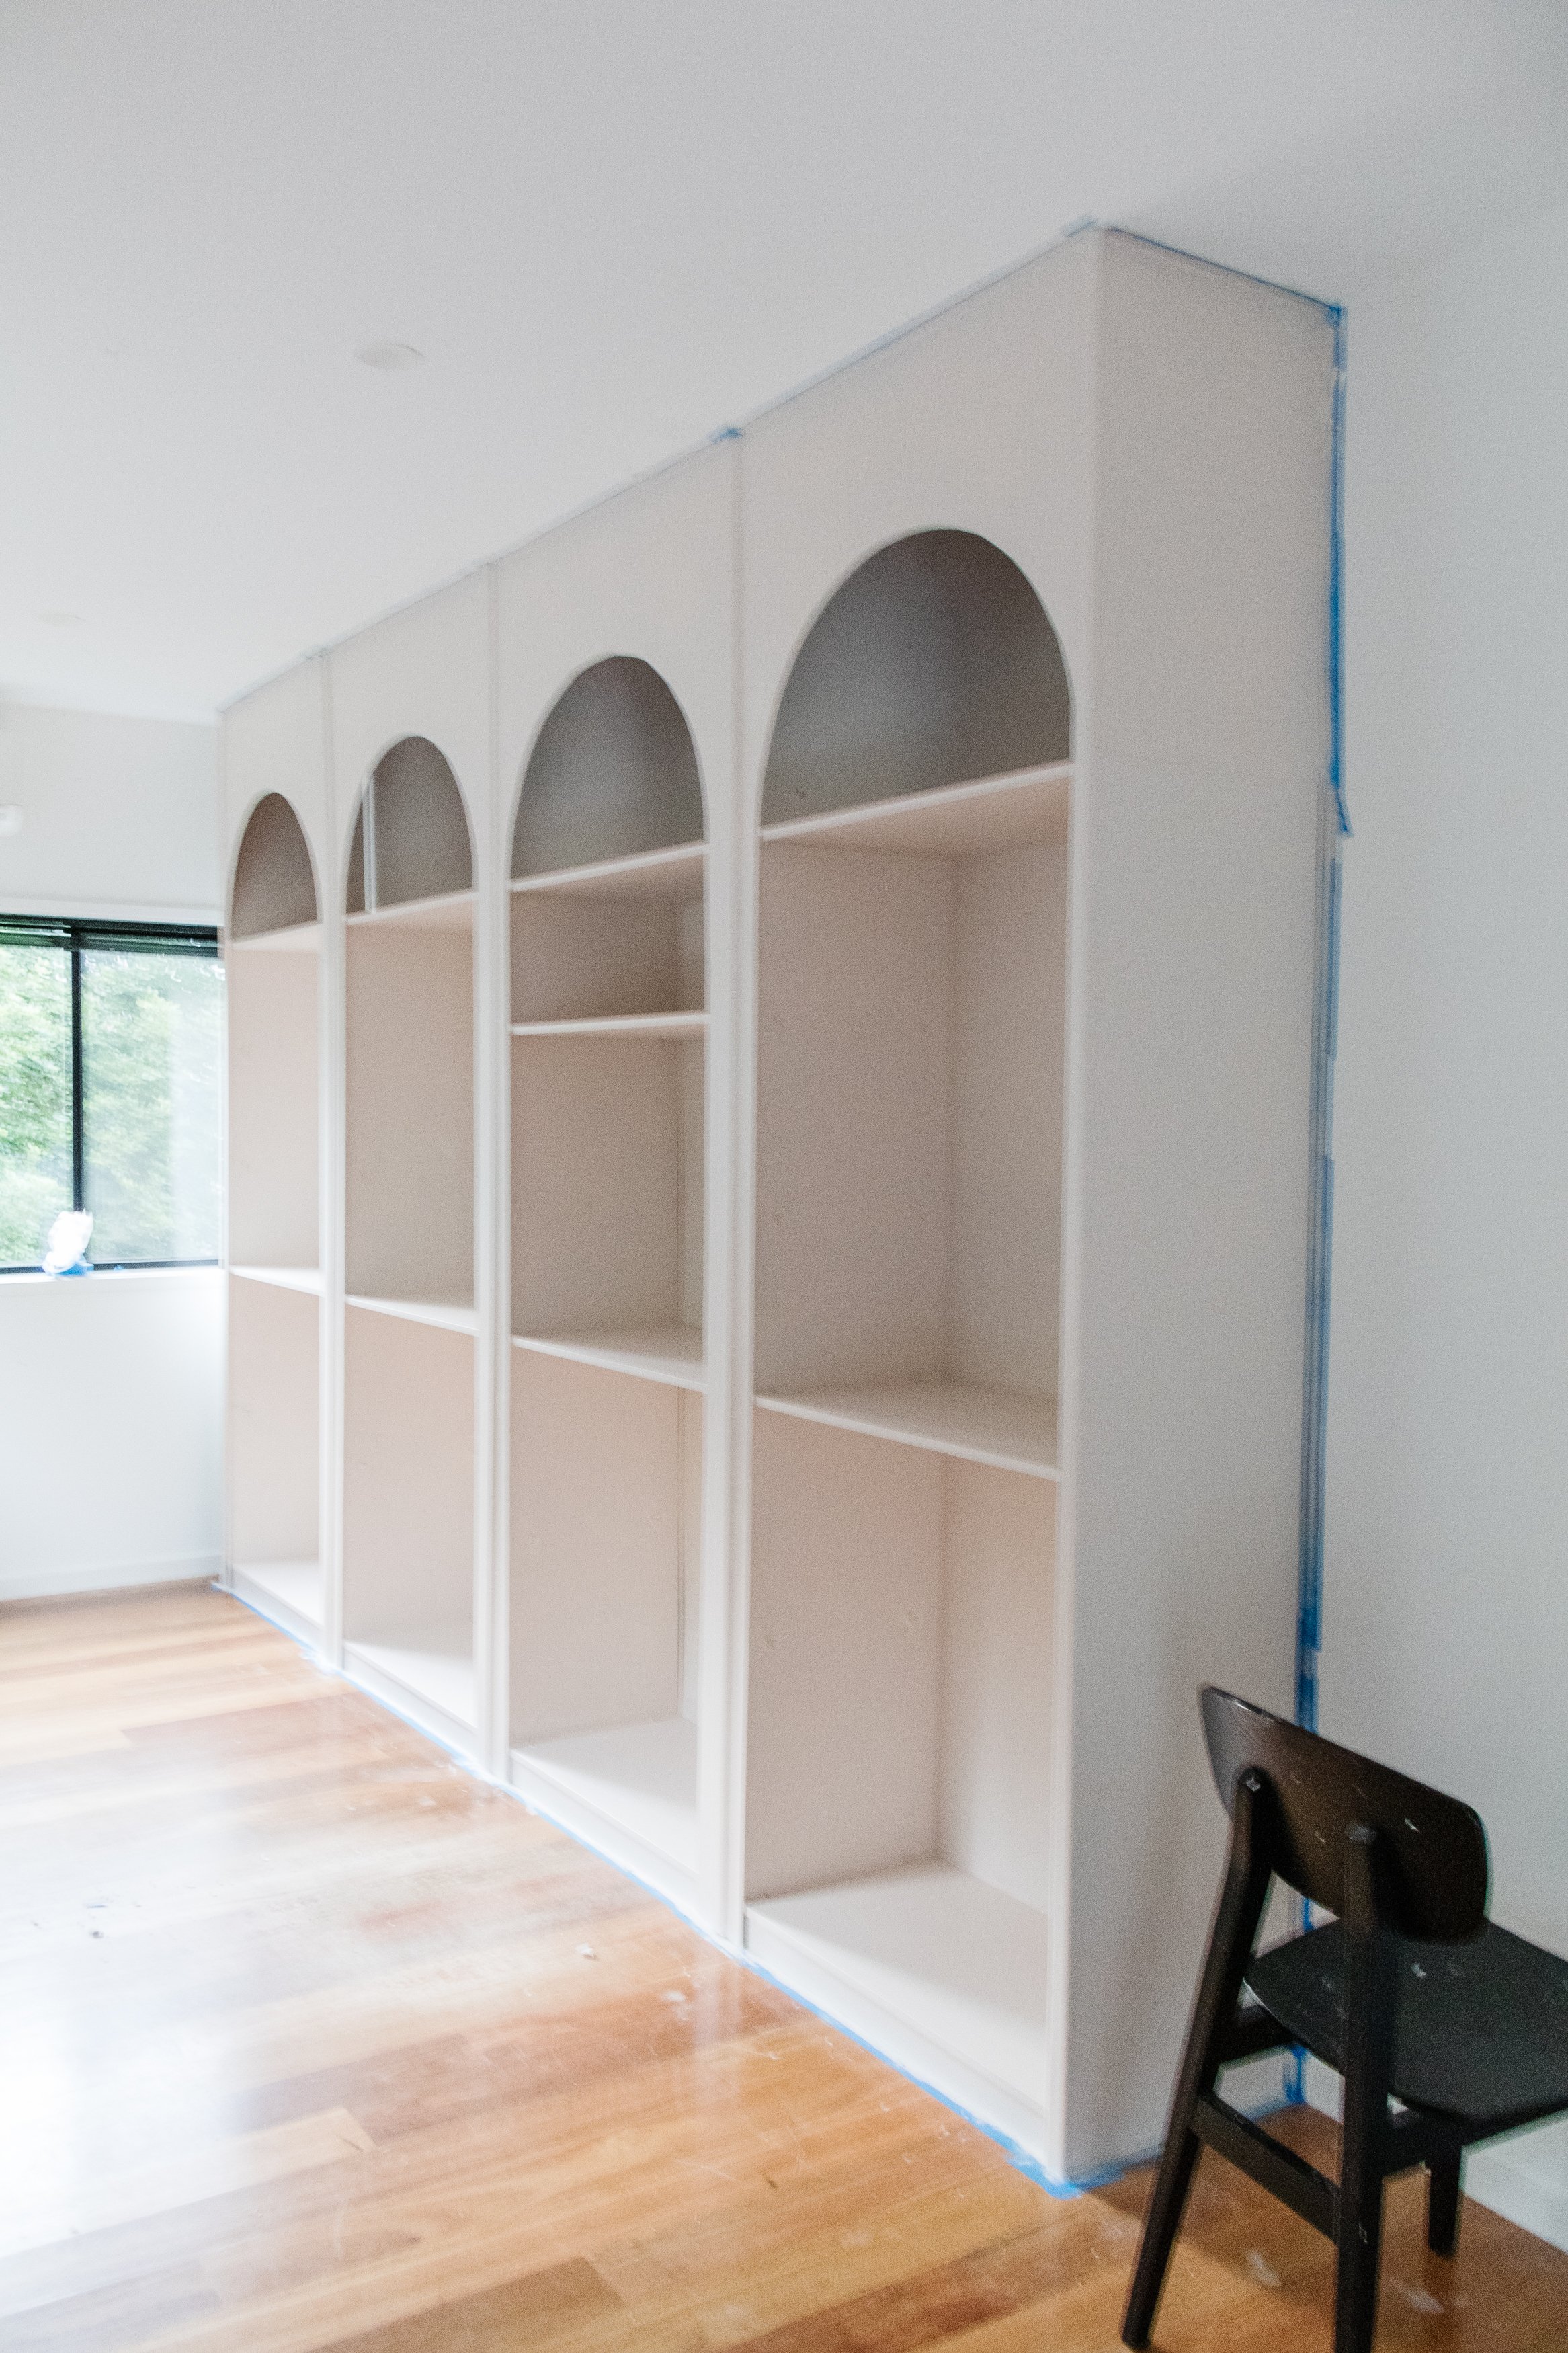
Workout how high you would like the arch to be cut; I chose 40cm above the top of the robe inserts. Draw the arch using a pen and string. Cut the arch out using a jigsaw. Make sure the hardboard is secured to your work surface with clamps.
When cut, position the cut hardboard into place over the top of the first robe insert (making sure the top is pushed up to the ceiling), mark where the hardboard lines up on the ceiling with a pen and remove the hardboard. Drill two pilot holes into a piece of cut pine and then drill this piece pine into the ceiling. Secure the cut hardboard to the pine in the ceiling and the sides of the robe insert using the brad nailer gun.
Use the leftover arch to trace directly onto a new piece of hardboard and repeat the process until the four arches are secured to the ceiling and robe inserts.
Measure, mark and cut the final pieces of hardboard that are to be positioned down the middle and ends of the robe inserts, then use the brad nail gun to secure them in place. Don’t worry if there are any gaps, you will fill these in later.
Cover the hardboard seams and ends (5 in total) with one piece of moulding and secure them each with the brad nail gun from the ceiling (not the ground). Measure, mark and cut the final pieces of moulding.
Fill in the hardboard gaps and brad nail holes with the multipurpose filler, and use a flat spatula to make sure the application is flat against the hardboard. Fill in the sides between the hardboard and moulding with Selley’s No More Gaps and a caulking gun in sections, and run your fingertip down the silicone to give it a smooth finish. Wipe your hand of excess filler using your fingertip and when you are finished using the caulking gun, push a nail into the No More Gaps nozzle to ensure the silicone doesn’t dry out.
And that’s it for Day 2 - it’s a big day so make sure you rest up! If you don’t have enough time to dedicate a whole day, break Day Two after the hardboard has been cut and secured using the brad nail gun. You can do the moulding and gap filling the next day.

DAY THREE - 6 hours
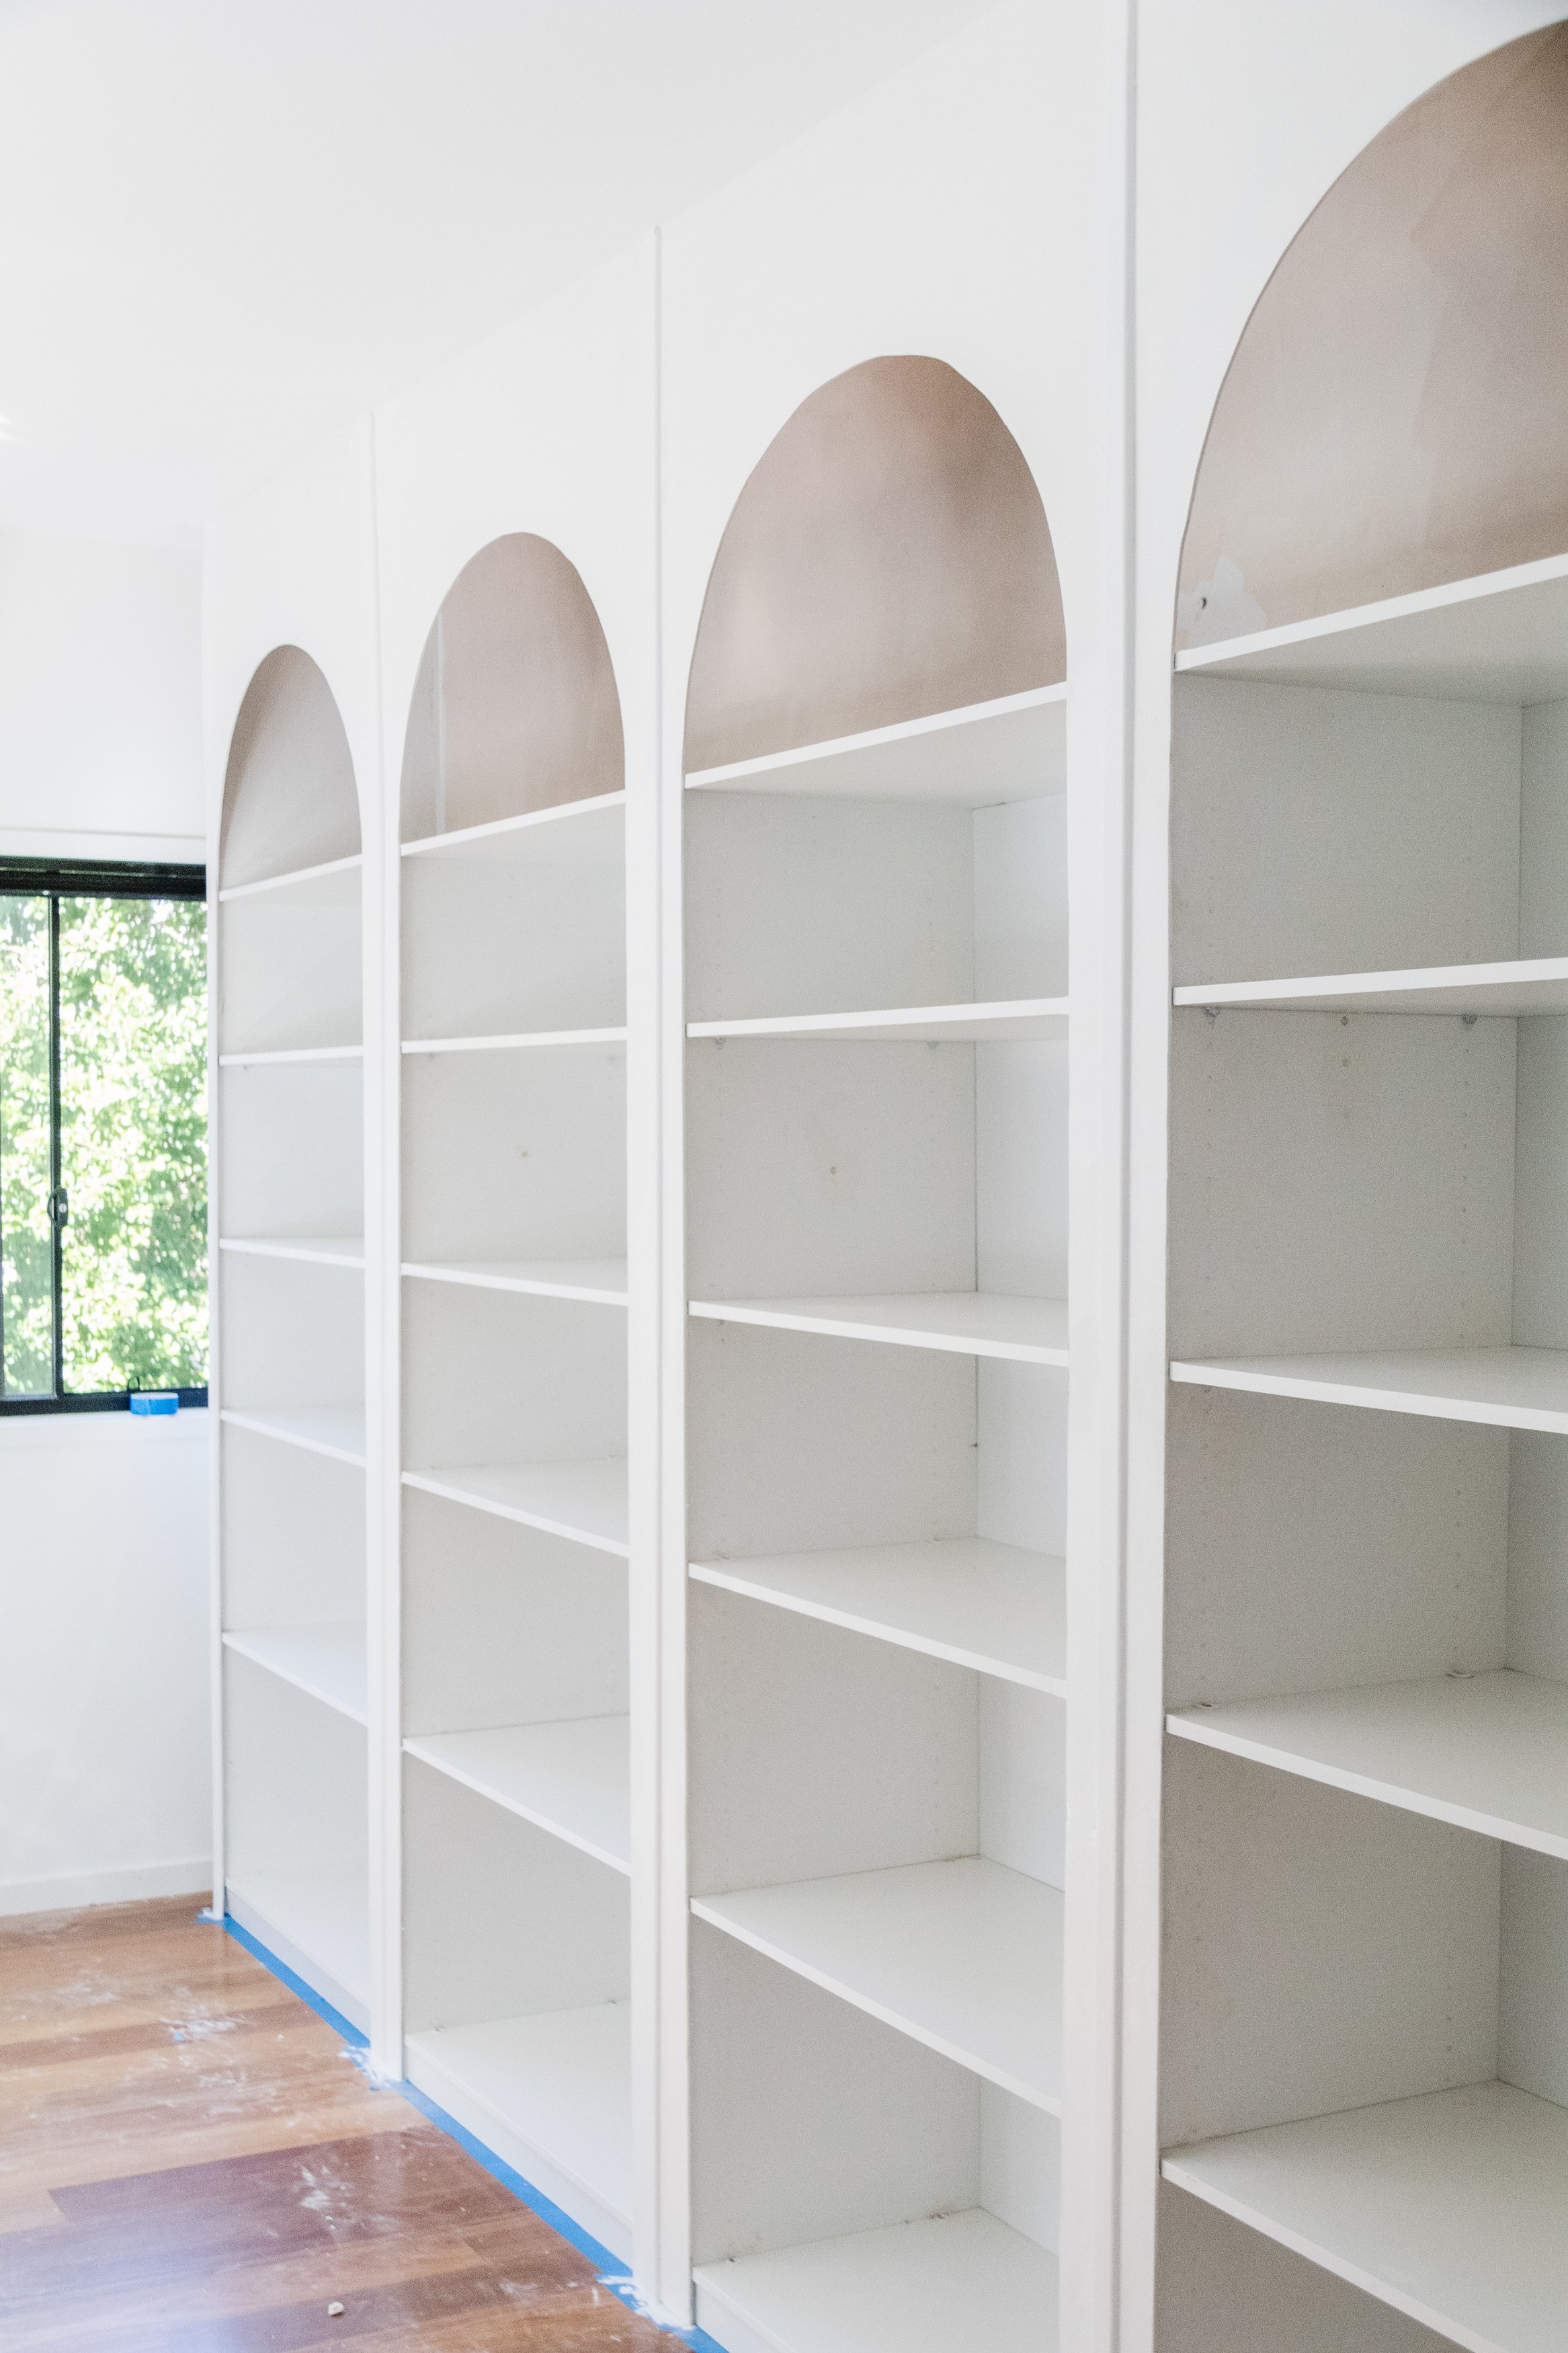
Sand down the multipurpose filler so it’s nice and flat/flush against the hardboard. Reapply if you need to, and allow at least 3 hours for it to dry then sand again.
Protect your walls and floors with painters tape and lay a drop sheet on the floor. Paint the hardboard and timber moulding with two coats of Dulux white primer. Remove the shelves and apply one coat of Zinsser Sealer/Primer all over the bookshelves and shelves - please wear a mask when you do this. I recommend opening the windows and priming the shelves outside as the smell can get very intense.

DAY FOUR - 4 hours
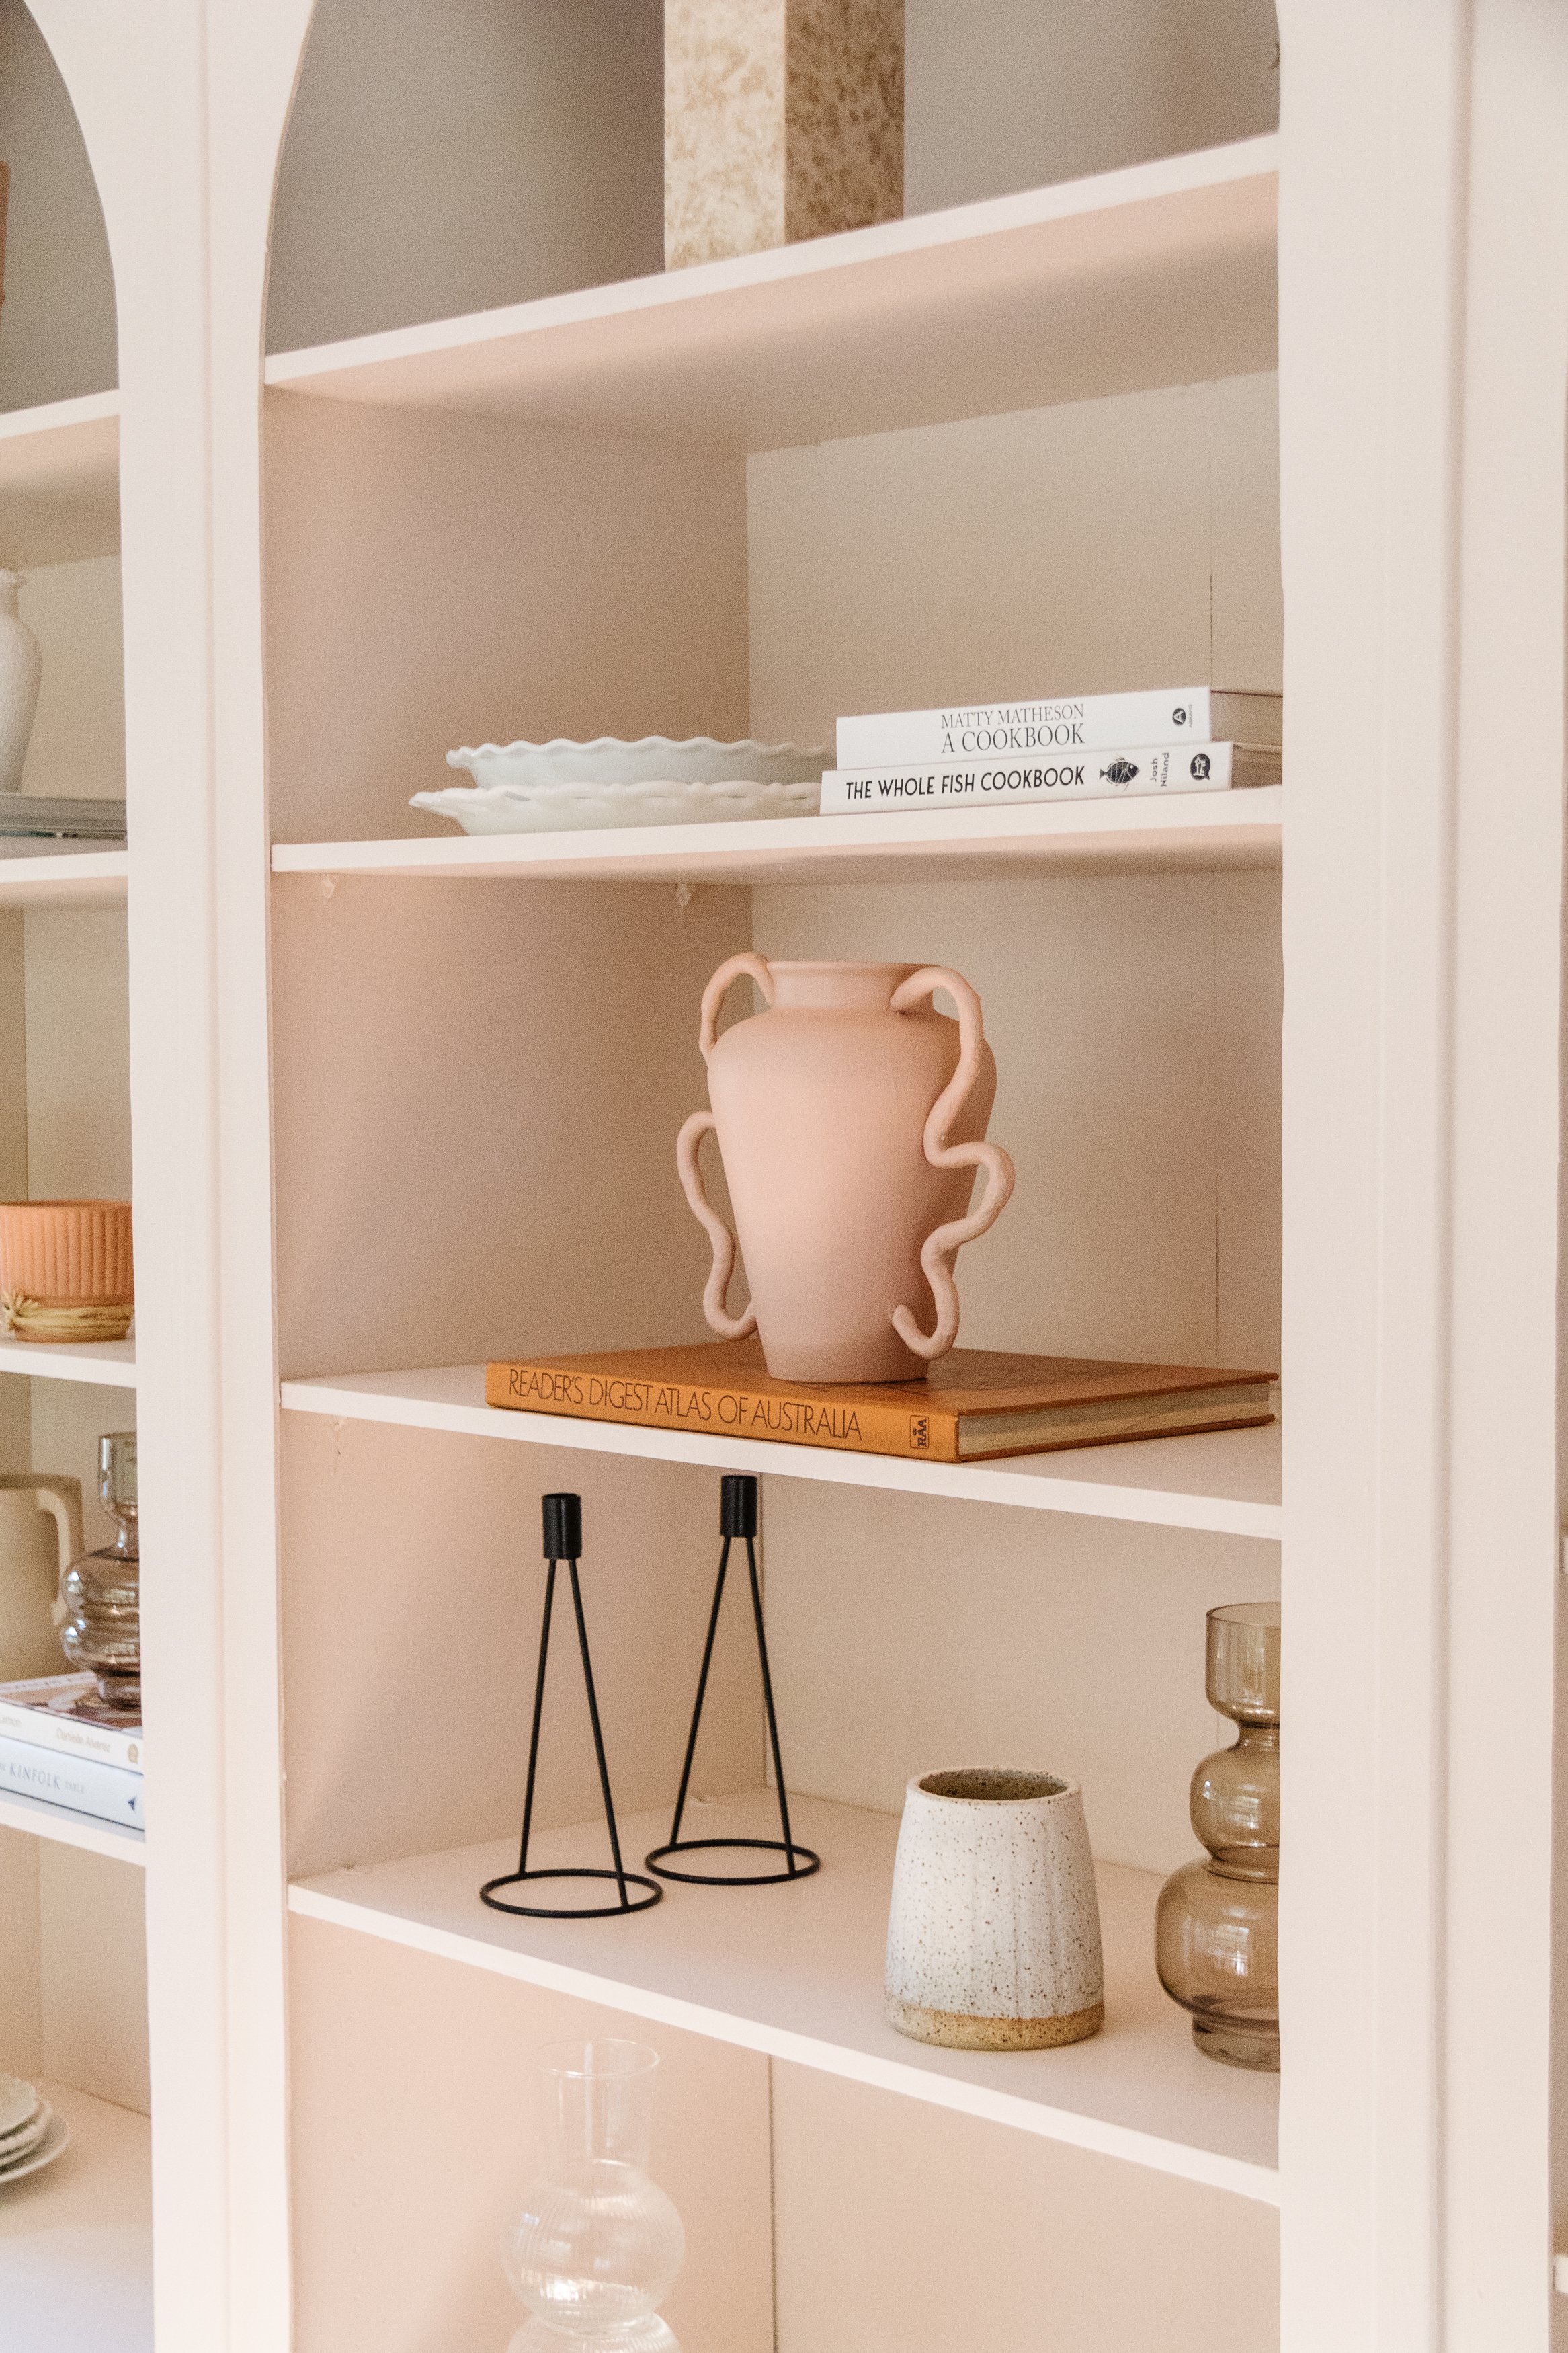
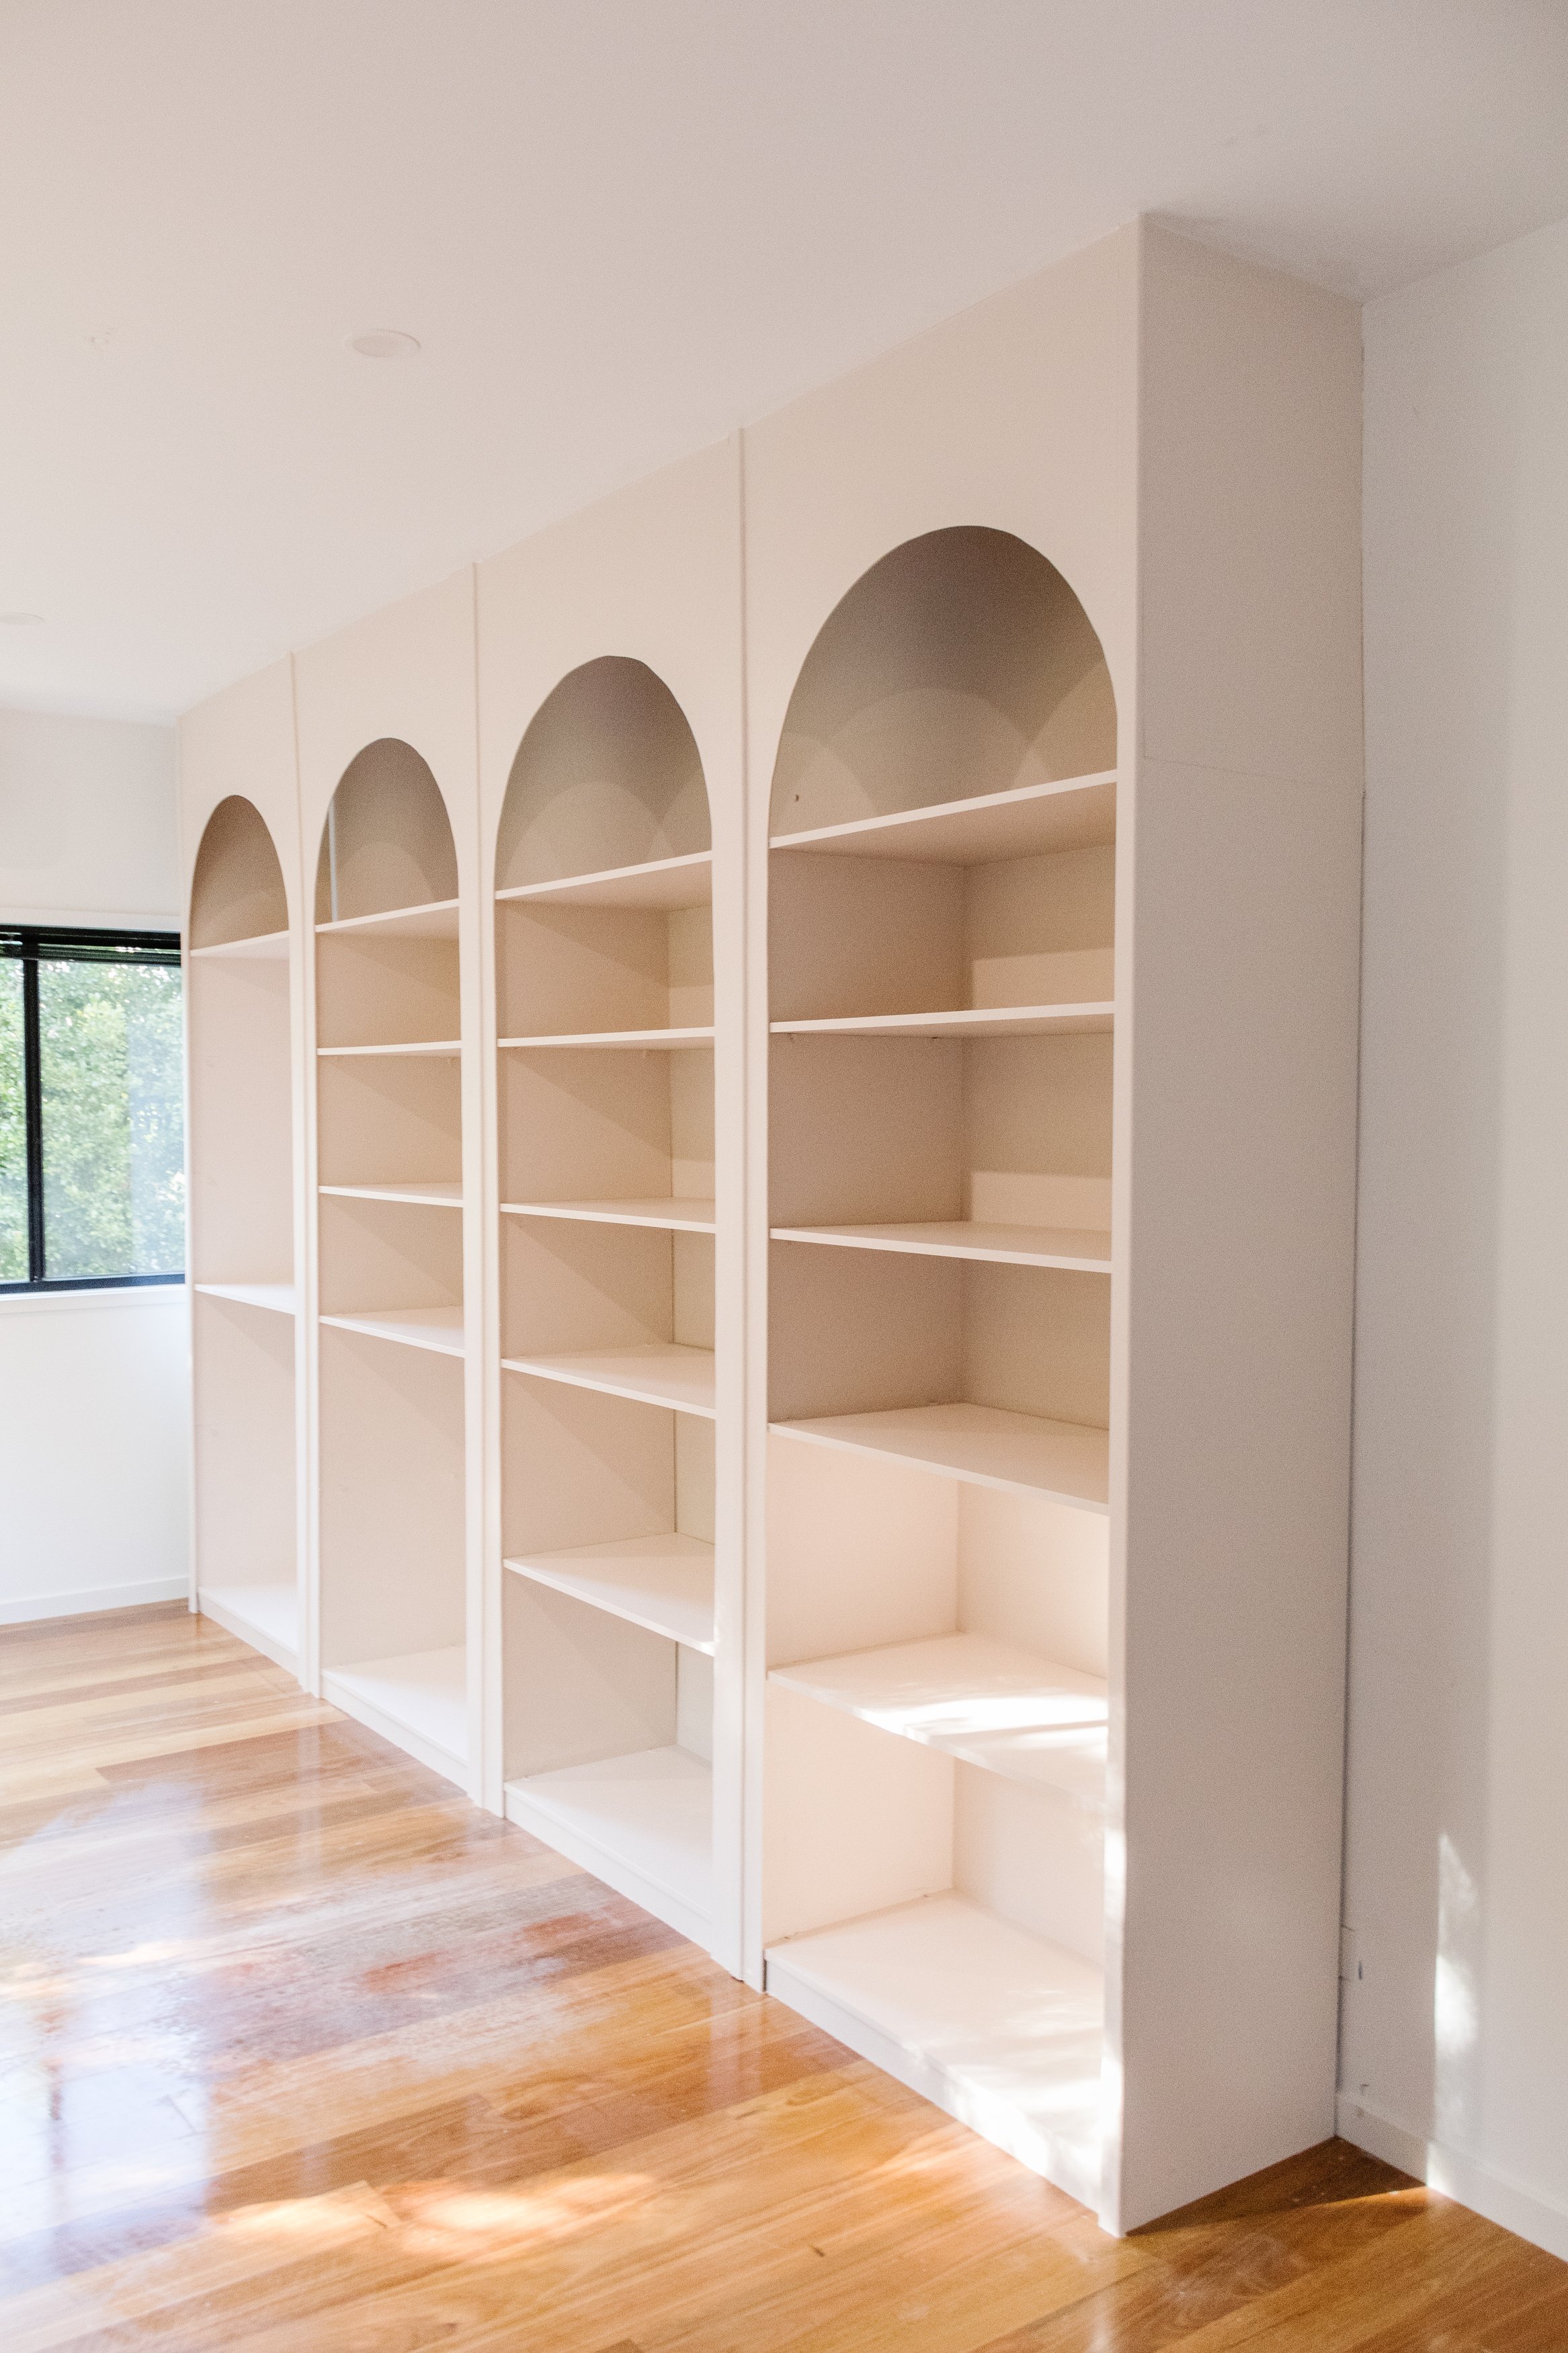
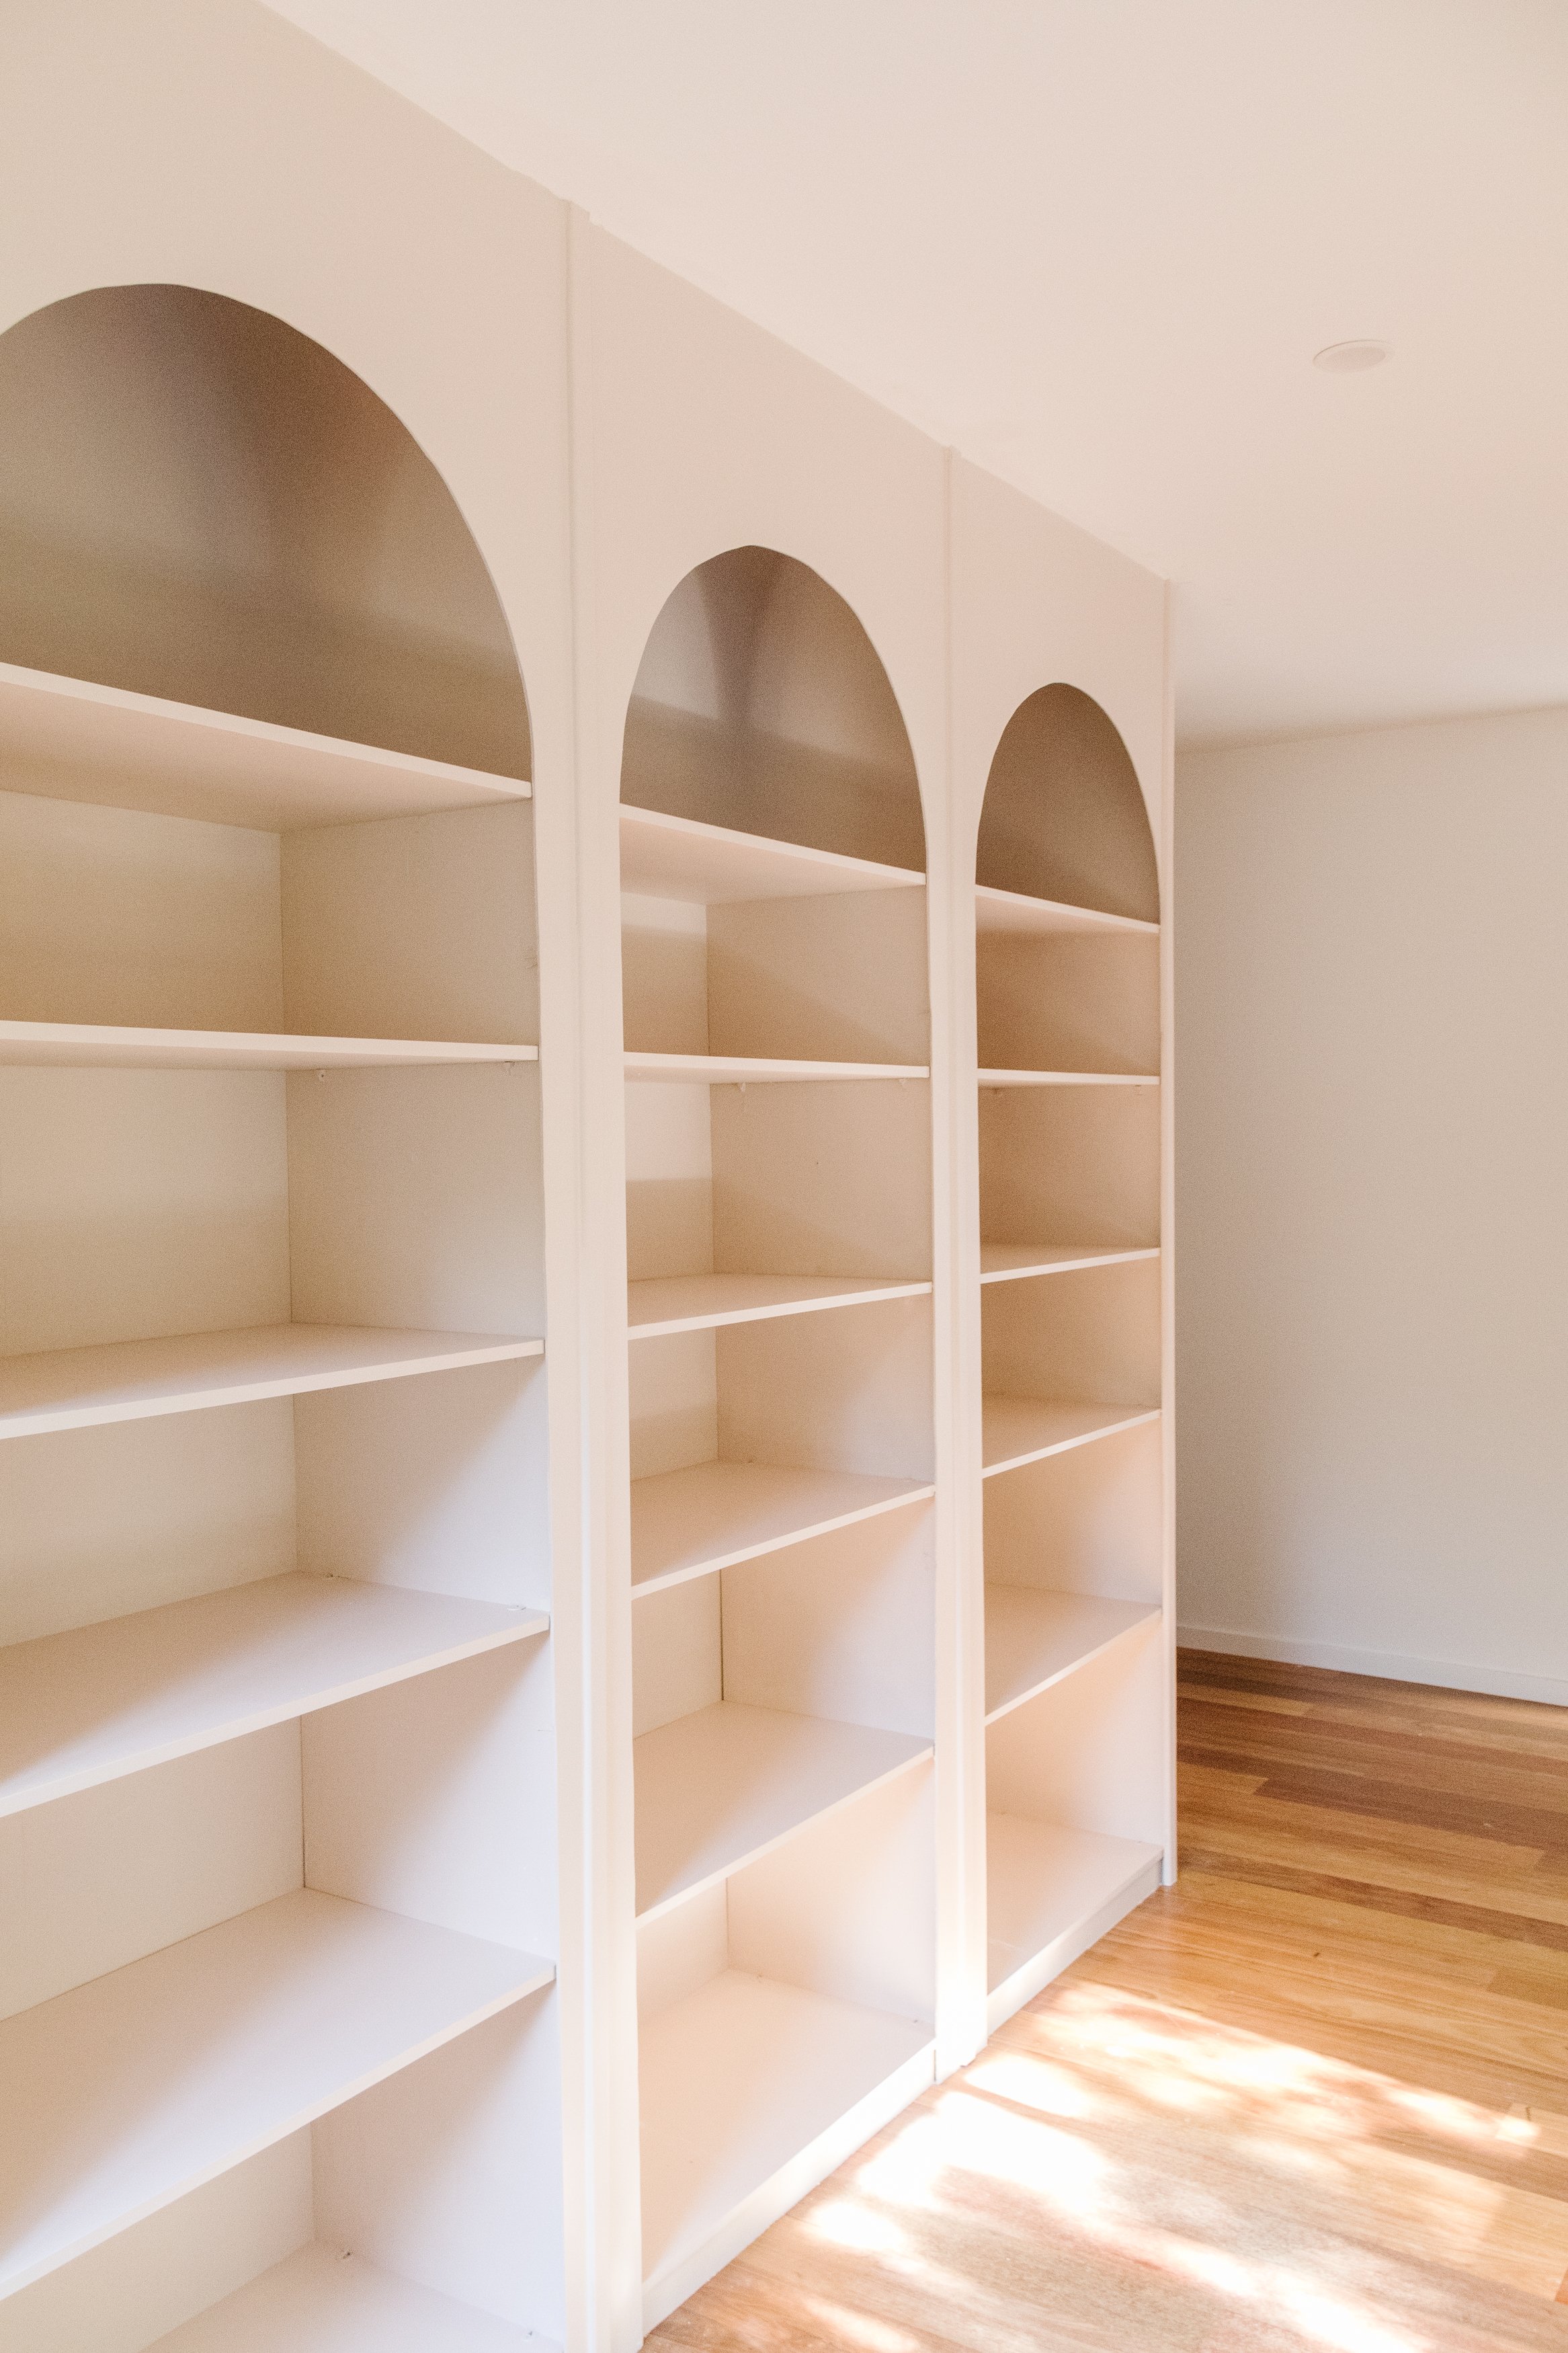
Apply 3 coats of your preferred paint colour - in my case, I used Dulux “Clay Pipe” using a roller and cutting in paint brush. Make sure the surface is completely dry between applications. Once the last coat of paint has dried, place the shelves back into the robe inserts remove the painters tape from the floors and walls, and touch up any spots if required. And then your DIY Arched Wall Library will be finished - hurrah!
Ta daaaa!
I have been dreaming about this project for years and it came down to 4 days of non-stop work to make my dreams of having an Arched Wall Library come true. And I couldn’t be happier! This project pushed me right out of my comfort zone and then some as I hacked four robe inserts from Bunnings and transformed them into this beautiful Arched Wall Library. I learned lots of new skills, my attention to detail was tested in every way, and I learned how to use a mitre saw and a brad nailer. I became one with my painters tape, paint brush and roller, and heavily relied on my fave Zinsser and Dulux paint to get the job done. This project was a total labour of love and every time I walk past my studio now I can’t help but smile with joy and satisfaction and think “I made that''. And it’s the best feeling in the world!
This project is in collaboration with Bunnings.