DIY Dowel Christmas Tree
If you're looking for a sustainable Christmas tree this year that's easy to put up and pack down, this is it.
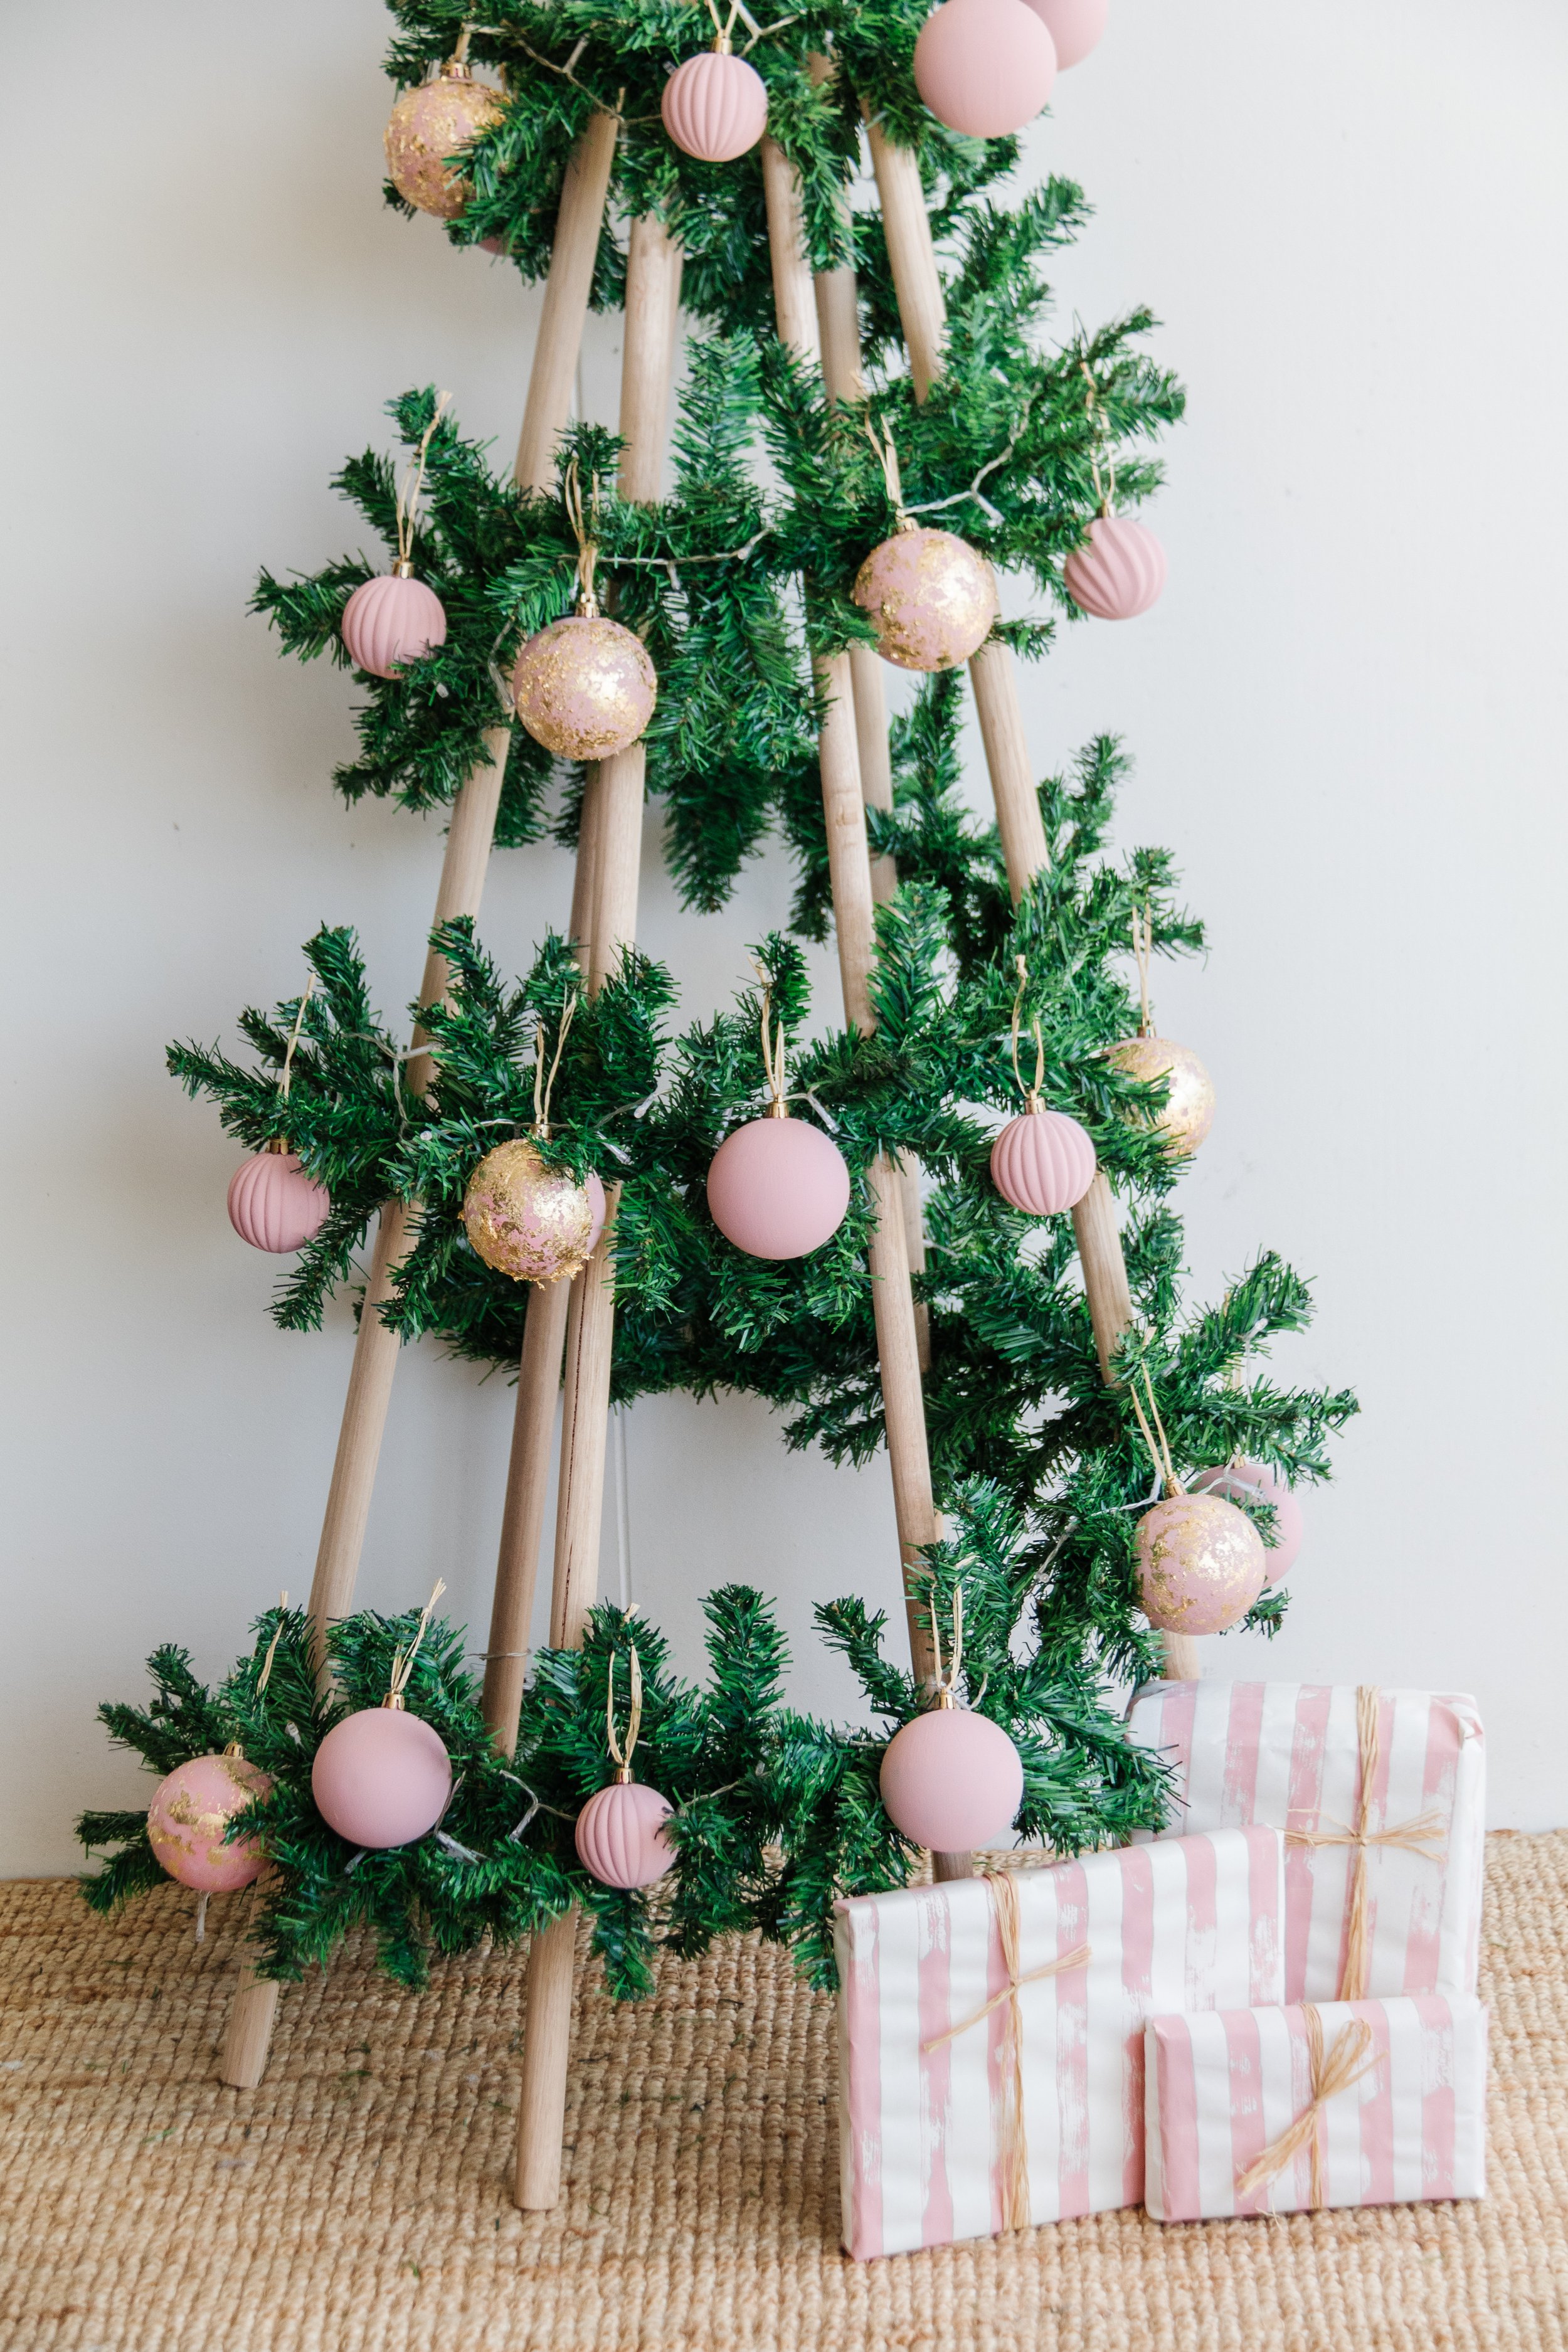
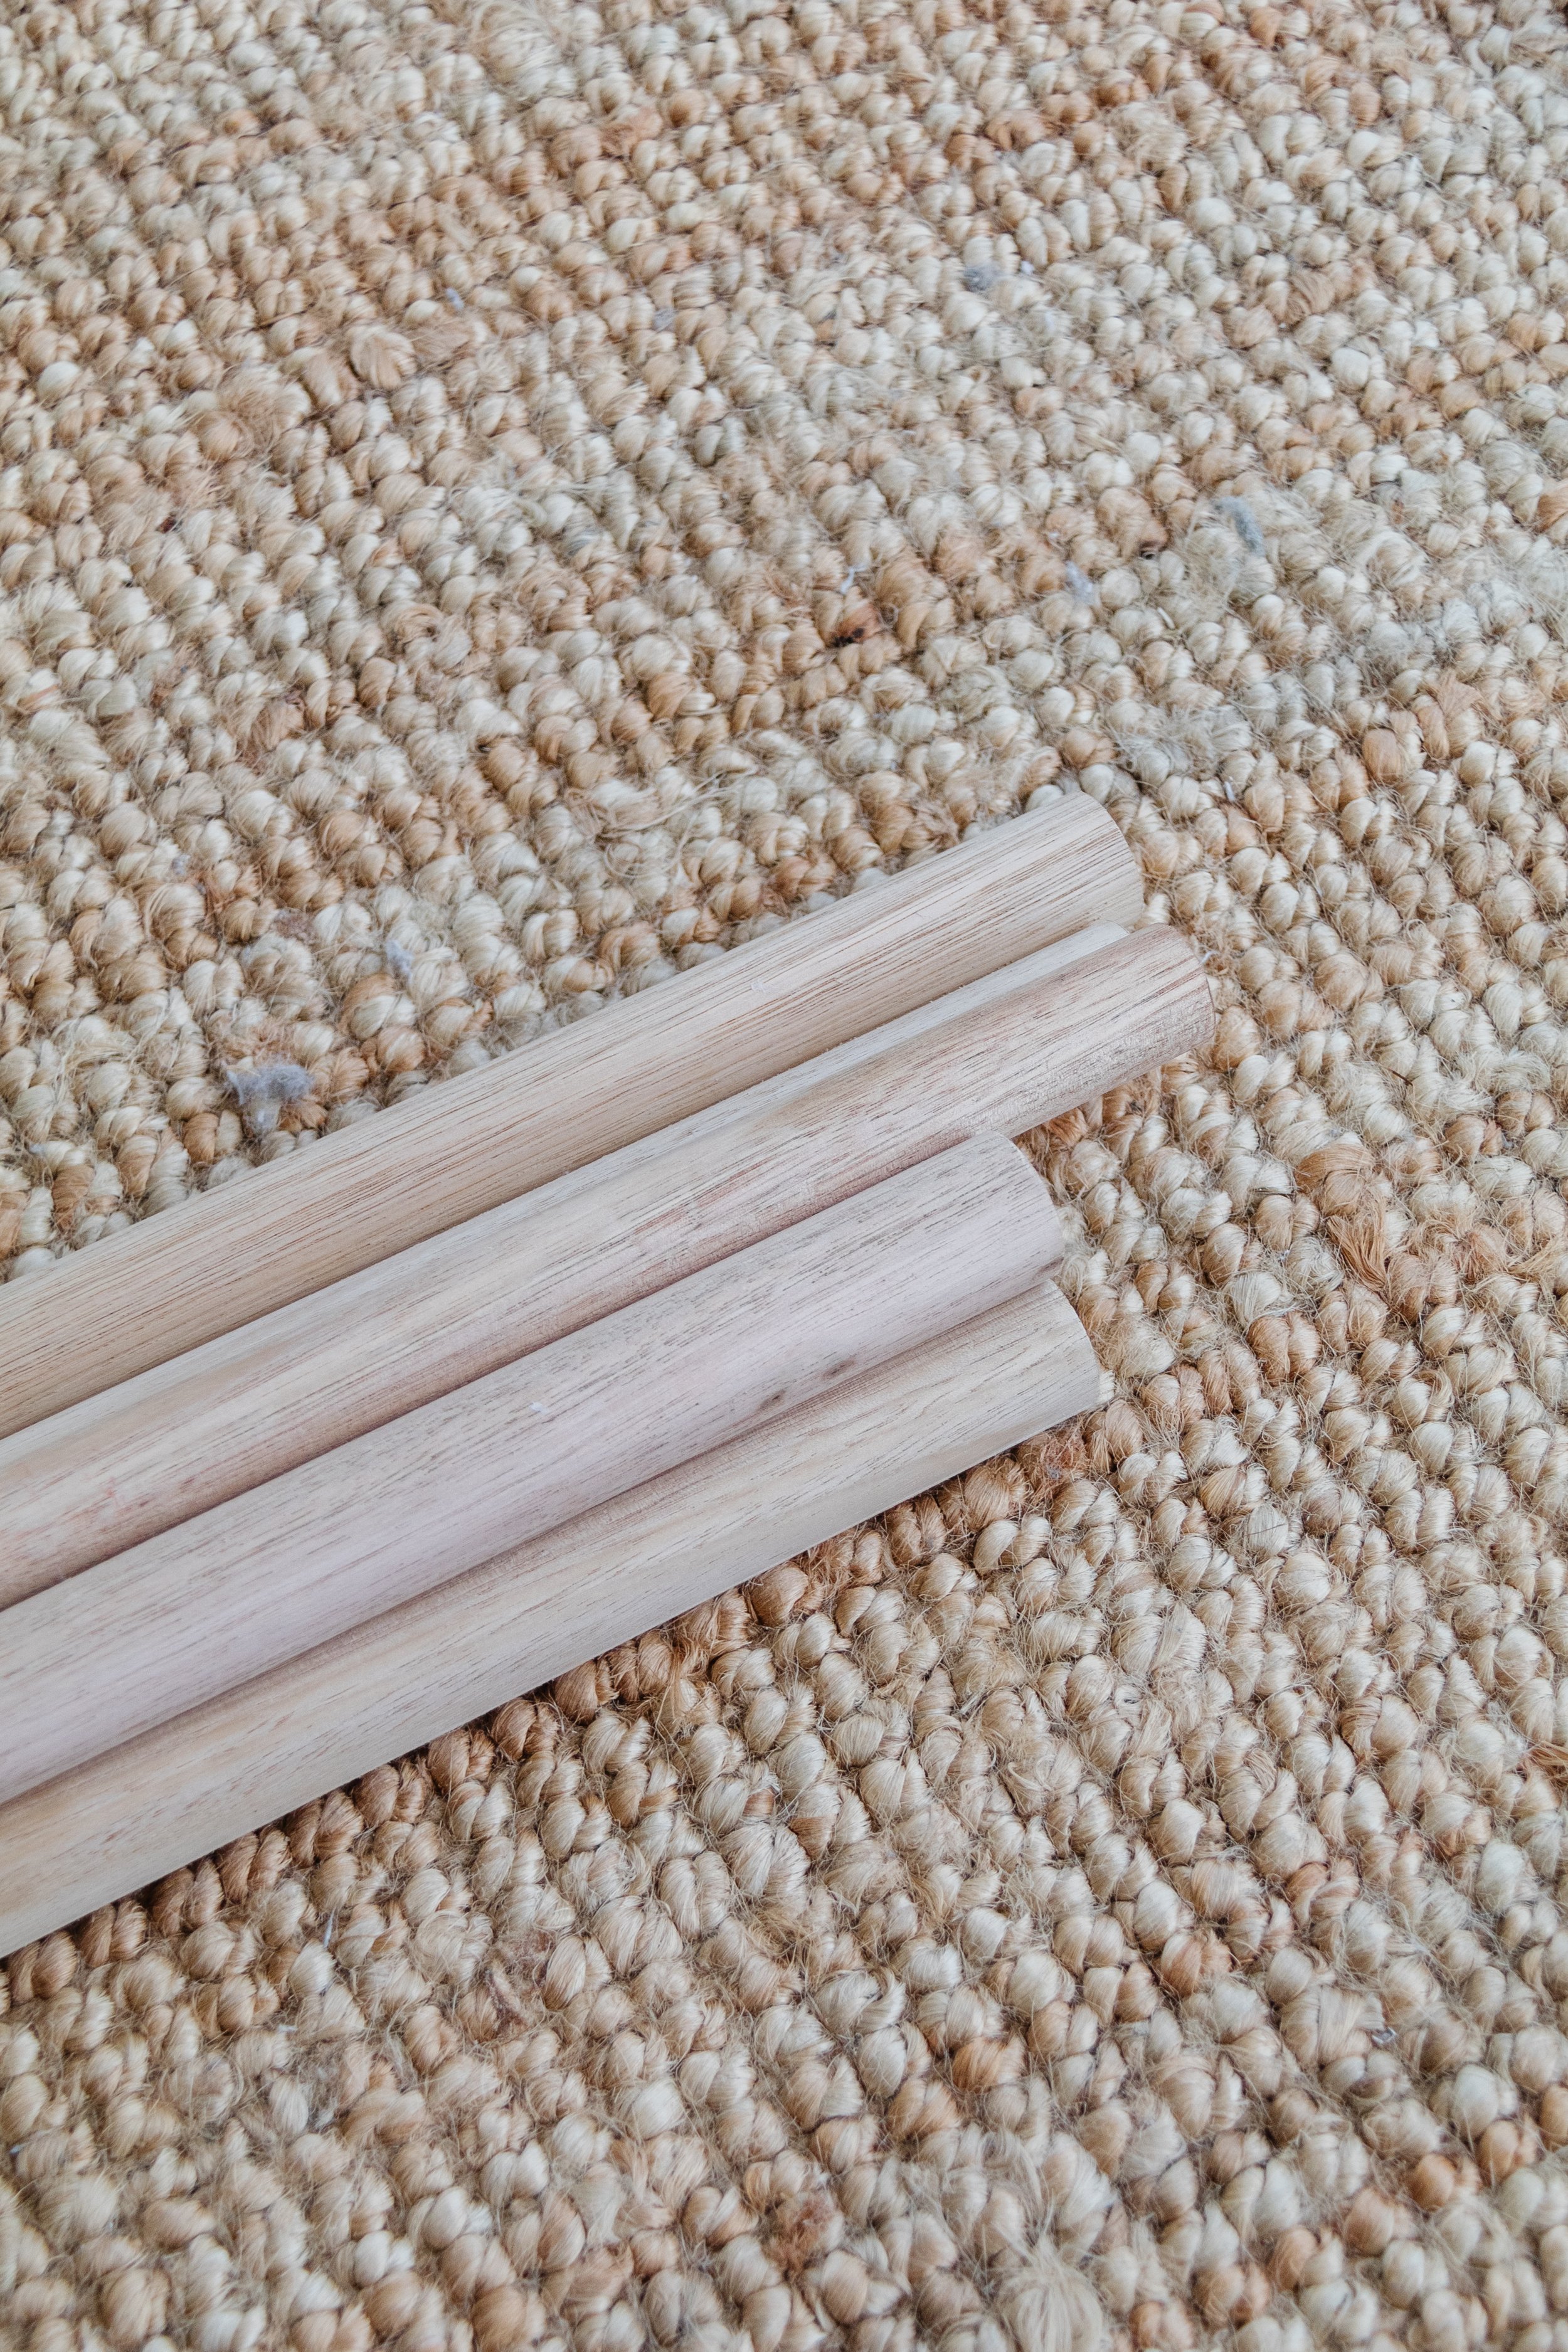
With my sister and her family flying into Noosa for Christmas this year, I felt sad knowing they wouldn't have a tree to enjoy on their holiday and wake up to on Christmas Day. So naturally I went to Bunnings to see what I could find to make a tree that was easy to transport, put up and pack down. When I was walking down the timber aisle I saw some beautiful Tasmanian Oak Dowels and I couldn't stop thinking about them, so I decided to make a Christmas Tree with them!
And then I set about seeing what else I could find at home to make it look beautiful. I used some garland we've had from years past, I painted and decorated a bunch of secondhand baubles I picked up at my favourite charity shop and I made a star topper using fluted cardboard and paint. I added more sparkle to the Christmas Tree with fairy lights because more is more, right? And I made my own DIY Painted Striped Wrapping Paper using butchers paper and paint, which I used to wrap some gifts to put under the tree. Read on to make your own transportable, easy to put up and pack down DIY Dowel Christmas Tree. And of course, Merry Christmas!
And to see how this DIY Dowel Christmas Tree came together, make sure you check out this video!
DIY Dowel Christmas Tree


Project Details
🕒 Project Time Estimate: 1 hour, not including paint and clay drying time
💰 Materials Cost: Approximately $175
⚒️ Ryobi Power Tools: None!
👷♀️ Skill Level: Beginner DIYer
NB: To make the same pink paint I used, mix 75% Dulux “Lexicon Quarter” with 25% Dulux “Morocco”.
Materials
Small Cable Clips from Bunnings
Faux garland. I used what we already had at home but you can get Lit Up Garland from Bunnings.
2 to 3 x Warm White Battery Operated Fairy Lights from Bunnings
Upcycled Baubles: Baubles (which you can get from Bunnings), gold spray paint, pink paint, paintbrush, skewers, cardboard boxes, raffia, gold leaf foil
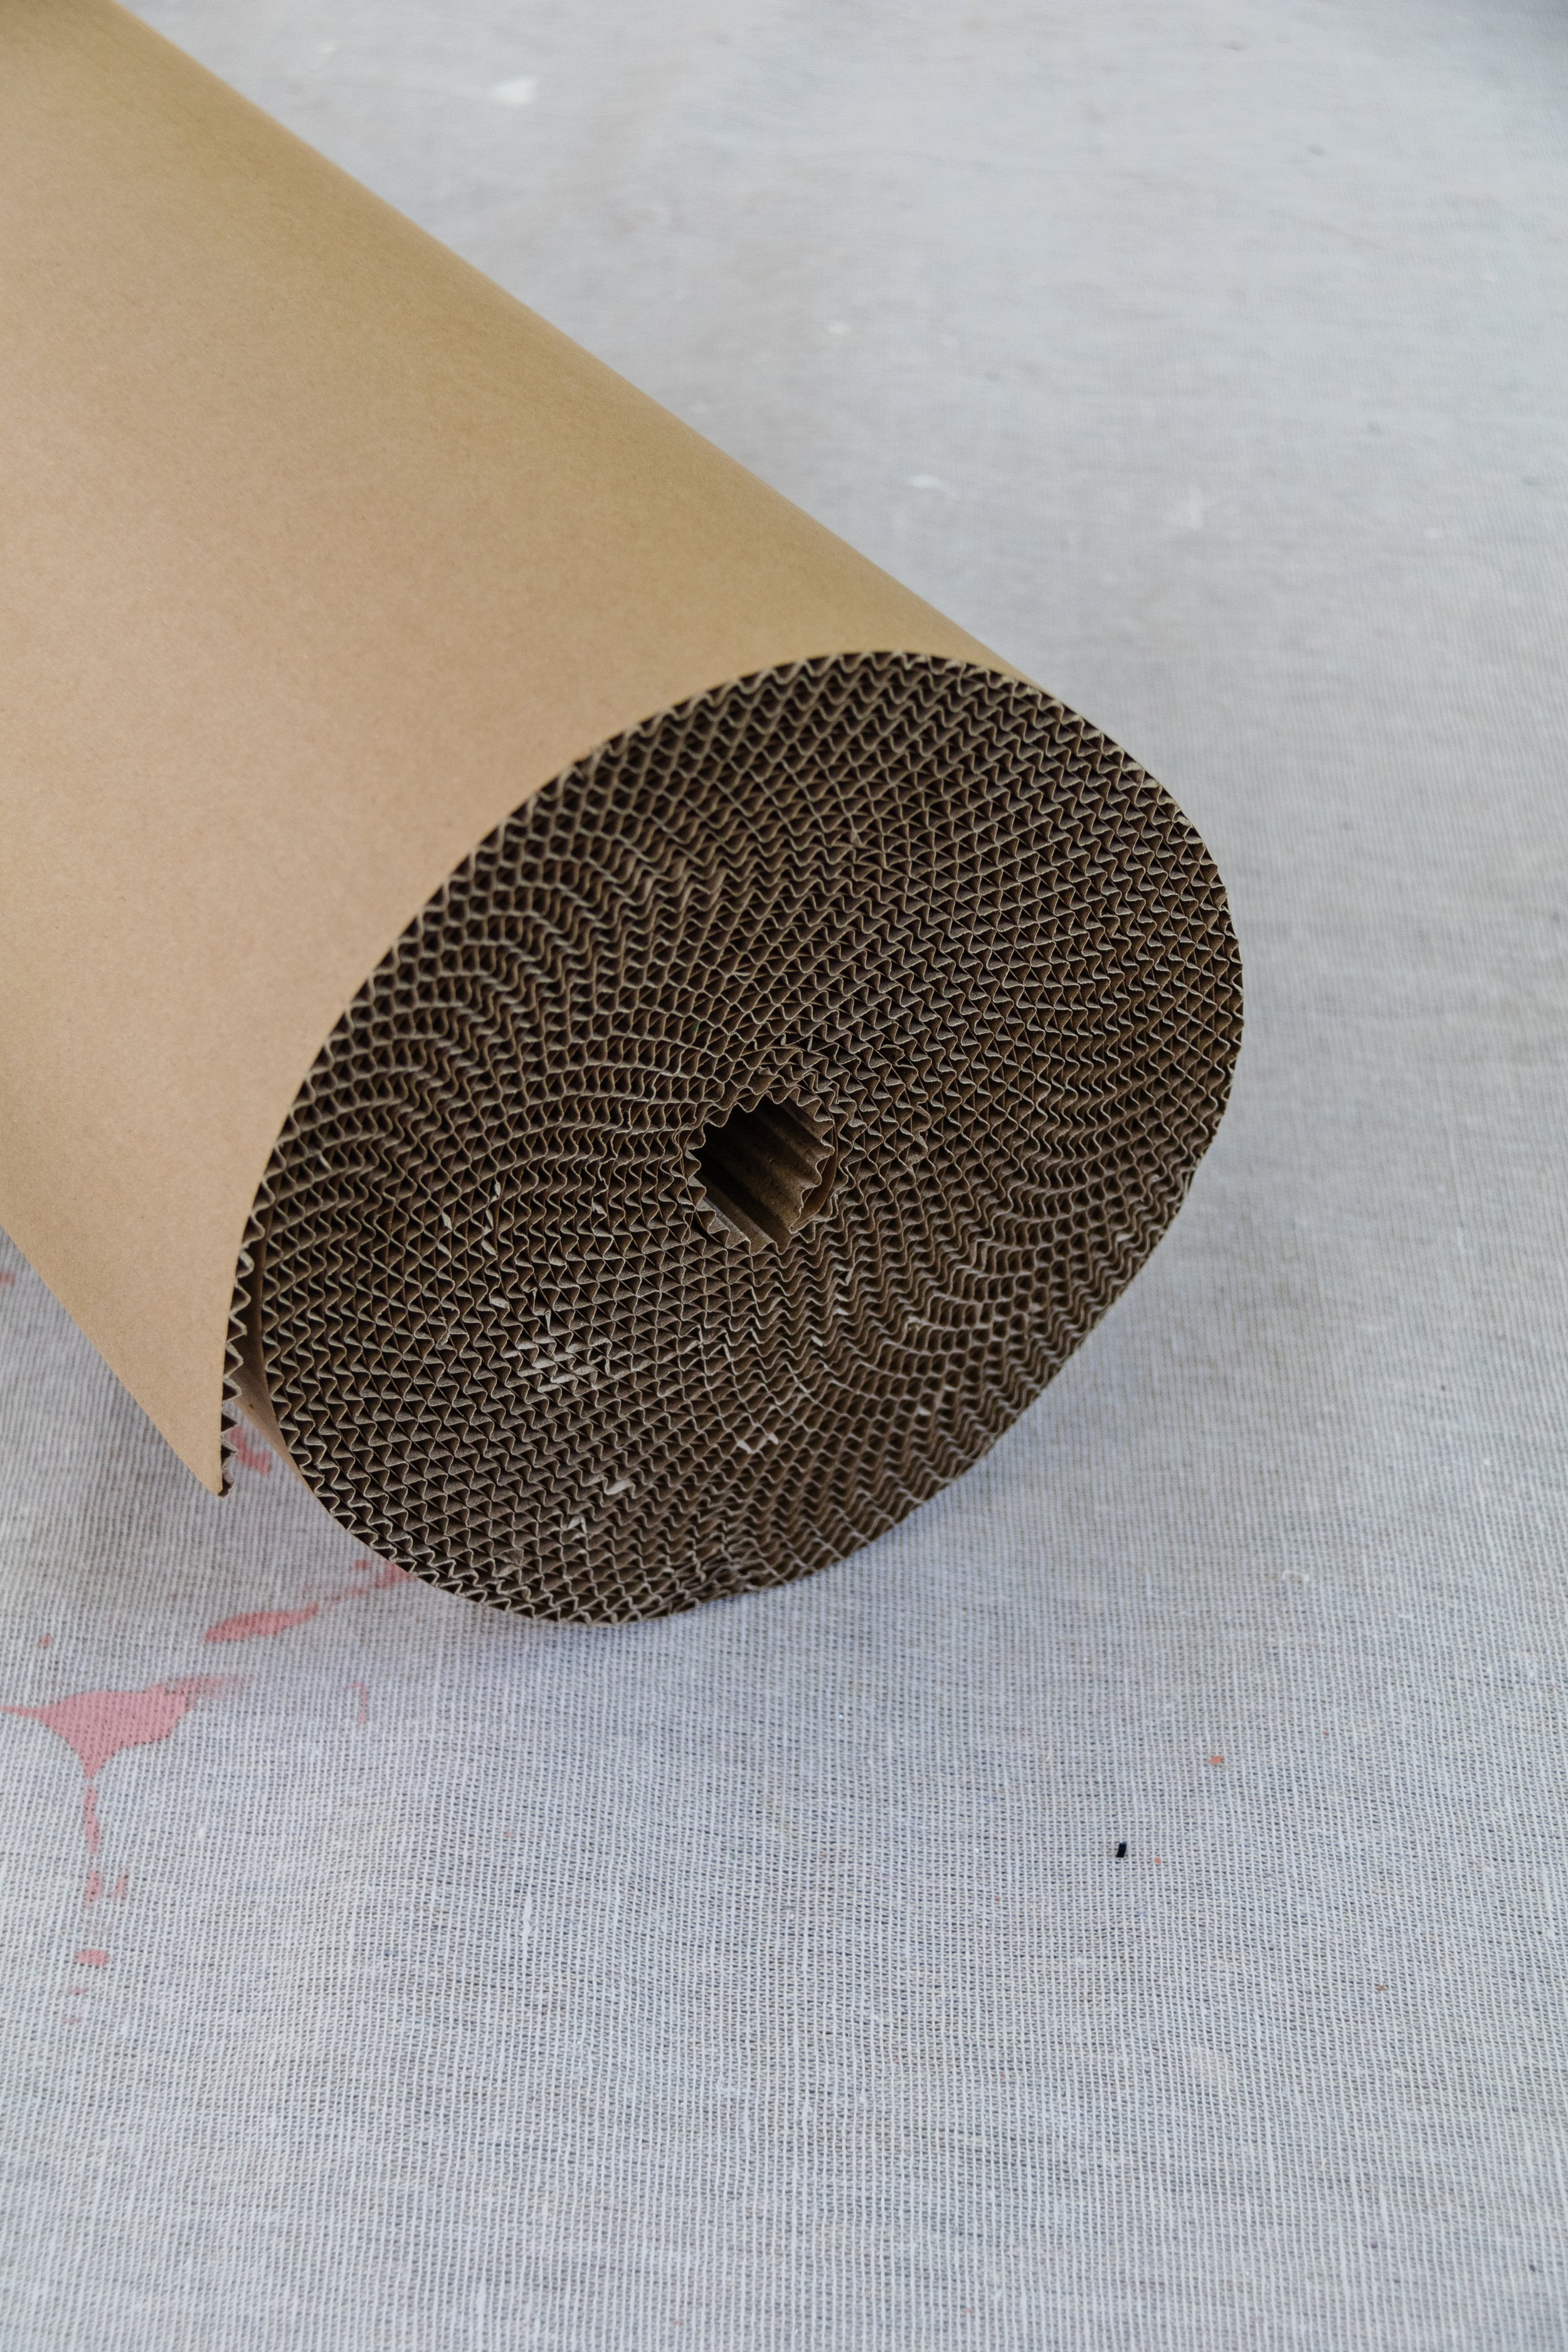
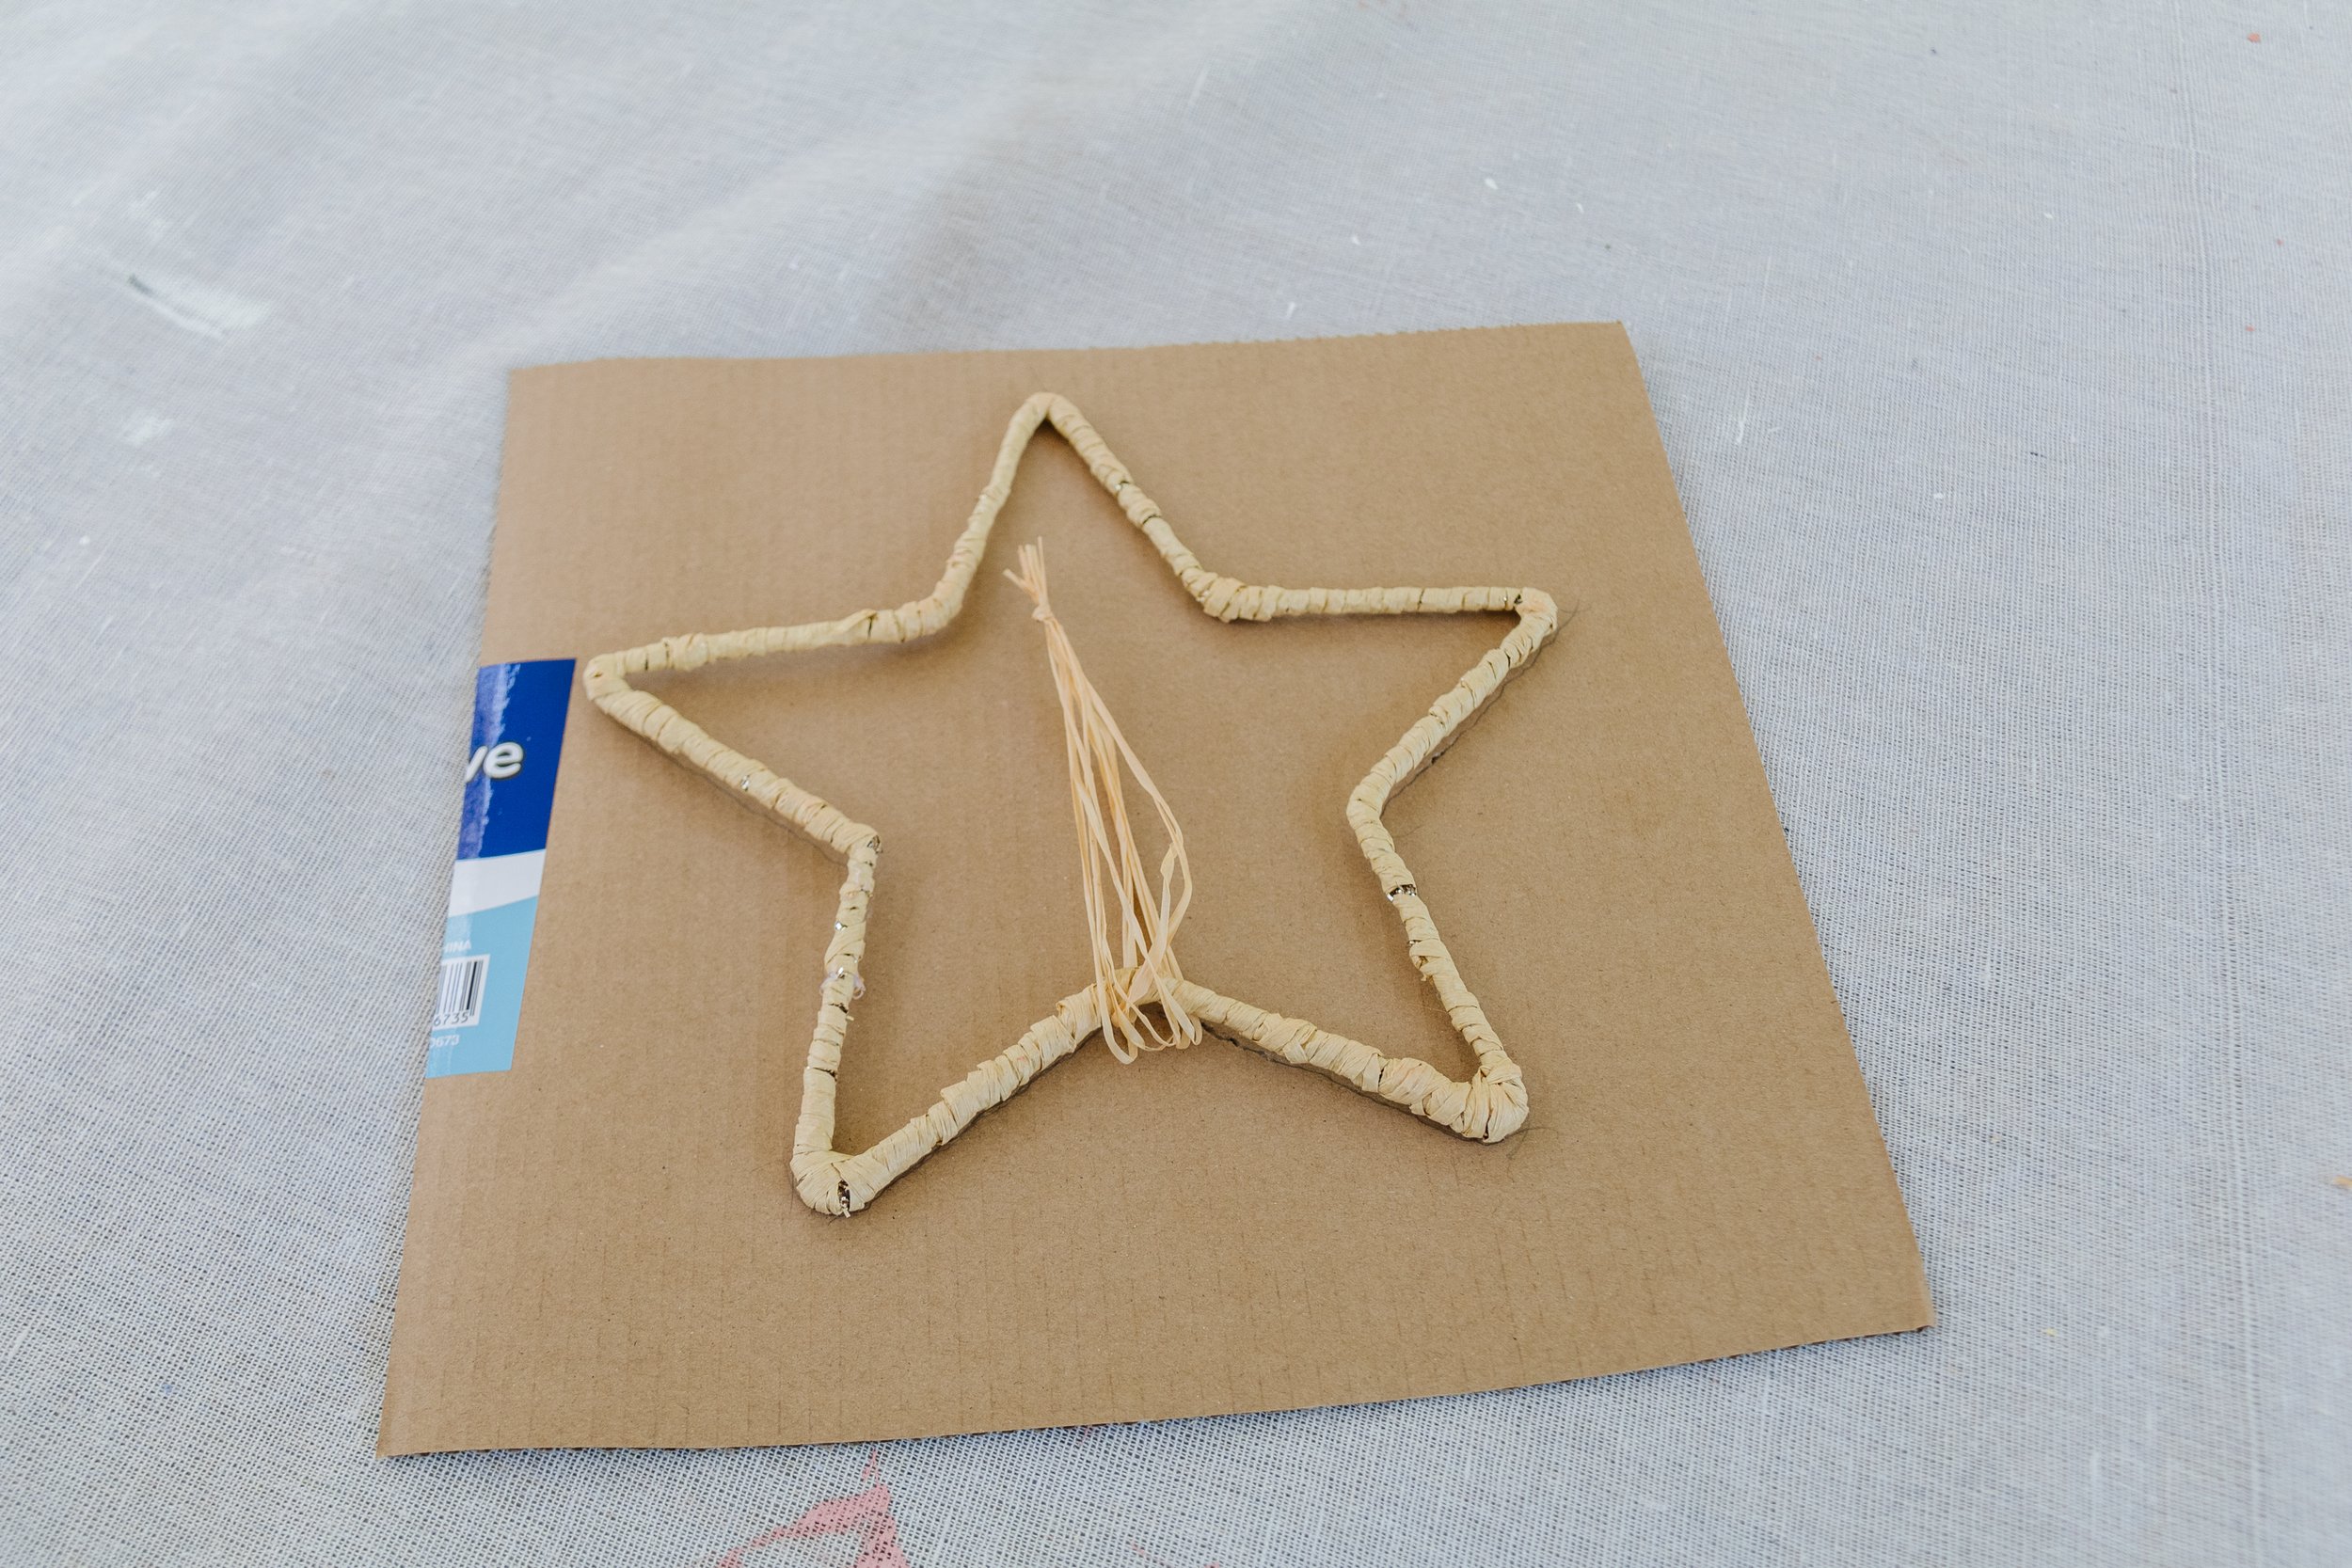
DIY Fluted Cardboard Star: Fluted Cardboard from Bunnings, ruler, scissors, pink paint and paint brush
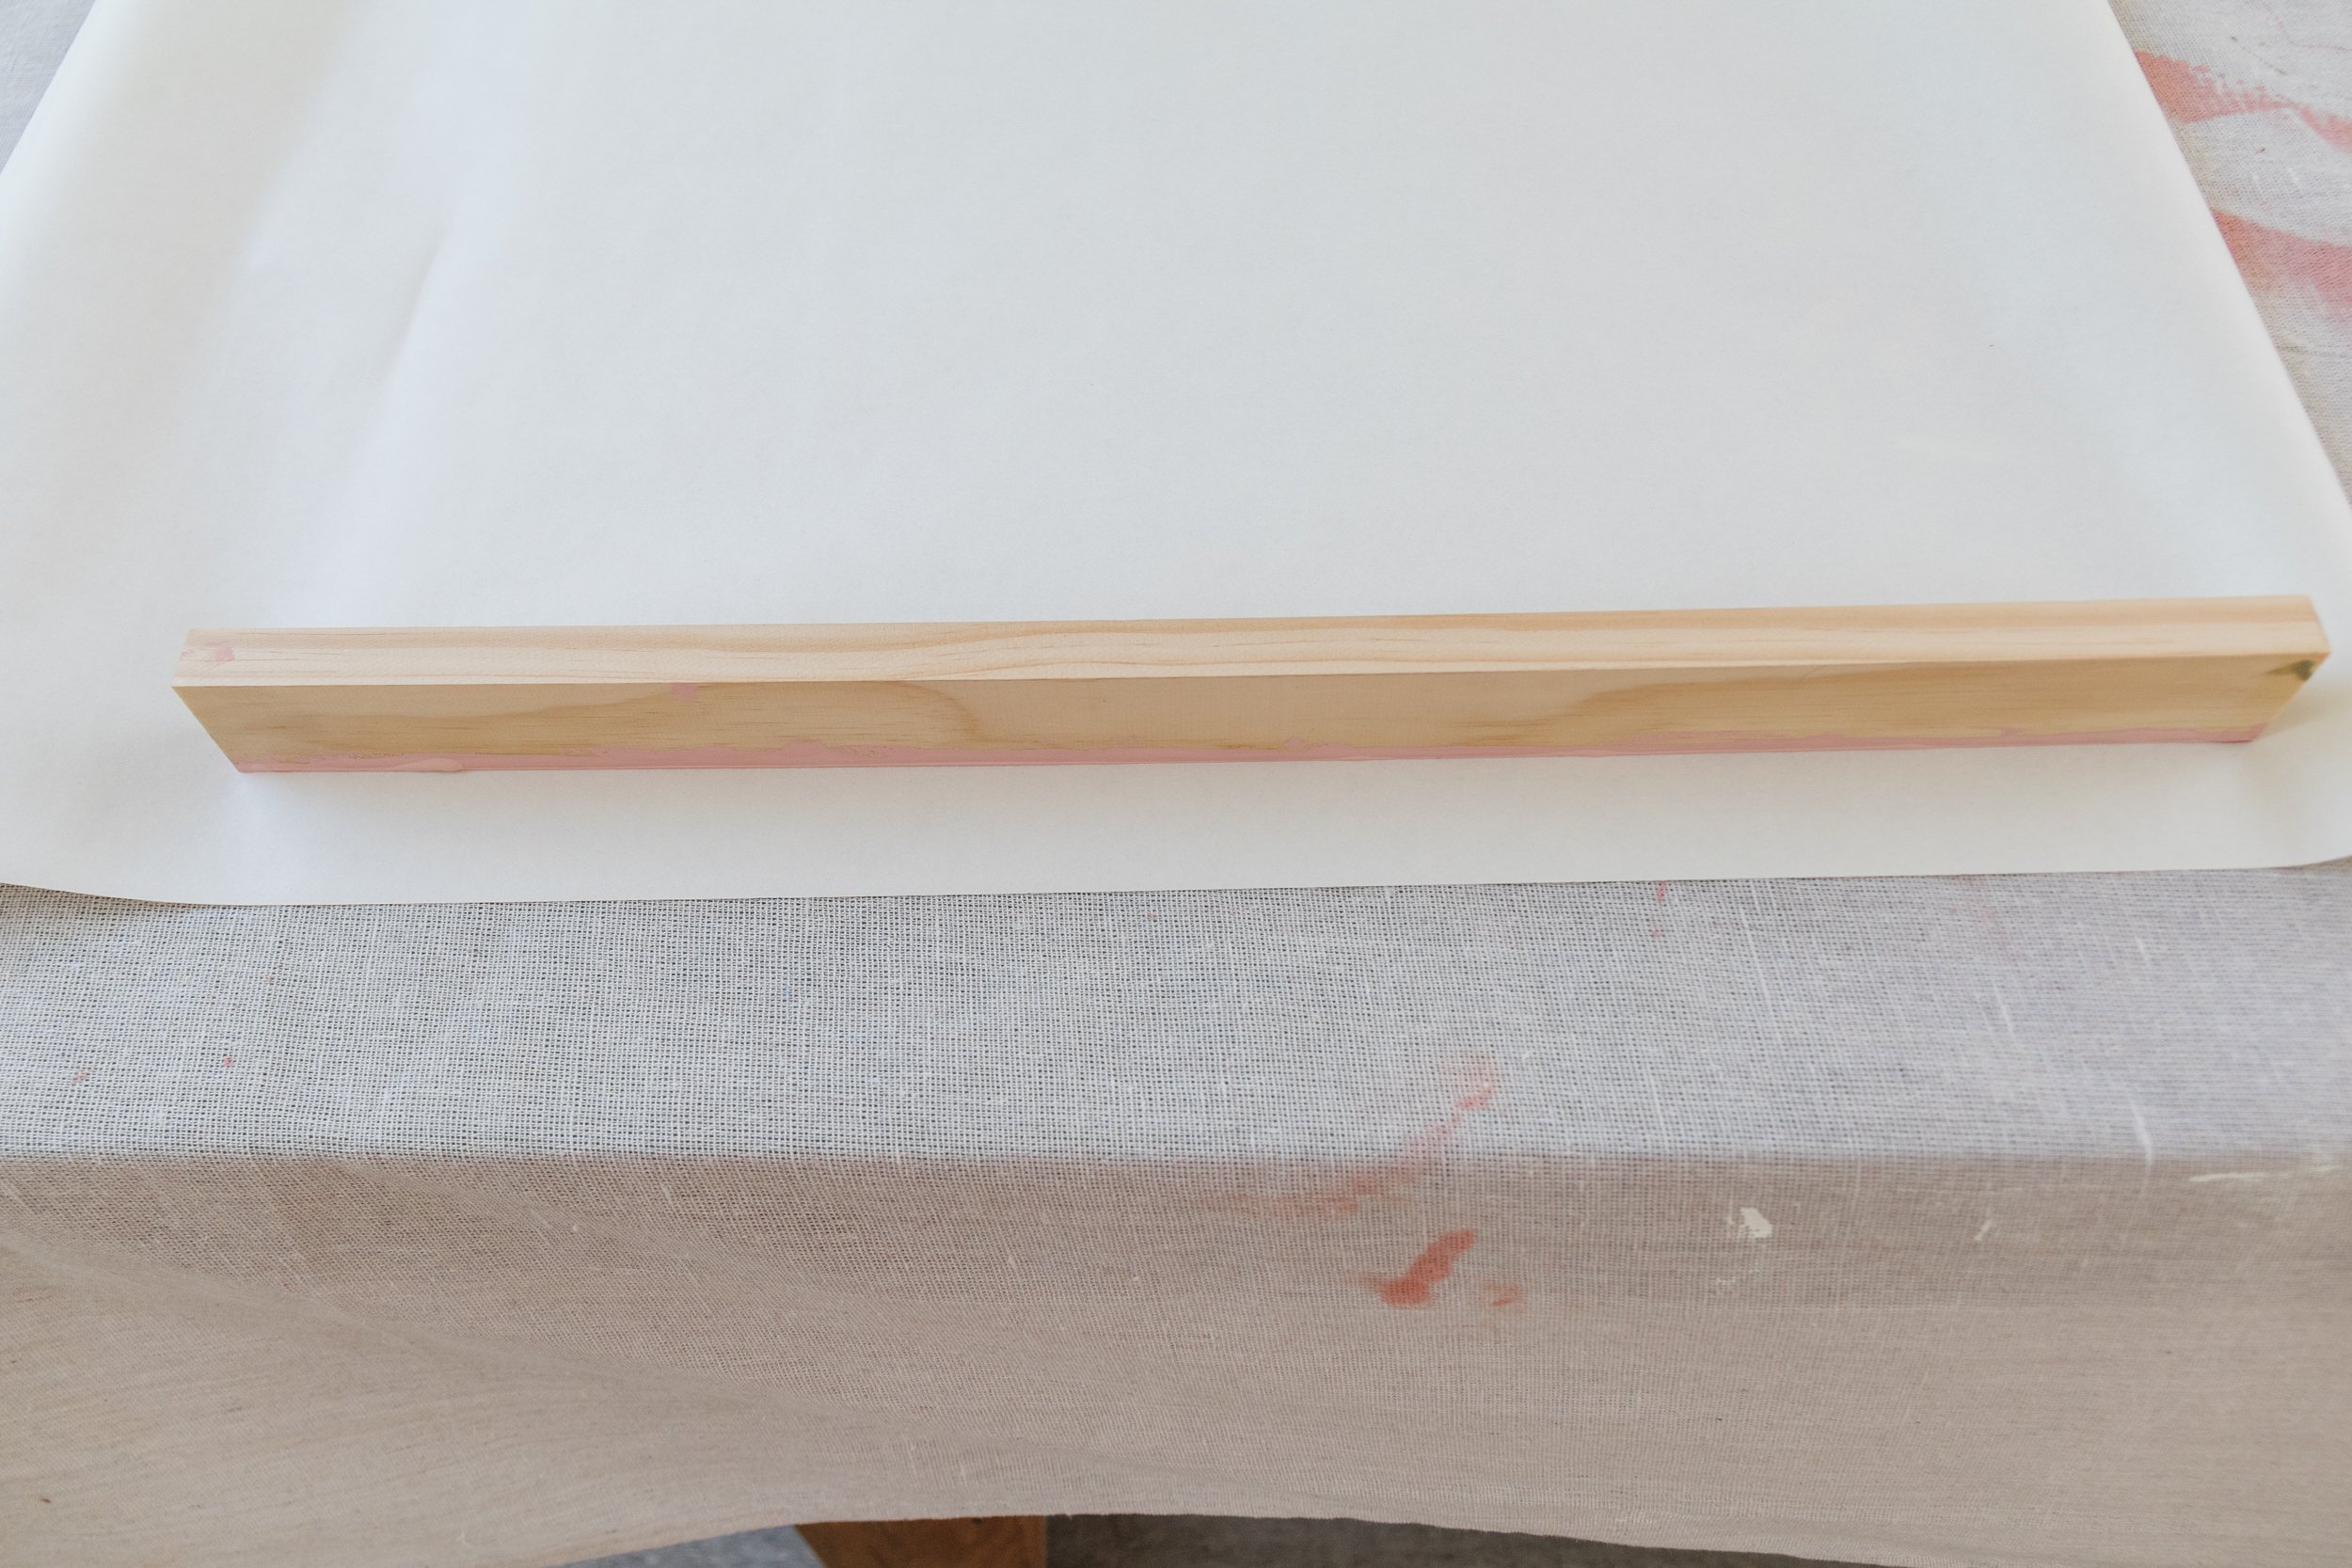
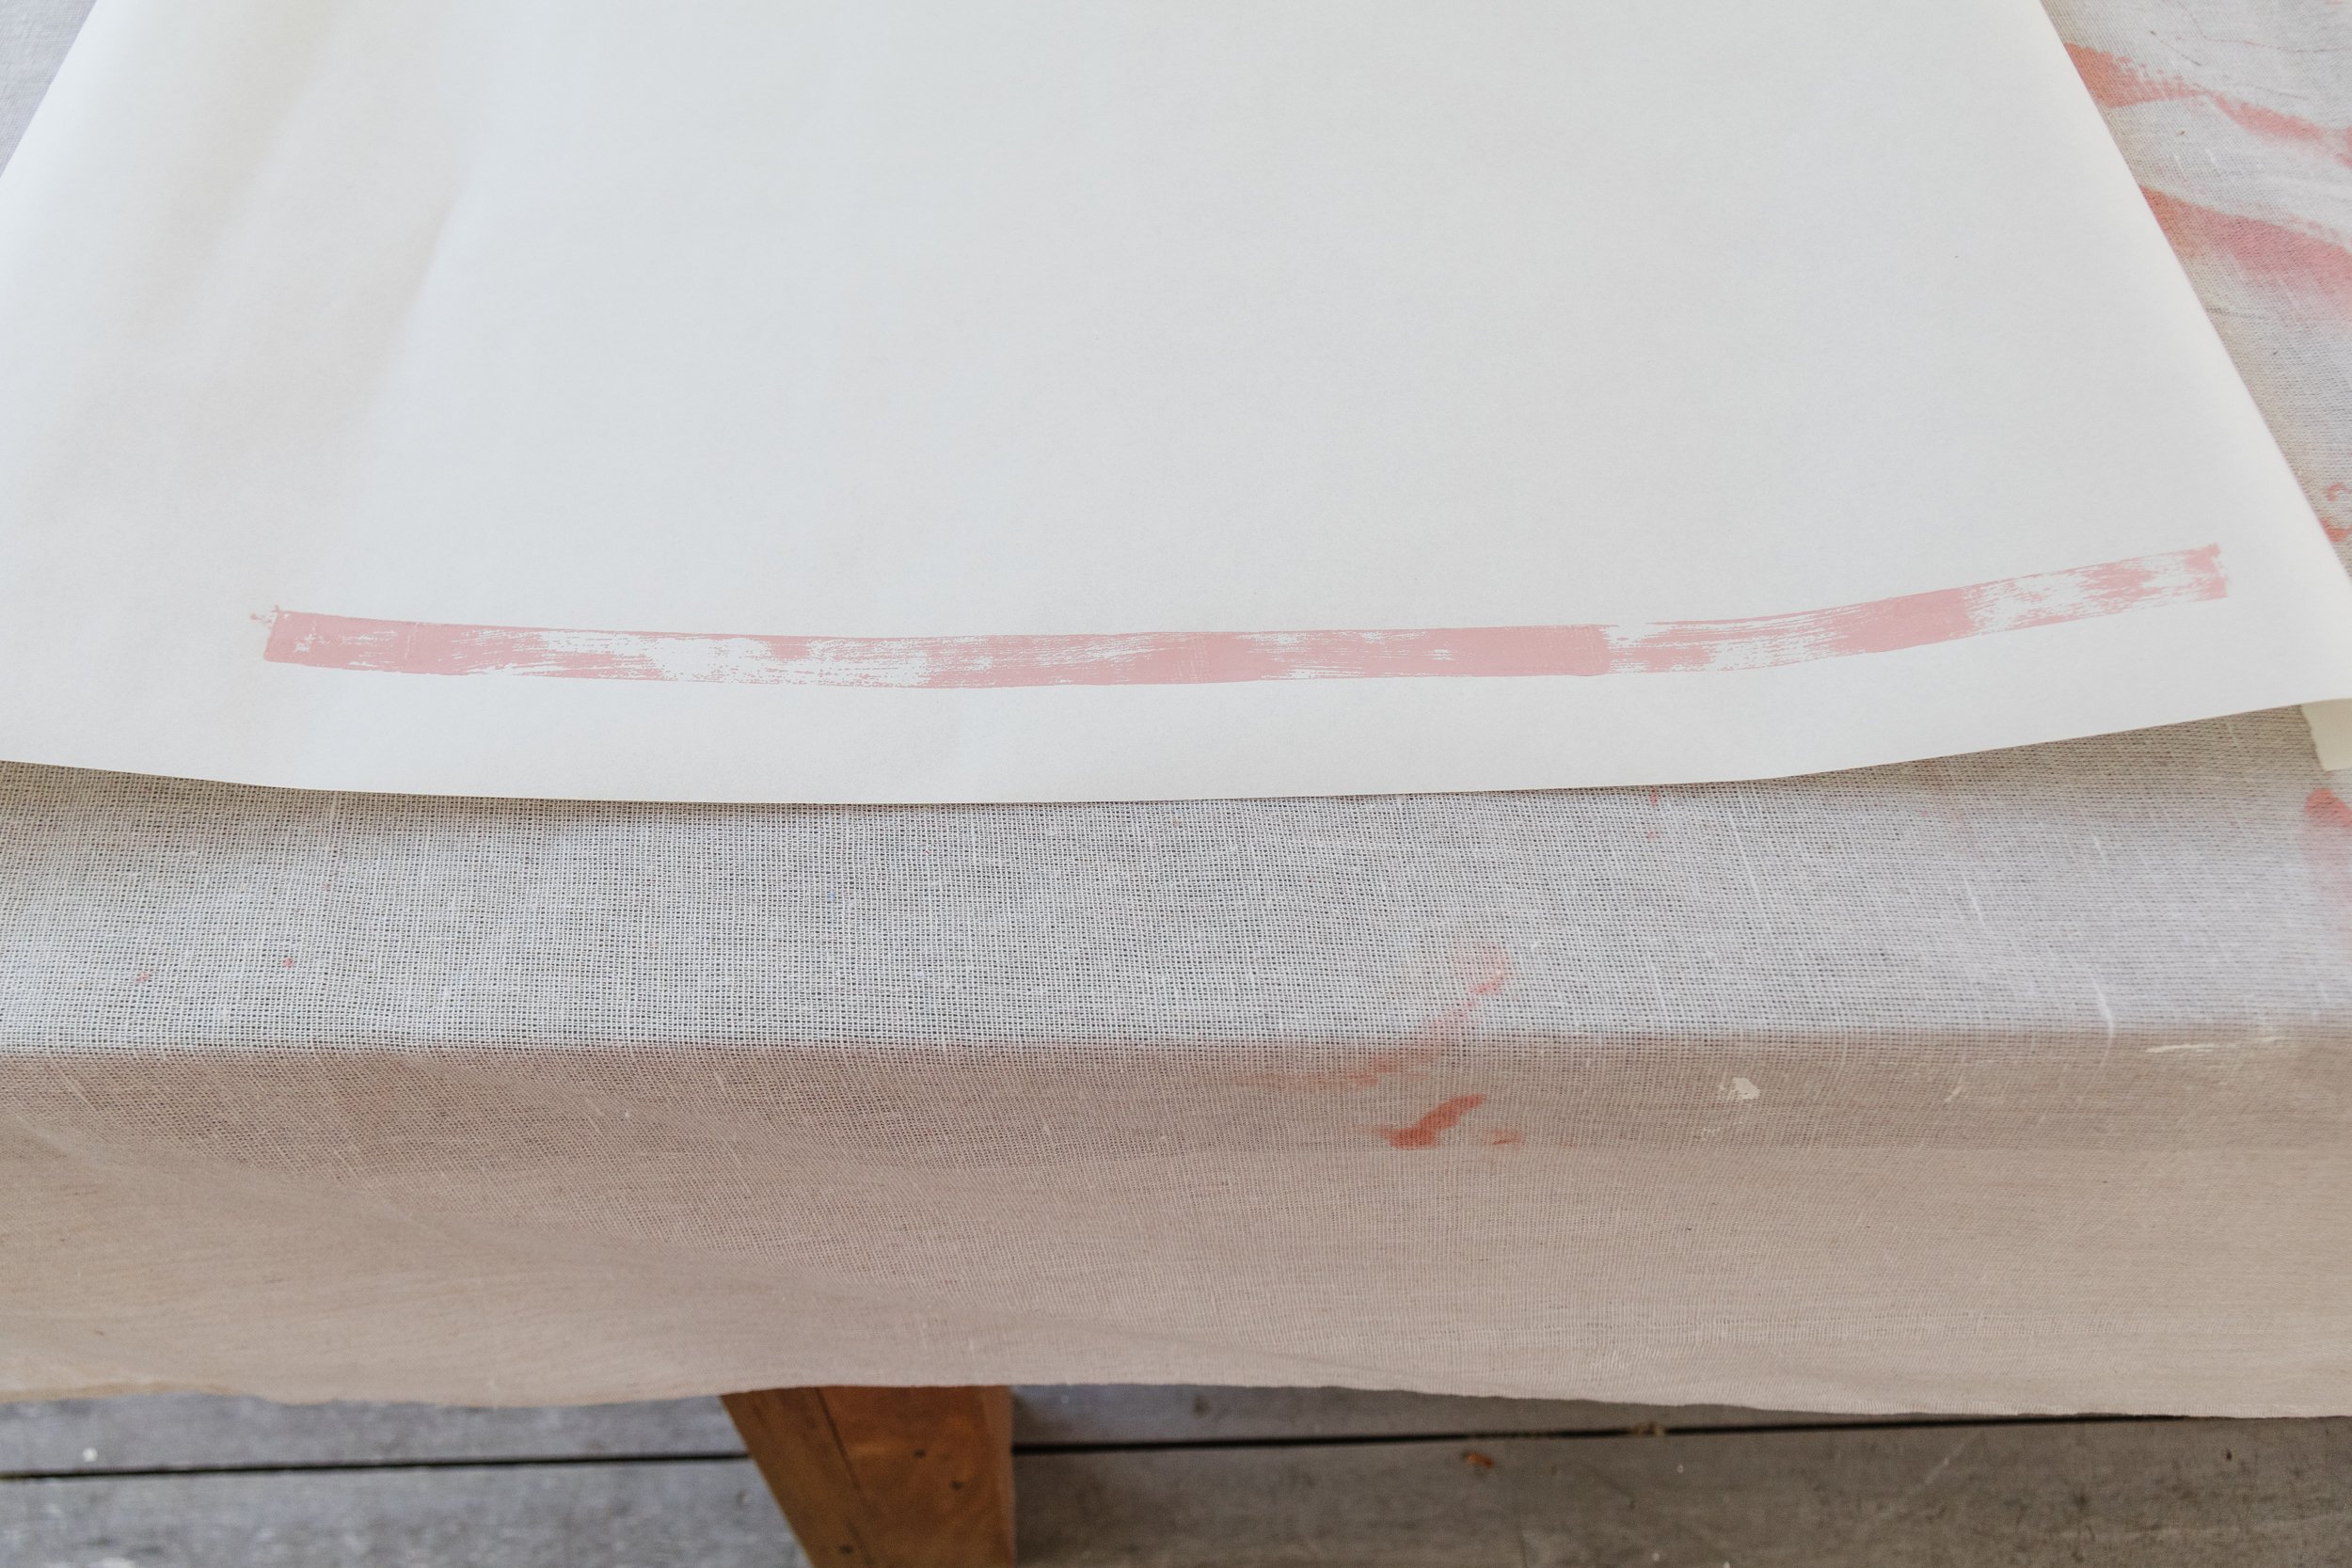
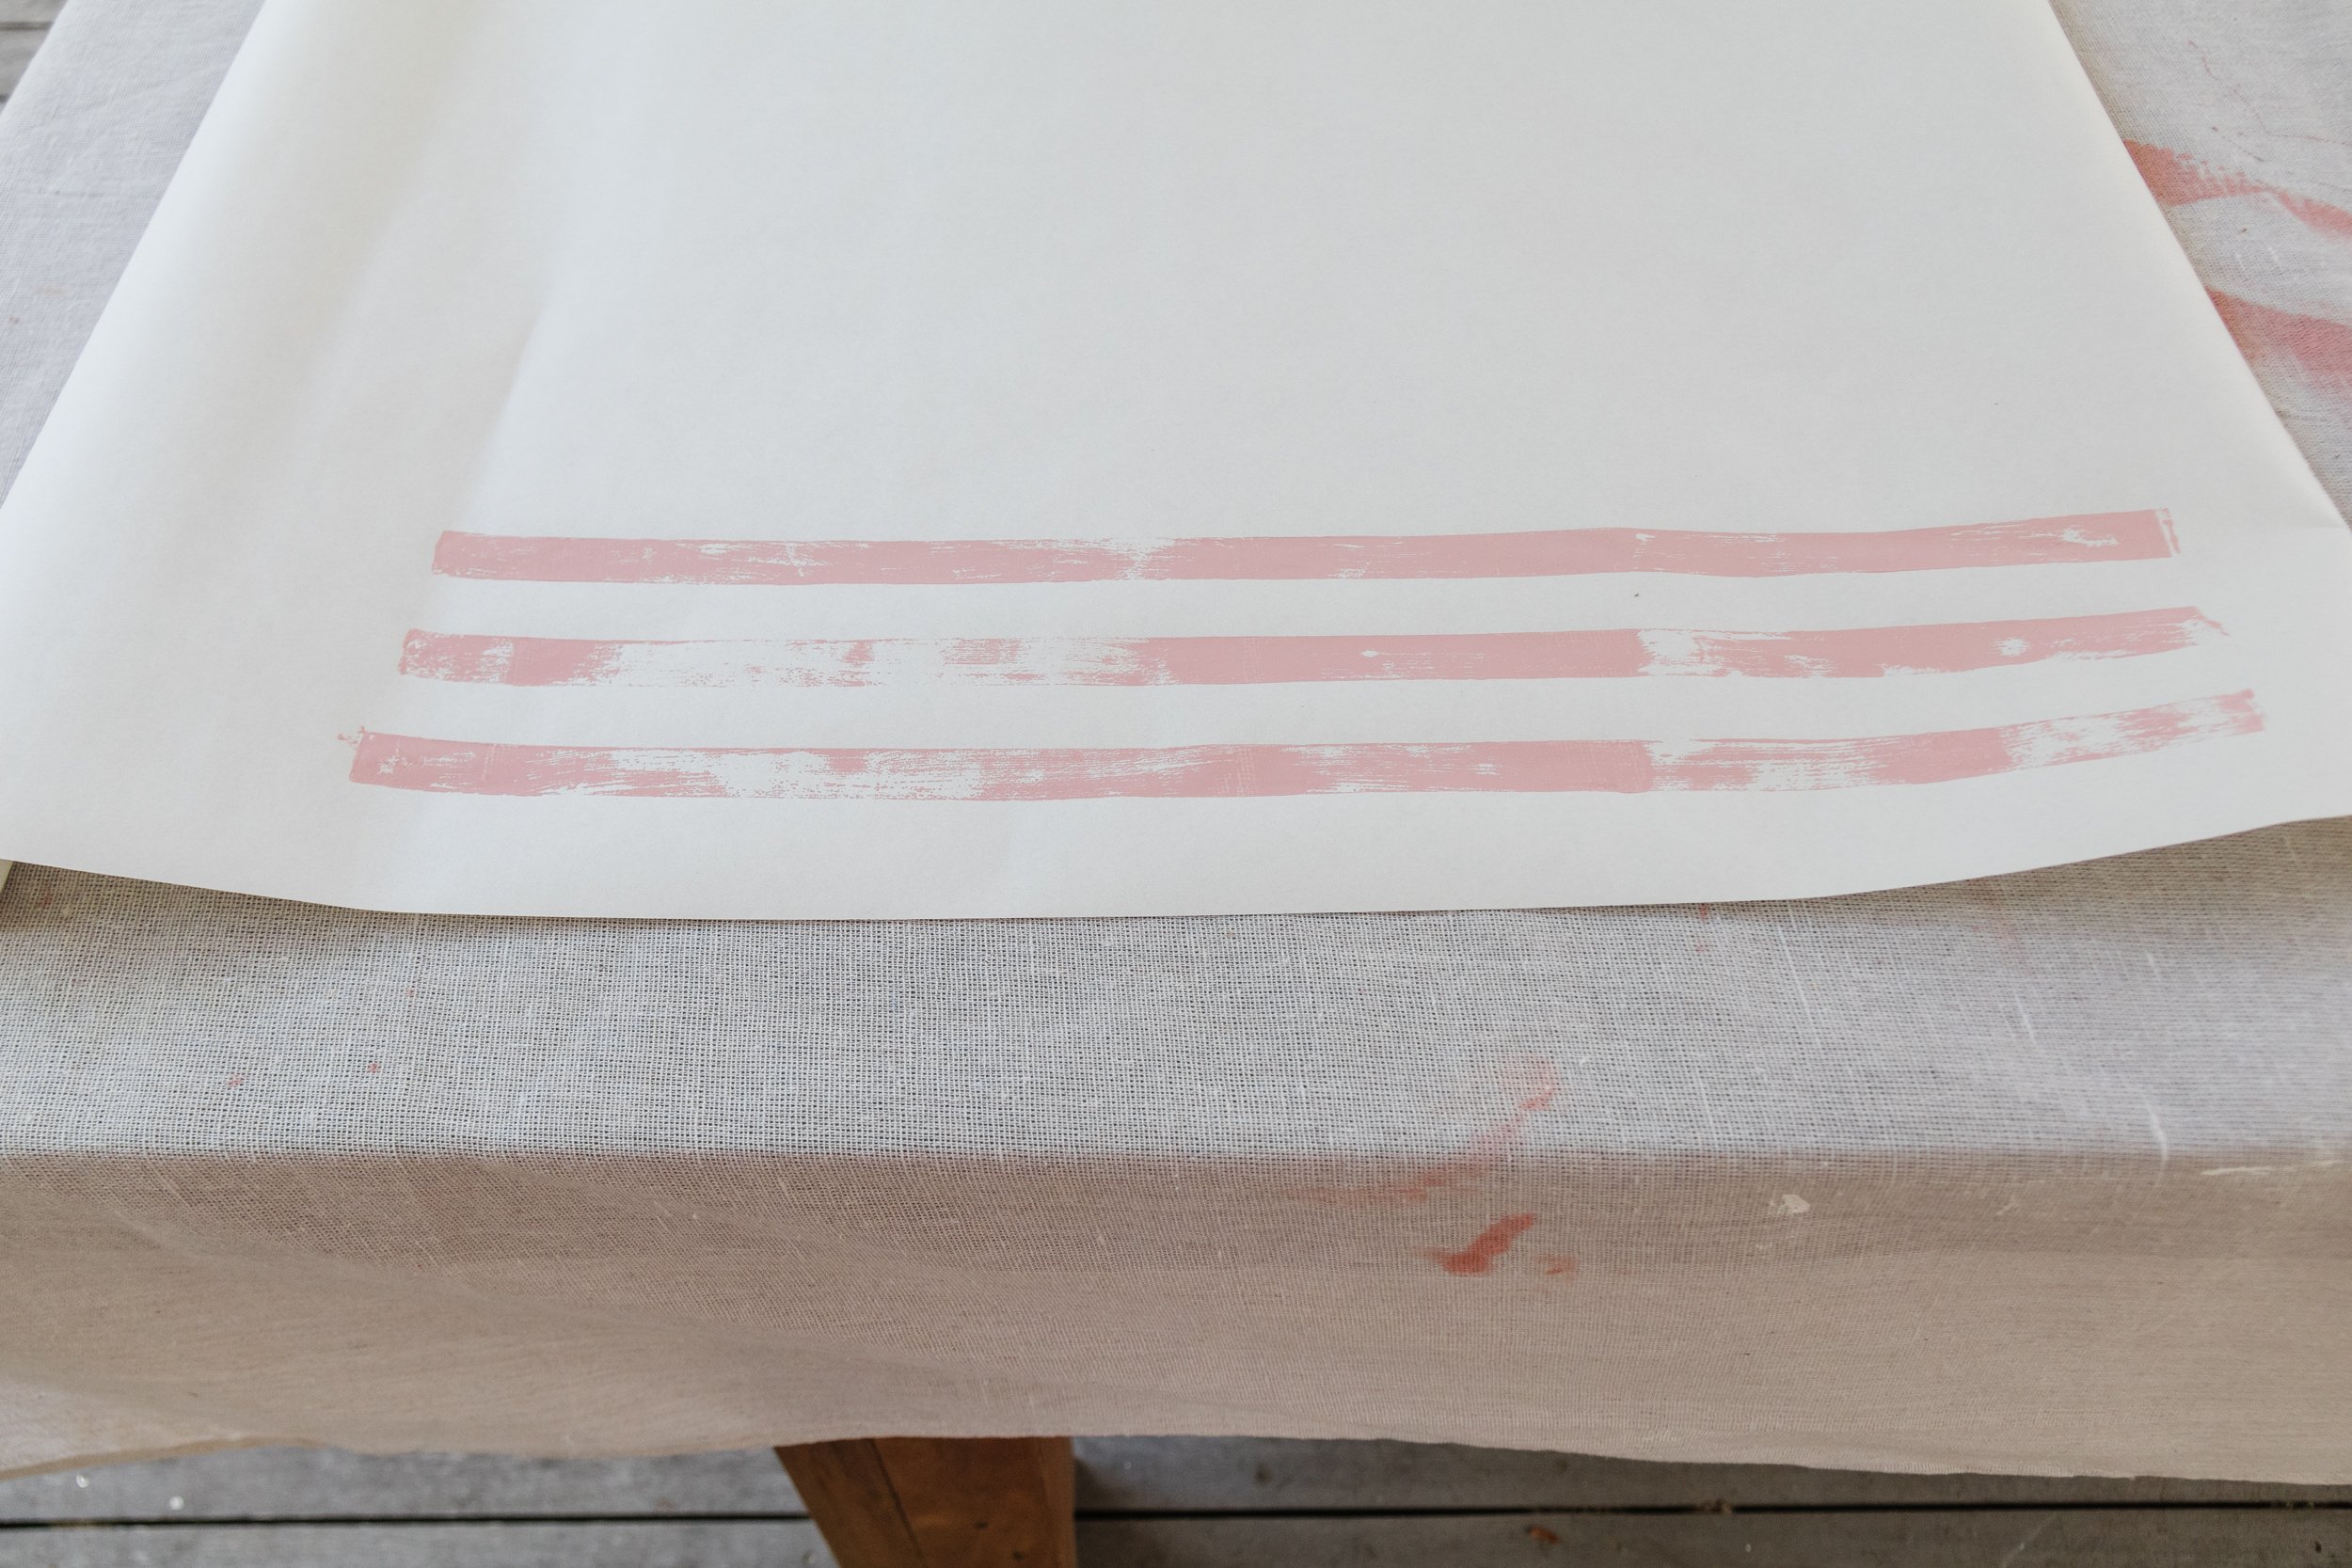
DIY Painted Striped Wrapping Paper: Butchers Paper from Bunnings, pink paint, paint brush and 1 x 42 x 19mm 1.2m DAR Pine

How To
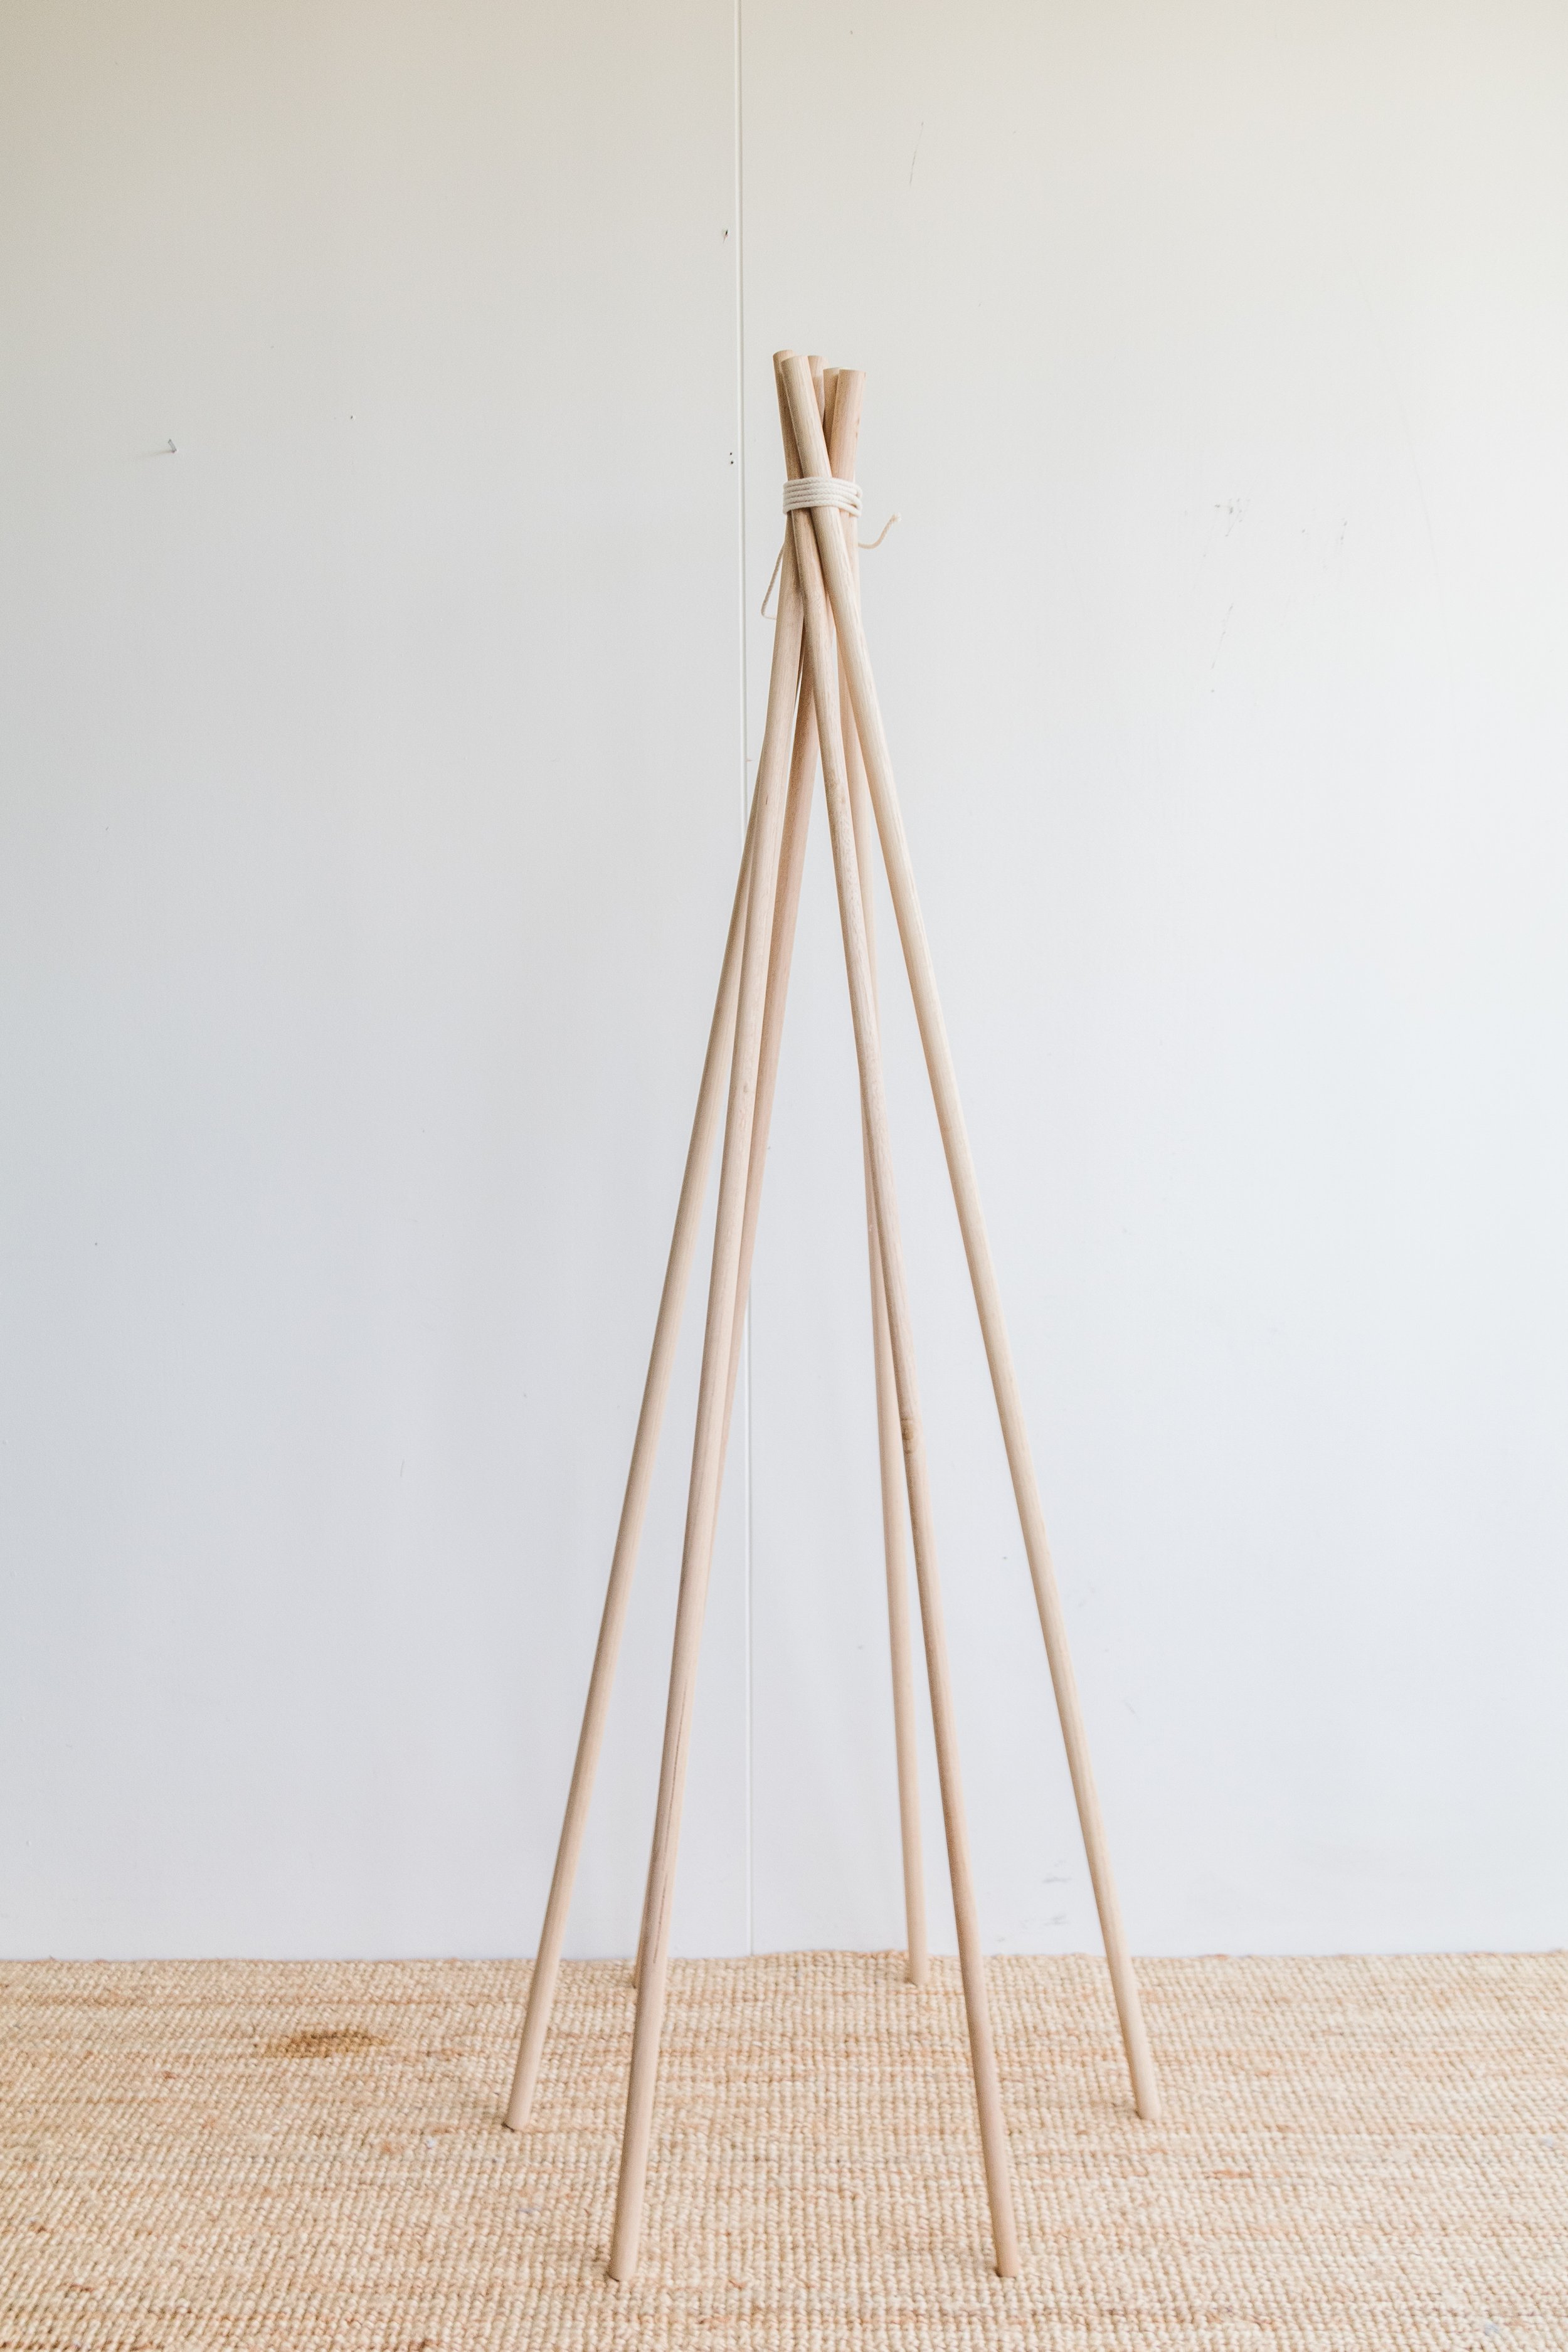
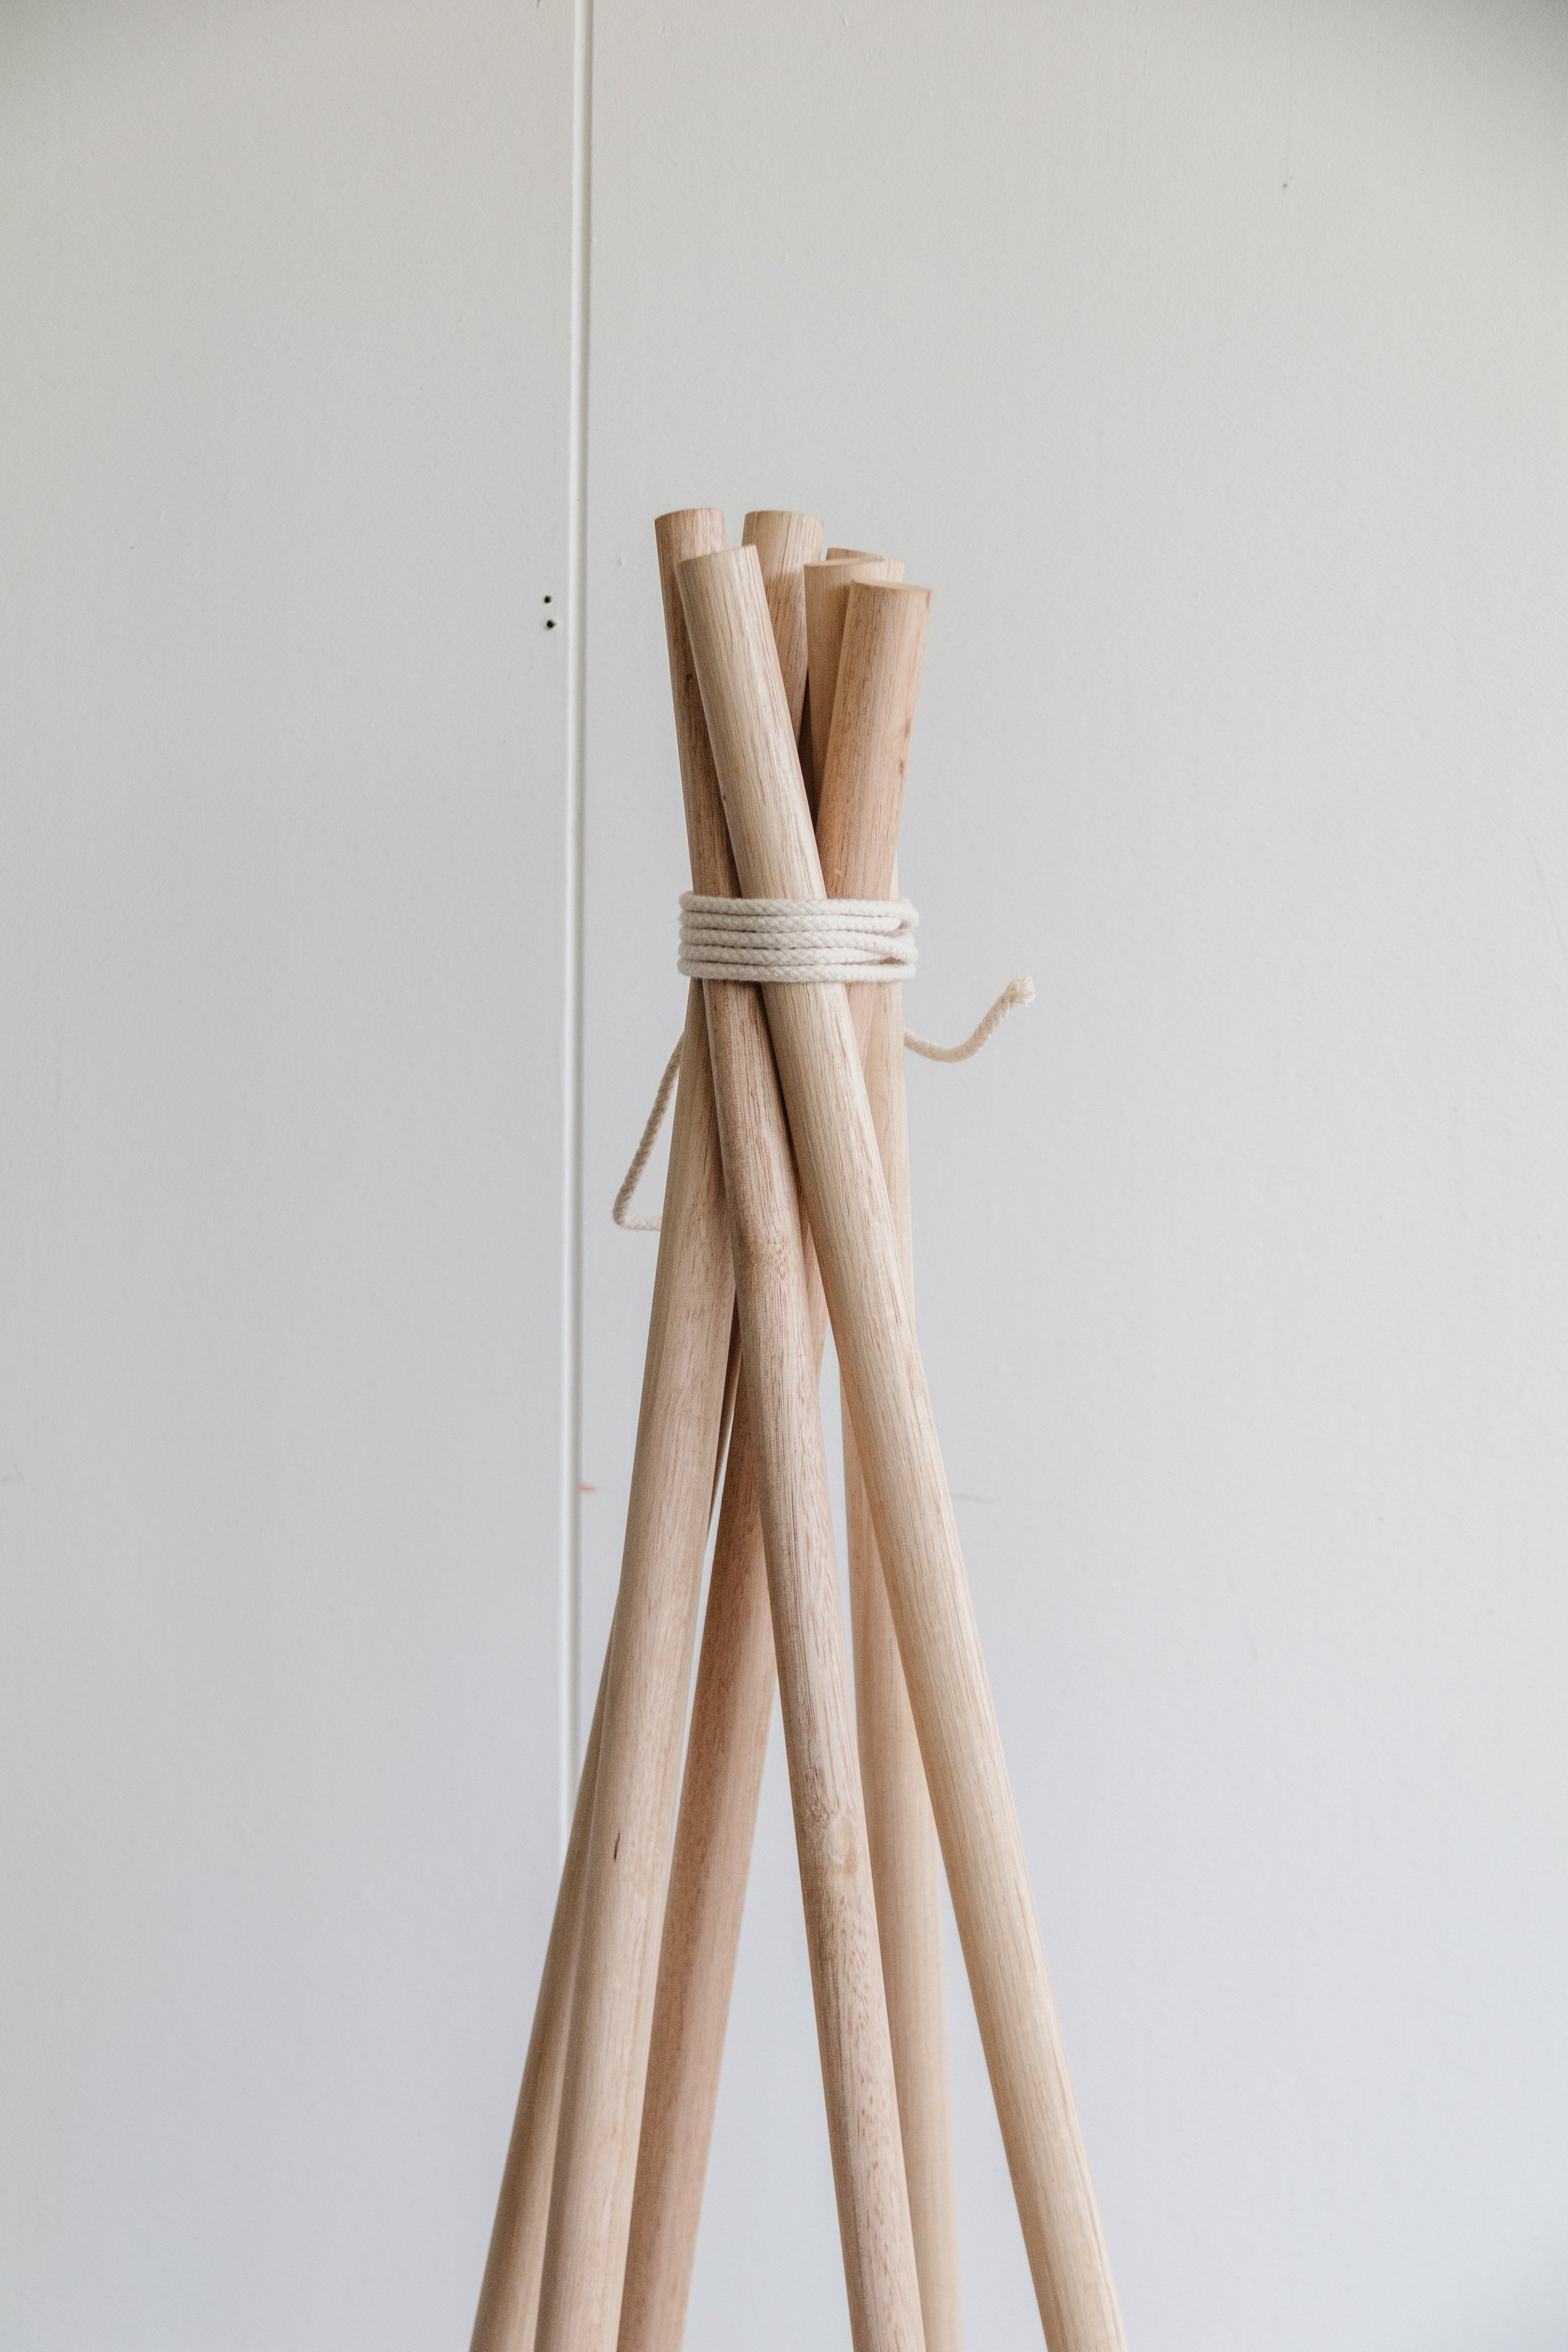
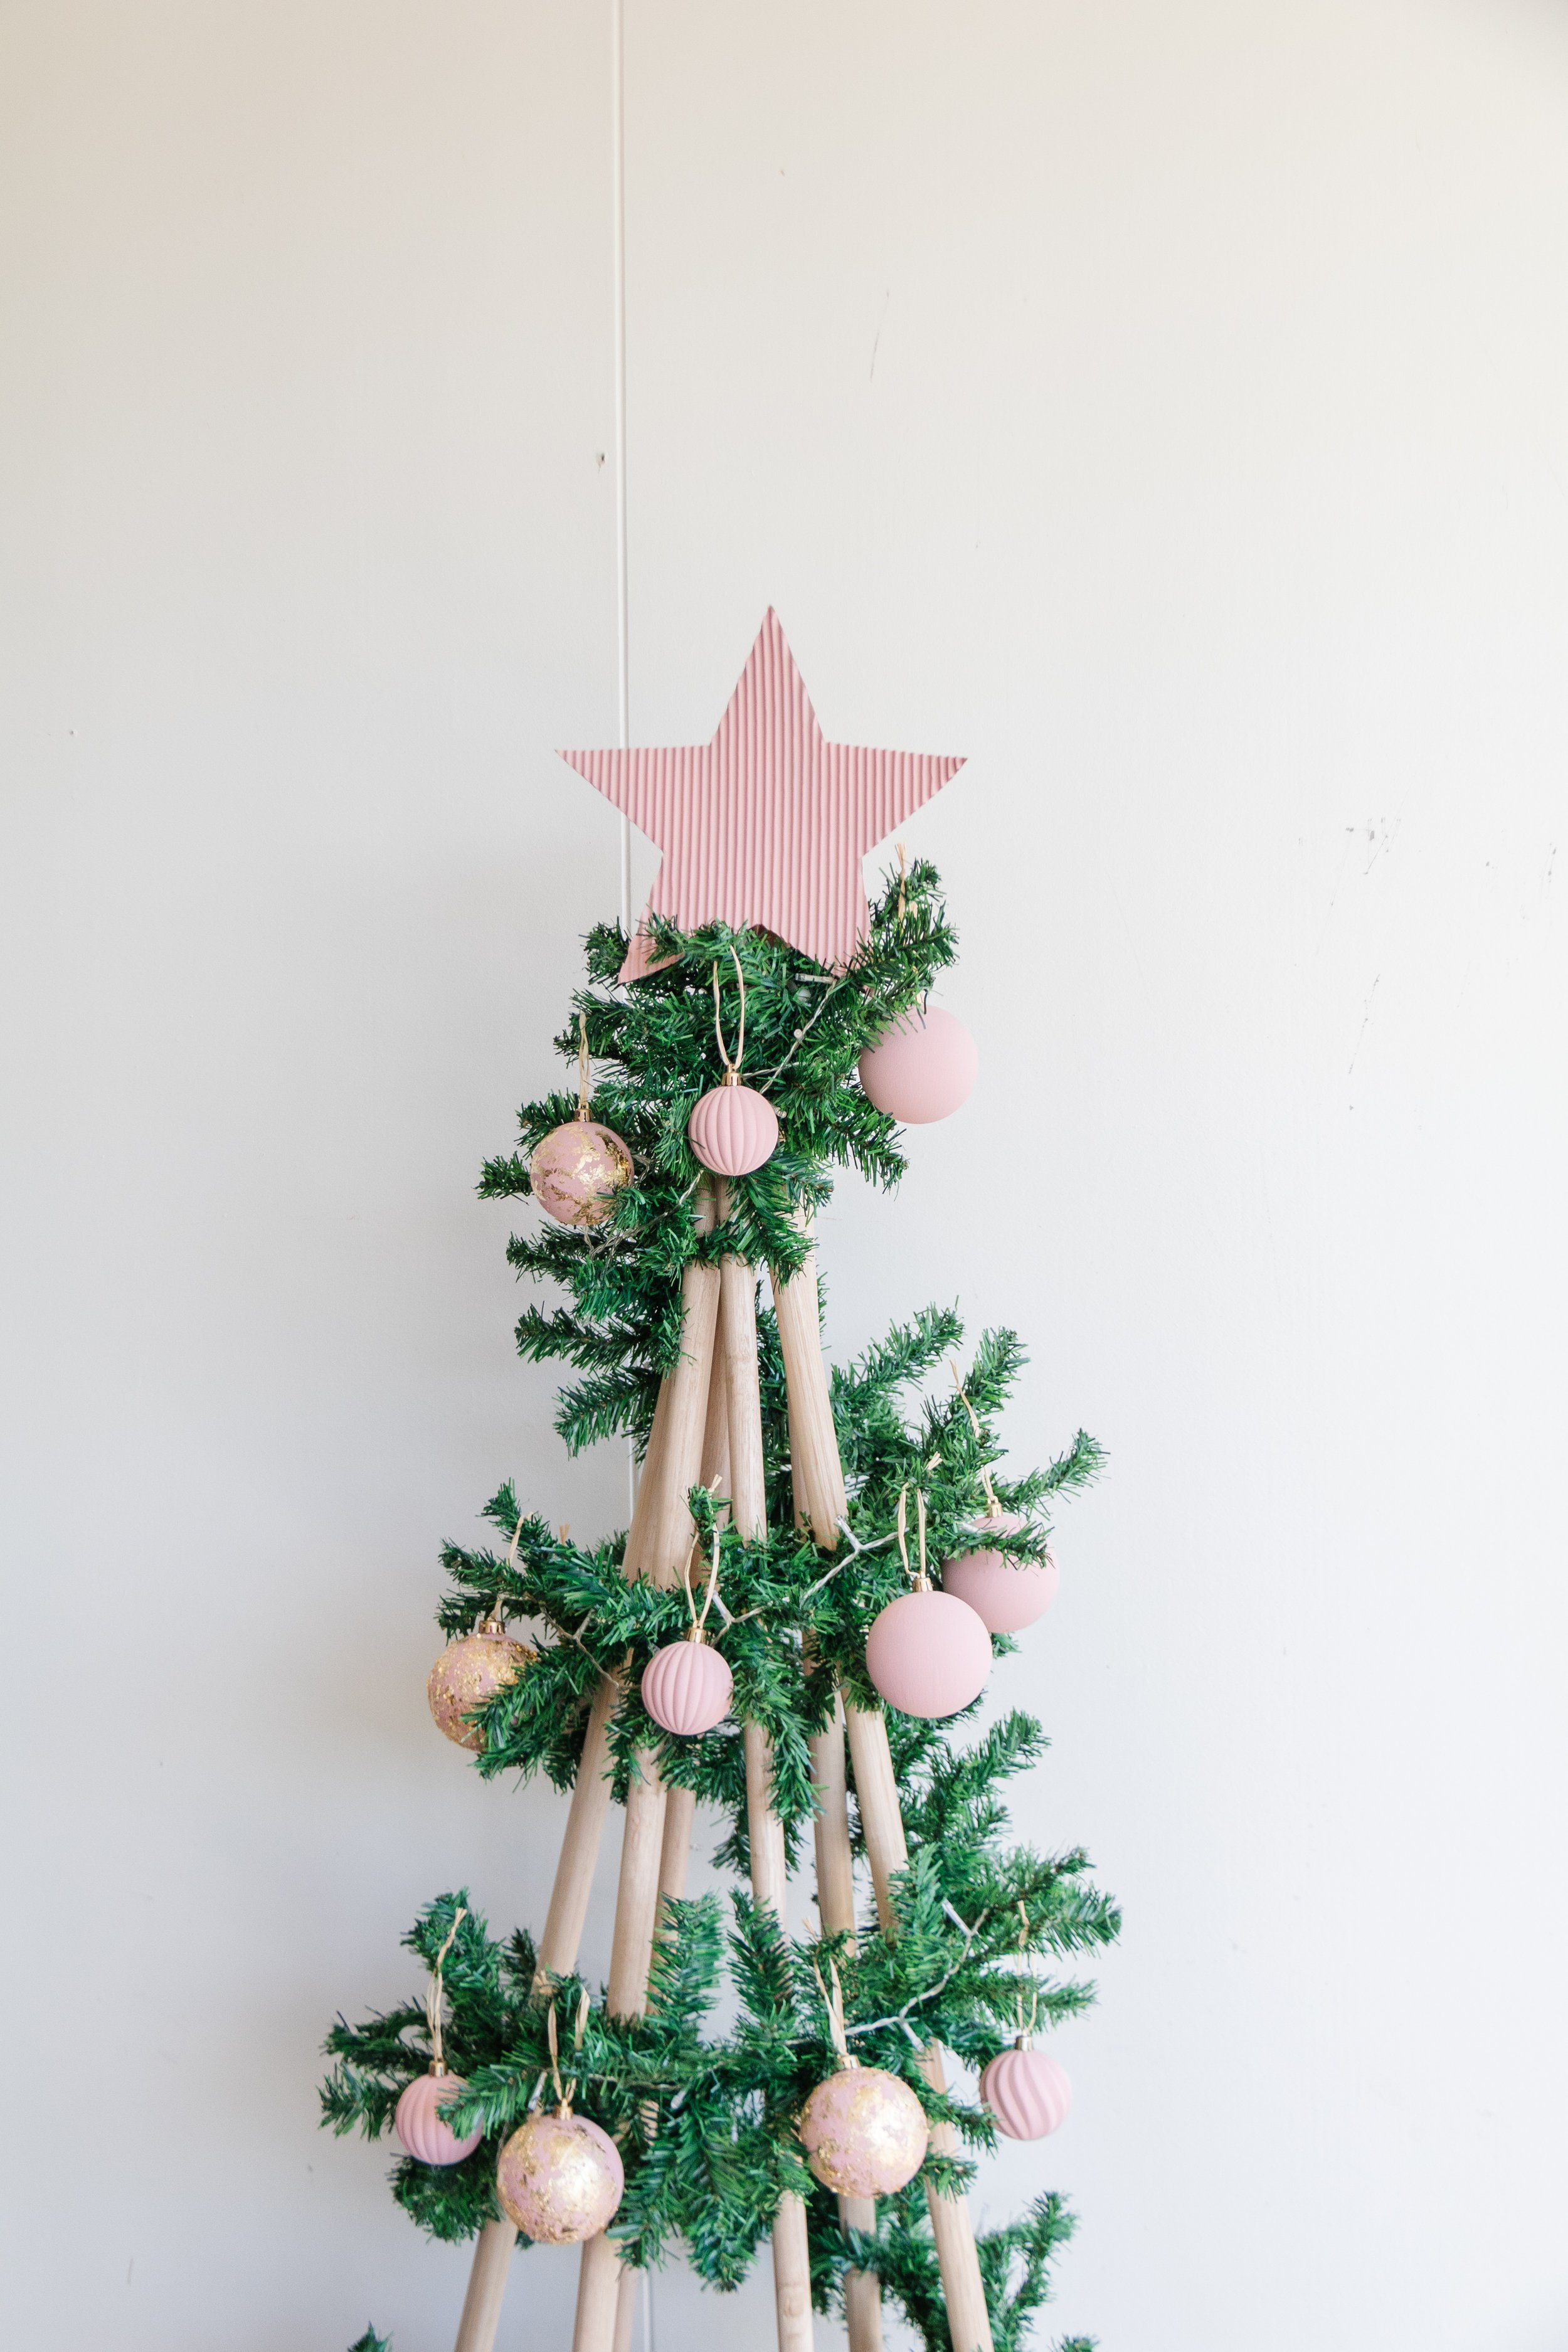
Step 1: Stand the dowels together and wrap the cotton cord a few times around the top. Gently pull the base of each dowel apart to create a teepee shape, then tie the cord in a double knot and cut off any excess cord. This is the foundation of the Christmas Tree.
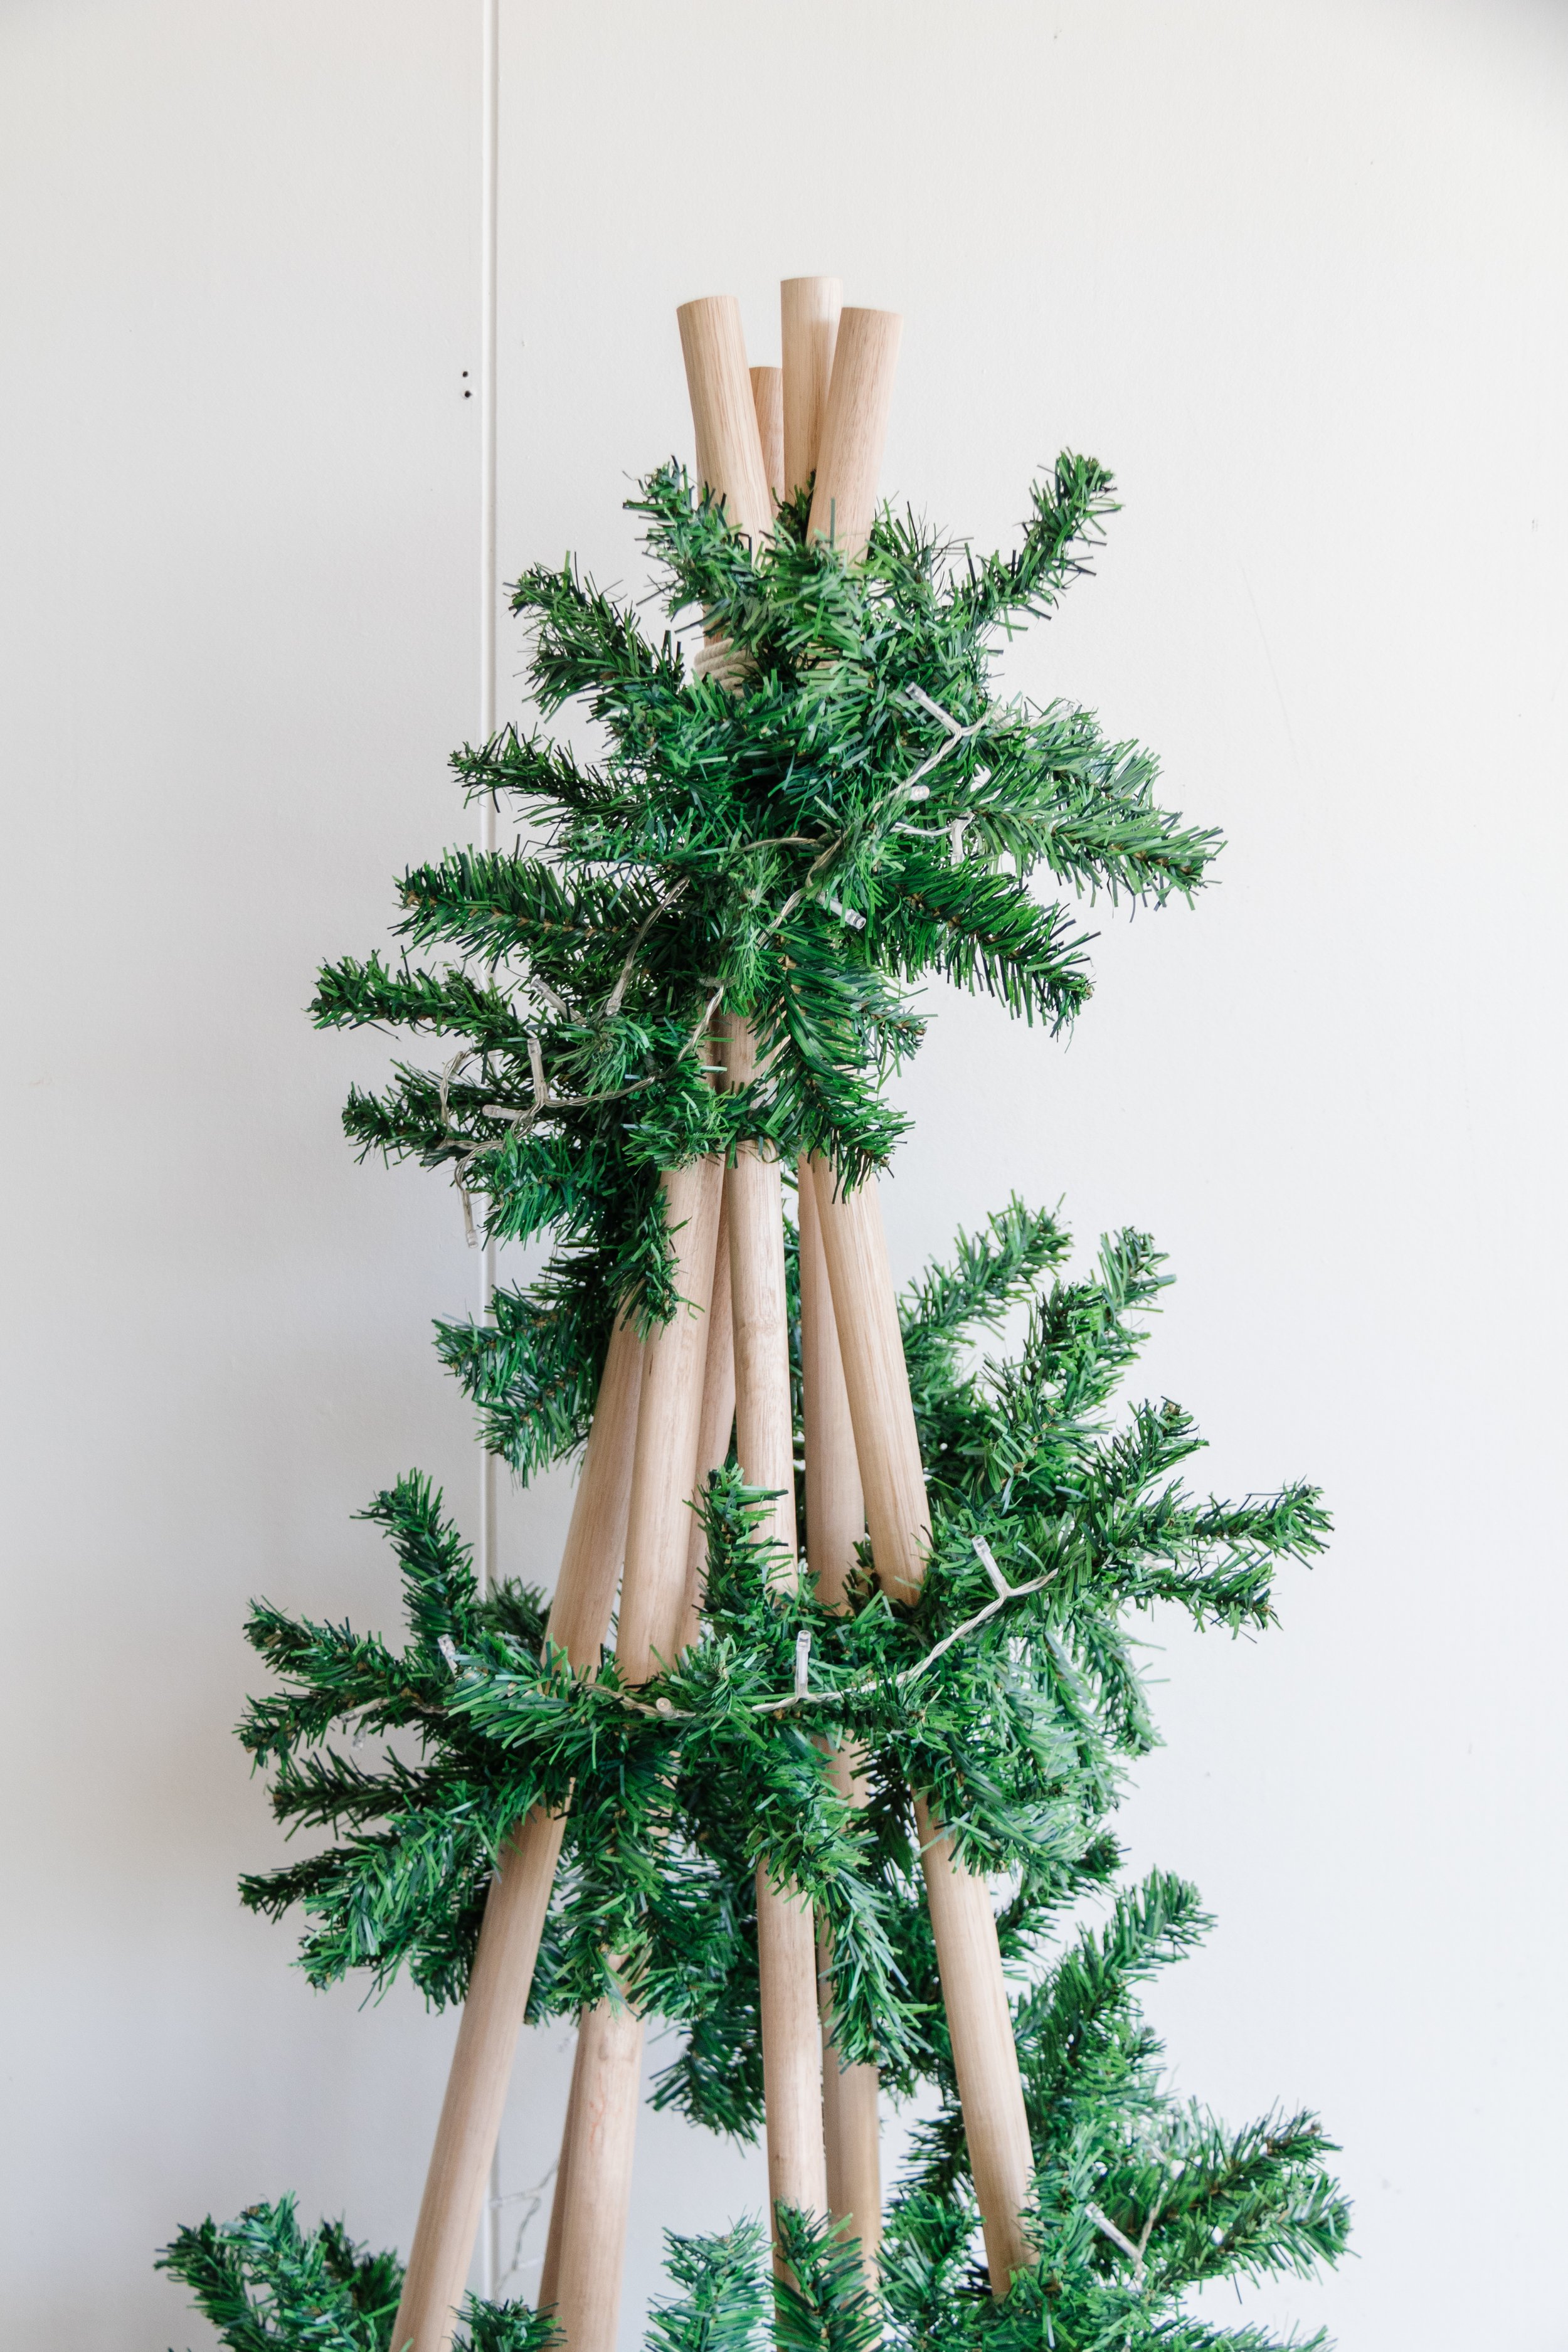
Step 2: Starting from the top and working your way down to the bottom, wrap the garland around the tree. Secure the garland onto the dowels by wrapping garland leaves around the dowel. Optional: For extra festive cheer, wrap the fairy lights over the garland making sure to tuck the wires in and around the garland.

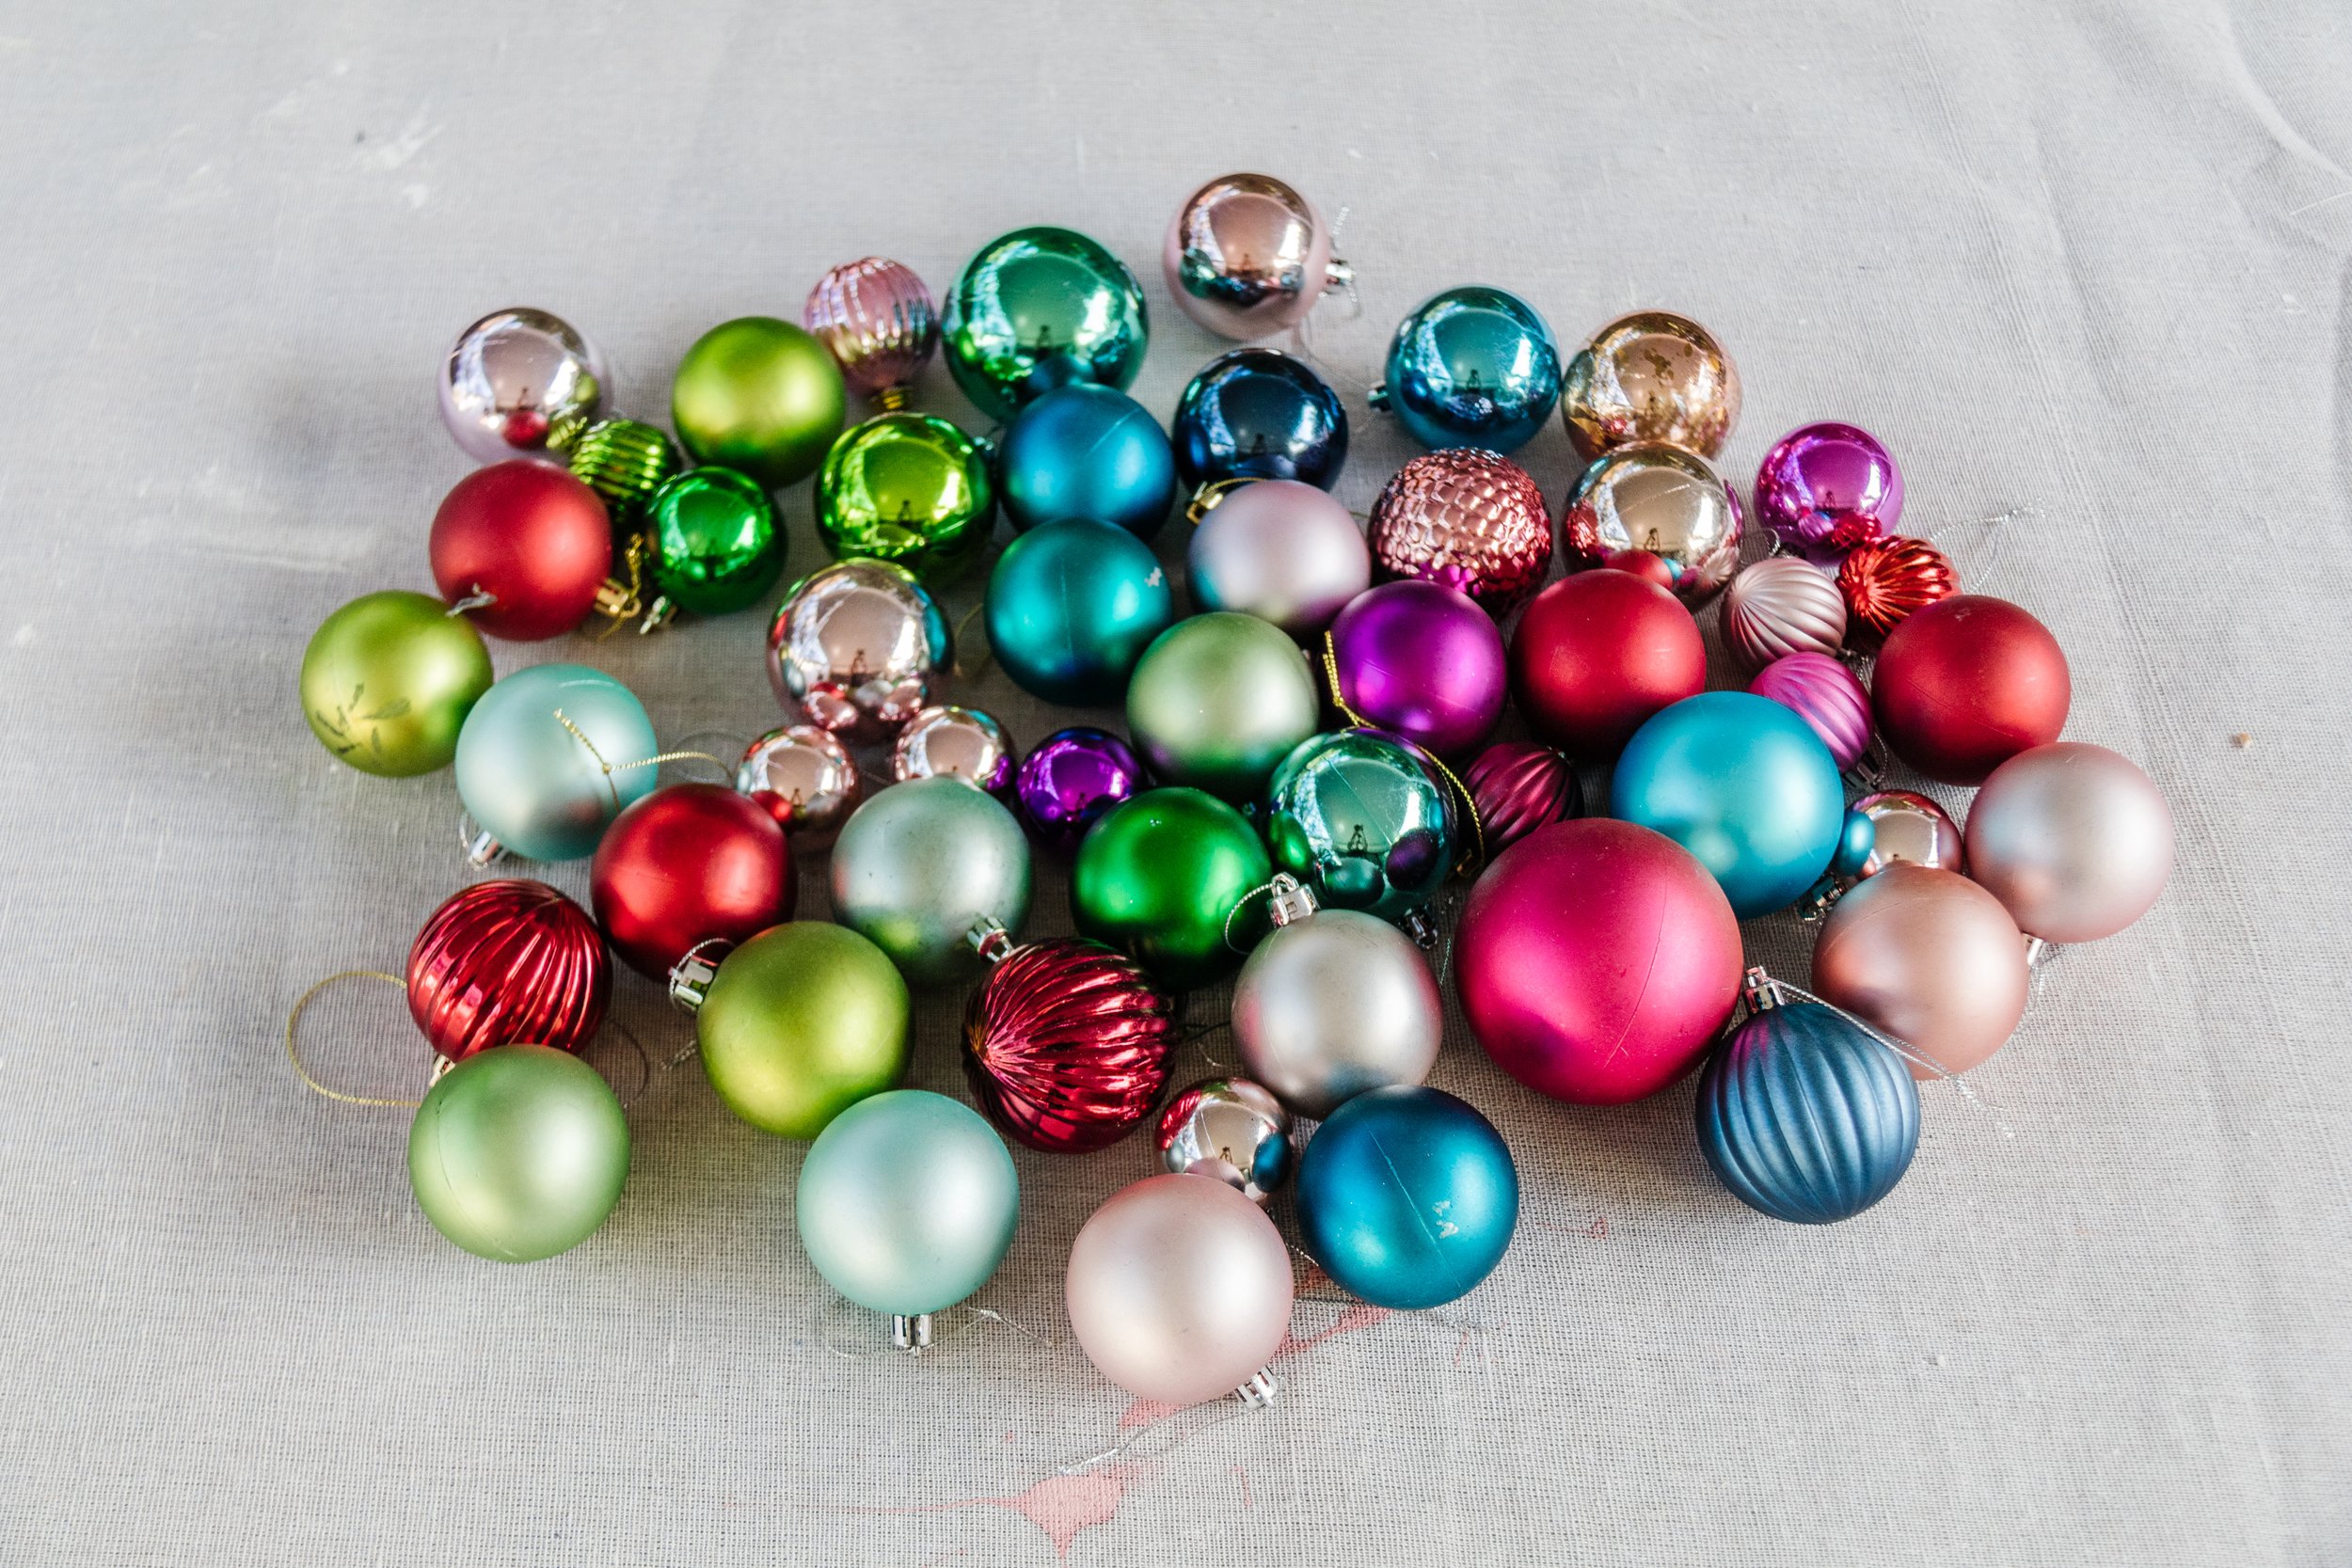
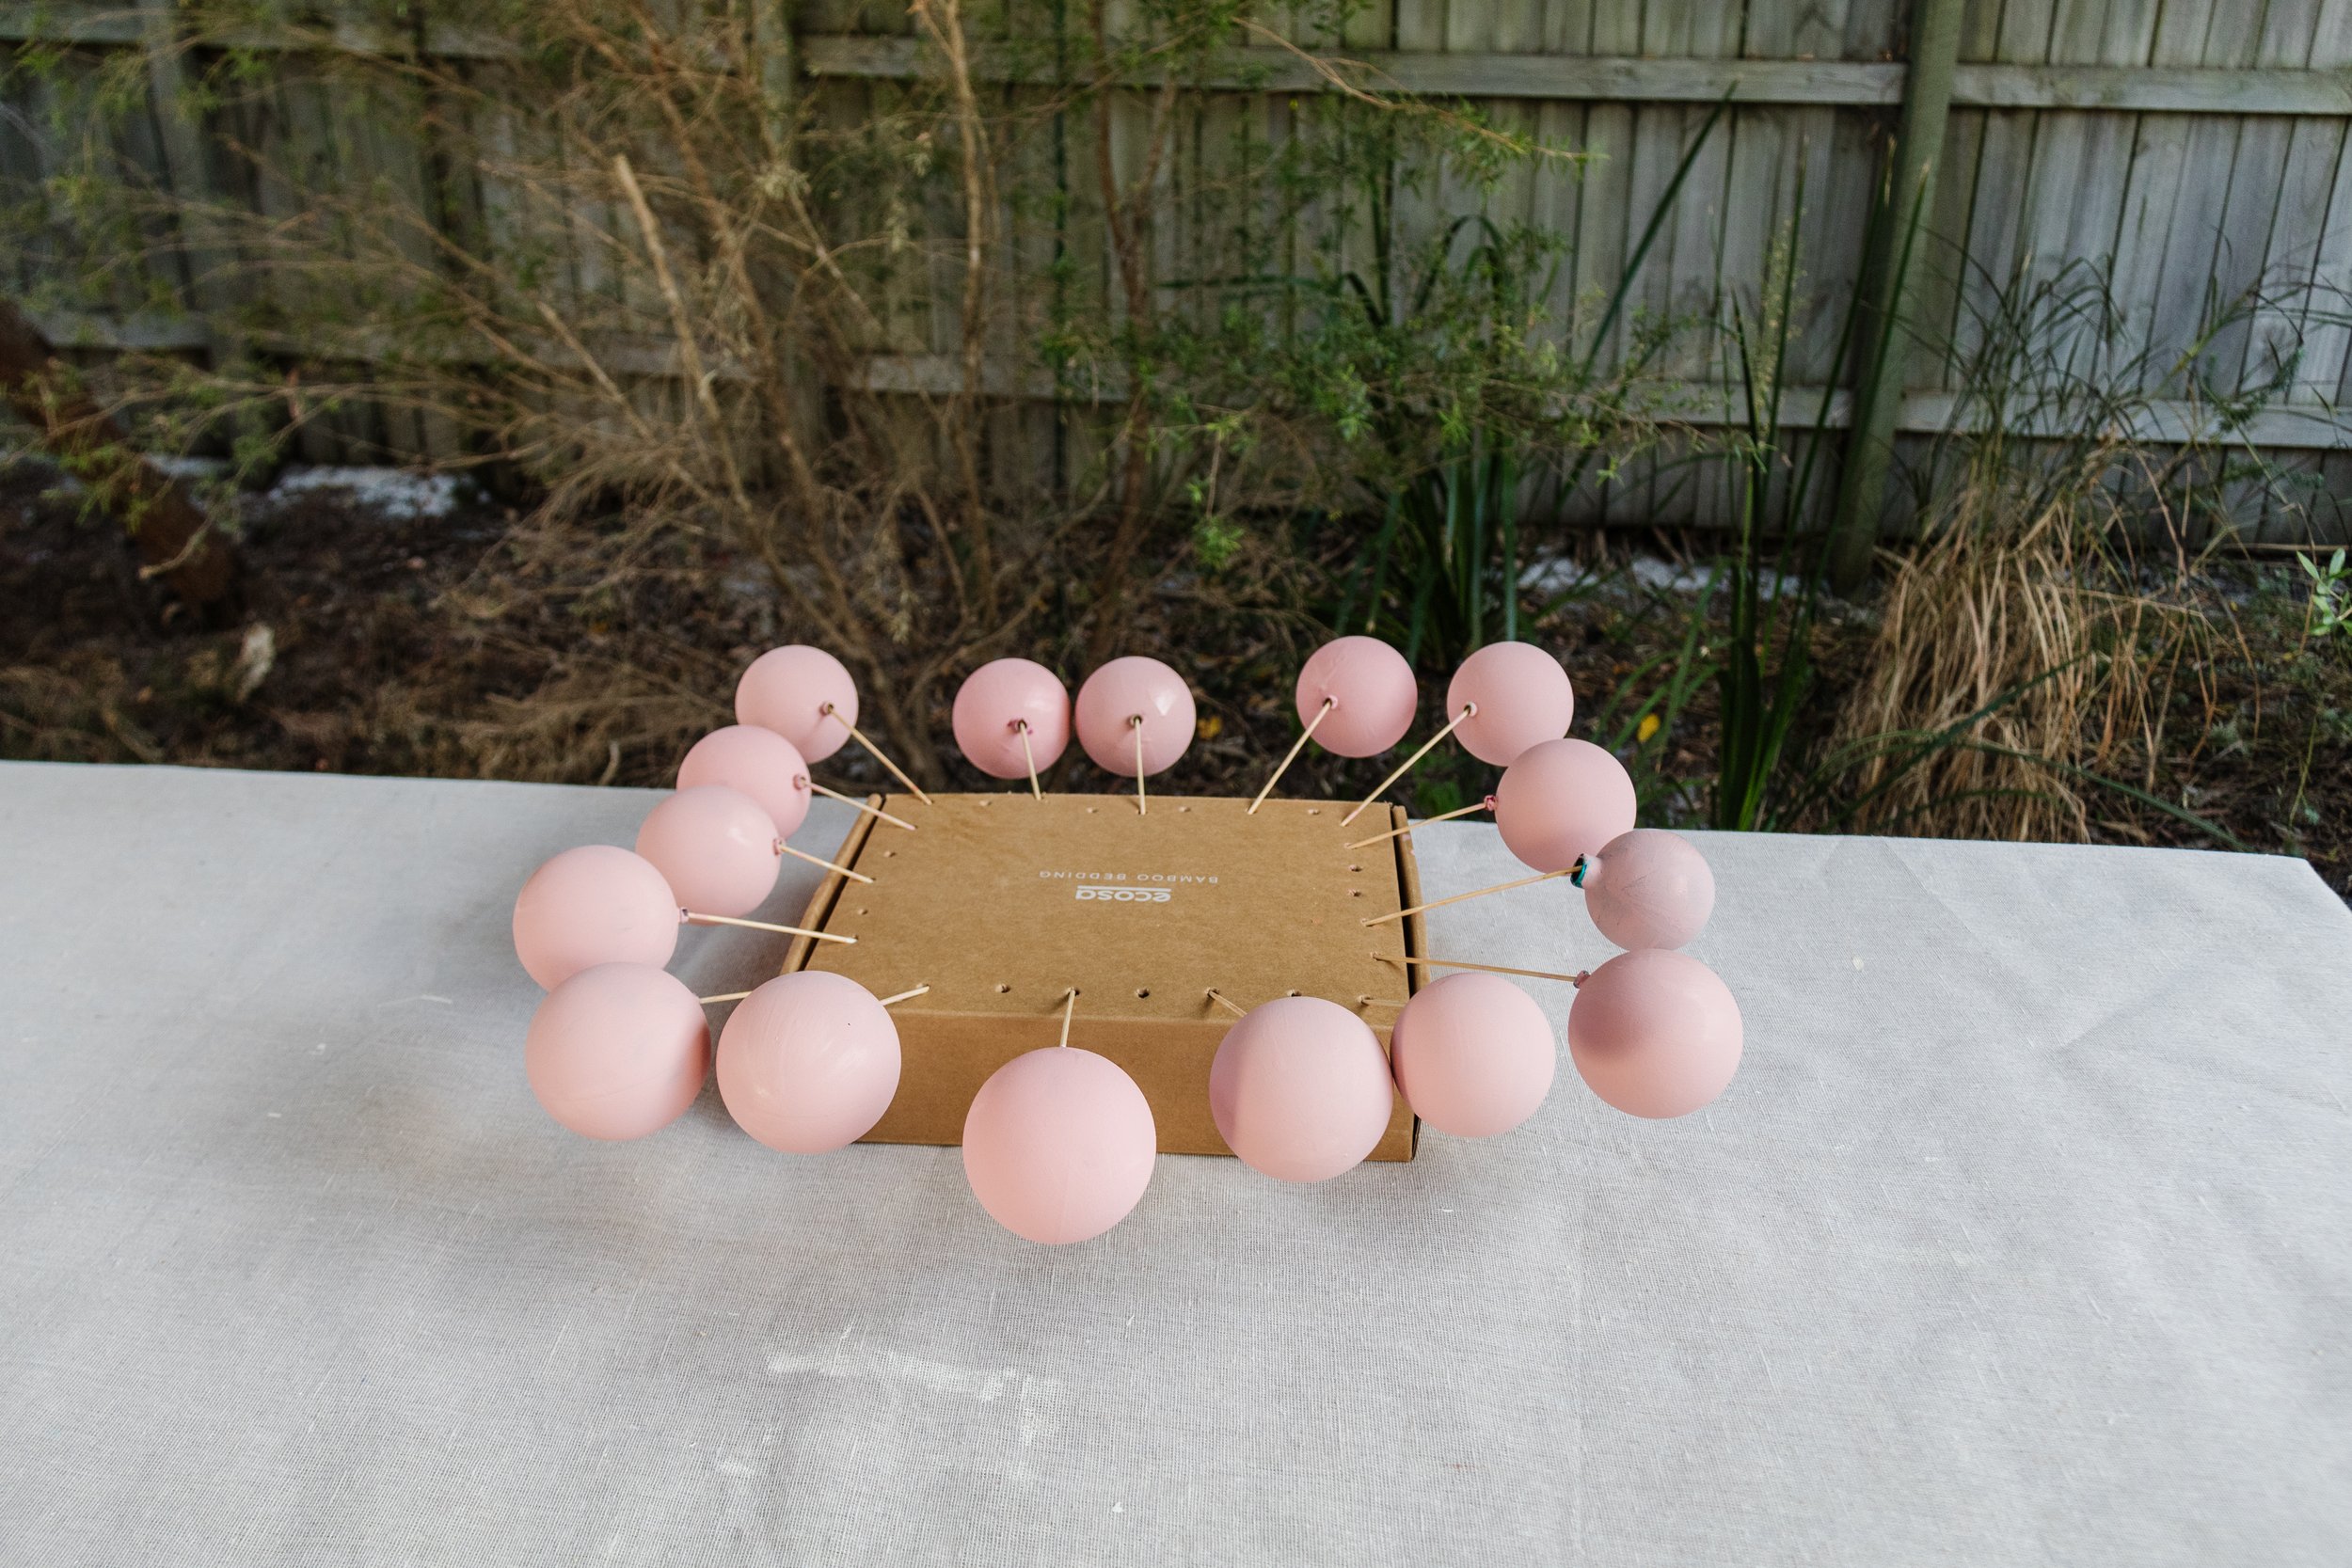
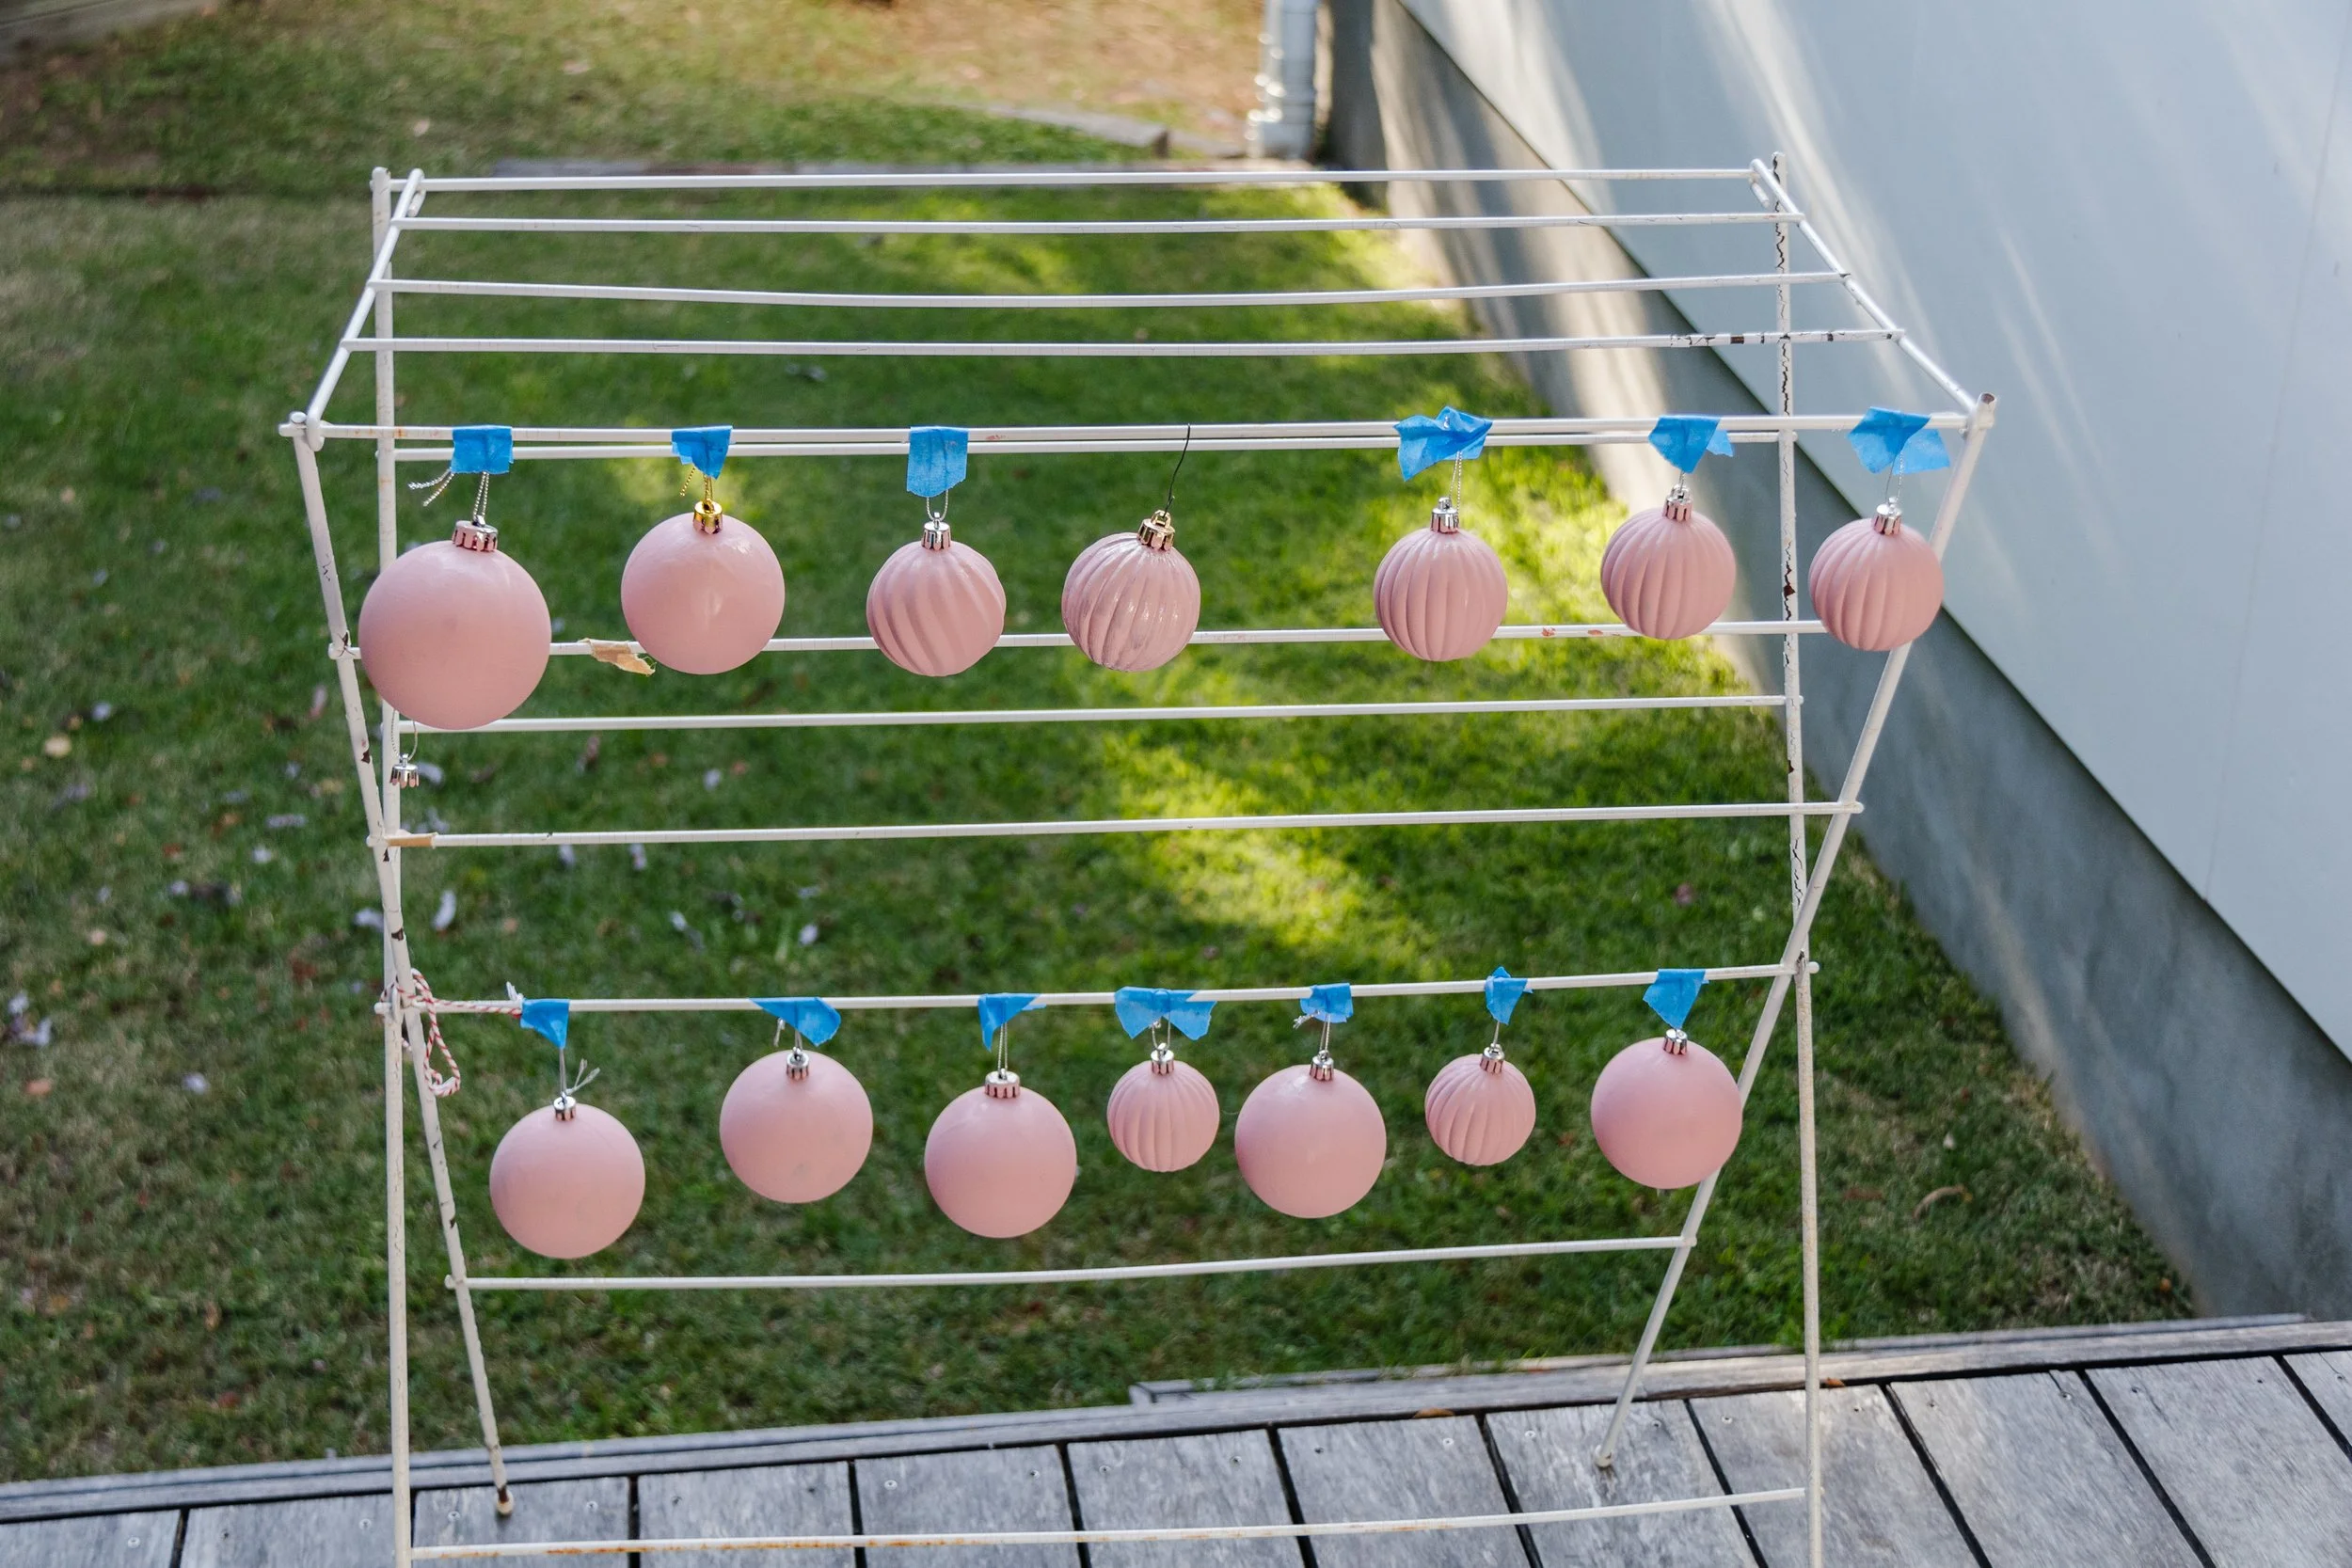
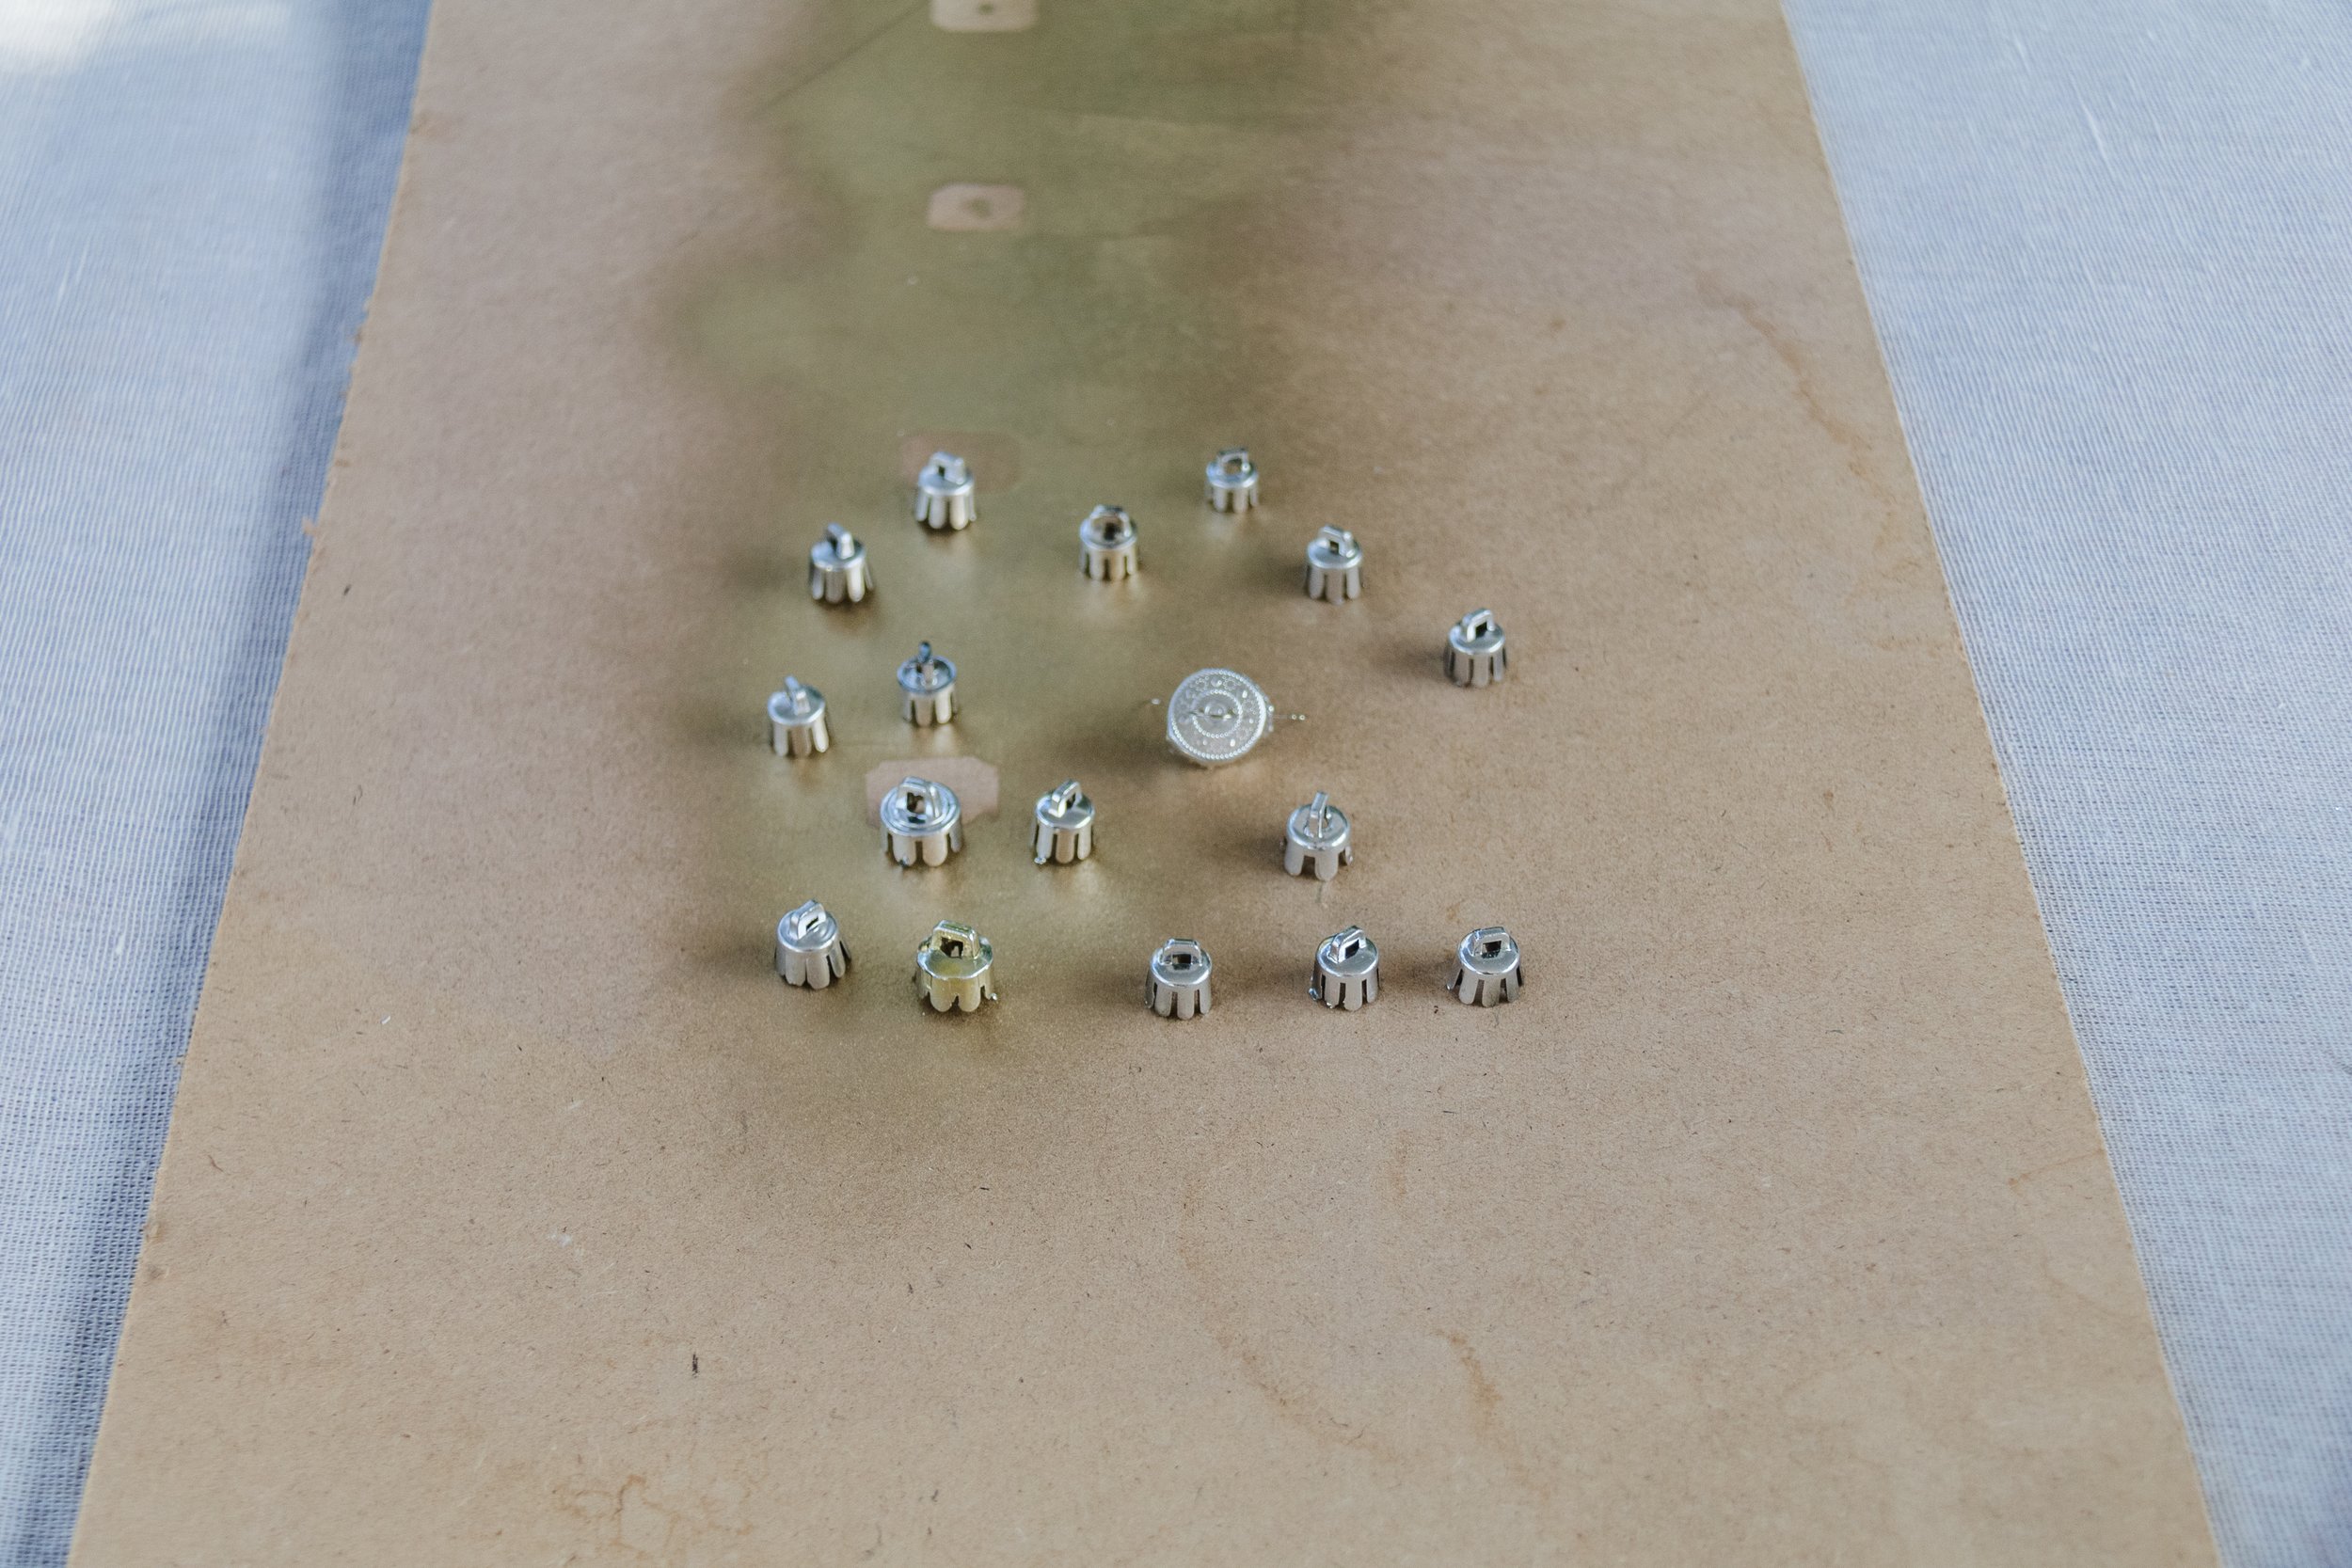
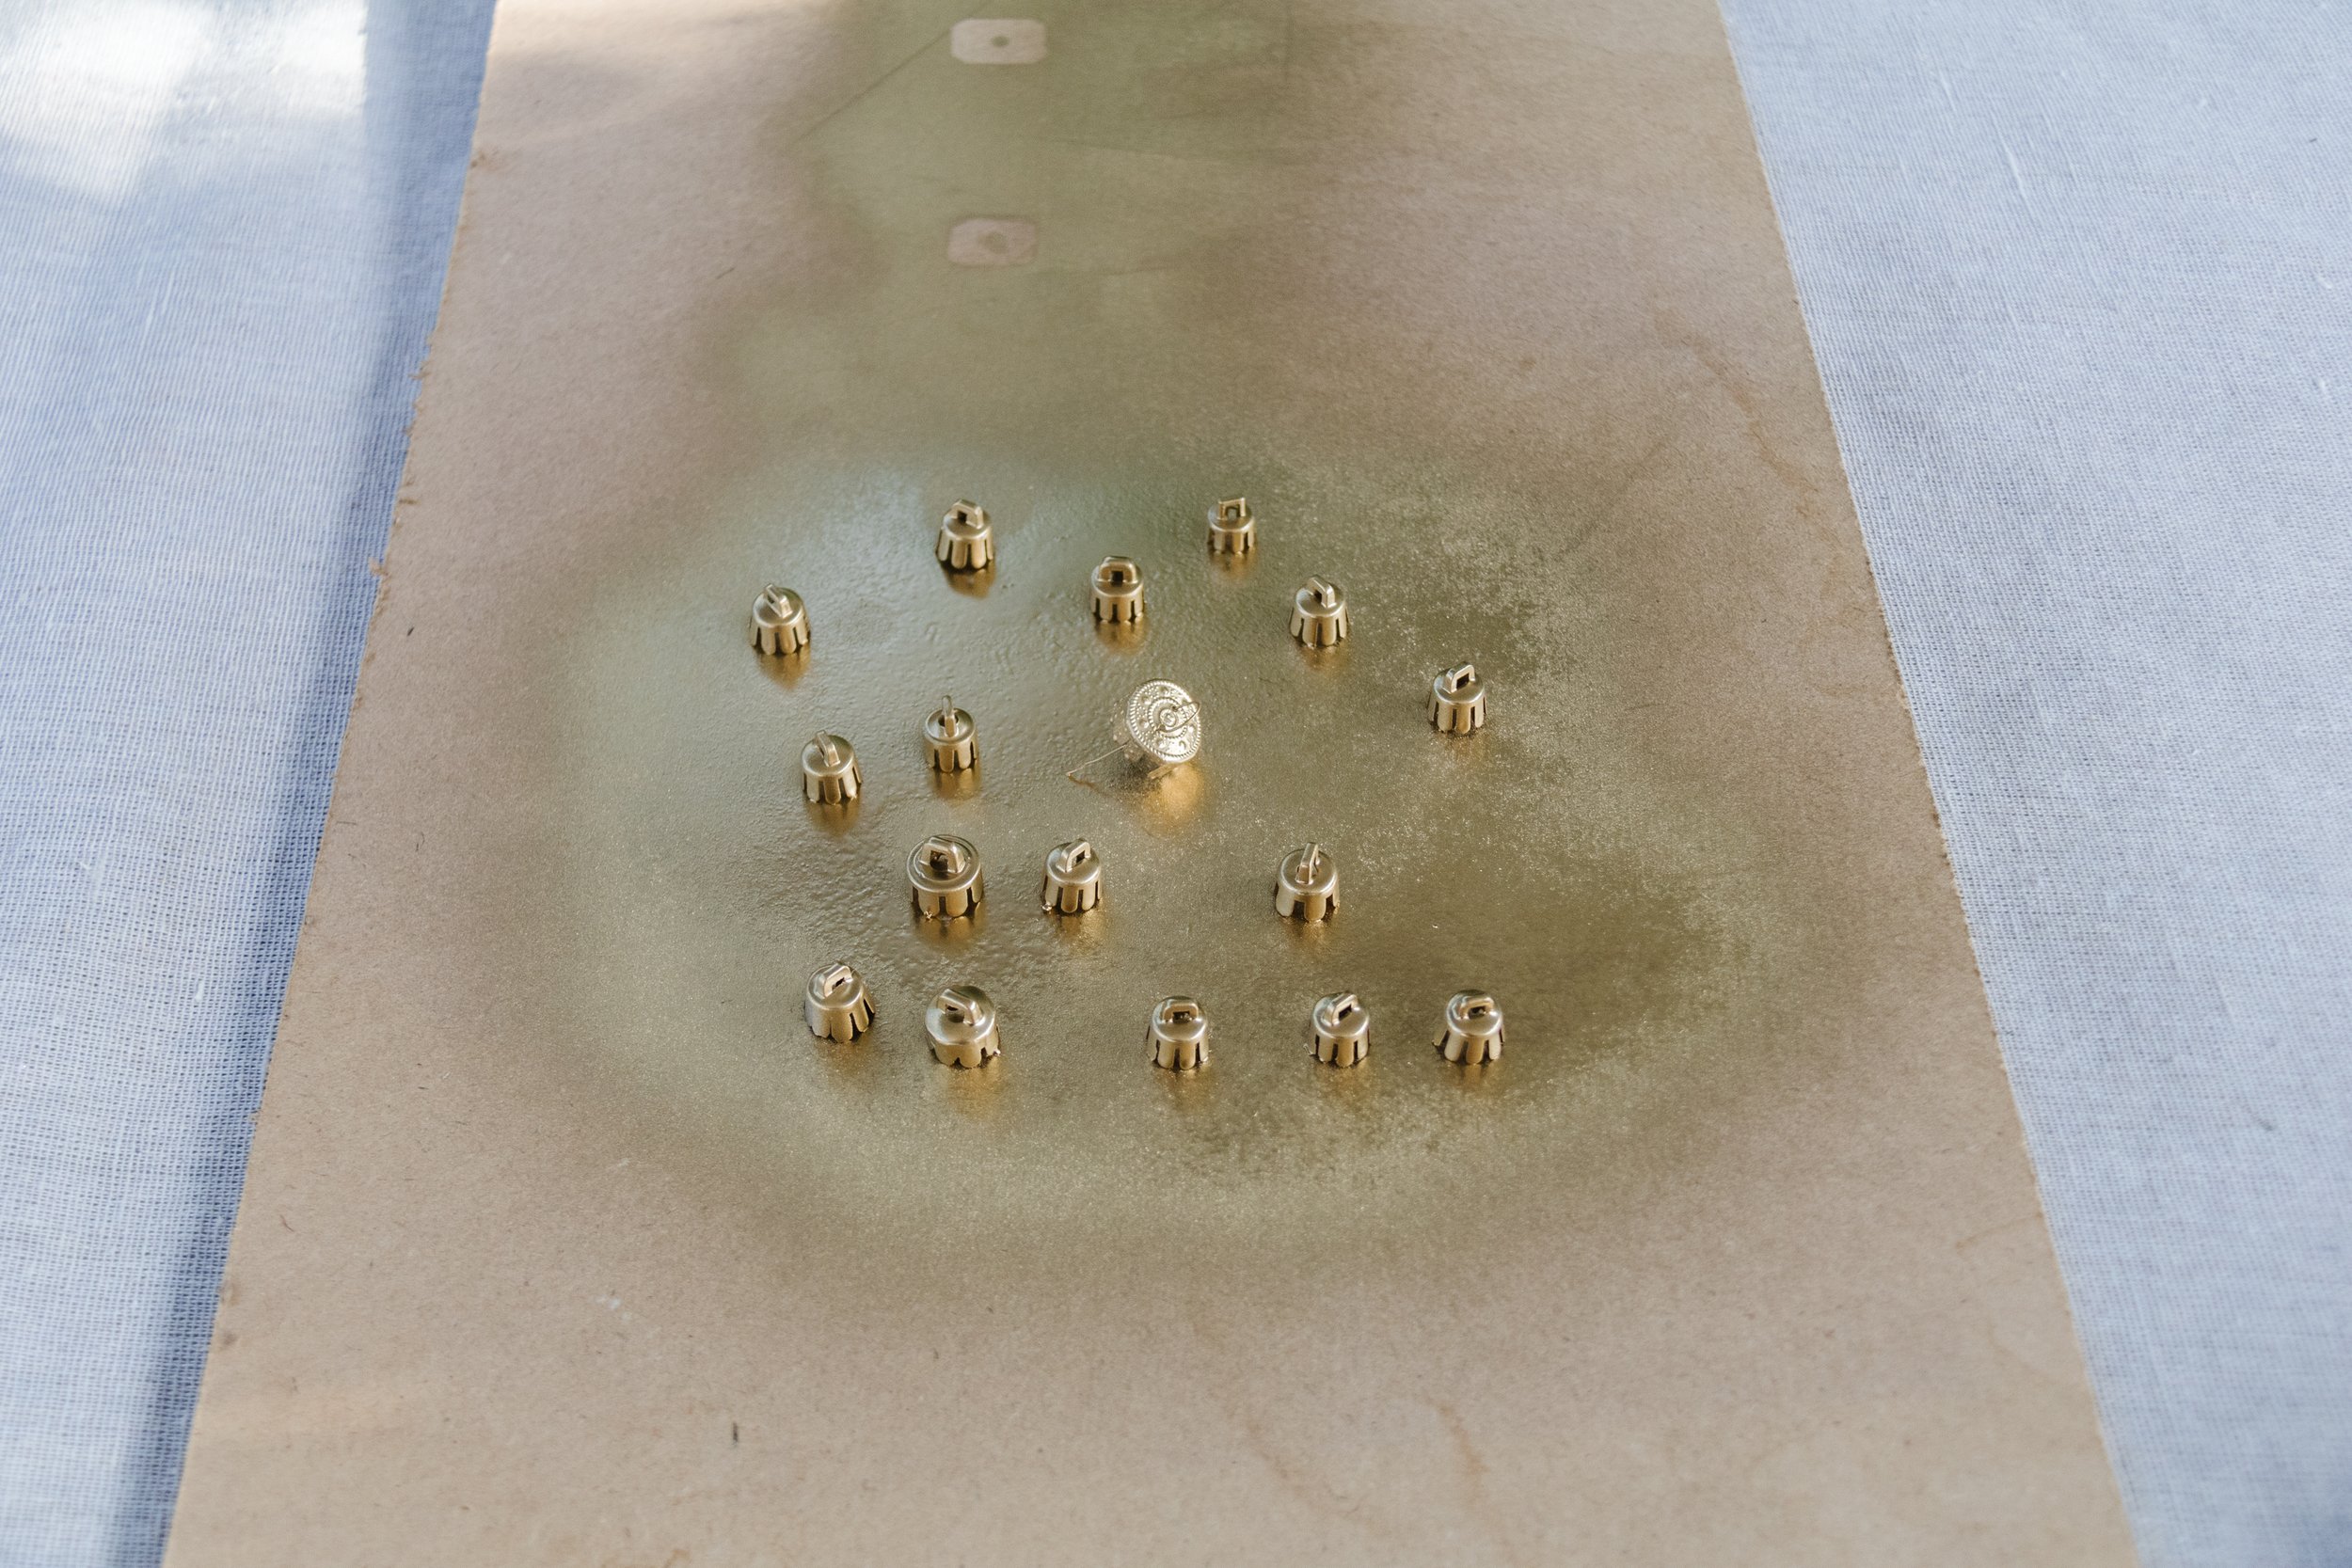
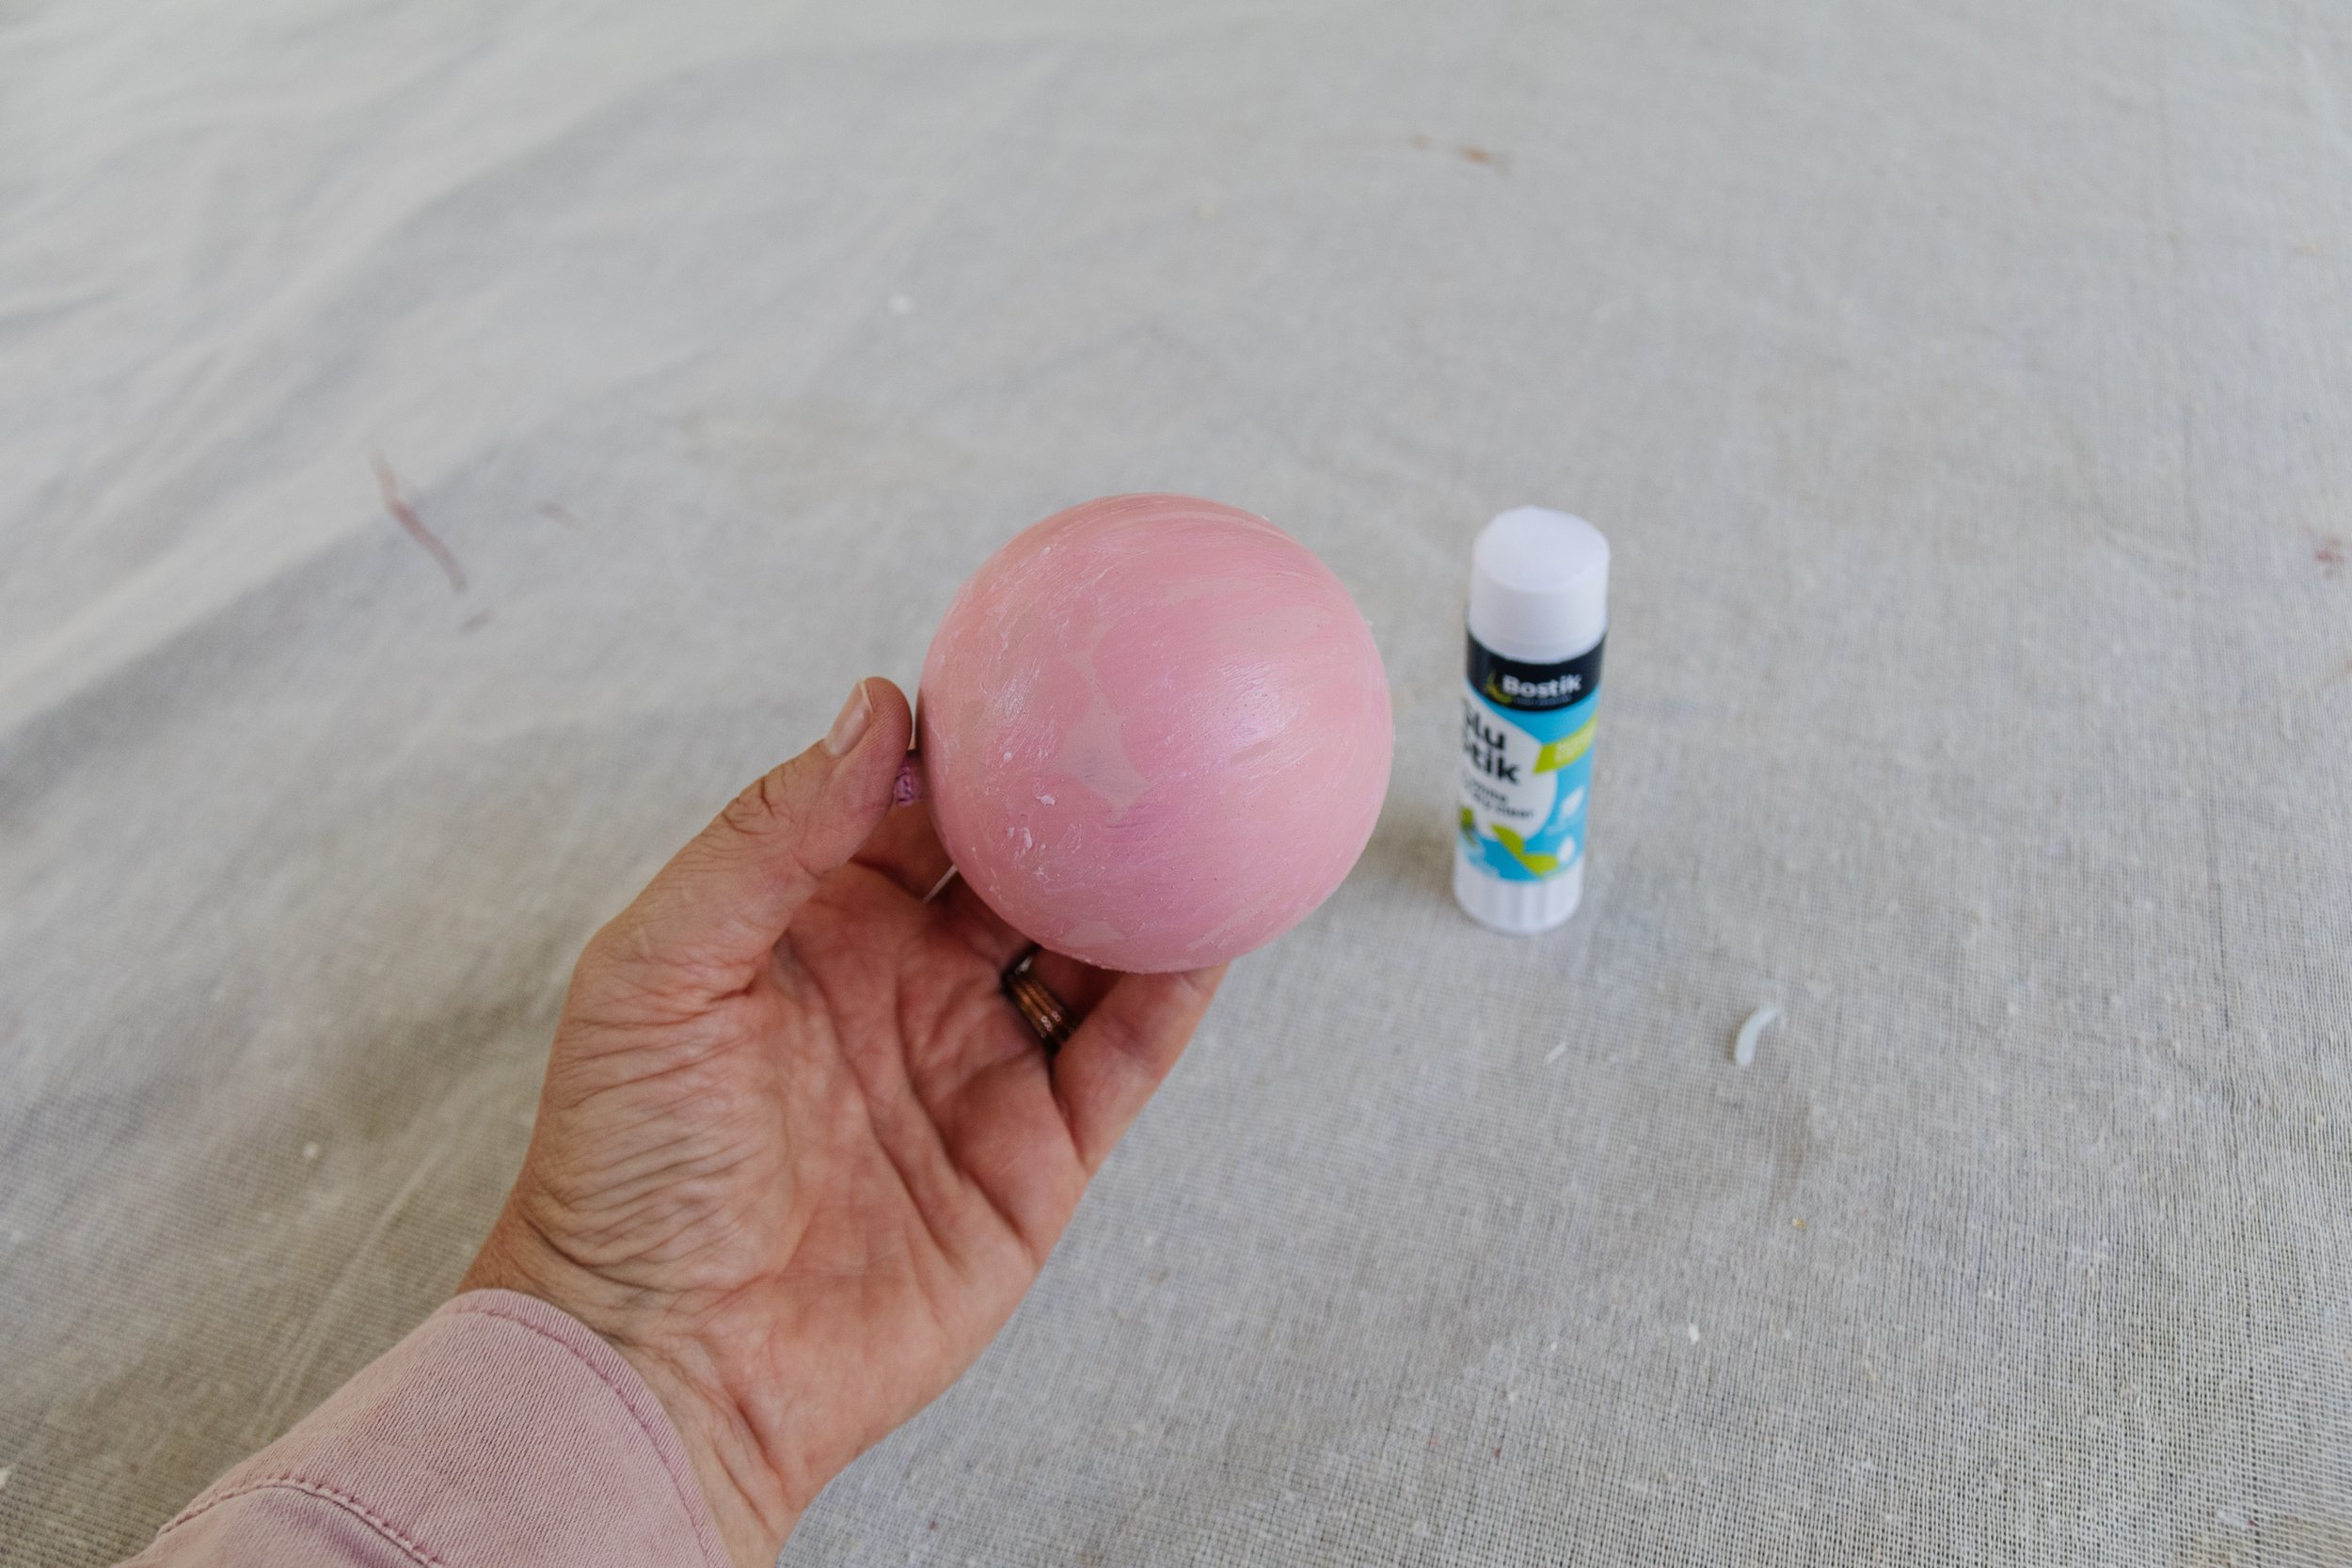
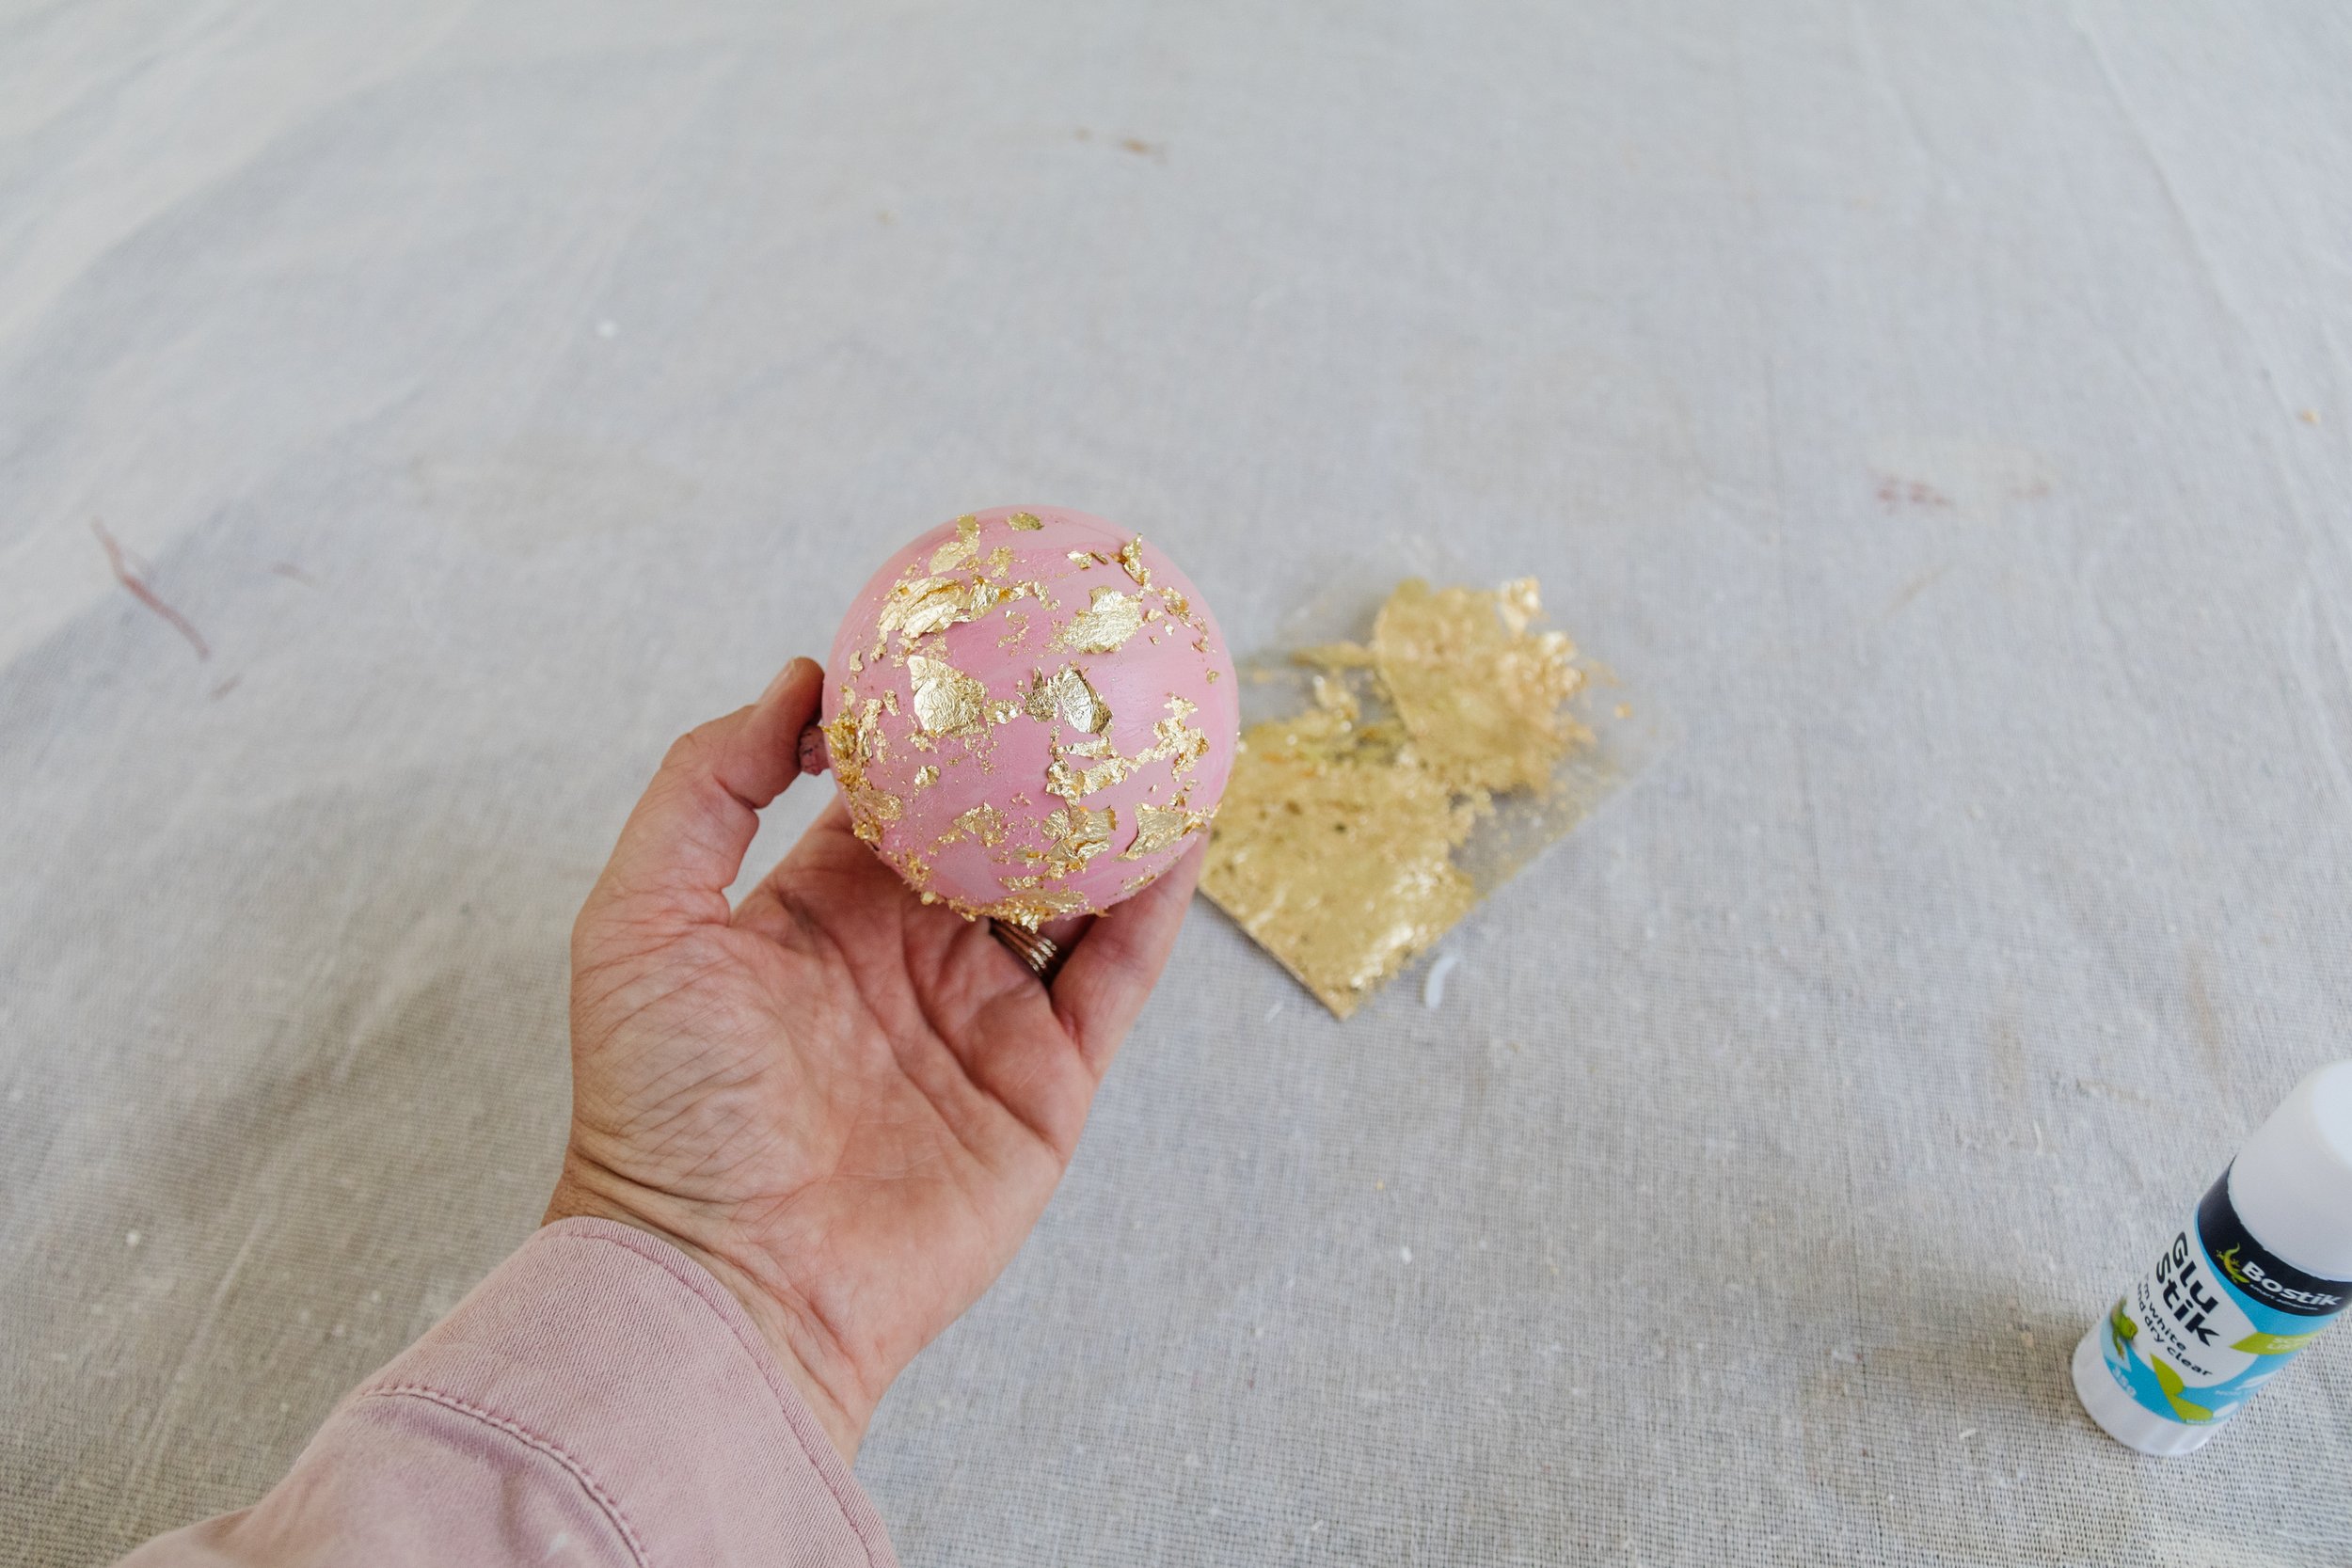
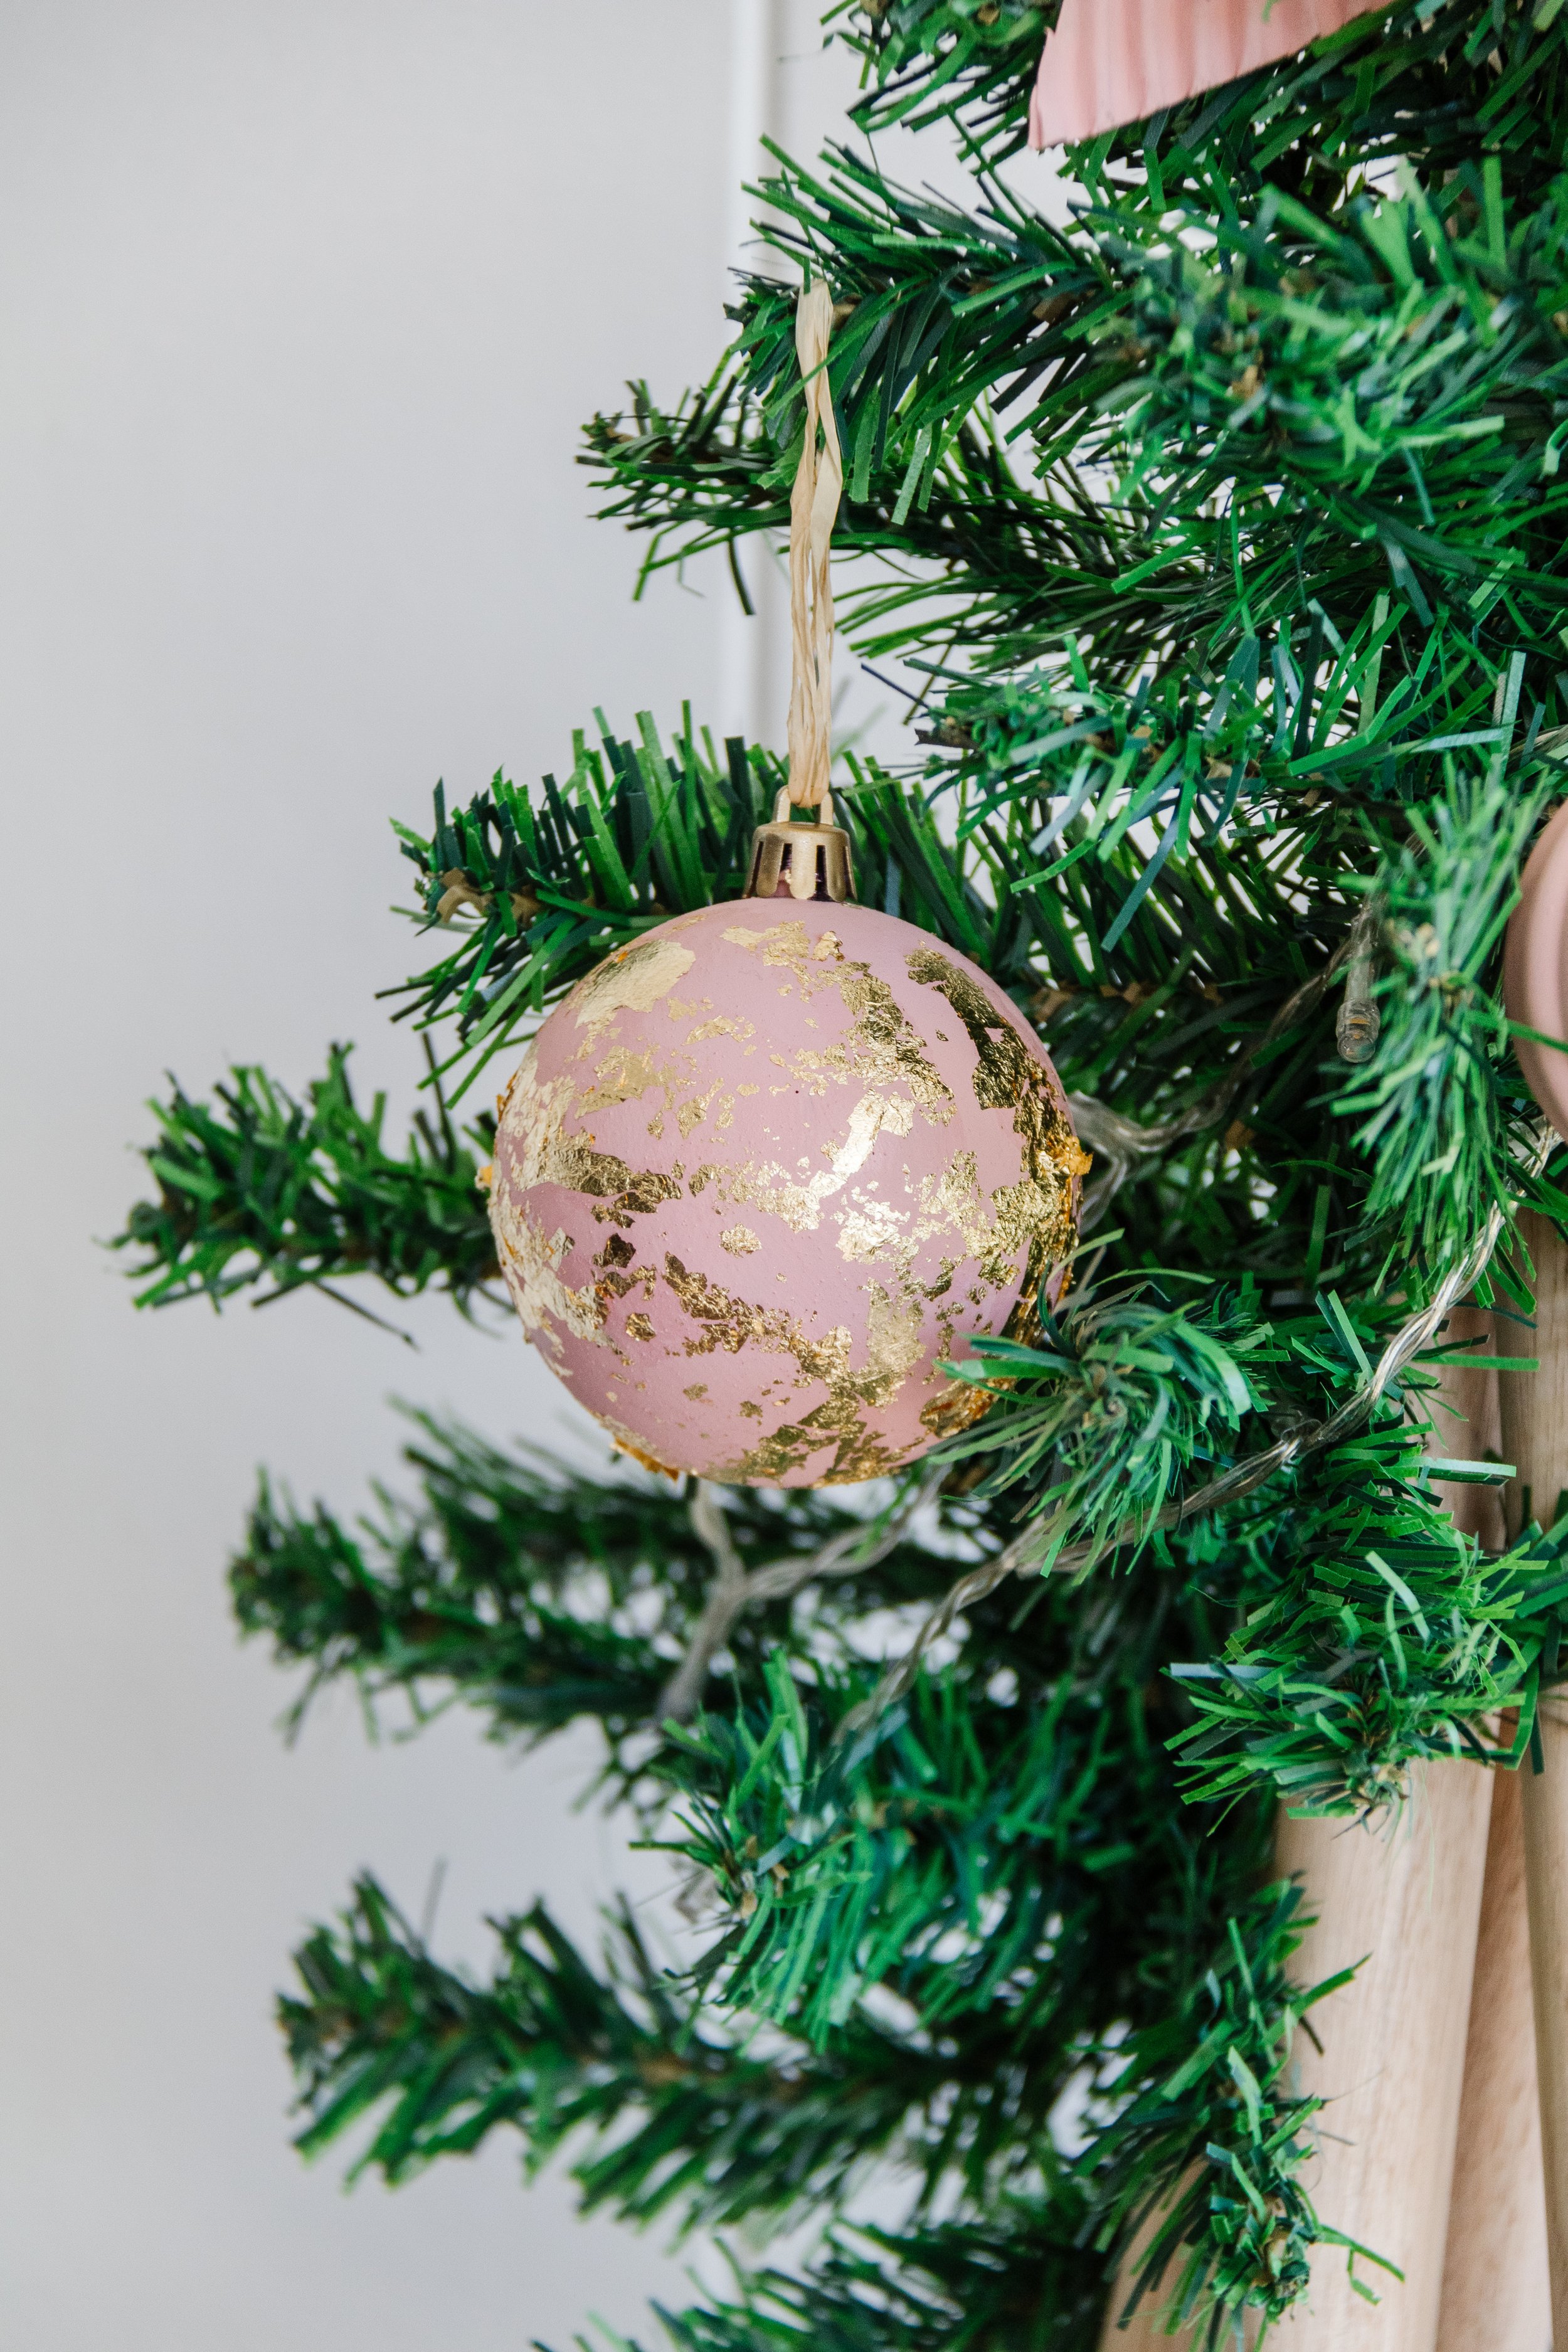
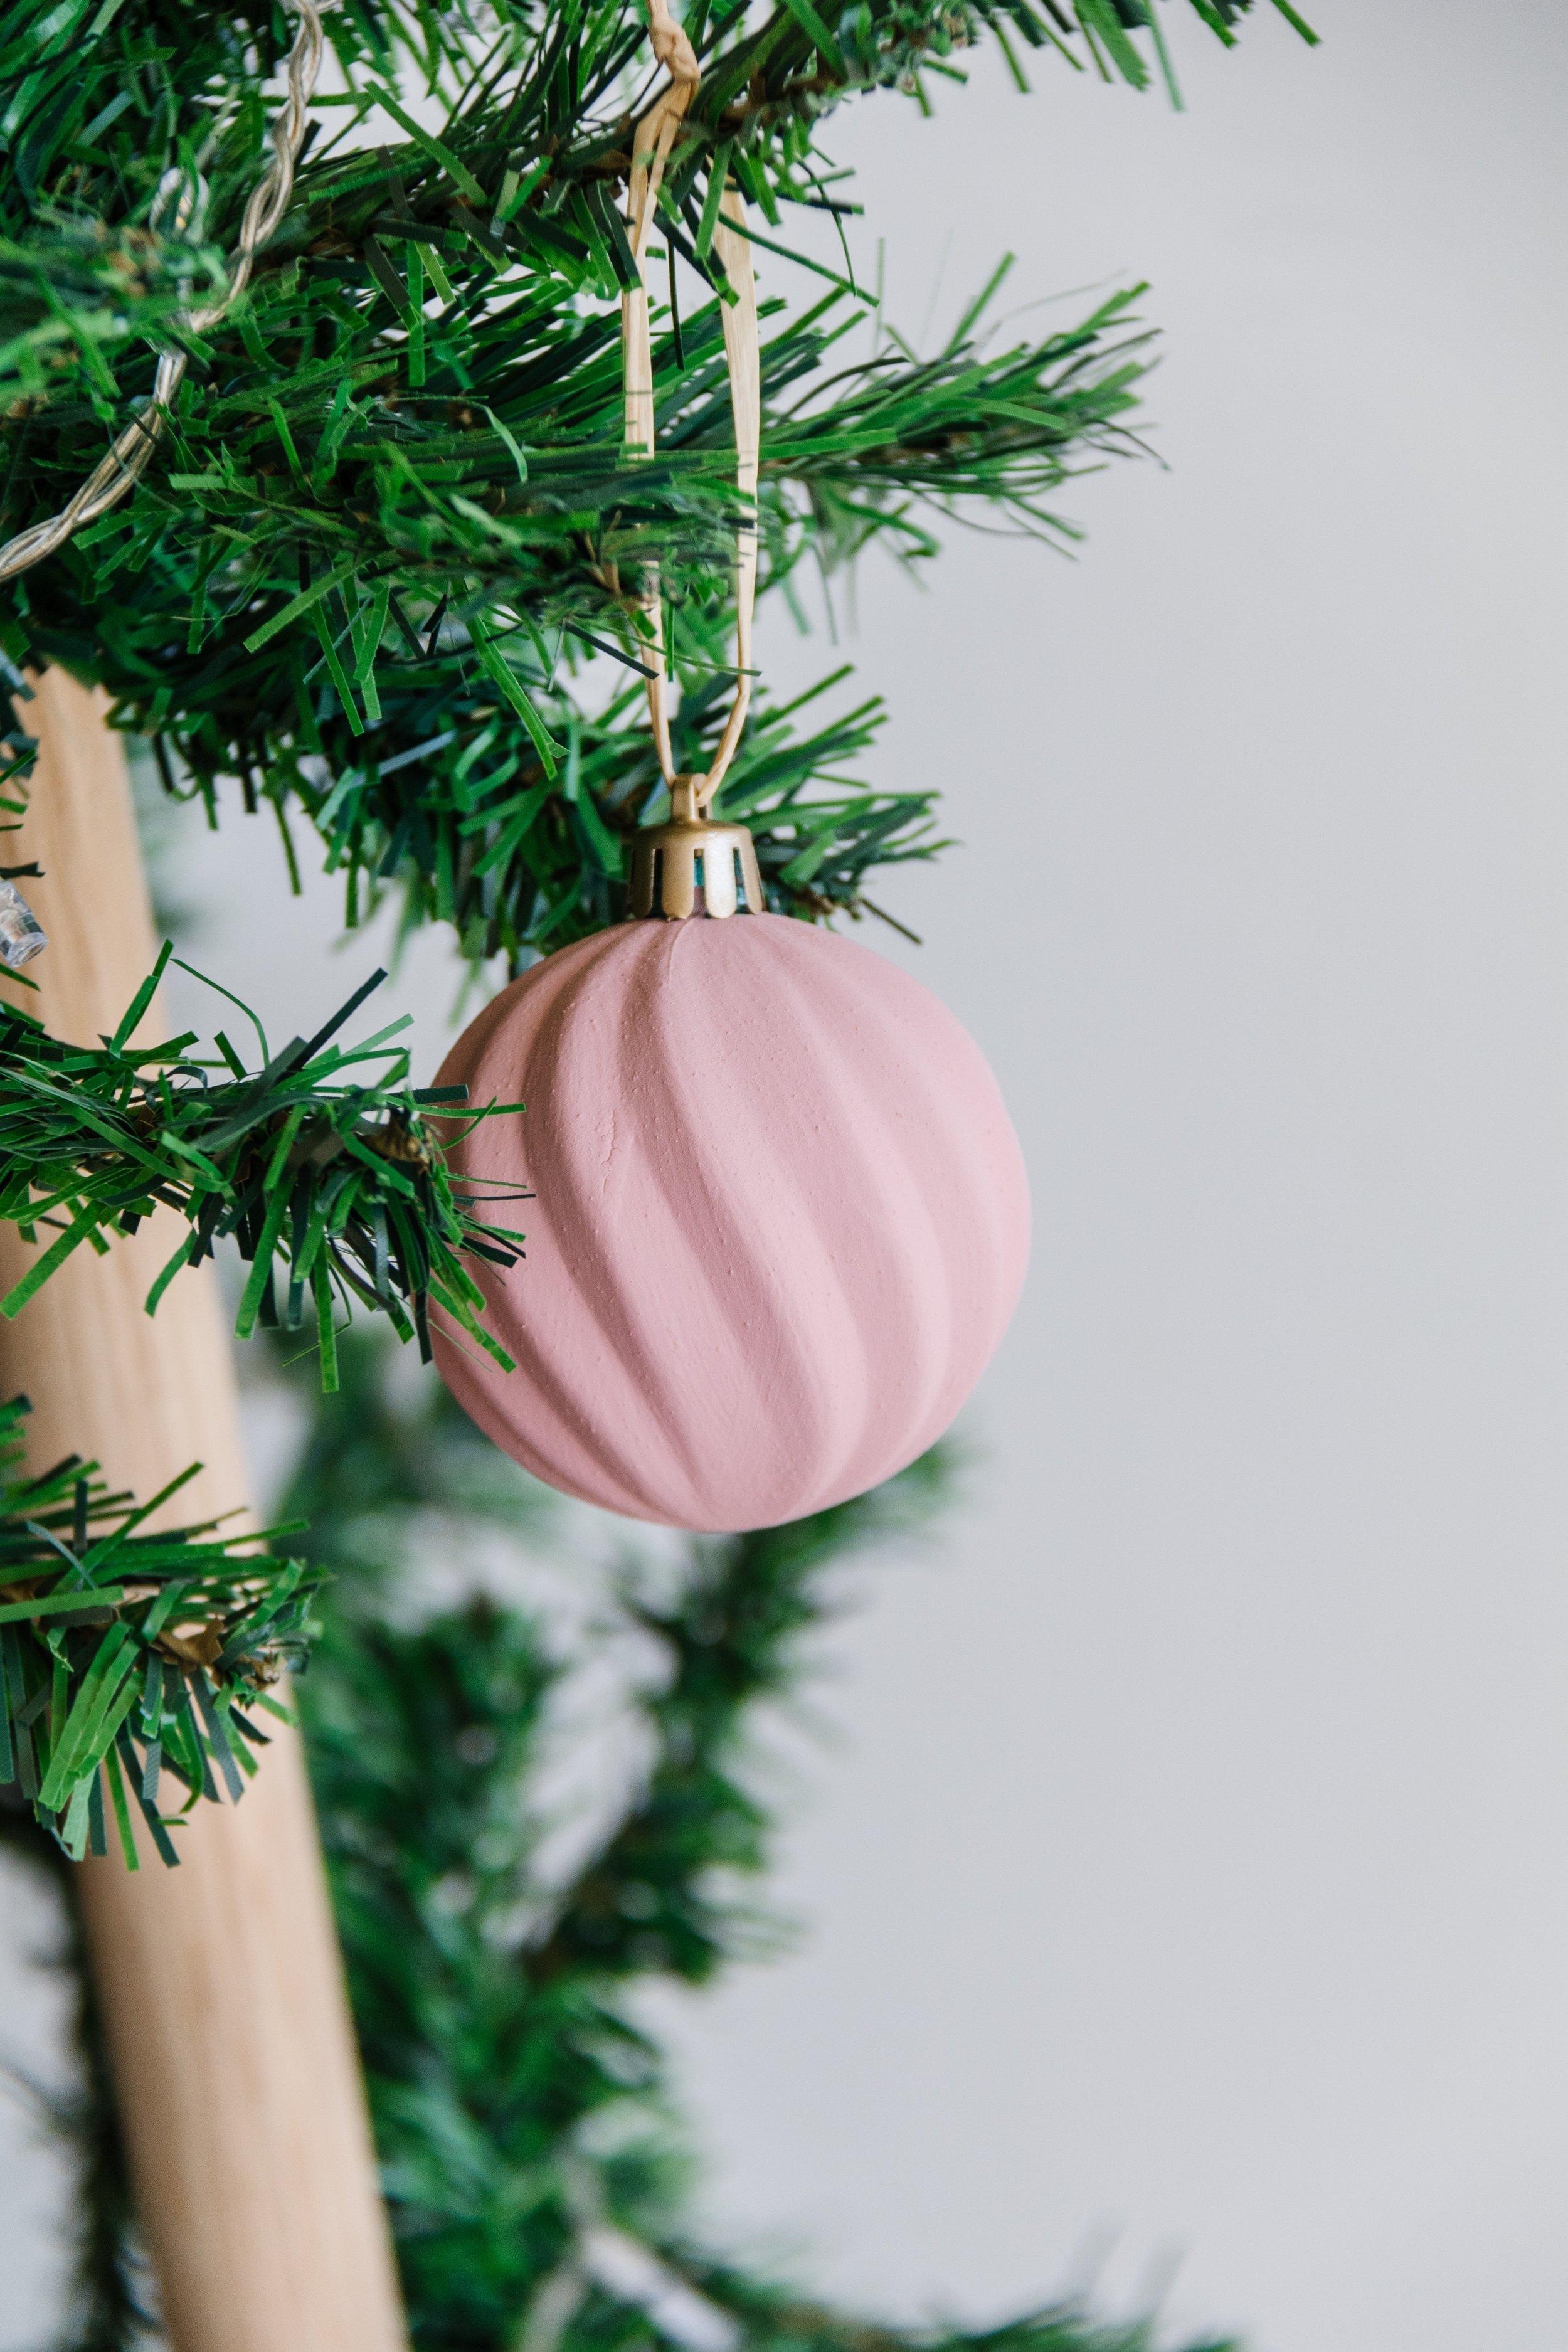
Step 3: Now it’s time to make the ornaments! Pop the tops off each bauble, remove the existing strings with scissors, lay the the tops onto a sheet of paper or cardboard and spray paint them gold. Set aside to dry. Insert a skewer into a bauble and paint. Set aside to dry in a pierced cardboard box or hung up on a clothesline using painters tape. Paint the rest of your baubles. When dry, take half of the baubles and apply a Glu Stik all over, then using your fingers dab the gold leaf foil onto the glue. Set aside to dry and when dry, press the gold leaf foil down with your hands so it’s nice and flat. Place the tops back onto all of the baubles and re-string them with raffia.


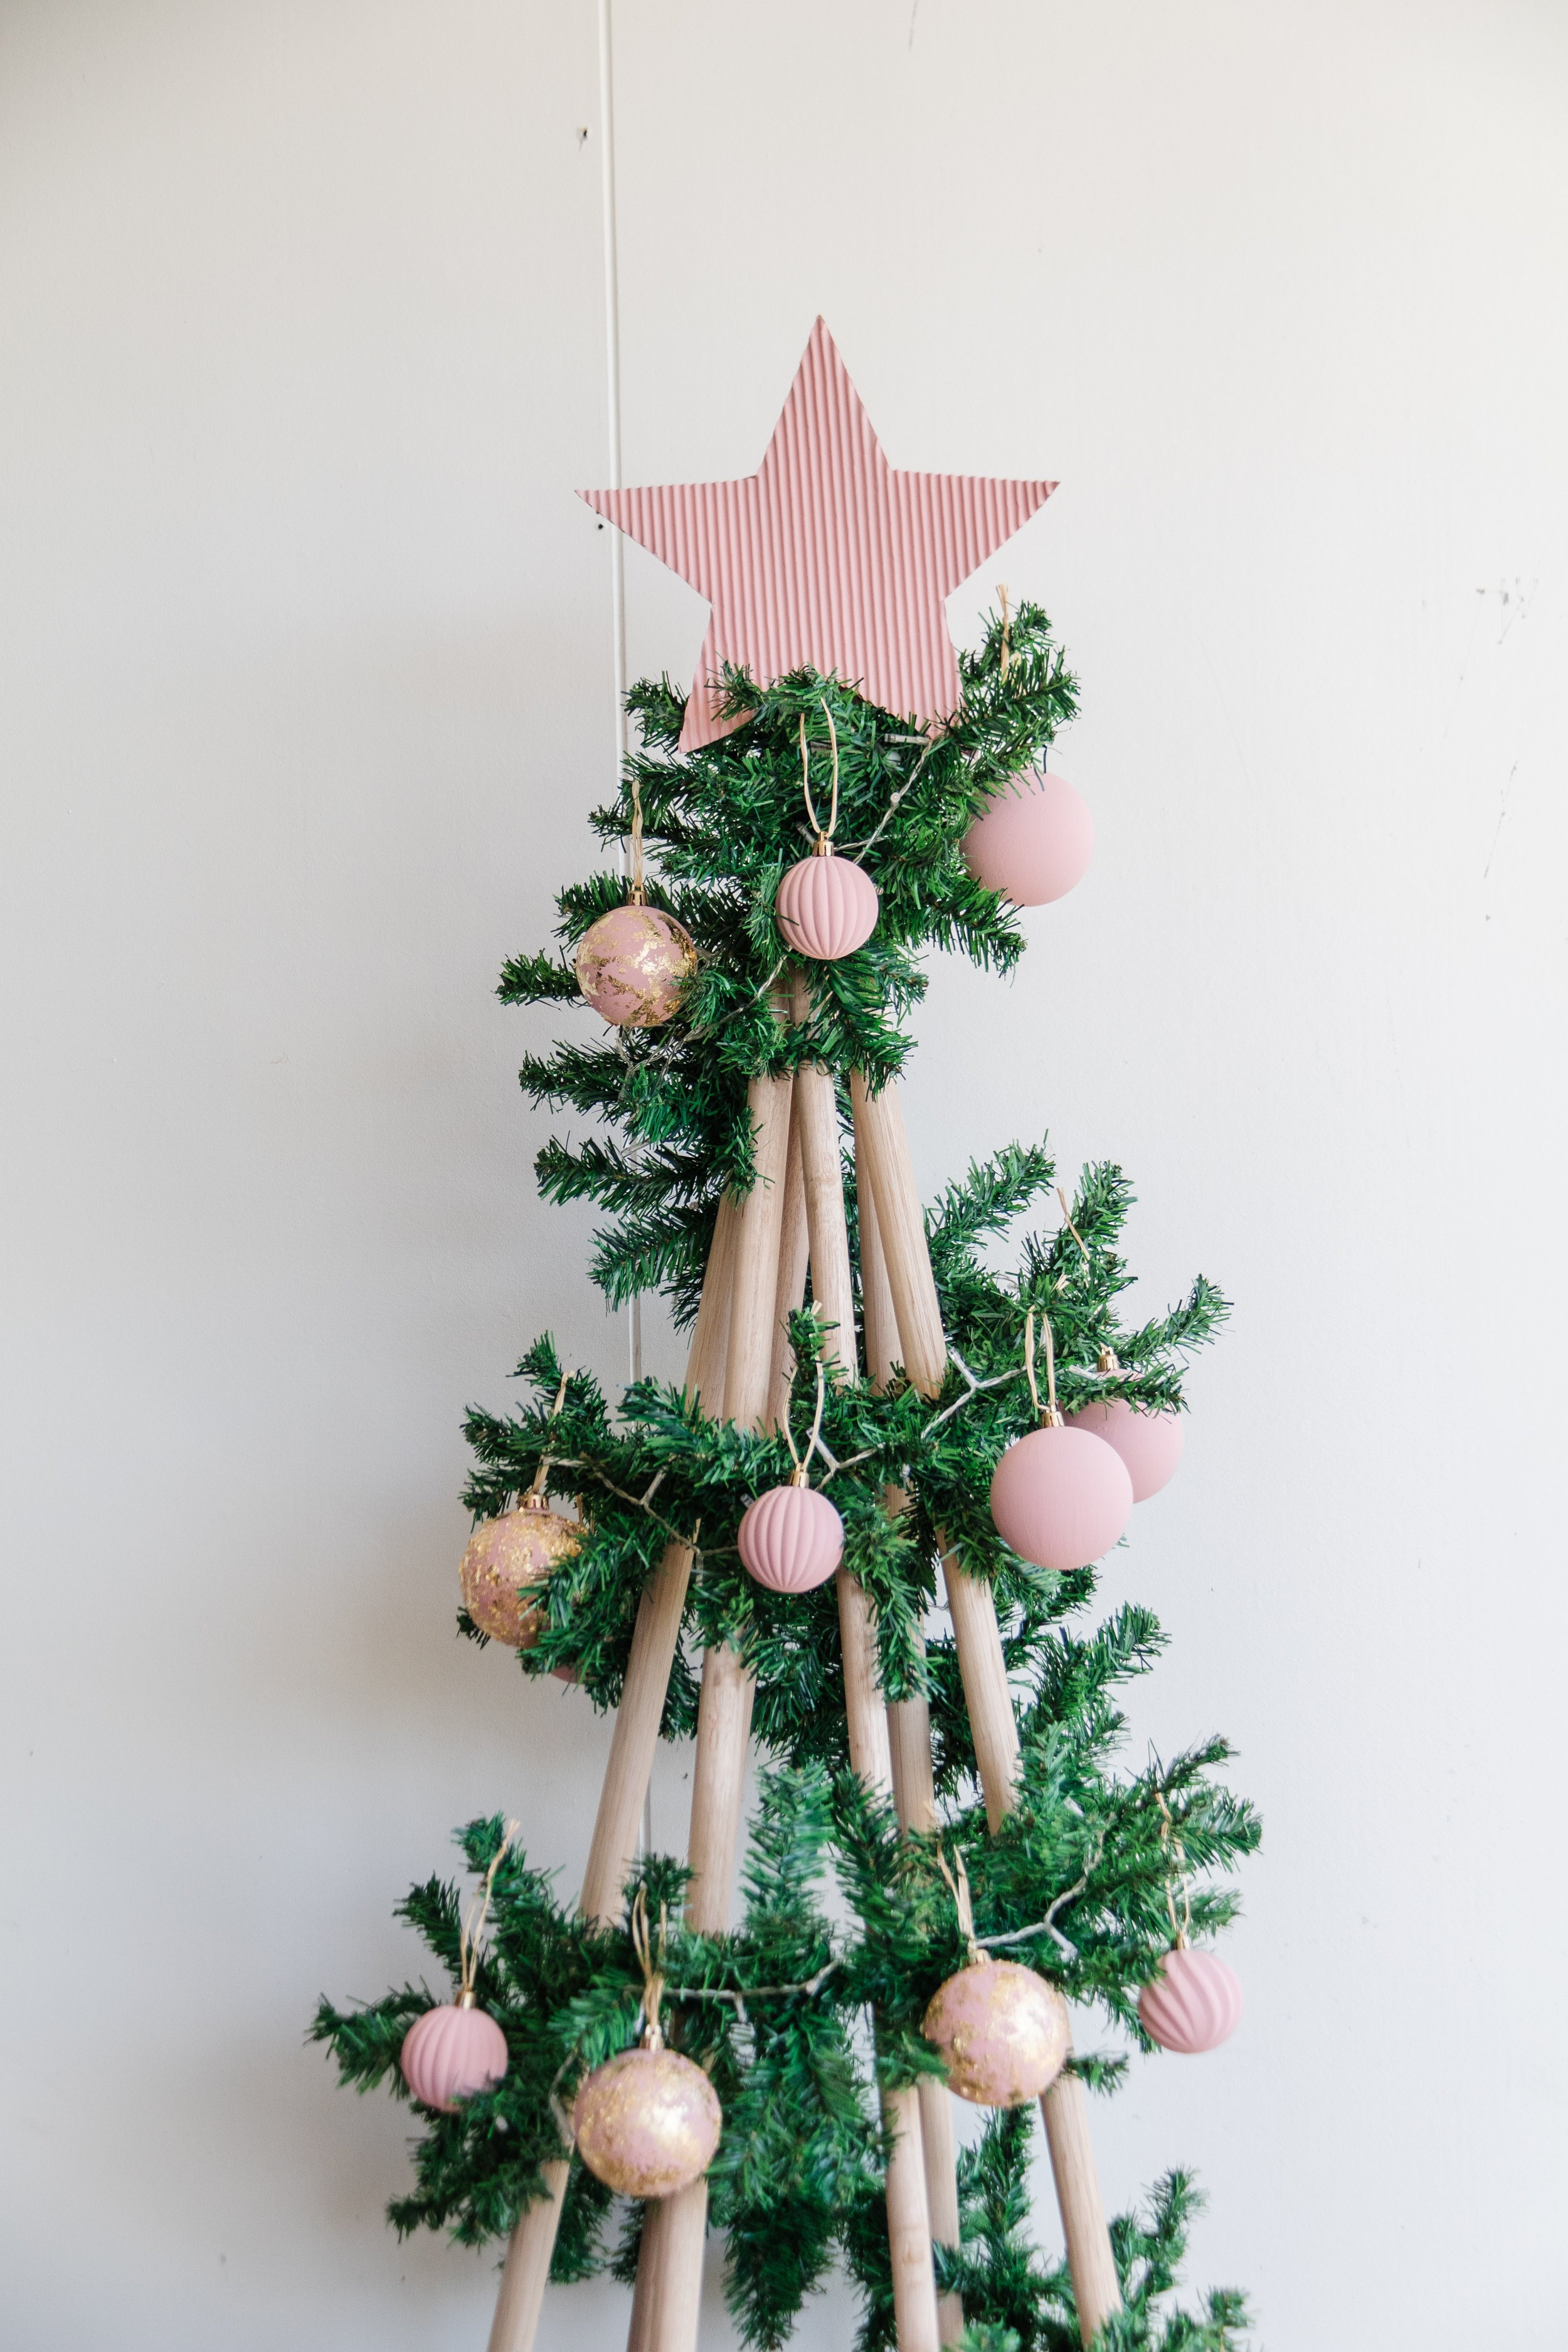
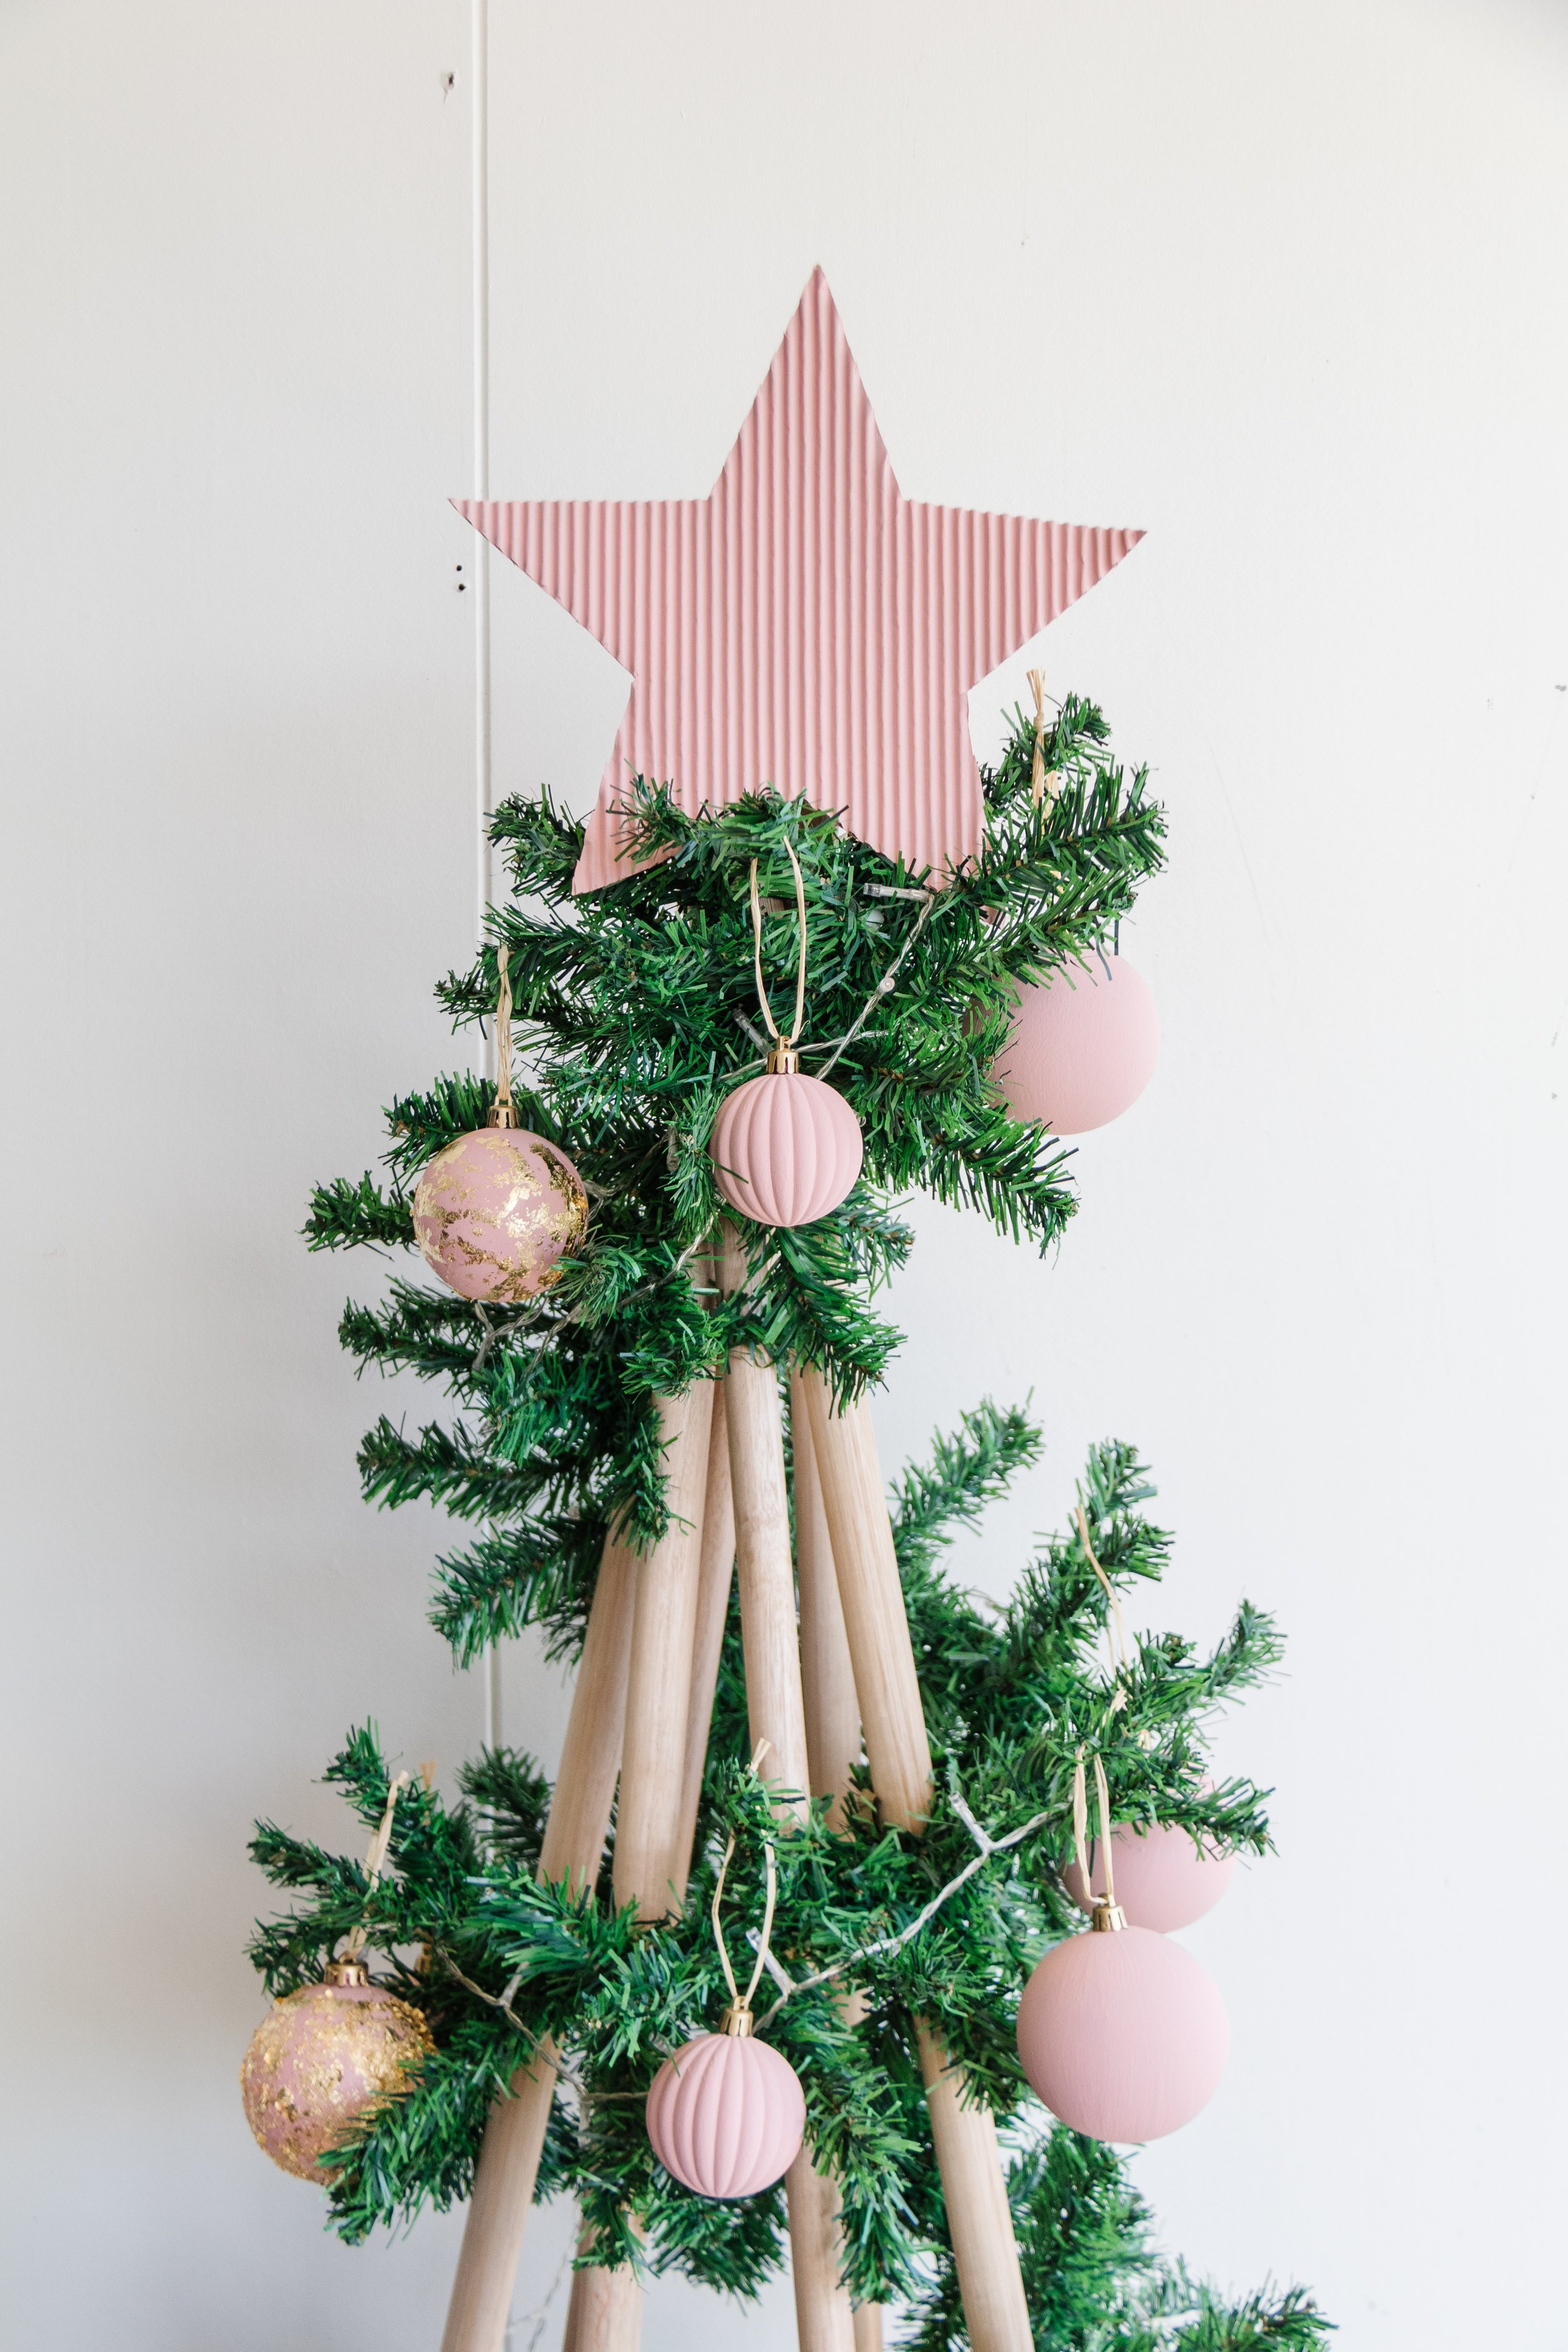
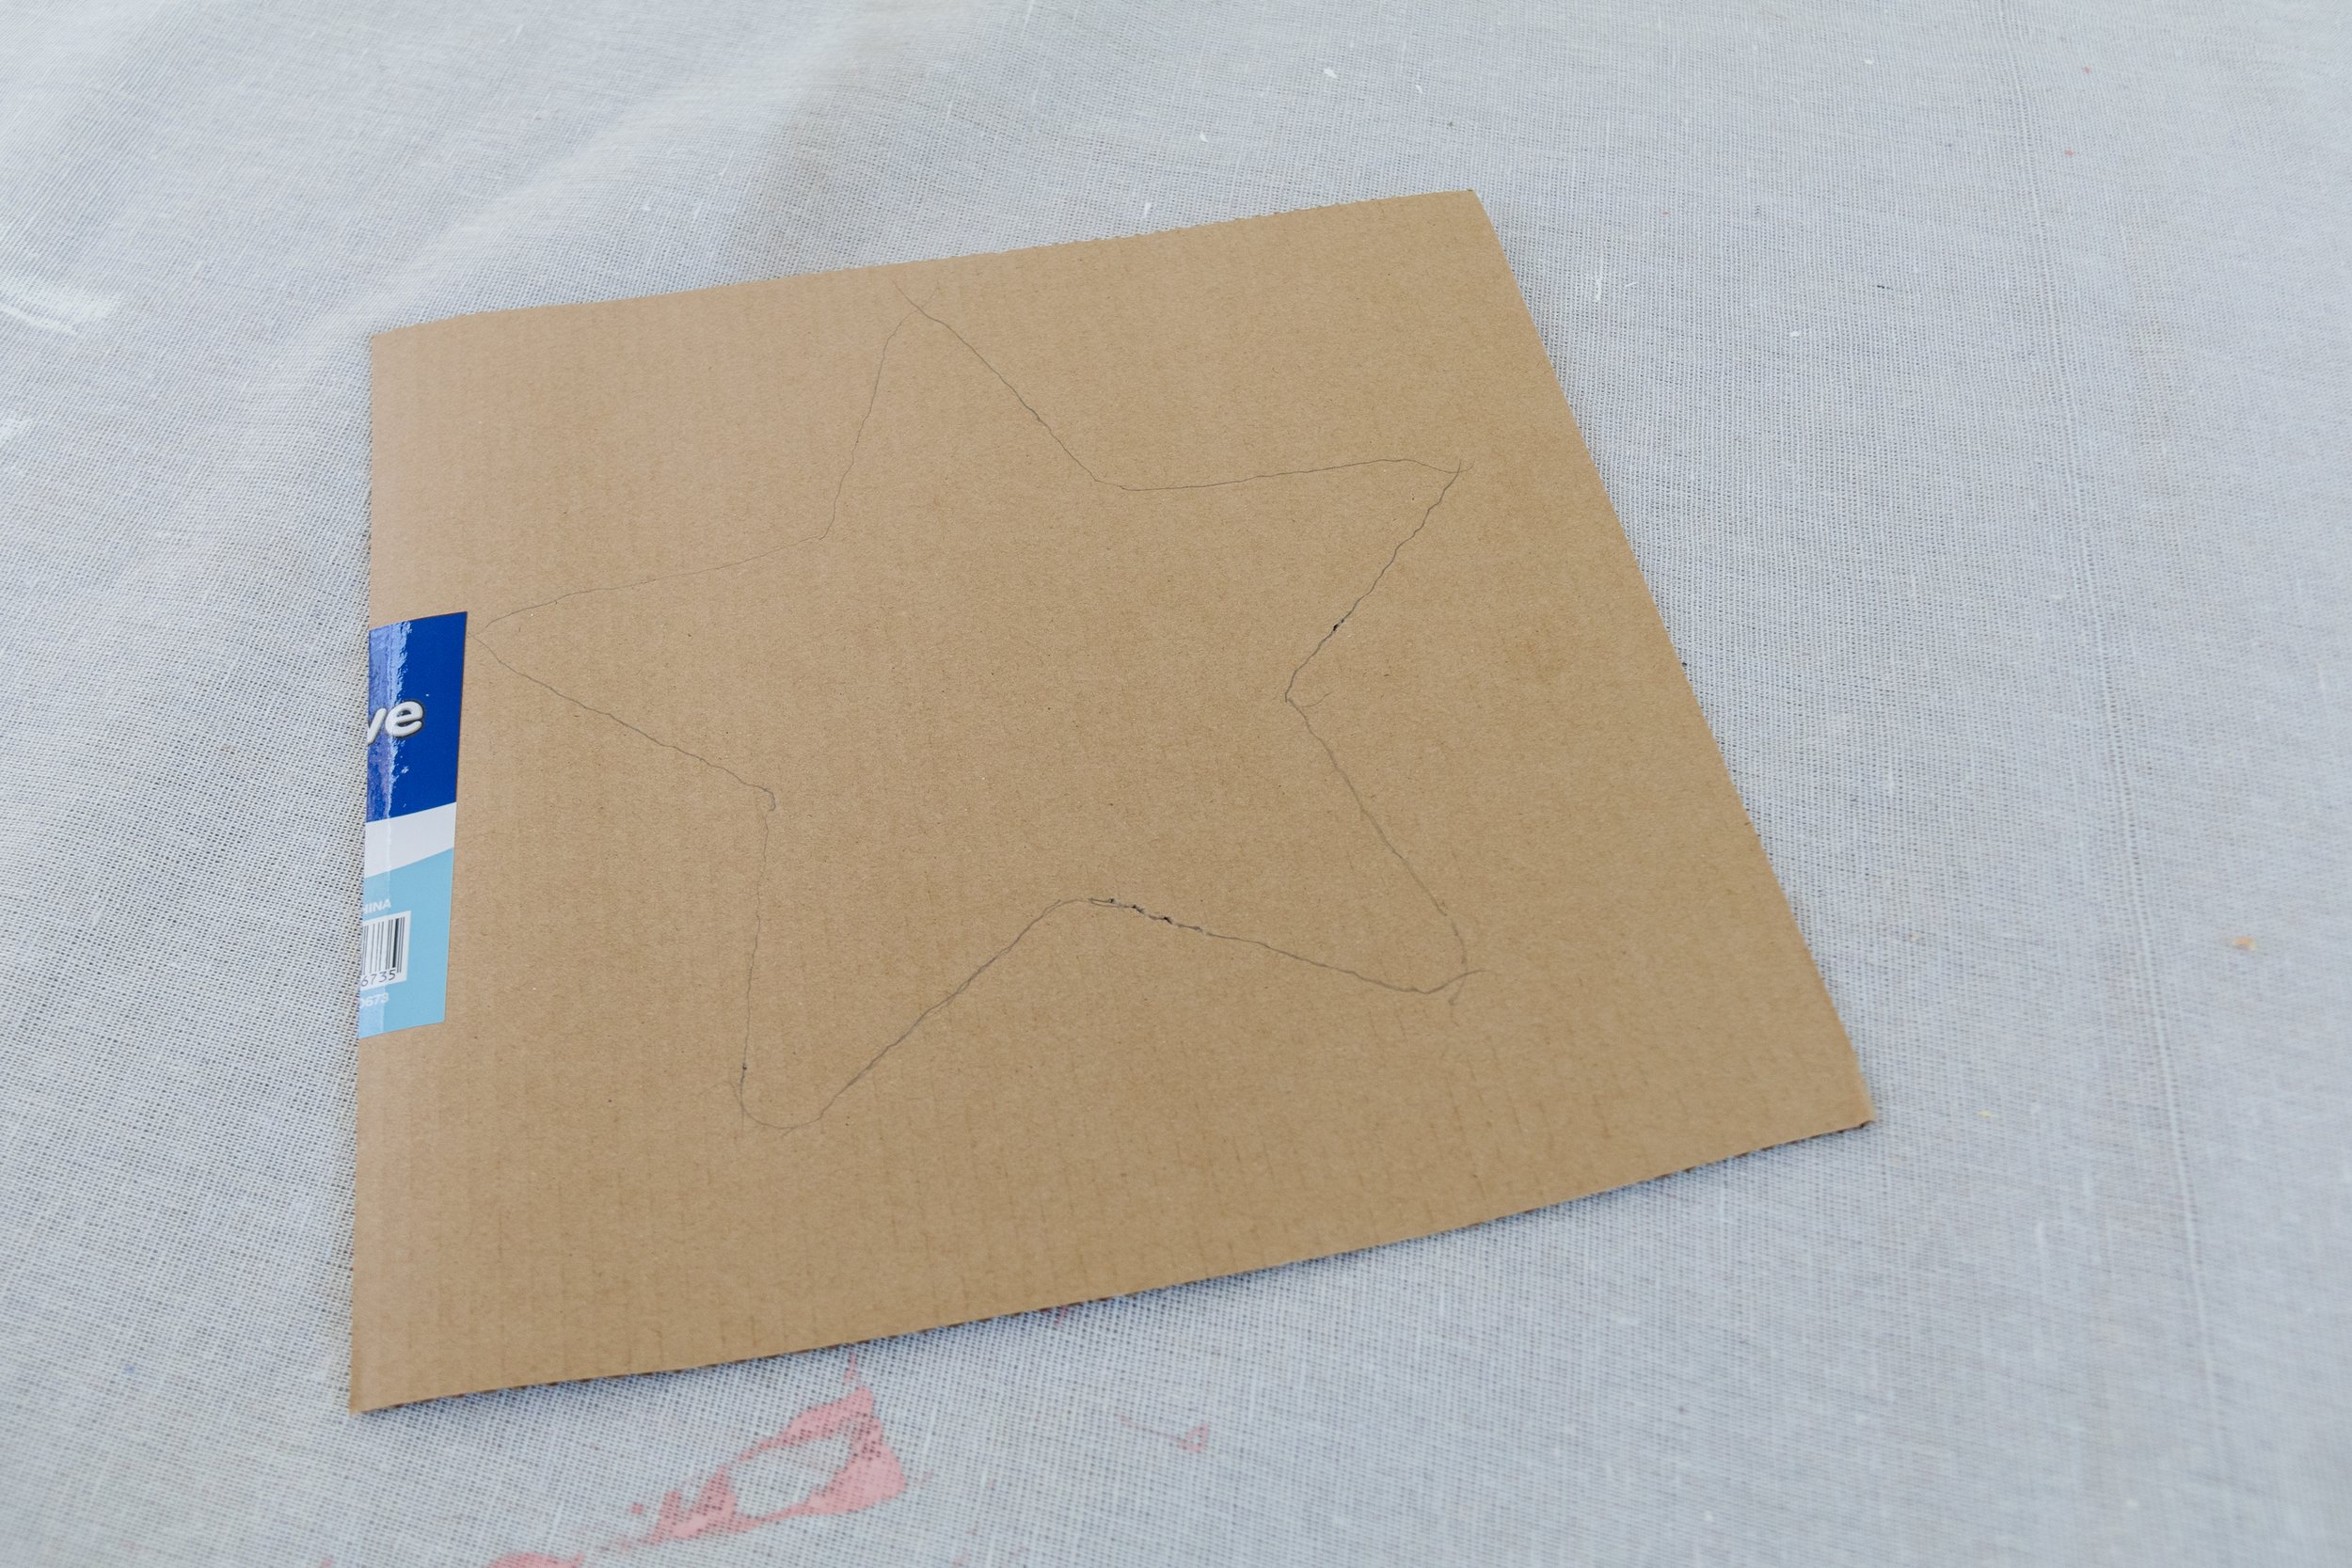
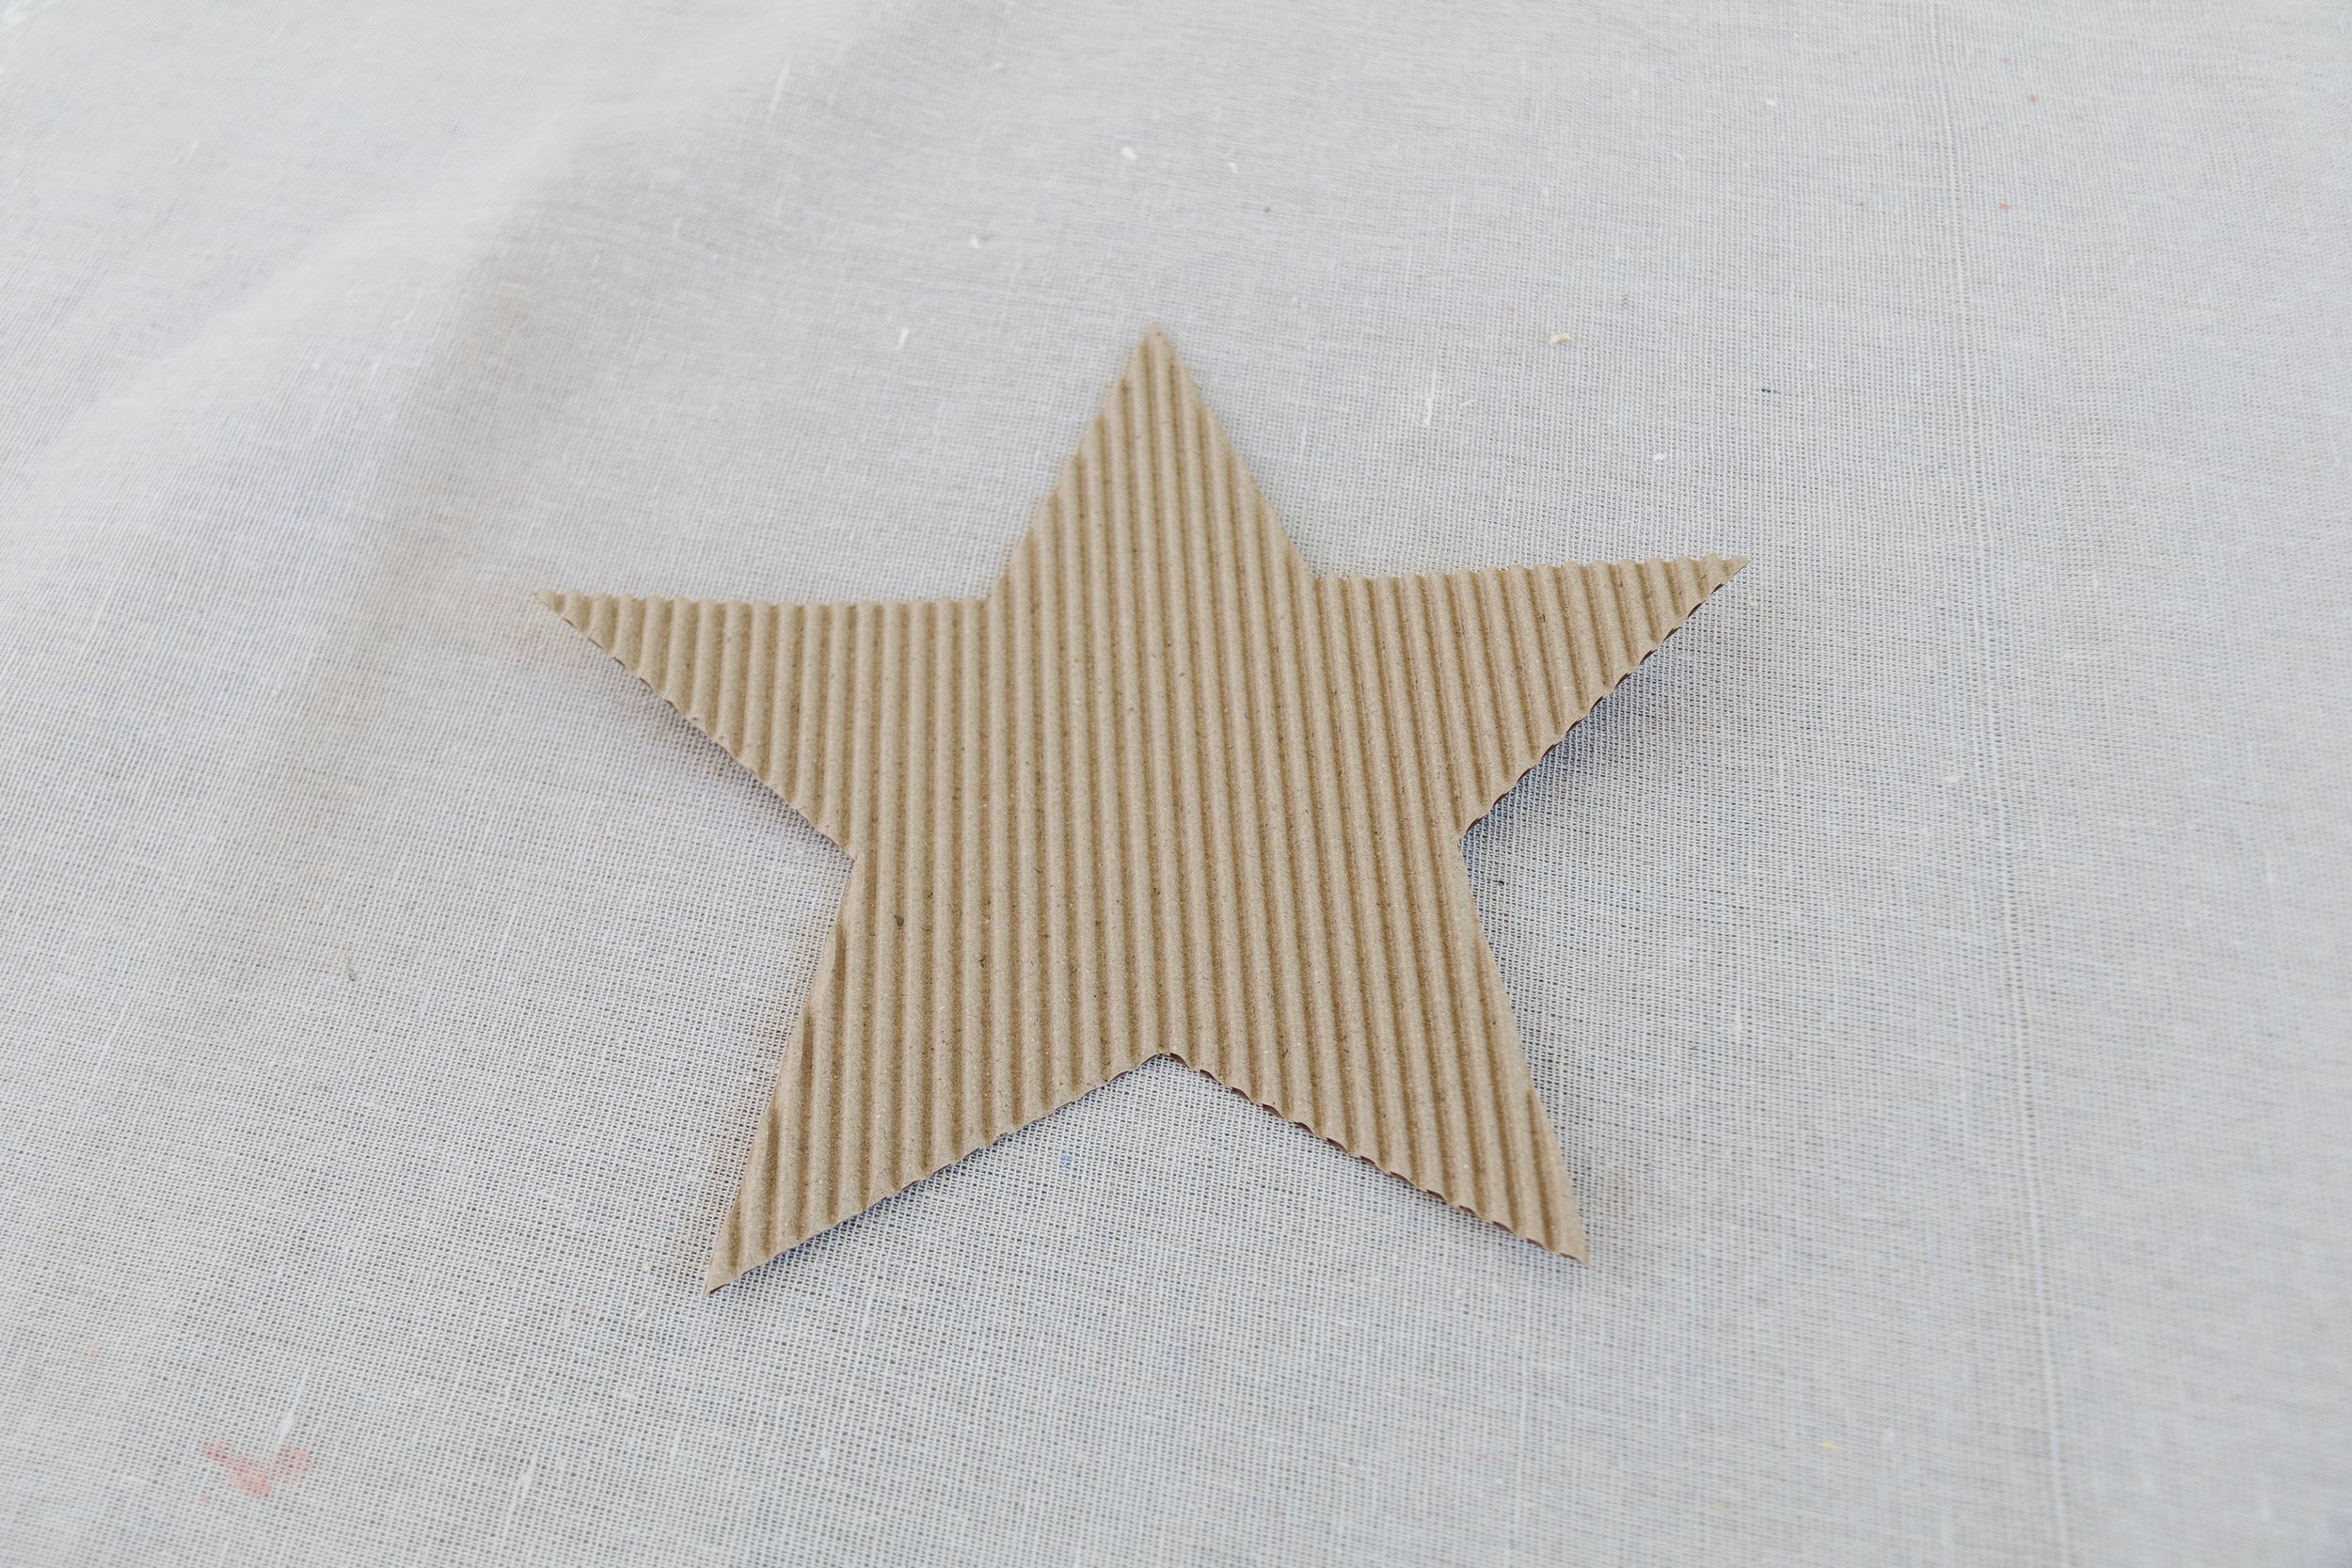
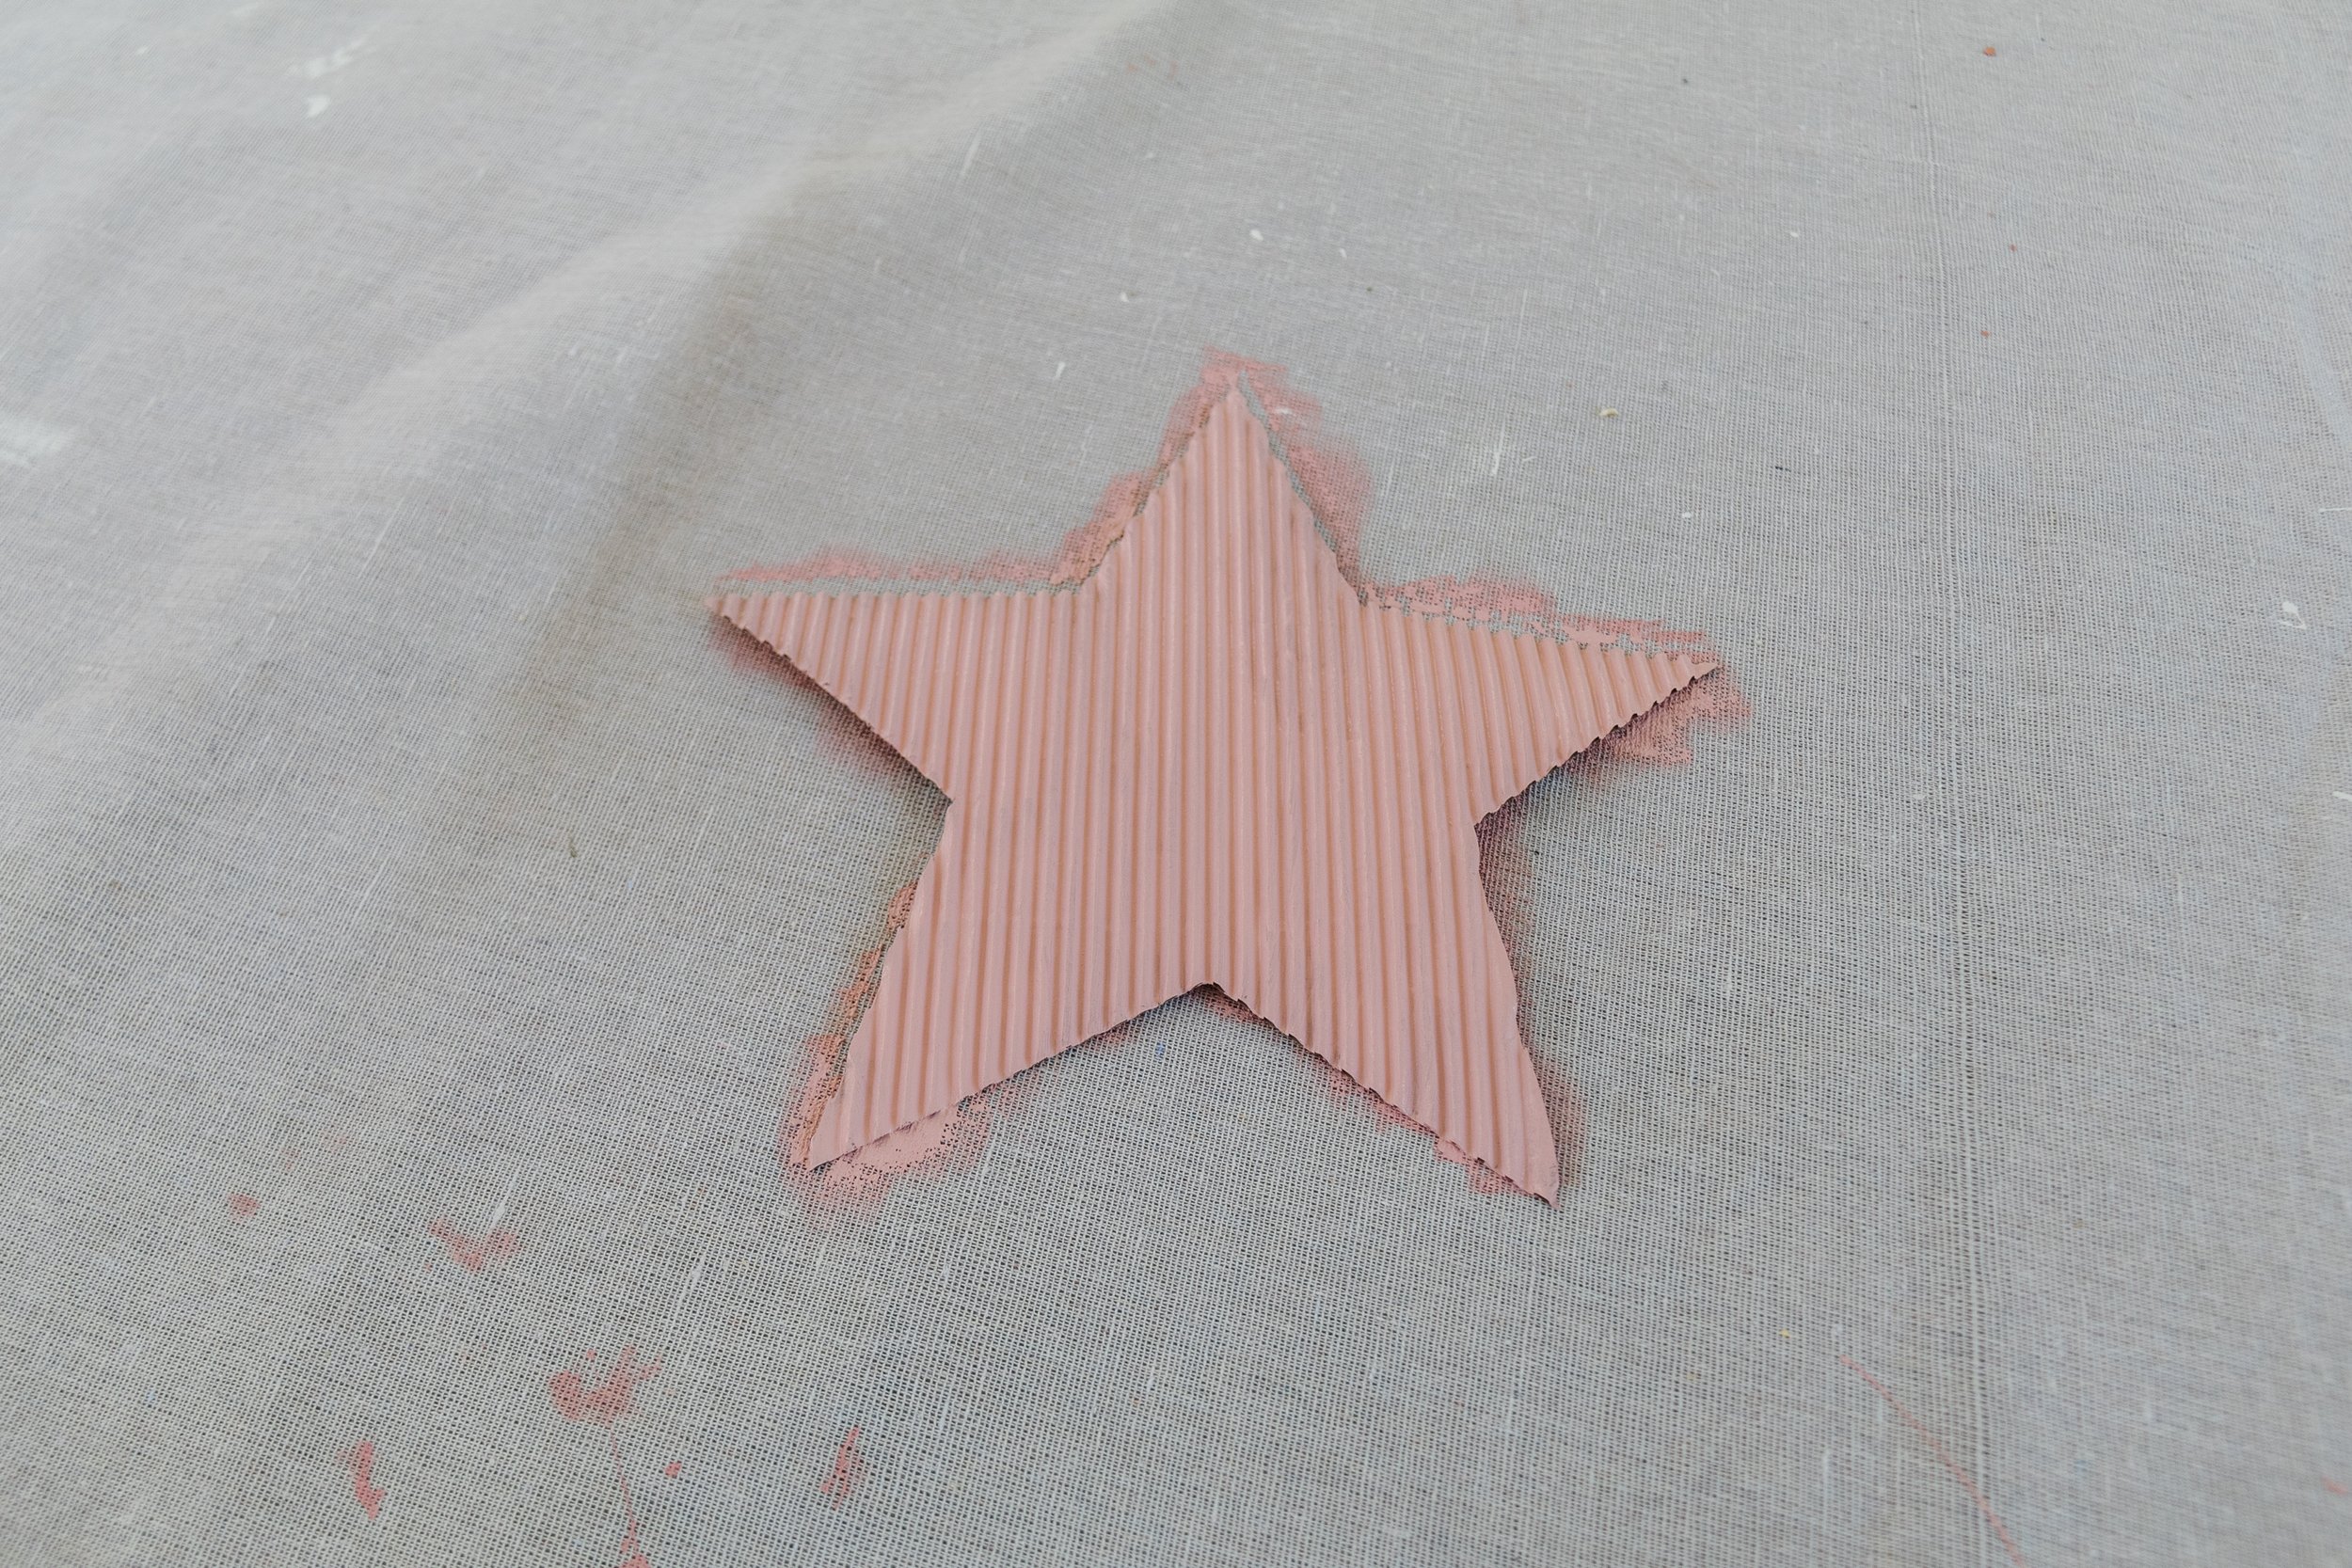
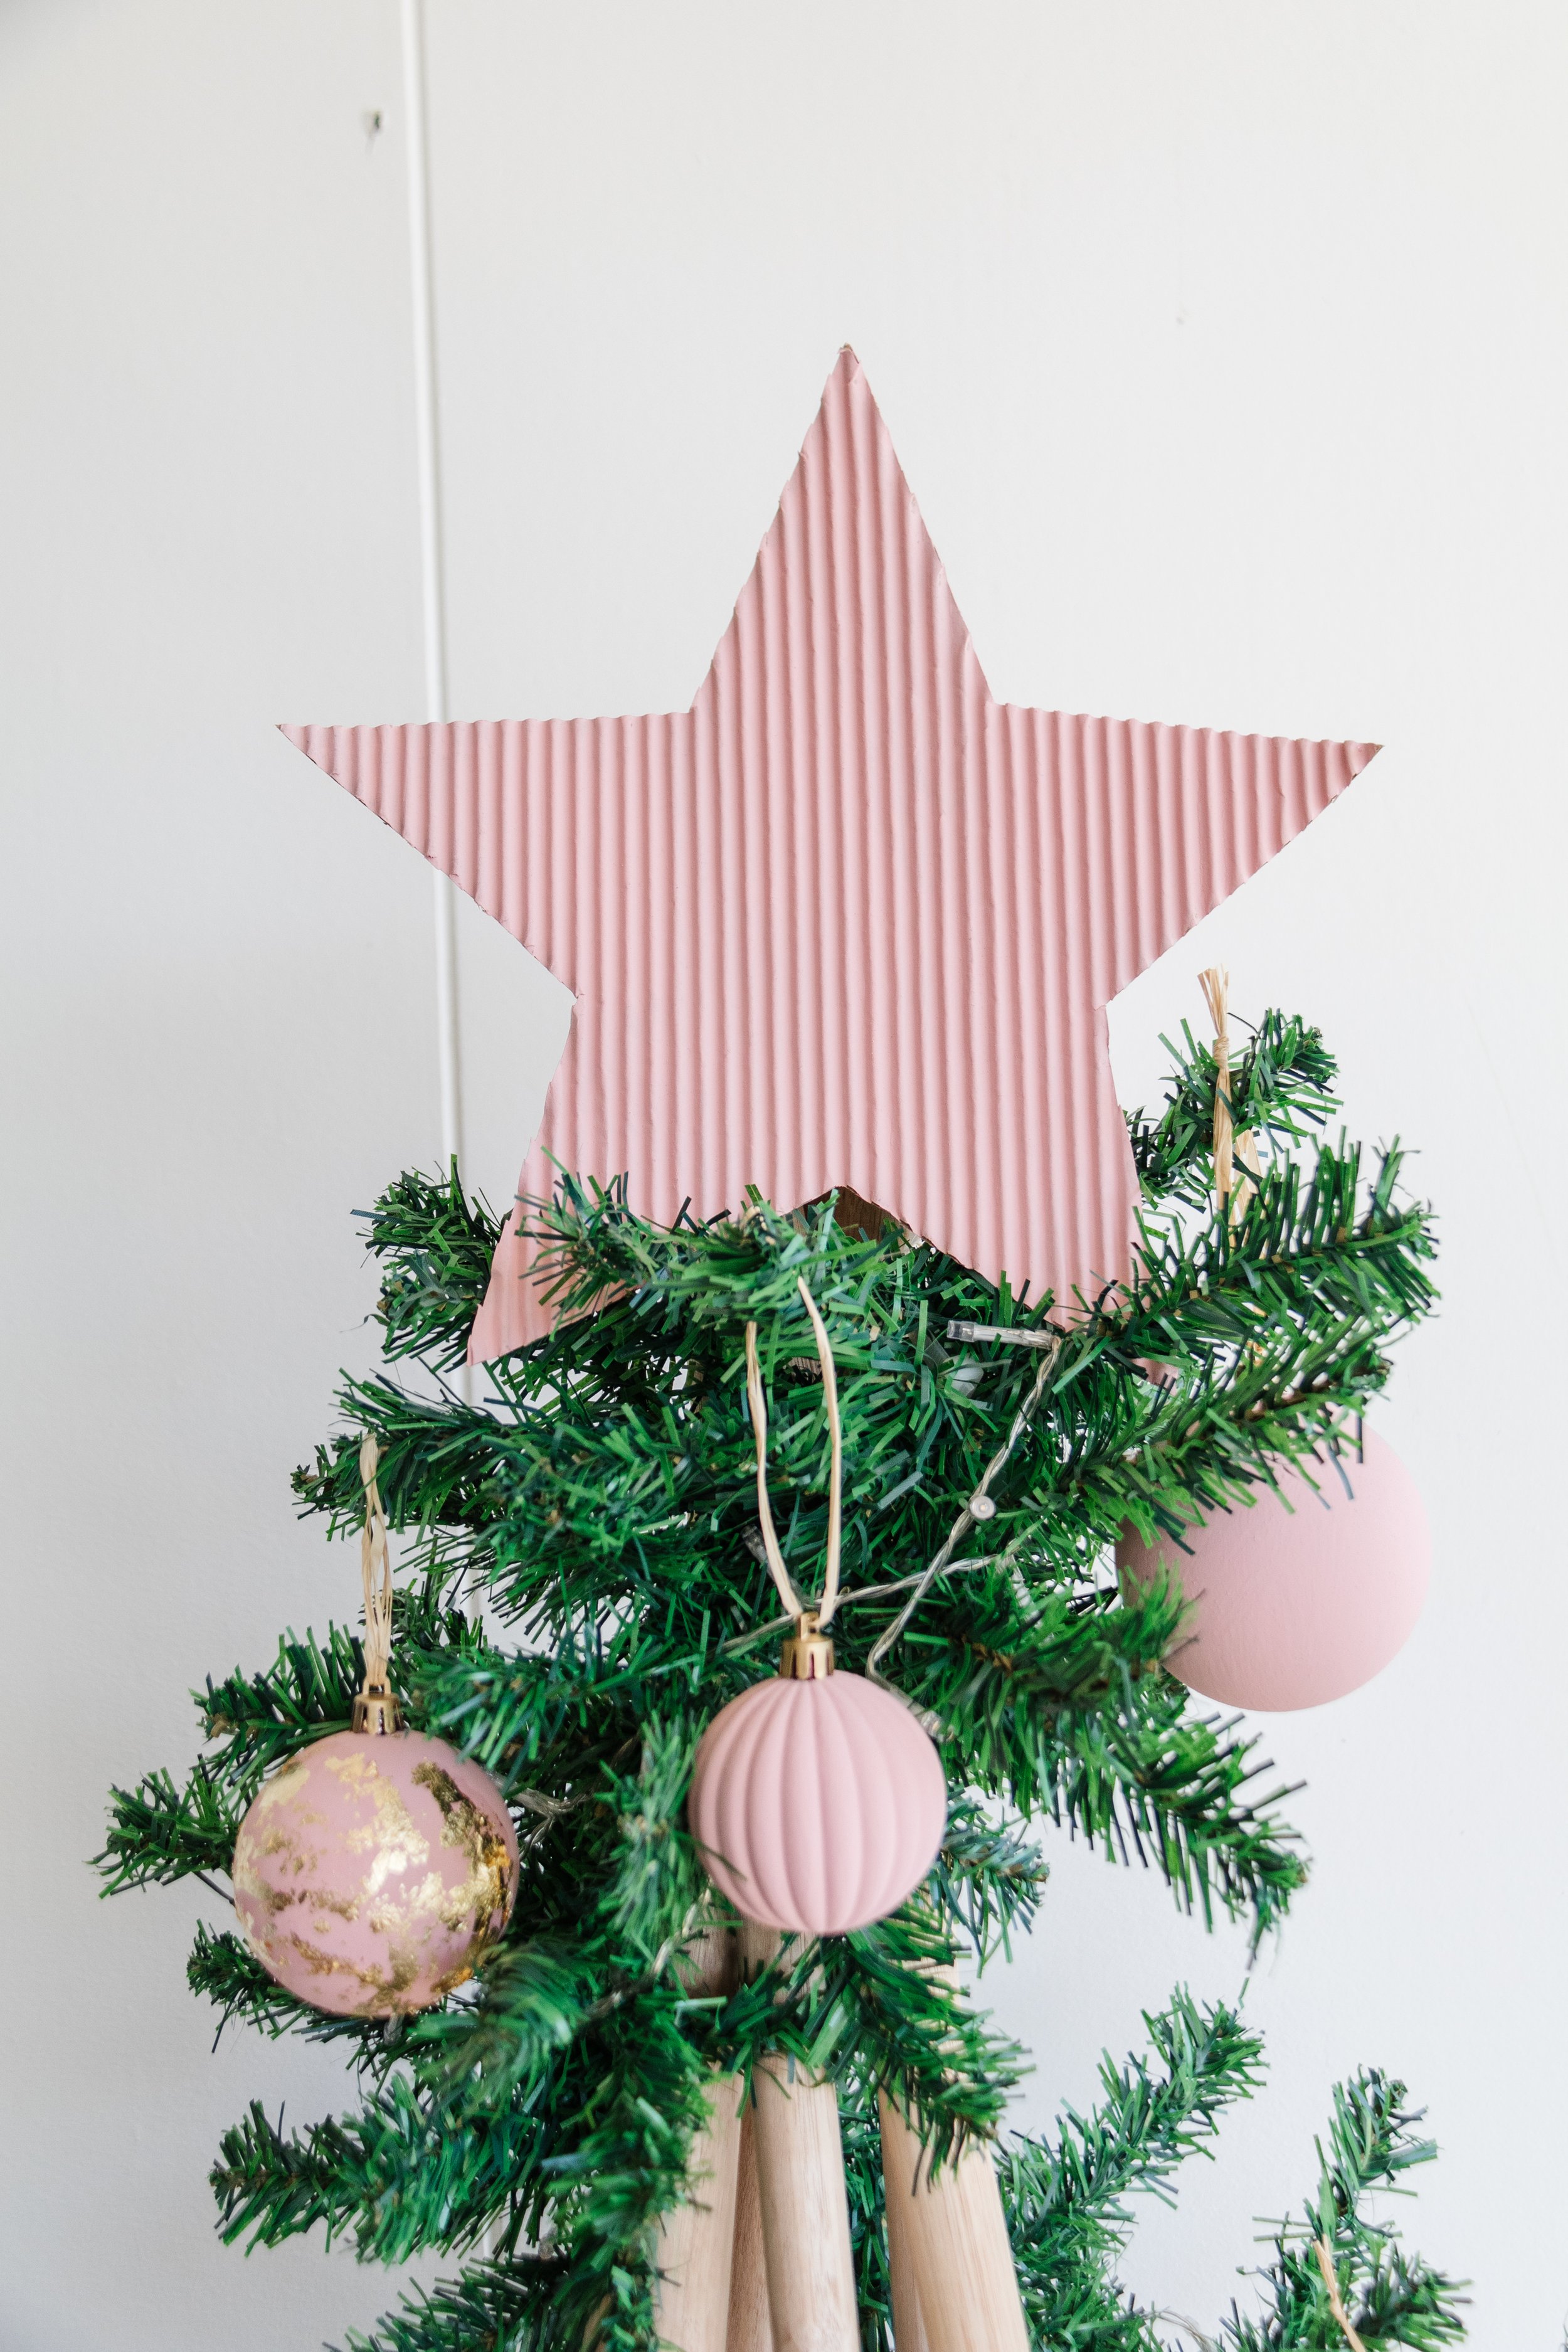
Step 4: Using scissors, cut a star out of the fluted cardboard and paint it with the same pink paint. Set aside to dry.
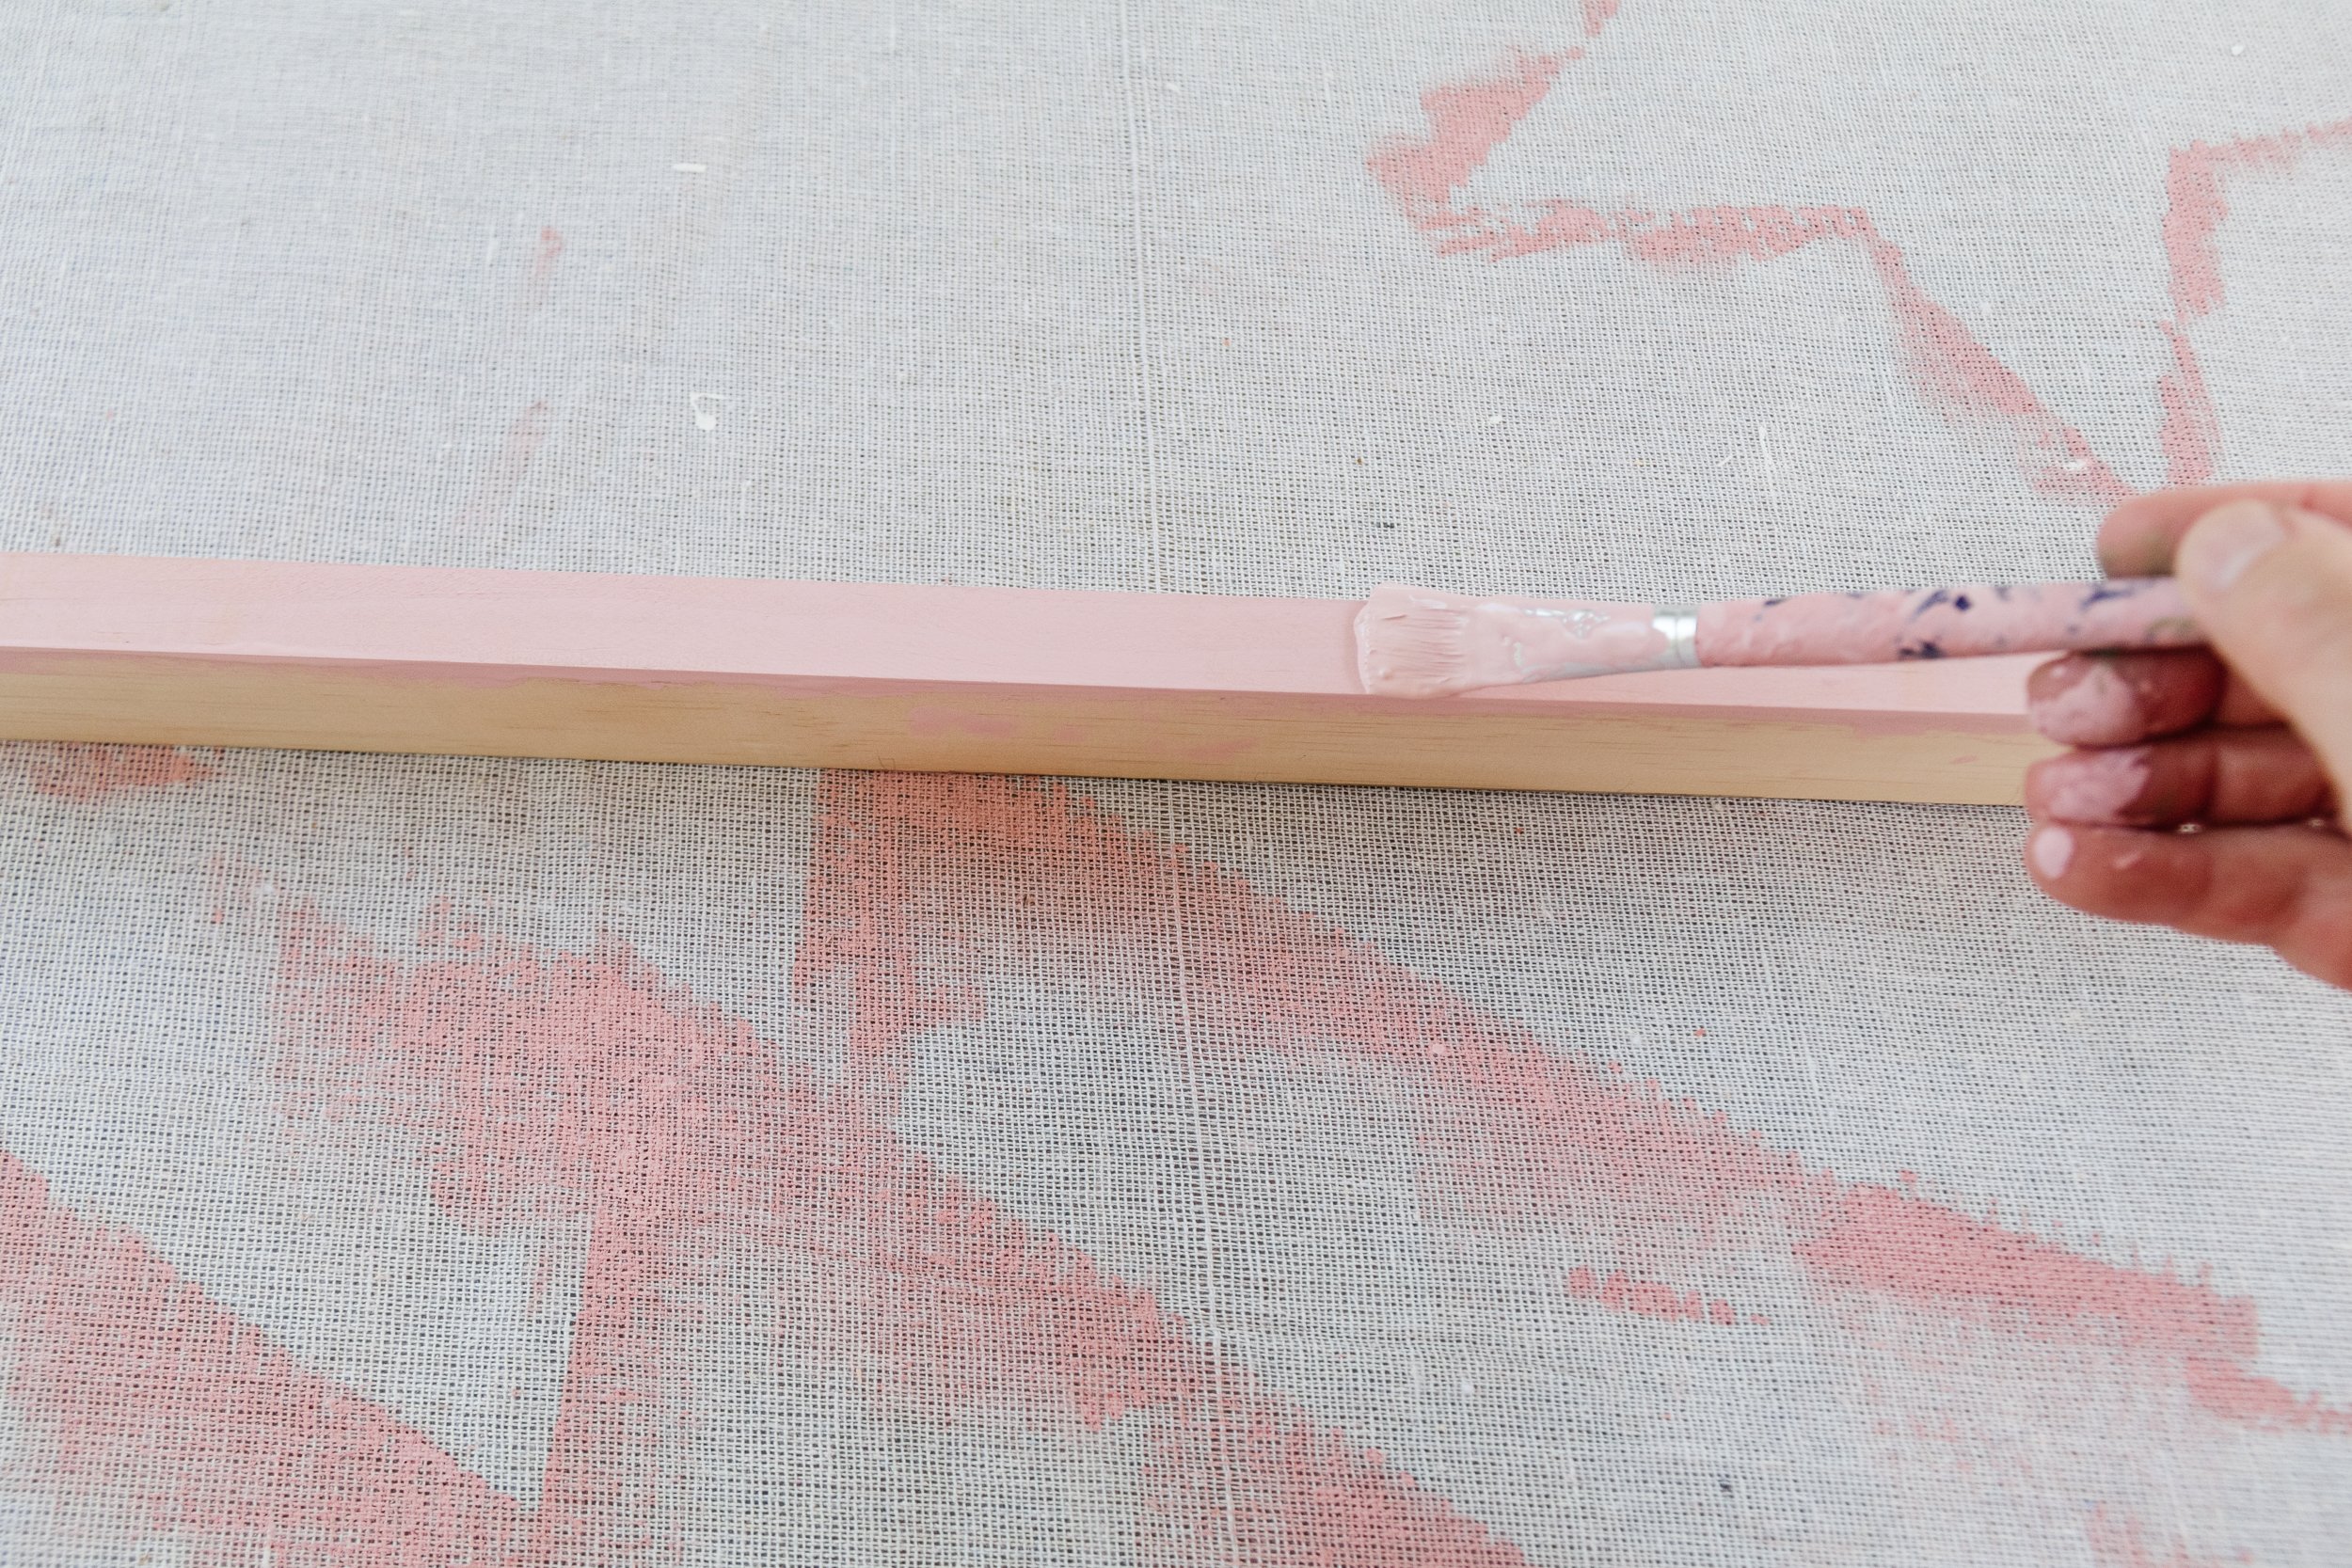
Step 5: To make DIY Painted Striped Wrapping Paper simply apply a thick coat of paint onto the side of a plank of pine, then stamp it onto a sheet of butchers paper. Repeat to create a striped pattern. Set aside to dry.
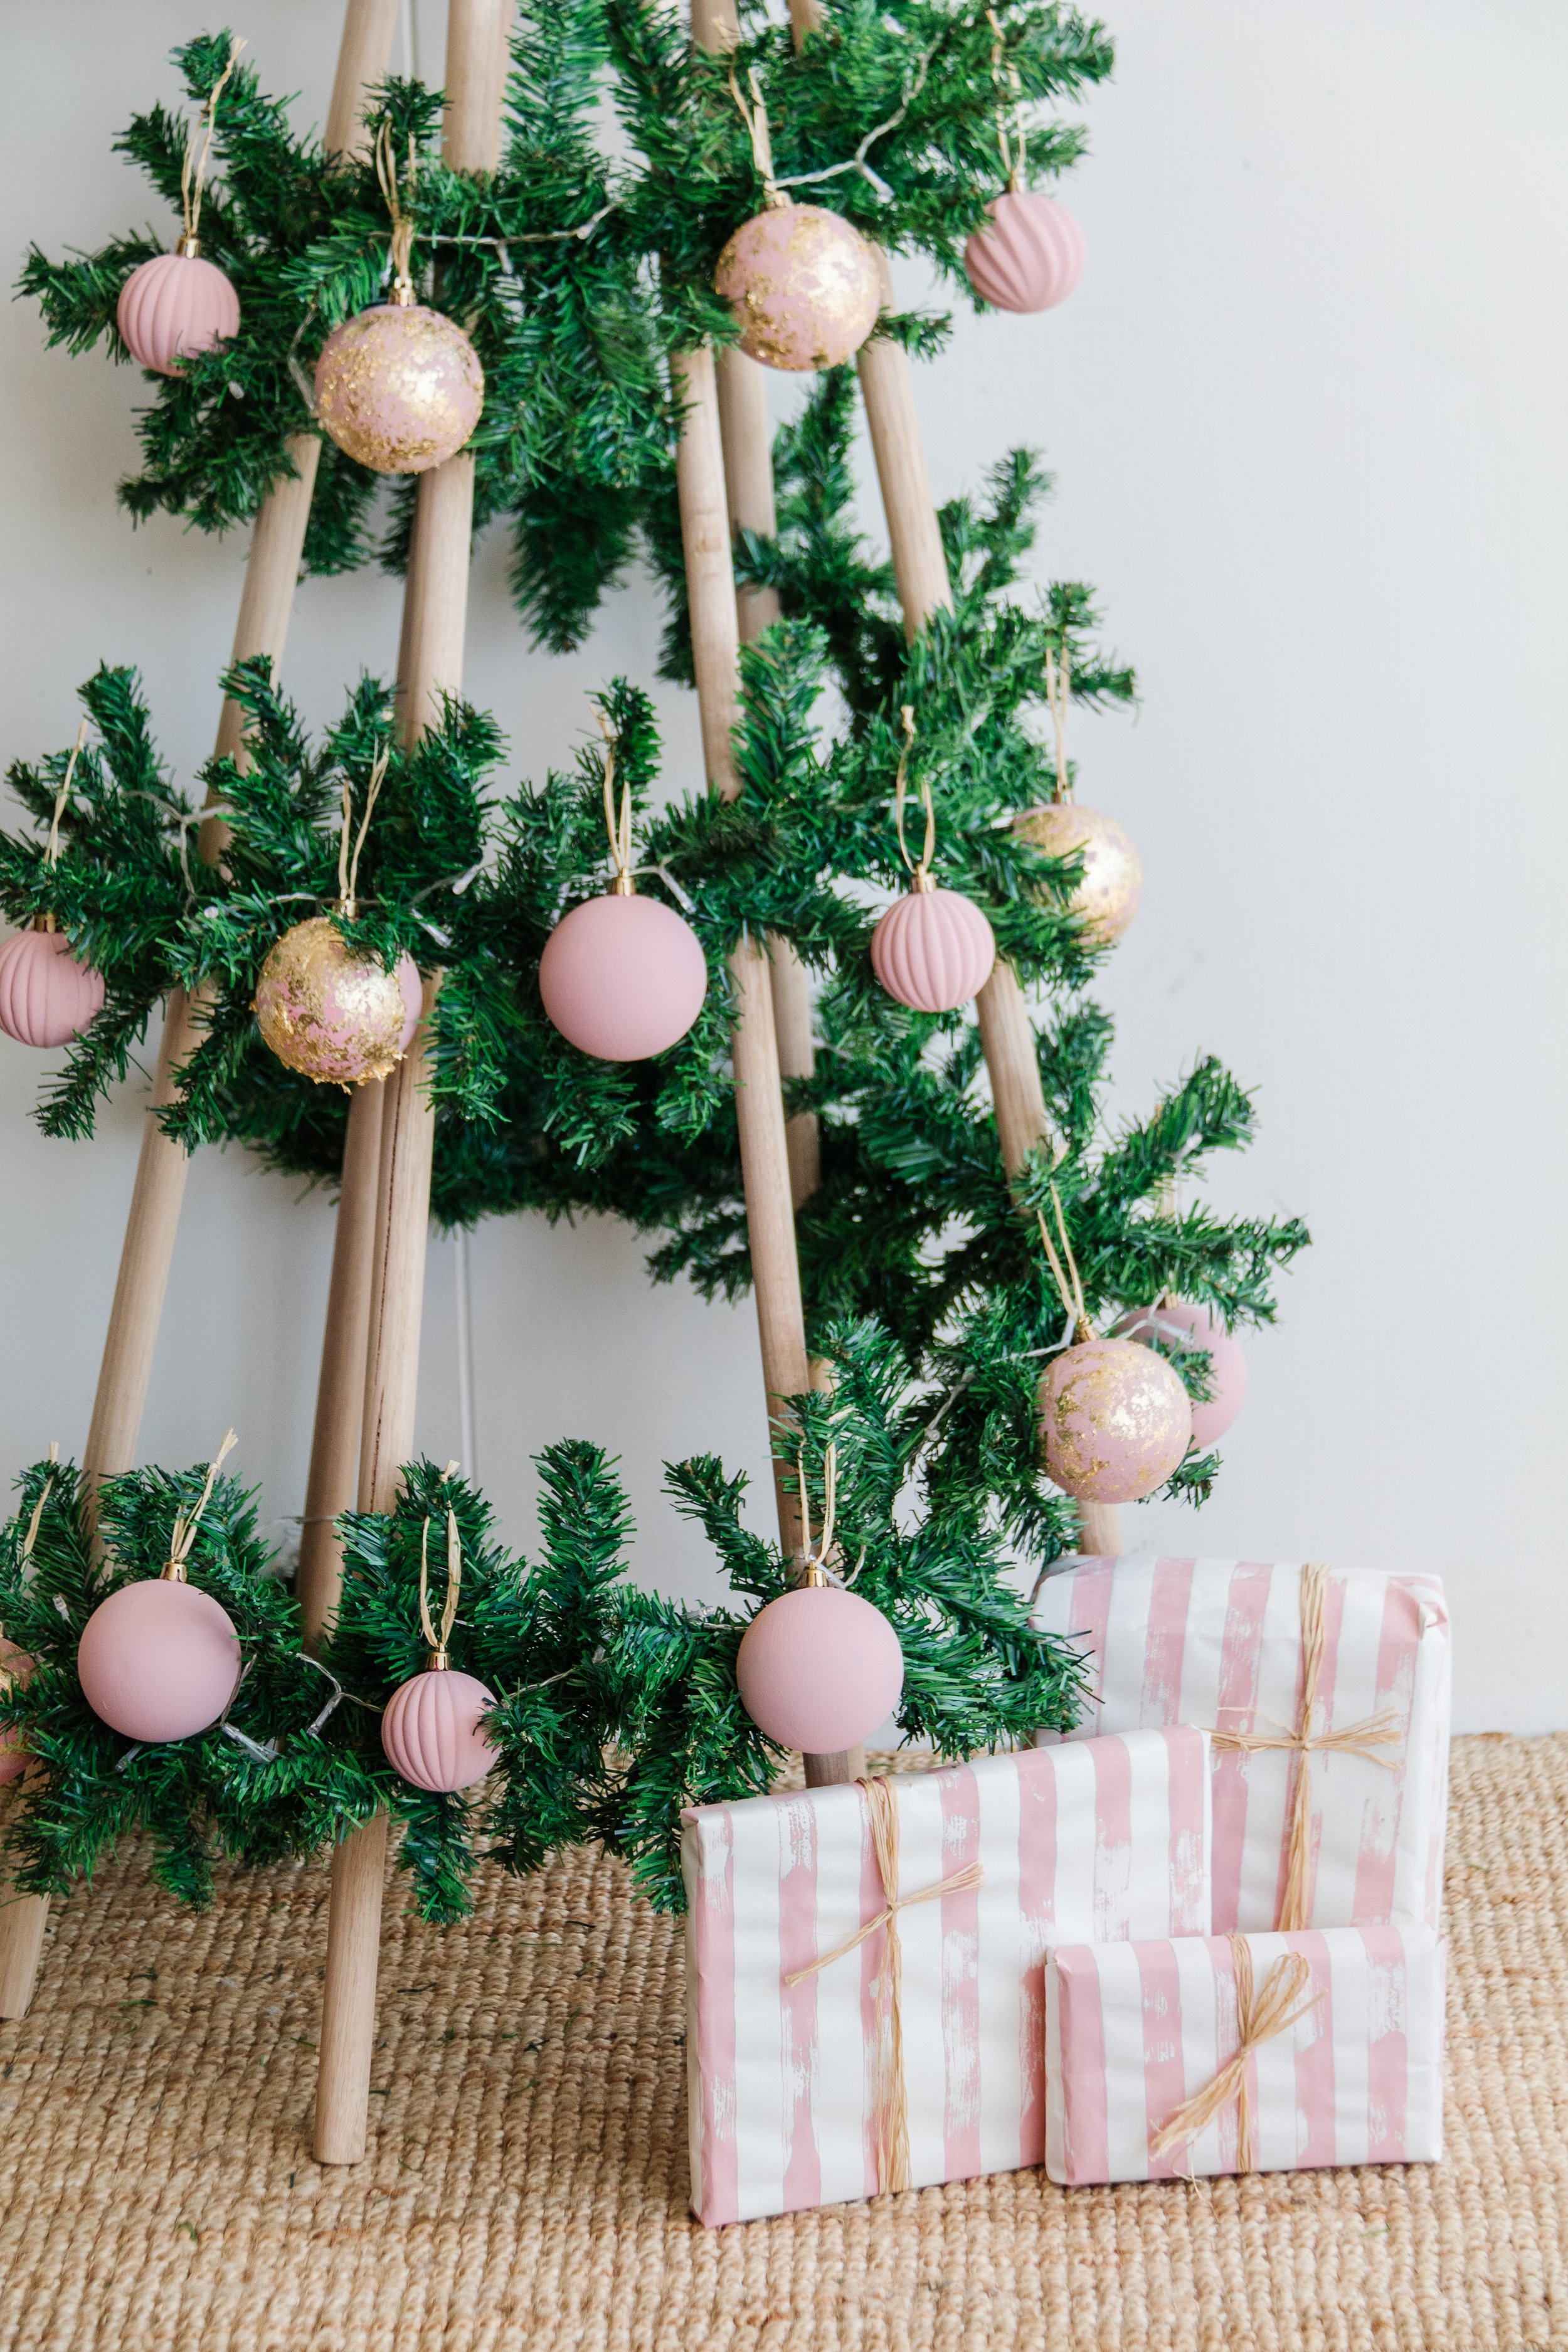
Step 6: Alternatively hang the painted baubles onto the garland and nestle the painted star on top of the tree. Wrap your gifts in the DIY Painted Striped Wrapping Paper, tie them with raffia and put the underneath the Christmas Tree.
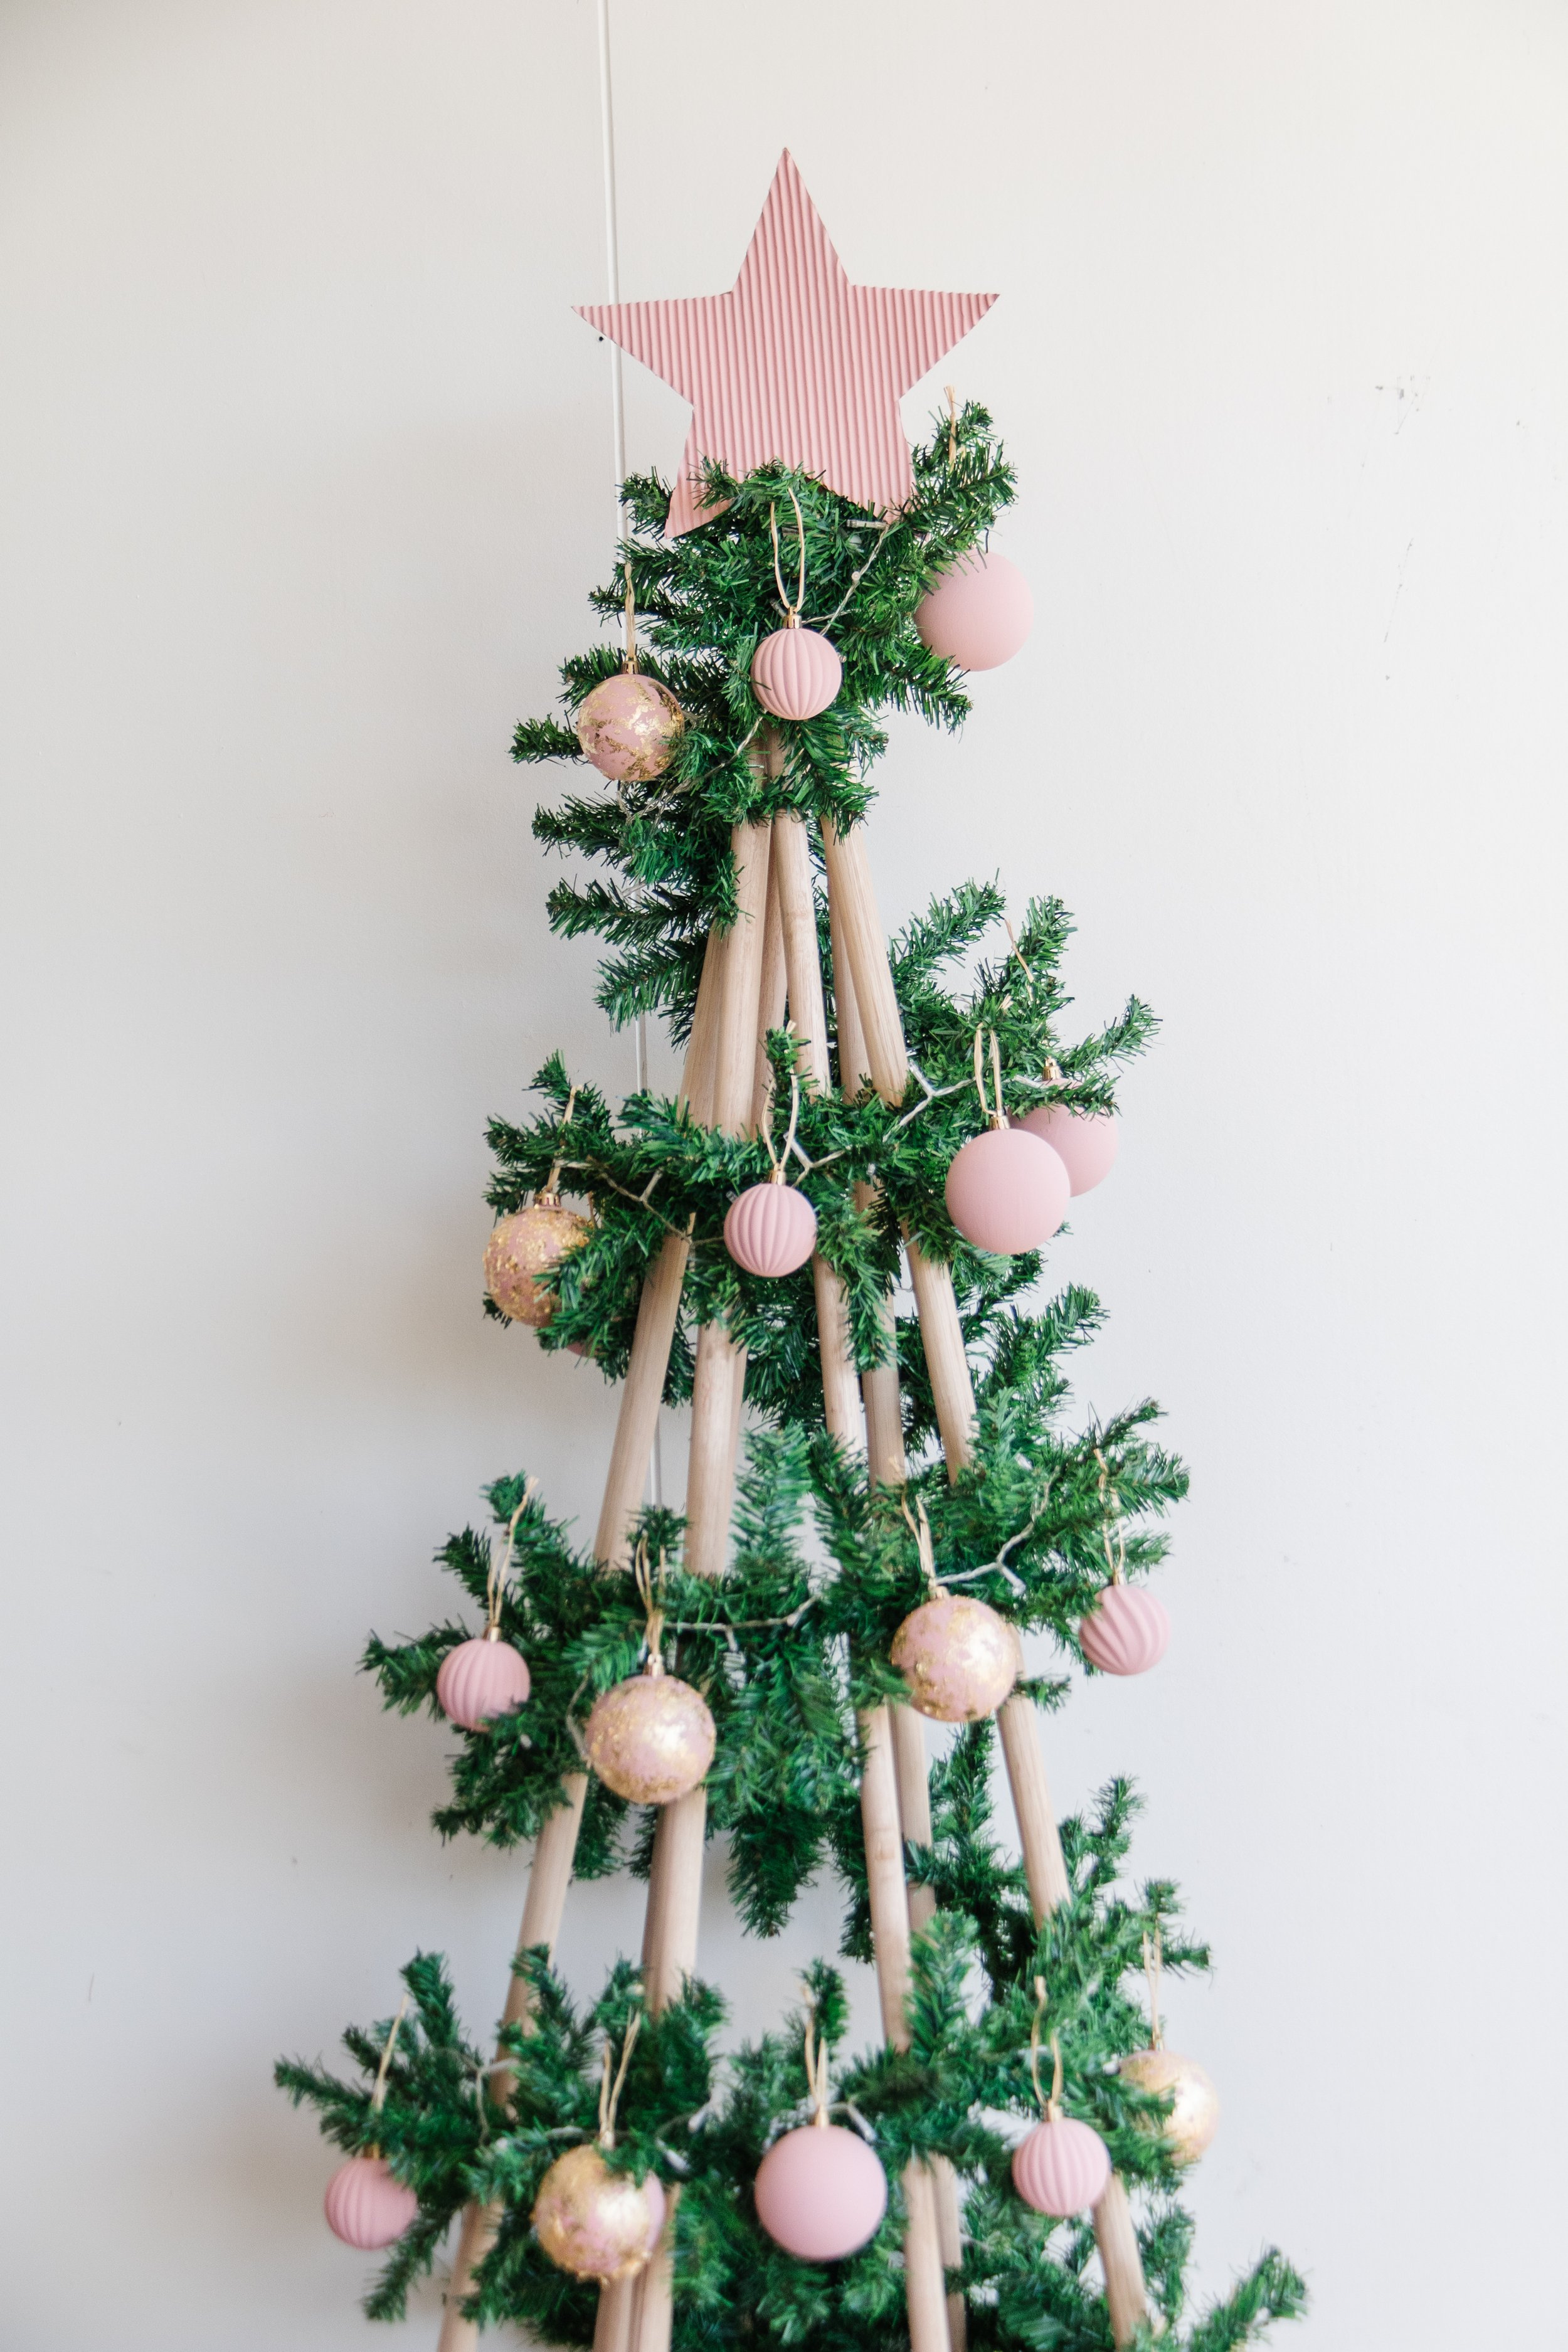
Ta daaaa!
I am so excited to put this Christmas Tree up for my sister and her family to enjoy; my nieces and nephew are going to love it! Best of all? I can easily pack it down, bring it home and store it away safely until next year. How good is that?!