DIY Sandstone Side Table - for under $75!
When you see something you like, you make it!
And that’s exactly what I did when I stumbled across this photo on Pinterest. What drew me to this side table was the raw, chipped, broken stone and the variation of coloured lines juxtaposed with the harsh straight lines of the metal top and bottom. The side table is by Barcelona-based sculptor Carla Cascales Alimbau and while I can’t afford to buy one myself, I felt inspired to make a side table inspired by this design.
Naturally I went to Bunnings to see what I could find and I was drawn to a pile of beautiful, earthy sandstone pavers. I have always loved working with stone, and you’ll find I used a lot of it over in the photos for my online store here, here and here all the way back in 2019. I knew these would be perfect so I took a few pavers home and got making. It felt great to break stone again, but I umm’d and ahh’d over the tabletop and in the end, I settled on a round mirror I picked up at the tip shop a long while ago. And here we are. Read on to make your own DIY Sandstone Side Table.
And to see how this DIY came together, make sure you check out this video!


Project Details
🕒 Project Time Estimate: 20mins DIYing time, 24 hours drying time
💰 Materials Cost: $75 plus mirror (which I got for $10 at the tip shop)
⚒️ Tools: Hammer
👷♀️ Skill Level: Beginner DIYer

Materials
2 x Sandstone paver from Bunnings - and maybe an extra one or two pavers just in case :)
2 x thick placemats or 1 x magazines to help you crack the pavers right down the middle
Round or rectangular mirror - I got mine from the tip shop
Hammer
Selley’s Hold Up glue from Bunnings
1 x L bracket
Gold spray paint
Selley’s Liquid Nails Mirror Metal Glass Glue from Bunnings
Round or rectangle mirror (I got my round mirror for $10 at the tip shop)
How To
DAY ONE
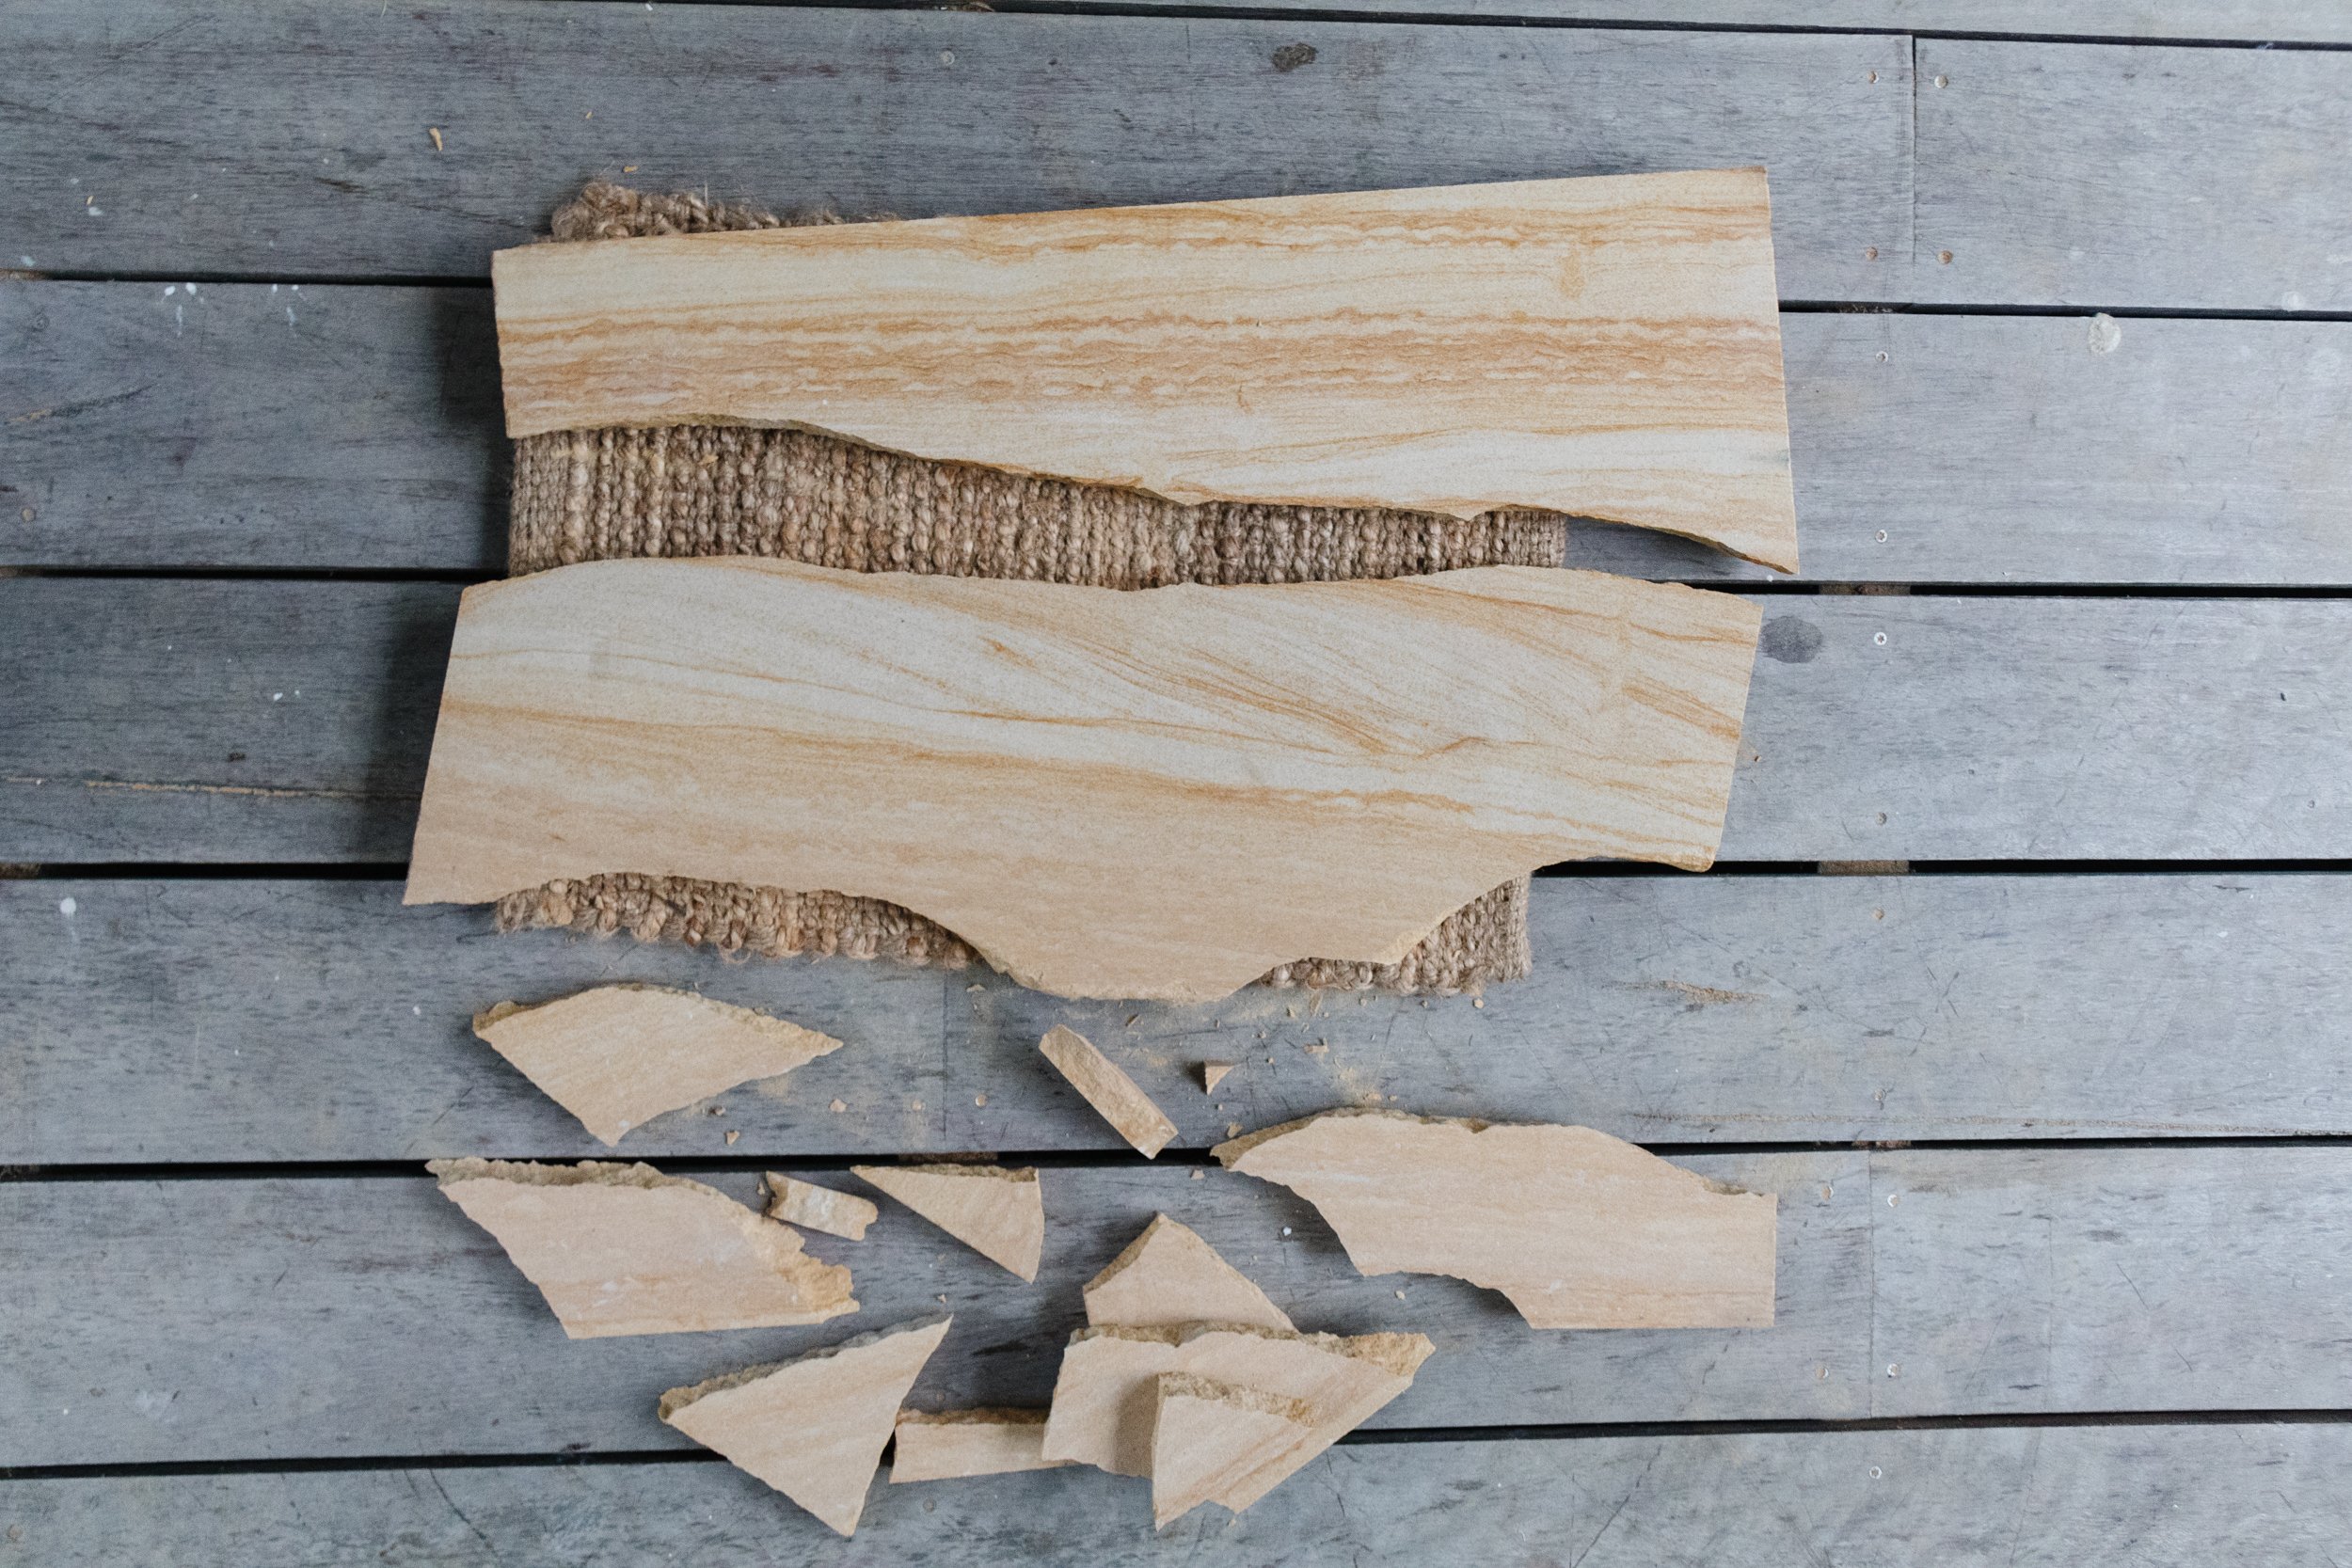
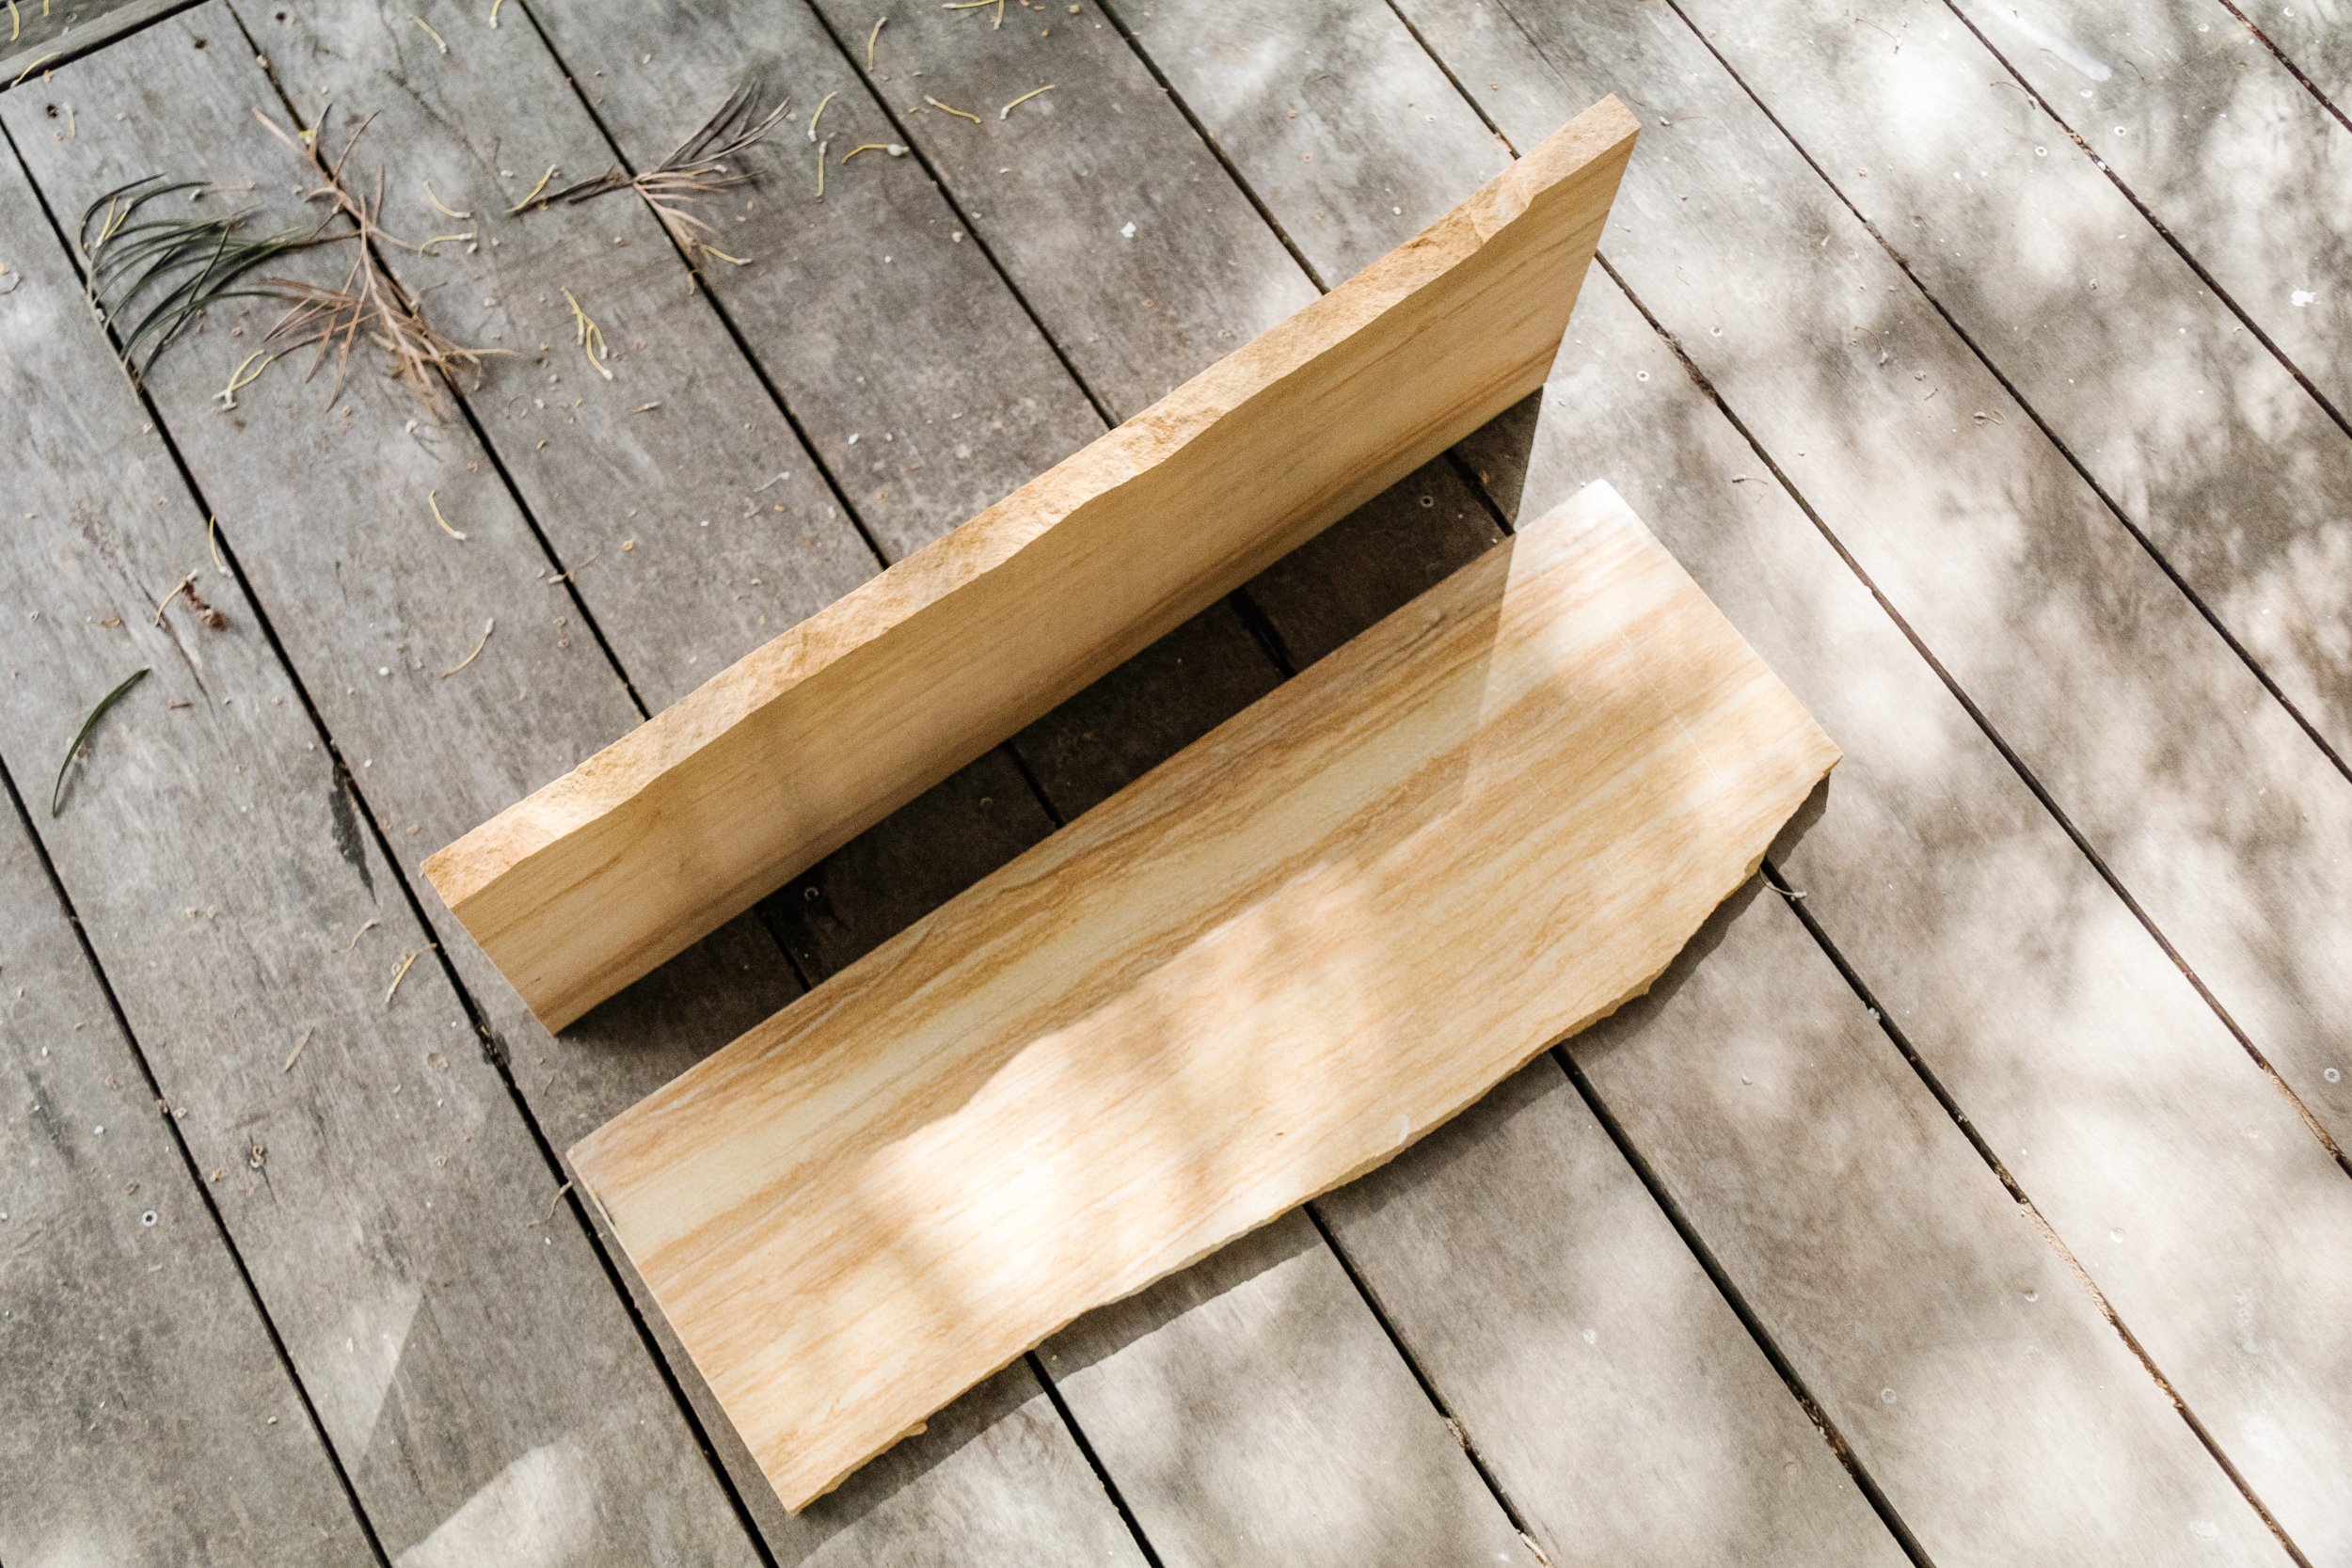
Start by placing two thick placemats or two magazines side by side on the ground and leave a 2 inch gap between the (it’s probably best you work outside for this step!). Place a sandstone paver right over the top and using the hammer, lightly but firmly hit the paver in the centre to encourage it to crack down the middle. Do this until you have 3 pieces of cracked/broken sandstone. They will need to be the same height/same height as the existing paver for this to work.
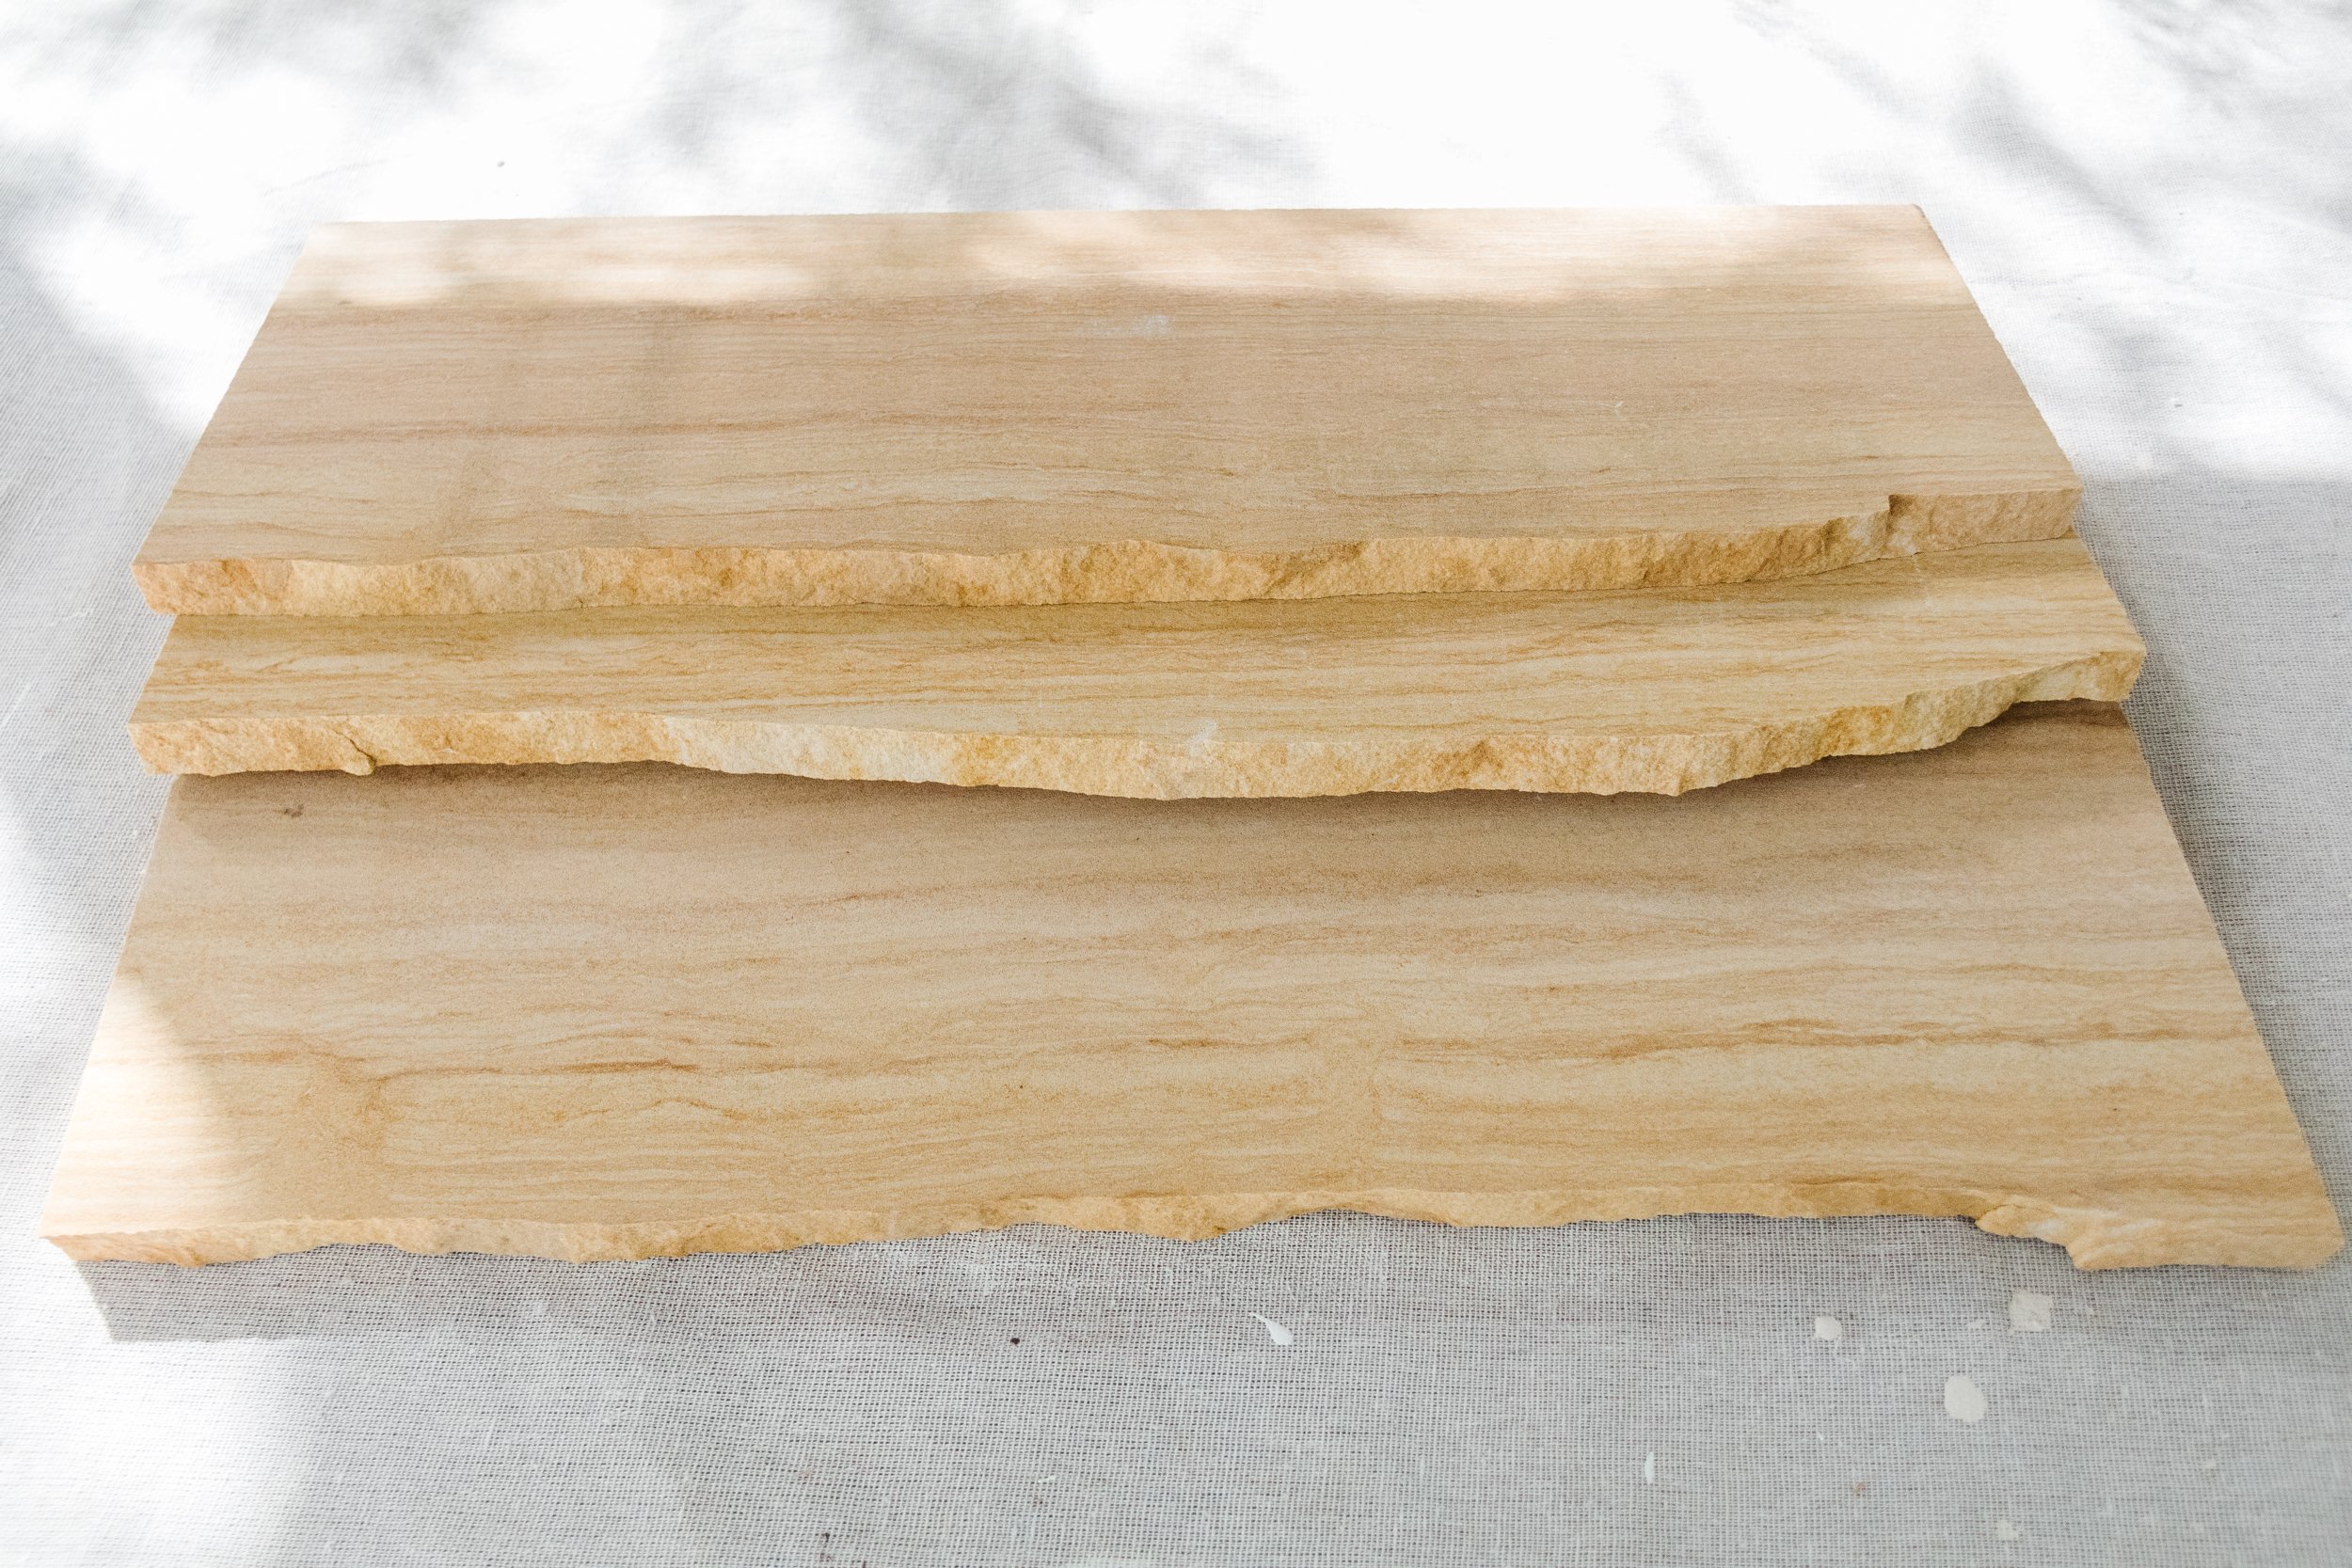
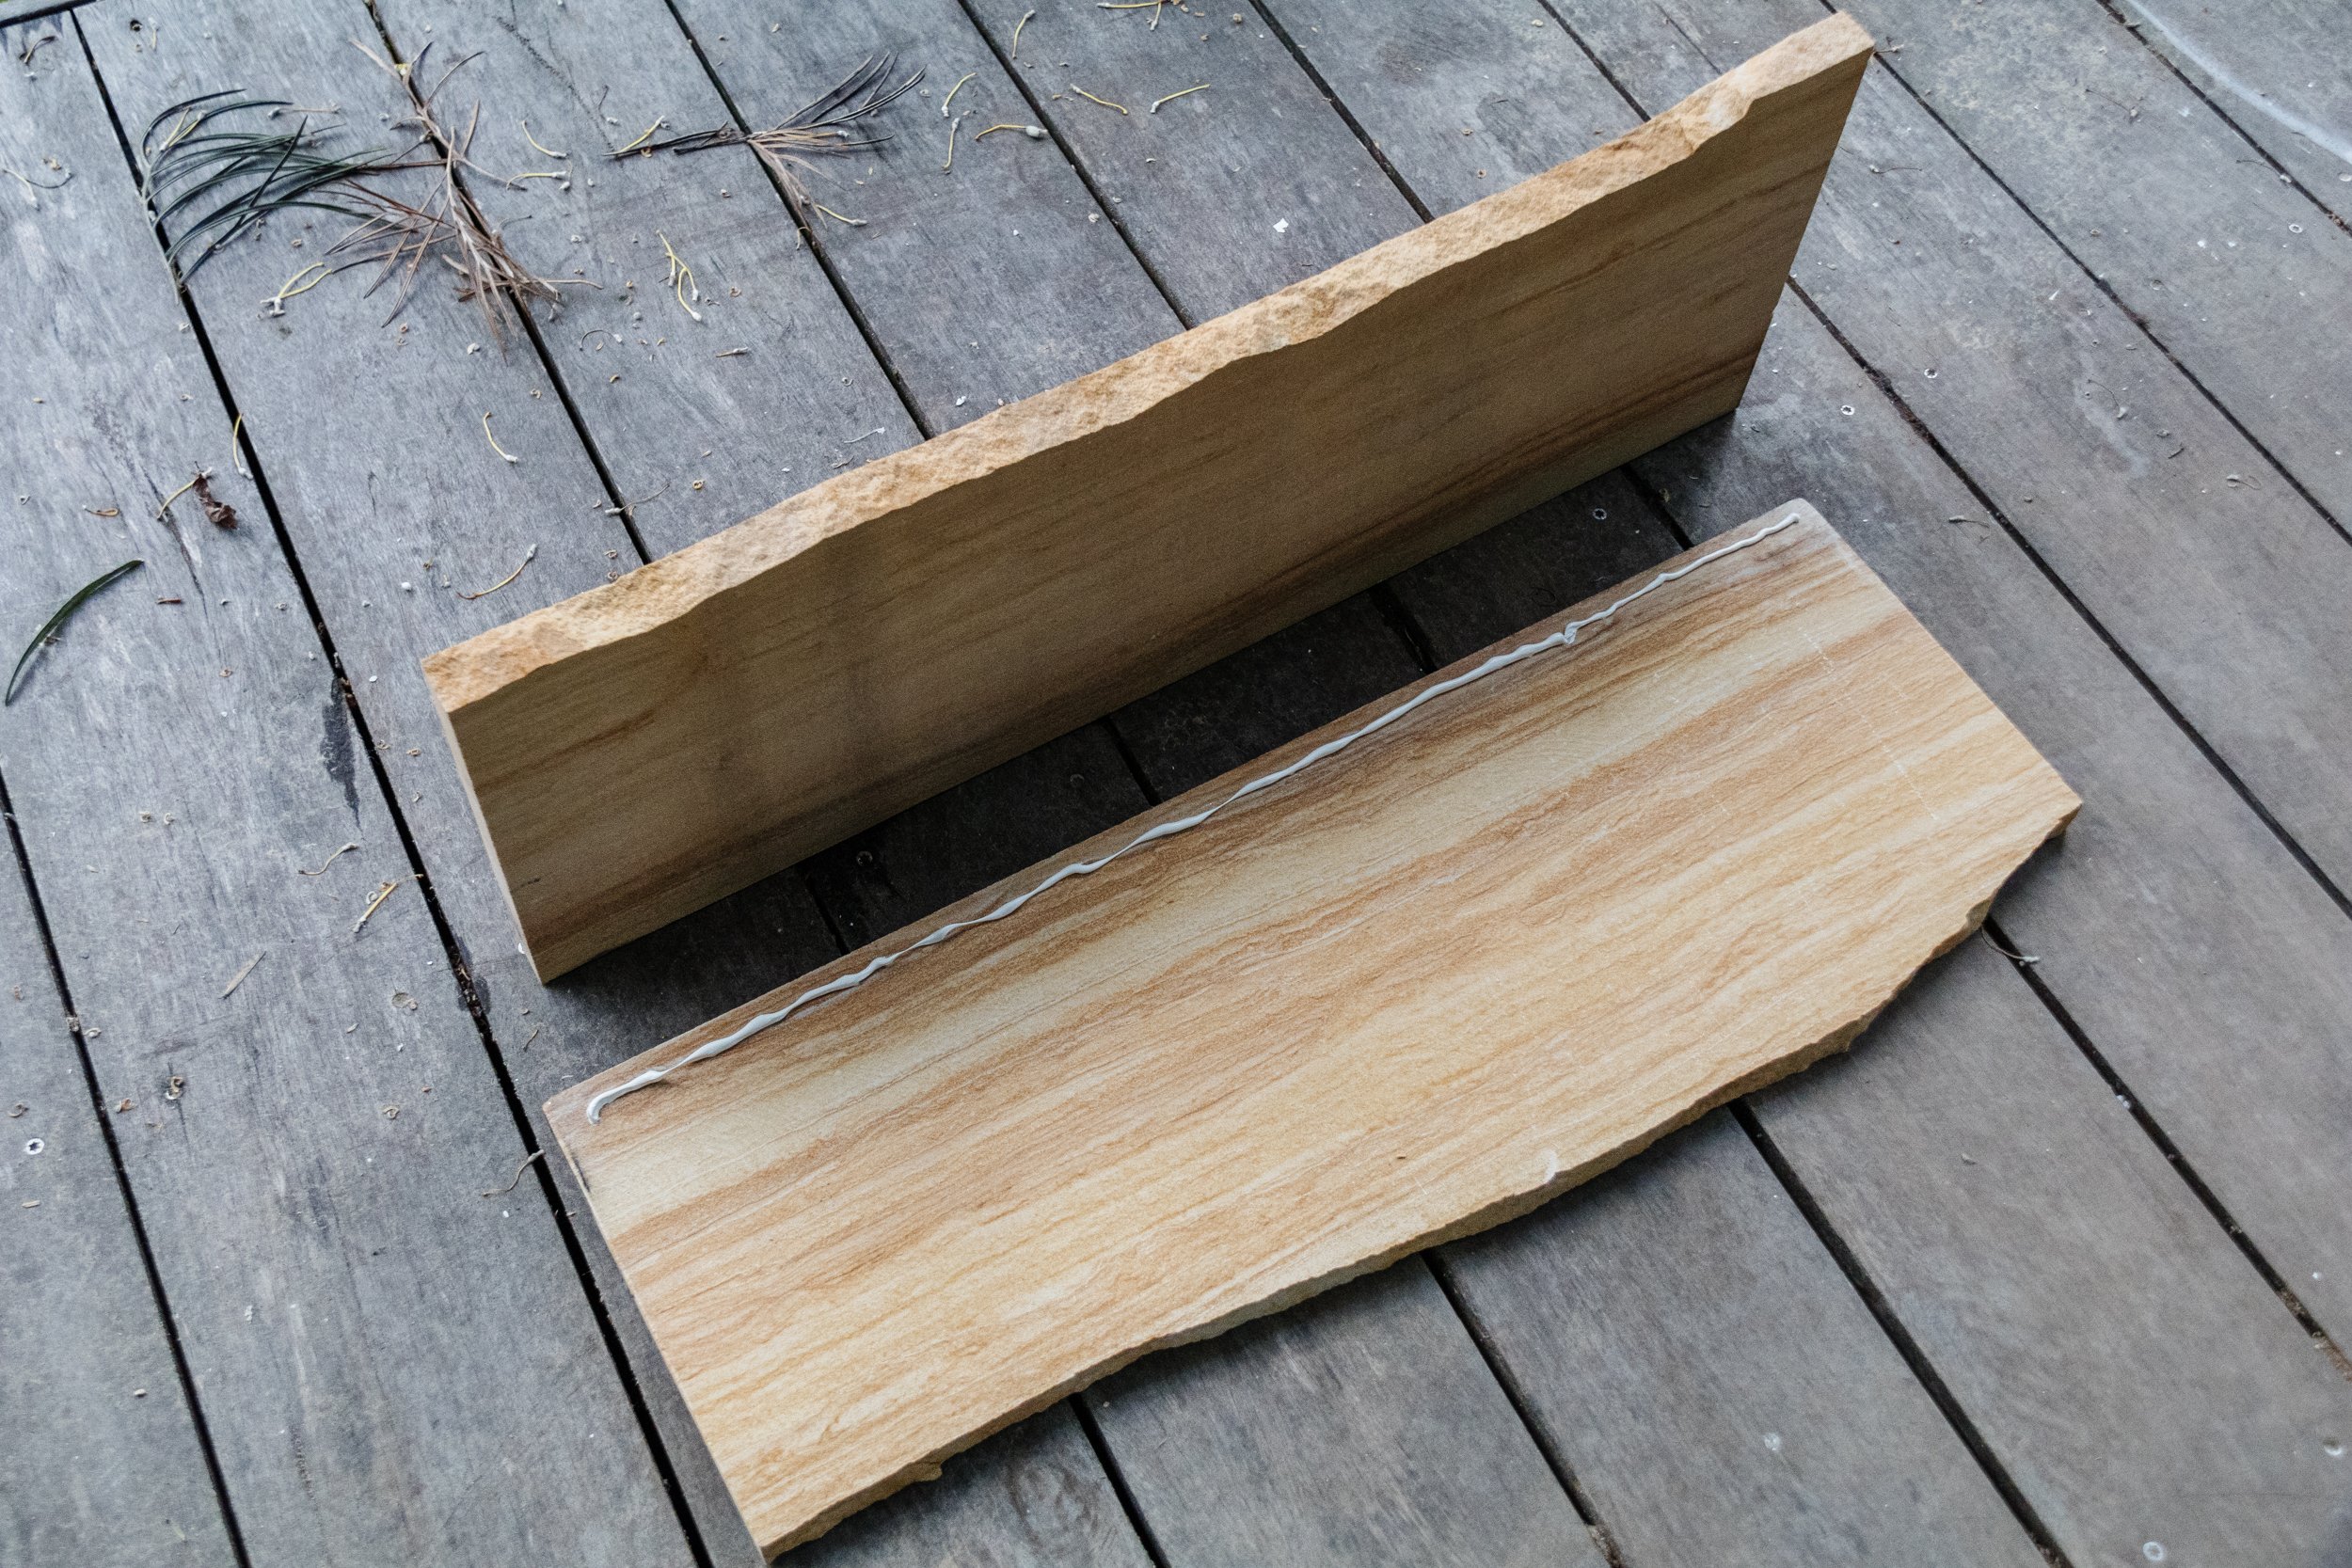
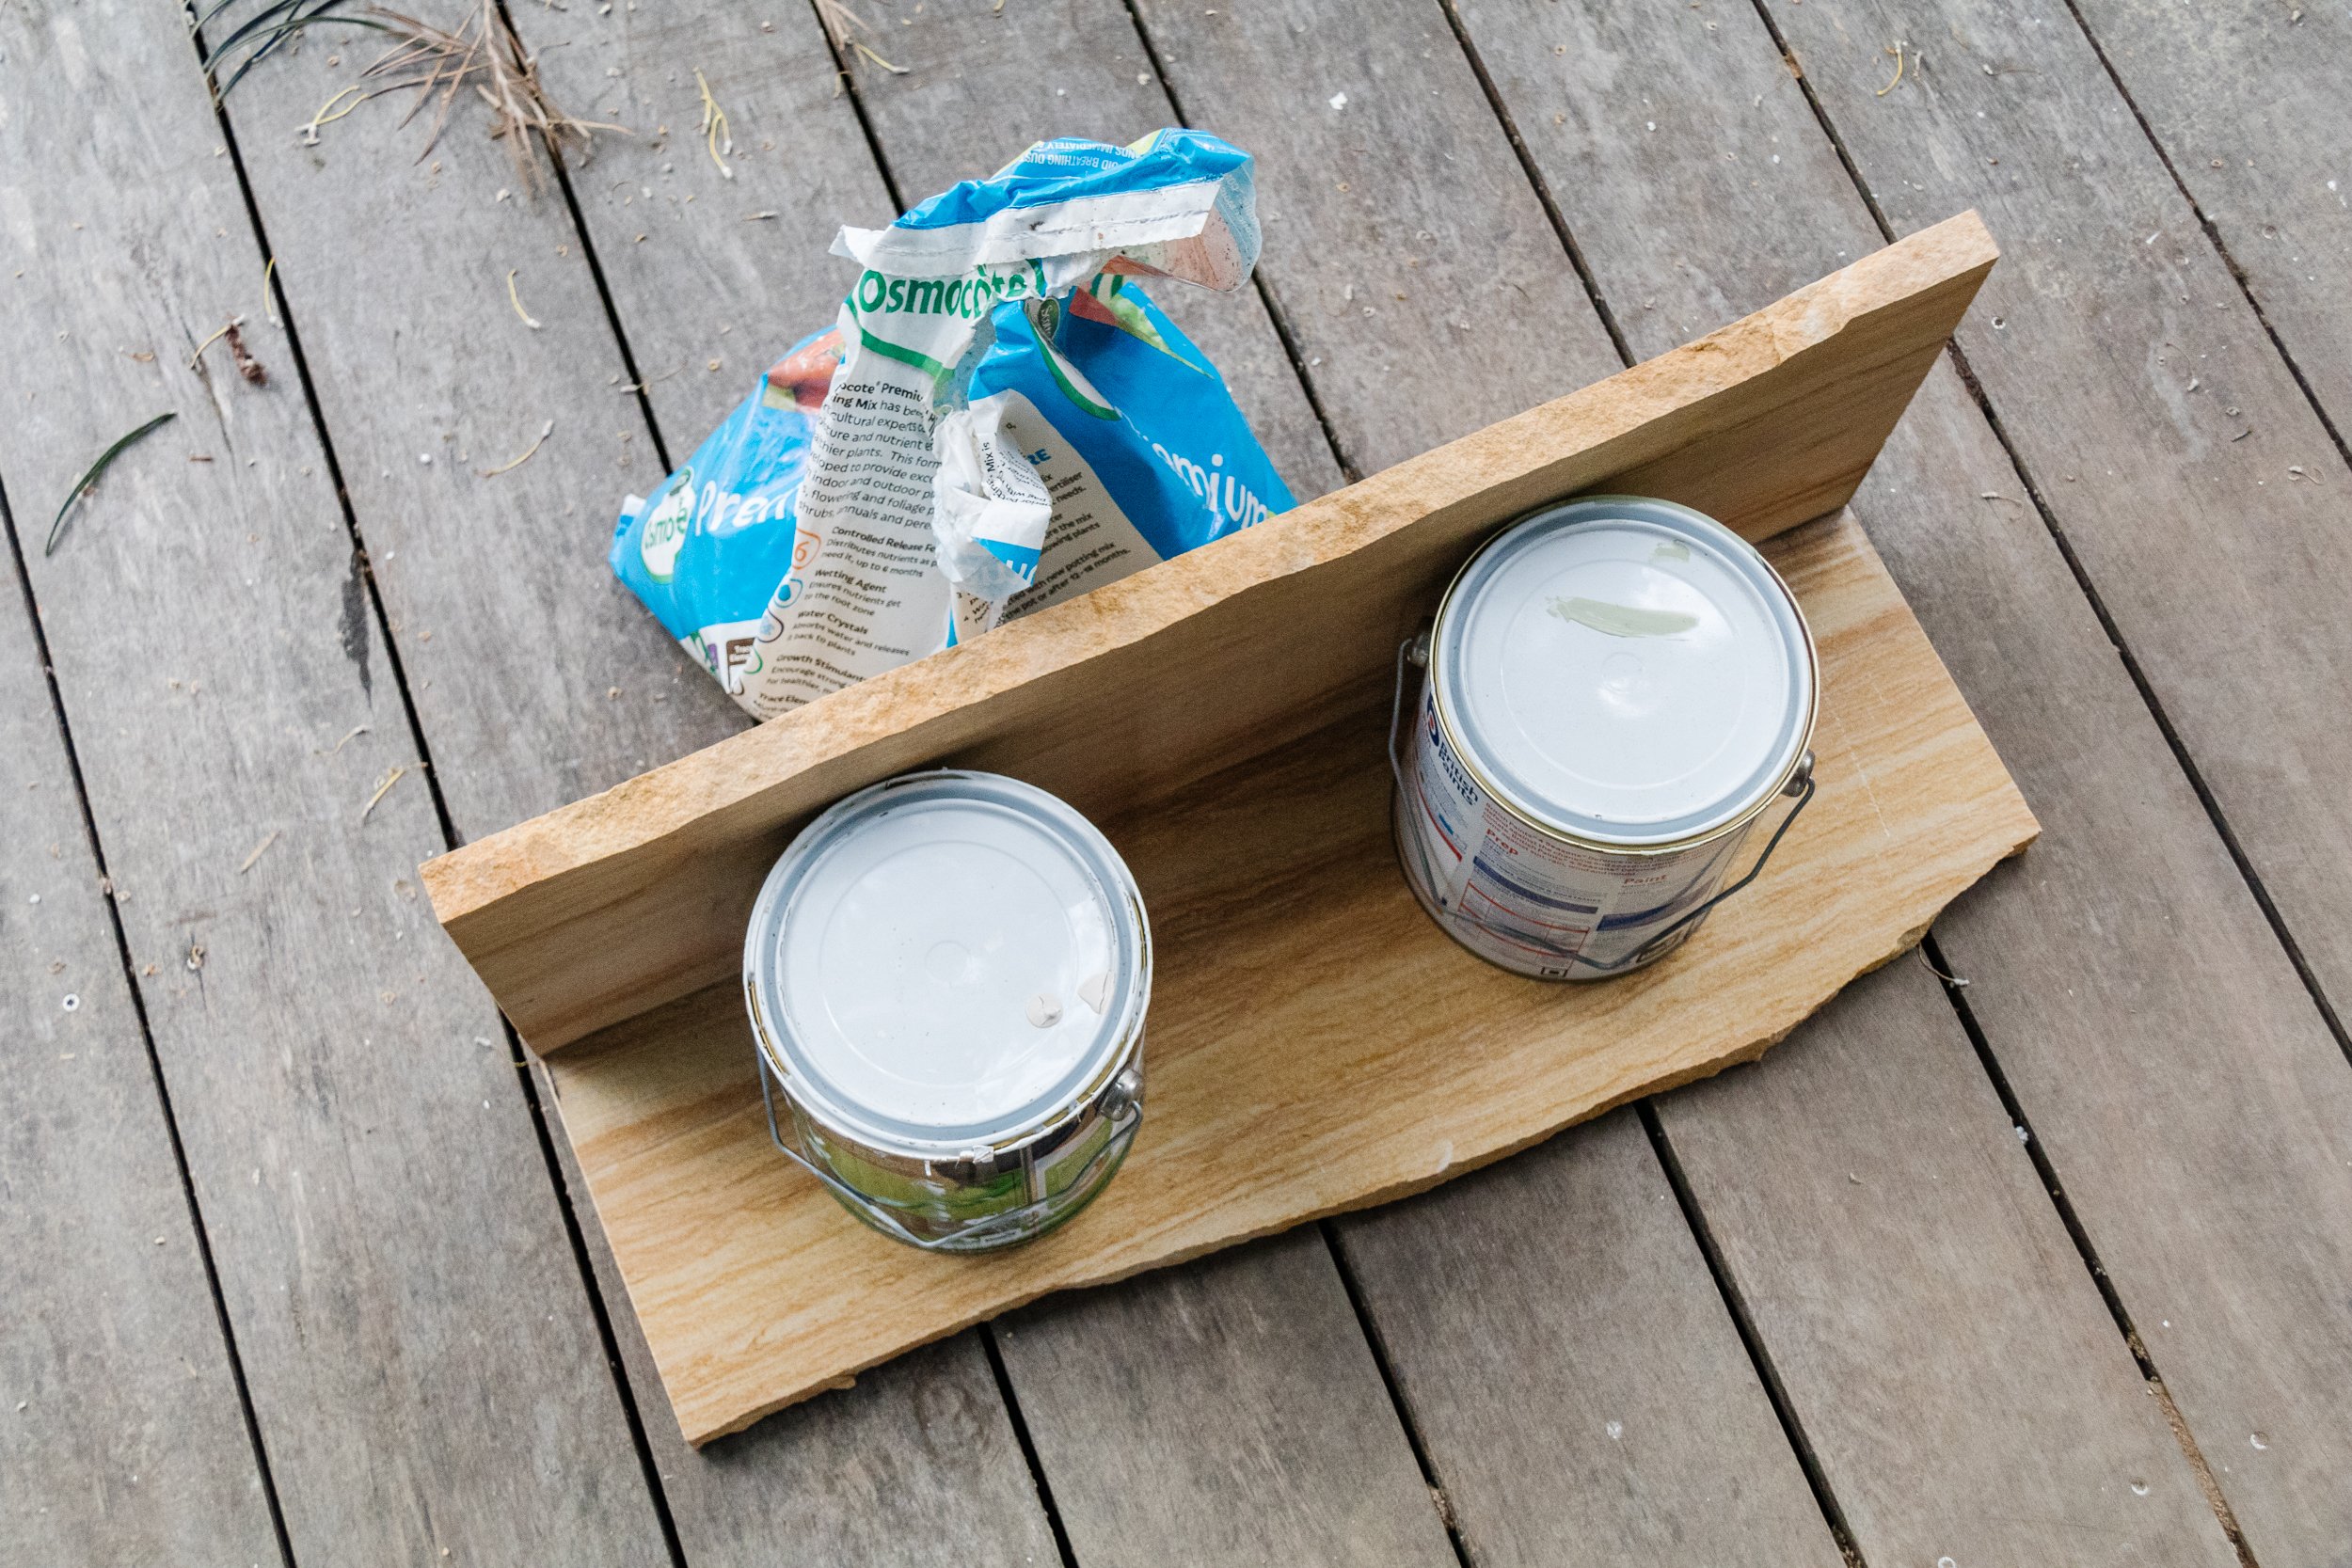
Glue two pieces of broken sandstone along the straight sides by placing one on top of the other at a right angle. Prop heavy items either side of the standing piece of sandstone to keep it from falling over; I used a bag of potting soil and paint tins.
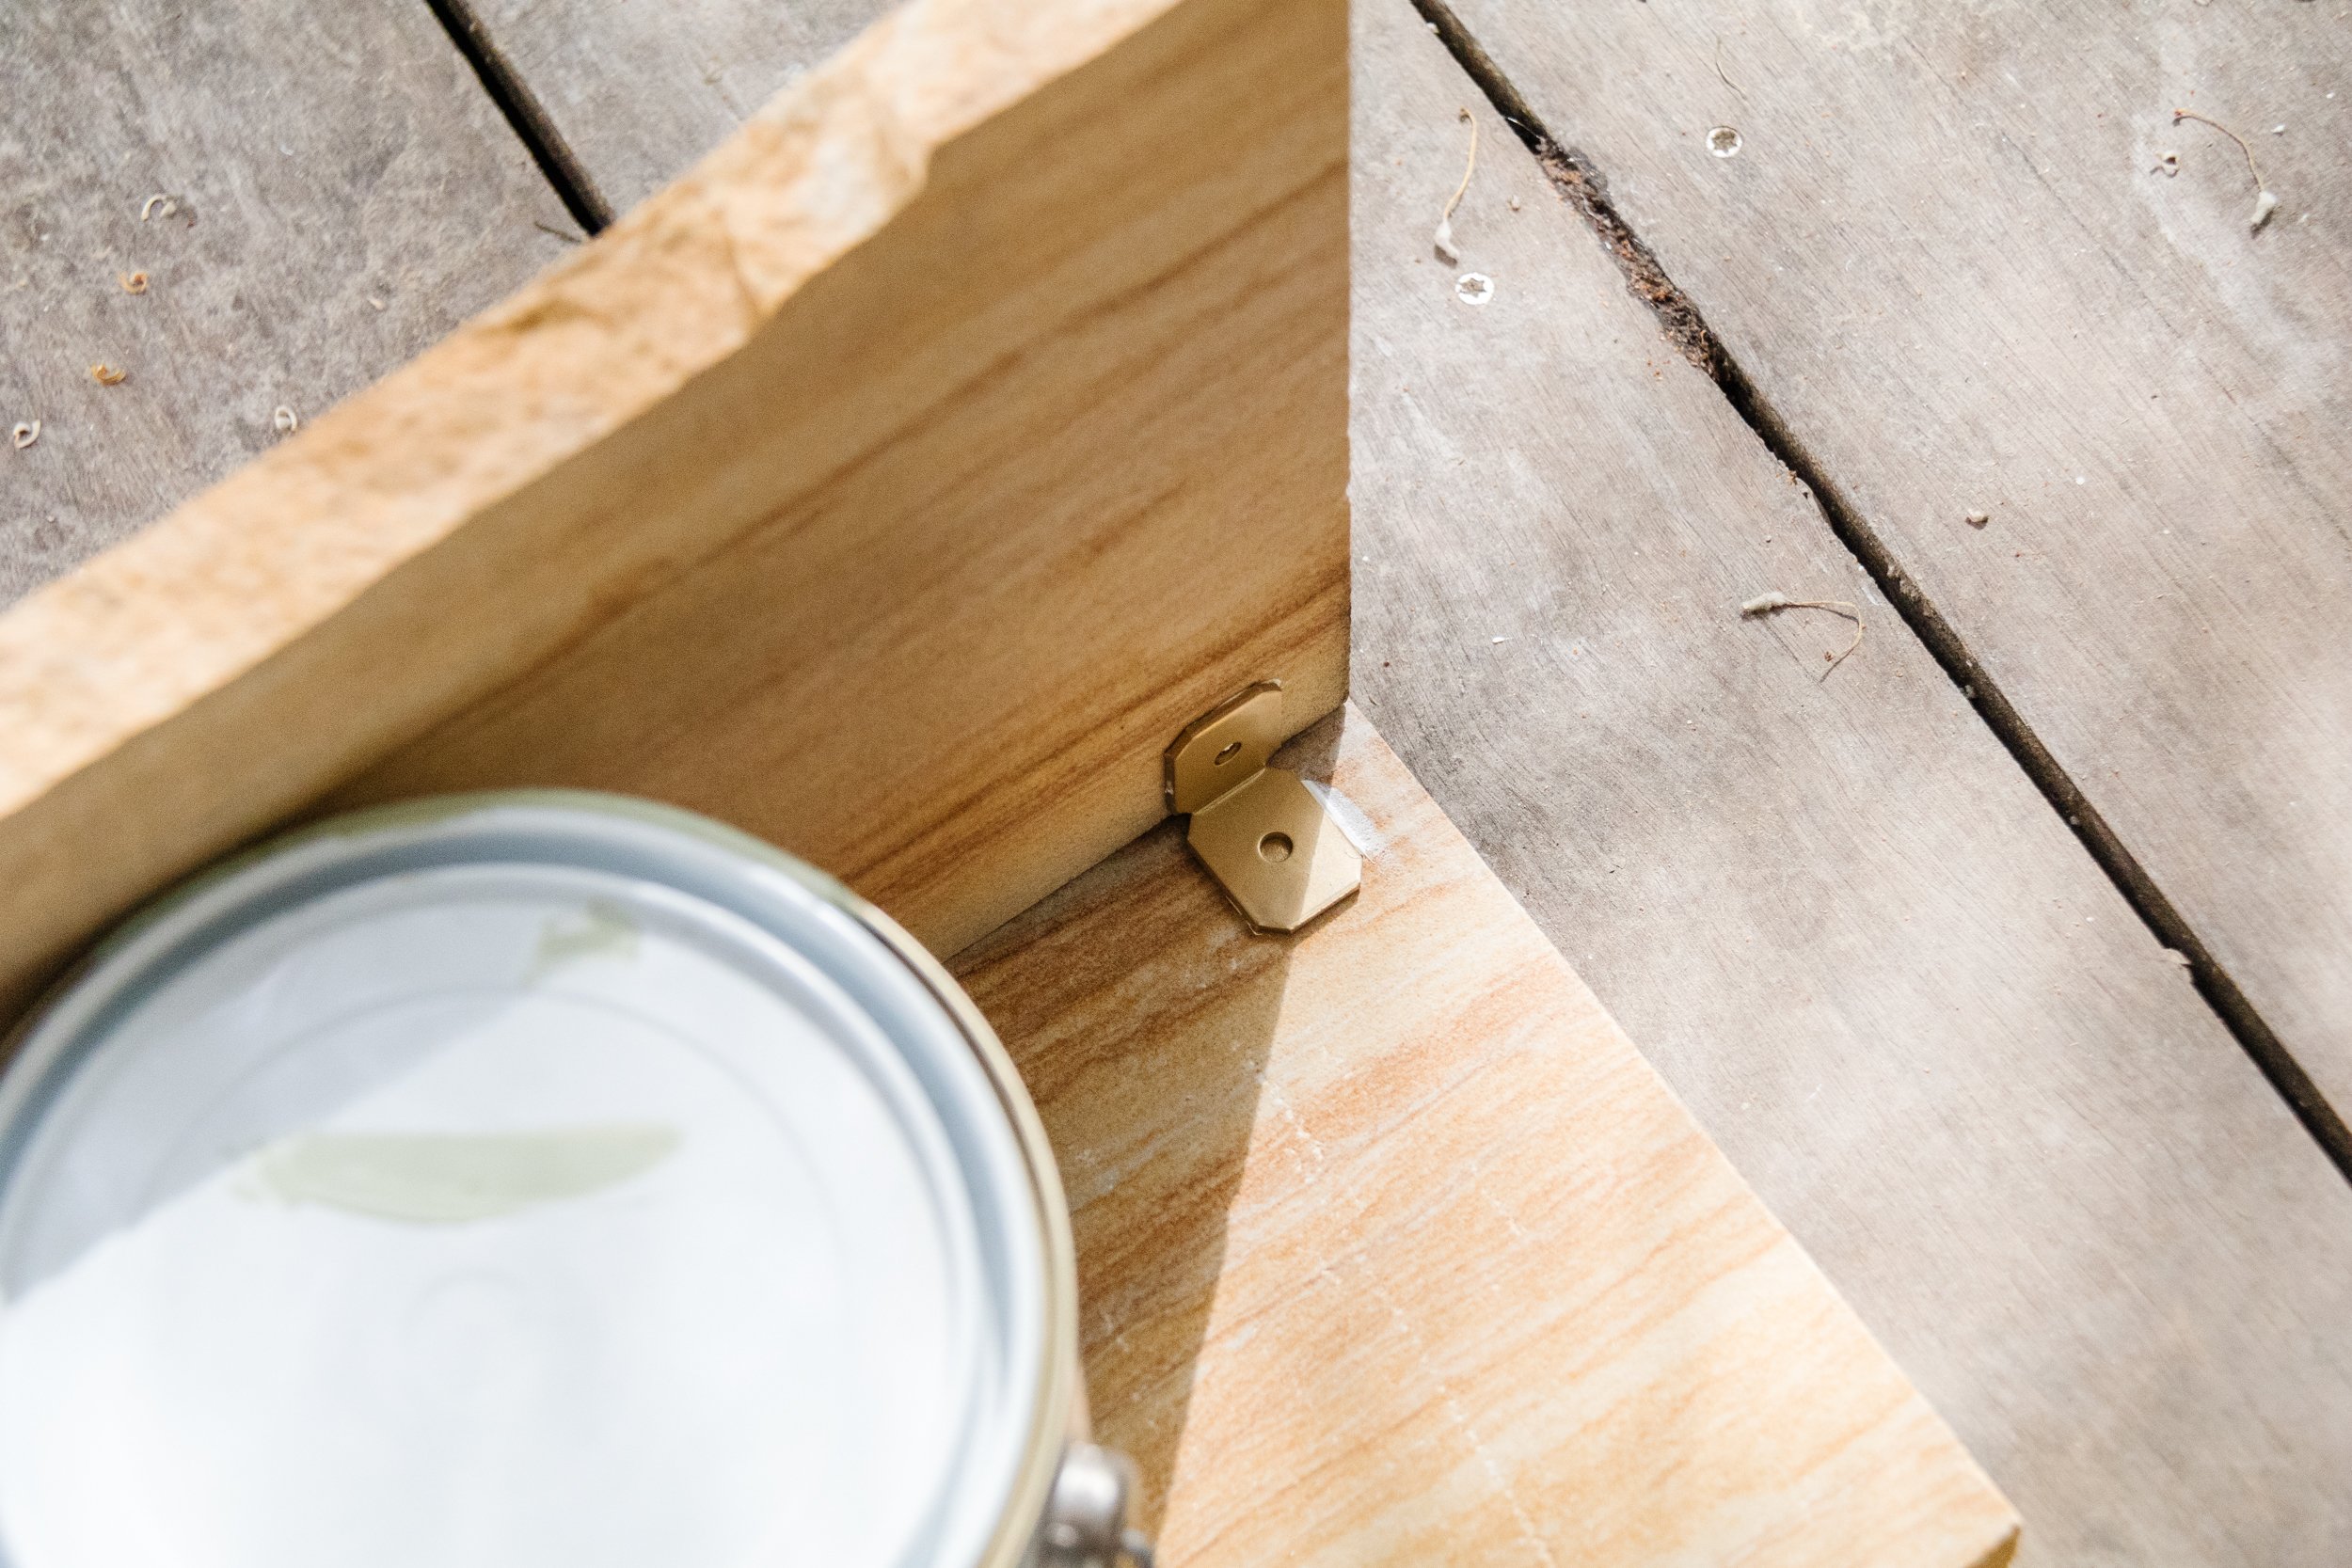
Using gold spray paint, paint the L bracket and then glue it to the top end of the sandstone. Set aside to dry overnight and at least 24 hours.
DAY TWO
Stand the glued sandstone pieces up. Stand the second piece of sandstone up. Place Selley’s mirror glue either on the underside of the mirror or on top of the sandstone pieces (the latter is easier), and place the mirror on top. Set aside to dry for at least 24 hours. And then your new sandstone side table will be ready!
Please note: Always carry this side table by holding the sandstone and get someone to help you.
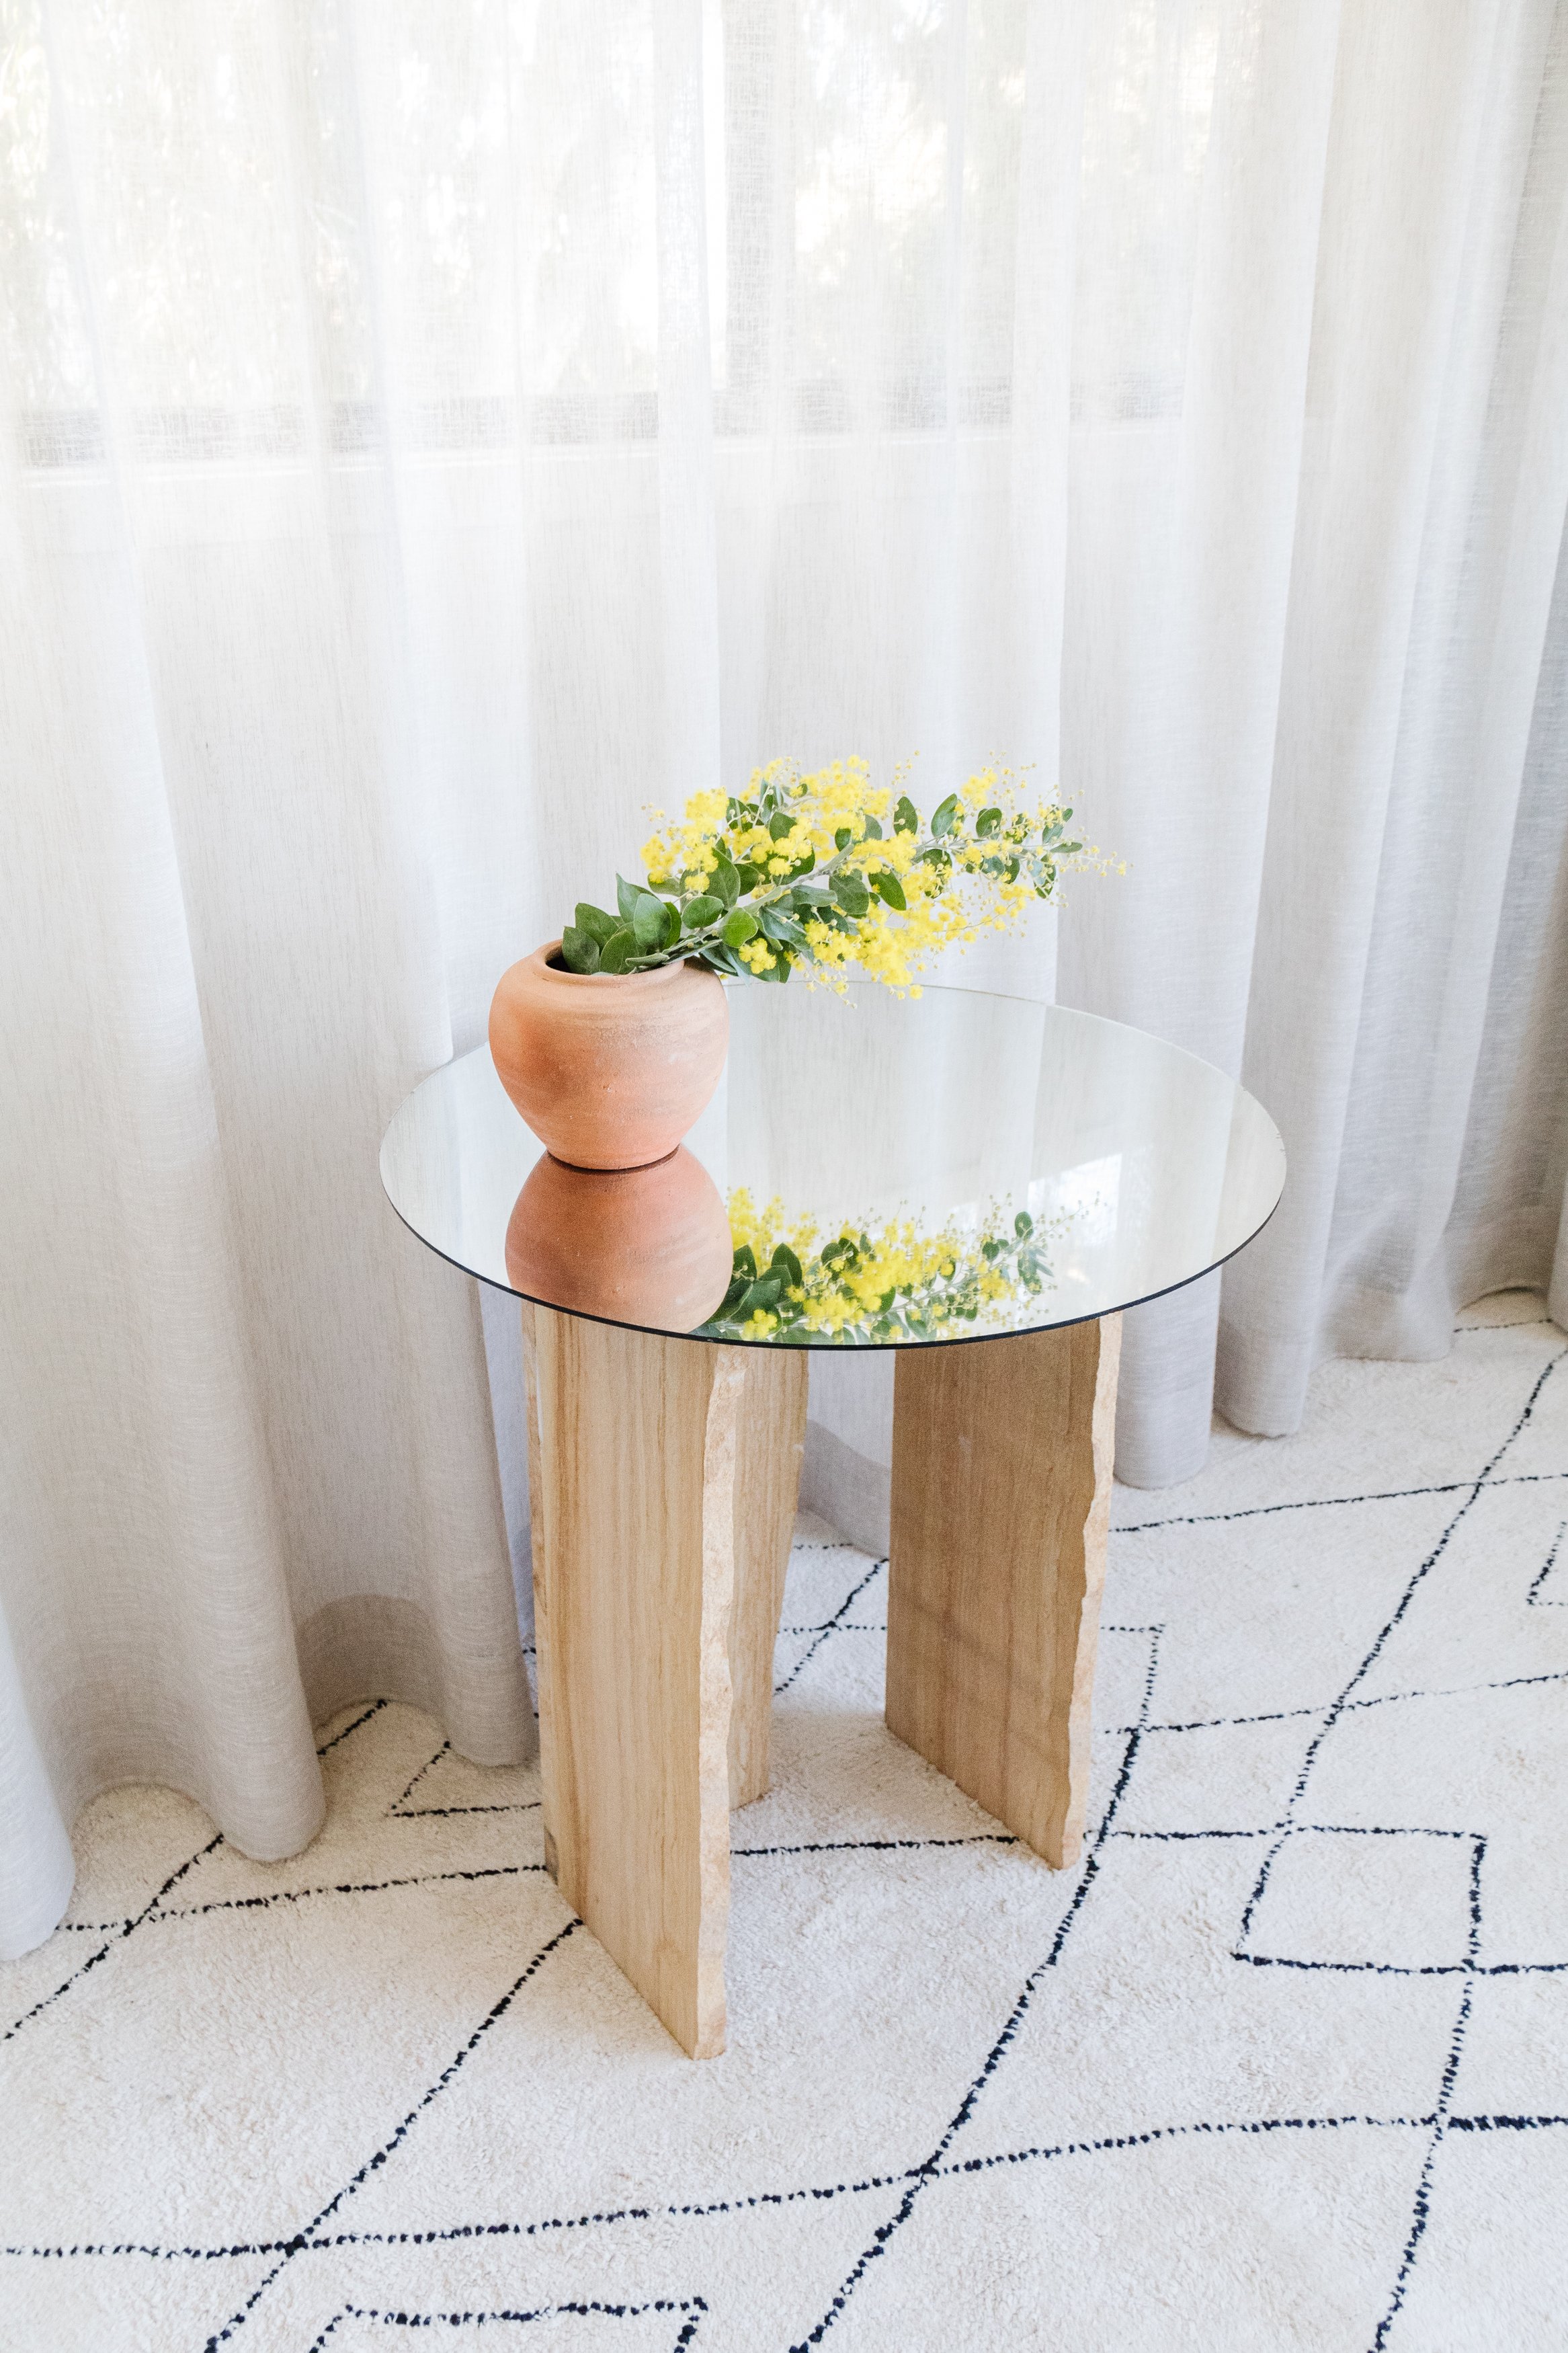
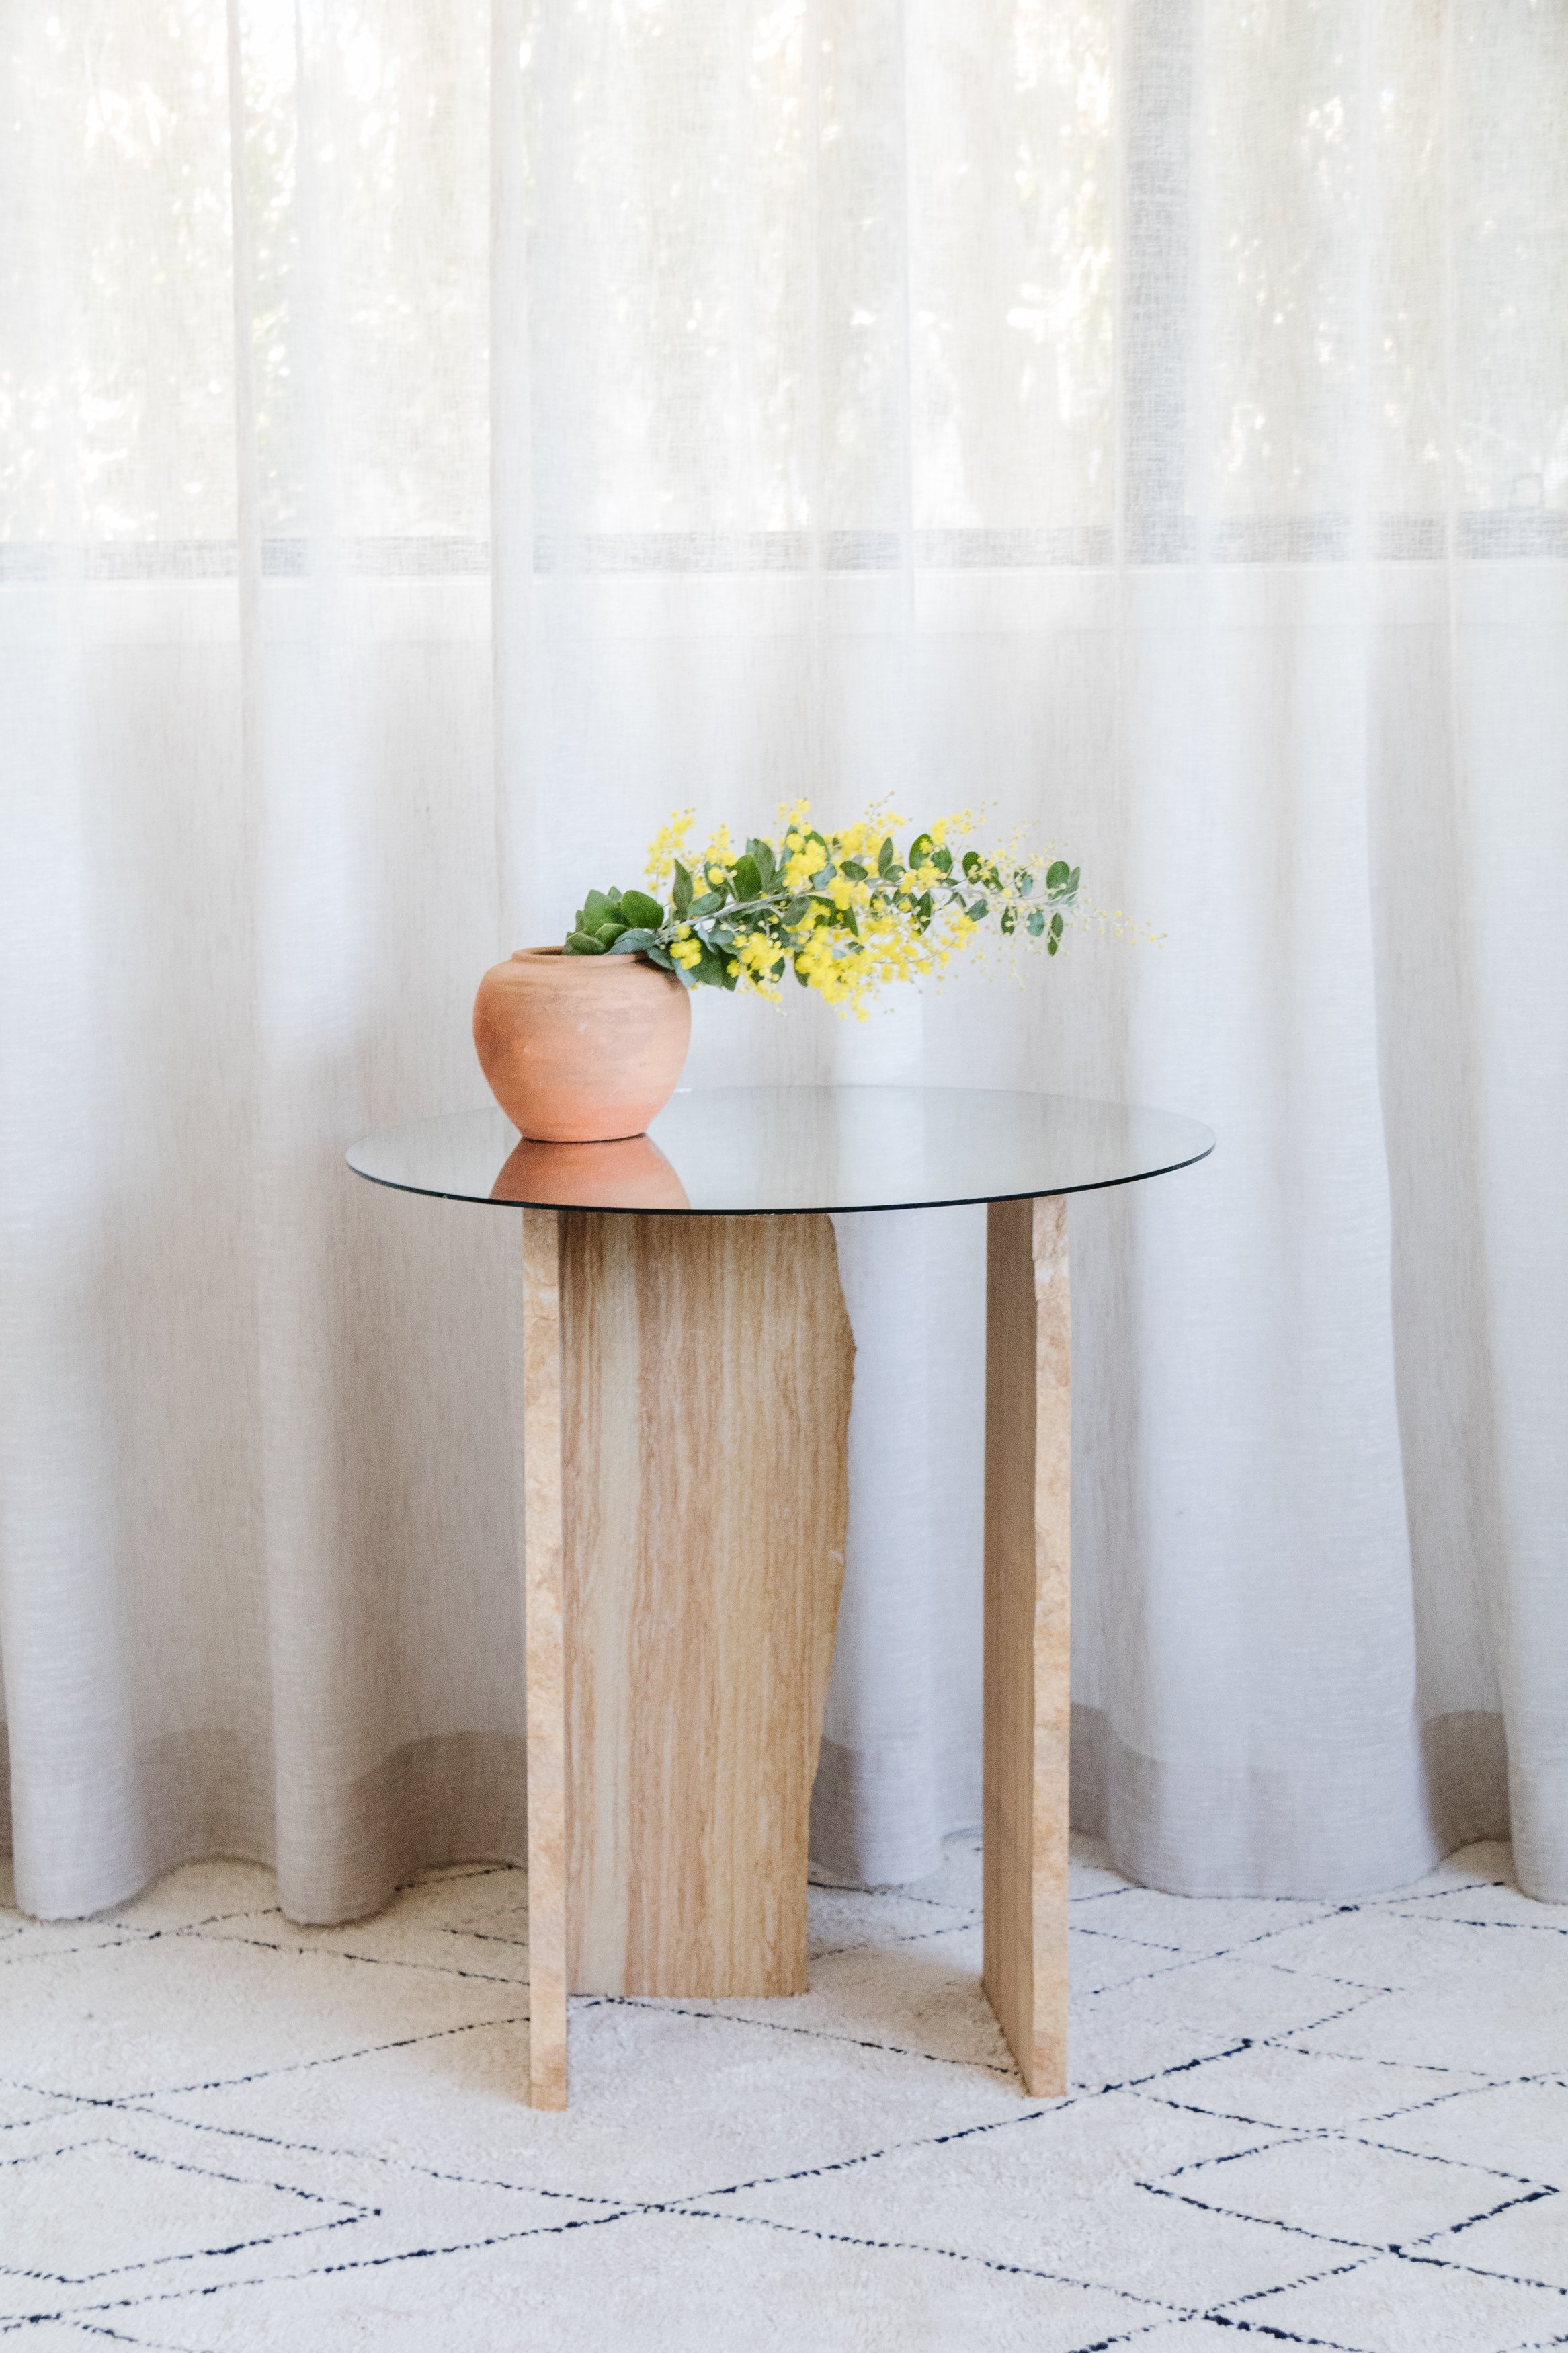
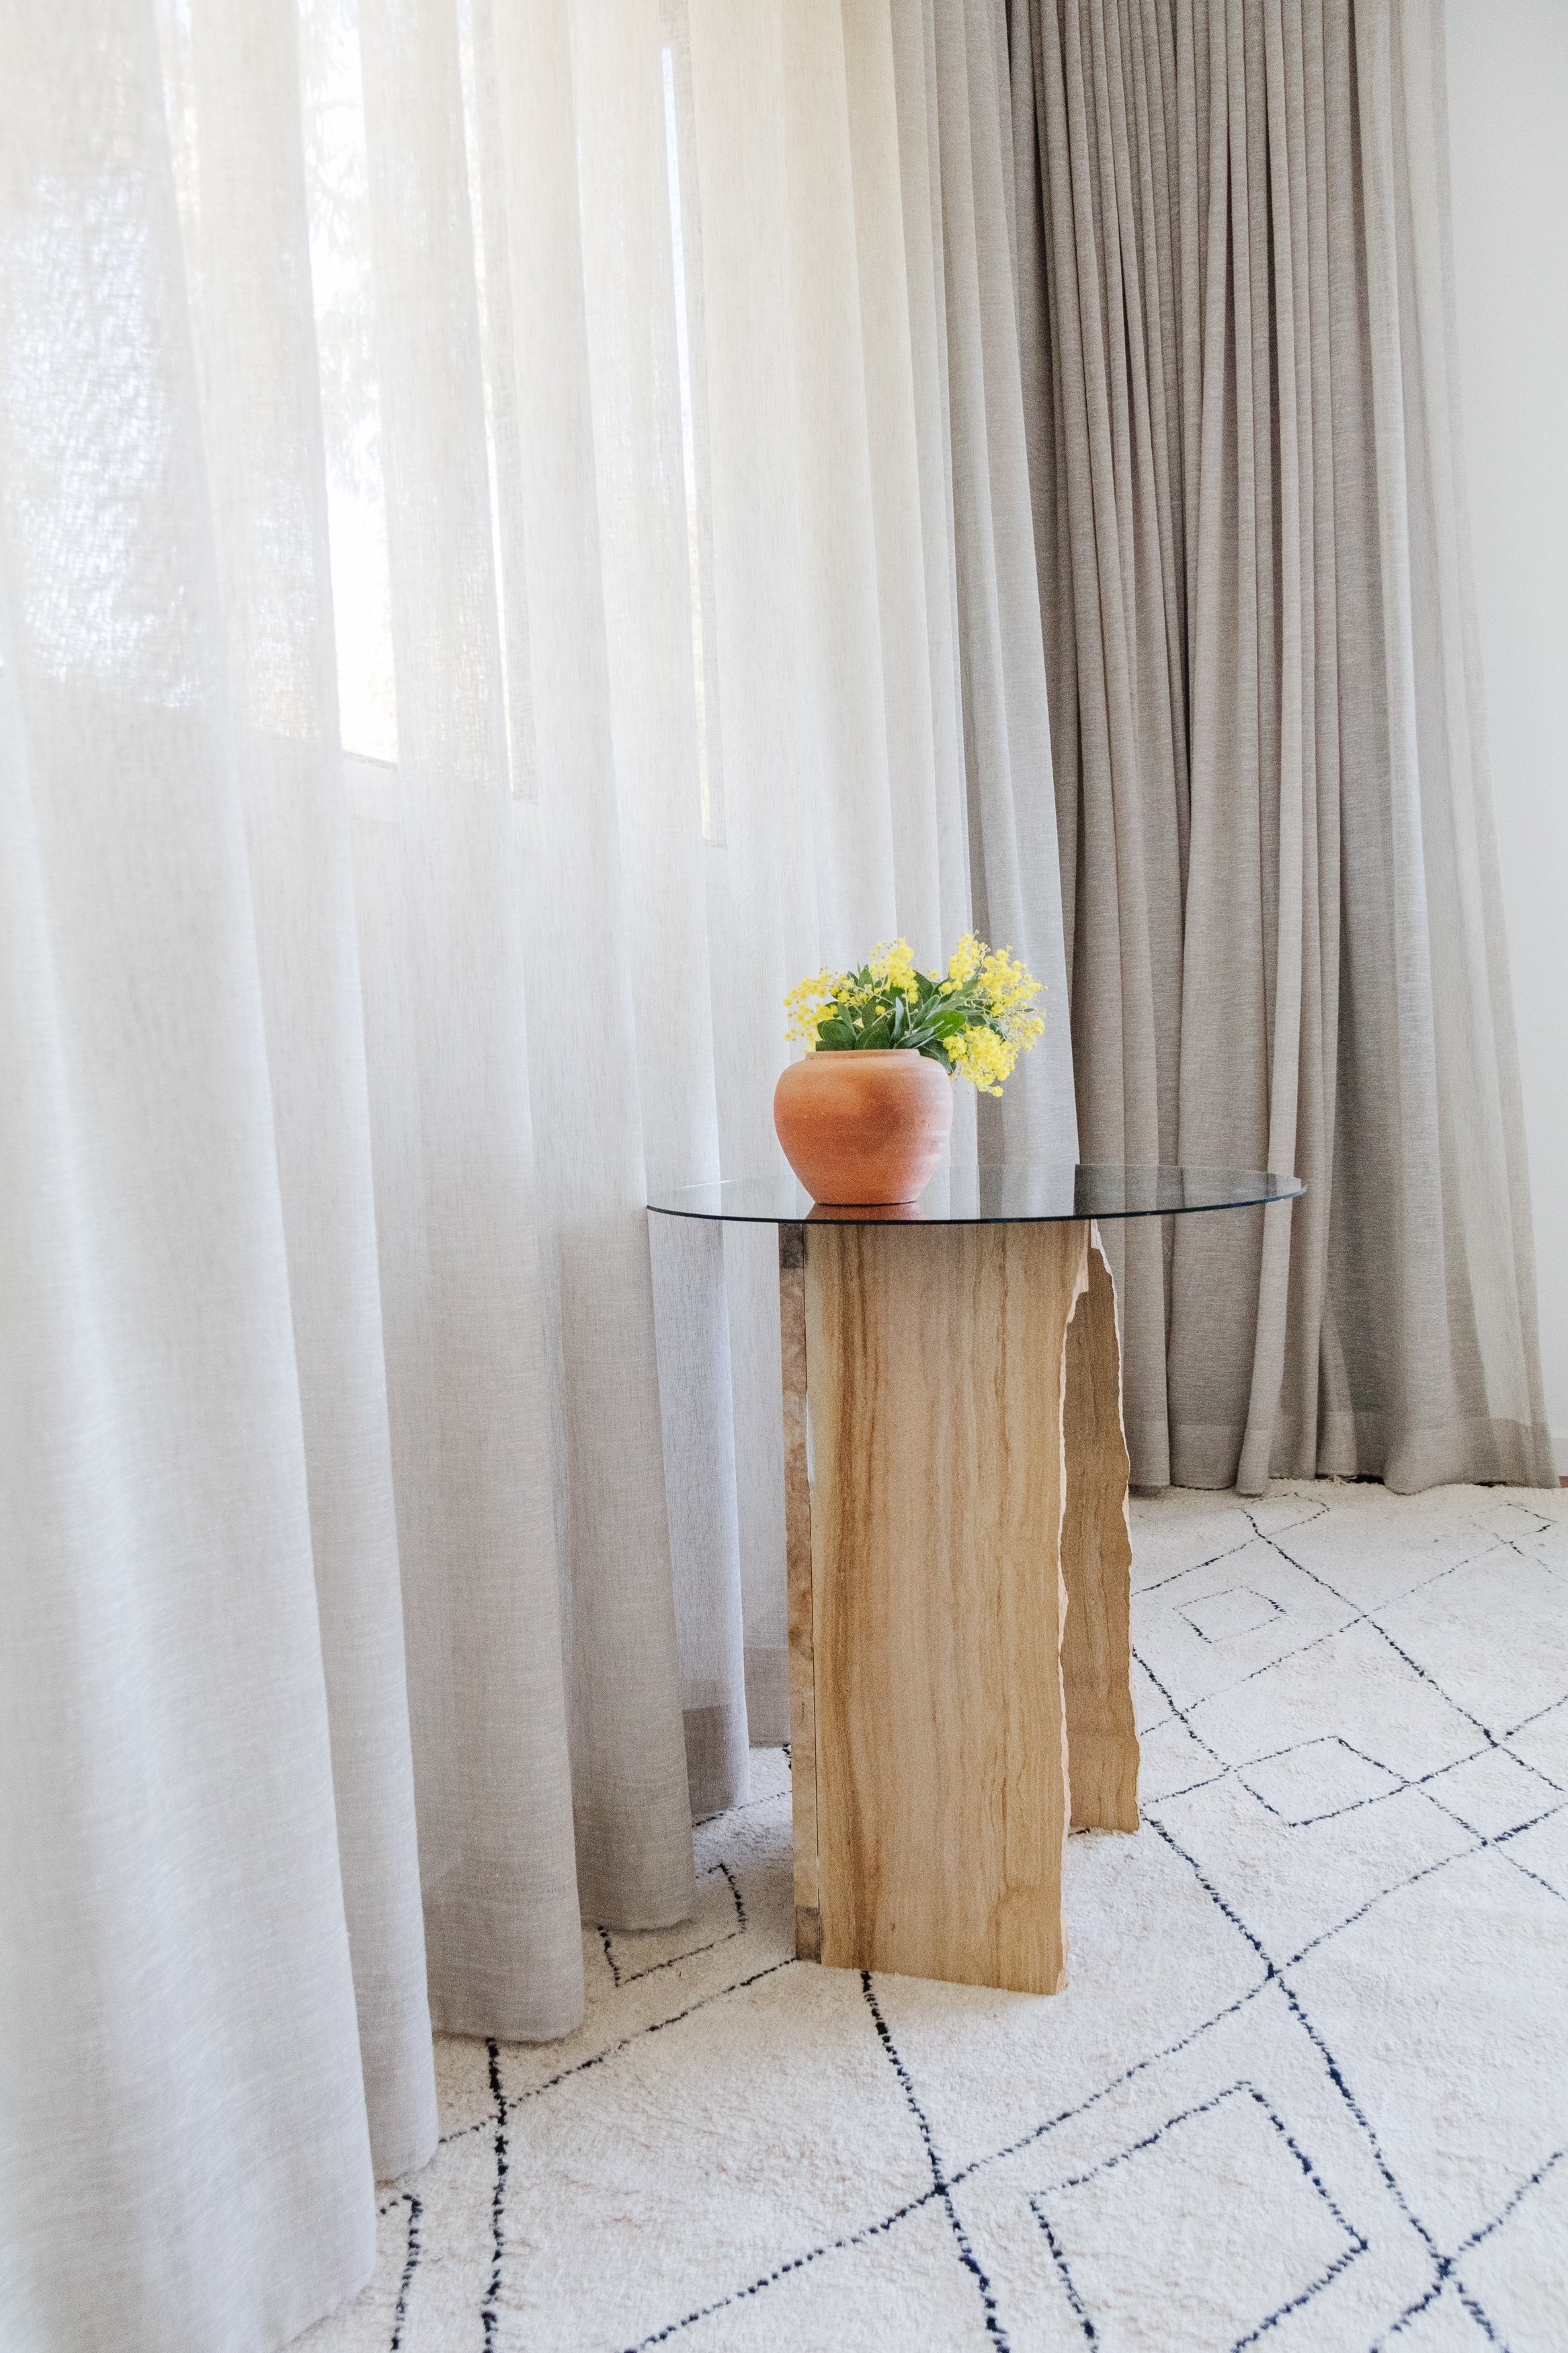
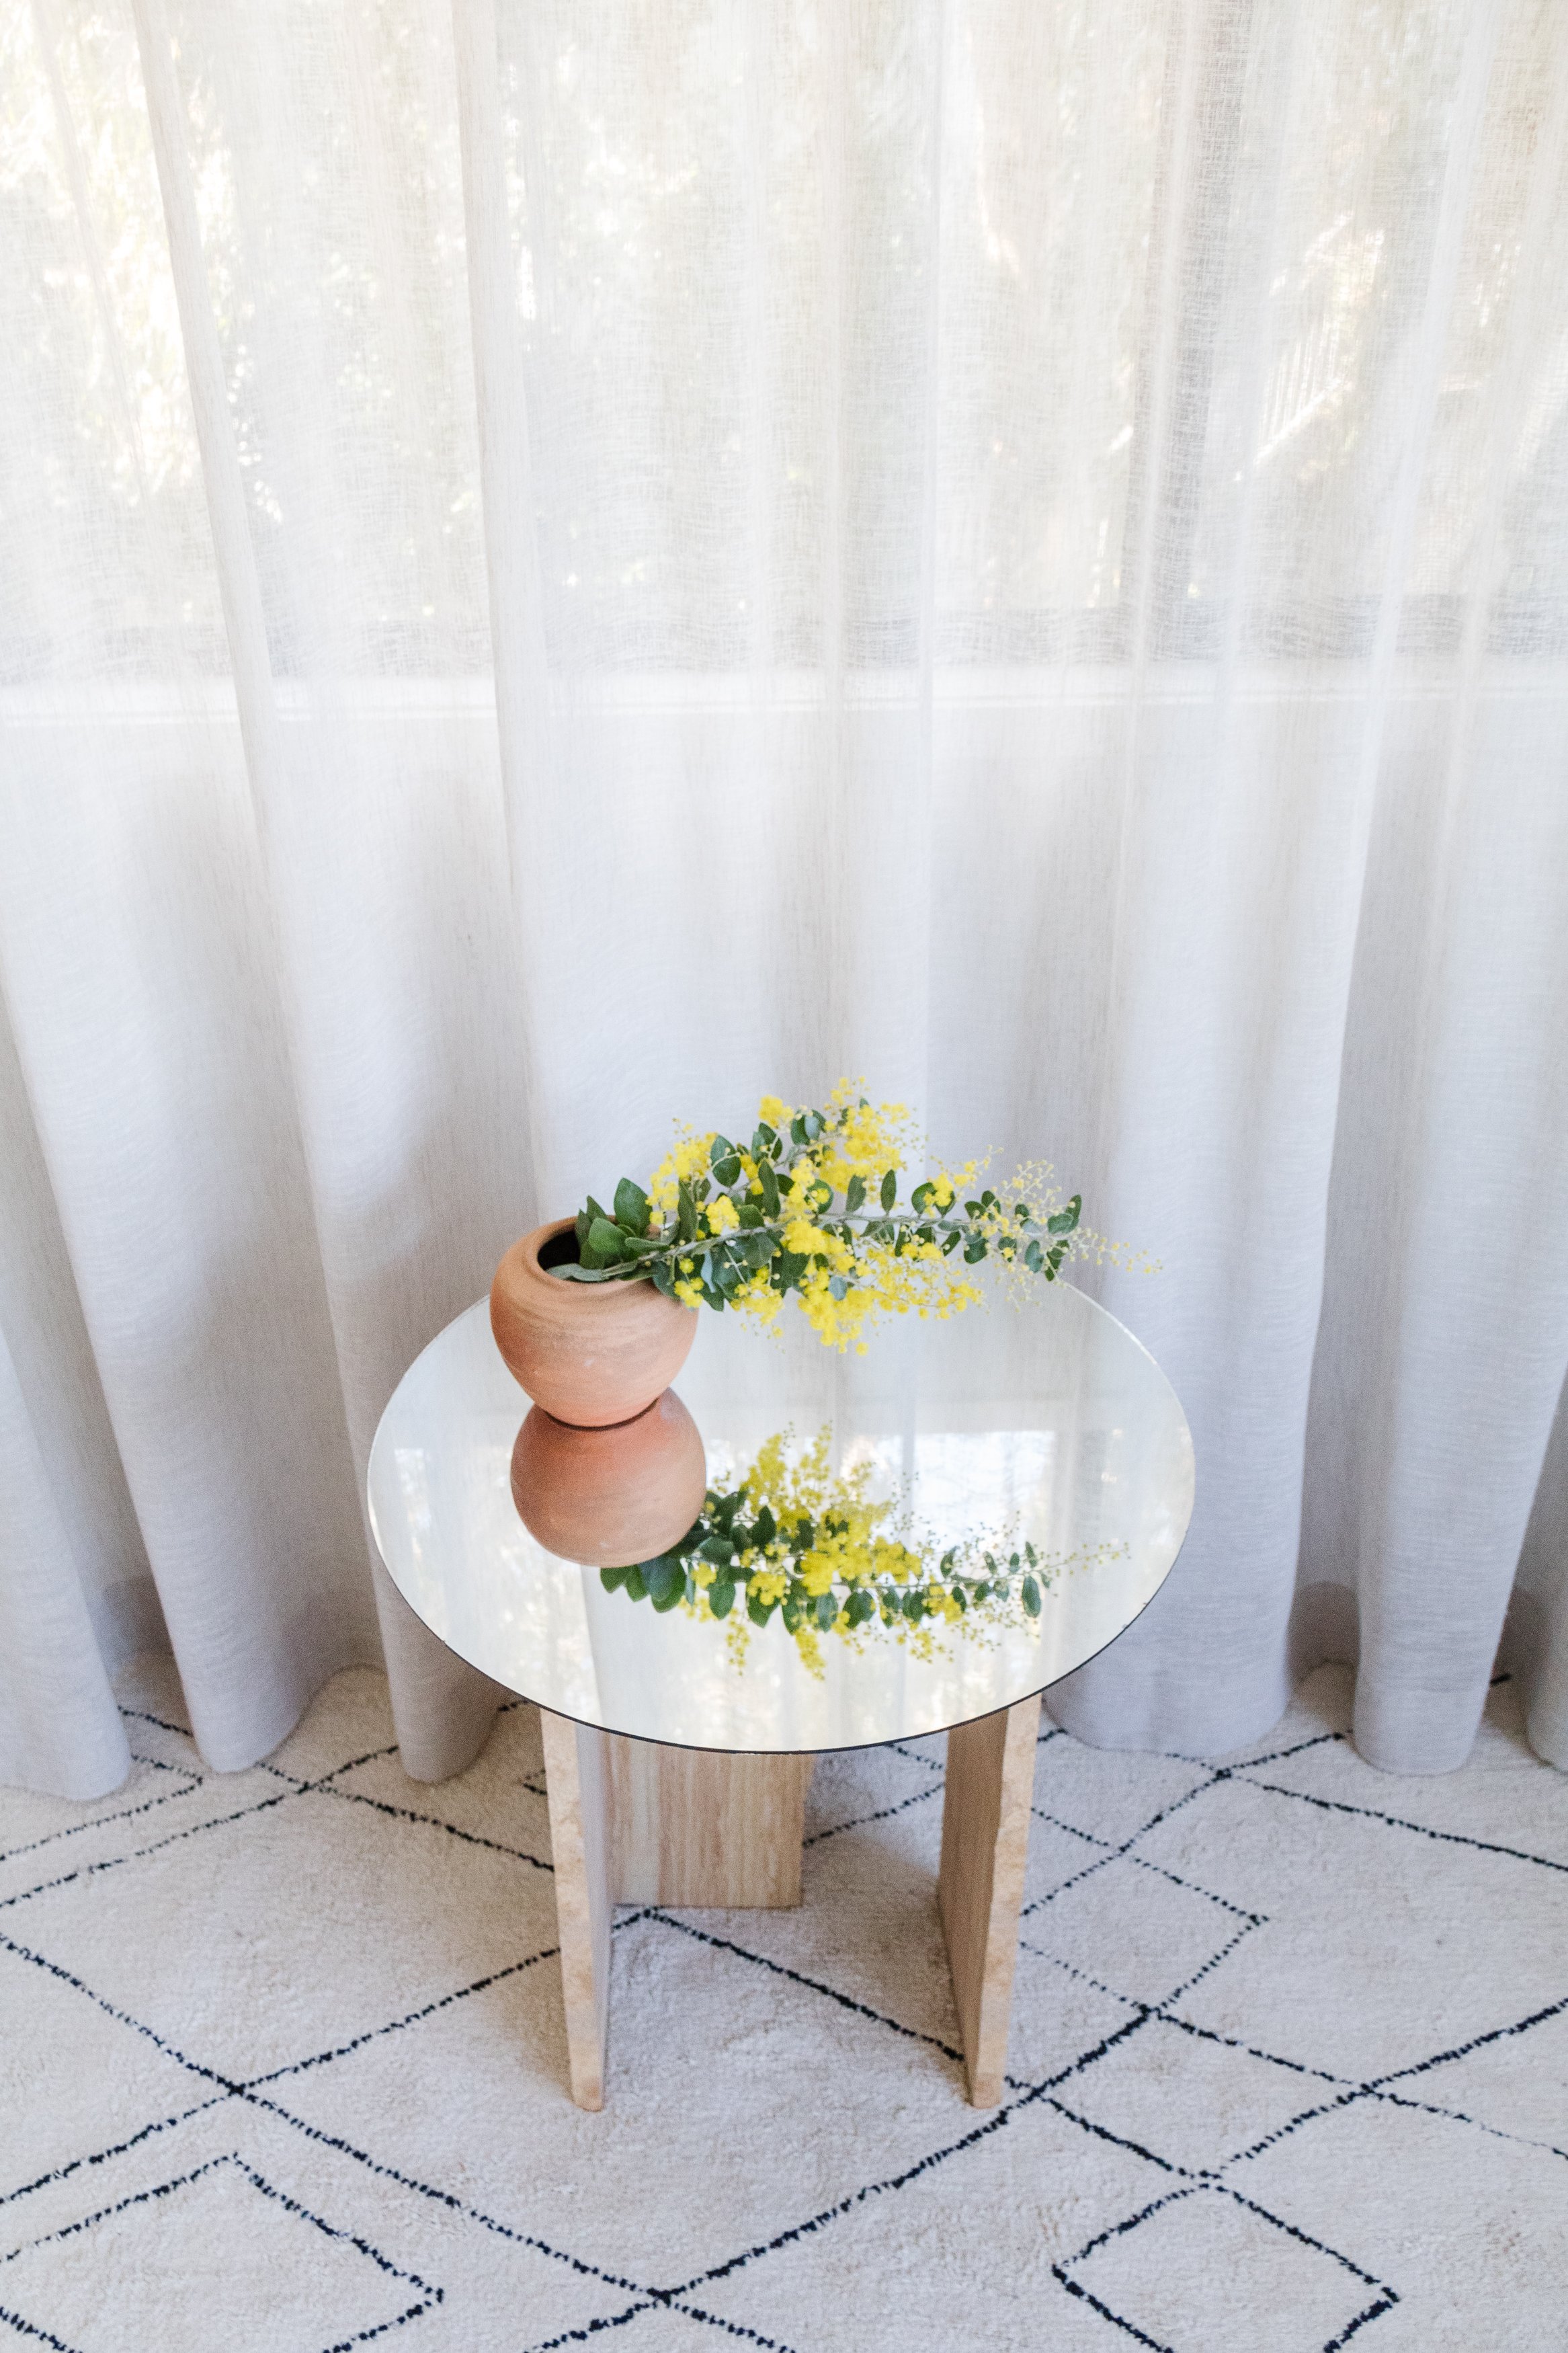
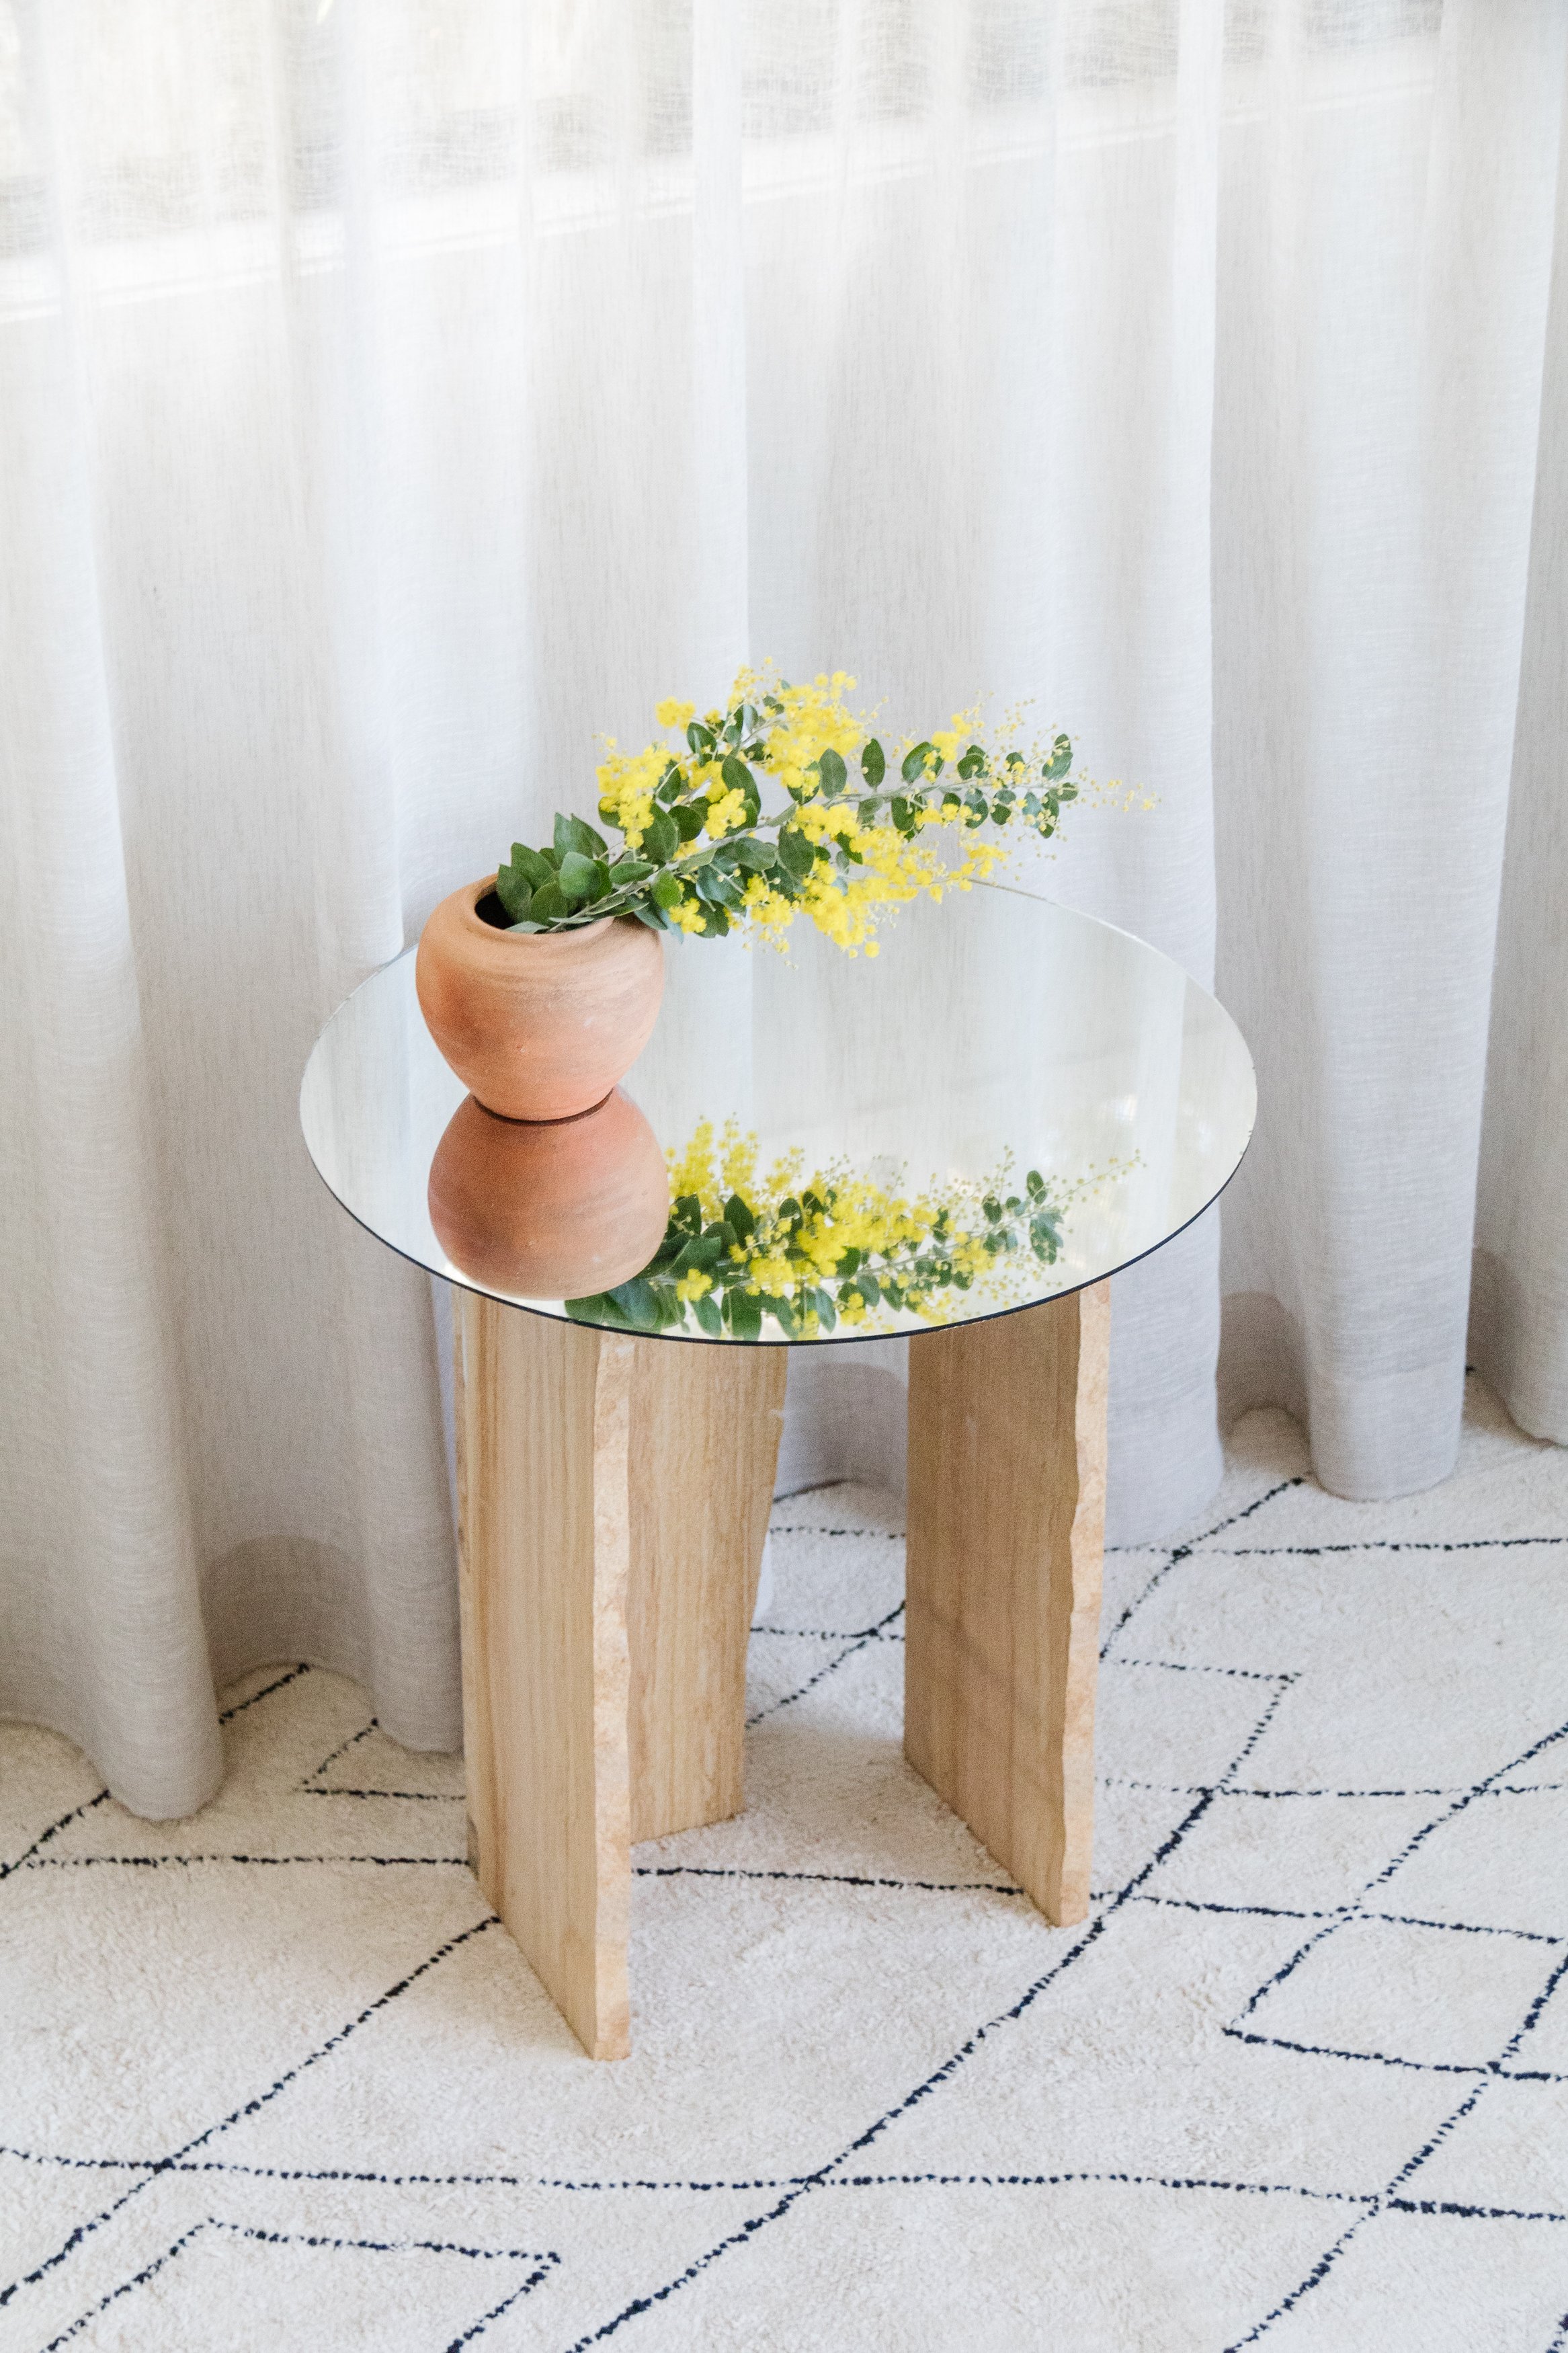
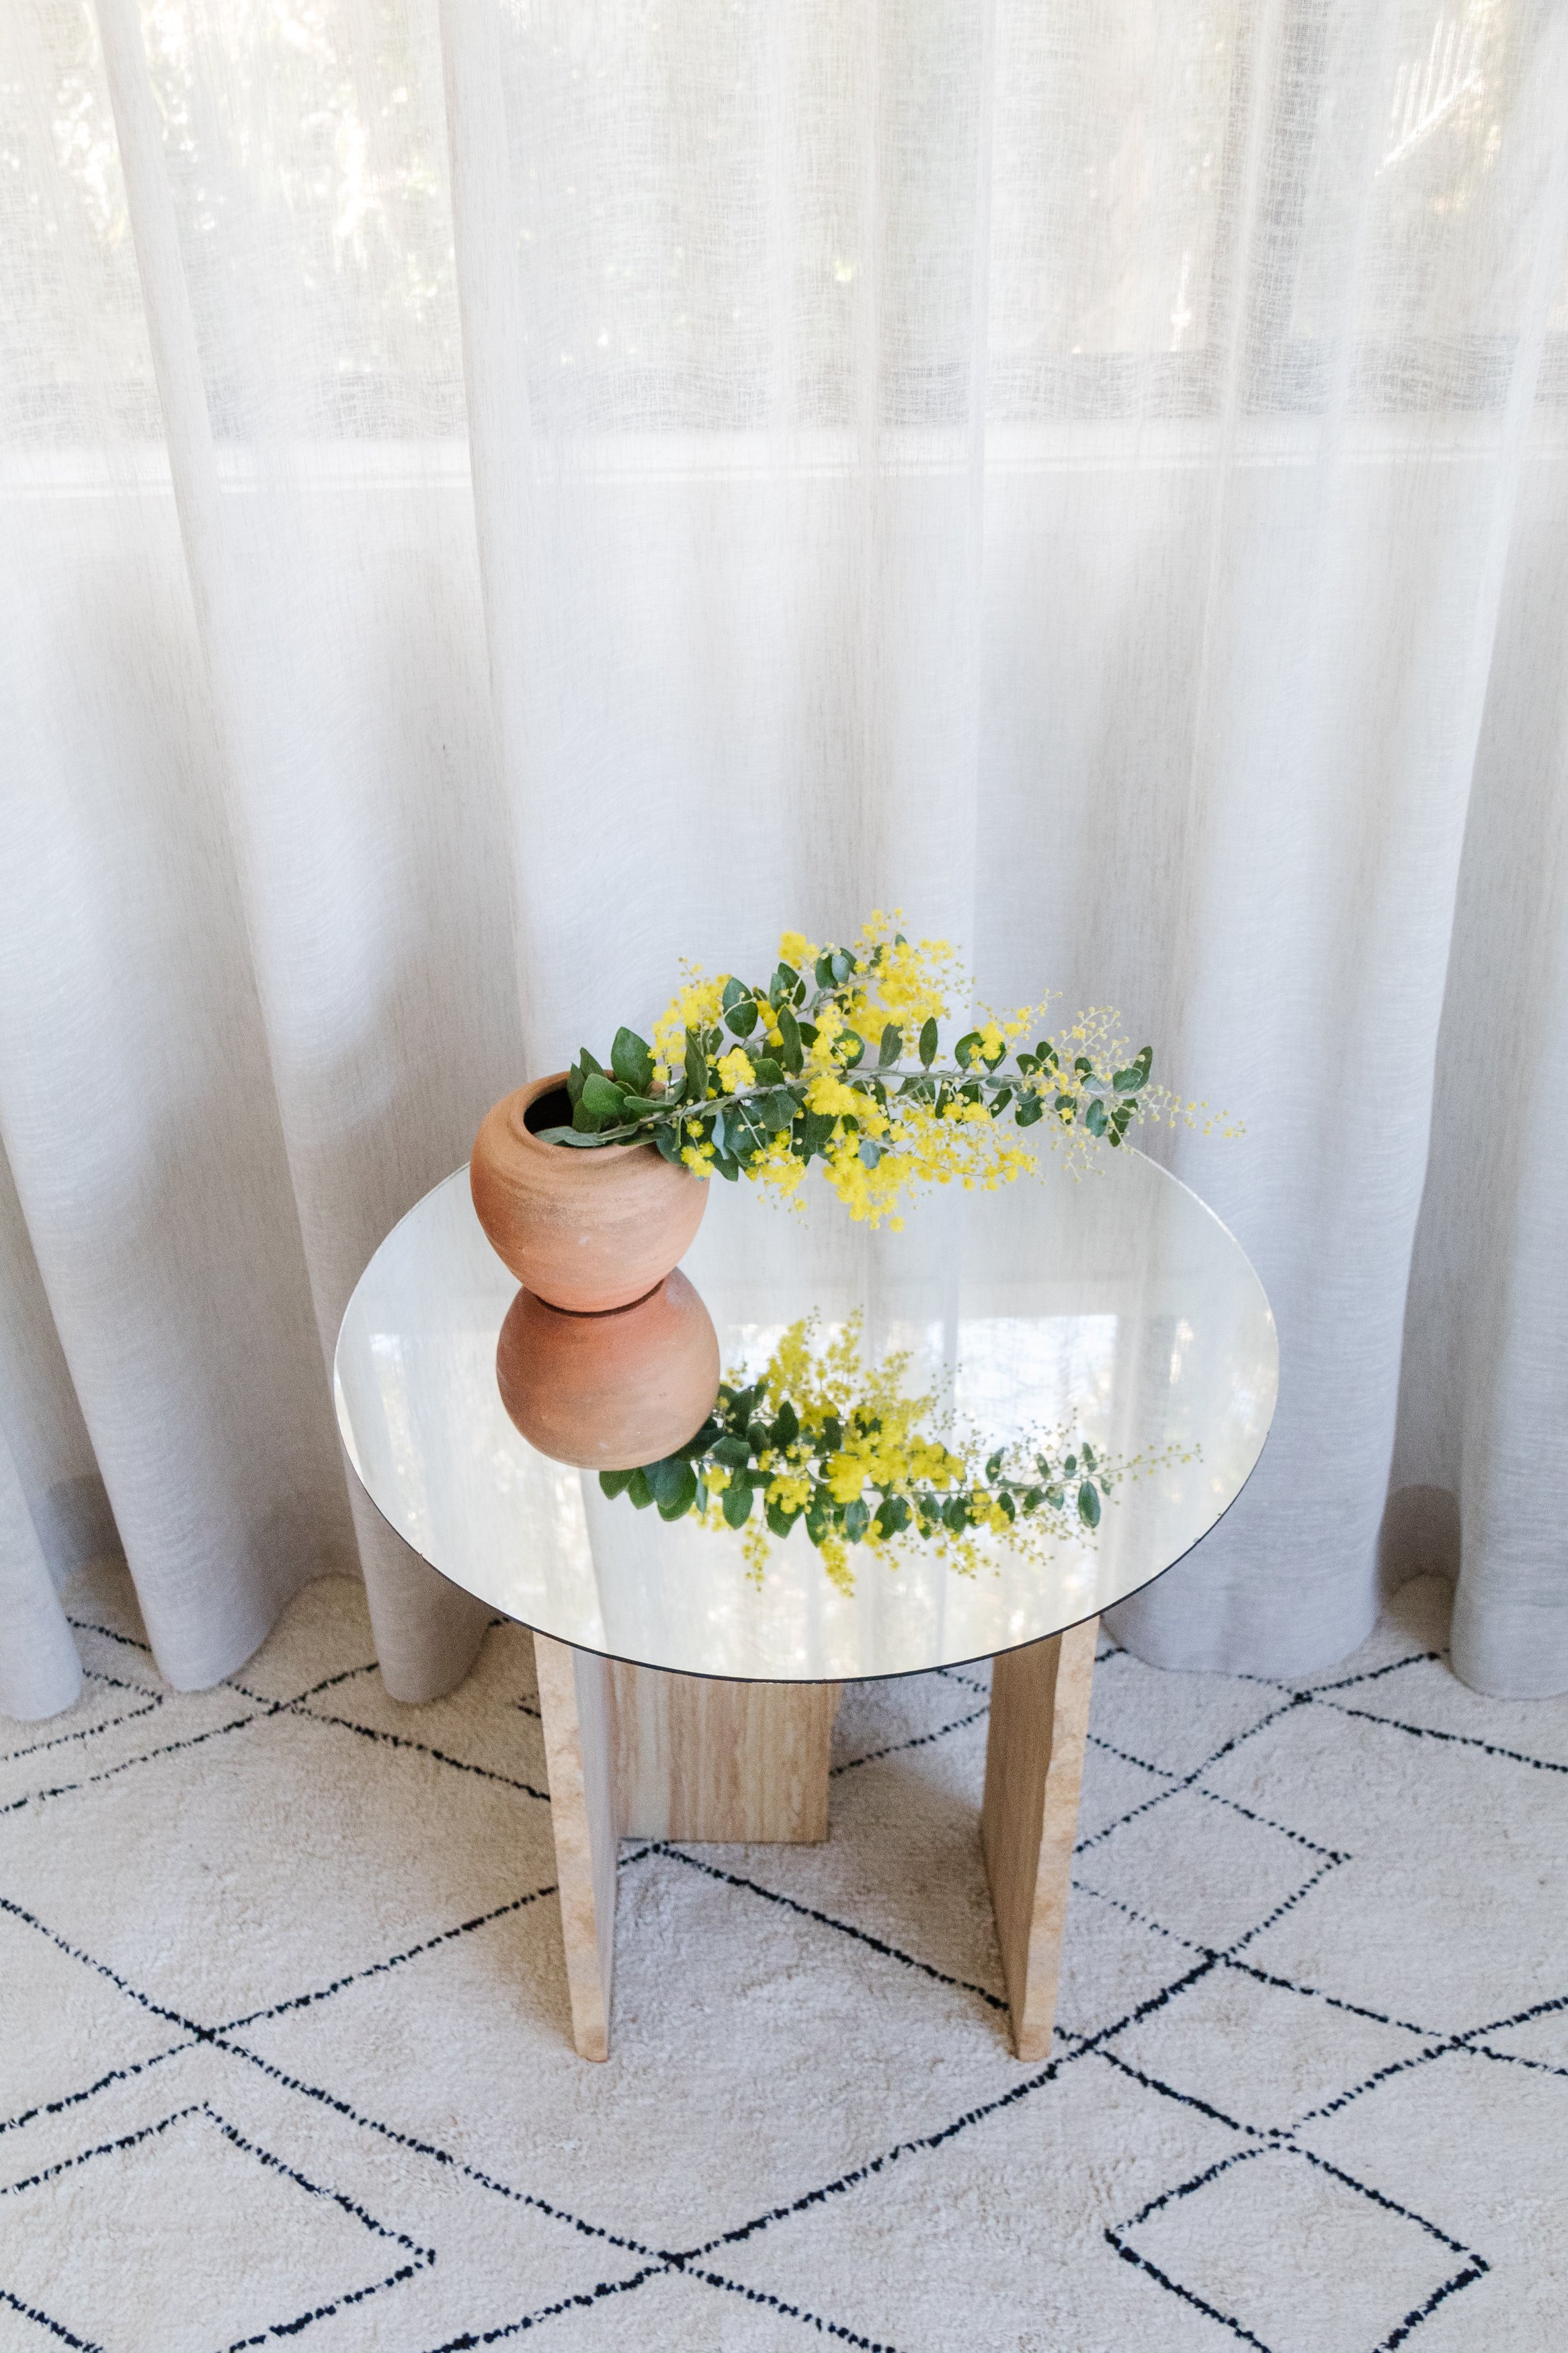
Ta daaaa! A beautiful sandstone side table that looks custom and very expensive (but it’s not ha!).
I have to admit, this sandstone side table looks way better than I could have imagined! And I am so glad I chose the mirror tabletop in the end. The wood grain in the round pine panel, even after whitewashing it, clashed with the natural lines in the sandstone so I am thrilled I remembered I had a round mirror collecting dust in or garage. It ended up being the best plot twist ever! I love how it reflects everything around it and it reminds me of a photo I took and shared on Instagram for my travel blog Mister Weekender back in 2015. I’ve always had a thing for mirrors reflecting nature, and this project reminds me of that. I hope this project inspires you to make your own DIY Sandstone Side Table! It has brought me so much joy and satisfaction, and I know it will for you too :)