DIY Wooden Christmas Tree
I've always wanted to make an alternative Christmas tree, so…
When Ryobi asked me to make one this year, I knew straight away I had to make a wooden tree. Christmas is my favourite time of the year, so I decided to celebrate by making a tree with my own hands, while showing you how easy it is with my favourite Ryobi power tools by my side. This has been such a deeply fun, creative and rewarding project, and I love that you can truly make it your own by moving the timber slats however you like to create a design you love. Then simply add a tree topper, like my pink linen bow tie, some gifts underneath and ta daaaaa! The most gorgeous DIY Wooden Christmas Tree that you can be proud of because you made it yourself. Read on for the tutorial, including links to the Ryobi tools and materials I used. Merry Christmas!
And to see how this DIY Wooden Christmas Tree came together, make sure you check out this video!
DIY Wooden Christmas Tree


Project Details
🕒 Project Time Estimate: 4 hours
💰 Materials Cost: Approximately $385 (including the pot)
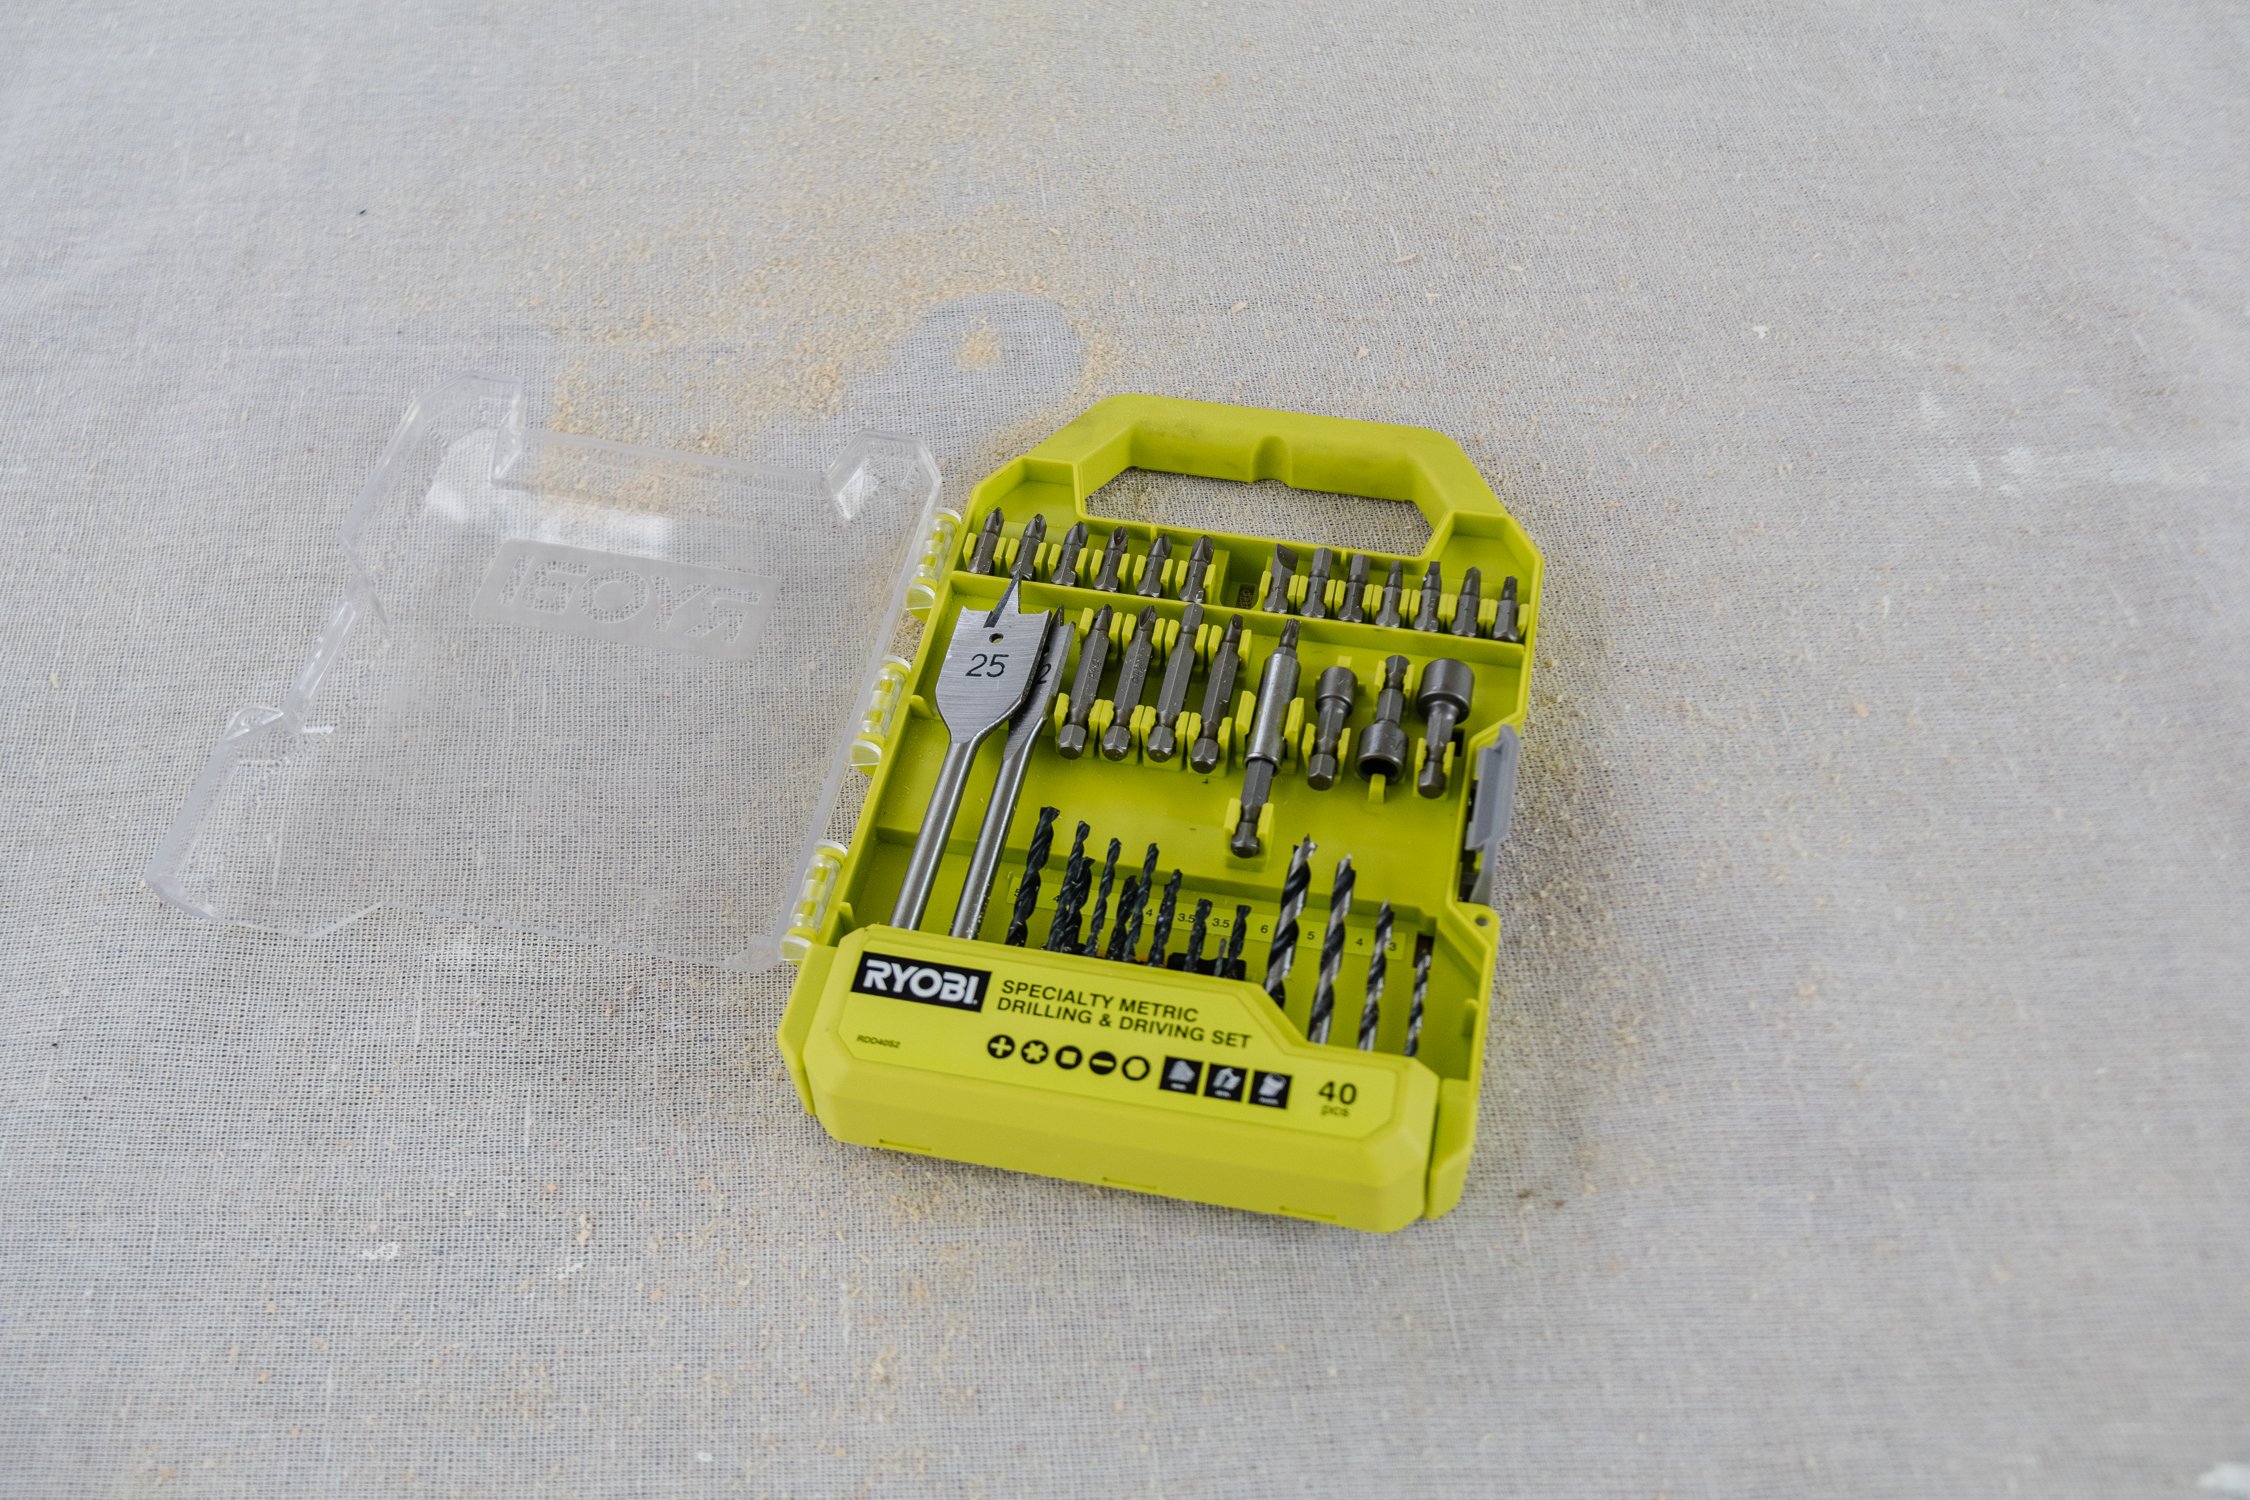
⚒️ Ryobi Power Tools: Mitre Saw, Orbital Sander, Drill
👷♀️ Skill Level: Beginner to intermediate DIYer
Materials
Ryobi Measuring Tape and ruler
3 x nails
String
2 pieces of long linen fabric (raw edges look best IMHO)
Tools
Hammer
NB: Please make sure you have the appropriate safety gear, including safety eyewear, ear plugs and gloves

How To
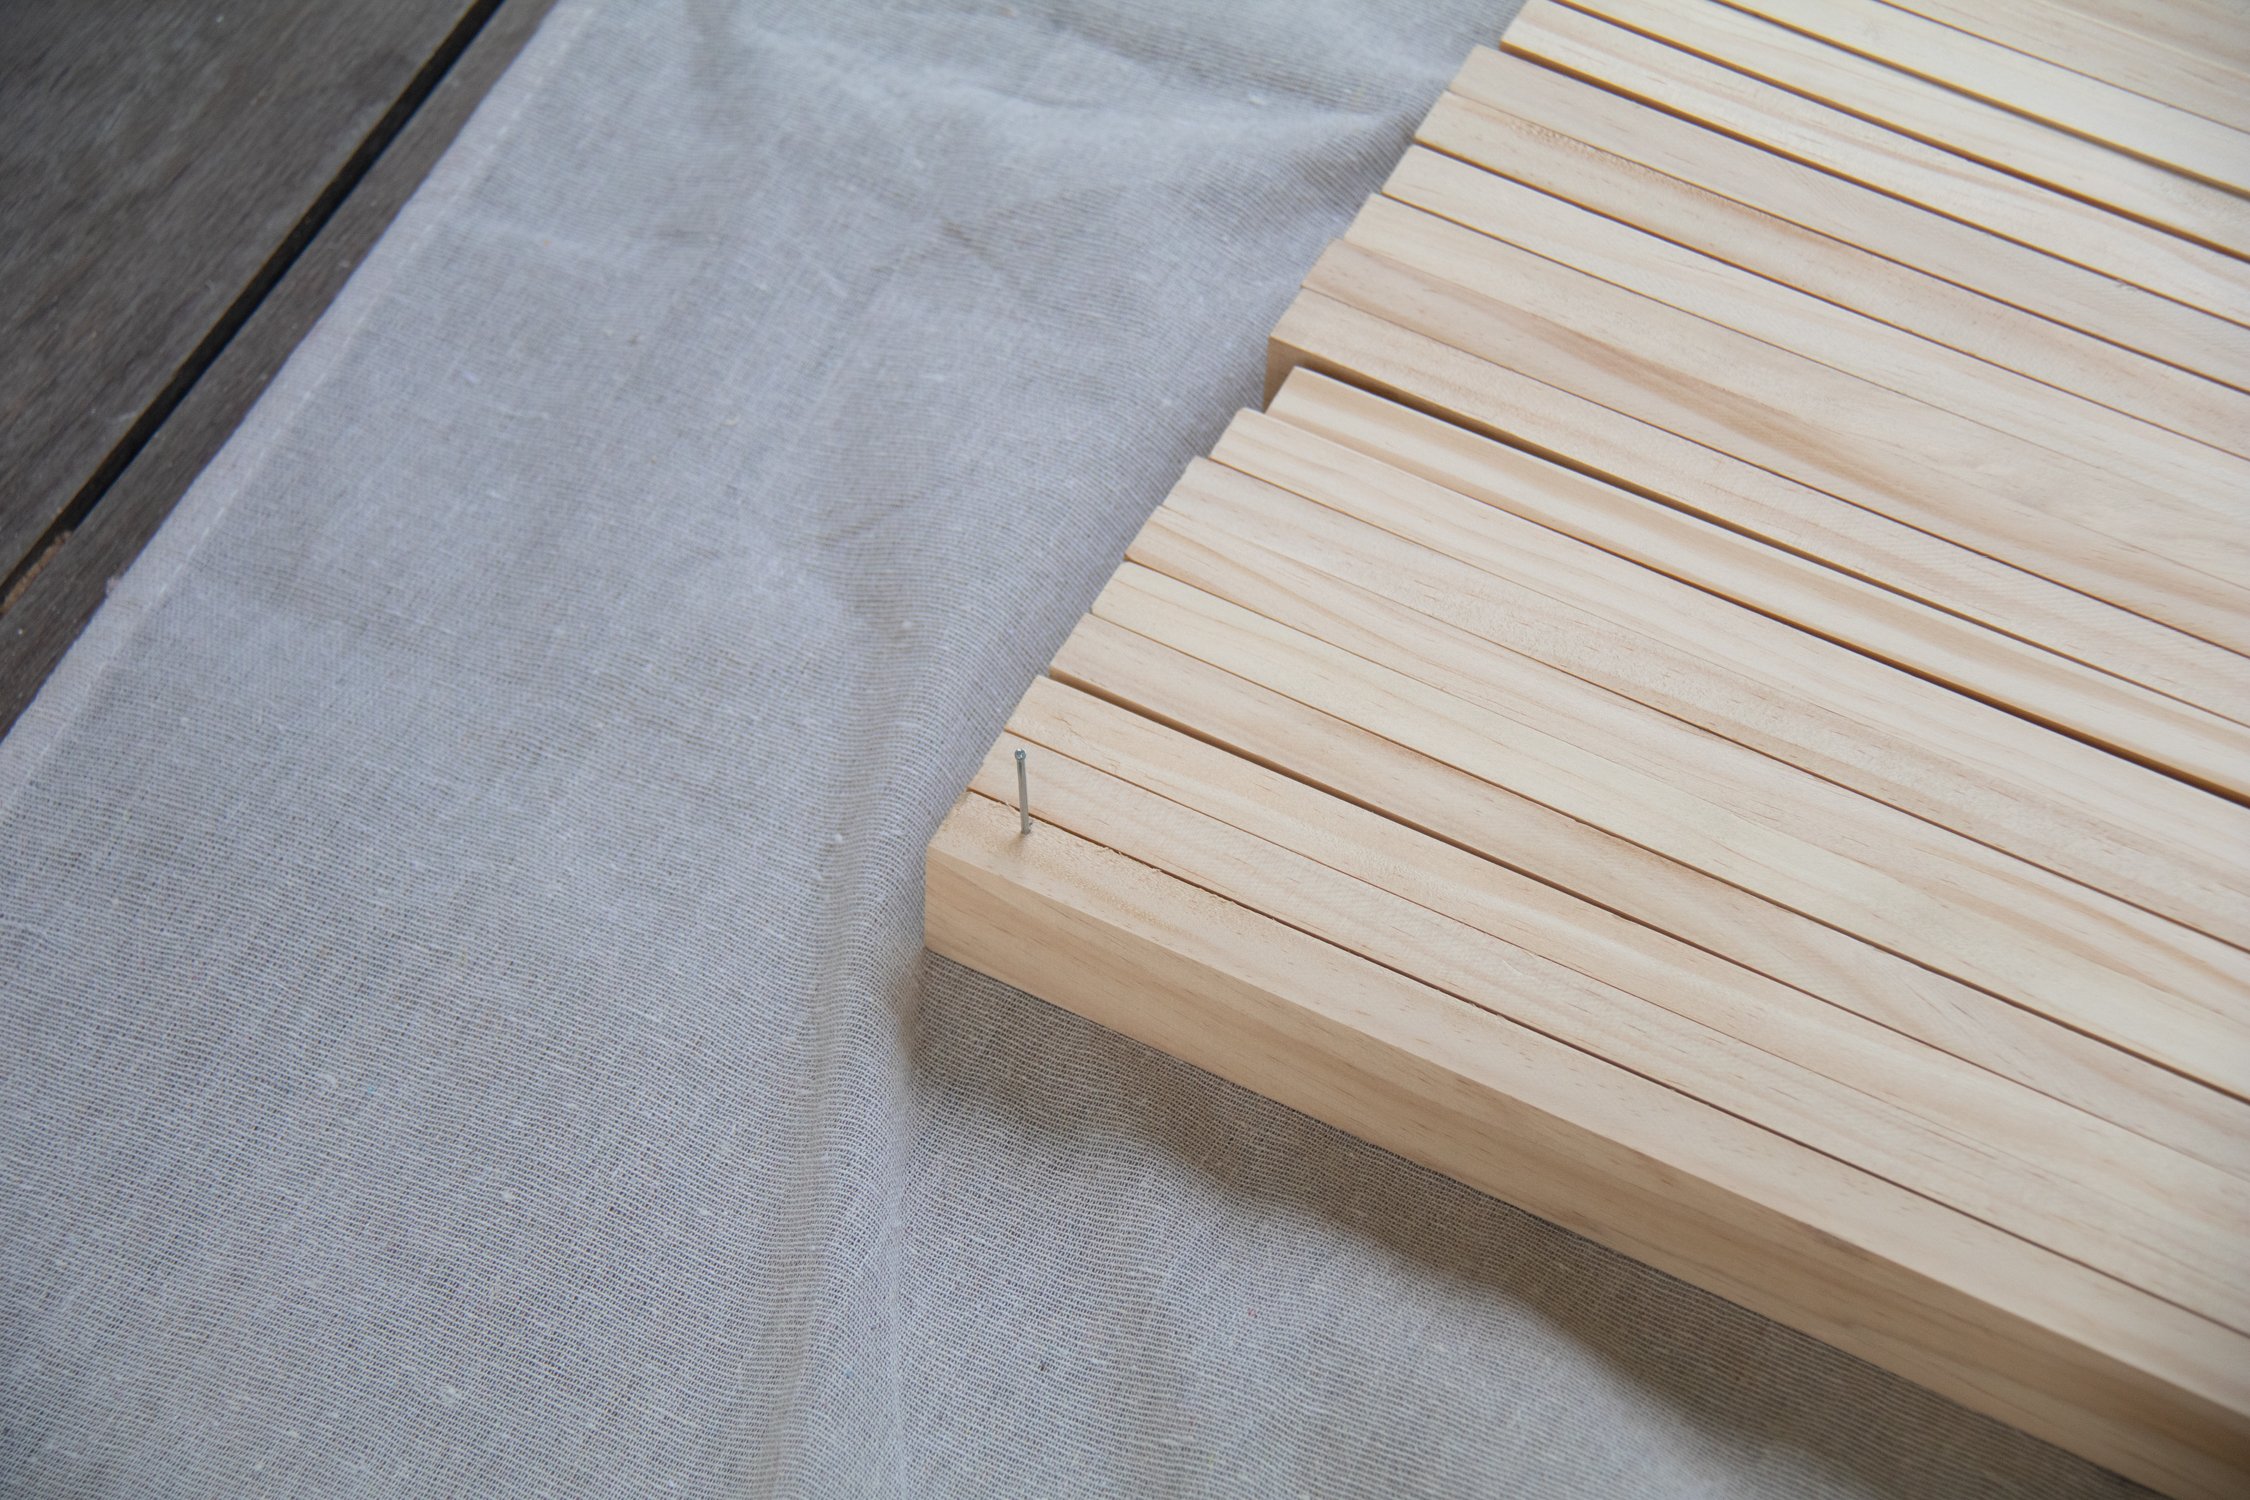
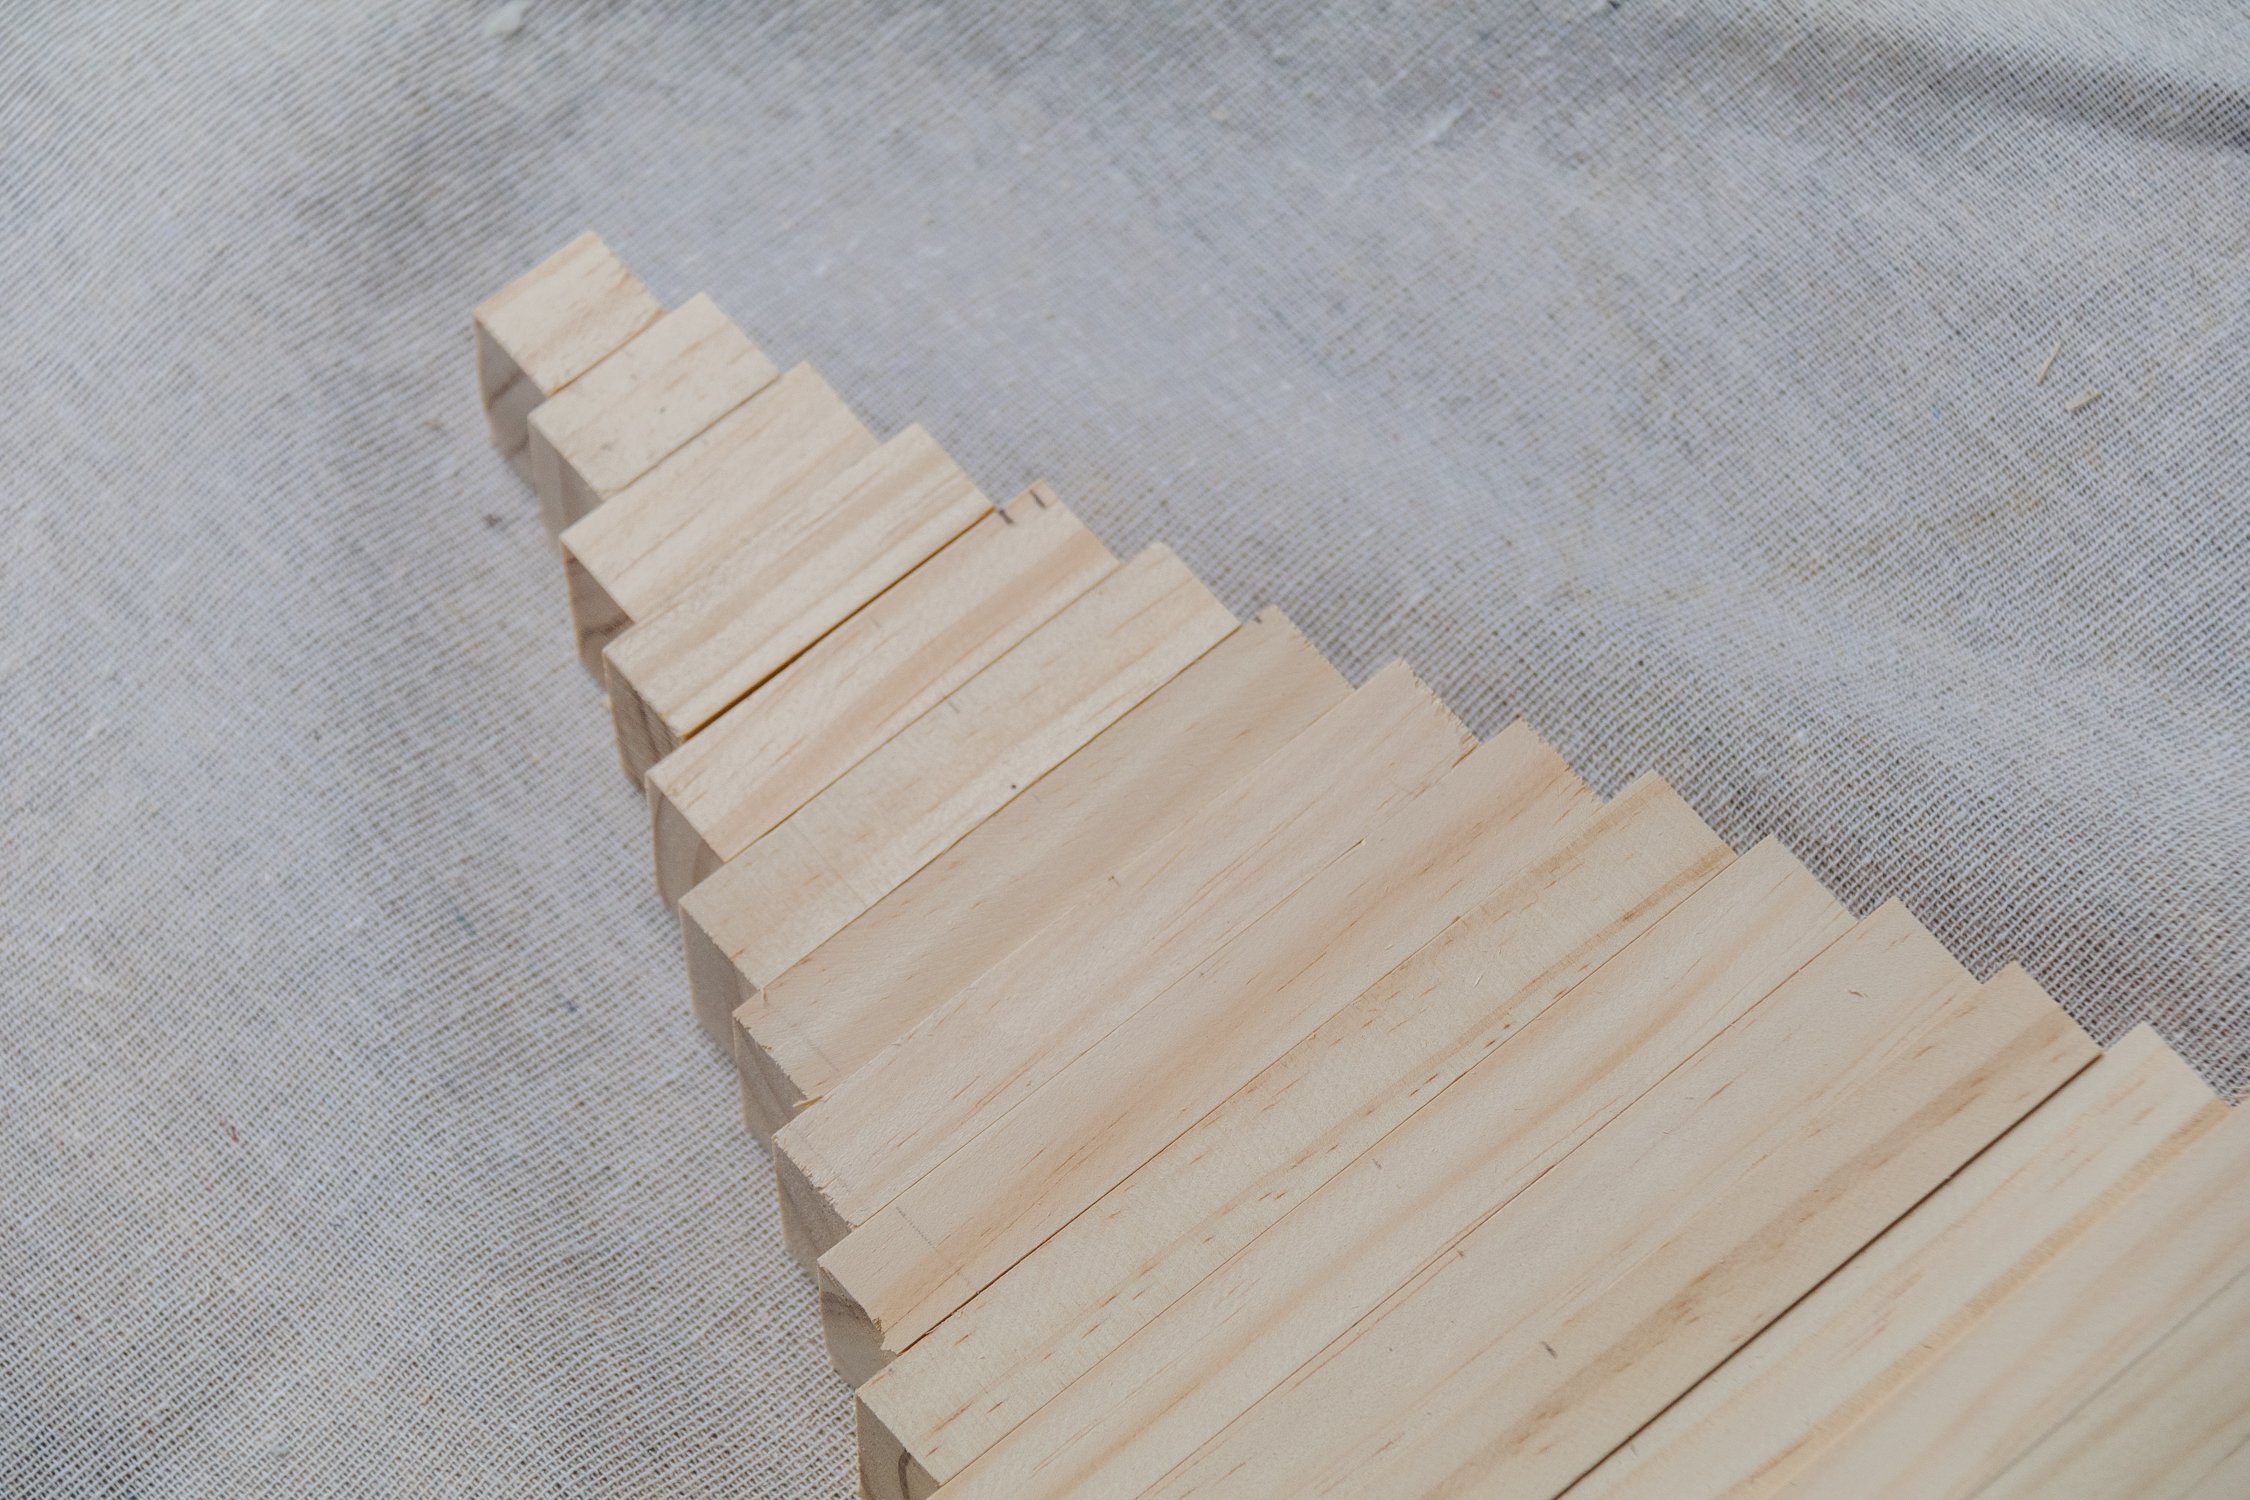
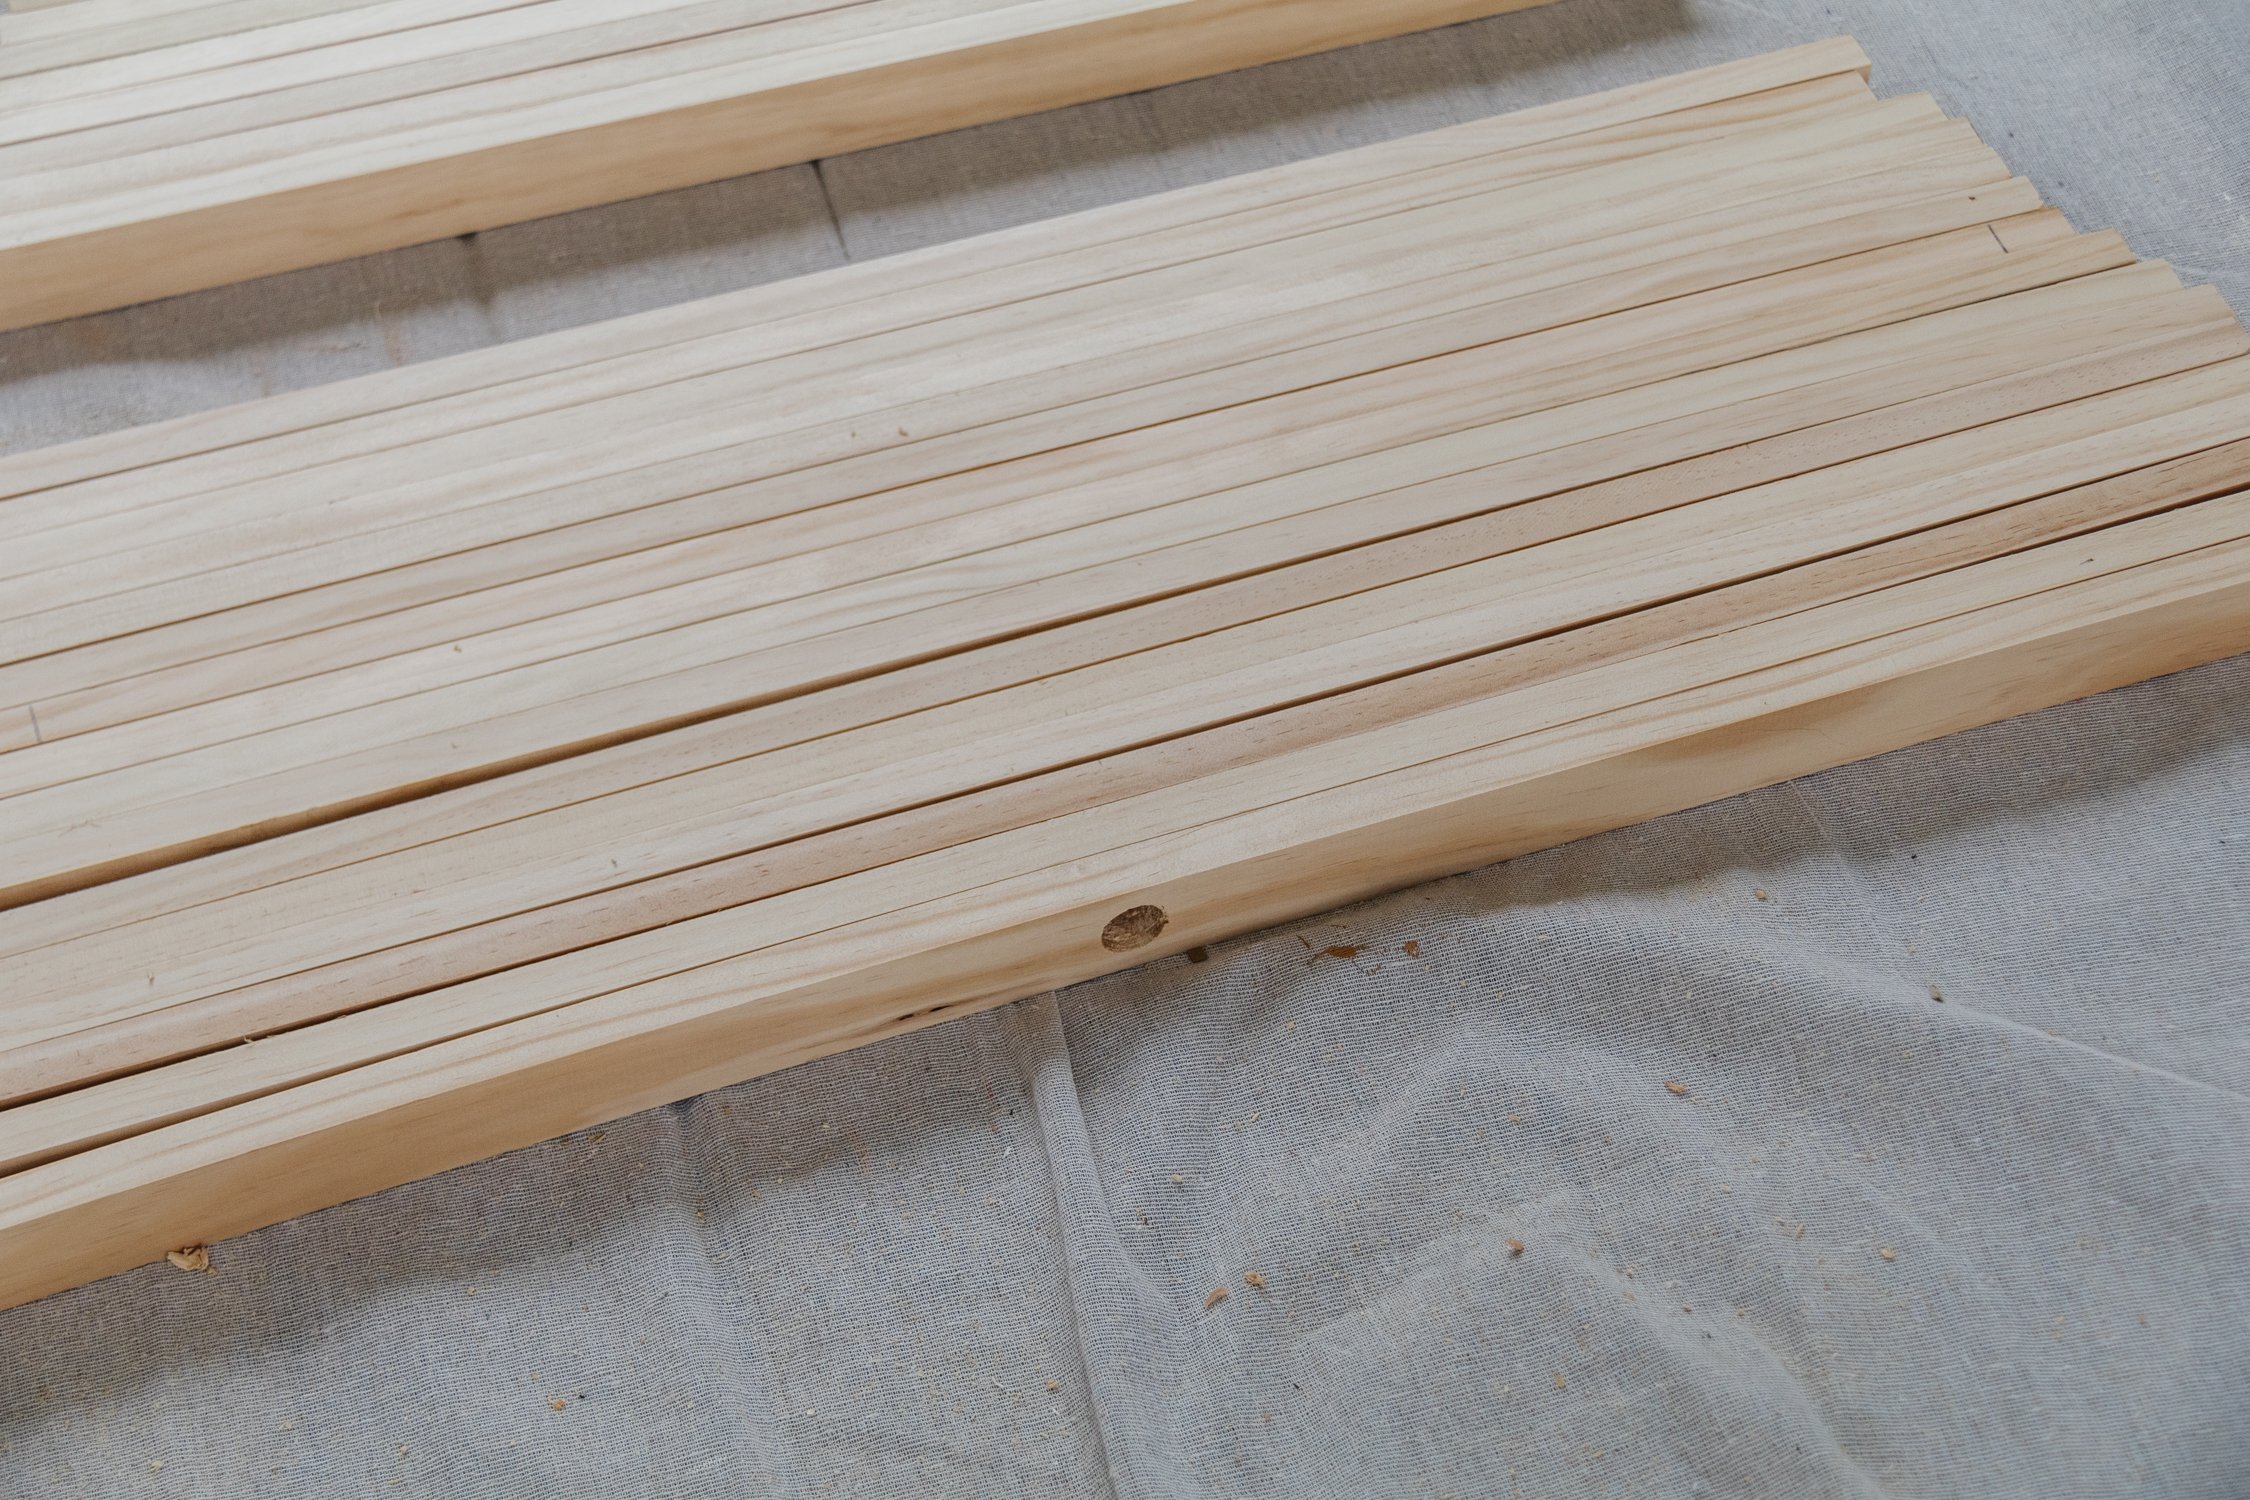
Step 1: Start by removing the stickers from the timber and line them up standing on their sides on a flat surface i.e. floor. Using the measure tape, measure then hammer a nail into the middle of the top piece of timber. Then on the bottom piece of timber, measure and mark two spots to make a triangle, and hammer a nail into each spot. Tie string onto the bottom left nail, pull it up and over the top nail then back down to the bottom right nail and tie a knot. This is the now the shape of your Wooden Christmas Tree (a triangle).
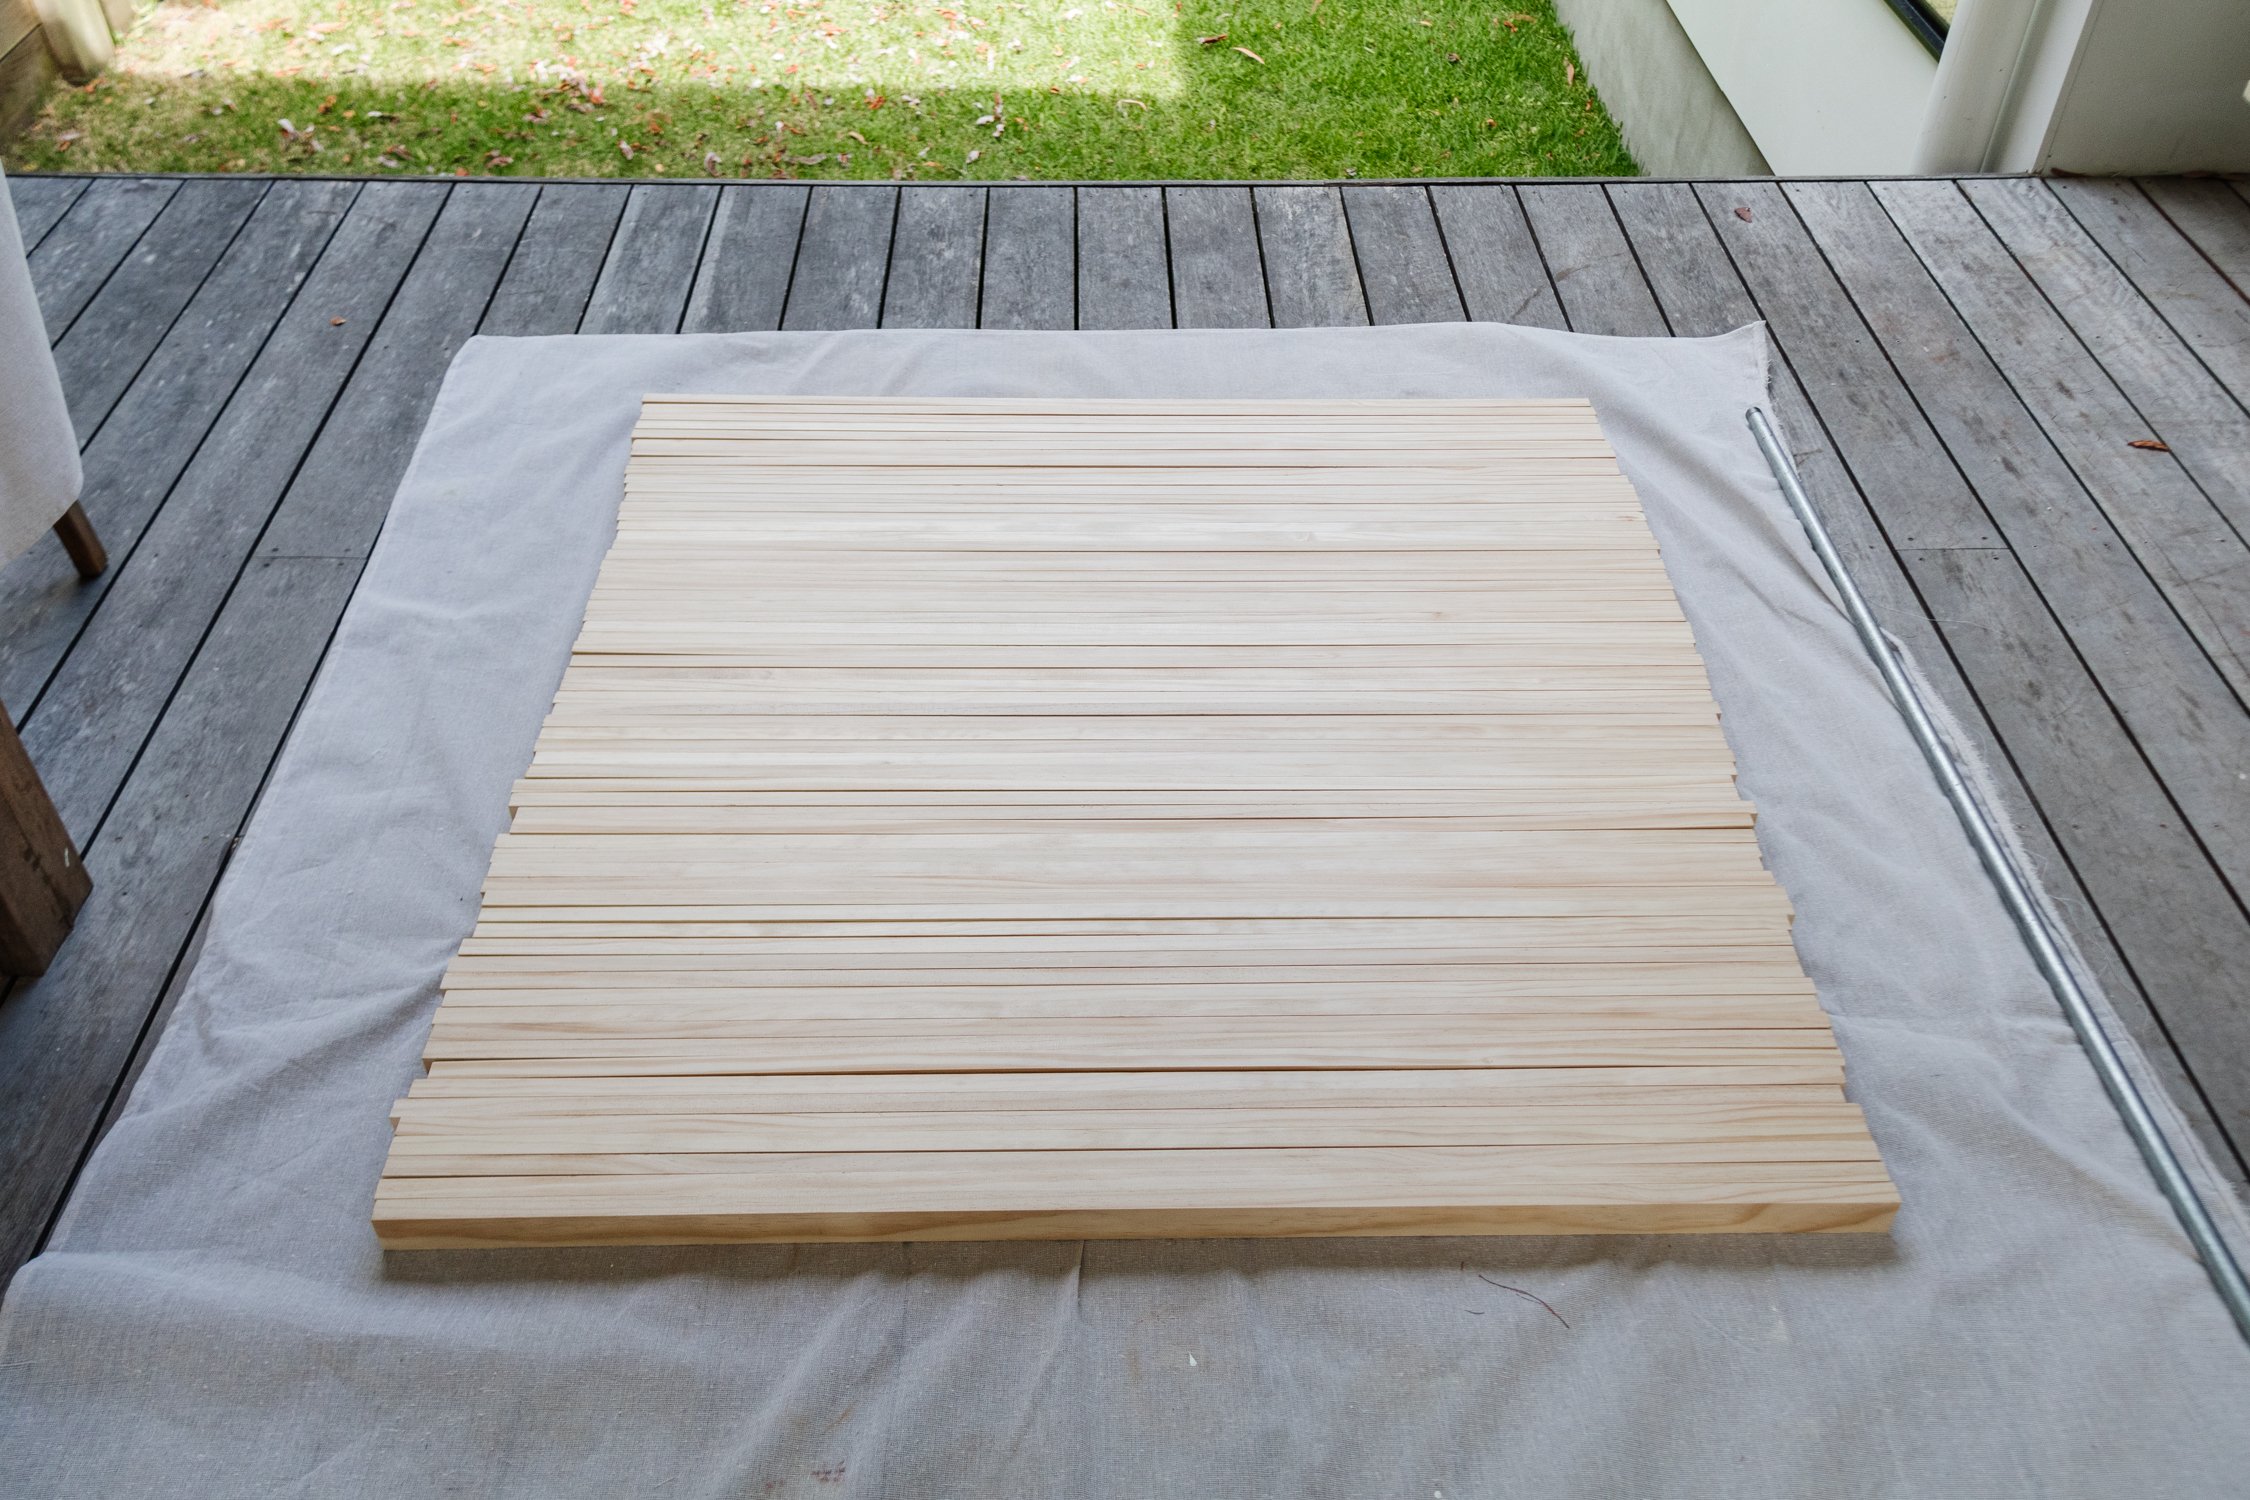
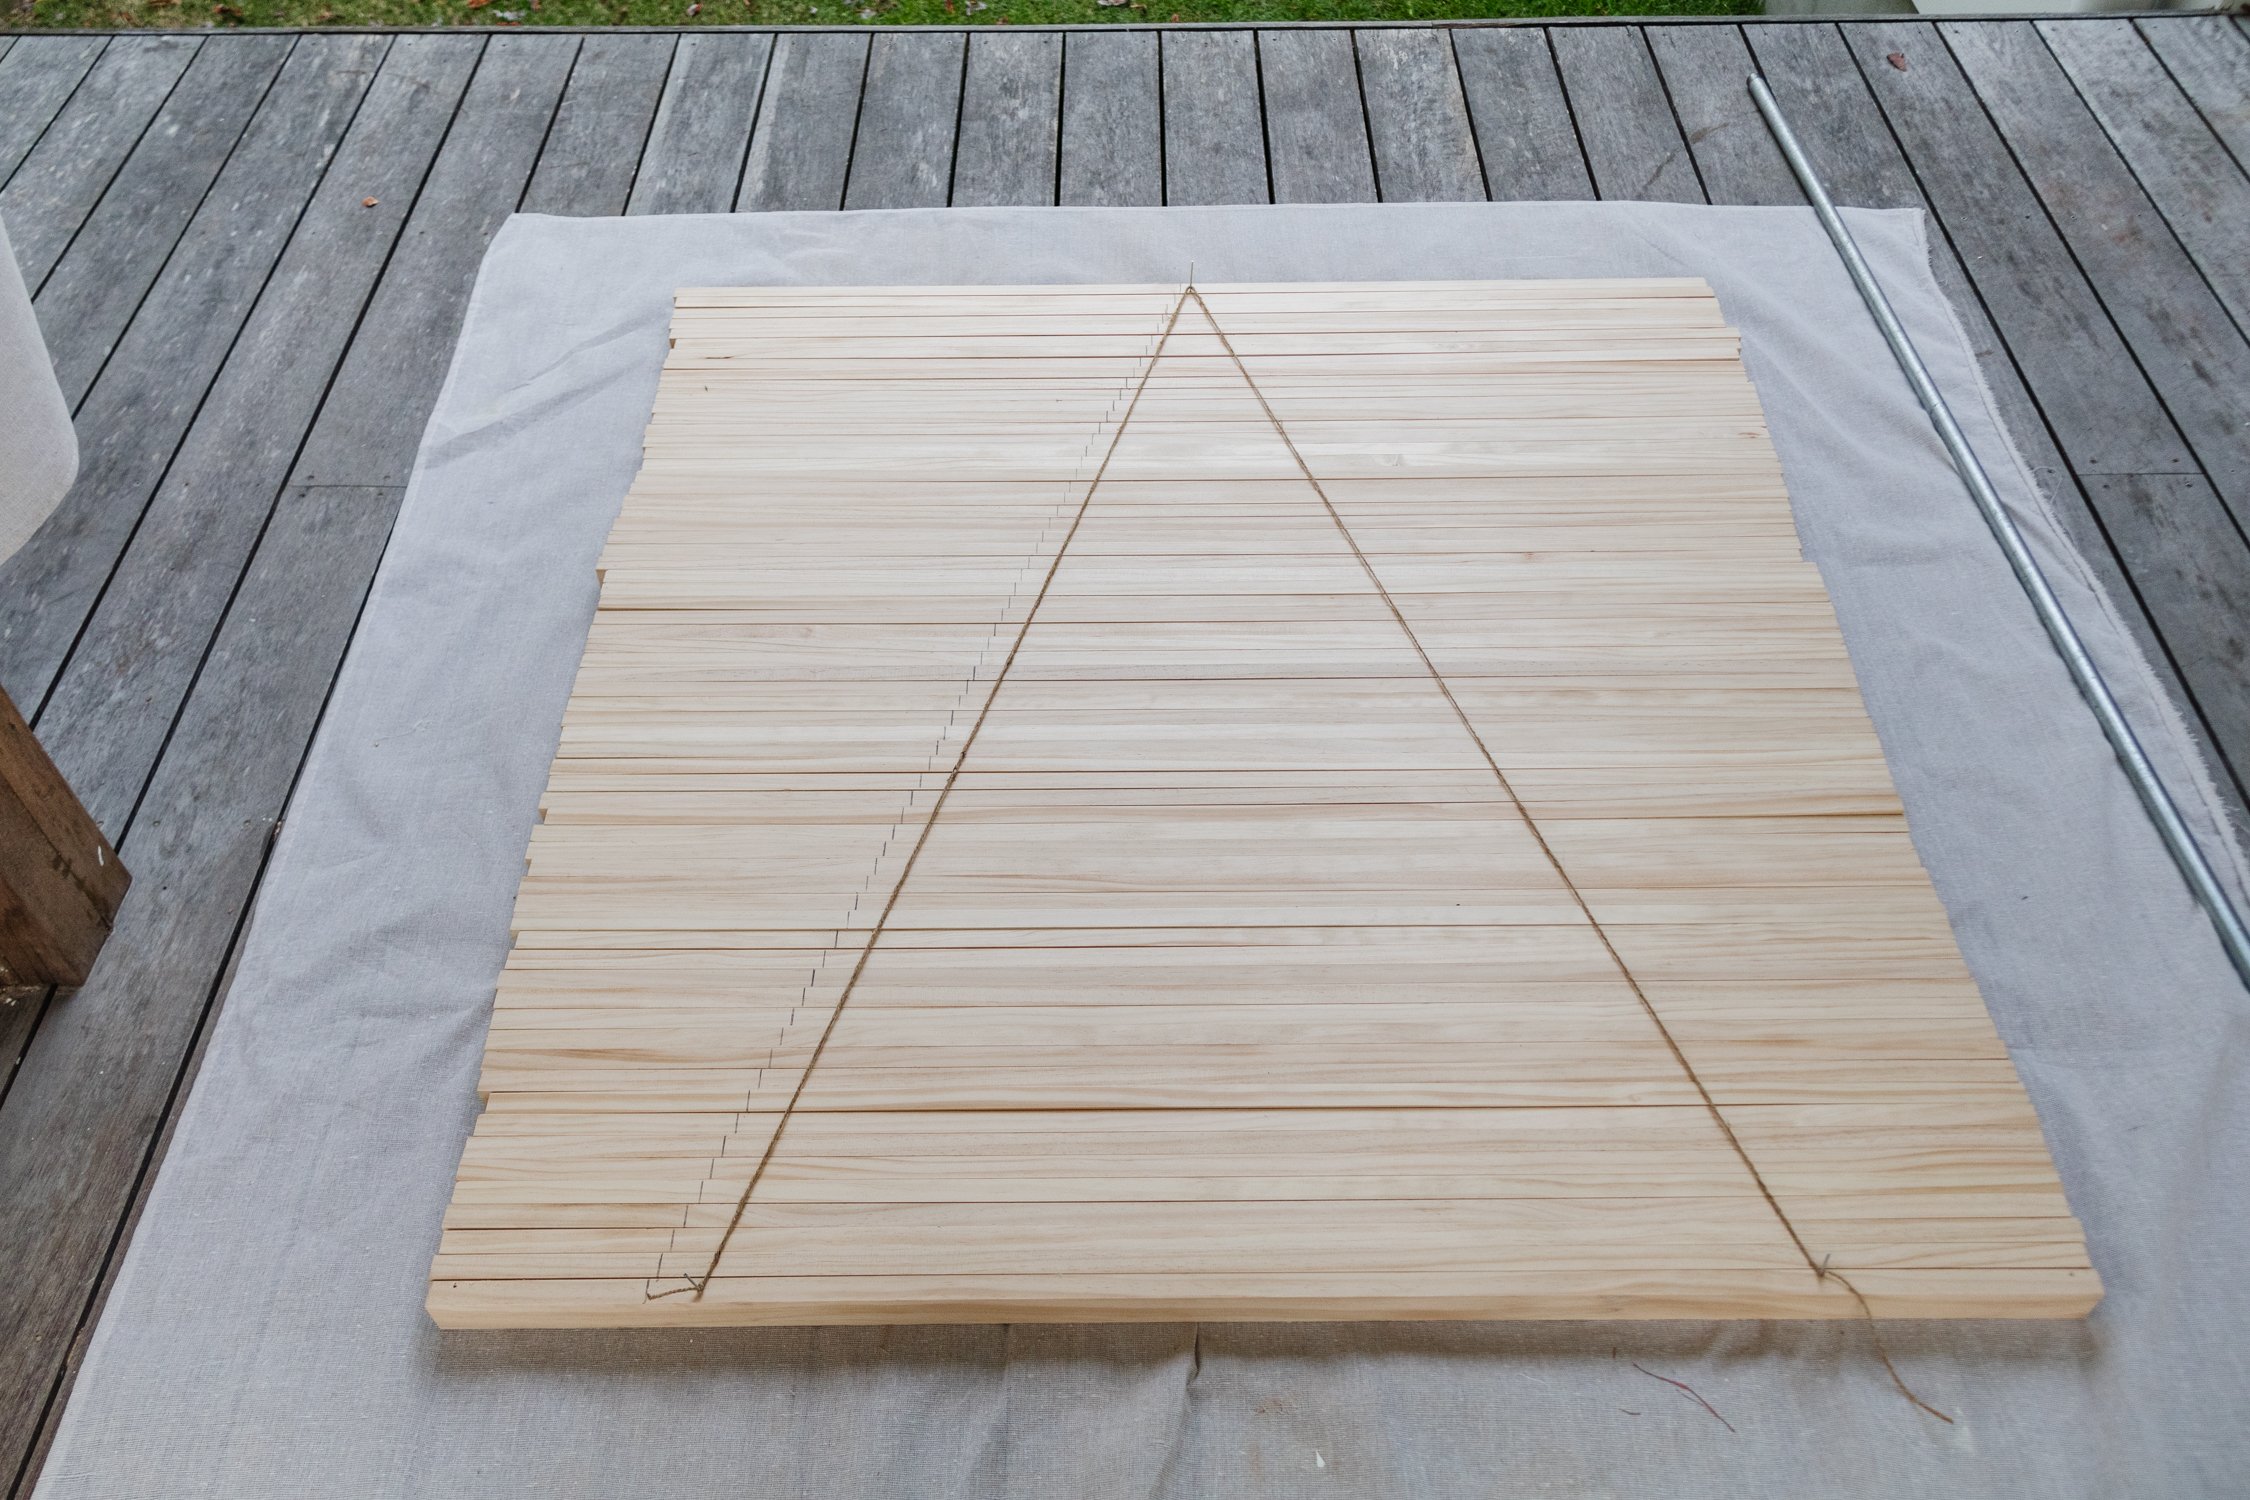
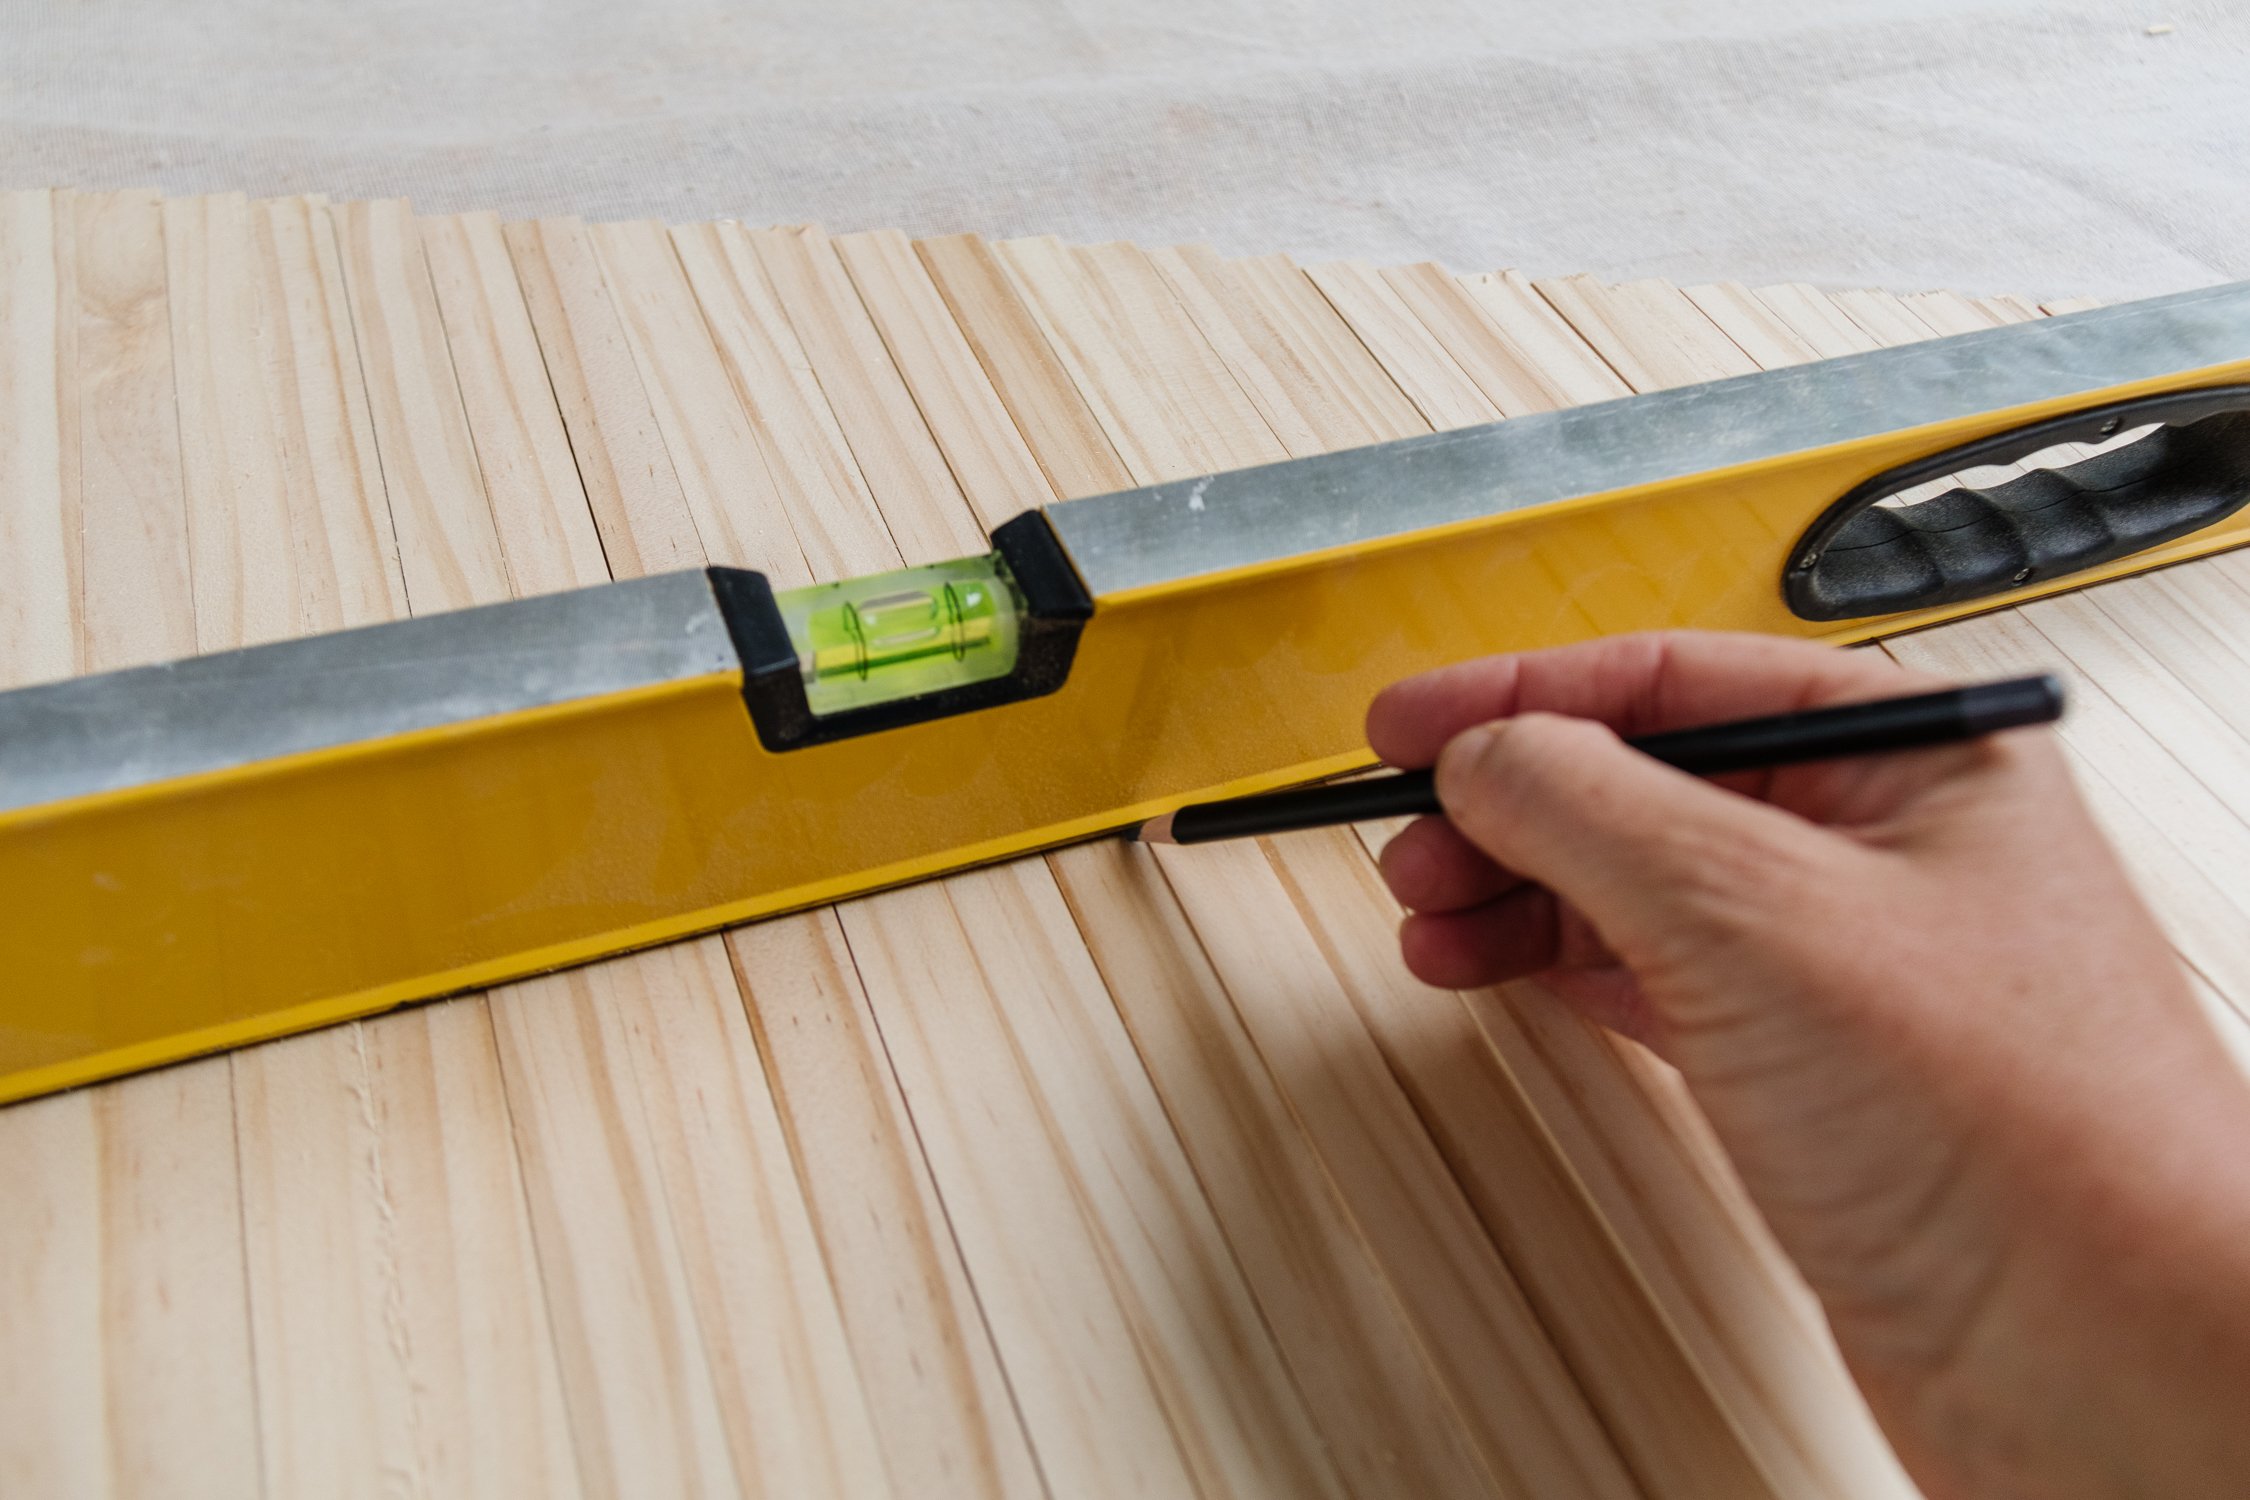
Step 2: Using a ruler, mark at least 1.5cm to 2cm out from the string then draw a line on each piece of timber from the bottom to the top; you want to cut the ends of the timber at 90° angle - not 45° angle, so it’s important to draw the line up and done and not along the line of the string. Remove the string and nails, then using a measuring tape or a spirit level, mark down the middle of each piece of timber with a pencil from bottom to top being careful not to move any of the timber (this will let you know where you need to cut a hole into each piece of timber later on). It’s really important that you don’t mark the middle of each piece of timber by measuring each piece; if you do the holes may not line up later on. It sounds counterintuitive, I know, but it works.
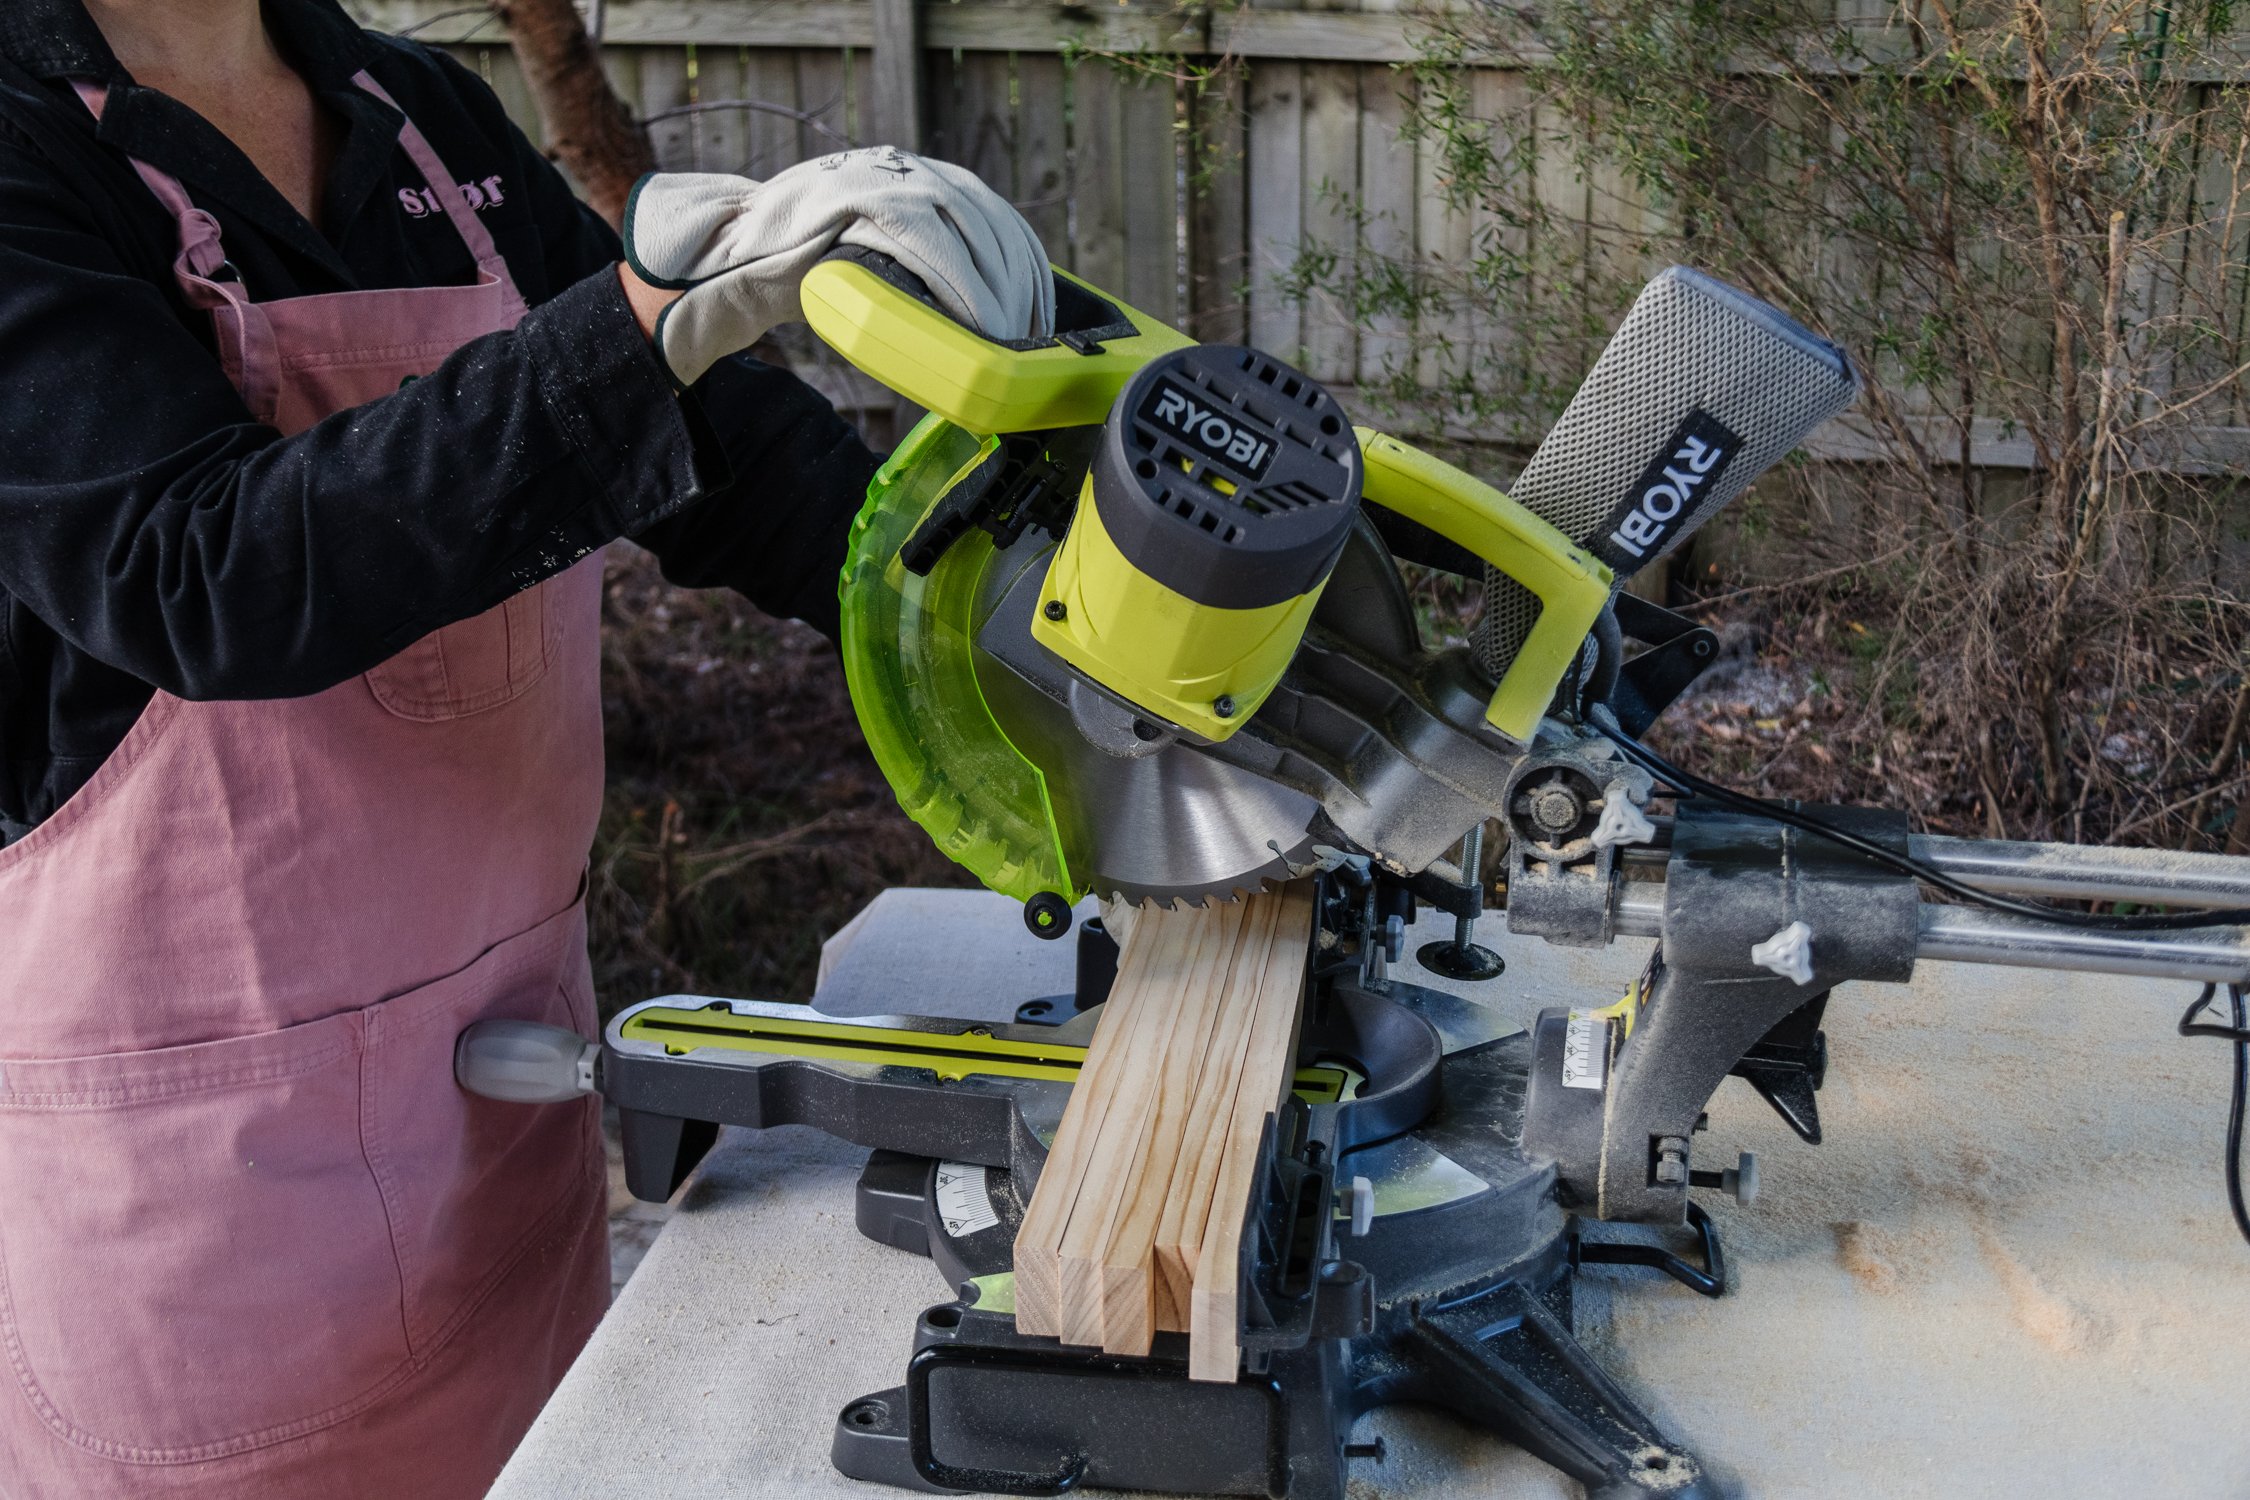
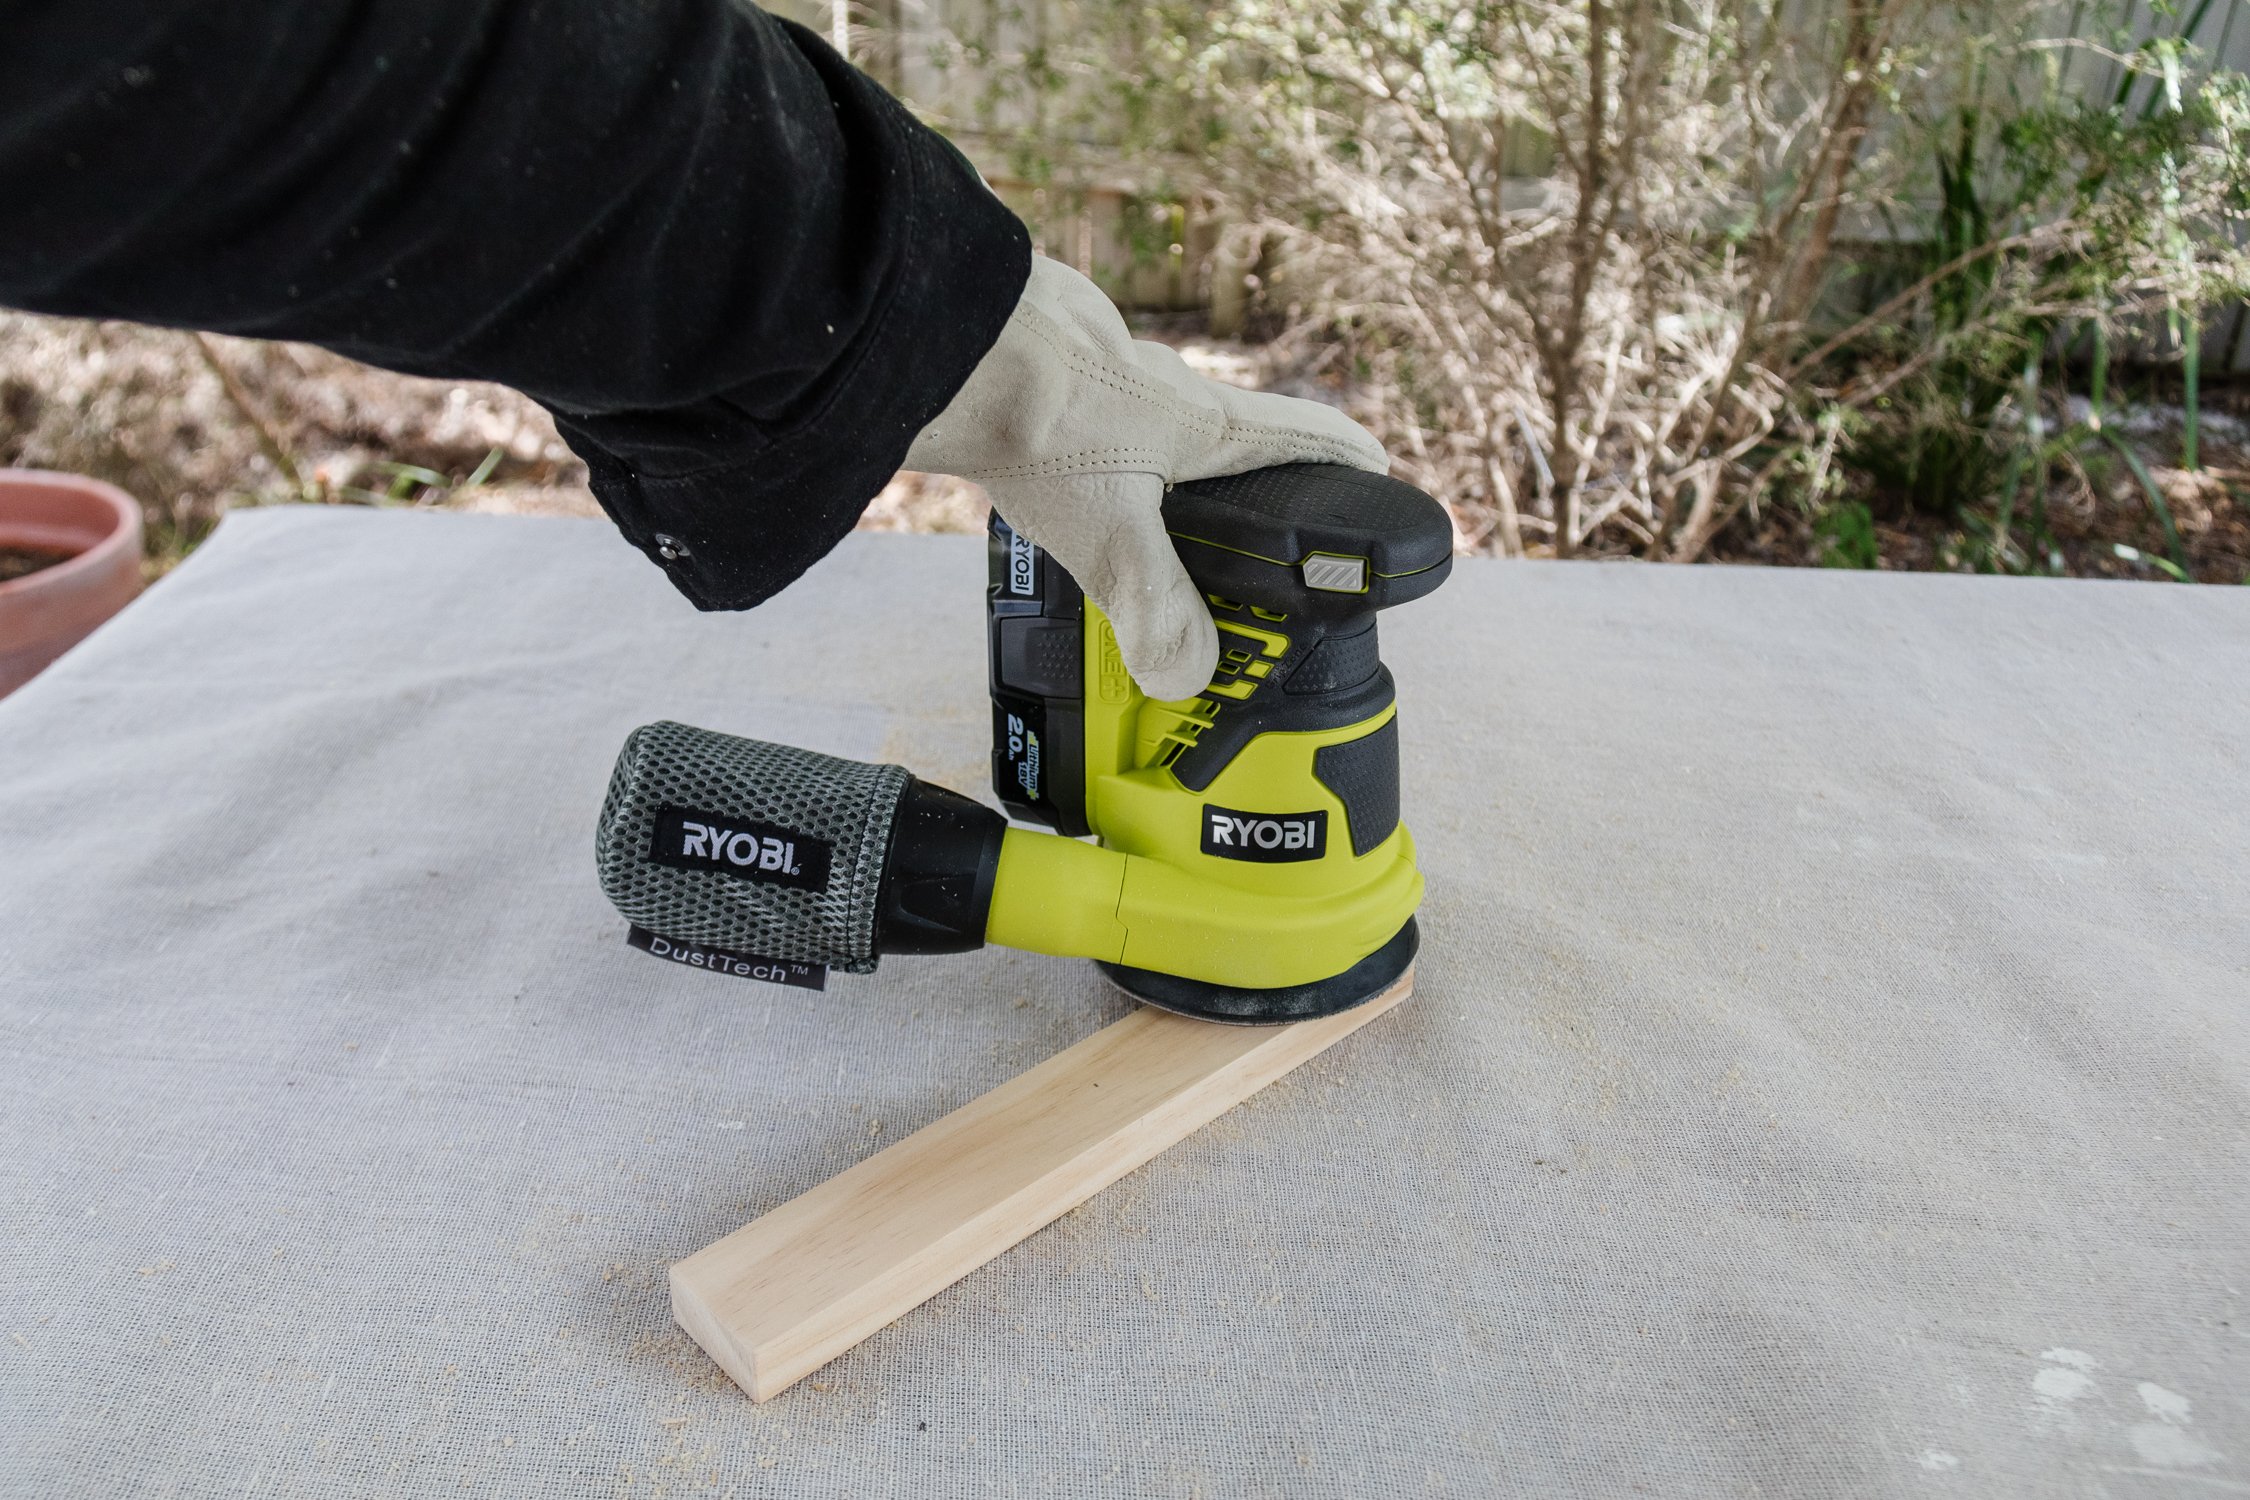
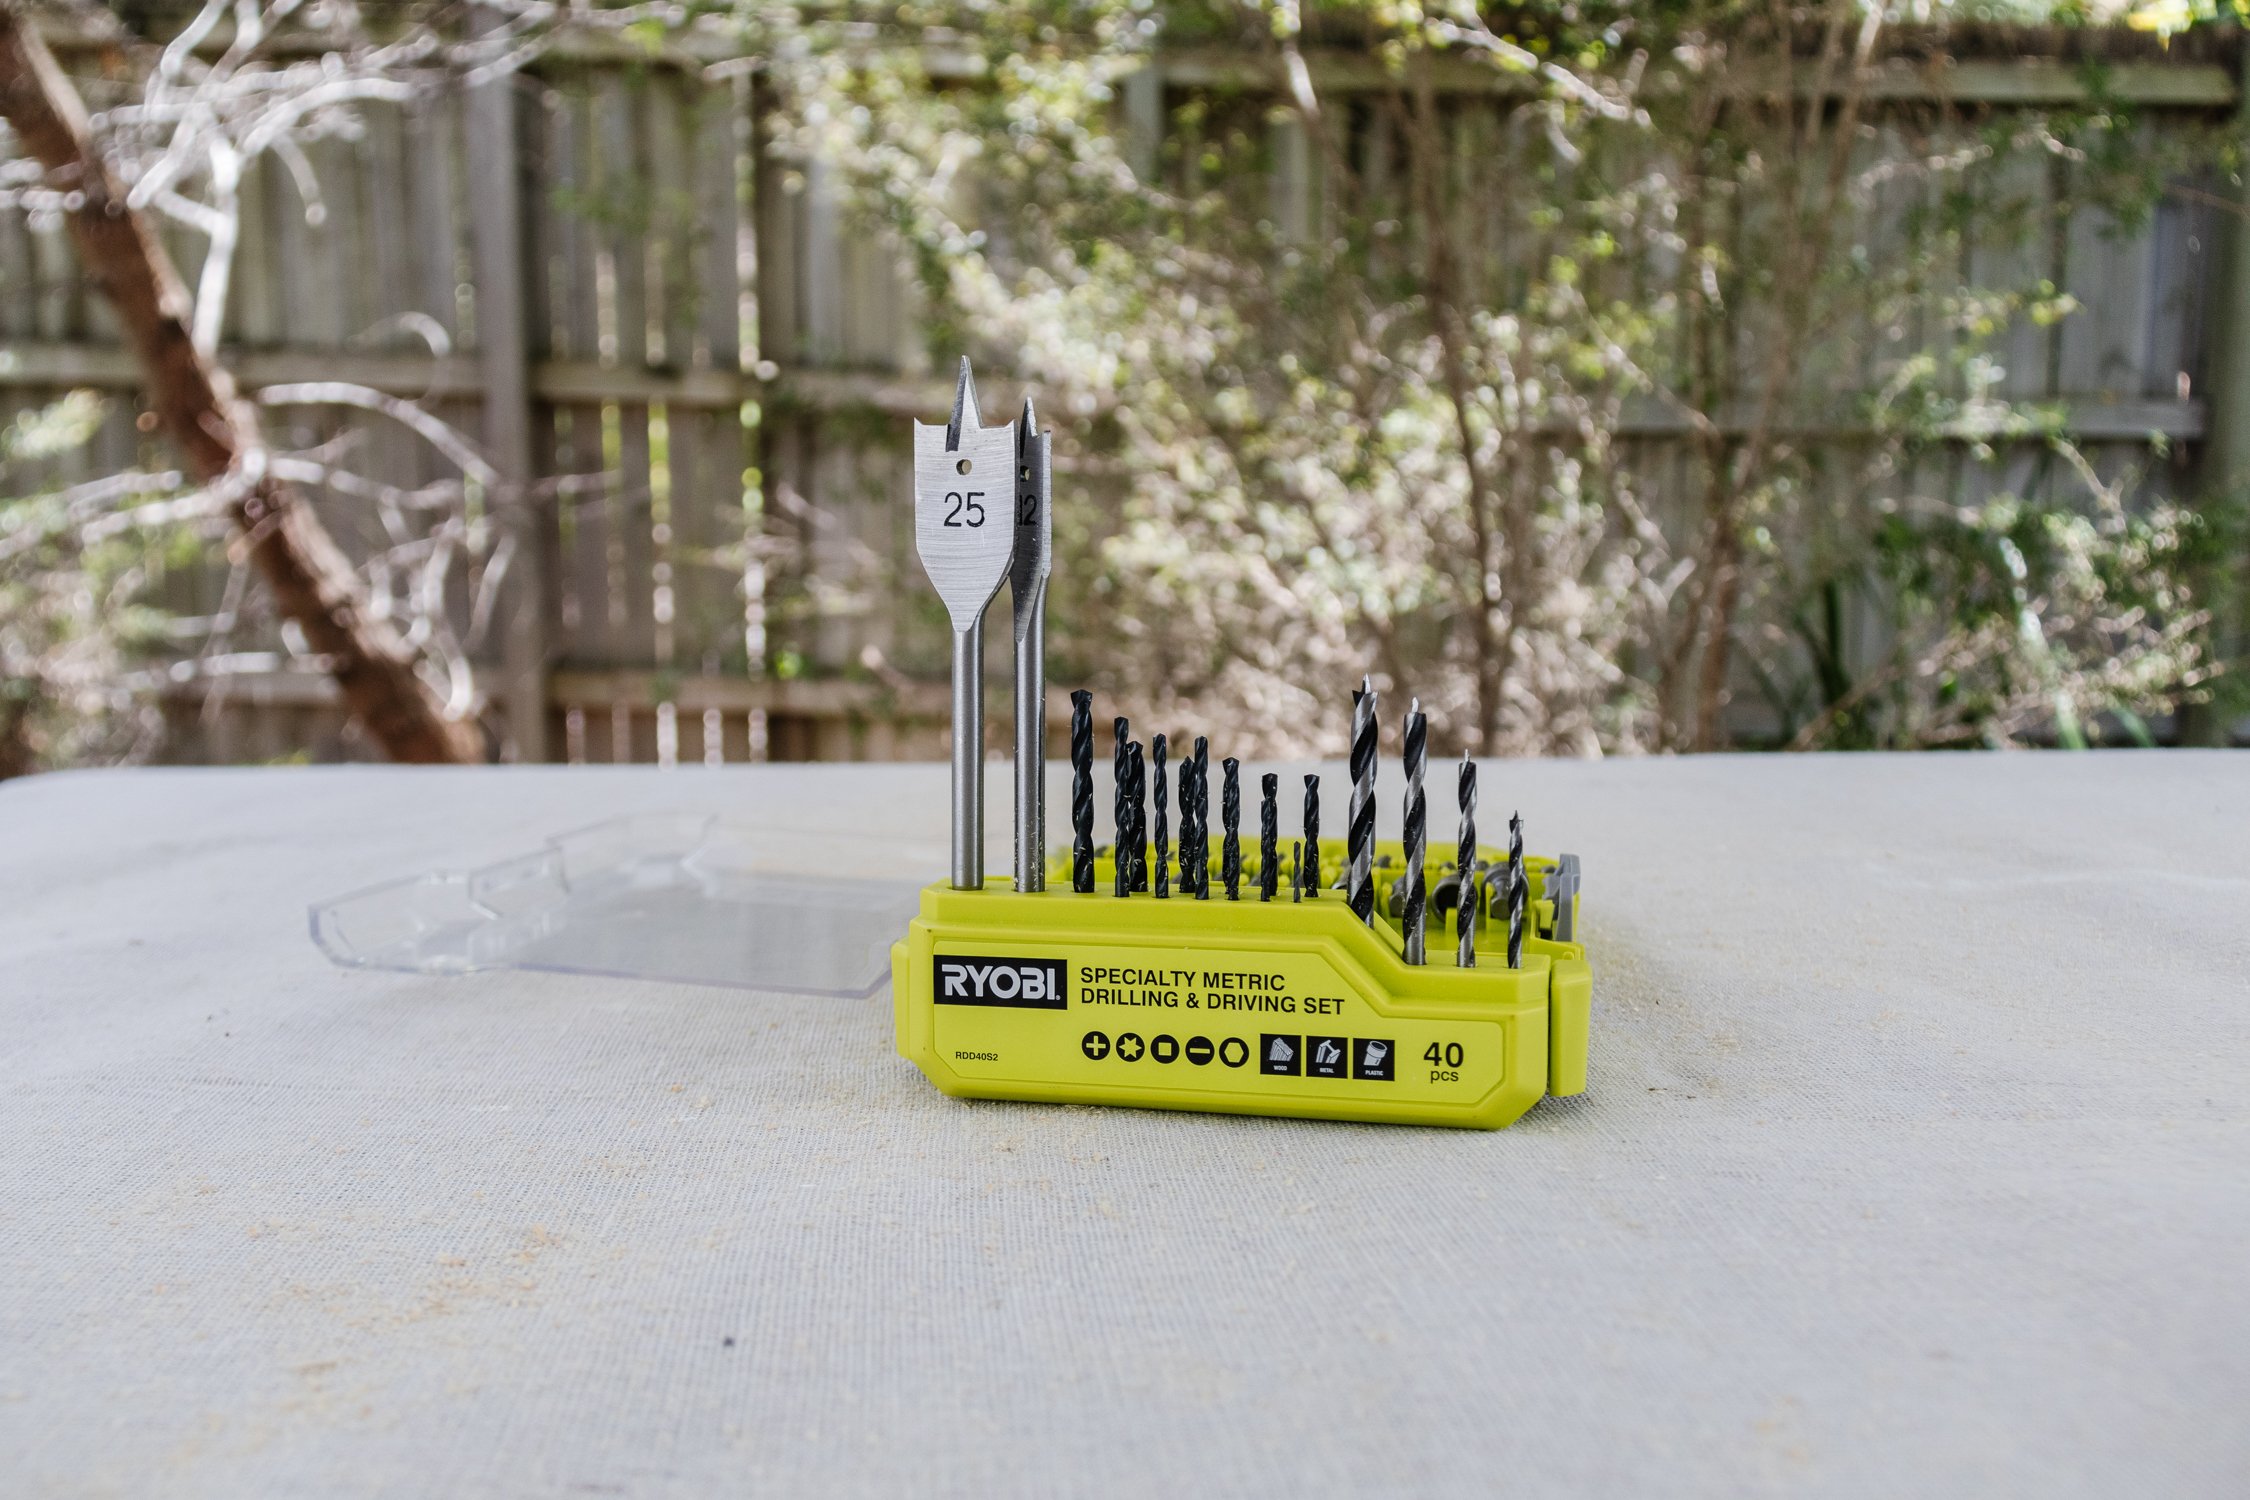
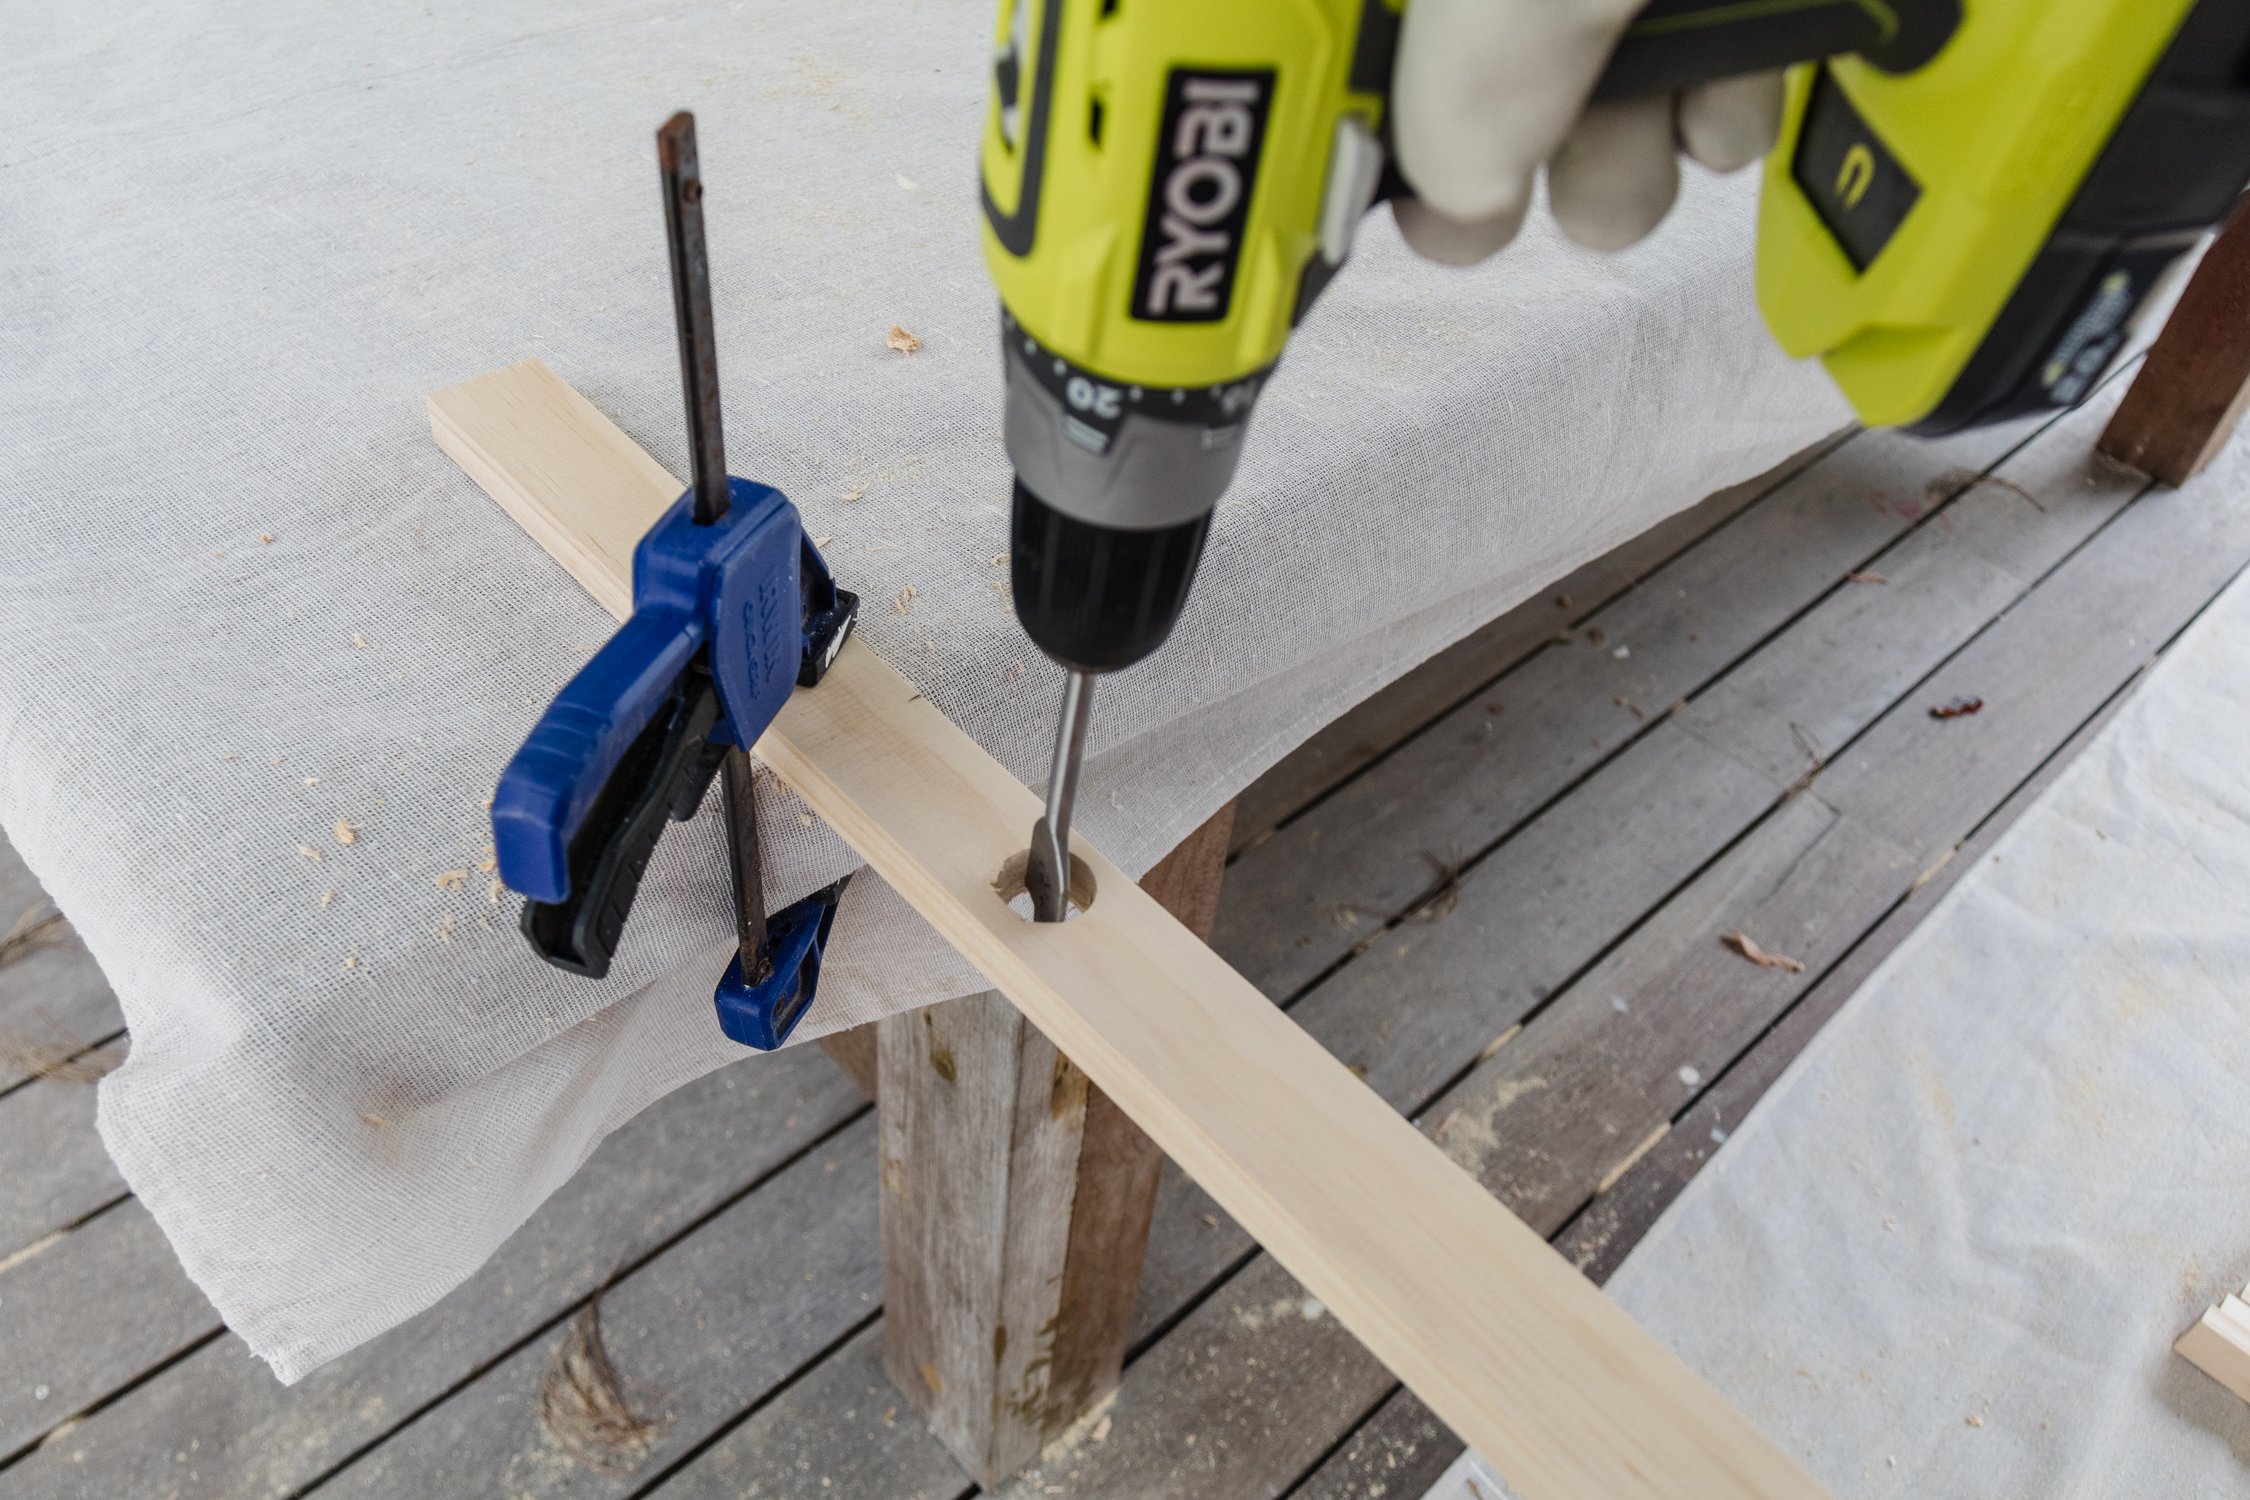
Step 3: Put on your safety gear and cut the ends of the timber using the mitre saw. You can cut several pieces at a time with the Ryobi 2000W 254mm Dual Bevel Sliding Mitre Saw. After cutting each piece of timber, smooth the edges with an Orbital Sander. Then clamp each piece of timber onto your work bench, and cut a hole into the middle of each piece where you left a mark using the Ryobi Drill and the 25mm Flatwood Spade Bit.


Step 4: Turn the terracotta pot upside down and place the steel pipe into one of the holes in the pot. Then gradually slide the timber over and onto the pipe, and let the slats build up until you have a standing Christmas tree! Wrap a piece of fabric around the exposed steel pipe at the top and then tie a bow with another piece.


Ta daaaa! This is the Christmas Tree that keeps on giving…
This is the most beautiful Christmas Tree I’ve ever seen - so much so that I am not sure I’ll ever top it! I know I should be more humble seeing as I made it myself, but I can’t help it. When I put that last piece of timber over the metal pipe, I stepped back and couldn’t stop smiling. I had no help, no instructions and no one telling me how to do what - I did this all on my own and that’s totally satisfying. And now you can too with this very east to replicate tutorial by your side.
What I love most about this tree is that you can make a myriad of patterns with the timber slats - it’s the Christmas Tree that keeps on giving! And I have a sneaky feeling that creating a different design every year will officially become our new festive tradition. And let's be honest, what I love most about this tree is that it can be easily packed down and stored away until next year - no faux green bits, messy decorations or dried leaves anywhere in sight, hurrah!
This project is in collaboration with Ryobi Australia.