
A Complete Guide To Making Your Own Coloured Plaster
Well, this is exciting! I am a huge fan of using plaster in my DIY and upcycling projects. I love it's organic colour, texture and infinite possibilities. It's very versatile and very easy to work with, and you can finish it raw, seal it or paint it. Last year I bought a range of colours from Dulux Avista's Colour Oxide range at Bunnings to colour concrete for another project, and it got me wondering - could I use these oxide pigments to colour plaster? I did a test and yes, you can COLOUR PLASTER! I was shocked because it was a random idea and I've never seen it done before. And I couldn't believe it worked. It didn't affect the integrity of the plaster due to it's natural properties and the spectrum of colours you can create are limitless! Read on to see how you can easily colour plaster.

Before we get started, let's take a look at colour oxides and find out what they are, what they're used for and how they work.
What is colour oxide?
Oxides are powdered pigments made from iron oxide. In fact, iron oxide pigments have been used as colourants since early humans began painting on cave walls.
What is colour oxide used for?
Colour oxide is used mostly used for colouring cement, and it is also used to colour mortar, rendering and grout. And plaster!
Does colour oxide work well?
Colour oxide works very well! They're a naturally-occurring pigments and they have a higher tinting strength and opacity.
What else can you use to colour plaster?
I've done a lot of research and it looks like you can use paint and food dye to colour plaster as well. I'll be testing these ideas and will report back with their results!
How To Make Coloured Plaster
Now comes the fun part! I encourage you to test and create a range of colours using a few different colour oxides to land on a colour you love. Here's how:
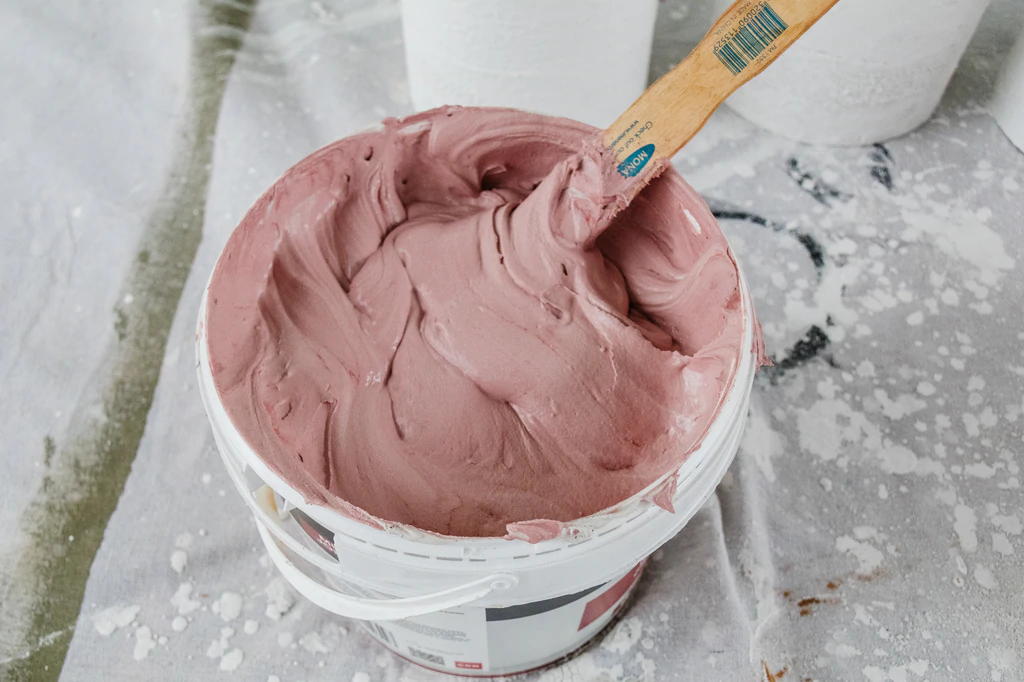
Roughly measure two cups of plaster into a bowl or bucket. Start with a base colour (I started with Brick Red) and add a teaspoon of colour oxide to the plaster. Mix thoroughly with a spoon. Take a sample from the batch and let it dry on a sheet of MDF.
Add another teaspoon of either the same colour to deepen it, or add a different coloured oxide. Mix thoroughly. Take another sample.
Add another teaspoon of either the same colour to deepen it, or add a different coloured oxide. Mix thoroughly. Take another sample.
Repeat until you have enough samples you love.
Let the plaster samples dry for at least 12 hours and then you'll see which colour you like the most. It's very important to note that the colours dry lighter than the mix.
Extra Tip: Remember to write down how much plaster and colour oxide you use. Note down which colours and in what order you added them to the plaster. This is so you know what you exact oxide and measurements used, so if you need to make more you have the recipe at hand!
To Sand or Not To Sand?
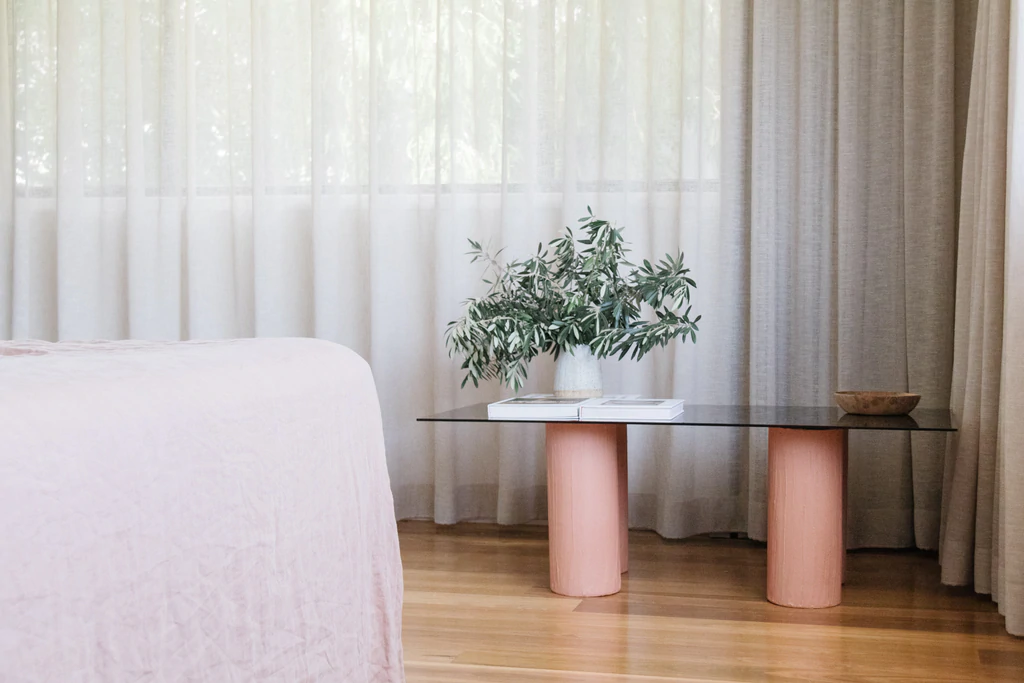
I might be getting ahead of myself here, but before you starting thinking about whether or not you want to seal the coloured plaster you need think think about whether or not you'll sand the plaster. When I upcycled my Coloured Plaster Coffee Table, I was positive I was going to sand the plaster legs (which I made using PVC pipes). I sanded a small section and realised that I didn't like it, so I focused on applying the plaster very neatly. It dried beautifully and I sealed it, of course.

How To Seal Plaster
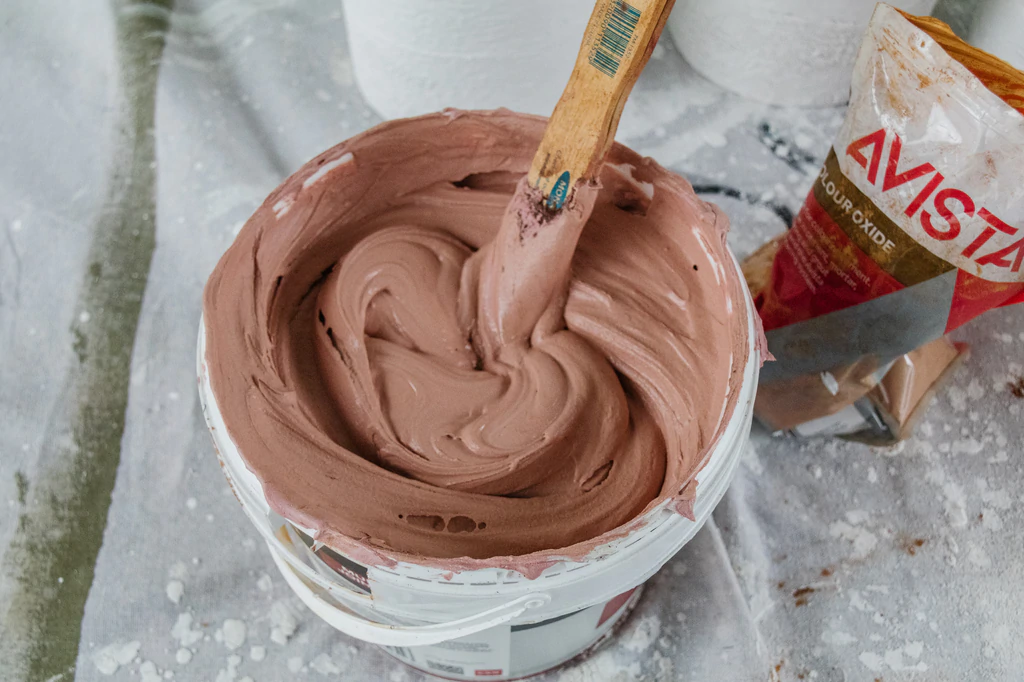
If you want to leave the plaster raw, this is totally ok! The matt, pale finish is gorgeous. Although I prefer to seal plaster. Why? It can leave a fine talcum-like powder if you brush up against it as well as leave a fine powder on your hands when I touch it. Sealing does darken the colour of the plaster as the liquid soaks into the dry plaster, so I recommend sealing your test batches so you can see what the final finish will look like.
To seal the plaster, simply apply the Cabots Cabothane Clear sealer onto the plaster using a paint brush. It is a milky colour but it dries clear, and is non yellowing.
Experimenting with the colours is a lot of fun and feel free to add more of one colour oxide if you want a richer depth of colour. For example, I used more Chocolate Colour Oxide than Red Brick and Sandstone. Dulux Avista also has white colour oxide, so you can use this to lighten the compound, which I love because plaster dries quite a chalky colour and adding white oxide will make the plaster pop! Let's get started!
Before Sealing

After Sealing

A Comparison

Materials
A tub of premixed plaster. I love these ones from Bunnings:
Dulux Avista Colour Oxide from Bunnings
Paint stirrier. I used two of these from Bunnings for extra strength.
Sealer. I used (and love!) Cabot's Water Based Cabothane Clear in Matt, which you can get from Bunnings.
How To
Before you officially get started, I want to make sure you have made a test batch and noted down the colour you like and want to create using the pigments. Although you can dive straight in if you like, especially if you don't want to mix colour oxides.
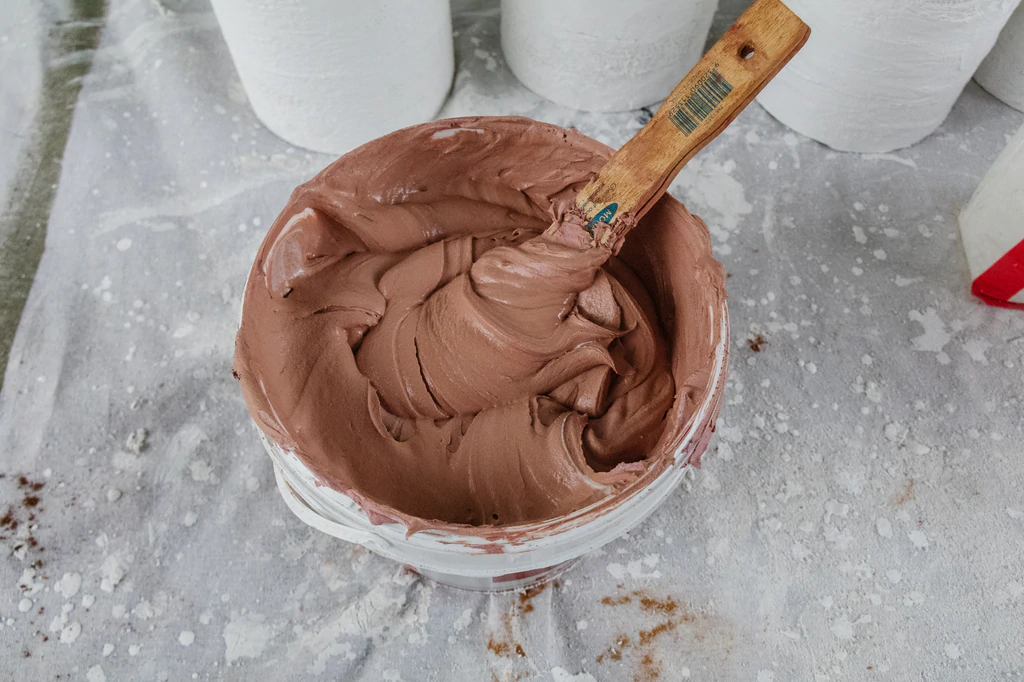
Before adding the colour oxide, thoroughly mix the plaster with the paint stirrer. This will soften the plaster and get rid of some of the air bubbles.
Add a tablespoon of colour oxide at a time. Mix, mix, mix thoroughly. Remember to write down how much colour oxide and plaster you used! If you are using one of the tubs above, you will need some muscle to mix all the way down to the bottom of the tub. The more you work the plaster, the easier it is to work with. Continue until you land on a colour you are satisfied with.
Apply the plaster to your DIY project or upcycle. Let it dry and seal if you like.


