
Before & After: DIY Raffia Lamp
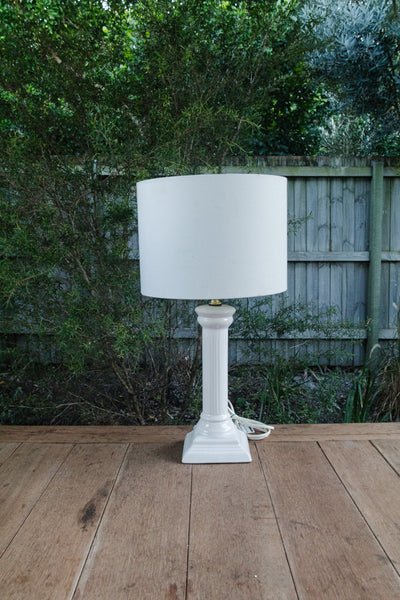
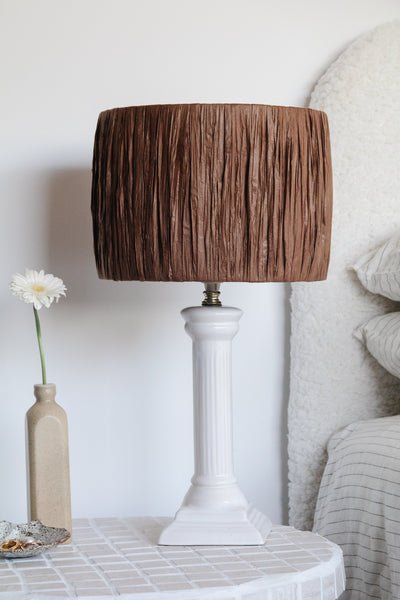
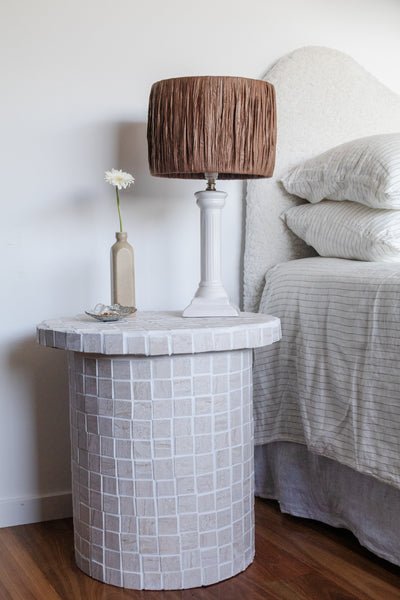
Hello! Hope you are all doing well wherever you are, and that my recipes and DIY projects are bringing you some comfort and distraction at the moment. If you've got any requests for recipes and home DIY projects, makes sure you let me know by emailing me at jaharn@smorkitchen.com. Today I've got a really fun and quick DIY project that you can do at home - the DIY No Glue Raffia Lampshade. I stumbled across a desk lamp at my local tip shop a few of weeks ago and I instantly fell in love with the Mediterranean inspired ceramic base. It was only $5 and I knew I wanted to flip the dirty lampshade into something beautiful.
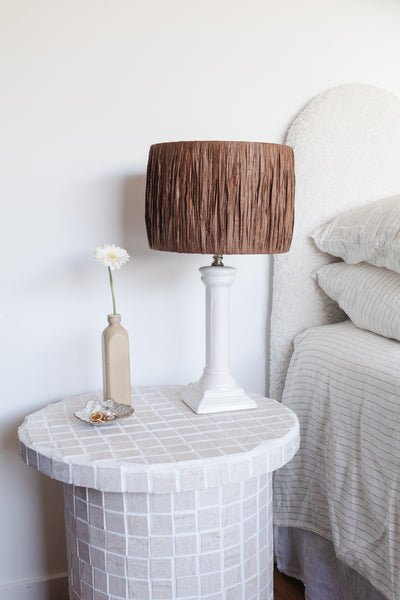
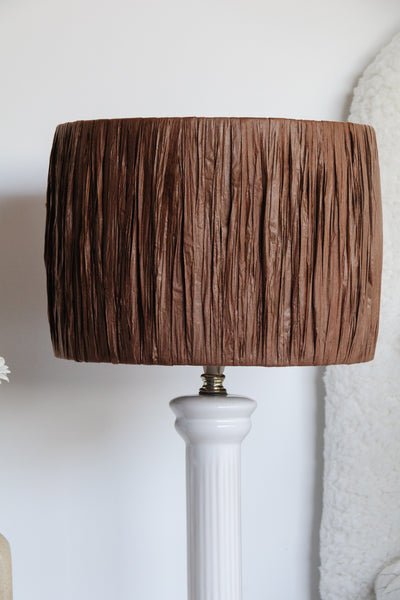
I have been contemplating wrapping it in twine or natural raffia but I wanted to create something fresh and new, something I haven't seen before. A couple of weeks ago I was at Lincraft and I discovered this beautiful chocolate brown raffia, and knew it would be perfect. The textural, fluted base is white and cream, so I knew a warm tone like chocolate brown would pair beautifully with it. And here we are. Often my DIY projects take a few days, so it was so much fun start and finish this in as little as an hour. Read on to find out how you can transform any old lampshade at home in as little as an hour using raffia. I might also add this is the perfect project for when you're binge watching Cruel Summer or The Parisian Agency.
Materials
Lampshade
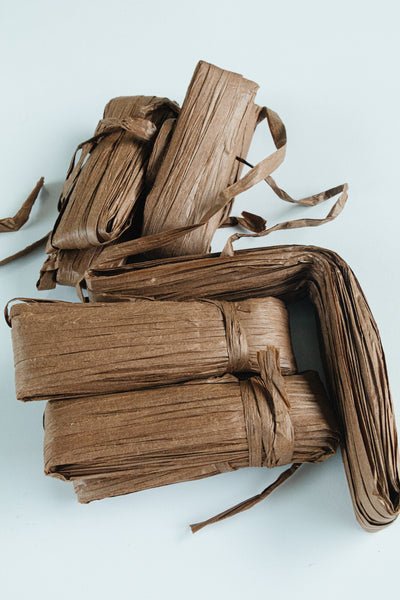
3 to 5 packets of Paper Raffia from Lincraft (there are lots of colours to choose from too!)
Scissors
Measurements
For context and figuring out how much raffia you will need, the measurements for the lampshade I flipped are:
Height - 19.5cm
Circumference - 87cm
Diameter - 27cm
How To
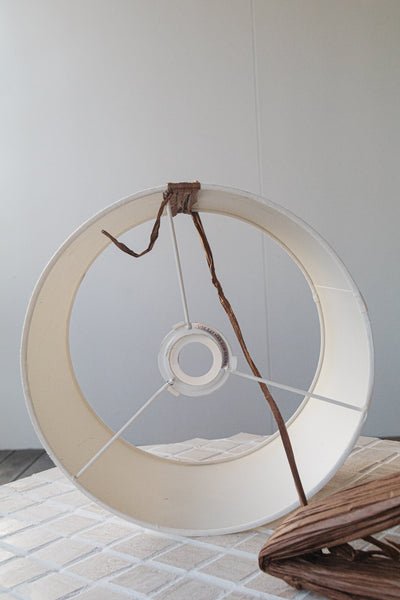
Remove the lampshade from the lamp.
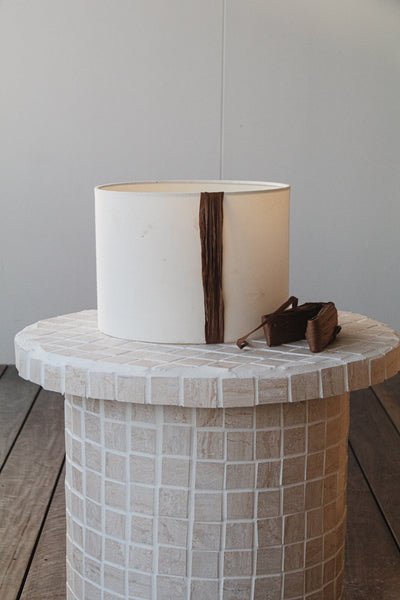
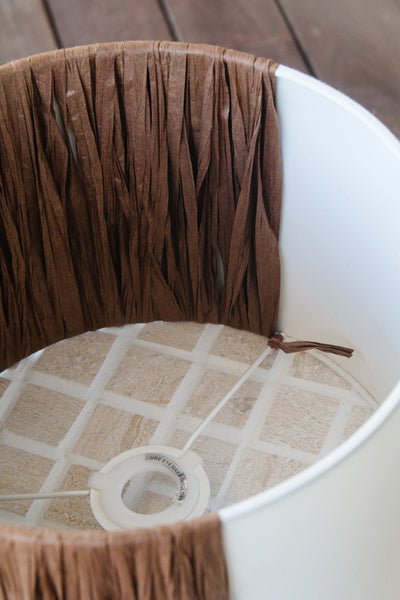
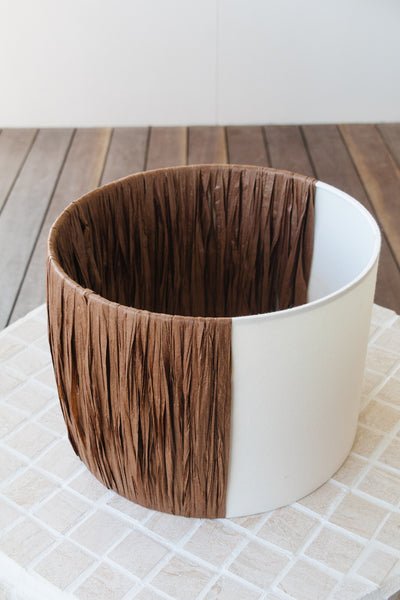
Start by tying the end of the raffia to the wire framing of the lampshade in a double knot. Make sure it's firmly tied.
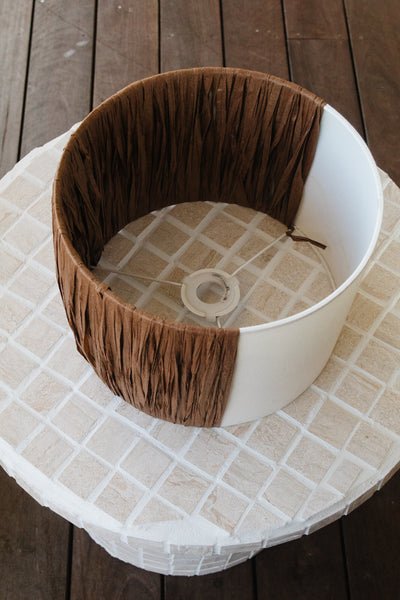
Wrap the raffia around the lampshade tightly. Make sure you can't see the lampshade underneath.
When you have finished one packet of raffia, tie the end piece with the start of a new piece in a double knot, and keep wrapping the raffia tightly around the lampshade. Repeat until the lampshade is completely covered in raffia.
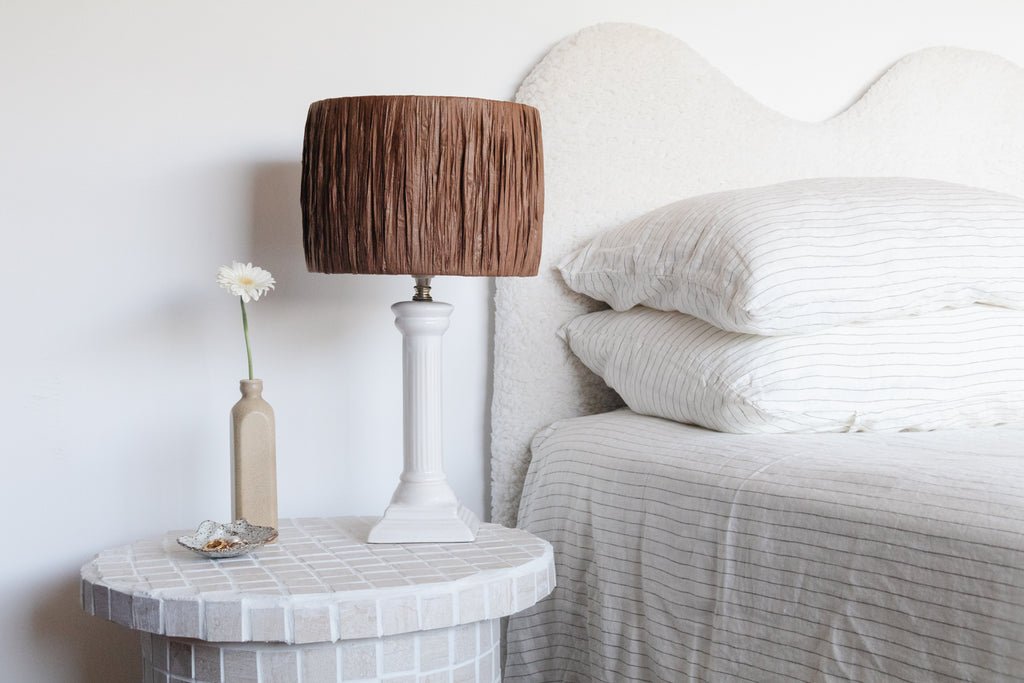
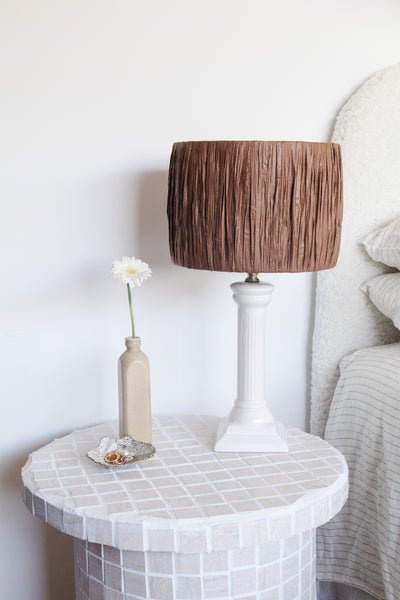
Secure the lampshade back onto the lamp and enjoy!

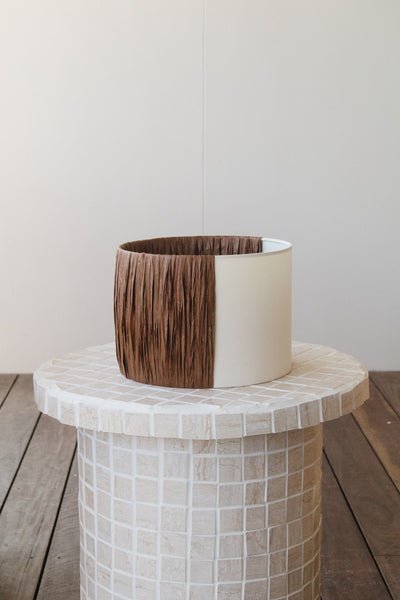
And it's done!
A little note from me
Thank you so much for taking the time to read through this tutorial. I hope you enjoyed it and feel inspired to flip your own DIY Raffia Lampshade! You can also stay in touch with me by following along on Instagram and Pinterest, or sending me an email at jaharn@smorkitchen.com. Happy cooking, happy making!


