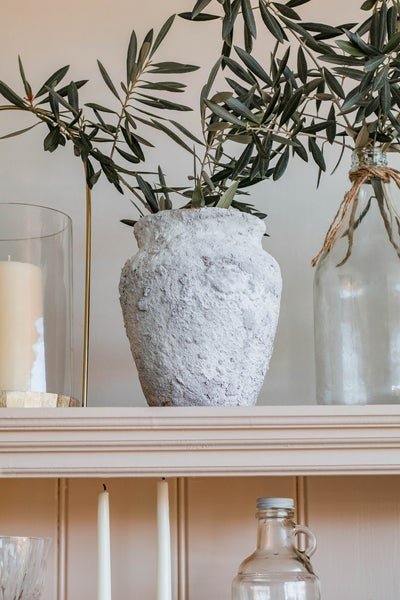
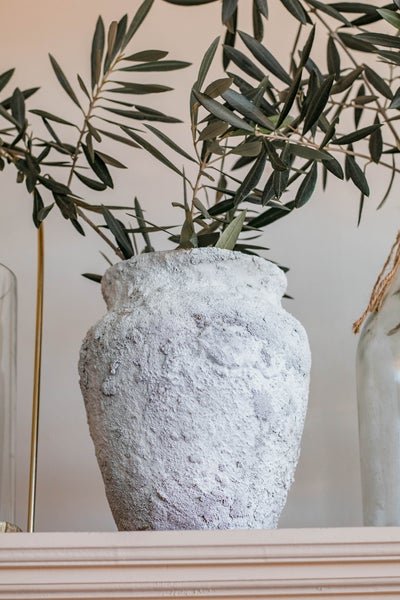
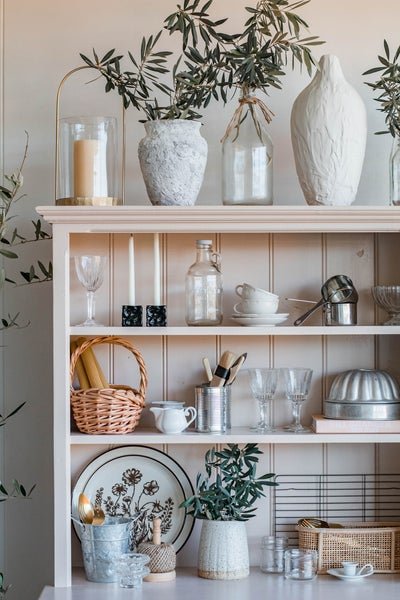
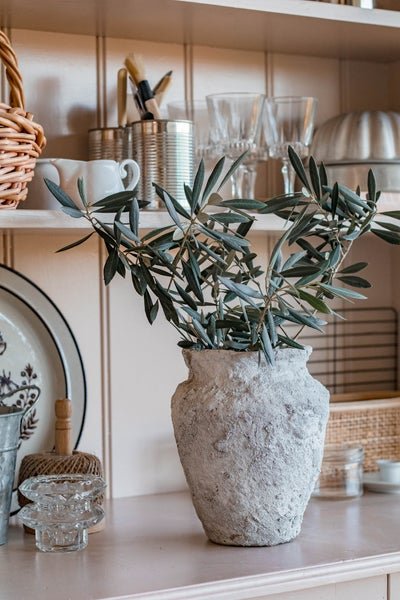
DIY Stone Vase (using concrete!)
If you have been following along here for a while, then you'll know how much I love sourcing secondhand items for my home, kitchen and table from my local thrift stores and charity shops. There are a few things I always look out for but recently I have been experimenting with different materials to bring some outdated secondhand vases to life. And I am excited to kick off this series with my first of three upcycle vase projects - my DIY Stone Vase using concrete!
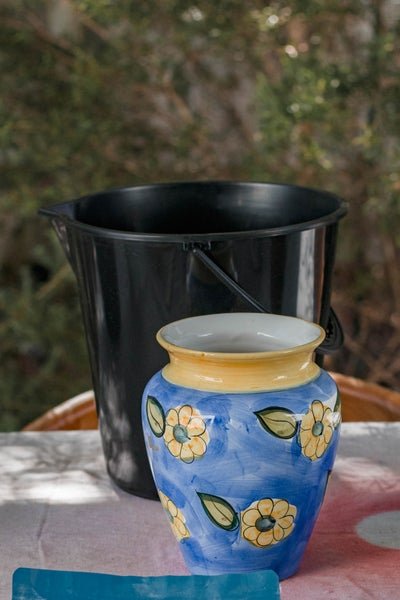
I love aged terracotta pots and stone planters, vessels, jugs and vases. There is something very nostalgic about them; they remind me of seeing Nona's sitting together outside their homes along the Italian Rivera when we were on our honeymoon a few years back. I have been on the lookout for a stone pot and vase back home but what I've been able to find is either too expensive or too ugly. So I recently set out to see if I could make my own stone vase for my kitchen and table. I went down to one of my local charity stores and was immediately drawn to a fairly ugly blue and yellow ceramic vase for $2; the shape was curvy and cute, and the size was perfect (not too tall, not too short) to not only put on our floating shelves in the kitchen, but also on our long outdoor dining table (where you will be able to see your guests over it). Once I had my ugly vase in hand, I went over to Bunnings and decided to experiment with fast drying concrete powder and here we are! Read on for the materials and steps to create your very own DIY Stone Vase - using concrete! And make sure you check out my second DIY in this Upcycled Vase Series DIY Textured Vase (using joint compound!).


Steps
Lay out a drop sheet or an old sheet to cover your entire work surface and wipe down your vase with a damp cloth.
Add water and mortar to a bucket as per the instructions and stir until you get your desired thickness. I found the ratio of 2 to 1 (mortar to water) to be pretty spot on. You want the concrete to be wet, but not so wet that it's runny and shiny.
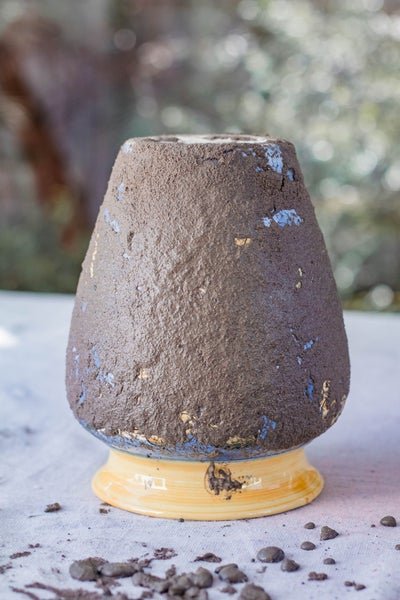
Put on the gloves and apply the first layer by patting the concrete on gently and all over the surface of your vase (or jug, or planter). Use a sea sponge to roughen up the finish and also to remove excess water from the concrete sitting on the vase. When you've managed to get one rough coat of cement on the vase, remove the gloves and wait for the concrete to dry overnight (even though this type of mortar is fast setting, it still takes a while to dry thoroughly). The goal here is to create a few layers of concrete for that aged stone look.
For the second layer, I mixed up more concrete and applied another layer of concrete all over the vase. If the concrete from the first layer hasn't dried properly, that's totally ok. I also found it easier this time to use my hands without gloves. I waited until the cement was a little drier to apply it over the curved rim (it was like applying bits of play dough) and then I used my fingertips and the sea sponge to roughen up the finish.
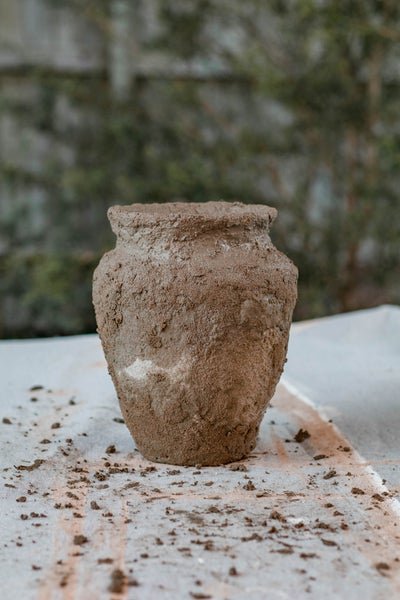
Wait until the concrete has partially dried then apply a light coat of white spray paint. The effect should not be perfect - spray some sections a little more than others, and spray some sections a little less than others. Don't overspray the vase as you want that create an aged, weathered look where you can still see the grey concrete.
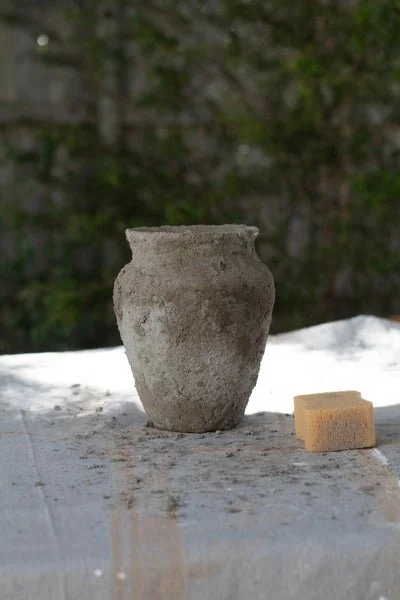
Wait overnight for the concrete and paint to completely dry before handling.
And there you have it! While it takes a couple of days to complete, the best part about this DIY is being able to upcycle an ugly secondhand vase and transforming it completely into a gorgeous weather stone vase. I also filmed myself making this DIY a couple of weeks ago, so I will make sure to share these videos on Instagram this week. And make sure you check out my second DIY in this Upcycled Vase Series DIY Textured Vase (using joint compound!). And to see if this concrete technique works on a planter!