
Upcycled DIY Checker Painted Side Table
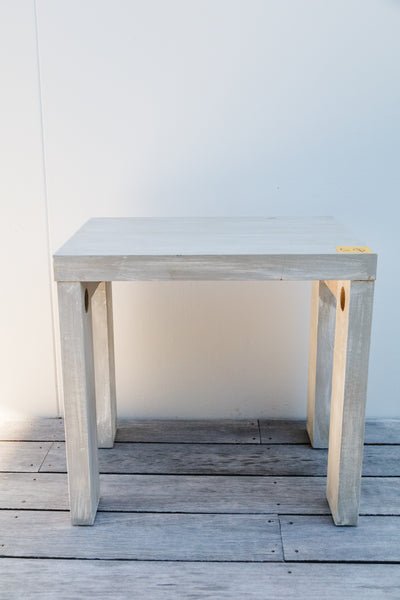
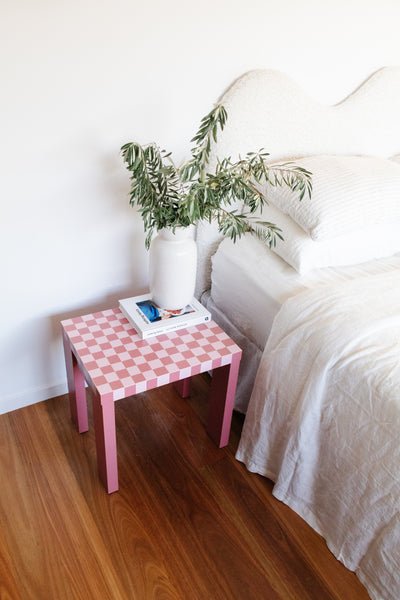
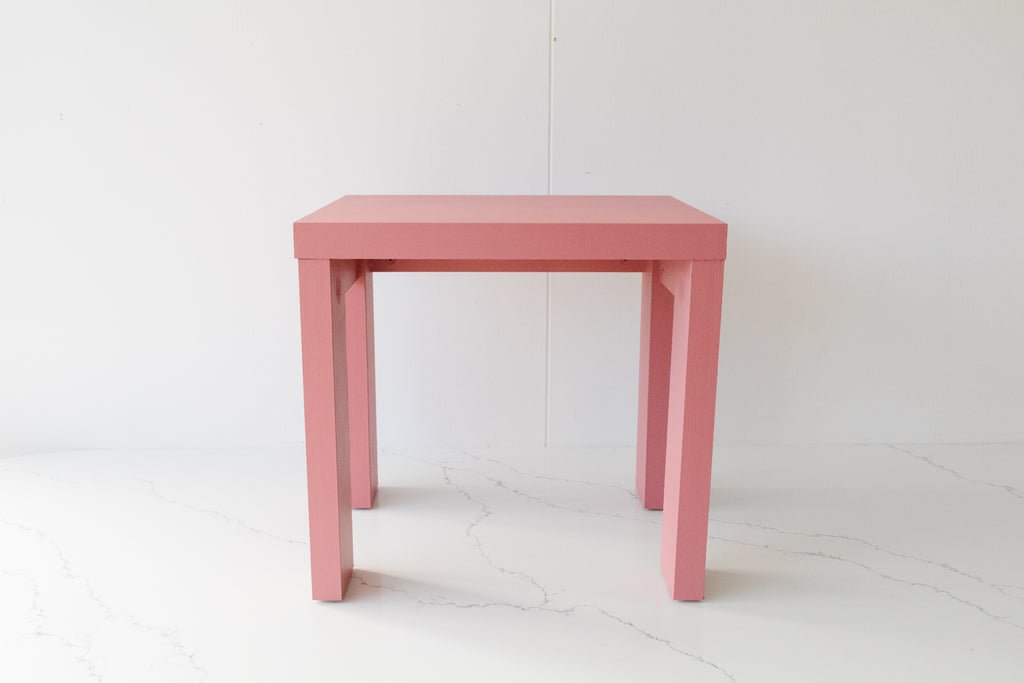
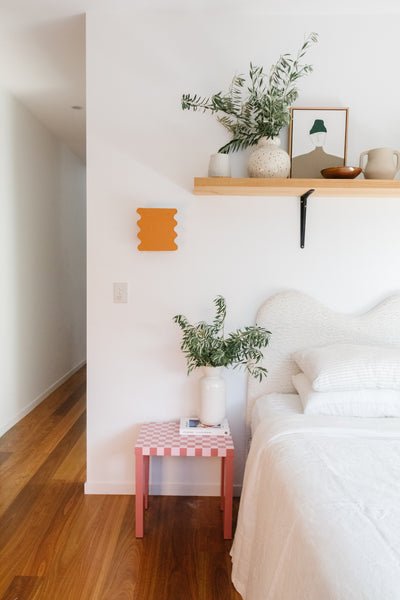
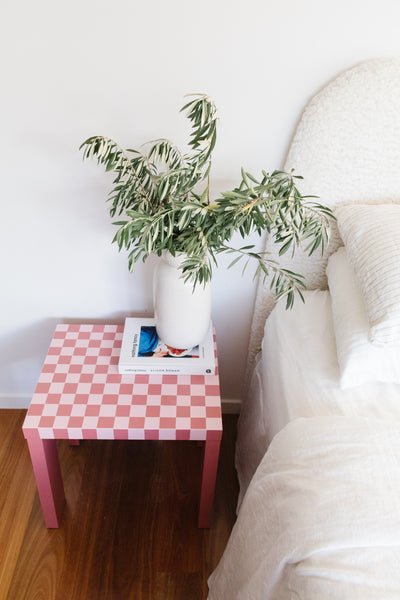
I am so excited to share my latest project with you - the upcycled DIY Painted Checker Side Table! I love the checker trend and it's here to stay in 2022, which I am so happy about. I've had the idea to paint a side table using my painted checker technique for ages and I was so excited when I stumbled across a side table at my local tip shop for $5. With it's straight edges, I knew it would be perfect for this upcycle. My next task was choosing the paint colours! I threw out Dulux paint colours to my lovely community on Instagram and once again, they came through with the goods! They know me so well and I am thrilled because the colours look beautiful with my DIY Terracotta Wavy Sconces in our bedroom. And while I wanted to paint a checker print all over the table, it was proving to be quite a challenge lining up the checks down the legs so I decided to paint the tabletop only and I am thrilled with how it looks! Read on to make your own DIY DIY Painted Checker Side Table. As always I have shared the materials I used, links and steps to make this upcycle so easy for you to try. Happy upcycling!
Before & After
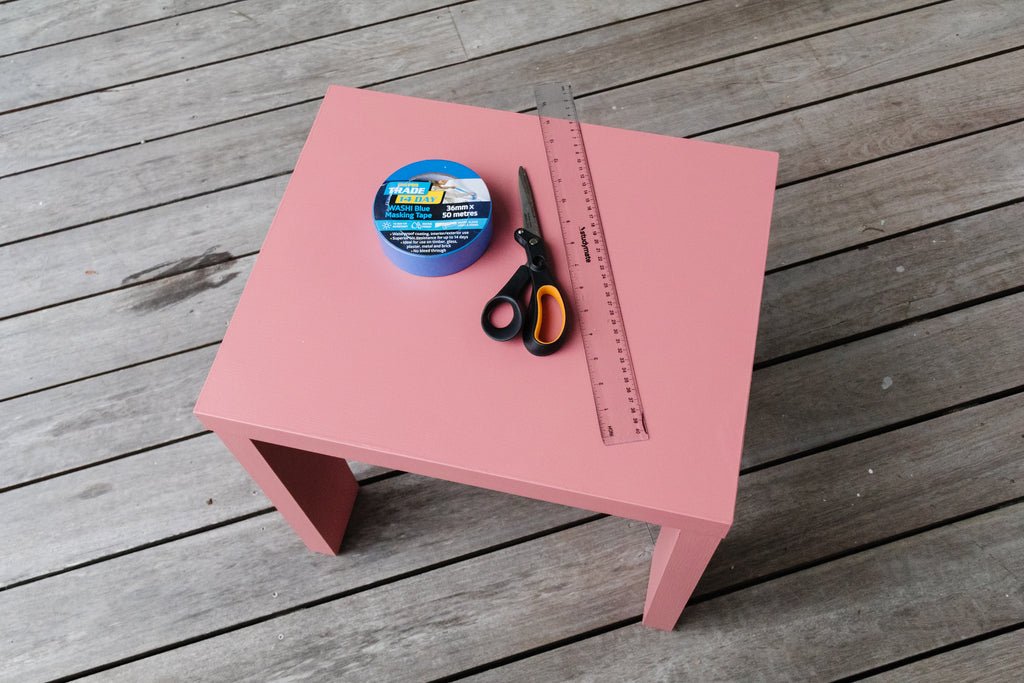
Materials
Side table - preferably one with straight edges as it'll make it easier to create my painted checker technique. I got my side table from my tip shop for only $5.
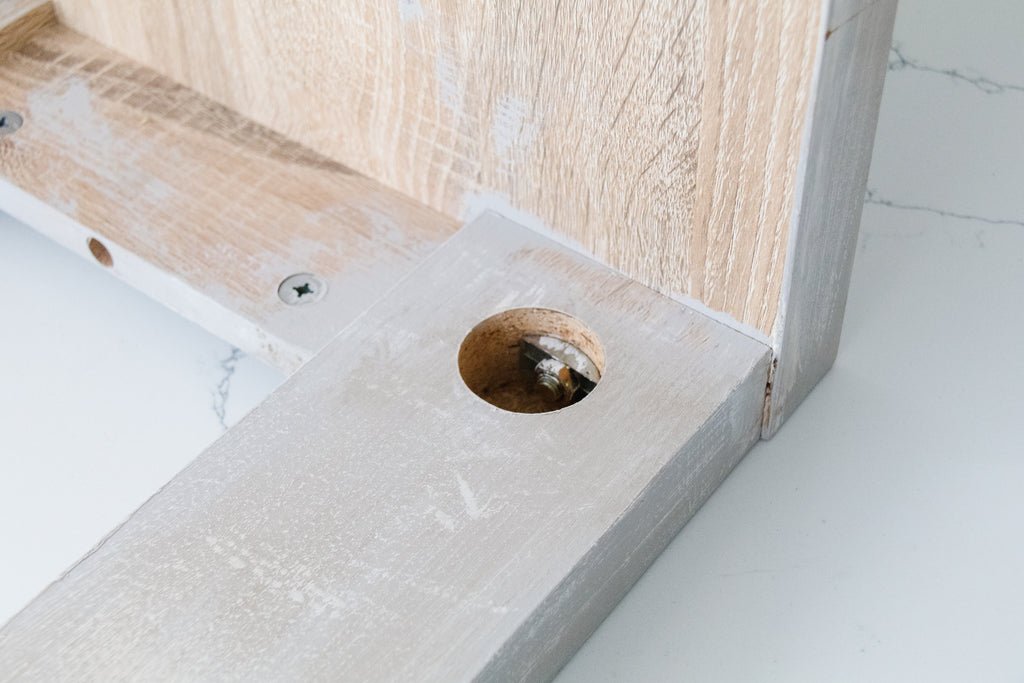
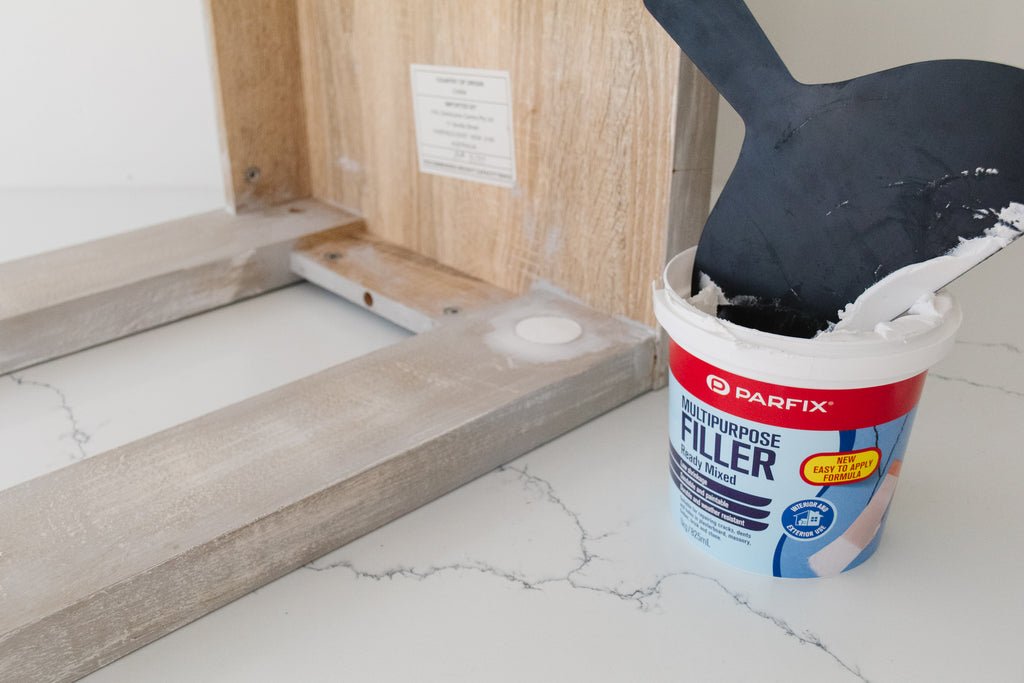
Multipurpose filler and a paint scraper - you will only need this if you side table has some holes or gaps in it, like mine did
36mm Painters tape from UniPro - the width of the painters tape will determine the width of your checks, so if you want a bigger check double the tape when applying it or purchase a wider painters tape like I did. It will help to measure the side table first then work out what width you'll need for the painters tape.
Ruler or measuring tape
Pen or pencil
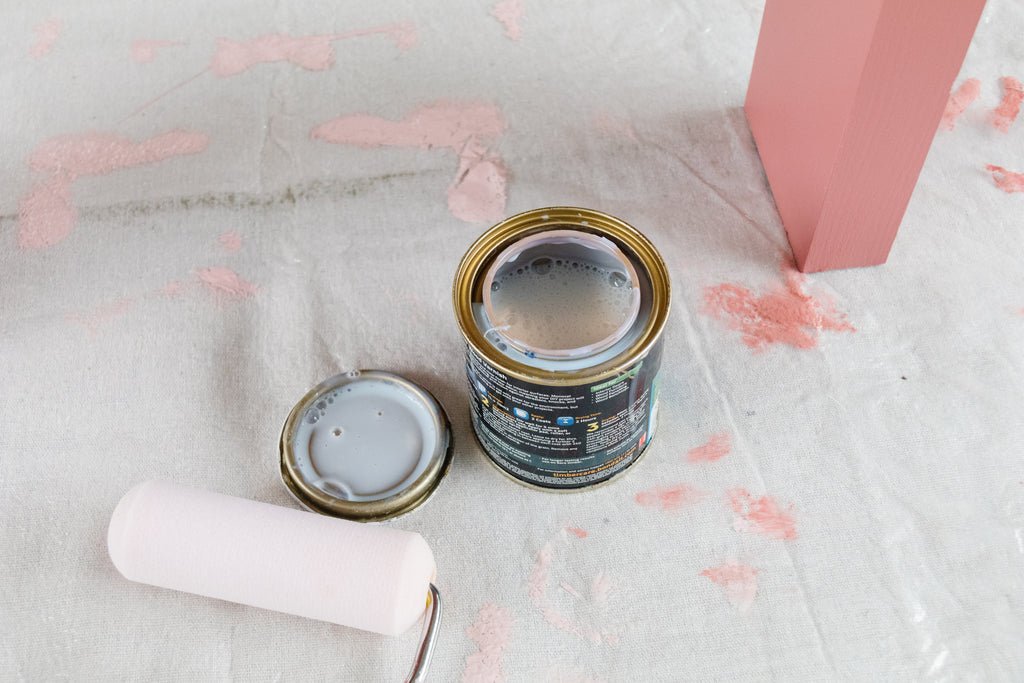
Two paint colours of your choice. I used Terra Tone and Perfectly Pink from Dulux, which are both available from Bunnings.
High density foam roller. I prefer to use this roller for painting furniture.
Small angled paint brush in case you need to tidy the checks up.
Matte varnish (non yellowing)
How To
Start by lightly sanding you table as this will help prevent paint peeling later on (I didn't do this myself unfortunately so I highly recommend you do!). If your table has a few holes or gaps like mine did fill them in using Multipurpose Filler, which I have linked in the Materials list above. Paint the table with at least two coats of paint; I painted three coats. Set aside to completely dry in between coats.
Apply painters tape using my Checker Print Painting Method. Use a ruler and pencil to mark out and measure the spaces in between the tape as this will help you paint perfect checkers. Apply the painters tape vertically down the side table from one side to the other. Carefully press down the edges to ensure paint doesn't seep in underneath the painters tape. Repeat by applying the painters tape horizontally across the side table.
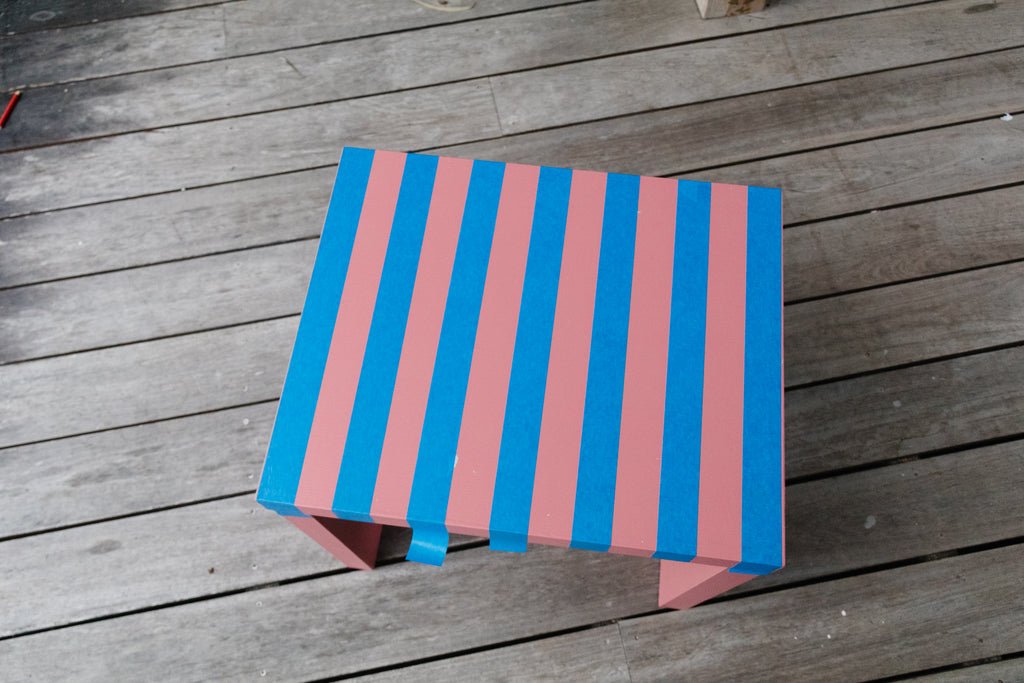
Paint the entire surface using the roller (sorry I forgot to take a photo of this step but if you keep reading on, I did take a photo for the same step later on). I highly recommend peeling the painters tape off the table when the paint is still wet; it helps the paint dry quicker, I touch up any mishaps with a small angled paint brush and I always get a better result. Use your small angled paint brush to make any touch ups. Set aside to completely dry.
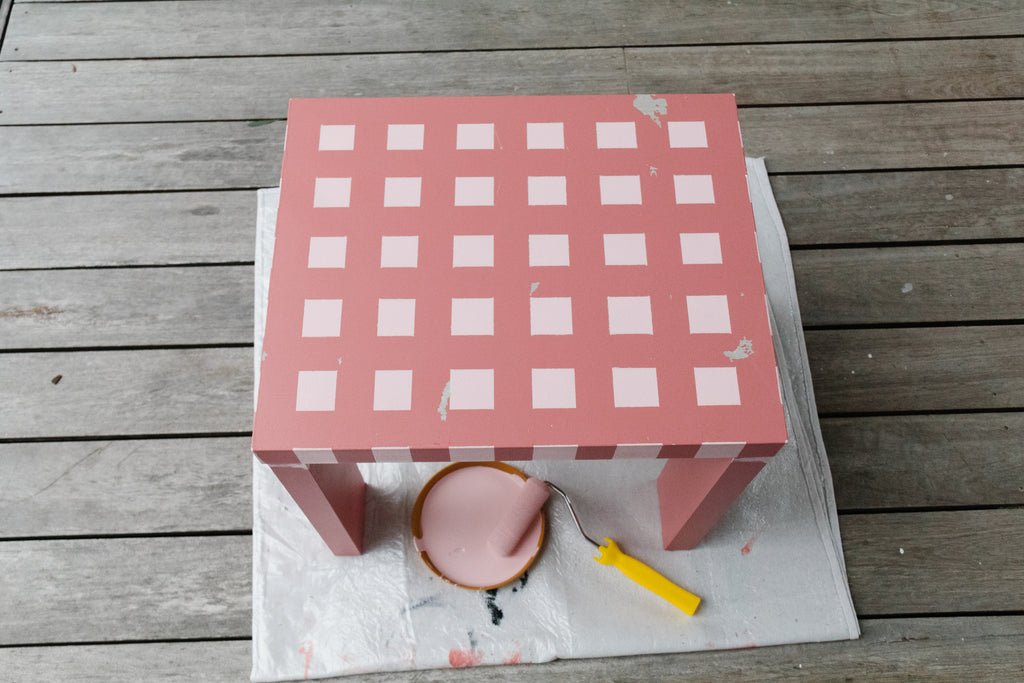
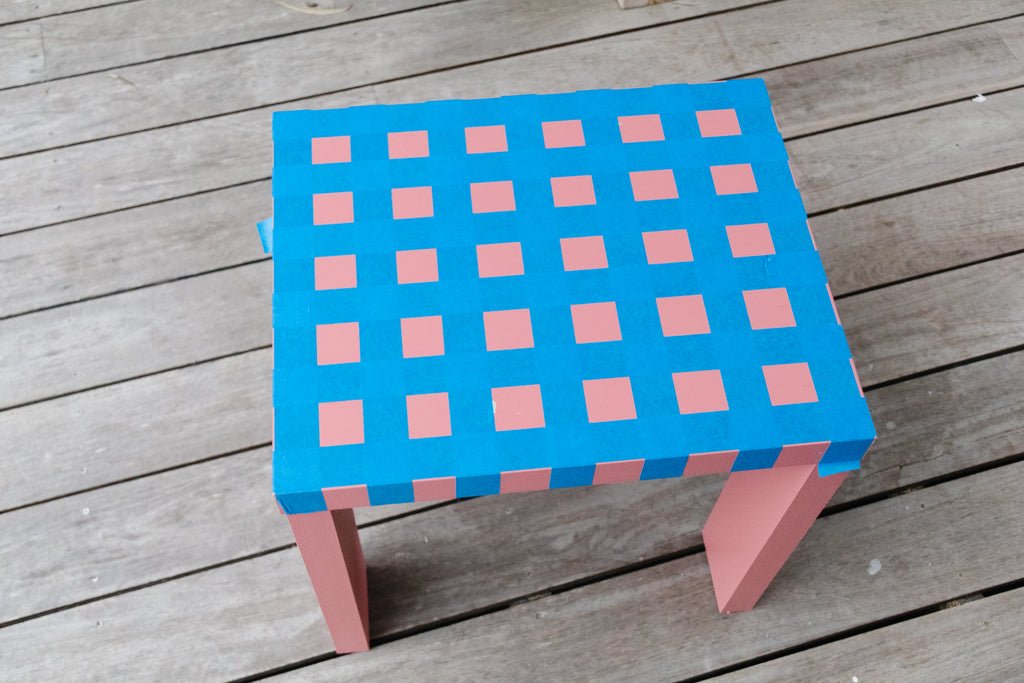
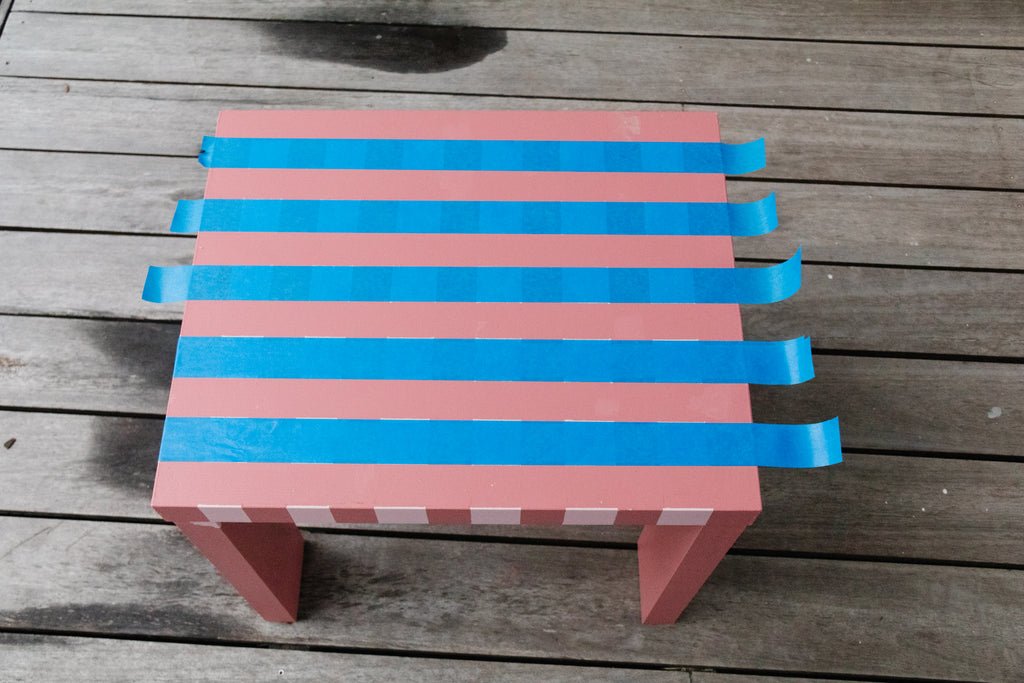
When the first squares are totally dry carefully apply the painters tape vertically onto the painted squares from one side to the other. Carefully press down the edges to ensure paint doesn't seep in underneath the painters tape. Repeat by applying the painters tape horizontally across the remaining painted squares. Basically you are covering up all the painted squares. It looks a little confusing I know, but stick with me.

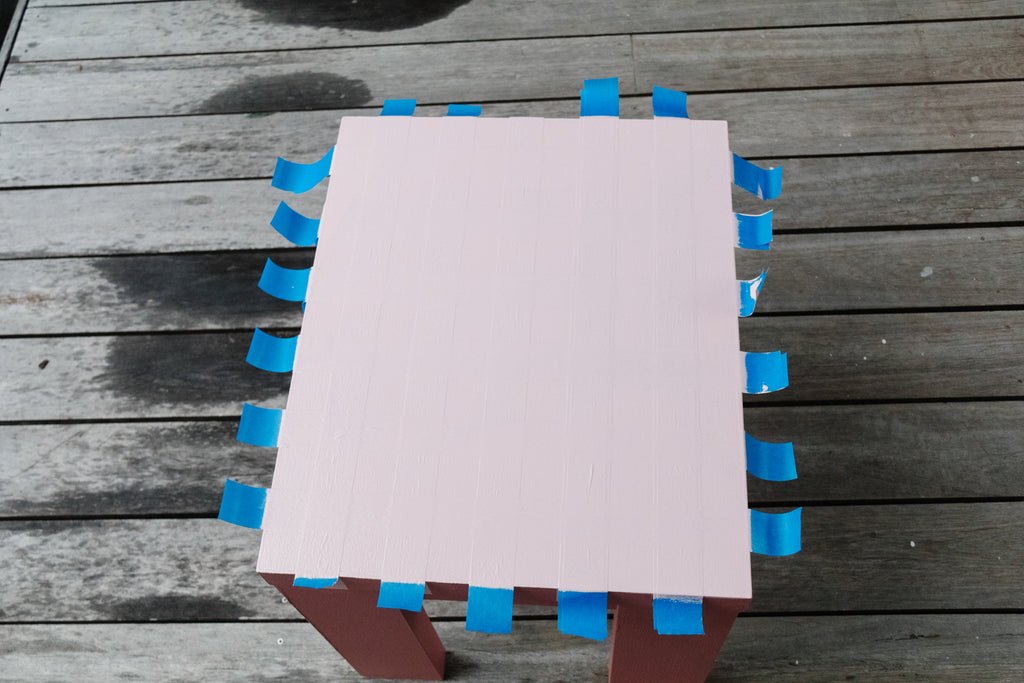
Paint the entire surface using the roller. Then carefully peel the painters tape off the fabric and the checker print will be revealed. Hurrah! Touch up any sections that need it if the paint bled or peels, then set aside to dry.
This next step is optional. When the table has completely dried, apply a thin layer of wood varnish to the surface using the same roller (you will need to clean the paint off the roller first or use a new sponge). You don't have to do this but I think the finish looks a bit more professional as I find painted furniture can often look quite flat and one dimensional. I also find it's best to apply the varnish in small sections as it dries quickly. Set aside to dry.
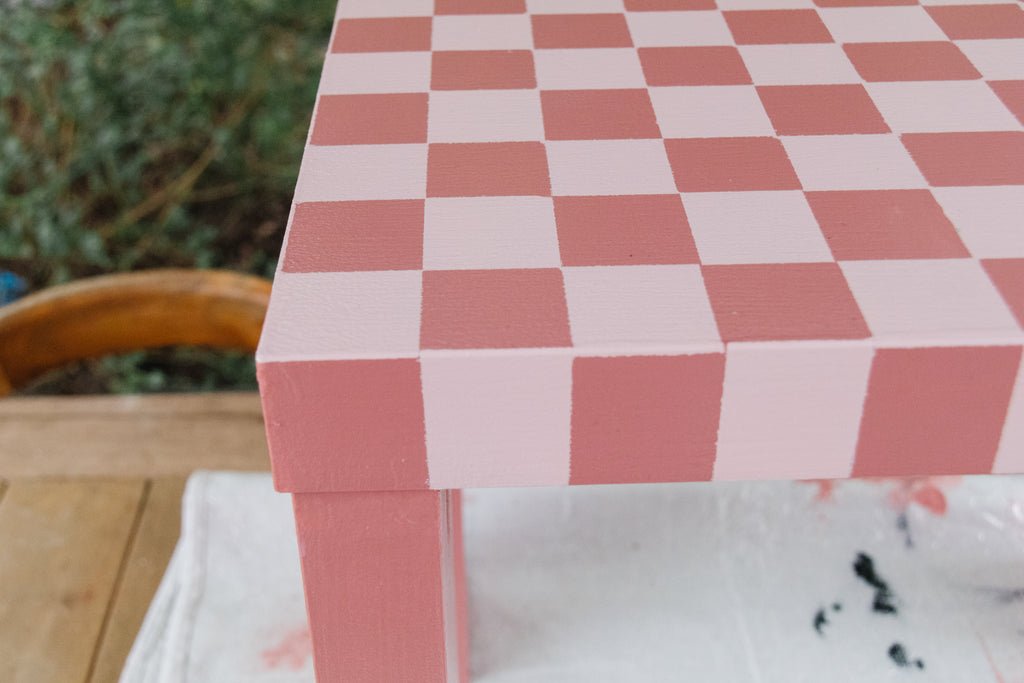
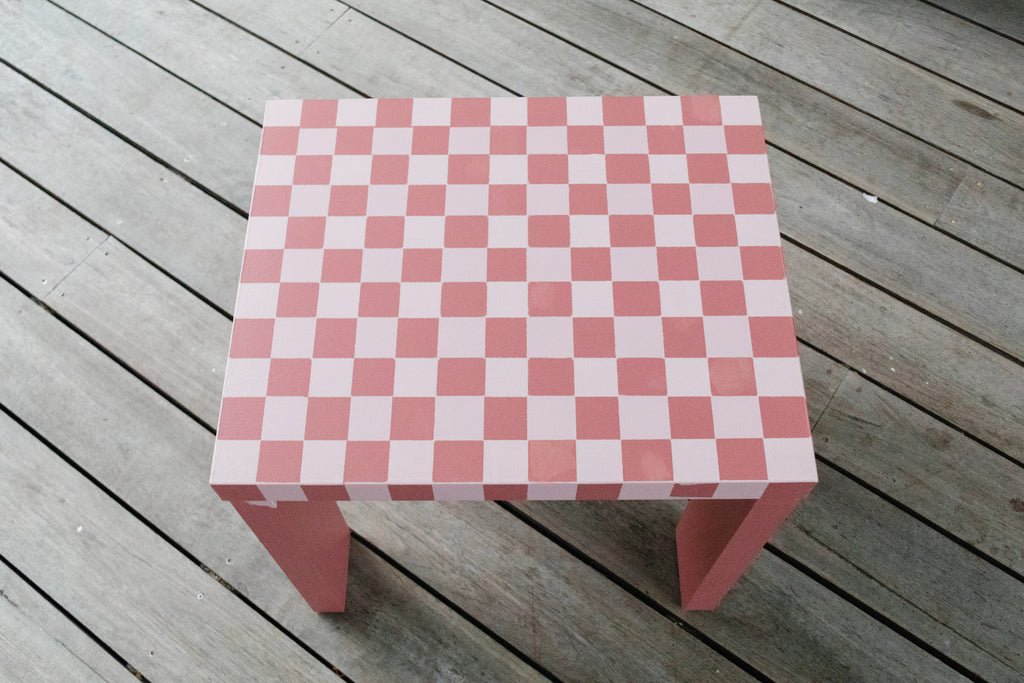
Ta daaaaa! A complete transformation using only paint!
I am so happy with my DIY Painted Checker Side Table! It's incredible what you can do with a thrifted side table, paint and tape. I love how fun and bright it looks in our bedroom, and how the colours compliment my DIY Terracotta Wavy Sconces. Thank you to my lovely community over on Instagram who helped me choose the colours. Again, this is another upcycle I couldn't have done without you. If you're looking to give this DIY a try, I recommend taking your time when measuring and applying the painters tape as this extra effort will ensure the checker pattern is uniform. Even though this is a quick and easy home decor DIY, I still want it to look as professional as possible and it's these small details that might take a little bit more time but make a big difference. I also highly recommend finishing the table with a lick of matte wood varnish to give it another nudge in the professional direction. You don't have to do this but I think the finish looks stunning!


A little note from me
Thank you so much for taking the time to read through my latest upcycle! I hope you enjoyed it and feel inspired to make your own DIY Checker Painted Side Table. If you loved this DIY please stay in touch with me on Instagram and Pinterest where I share lots of DIY projects every week. If you have any questions about this project, or if you just want to say hello, I'd love to hear from you. Write to me at jaharn@smorkitchen.com or send me a DM over on Instagram. Happy DIY'ing!


