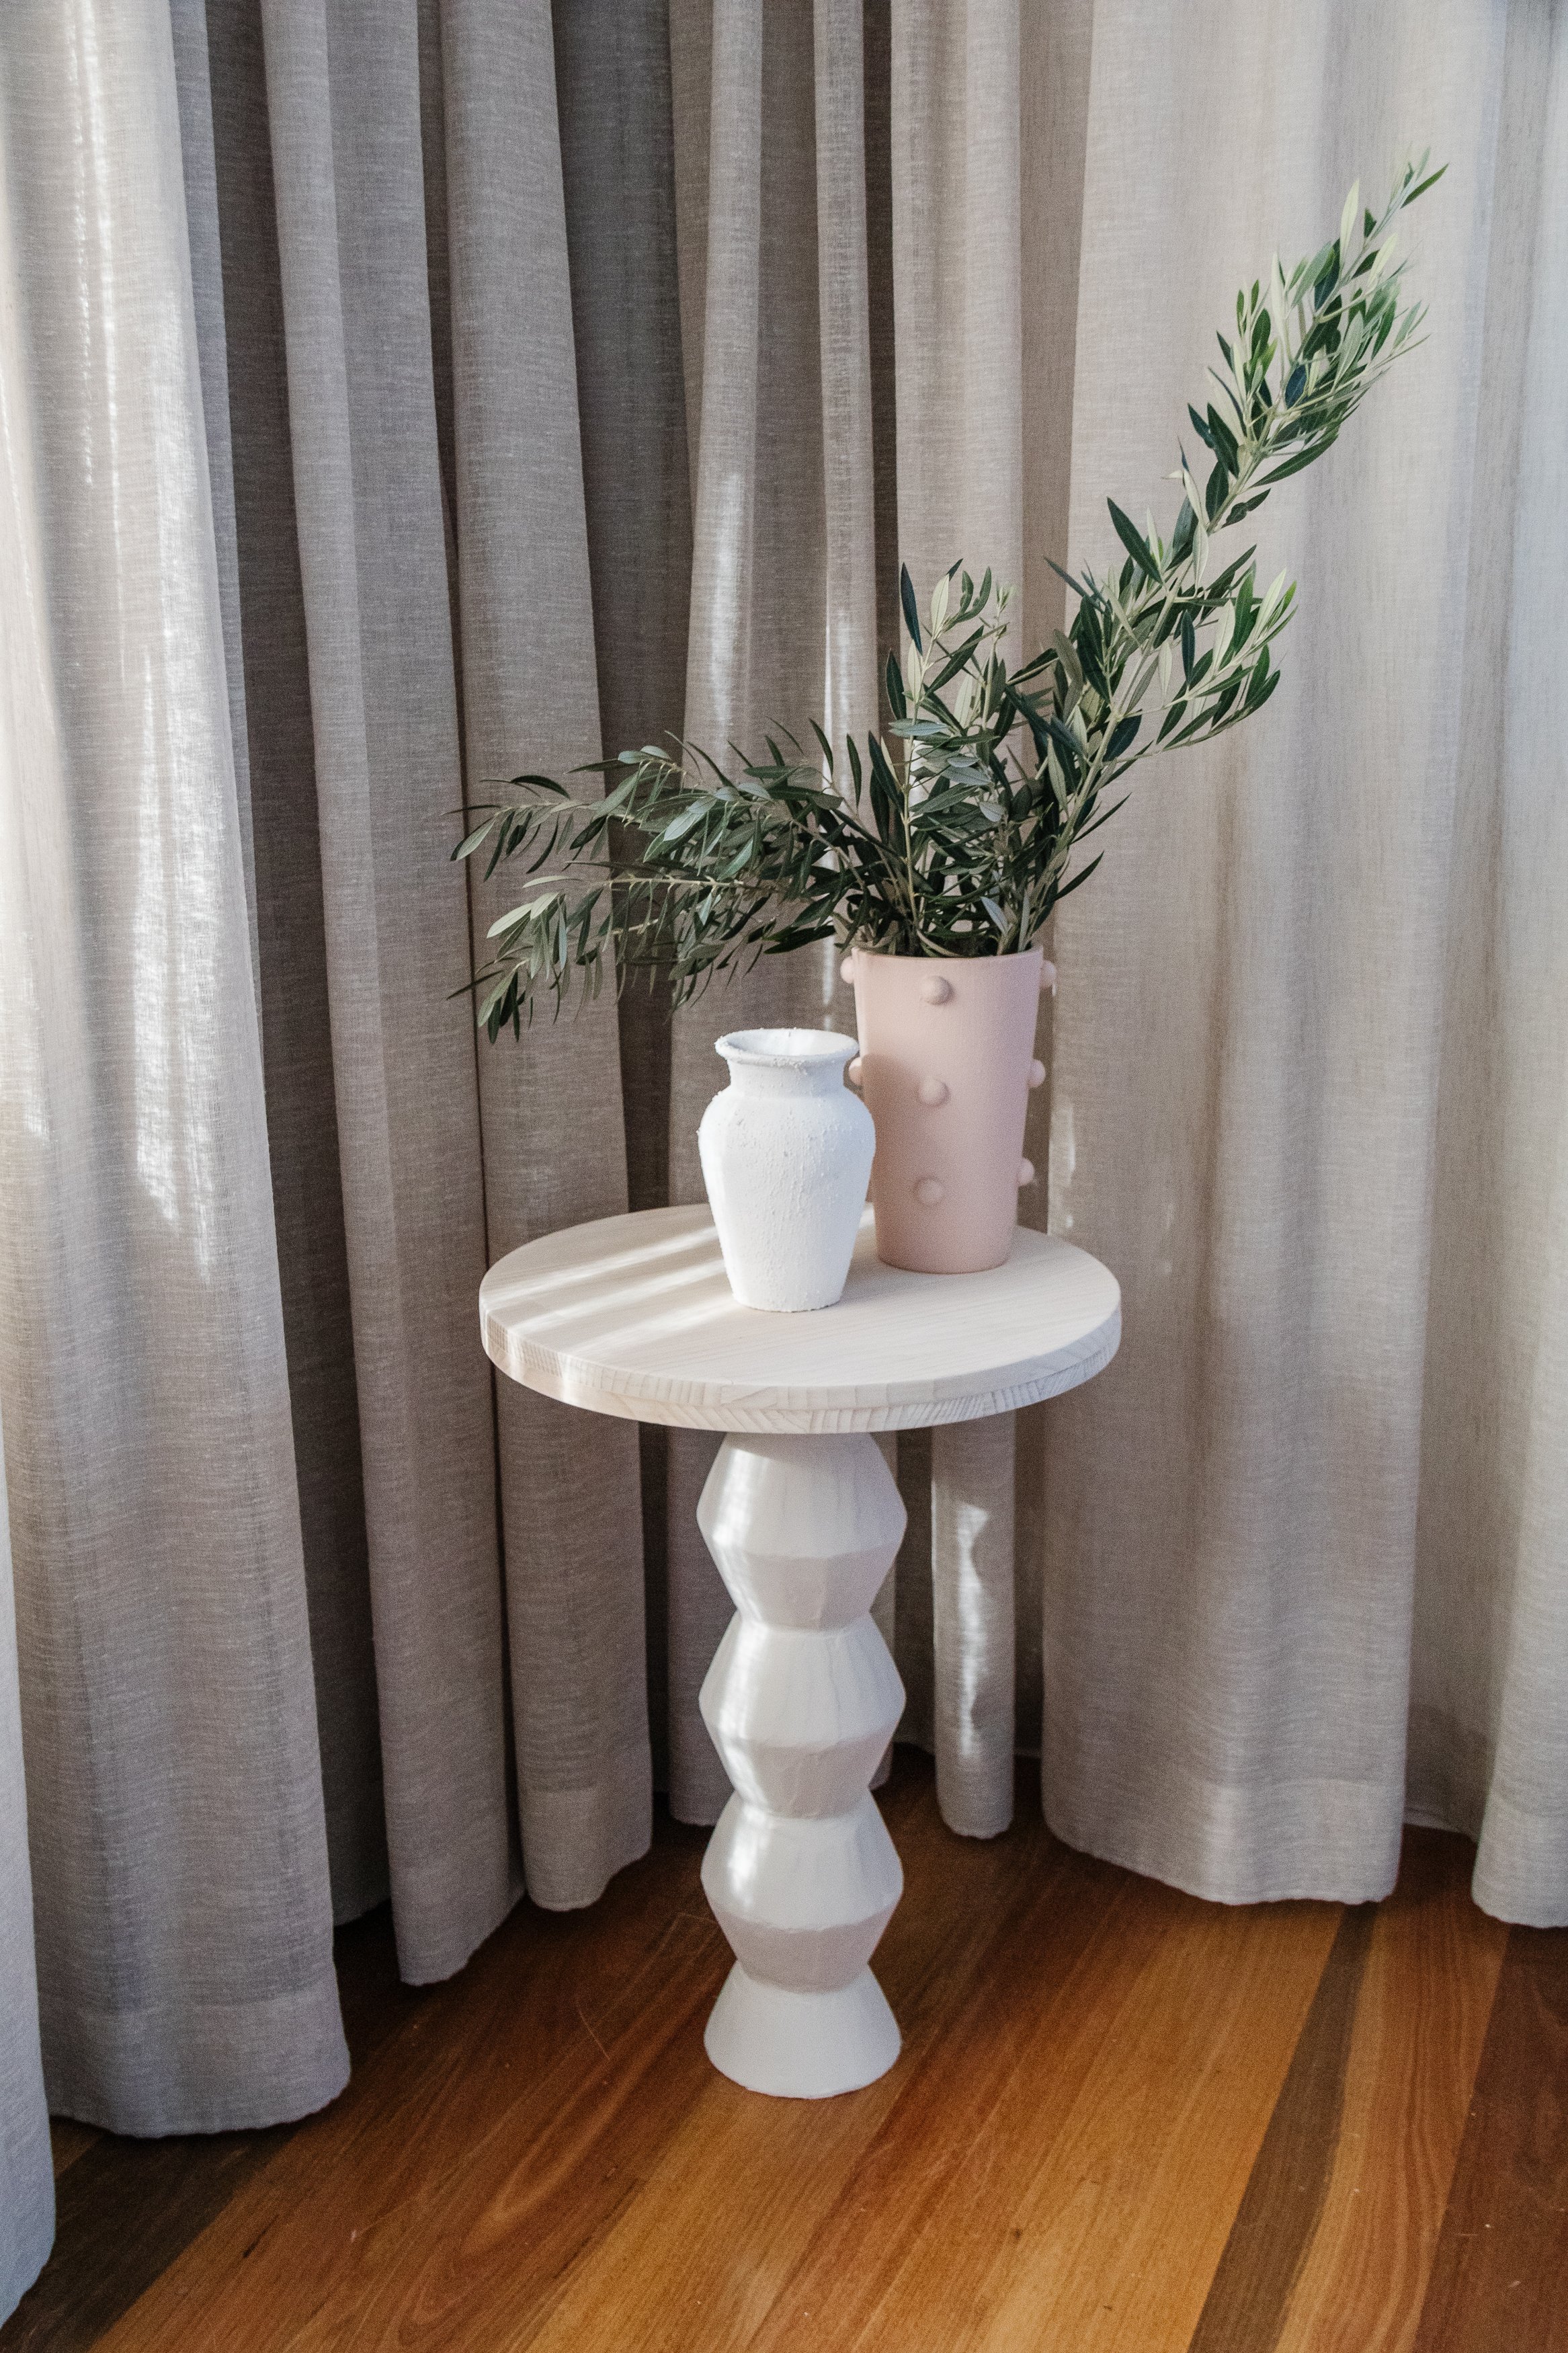
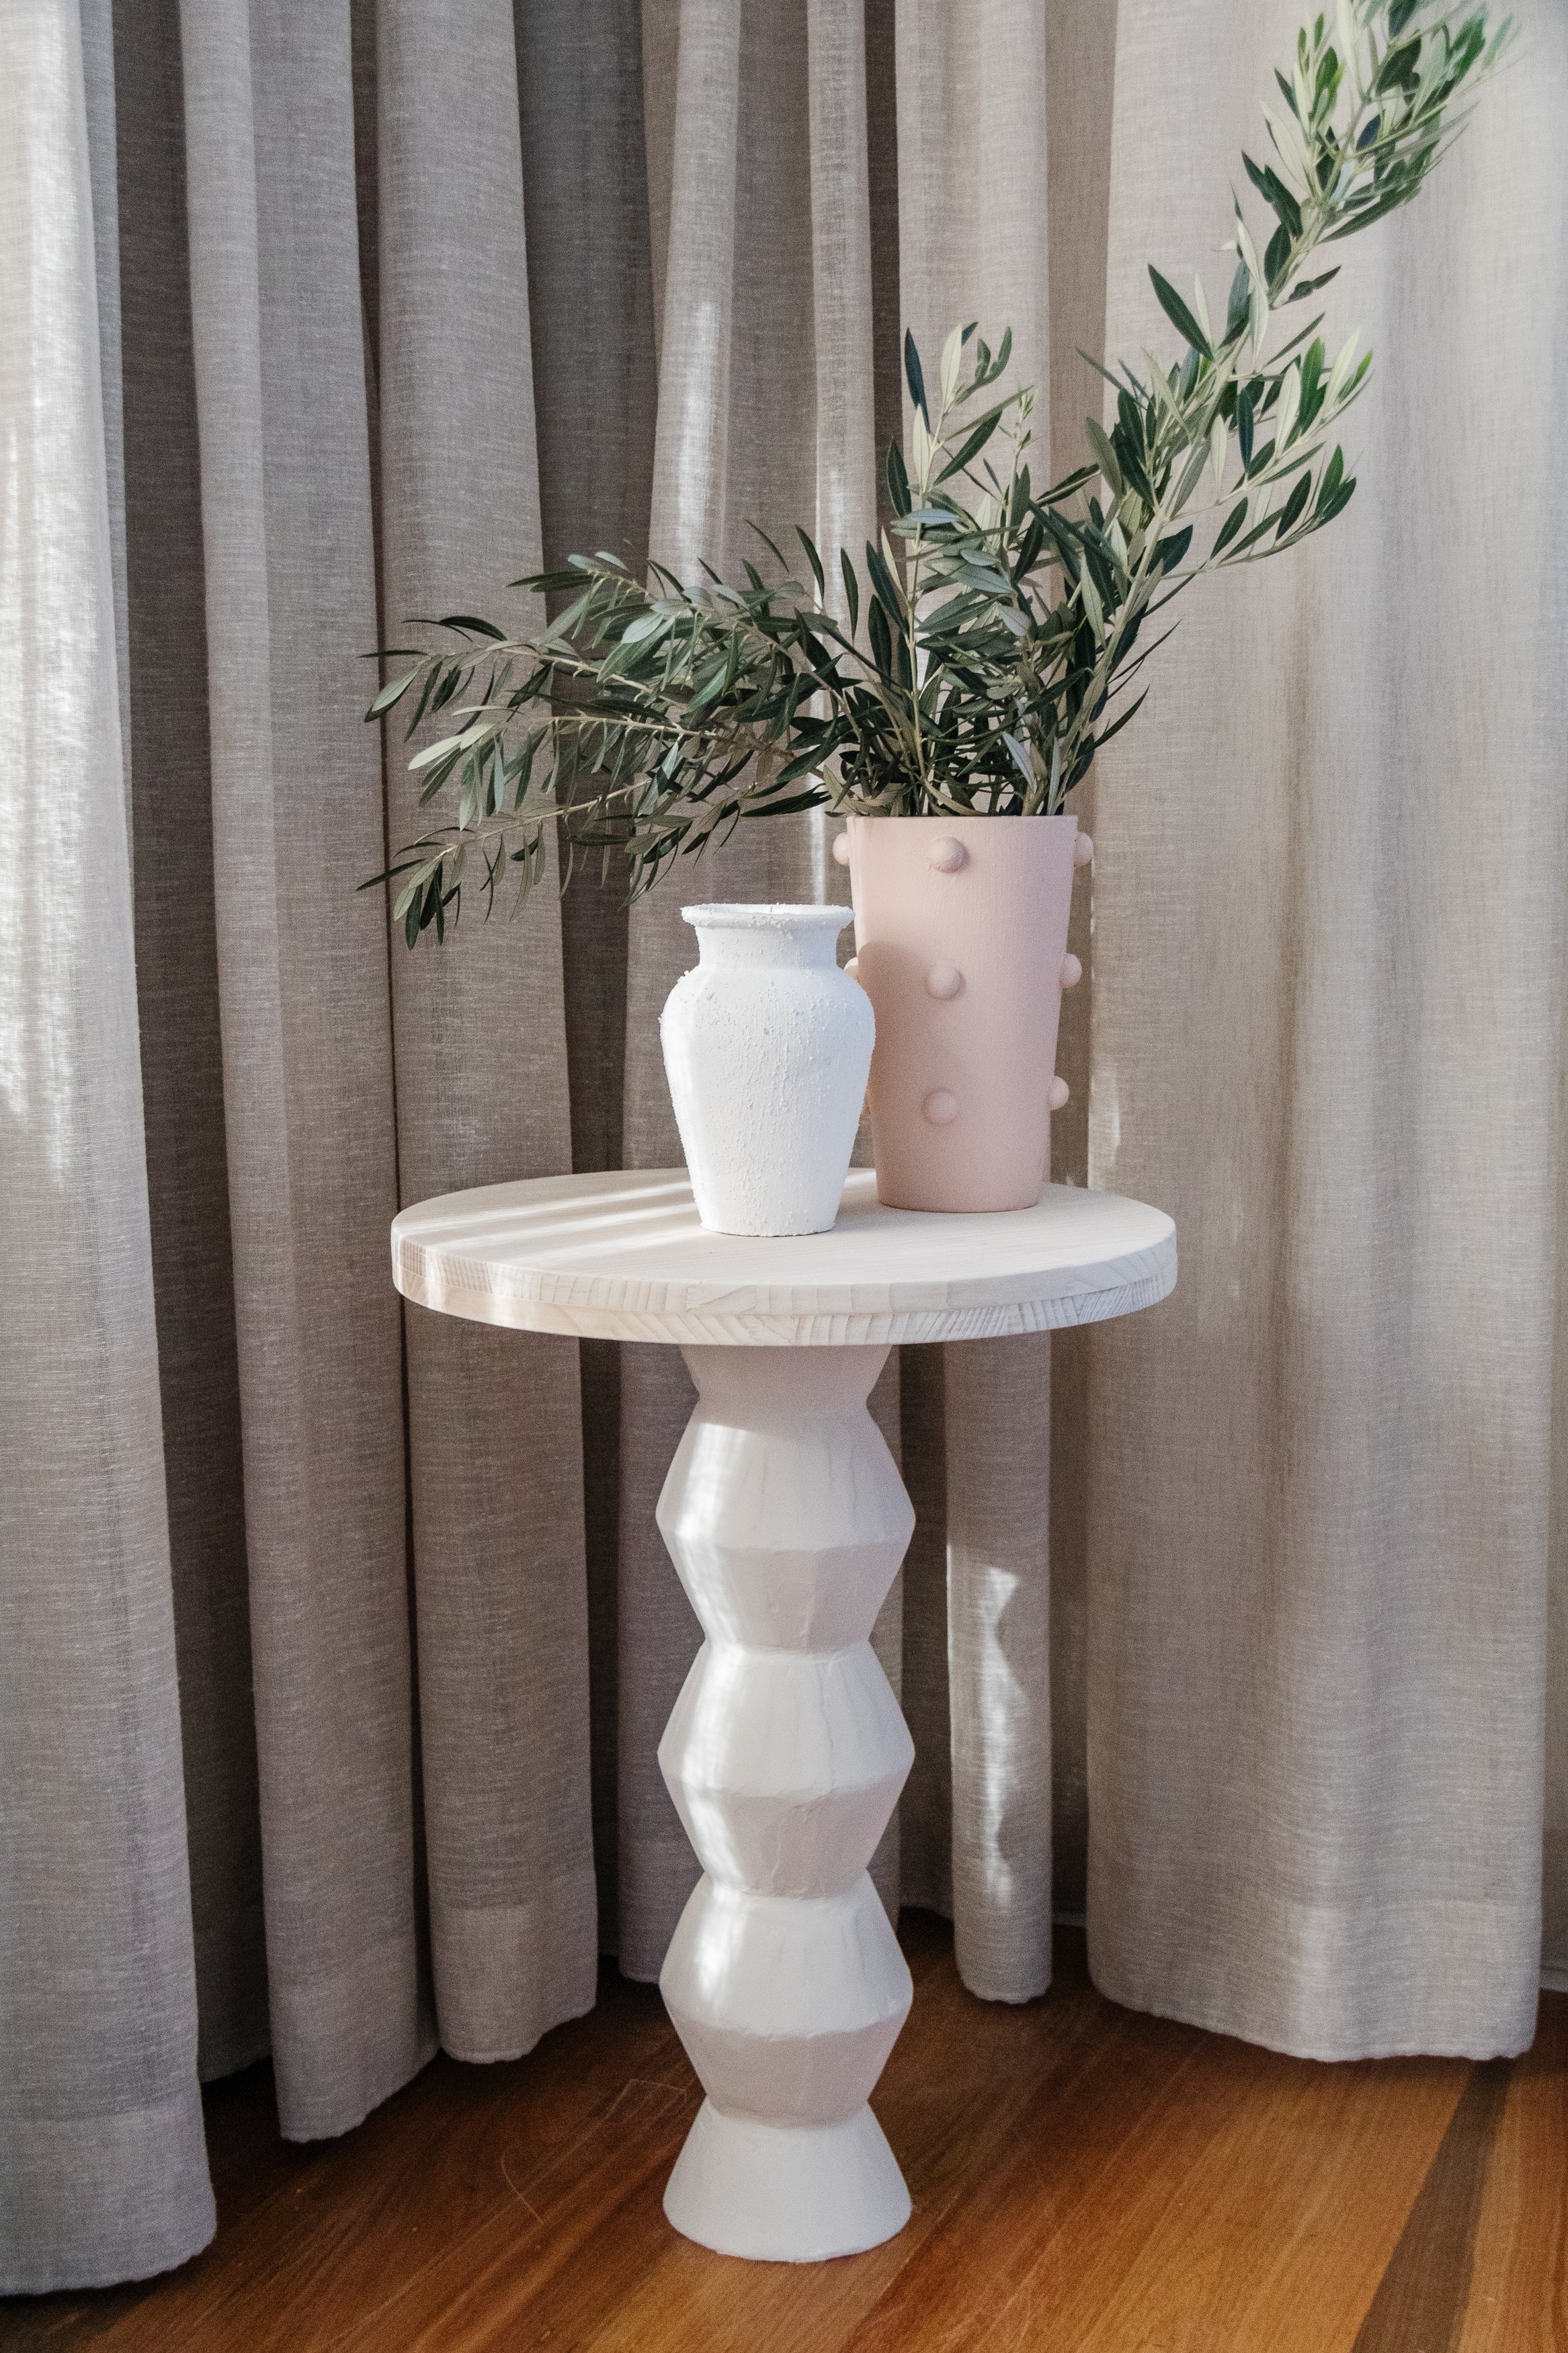
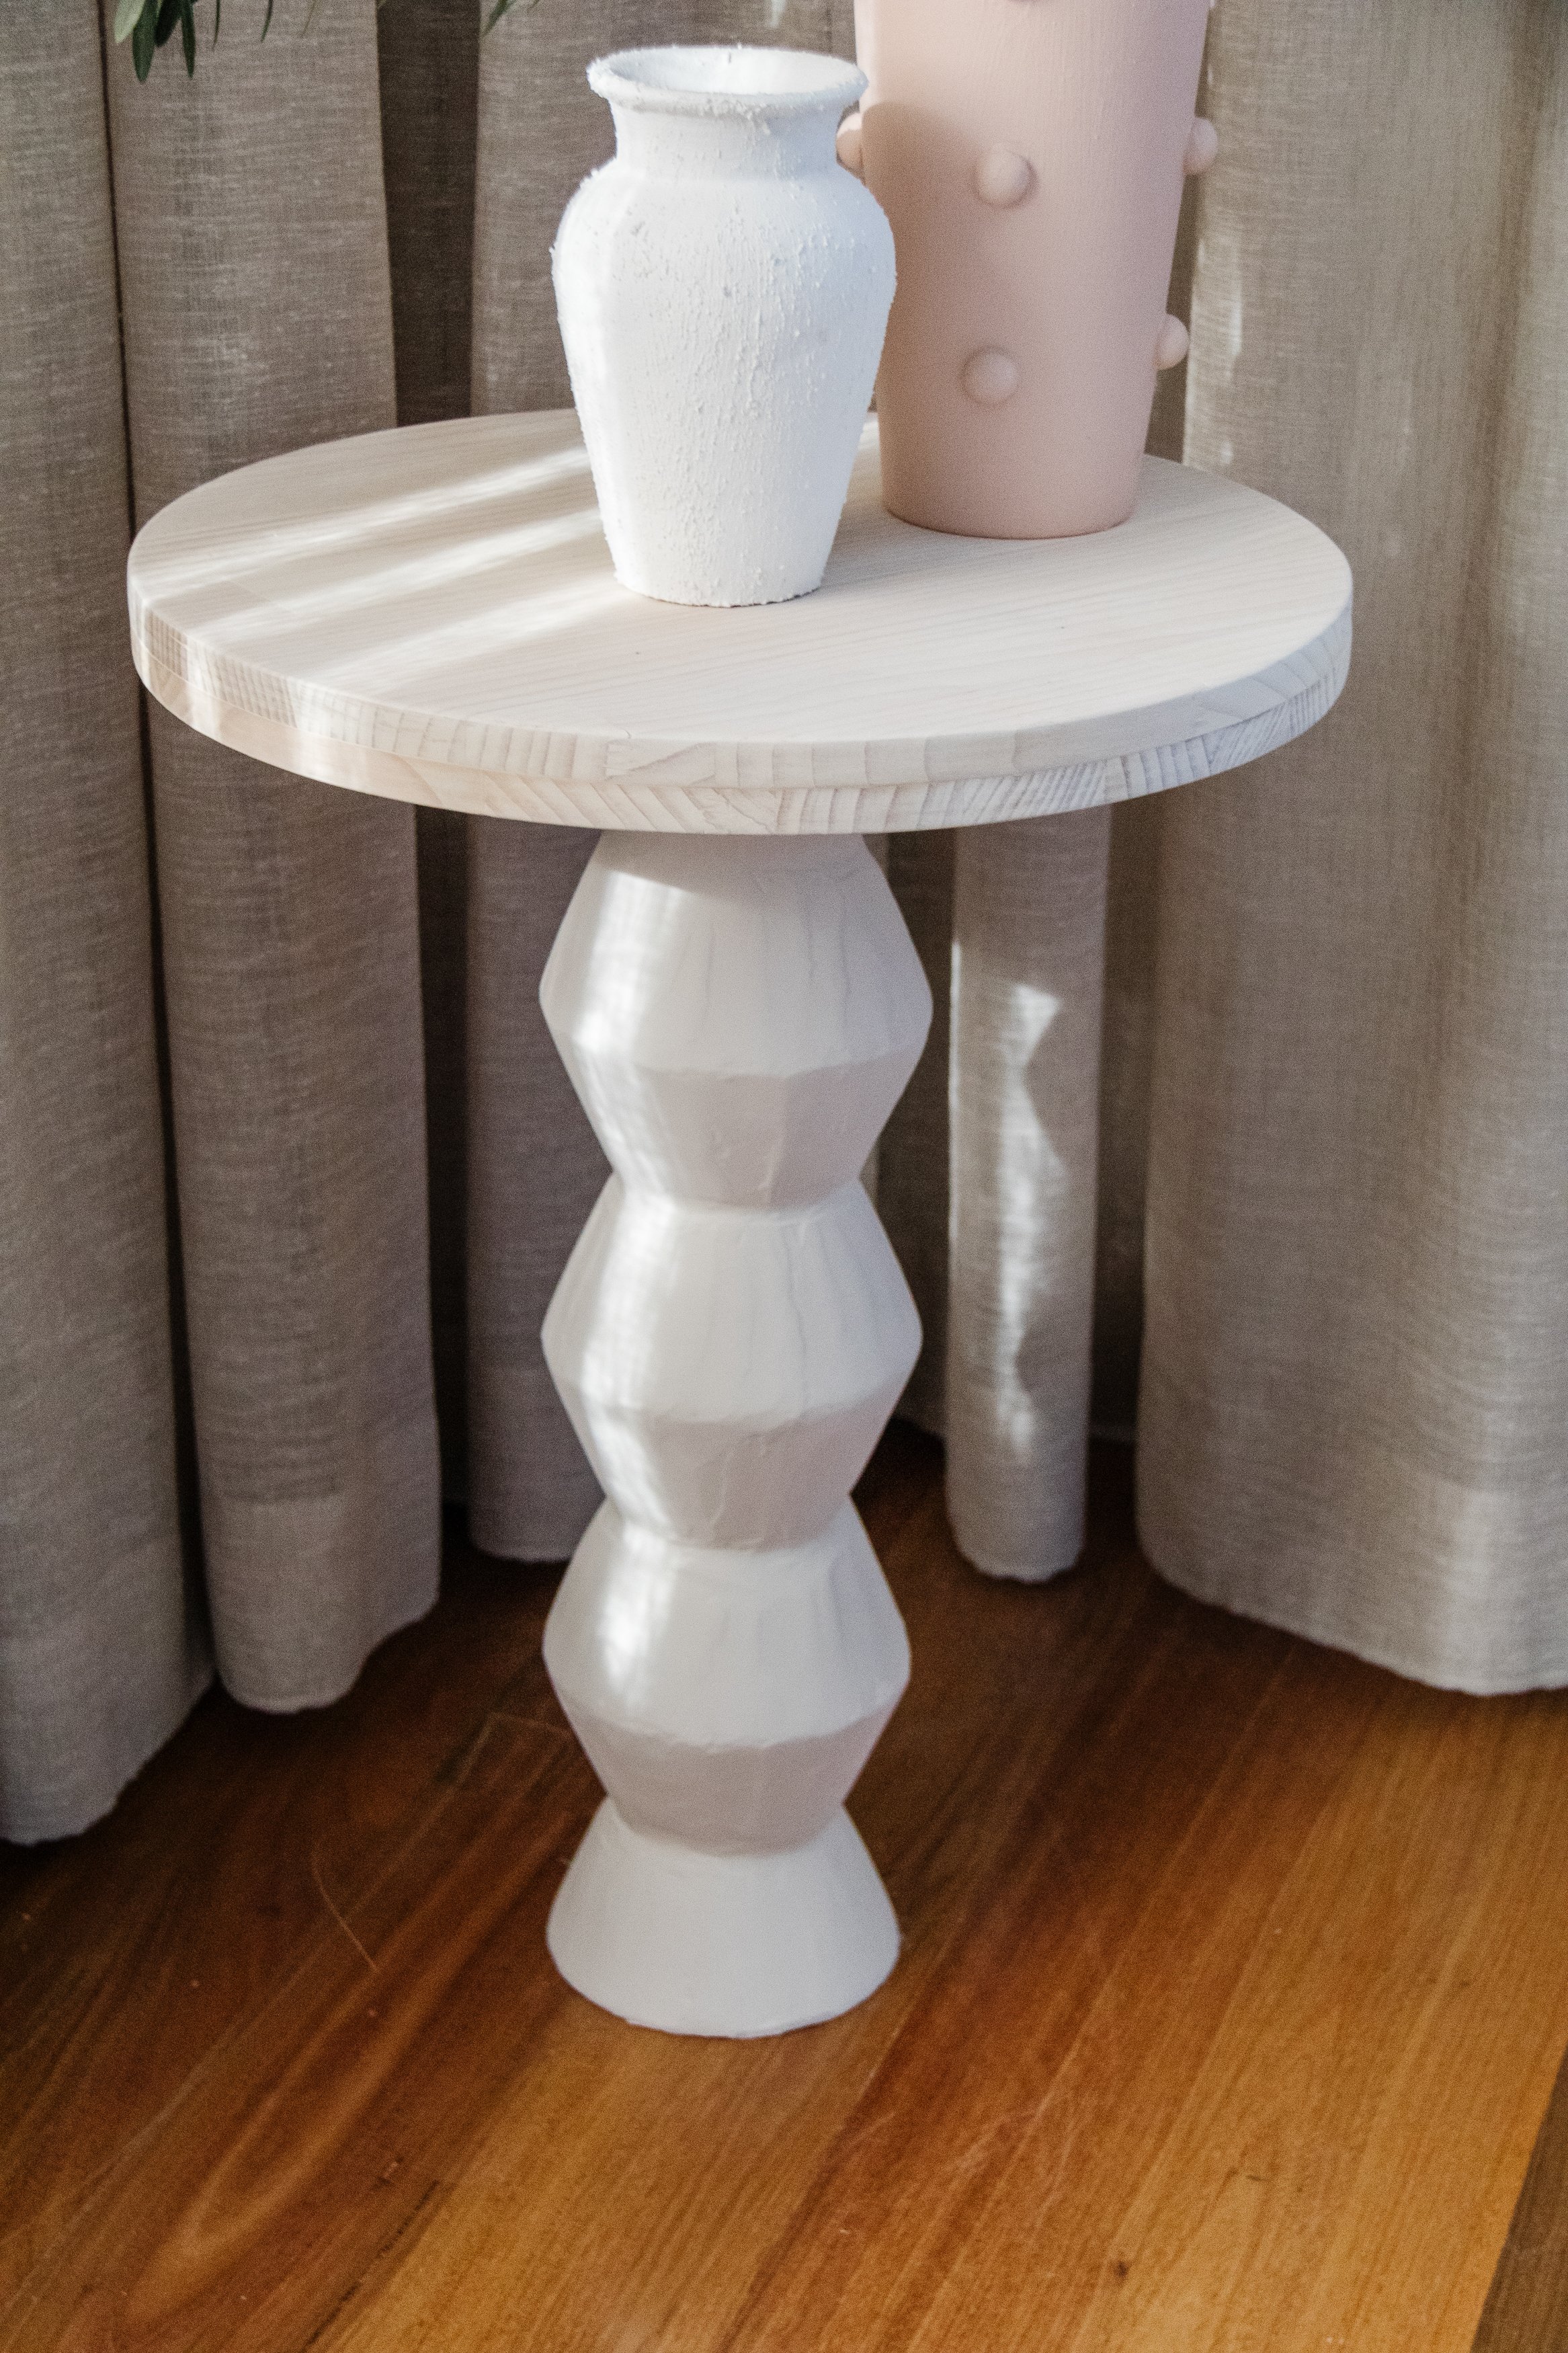
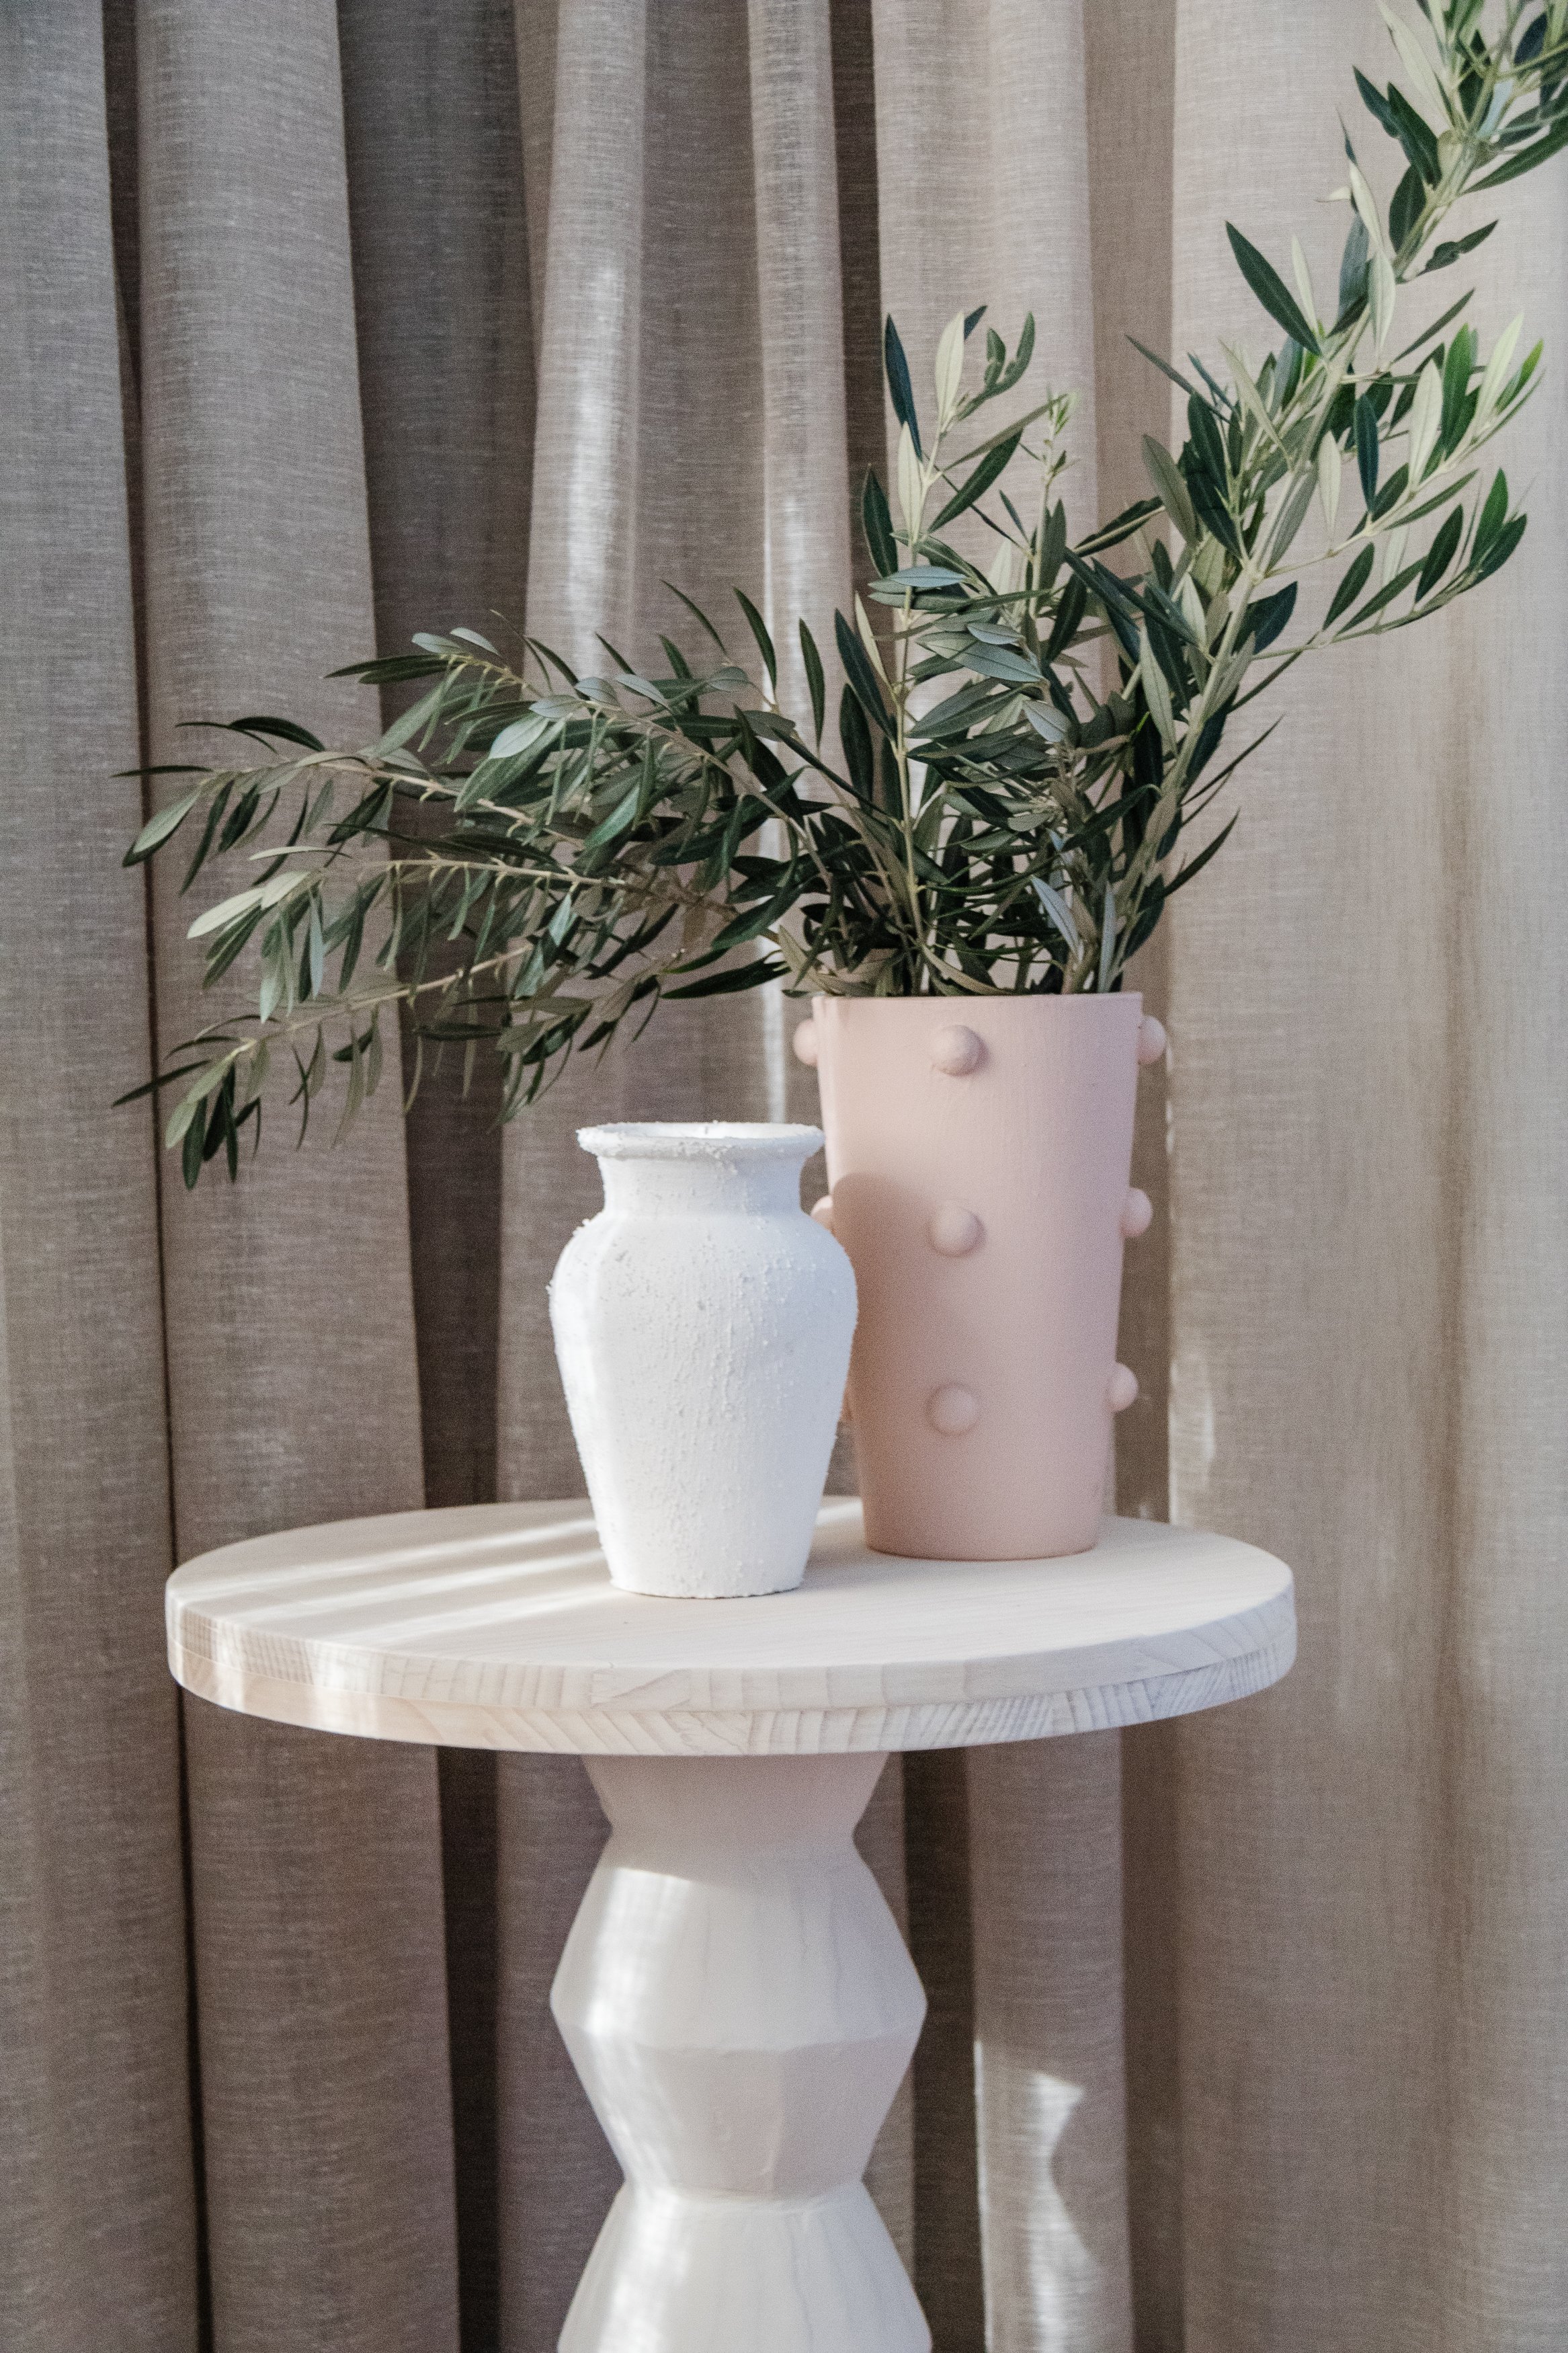
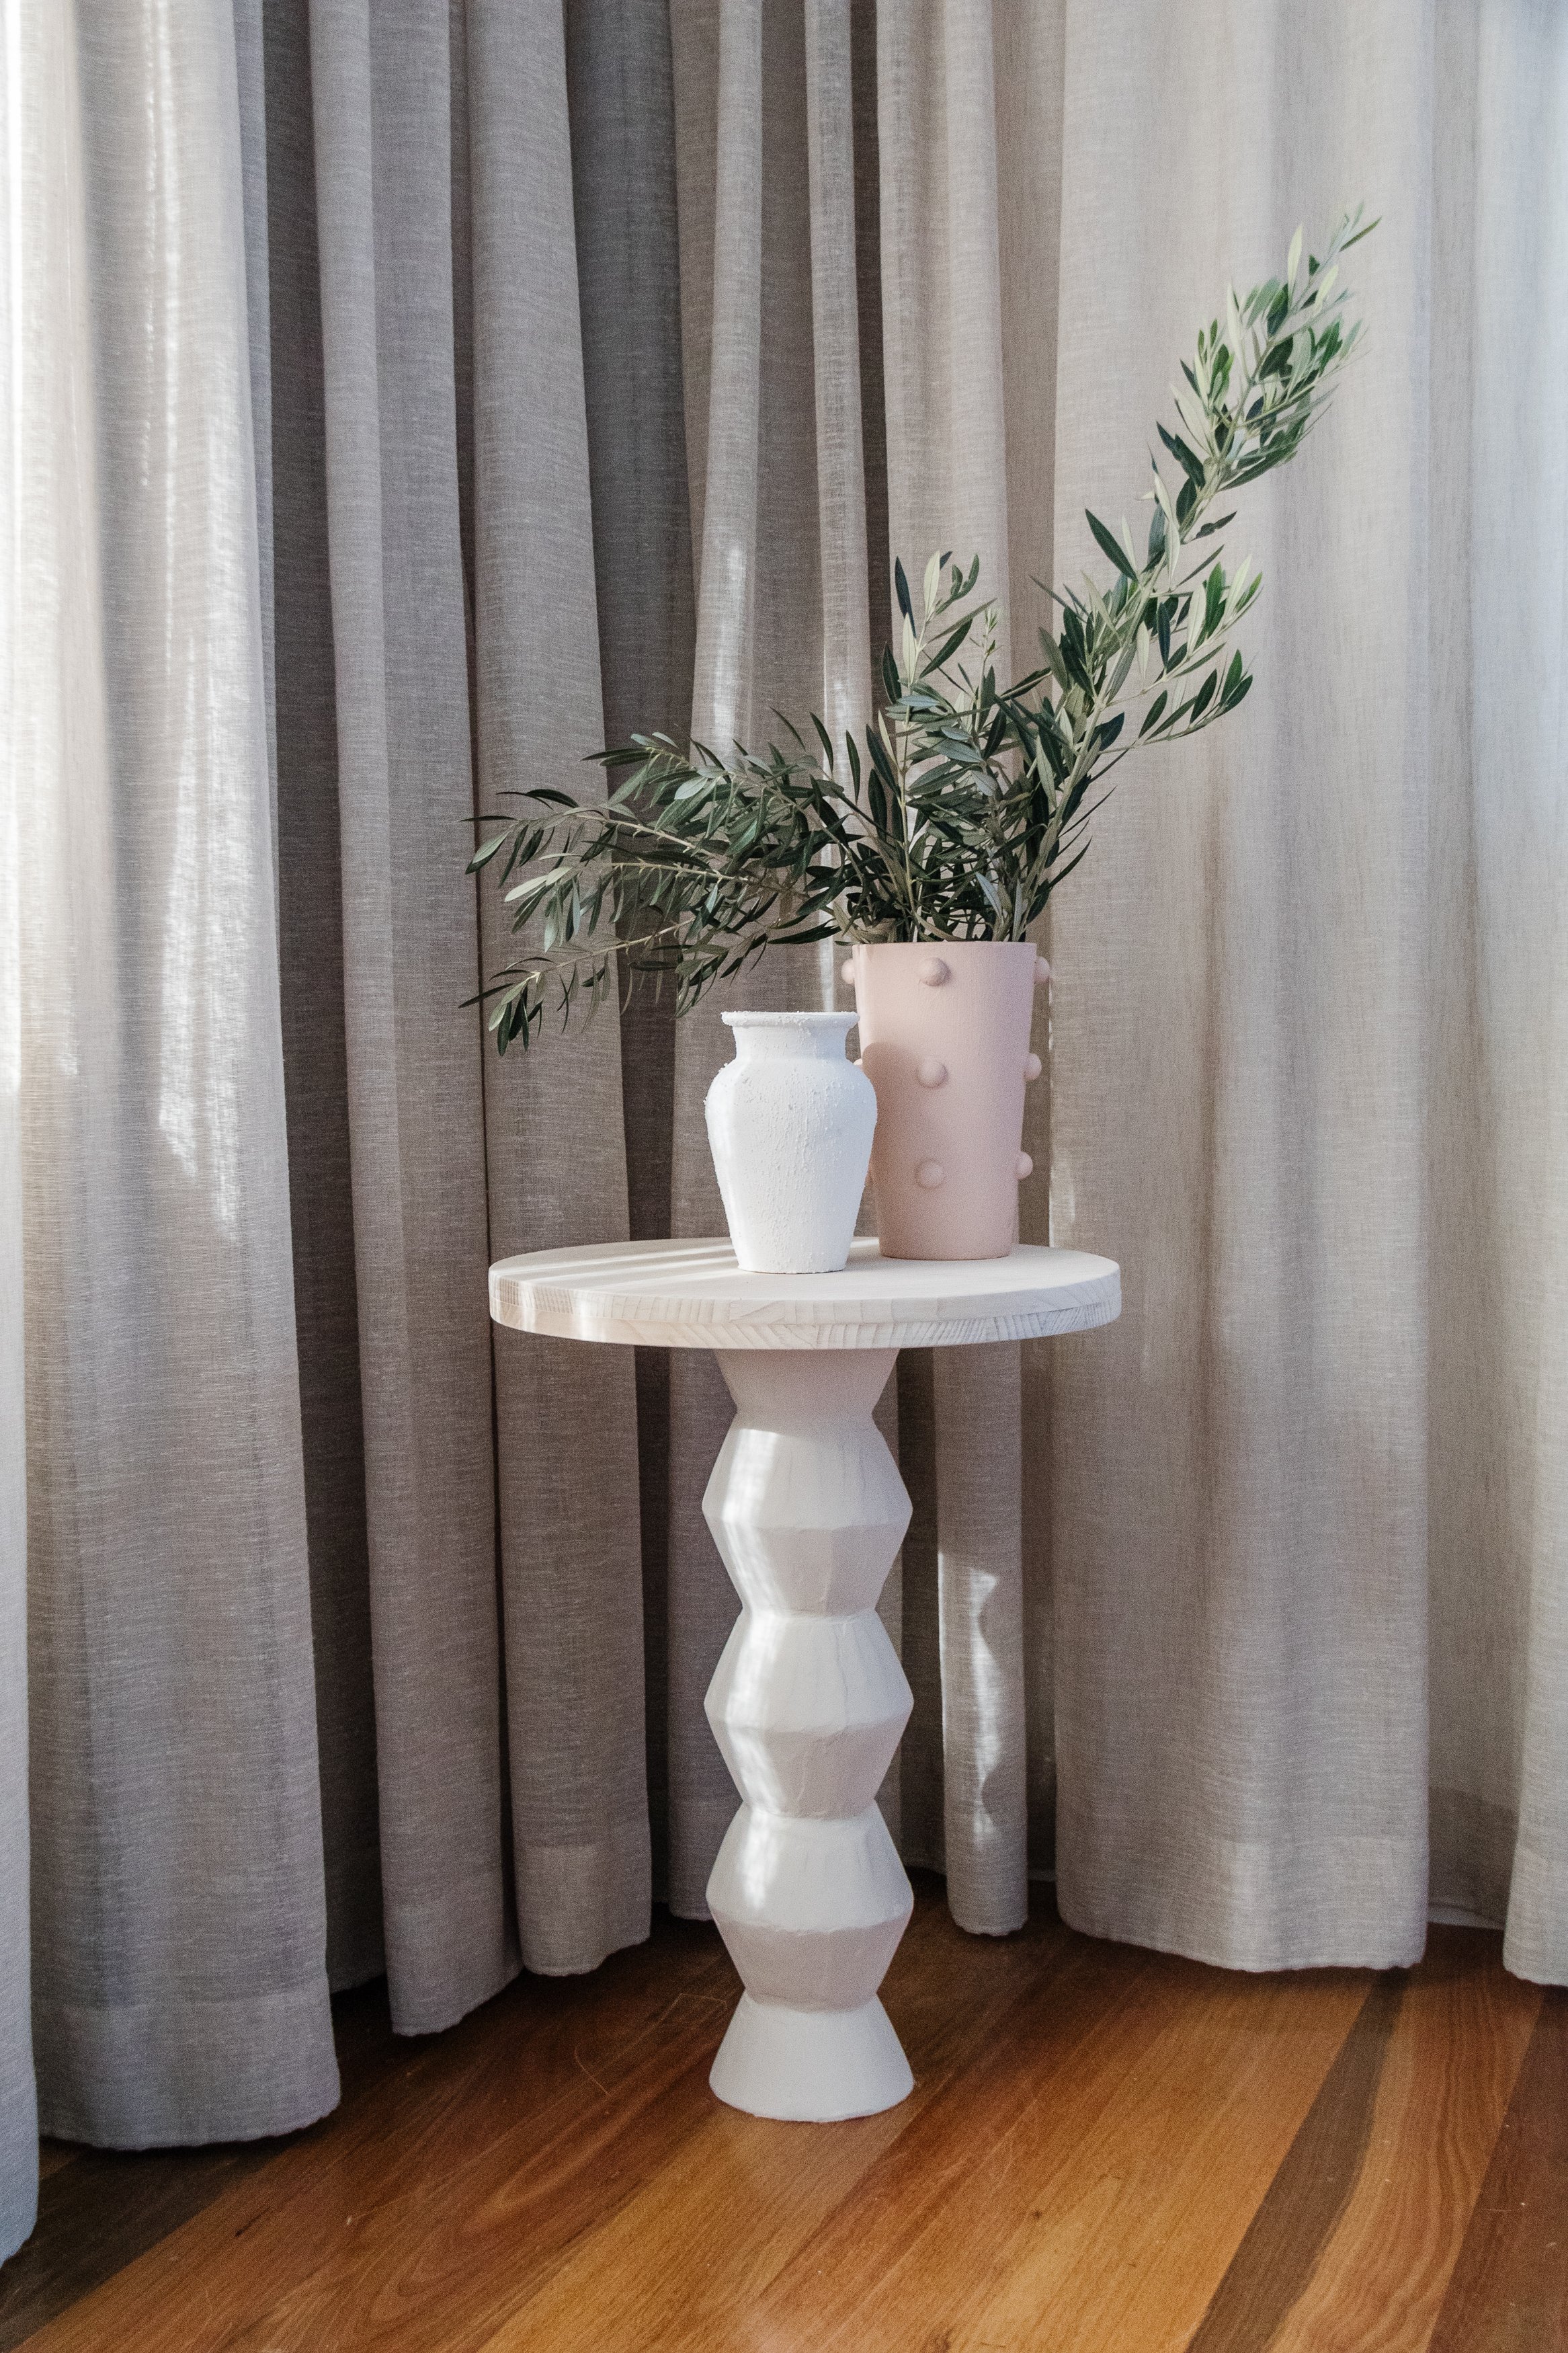
DIY Totem Side Table
A side table made from $2 plastic bowls and a couple of round pine panels? Oh yes, yes indeed!
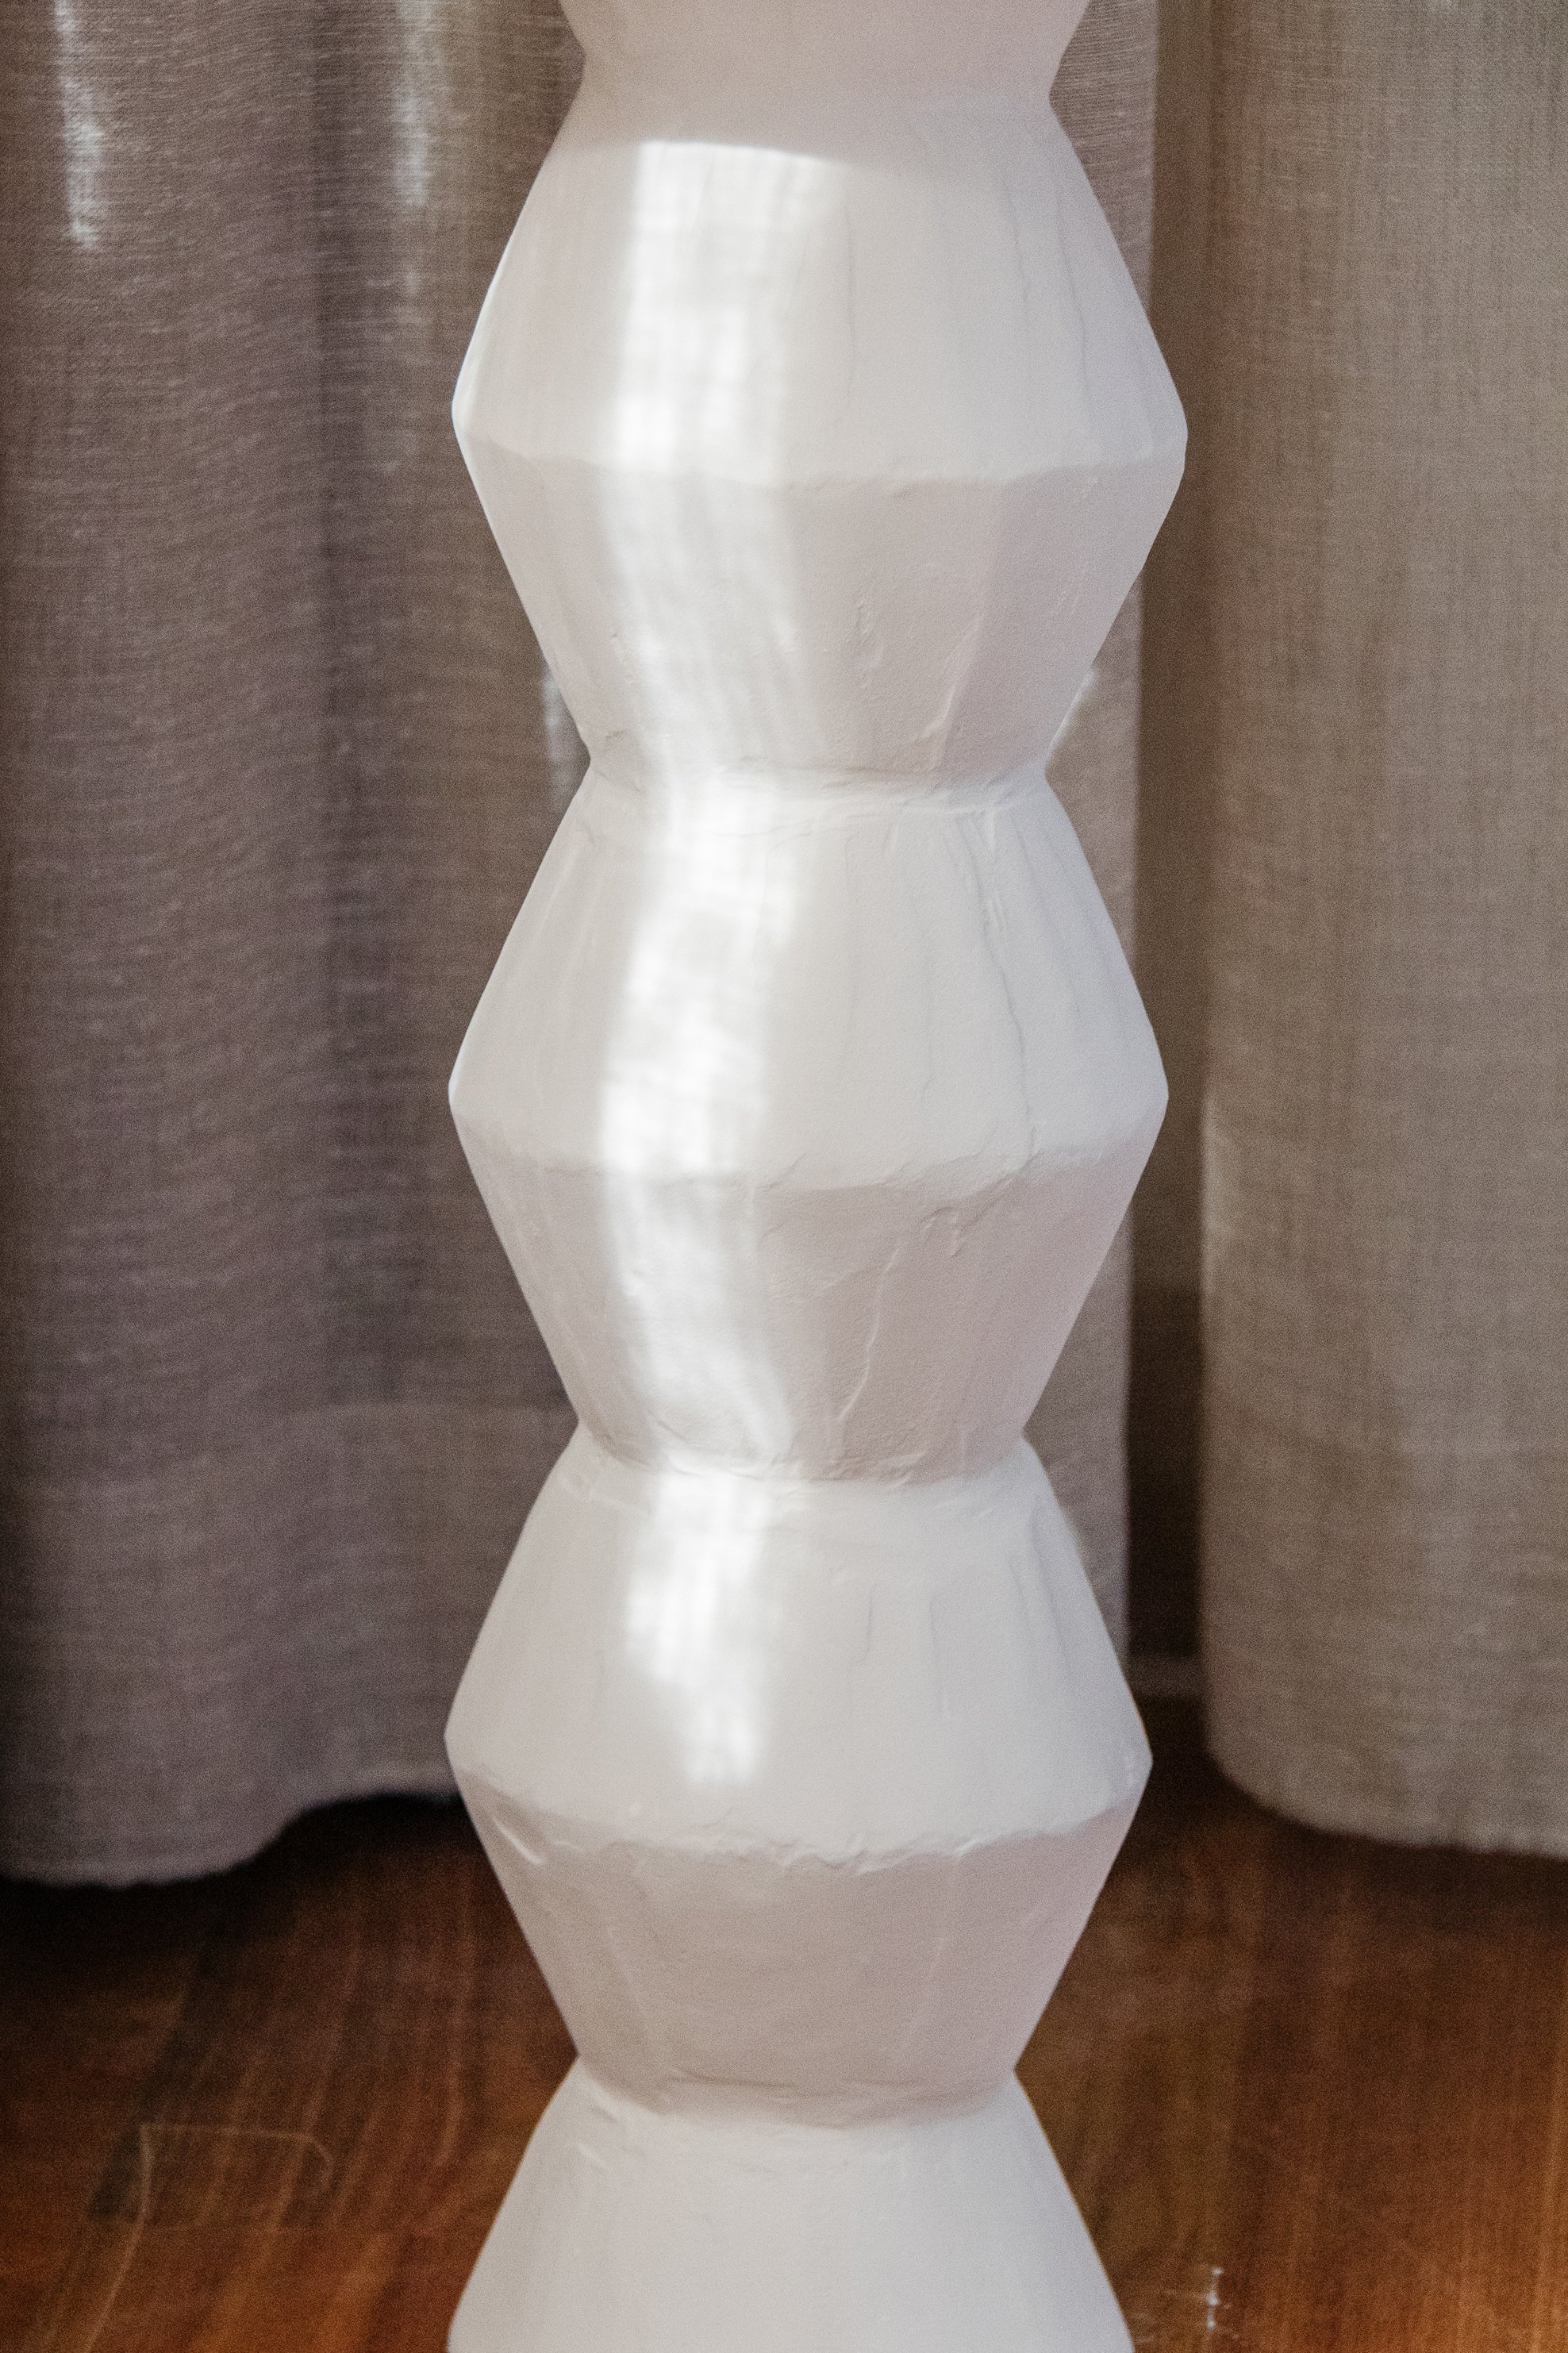
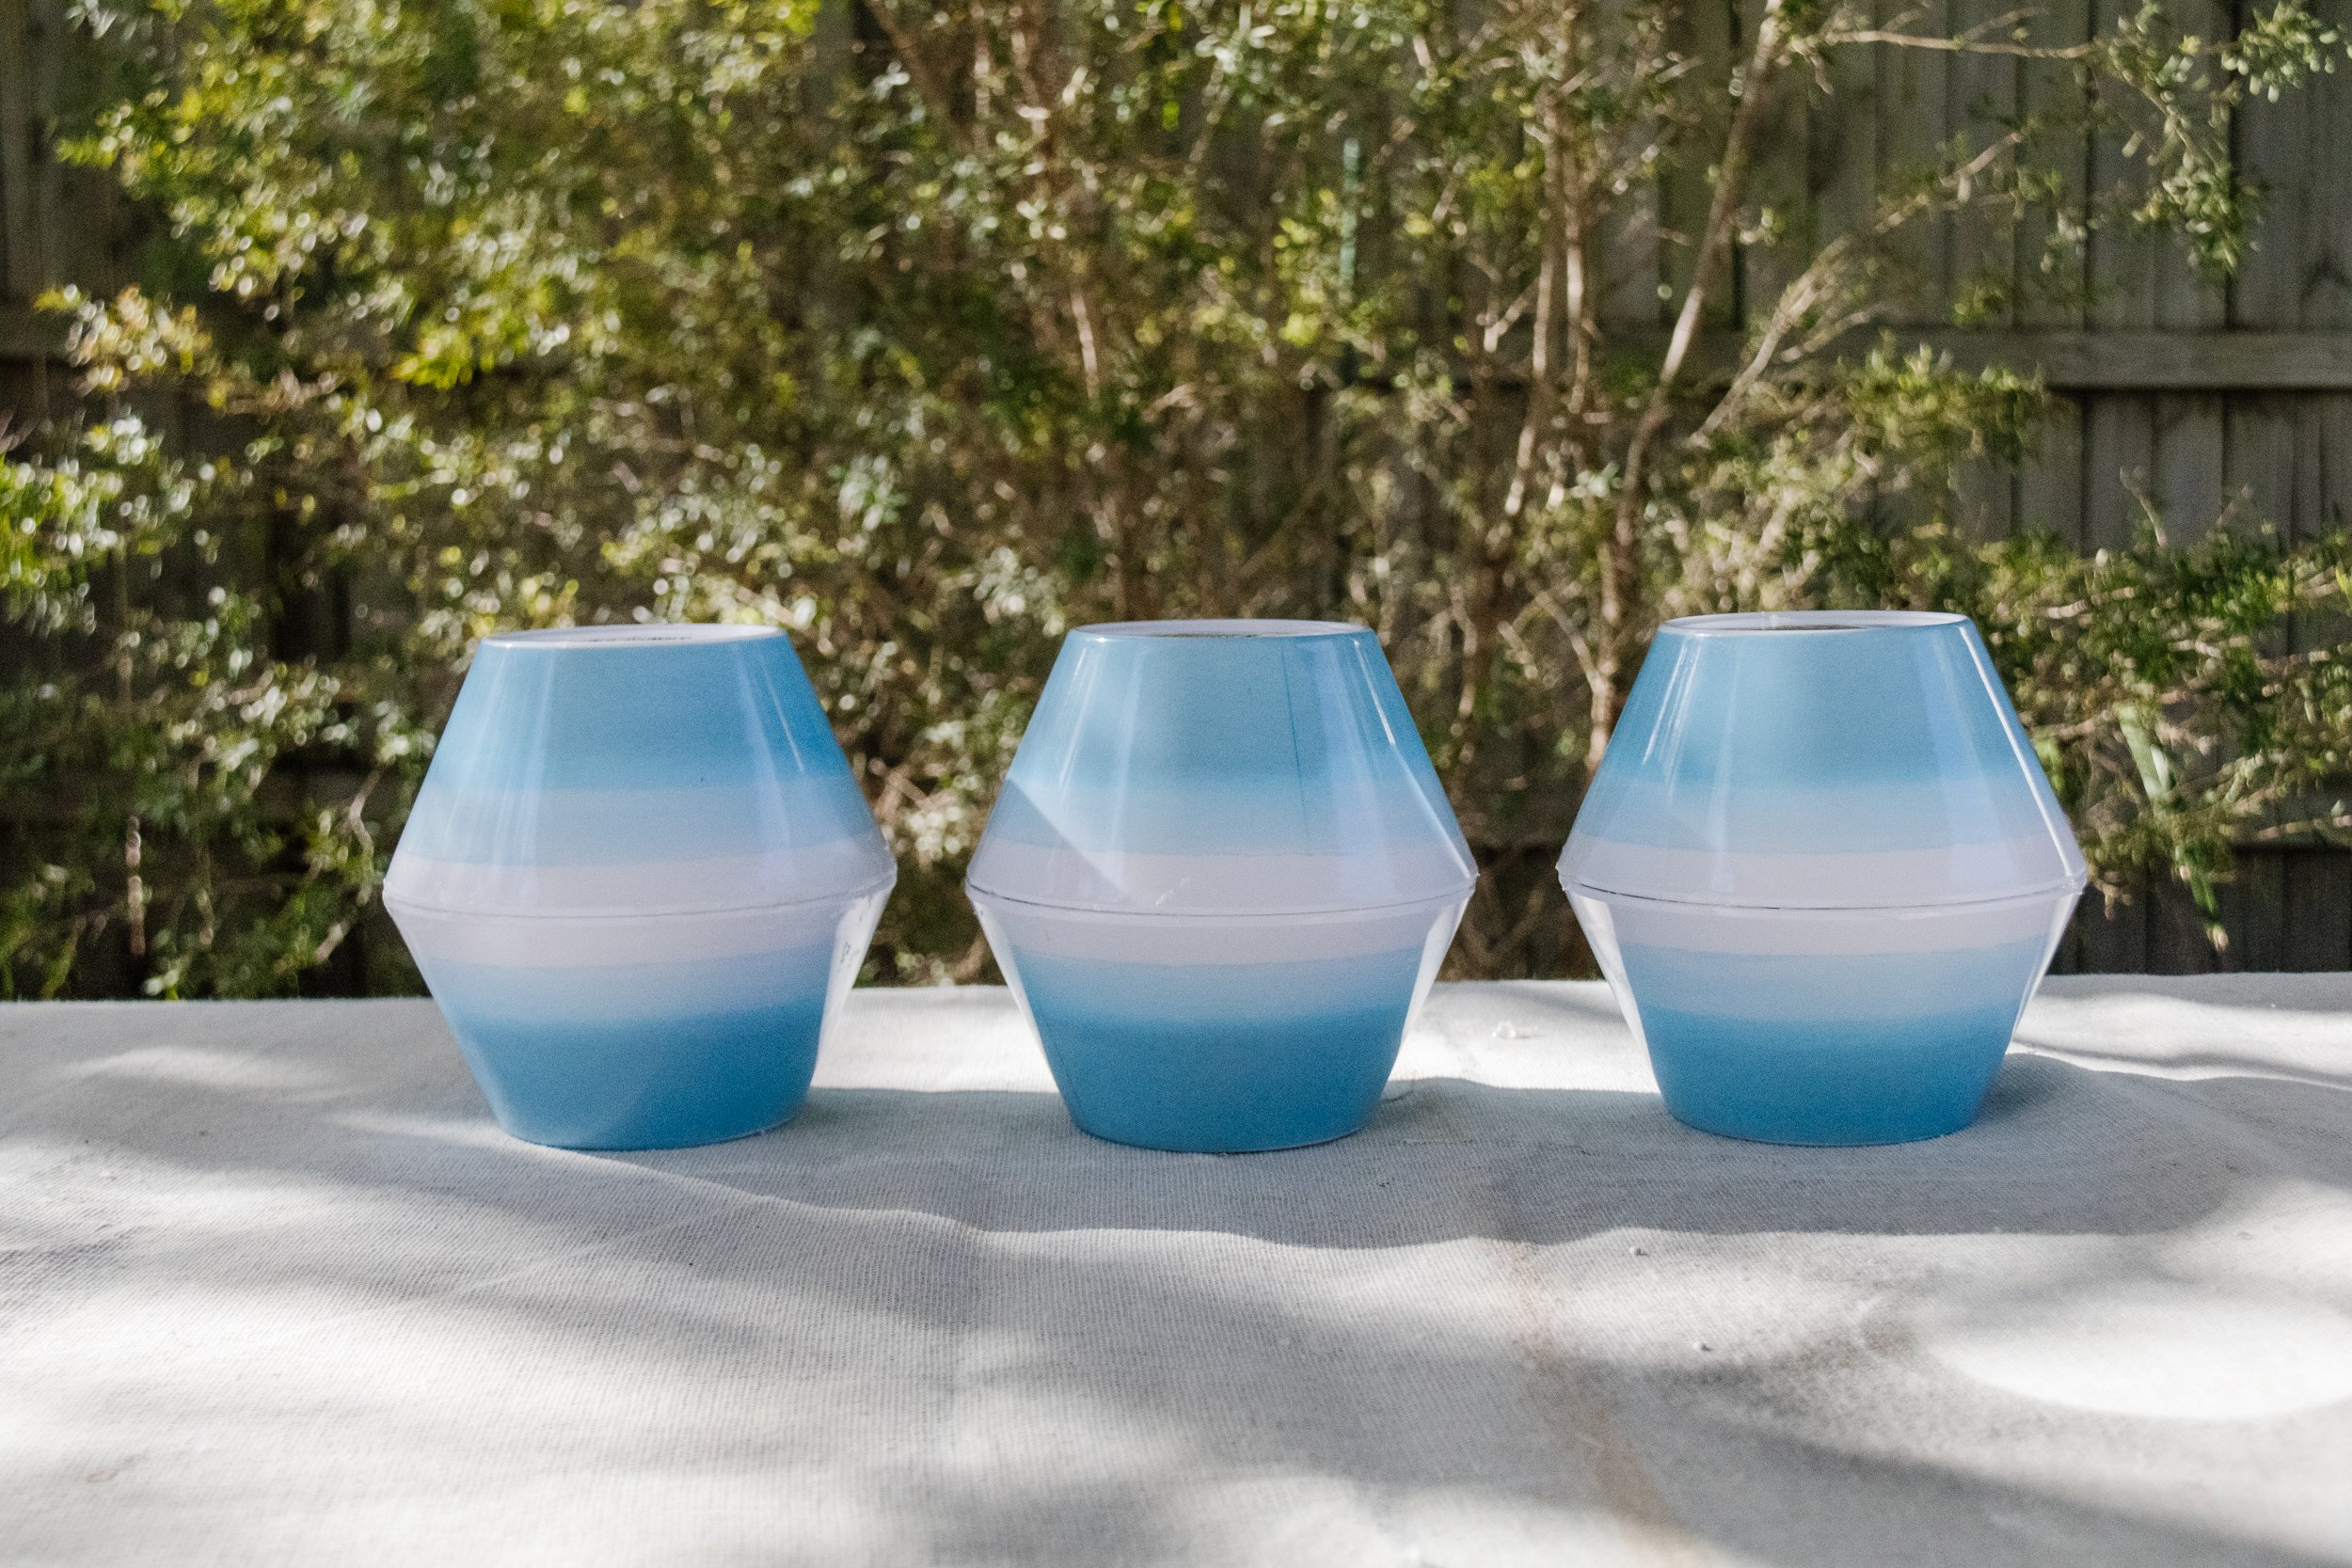
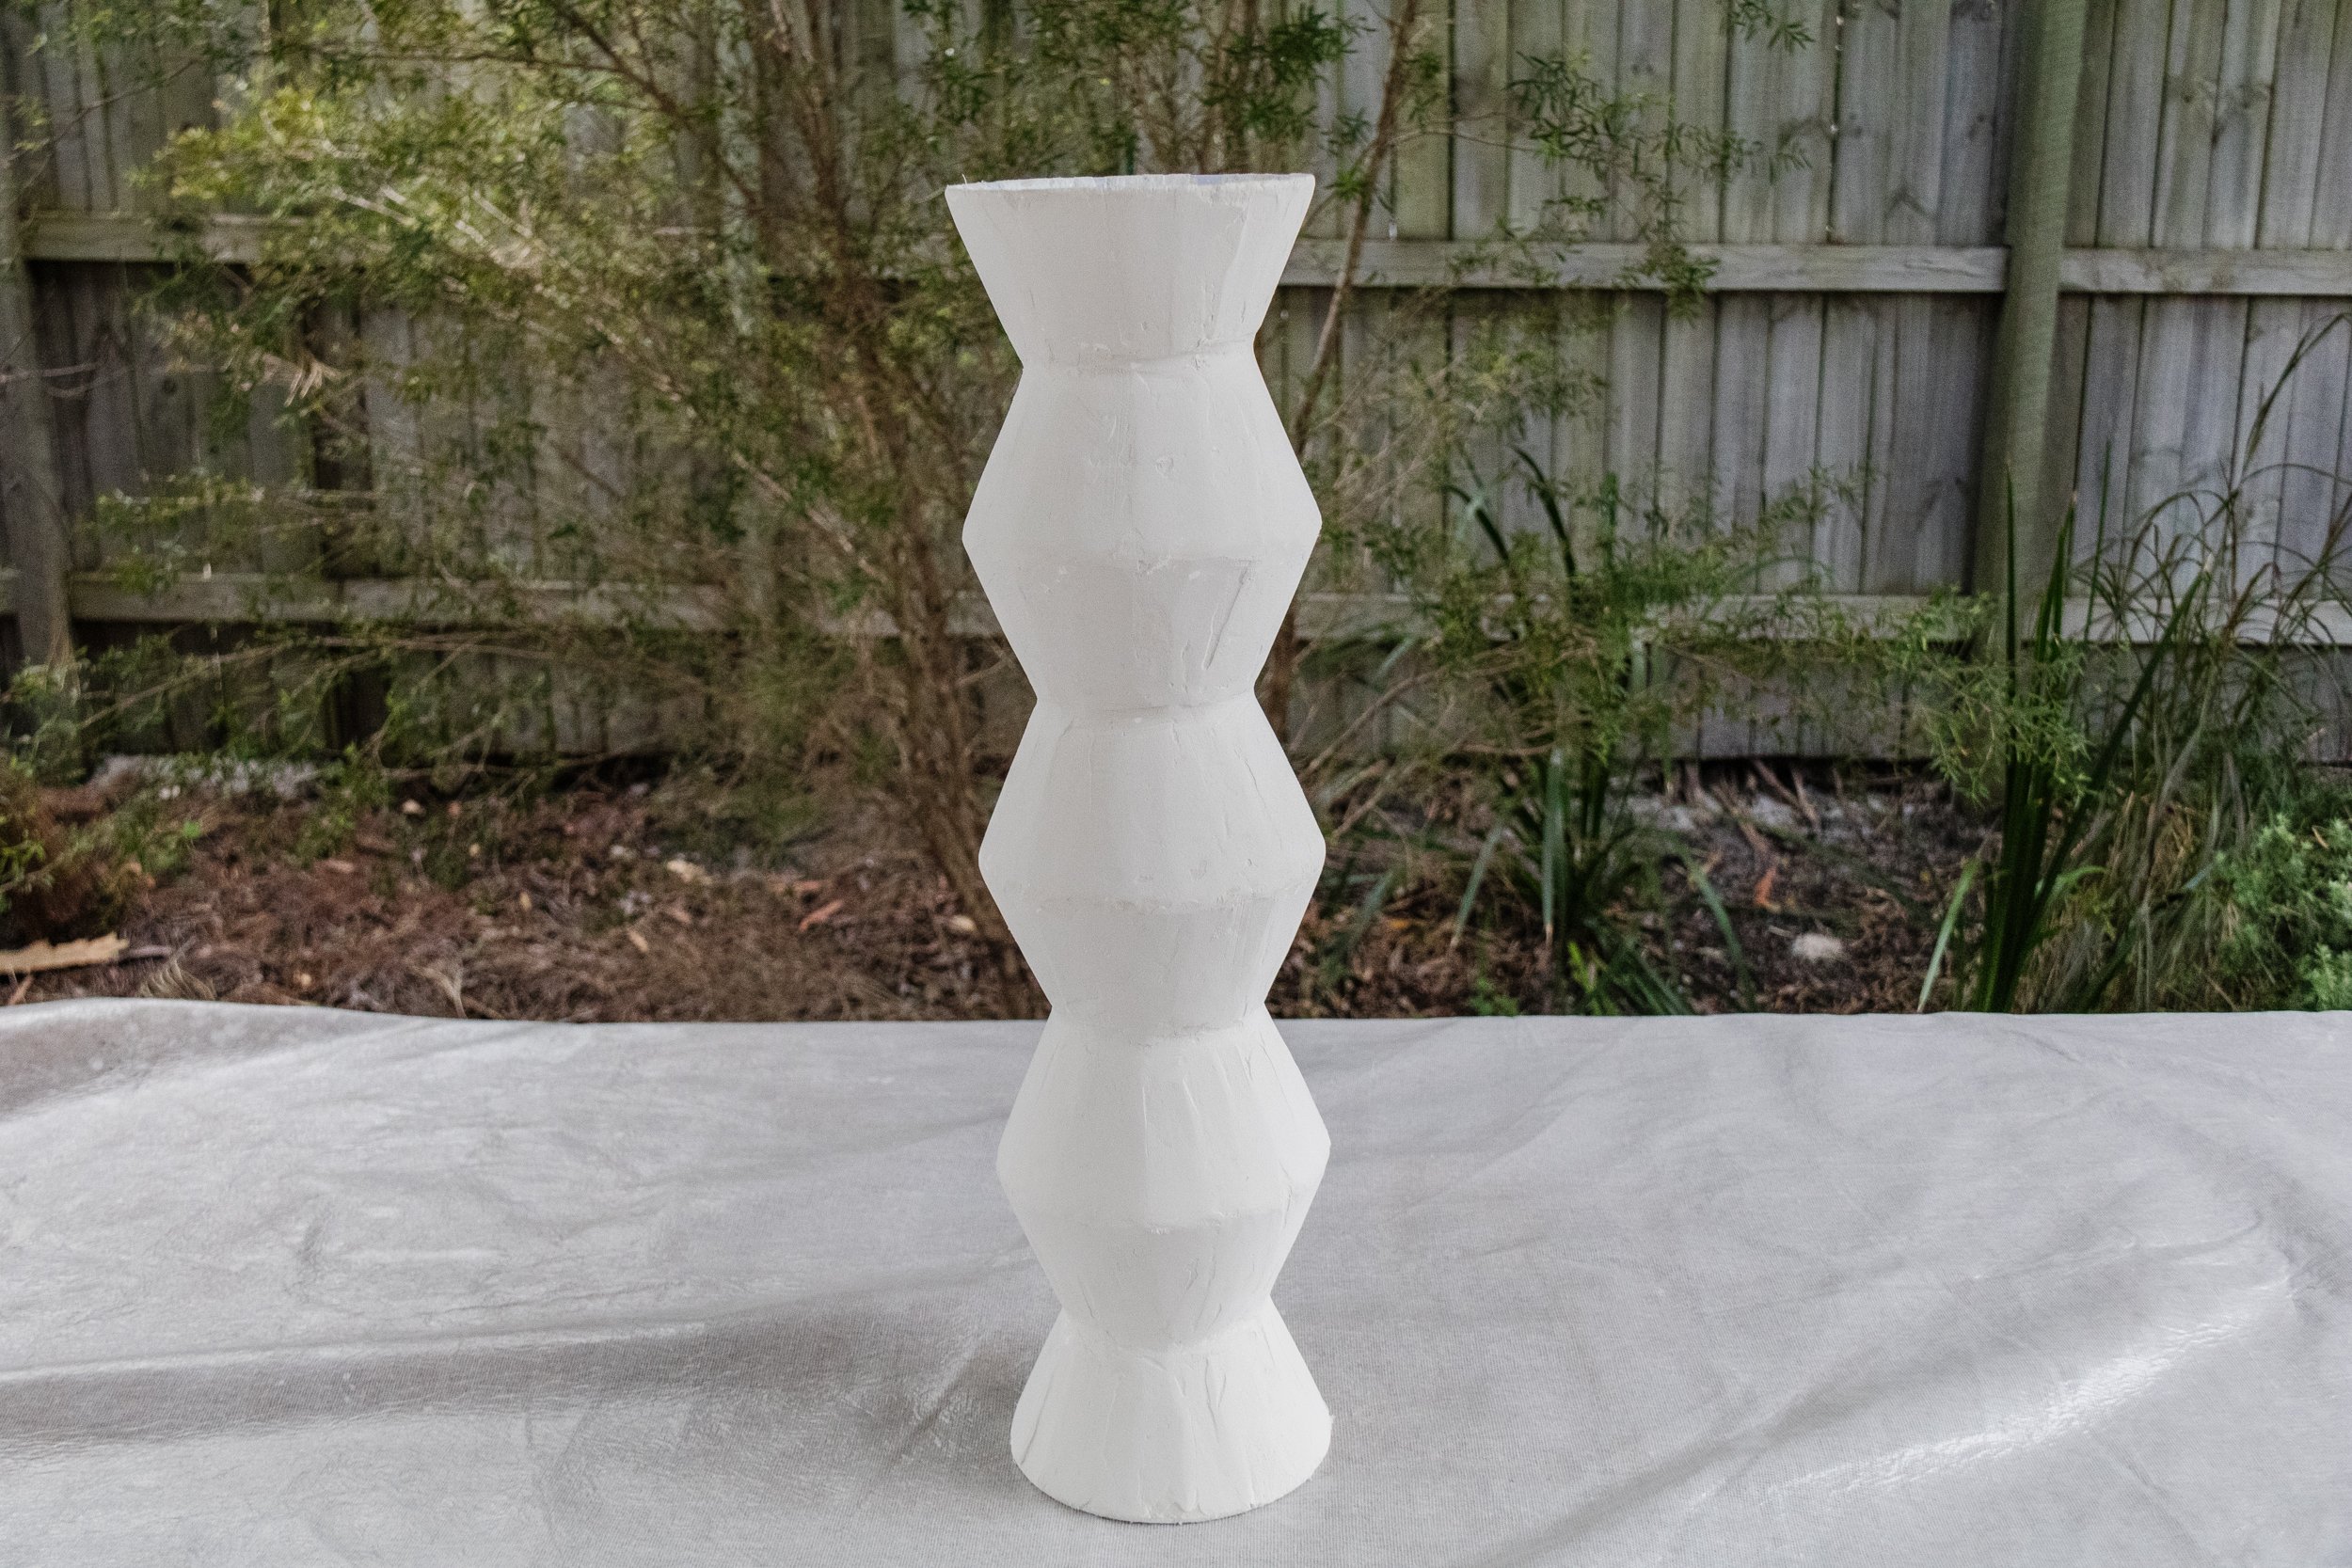
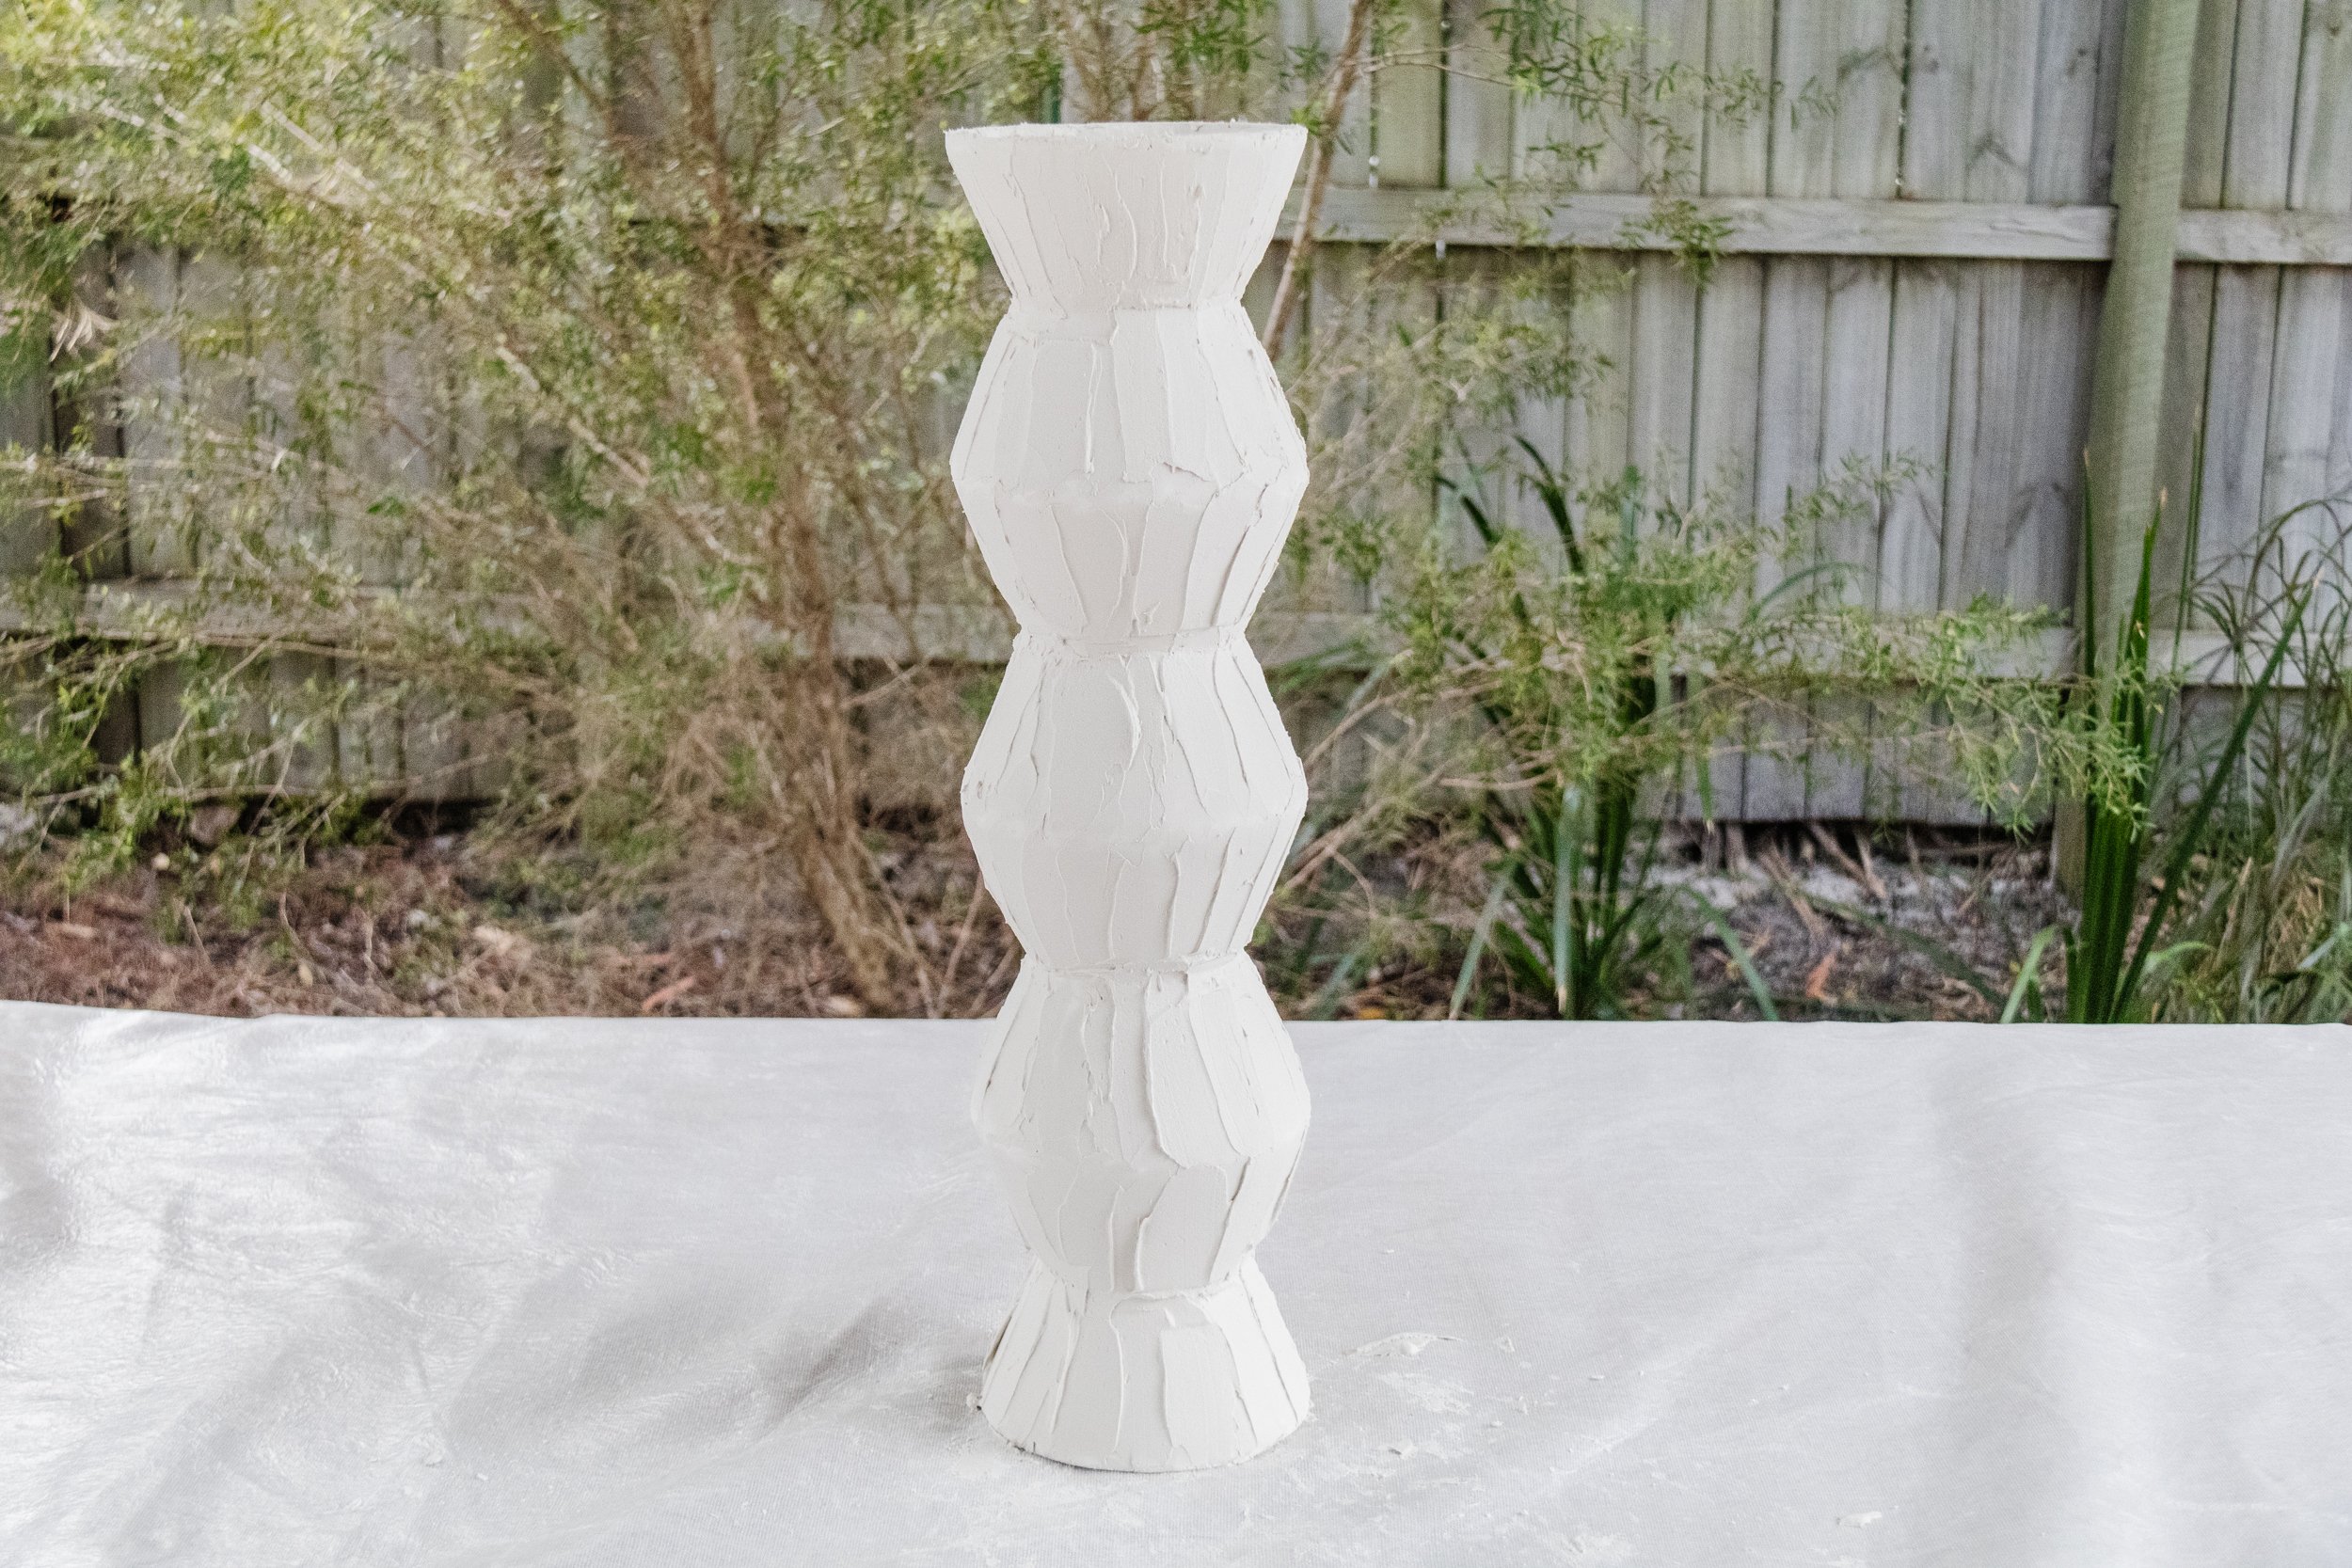
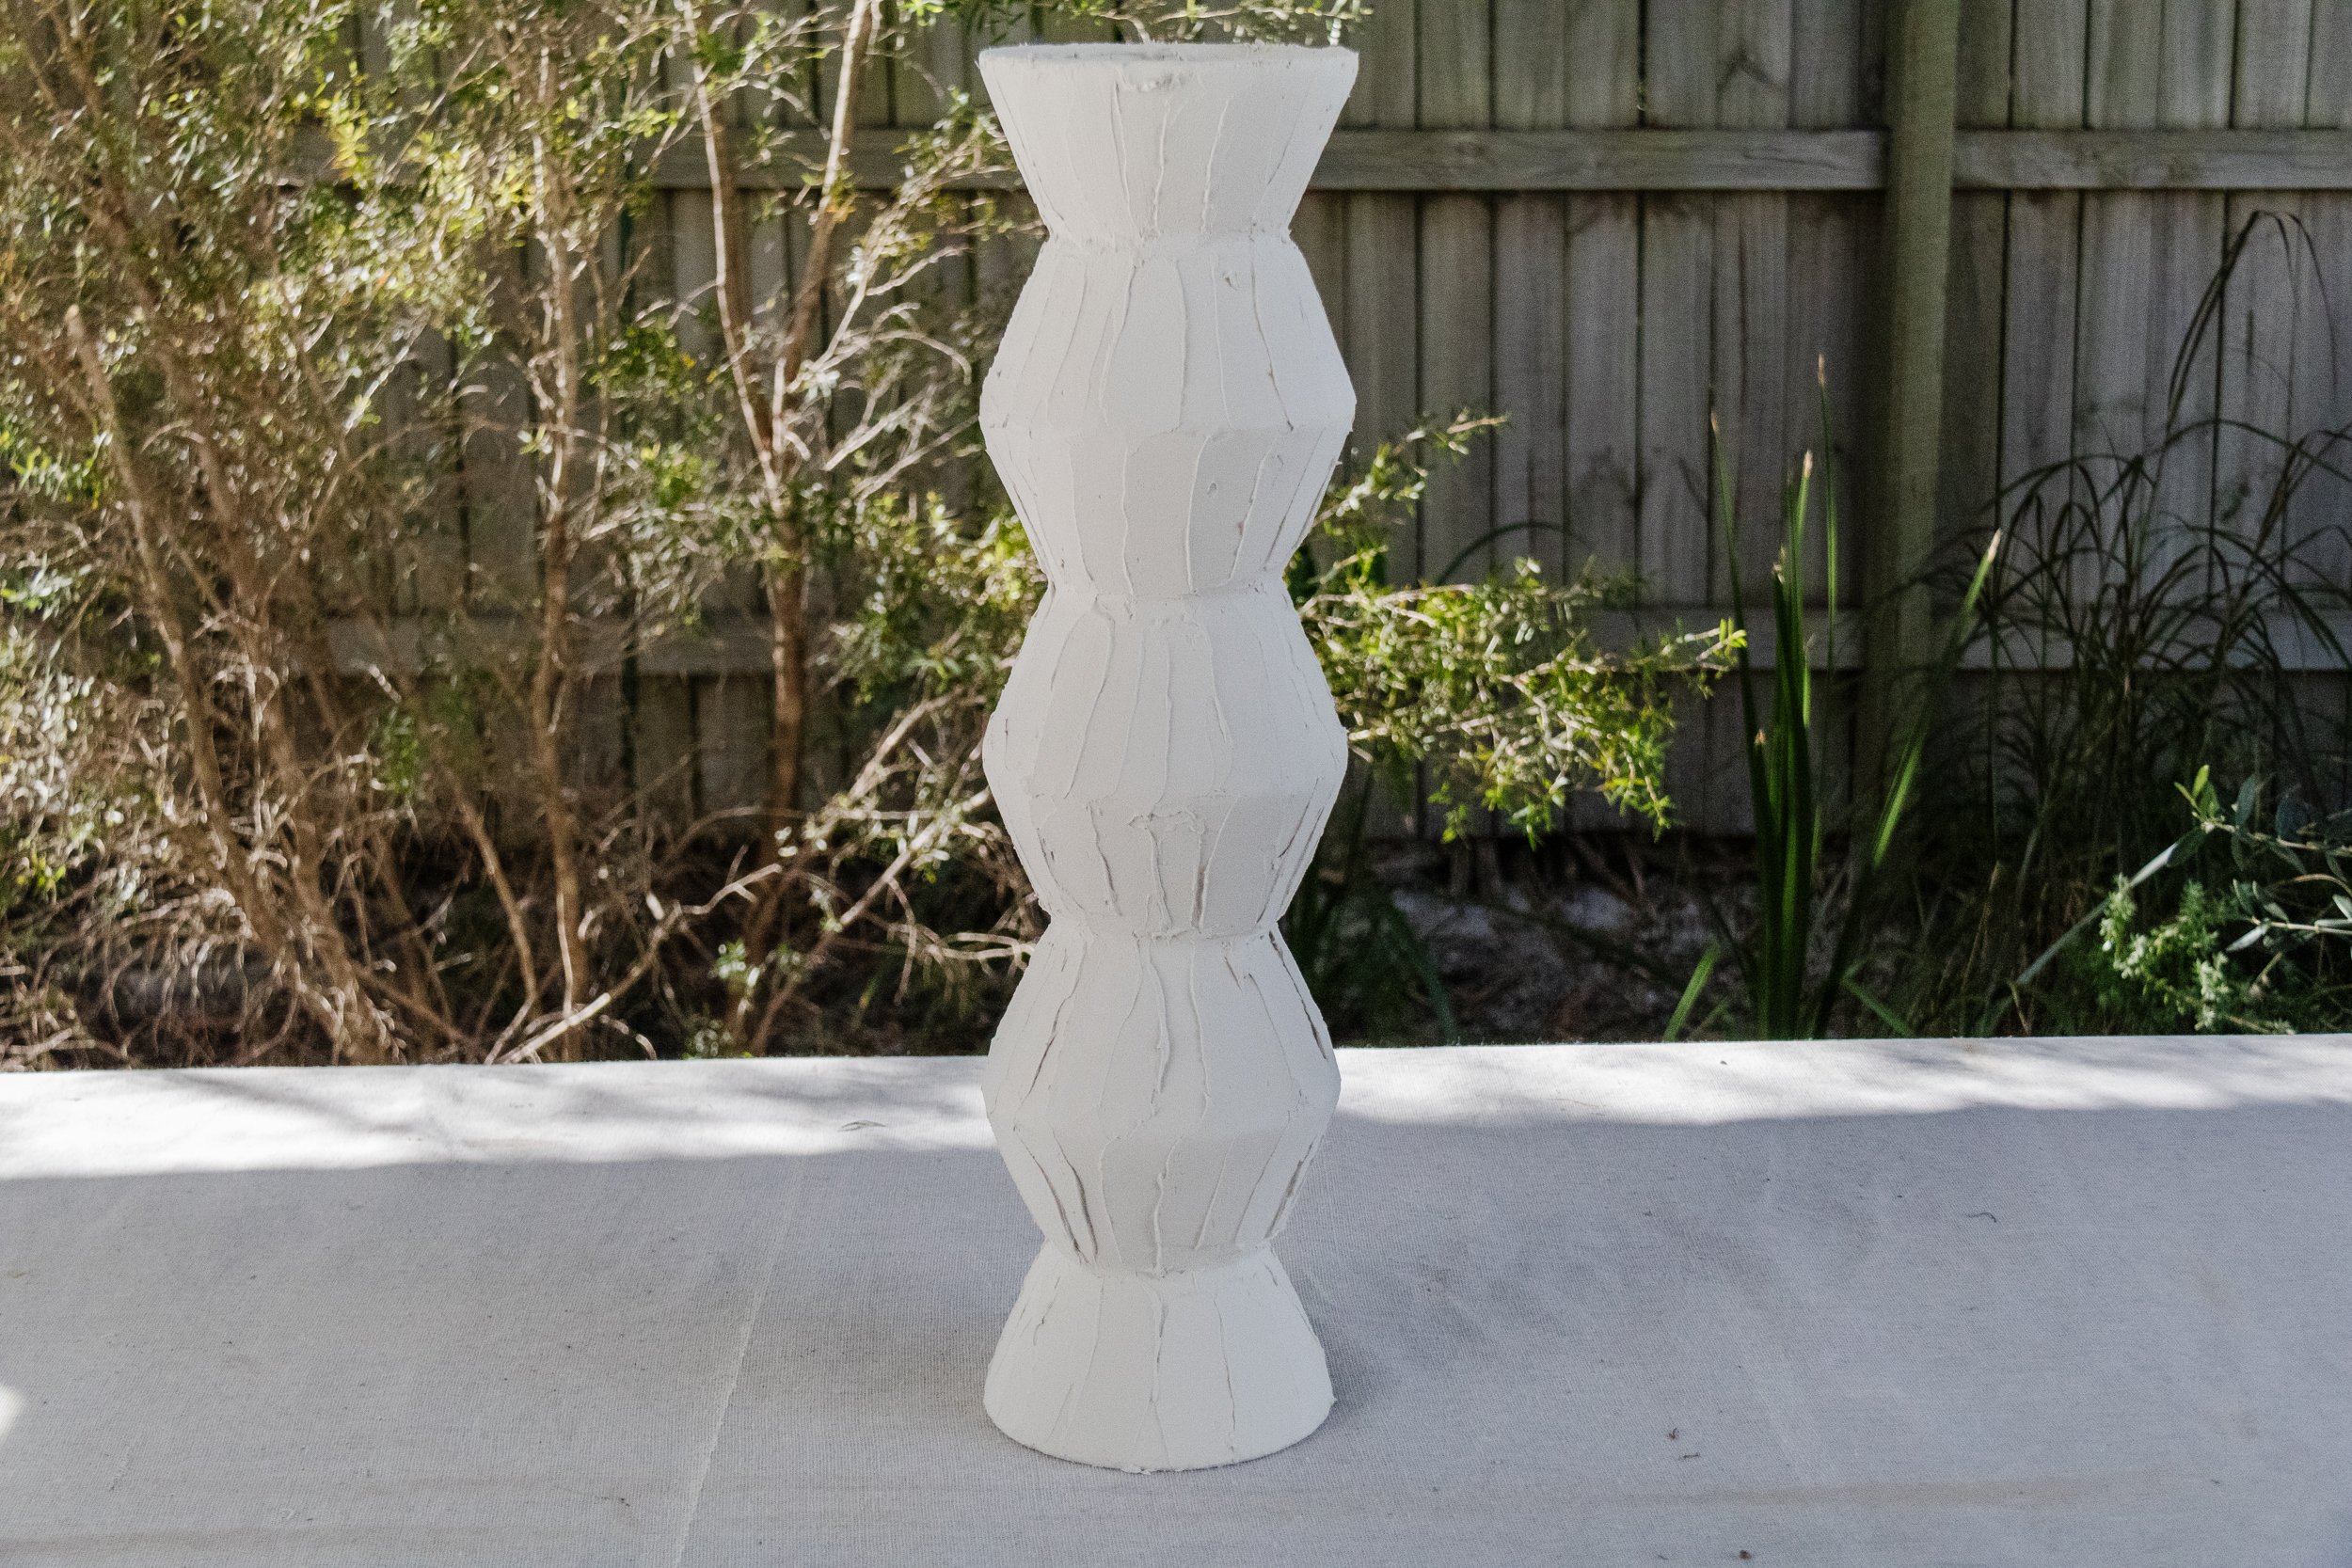
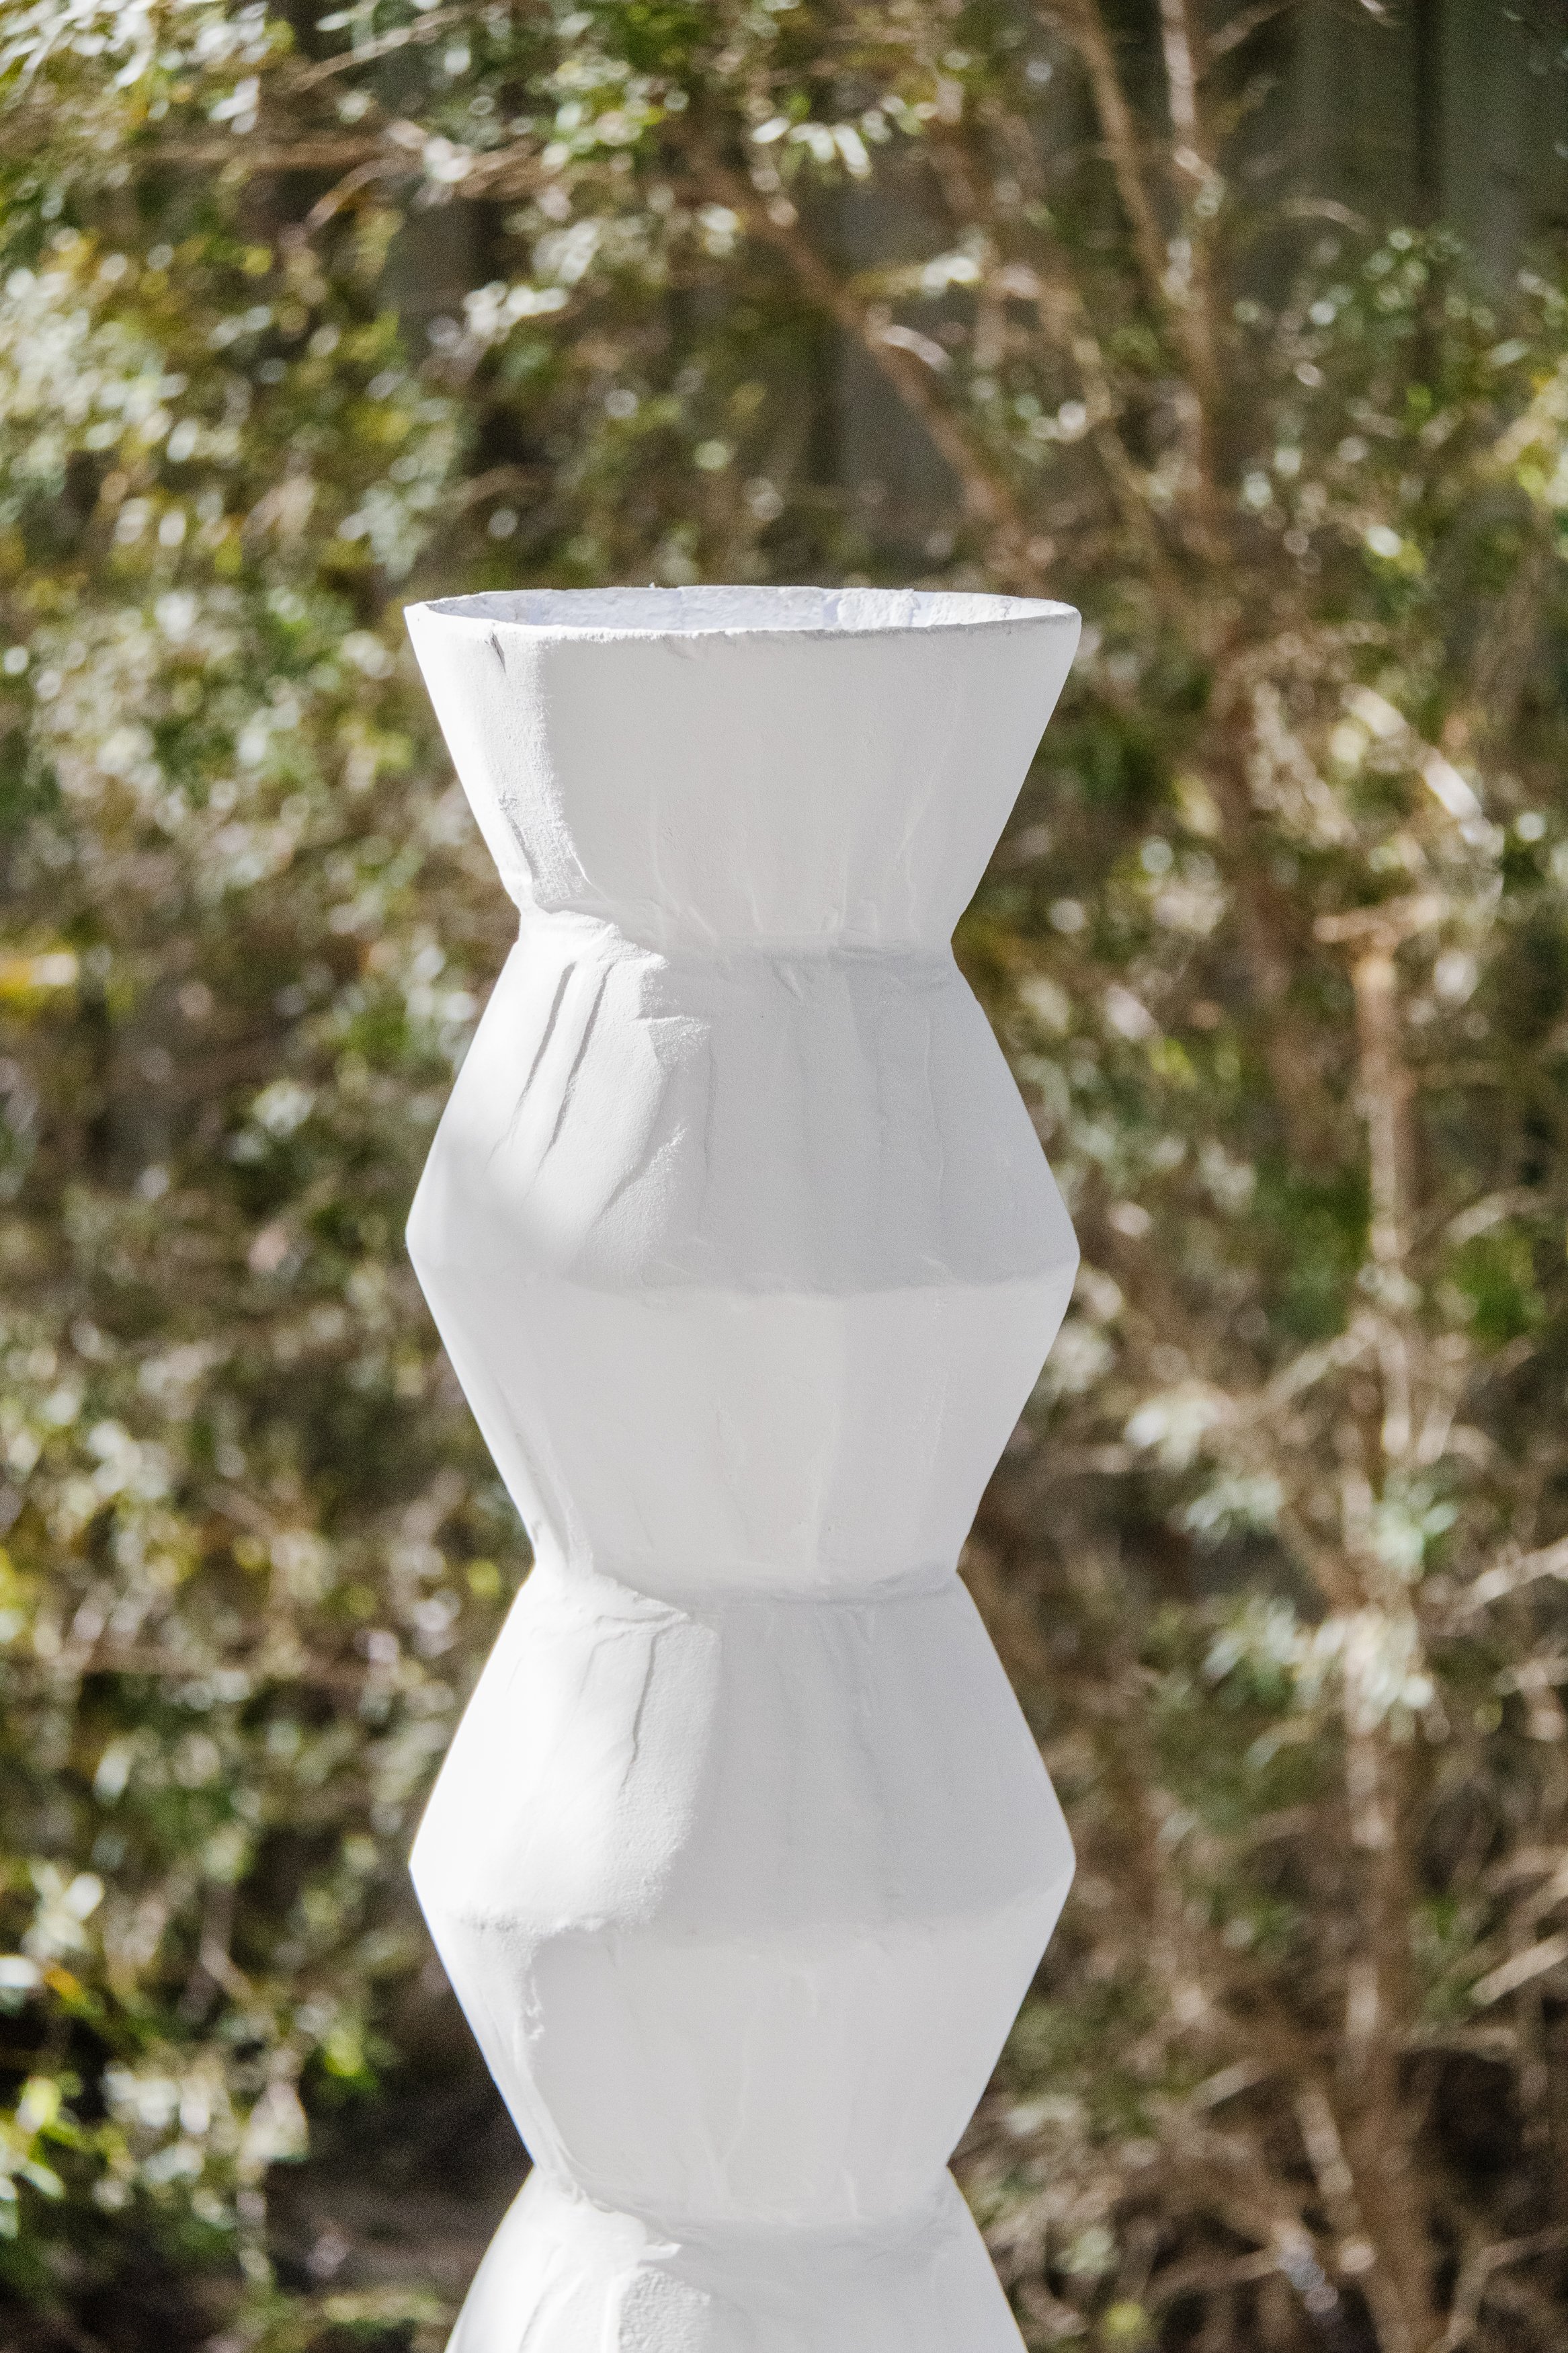
I have been feeling really inspired by modern totems and I’ve been wanting to recreate this trend but in a more practical way. So, I set about making a Totem Side Table. I fell madly in love with the zigzag shape of this dining table when I first saw it, so I used this as the foundation for my idea. I put a lot of thought into this project and knew I could recreate this zigzag totem by gluing bowls together; I just needed to find the right shaped bowls and that proved to be a little difficult. We don’t have a lot of options for large retail stores where I live in Noosa, but we do have a really good Big W at Noosa Civic, so I took the kids with me a couple of weeks ago in search of the perfect bowl. It had to have sharp, straight edges and I couldn’t believe my luck when found some!
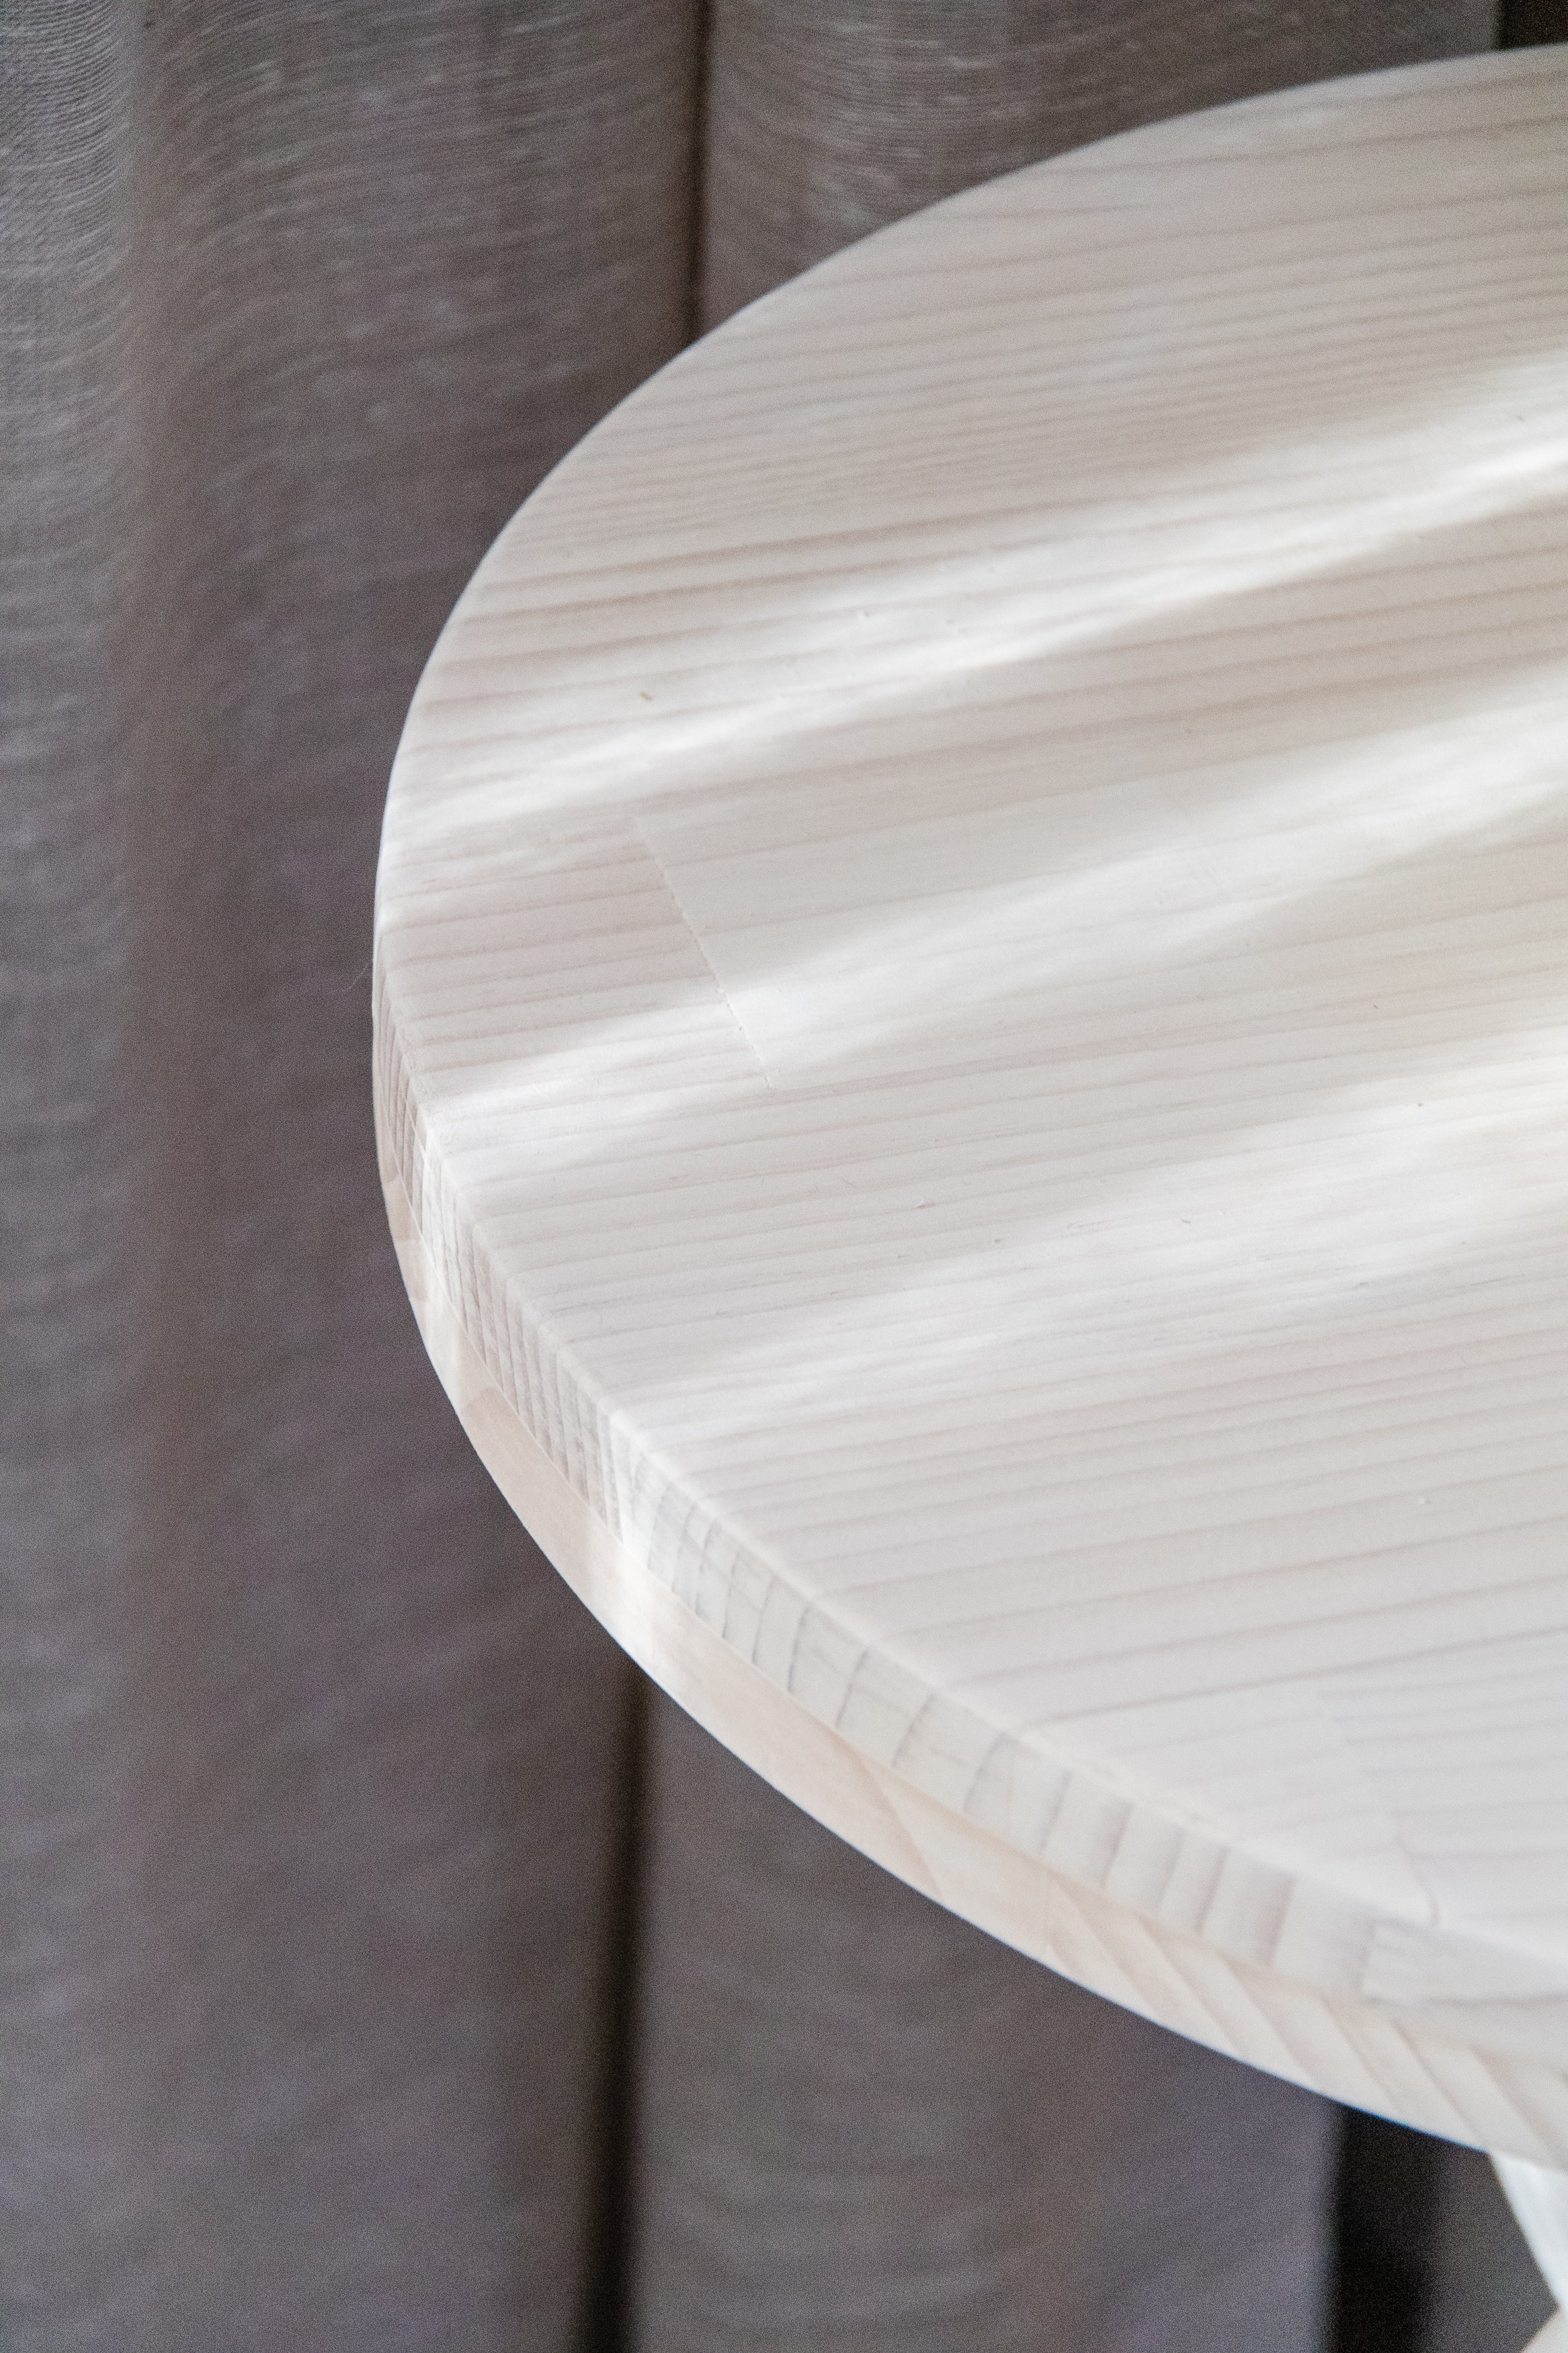
From here I went on a DIY adventure that involved gluing, prepping, plastering and whitewashing and honestly, I couldn’t be happier with the result! I really enjoyed taking my time with this project and I want to thank my lovely community over on Instagram who voted I plaster the zigzag totem; my original plan was to paint it, but I quickly realised that plastering it would look even better. I also want to thank @thelittleoilymama for her suggestion to whitewash the tabletop. It’s a technique I have never used before and I honestly think it’s what brings the entire side table together - thank you! I am forever grateful I have such an incredible community of likeminded people who are always by my side, cheering me on and helping me make decisions. I’ve come to really rely on this wonderfully supportive and creative community!
To see how this DIY came together, make sure you check out this video!
Before & After


Project Details
🕒 Project Time Estimate: 4 hours over 4 days
💰 Materials Cost: Under $75
👷♀️ Skill Level: Beginner DIYer
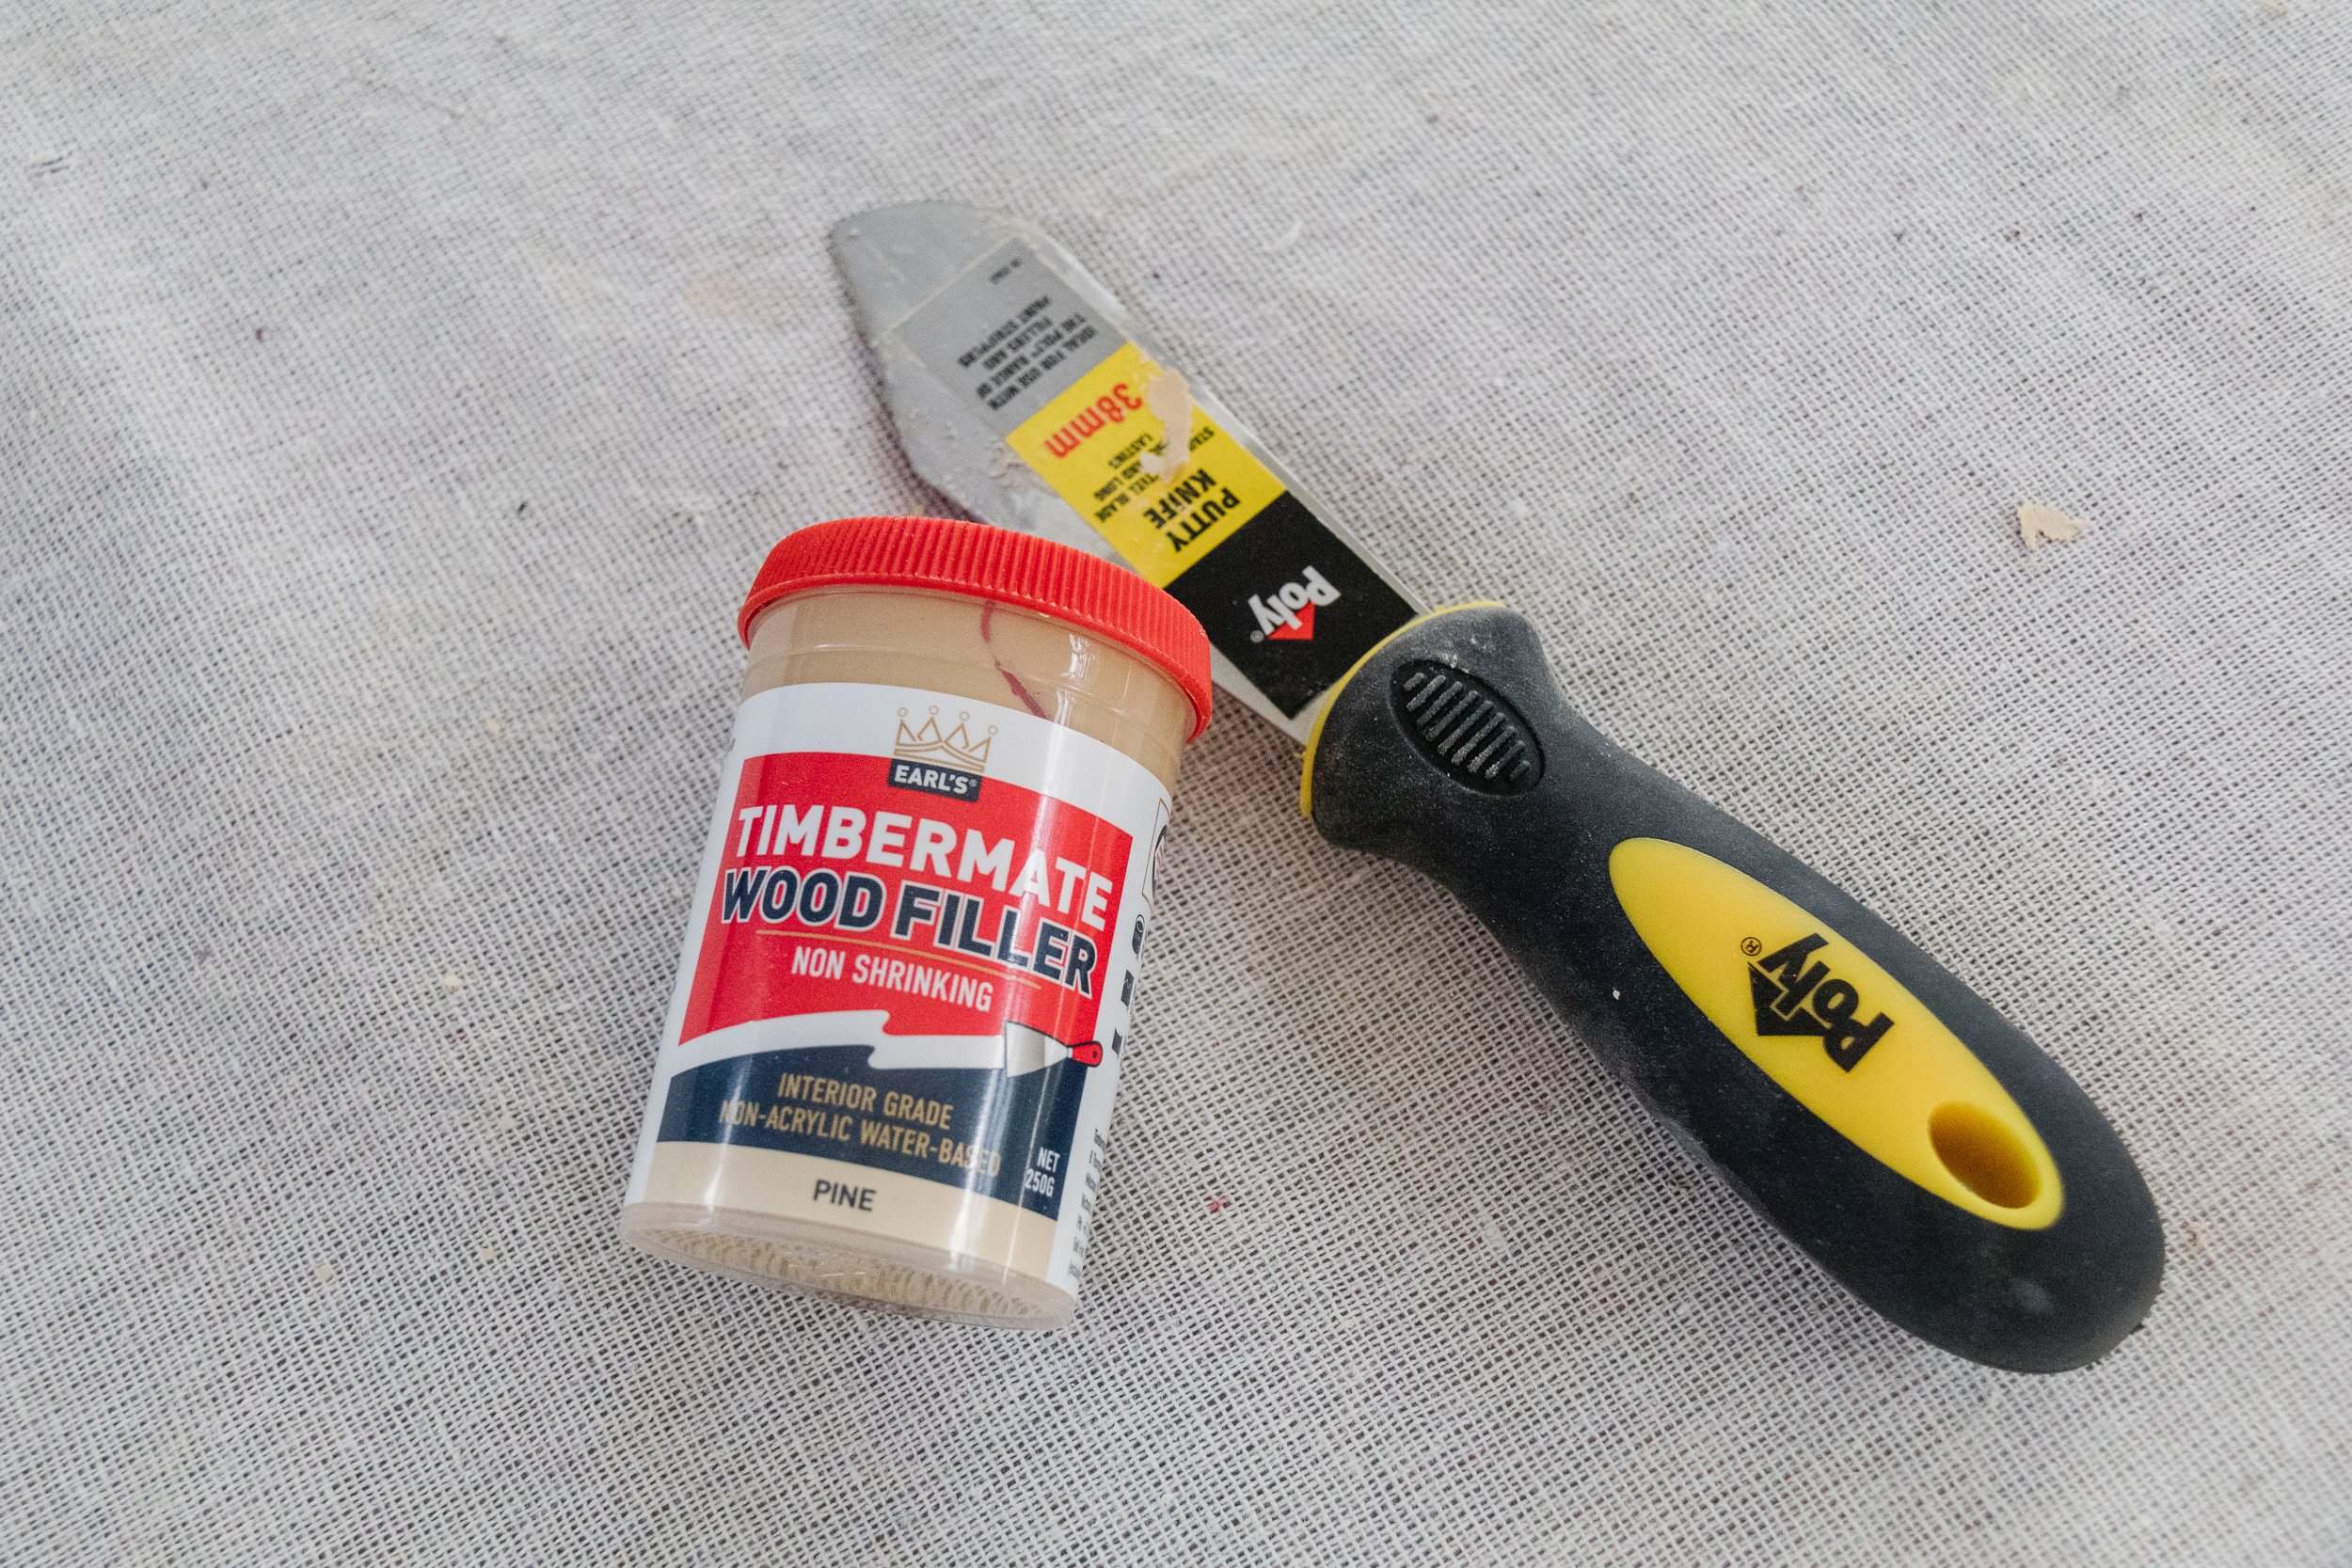
⚒️ Tools: Corner sander, table clamps and a putty knife
Materials
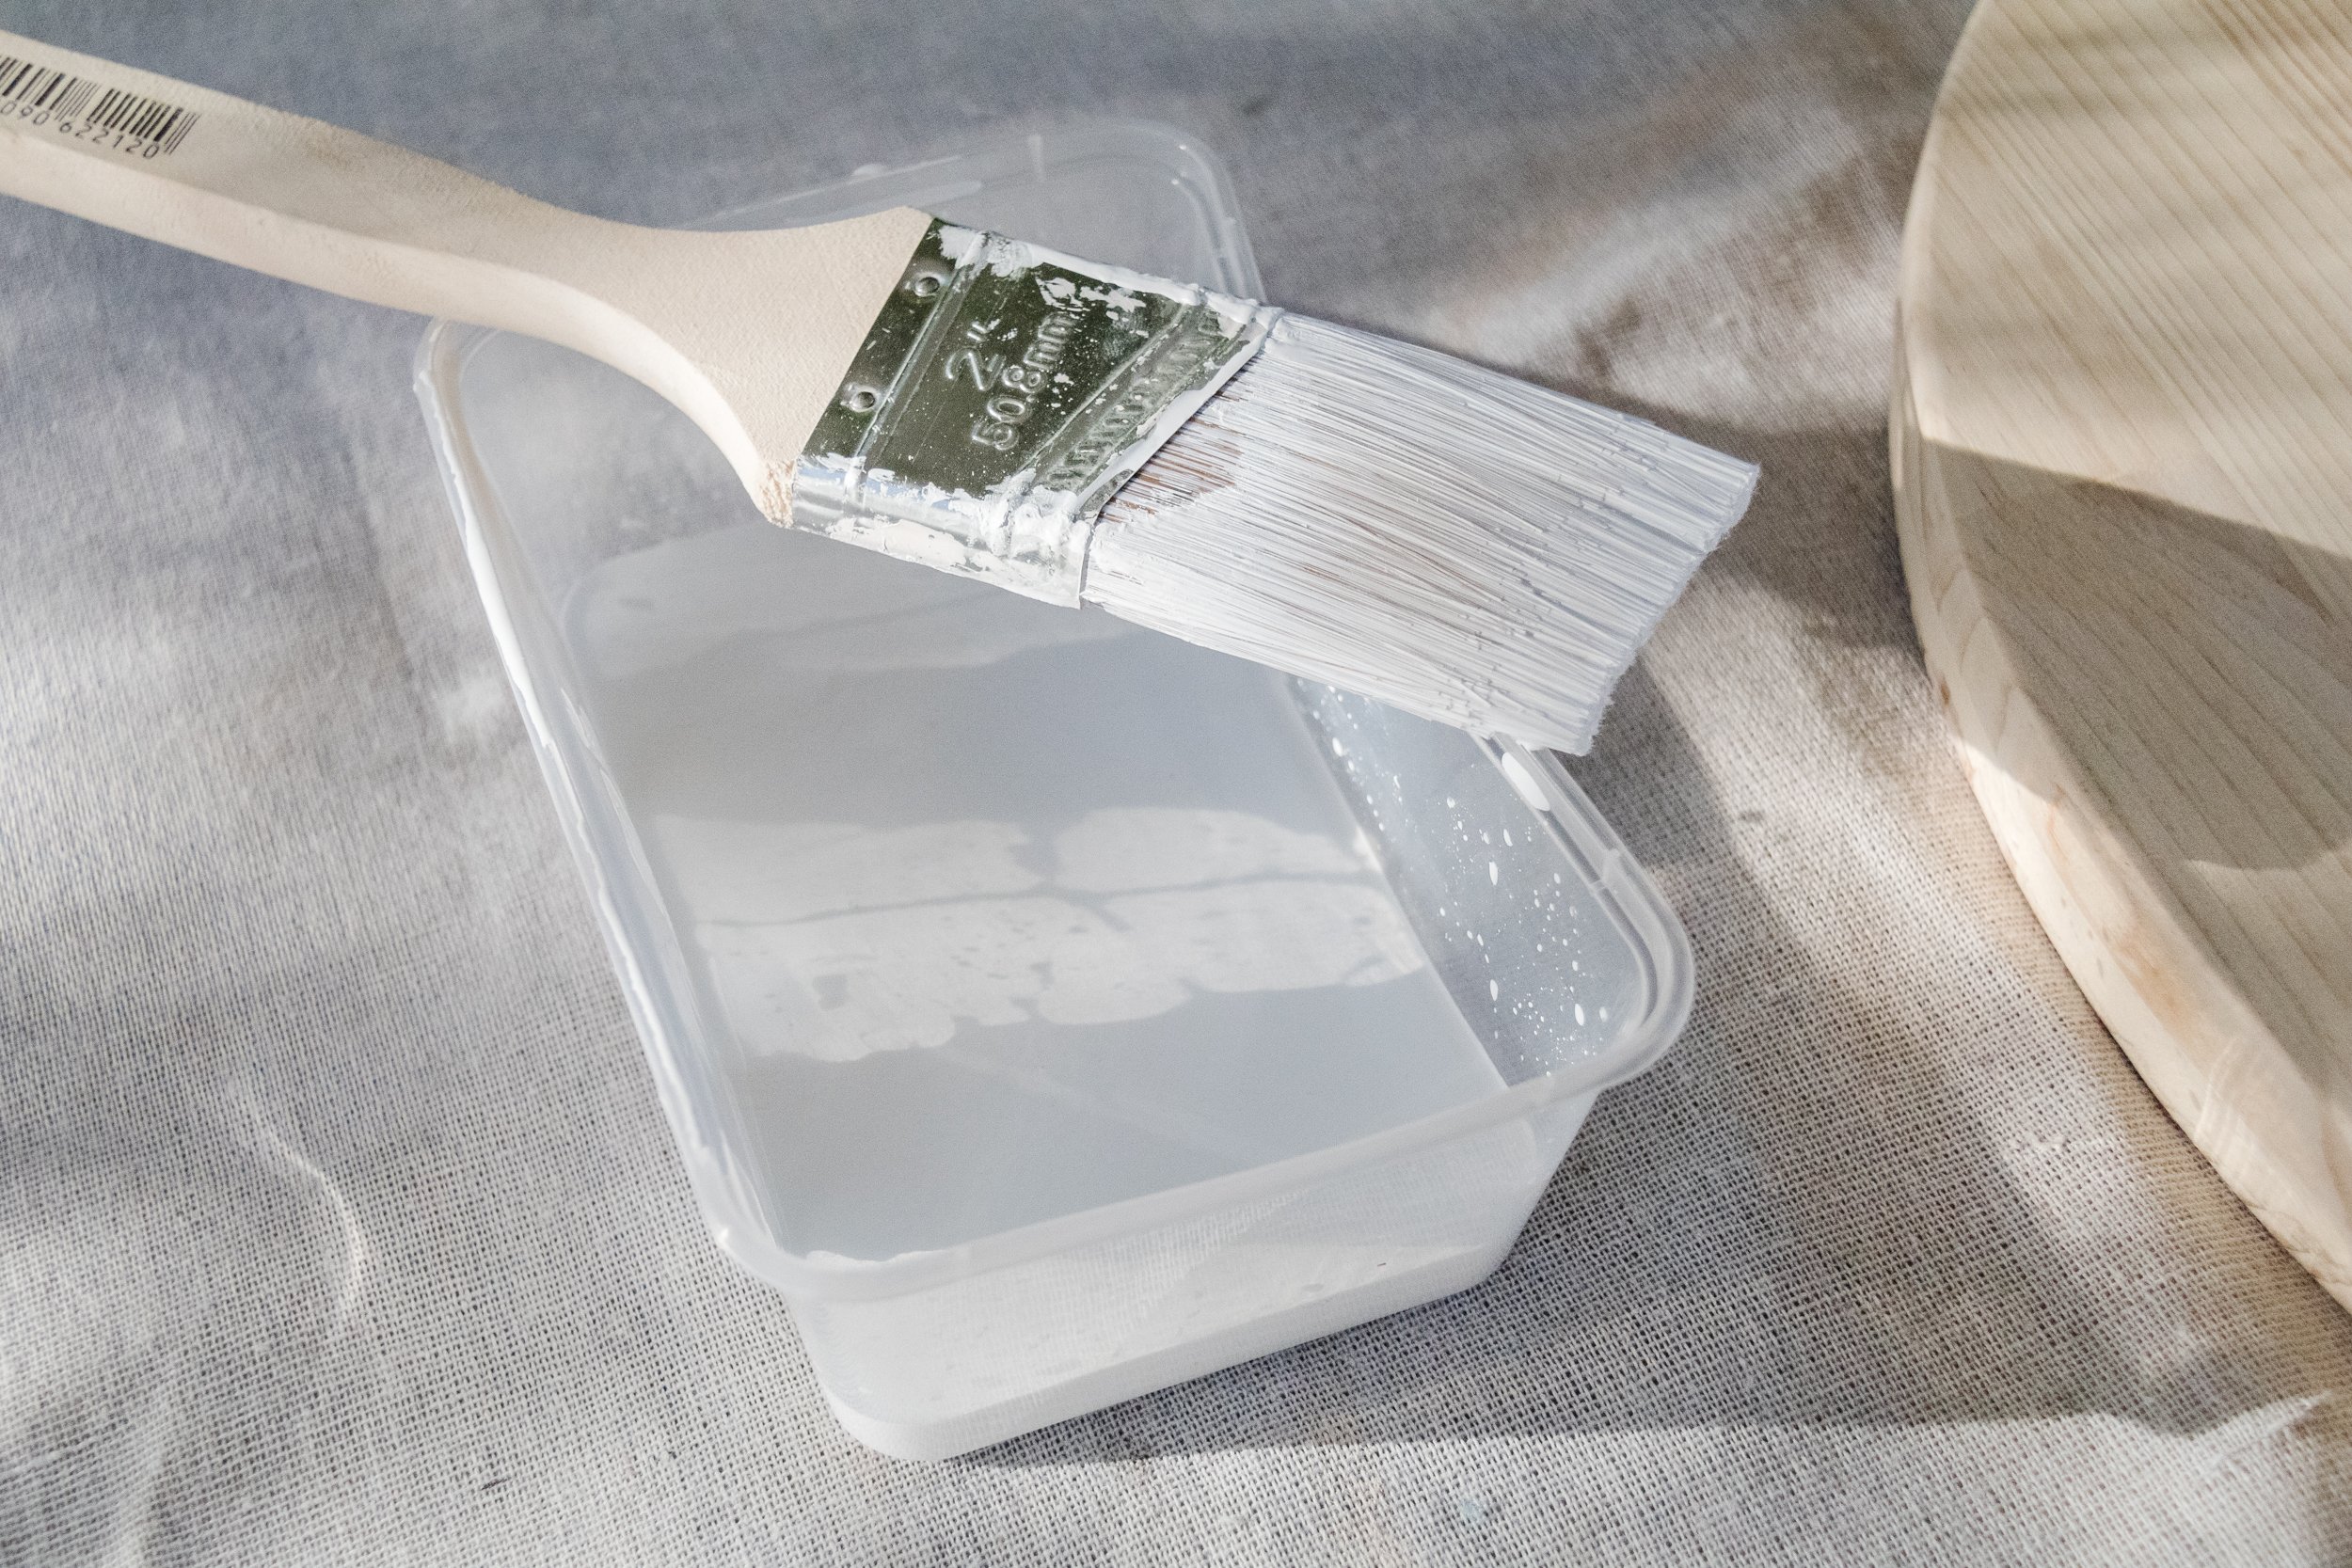
Whitewash: 2 tbsp water, 1 tbsp white paint mixed together in a plastic disposable/reusable bowl
Paint brush
Old clean cotton cloth
For this project I used a corner sander, table lamps, and a putty knife.
How To
DAY ONE - 30 mins
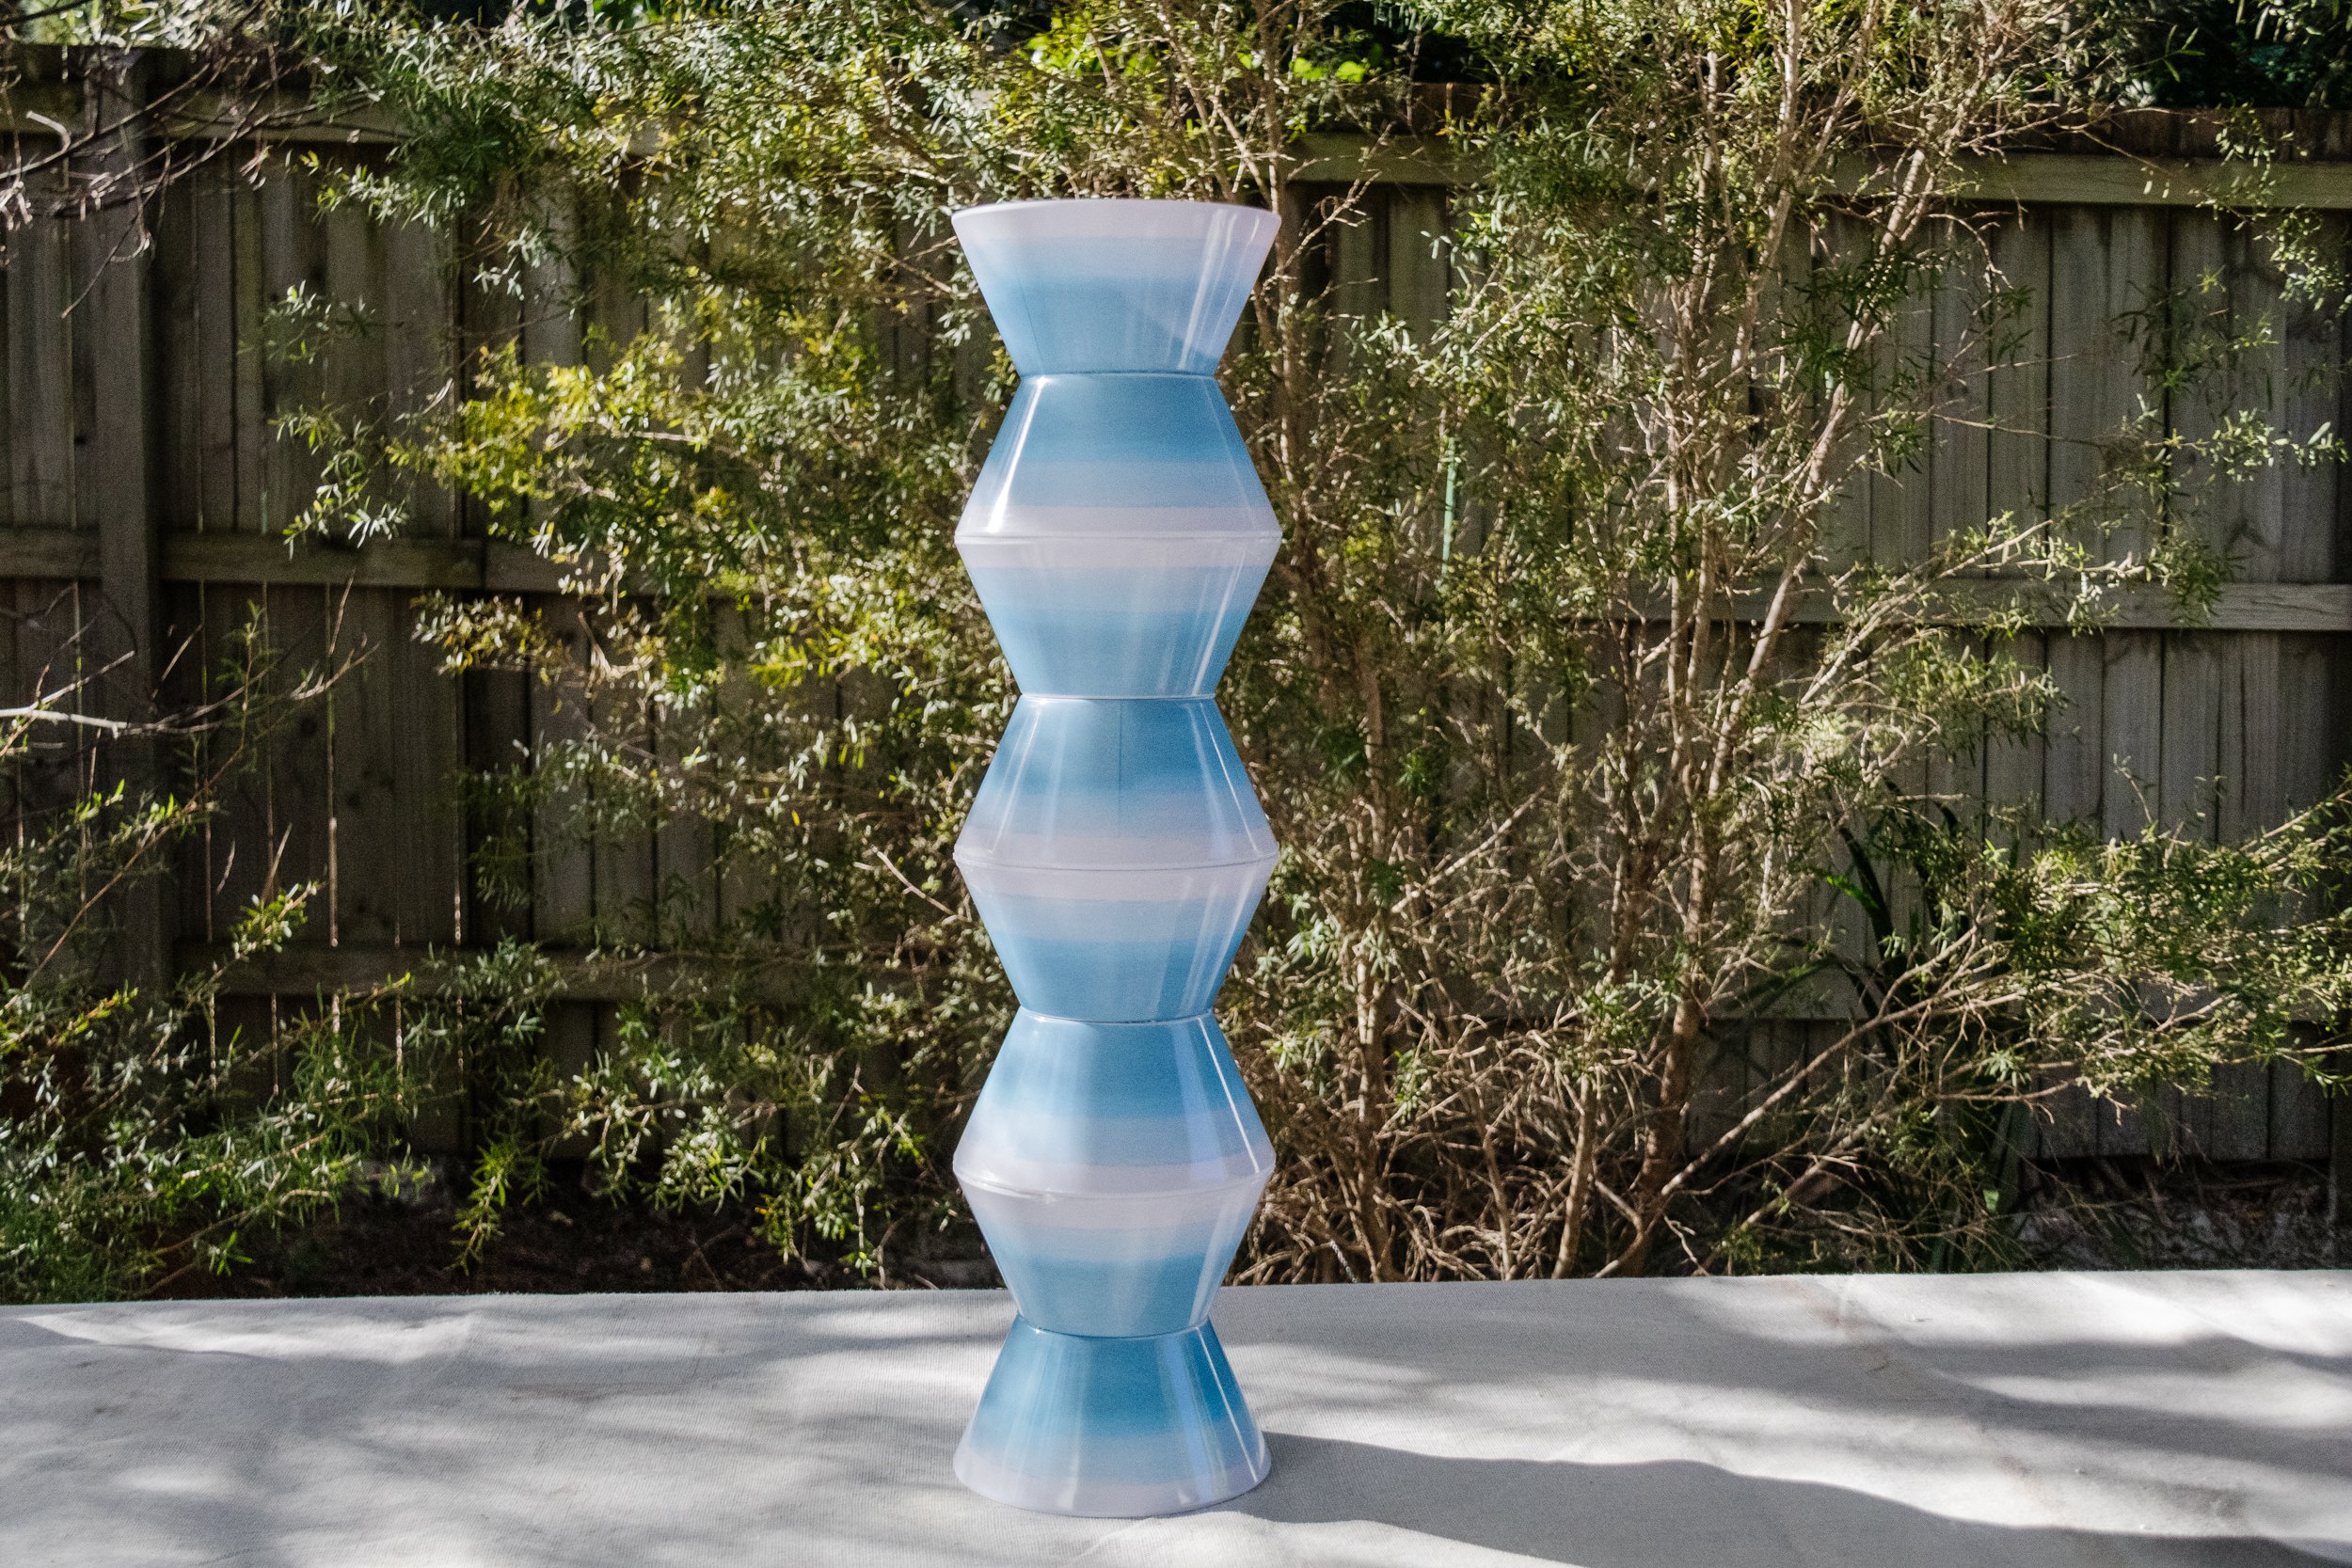
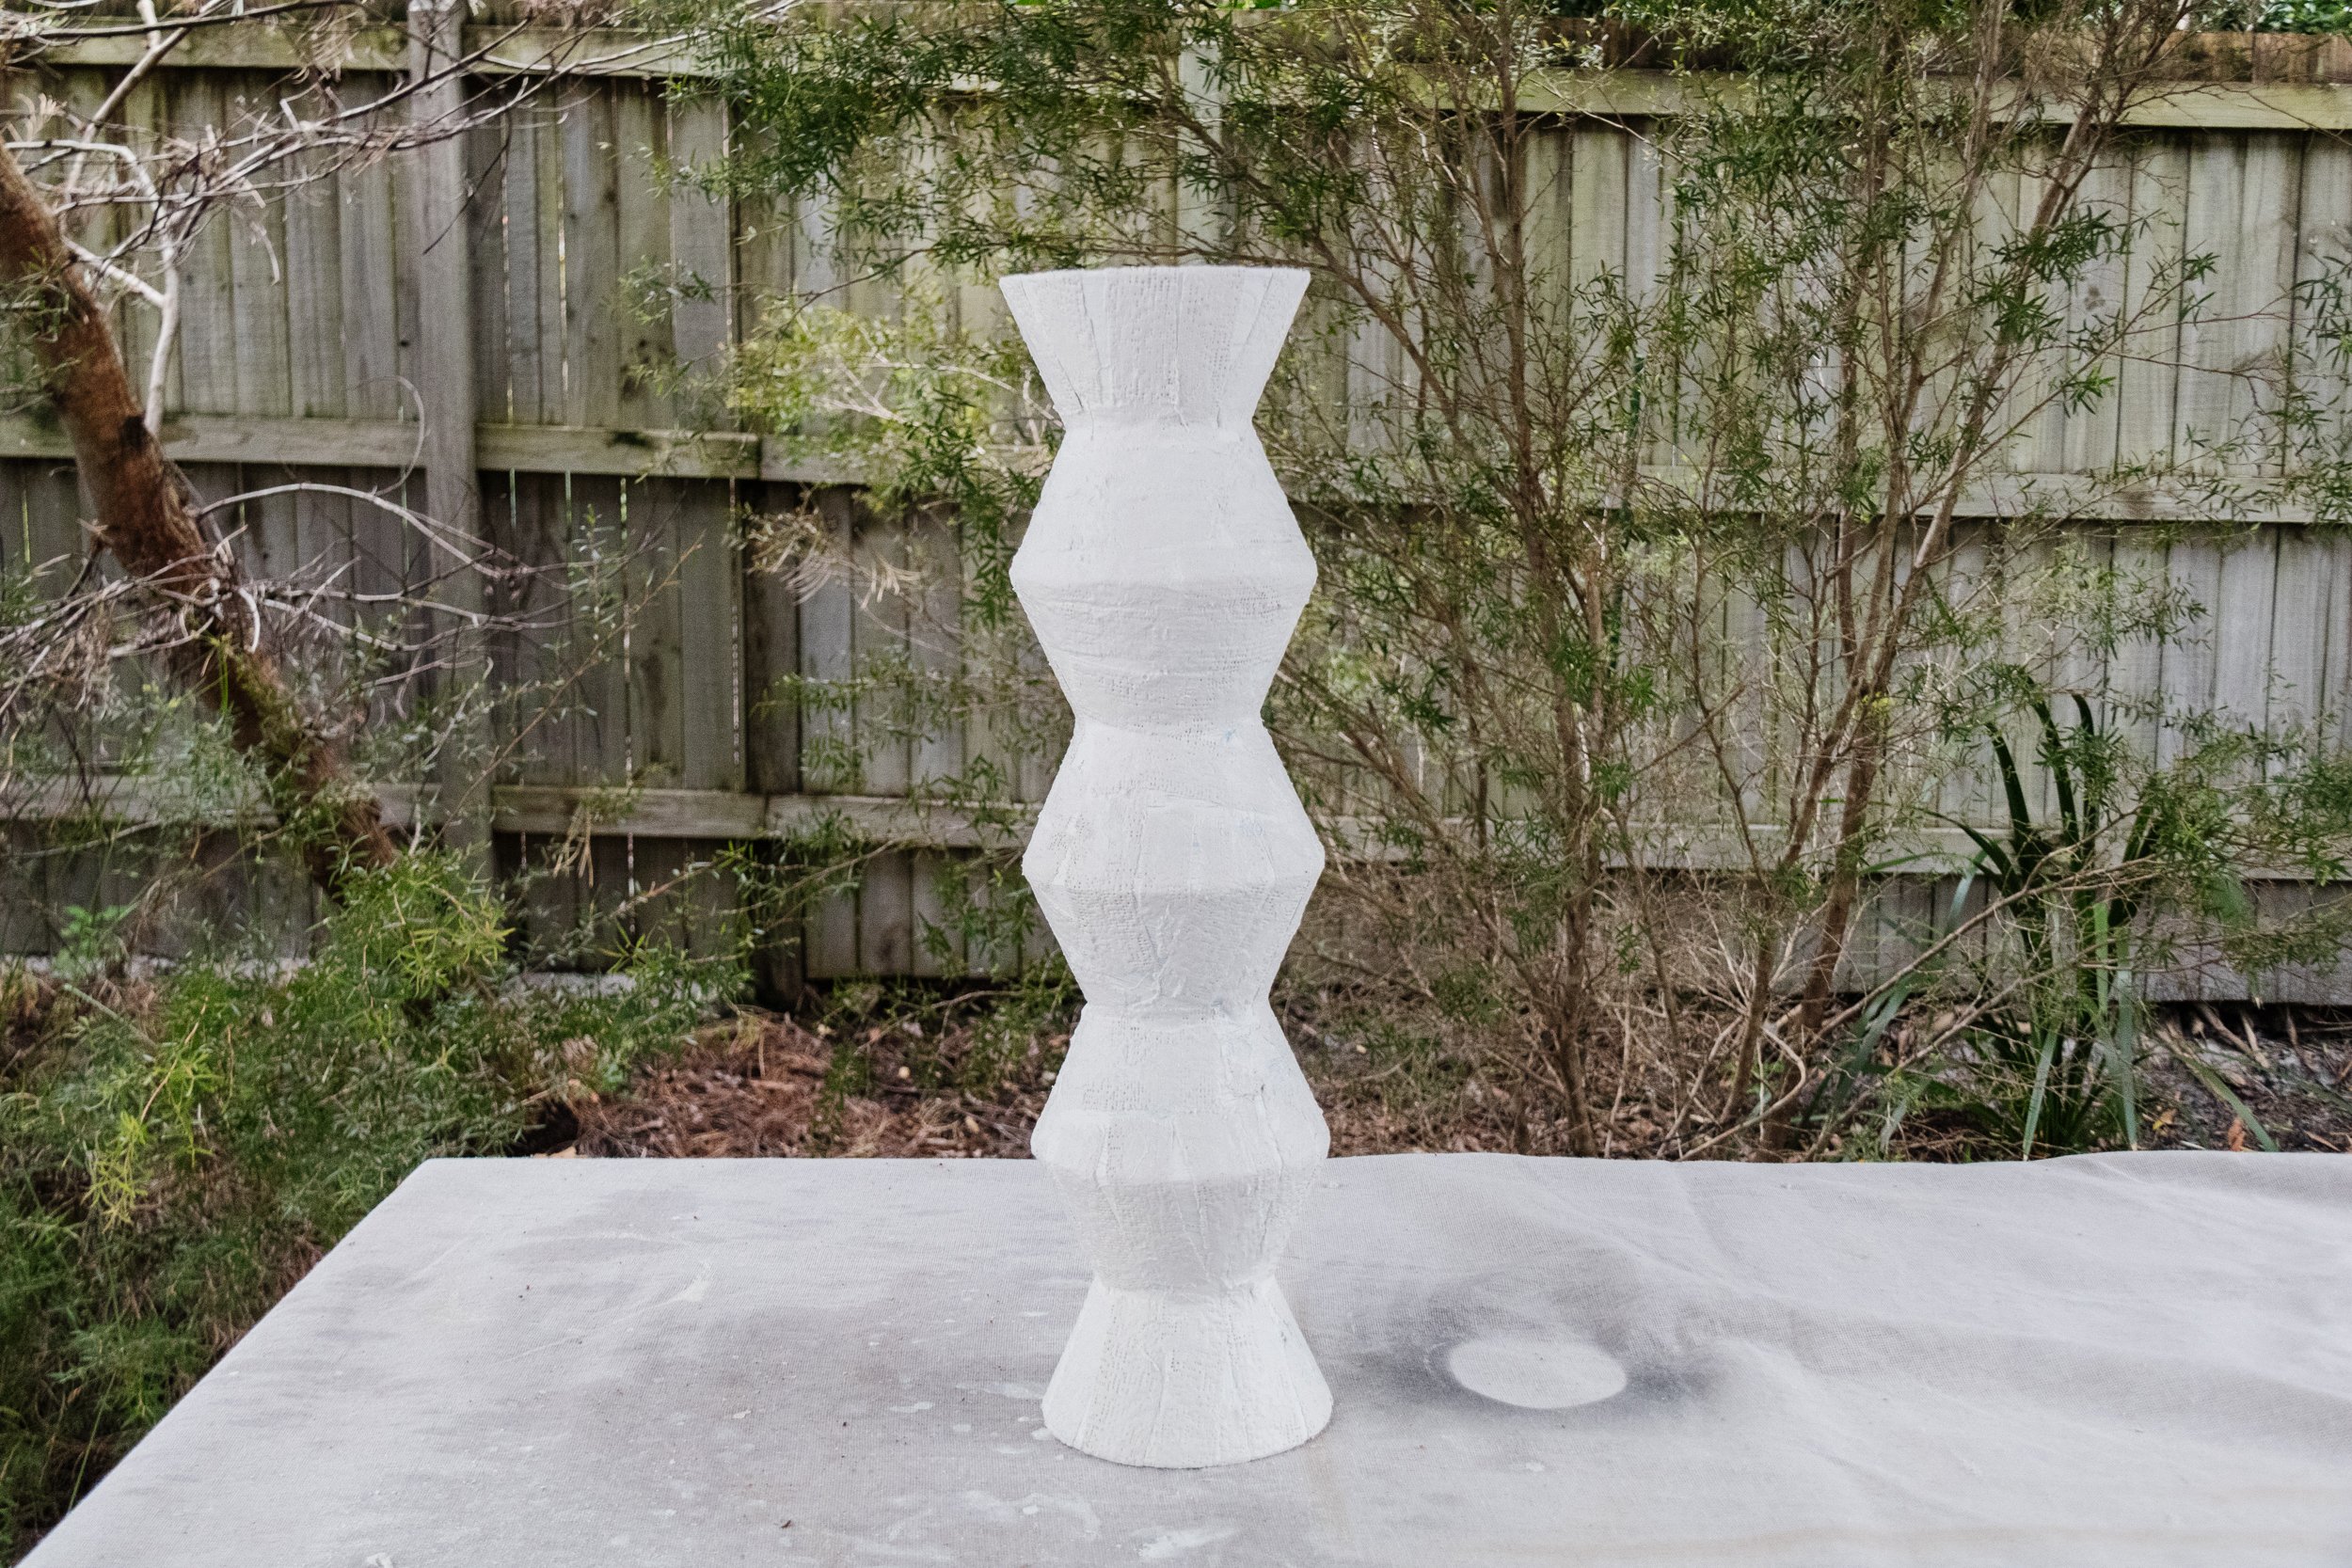
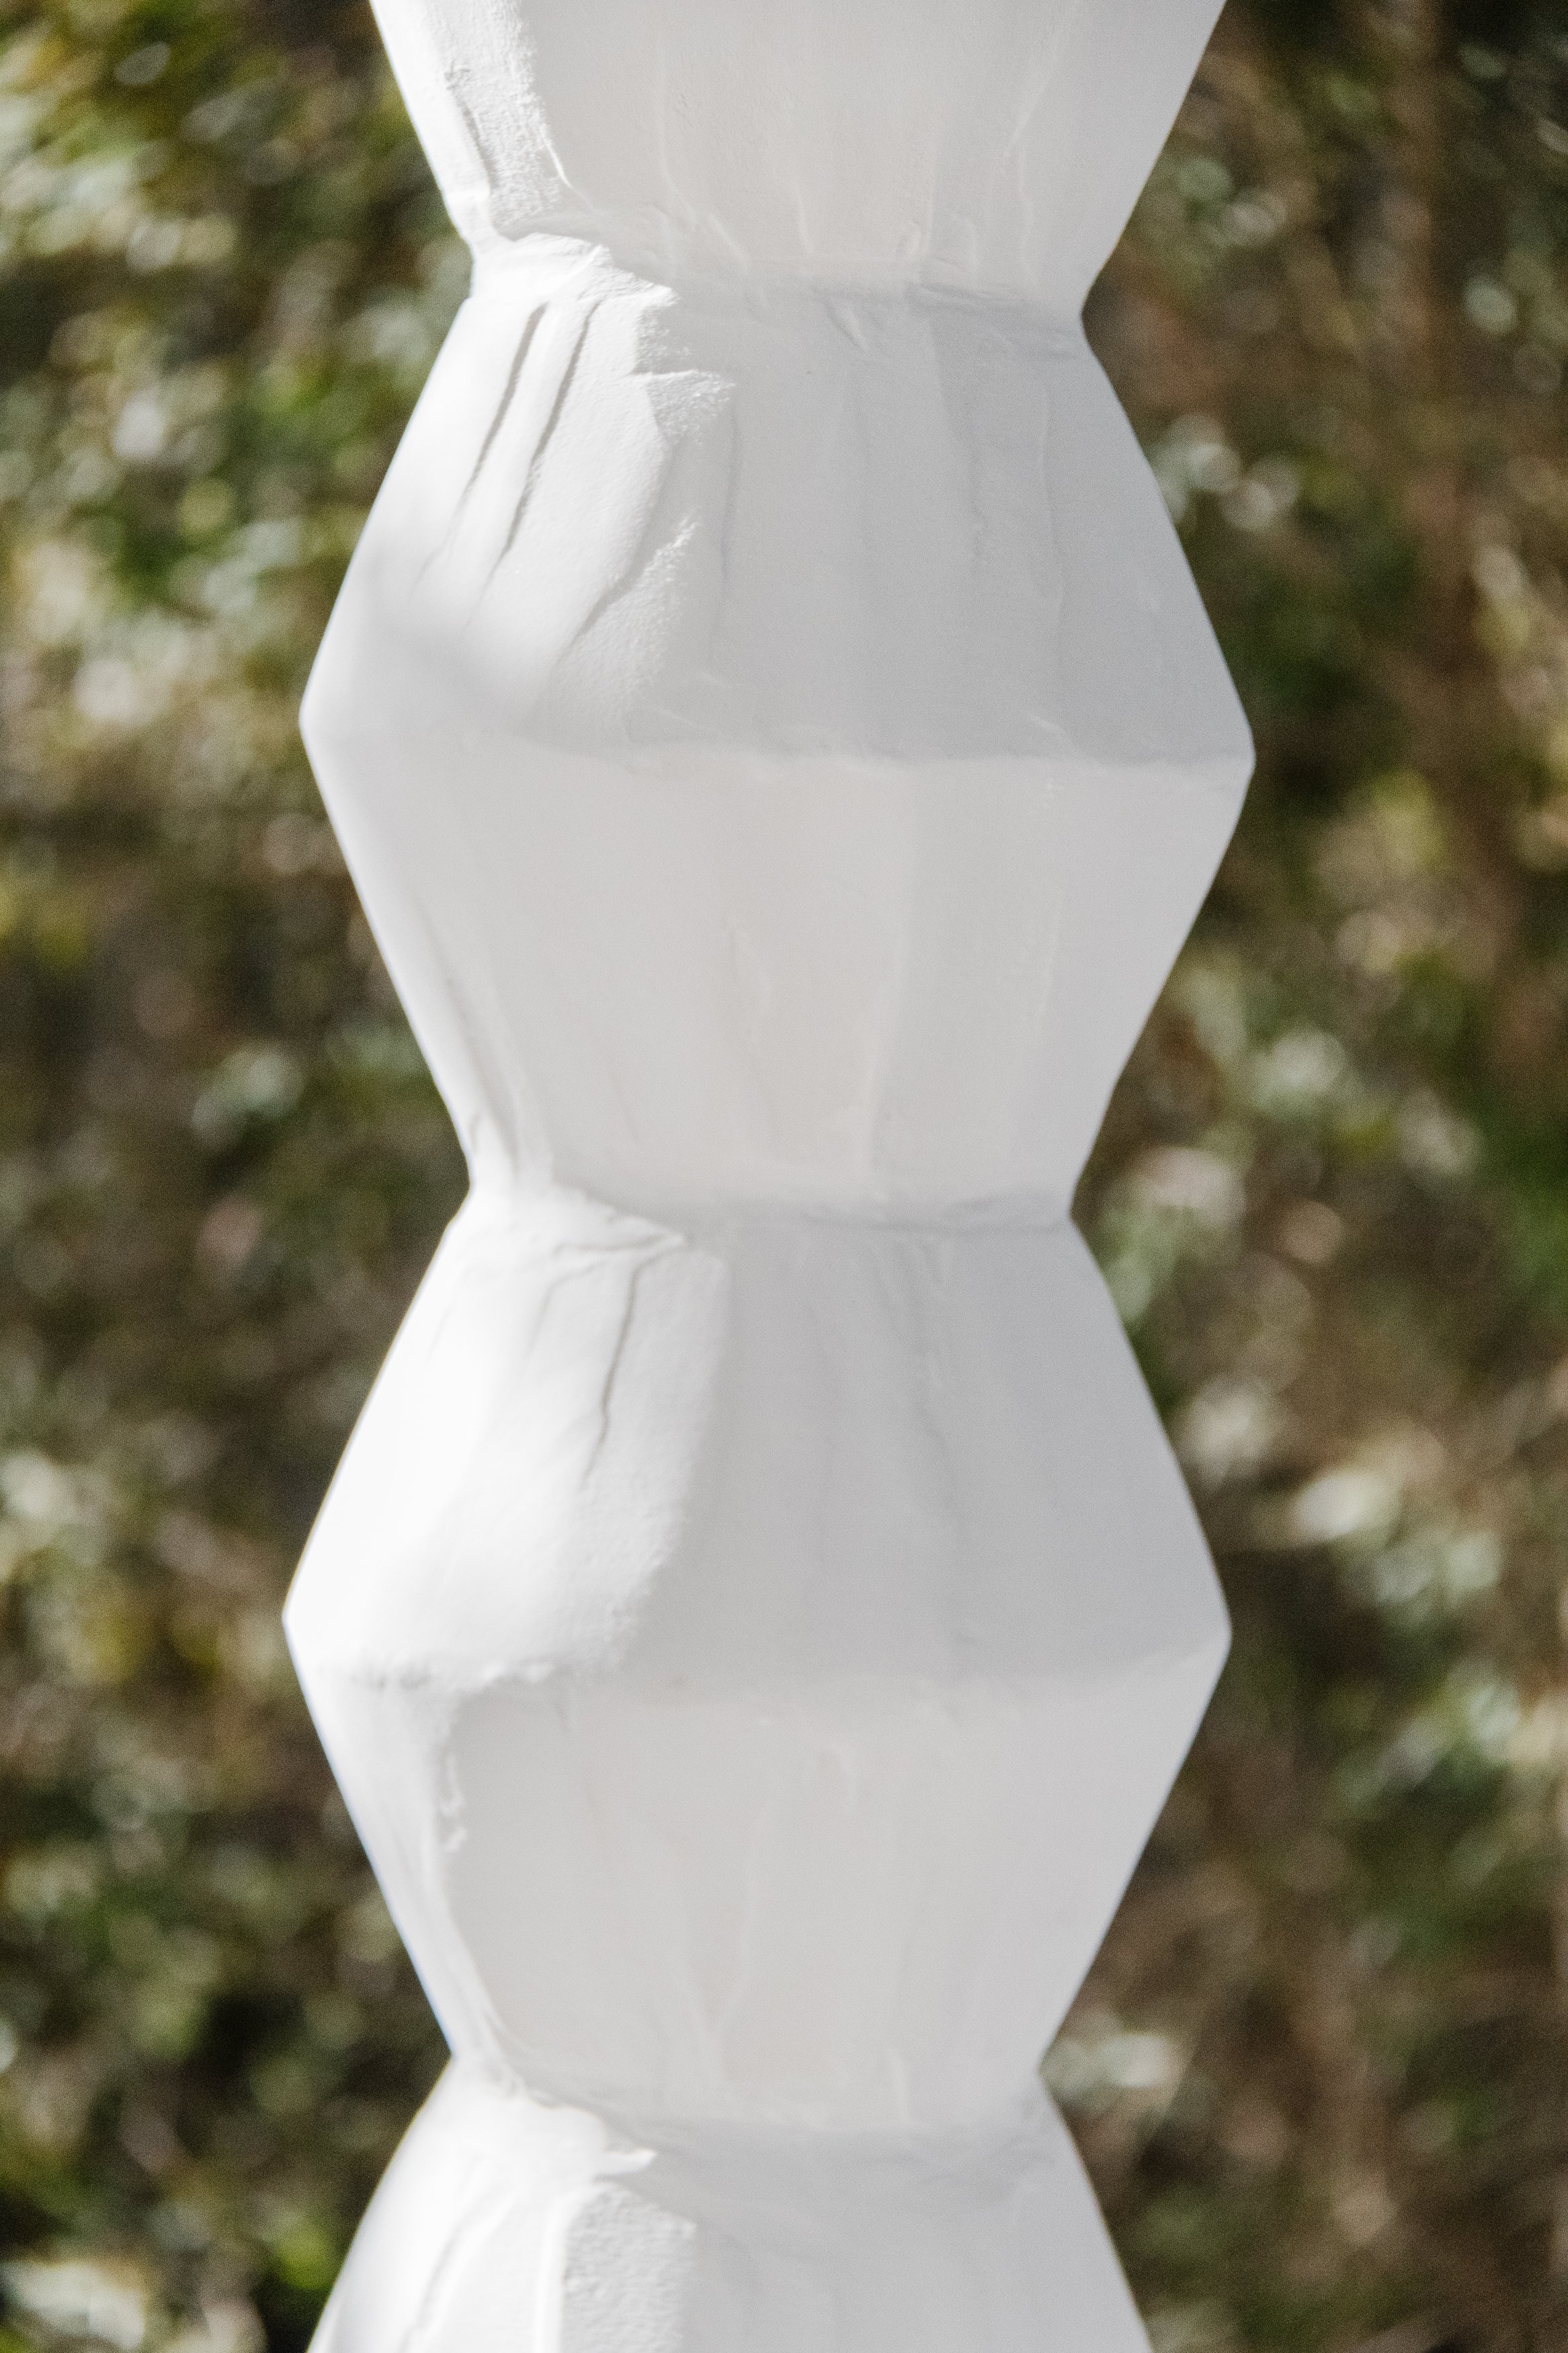
To create the totem, start by gluing the rims of 2 bowls on top of each other and repeat two more times; refer to photos below. After the glue has set (about 30mins) carefully glue the 3 pieces together, and then glue a bowl at the bottom and one at the top to make the totem. Set aside to dry overnight. NB: My original plan was to paint the totem, I had painted it over the bowls with Zinsser Primer Blocker Sealer but you don’t need to do this.
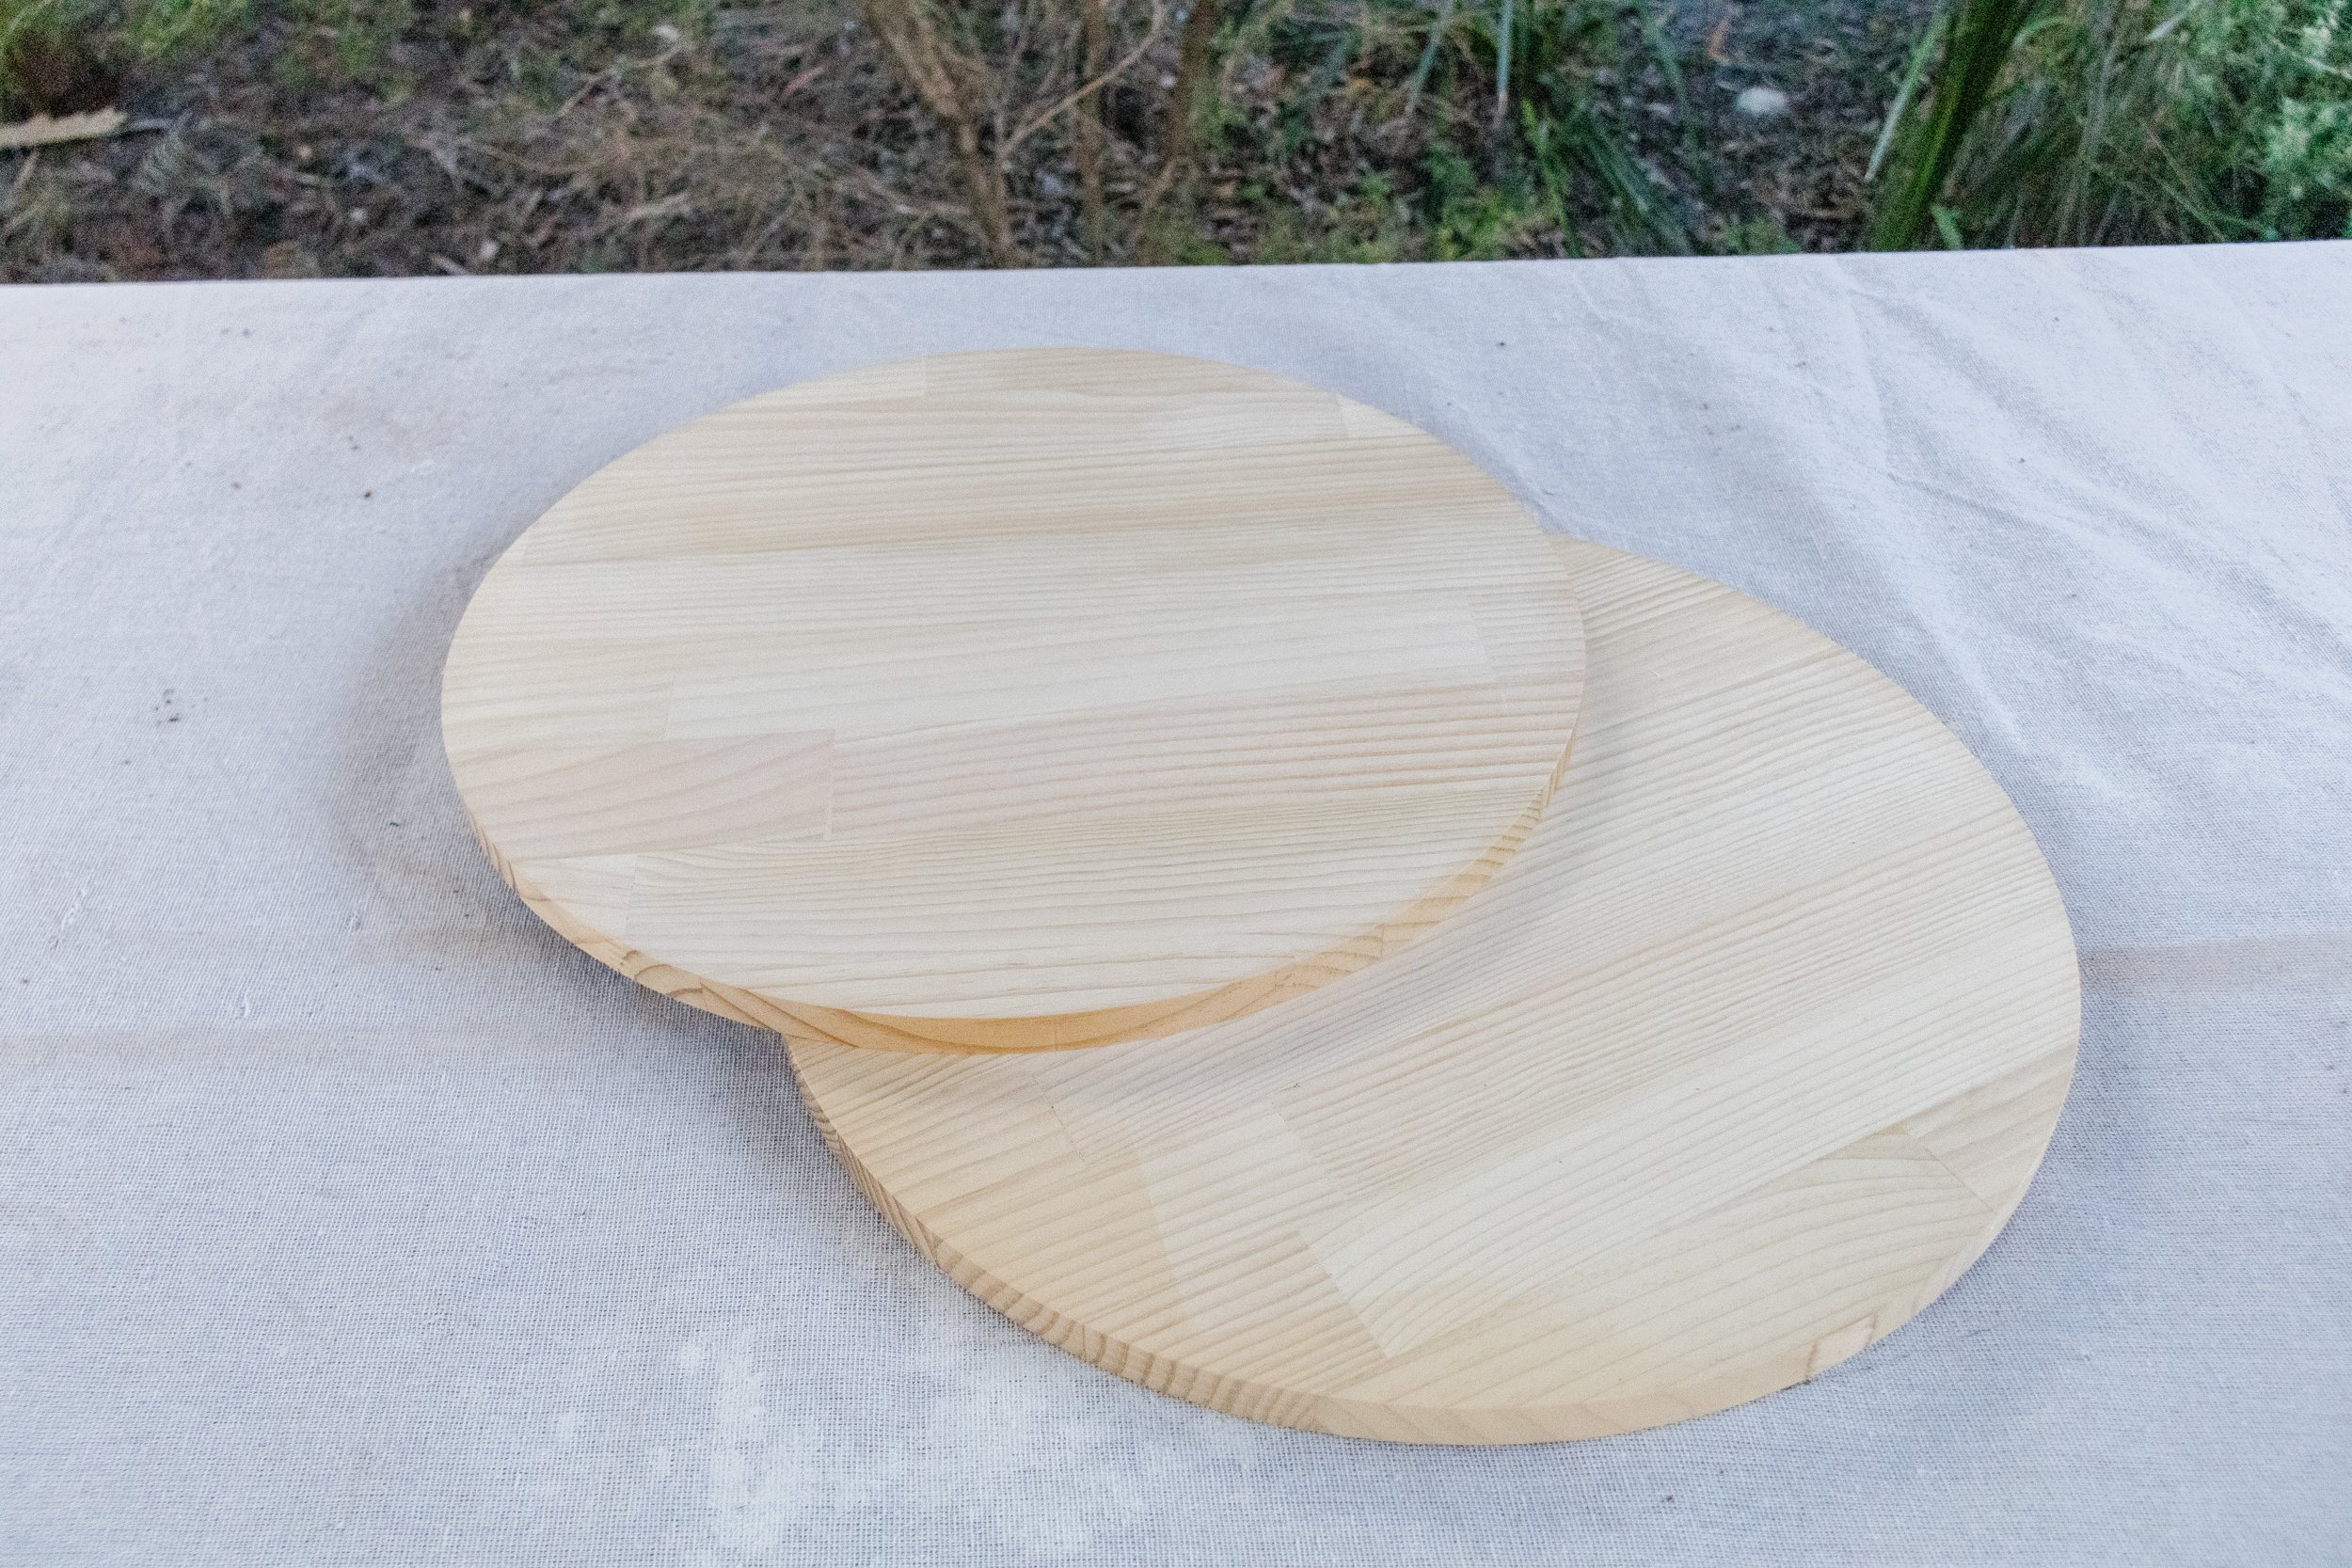
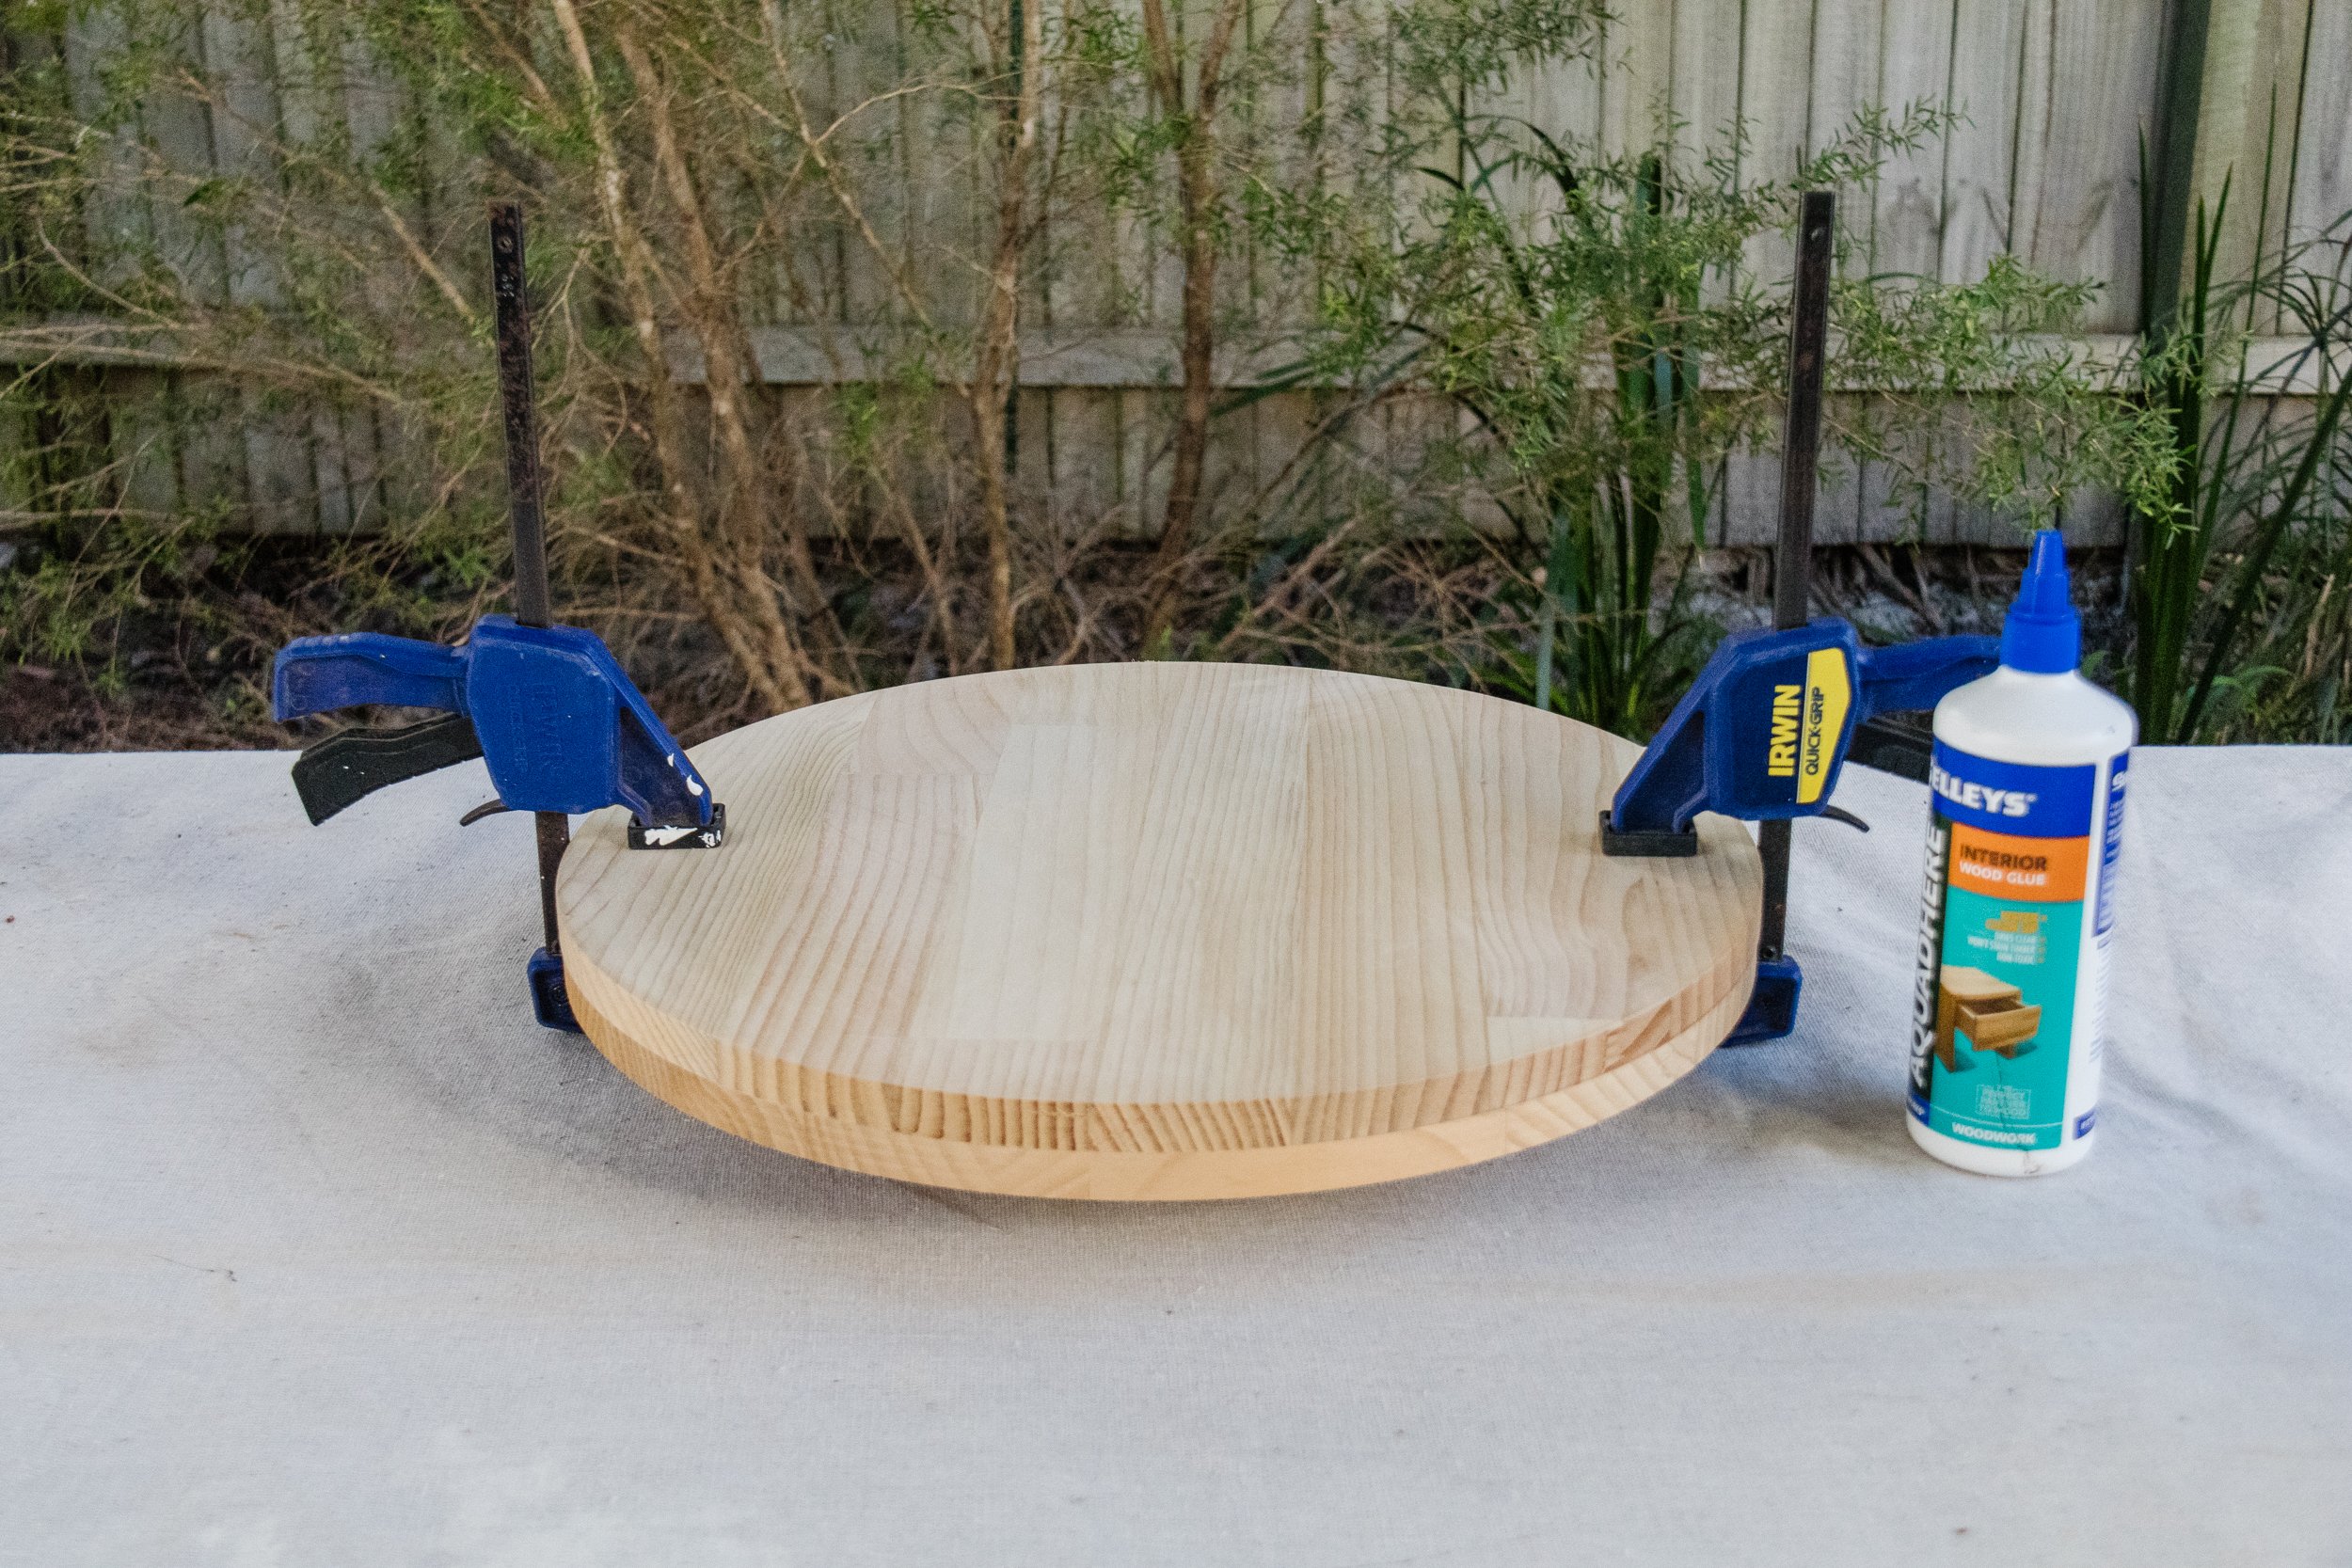
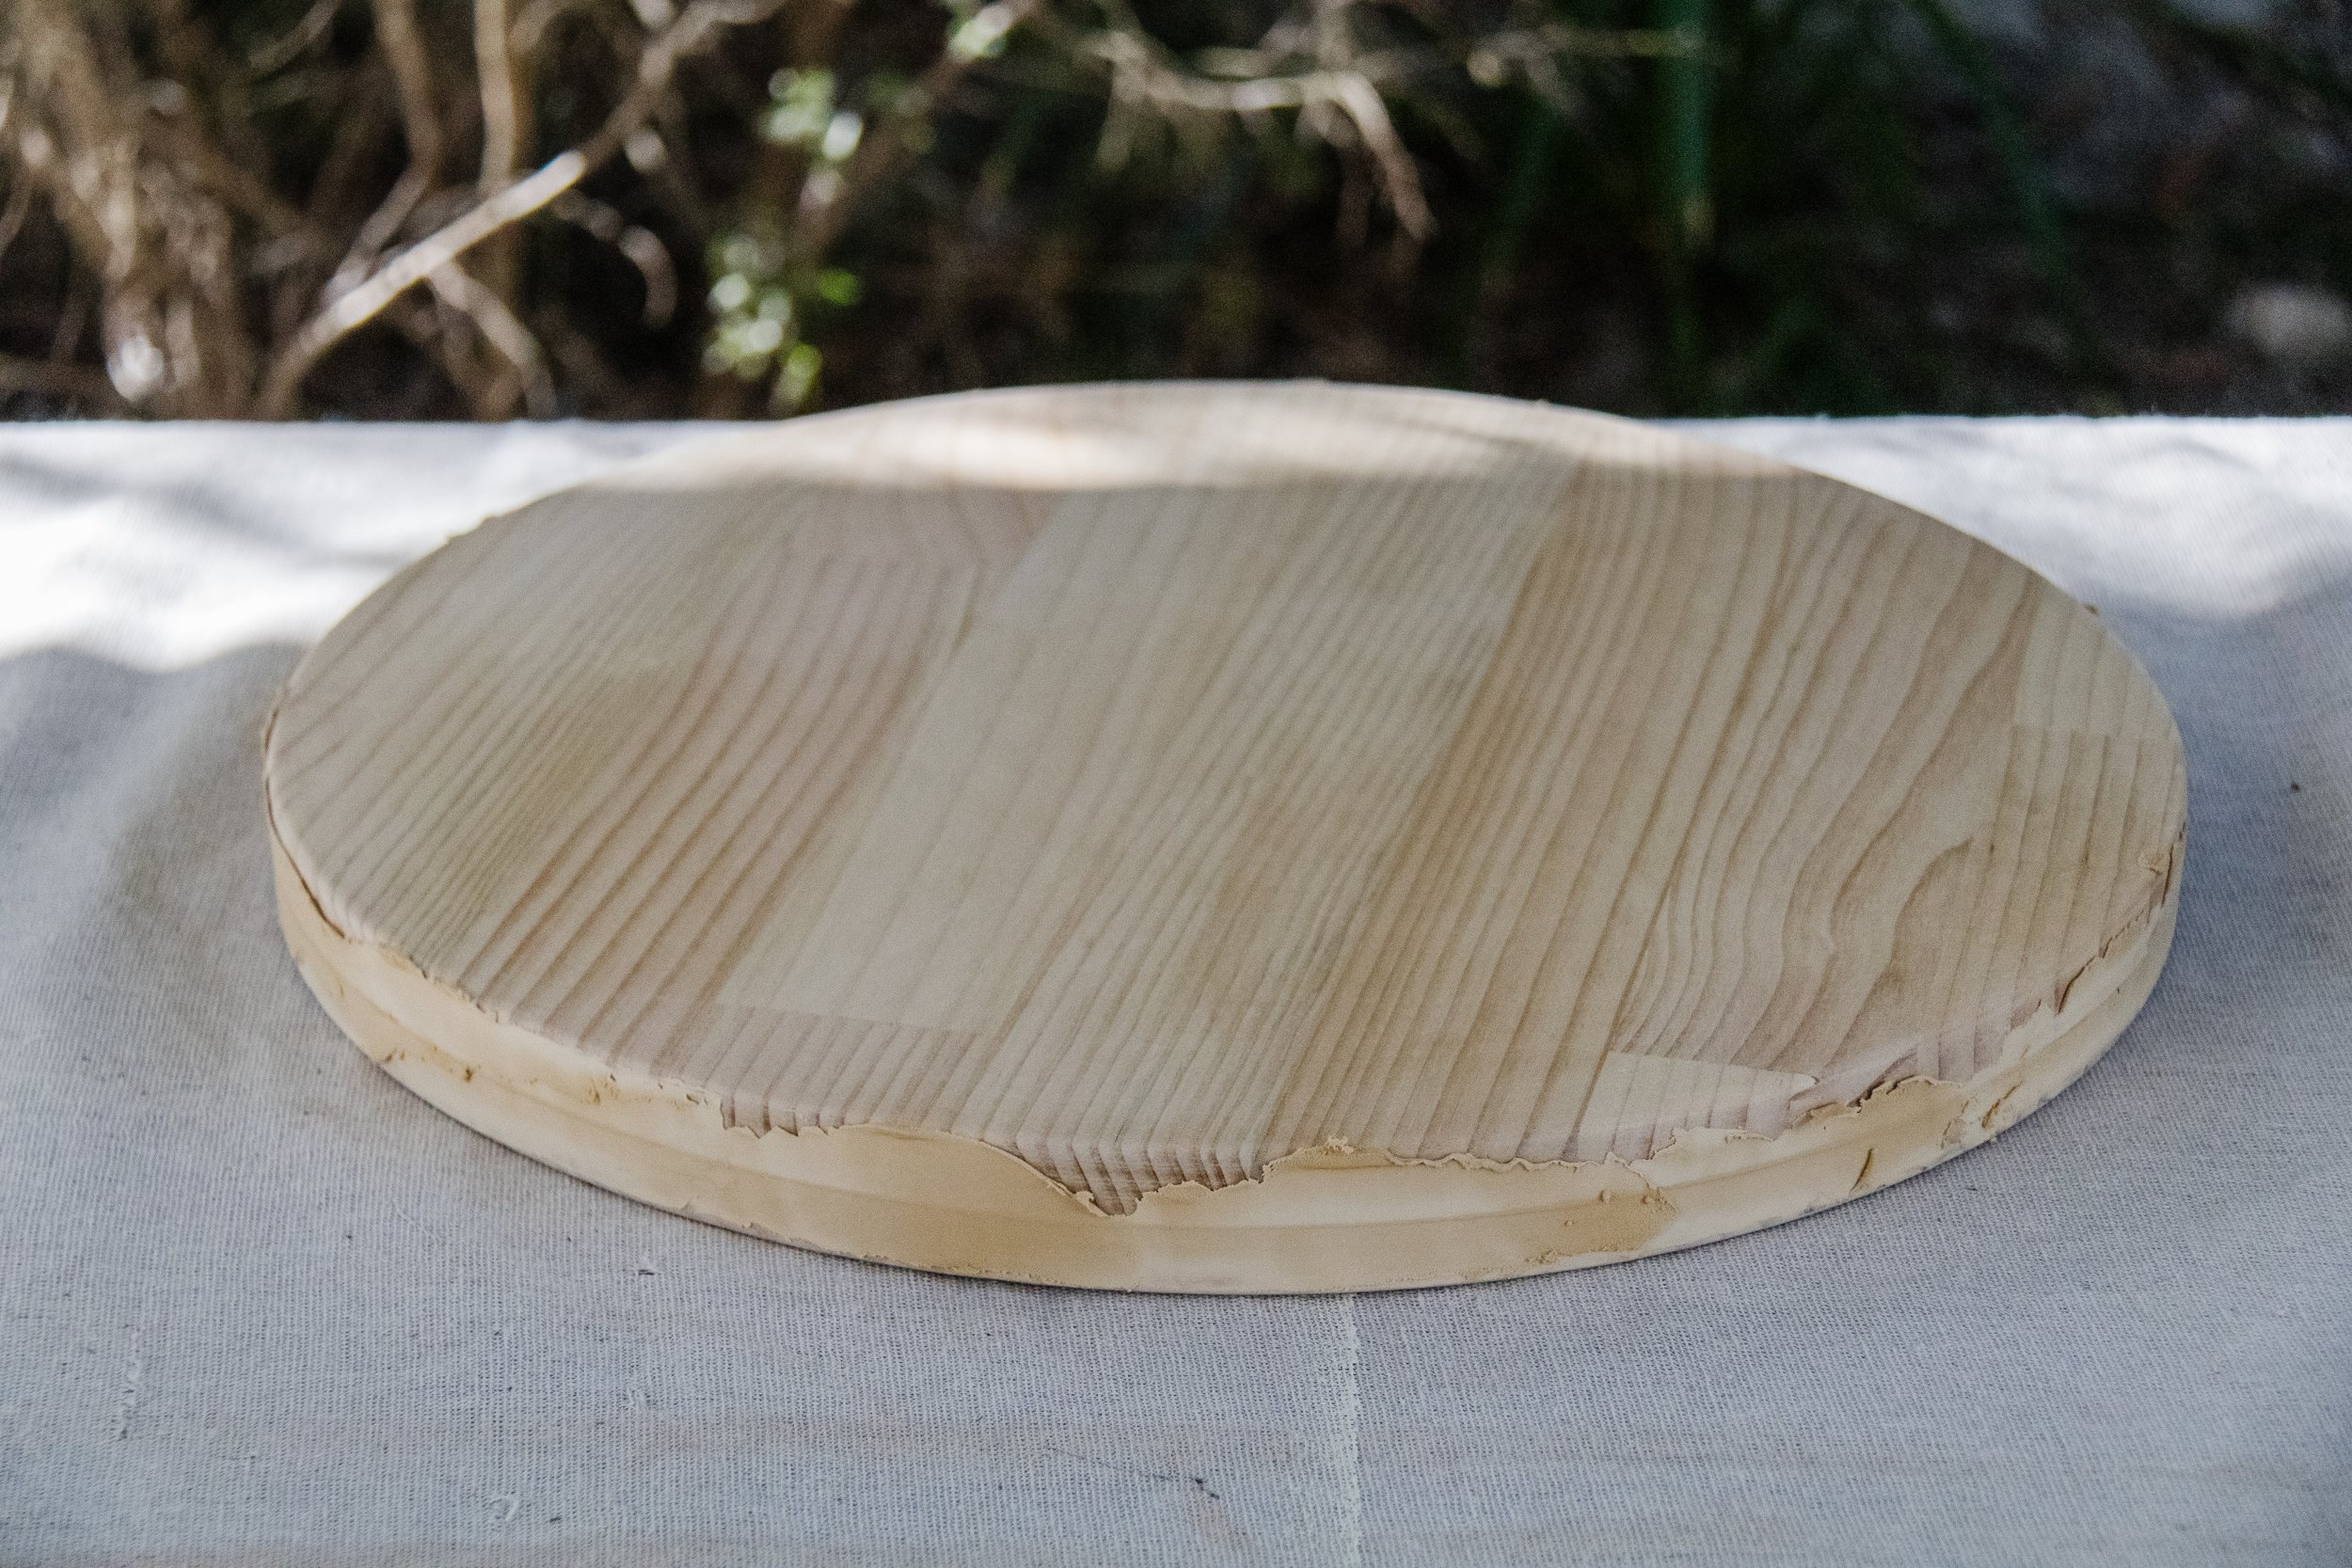
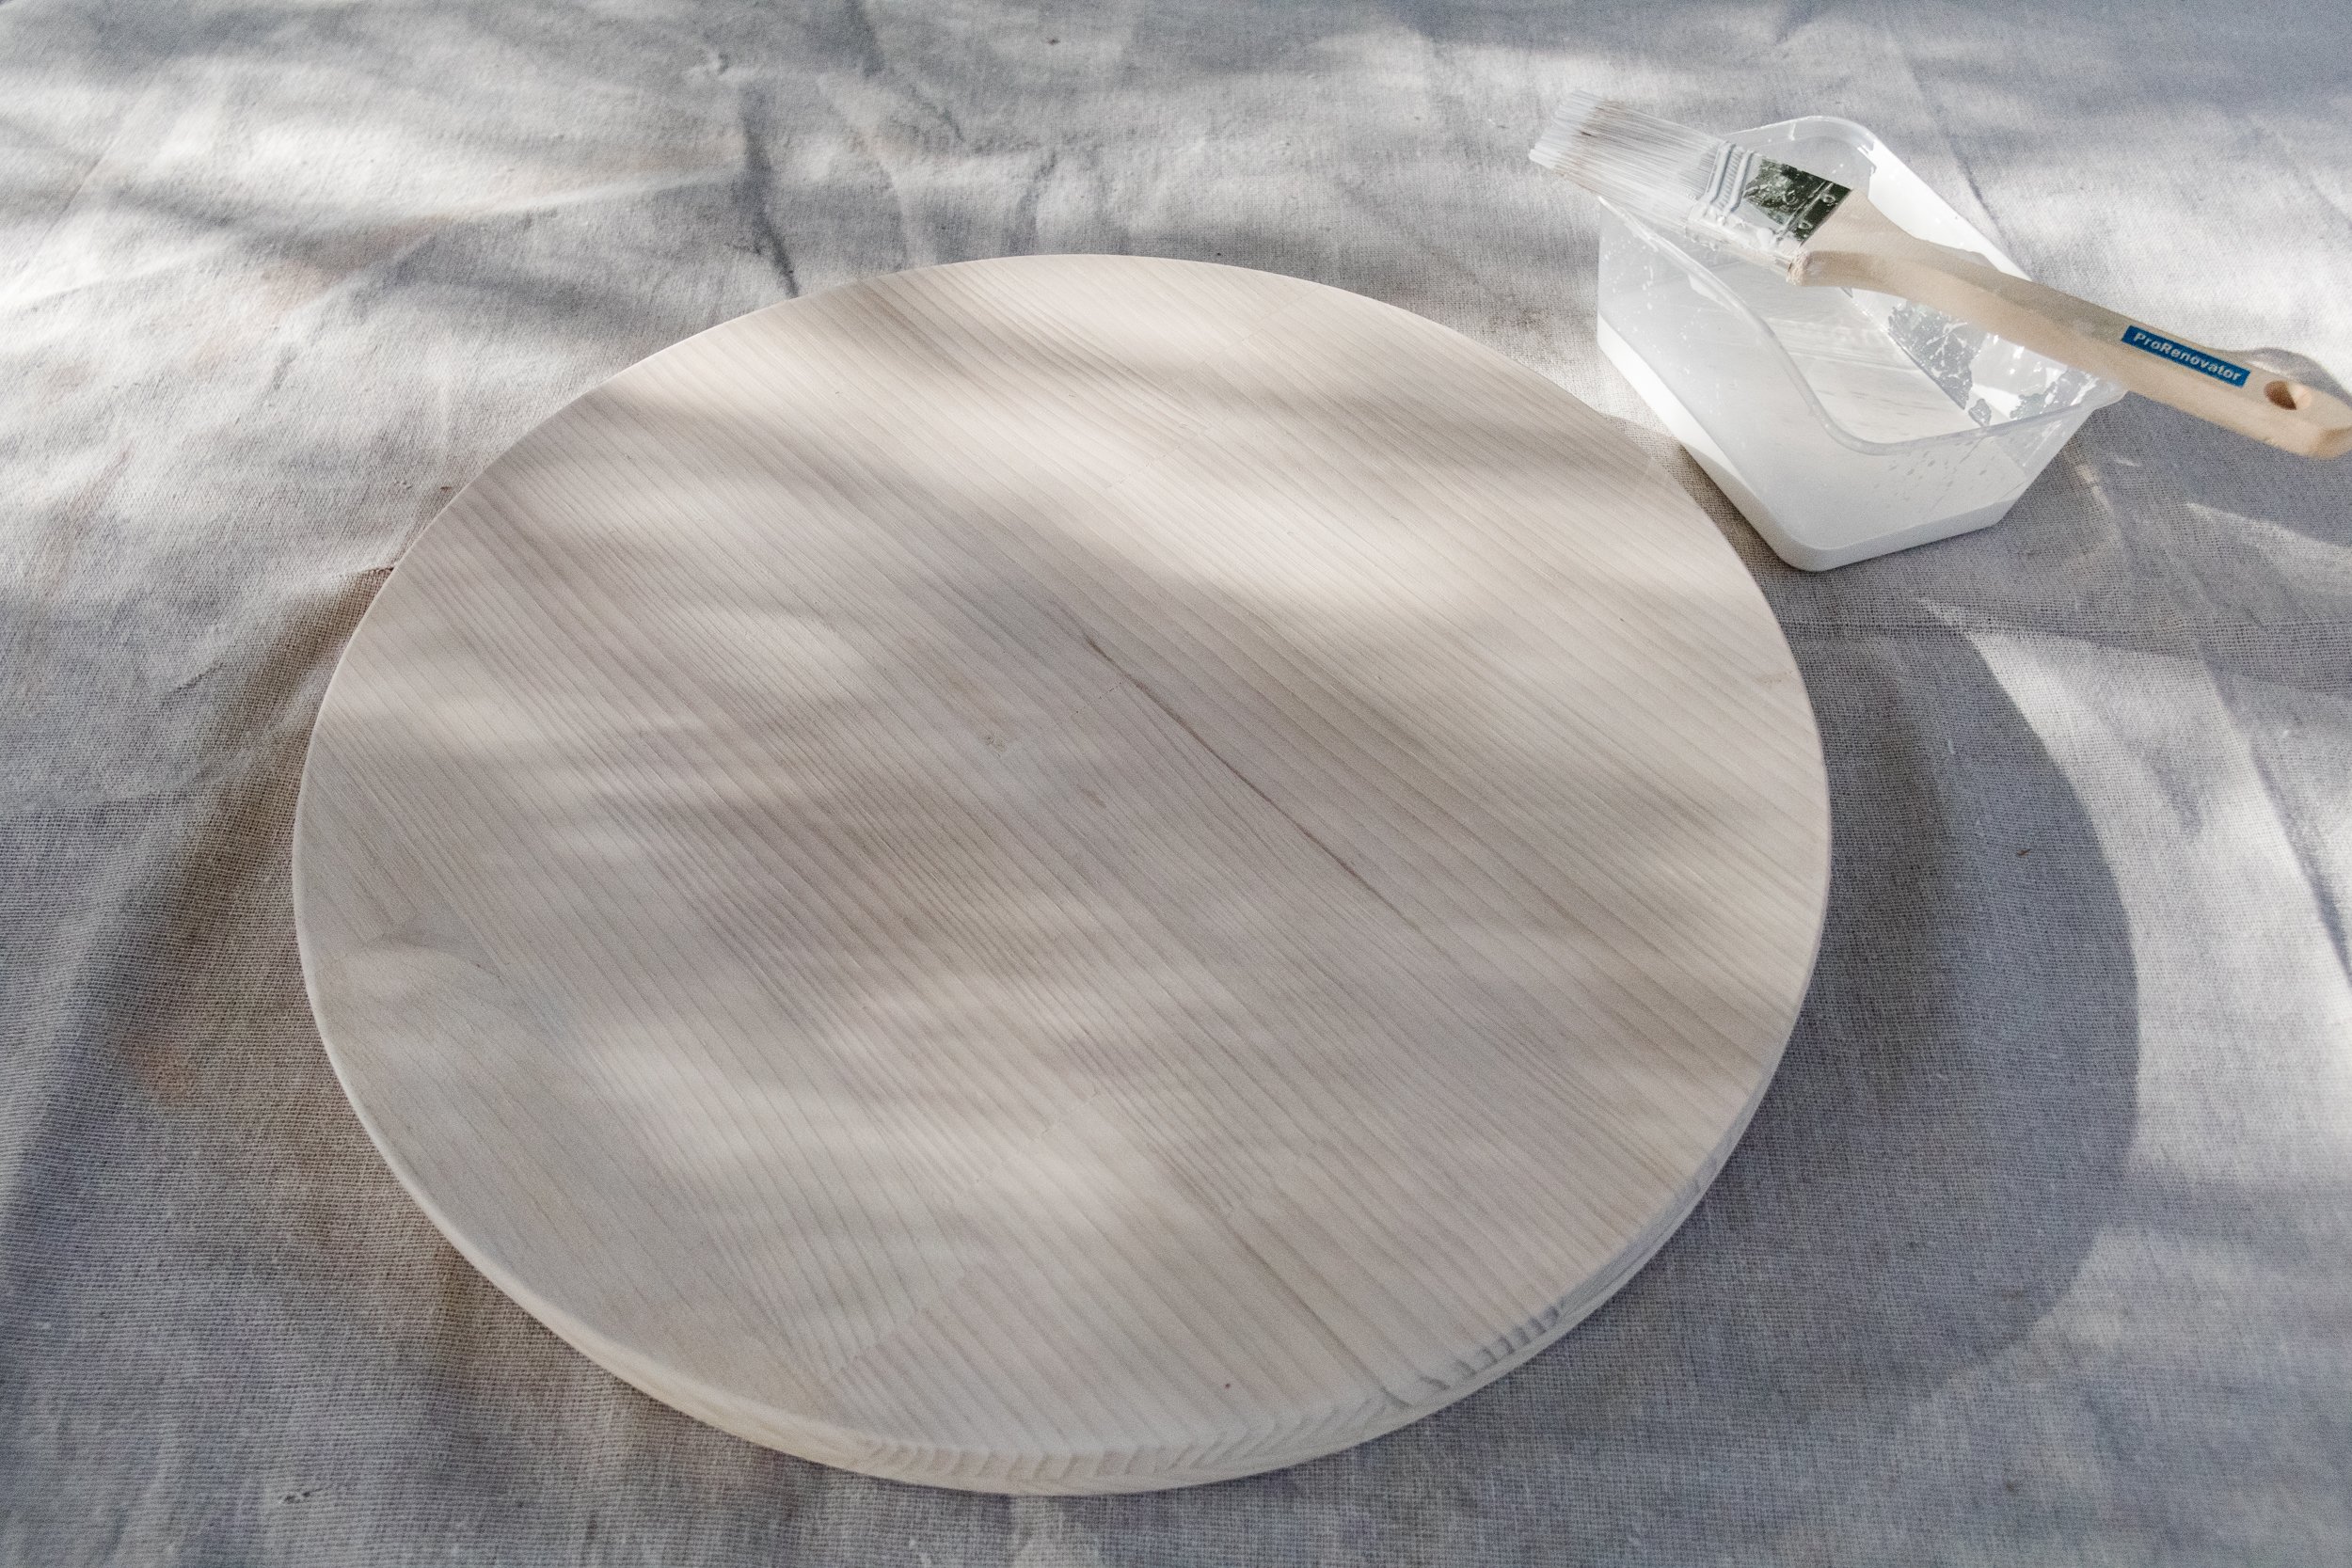
Next, glue the two pieces of round pine on top of each other. Use clamps to keep them in place. Set the tabletop aside to dry overnight.
DAY TWO - 1 to 2 hours
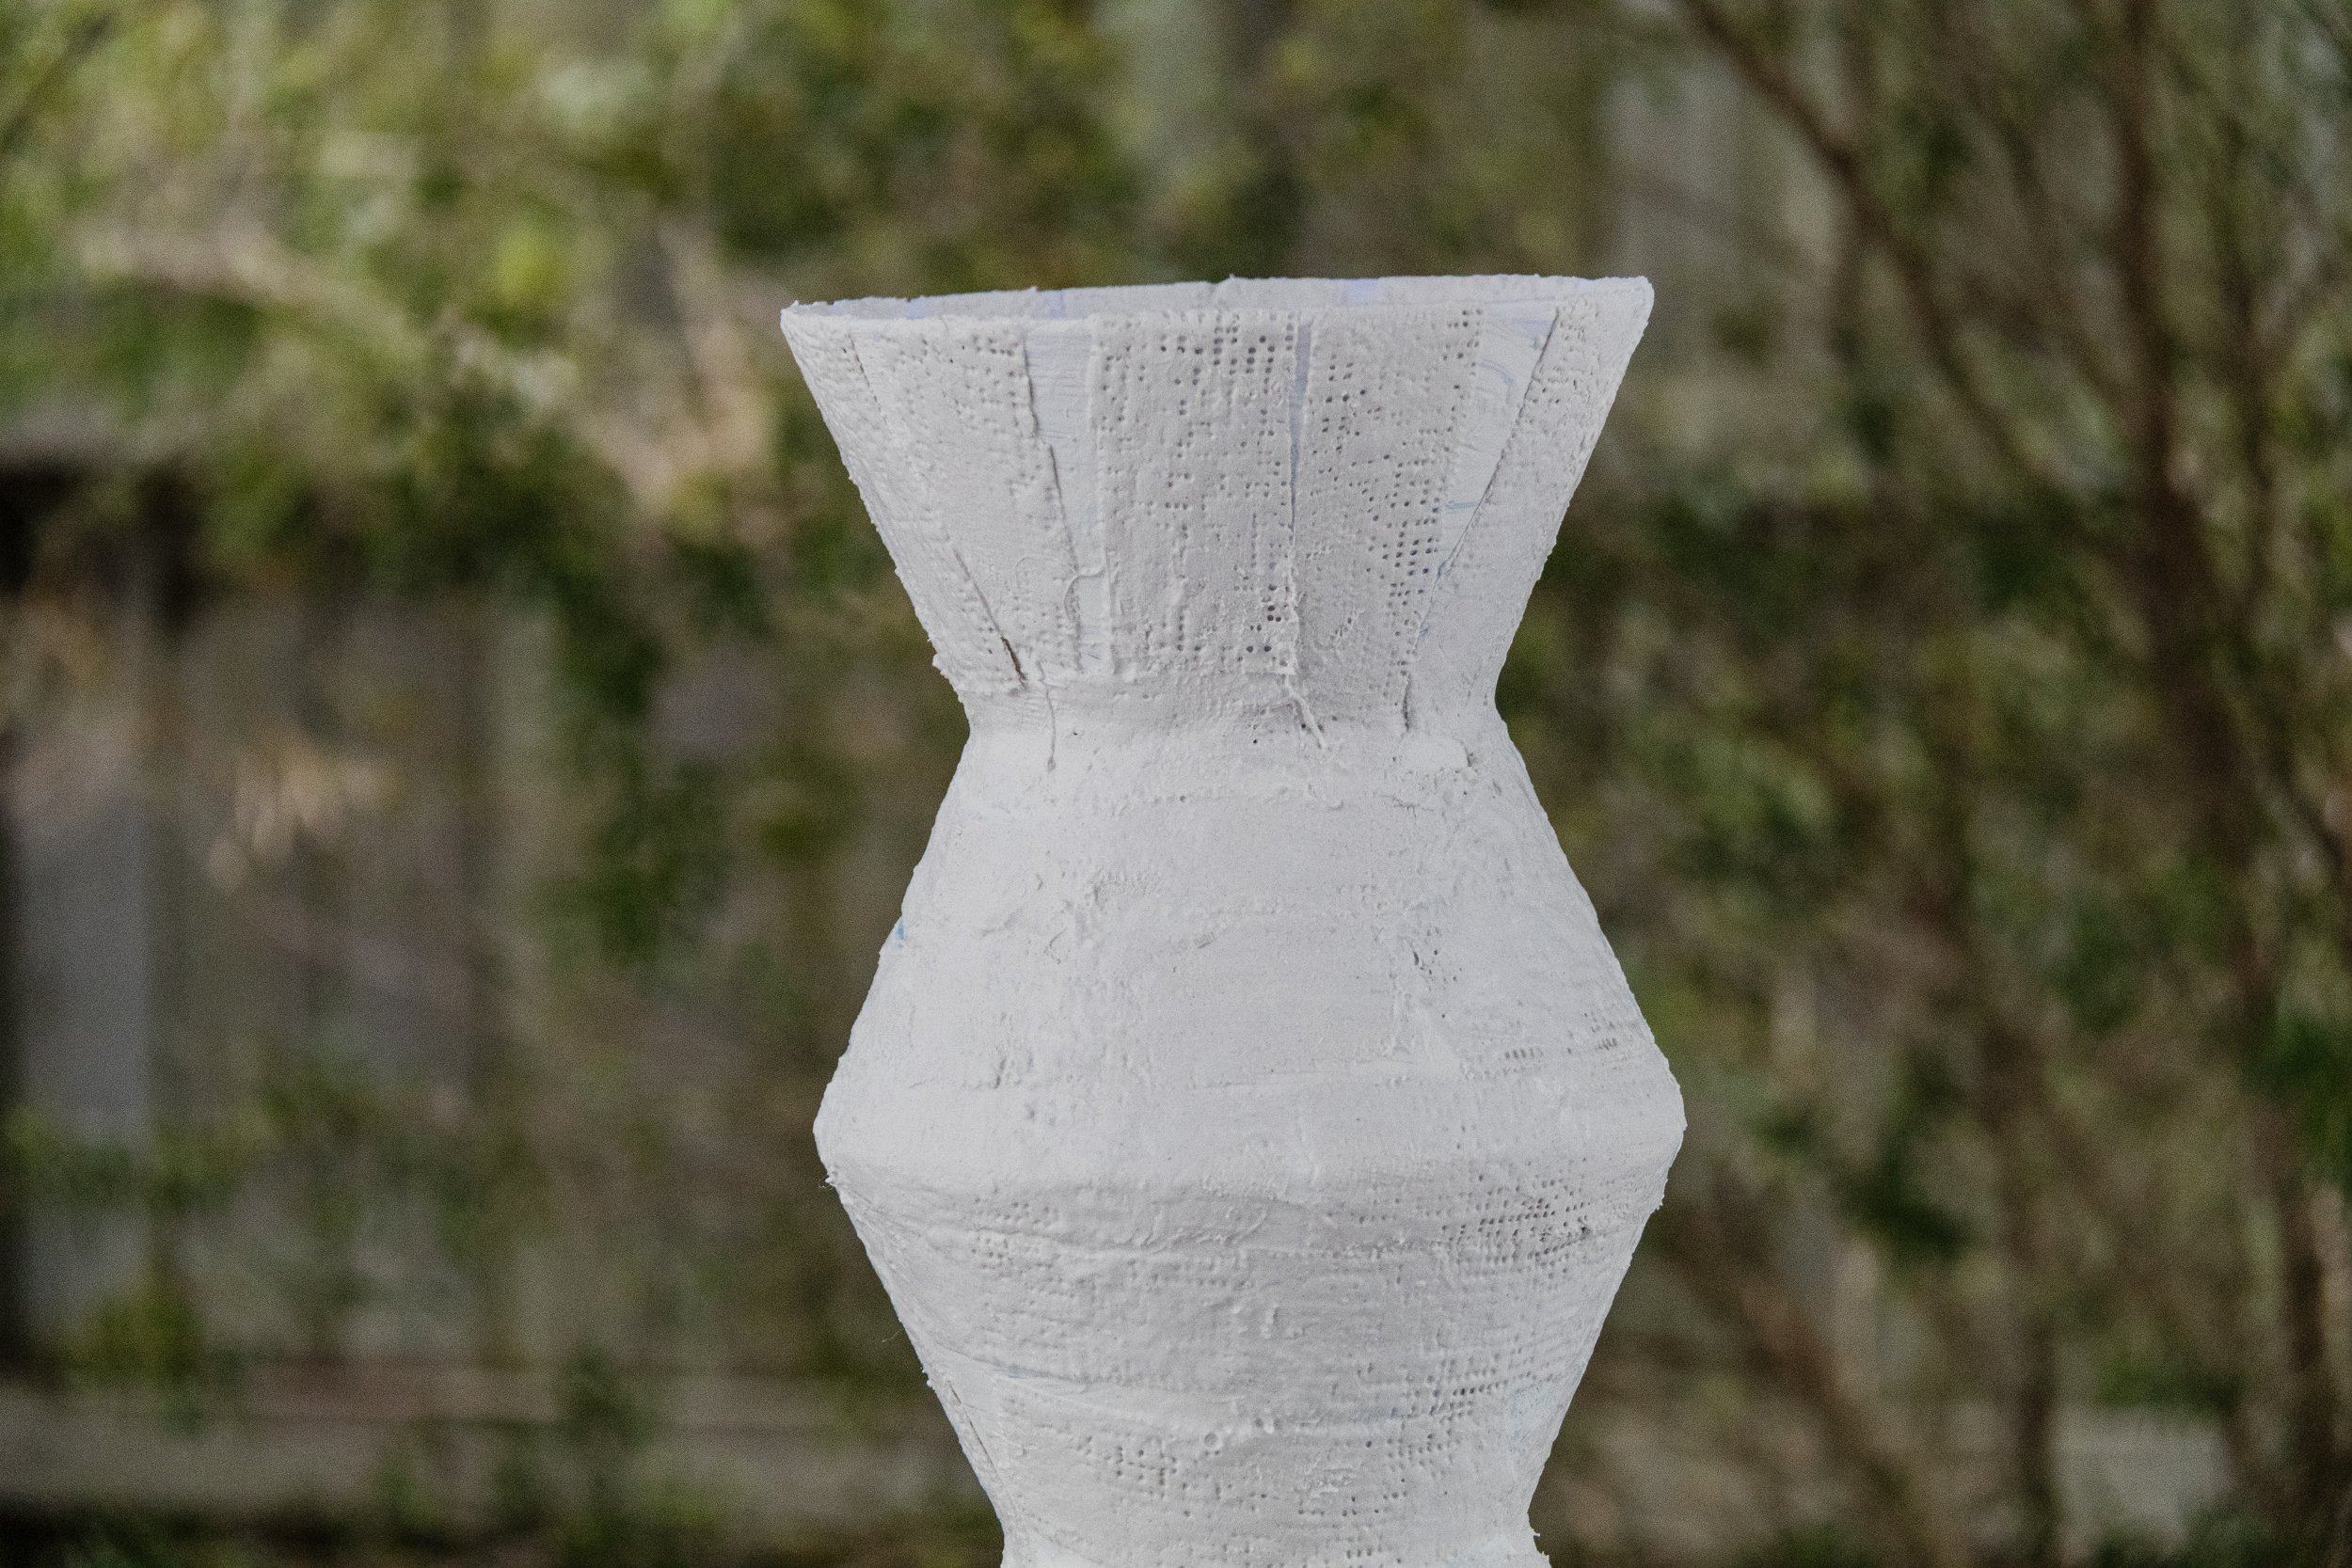
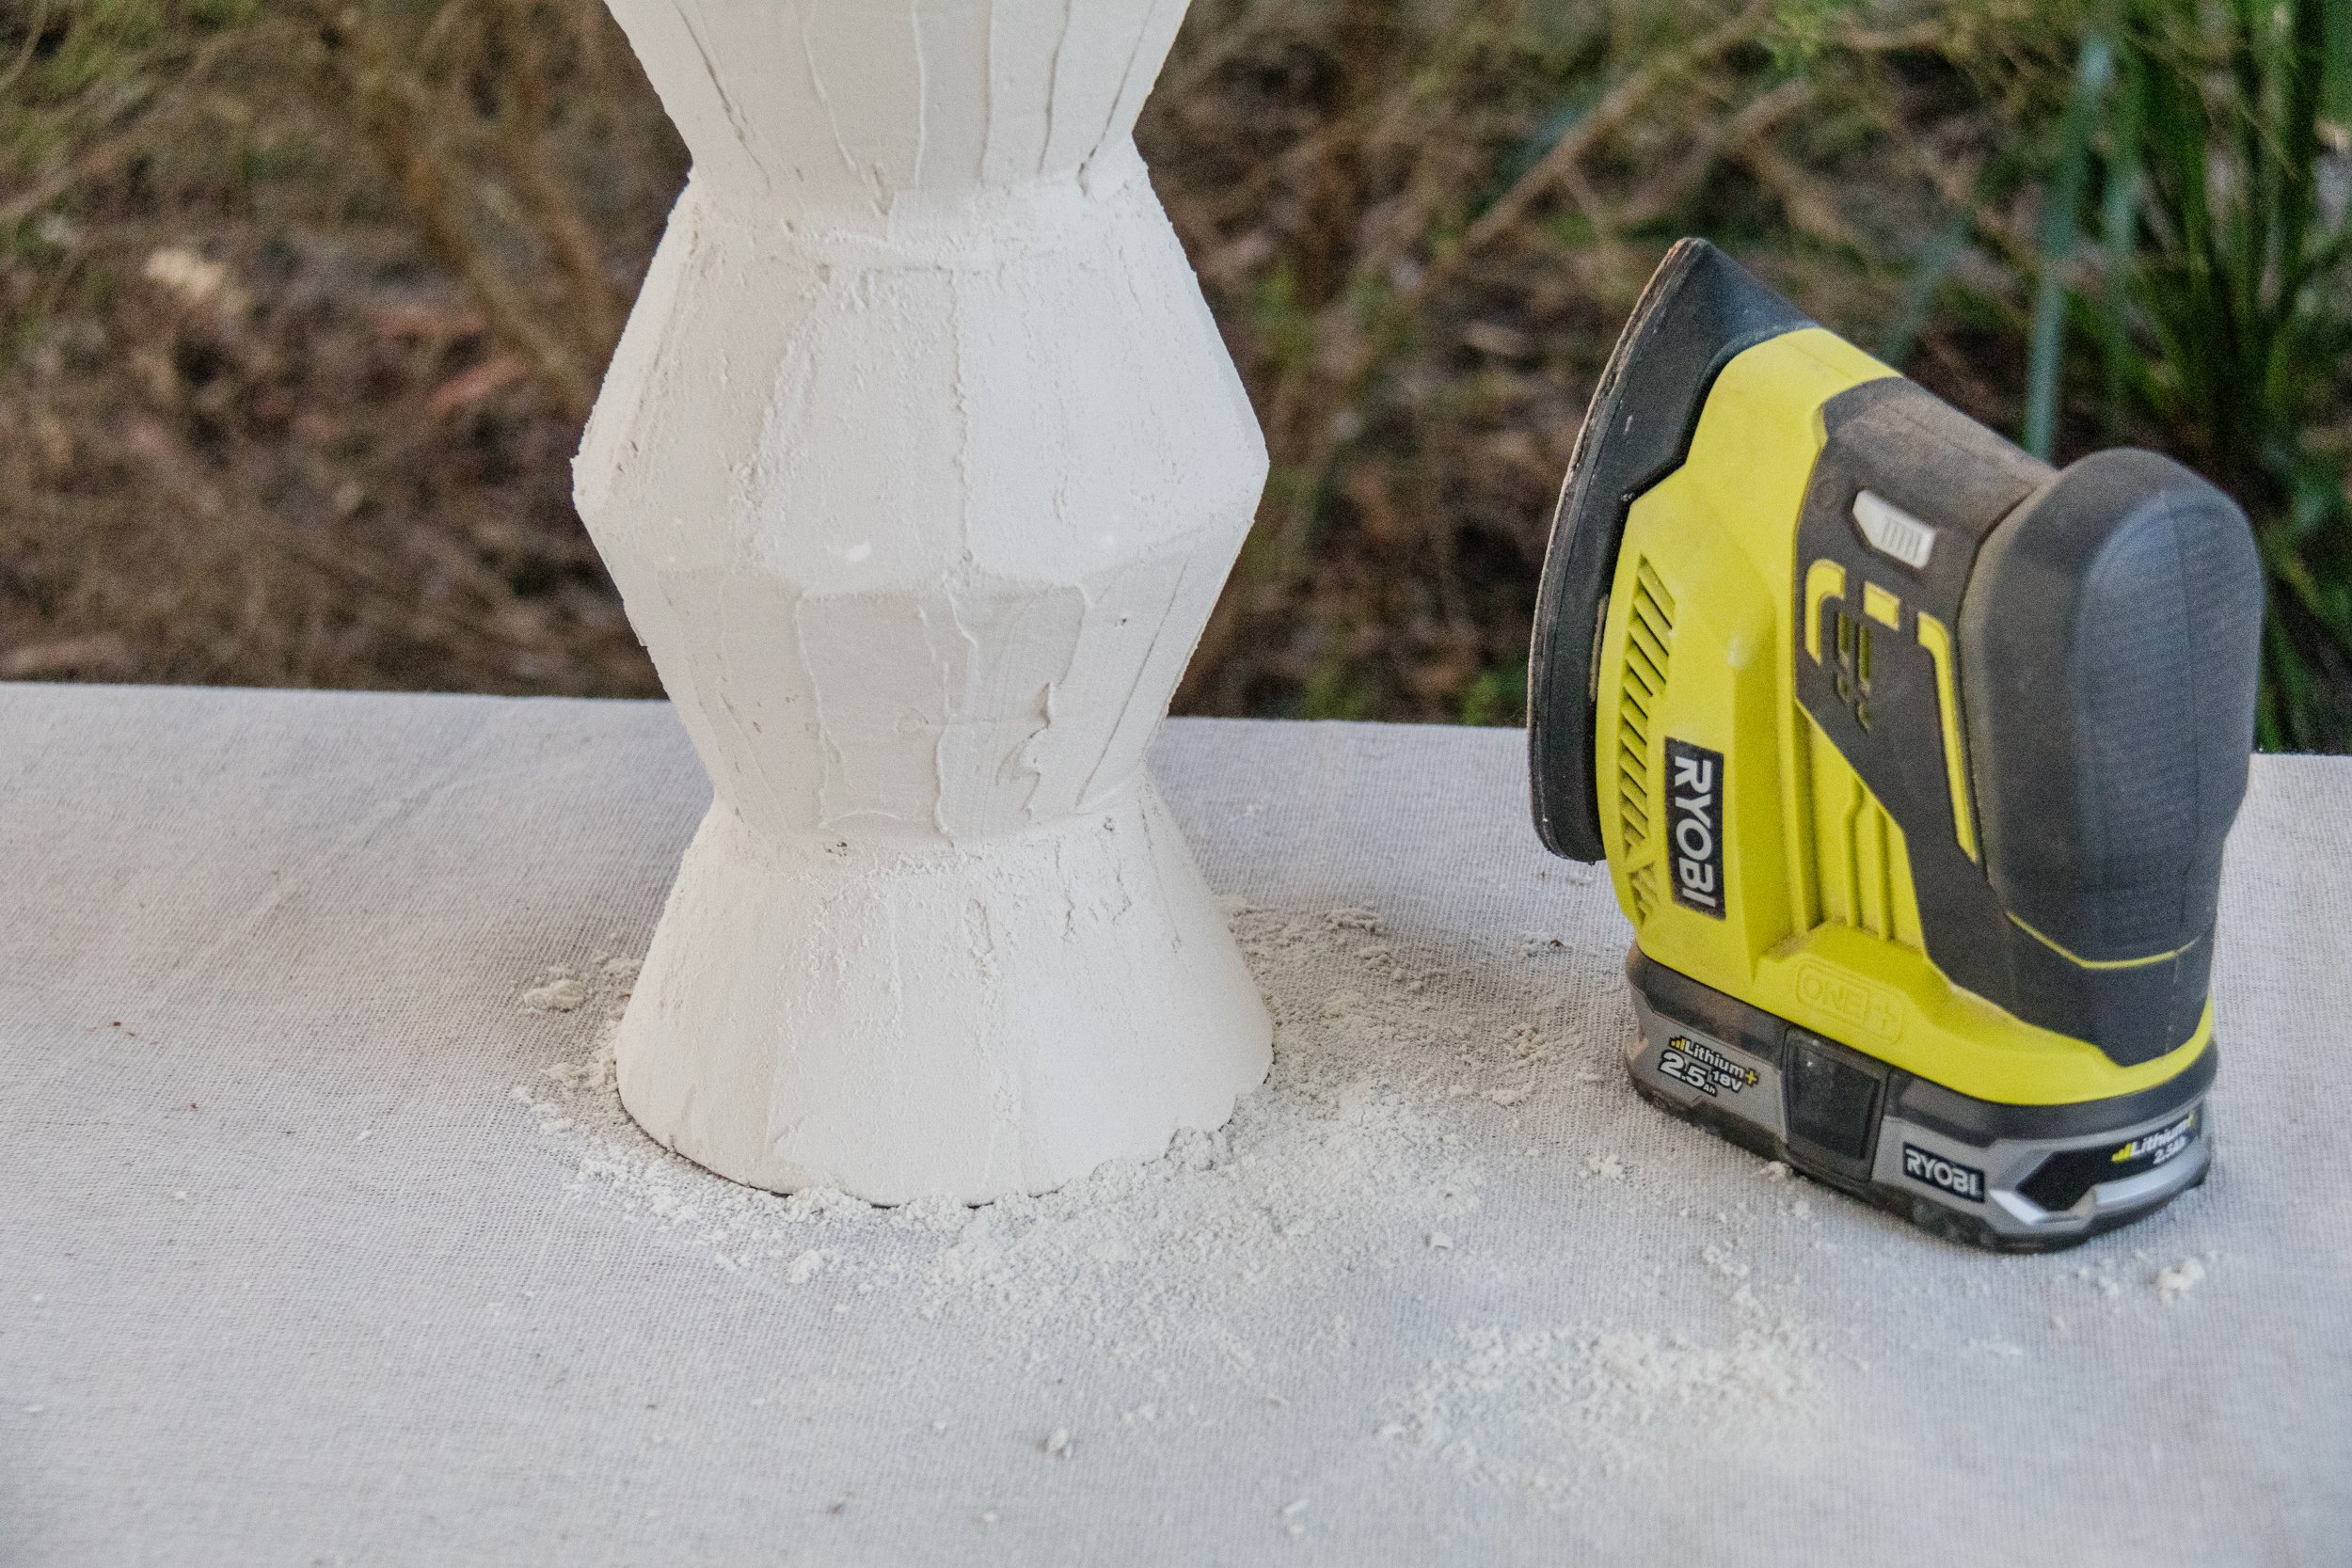
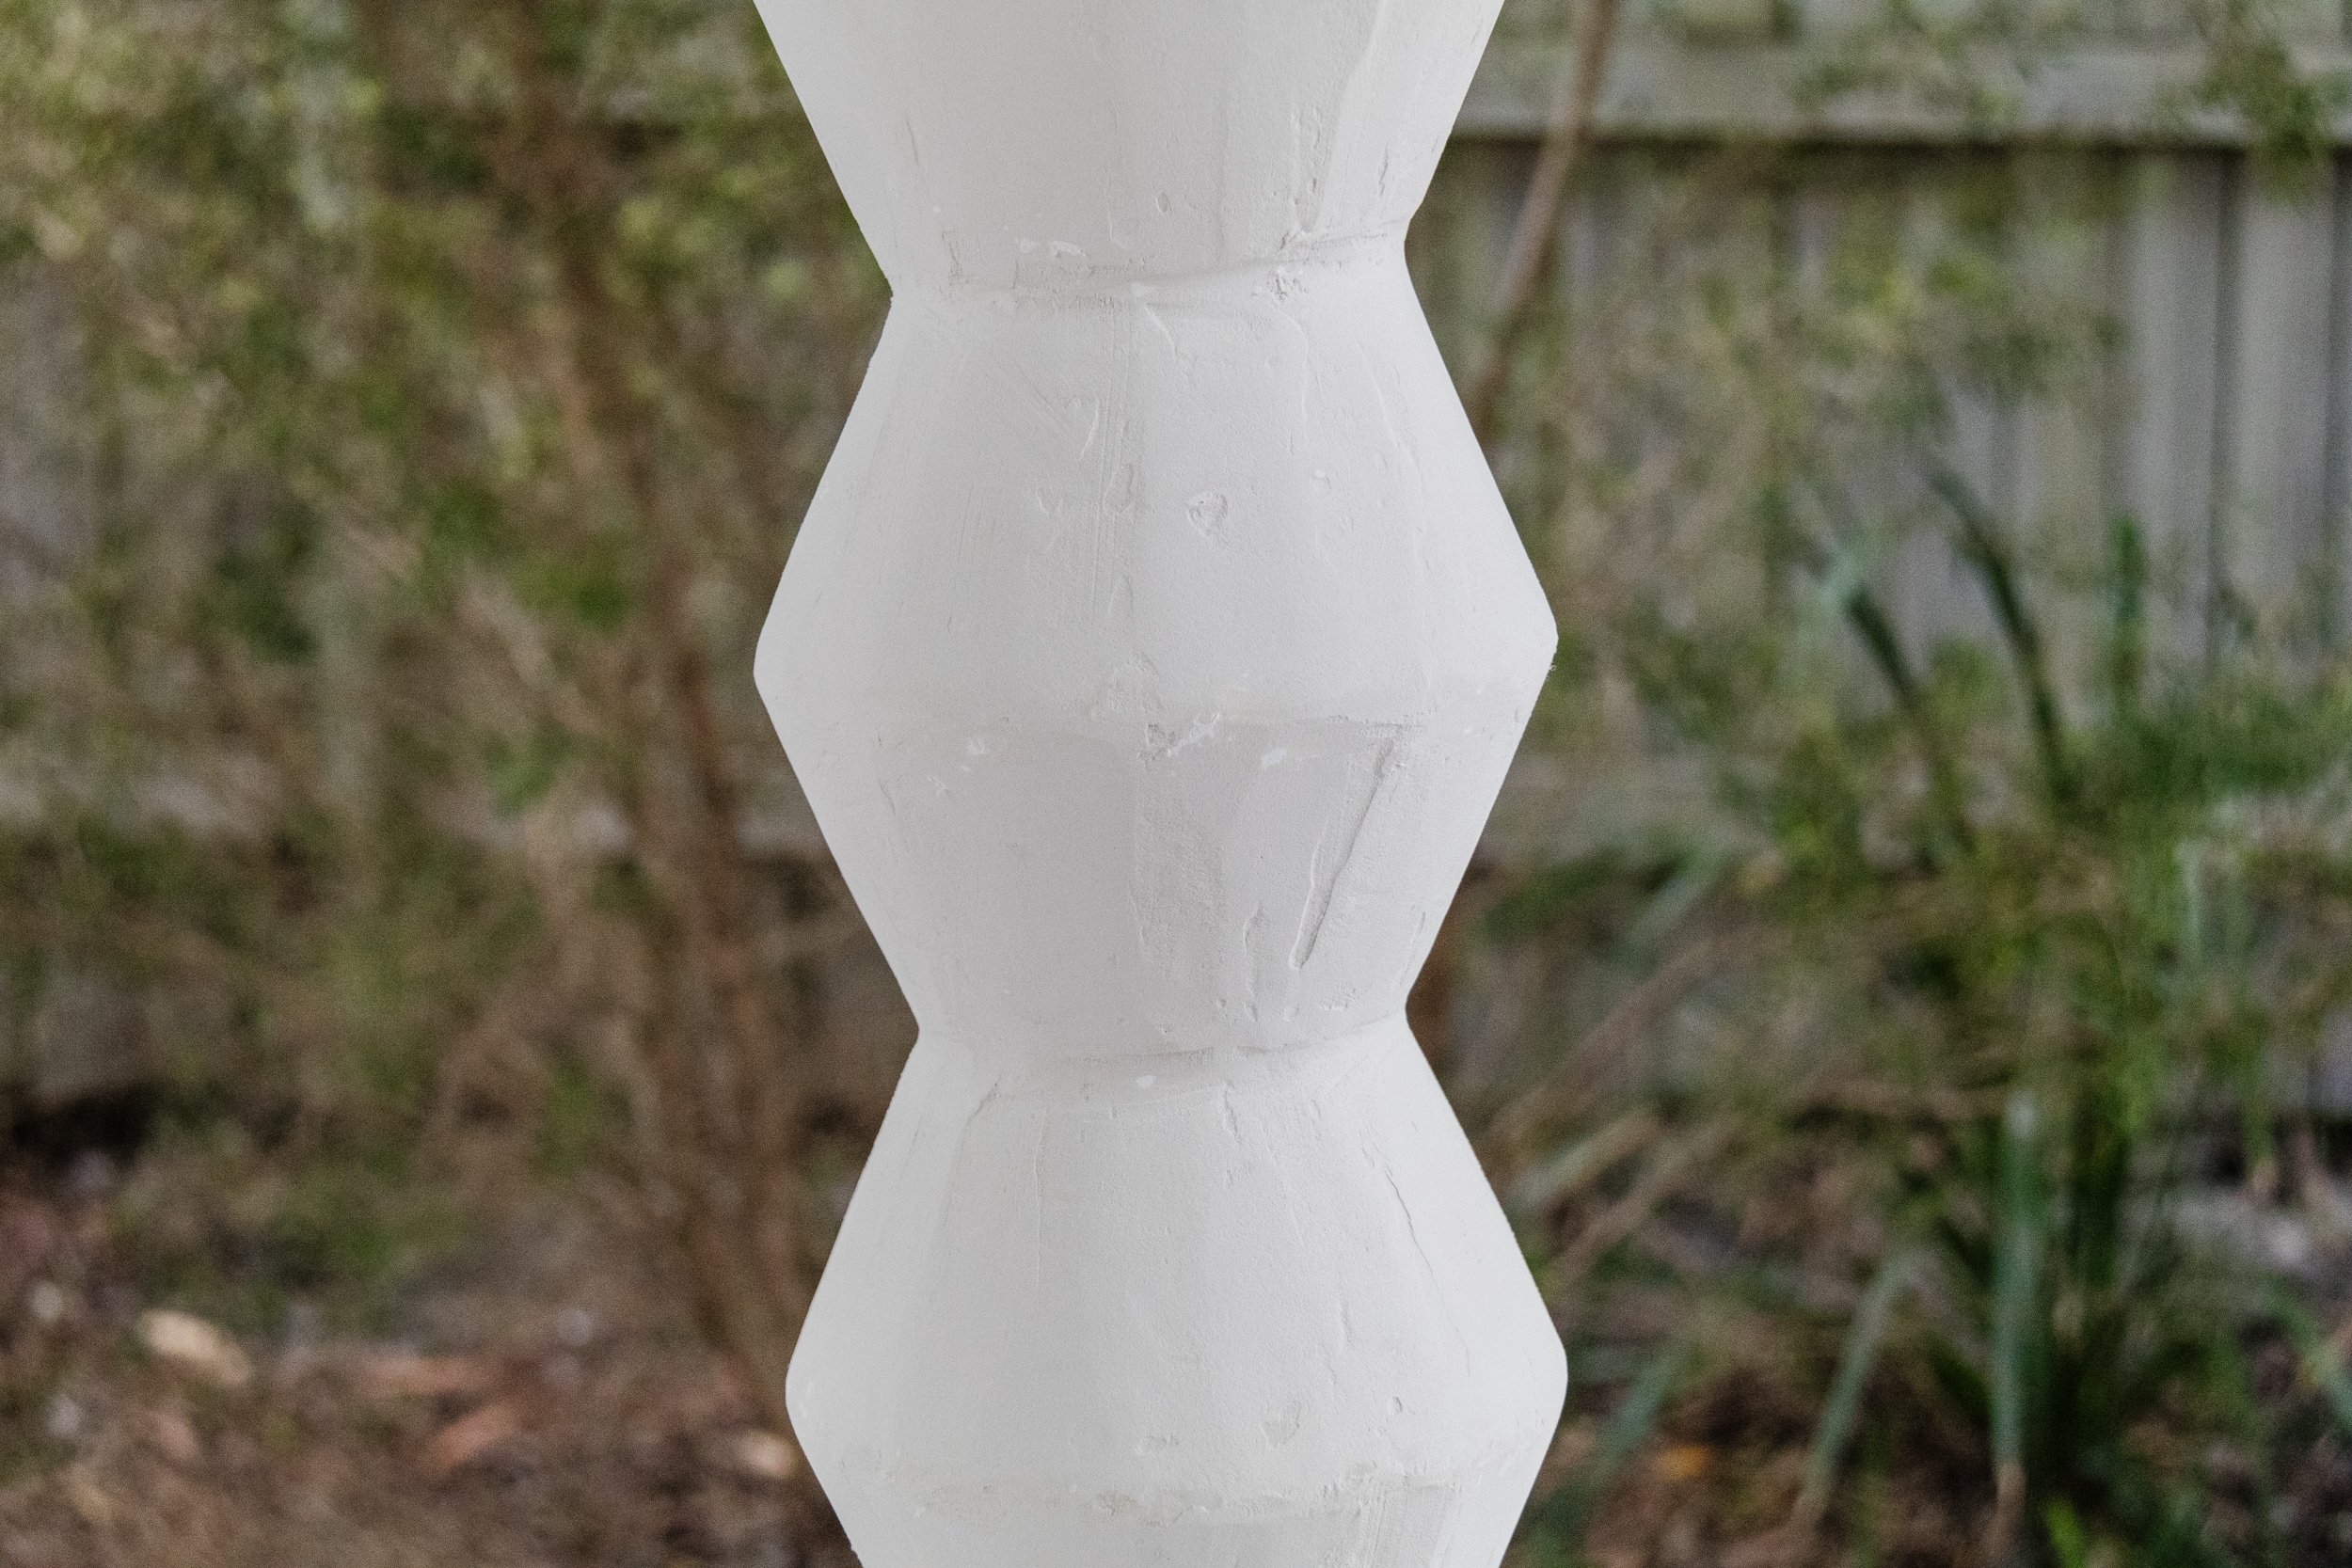
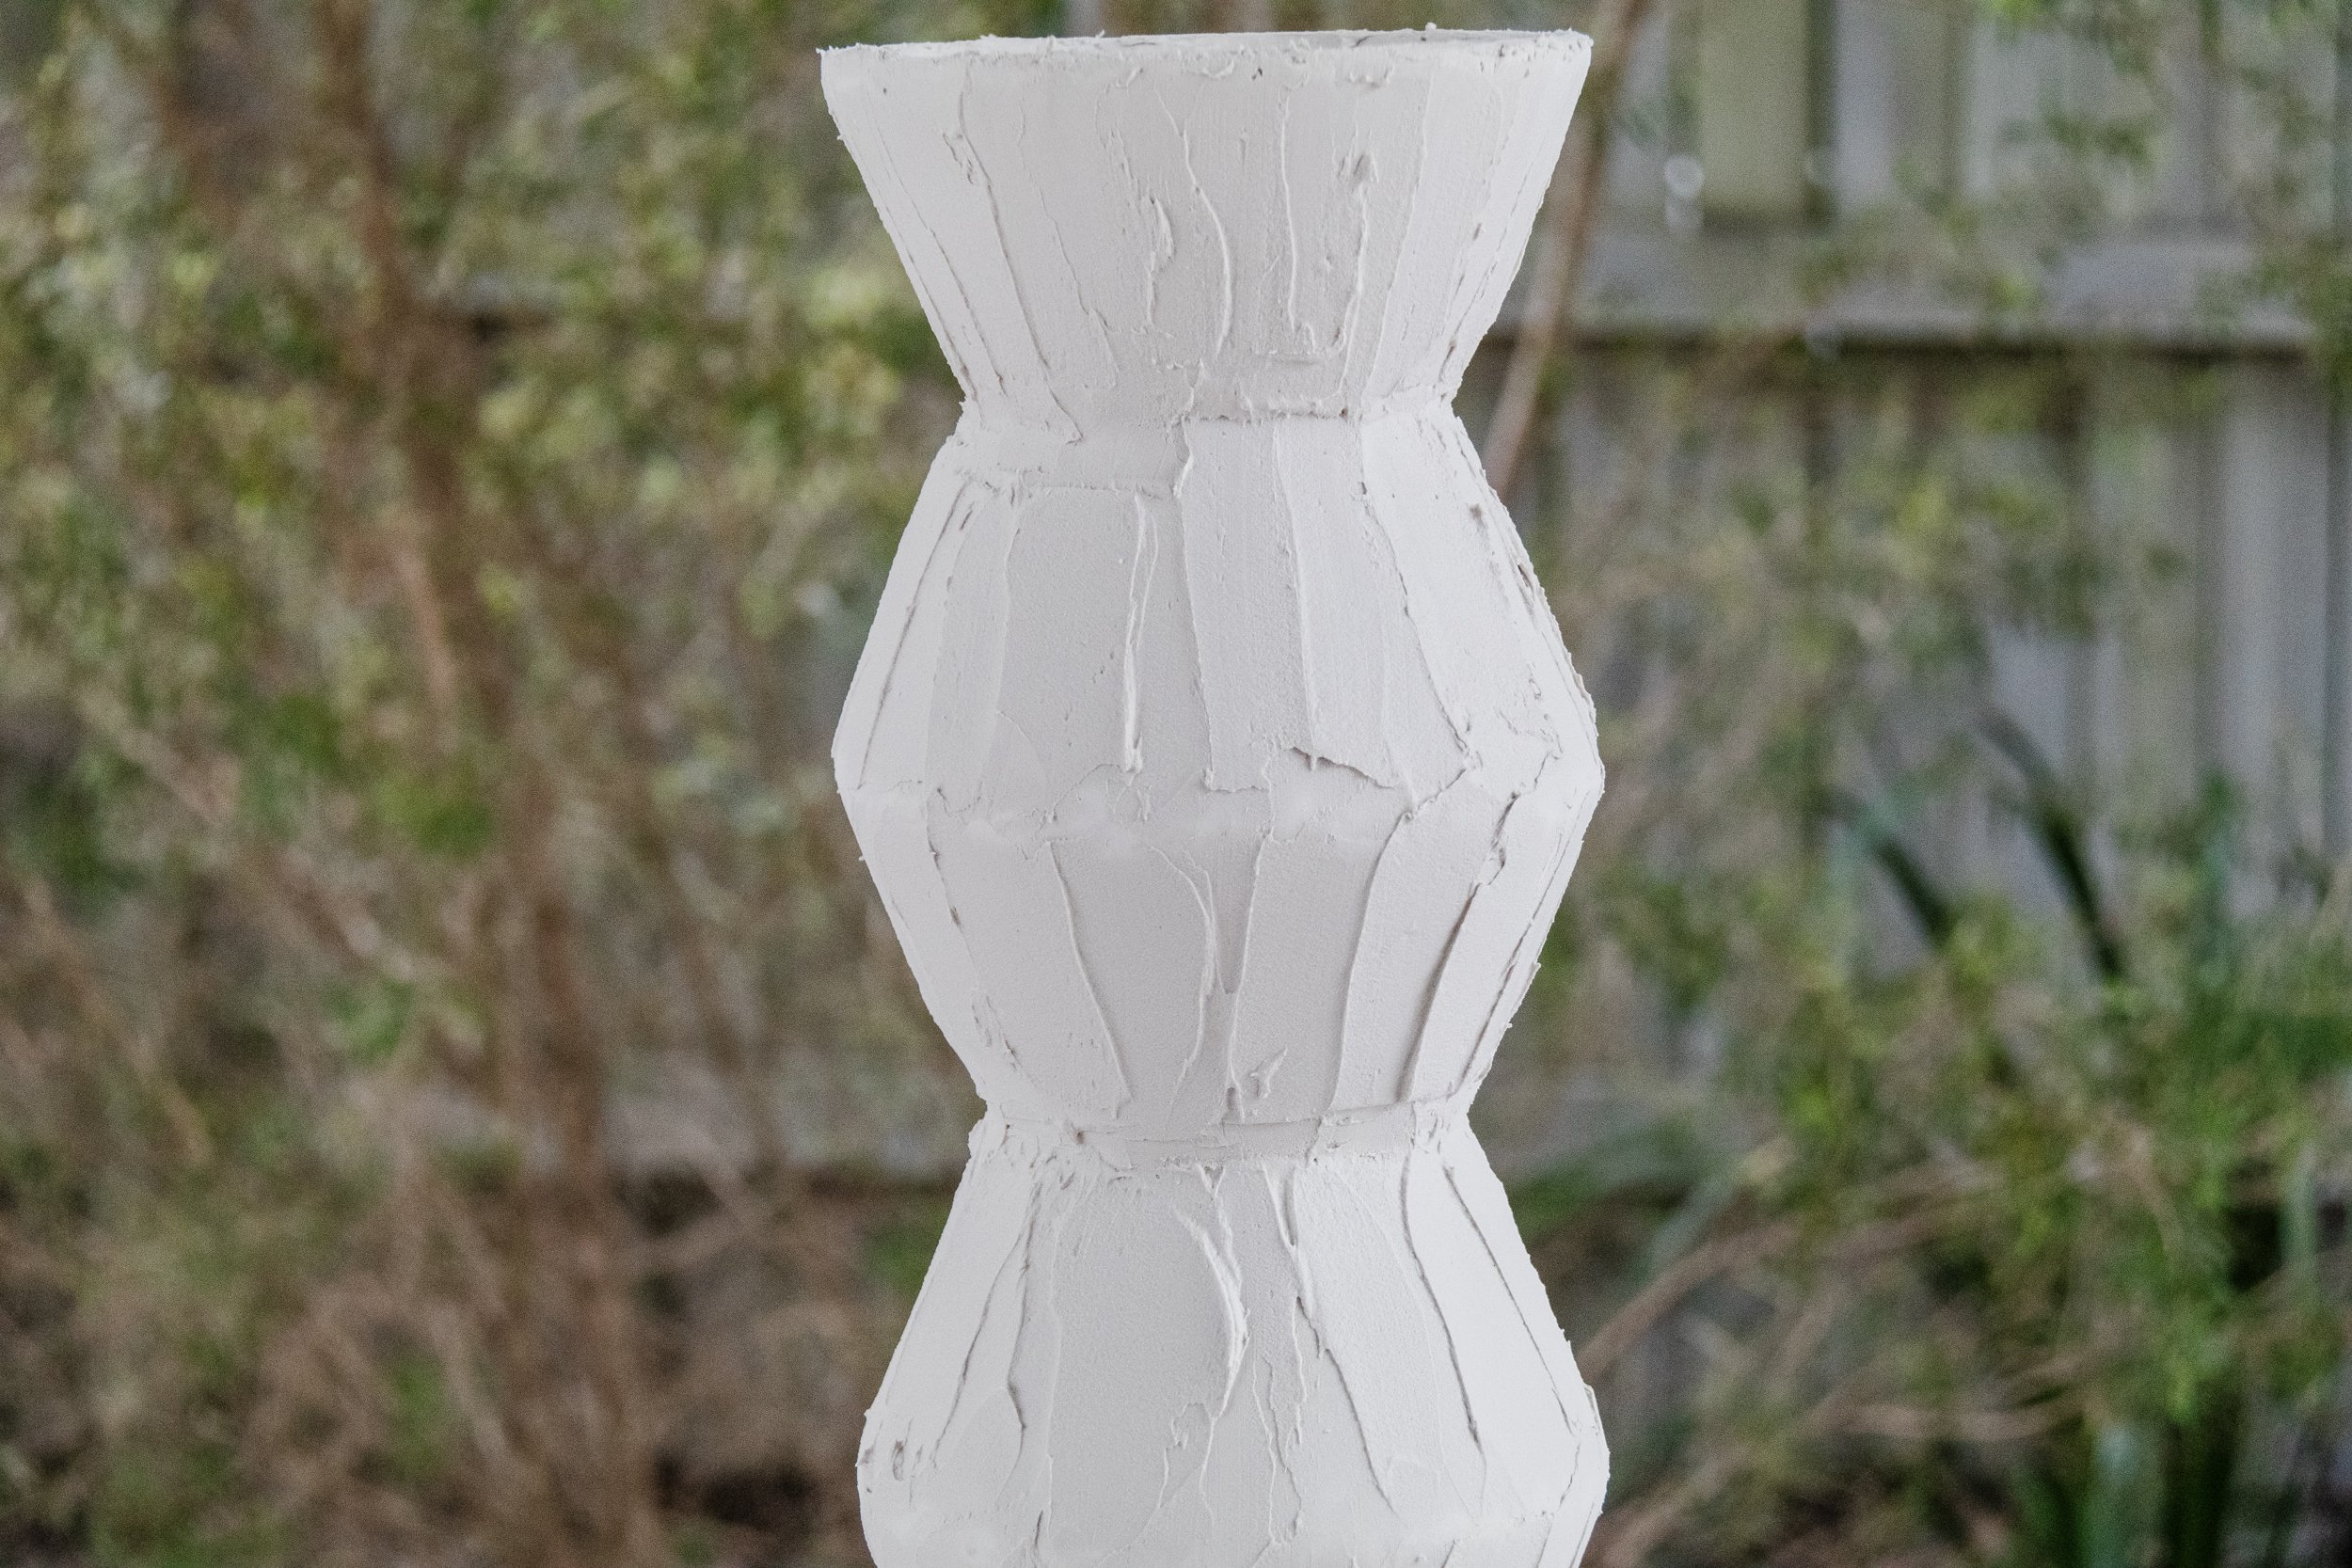
Fill up a bowl with water. Cut the Mod Cloth into small strips and one by one, place them into the water then place onto the totem until the totem is completely covered with Mod Cloth. Don’t overlap the Mod Cloth. Set aside to dry. A few hours later the Mod Cloth should be dry, if so apply one coat of plaster all over. Set aside to dry overnight.
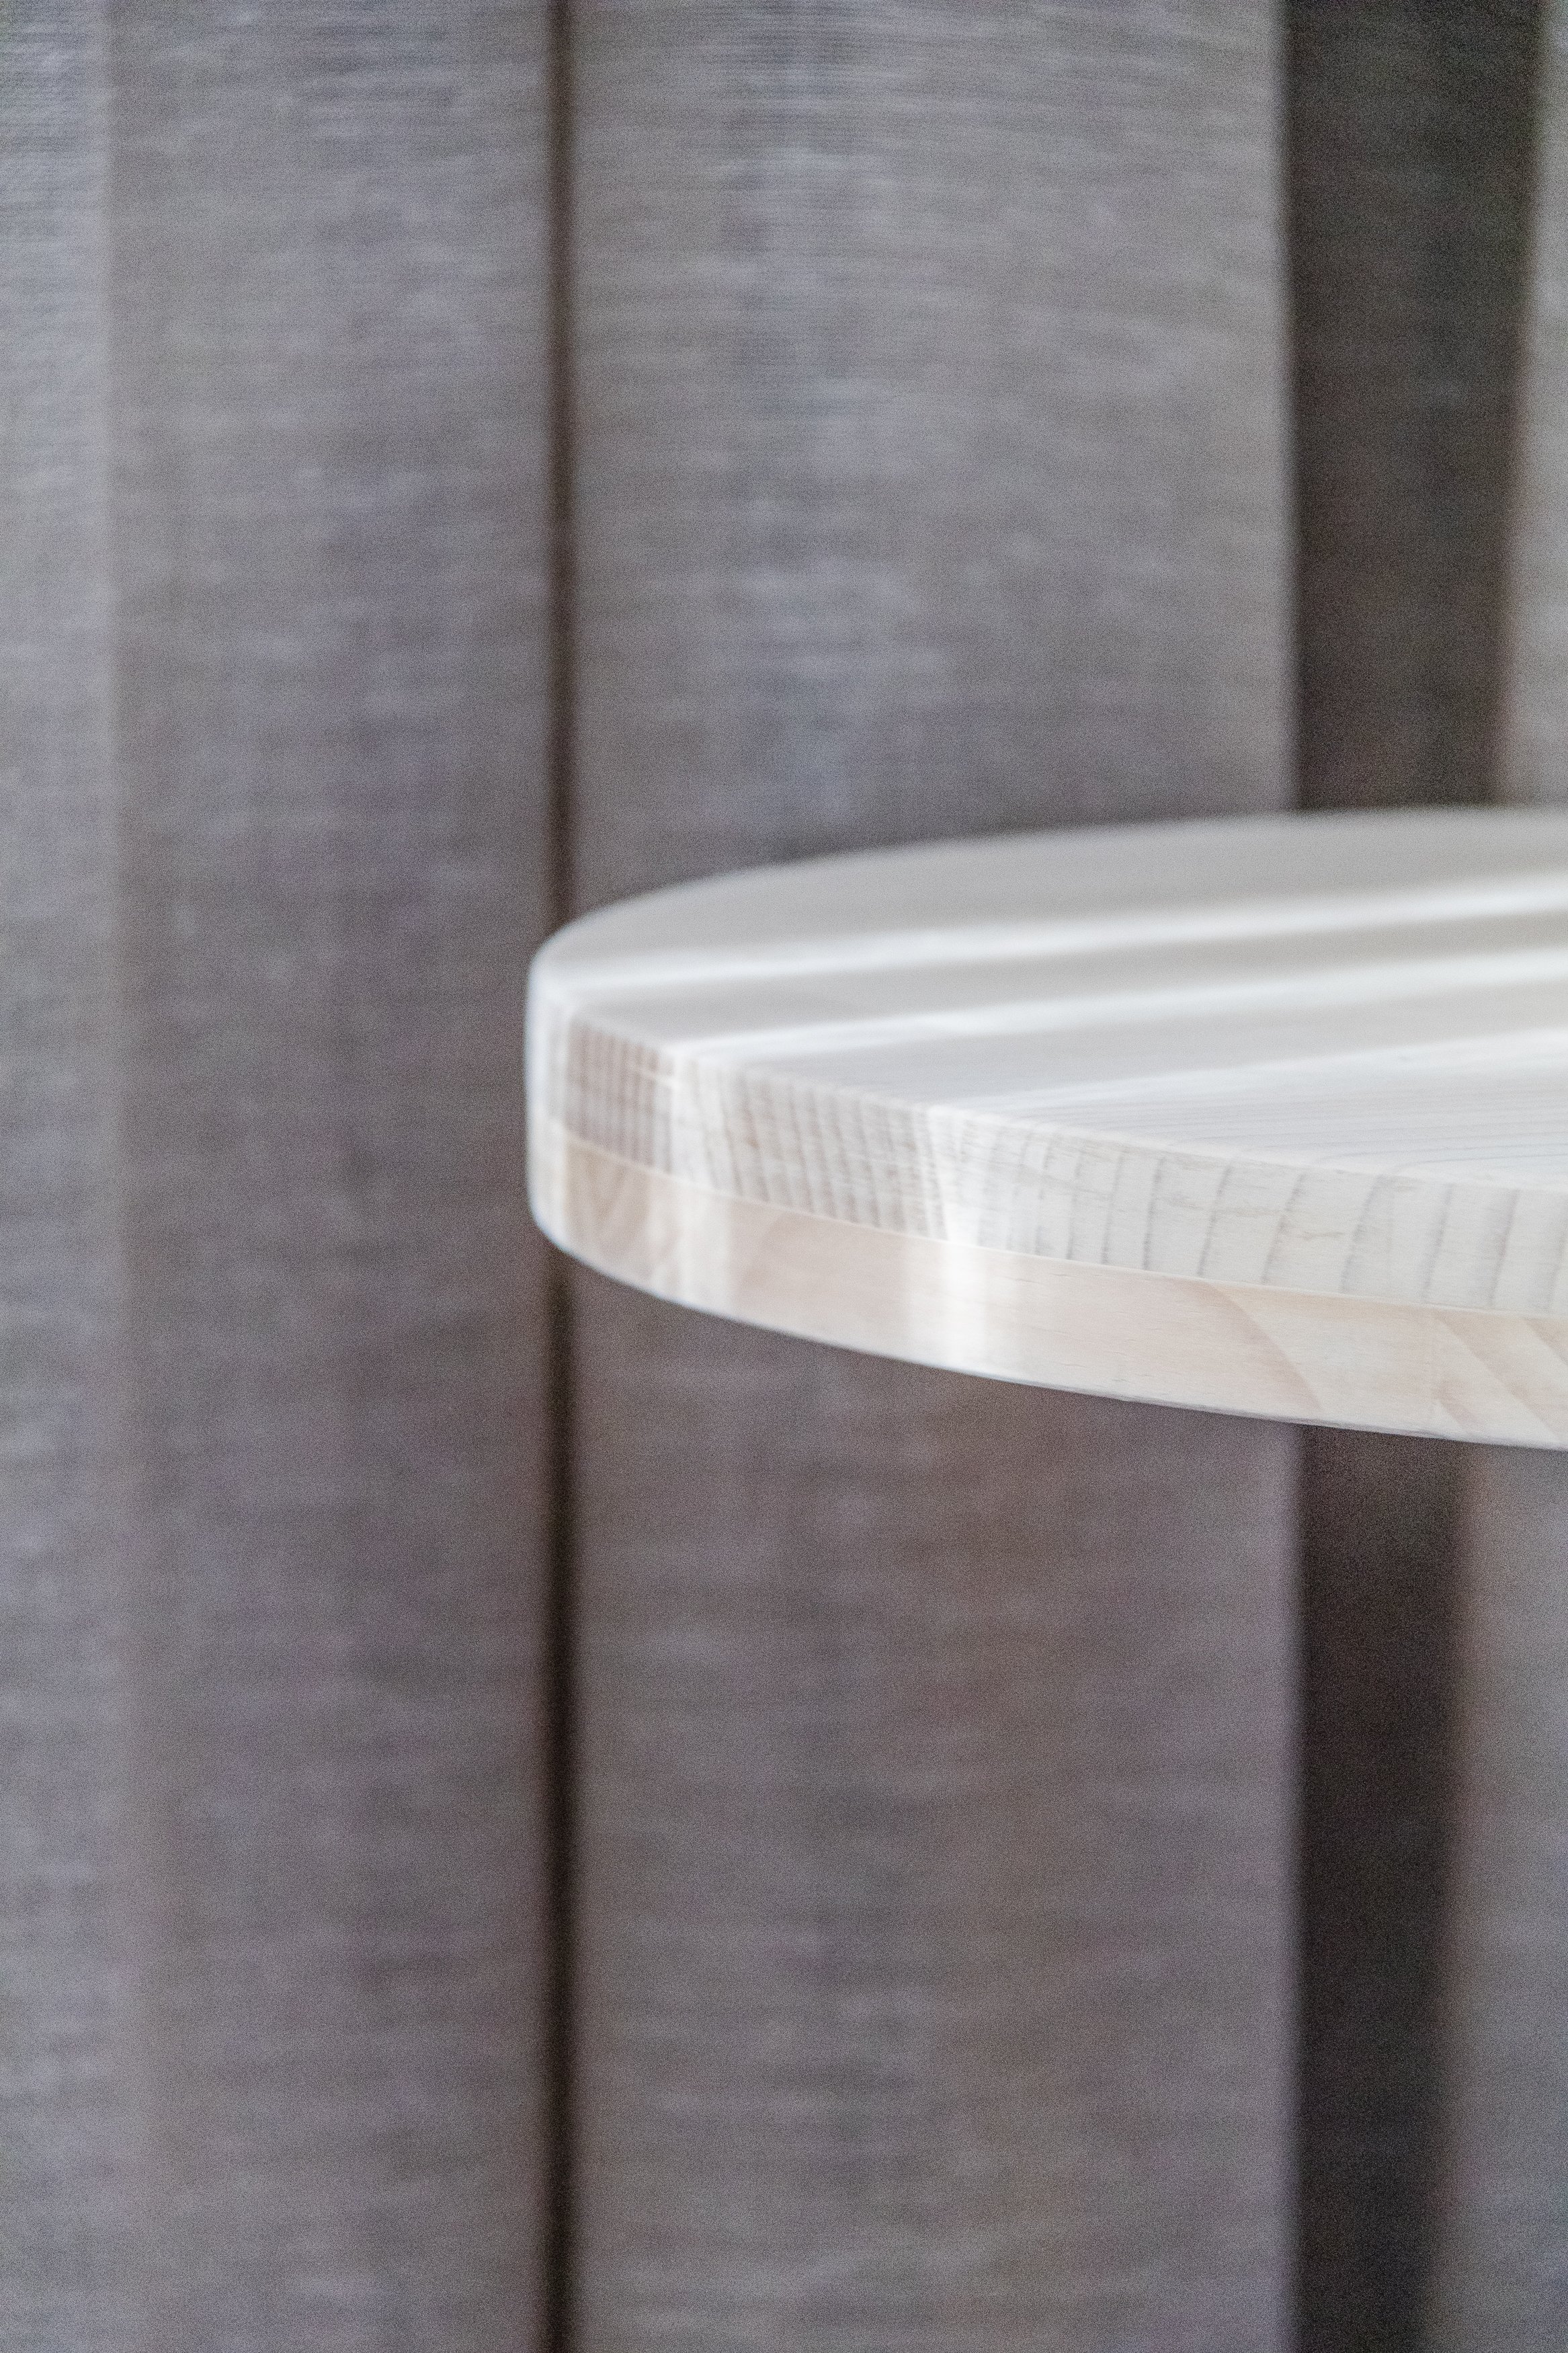
Sand the edges of the tabletop so they are smooth and rounded. Apply wood filler to fill in the gaps between the pieces of round pine using a putty knife. Don’t worry if it looks a bit messy as you’ll be sanding it tomorrow. Set aside to dry overnight.

DAY THREE - 1 to 2 hours
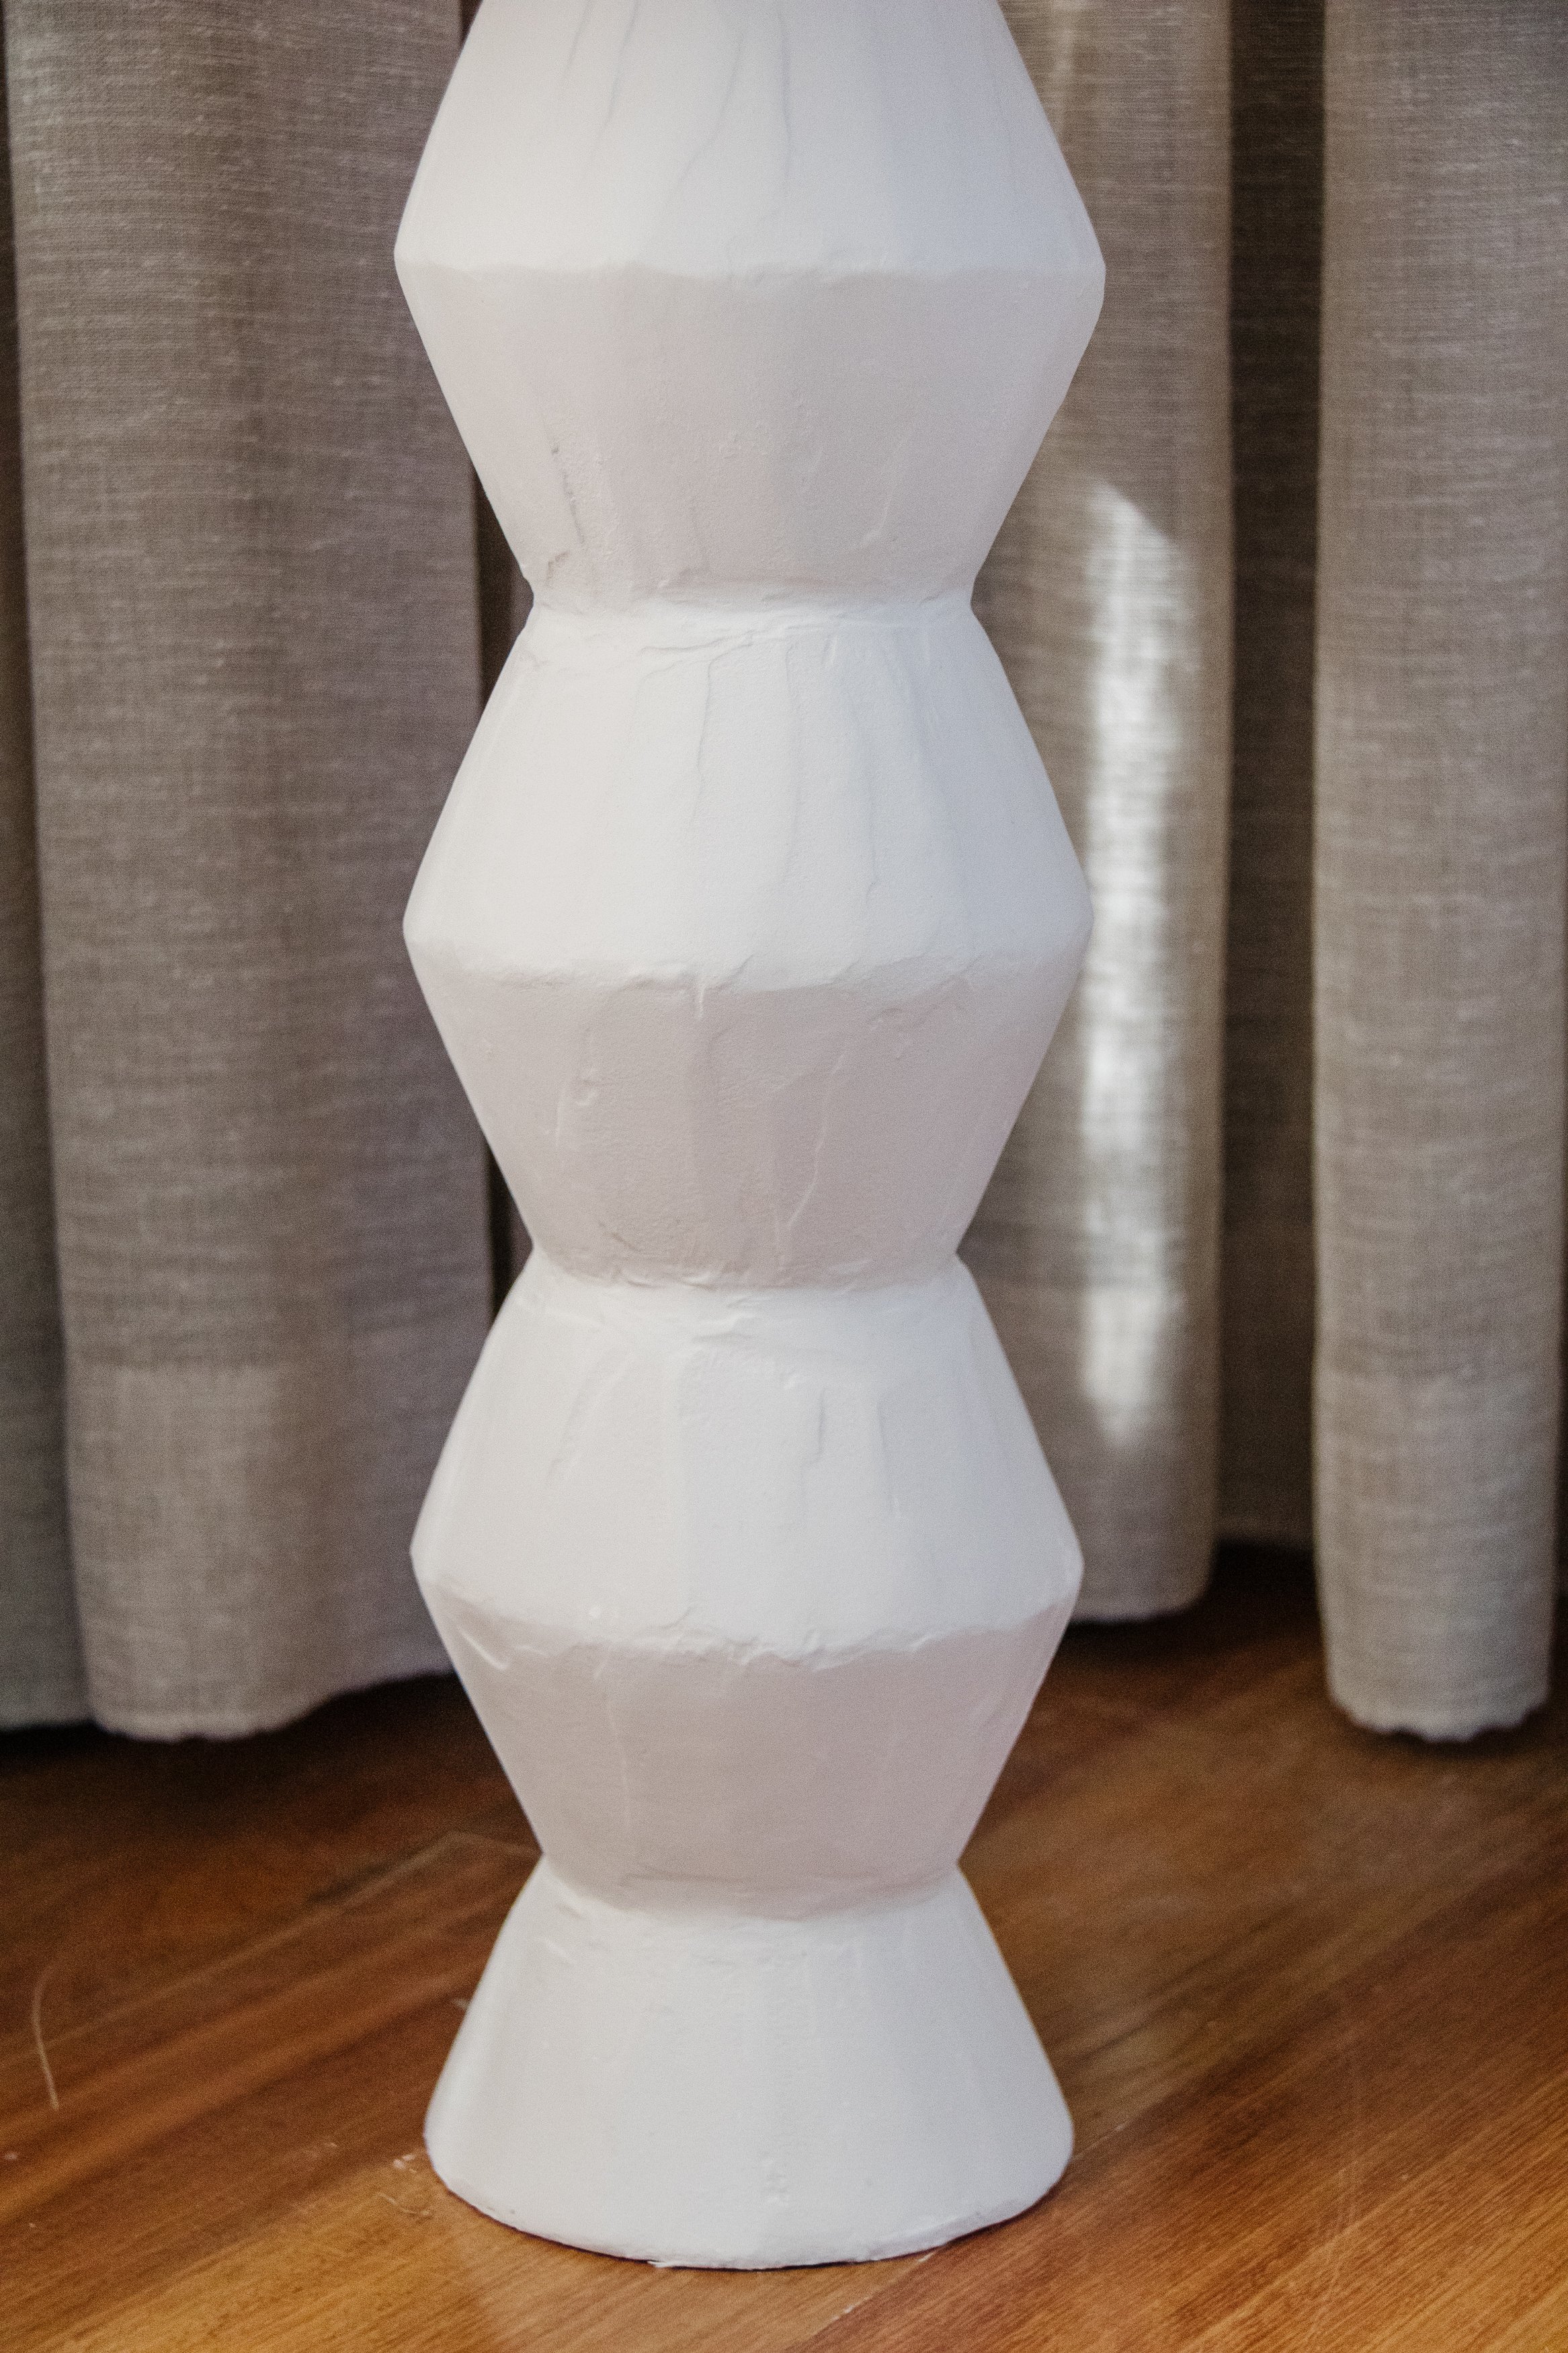
Sand the plaster on the totem using the corner sander until it’s smooth all over. Be careful not to sand with too much pressure. Apply a second coat of plaster but pay attention to the application as this will affect the overall look when you sand it tomorrow. I applied the plaster in an “up down” motion consistently up and down the entire totem. Set aside to dry.
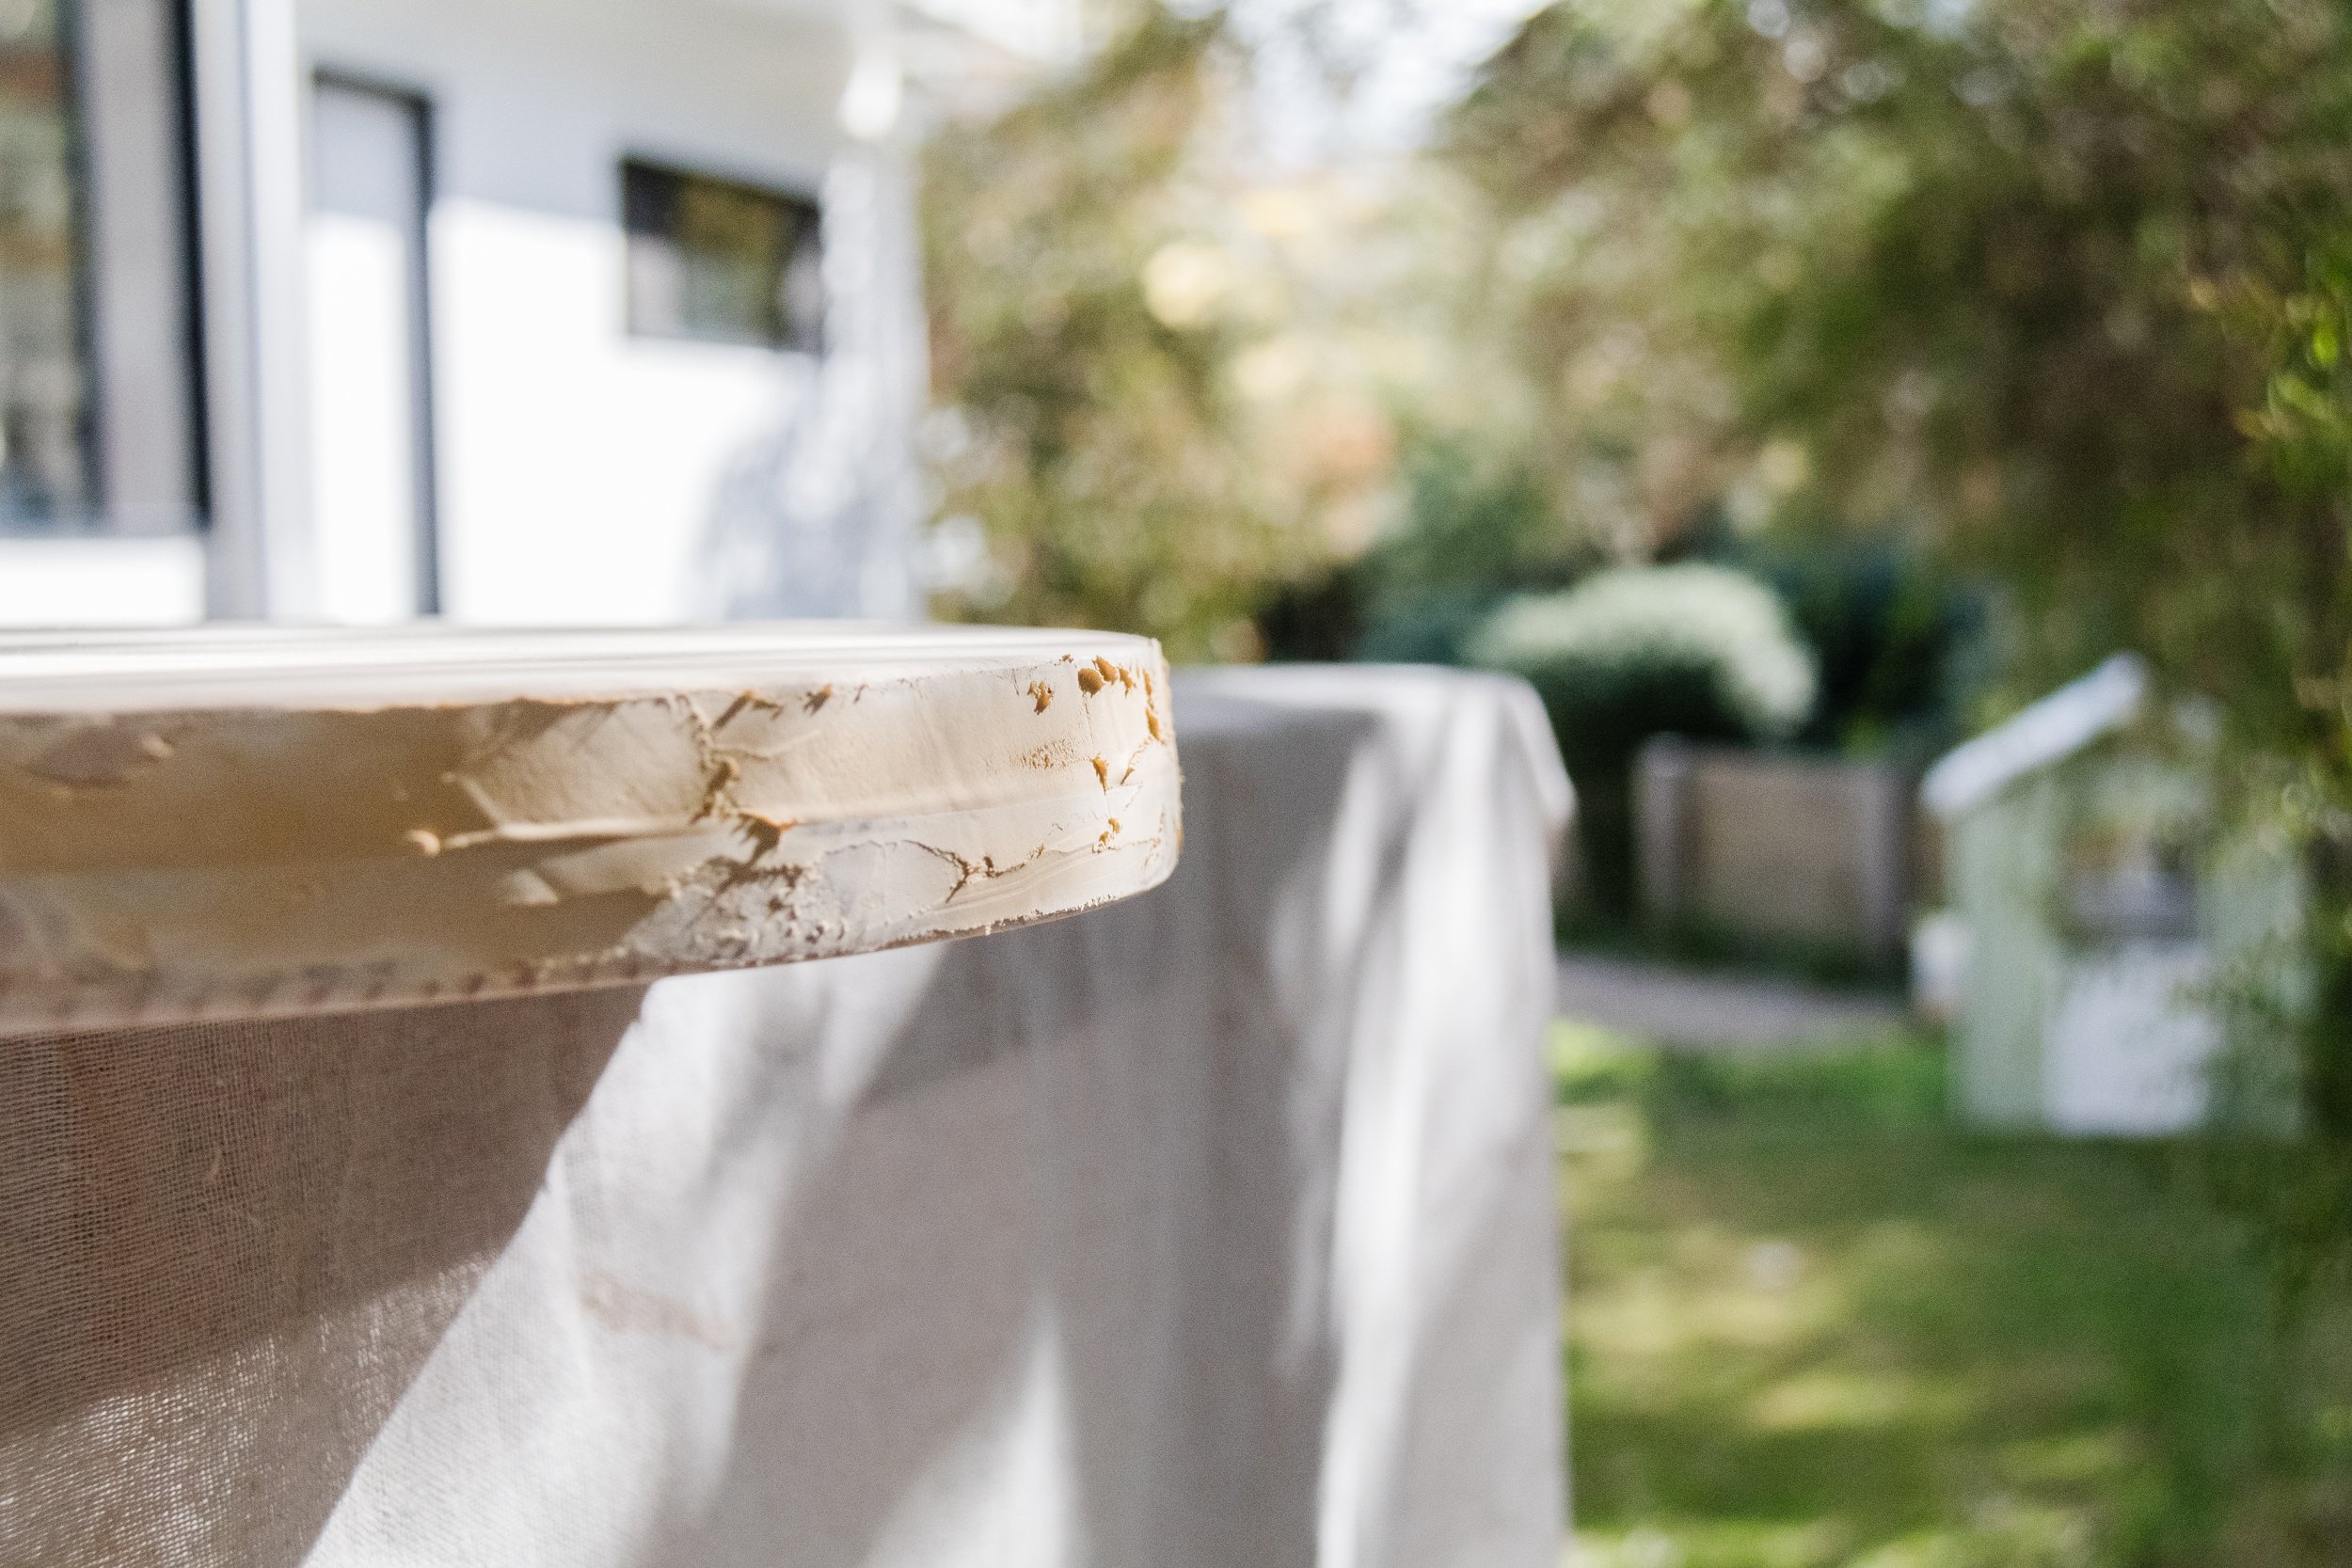
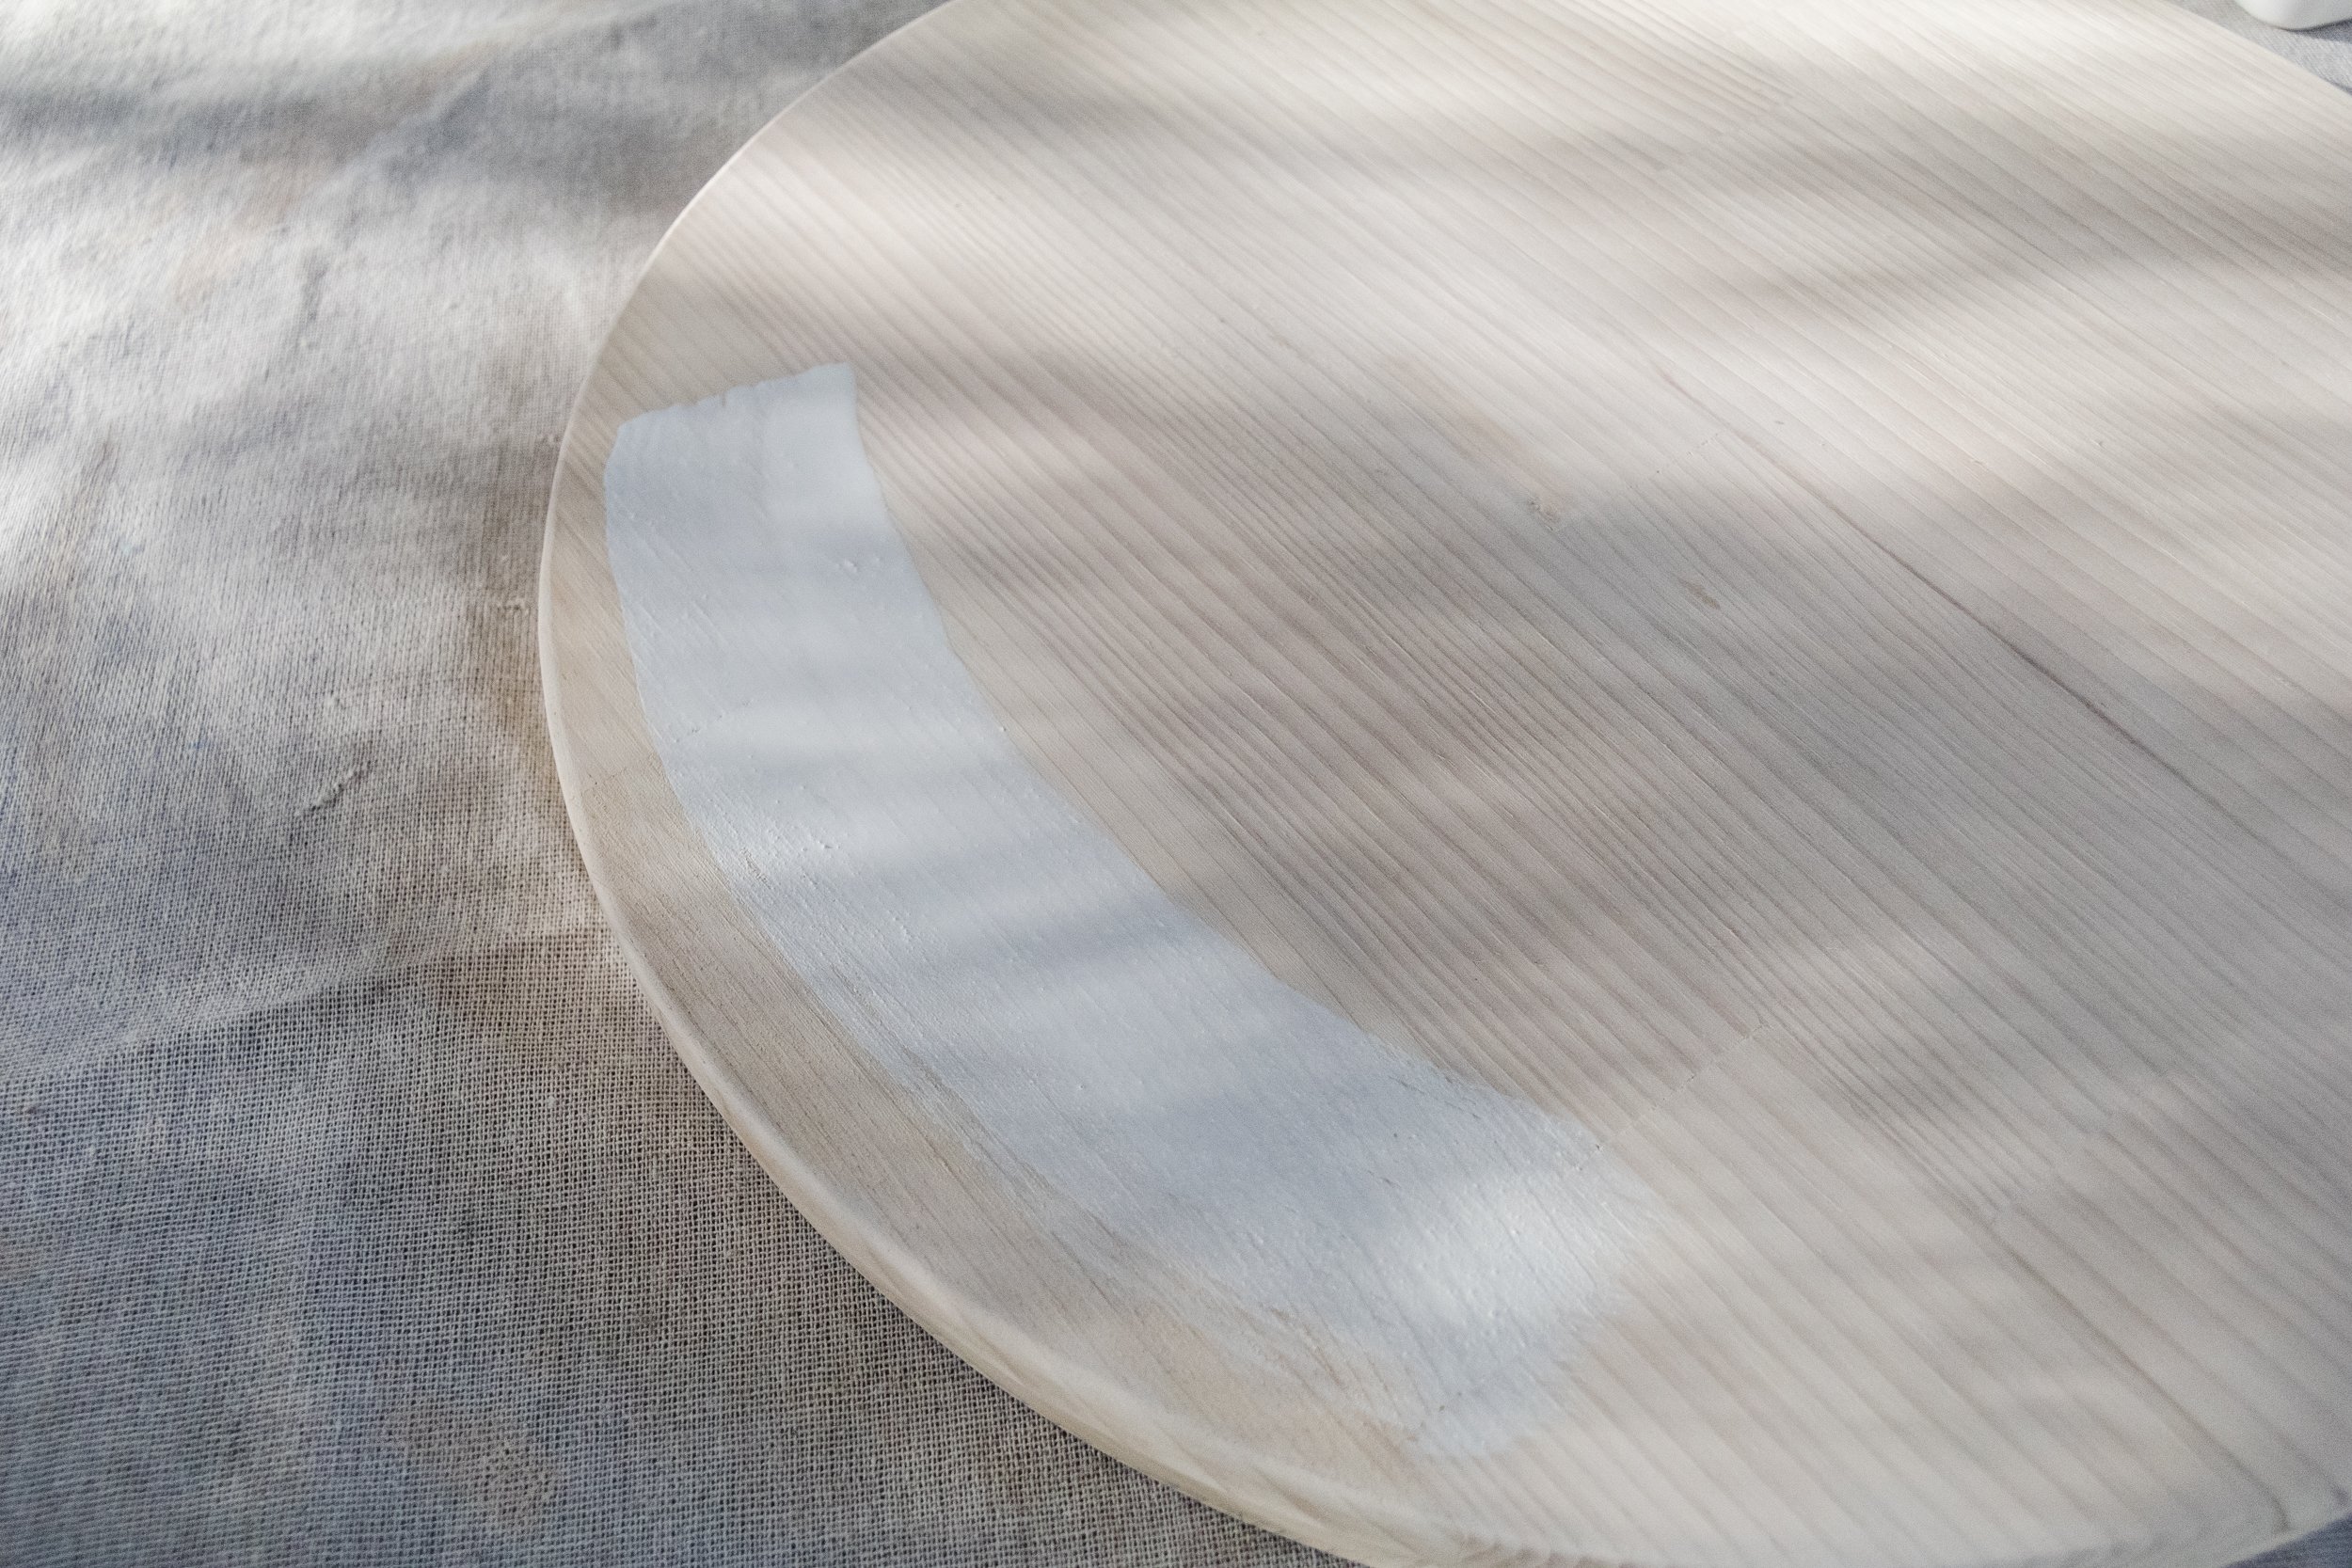
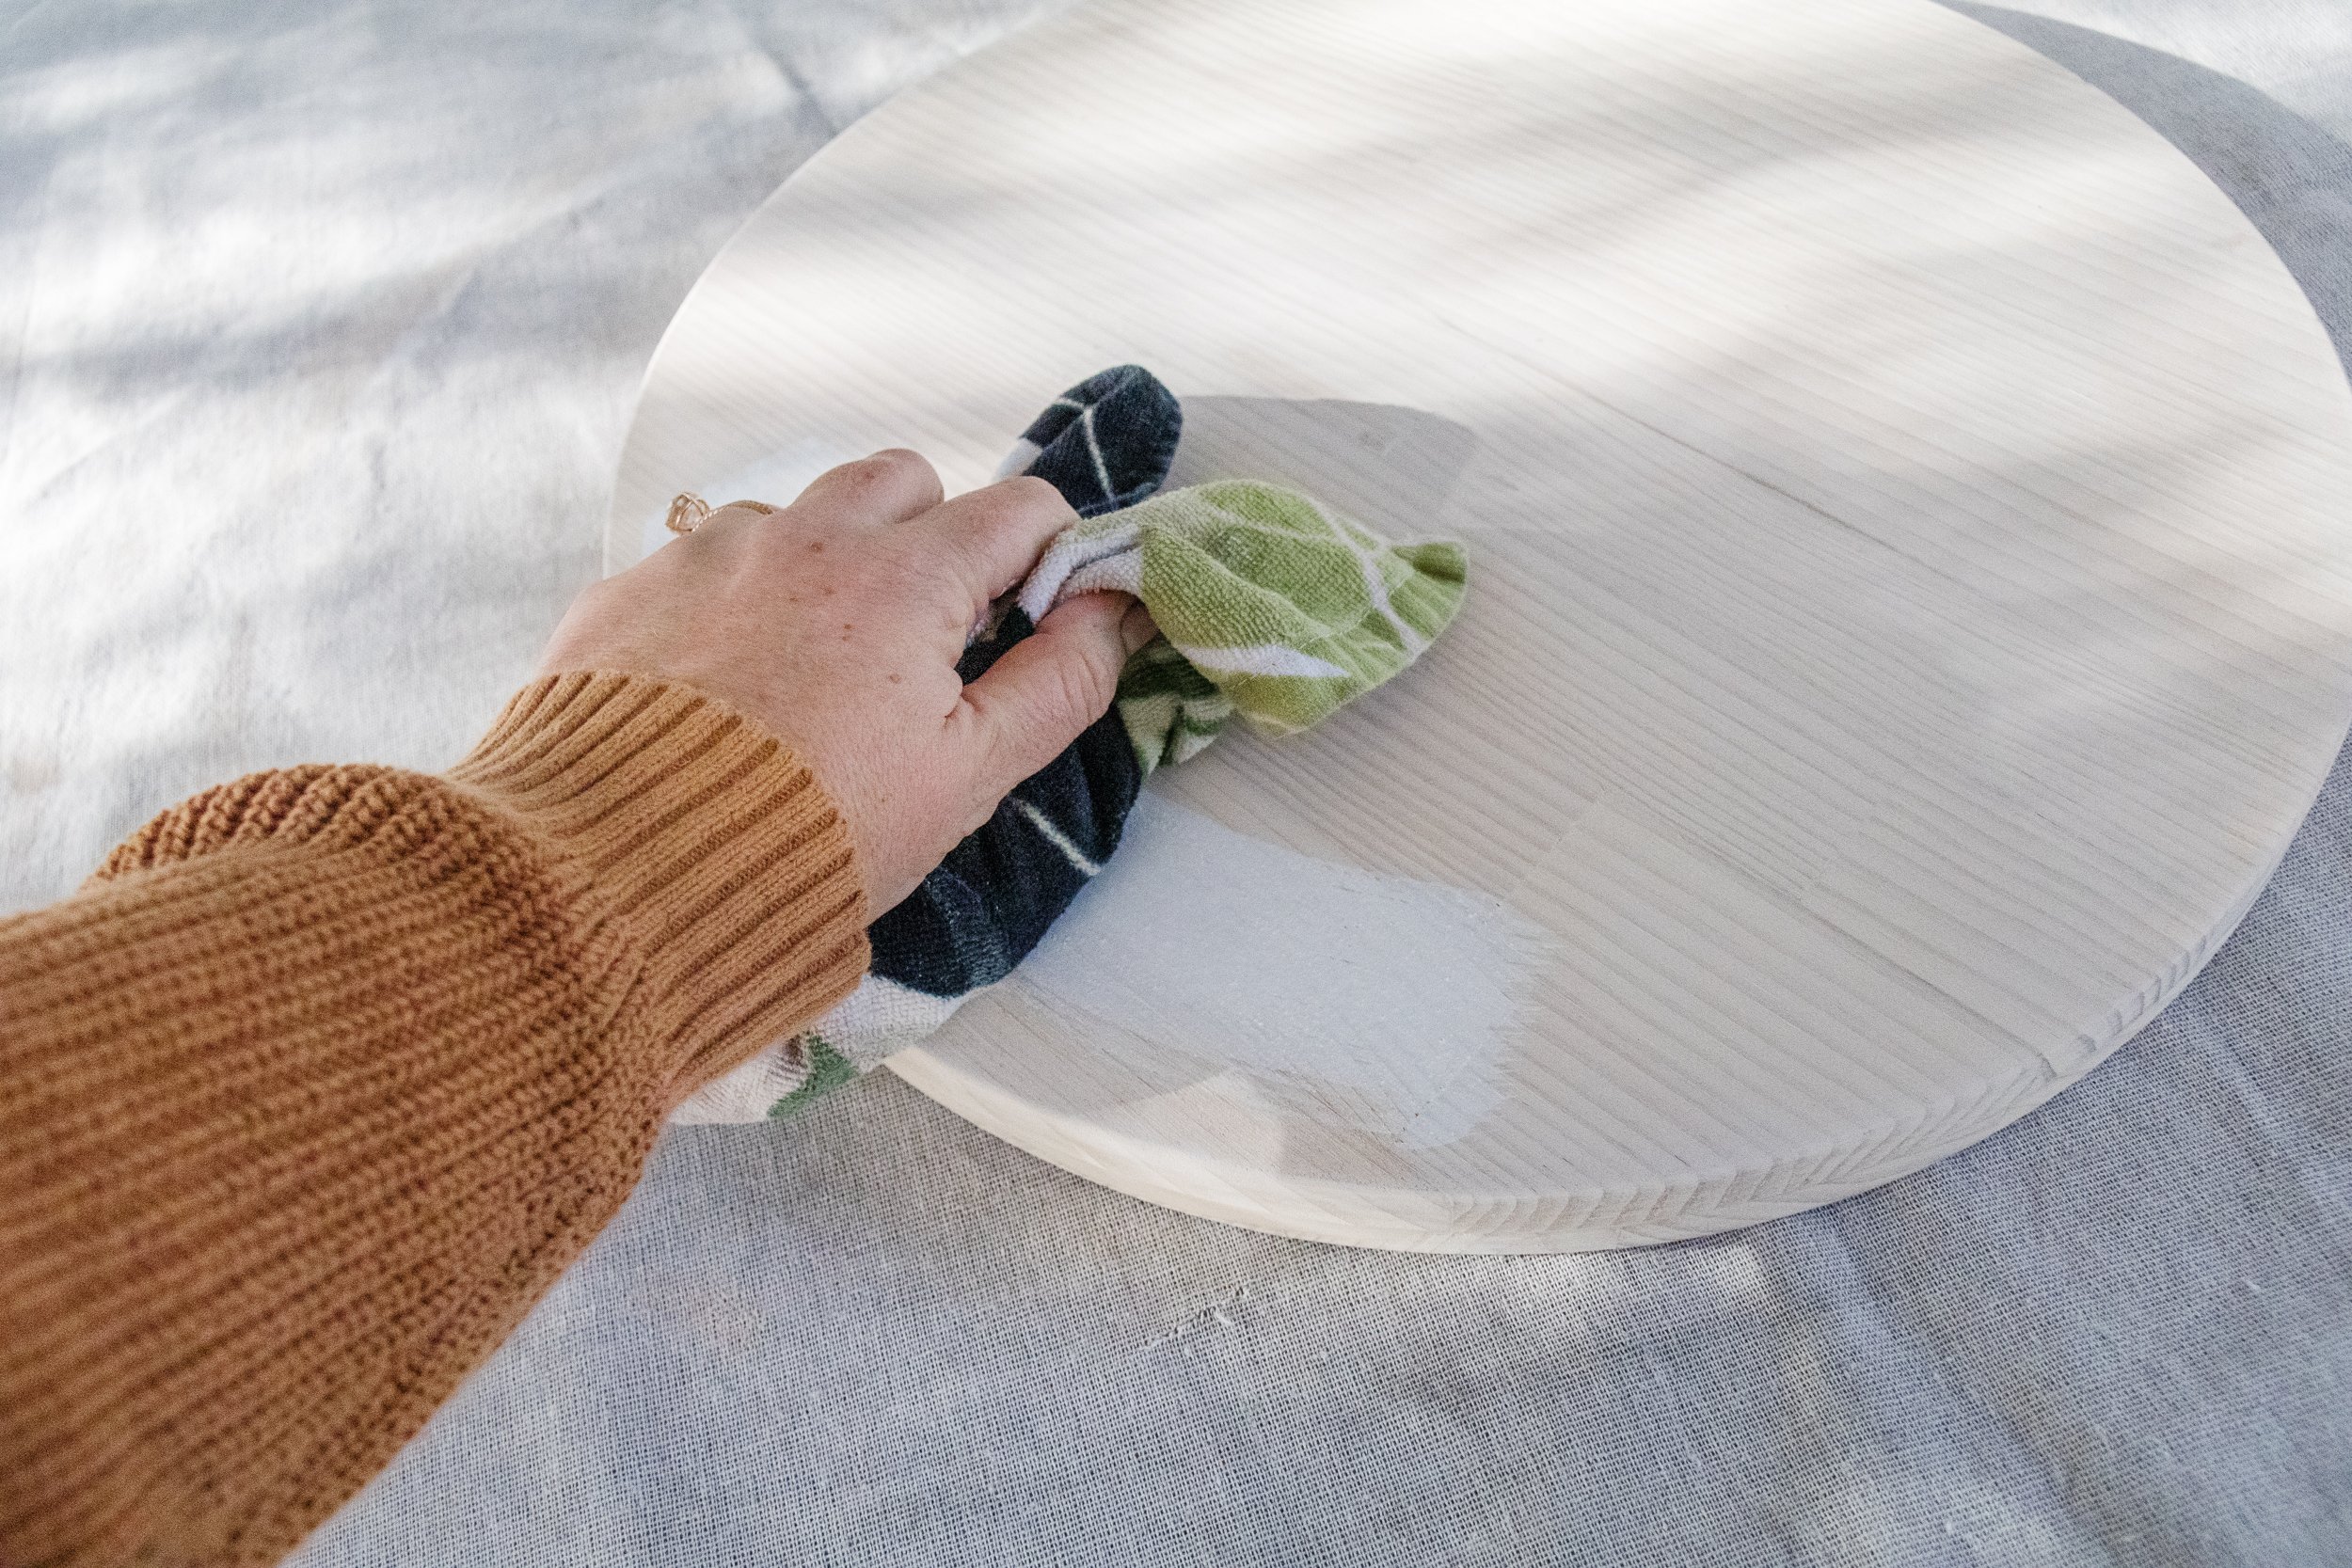
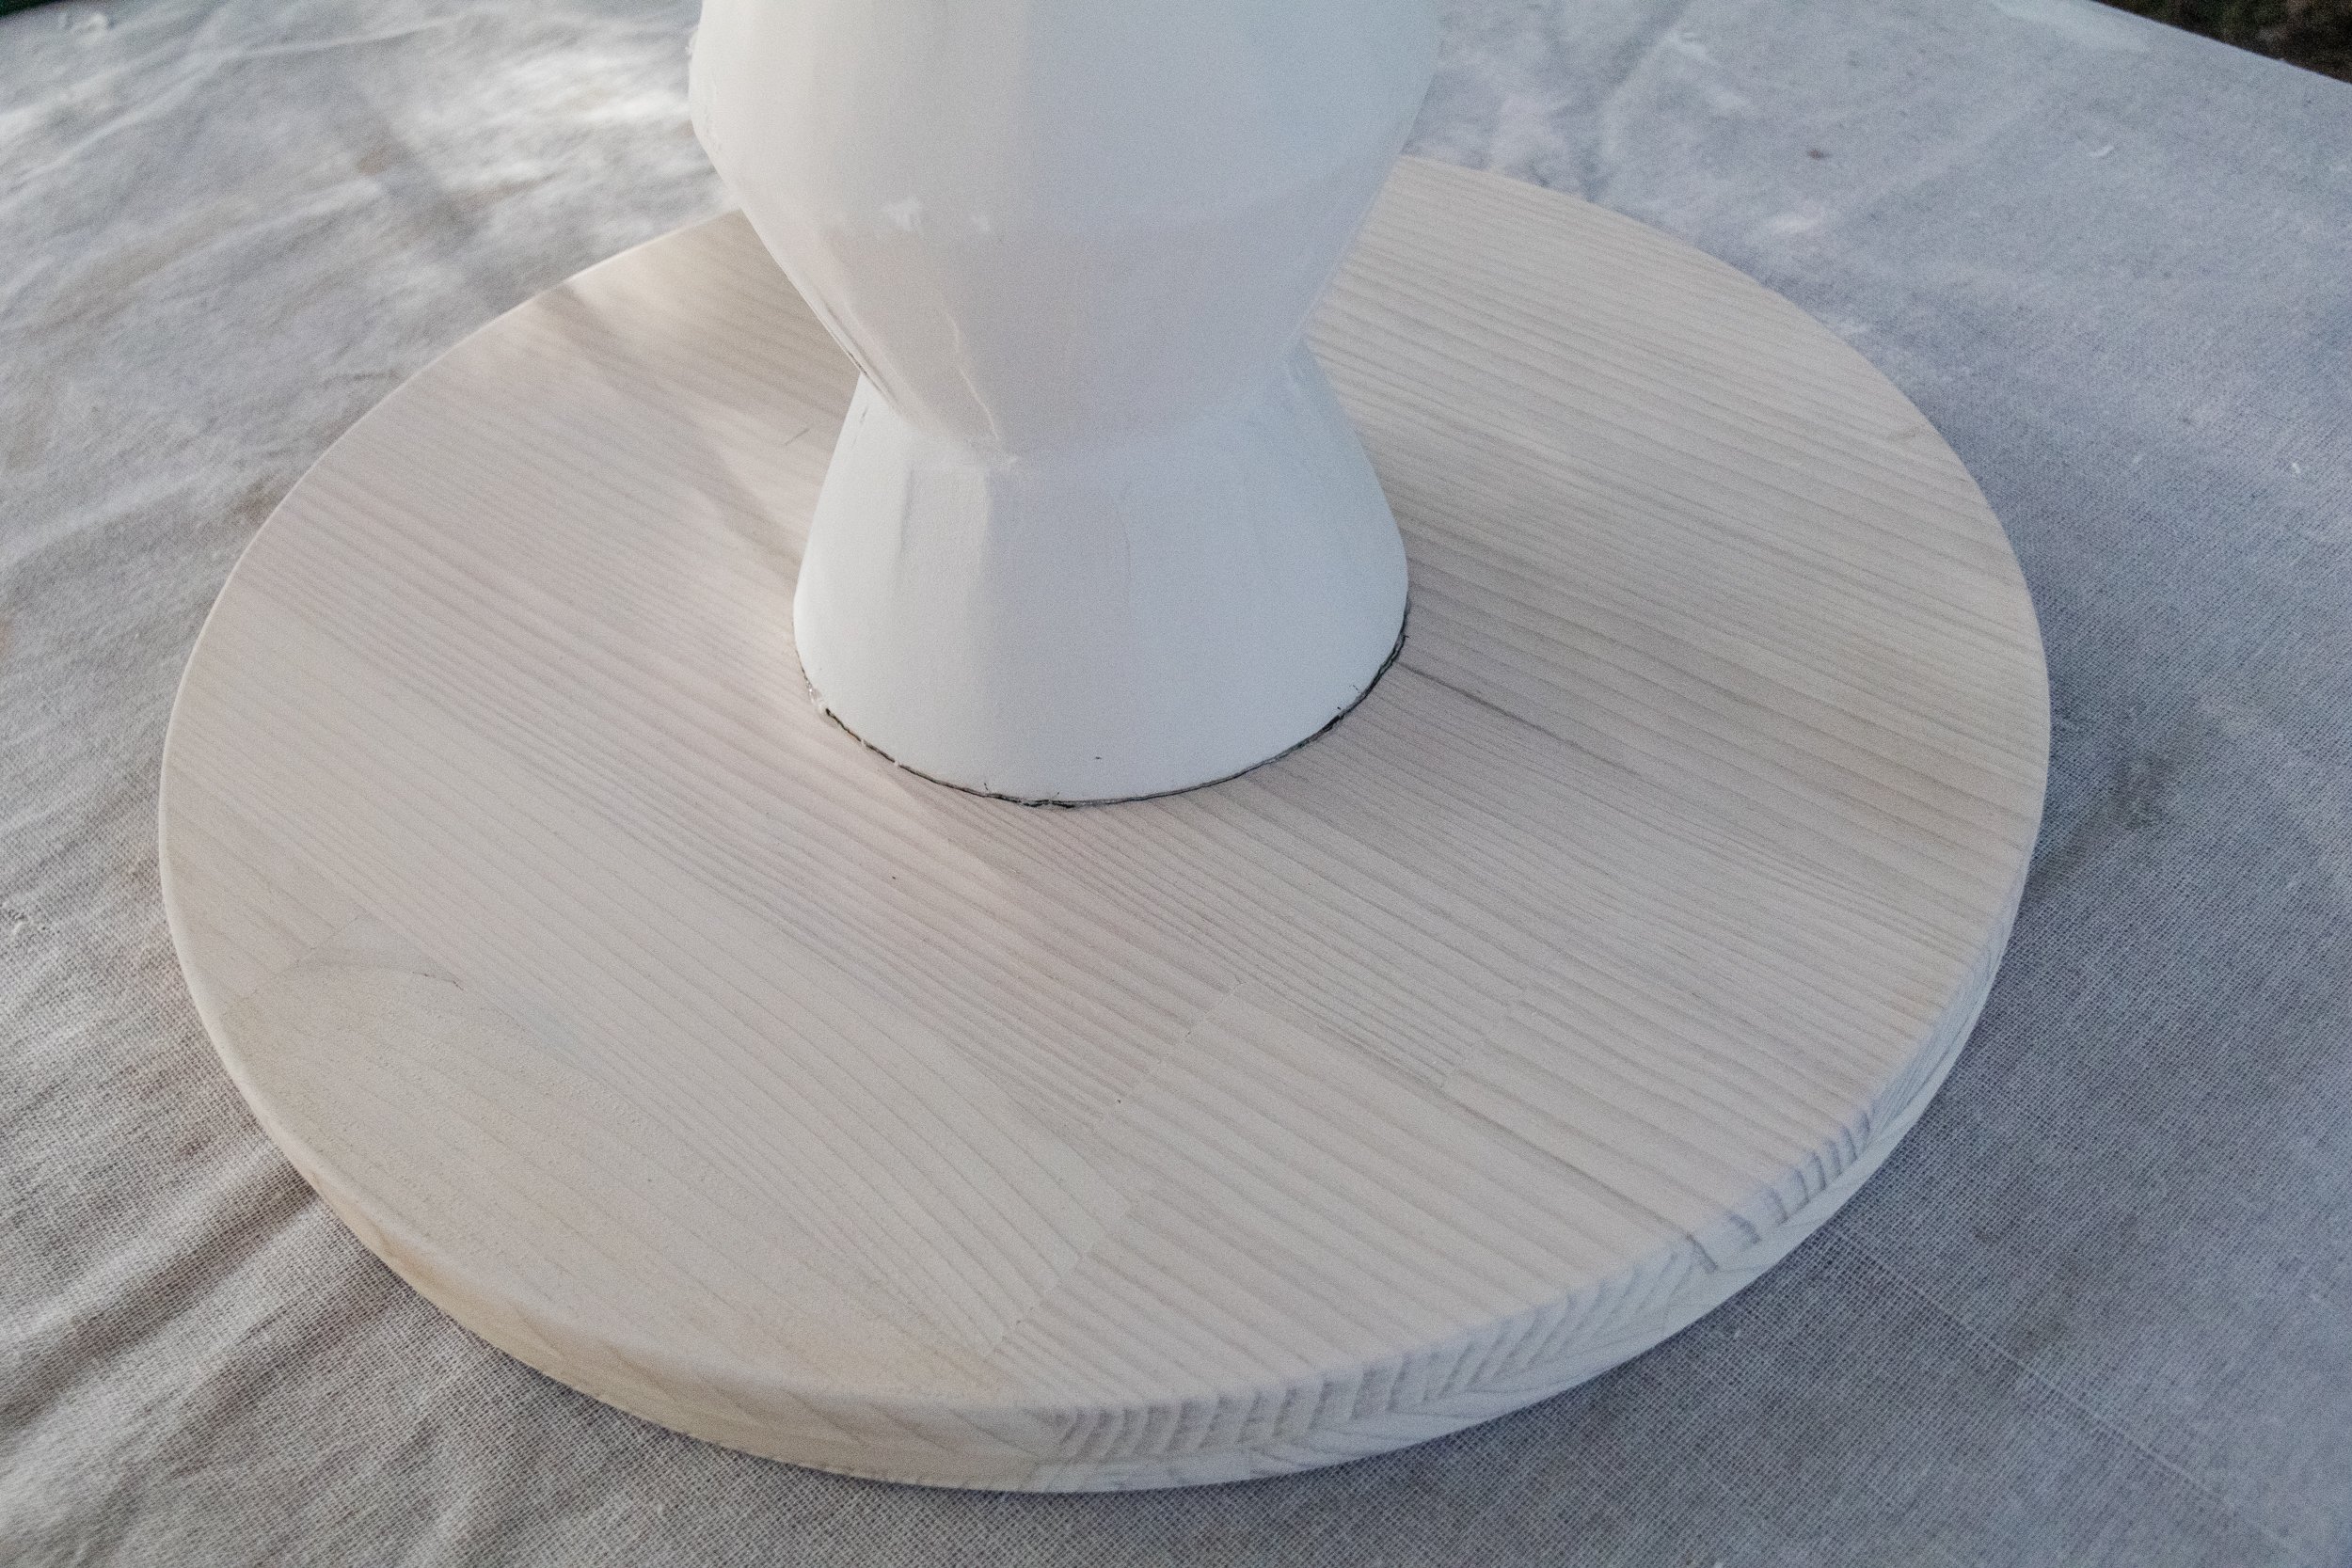
Sand the excess filler from the sides of the tabletop. Get your whitewash mix ready and clean cloth too. Working in sections, carefully apply the whitewash directly onto the a small section on the timber tabletop then quickly rub it in and around using a circular motion until it’s soaked into the timber. Don’t let the whitewash sit for longer than a couple of seconds as it will start to dry quickly. Repeat until the top, bottom and sides of the tabletop have been whitewashed. Set aside.
DAY FOUR - 1 hour
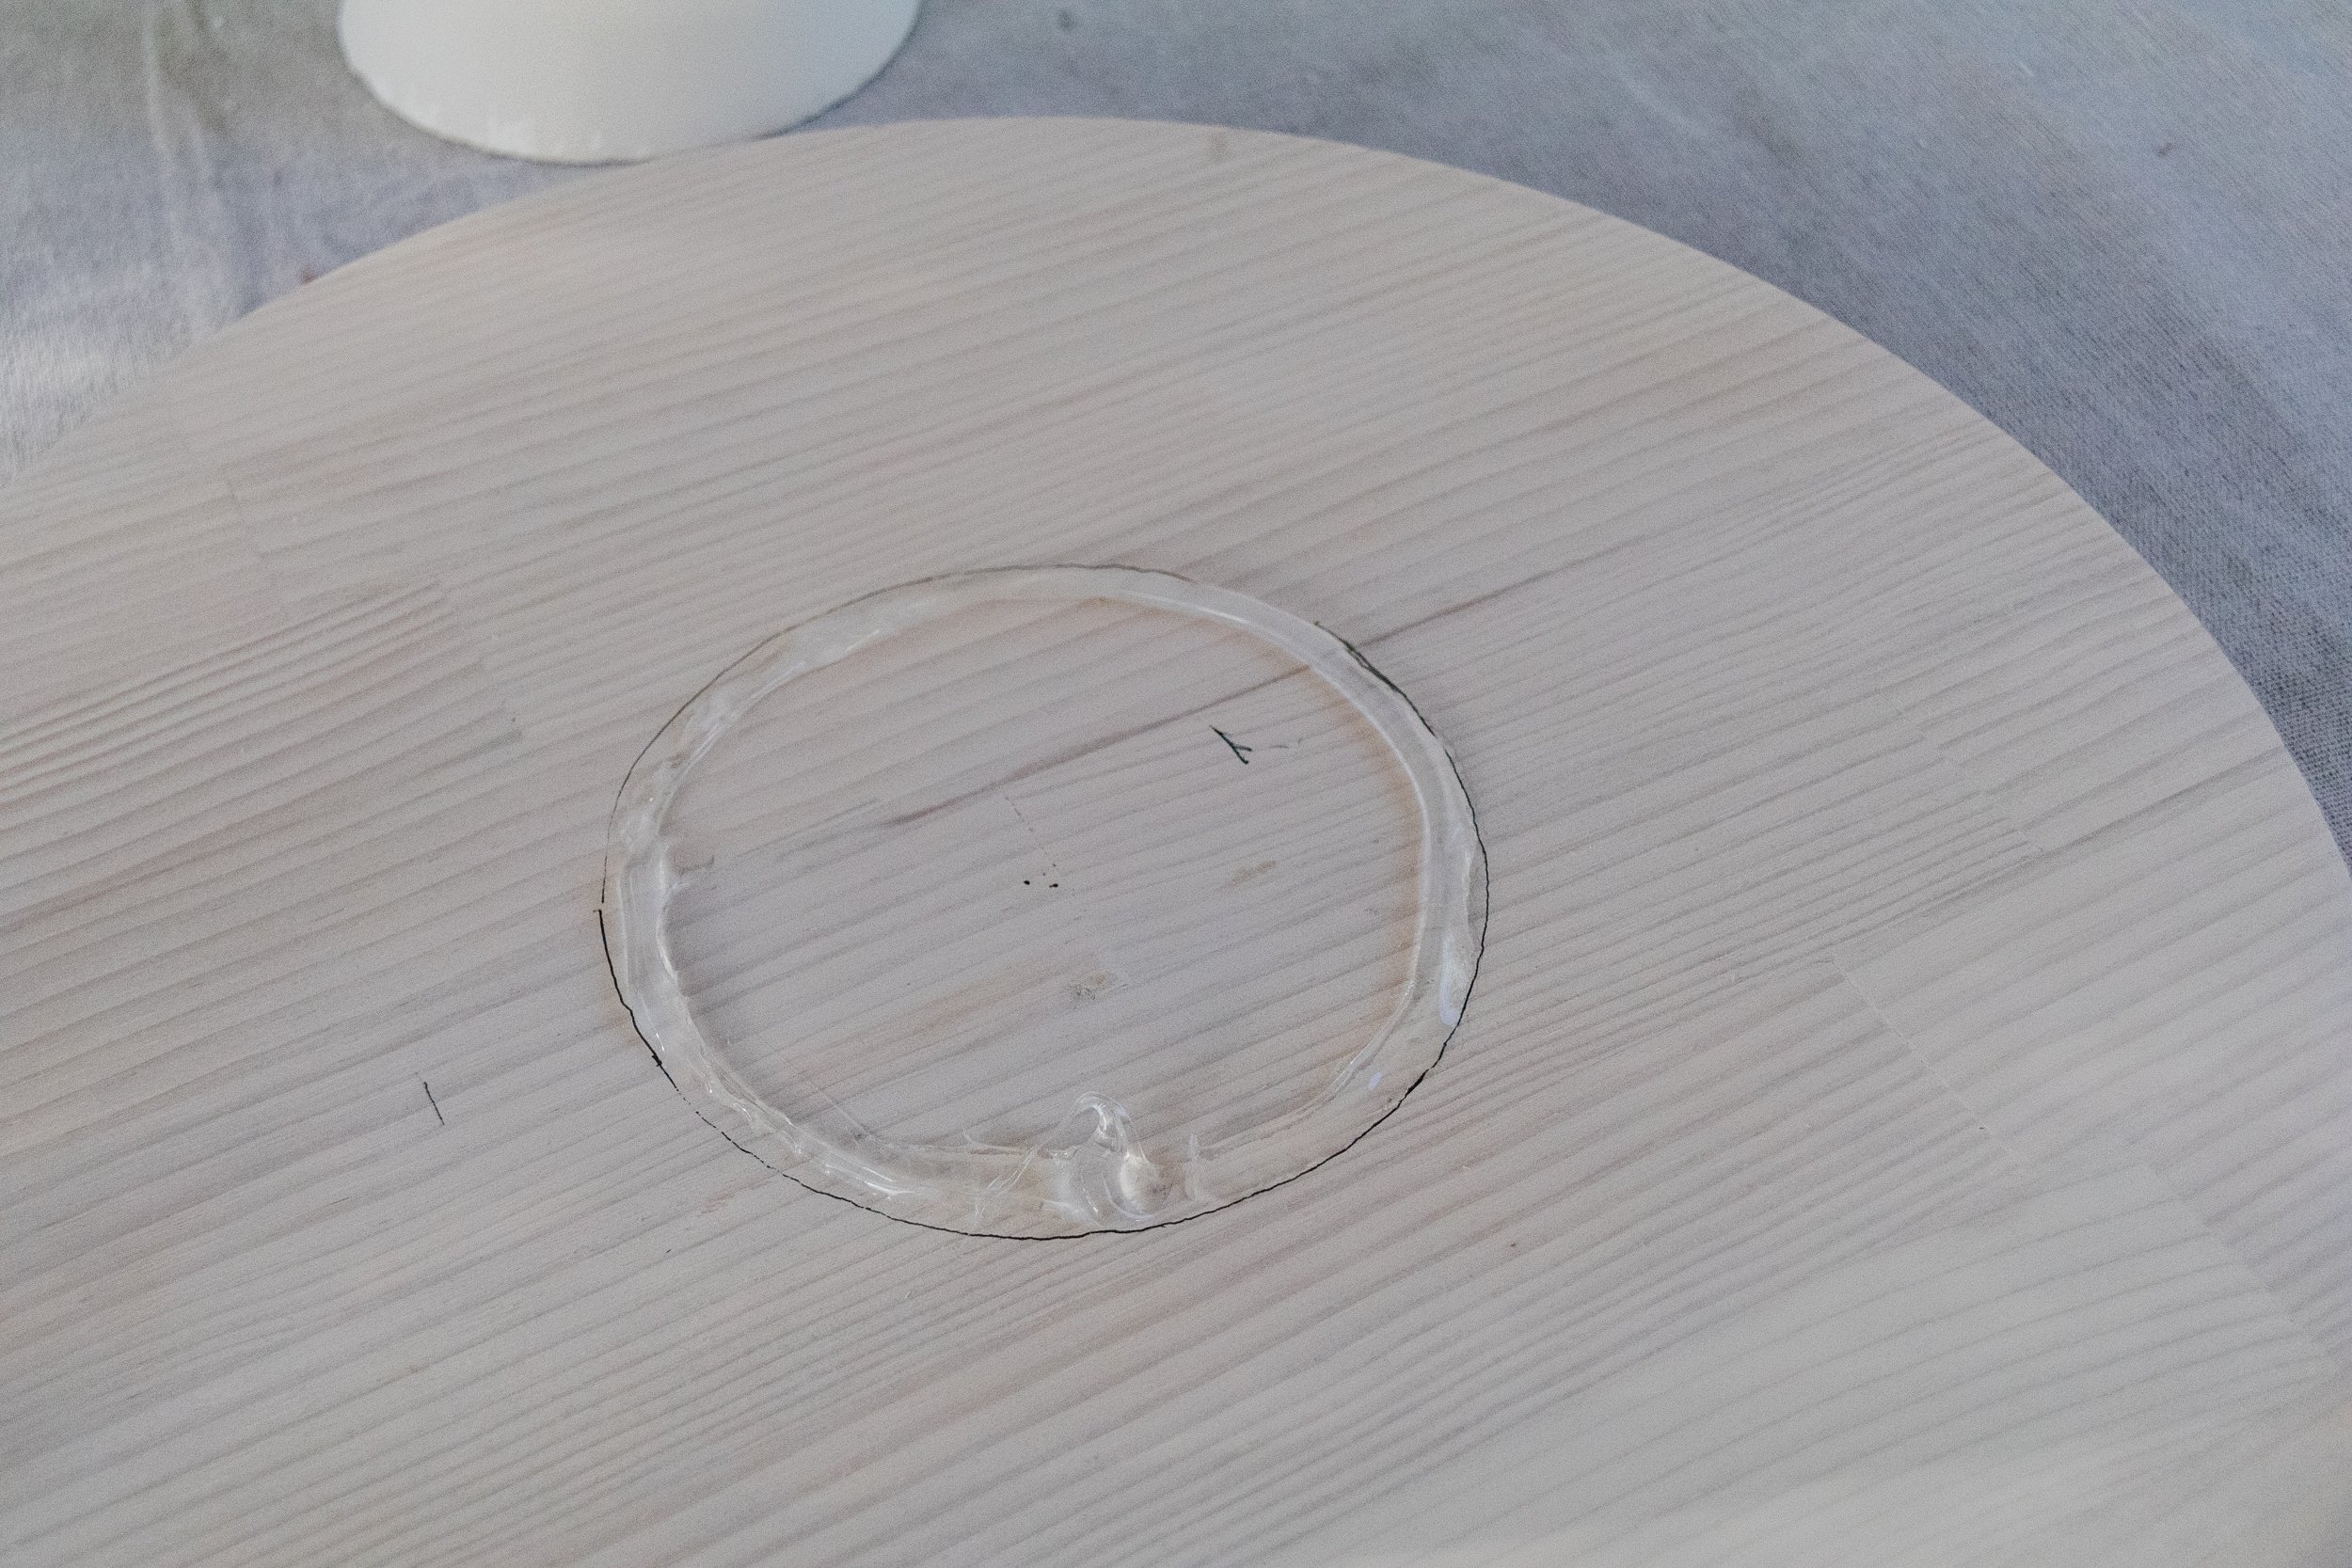
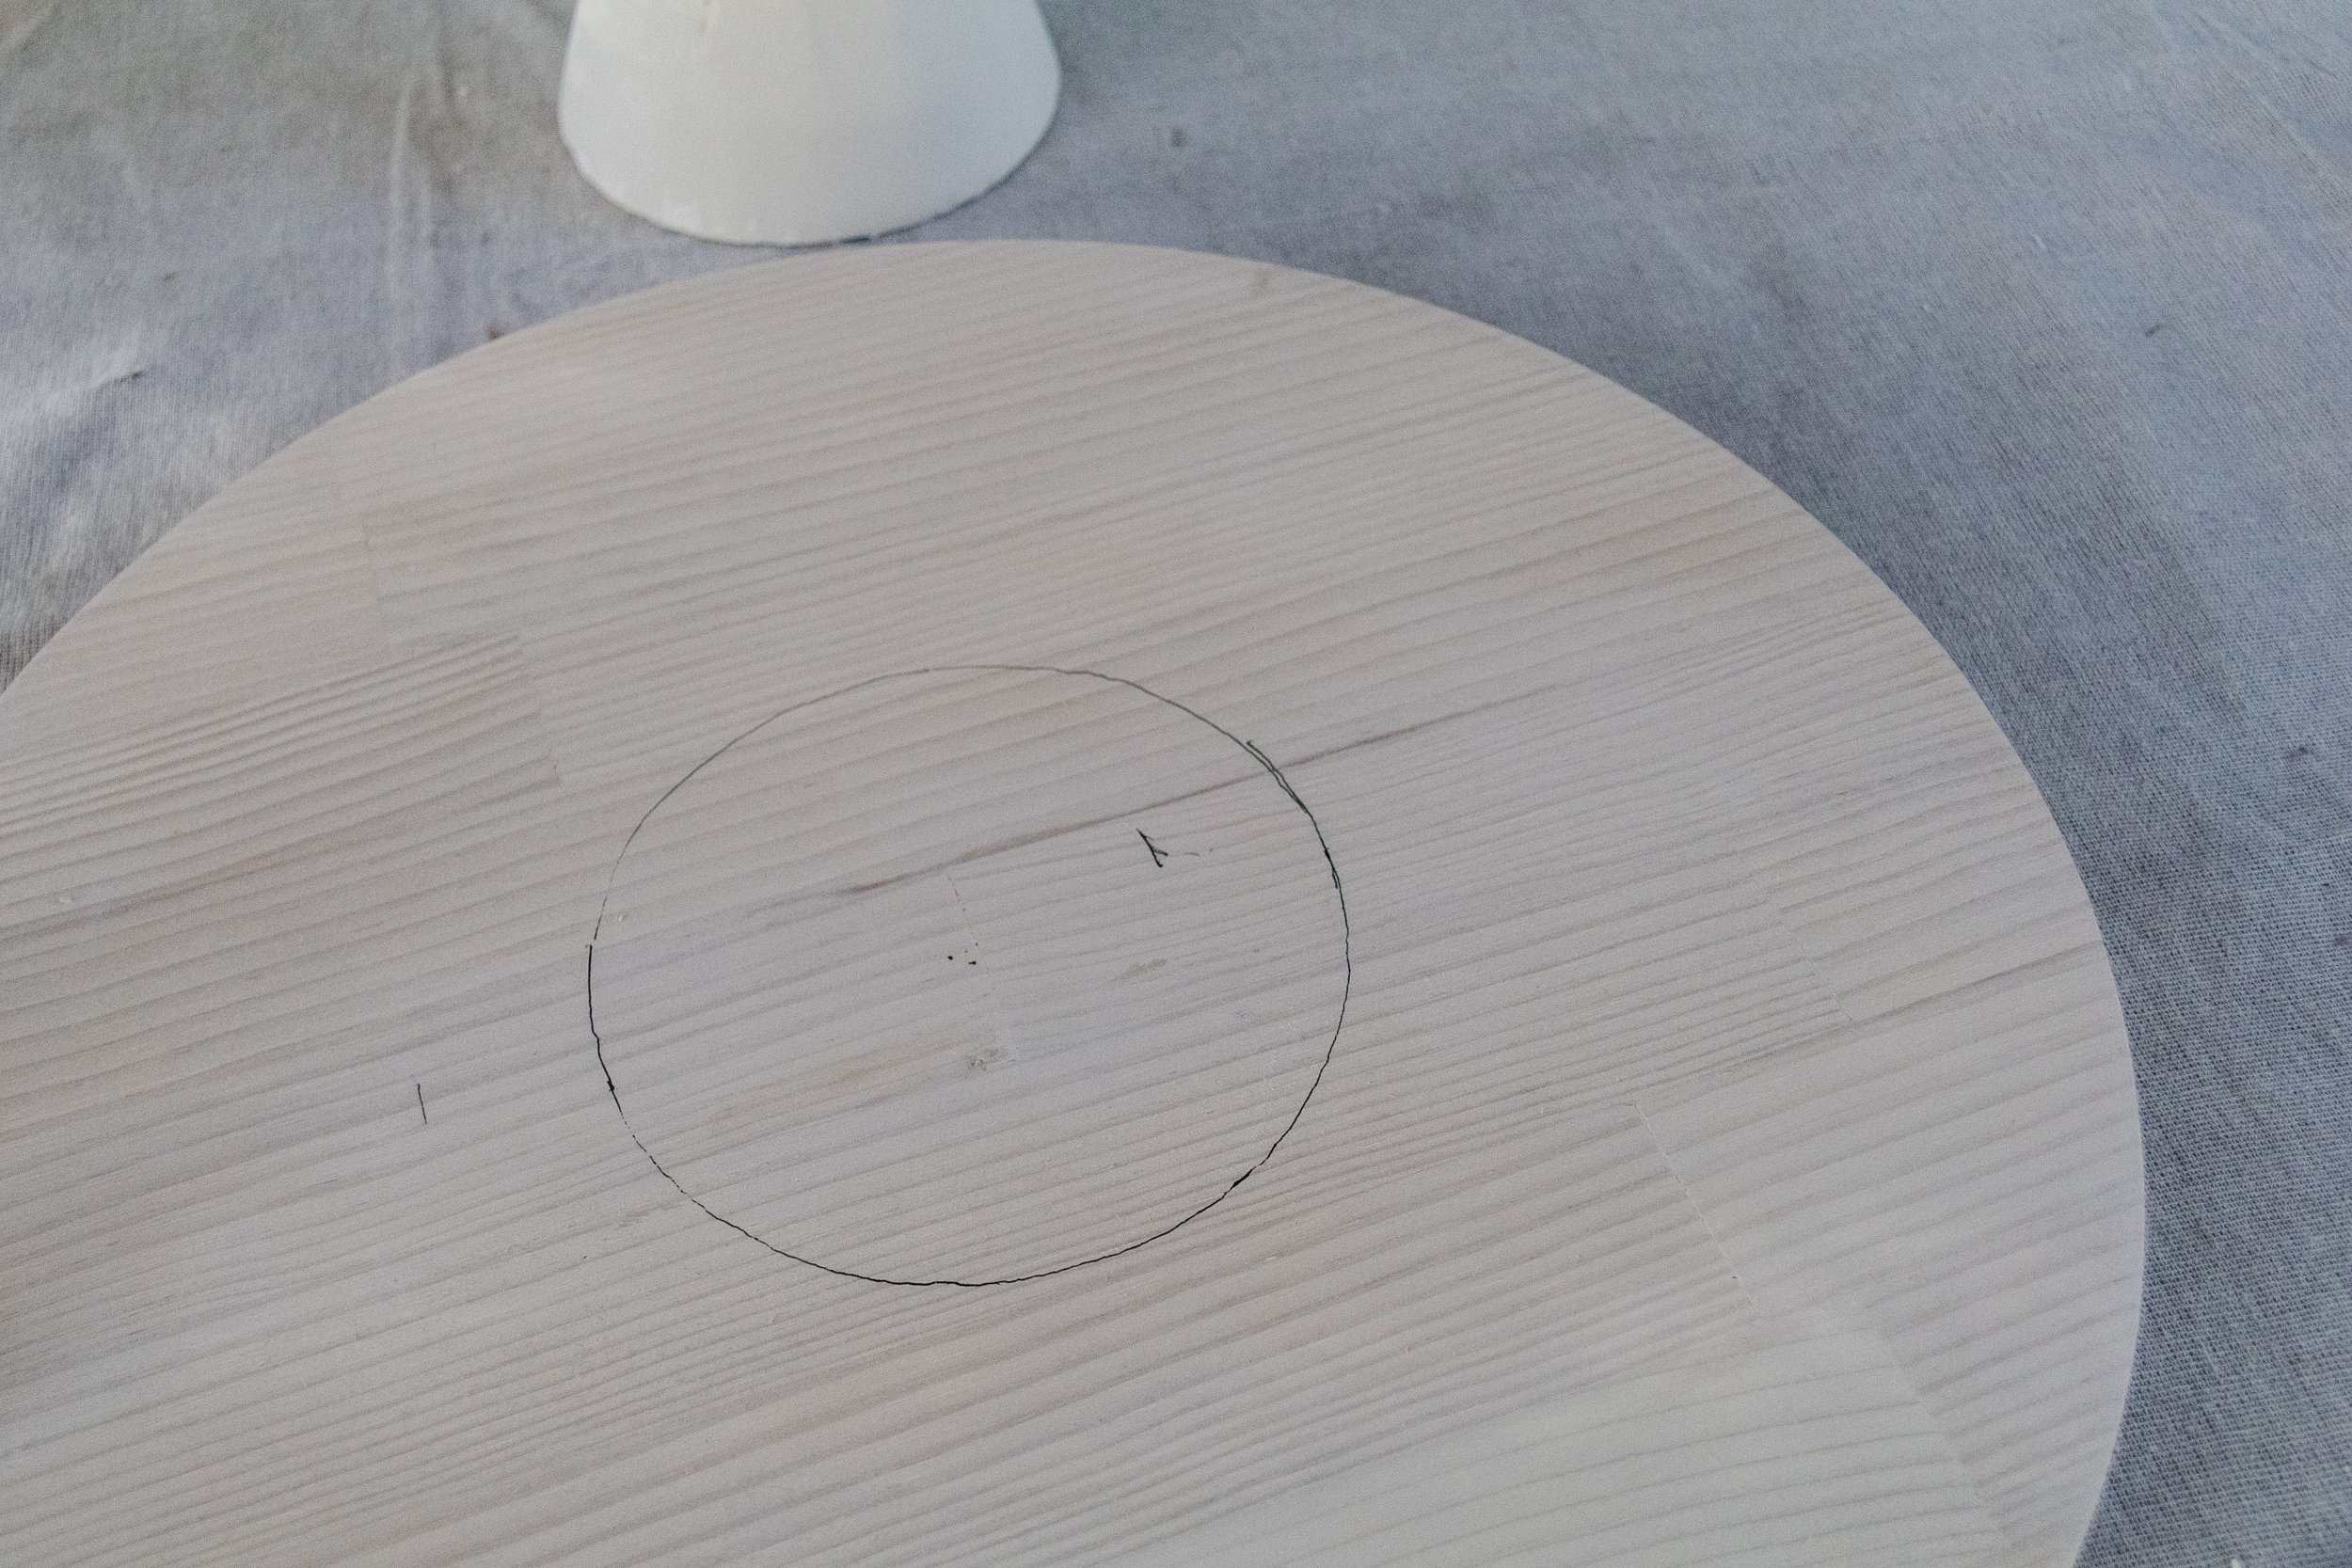
Sand the plaster on the totem again, and be careful not to use too much force otherwise you may expose the Mod Cloth underneath. Dust it off with a clean cloth. Place the tabletop onto a flat surface and mark where the totem will be positioned and glue into the centre. Draw an outline around the totem on the timber, apply Liquid Nails over the line and place the totem on top. Set aside to dry overnight and then your DIY Totem Side Table will be ready for you to style with your favourite lamp, books and decor.
Ta daaaa! I can’t believe I made a side table using plastic bowls…
One of my favourite aspects of making (and I am always making at that) is seeing something I love and breaking it down until I have figured out how I can make it myself, and in this case, put my own spin on it. Often you’ll find me rummaging for the most unusual materials in the most unexpected places, but that’s why I love doing what I do and being able to share the process and final reveals with you. If someone was seeing this side table for the first time, they would have no idea I made it using plastic bowls from Big W, and I get so much joy and satisfaction from that. And I hope you do too!