How To Make DIY Wavy Shelves
Paint is an easy and affordable way to transform your spaces at home
For me, Easter is the perfect time to catch up with the people I love and tackle a few DIY projects on my To Do List. One project that has been on my list for for a really long time is a library, a place to store our reading and coffee table books.
When I built my DIY Arched Wall Shelves the intention was to use this as a library, however I’ve slowly taken it over and our books are now stacked in tall piles on top of each other in our bedroom. It’s a bit chaotic to be honest. So I thought that this would be a great project to tackle and enjoy over the Easter Long Weekend!
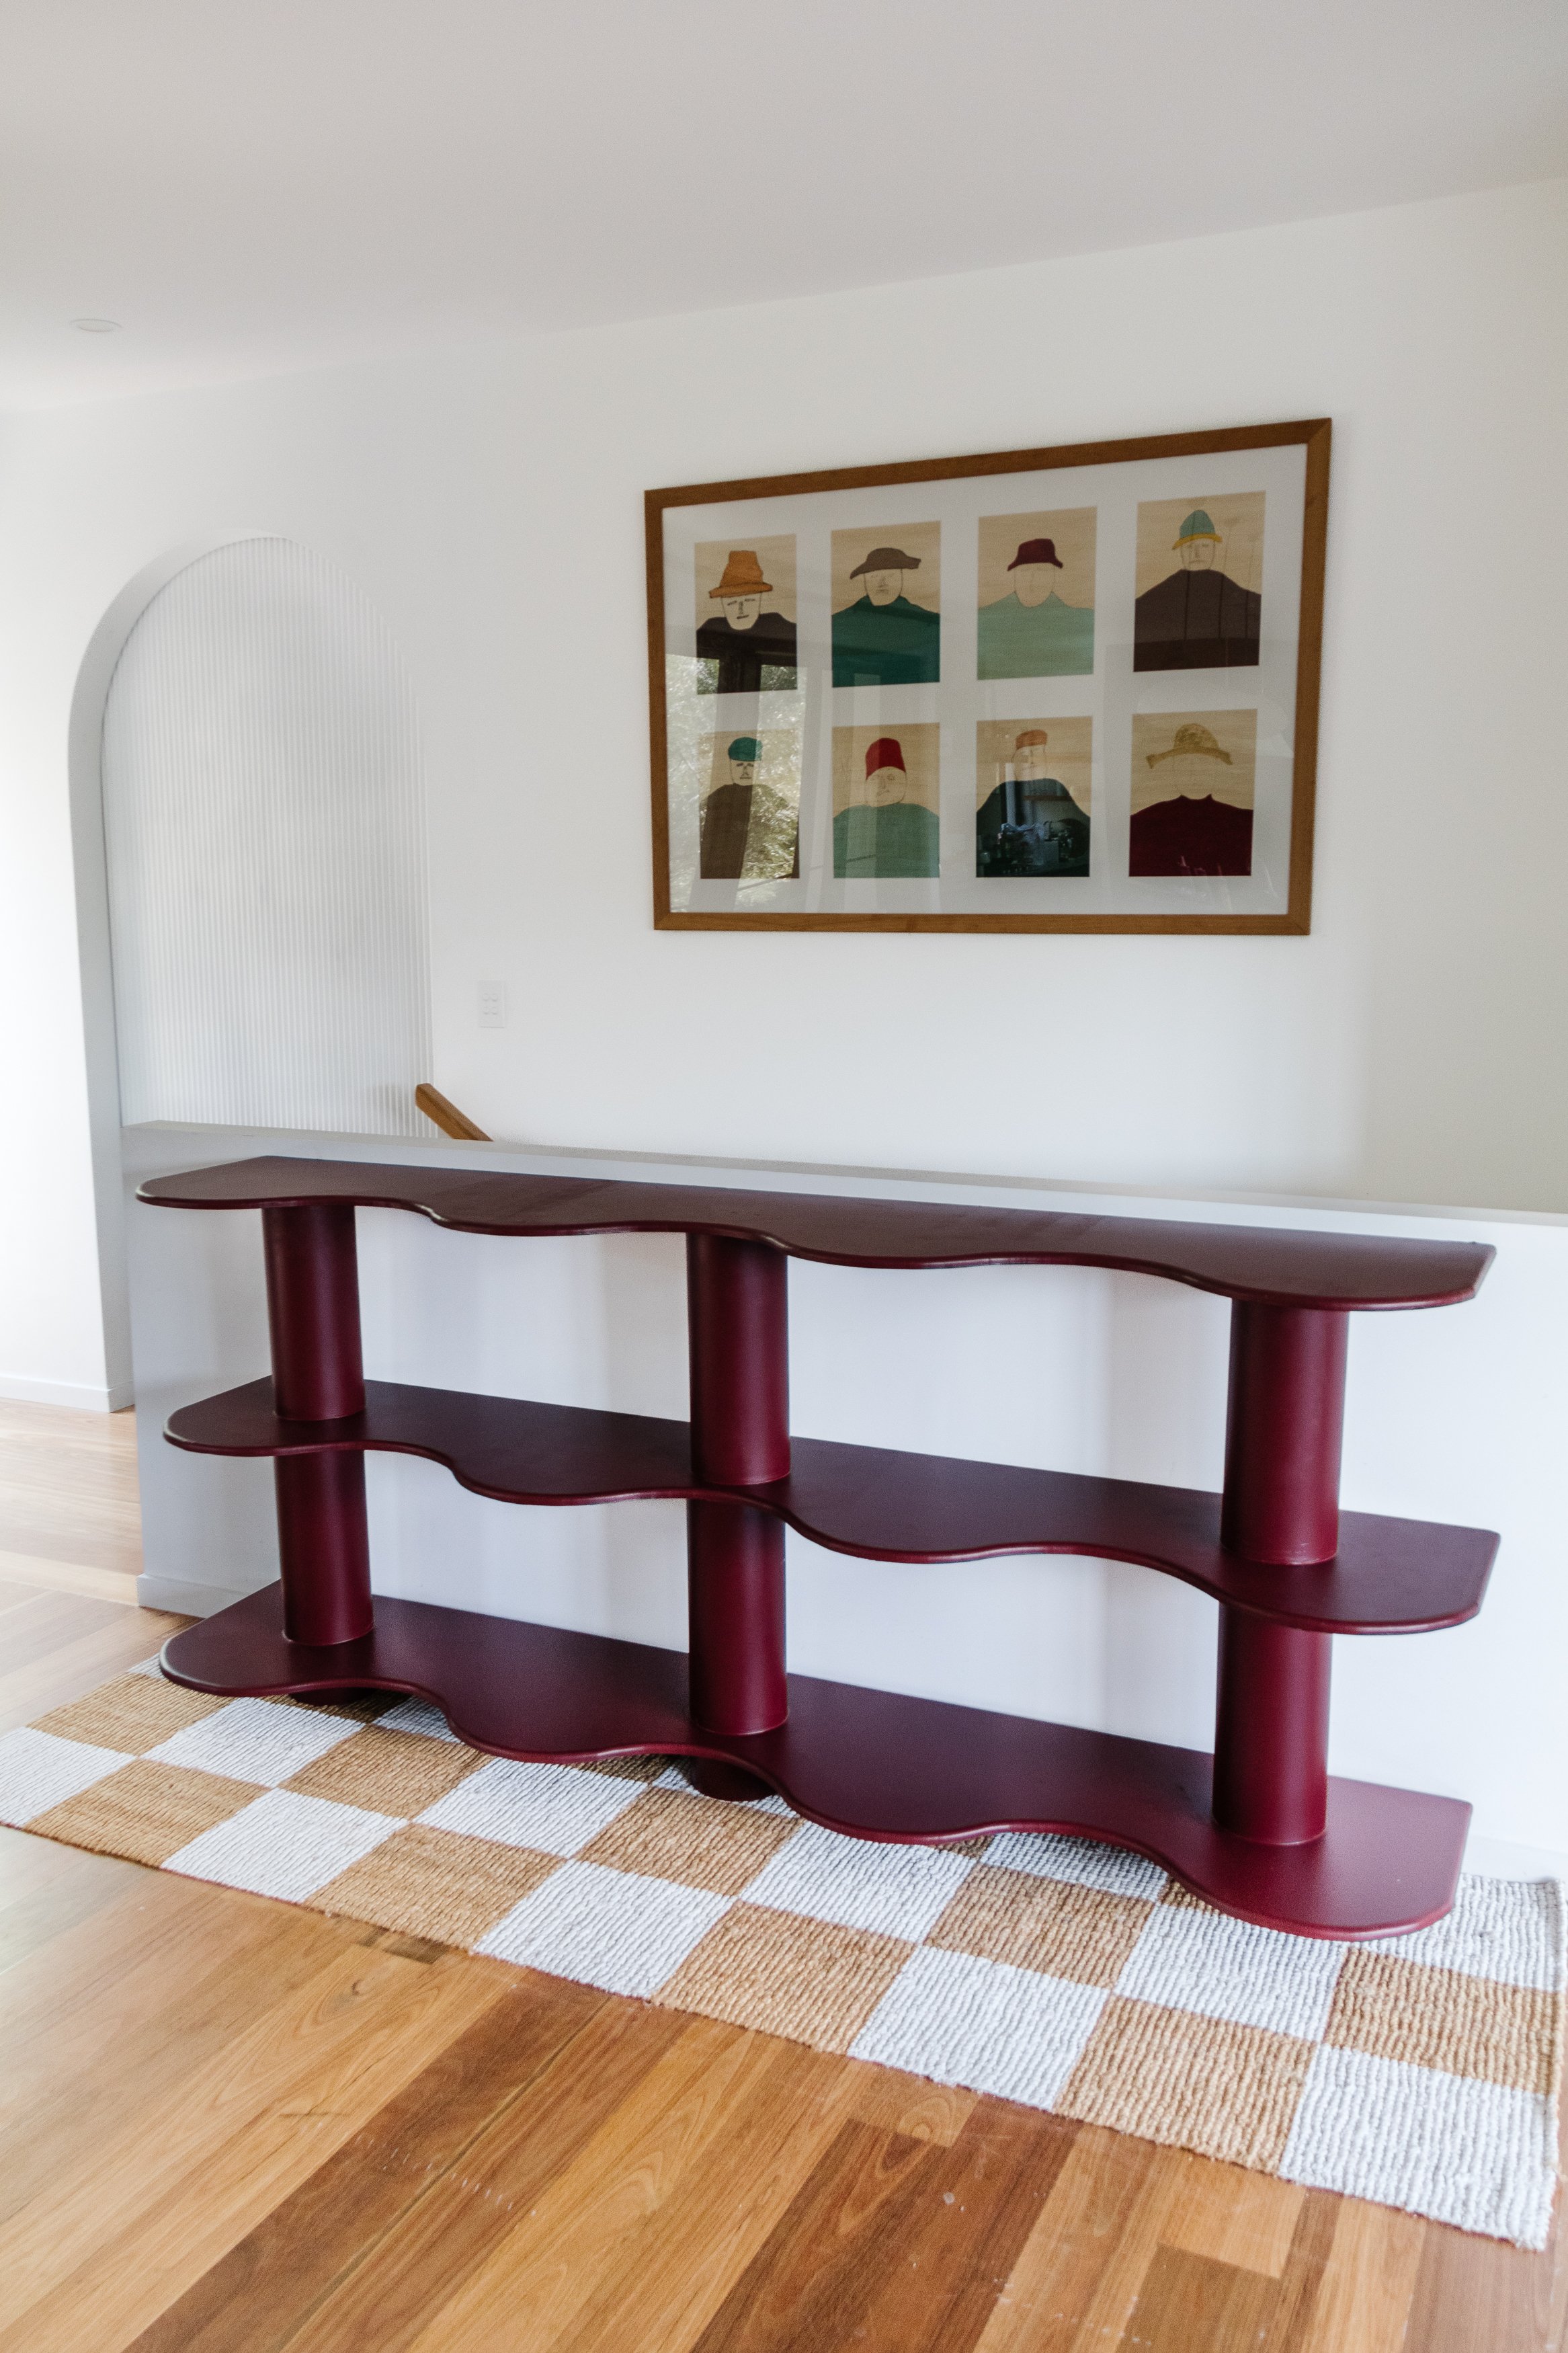
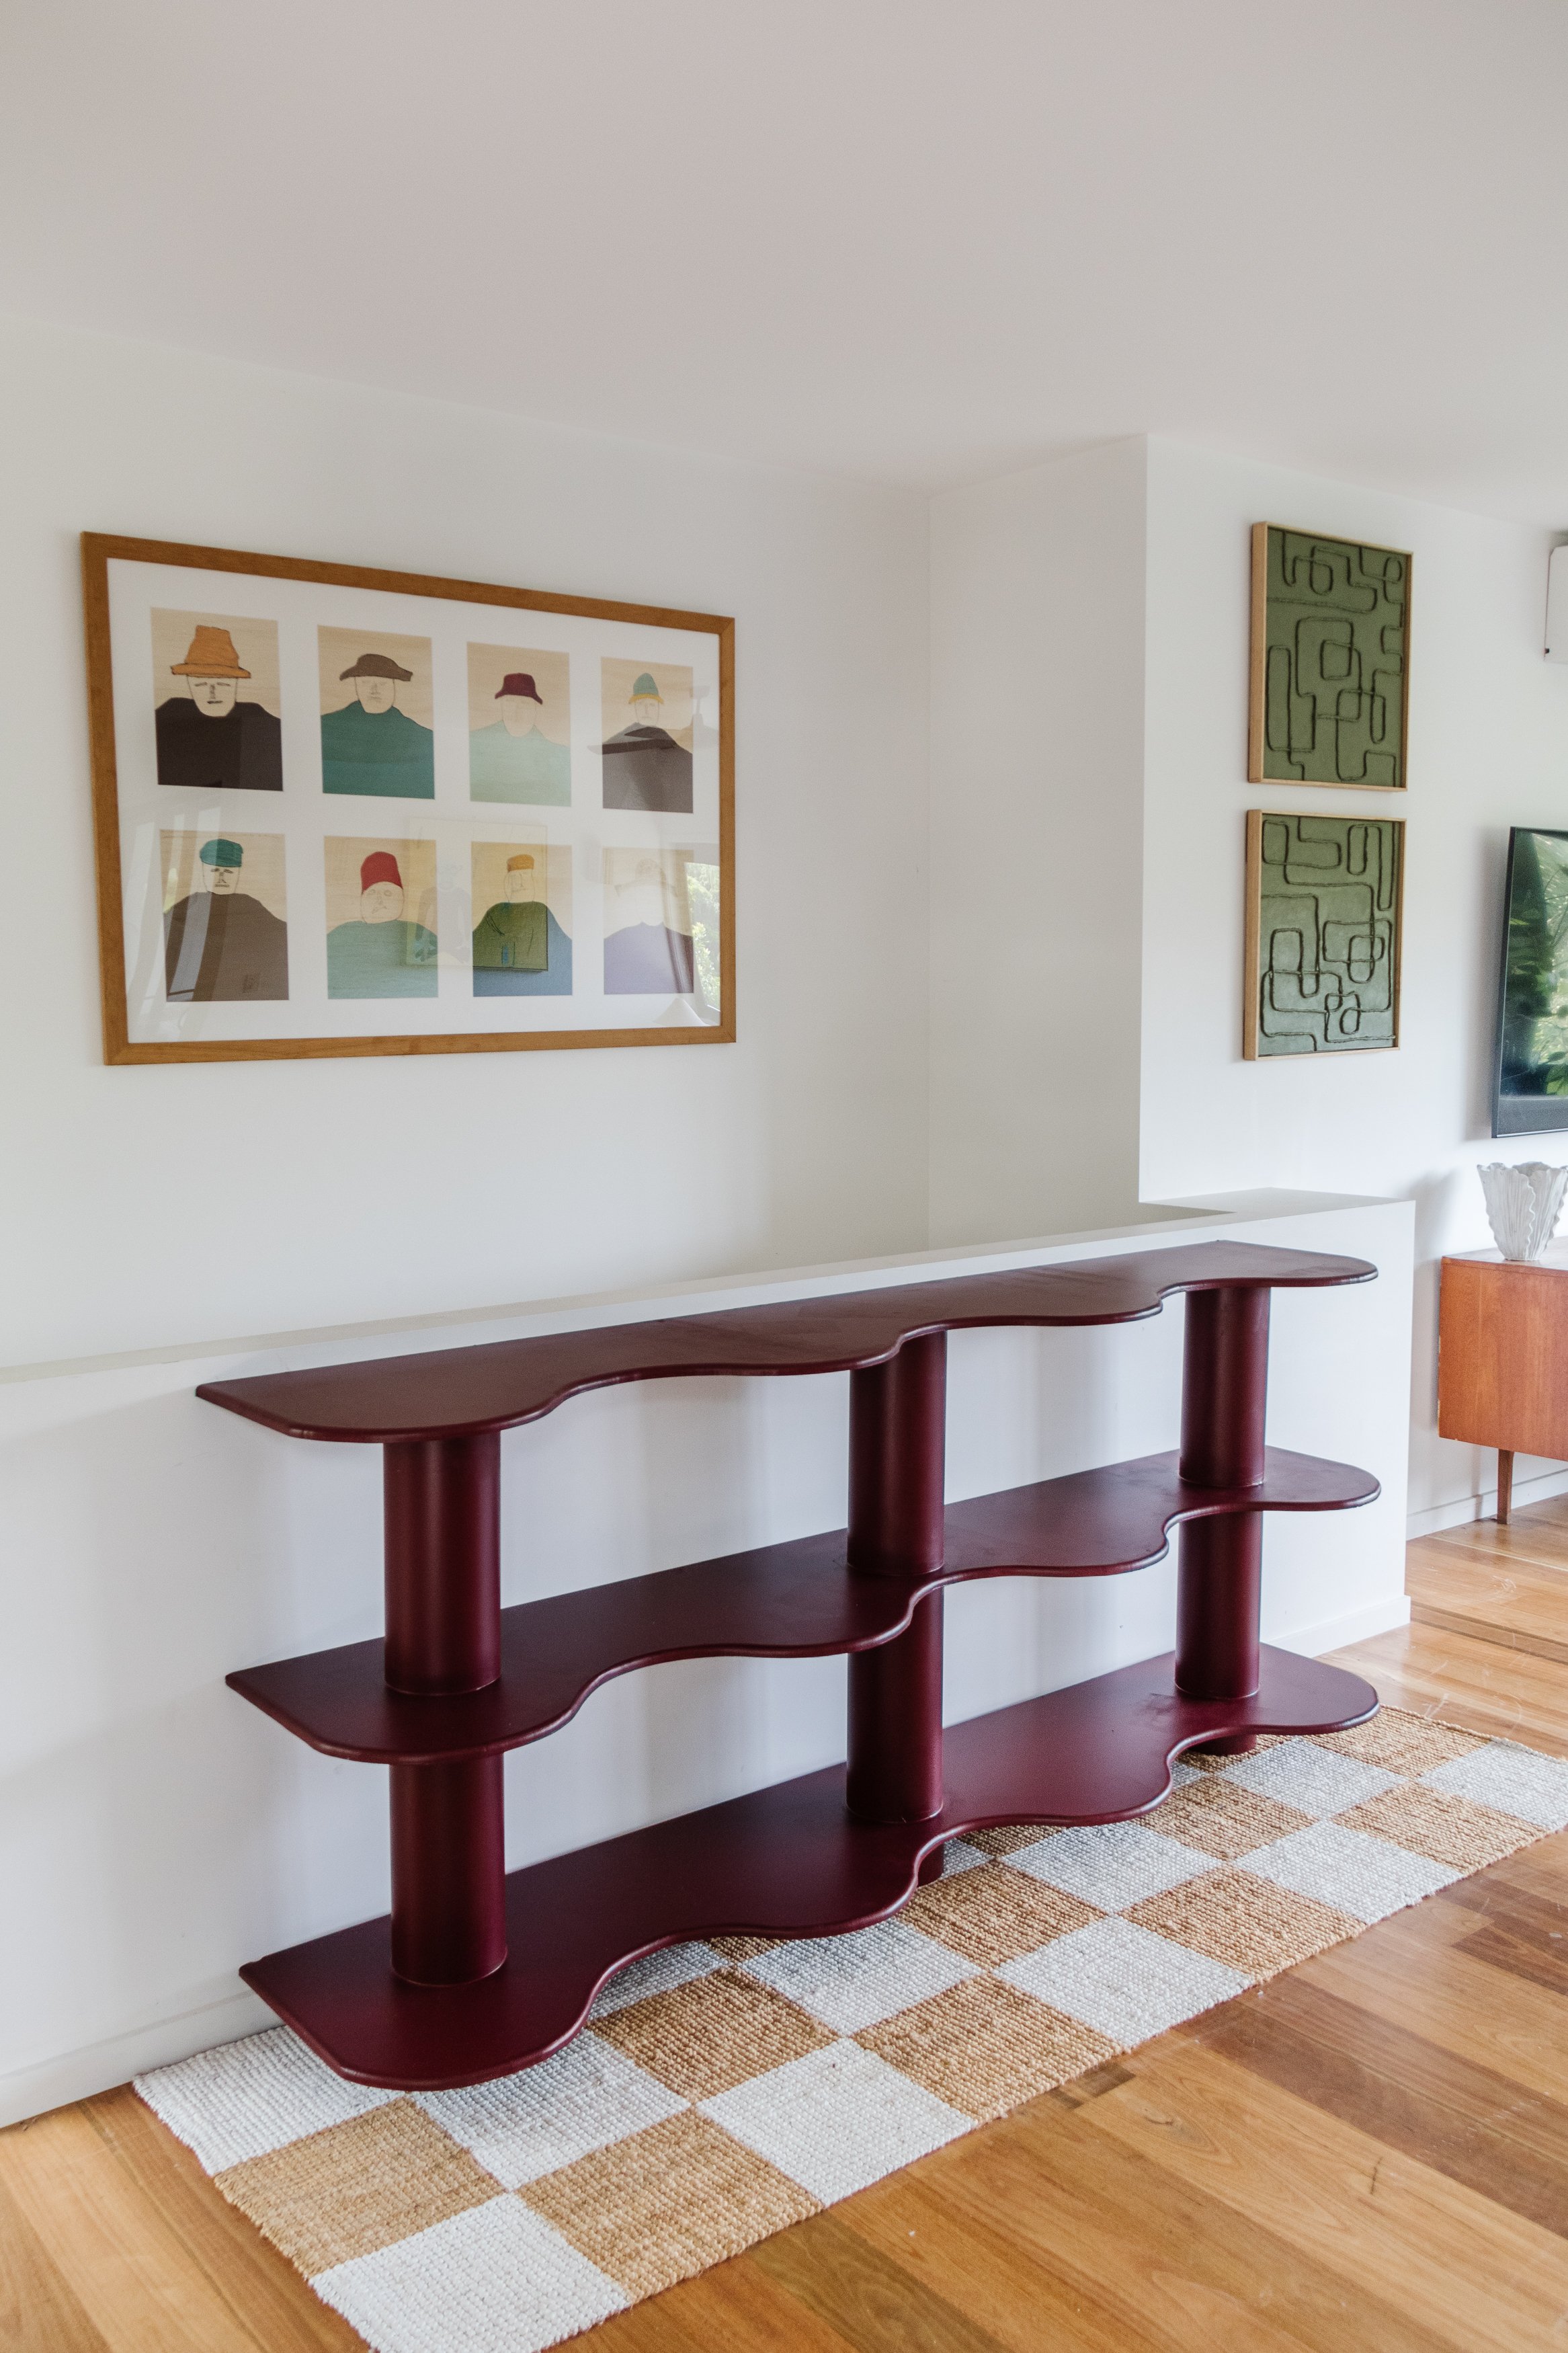
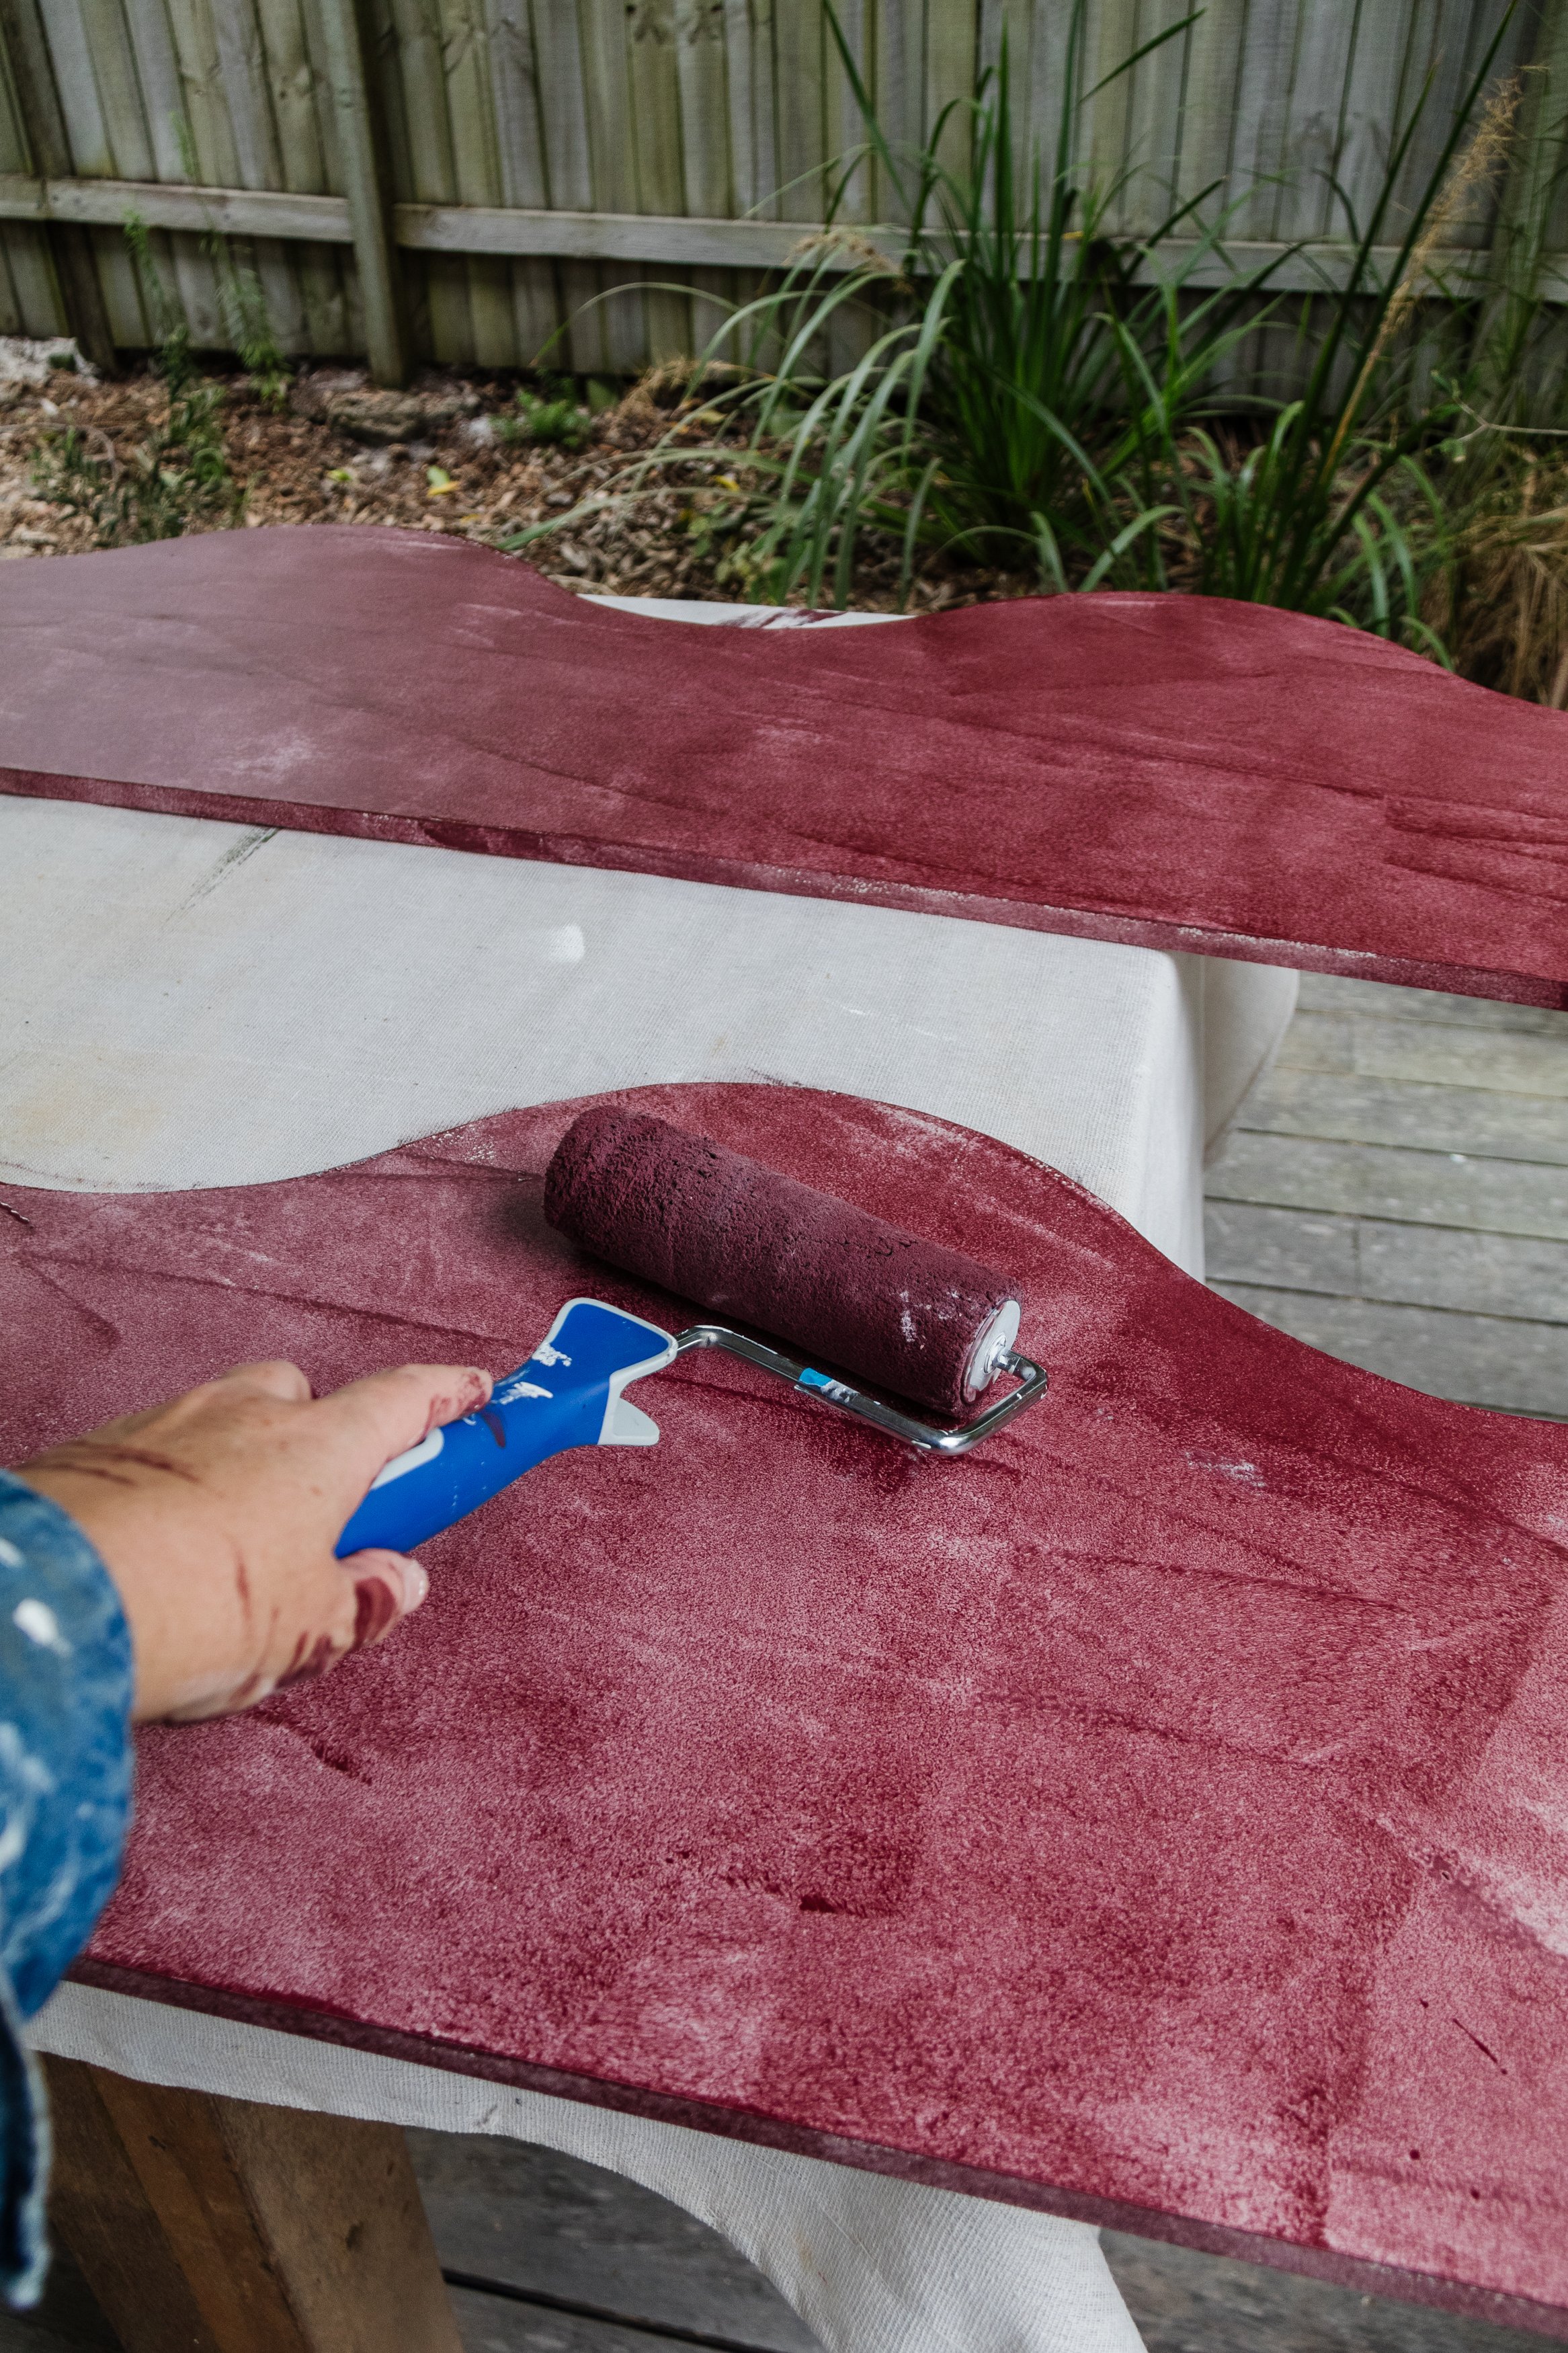
After recently discovering a beautiful paint colour called Indian Red and using it on a coffee table, I’ve been wanting to use it on a much larger, more daring project - DIY Wavy Shelves, which we’ll use as a library. I’ve always admired the power of paint; I love how paint can transform a space and how it makes you feel, so as you can imagine I was so excited to dive in and give it a go.
To see how it all came together, make sure to watch this video.
DIY Wavy Shelves

Project Details
♻️ Making: DIY Wavy Shelves
🕒 Project Time Estimate: One day
💰 Materials Cost: $350
Materials
3 x 2400 x 450mm 16mm MDF panel (you can use thicker MDF or timber if you’d like)
Felt tip pen and round chopping board or plate
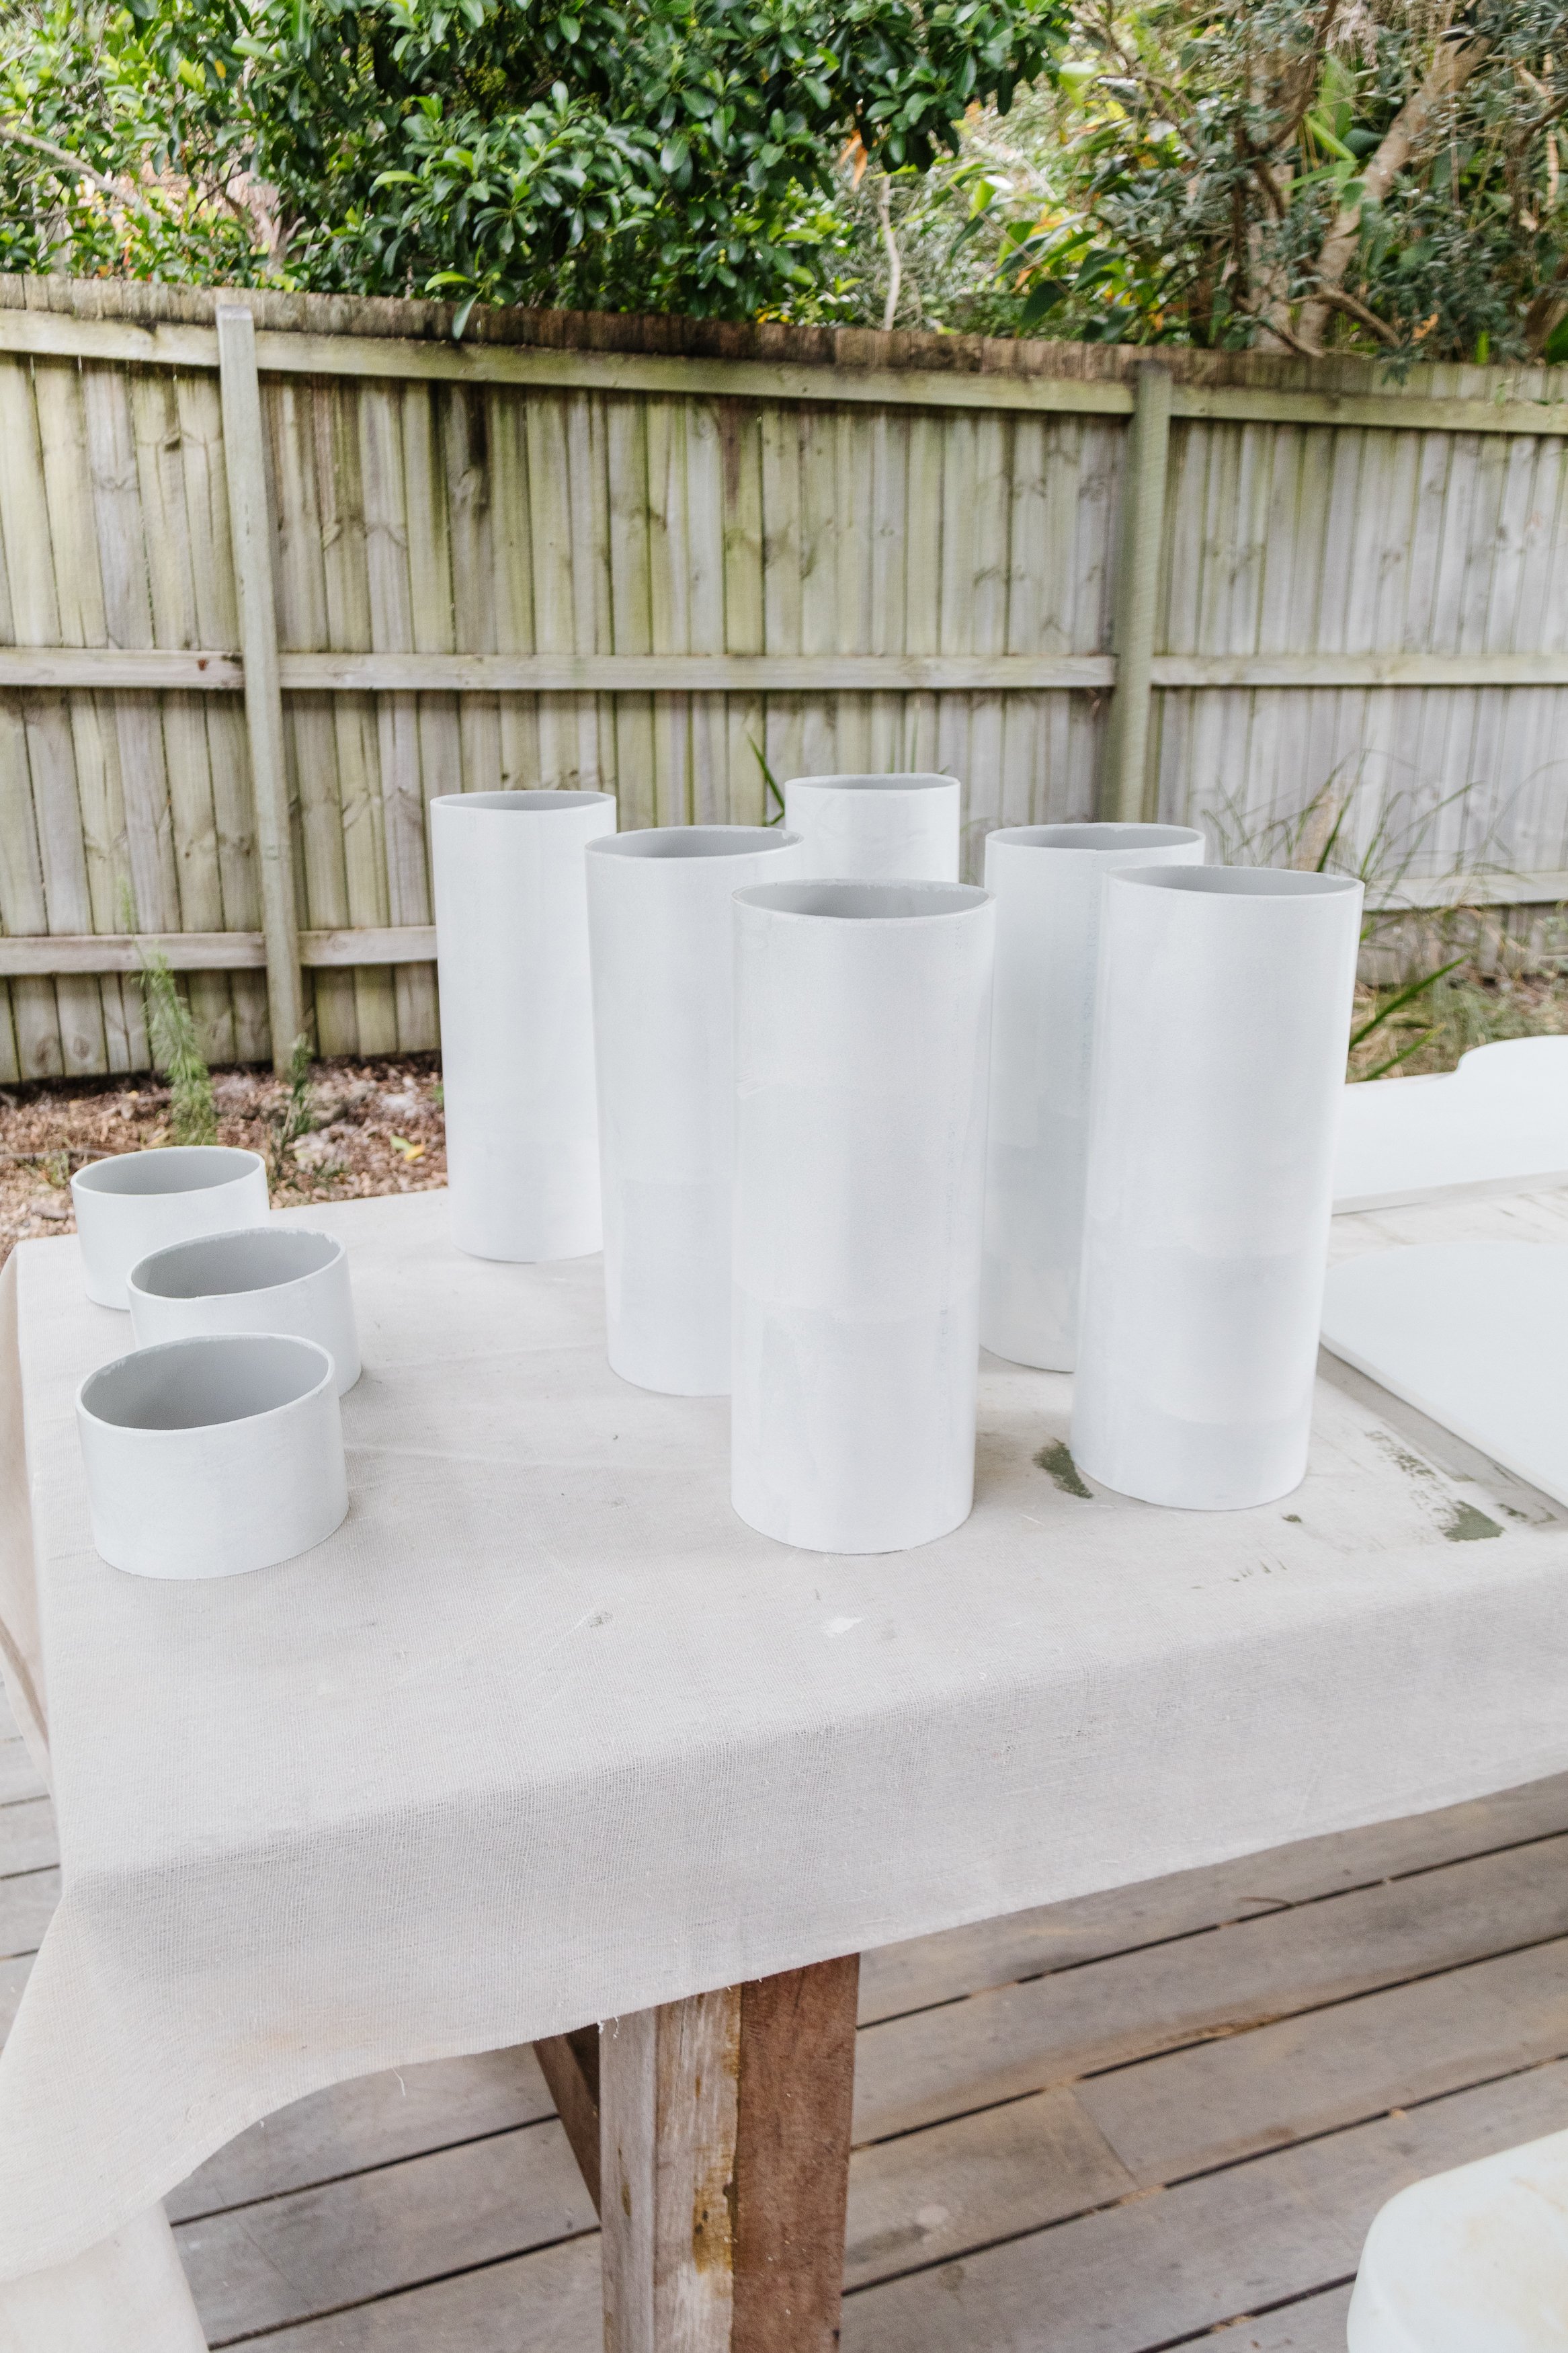
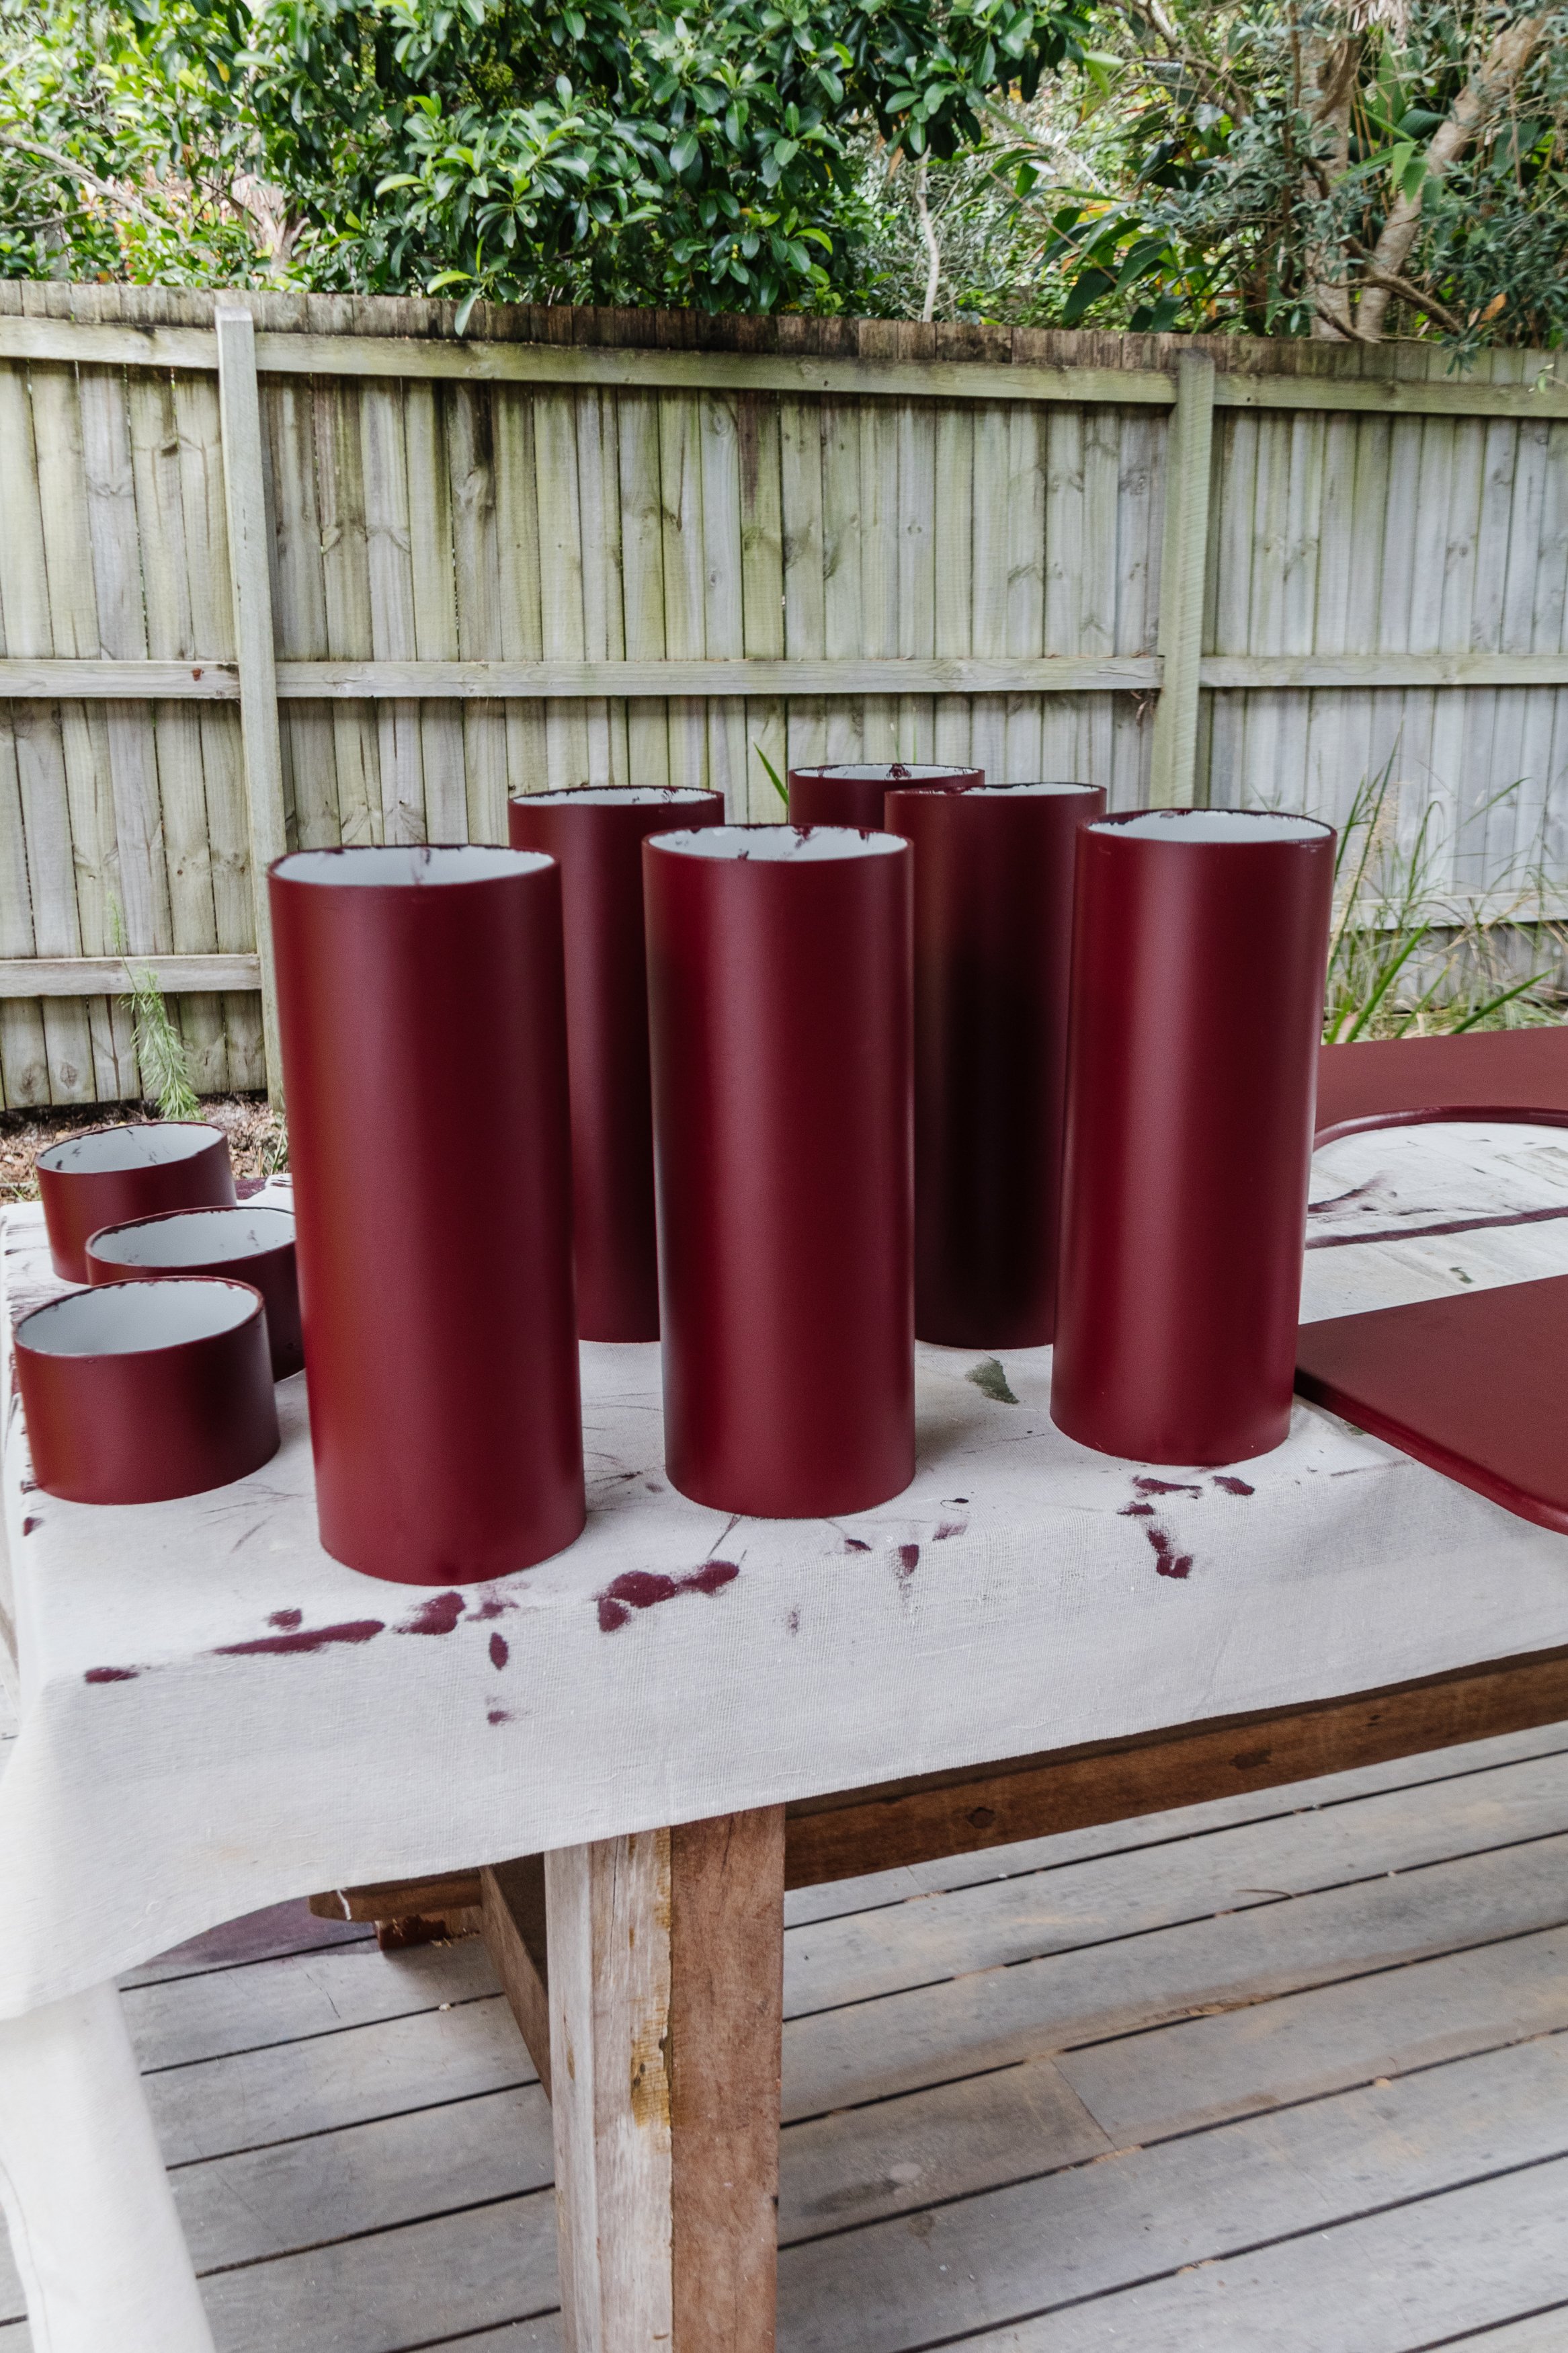
3 x 150mm x 1m PVC pipe each cut into 3 pieces at 400mm, 400mm and 100mm (100mm leftover)
Tools
Jigsaw
Router and bit
Detail sander
Tip: Some Bunnings Warehouse stores can handsaw PVC pipes for you

How To
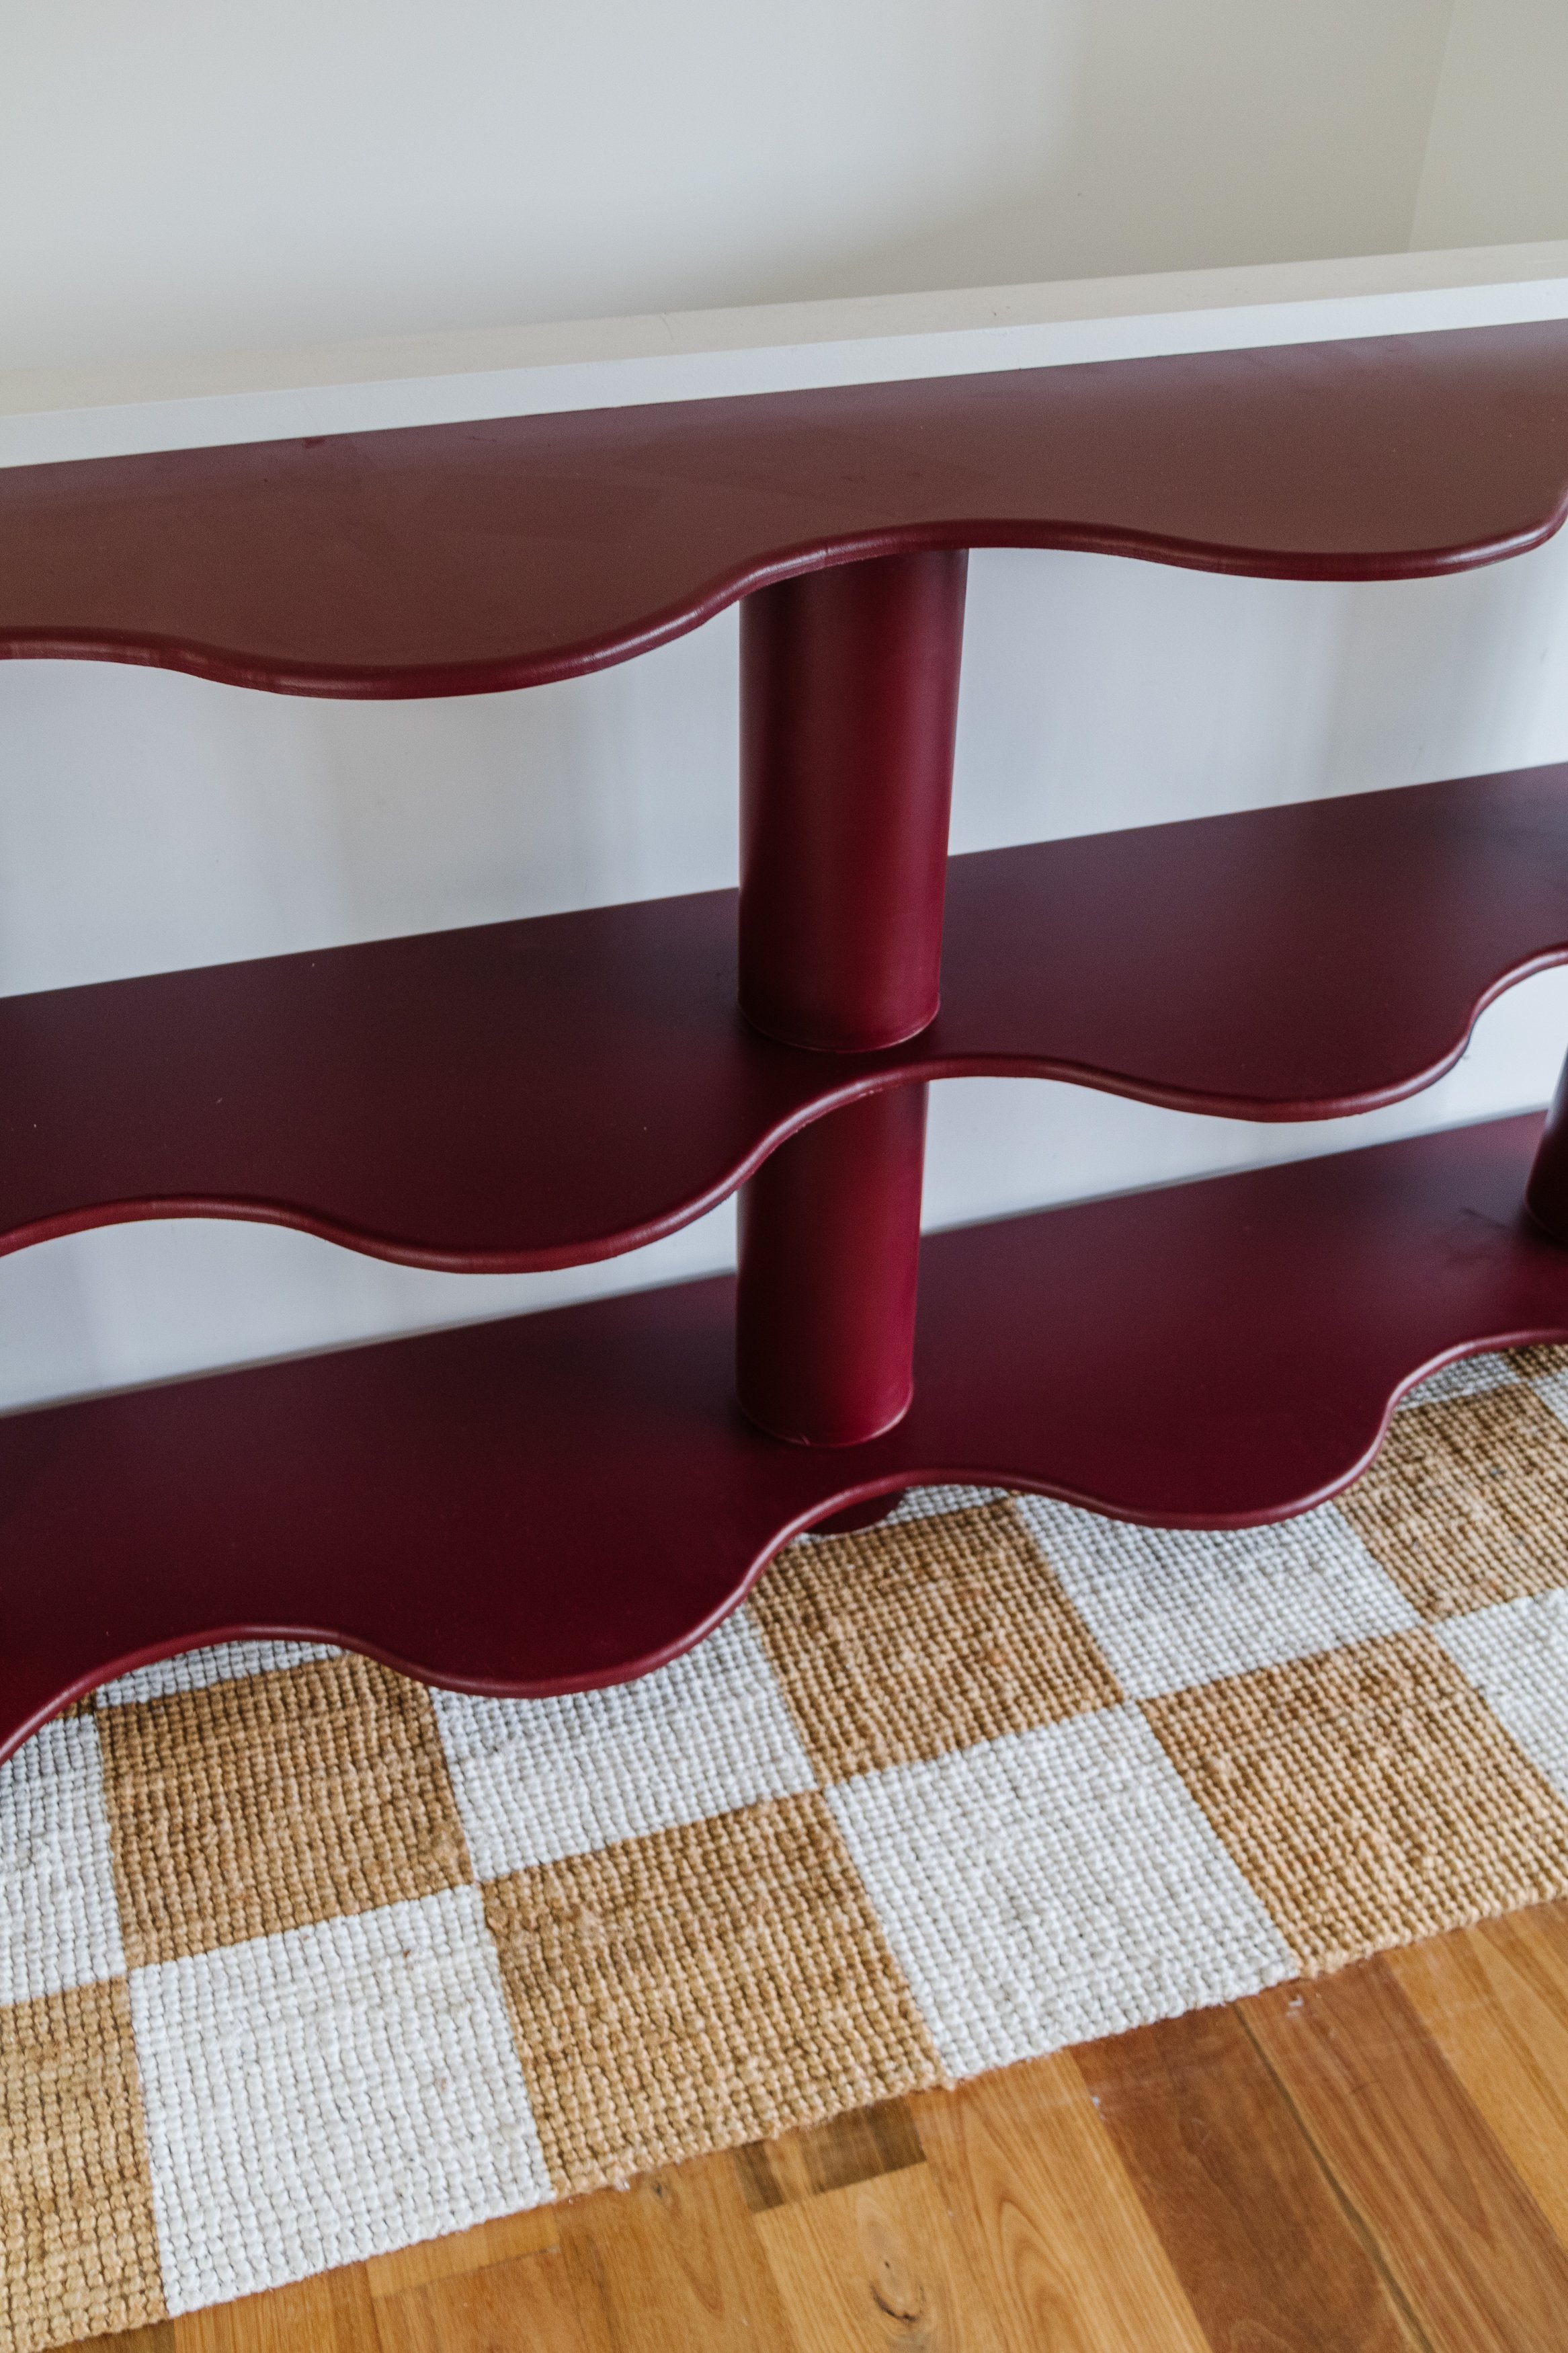
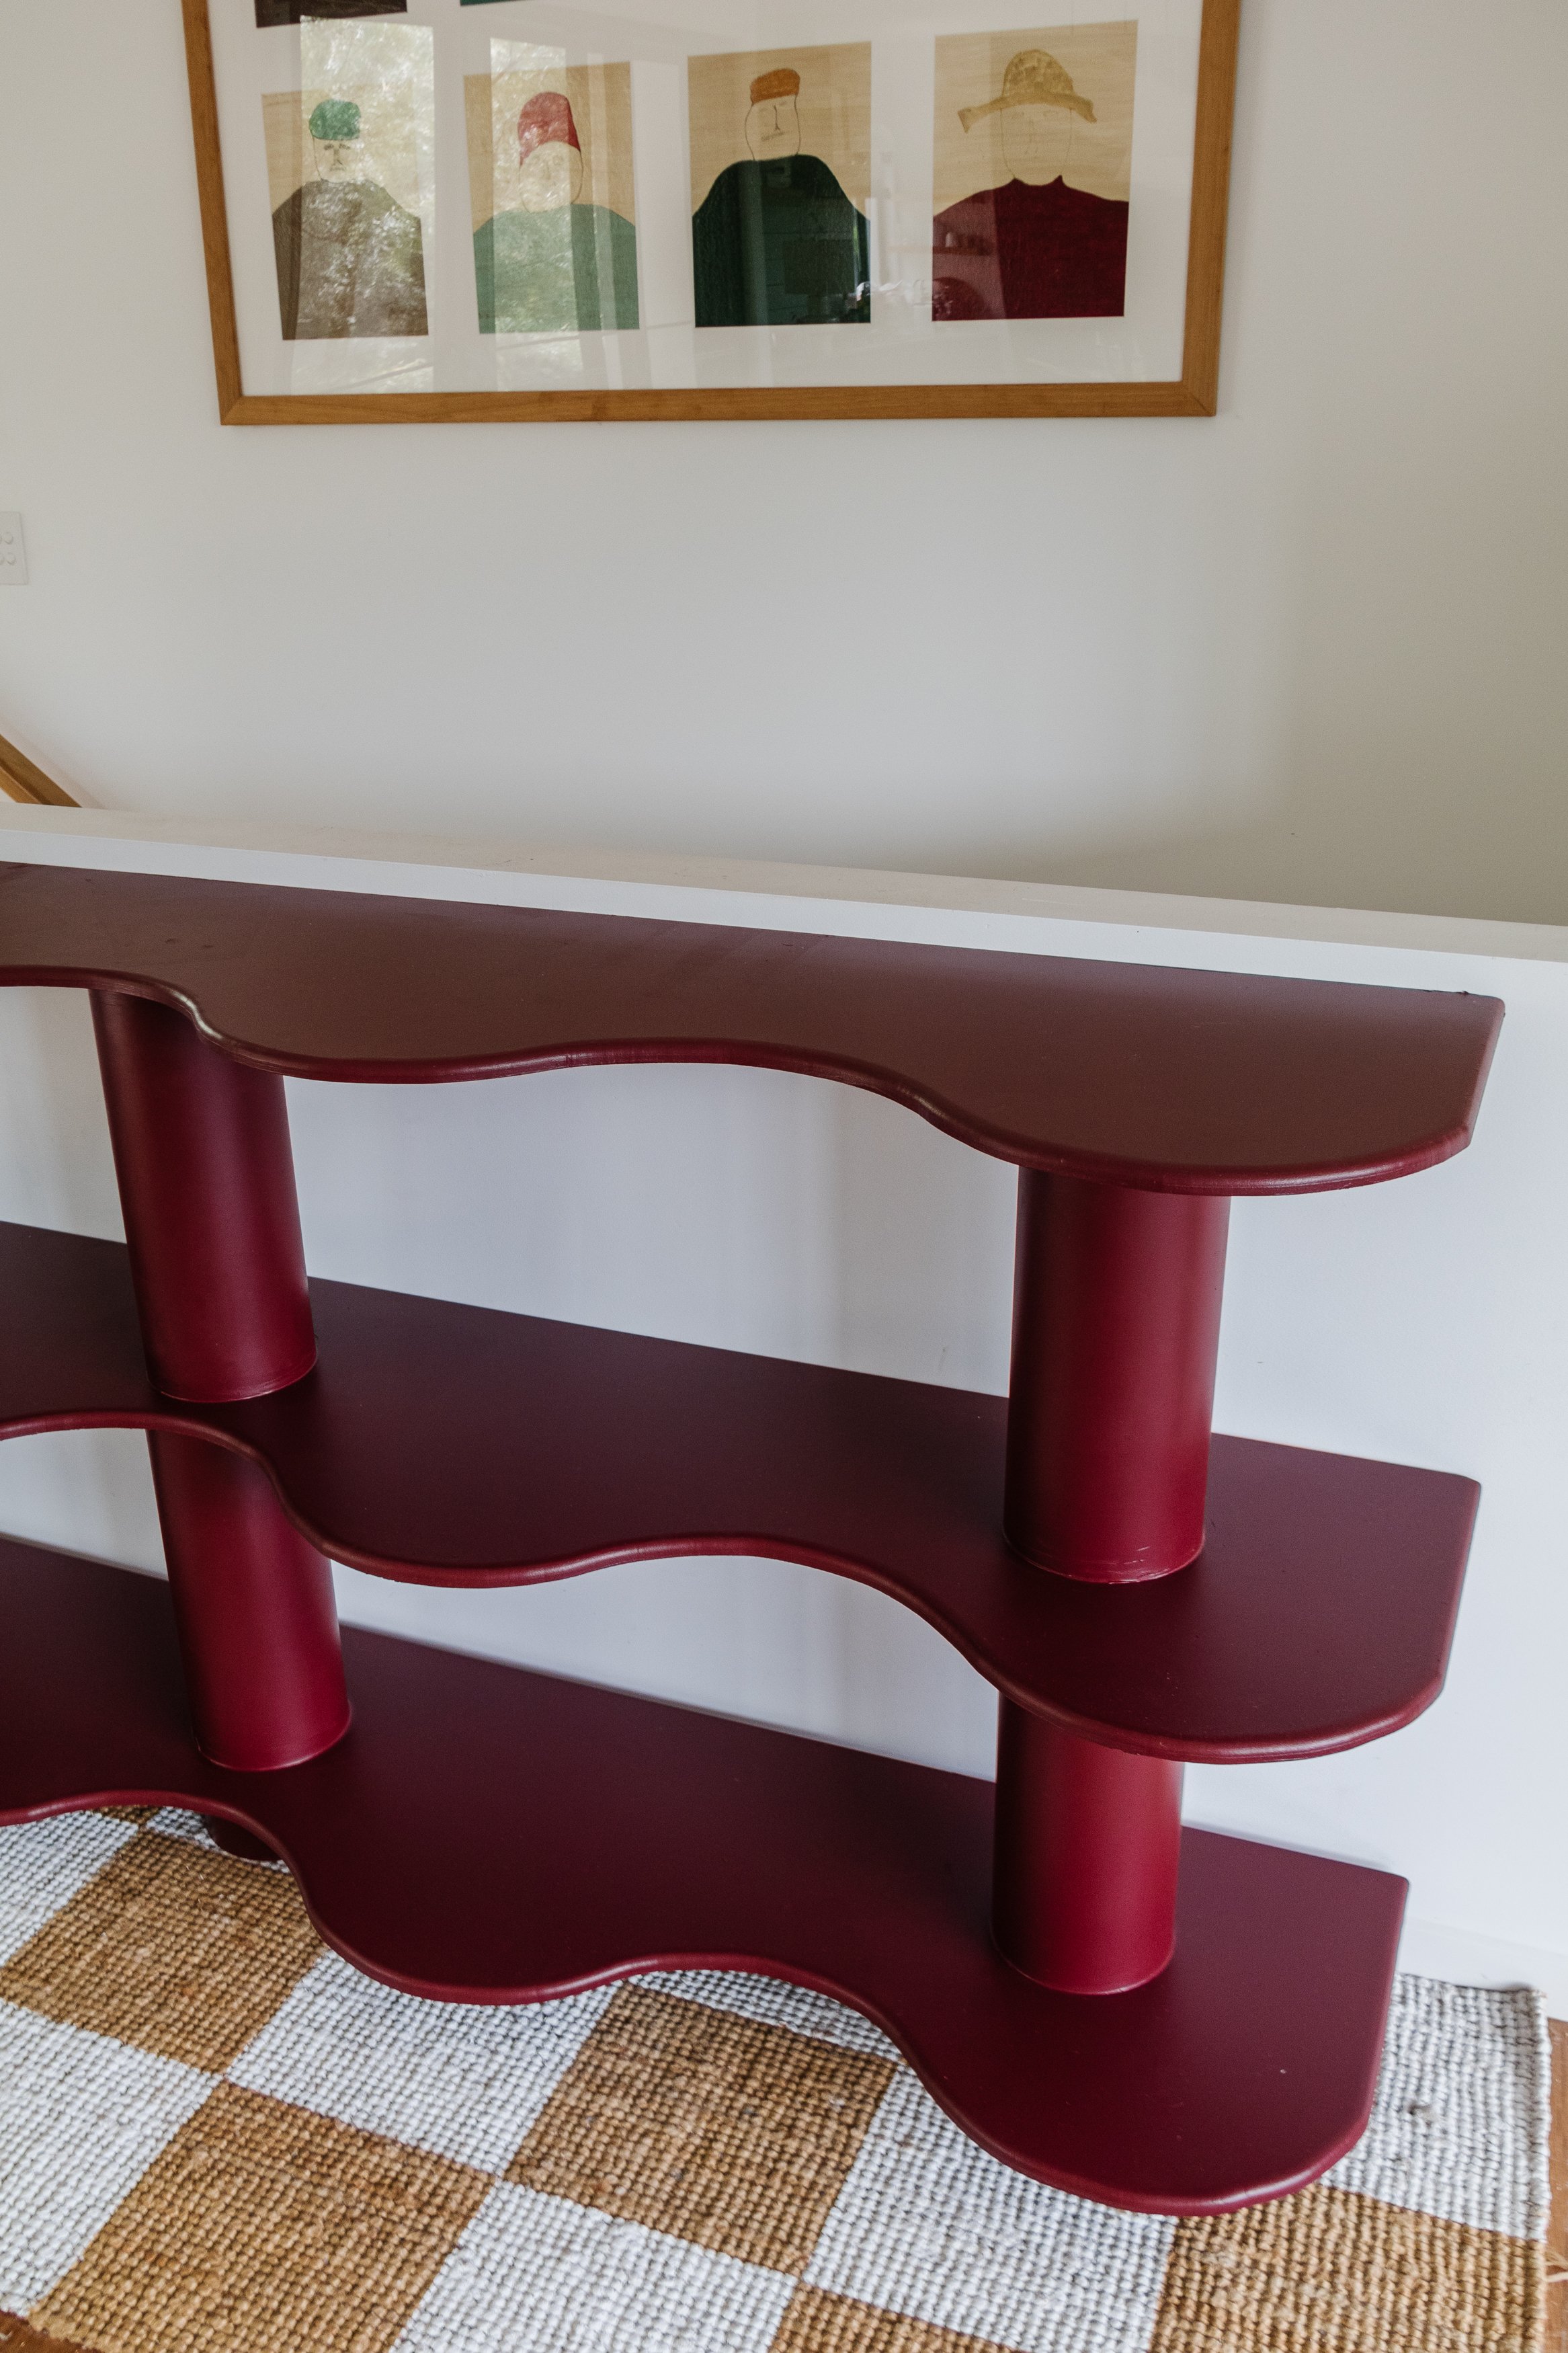
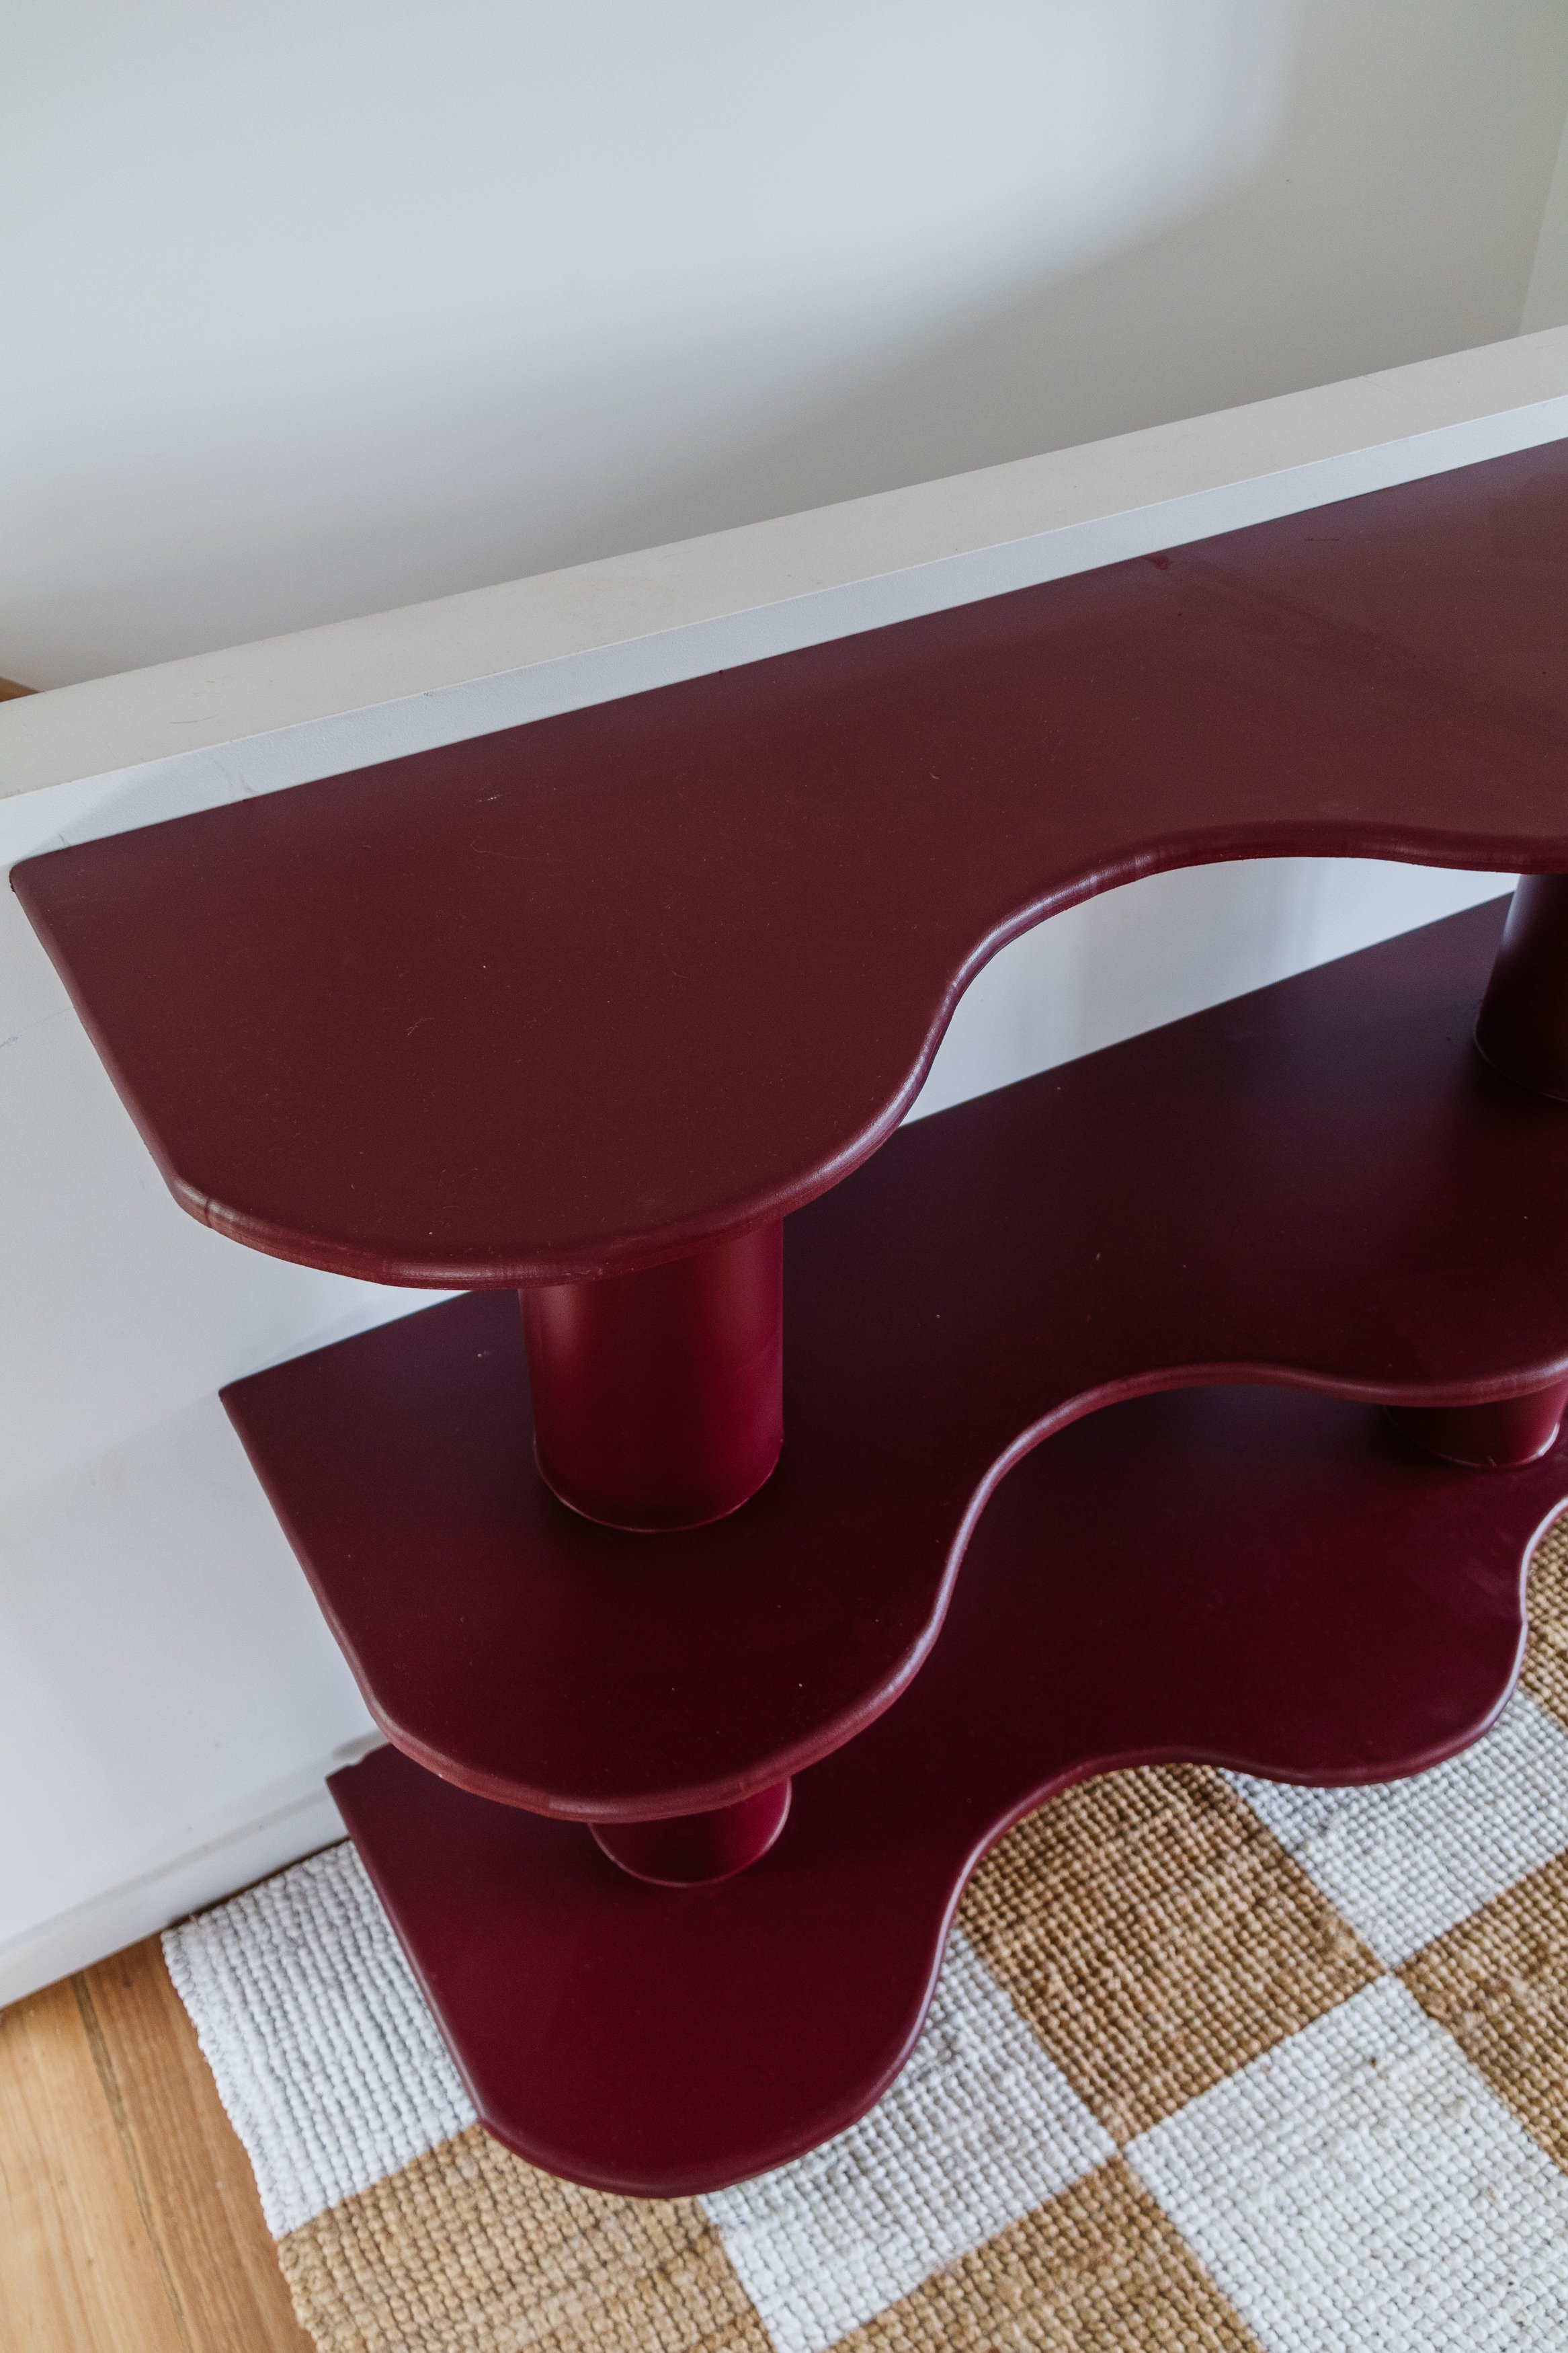
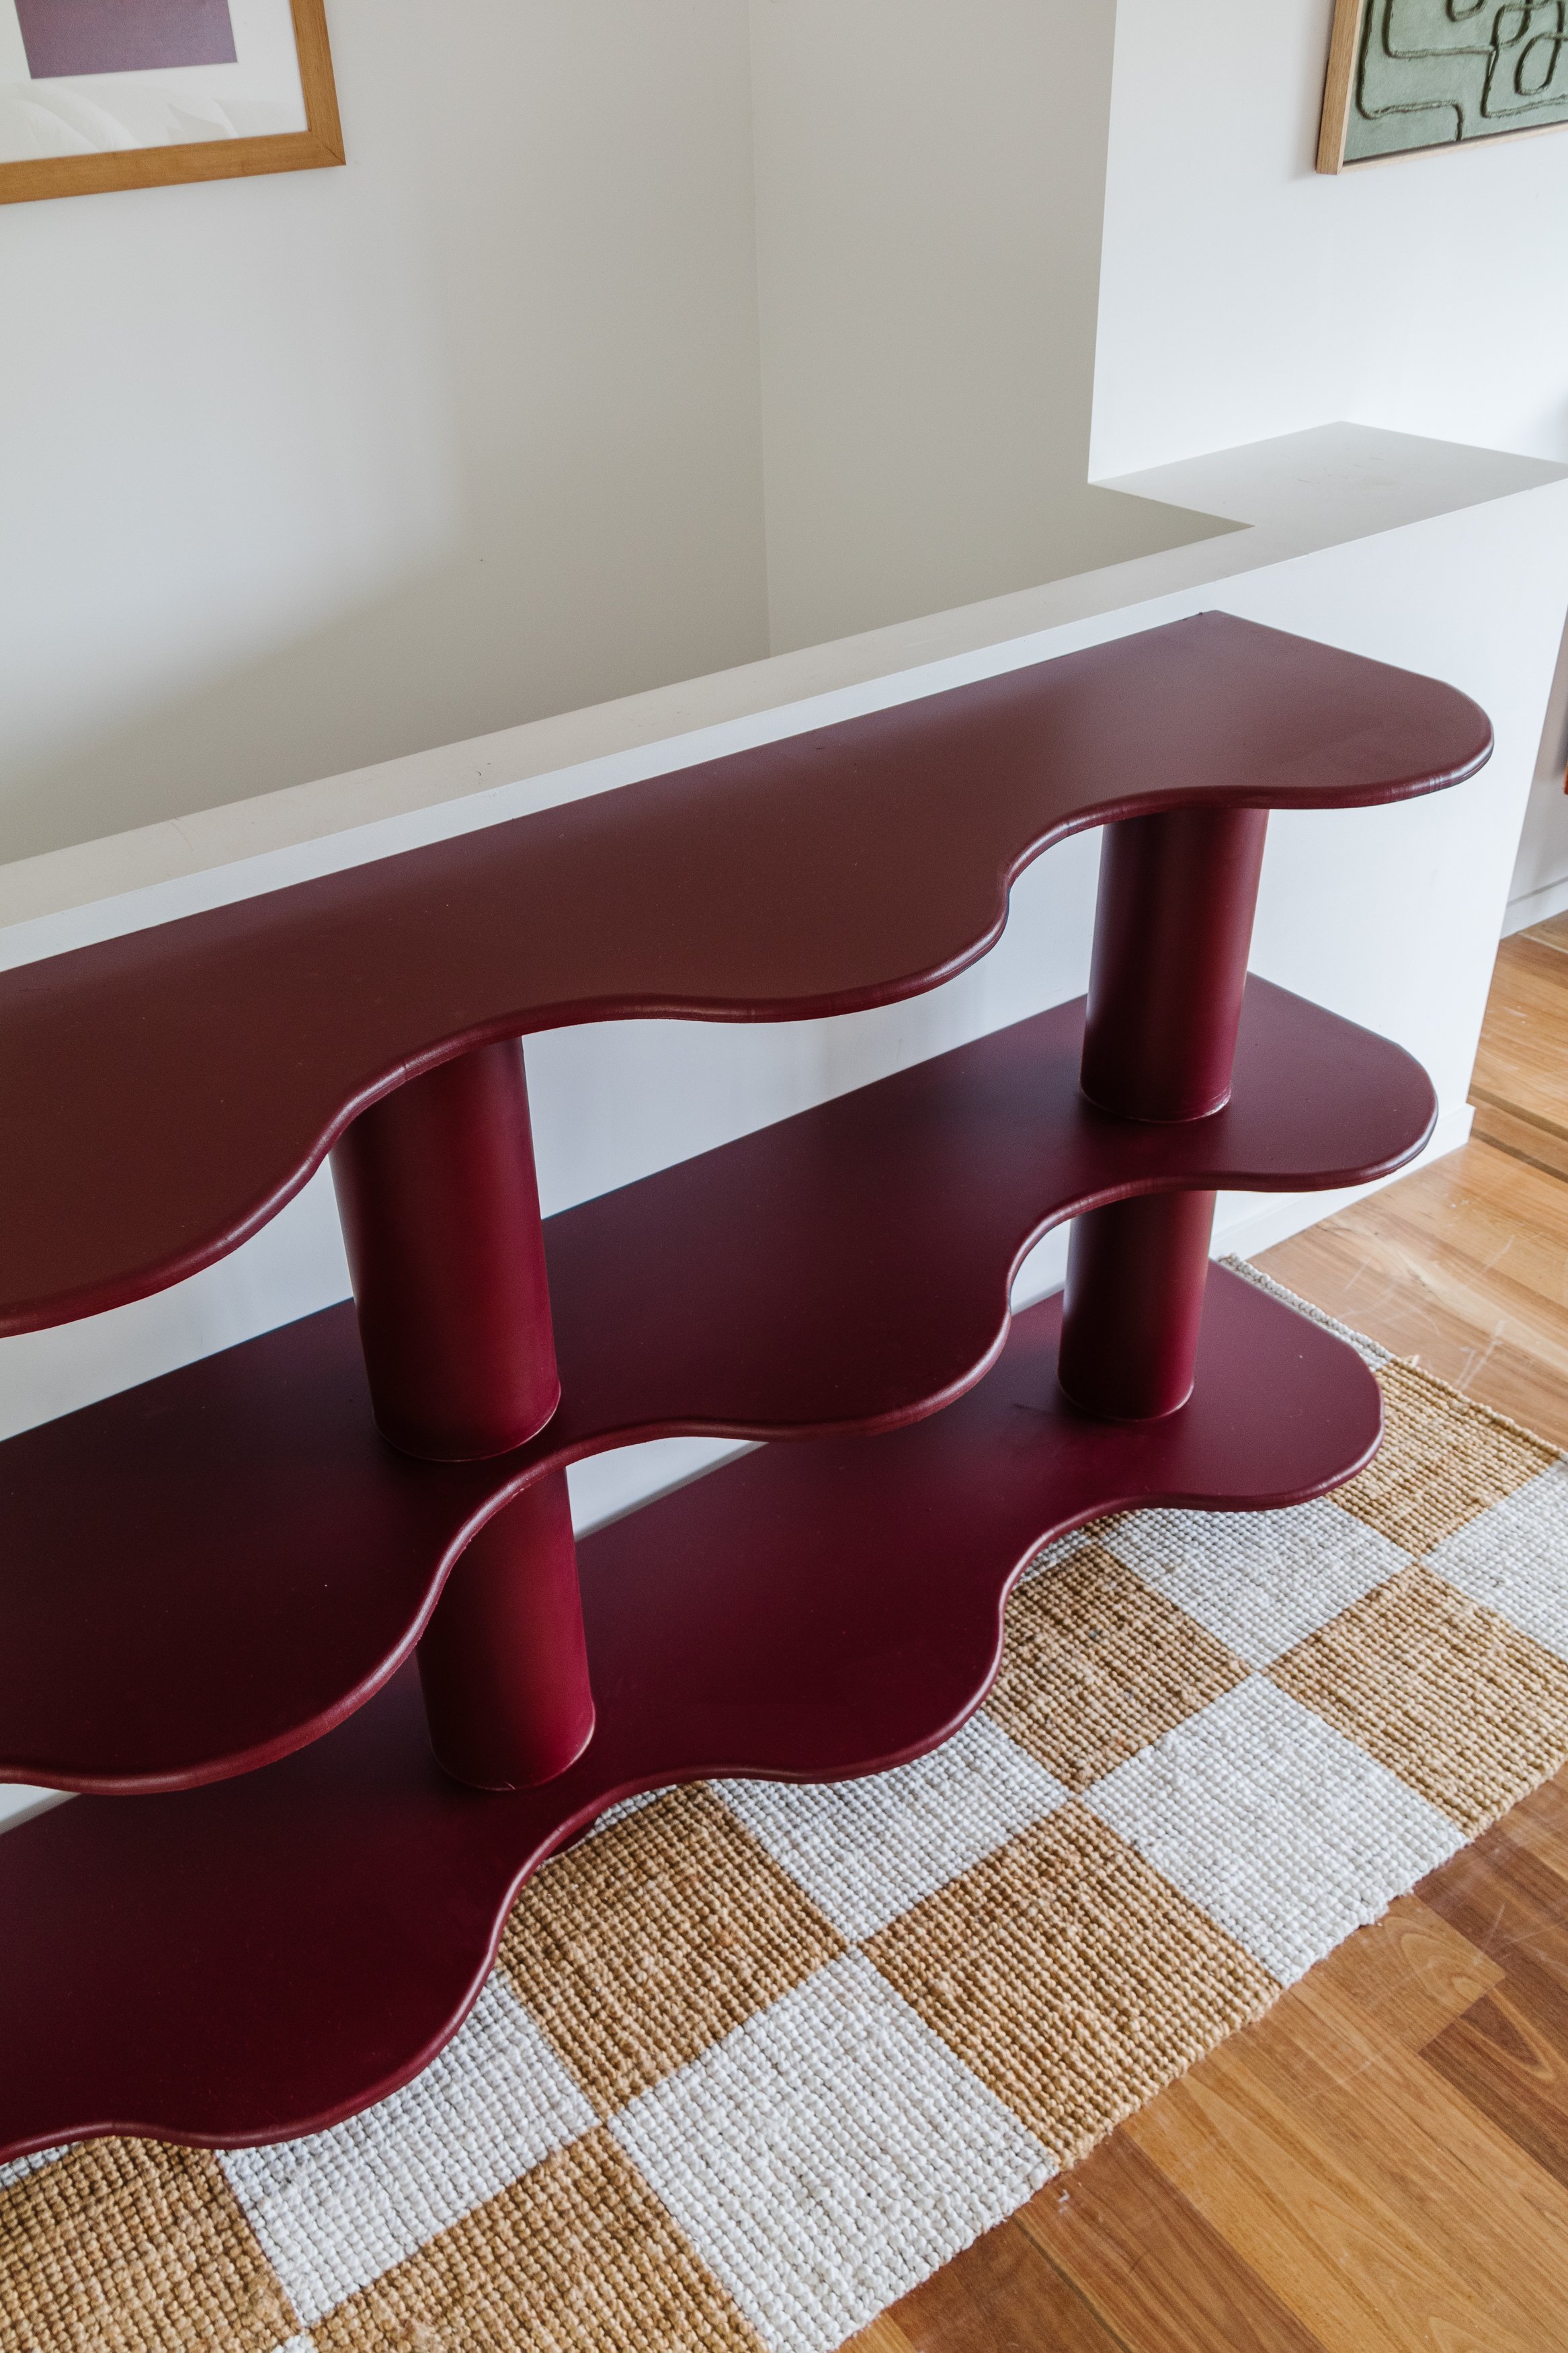
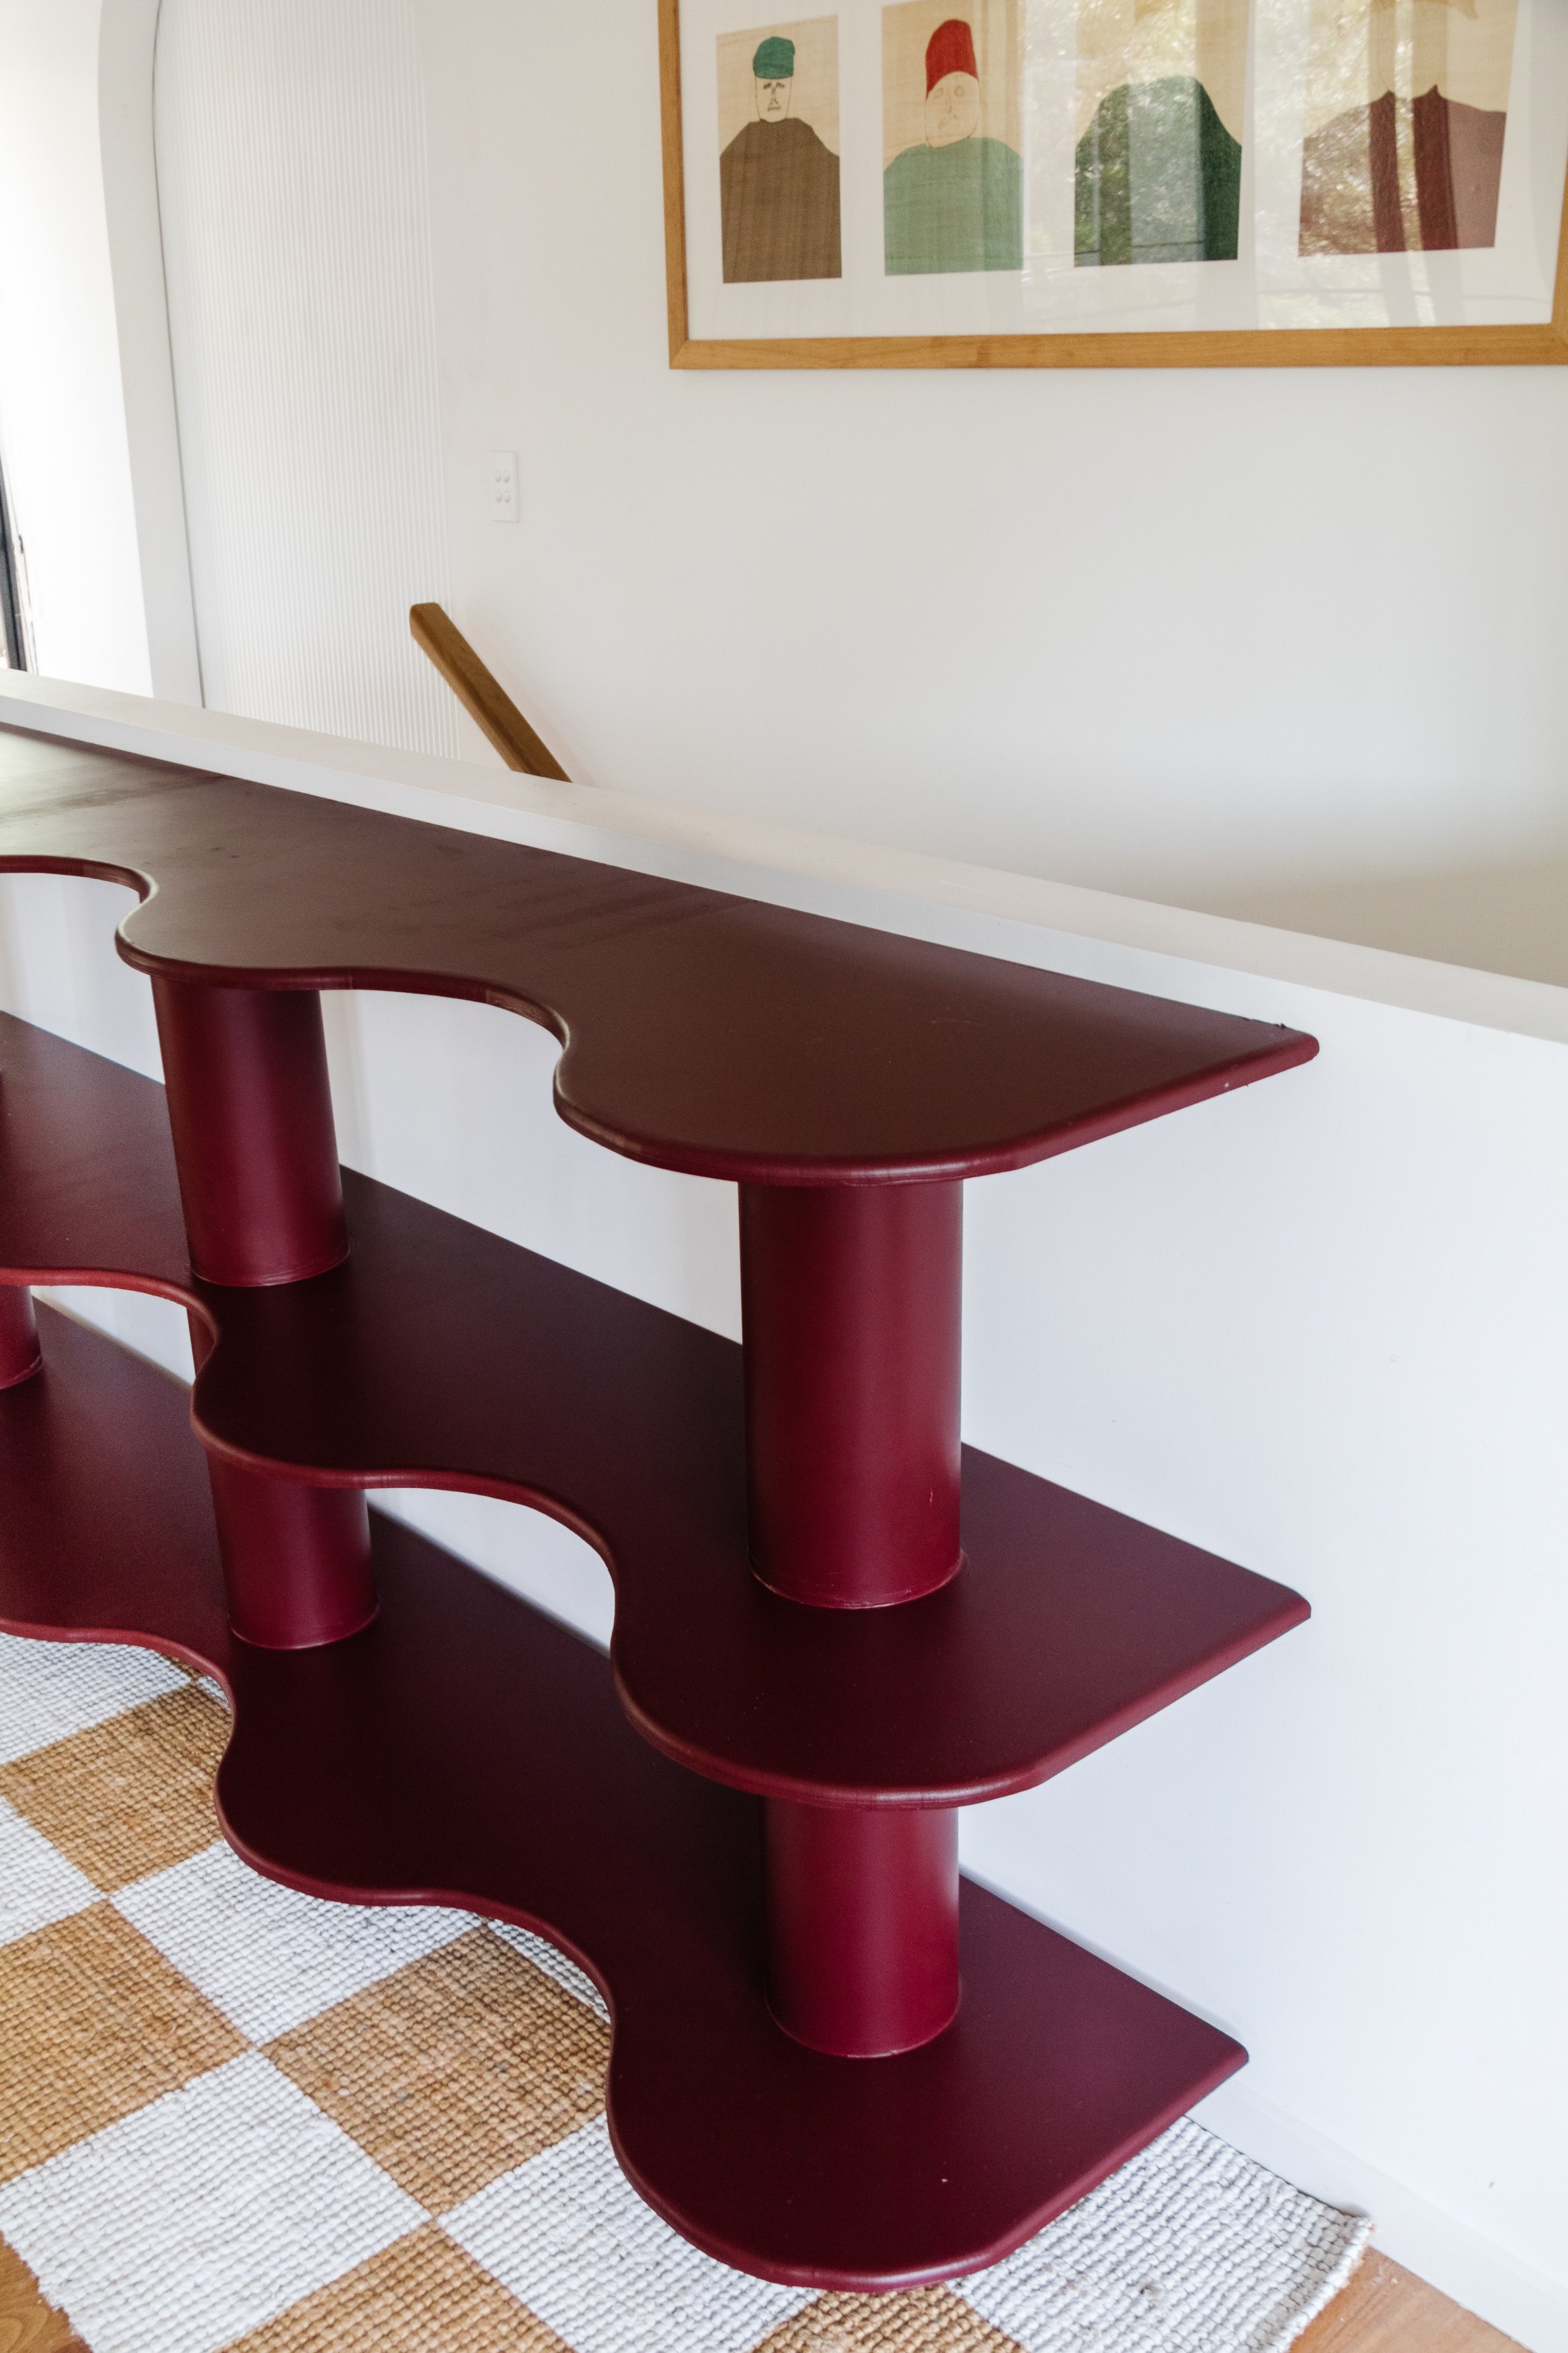
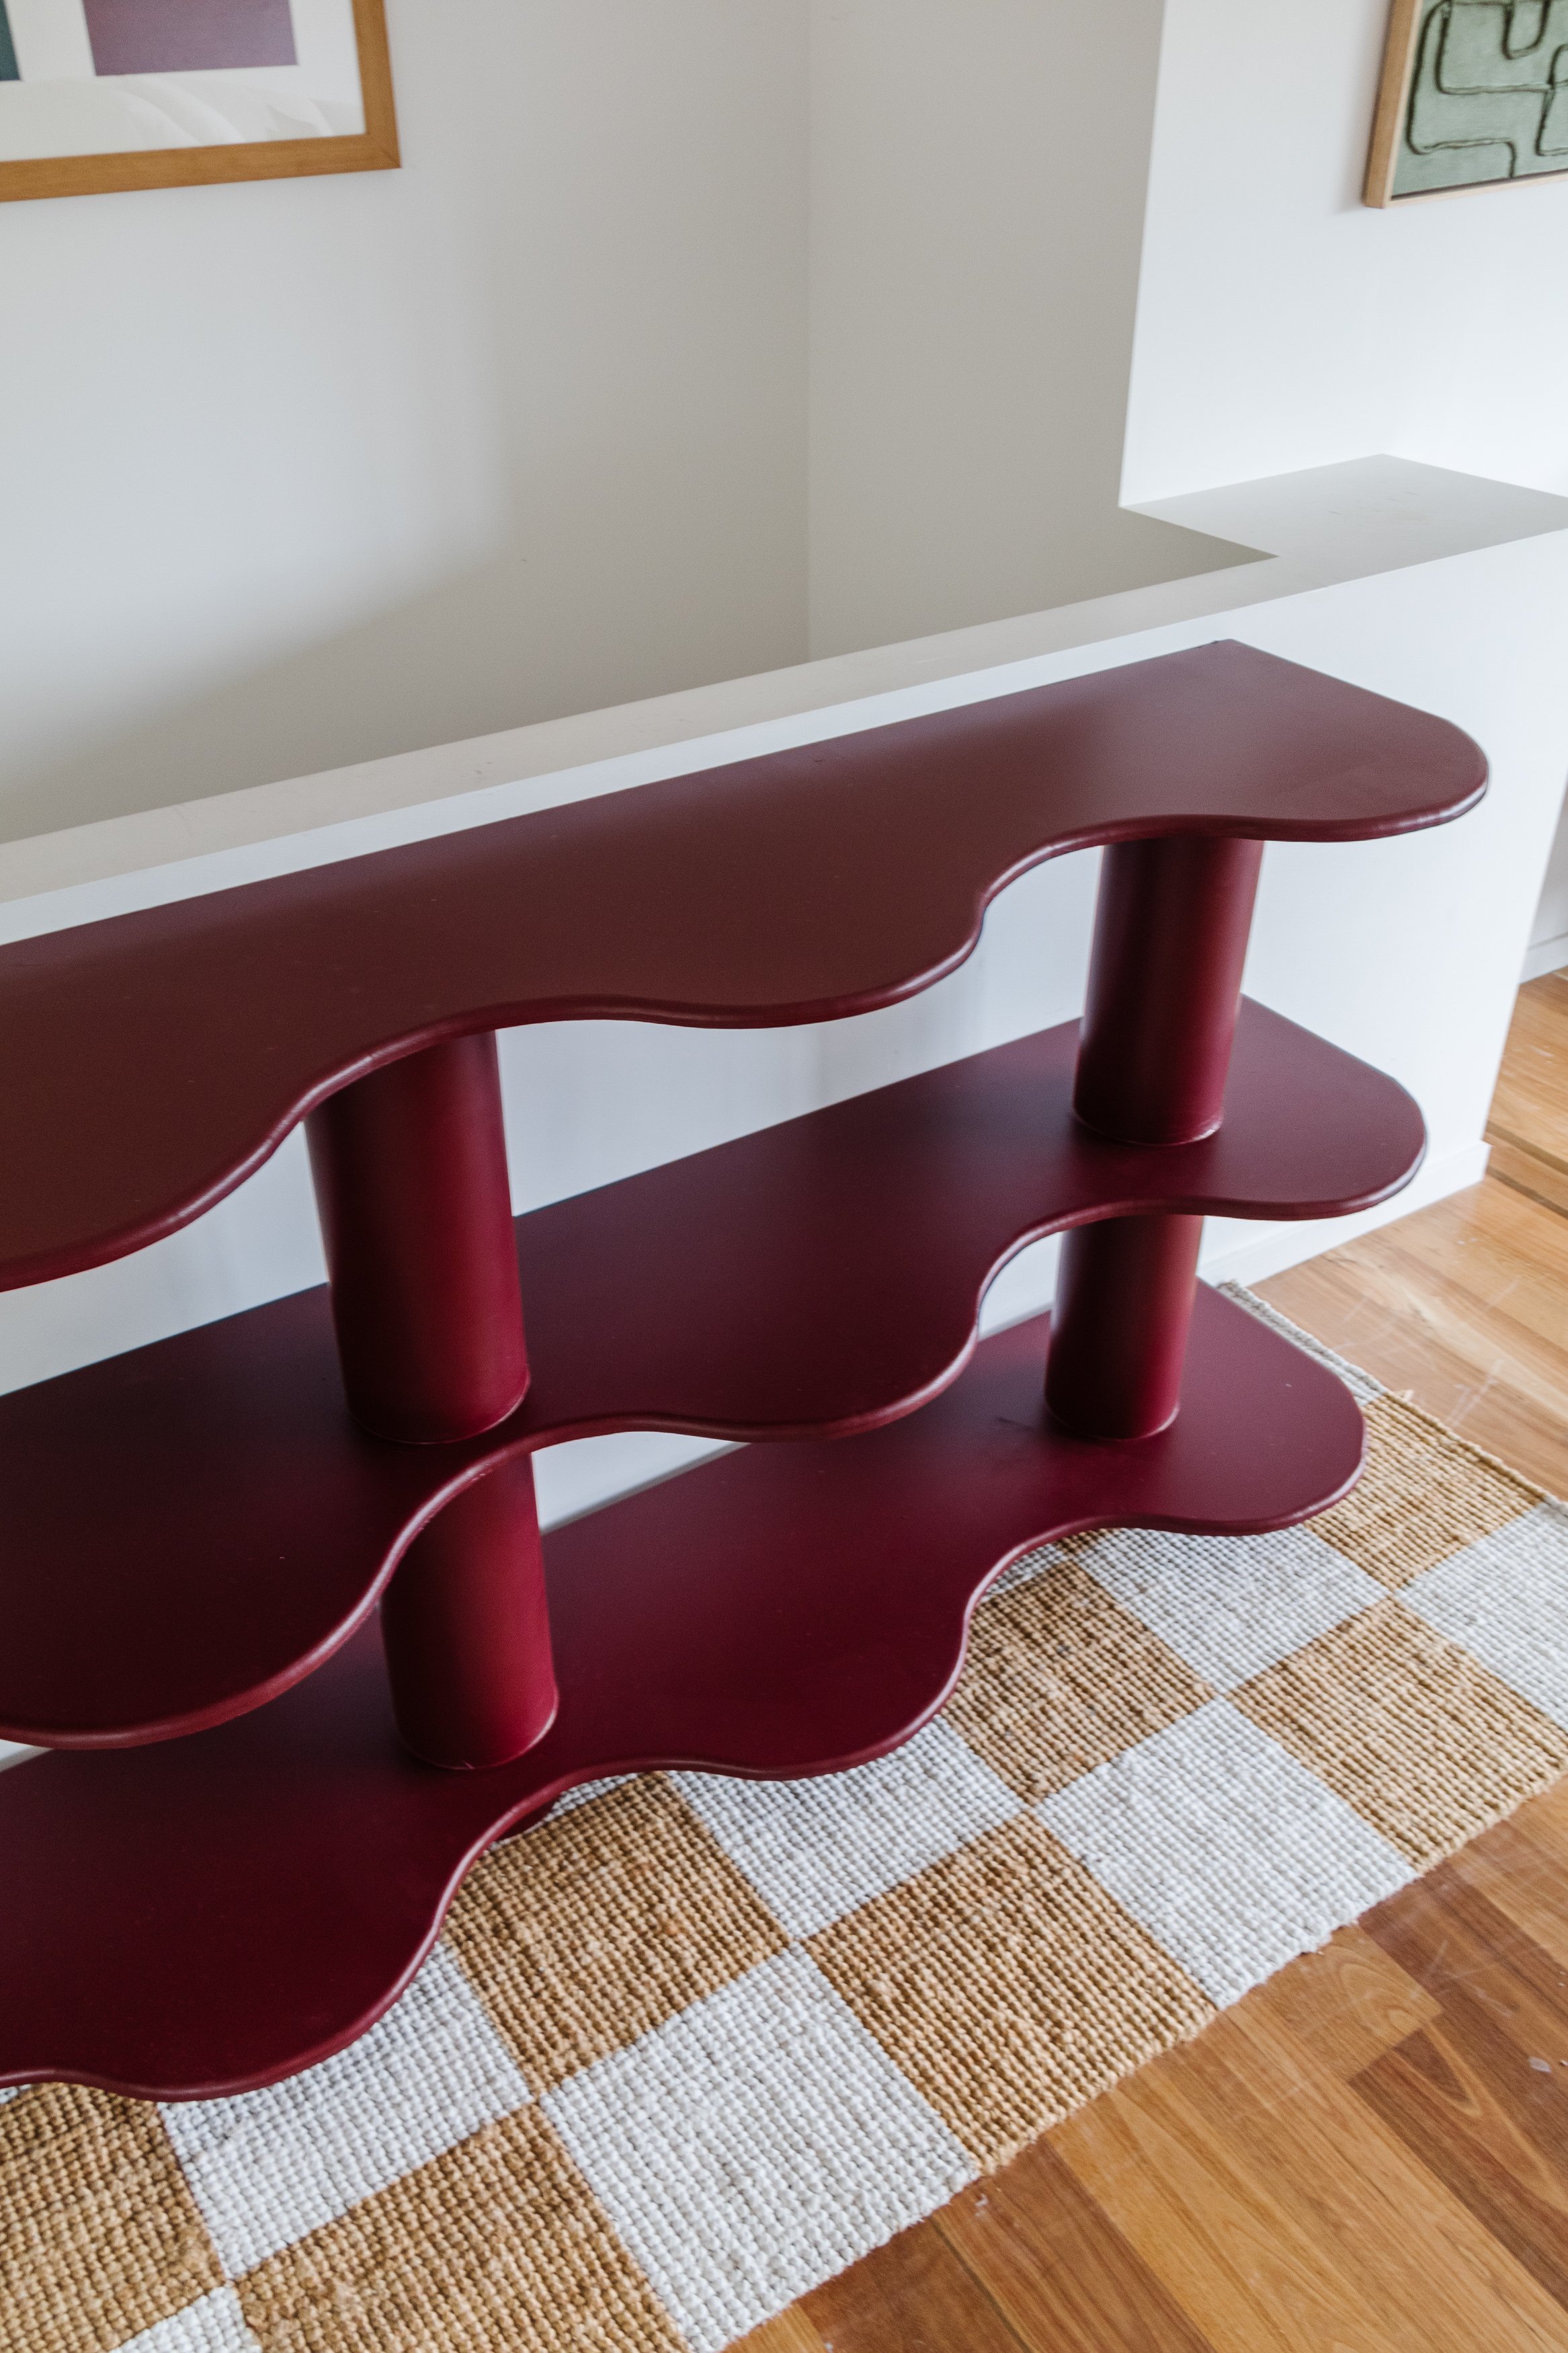
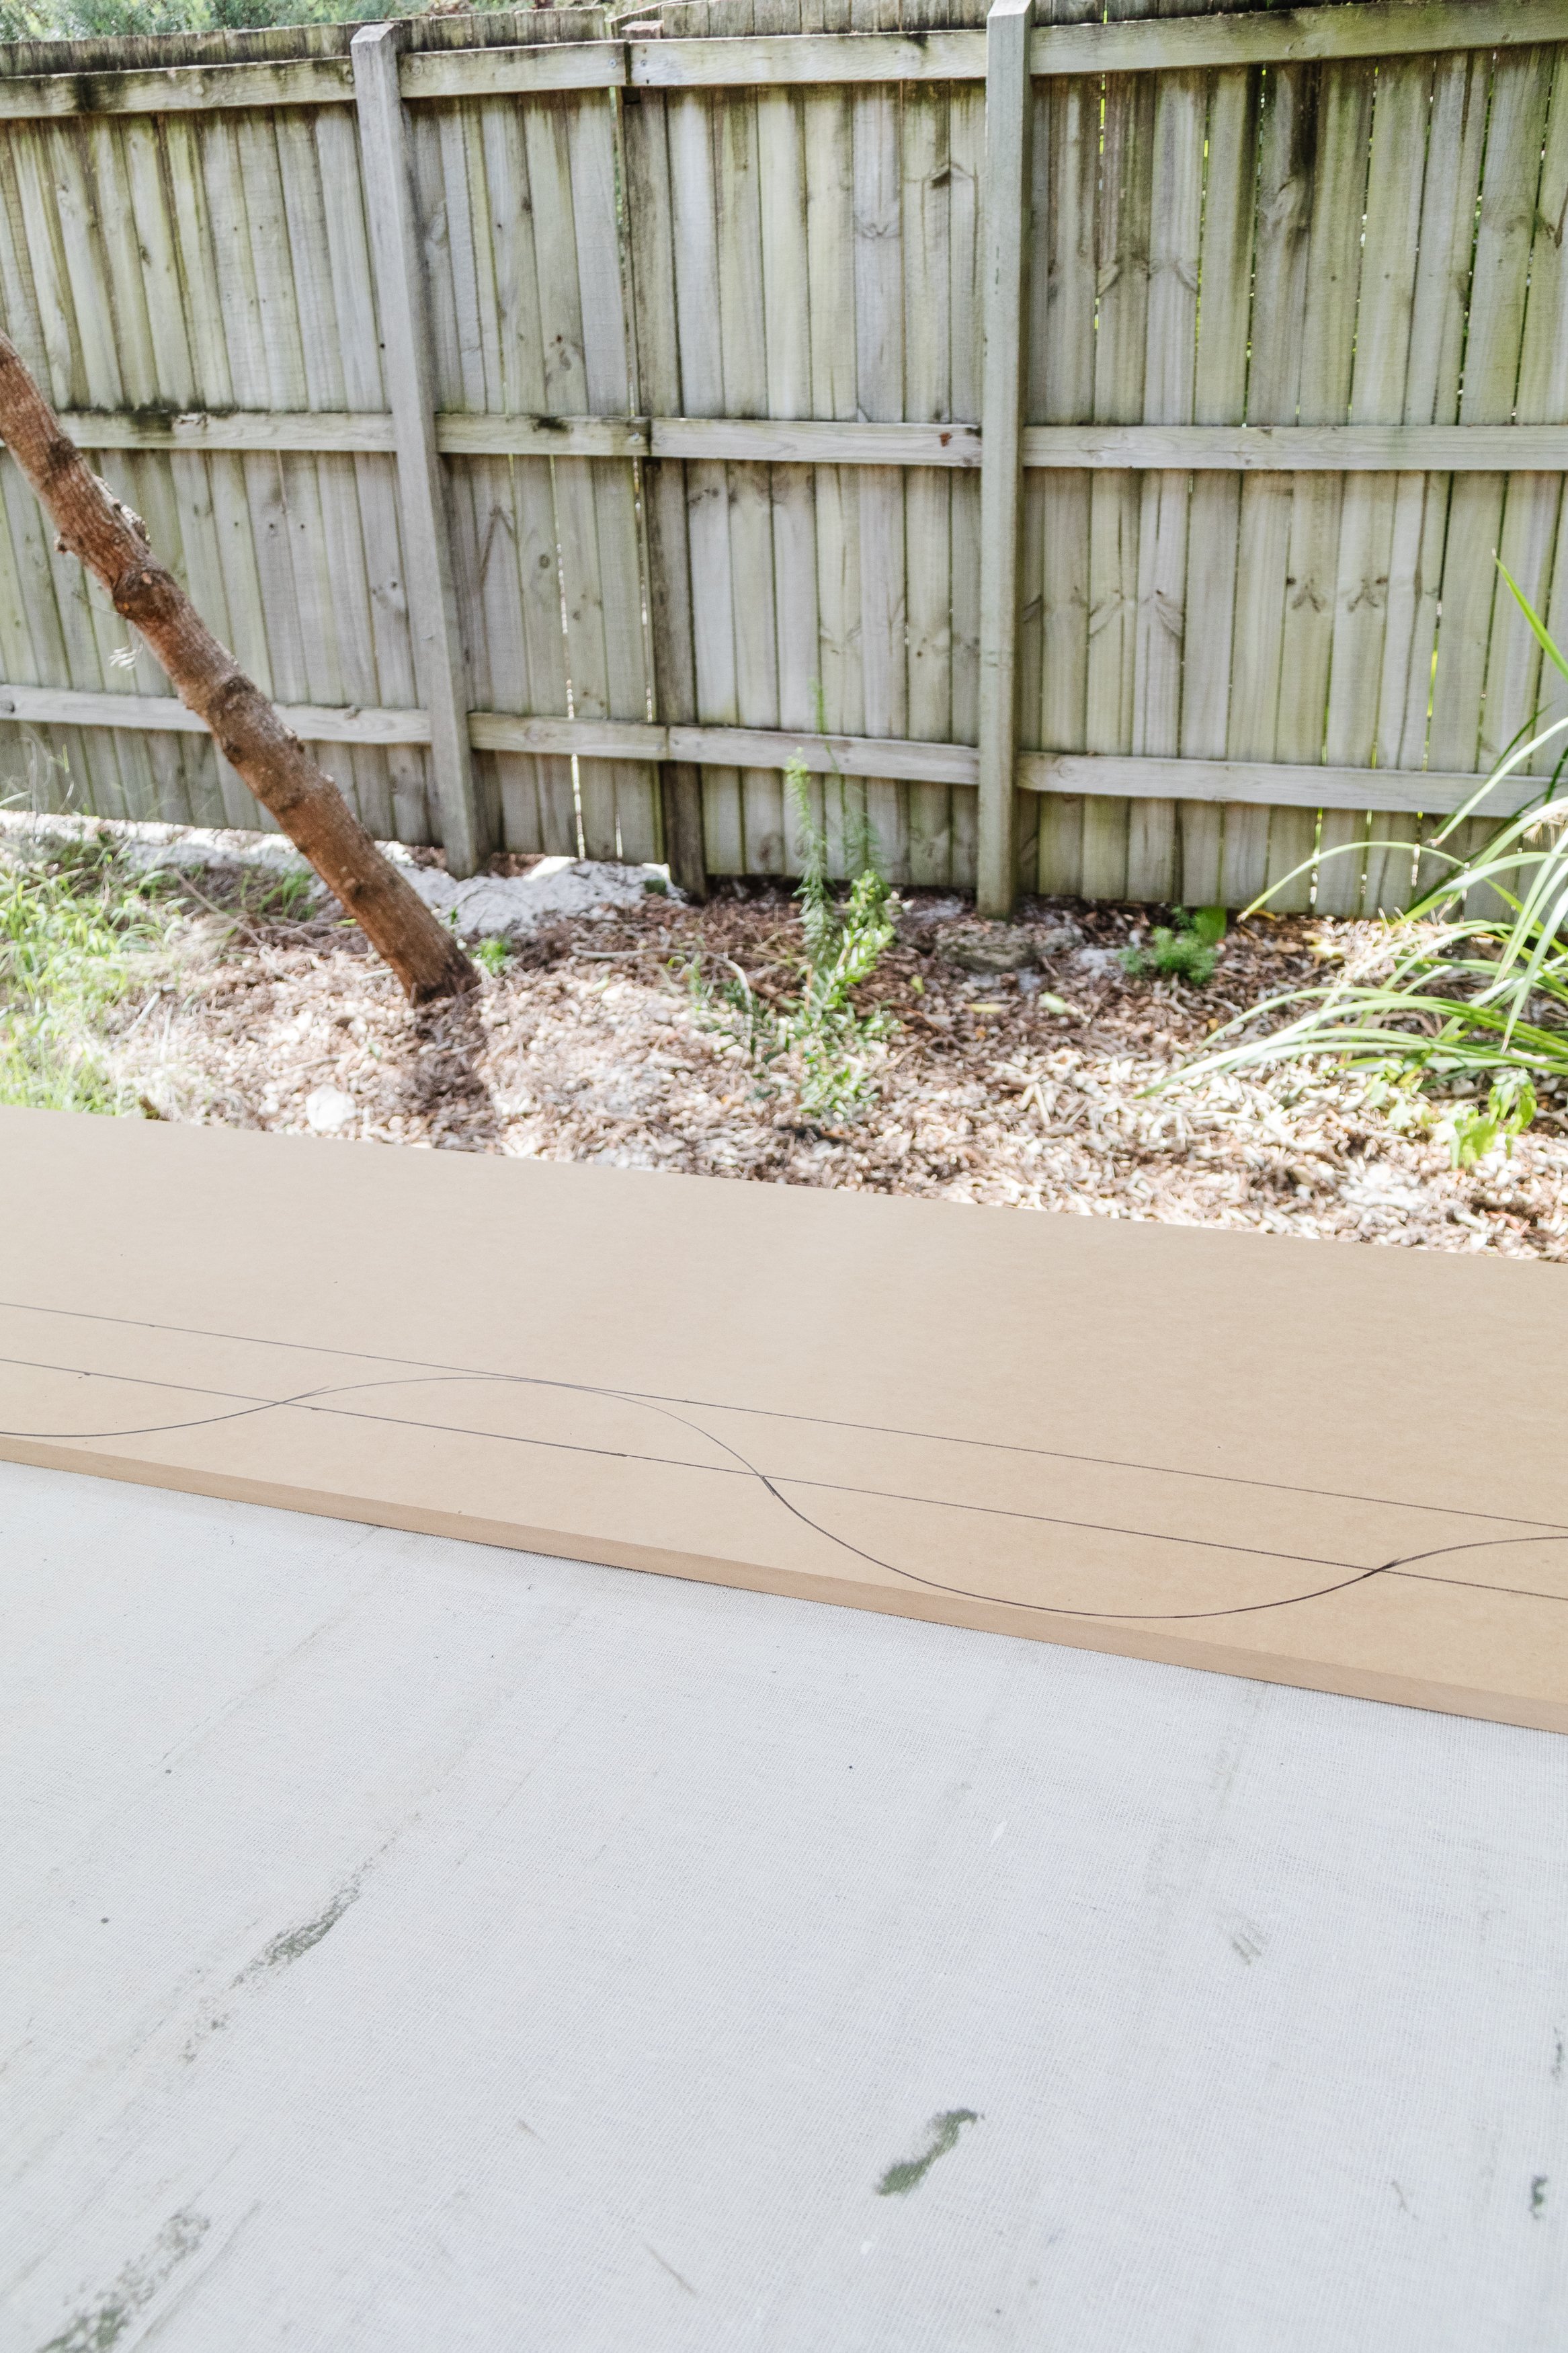
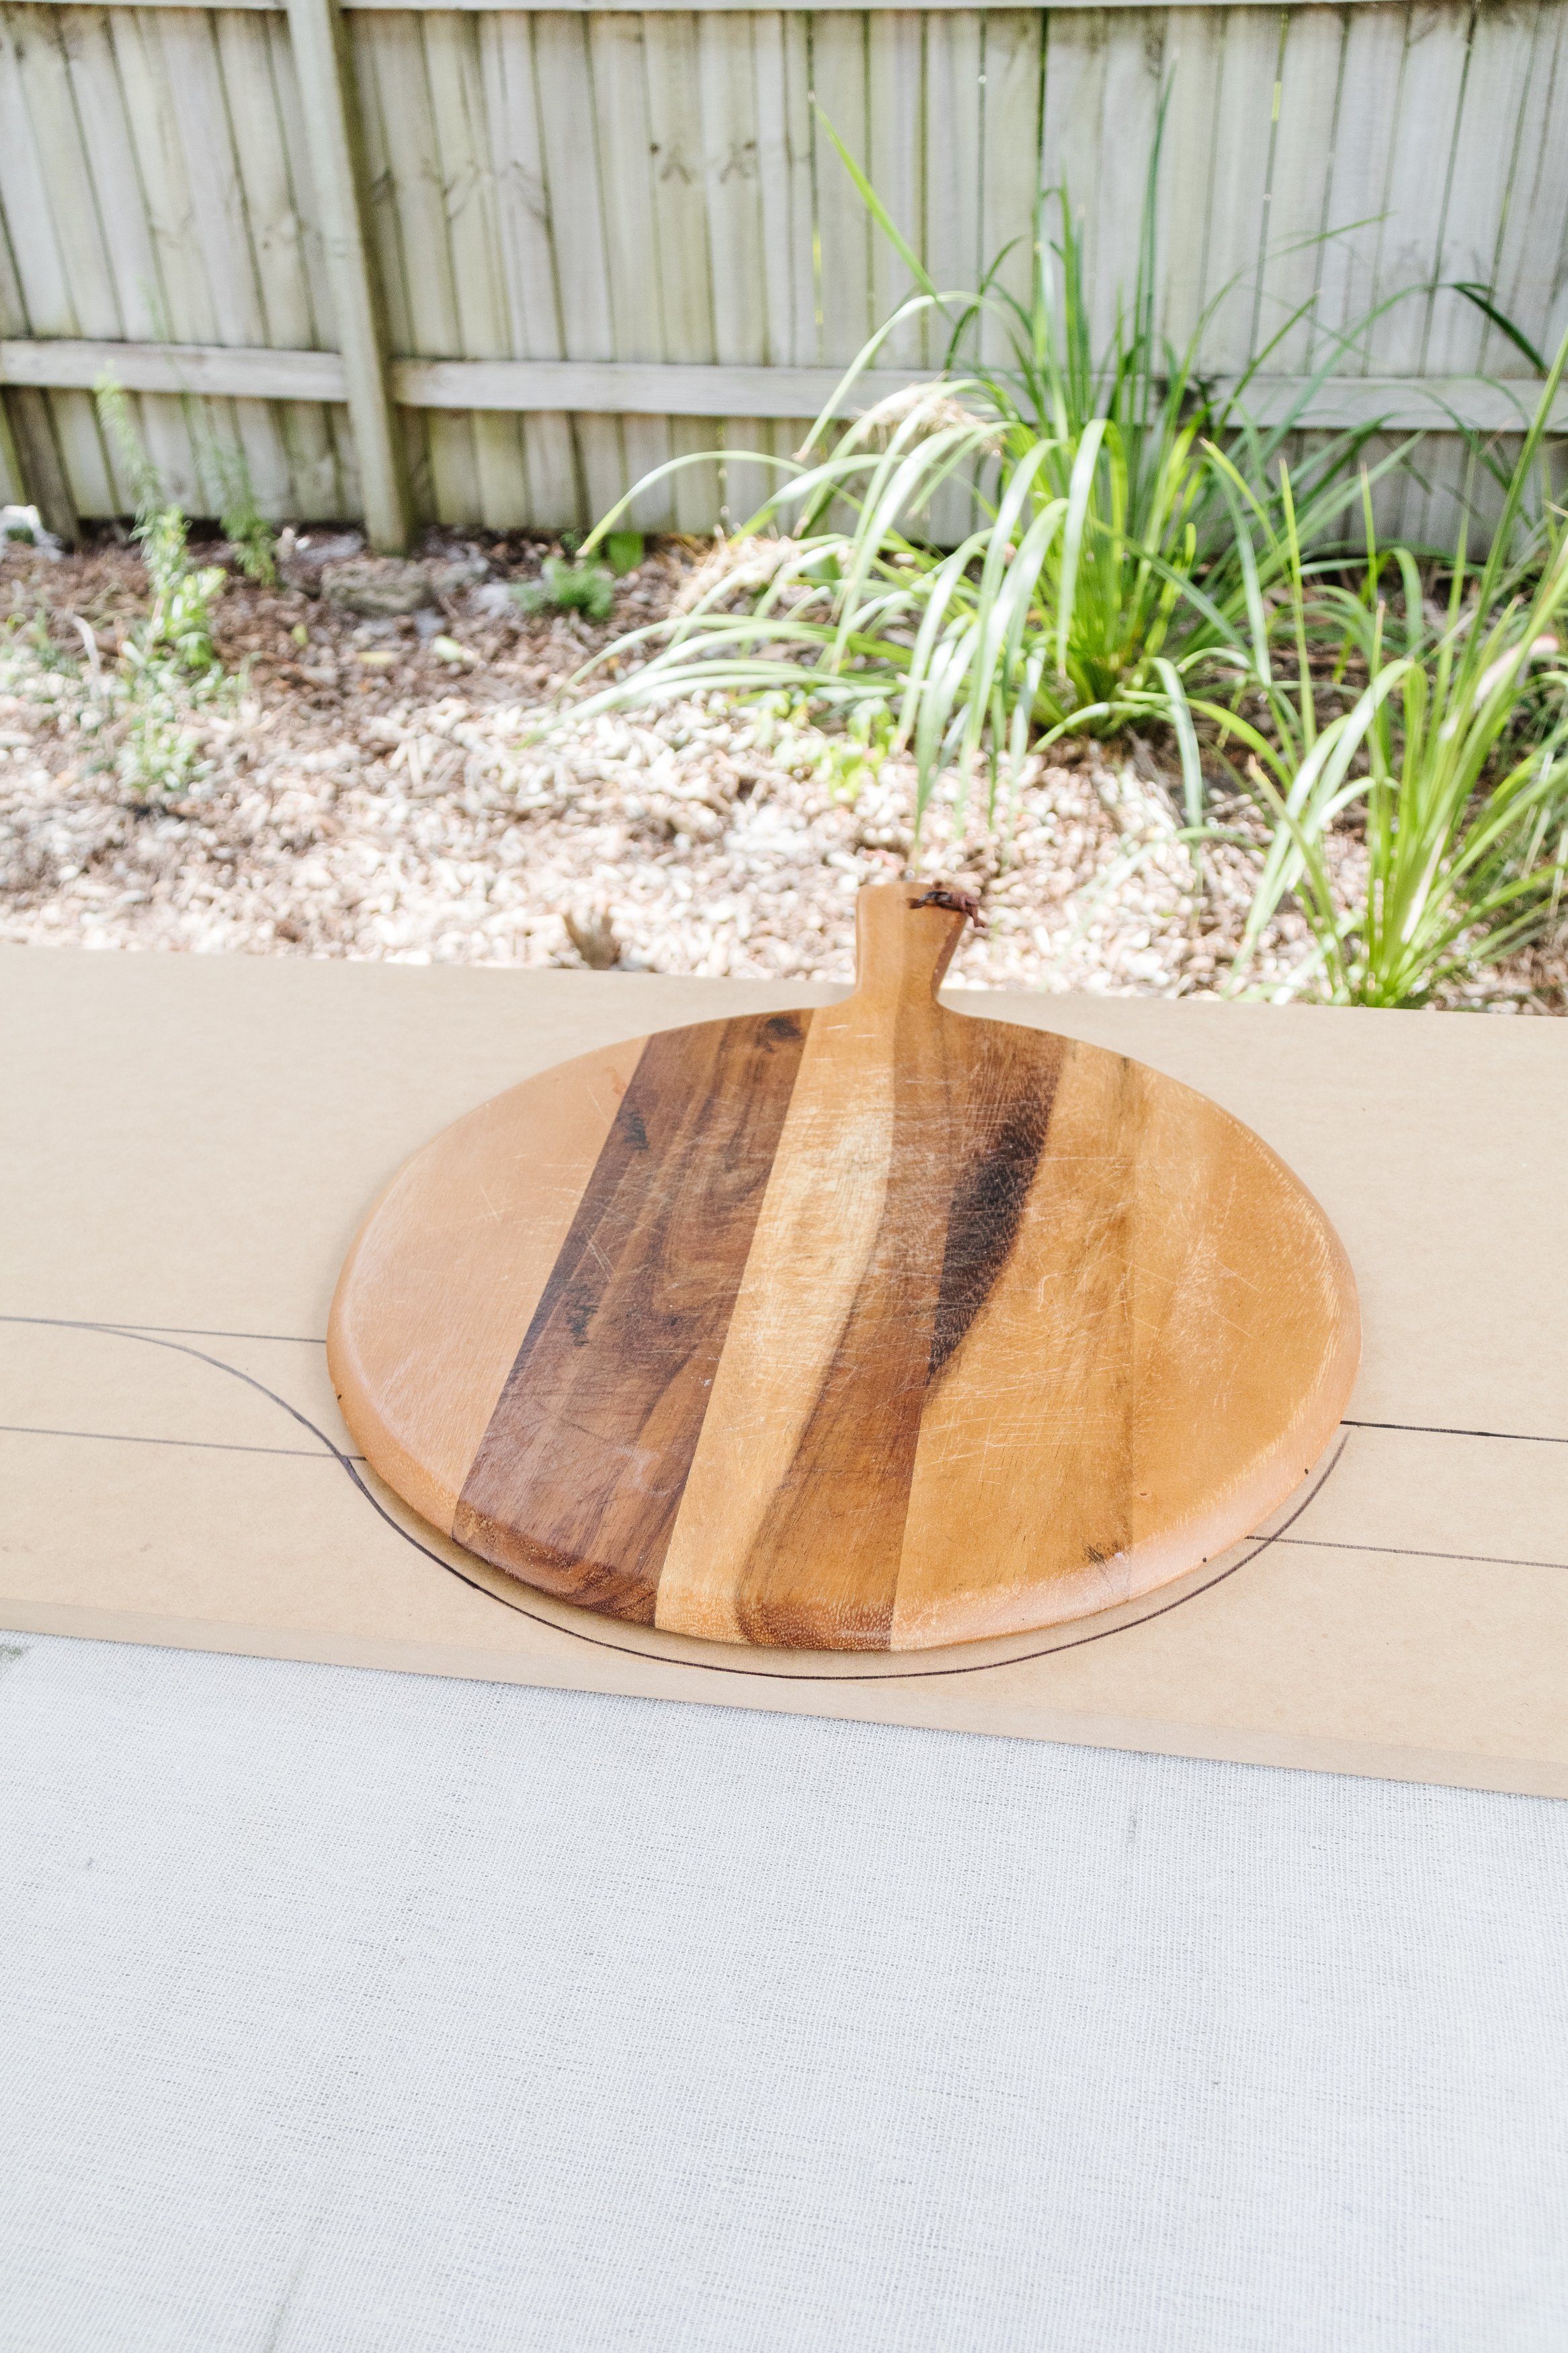
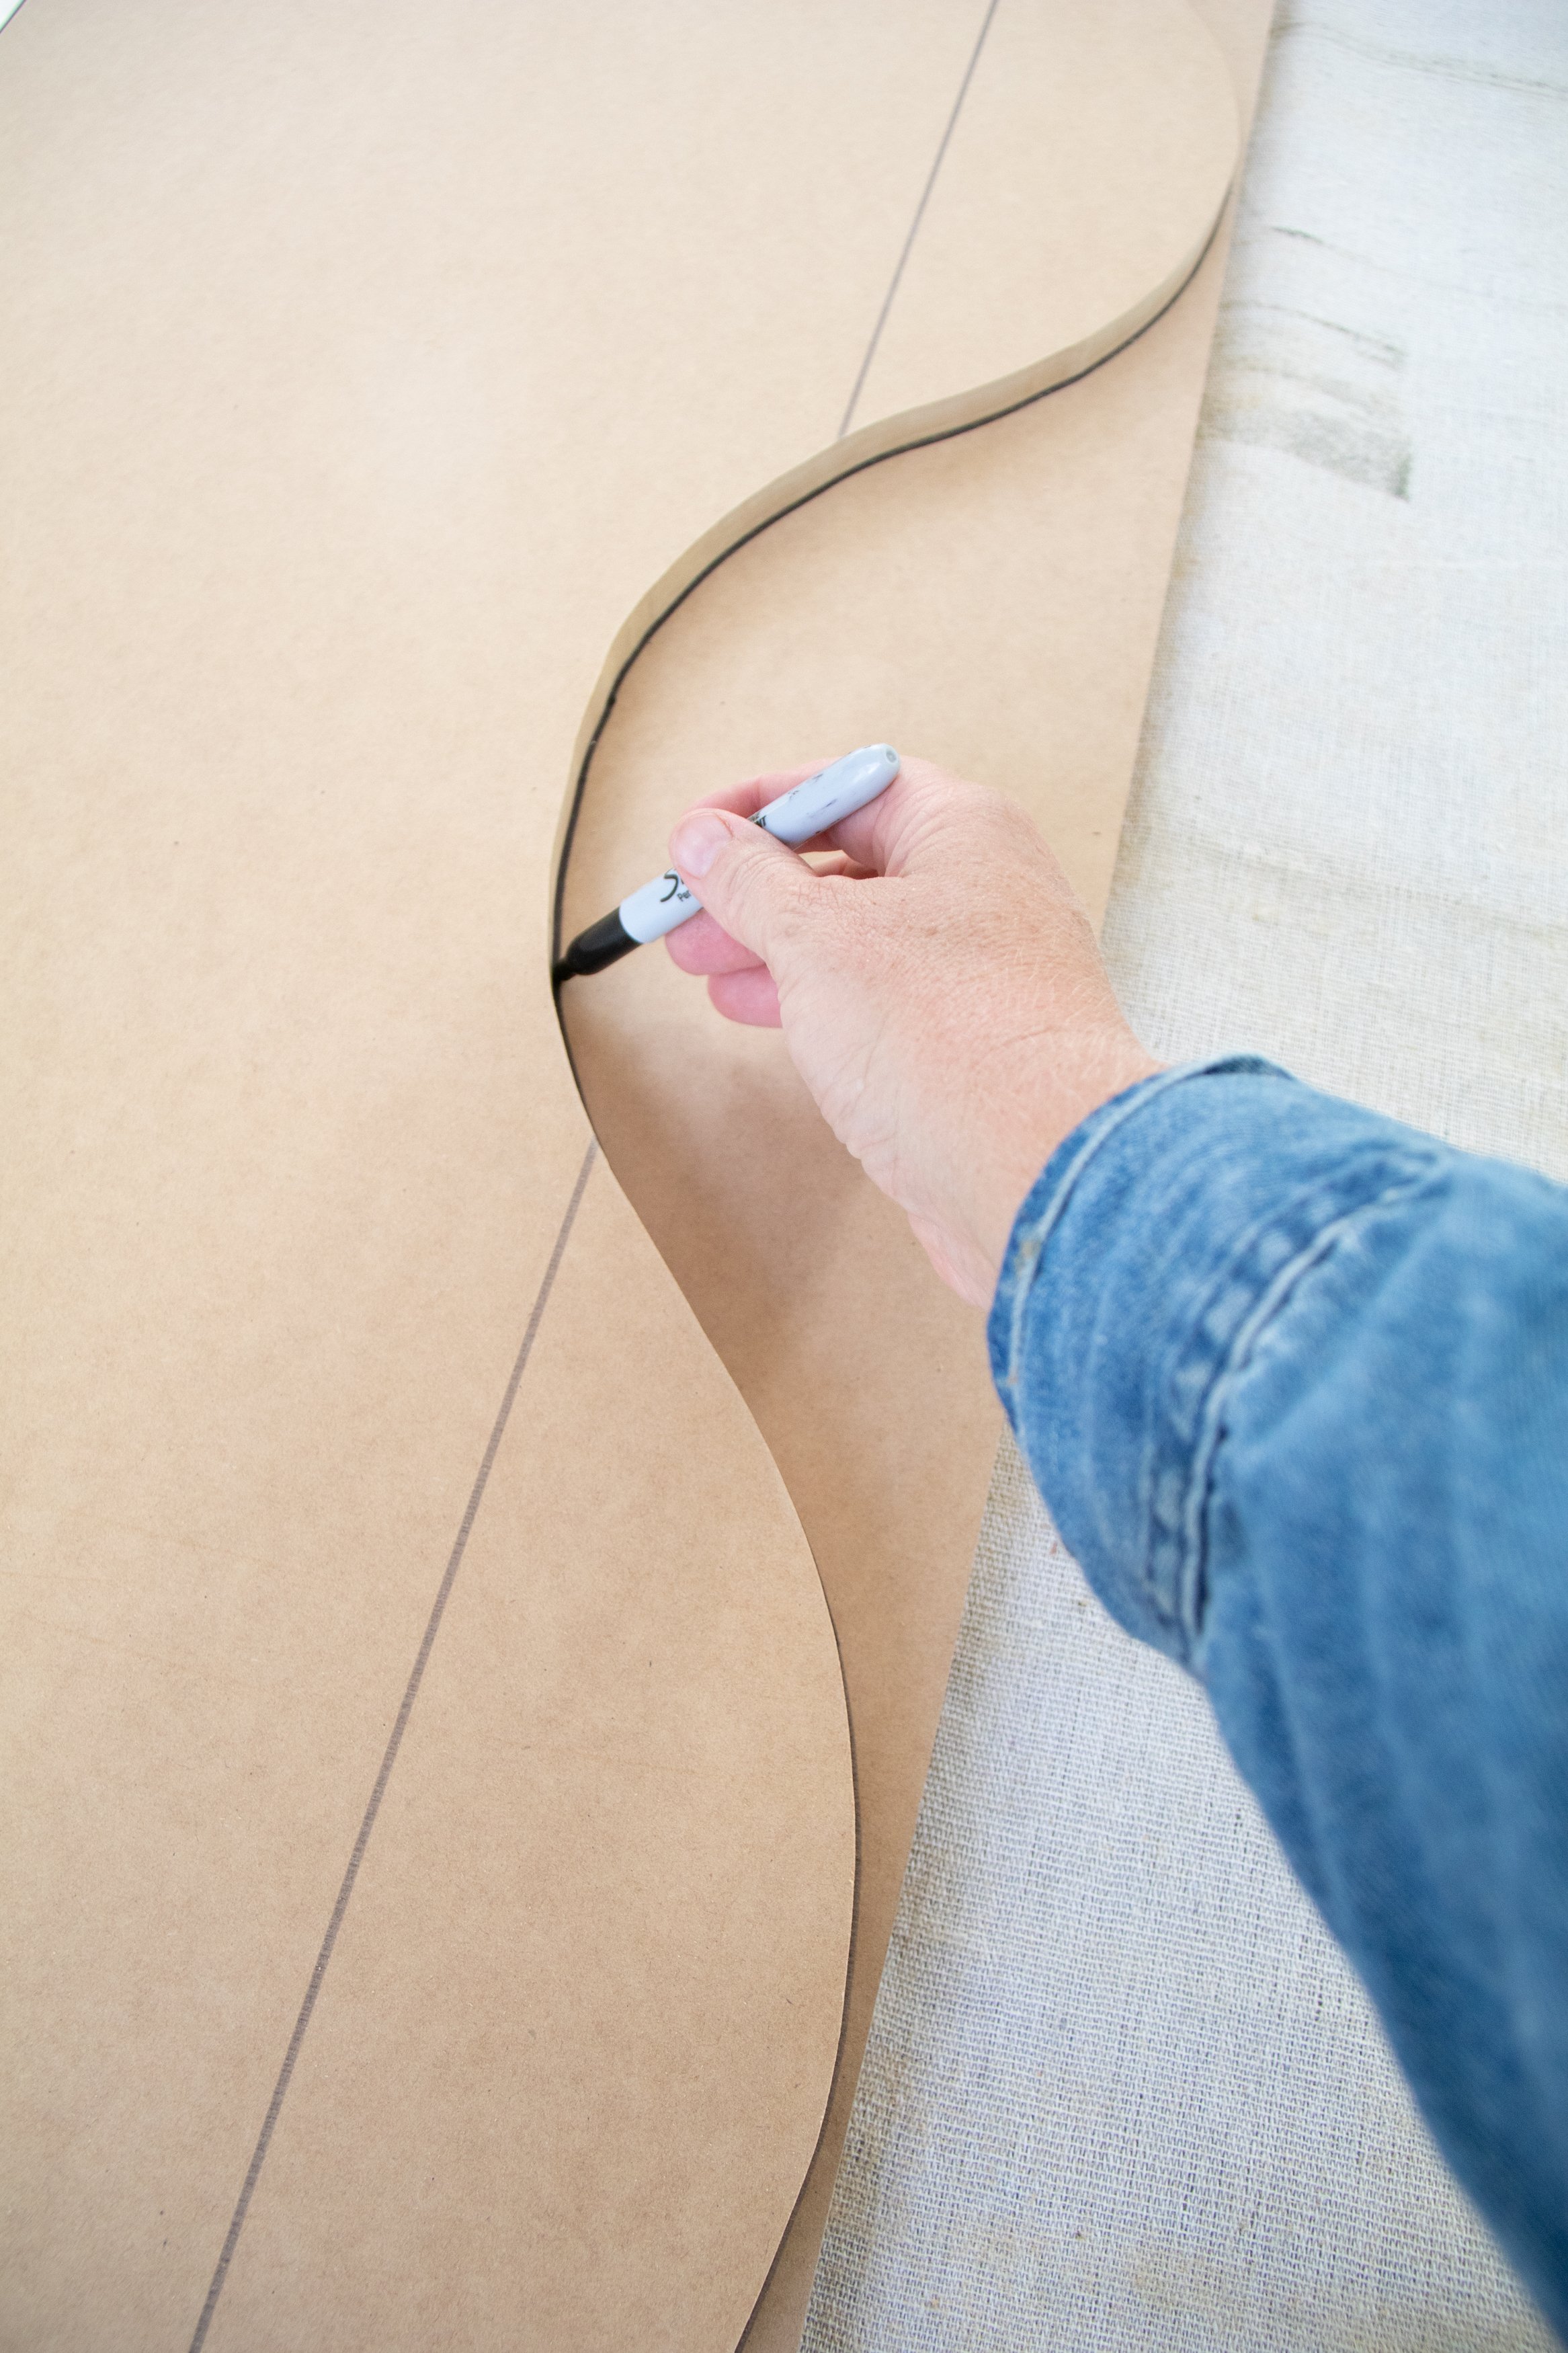
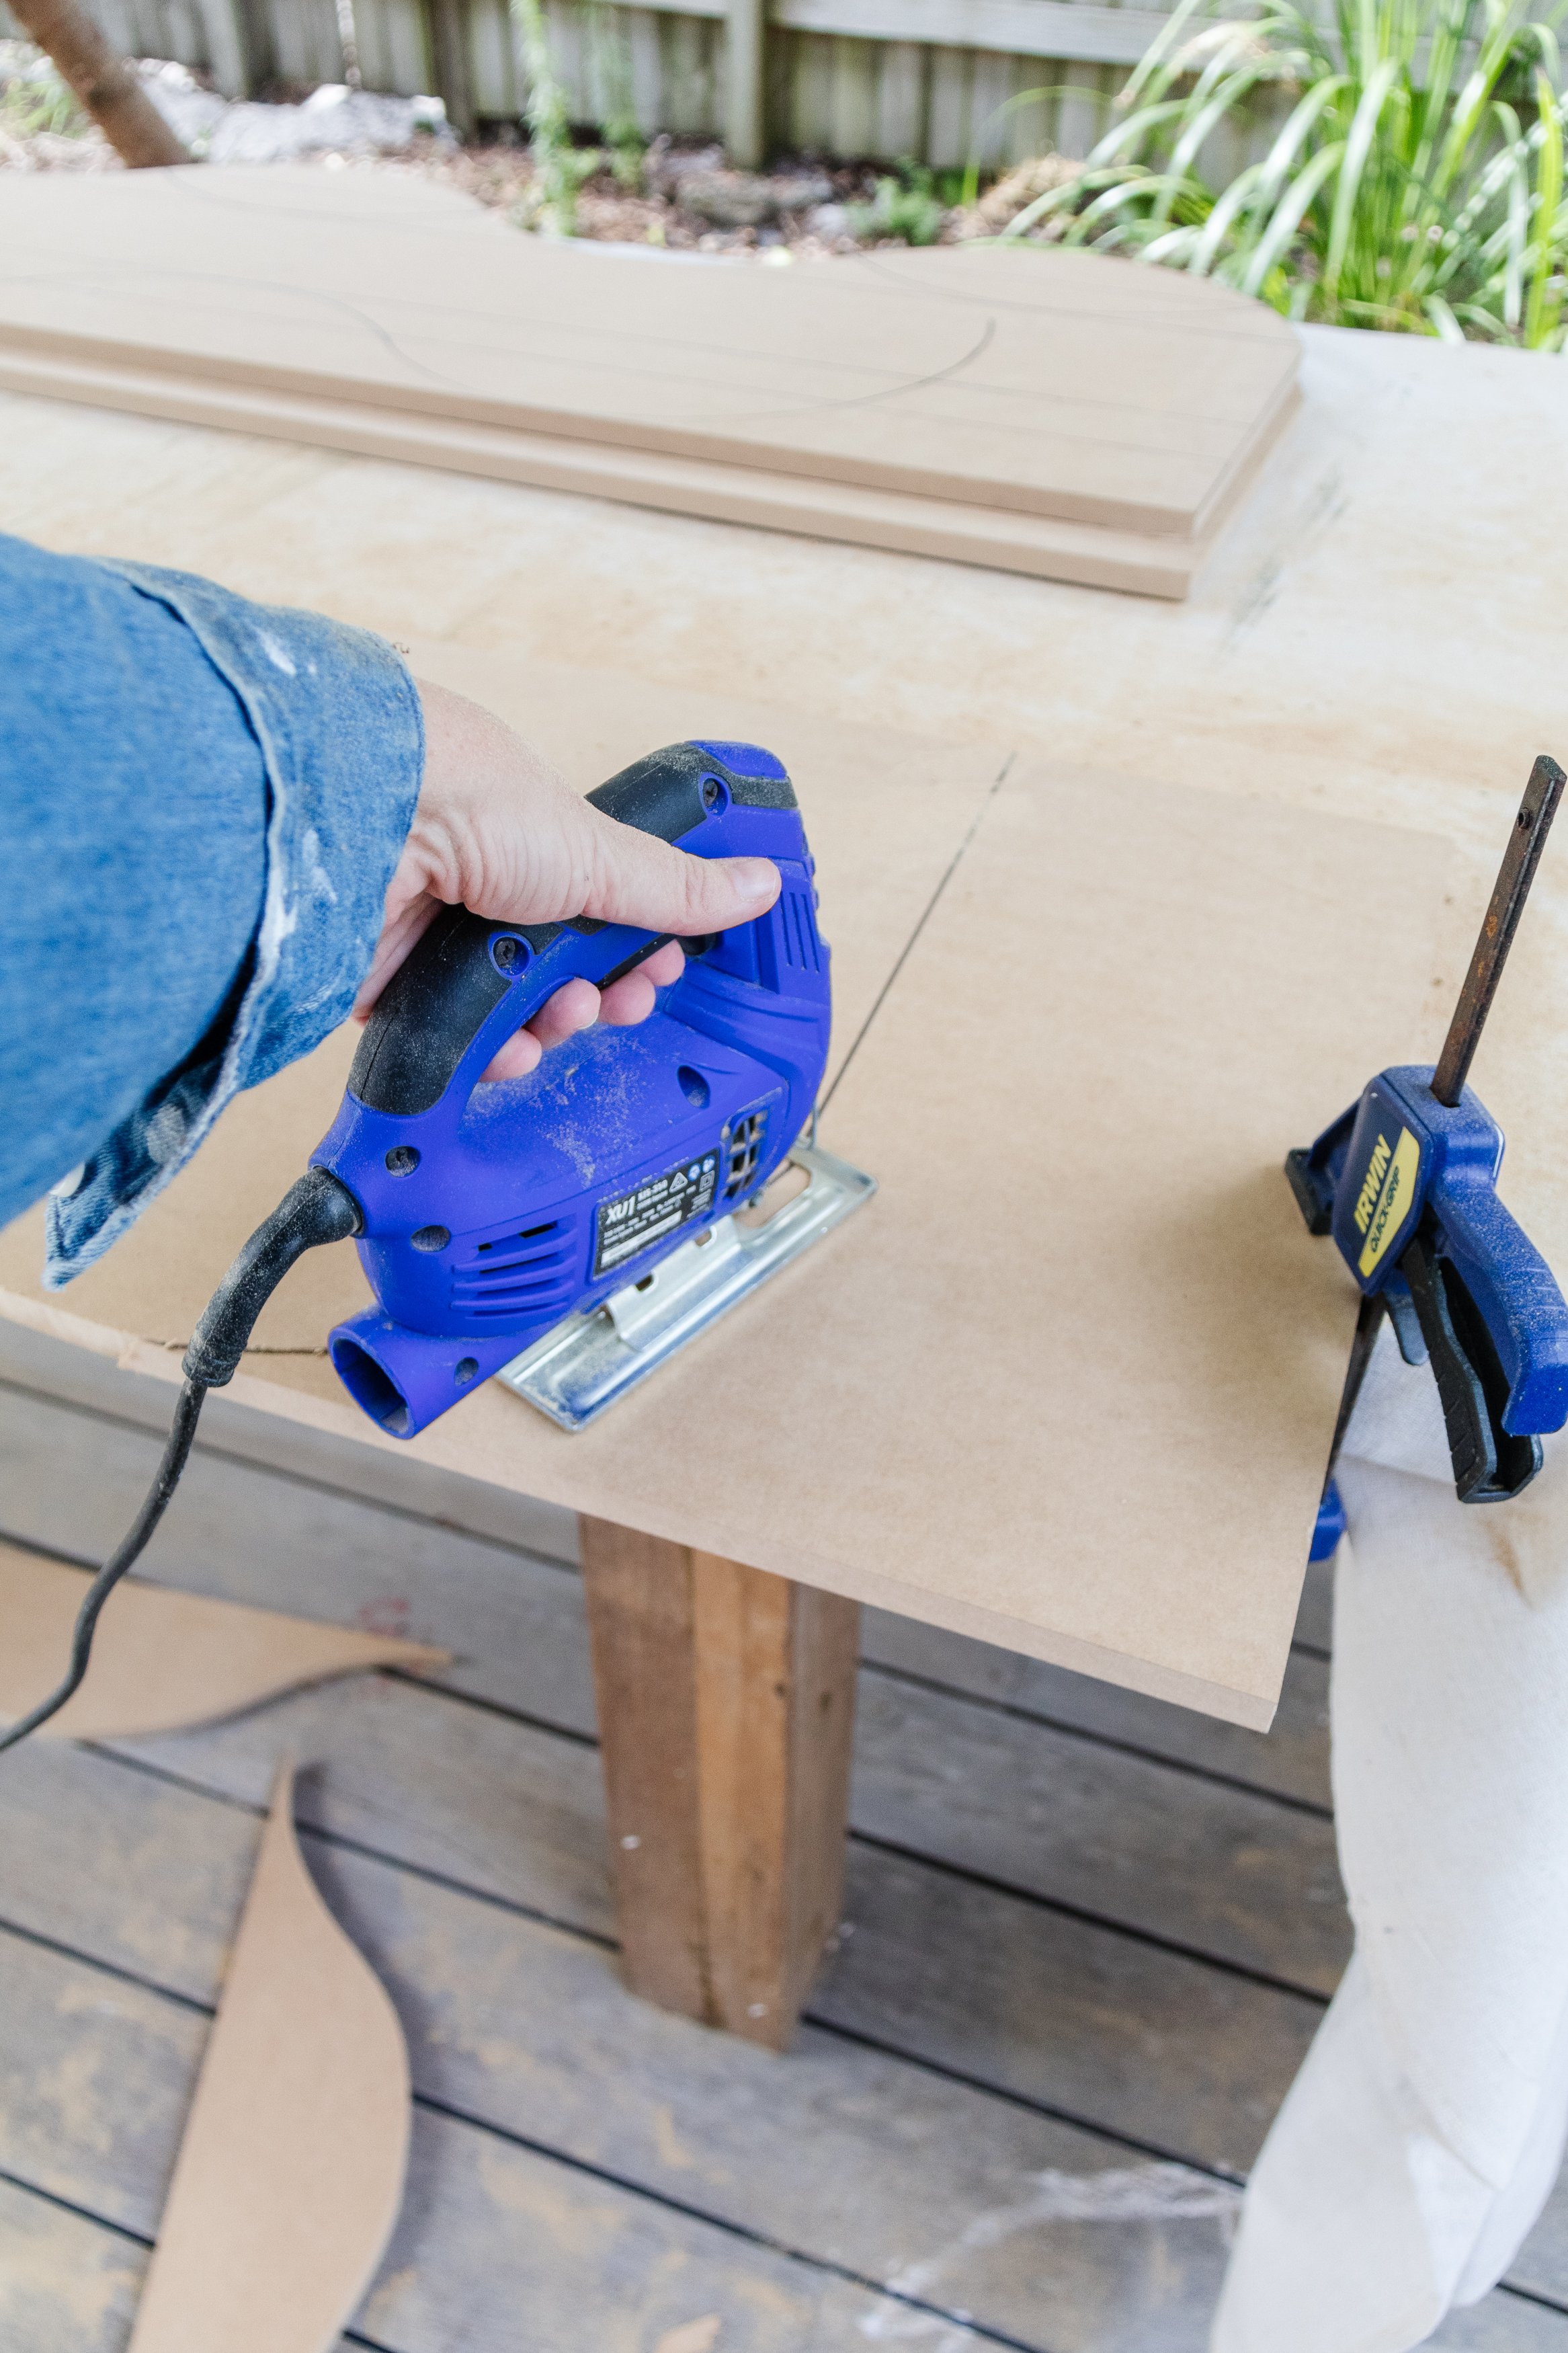
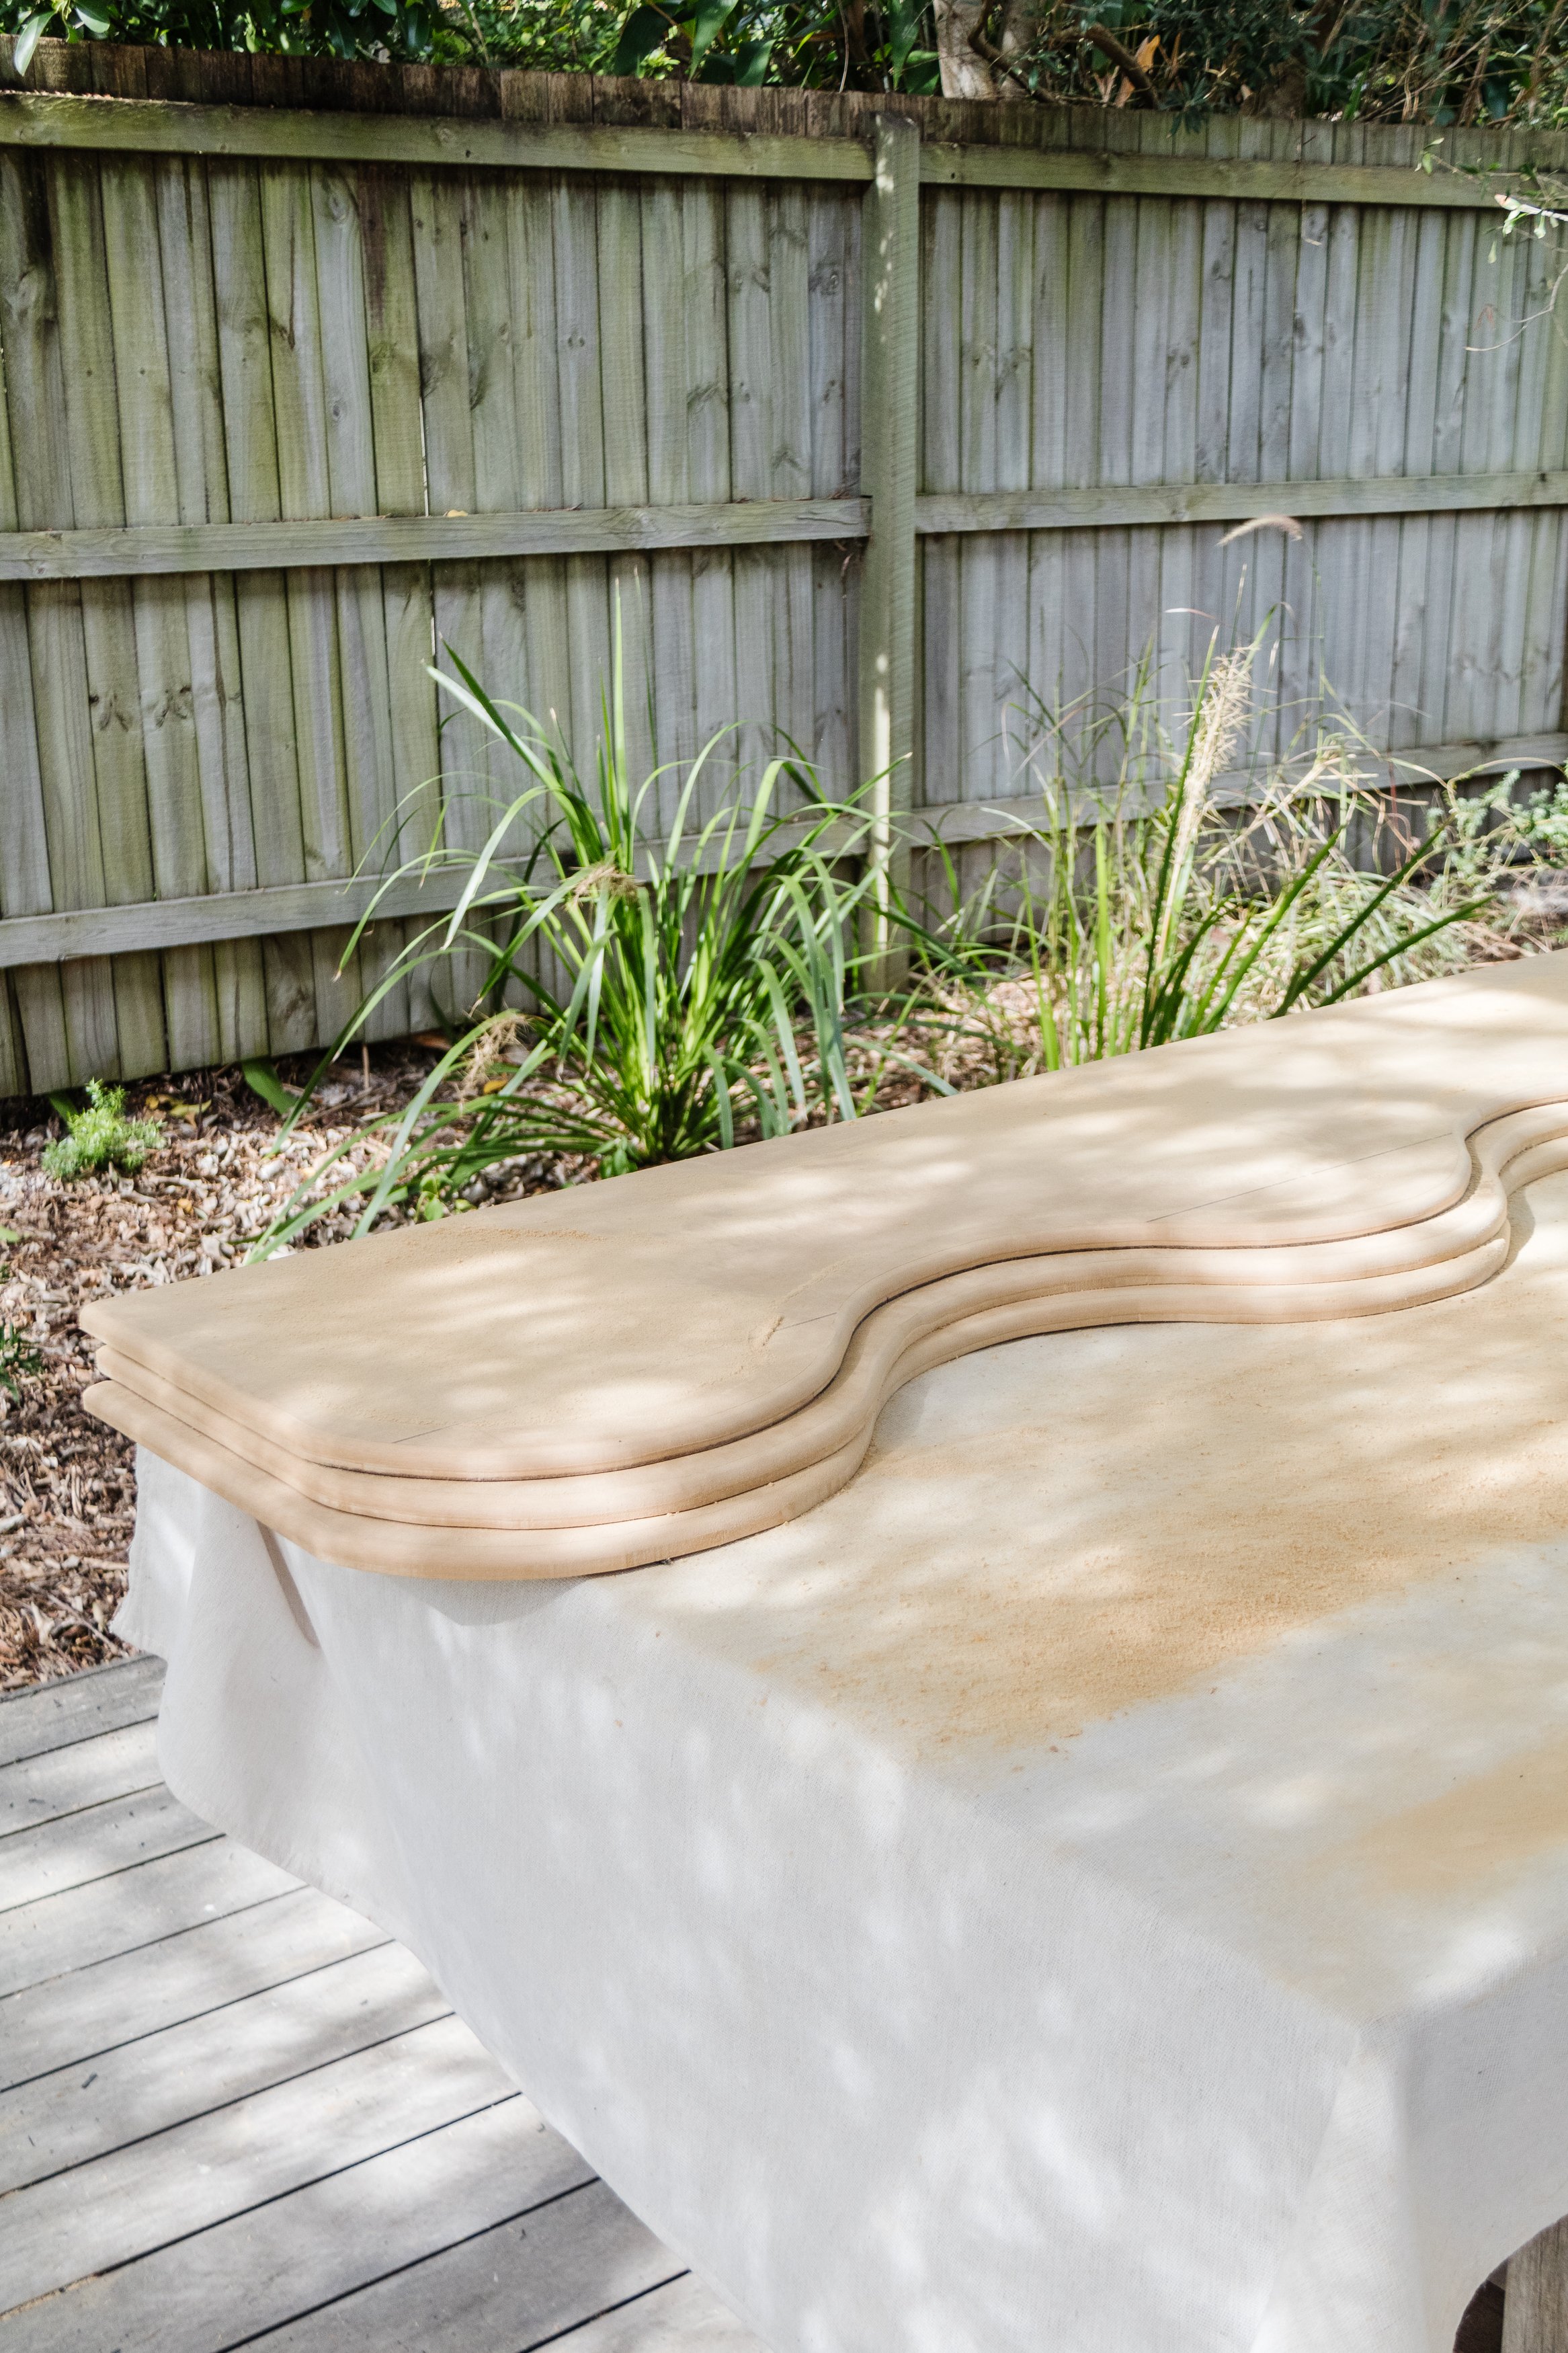
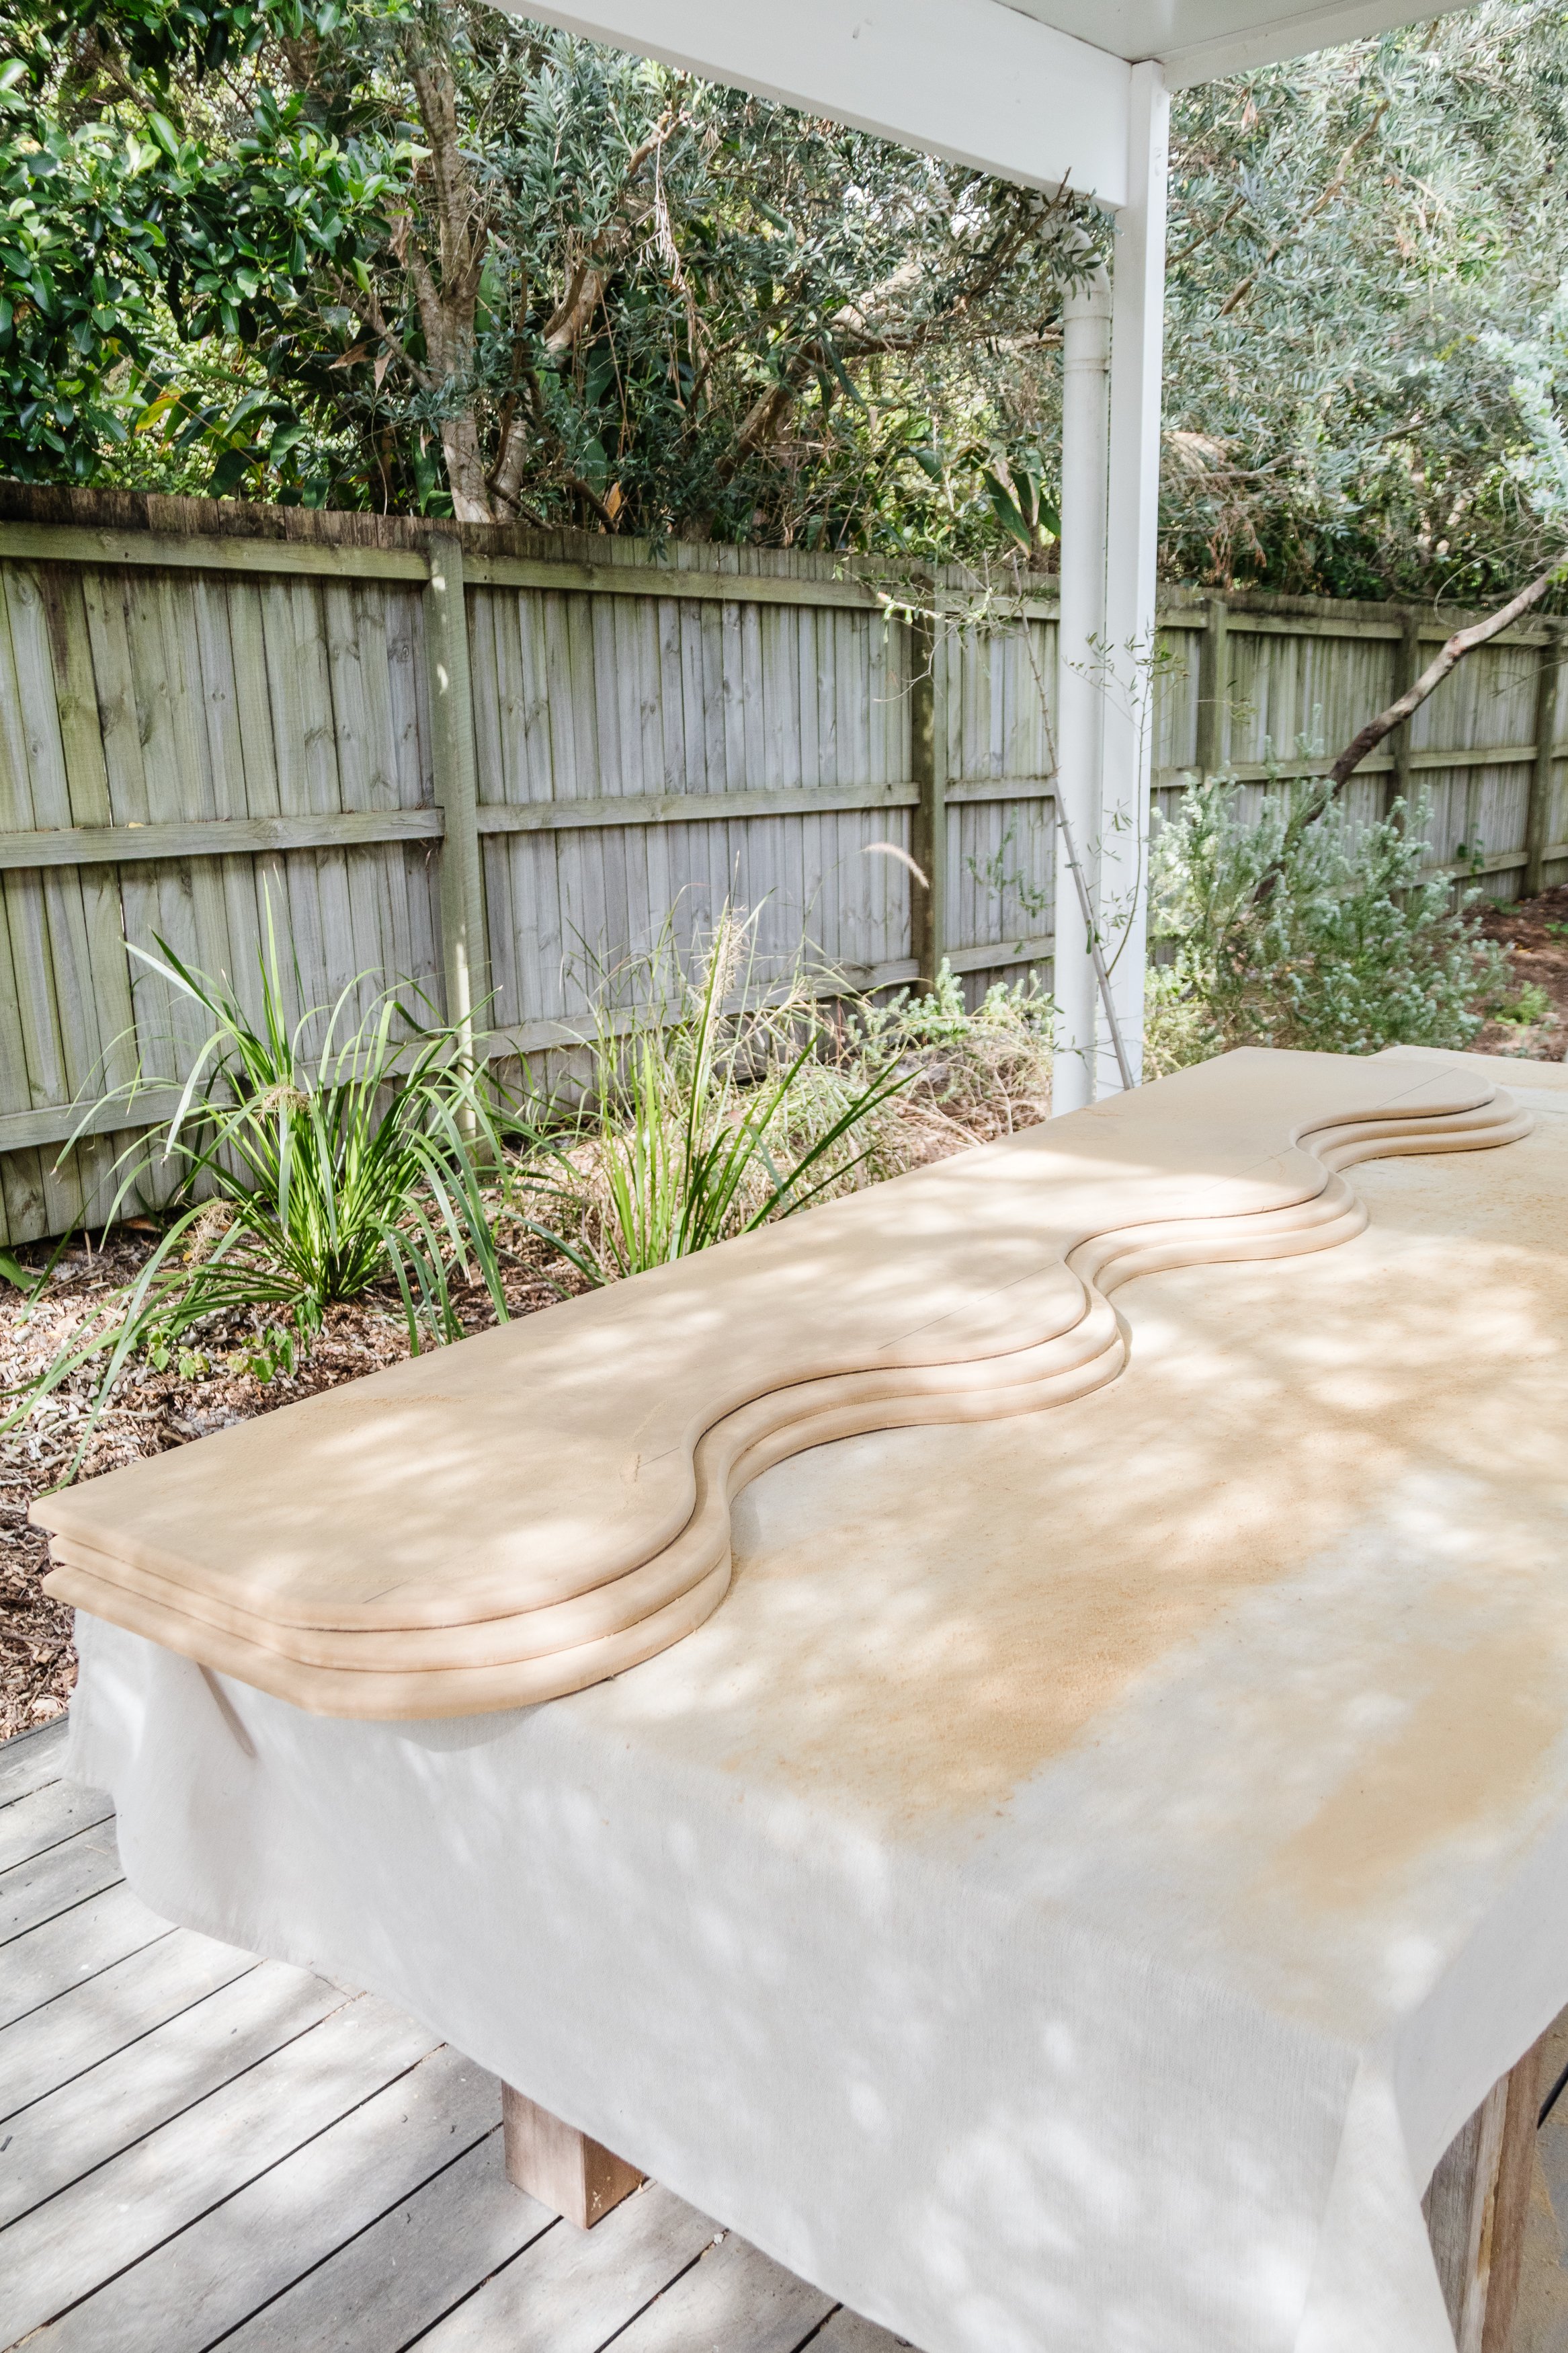
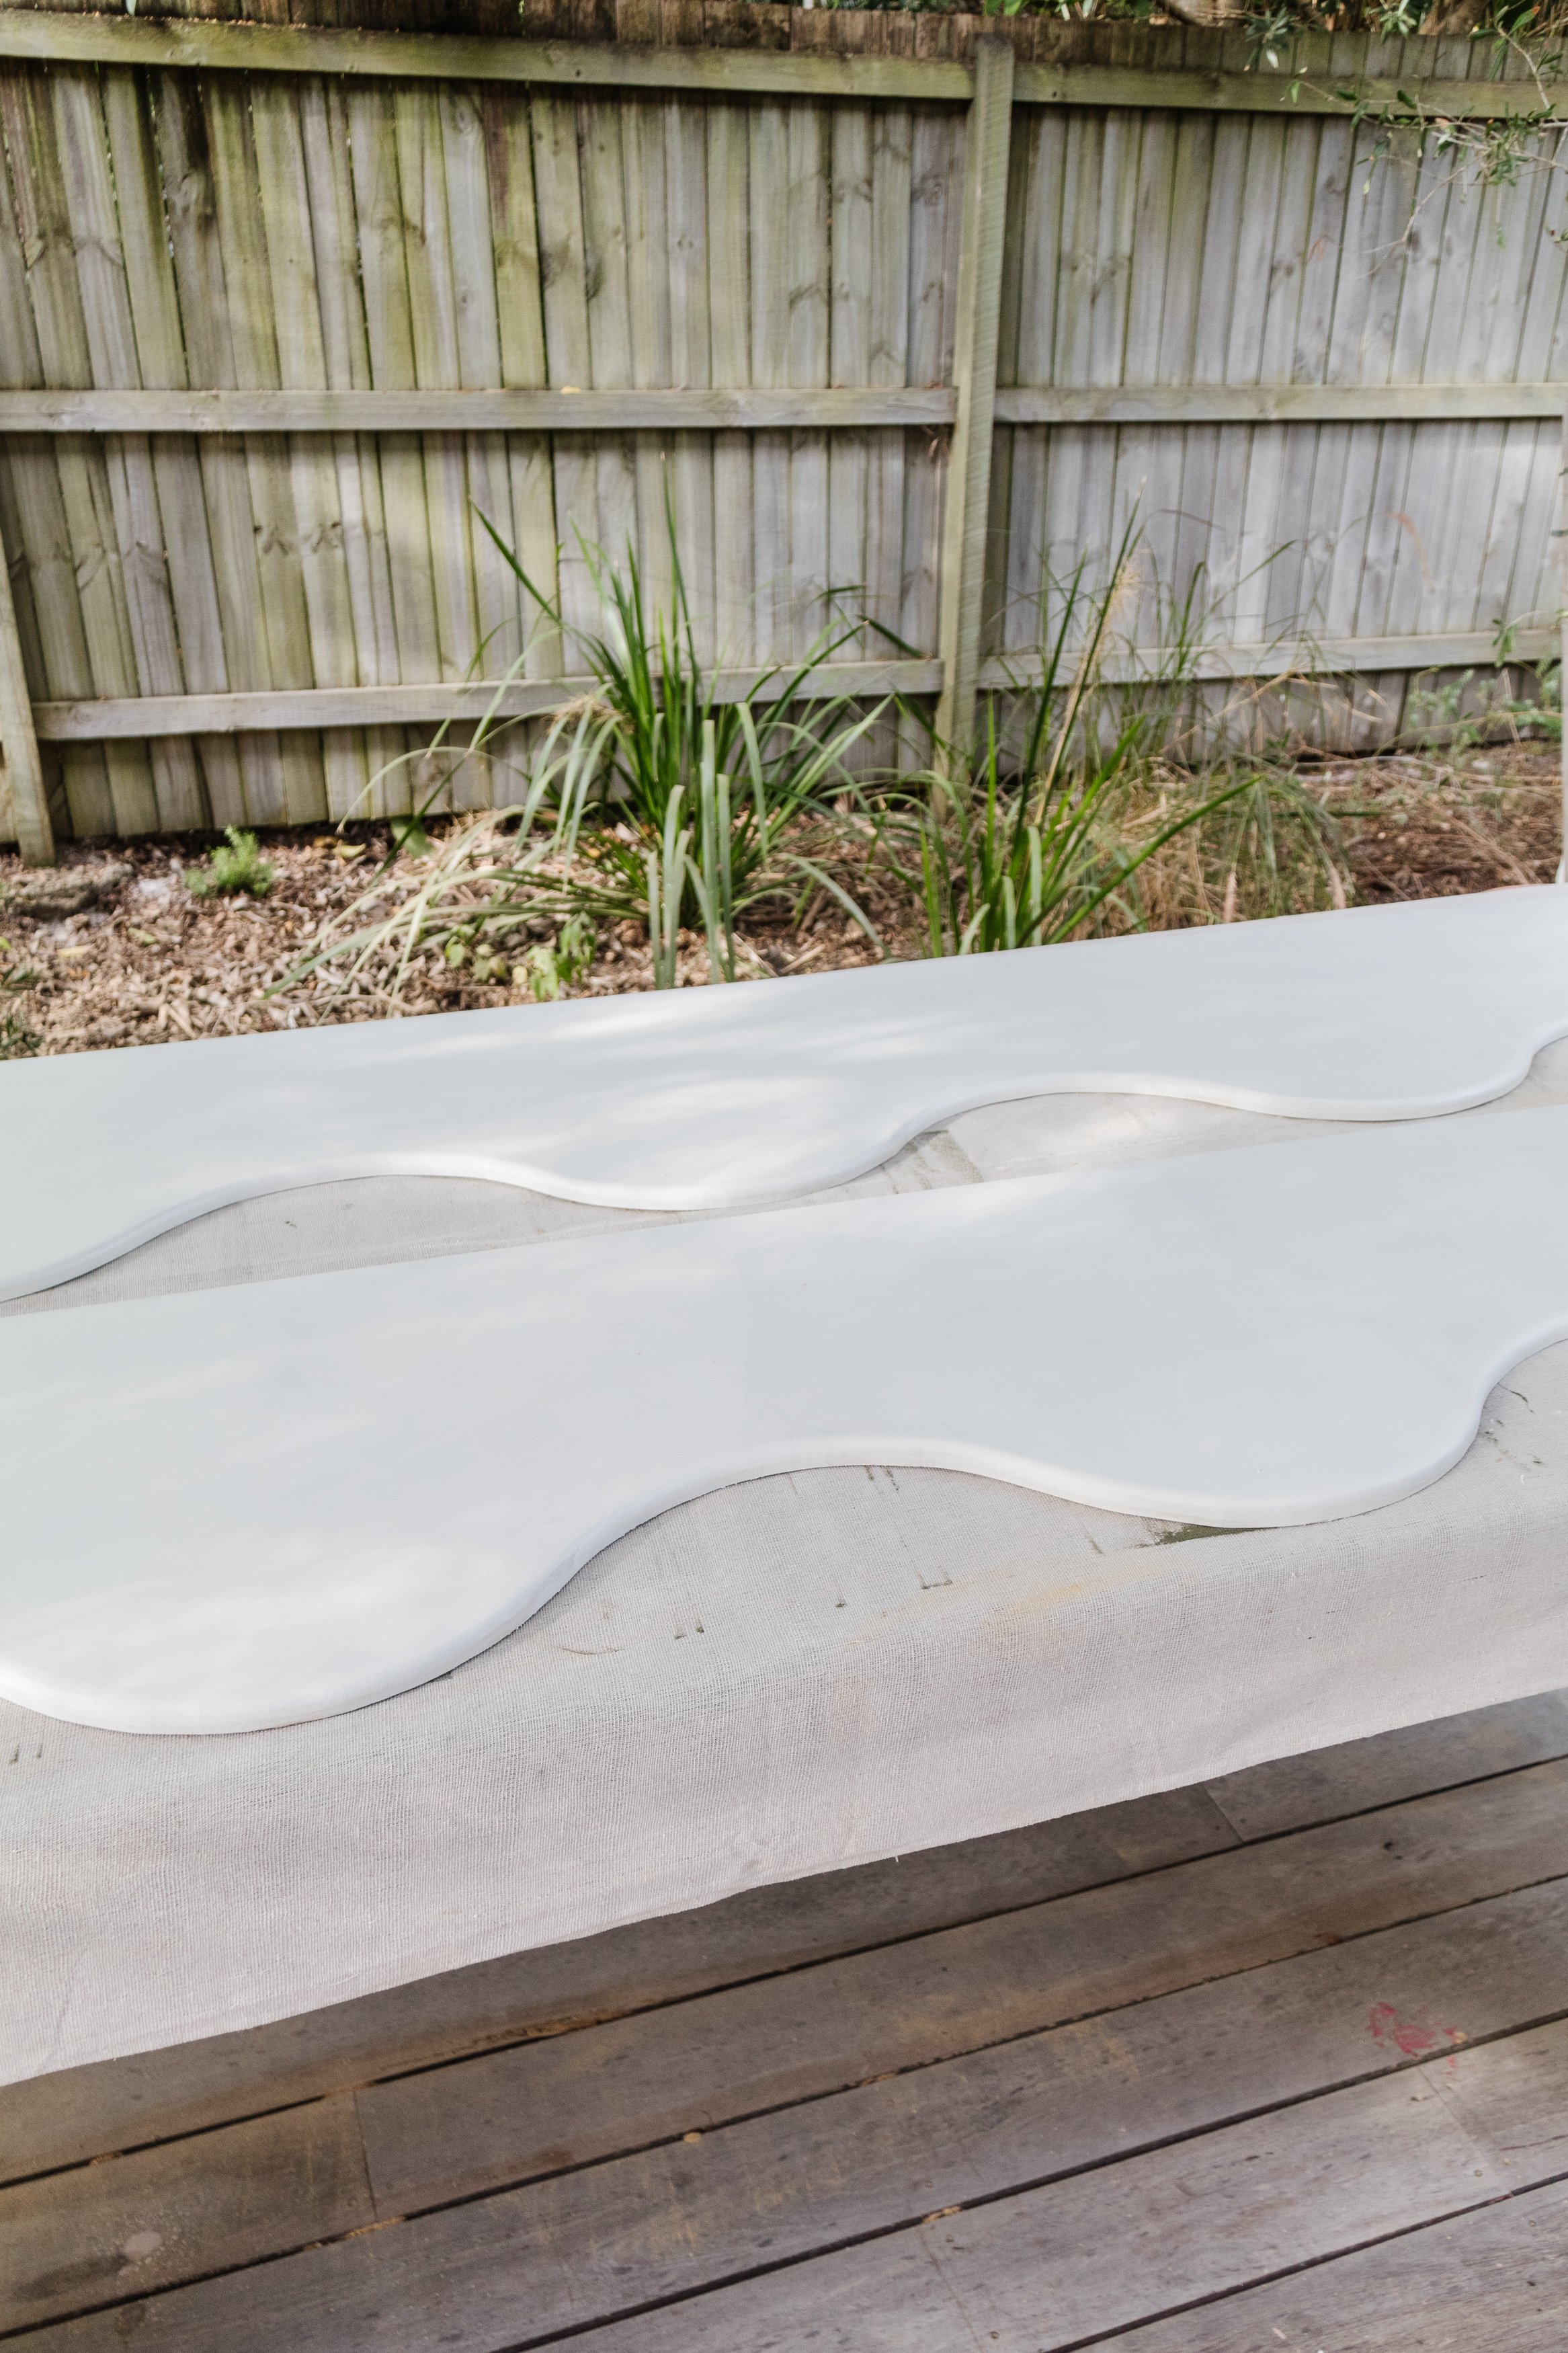
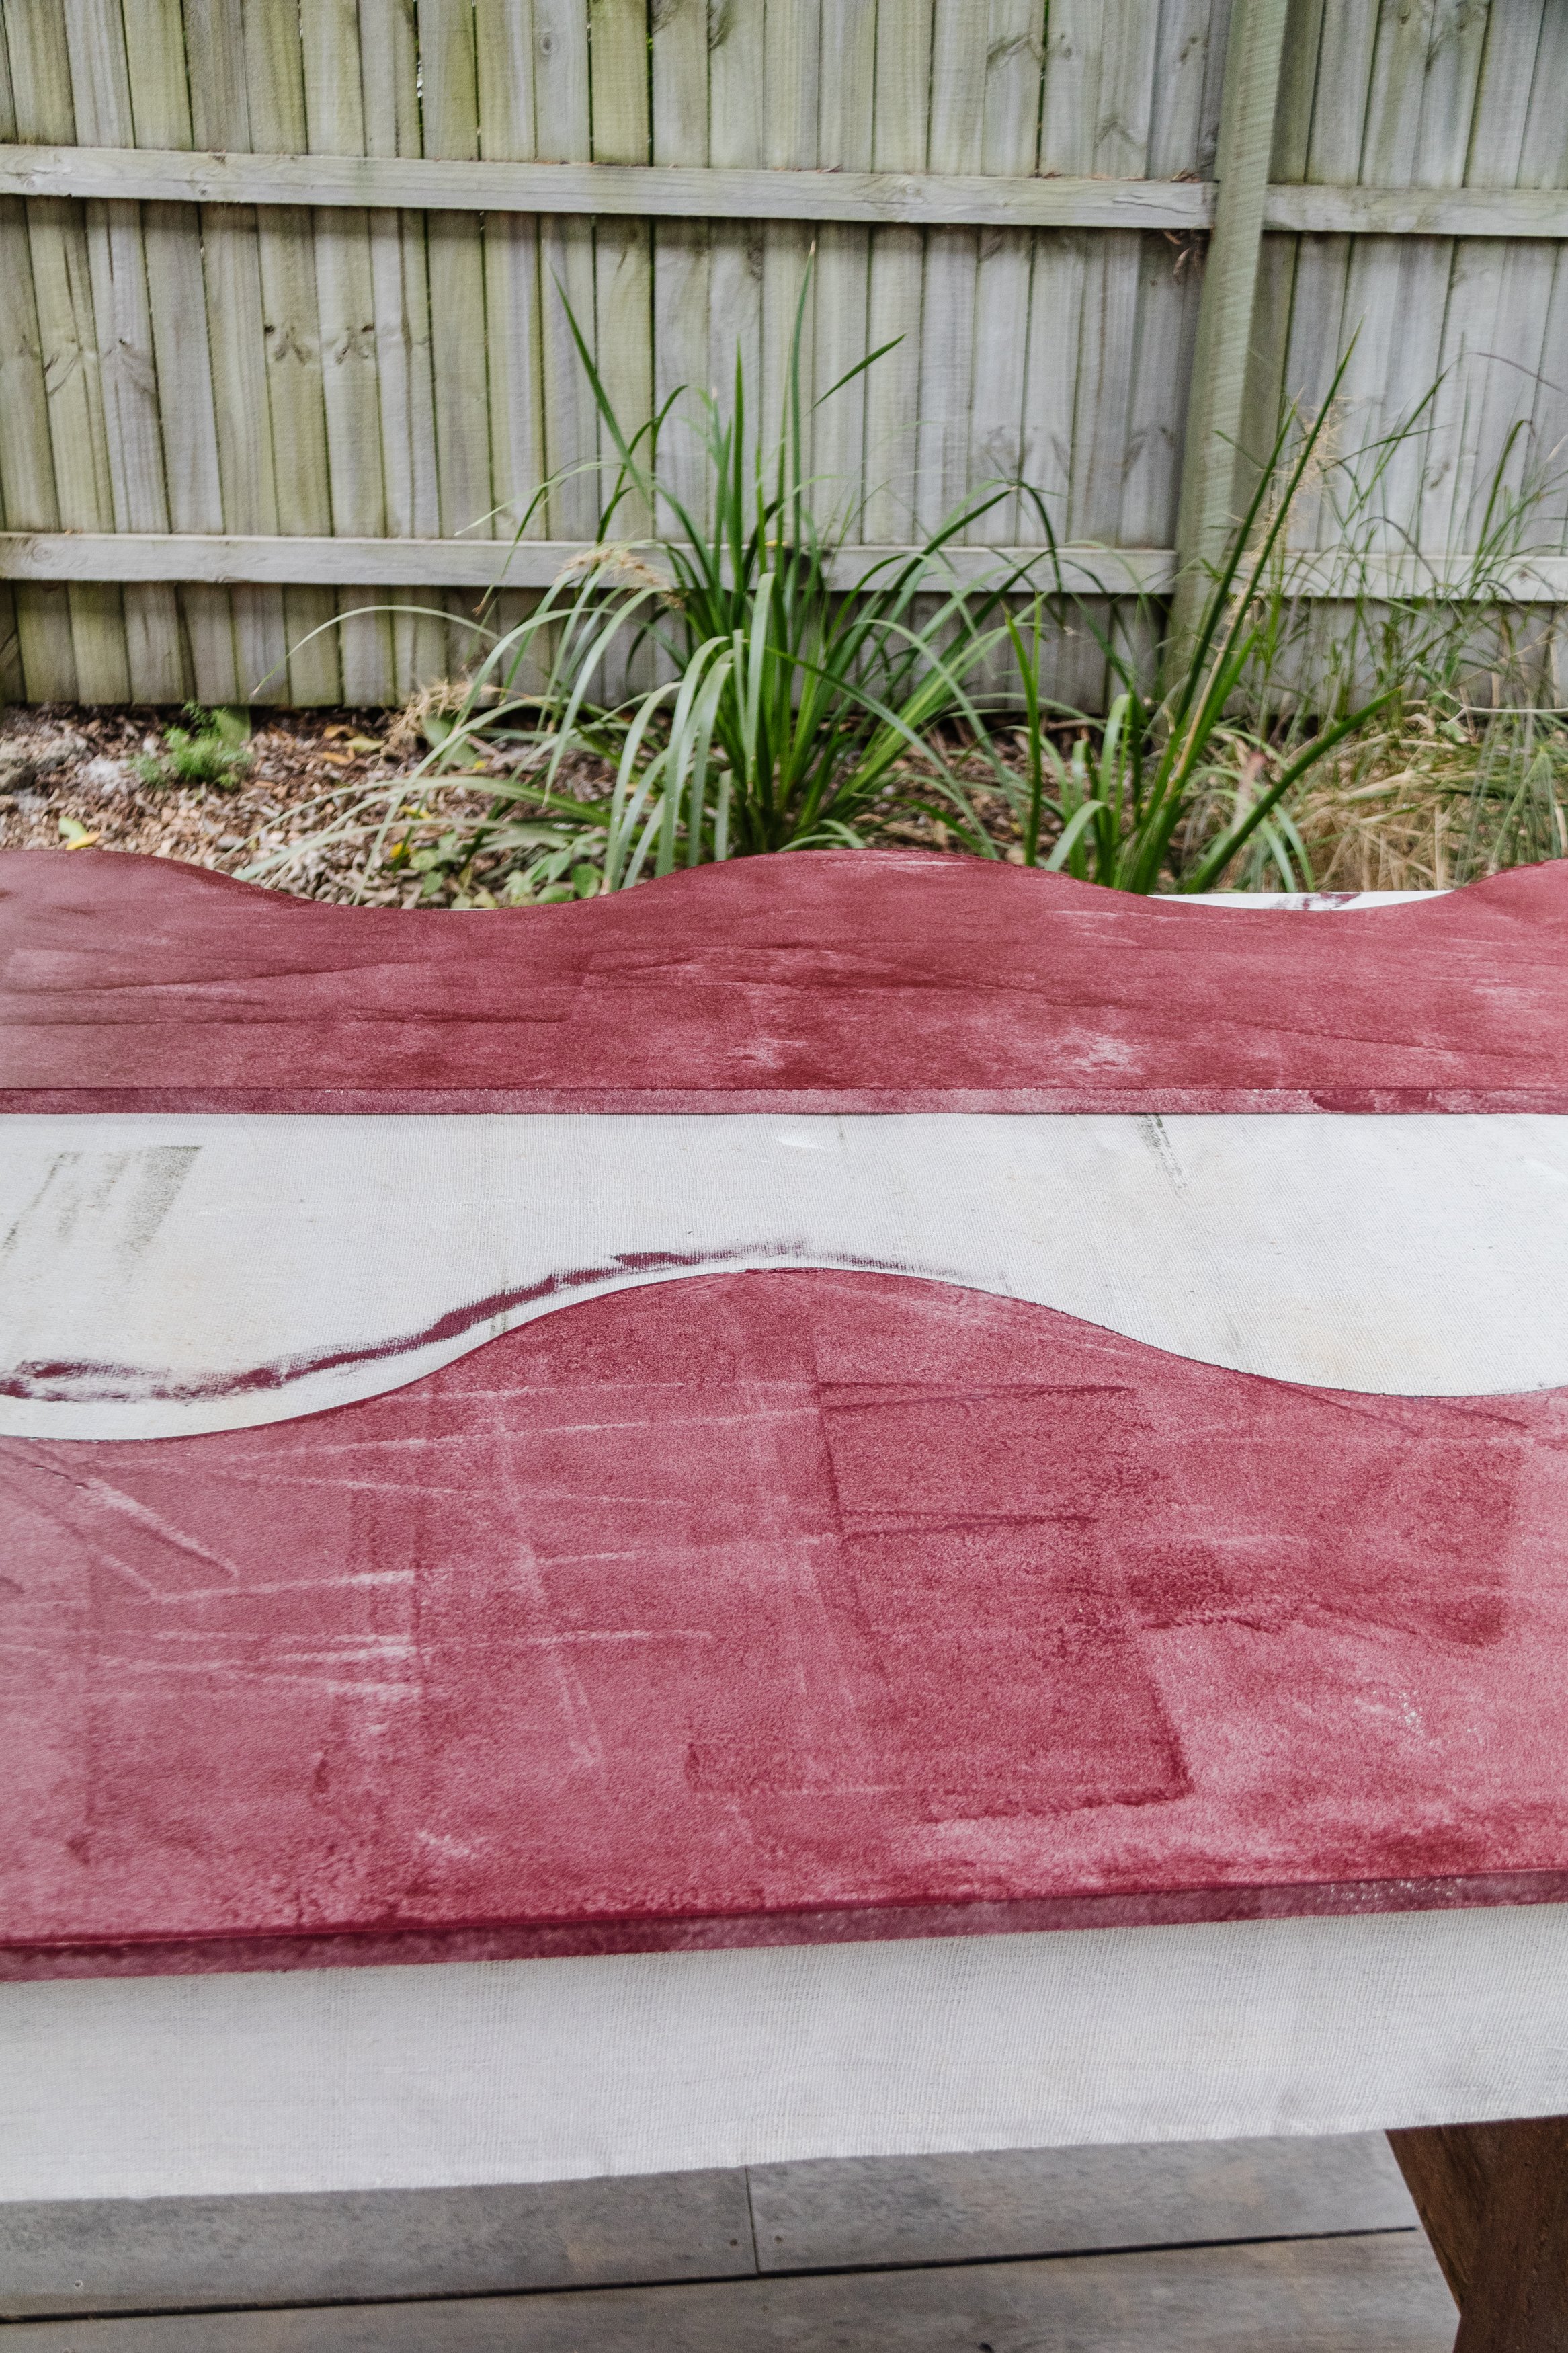
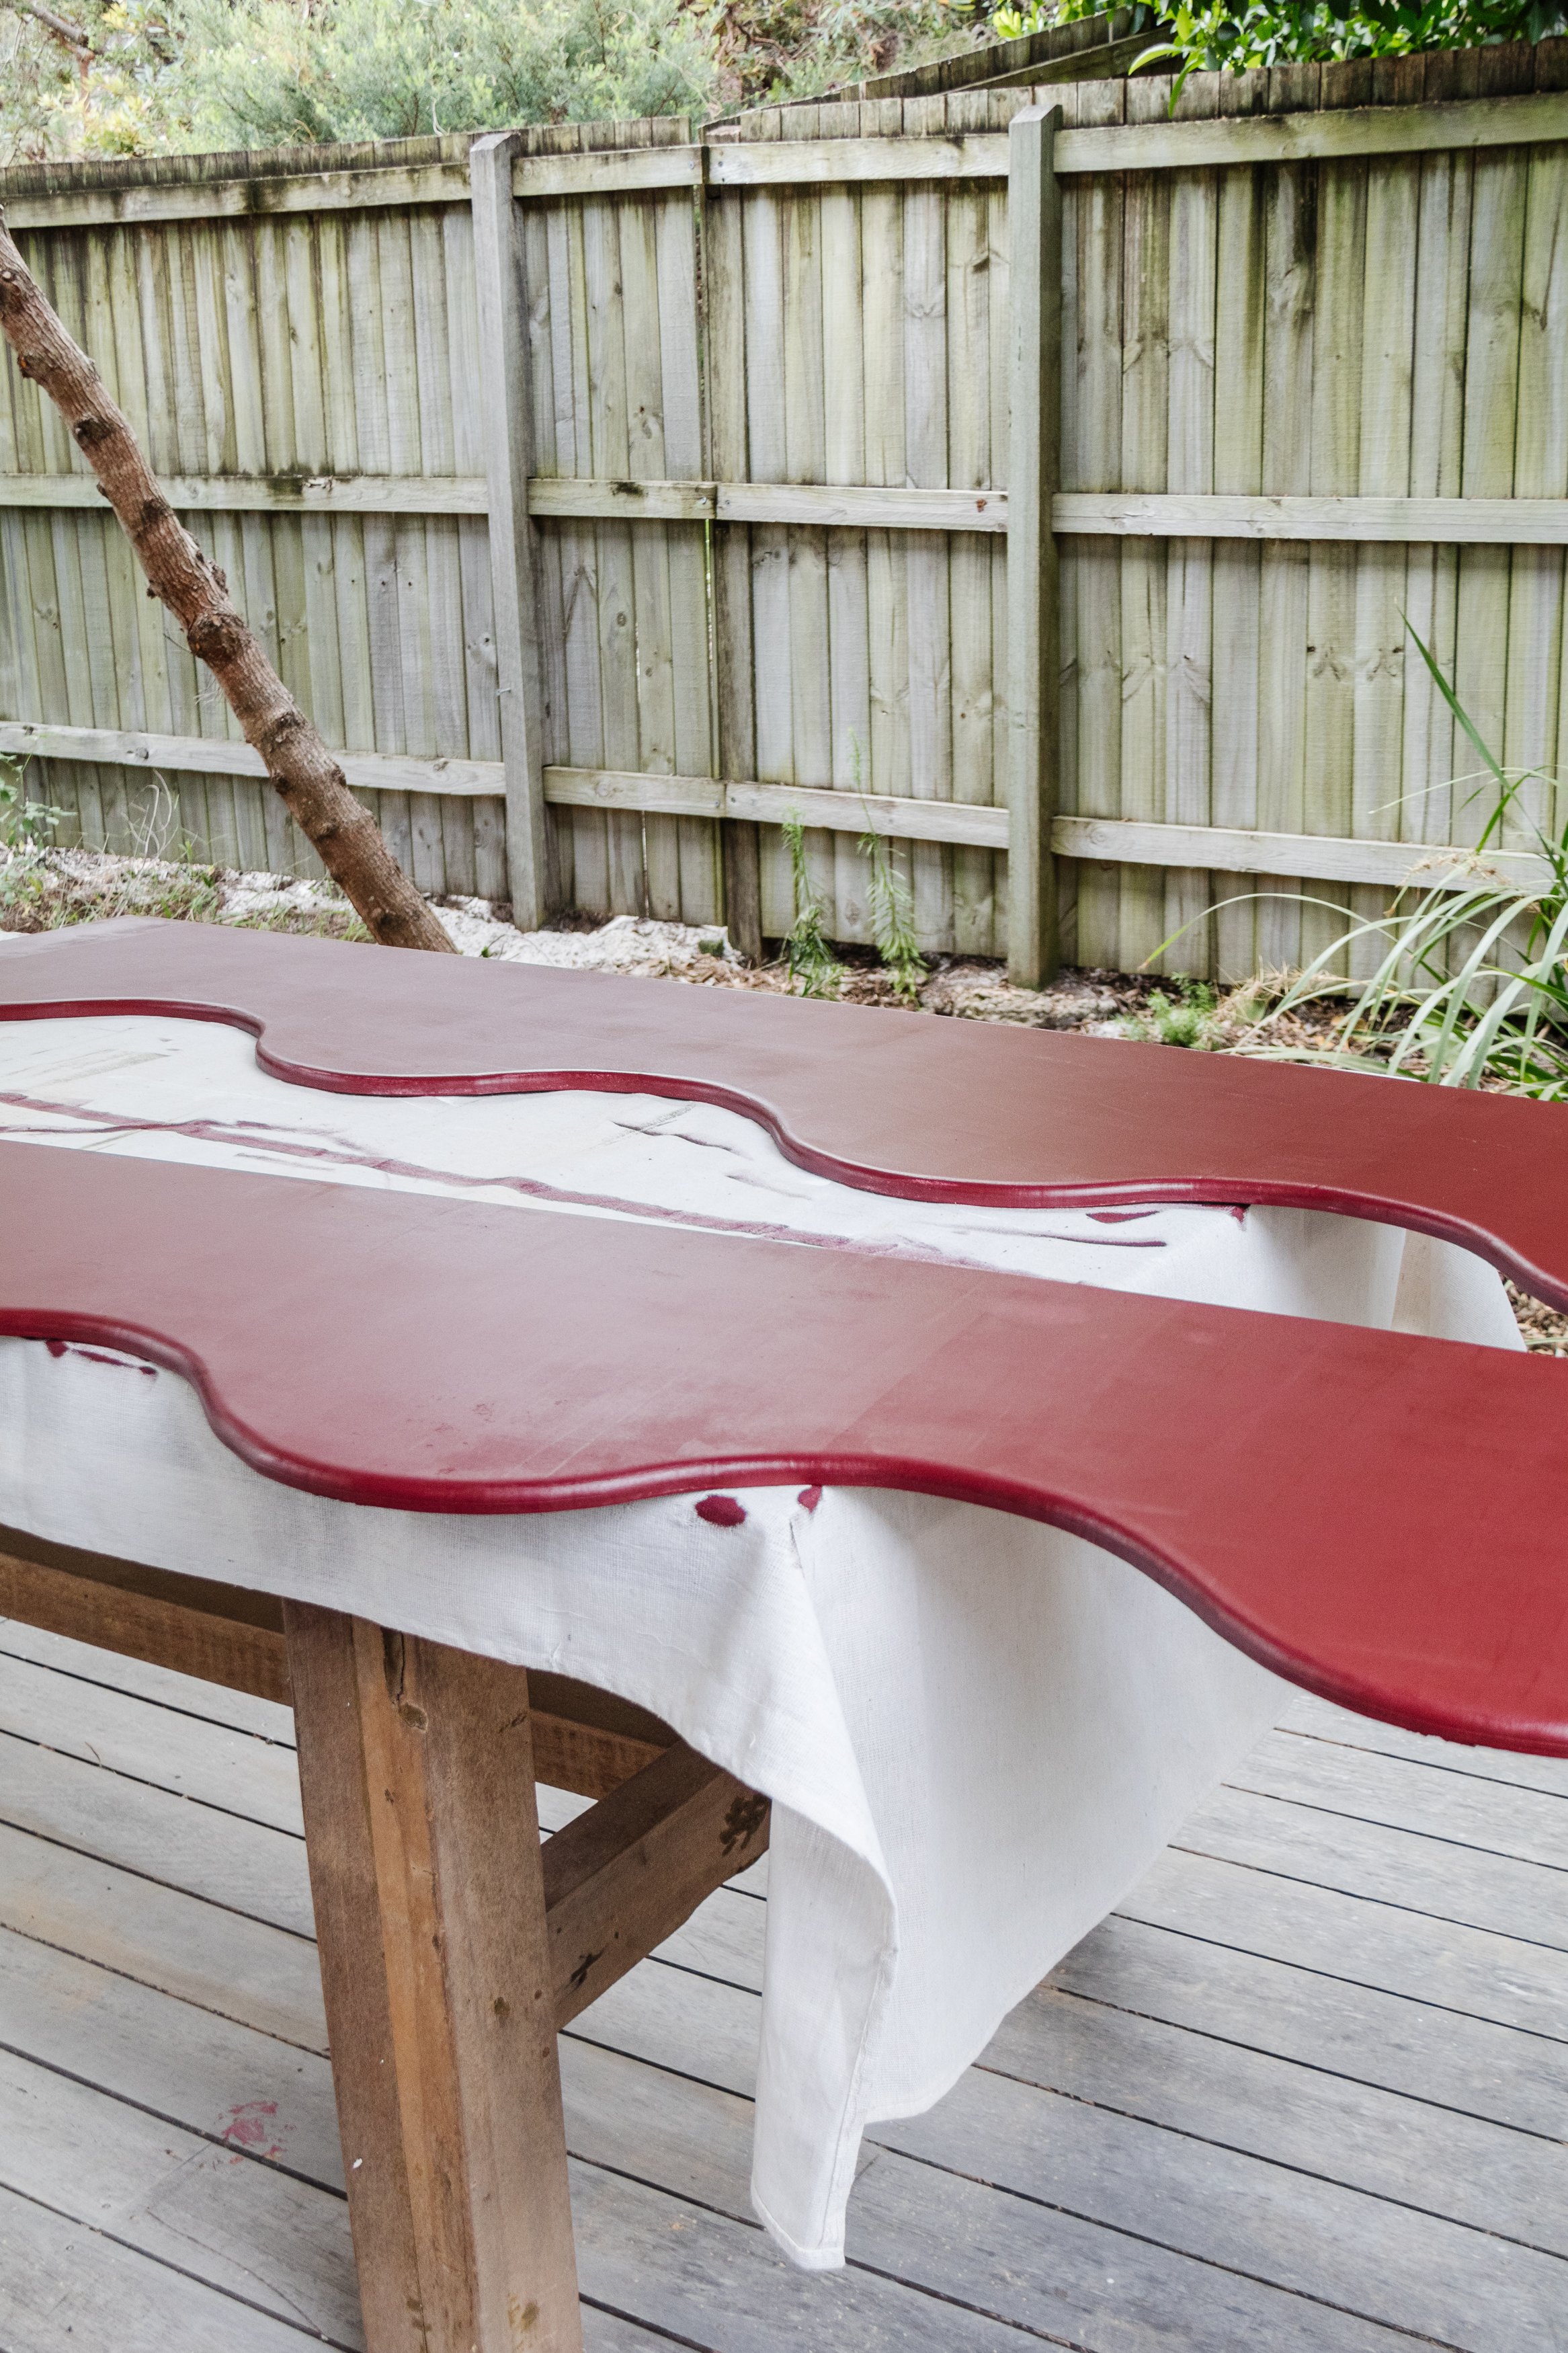
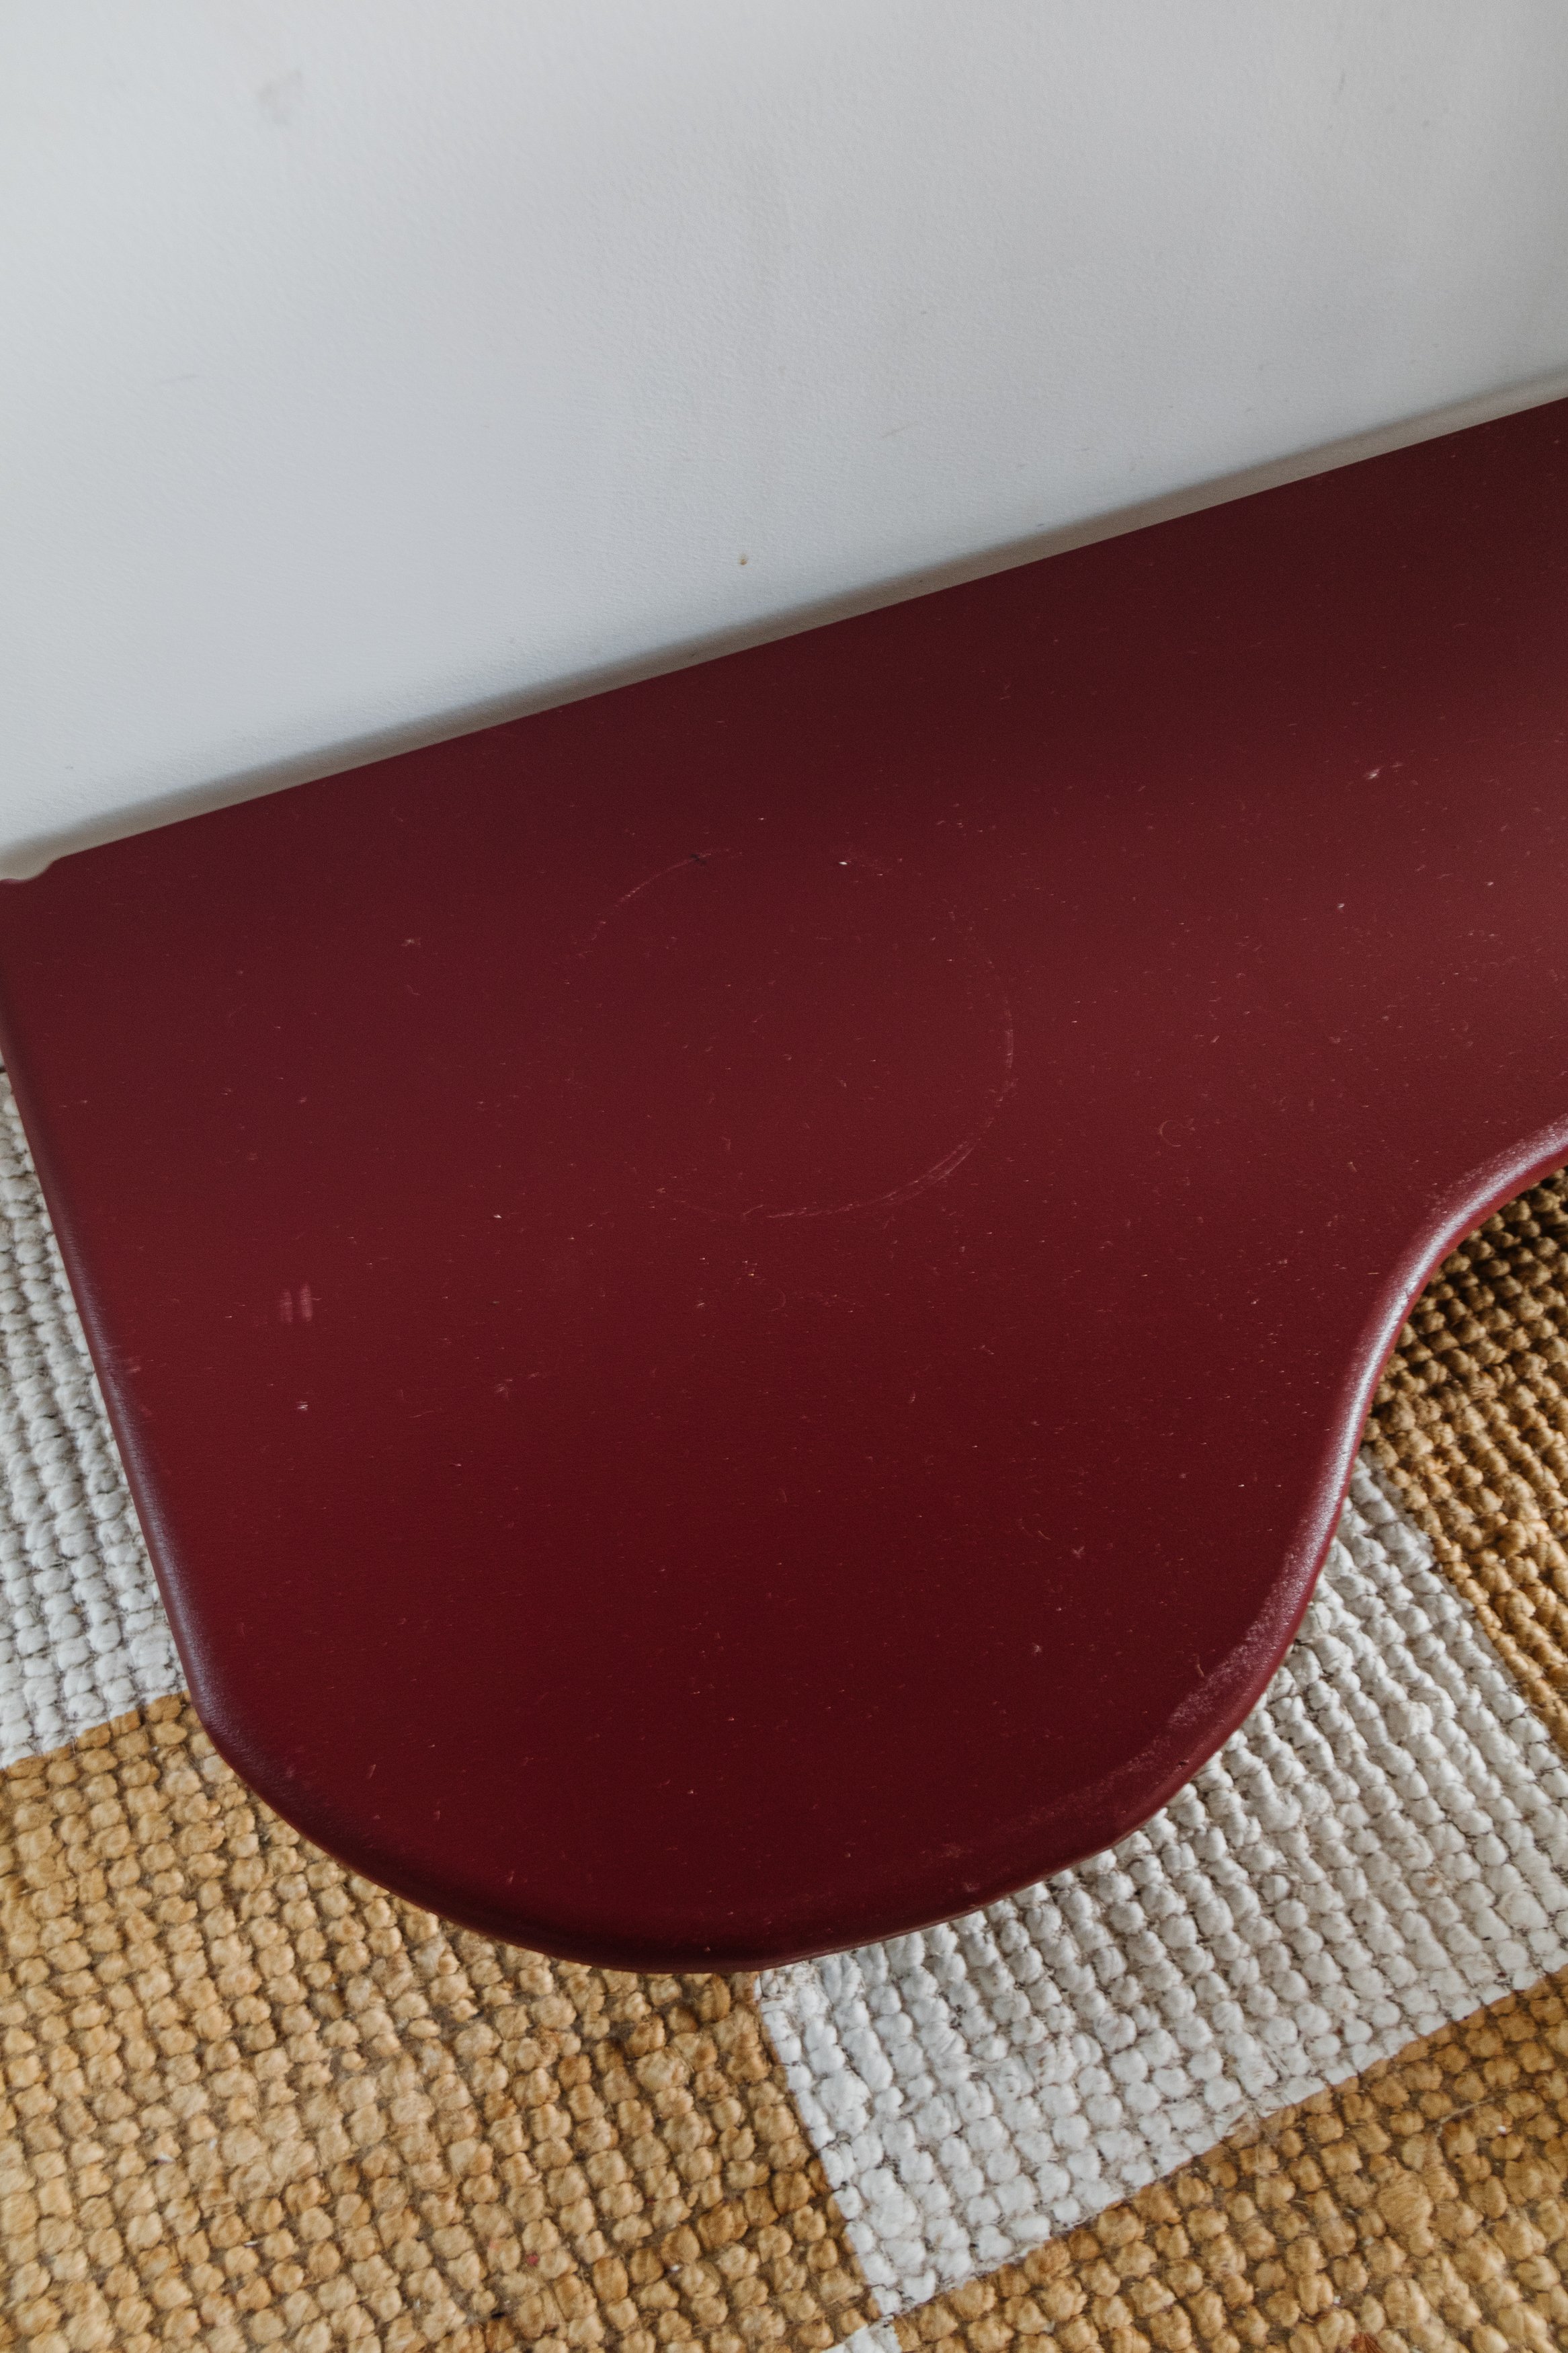
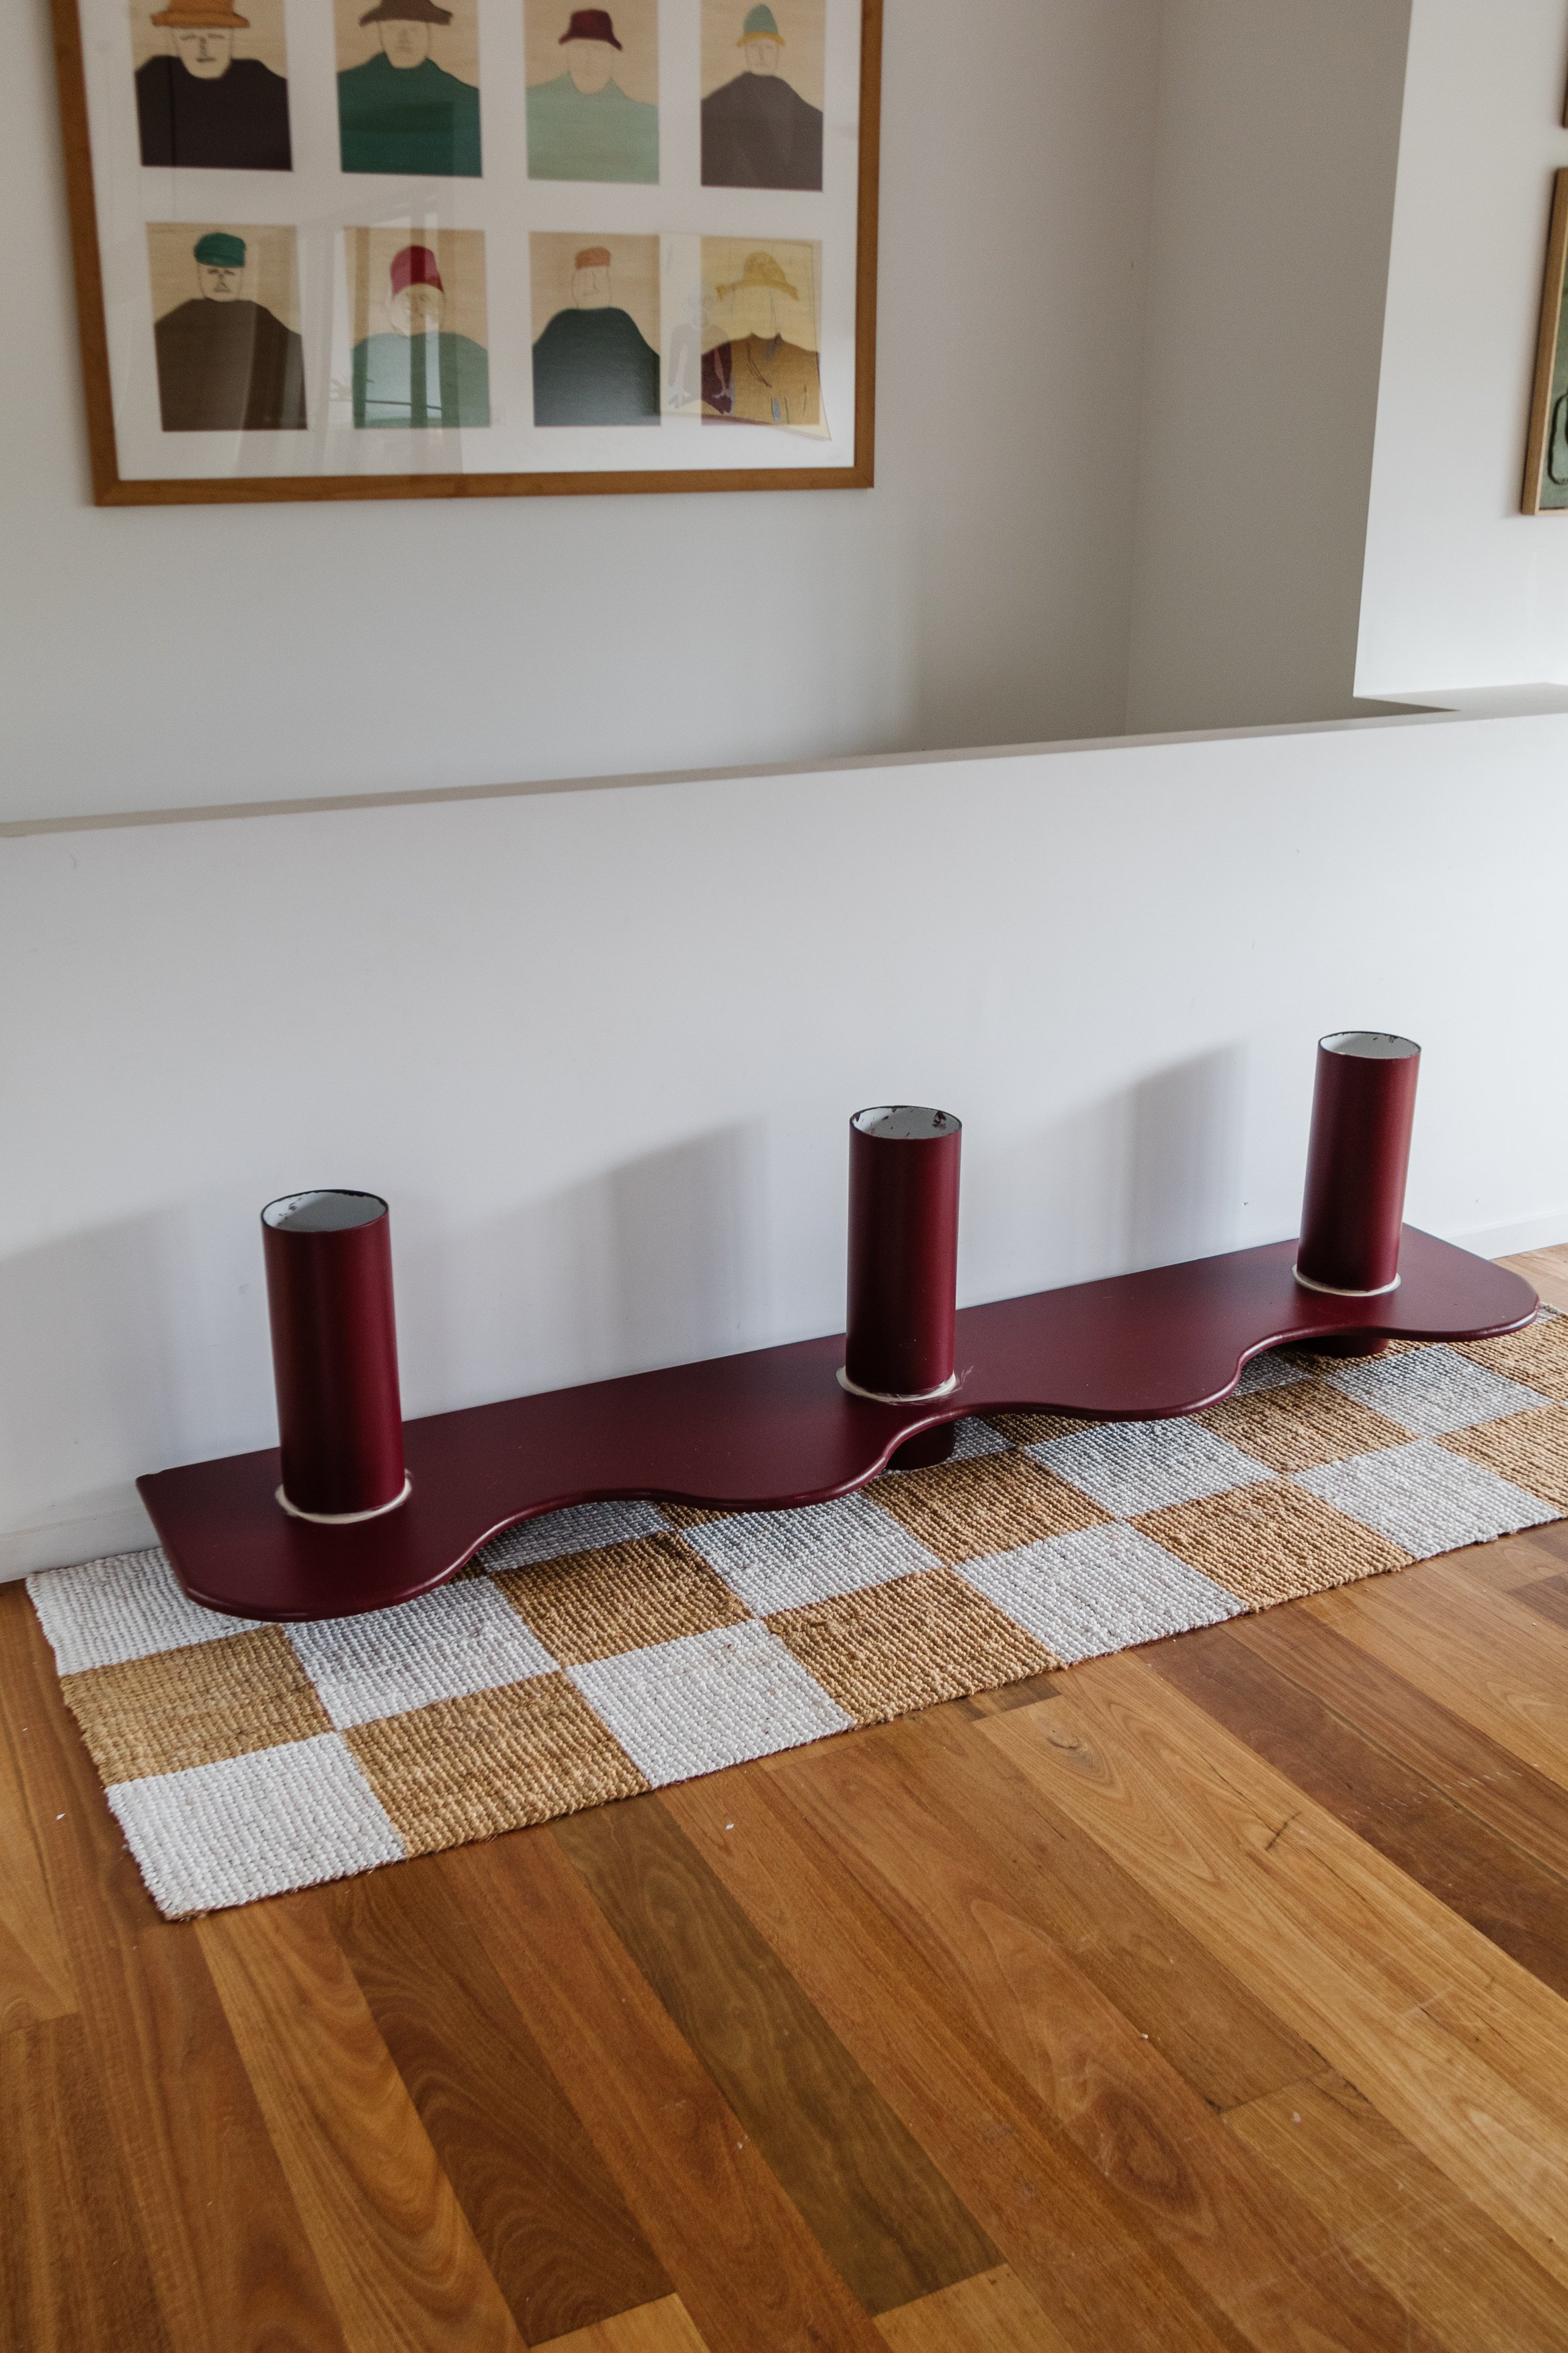
Step 1: The first thing I did was draw a wavy pattern onto one piece of MDF using a felt tip pen and a chopping board. The distance between the peak and trough was 200mm (100mm in the middle). I made sure the wavy edges started and finished in the same direction at each end. I secured the MDF to my workbench using clamps and then I cut the wavy edge using a jigsaw. I also cut the length down to 2200mm. I used this first piece as a template, which I traced using the felt tip pen onto the second and third piece of MDF, which I also cut.
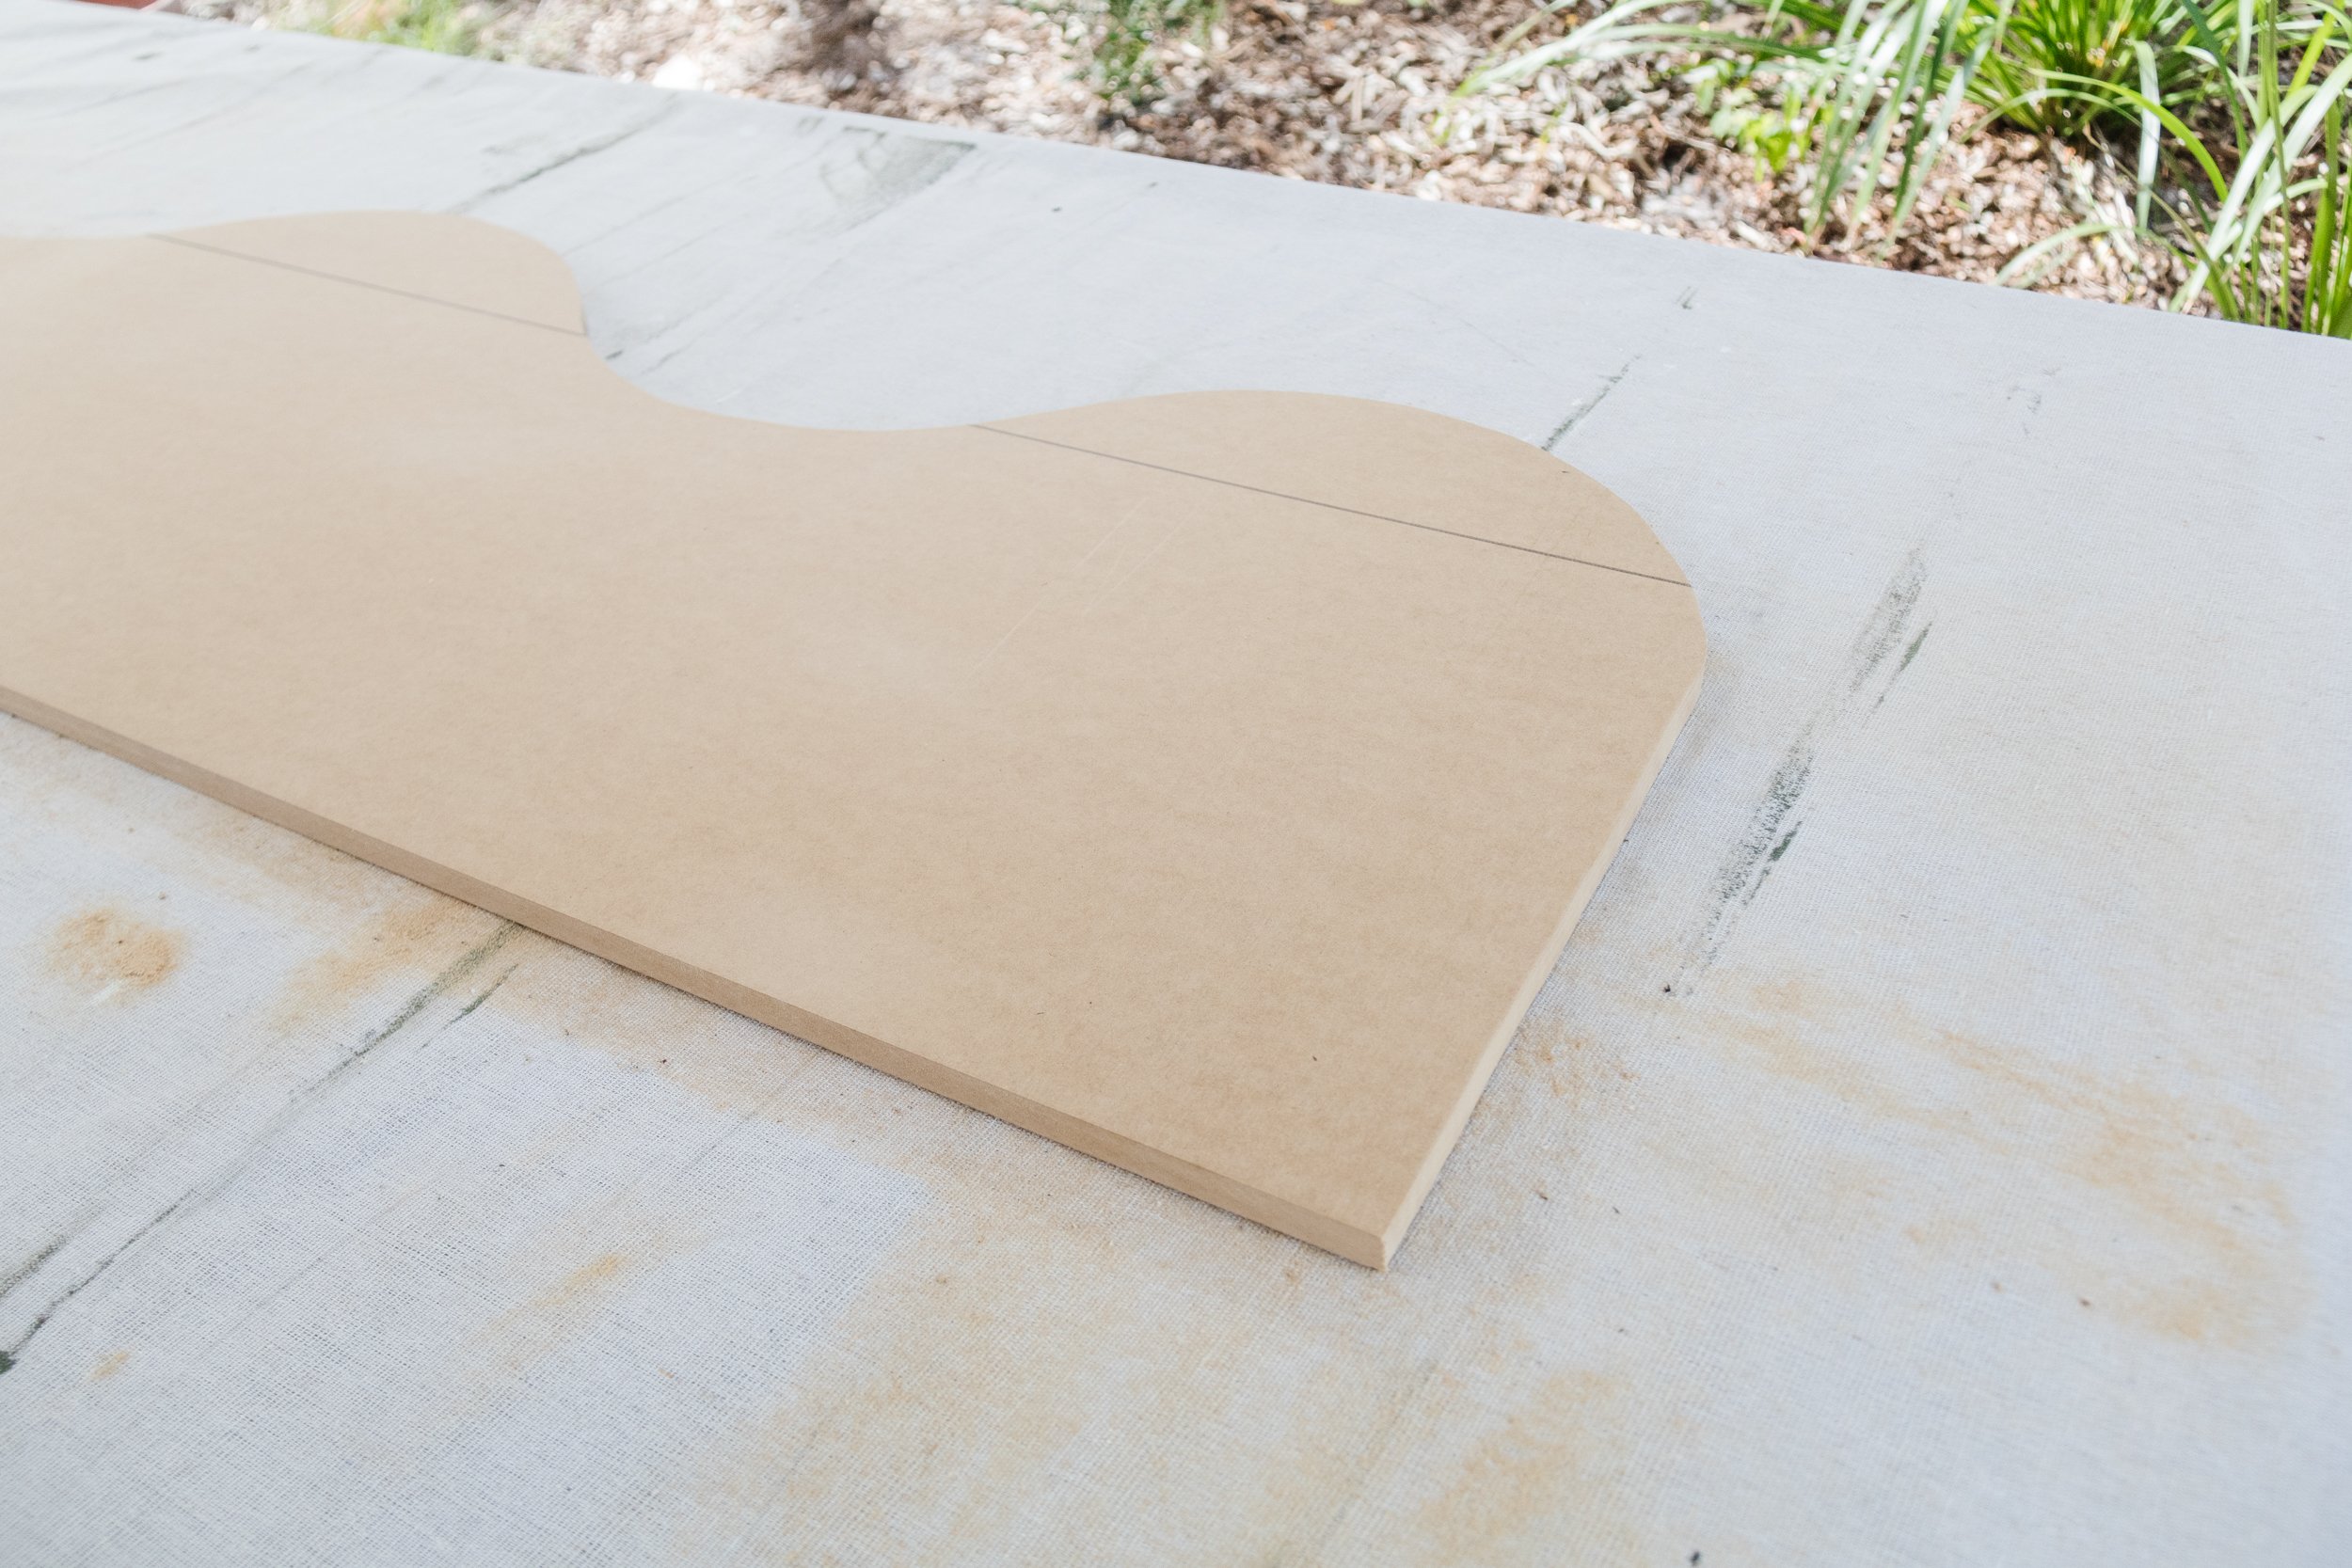

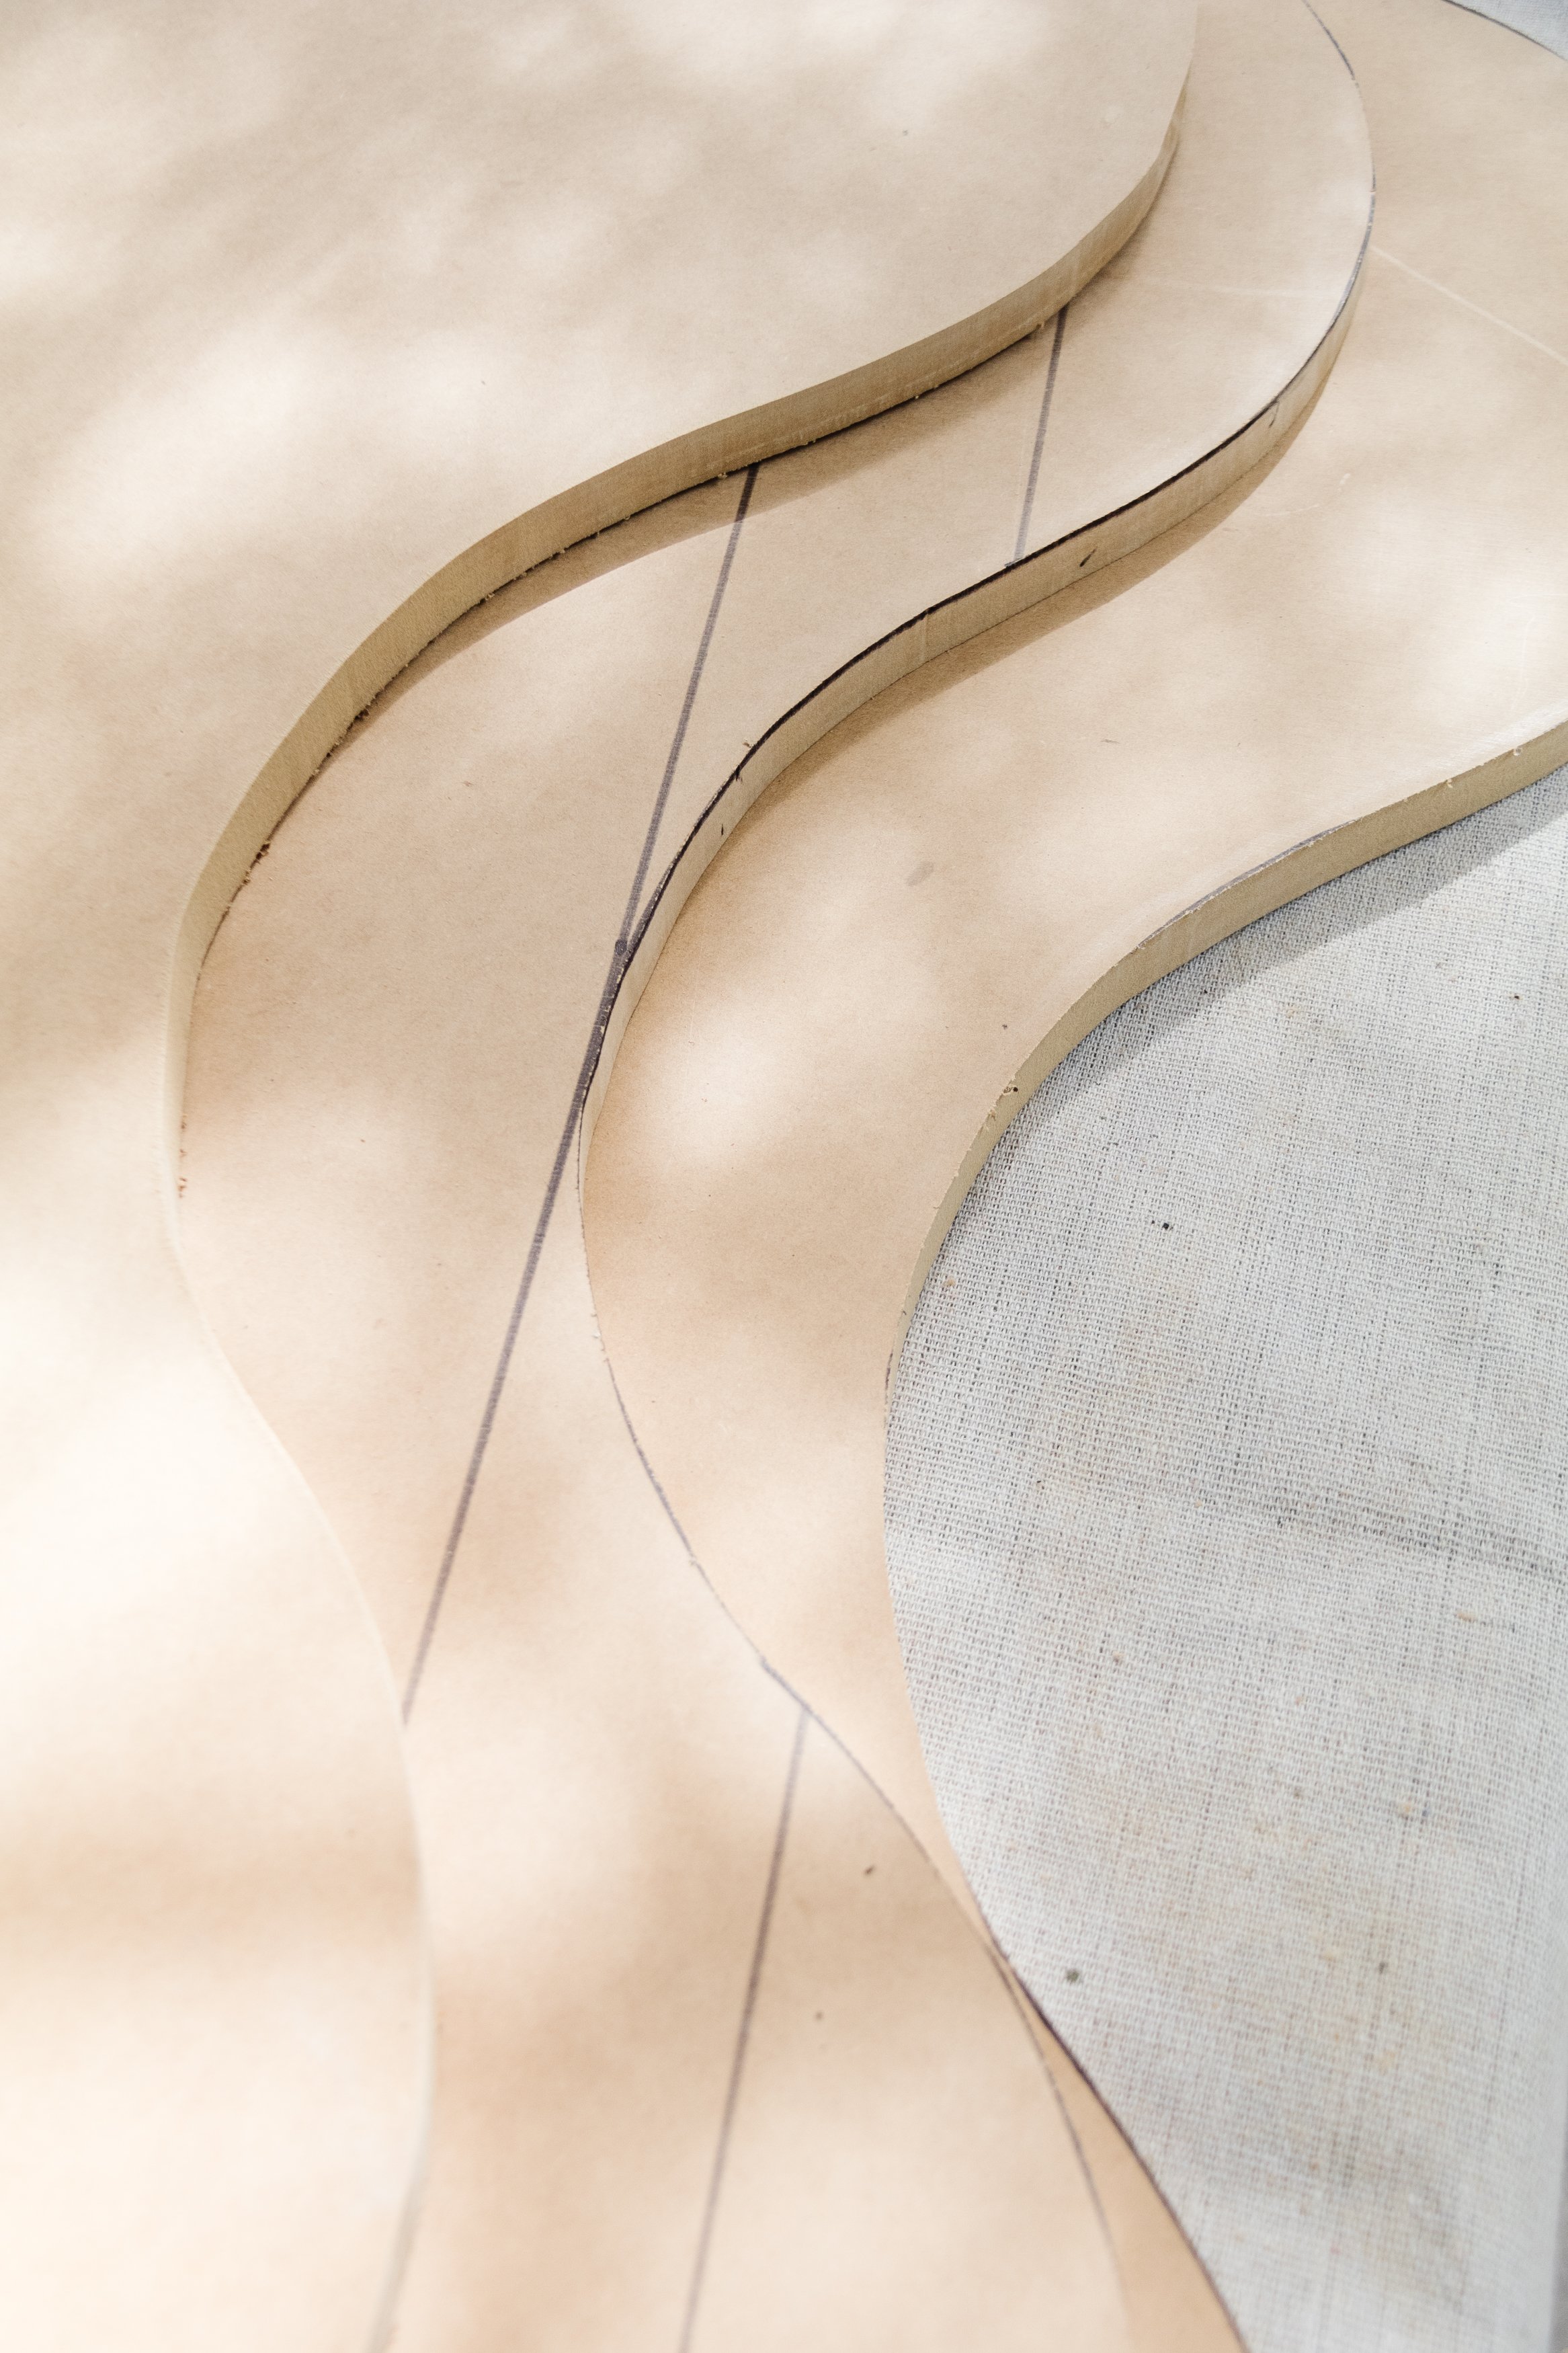
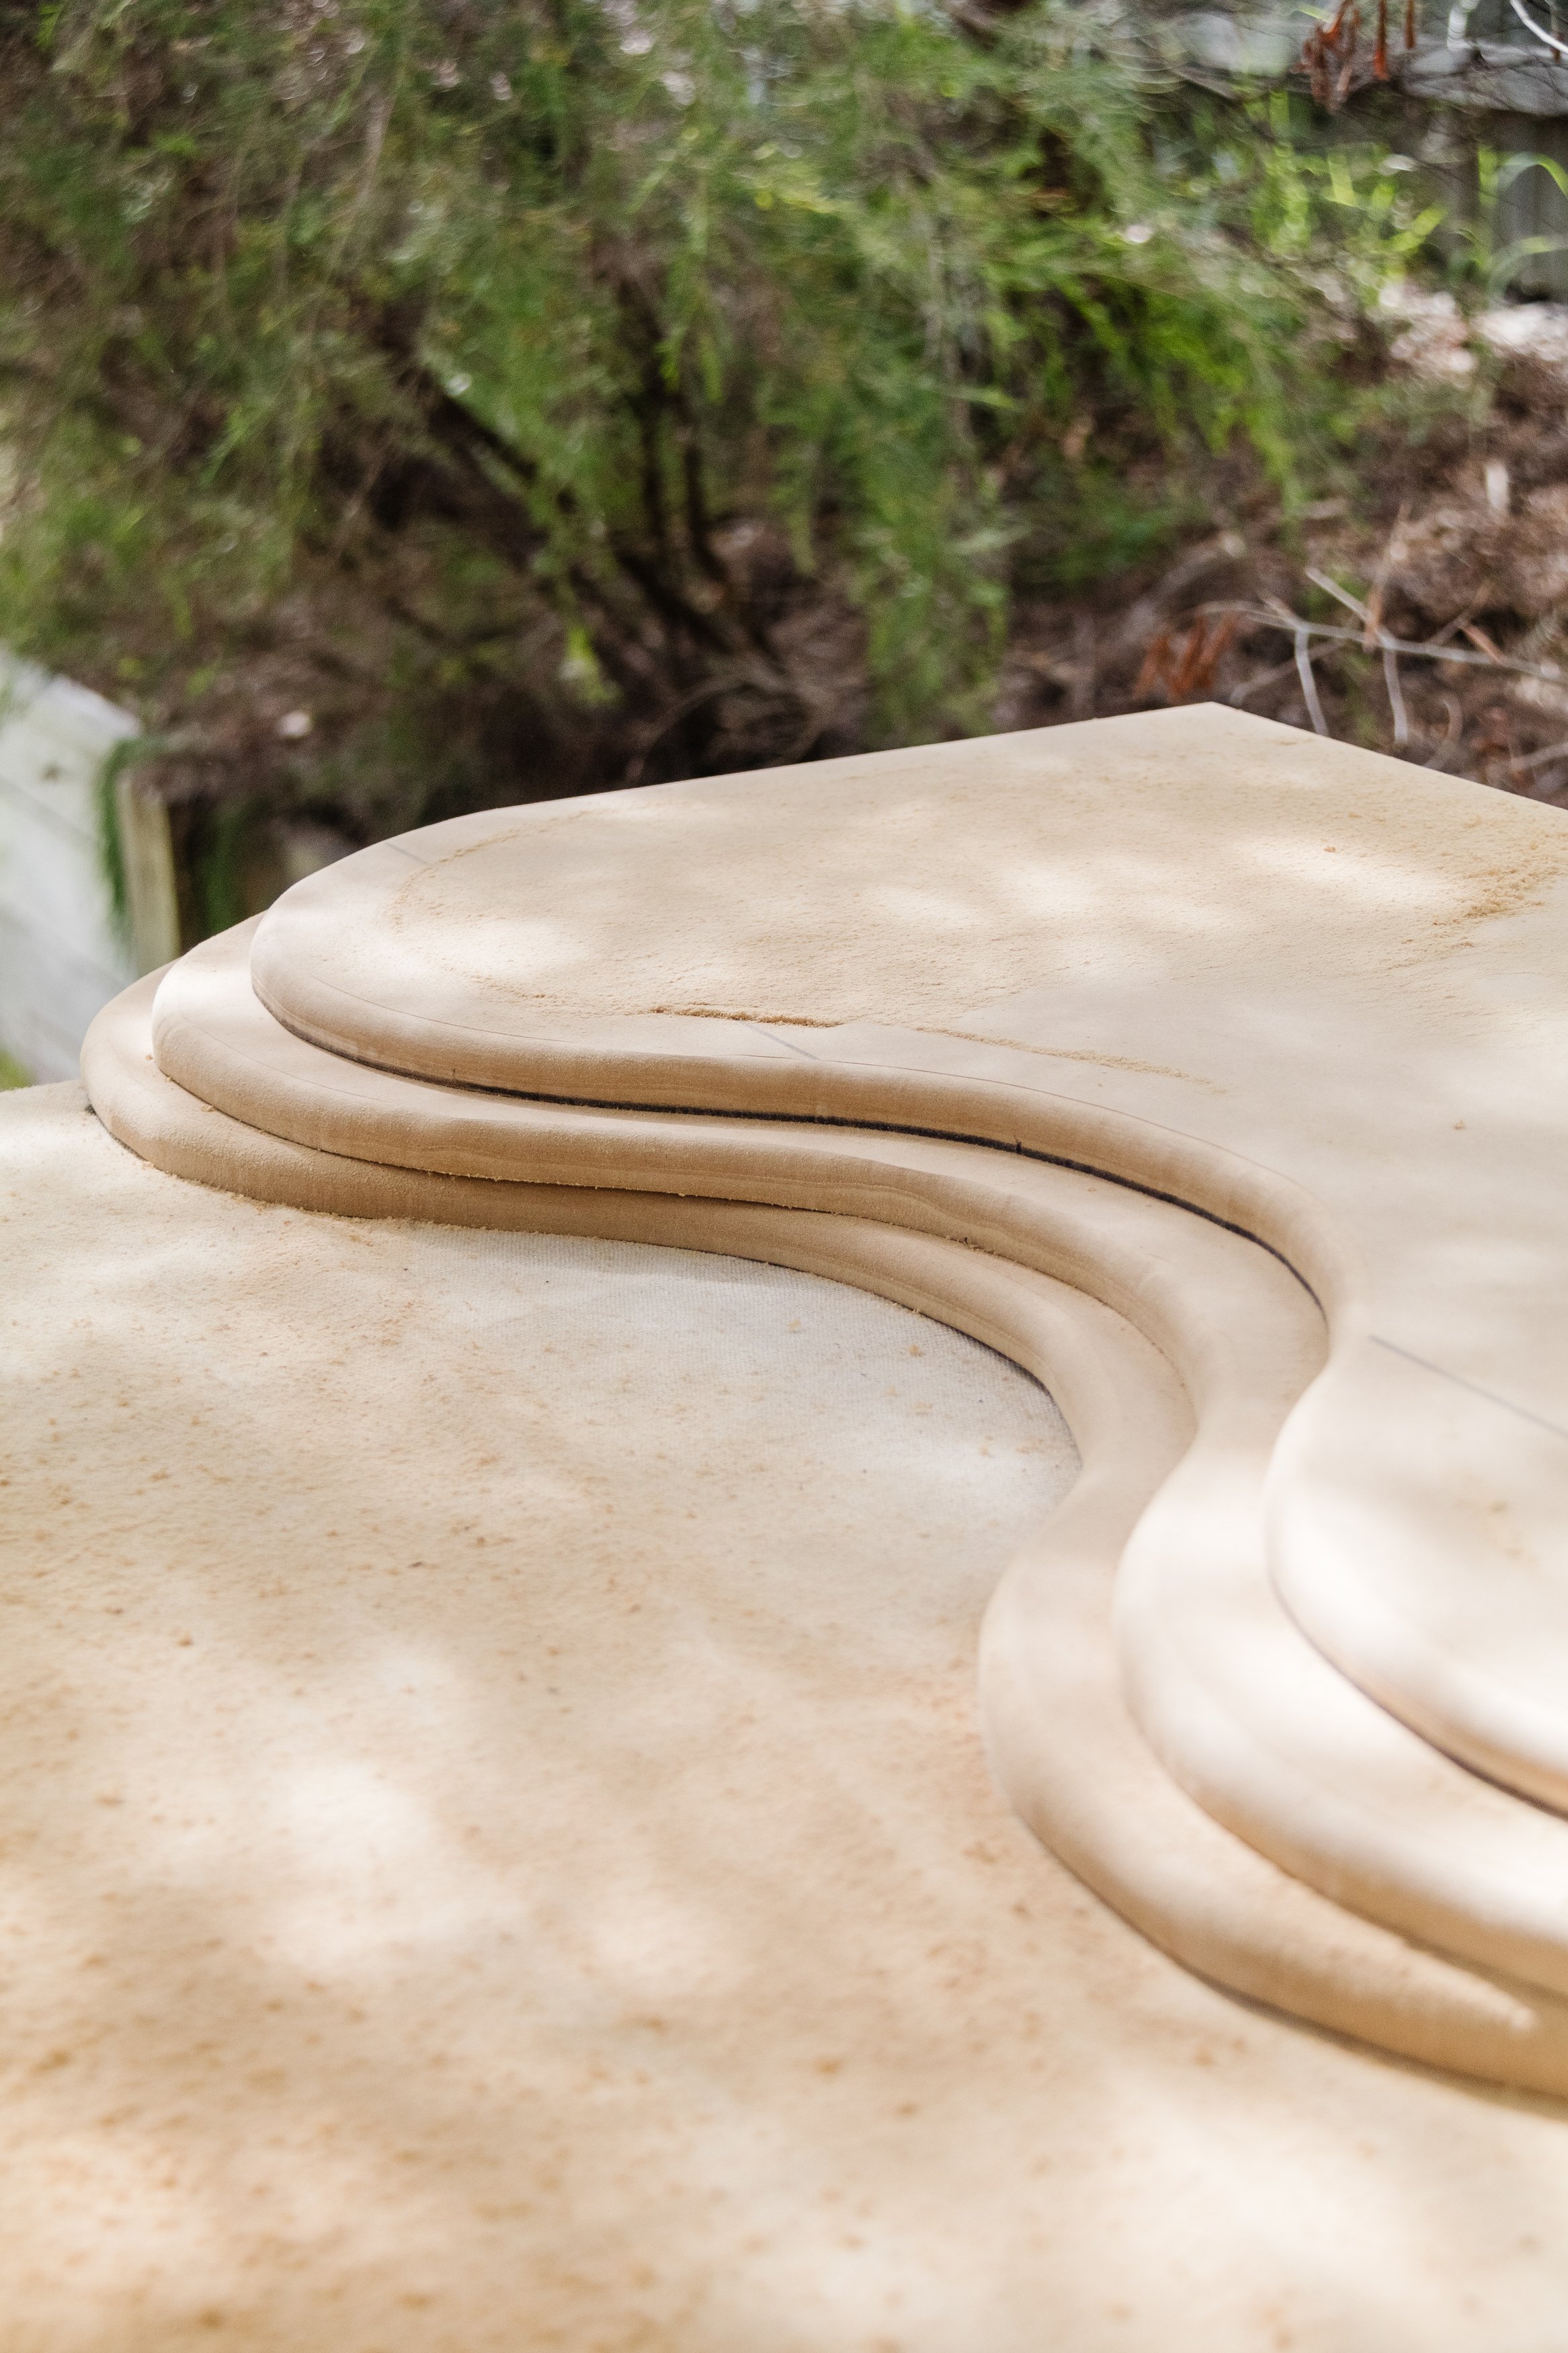
Step 2: I wanted the edges to be smooth and rounded, so I used my router to achieve this look. Creating a softened edge is also a lot safer if you have kids at home.
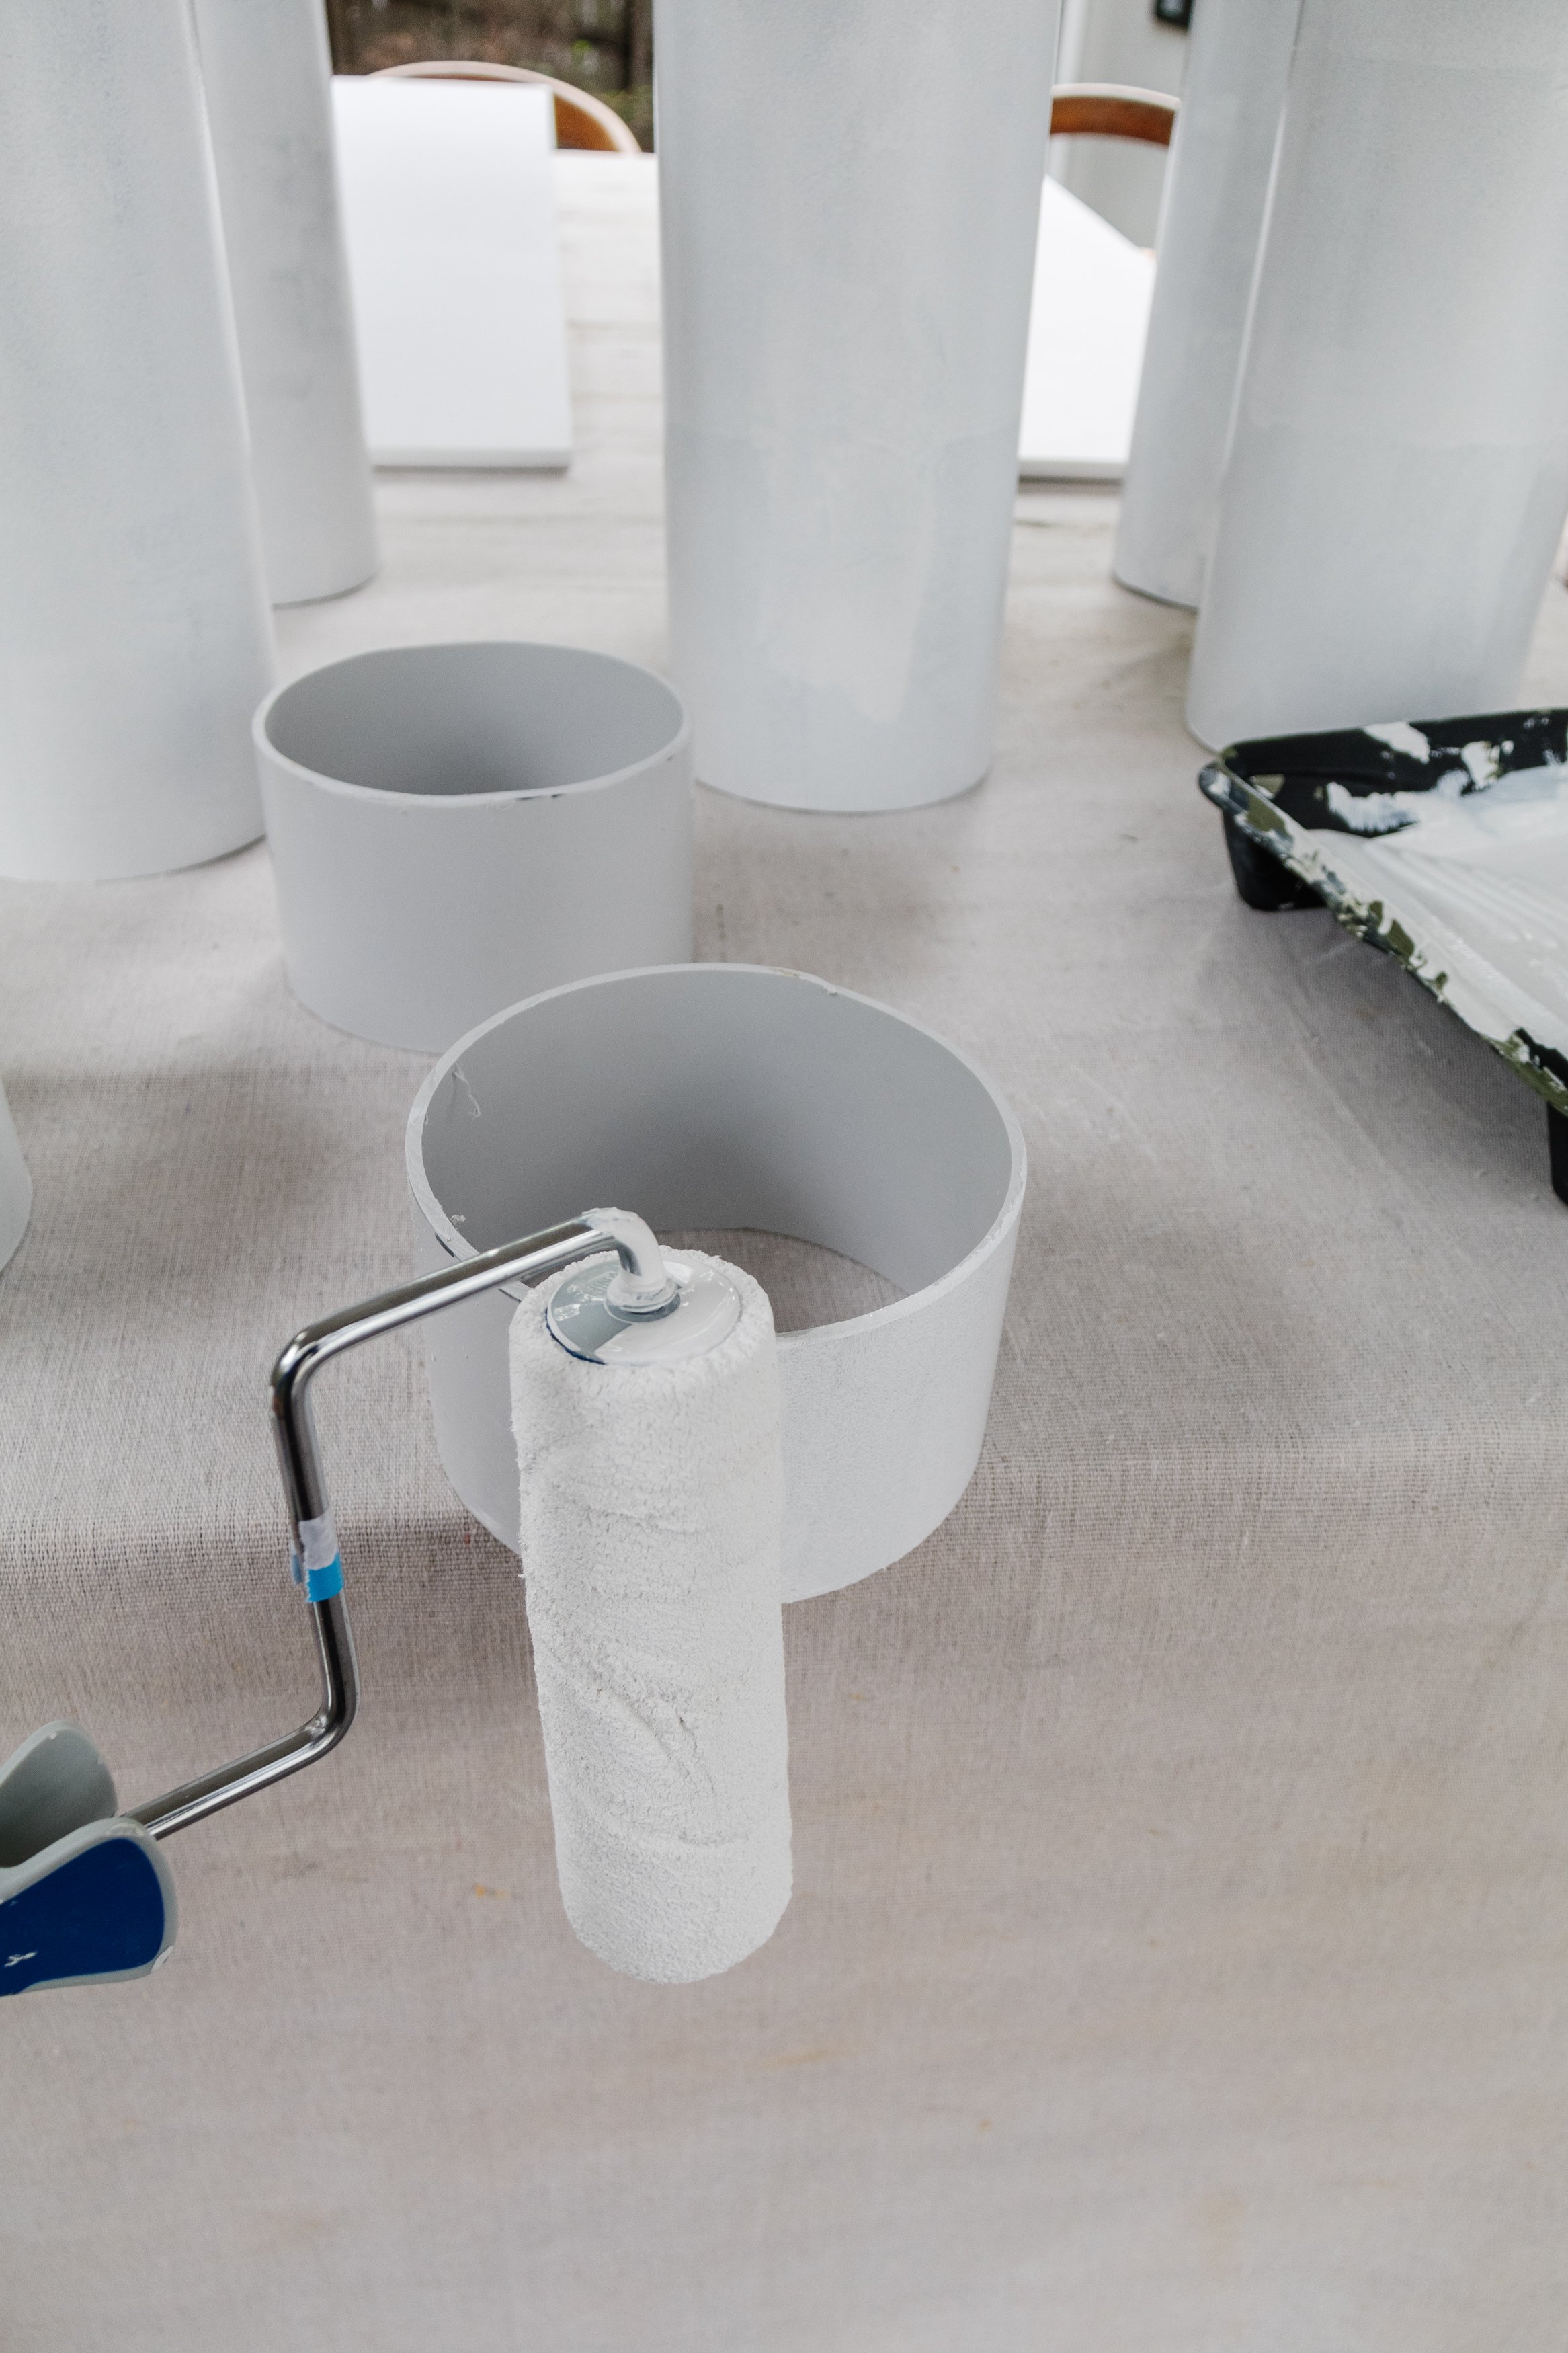
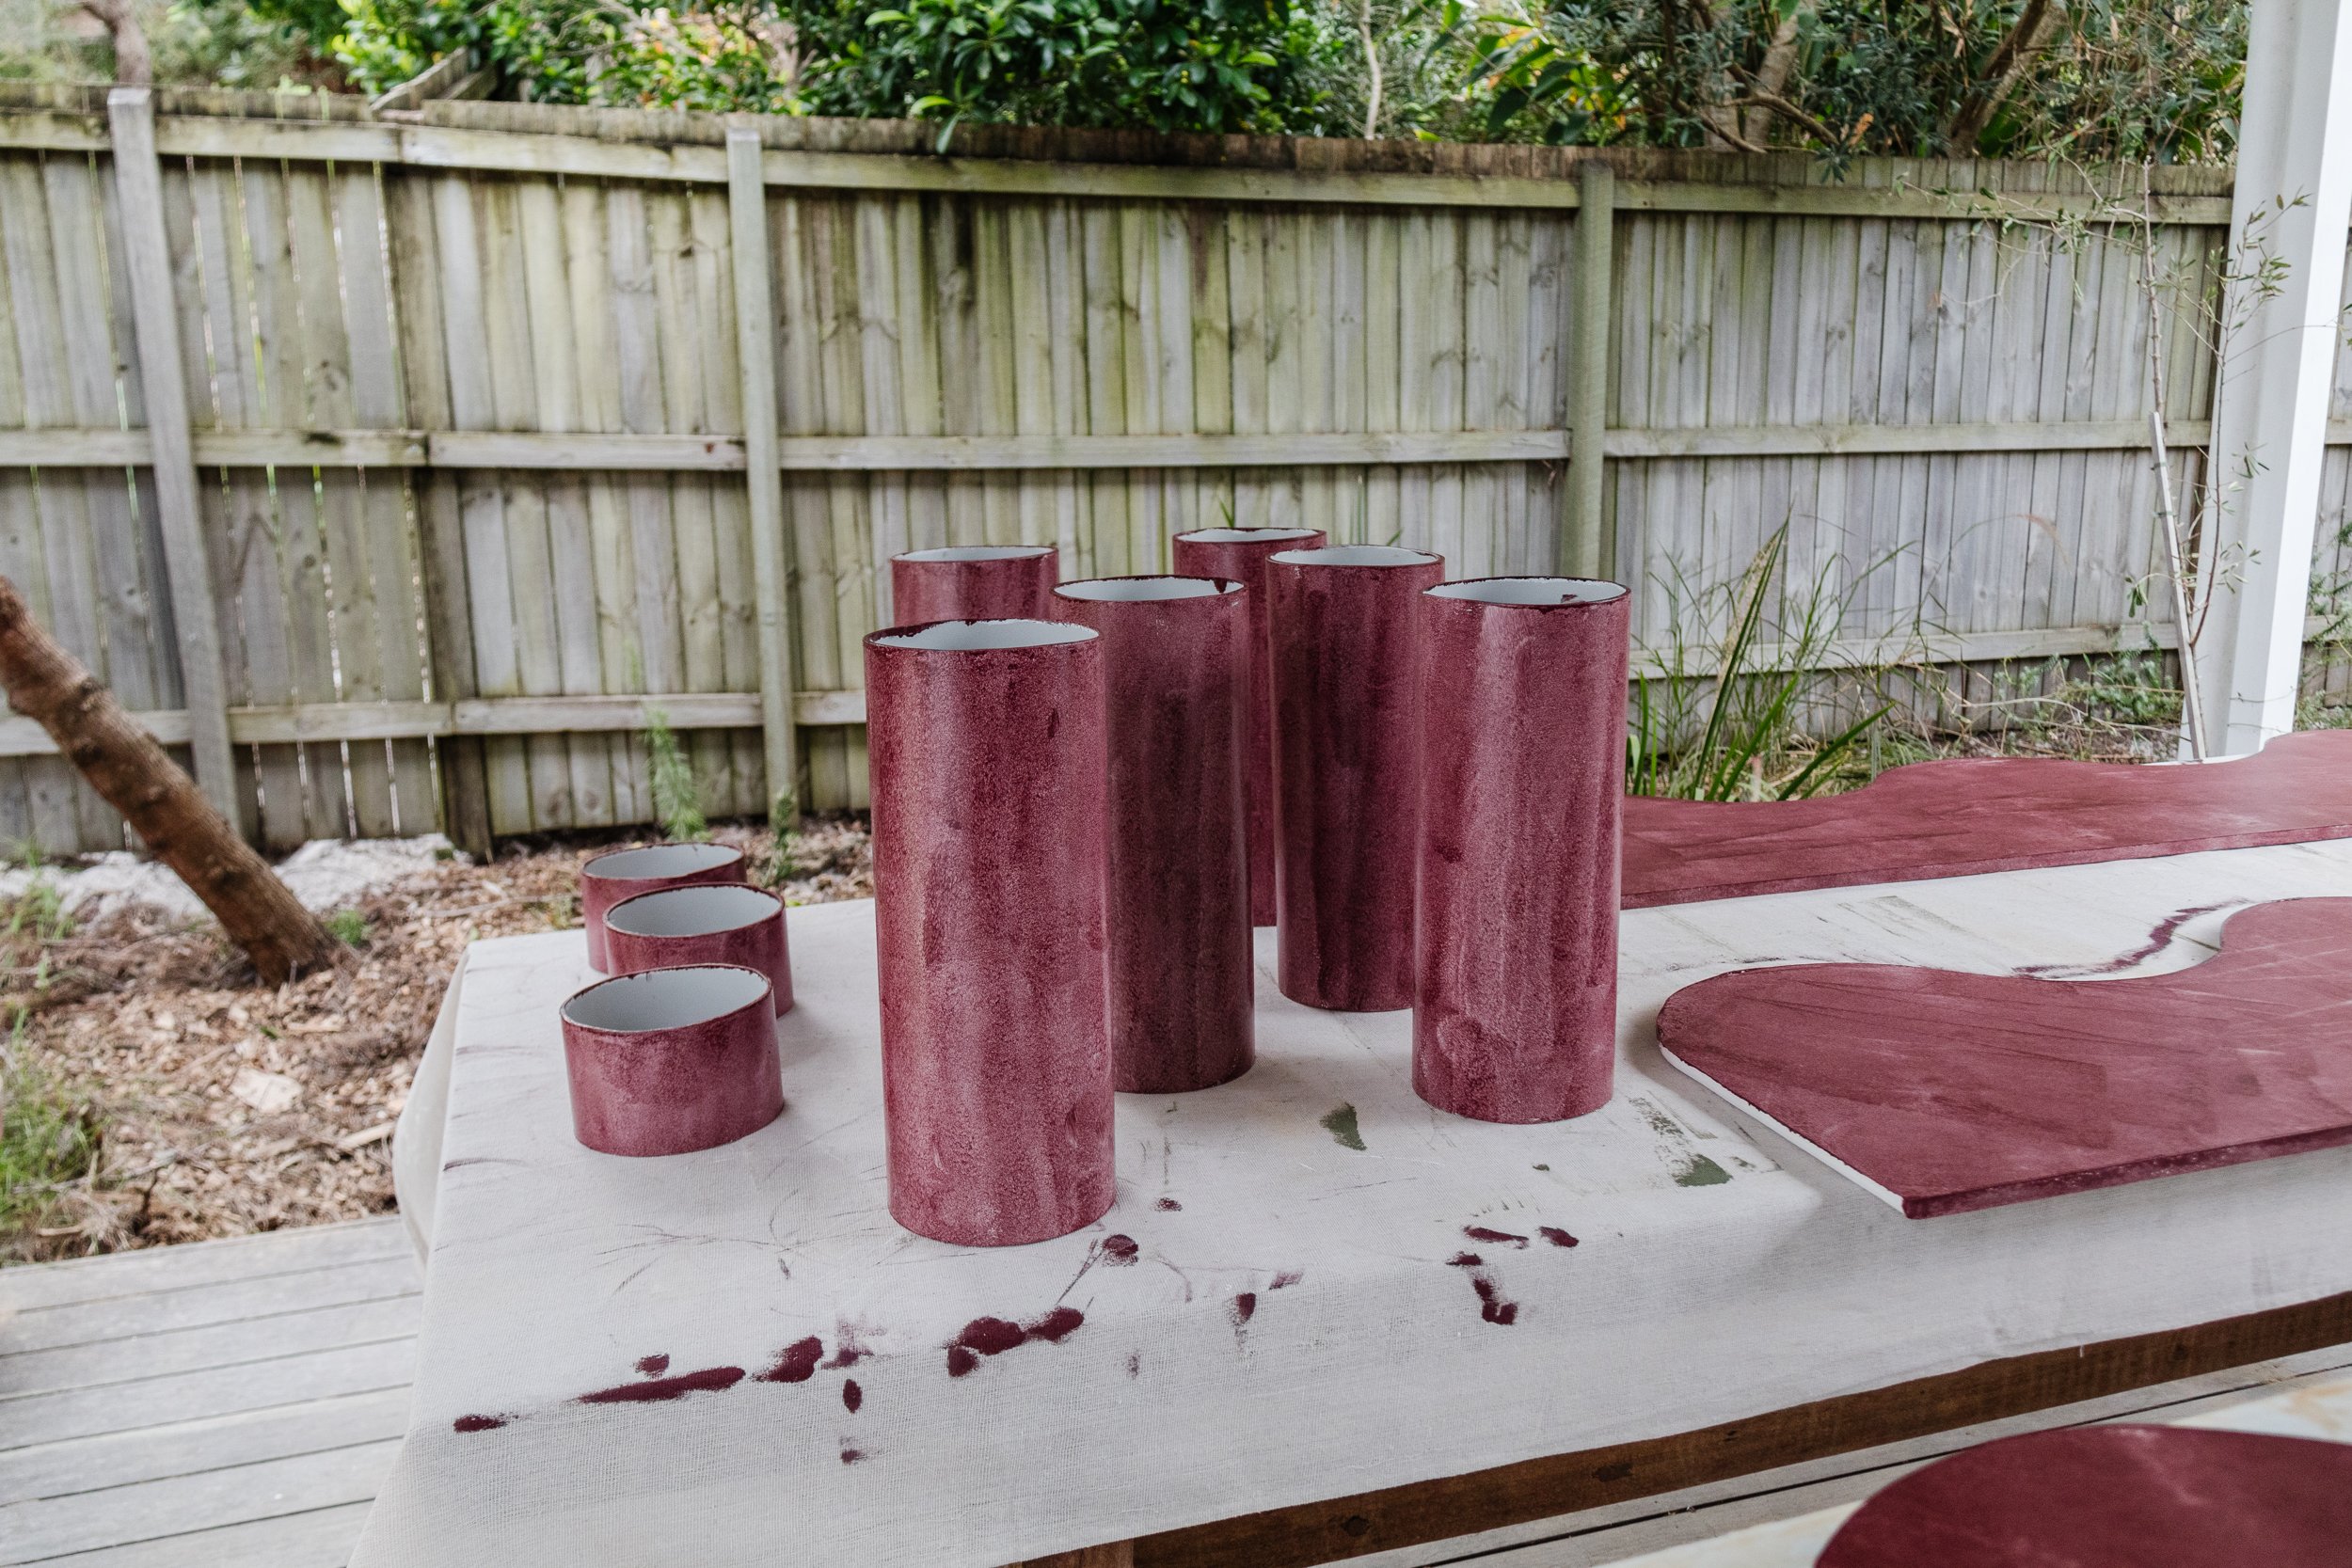
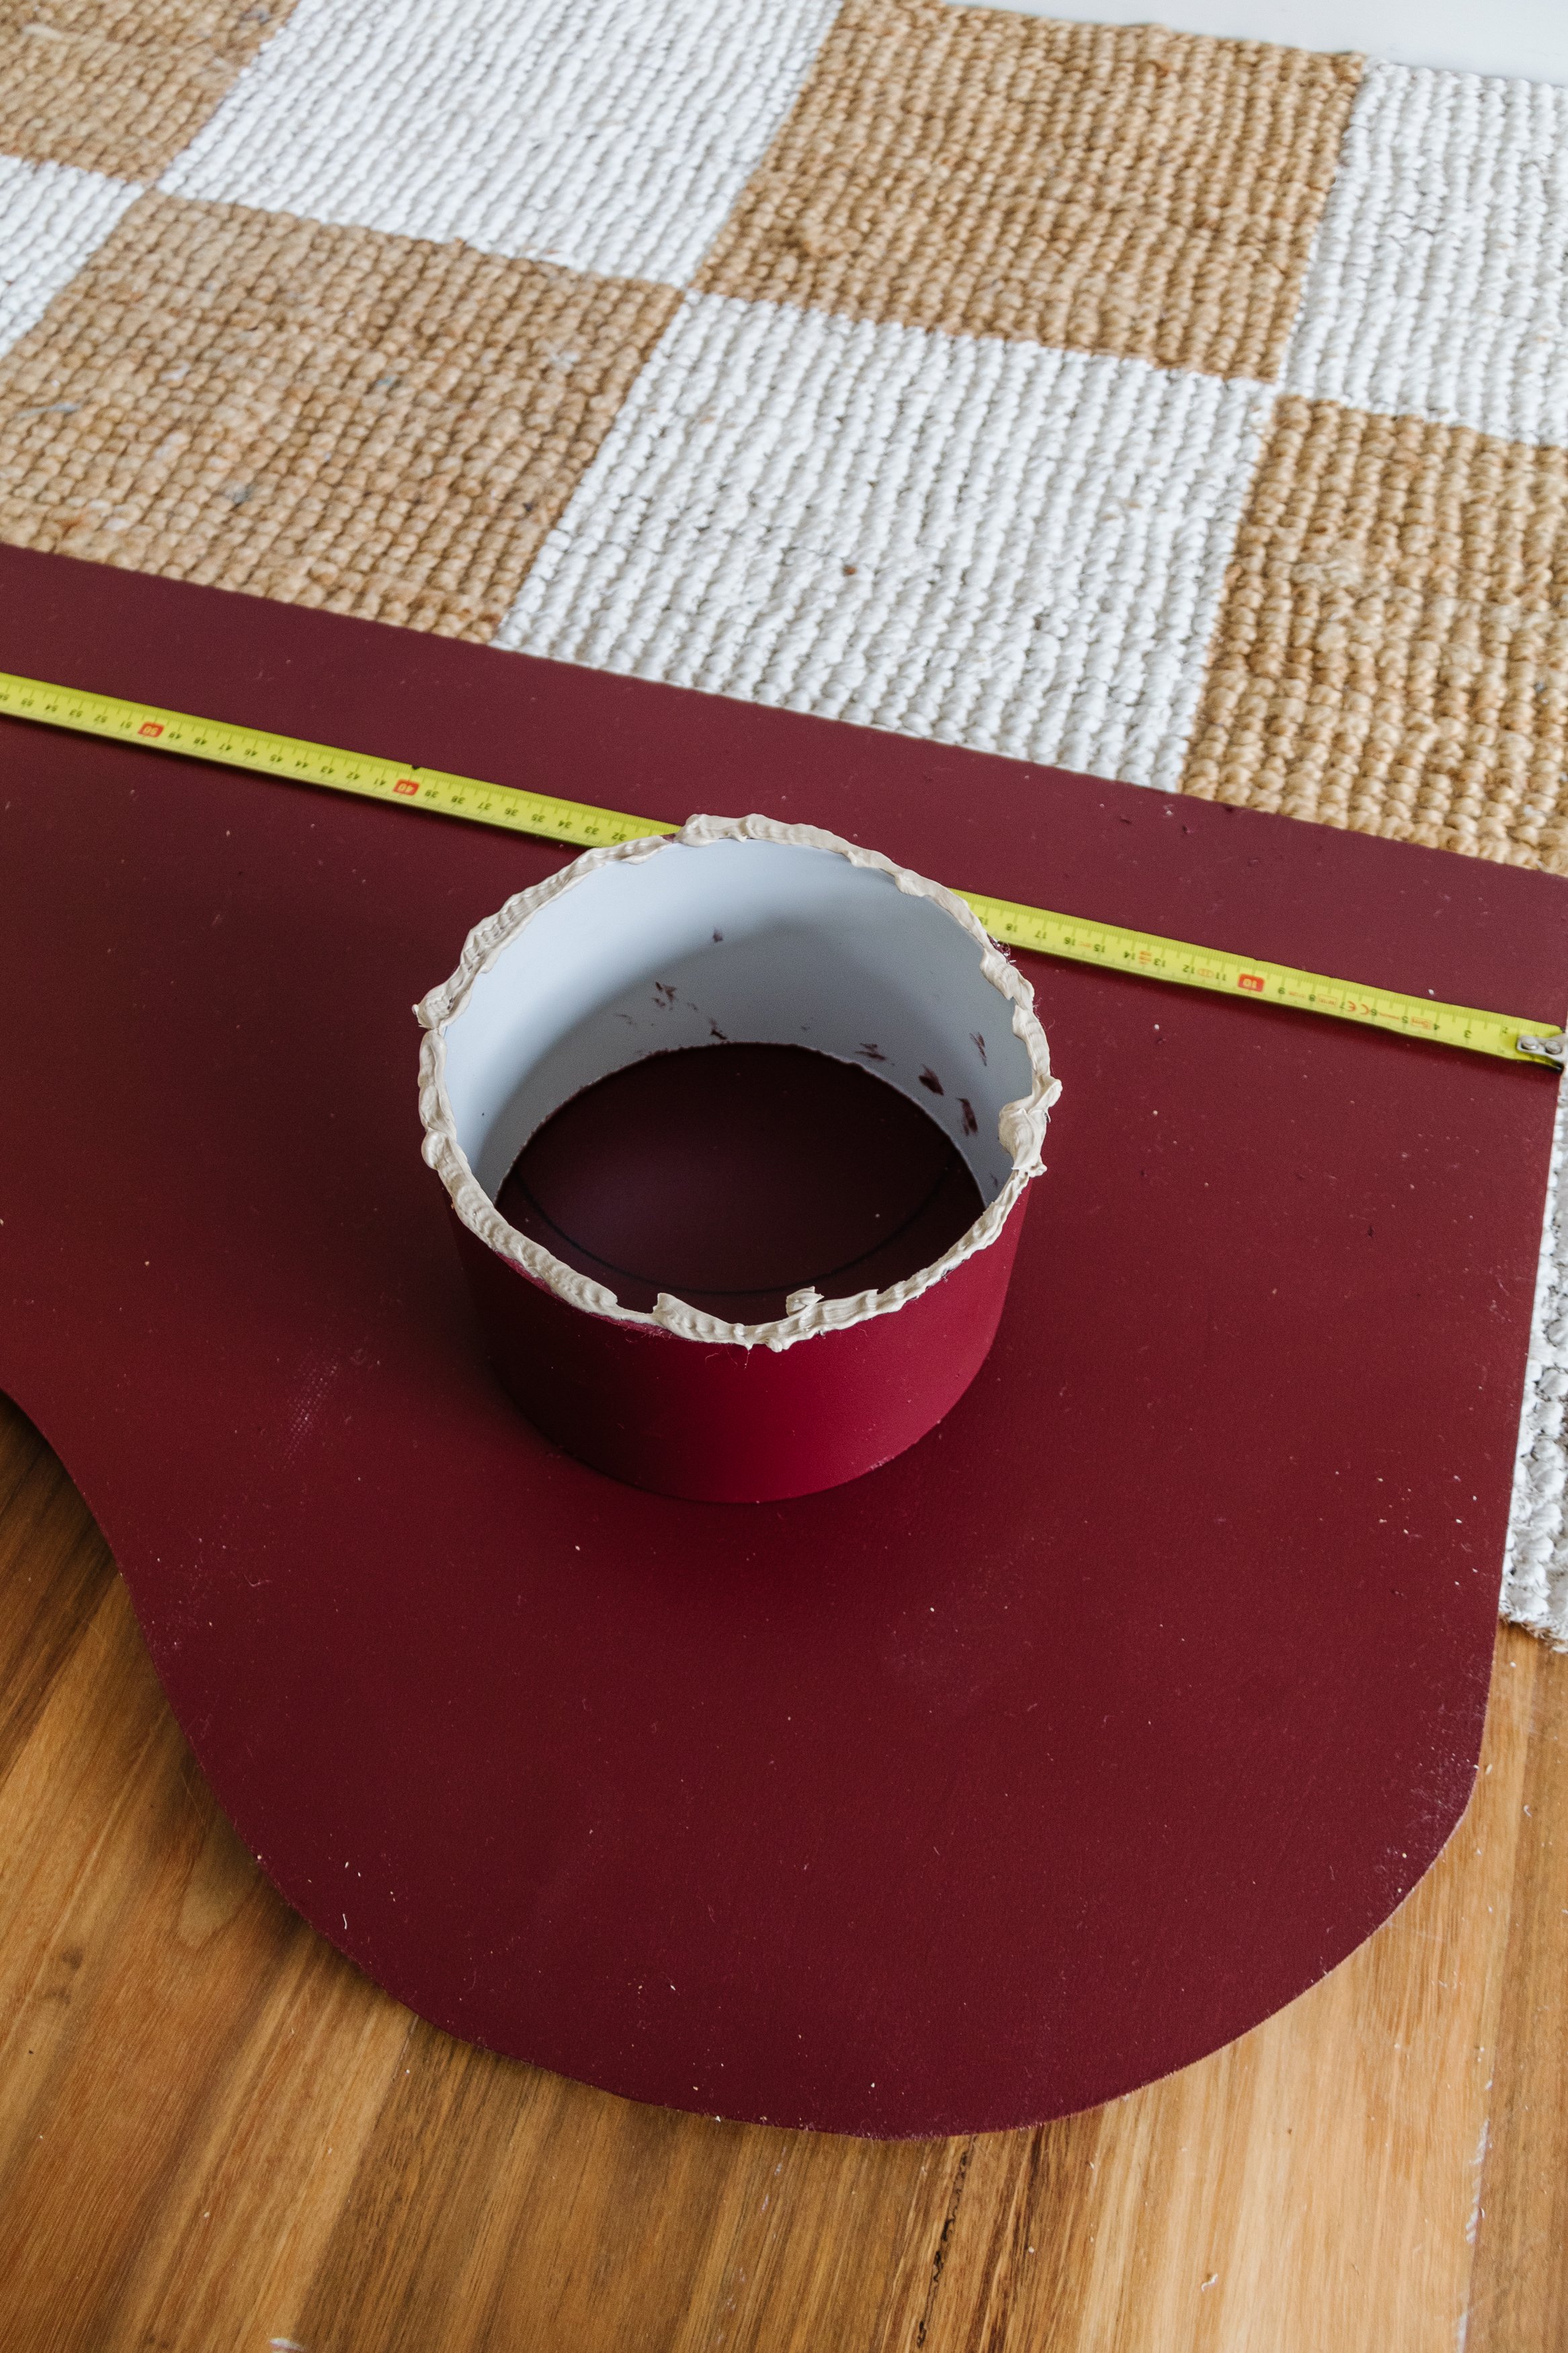
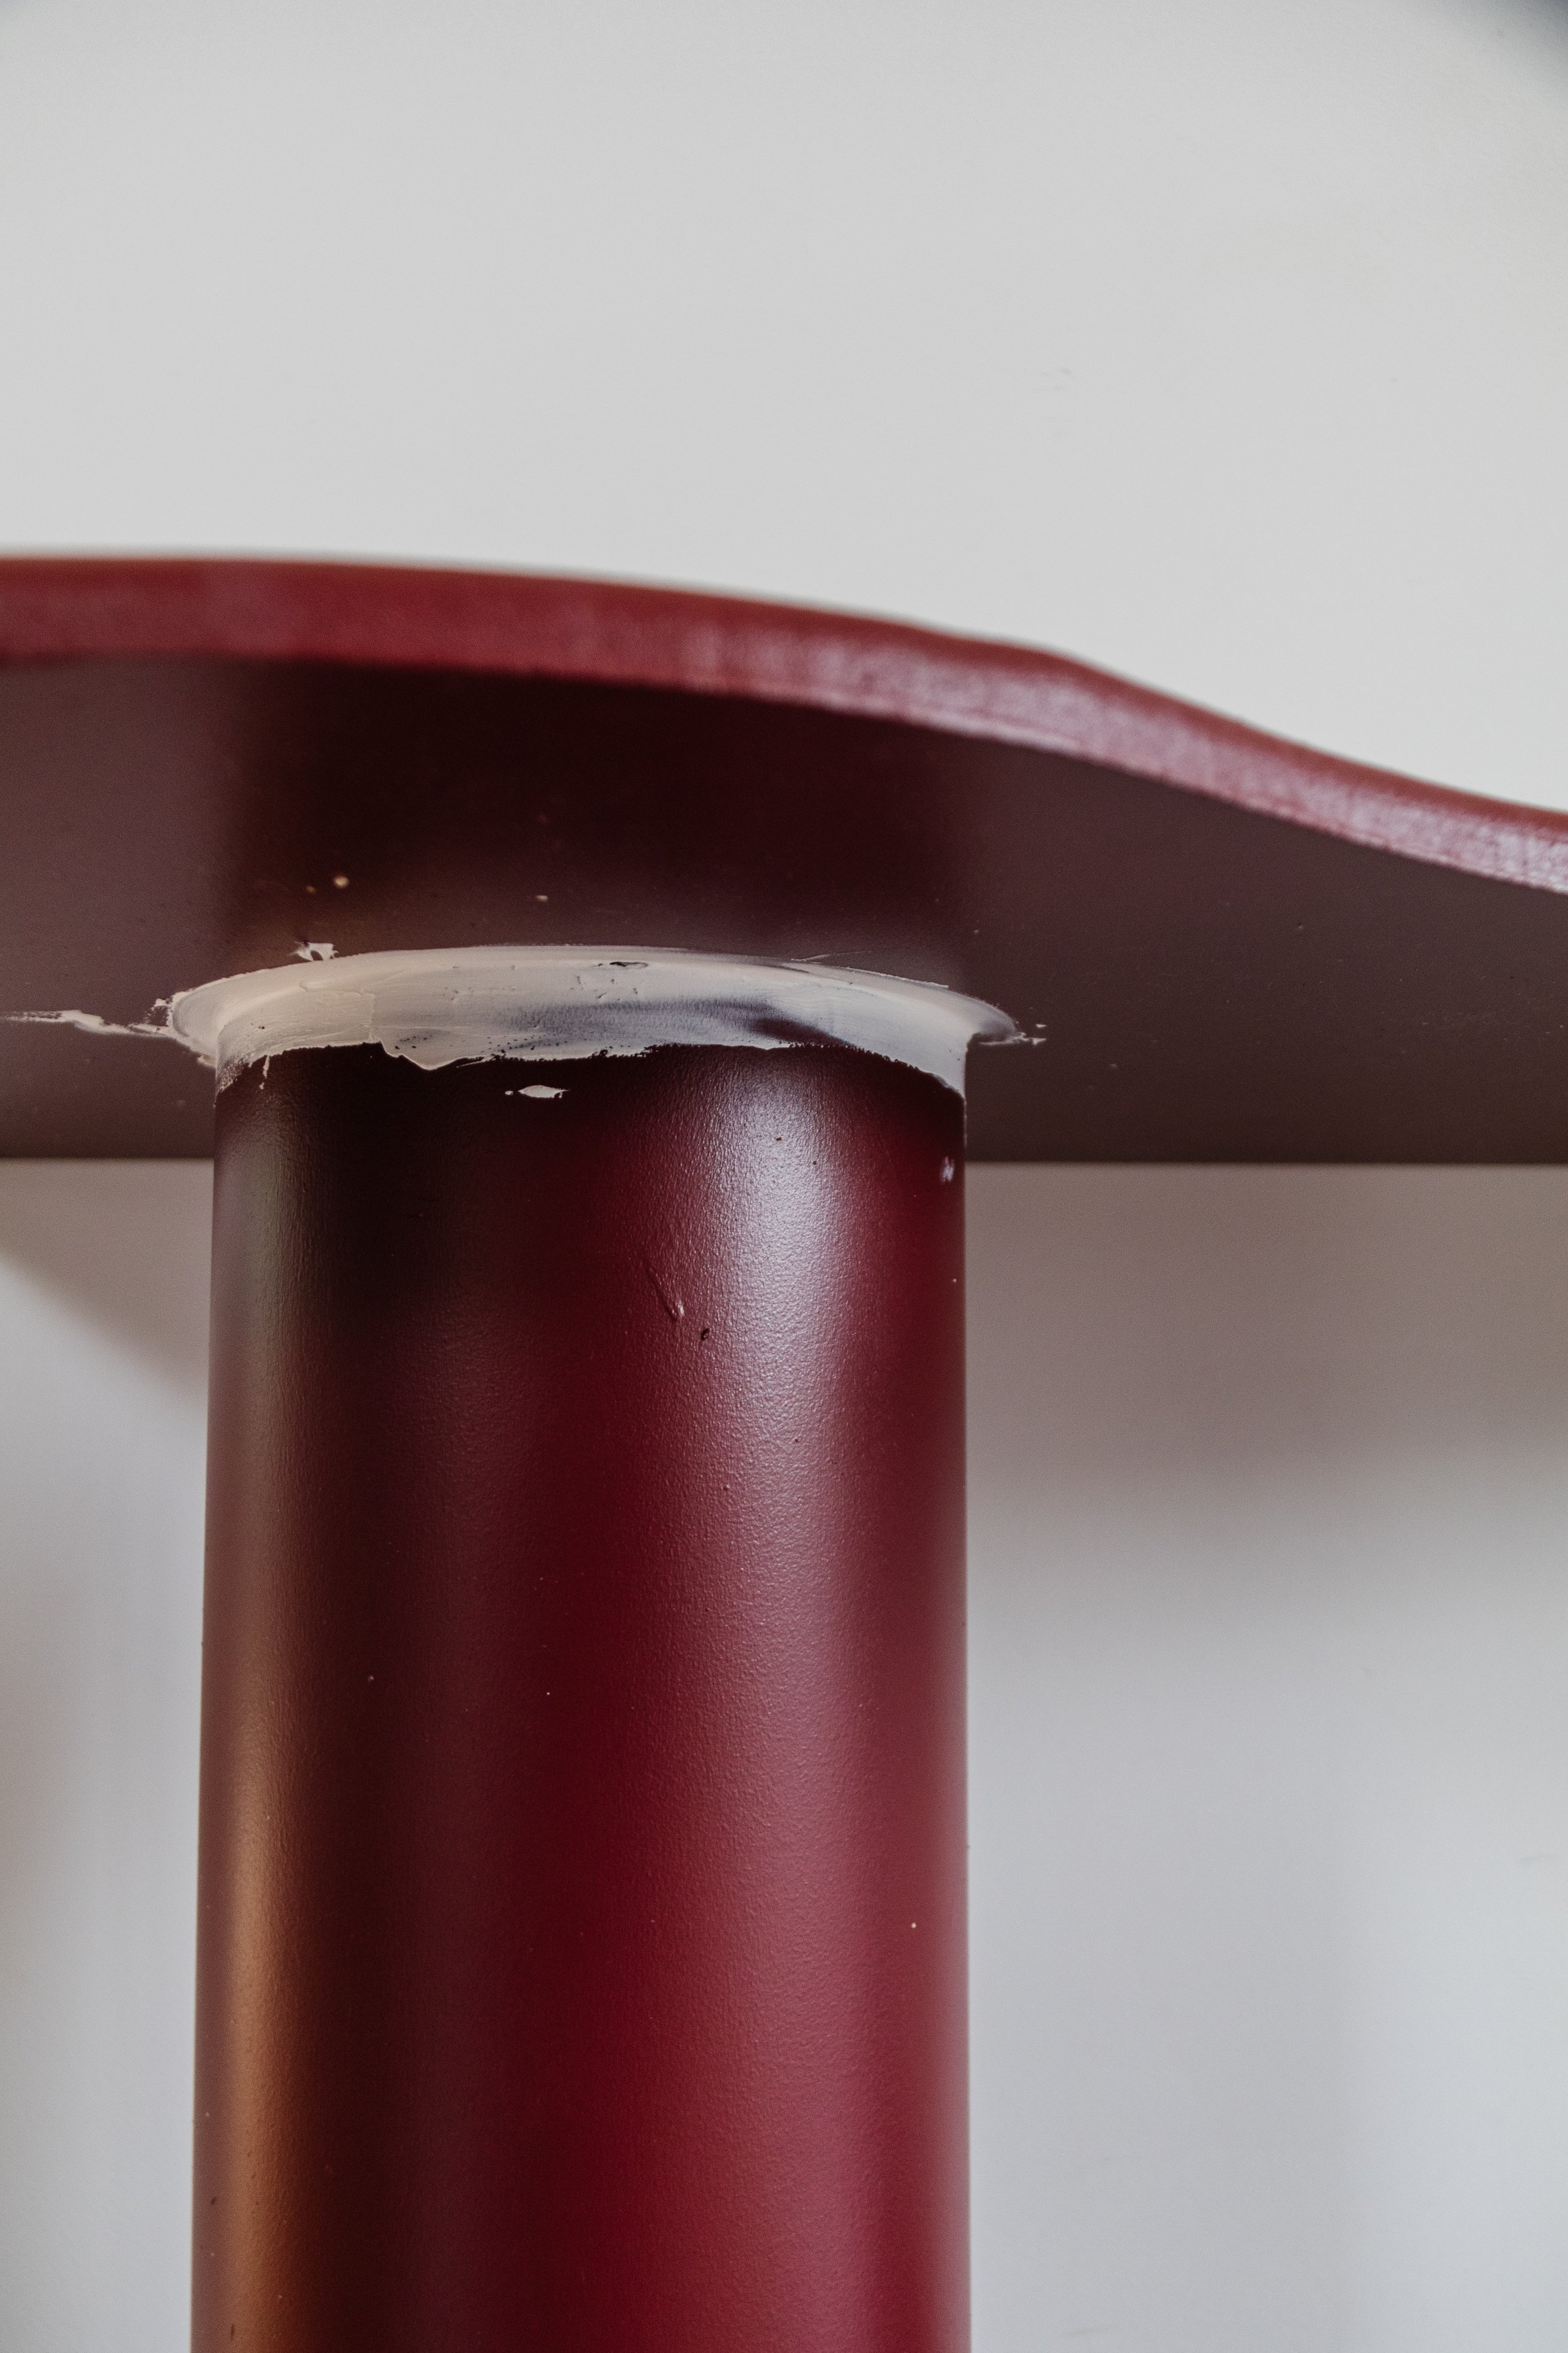
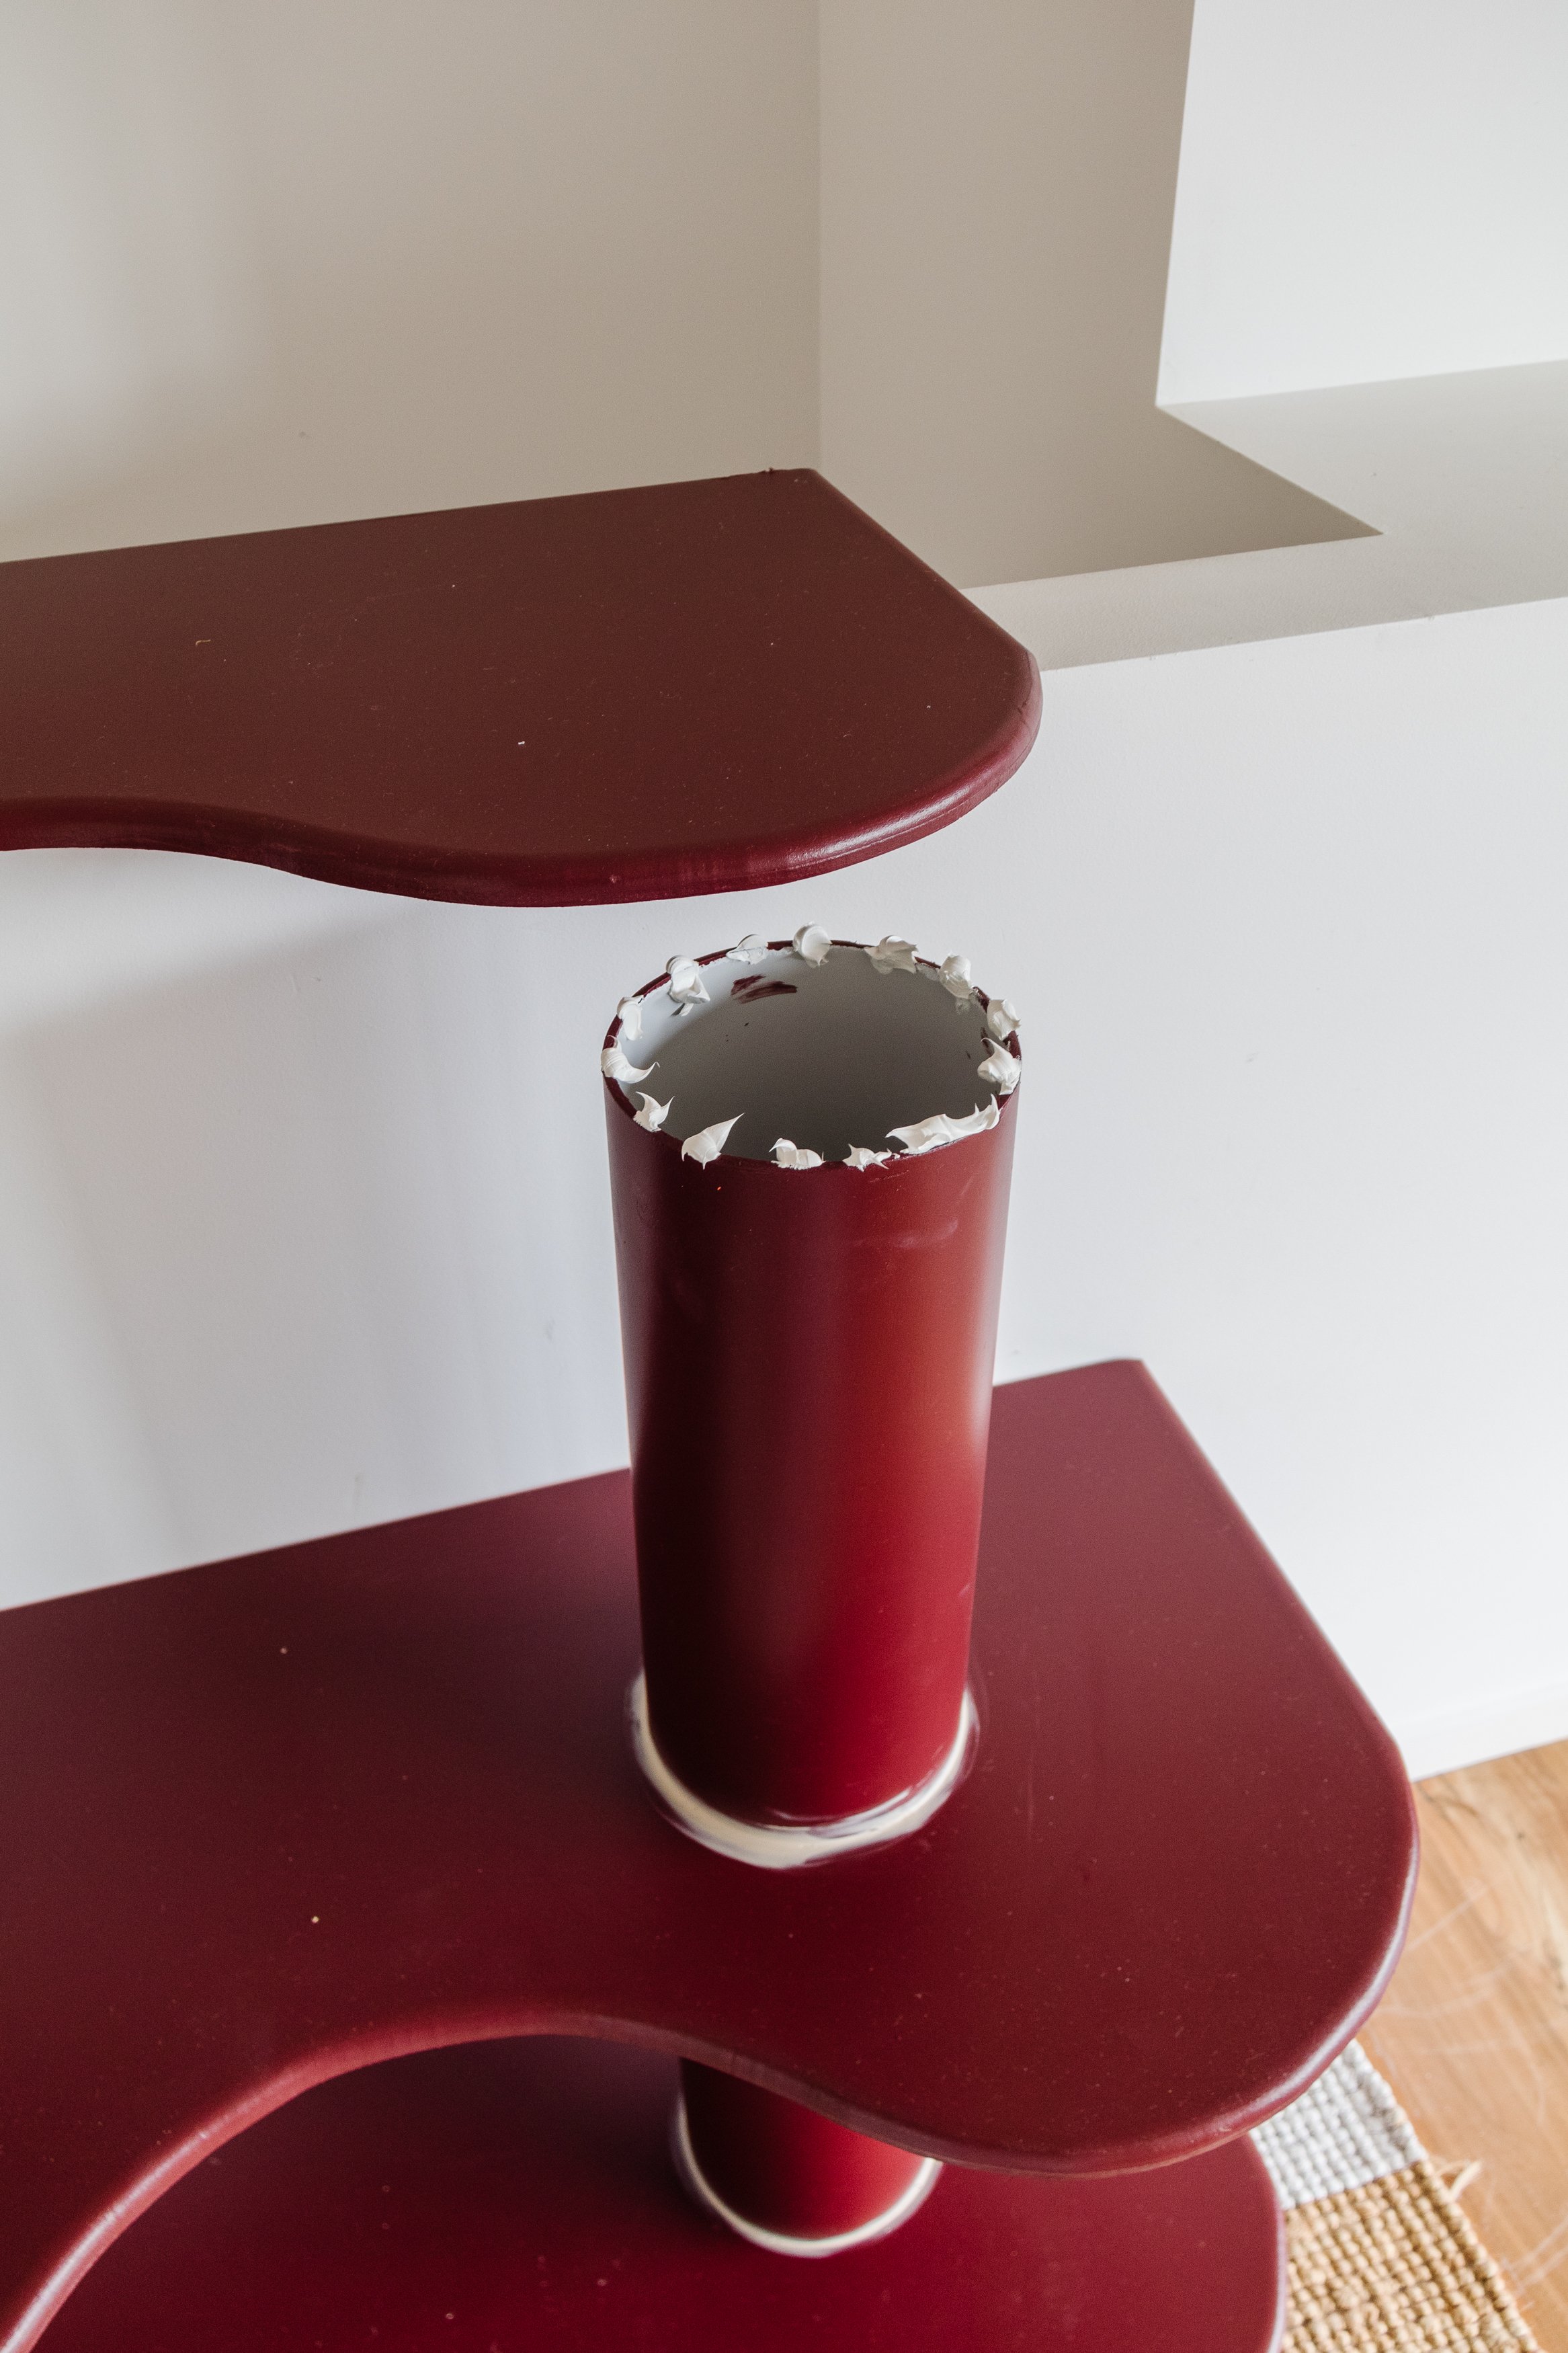
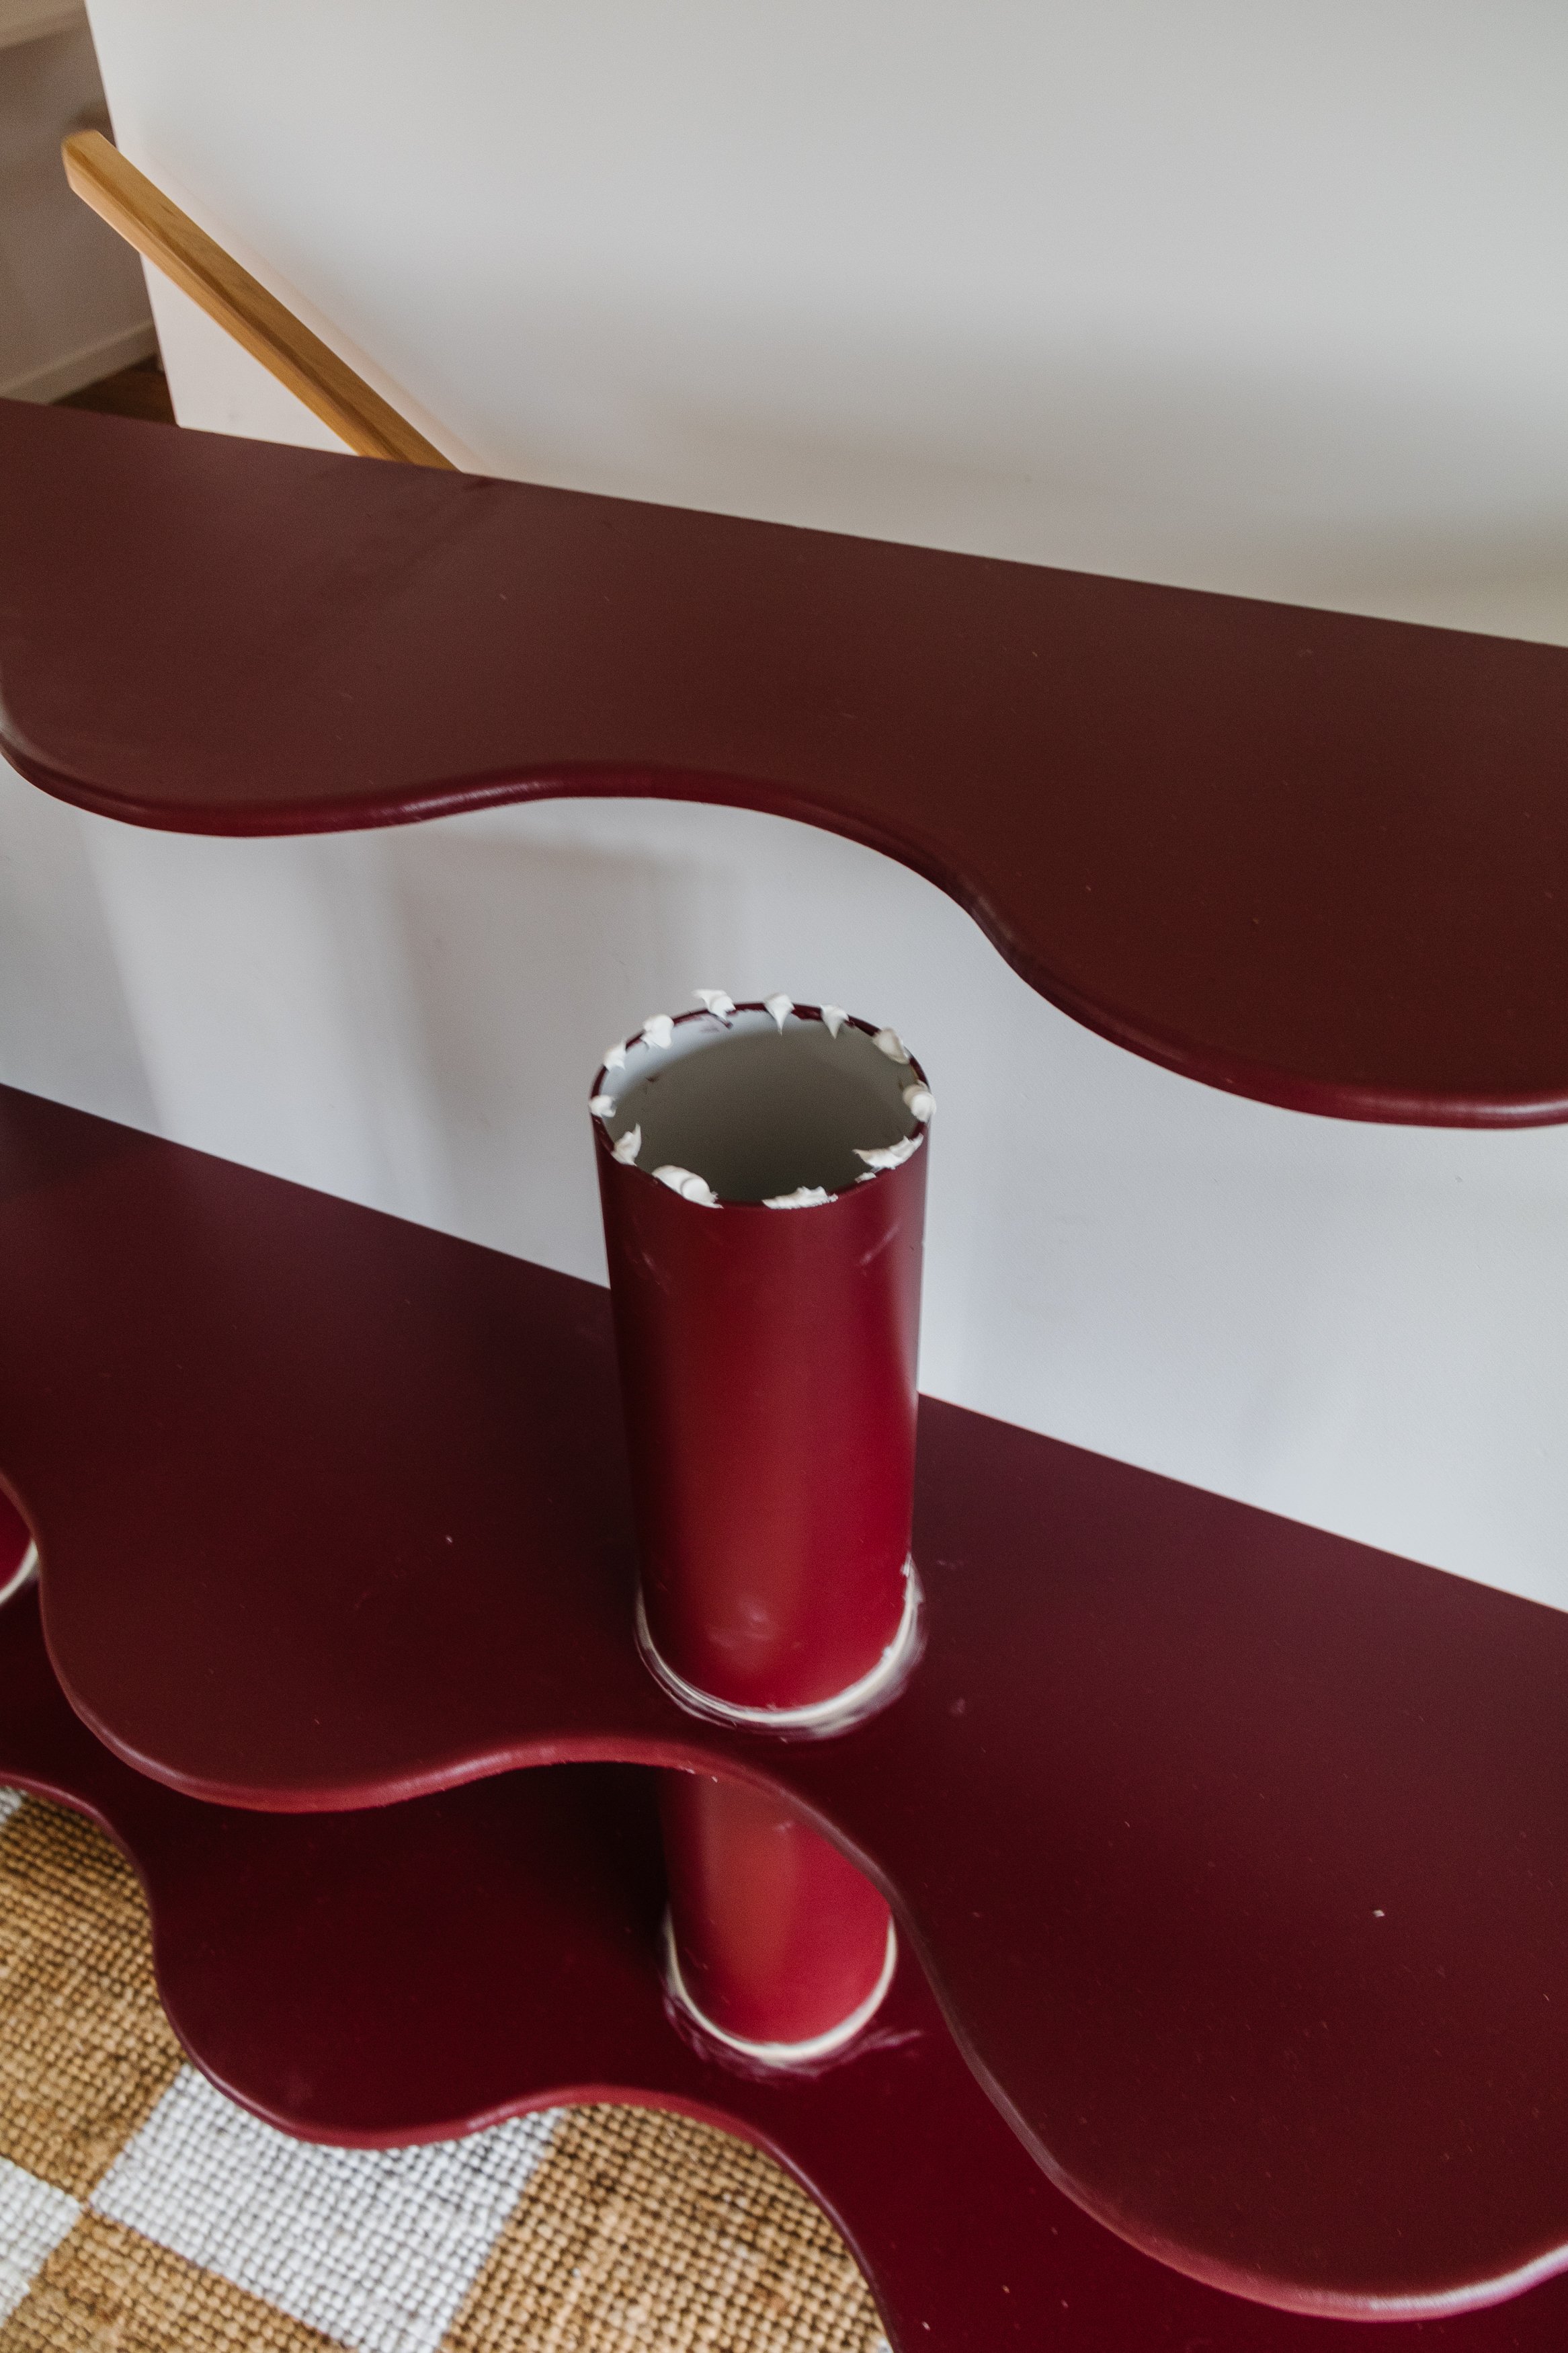
Step 3: After this I sanded the top and bottom of each PVC pipe until they were smooth and tidy.
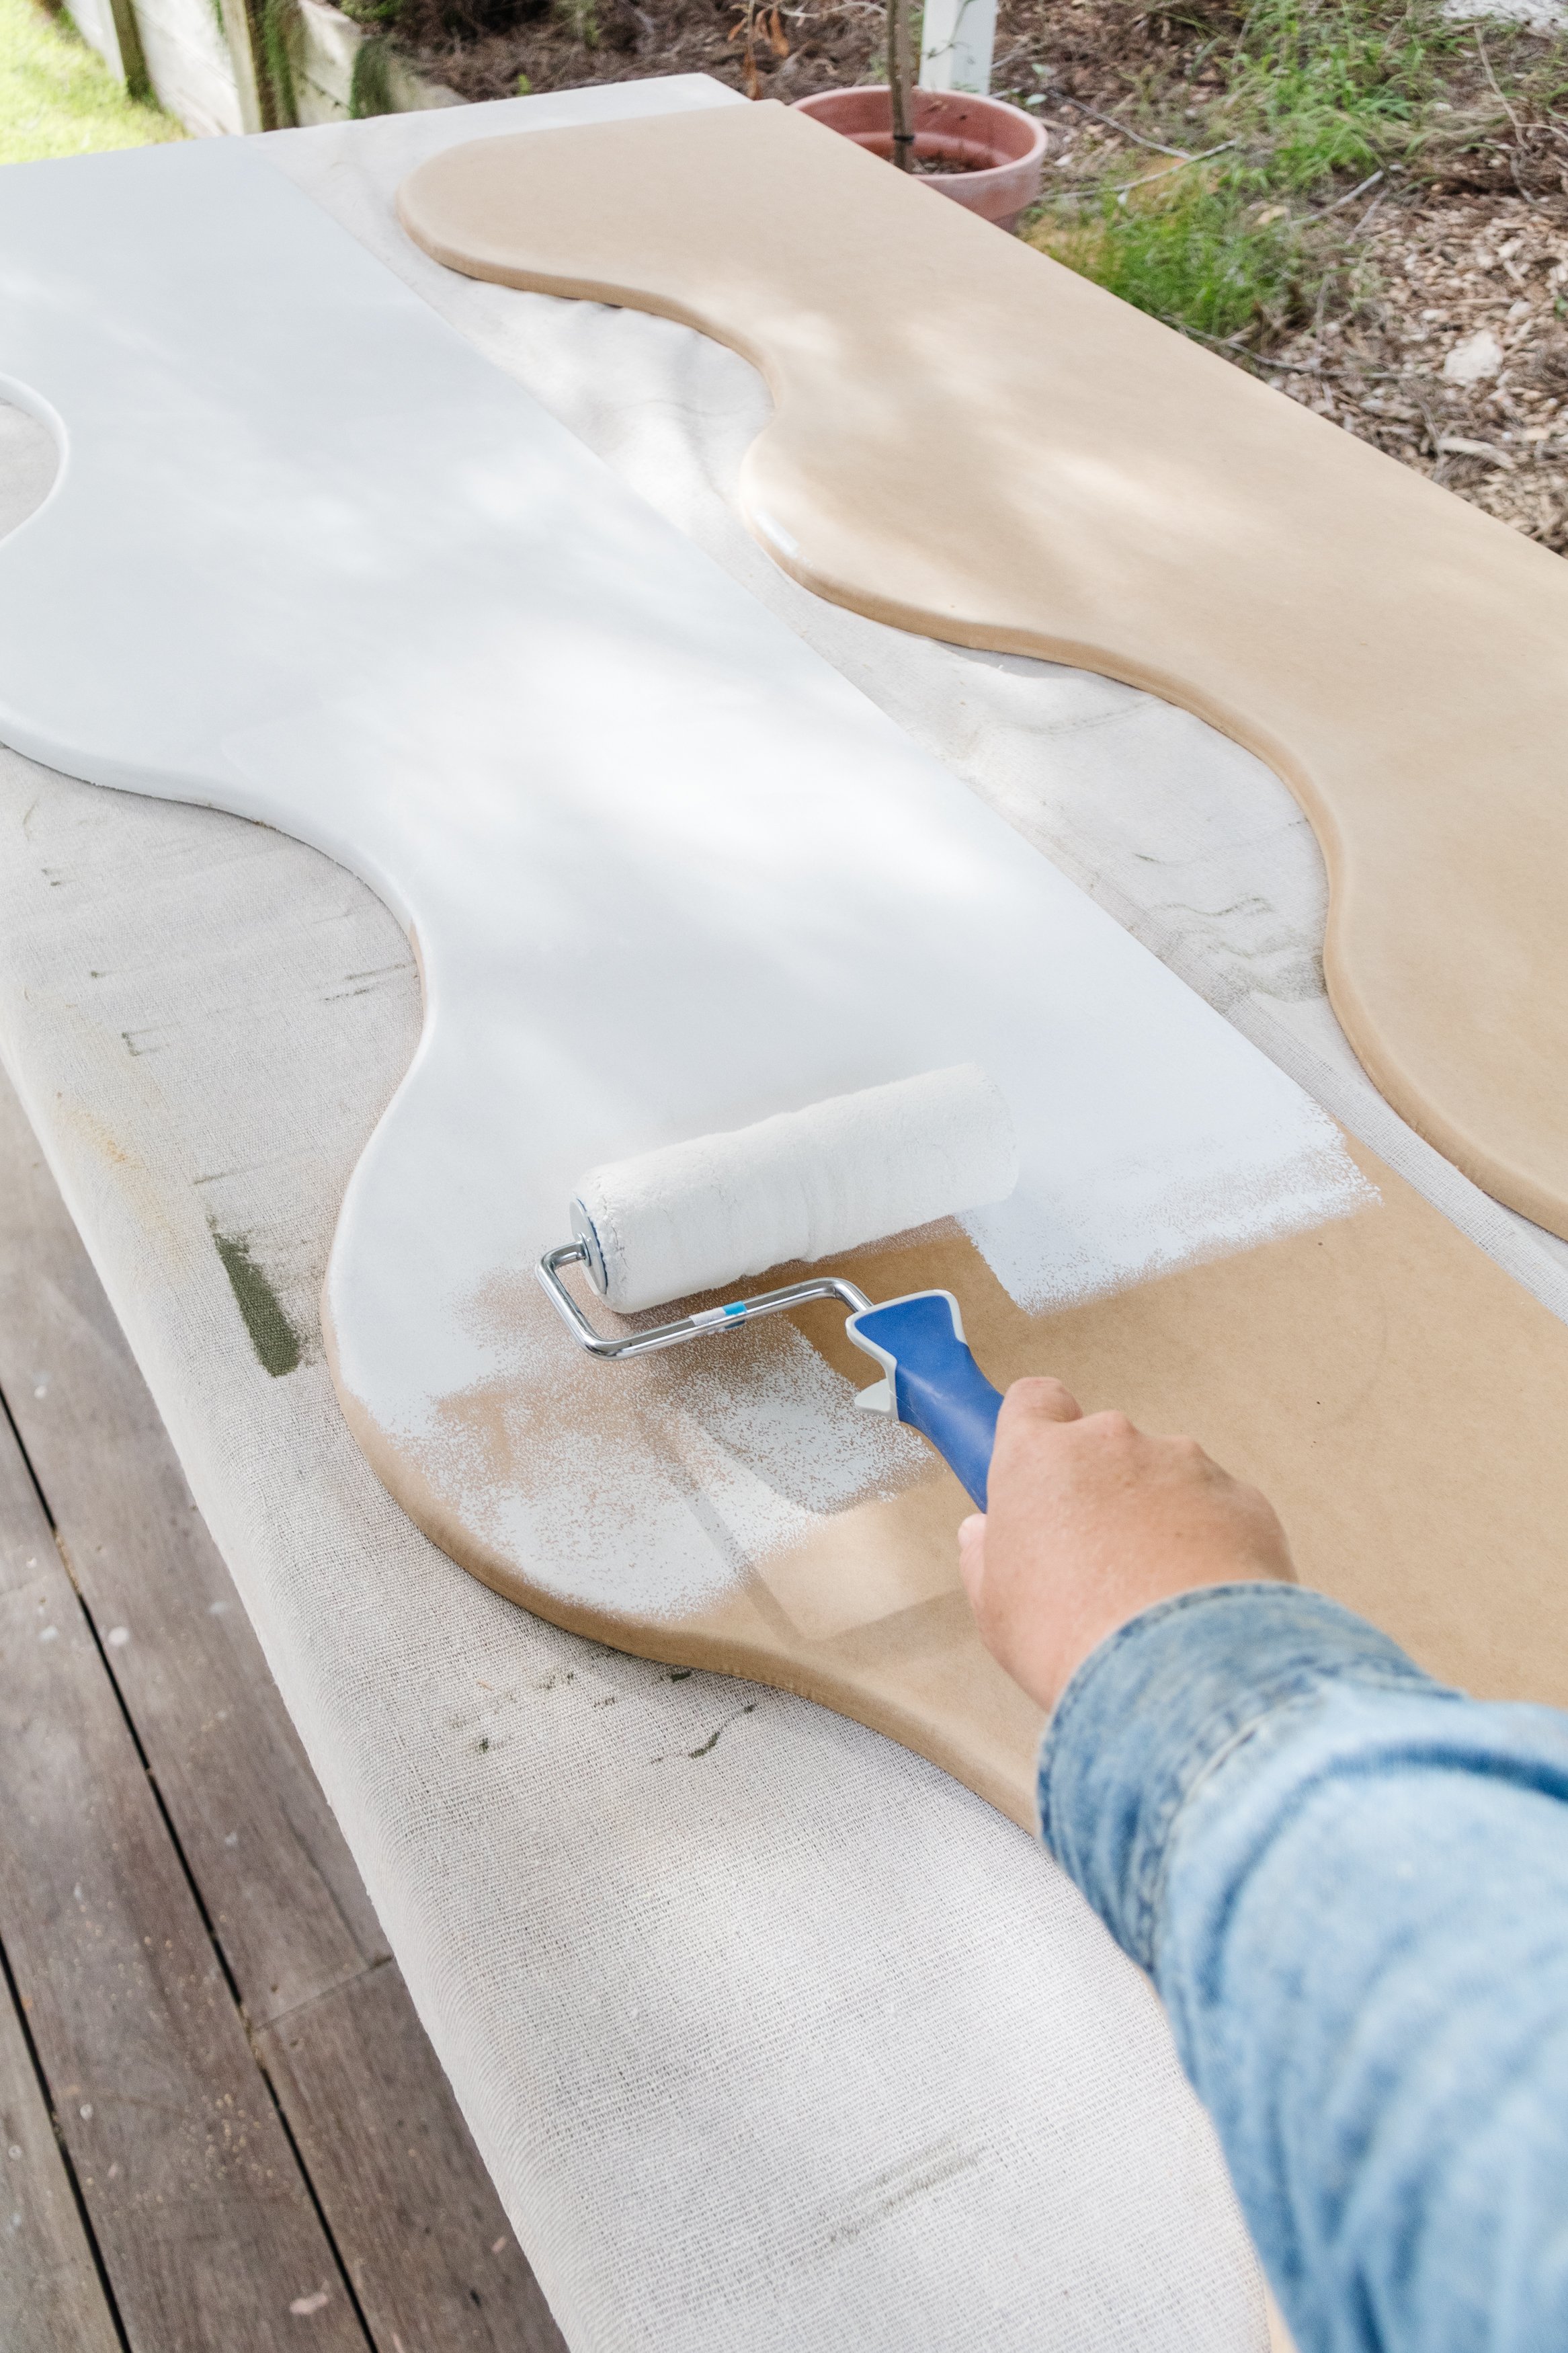
Step 4: I primed the MDF panels all over using Dulux 1Step Prep and all of the PVC pipes too. Once the paint had dried, I applied 3 thin coats of Dulux “Indian Red” all over the MDF panels and PVC pipes. Because I applied thin coats rather than thick coats the paint dried quickly, so by the time I had finished painting one side of the MDF panels, I was able to start again.

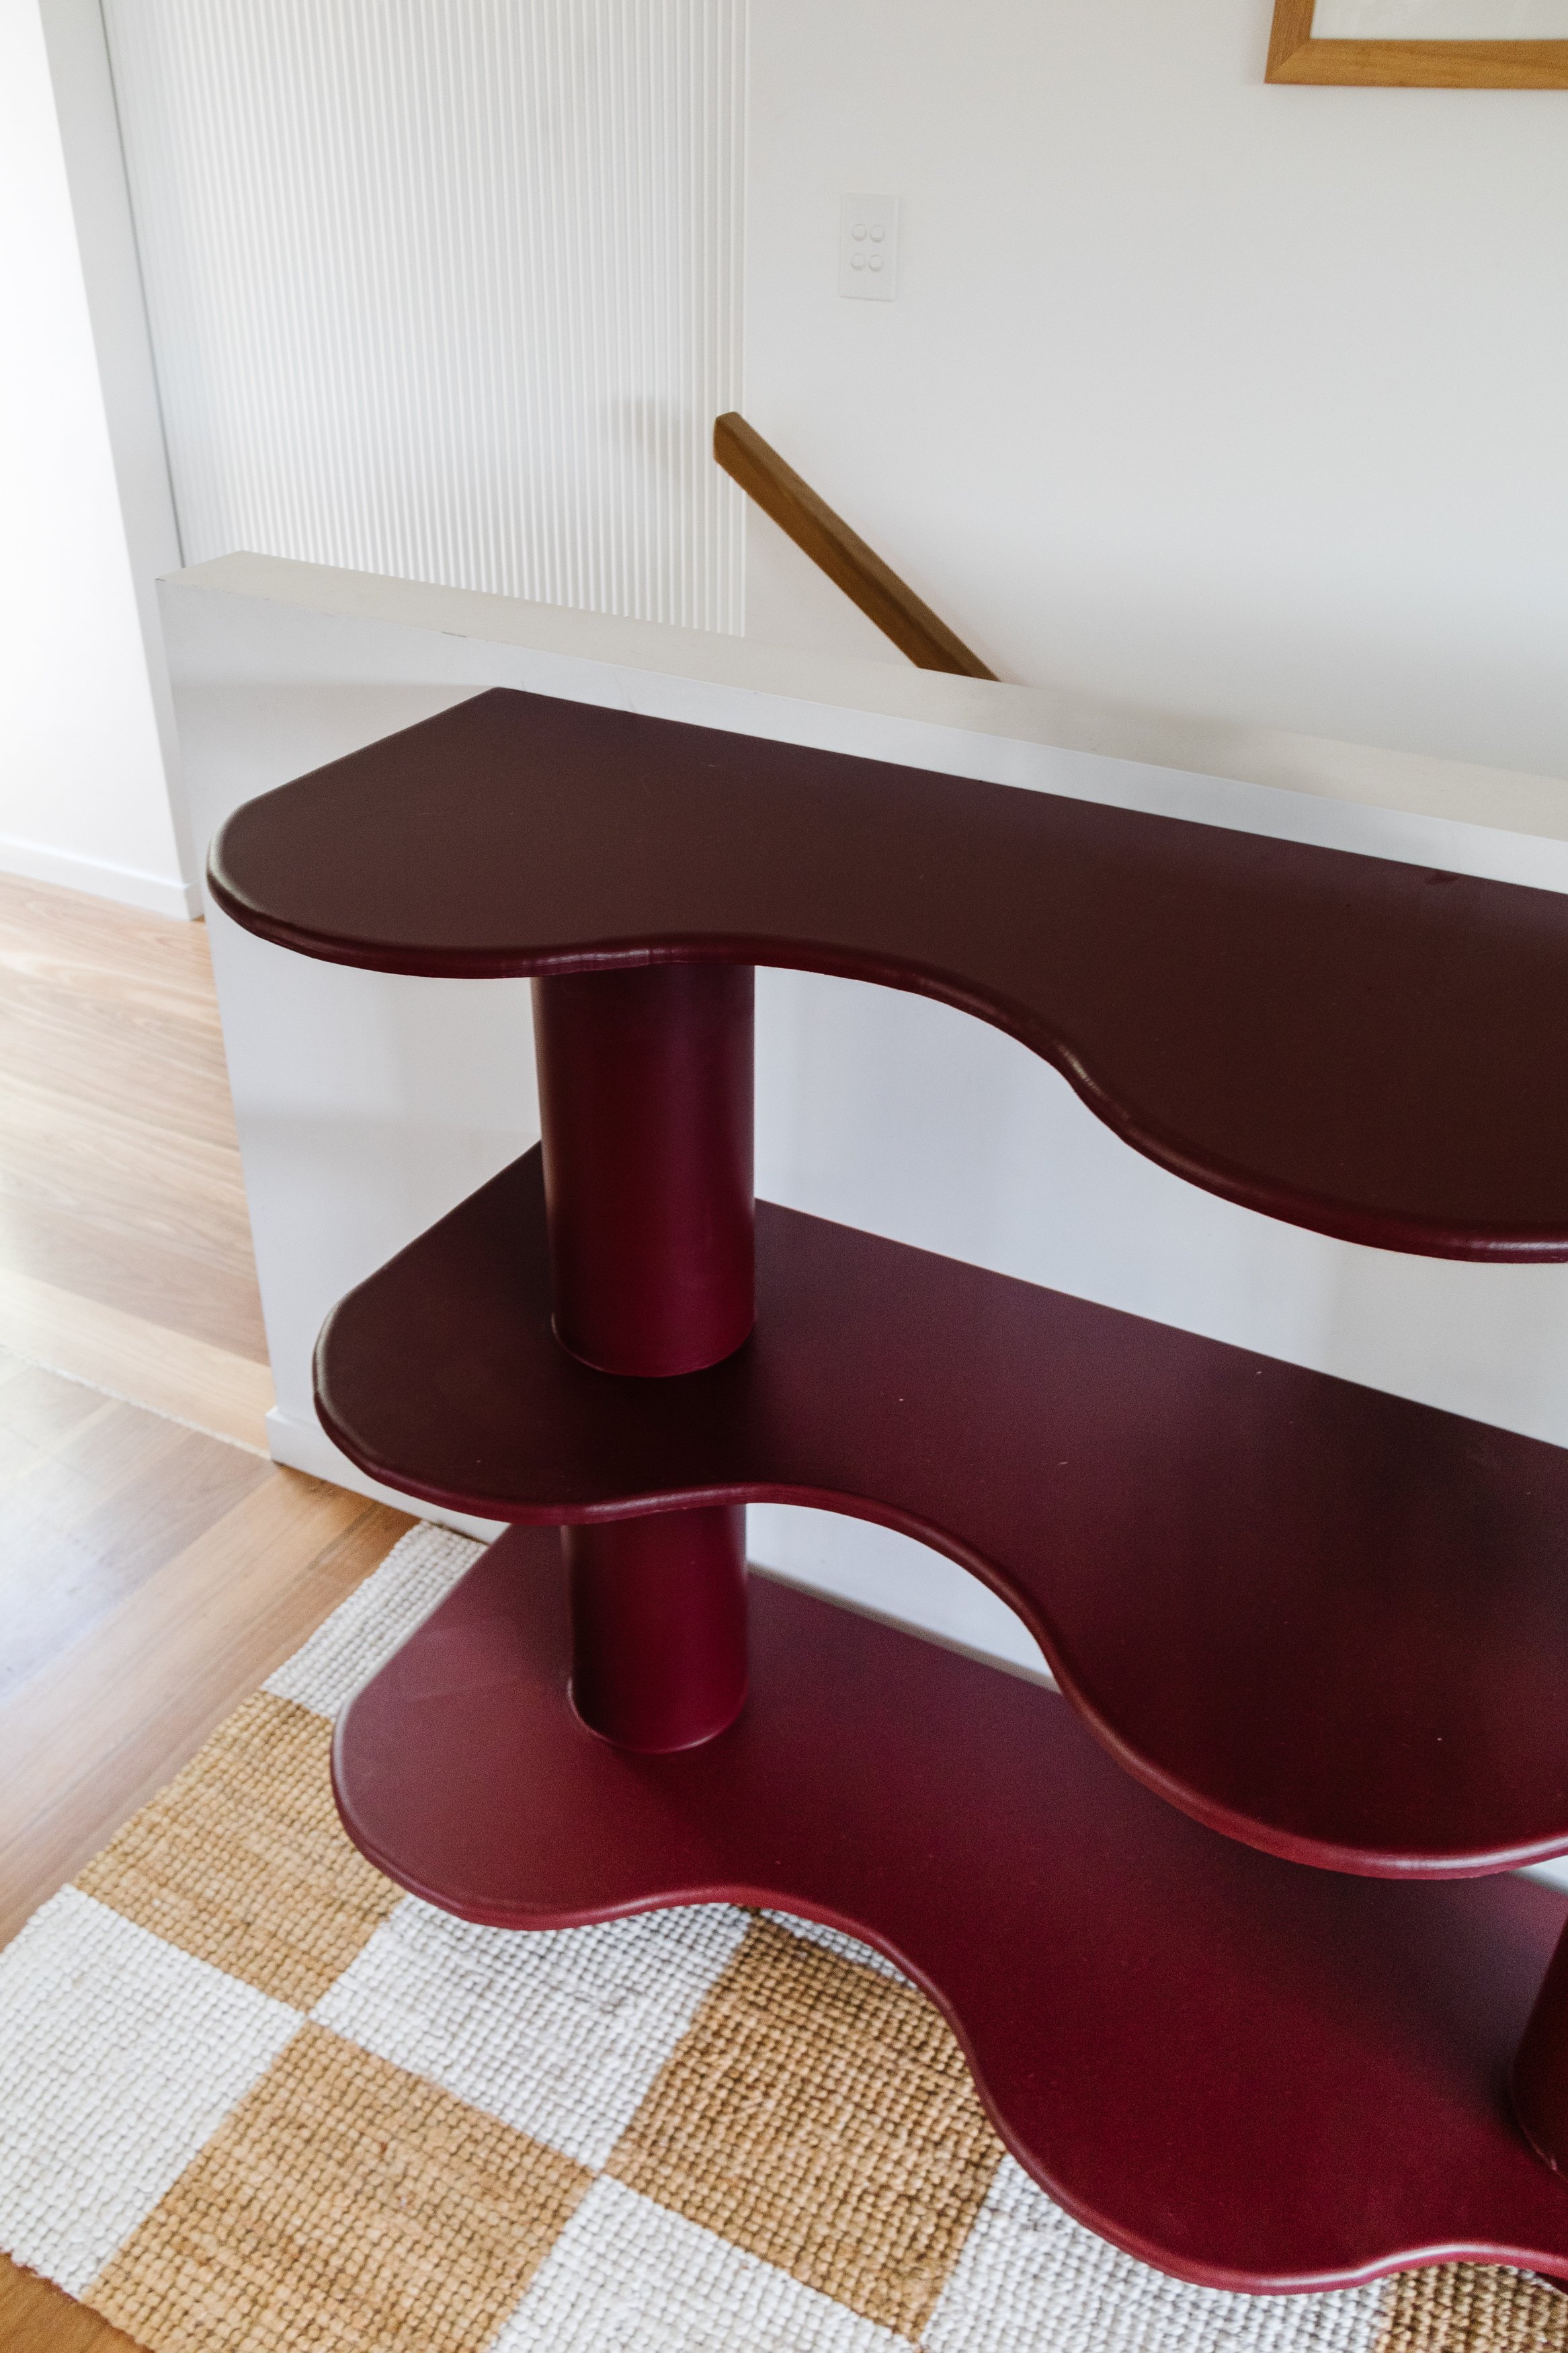
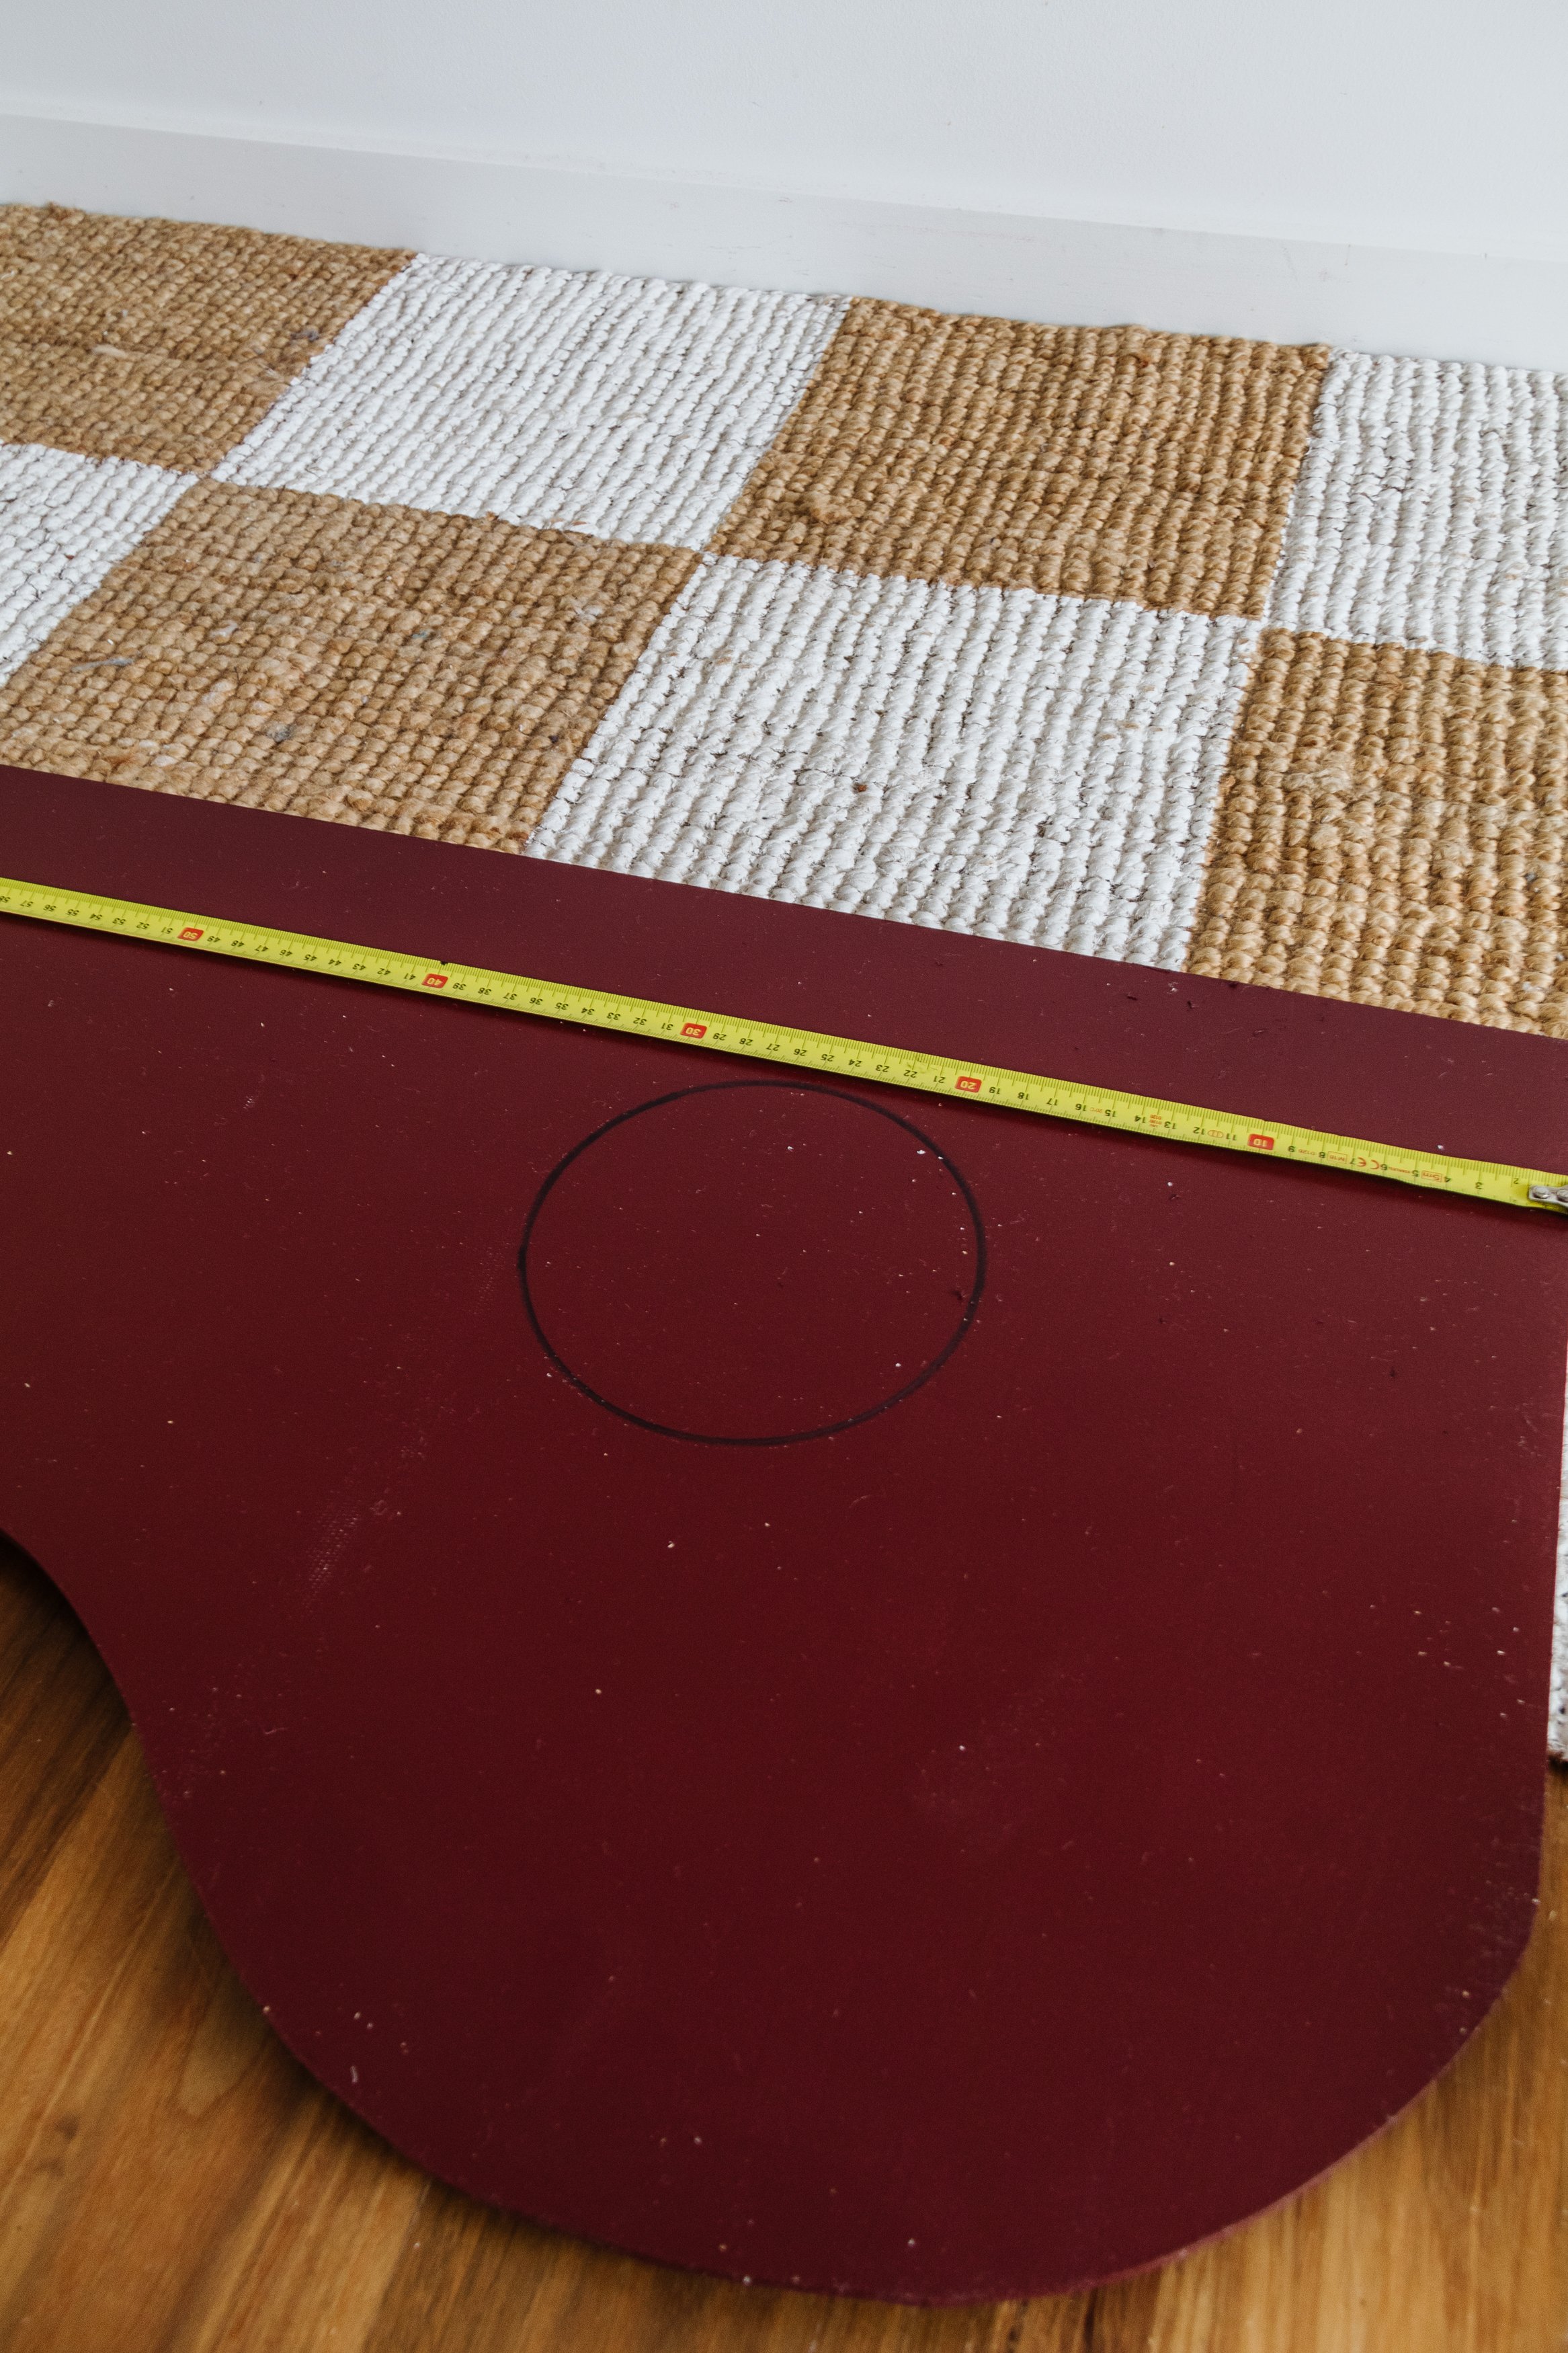
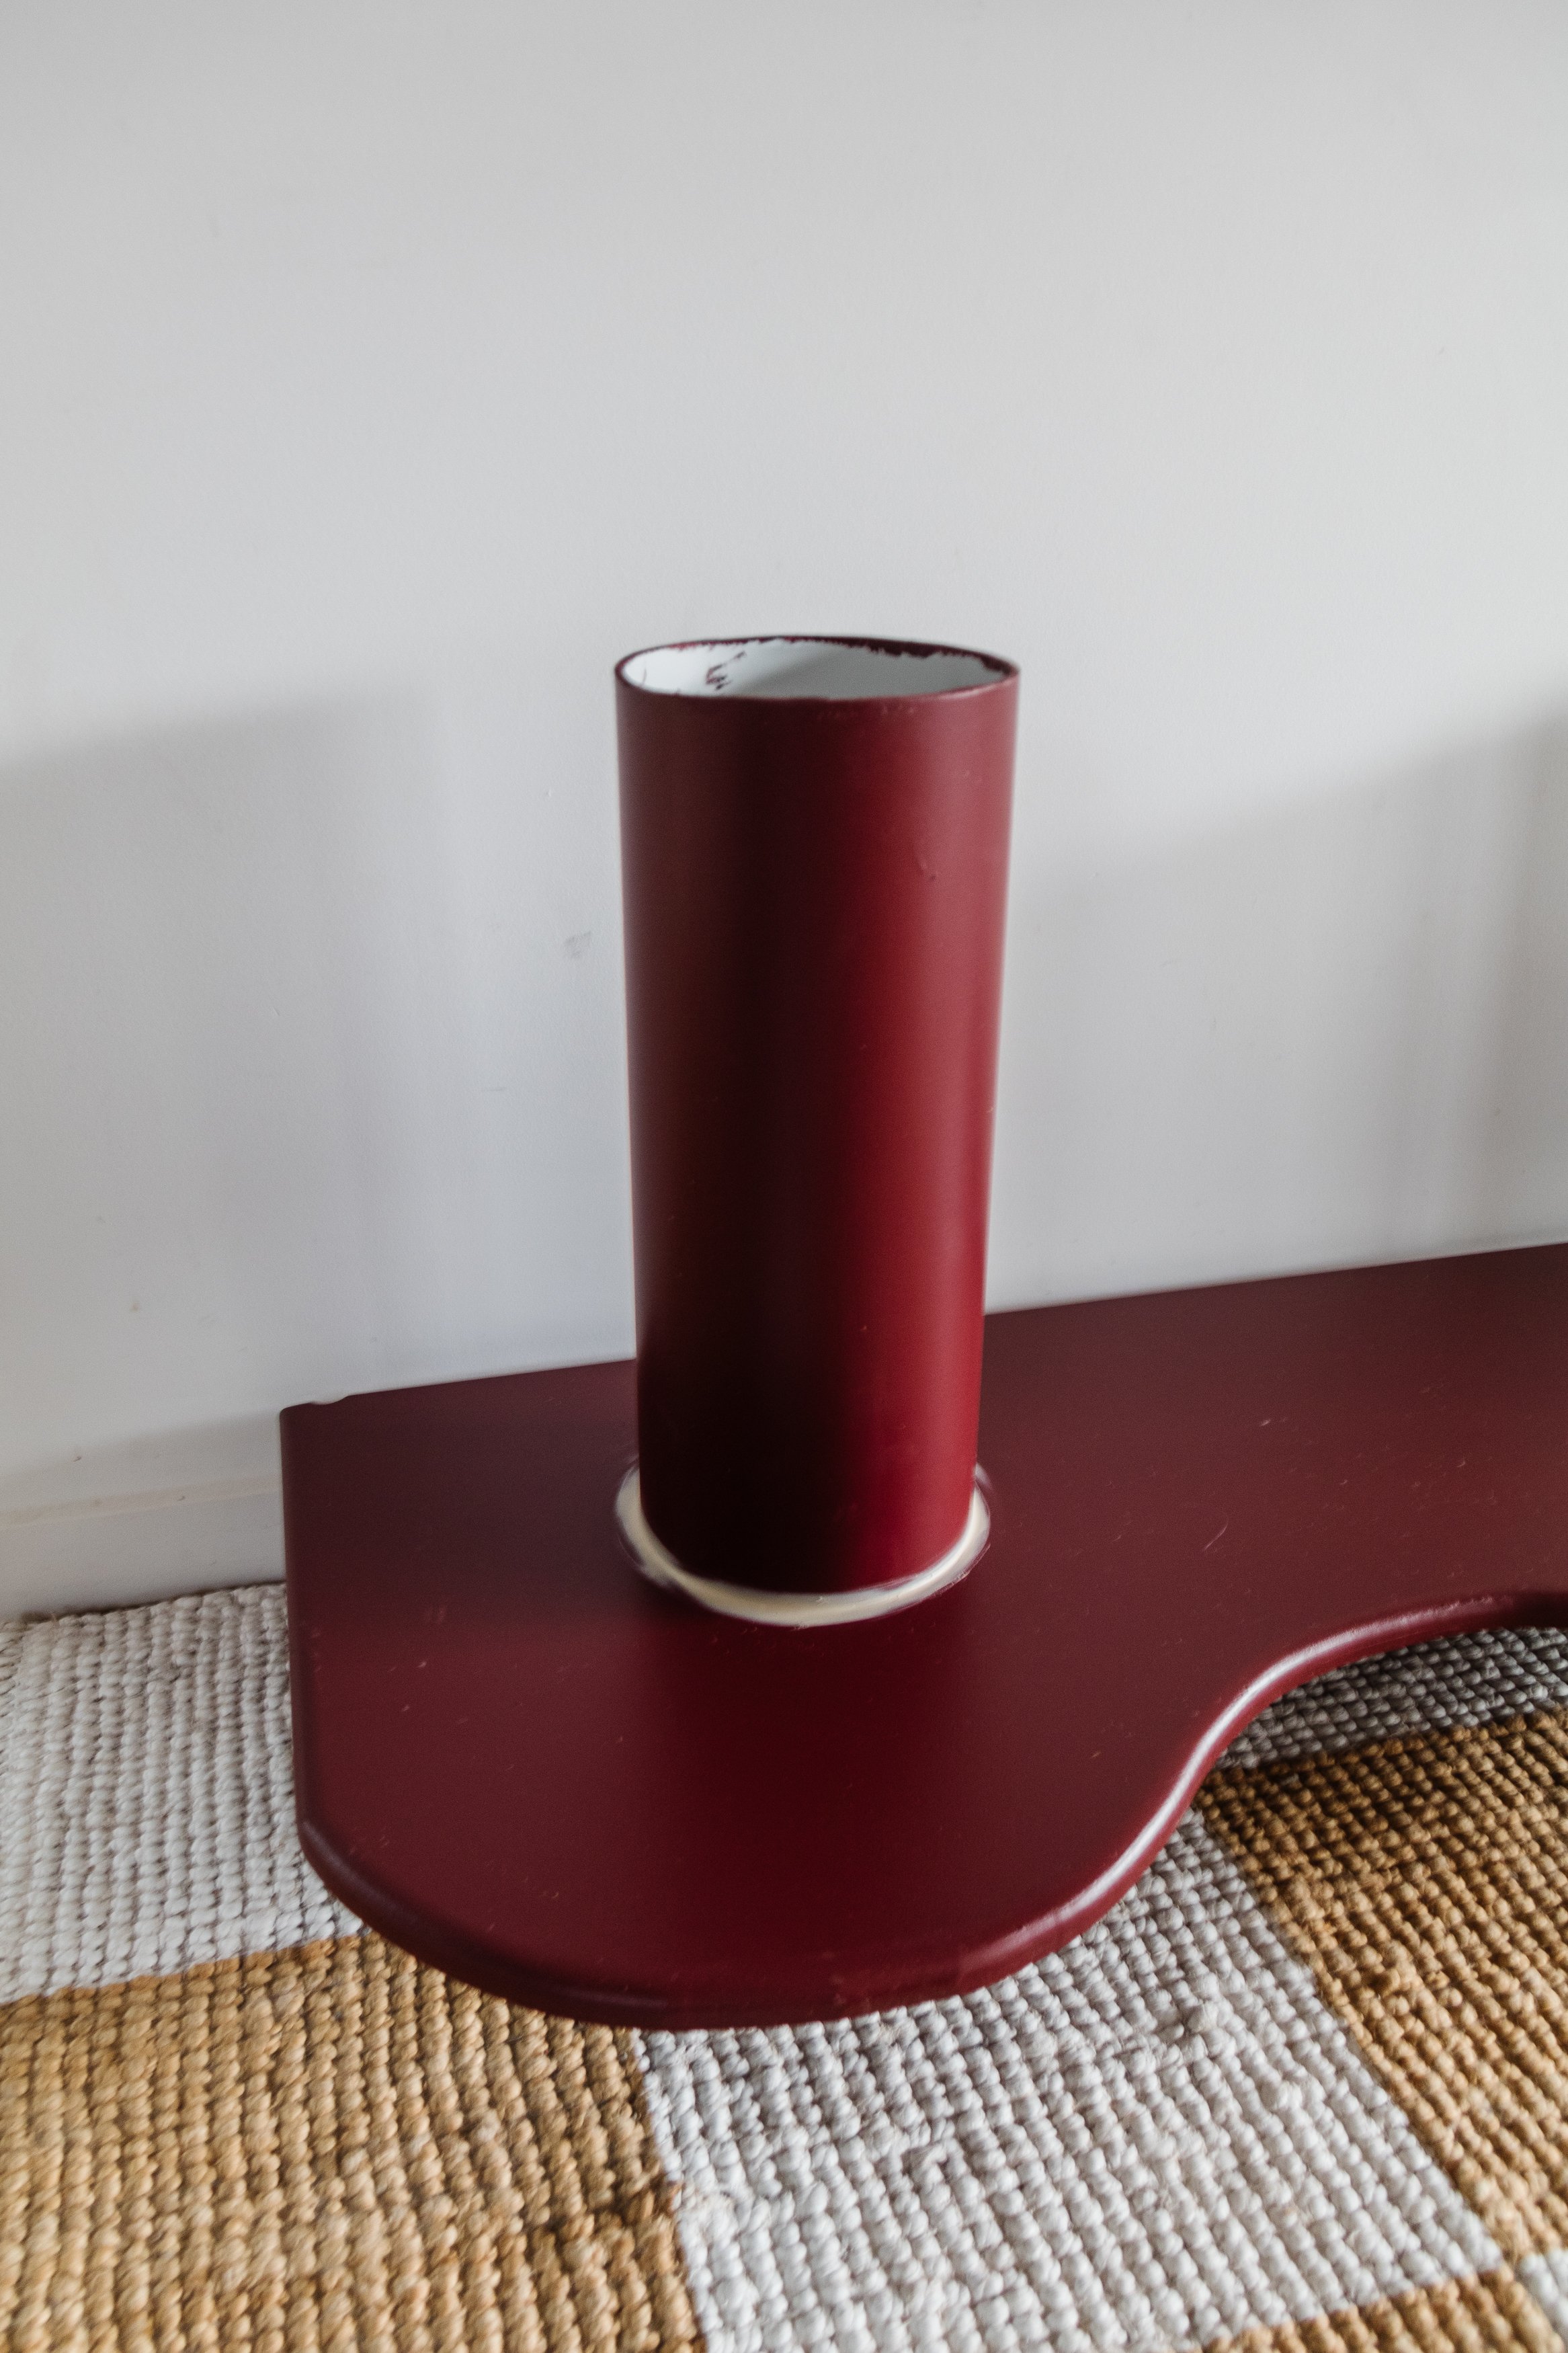
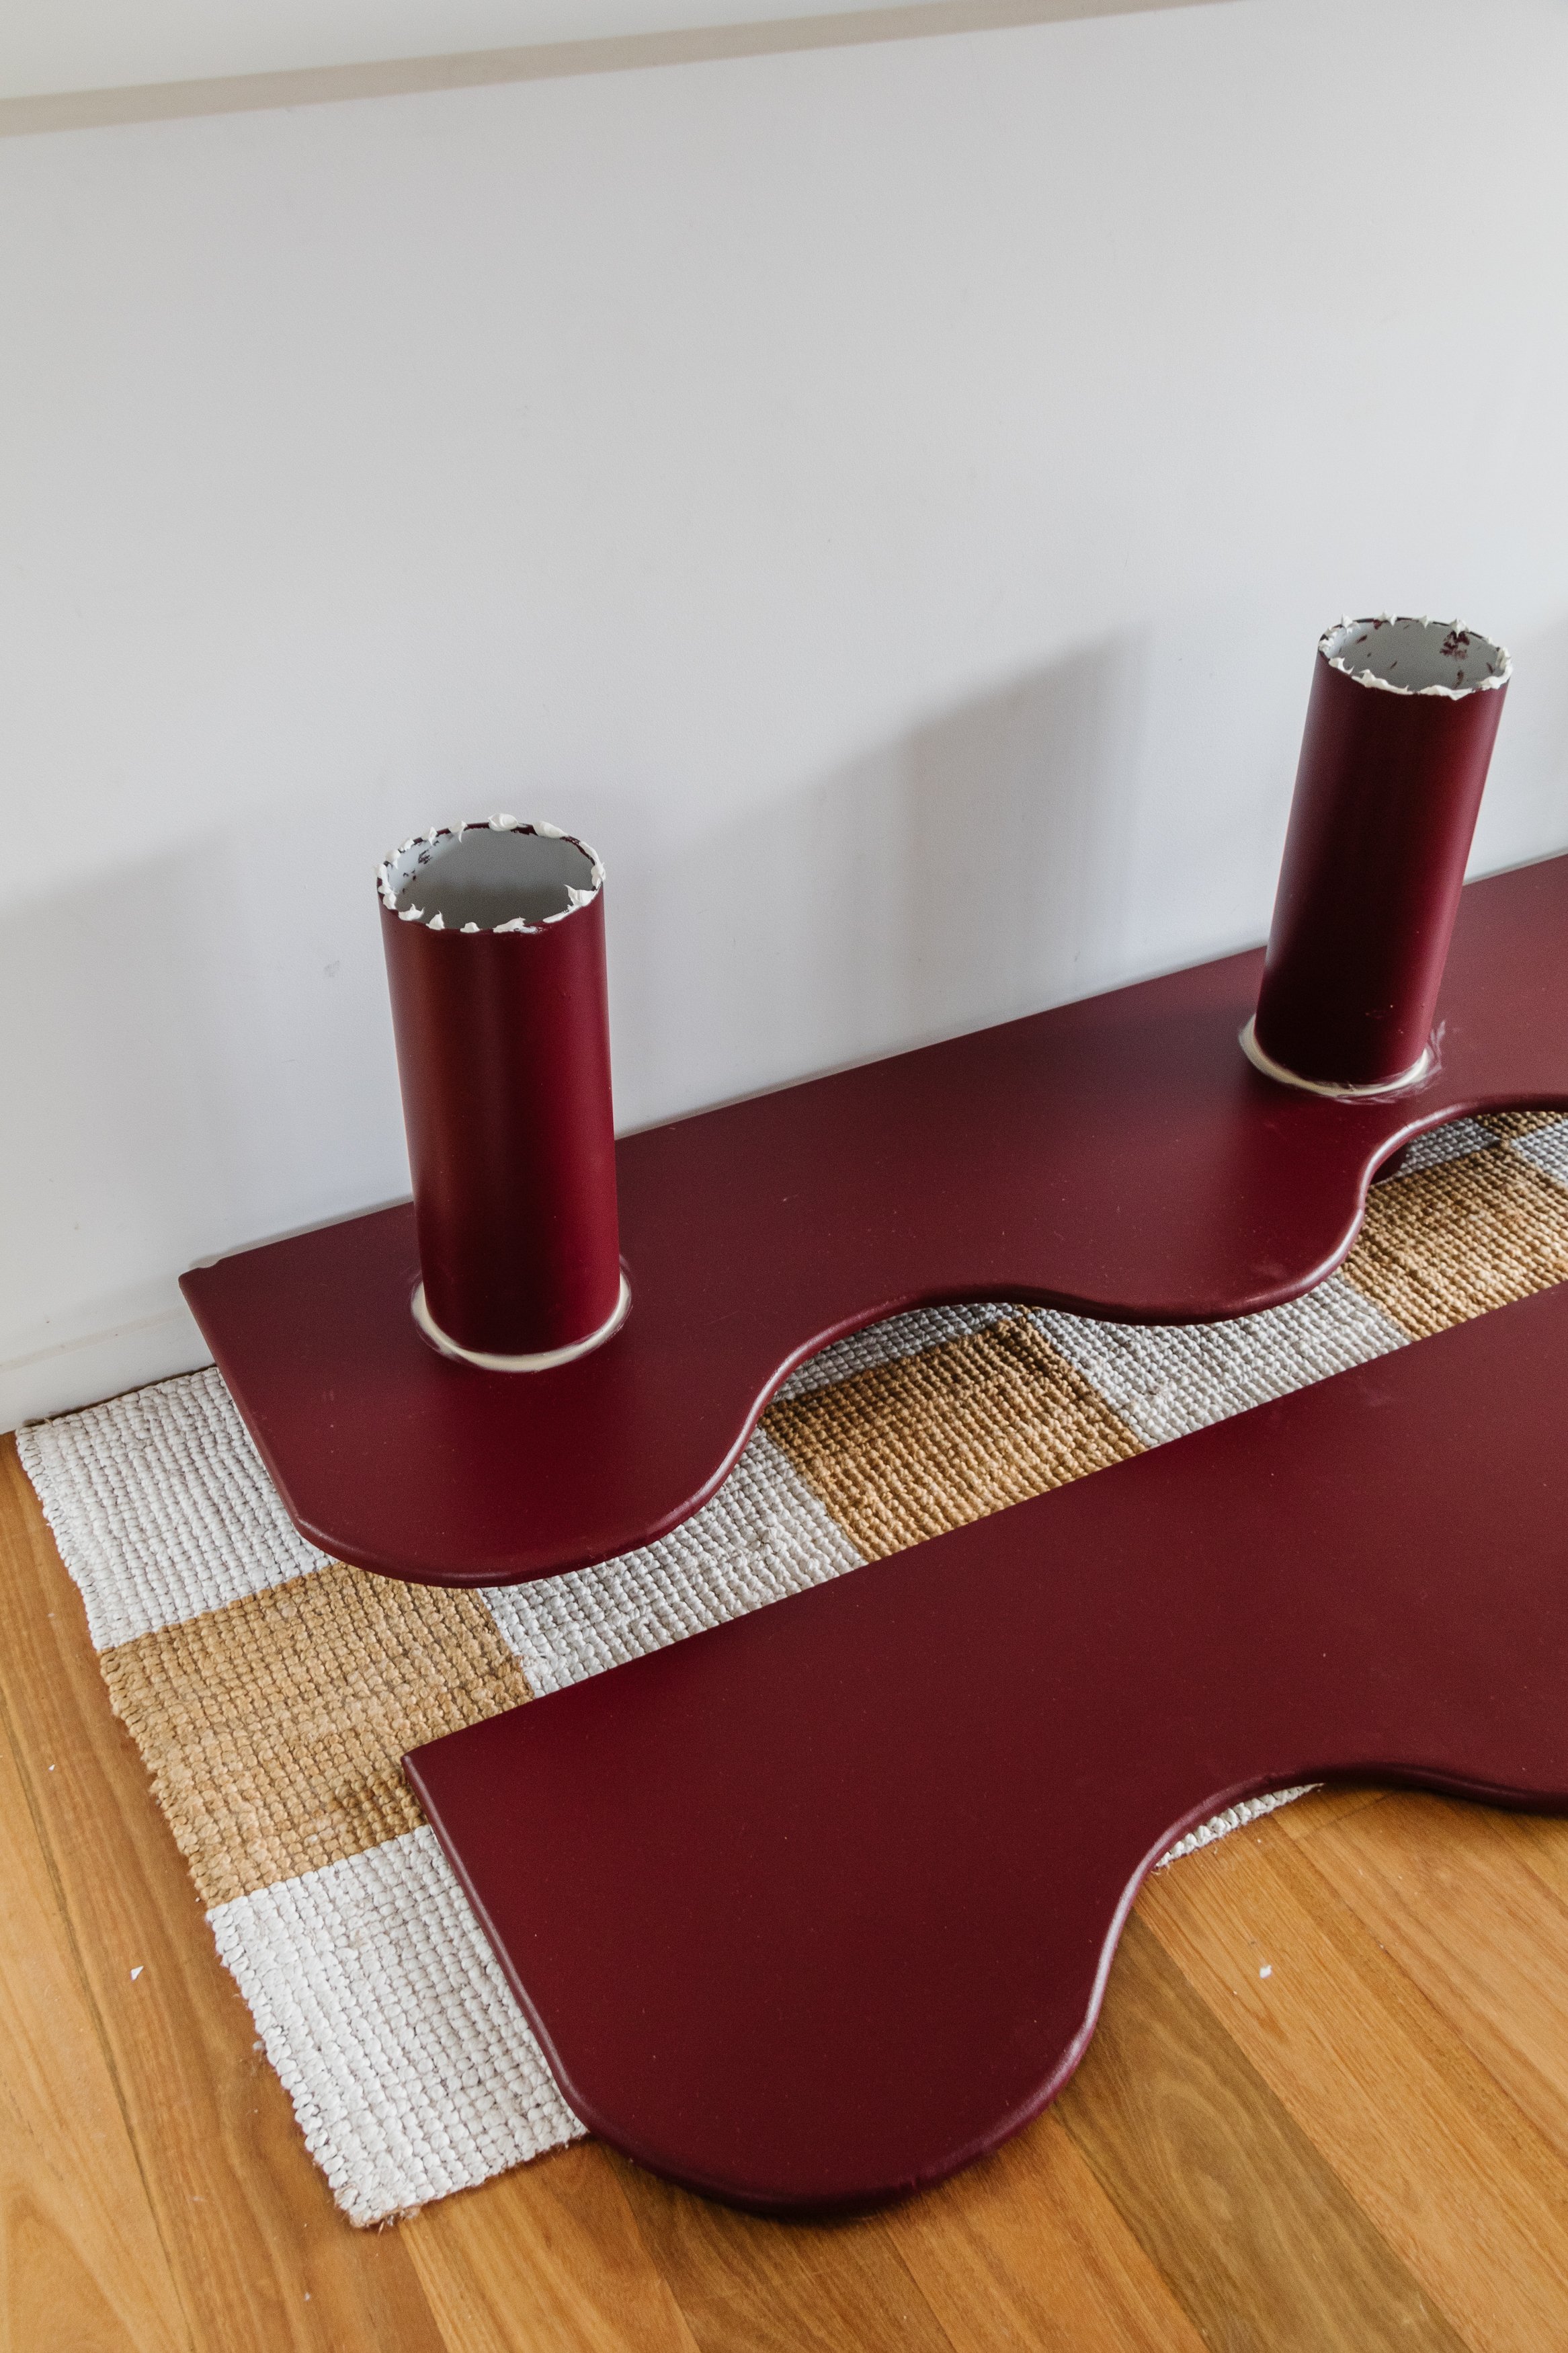
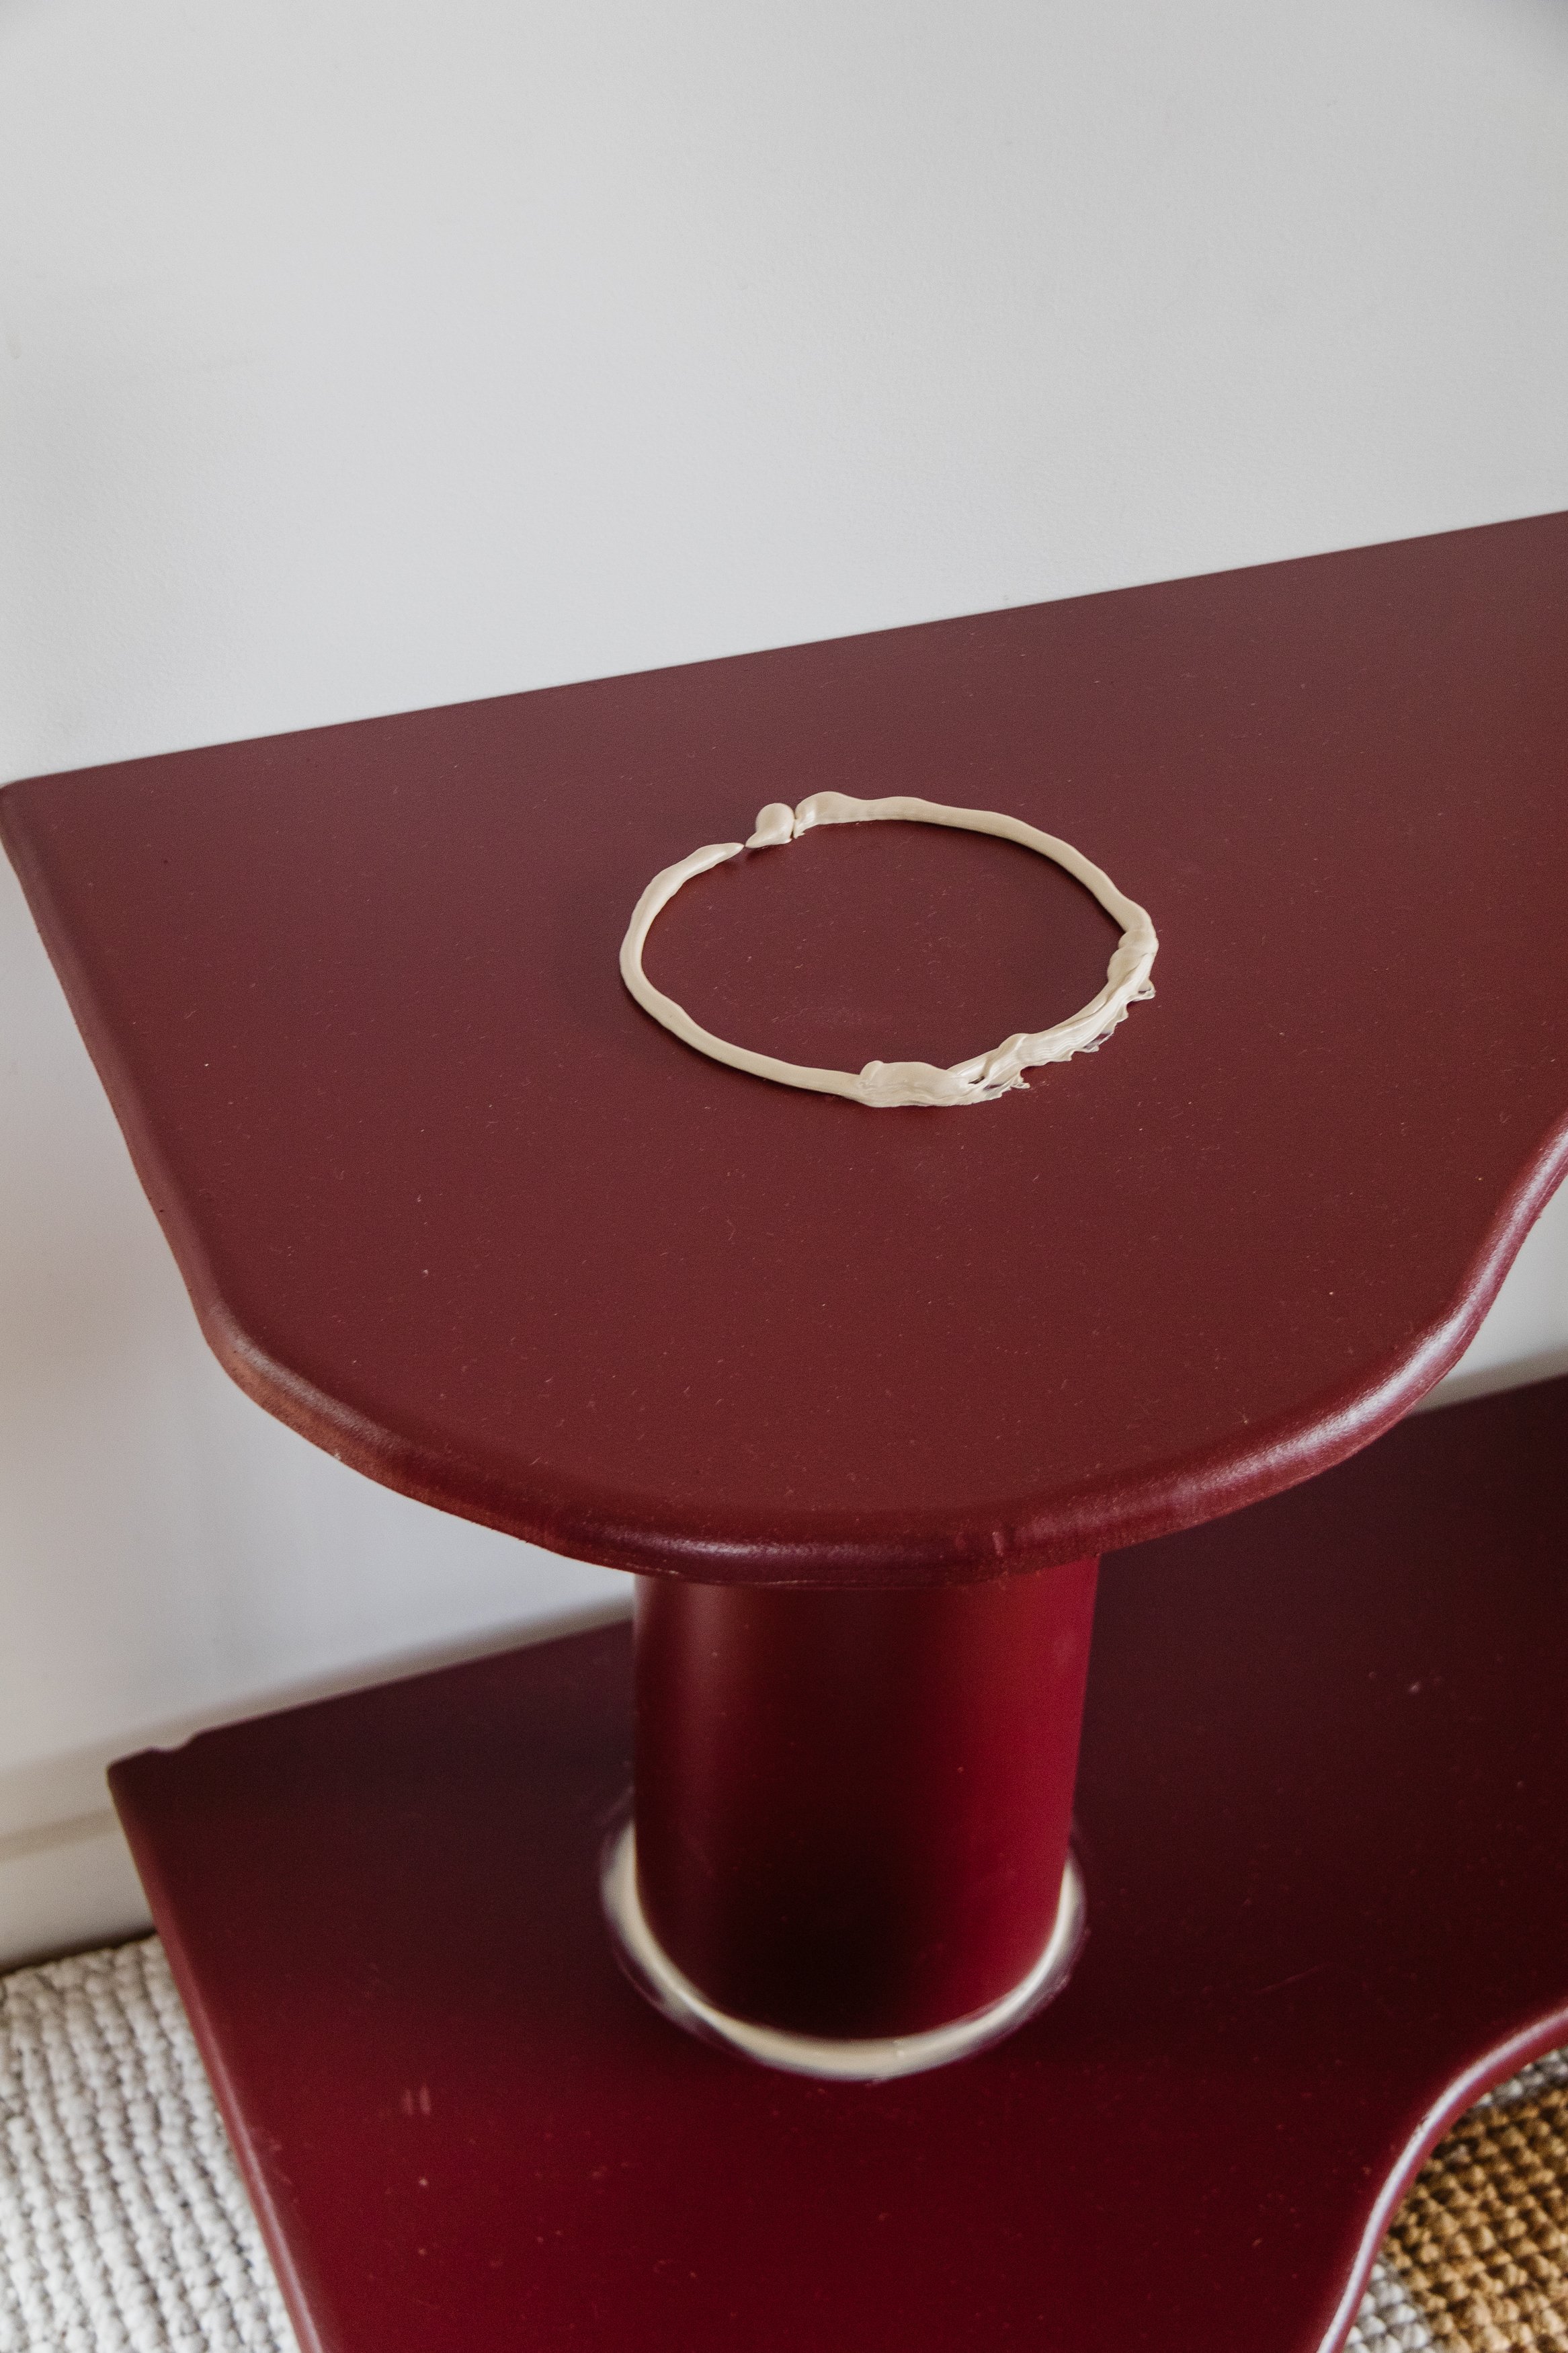
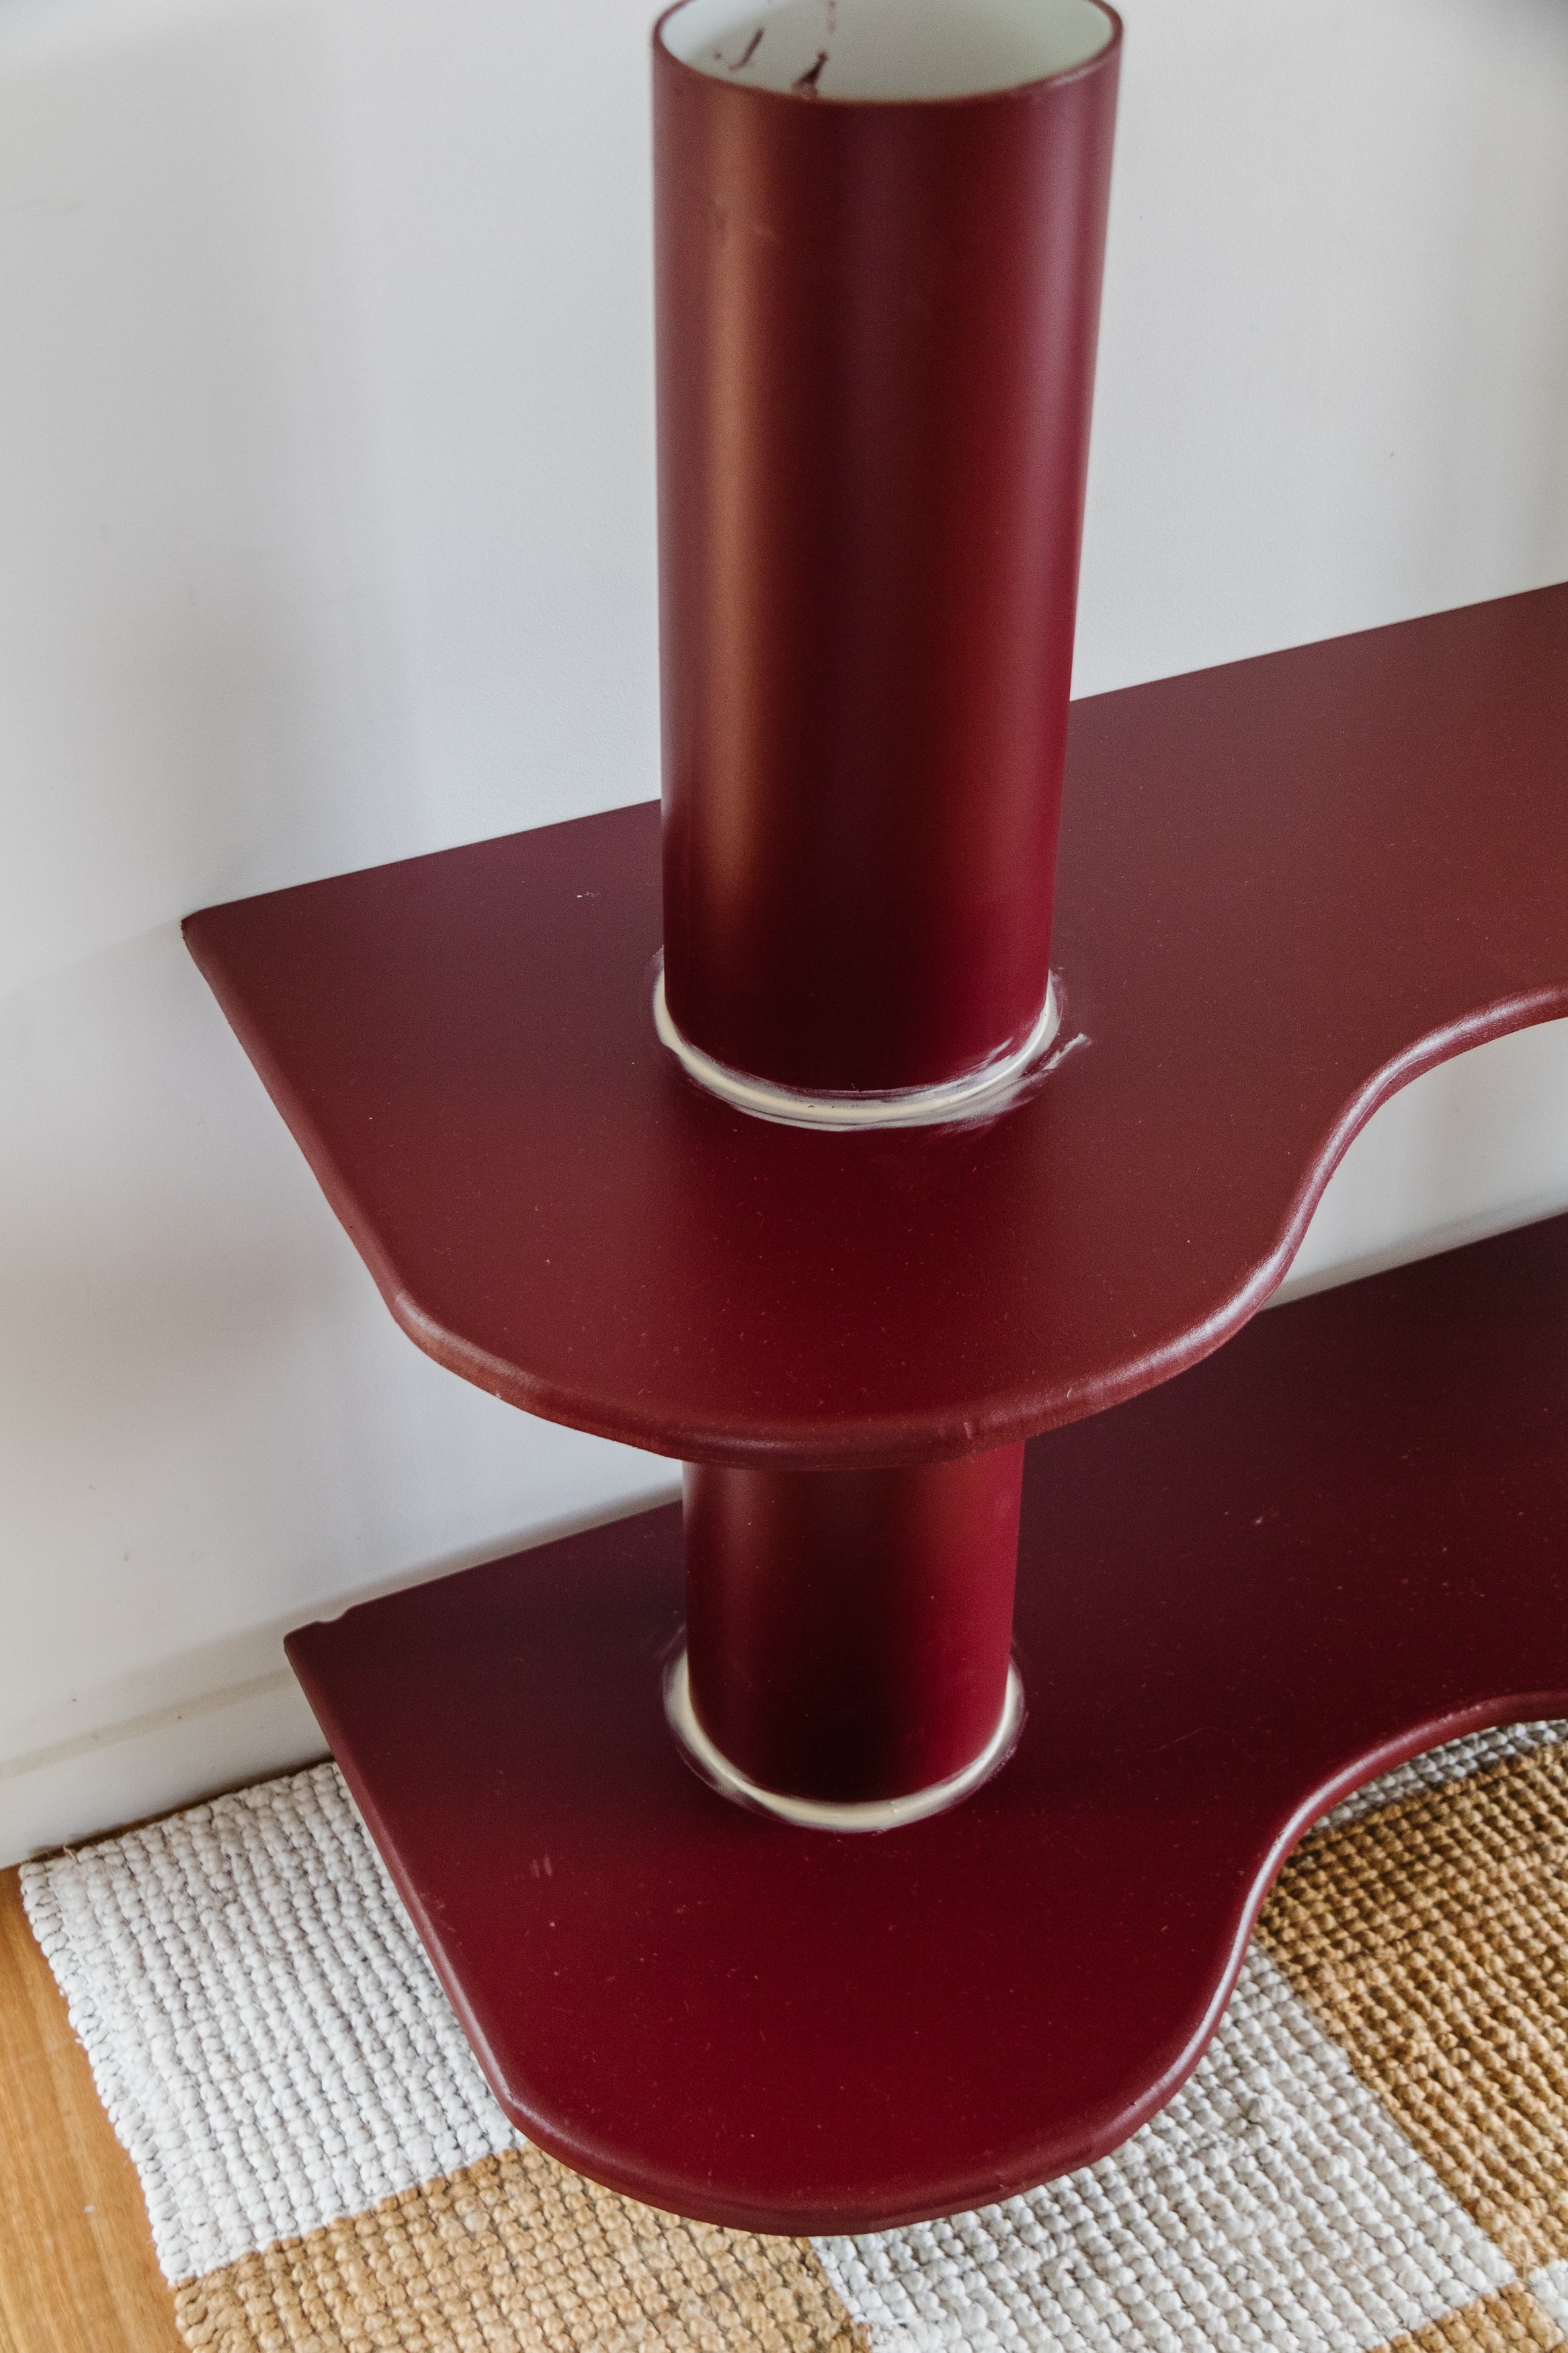
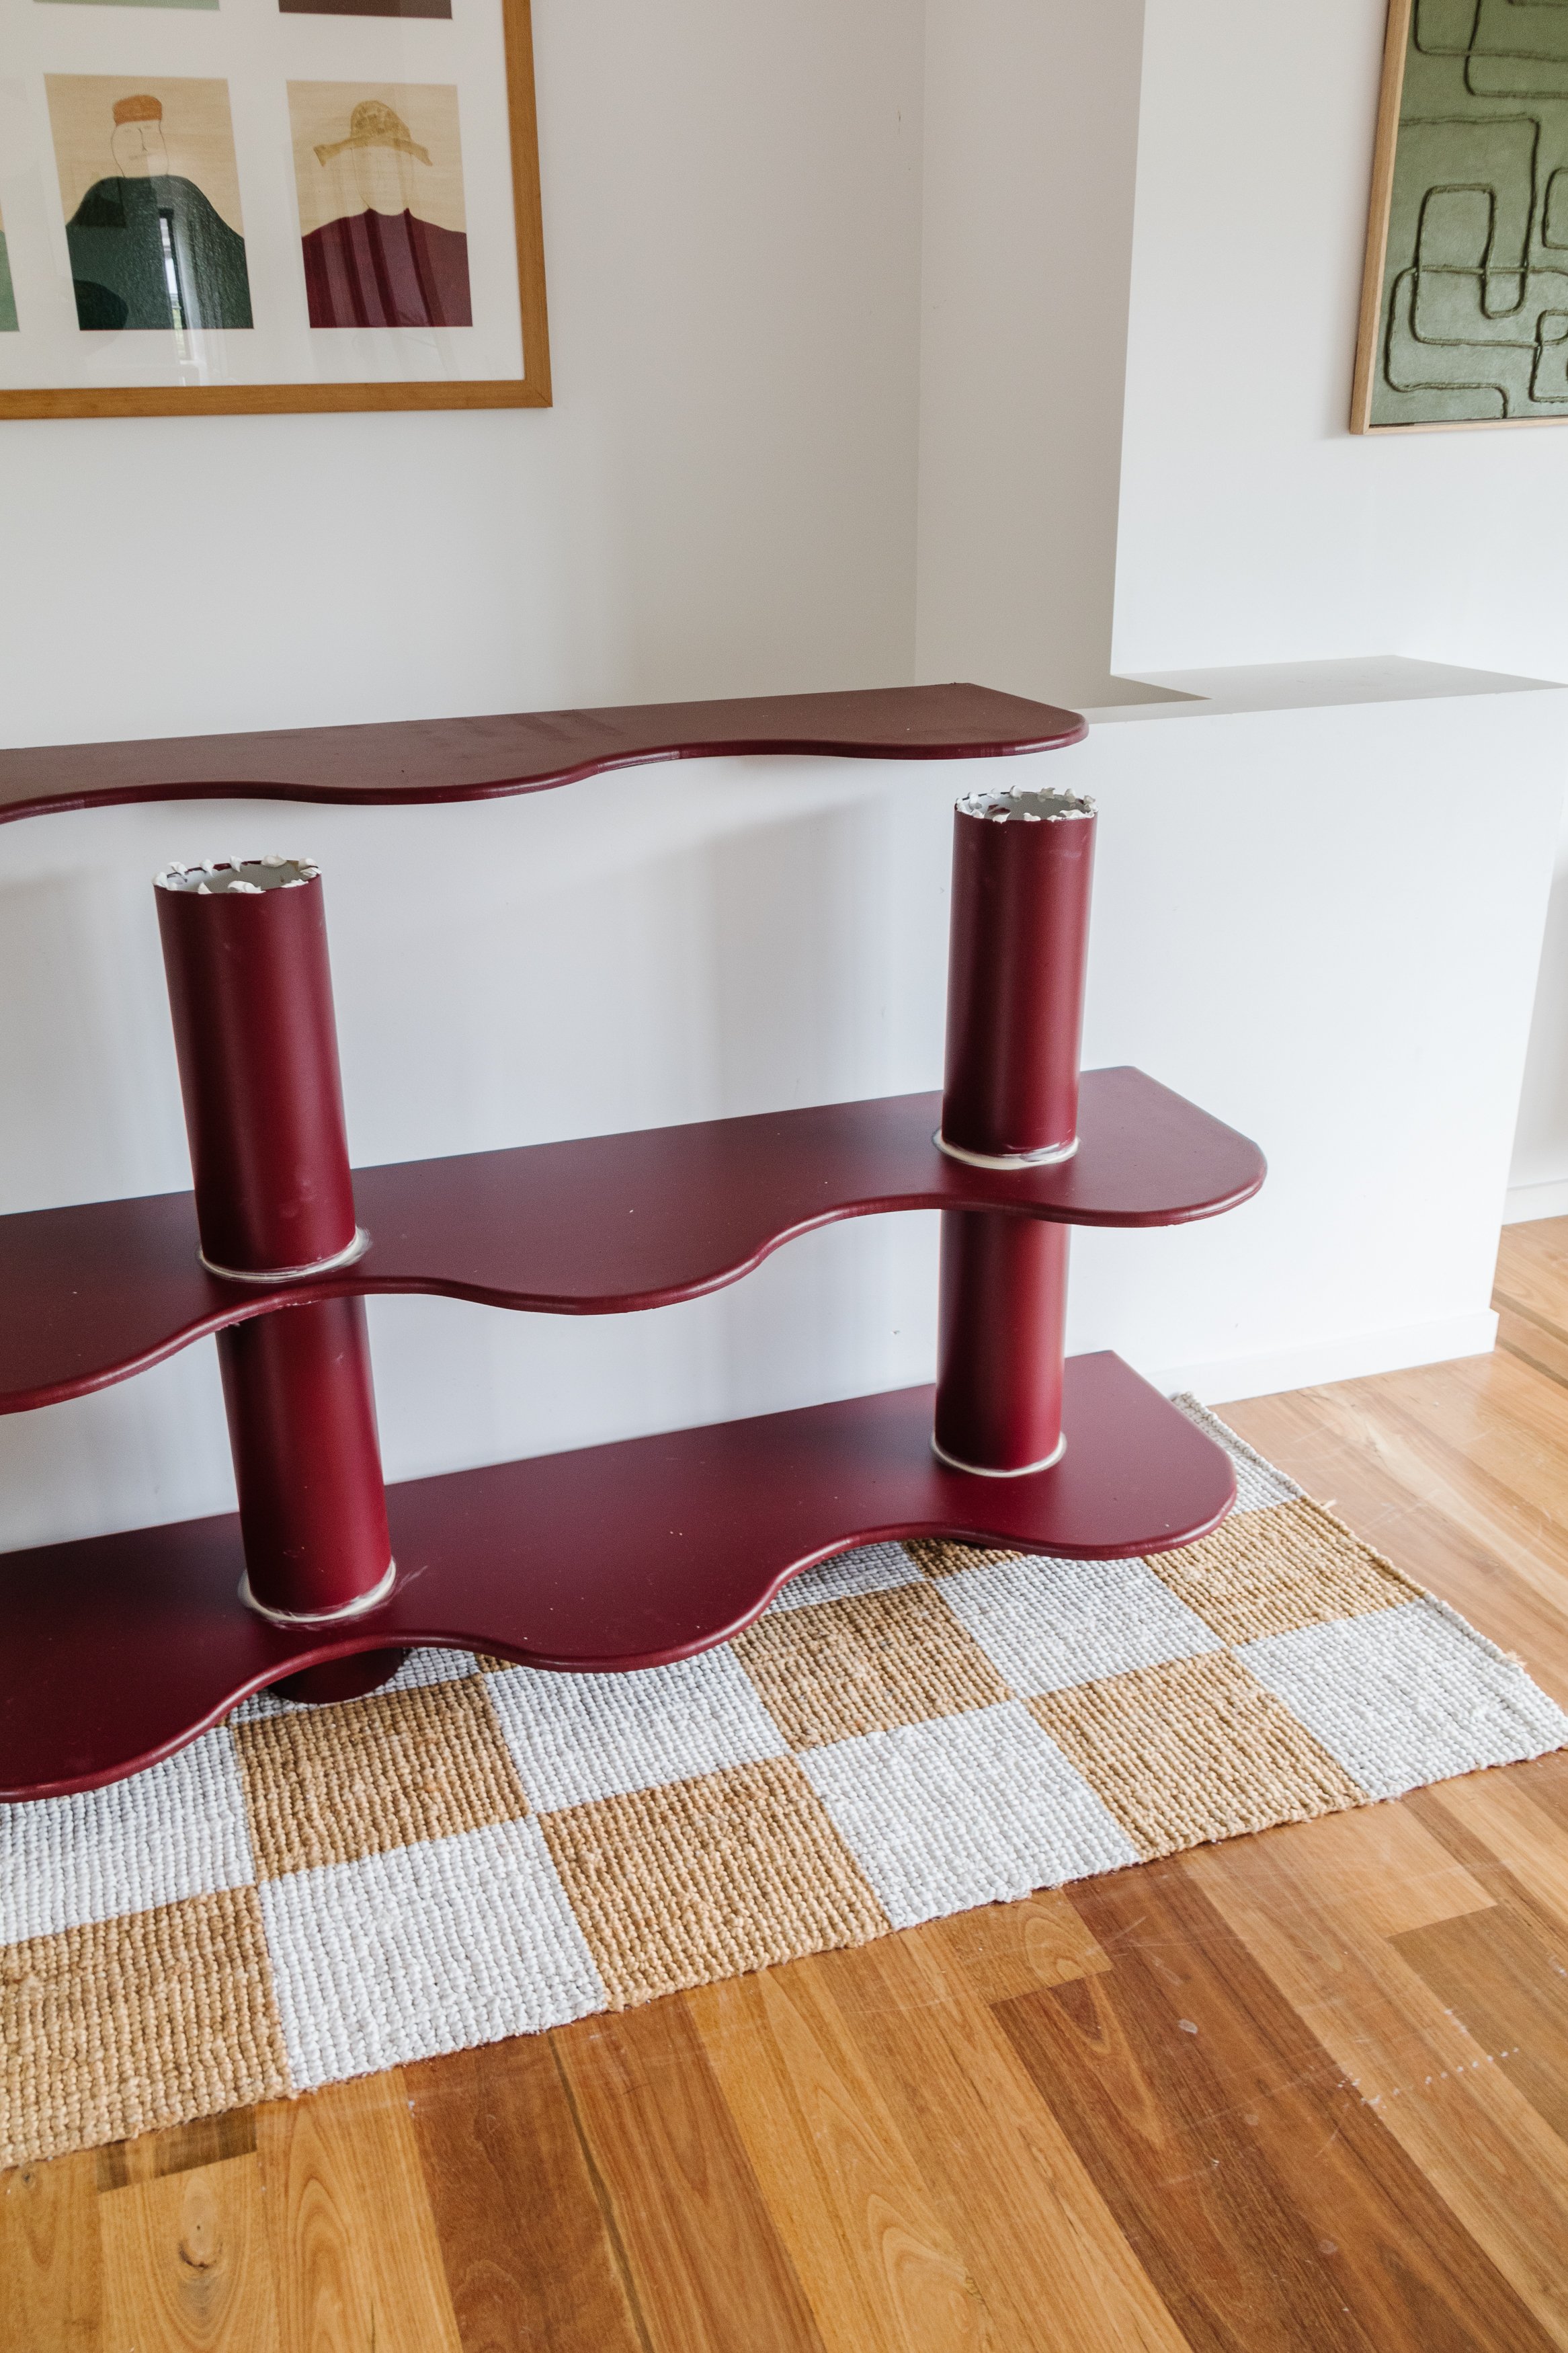
Step 5: Assembly time! I flipped the first piece of MDF upside down and measured/marked where I wanted the 3 x 100mm pieces of PVC pipe to be positioned; approximately 100mm down from the top and 150mm from the sides; my focus for the design was to ensure the weight would be distributed evenly.
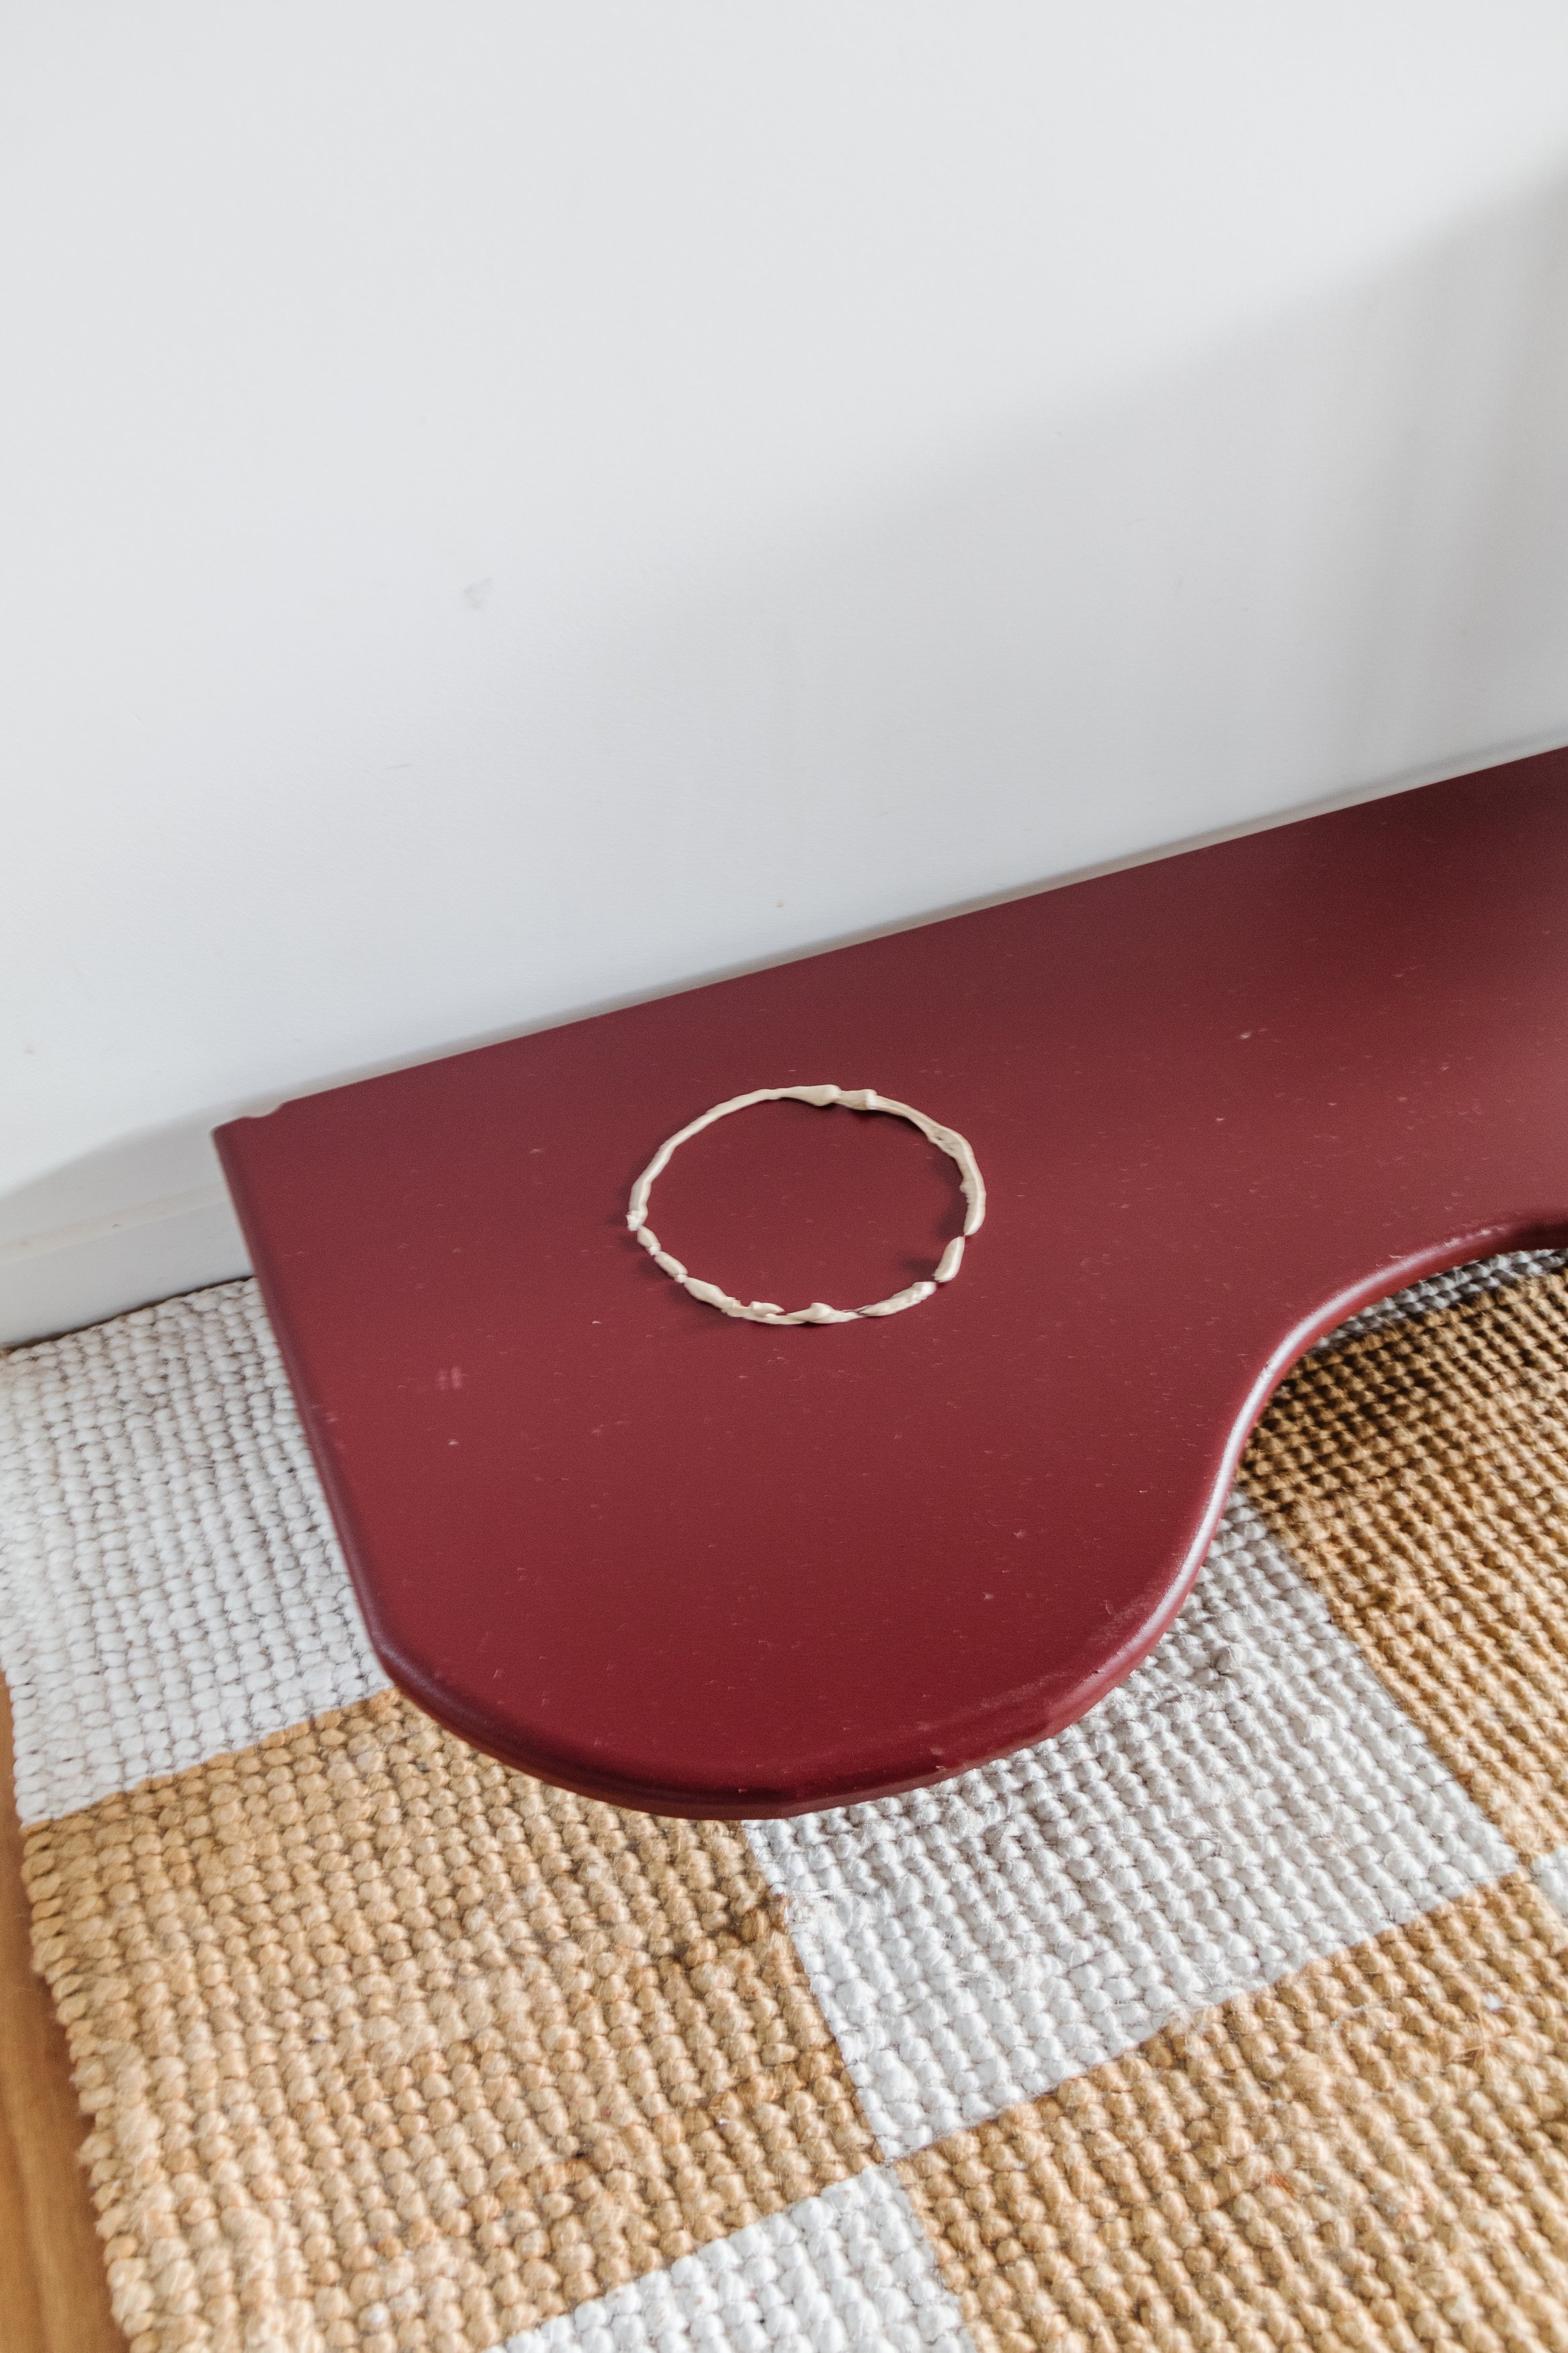
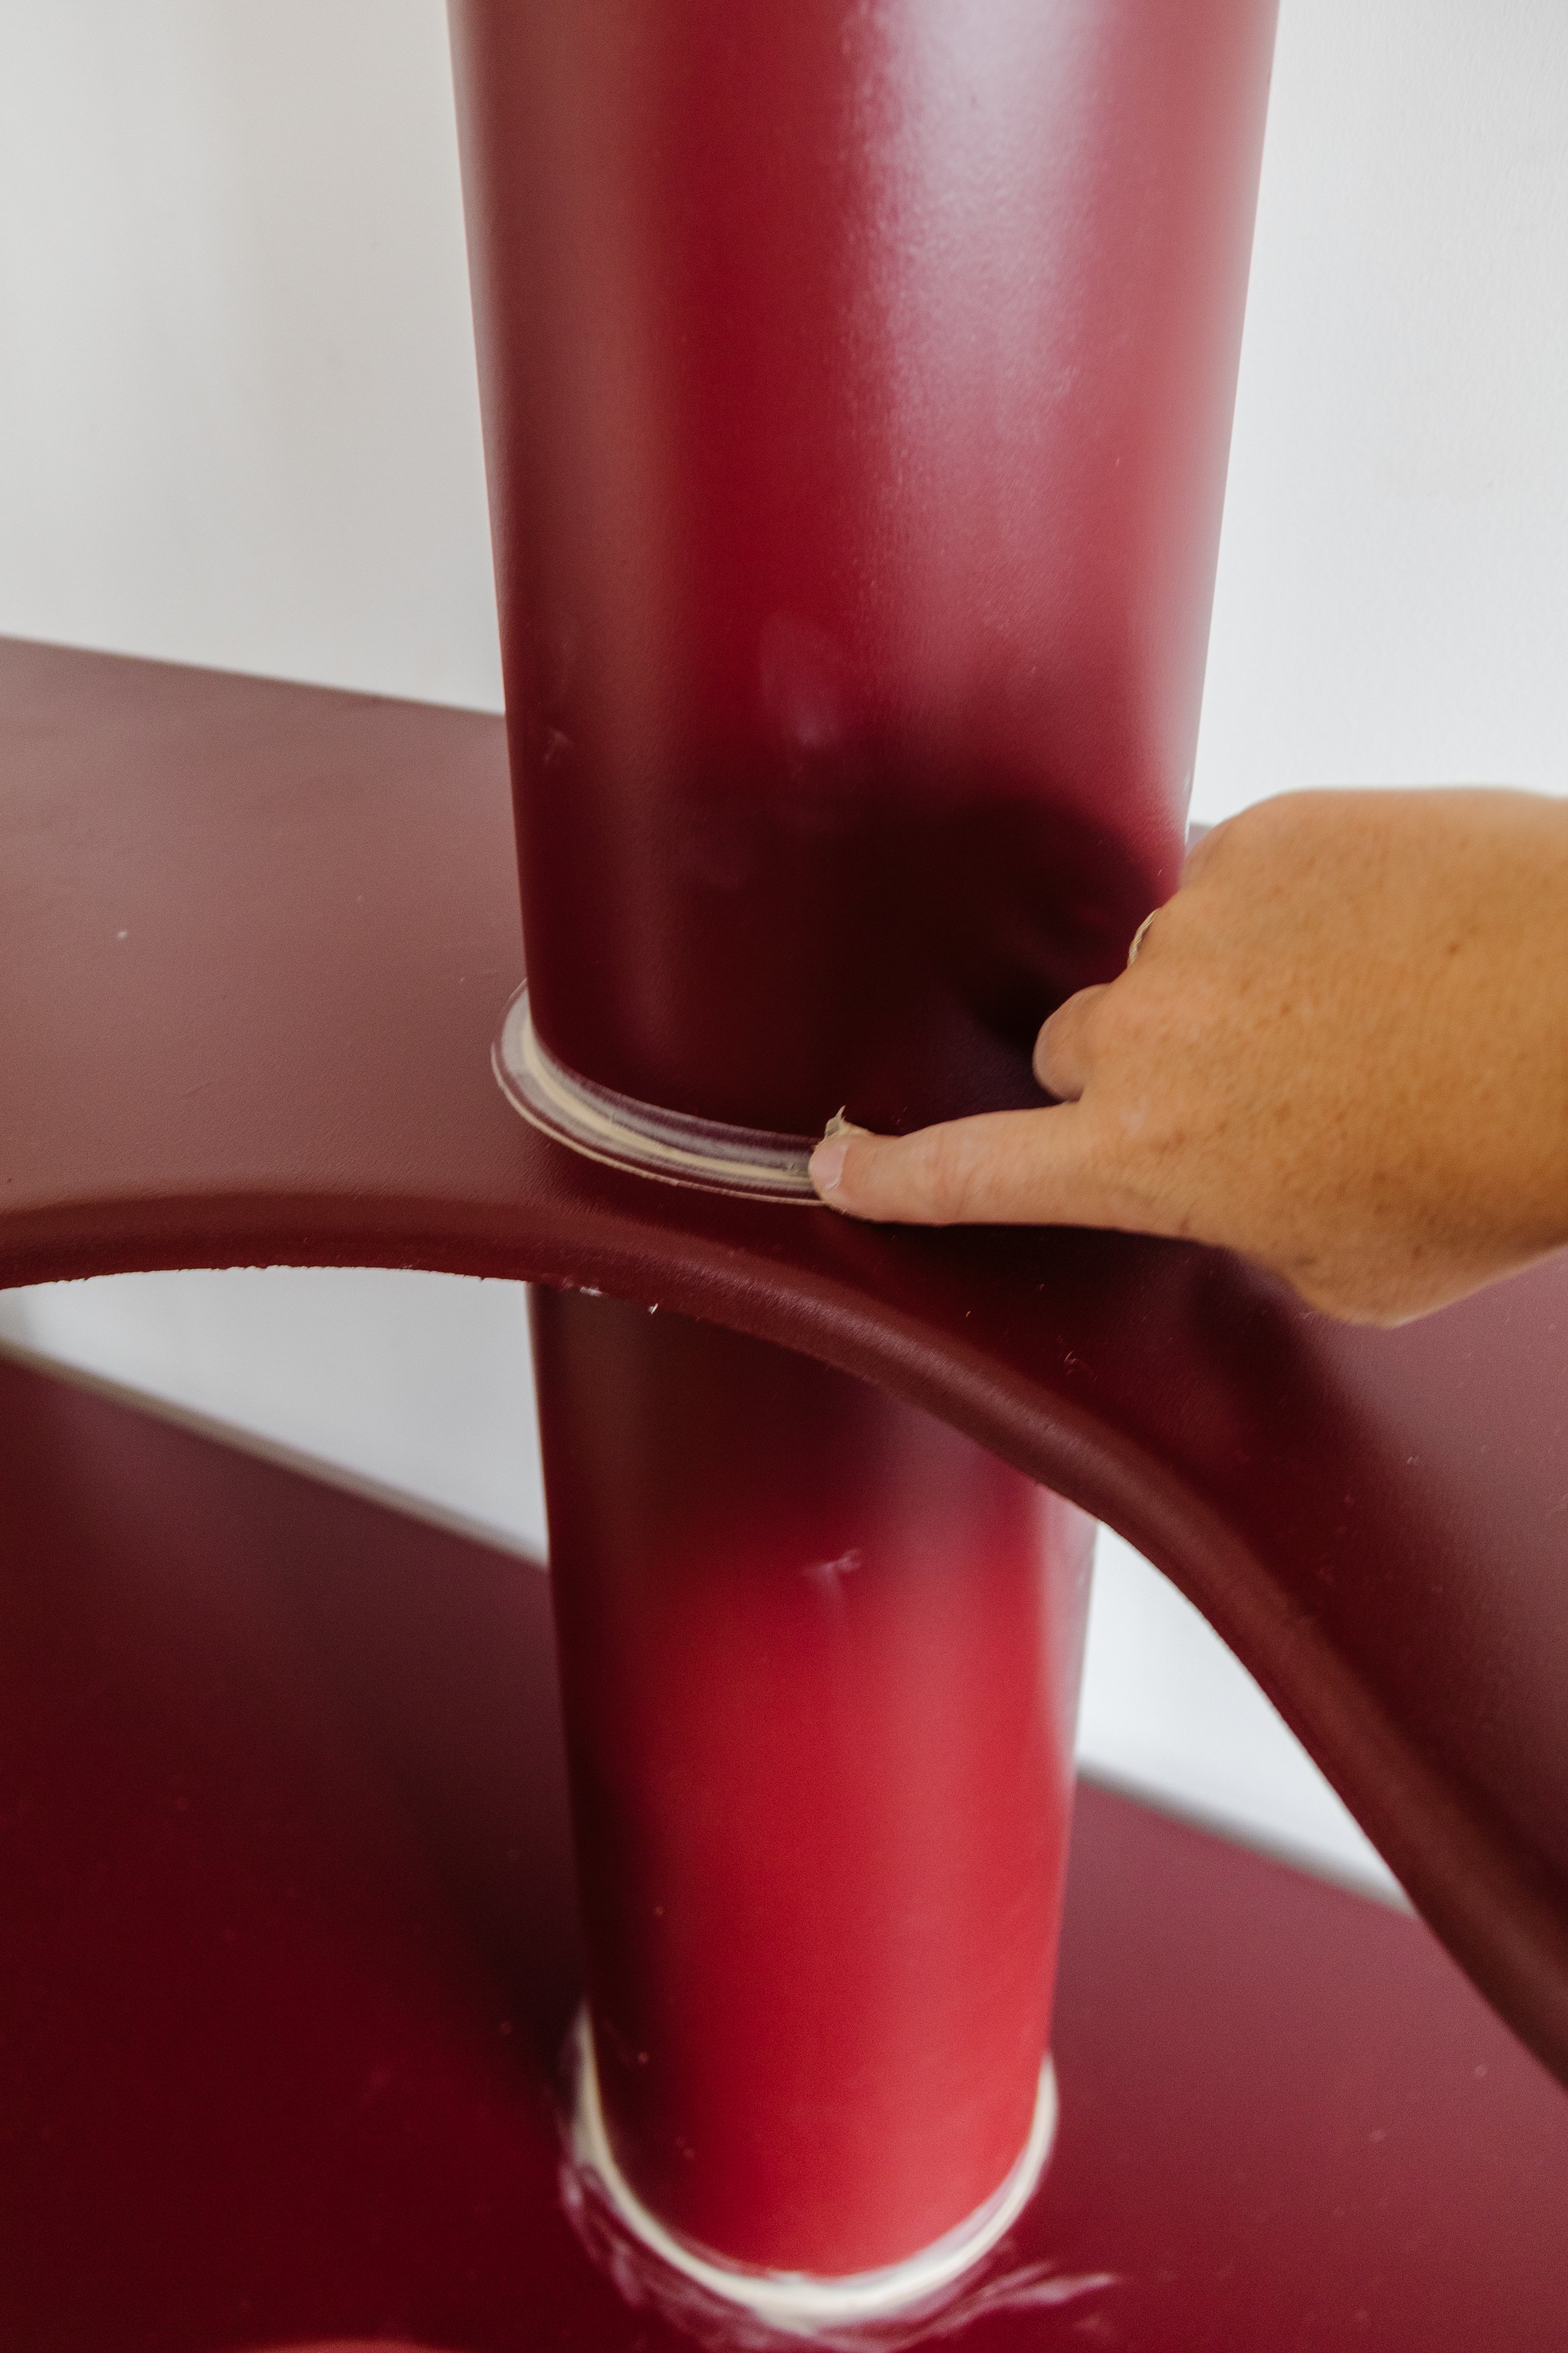
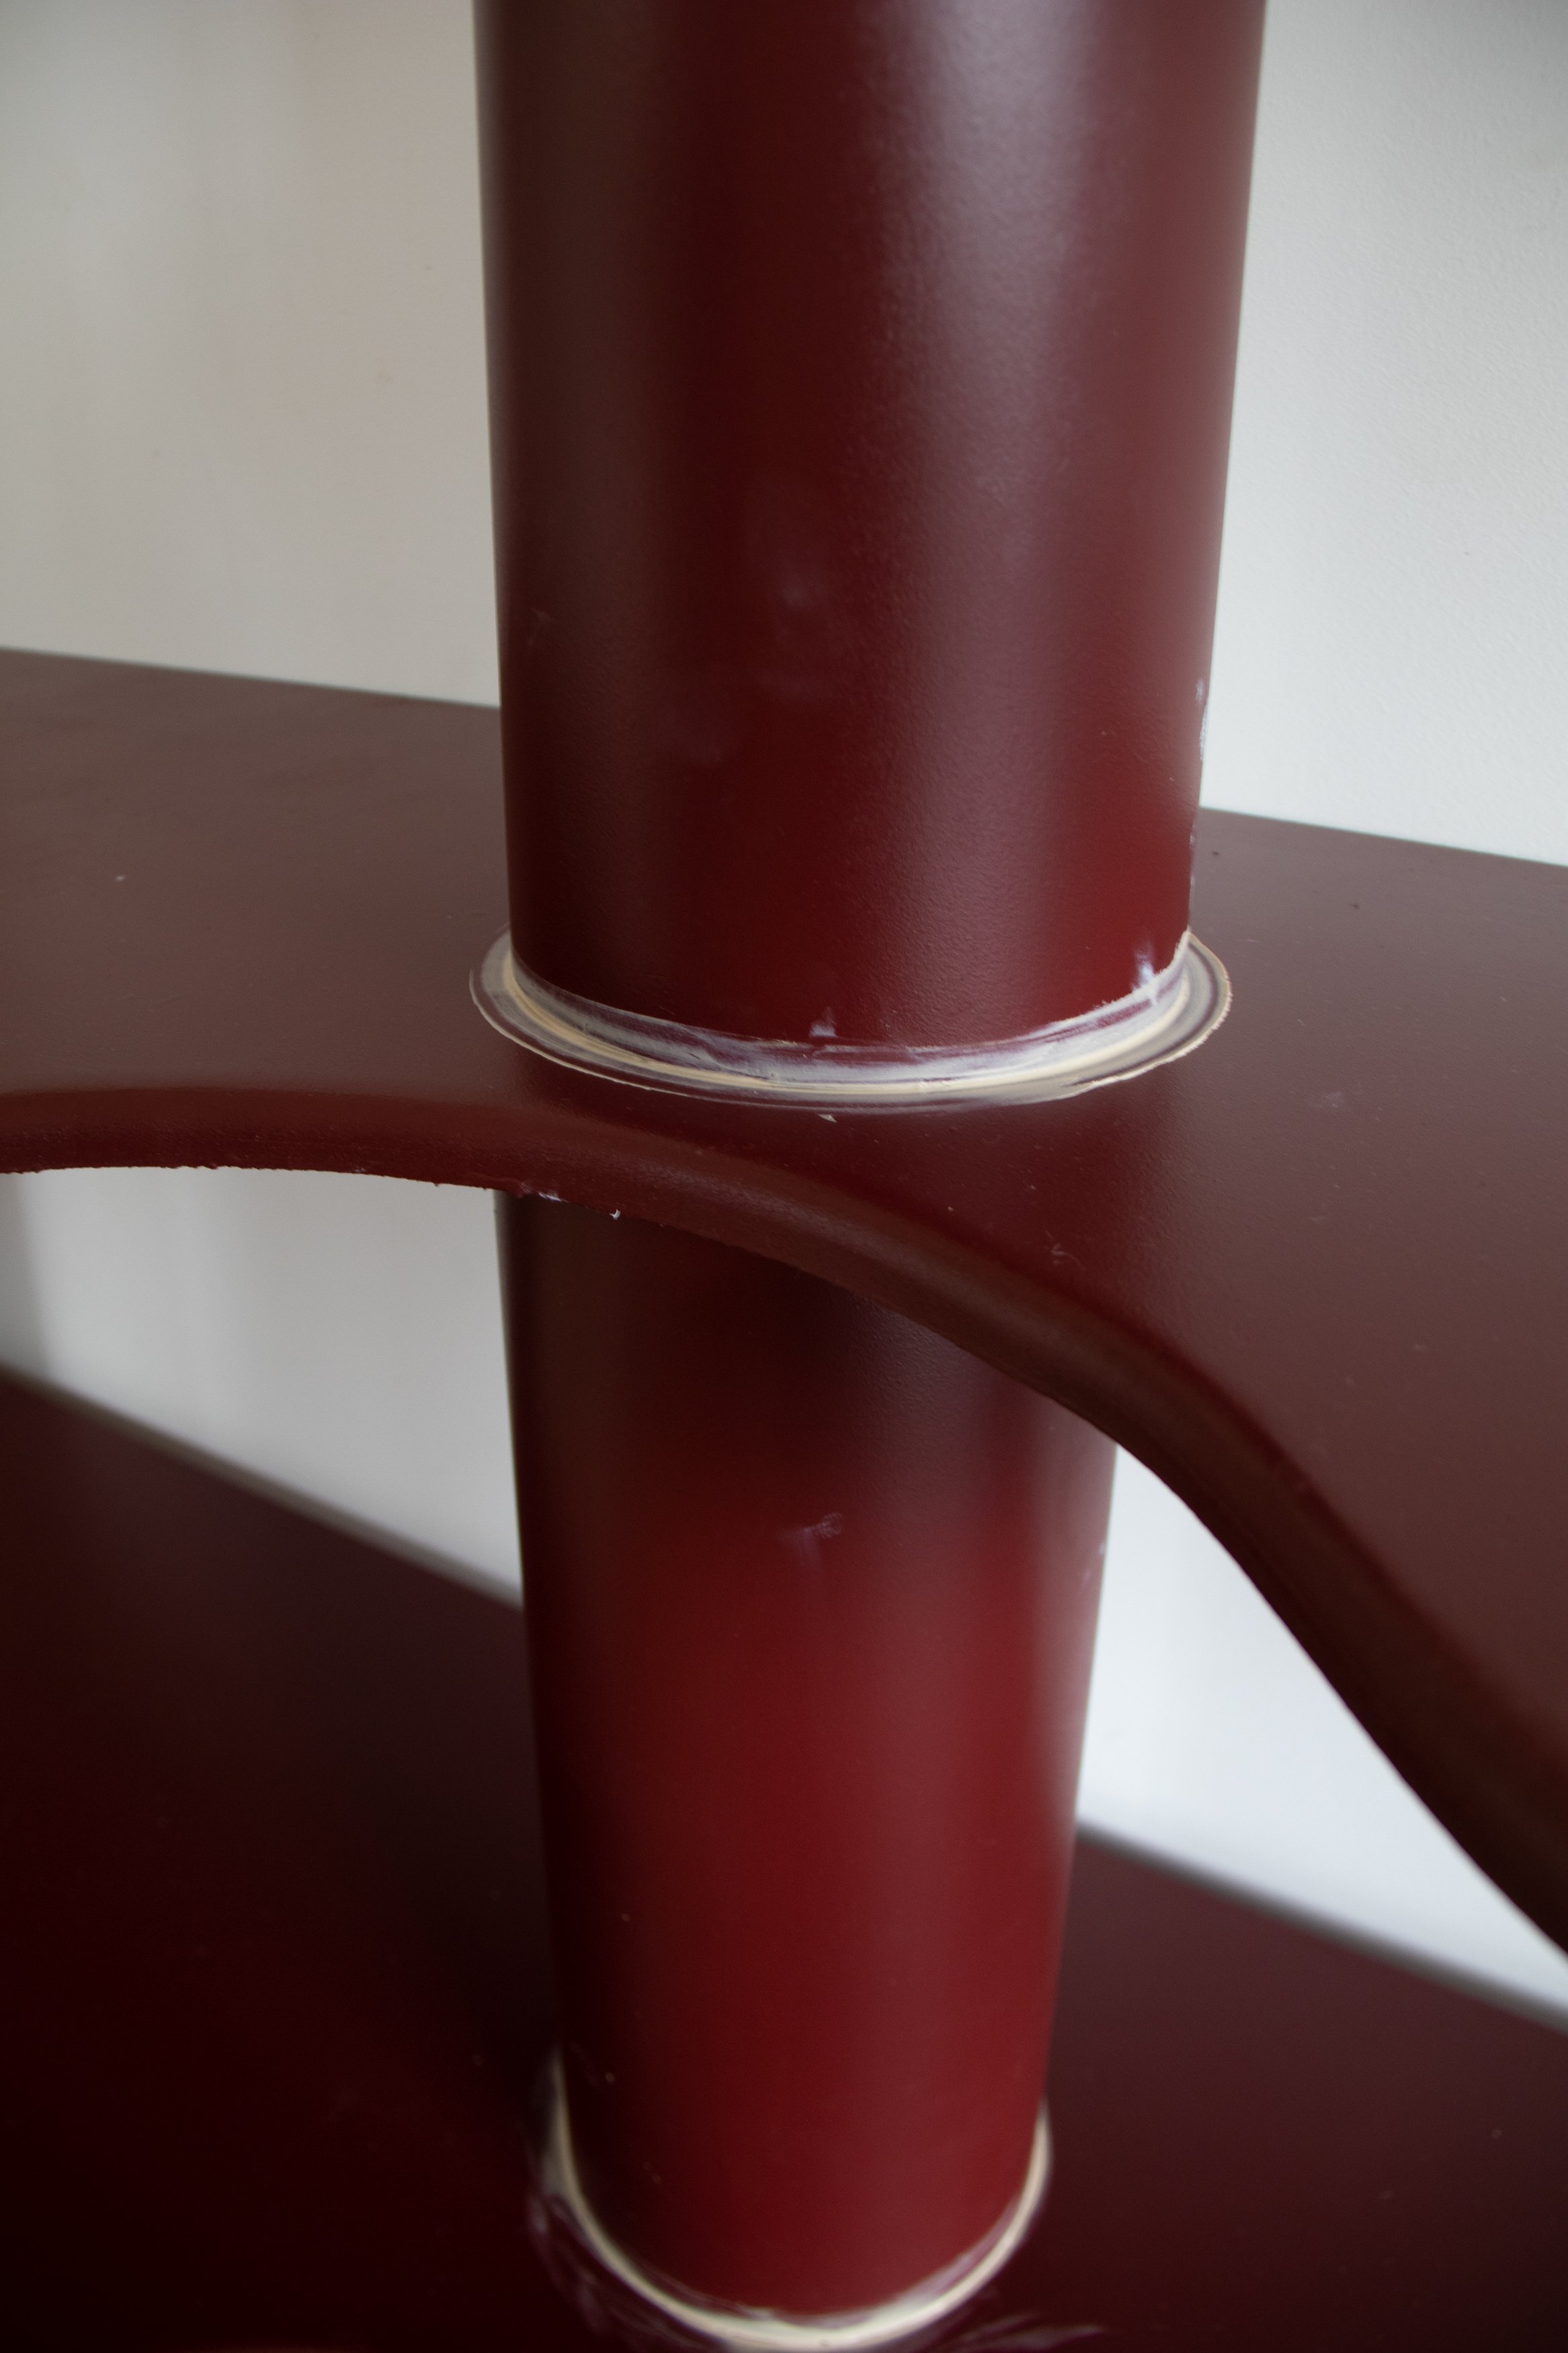
I used Selleys Heavy Duty Liquid Nails to glue them into position and when that had cured, I used Selleys No More Gaps between the MDF and PVC pipe, which I neatened using my finger - but you can use a baby wipe if you don’t want to get glue on your fingers. I flipped this first piece over and positioned it into the place I wanted the library to be.
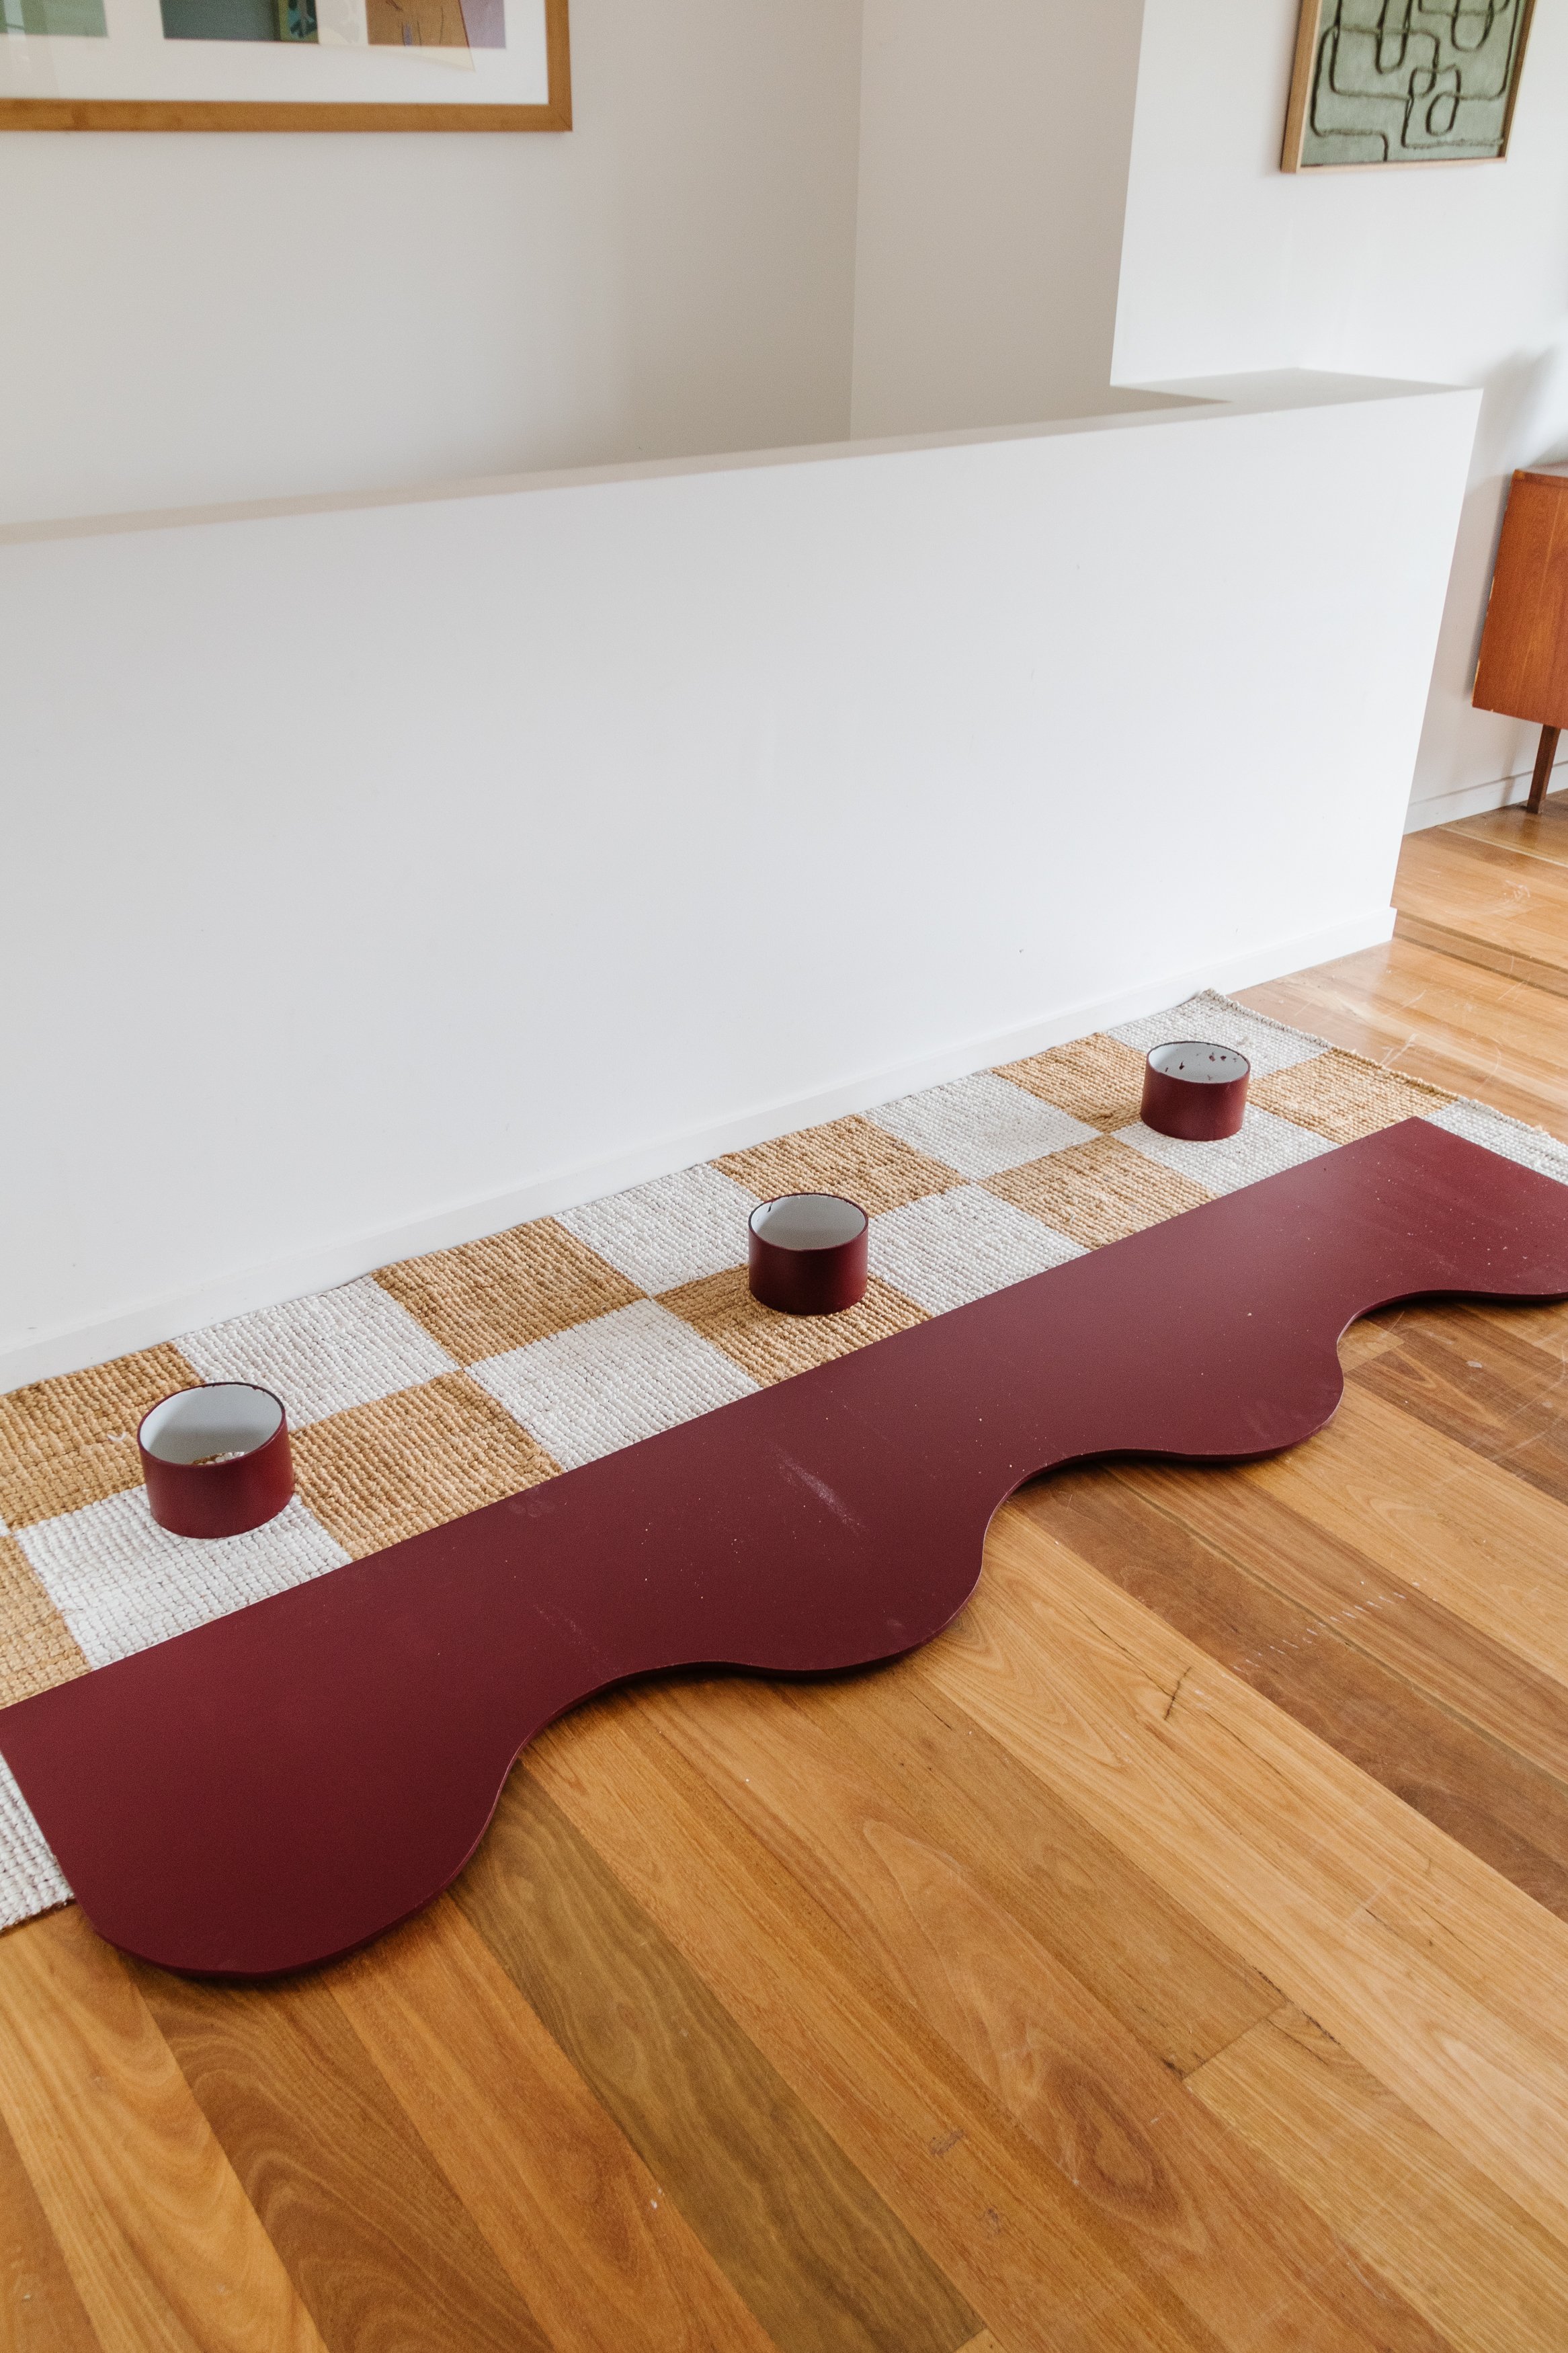
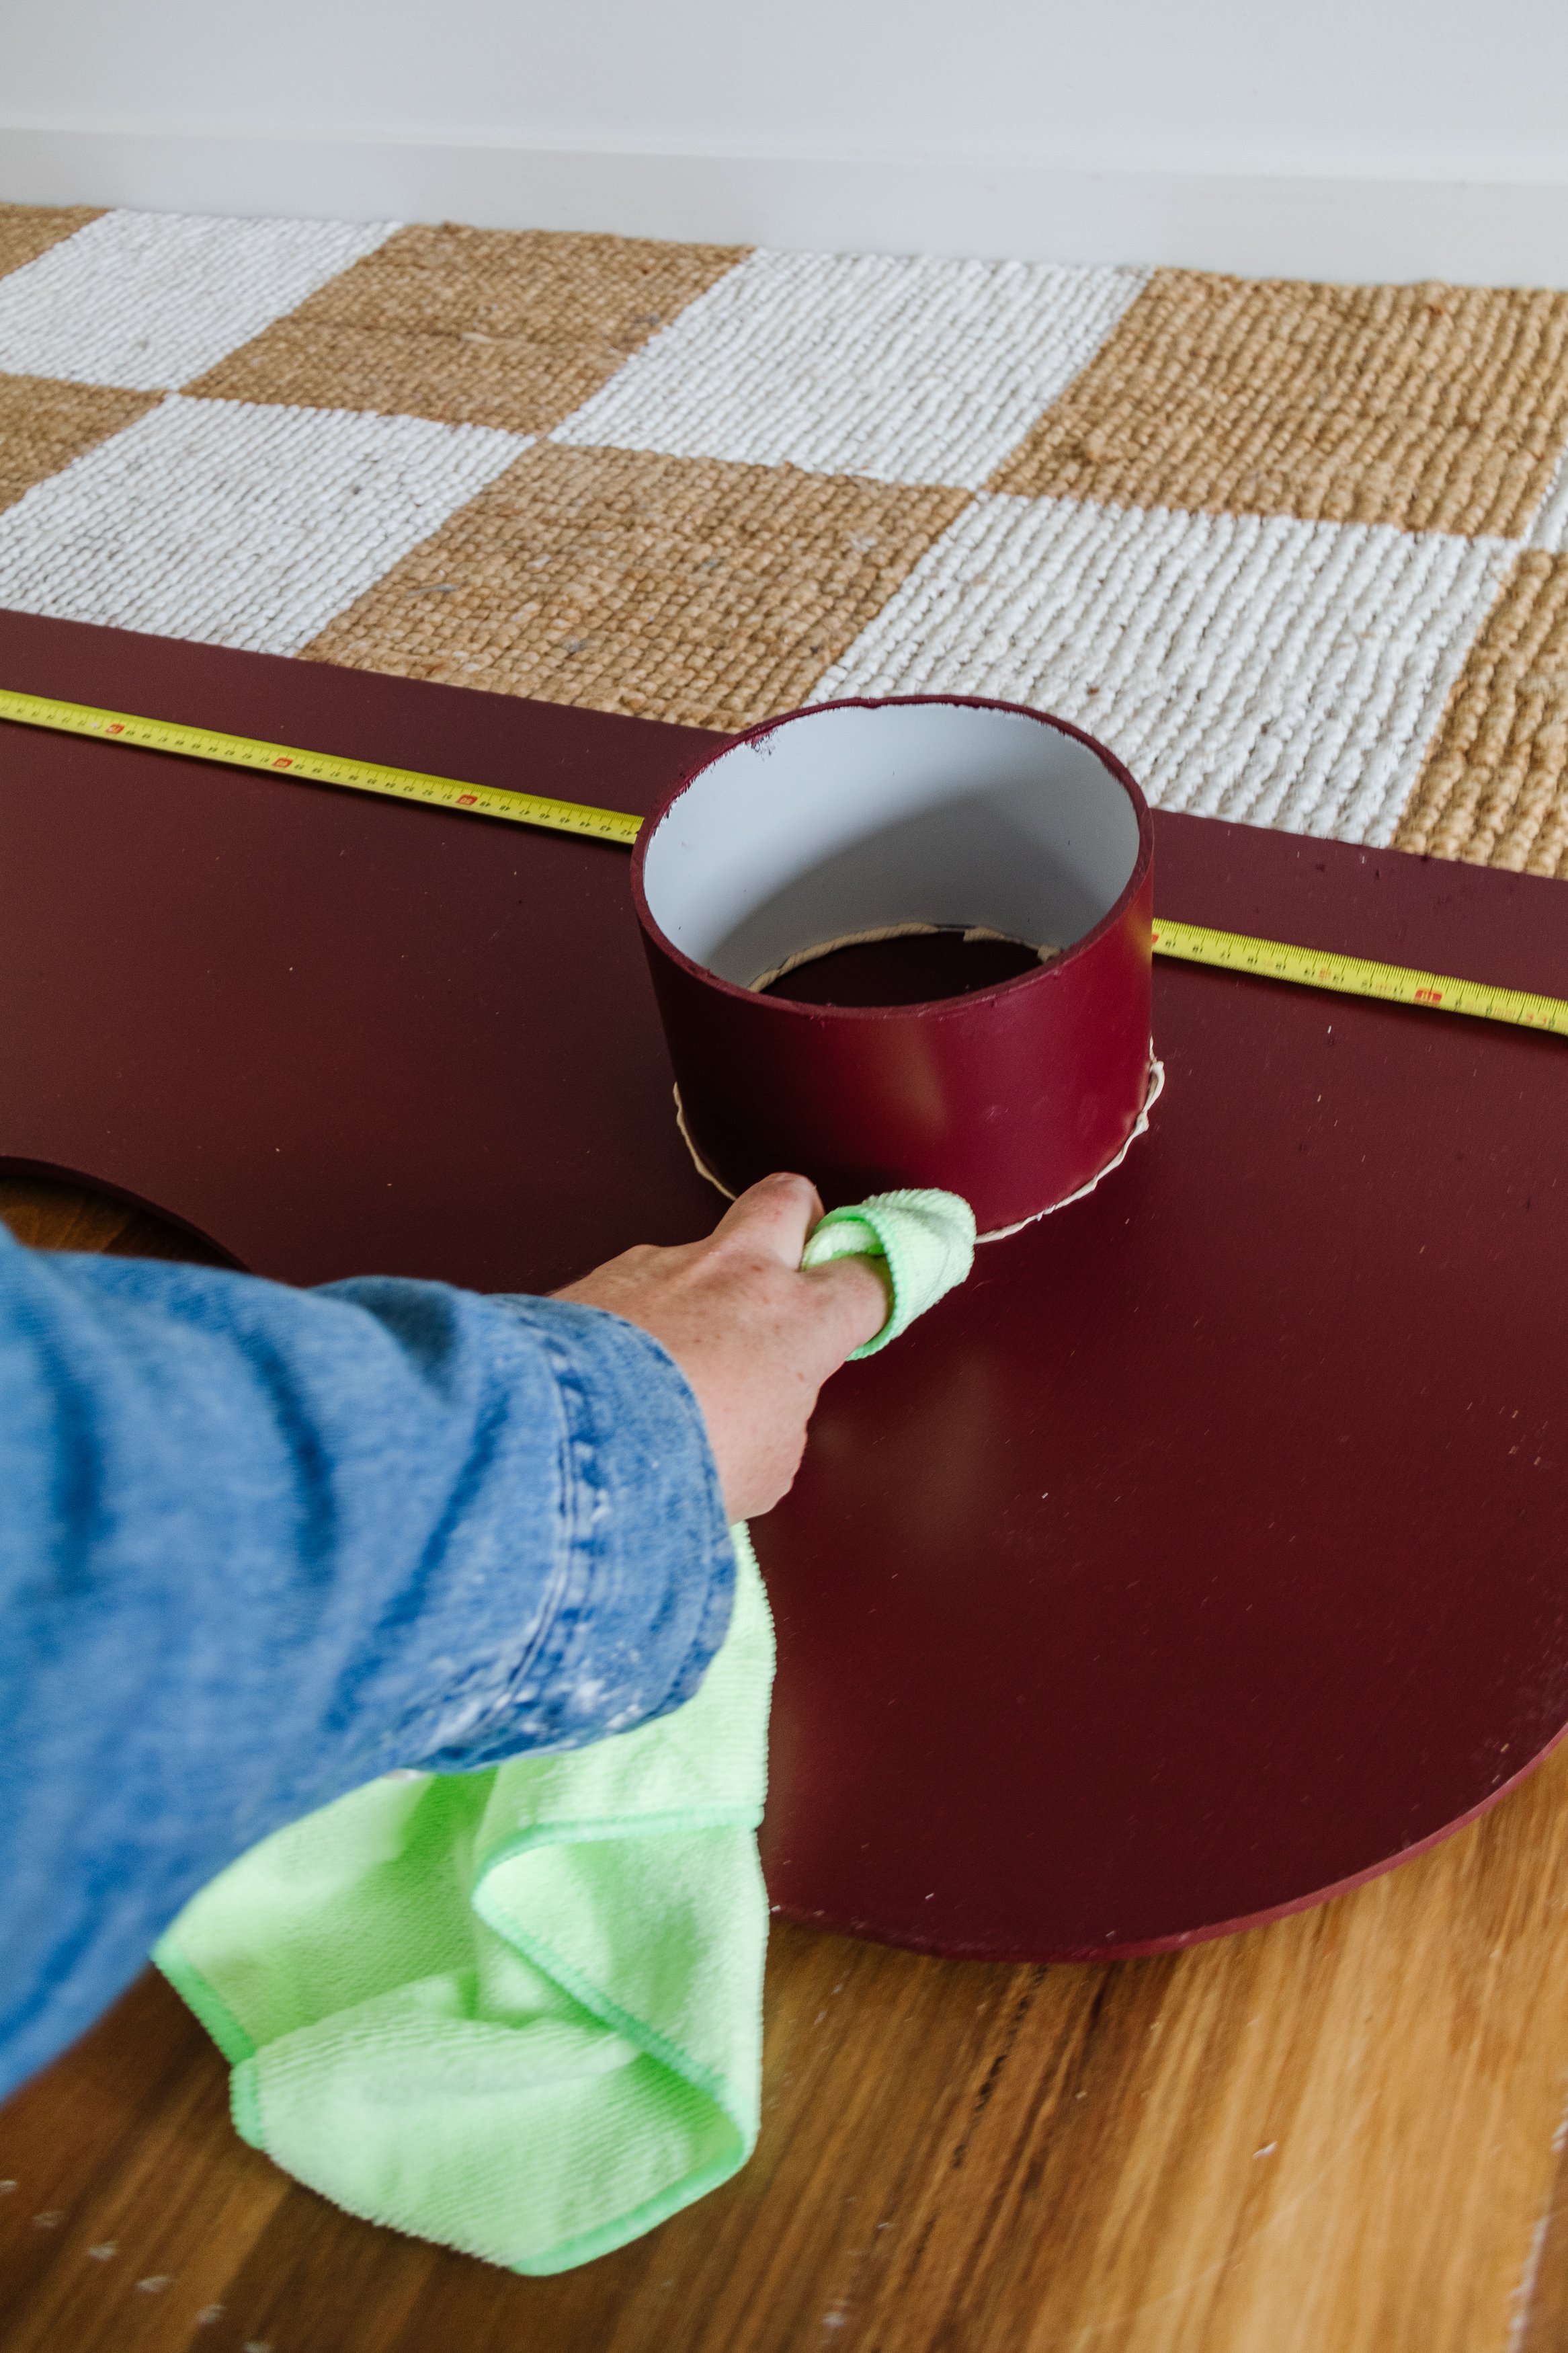
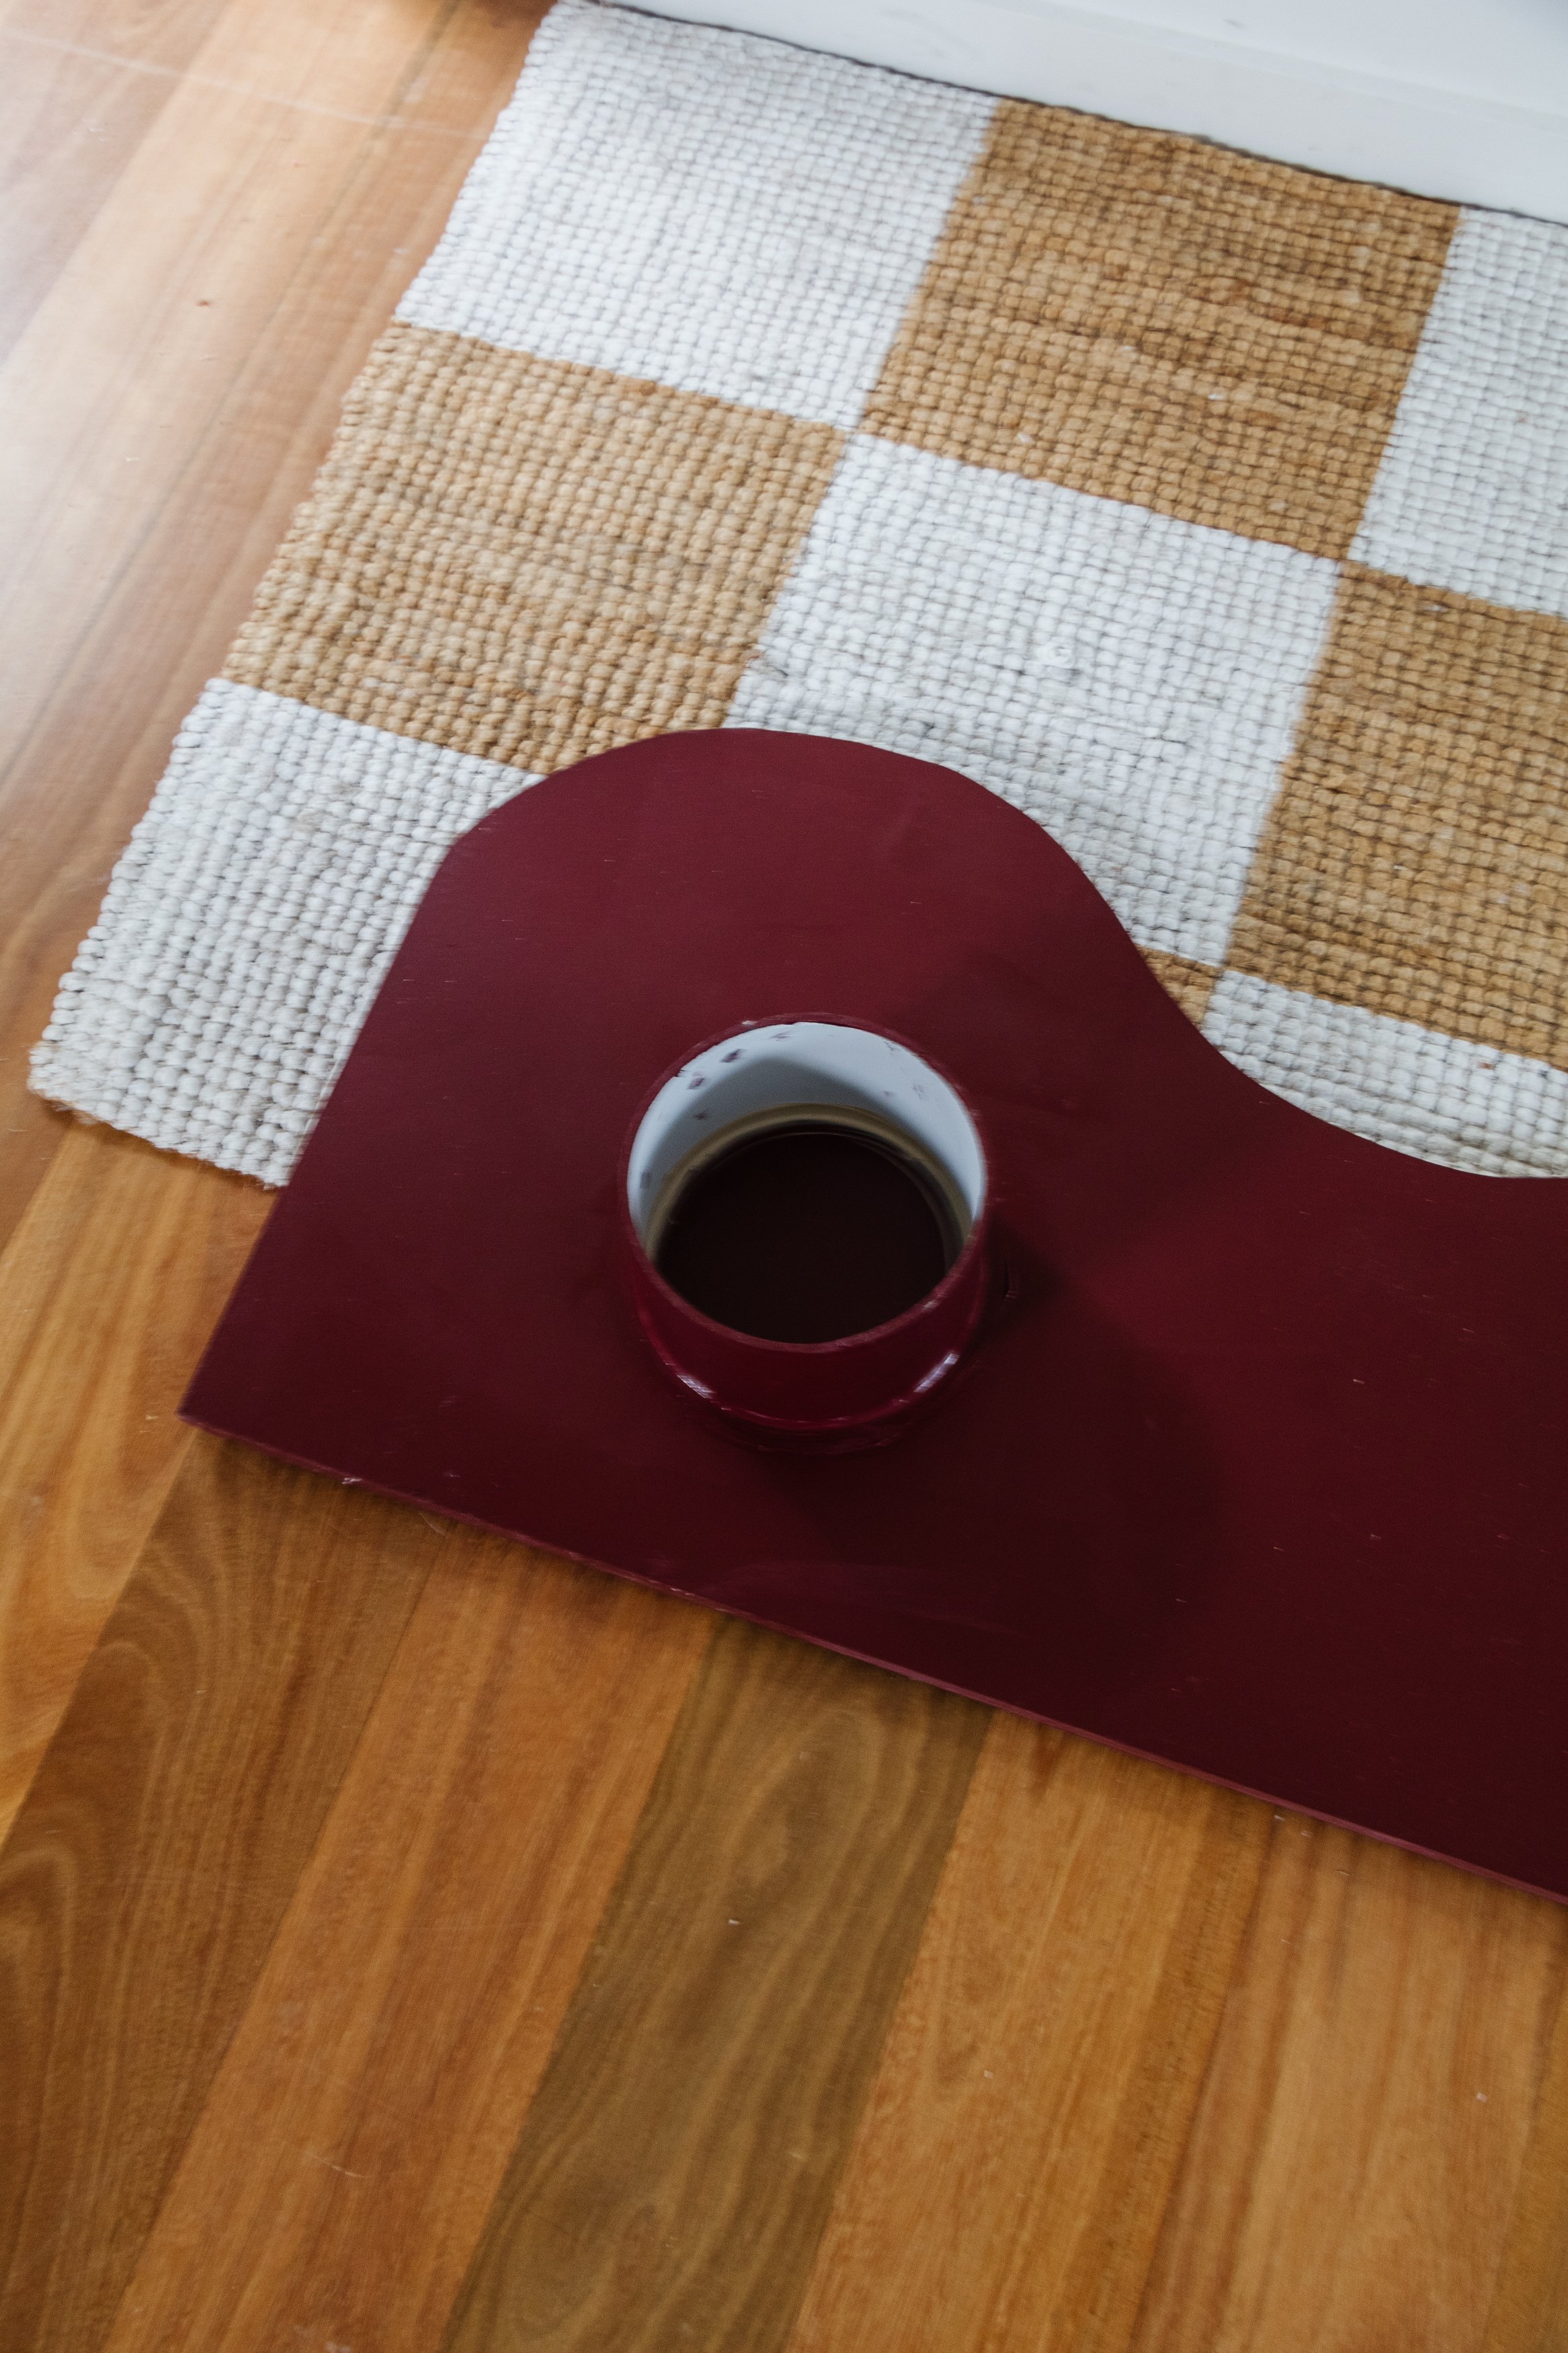
Step 6: Then I positioned up 3 x 400mm PVC pipes in line with the first 3 x 100mm. I glued them down and filled in the gaps as I did in Step 5.
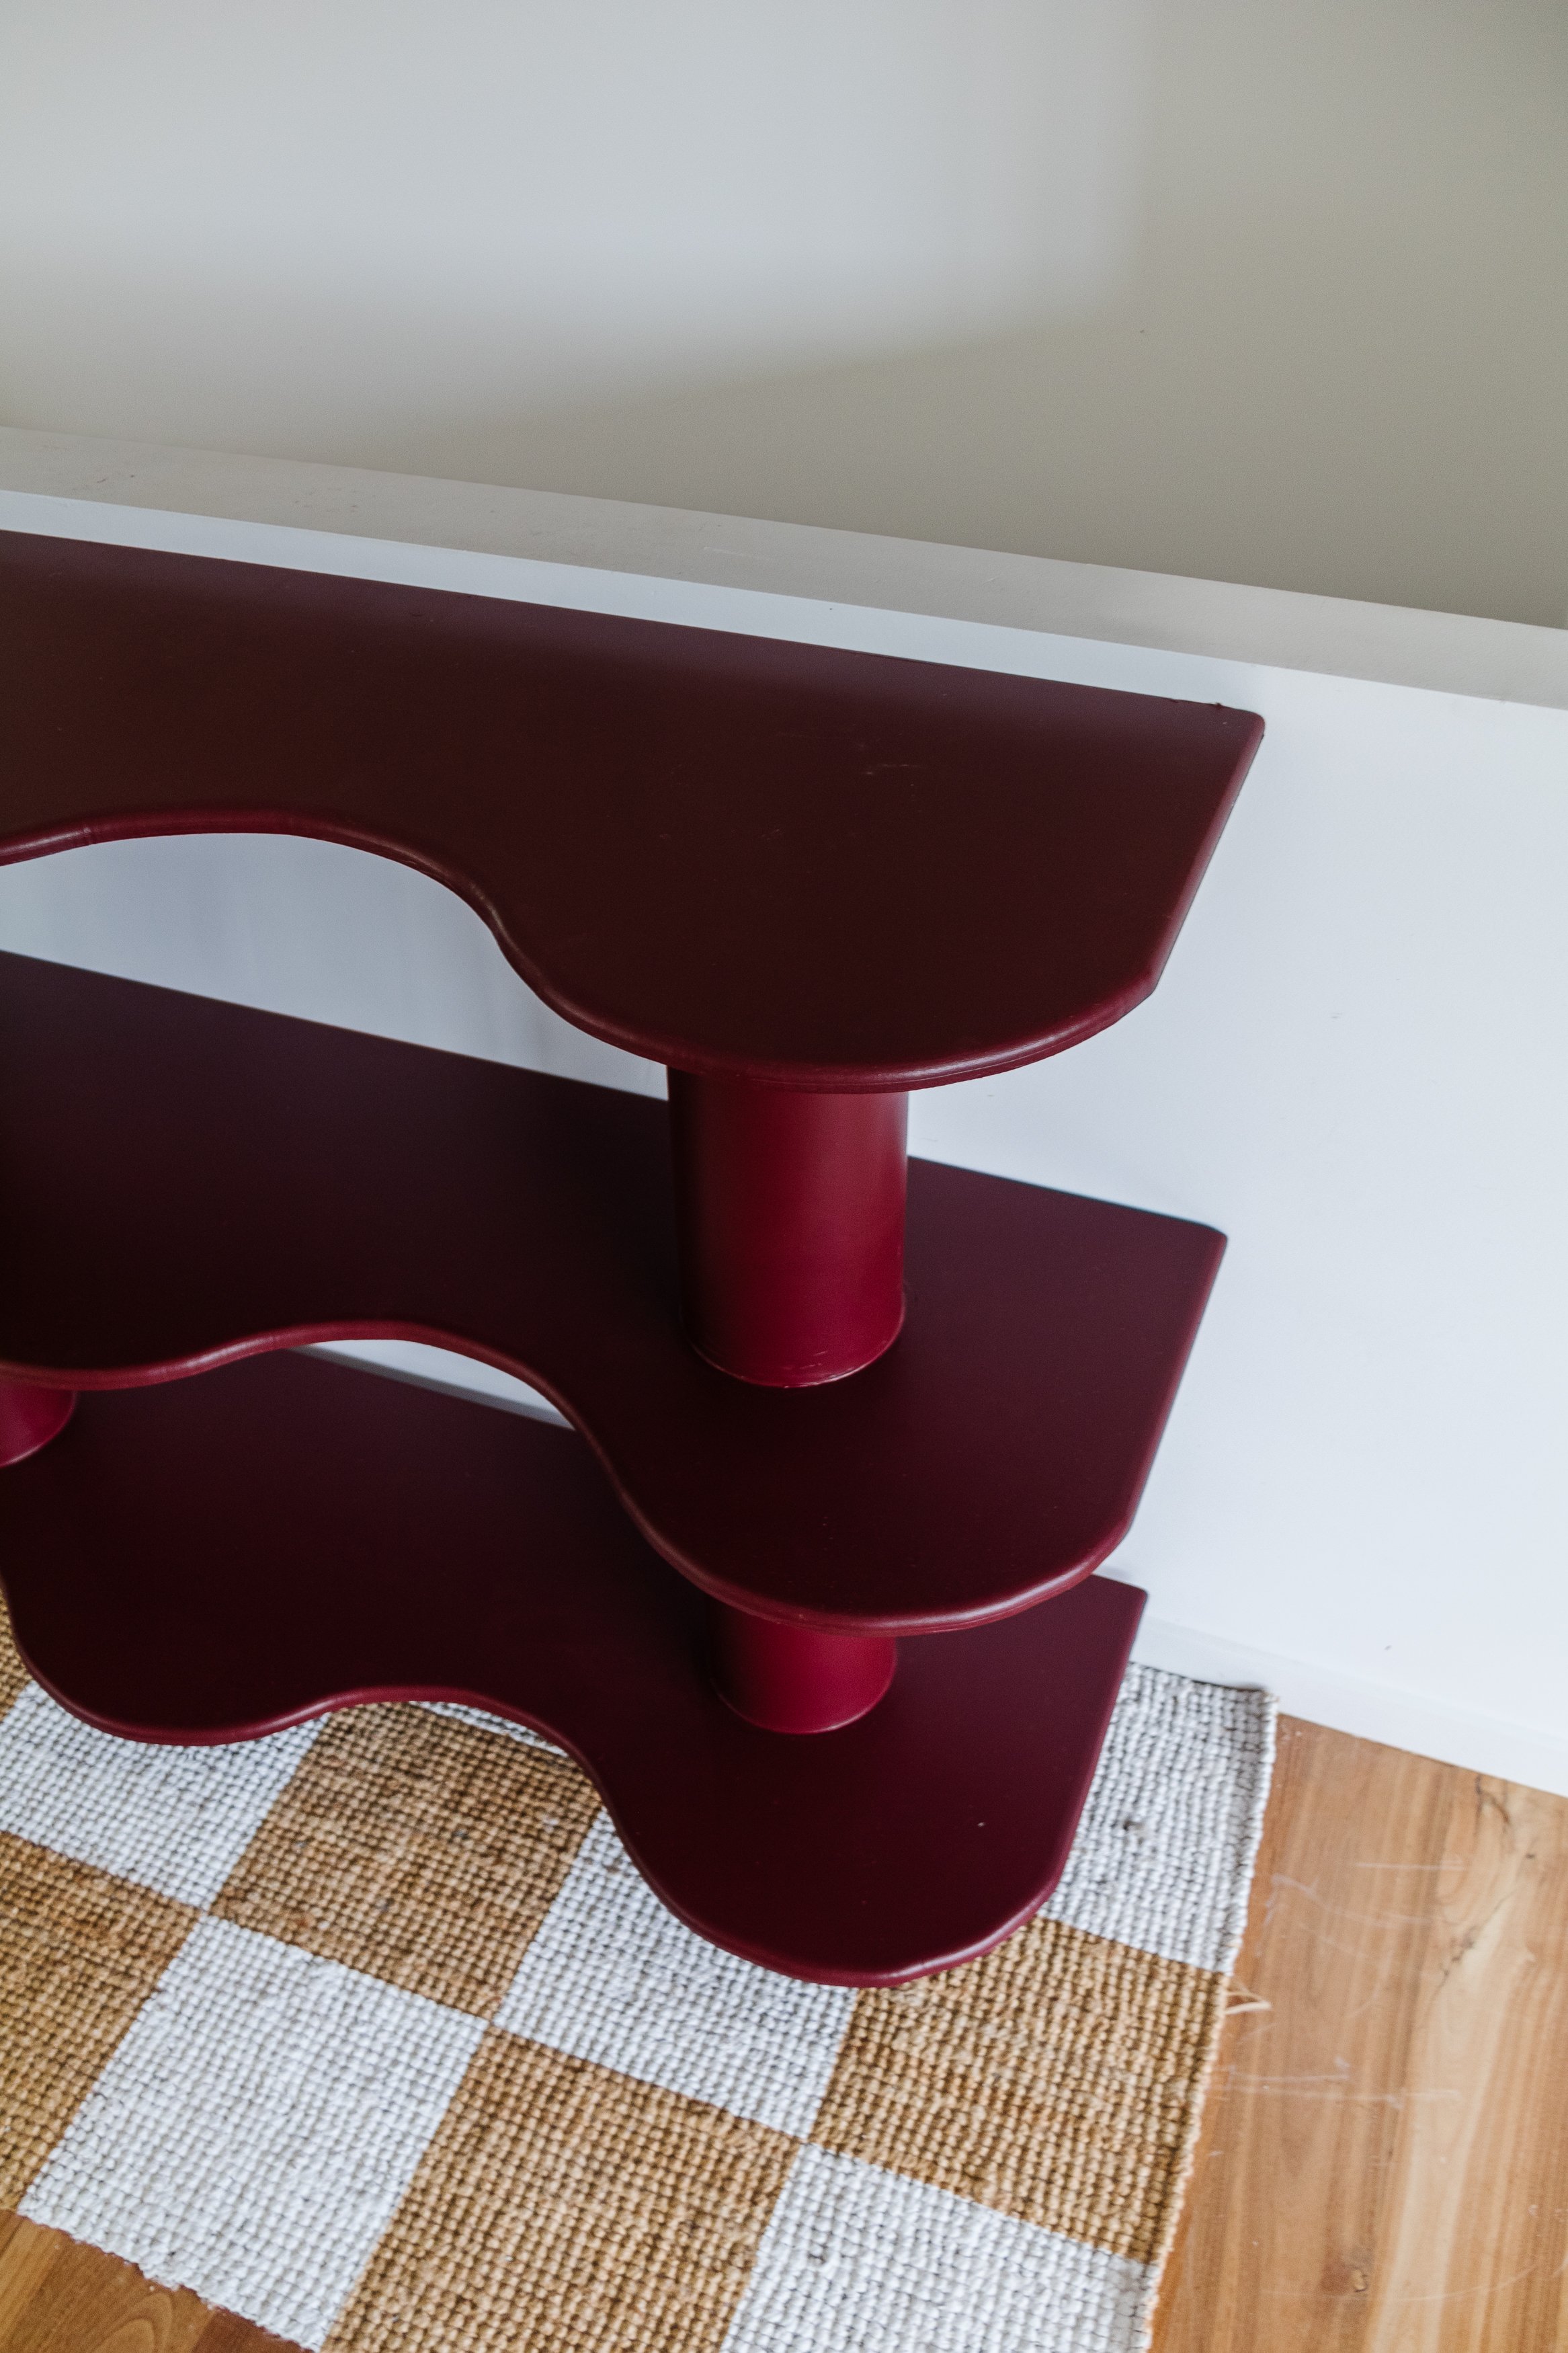
Step 7: I applied thick dollops of Selleys Liquid Nails Instant Hold onto the tops of the PVC pipes and then I positioned the second wavy shelf on top but back further by approximately 40mm (as a safe guard to limit the shelves tipping over in the future), making sure the sides were in line with the first shelf. Then I filled in the gaps with more Selleys Liquid Nails Instant Hold, and used my finger to neaten the glue.
Step 8: I repeated the same process in Step 5, 6 and 6 for the last 3 x 400mm PVC pipes and the last wavy shelf (again I positioned the top shelf back 40mm).
Step 9: When the glue and filler had cured (about 30 minutes), I painted over the joins. And that’s it!


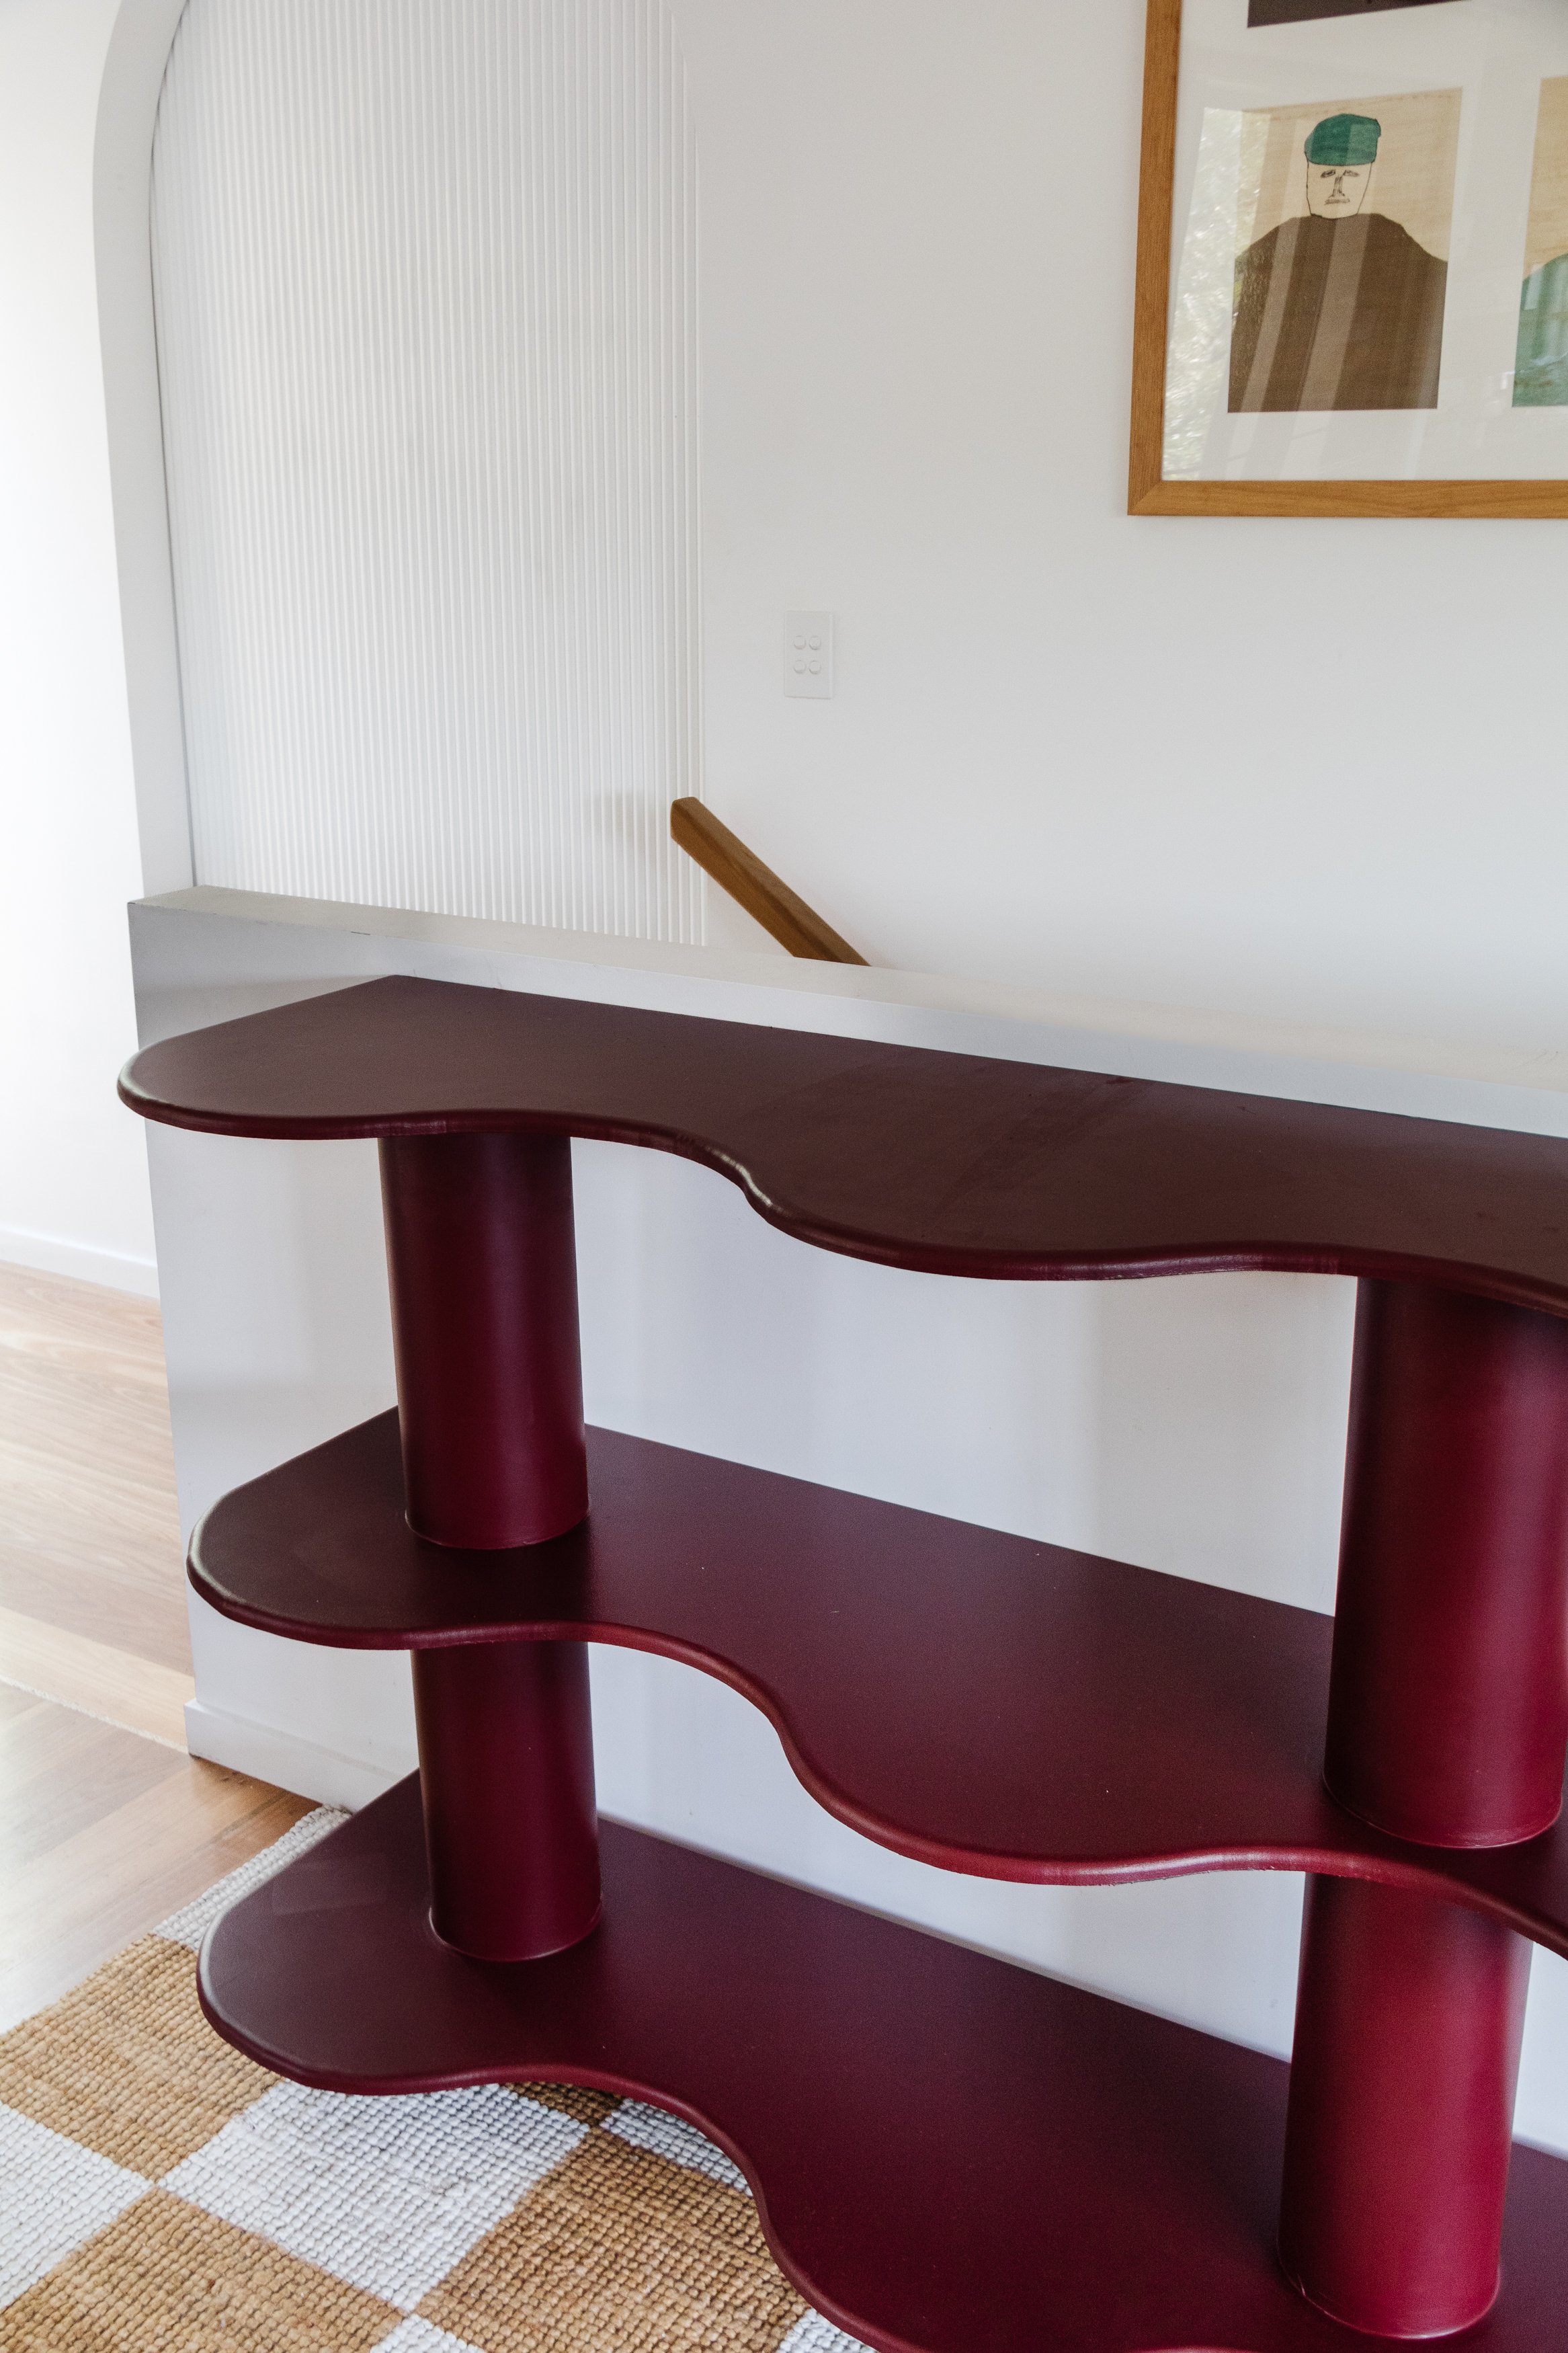
A quick note on stability
I know it might seem implausible building a shelf using MDF, PVC pipes and construction adhesive, but it’s not. However there are a few things I did (and some extra things you can do) to make sure its stable:
I used two different glues to ensure the build was stable and strong, Selleys Heavy Duty Liquid Nails and Selleys Liquid Nails Instant Hold. Construction glue is very, very strong and durable.
I used thick MDF (you can use thicker MDF or timber if you’d like) and I made sure the PVC pipes were evenly positioned for weight distribution purposes.
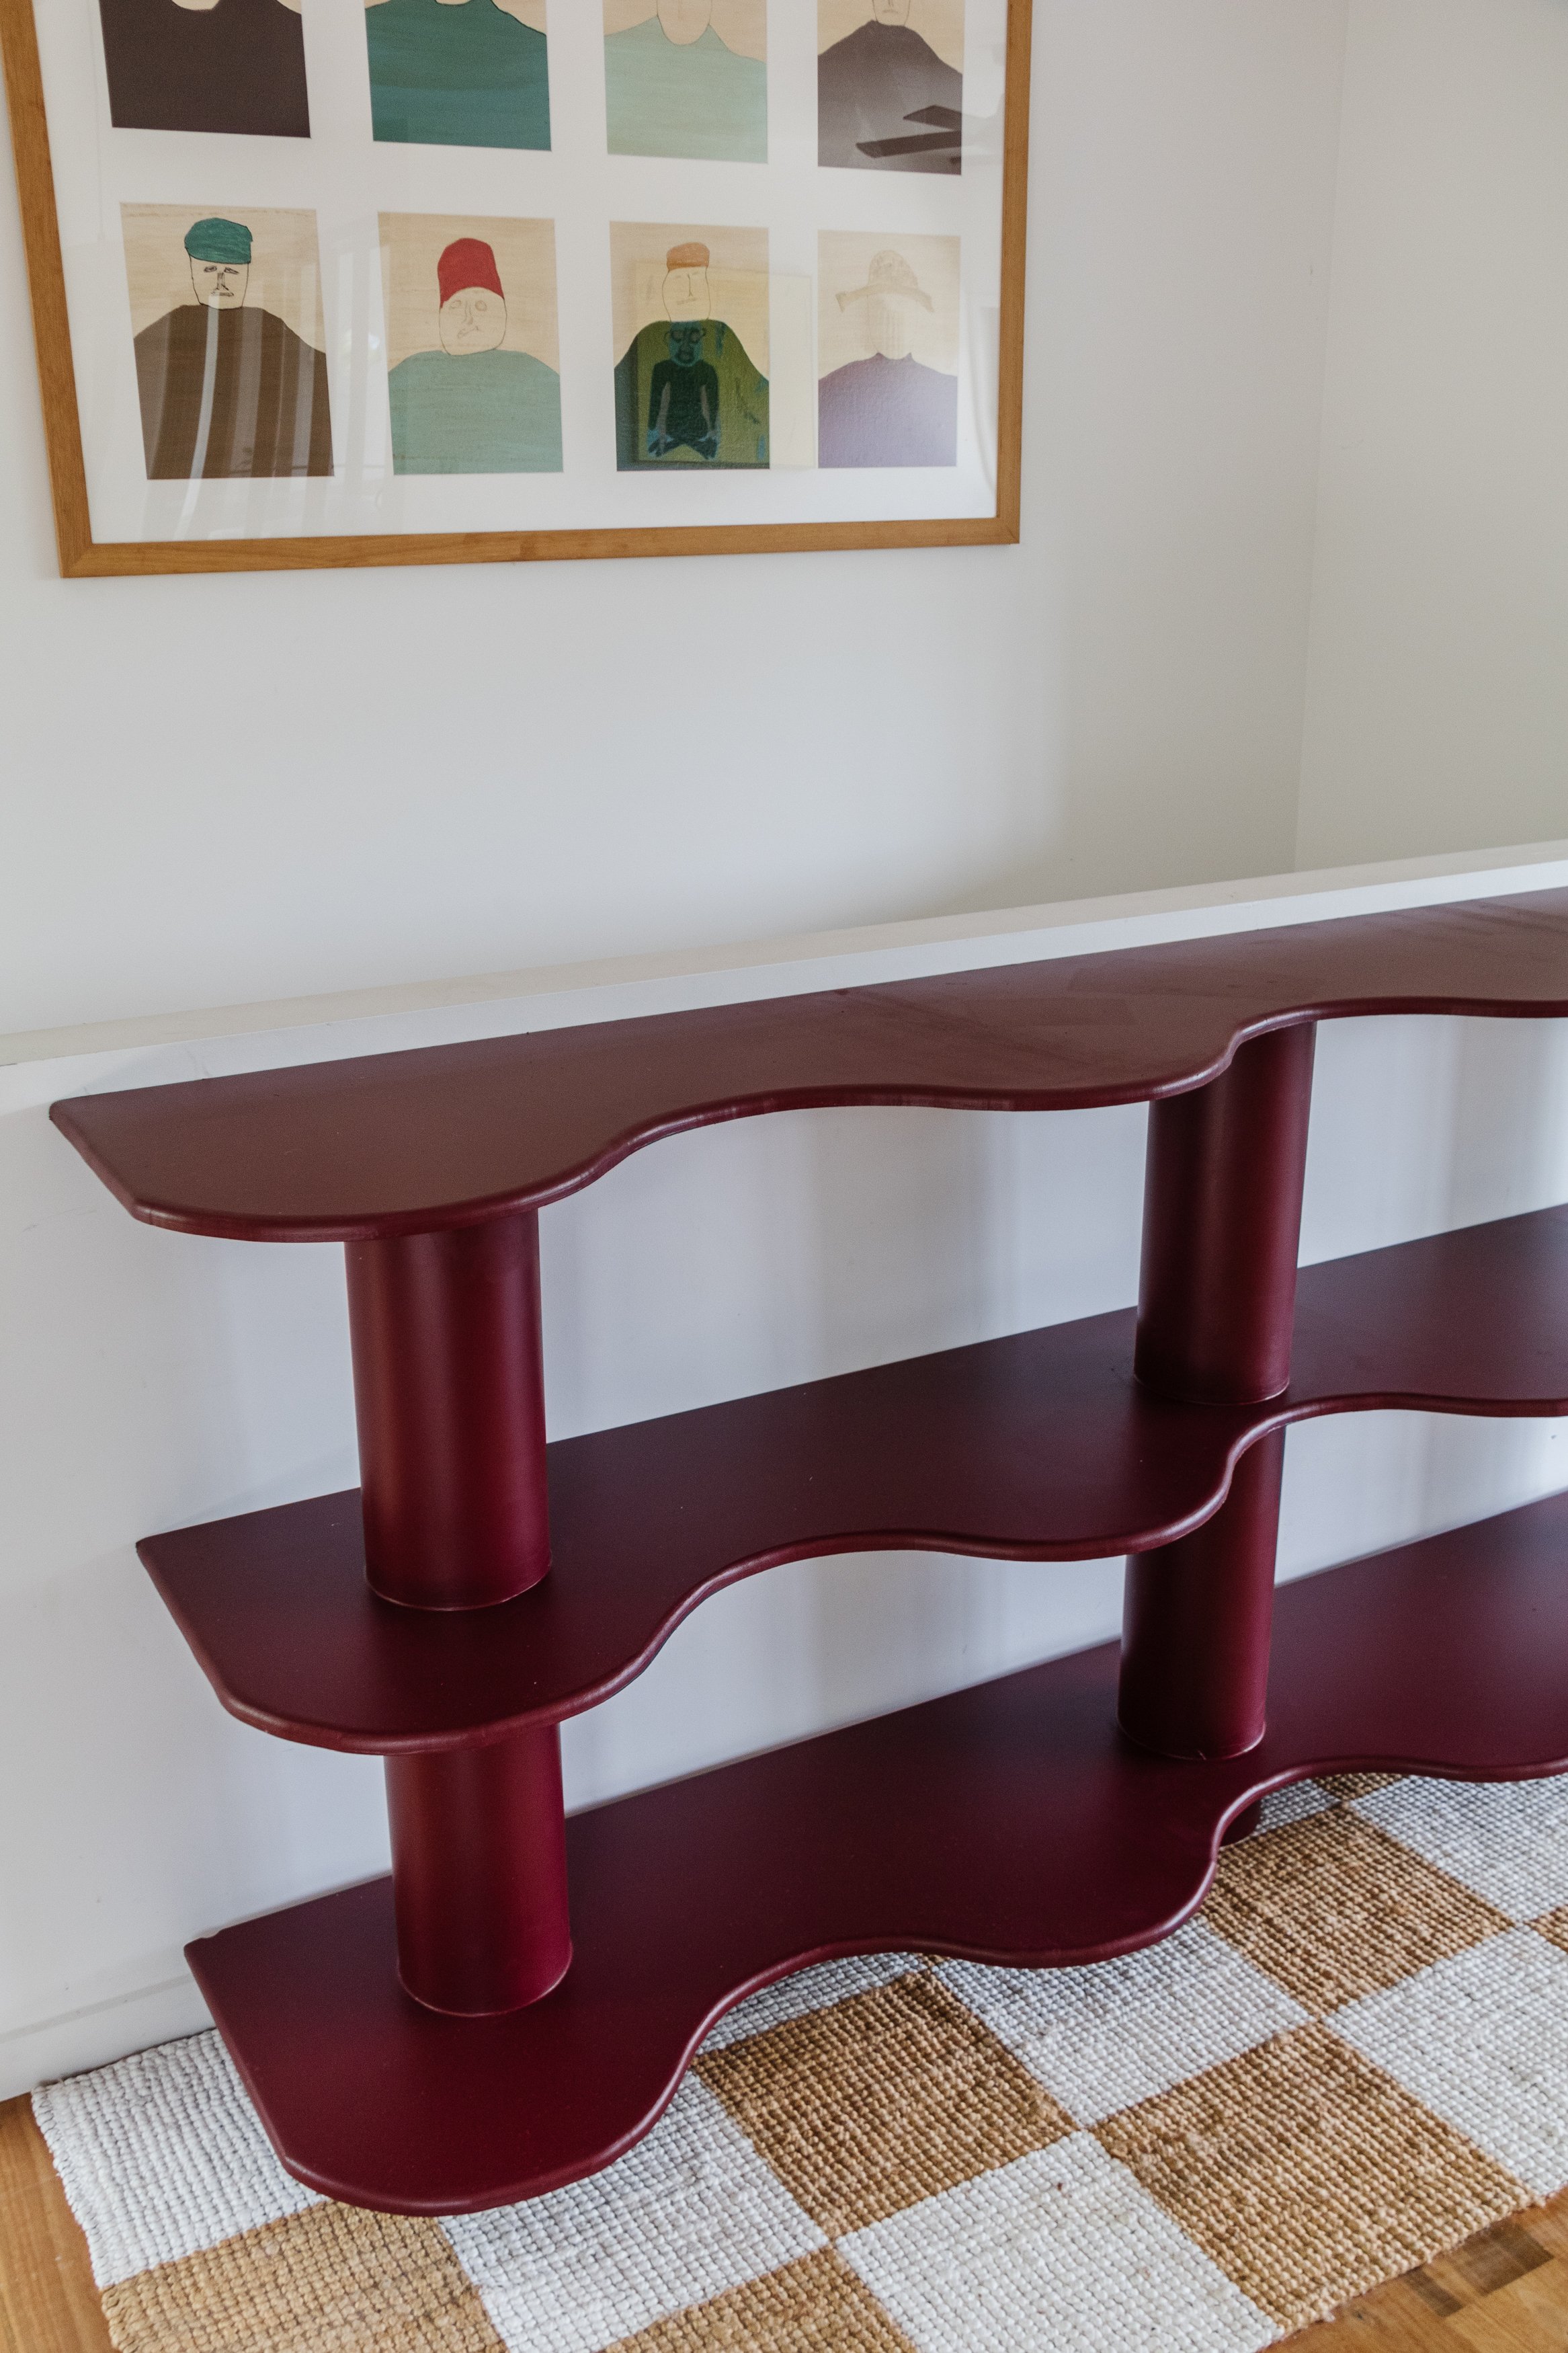
The top two shelves are positioned 40mm back from the bottom shelf as a safeguard to help prevent tipping (not 100% guaranteed).
On that note, child safety. If you are concerned, install L brackets into the wall studs and the shelves.
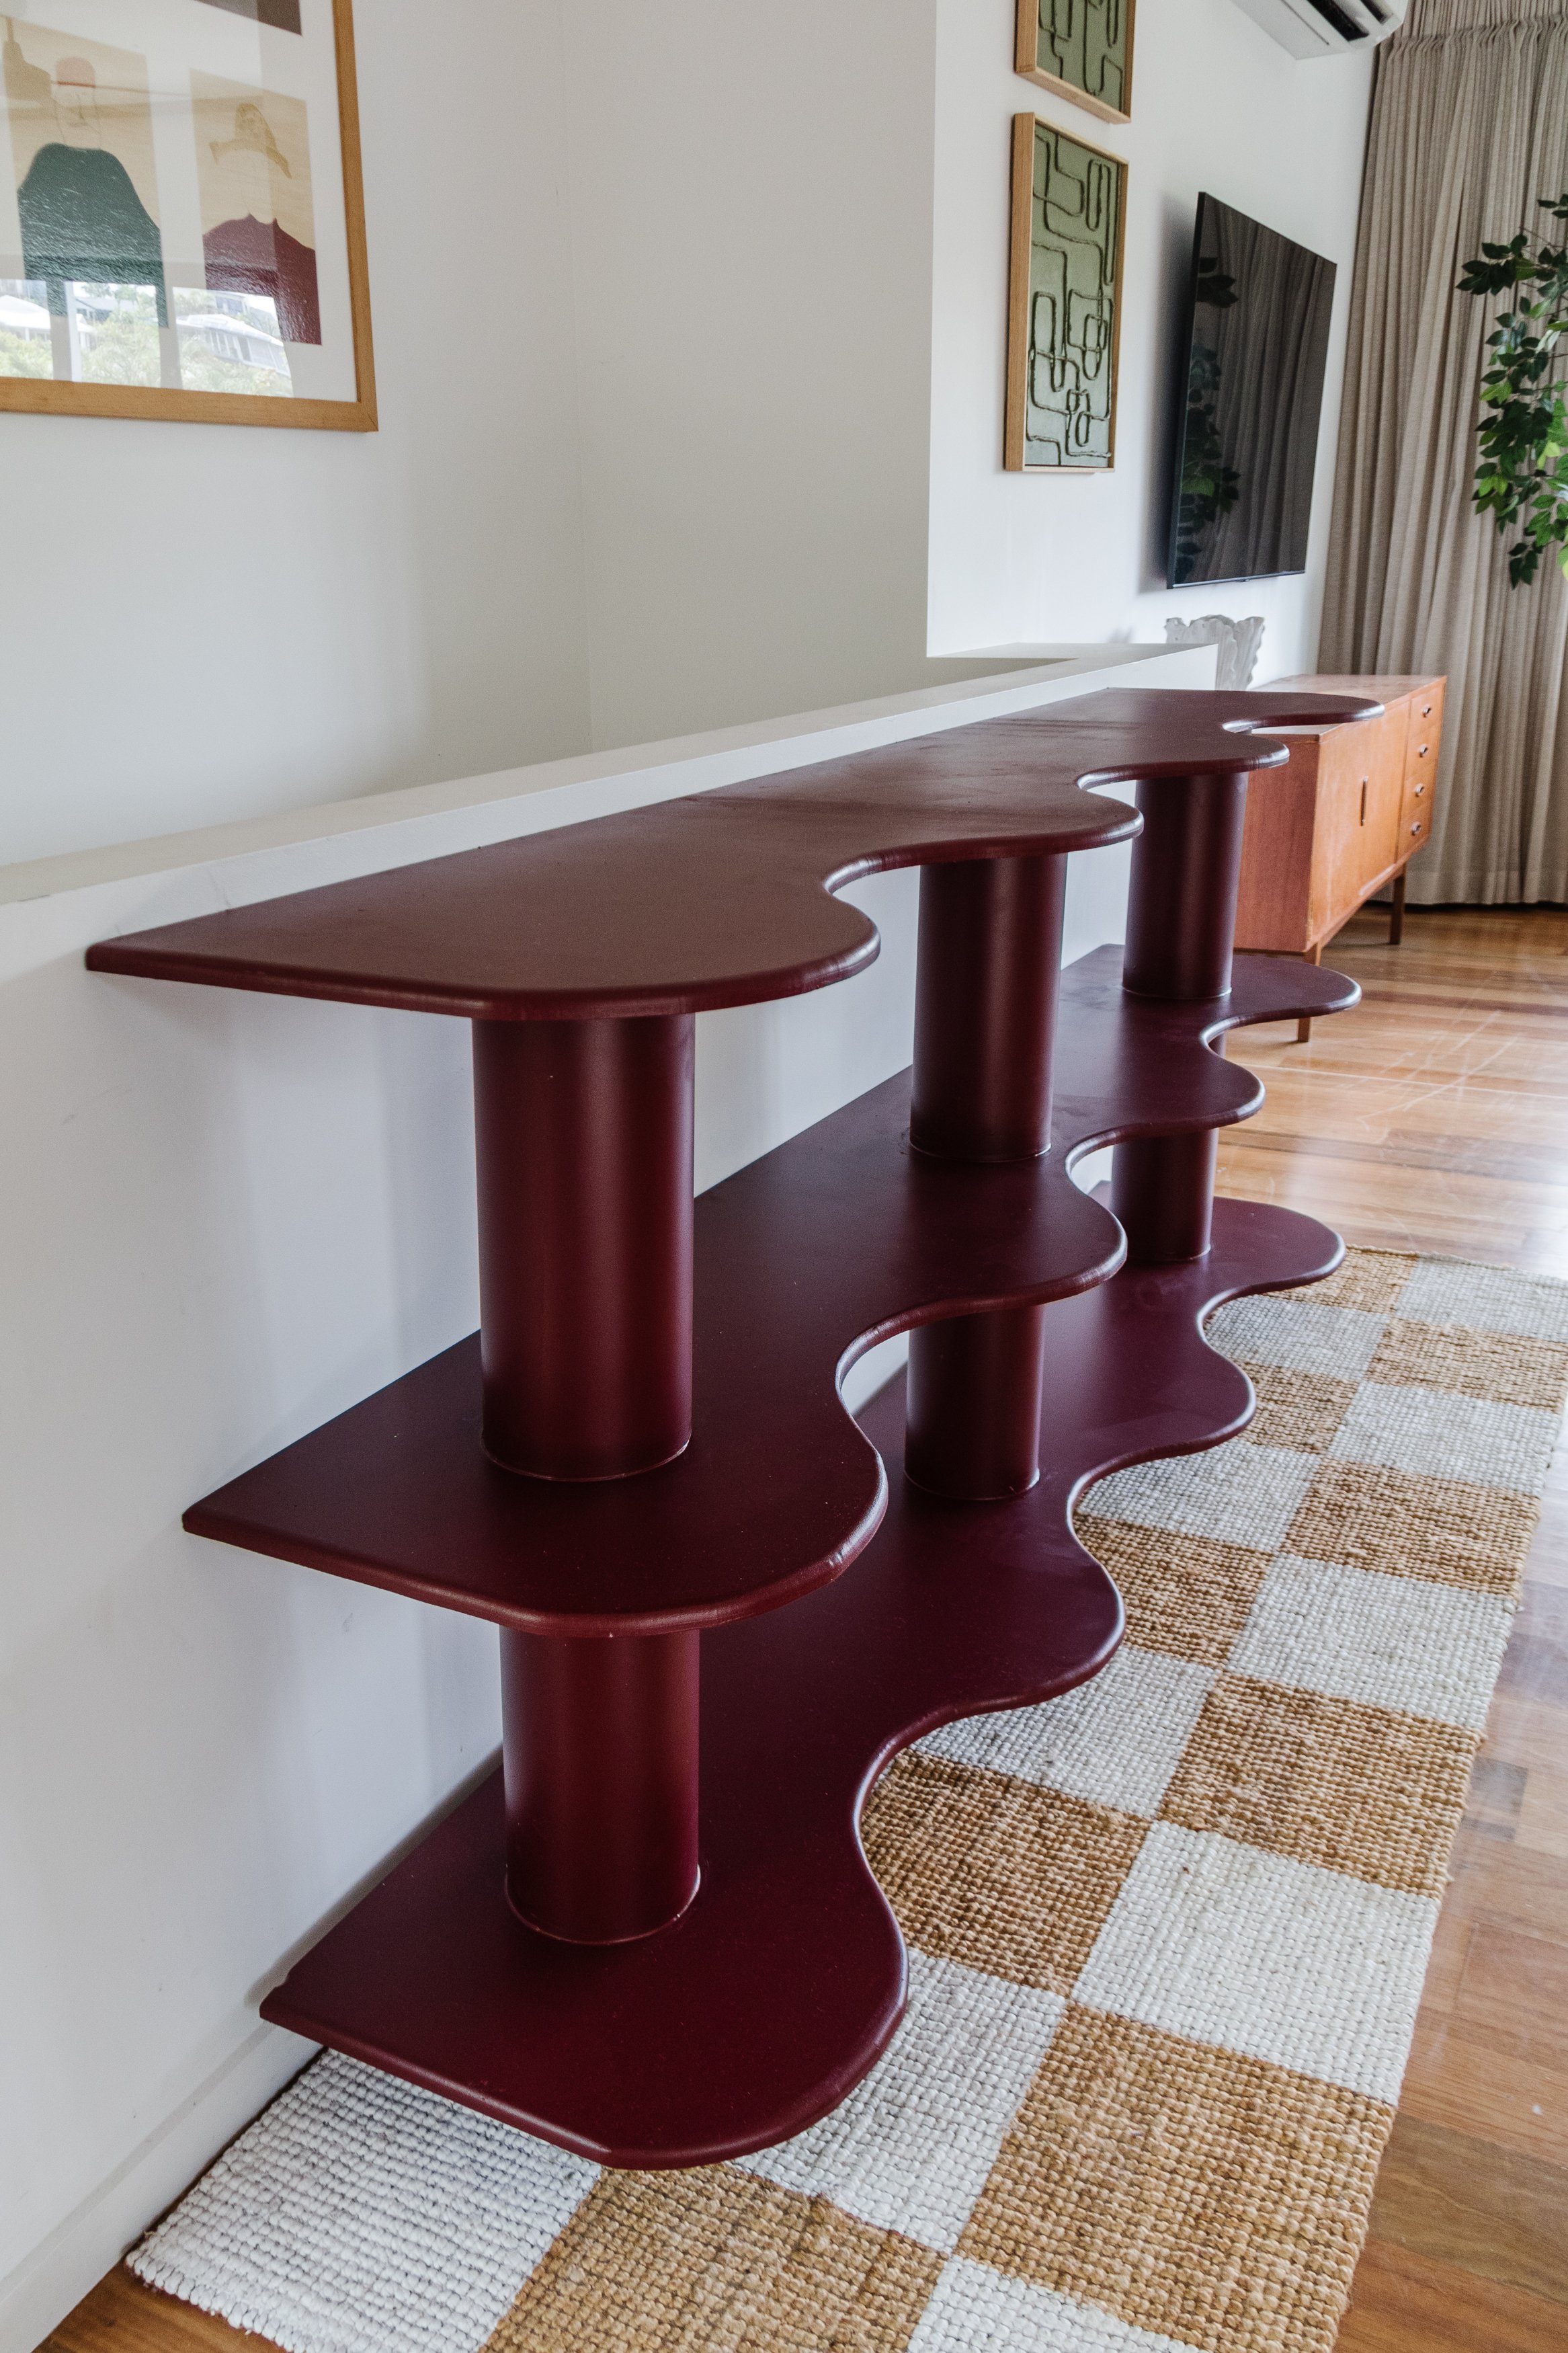
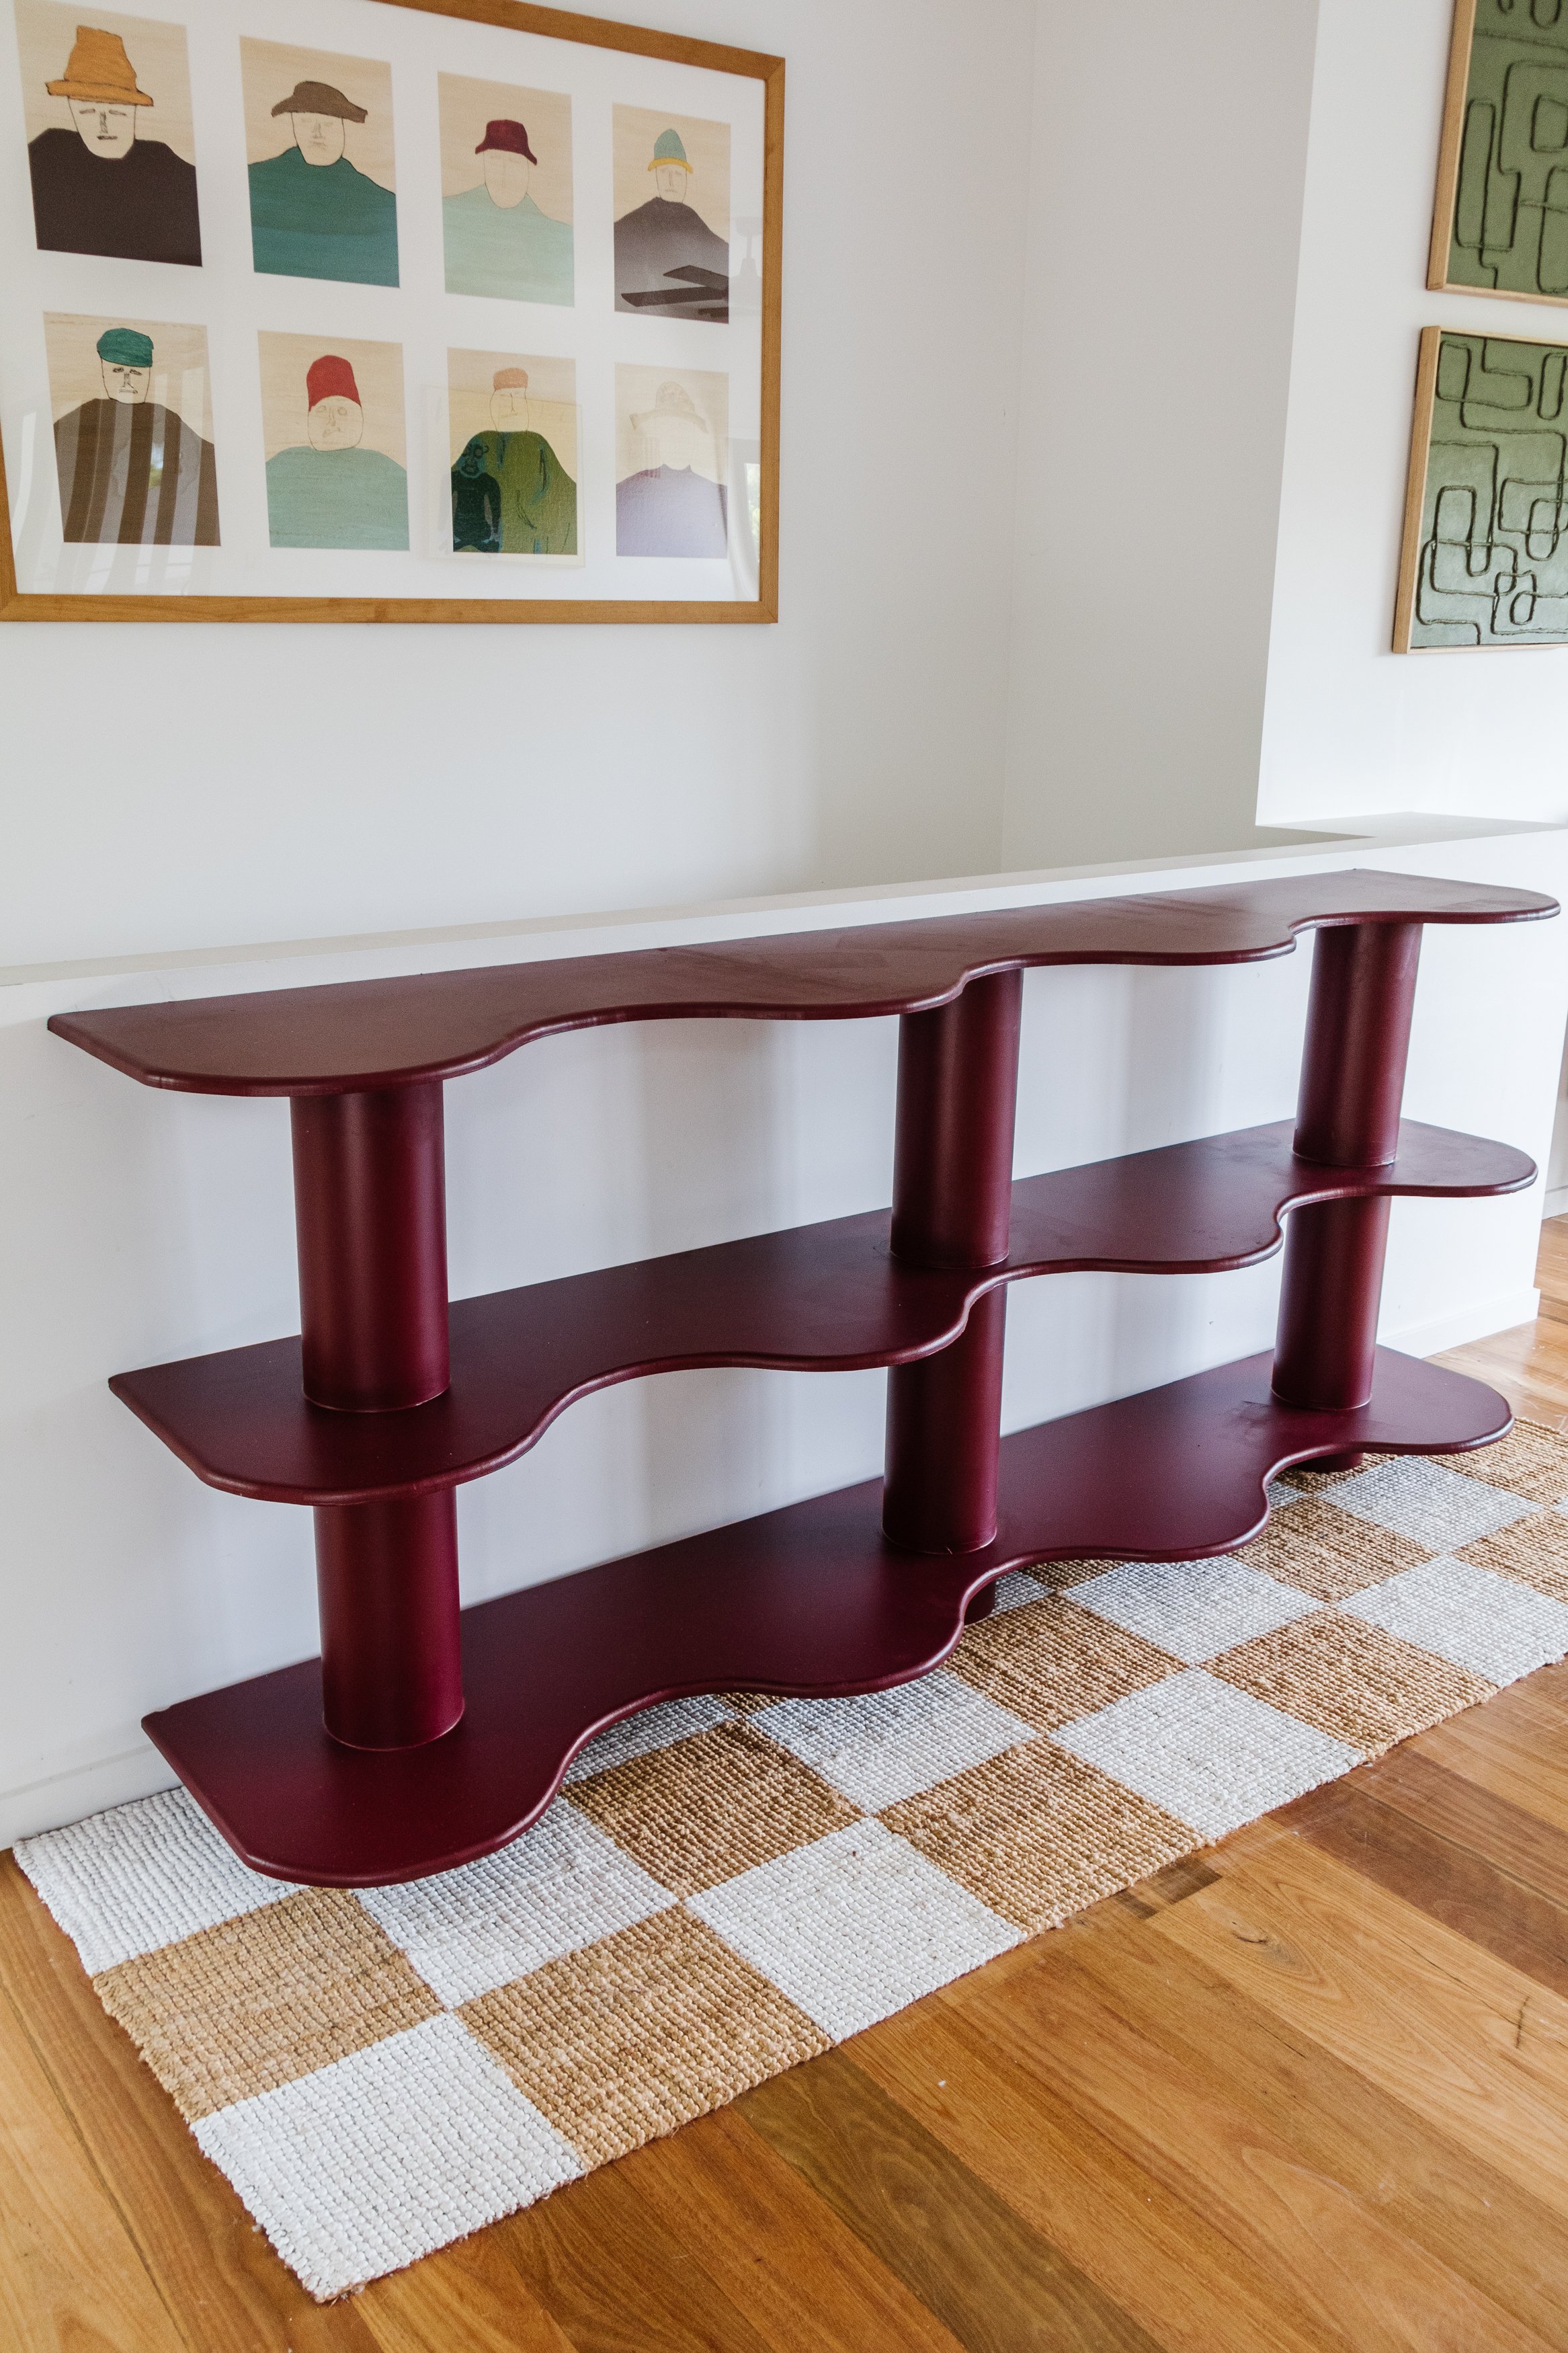
The depth of the shelves was also a big consideration. At the peak of the waves, the depth is 450mm and the trough is 320mm. The most common sized coffee table books measure around 220mm (L) x 300mm (H), so my measurements allowed me to have plenty of room to push the books in and back.
I put our heavy coffee table books on the bottom shelf and pushed them right back, and I positioned our lighter reading books on the top shelves. Again, another factor in keeping the shelves stable.
I also found the shelf to be quote stable when we had it on our jute rug, which could also help keep the shelves stables I am not sure how they would fair on a smoother rug without texture, but I think it would help. Again, this is not a fail safe but another element in helping the shelves stability.
Overall, the shelves are stable. Above are a few extra tips I put into place as I was building them and adding the books. If you are concerned, even in the slightest, as mentioned above I recommend installing L Brackets into the wall studs and shelves.
Ta daaaa!
And here we are! I am so in love with our new library! What I love most about this project is that you can really tailor it to suit your own space. You can make it shorter or longer, have more shelves or shorter gaps in between them, and choose whichever paint colour you love. I was so excited to share the final reveal, so I haven’t had any time to put our books in our new library yet. But that’s a job to get done over Easter, yay!
This project is in collaboration with Bunnings