How To Build Planter Boxes - with Ekodeck!
Make your own planter boxes using composite decking made from over 90% recycled materials
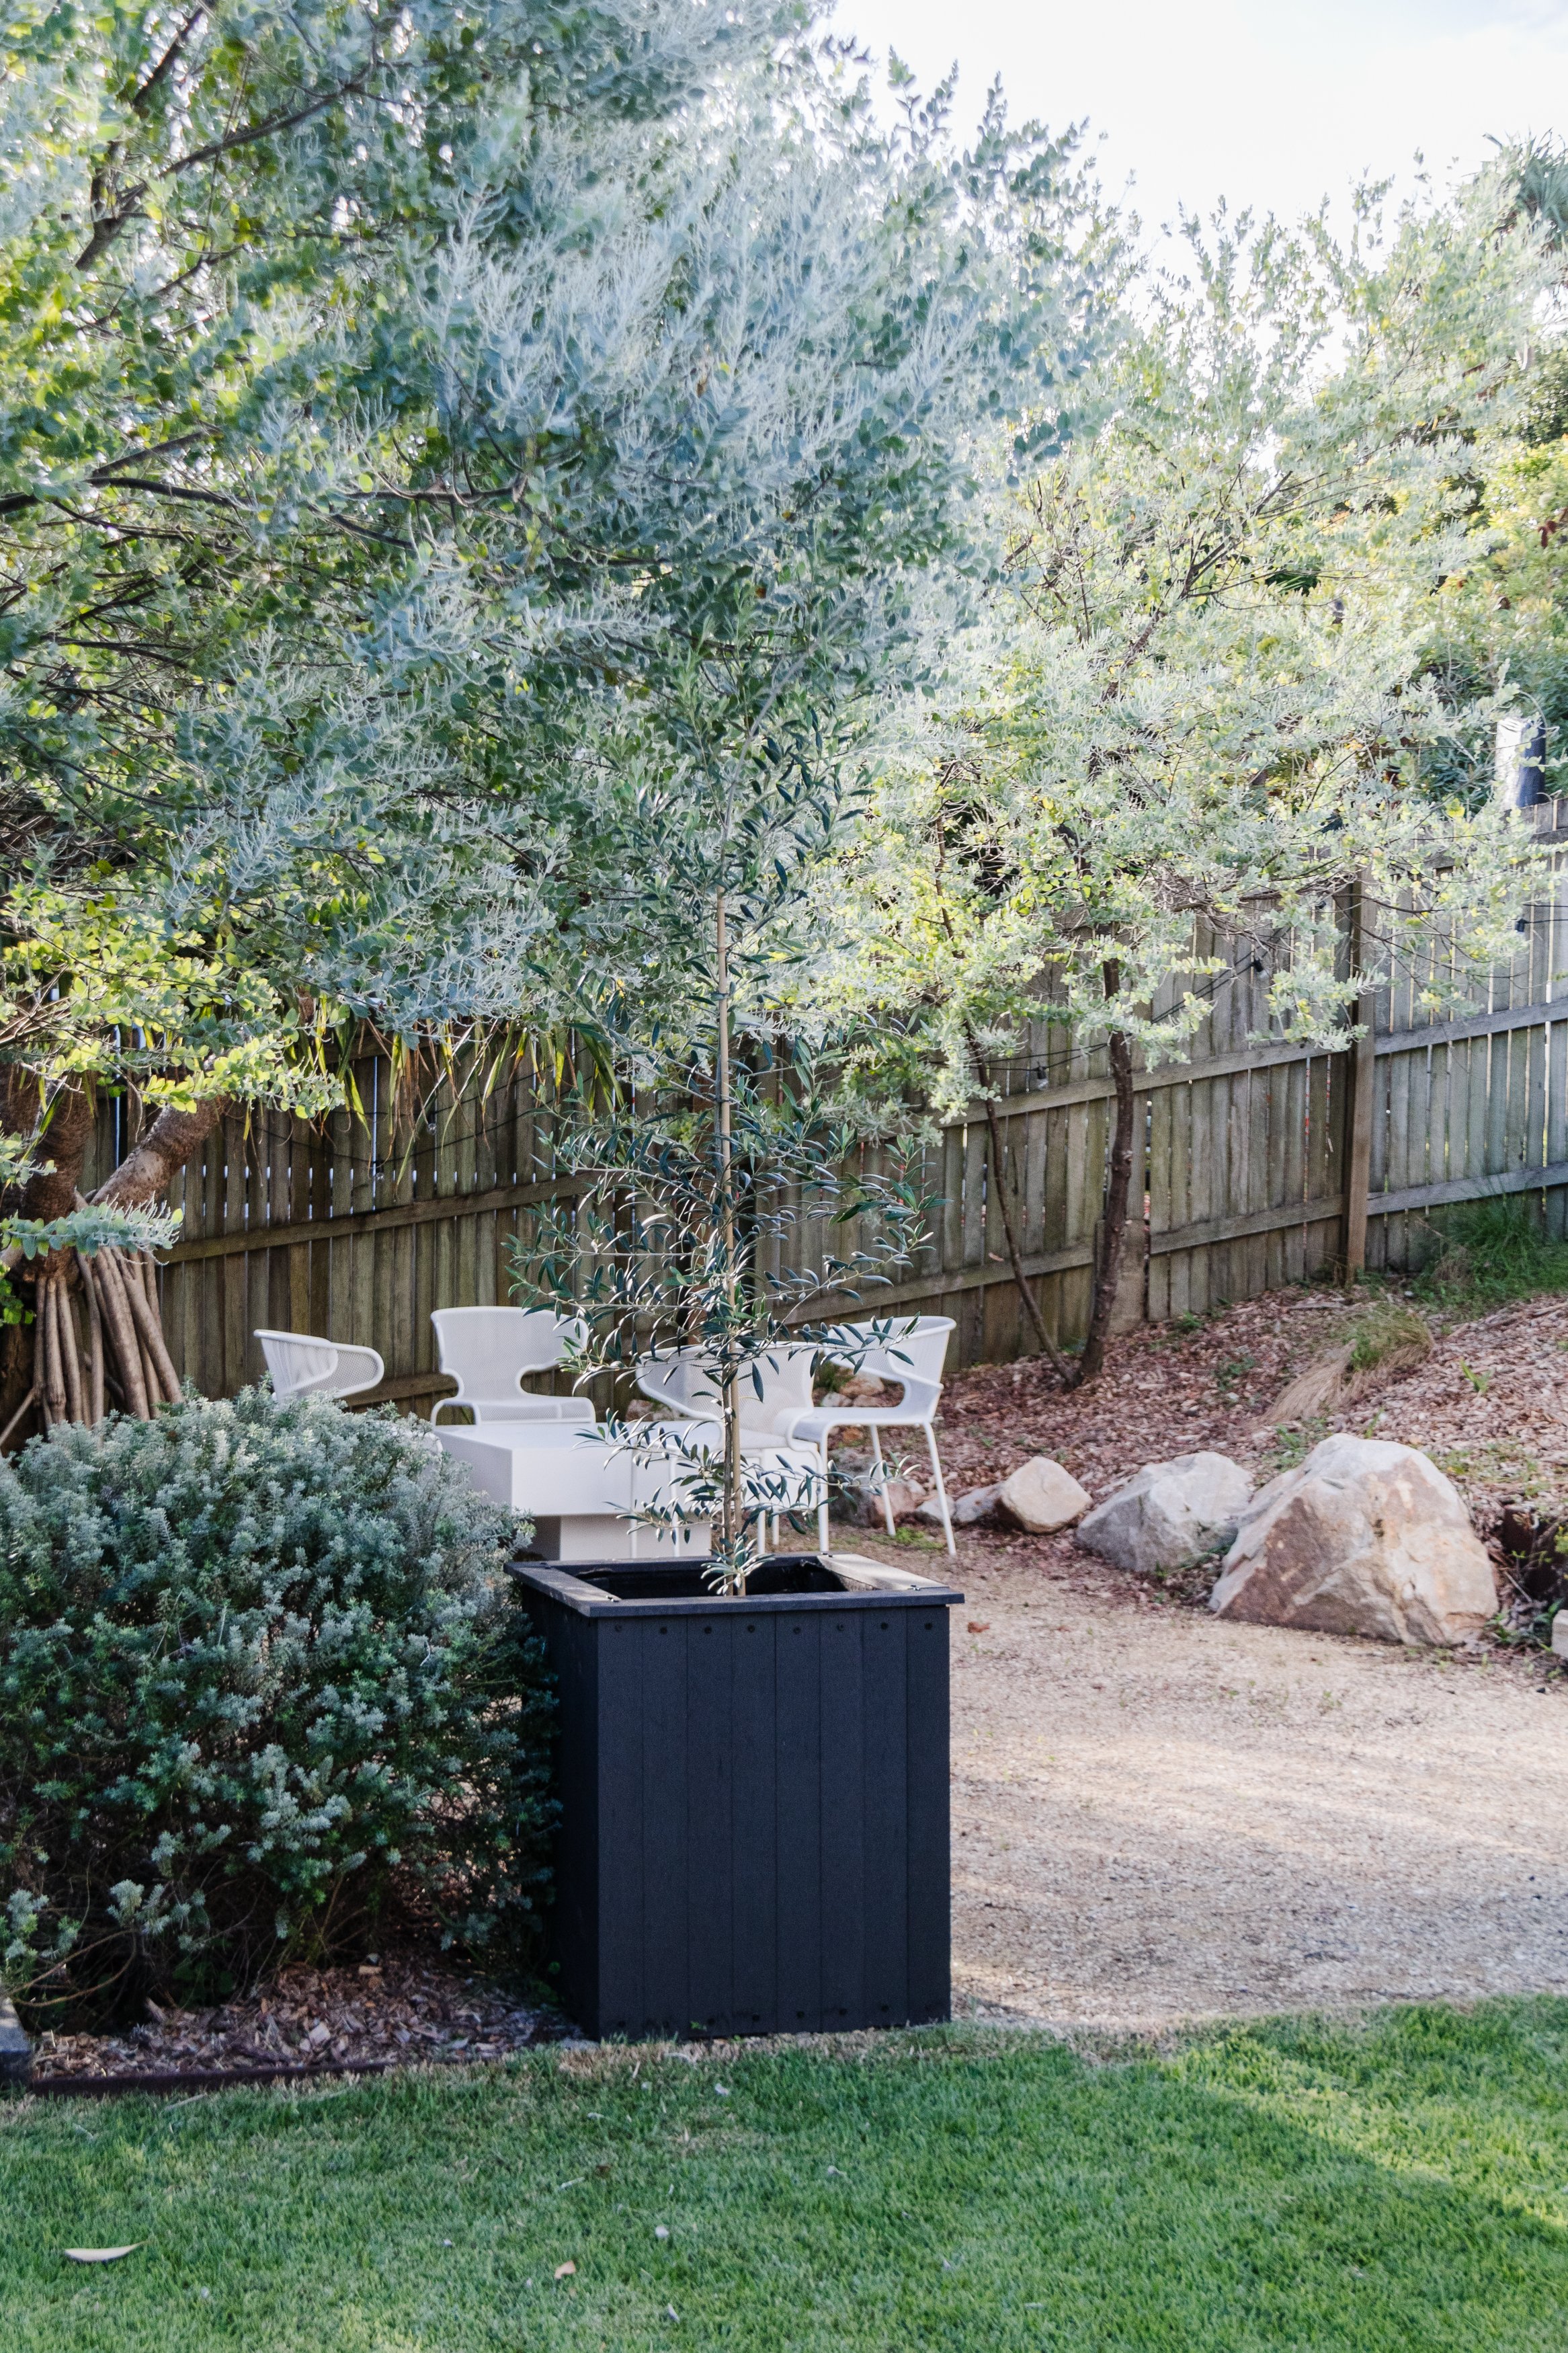
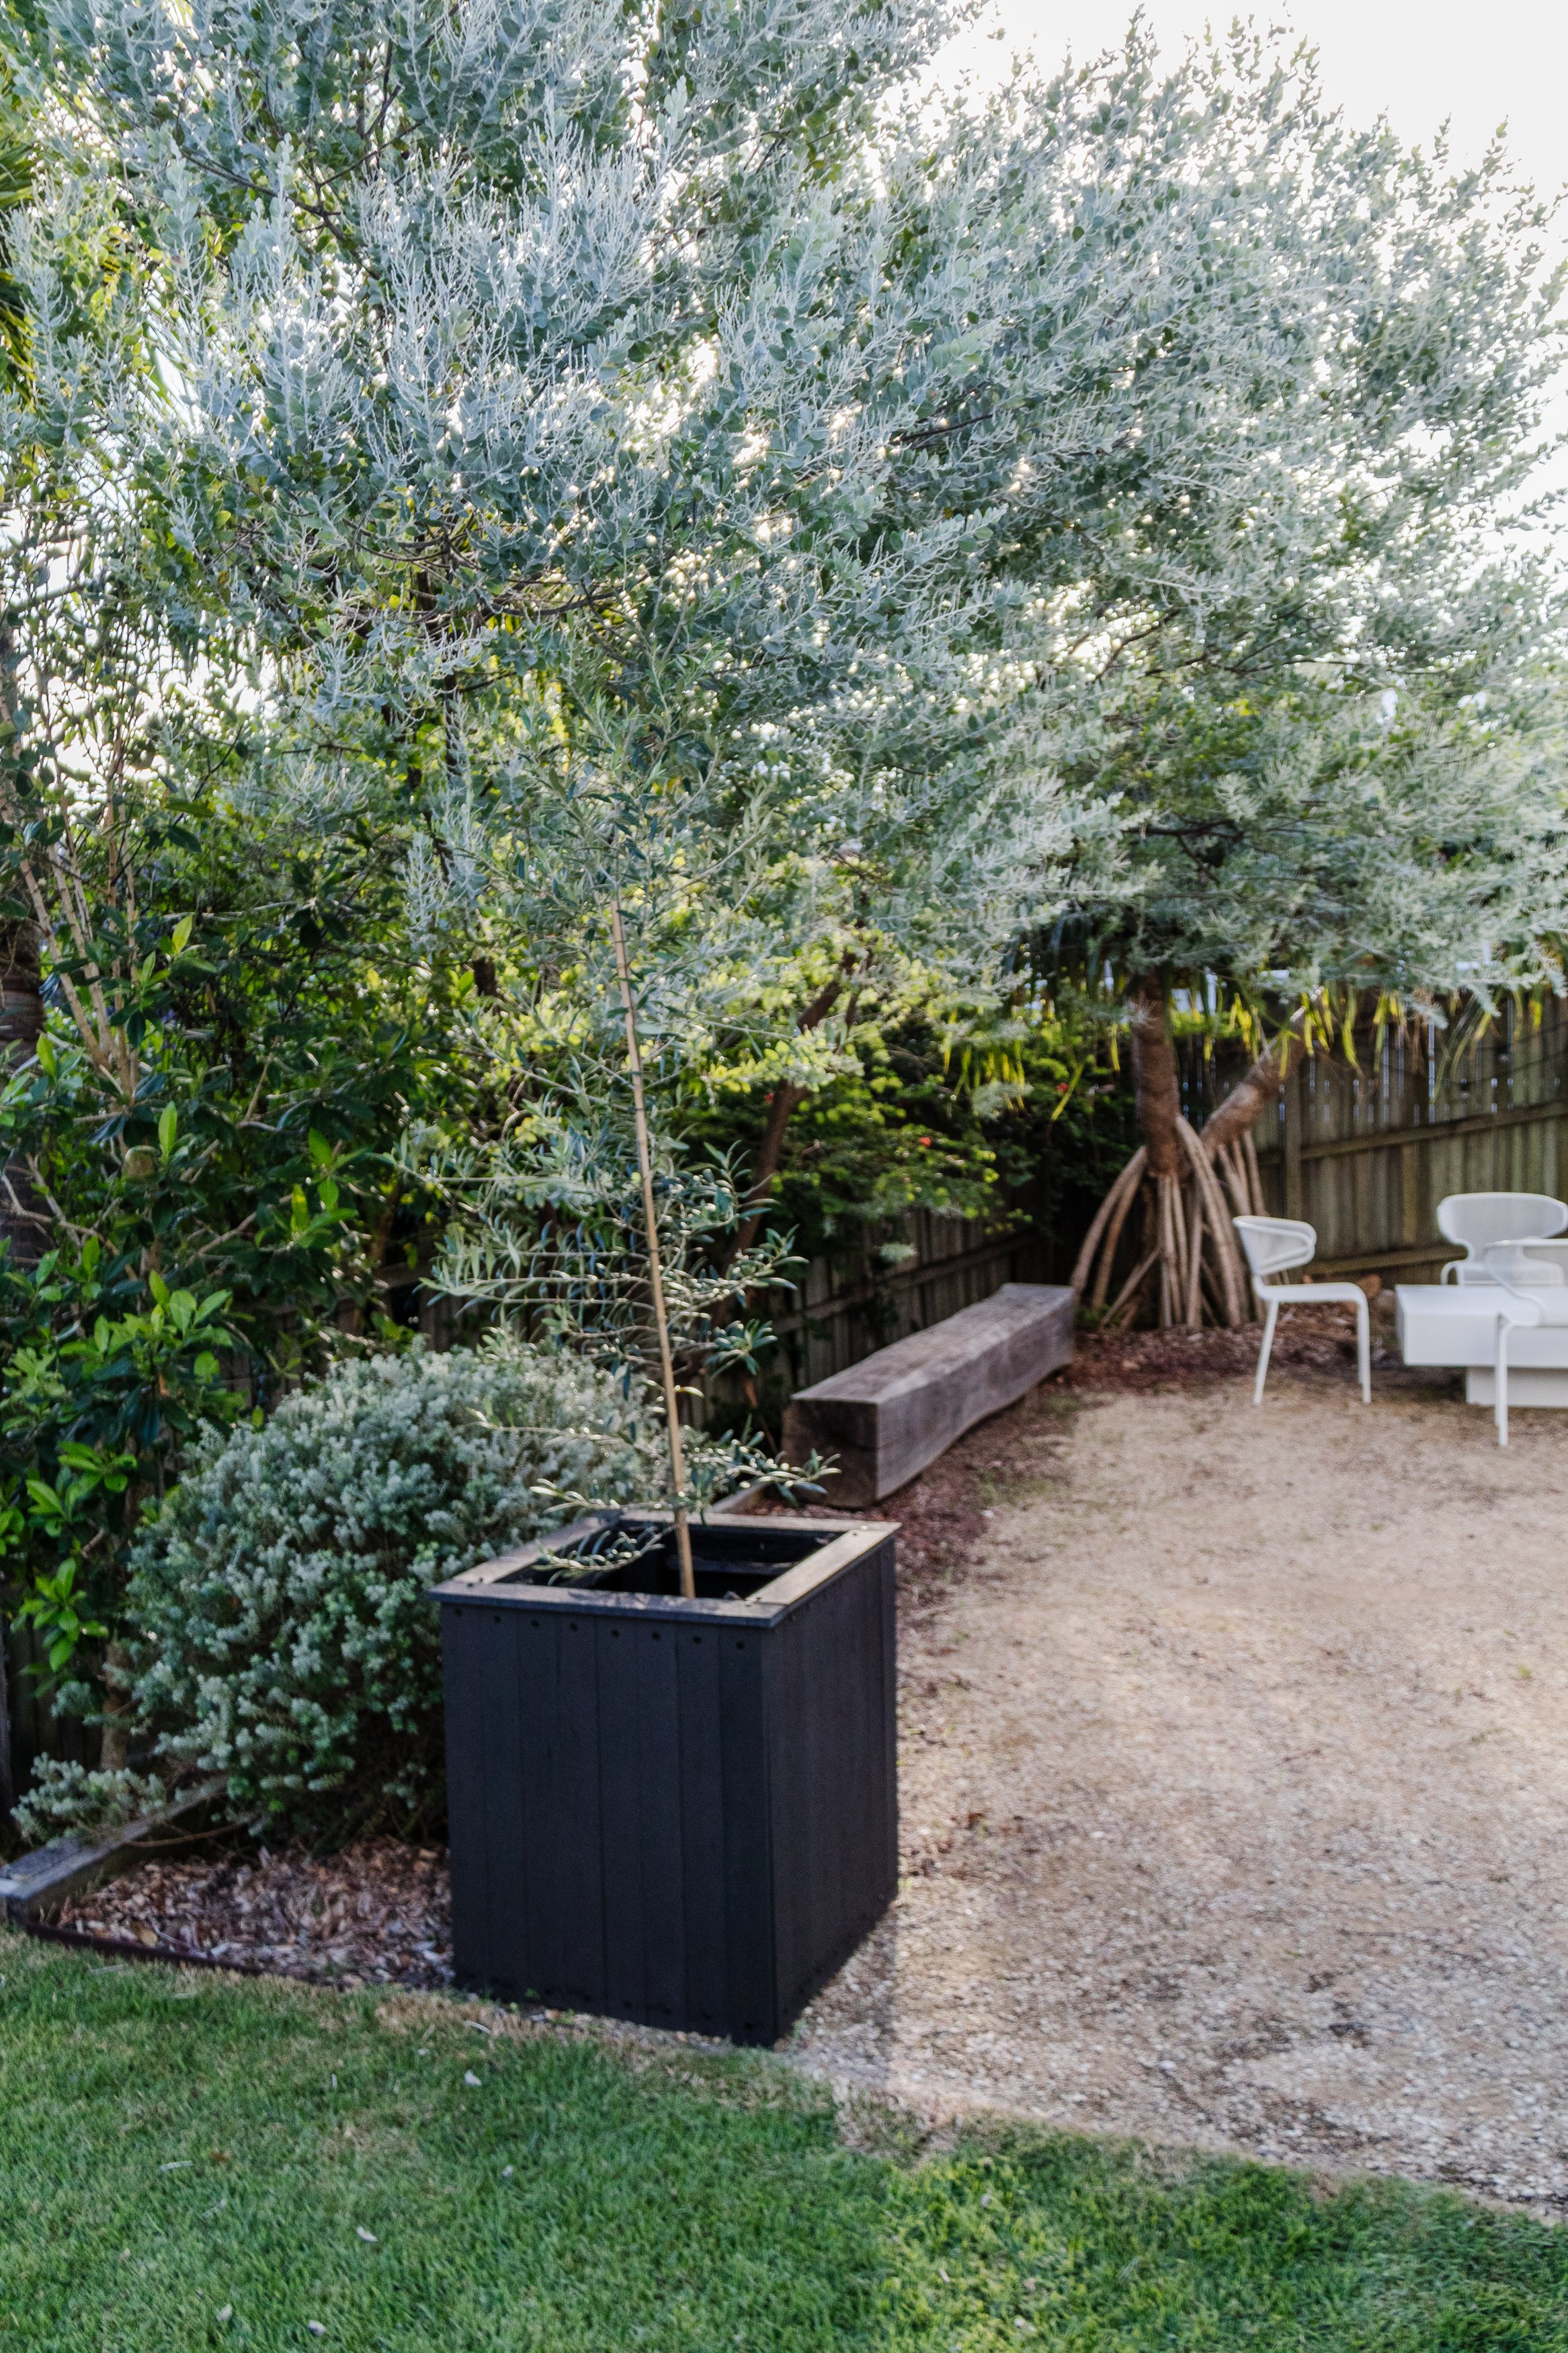
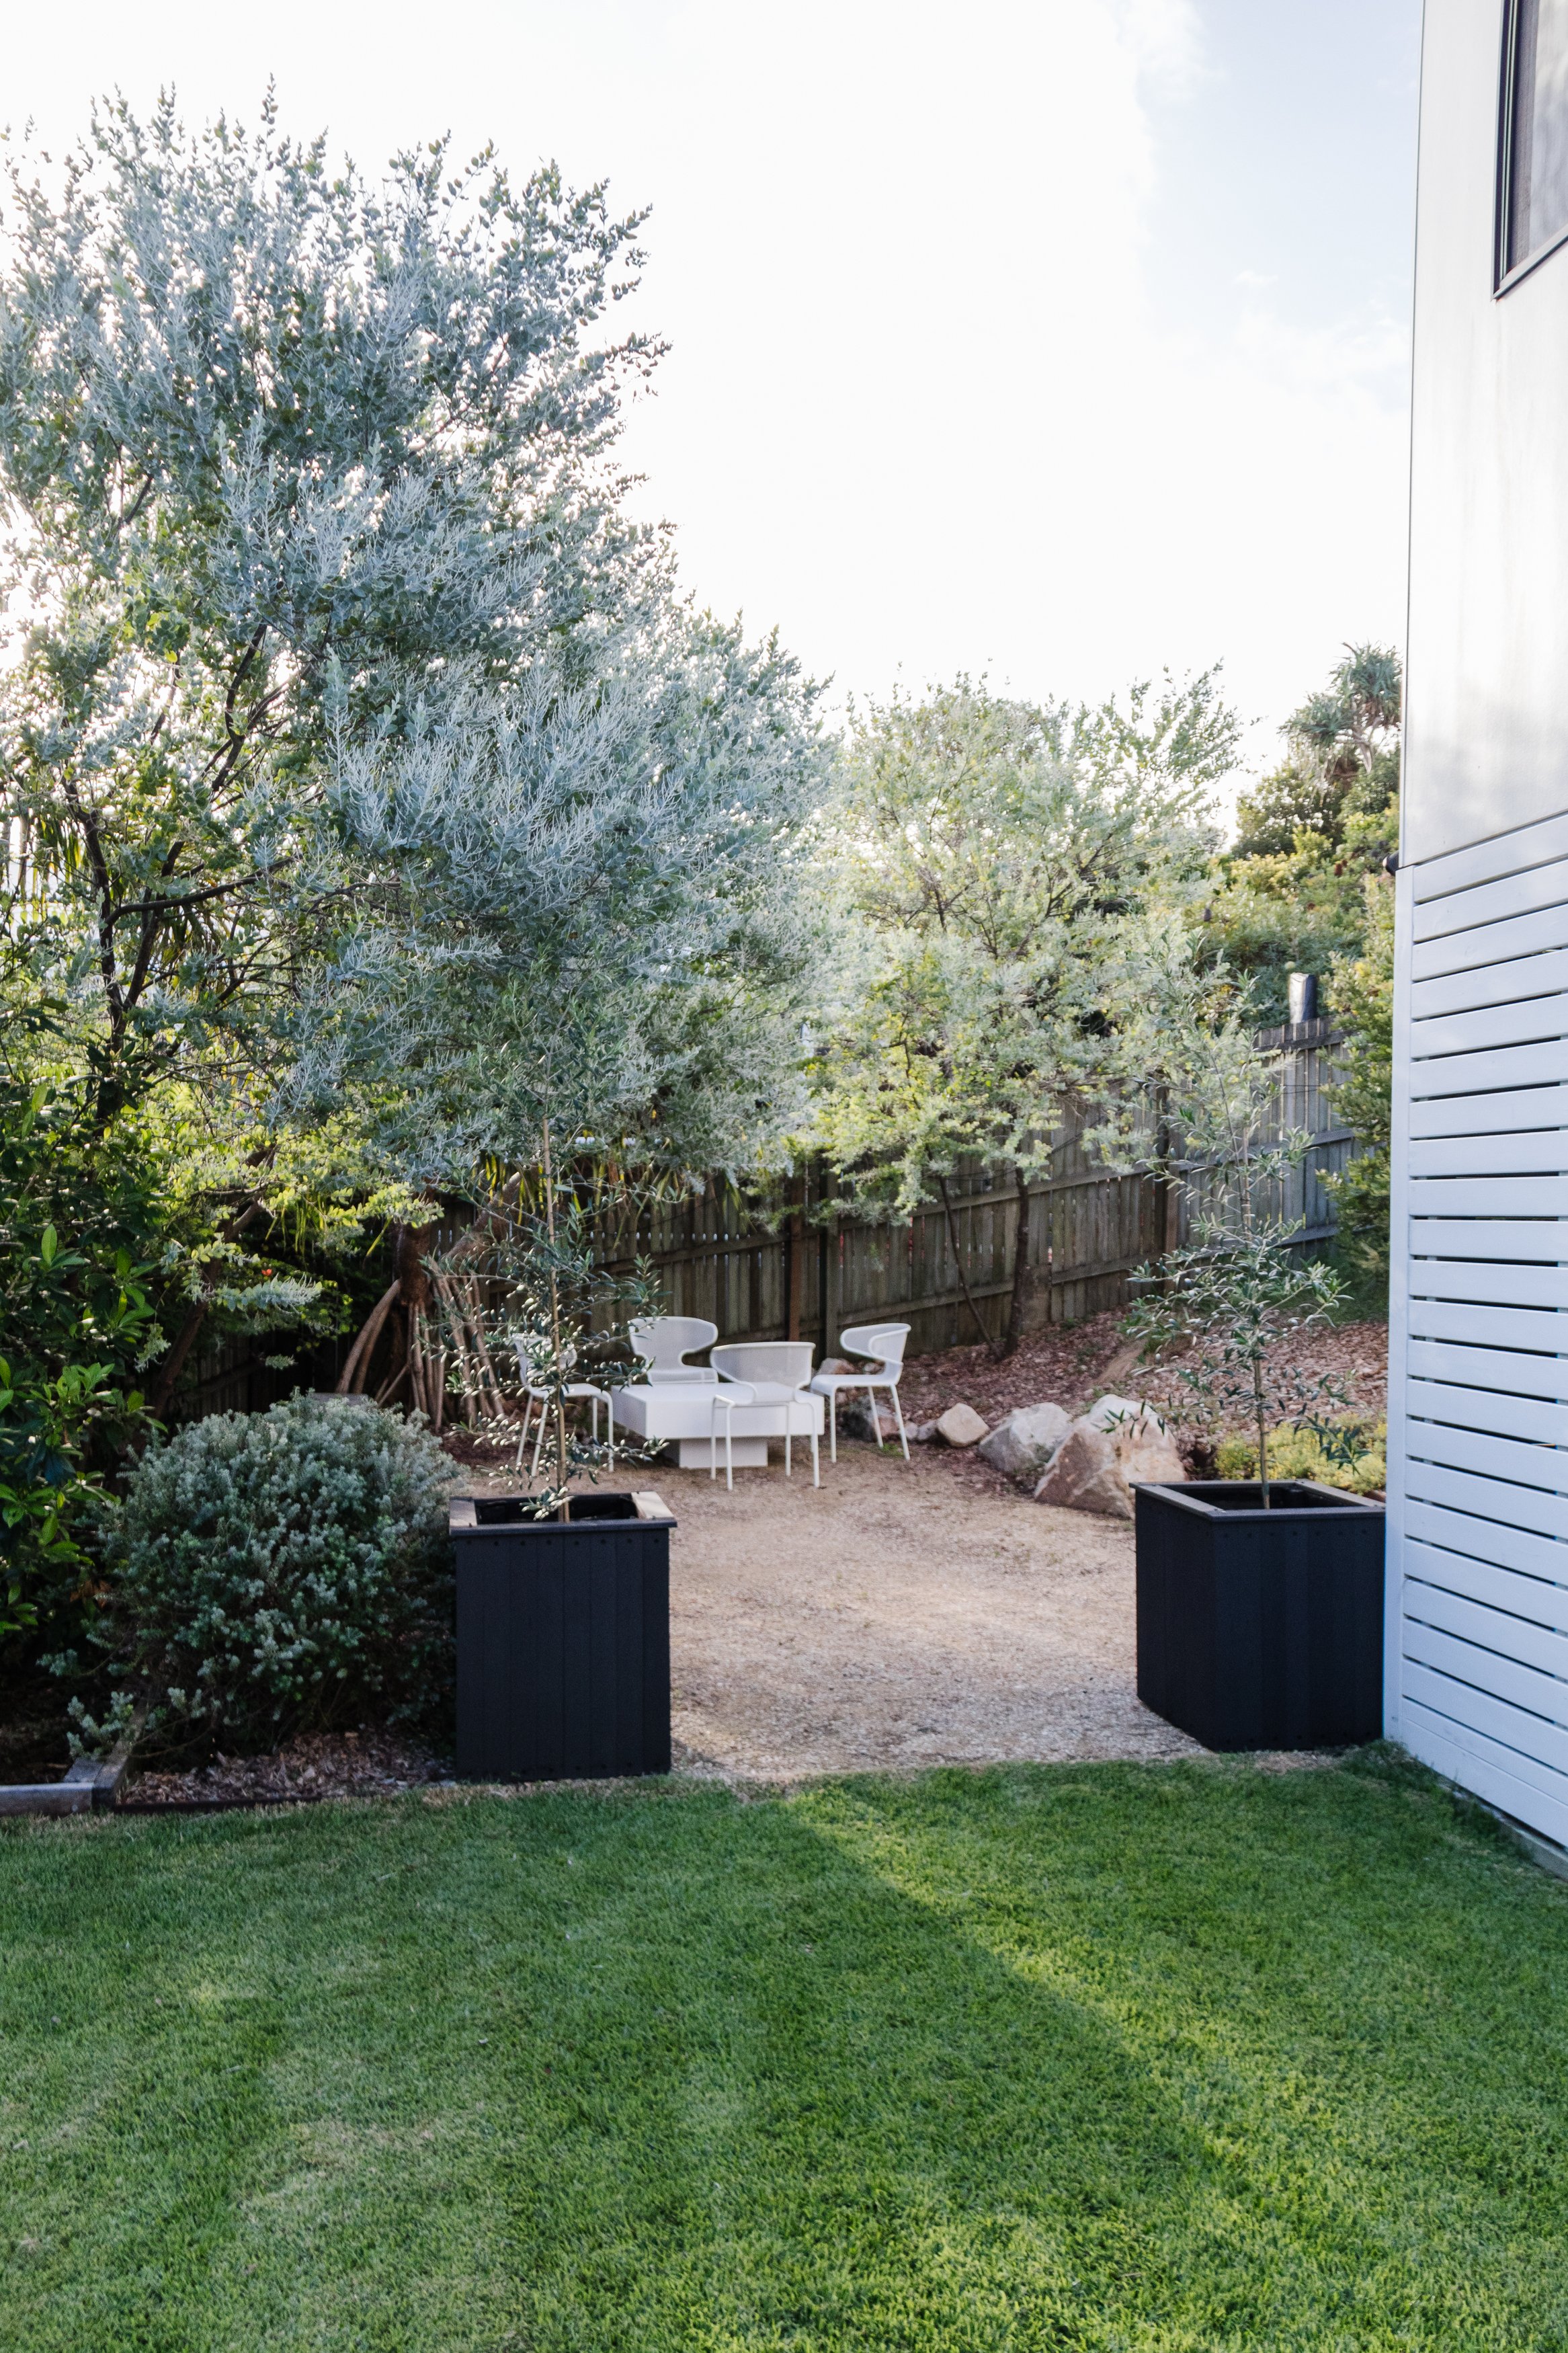
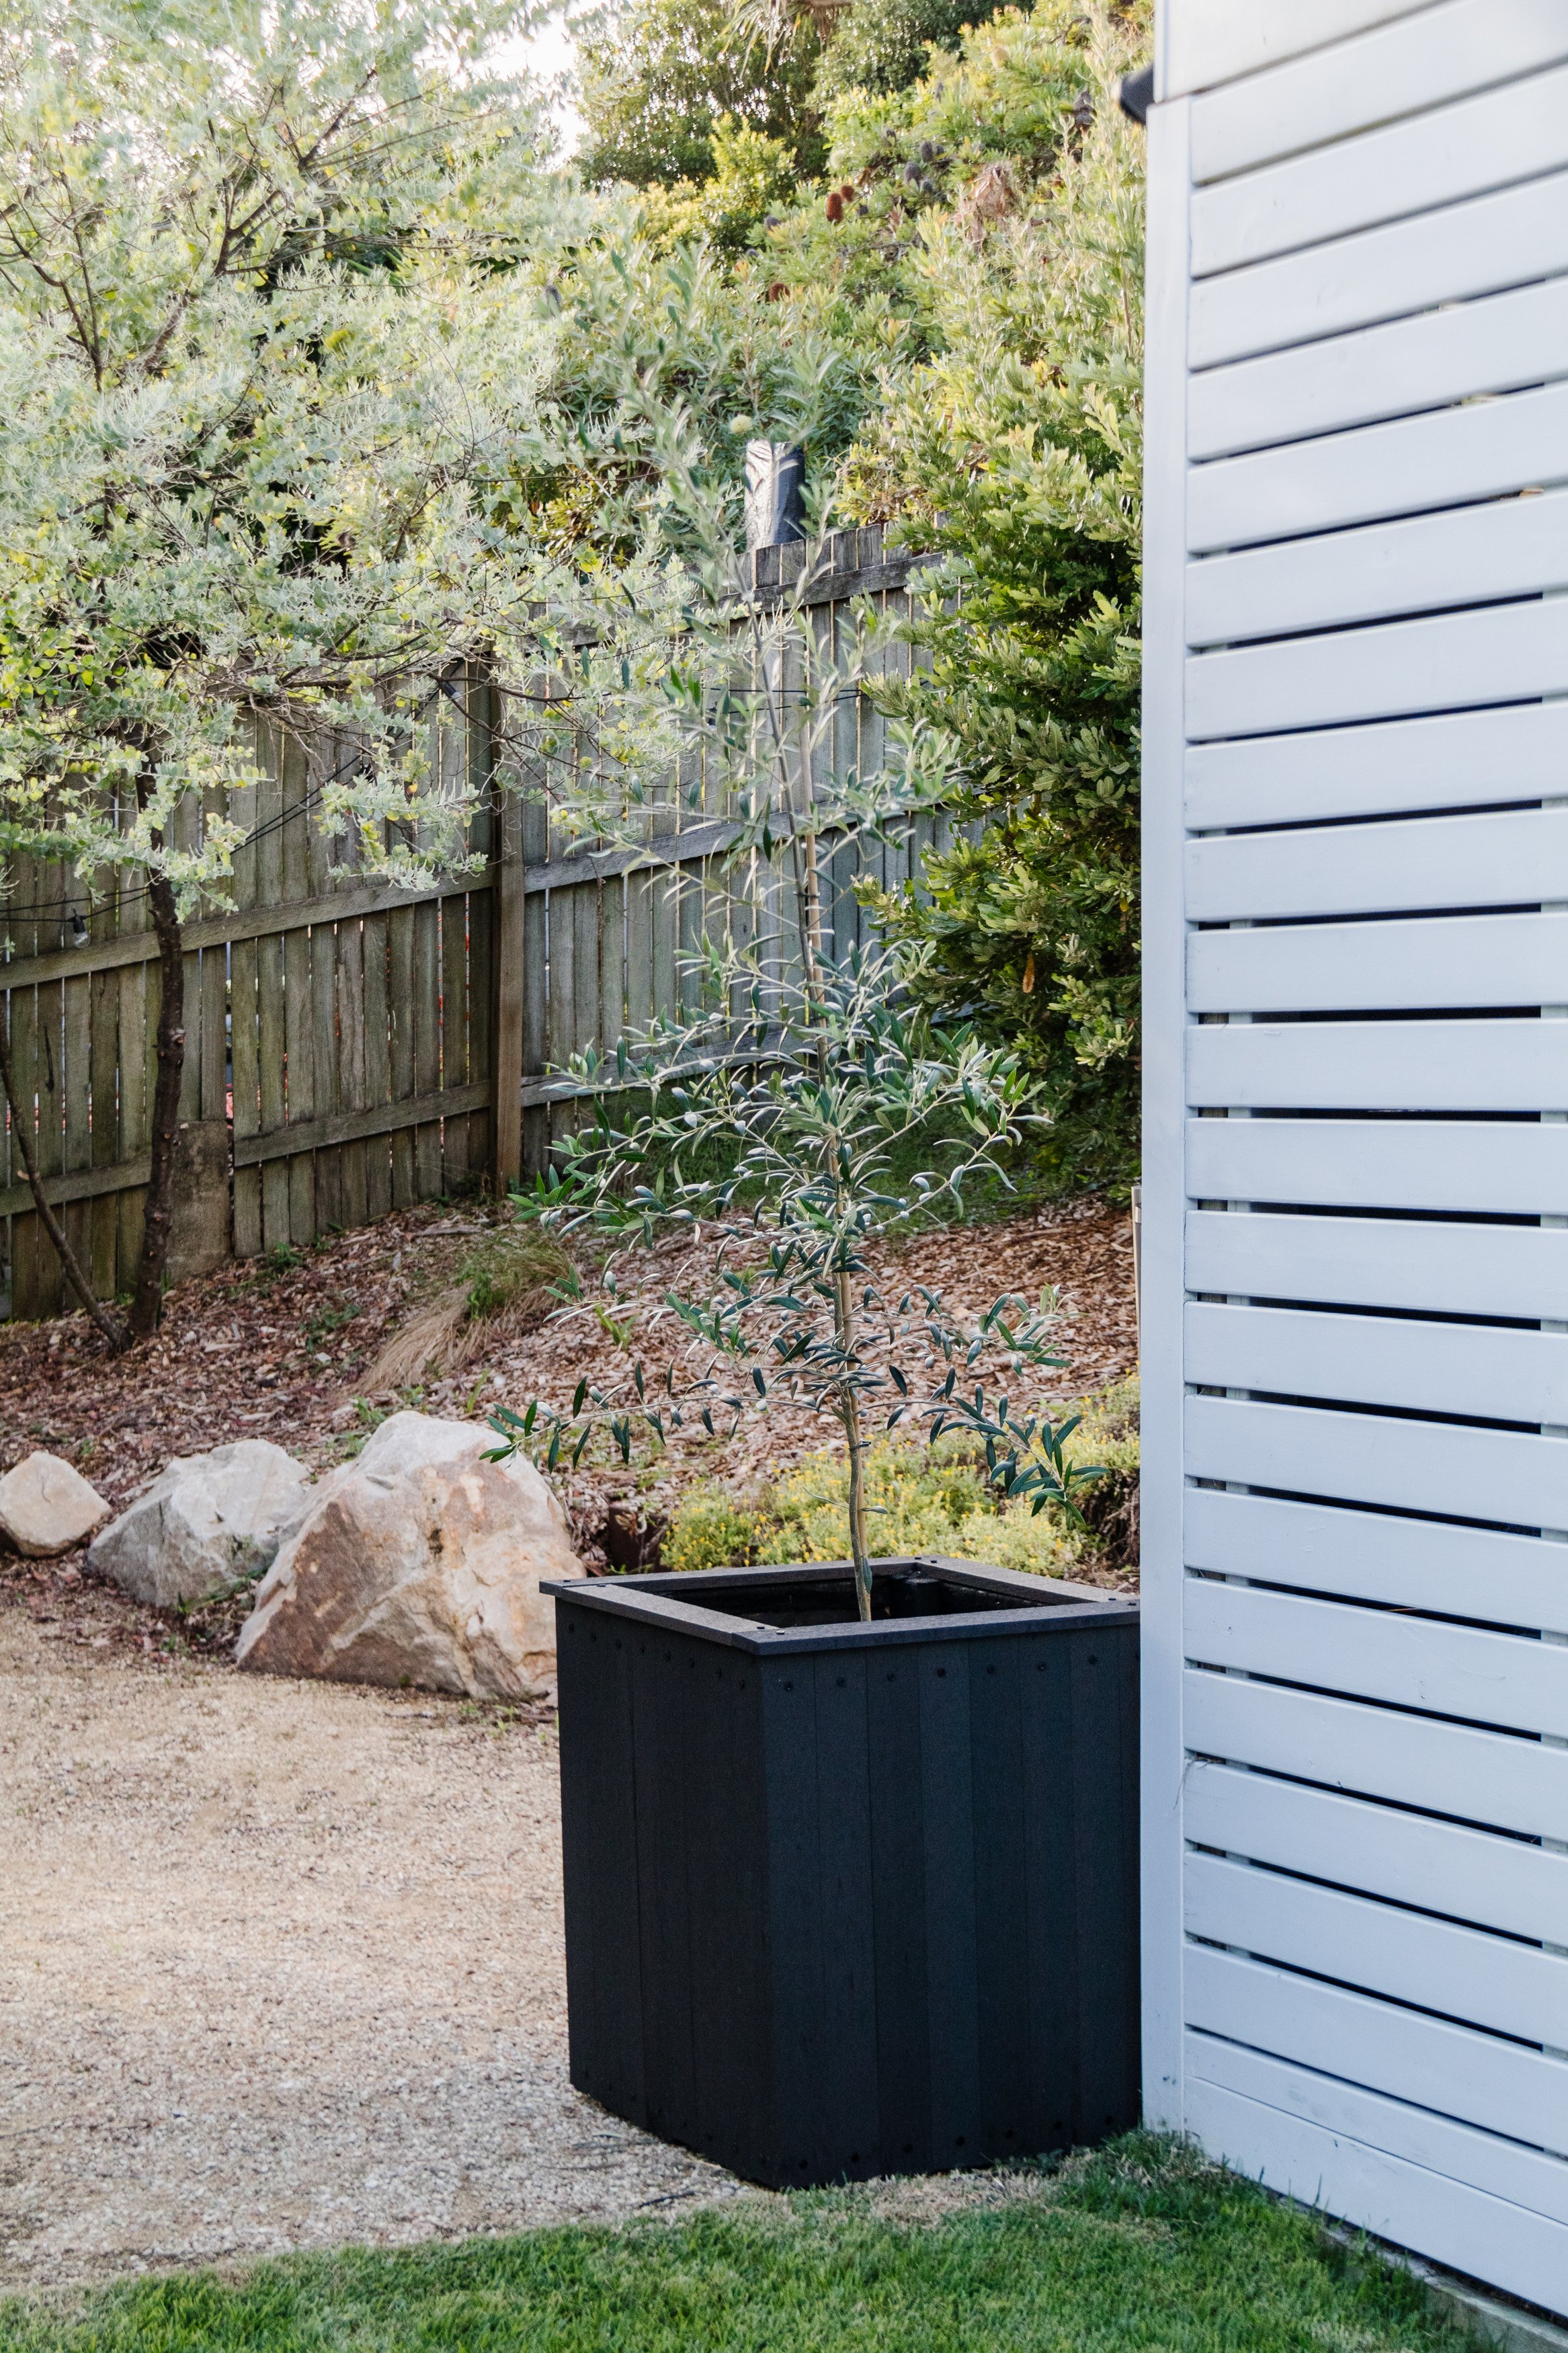
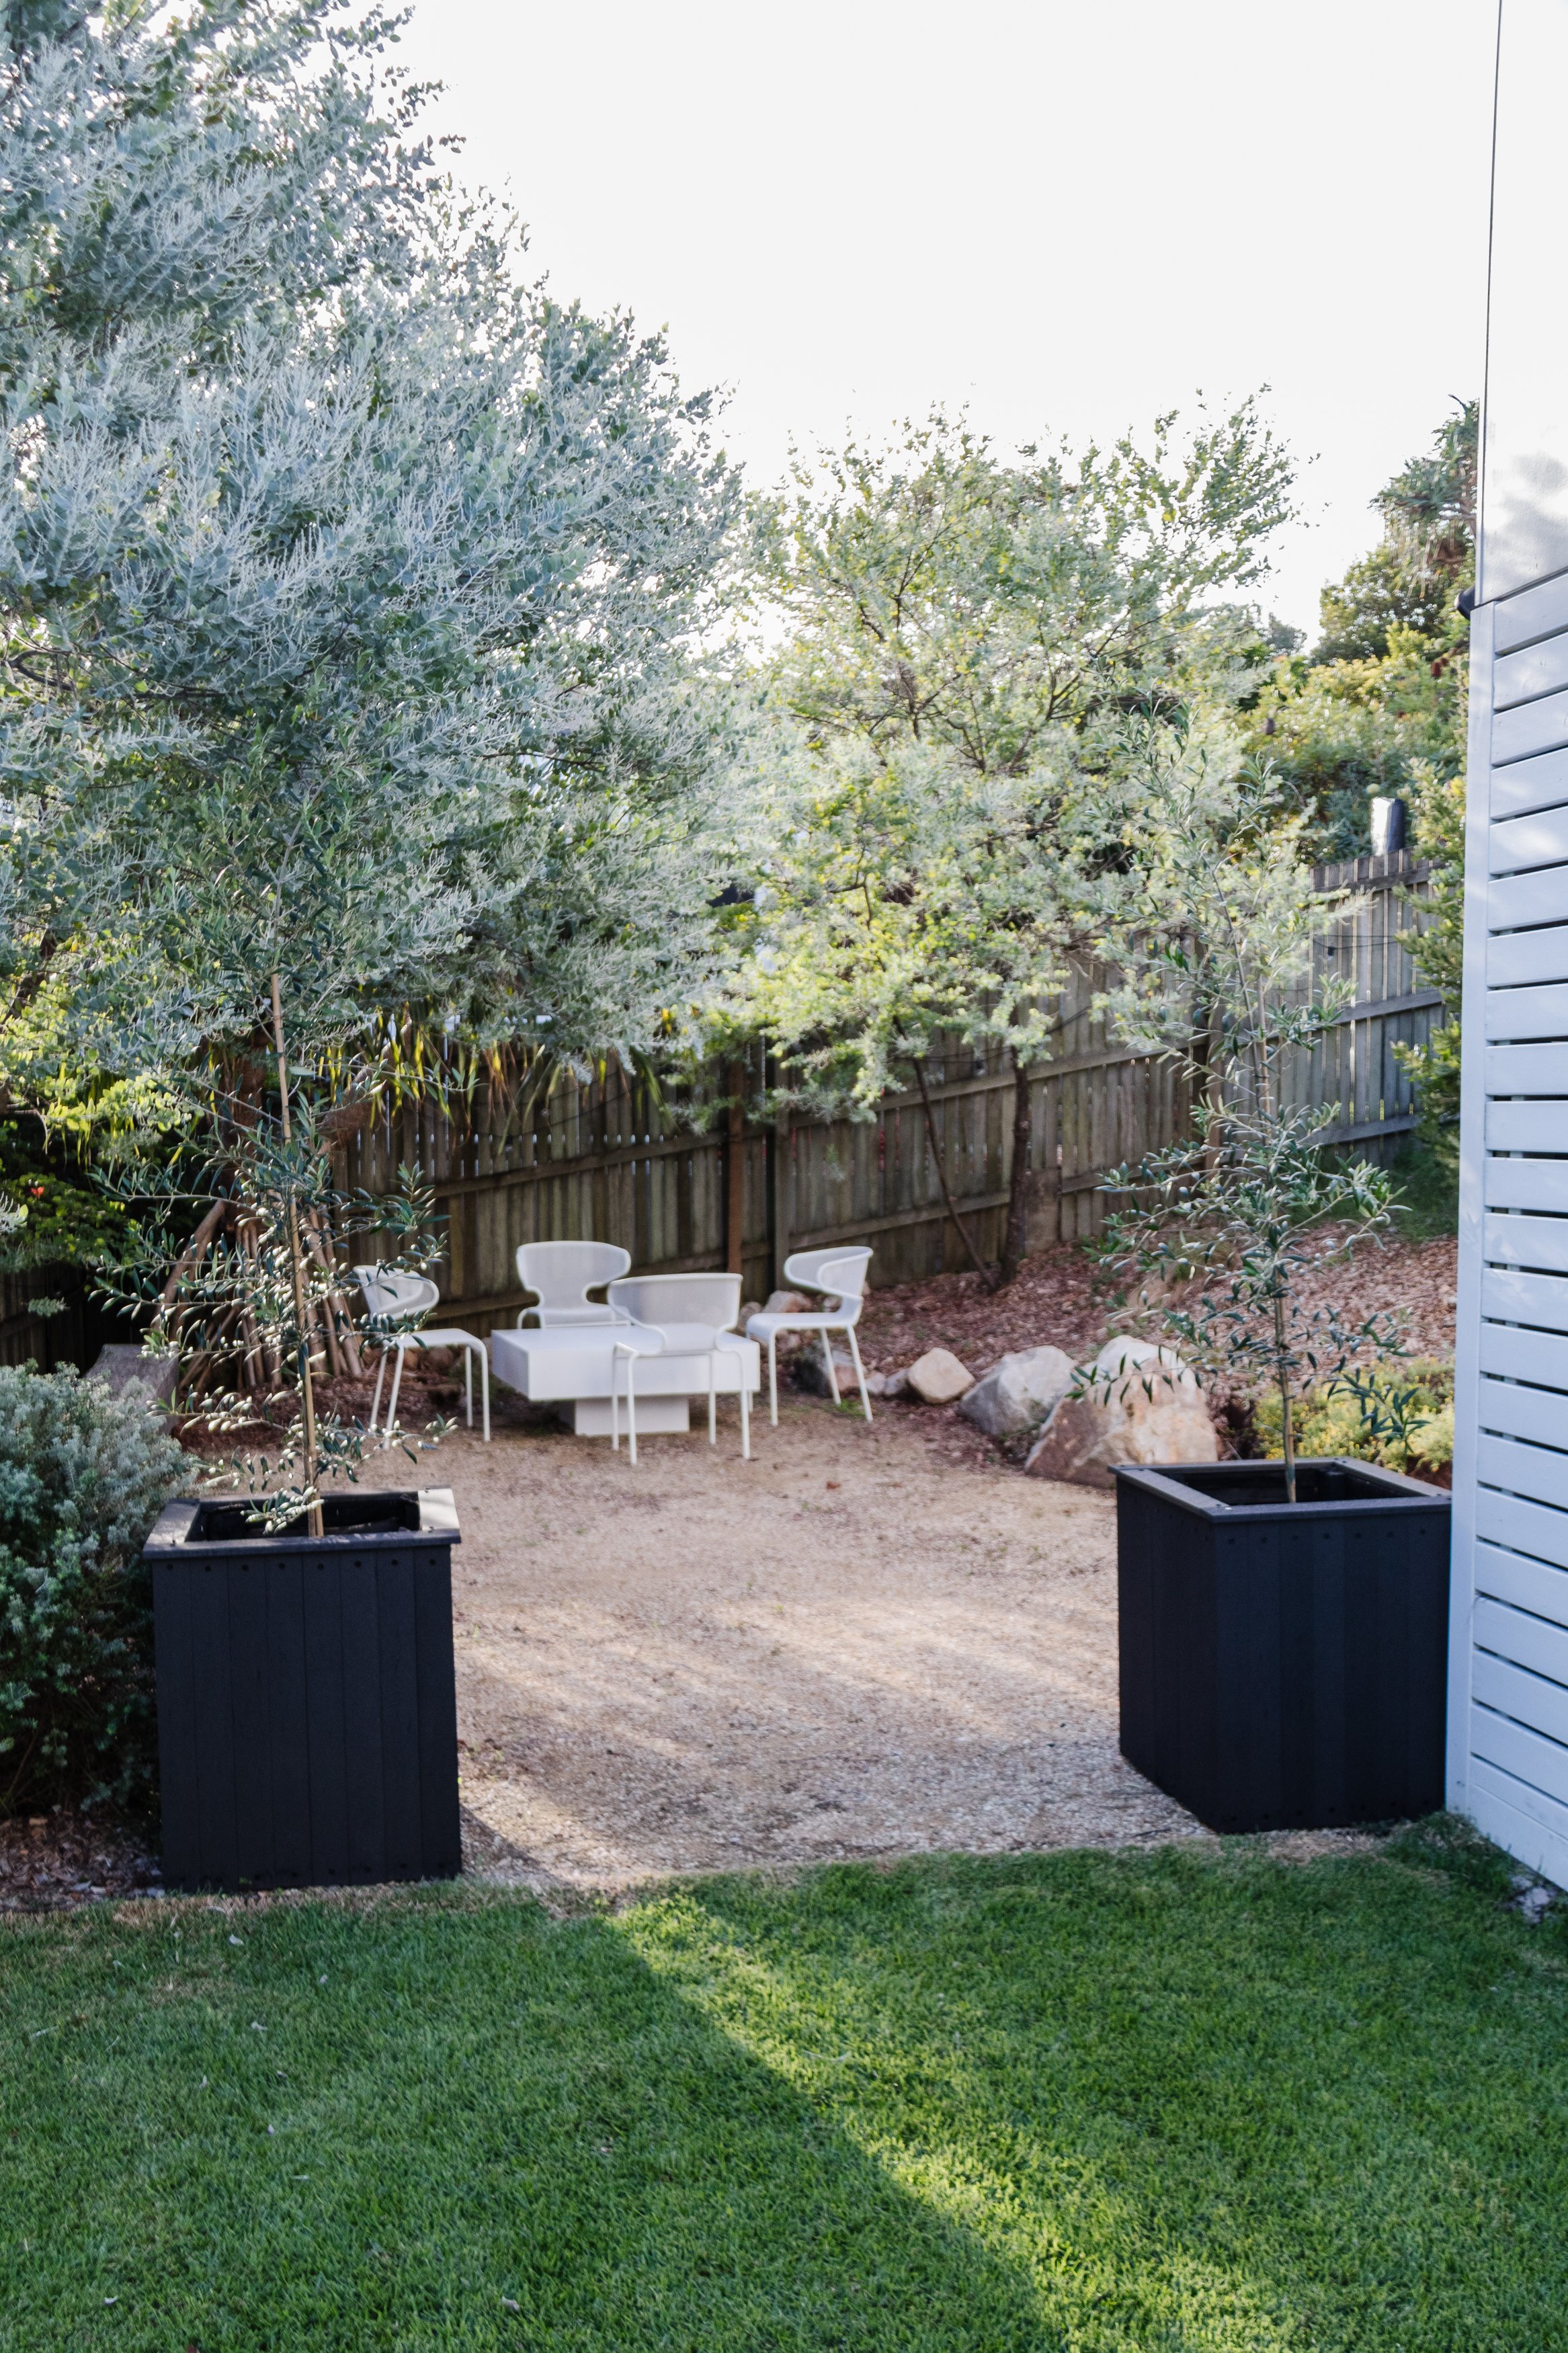
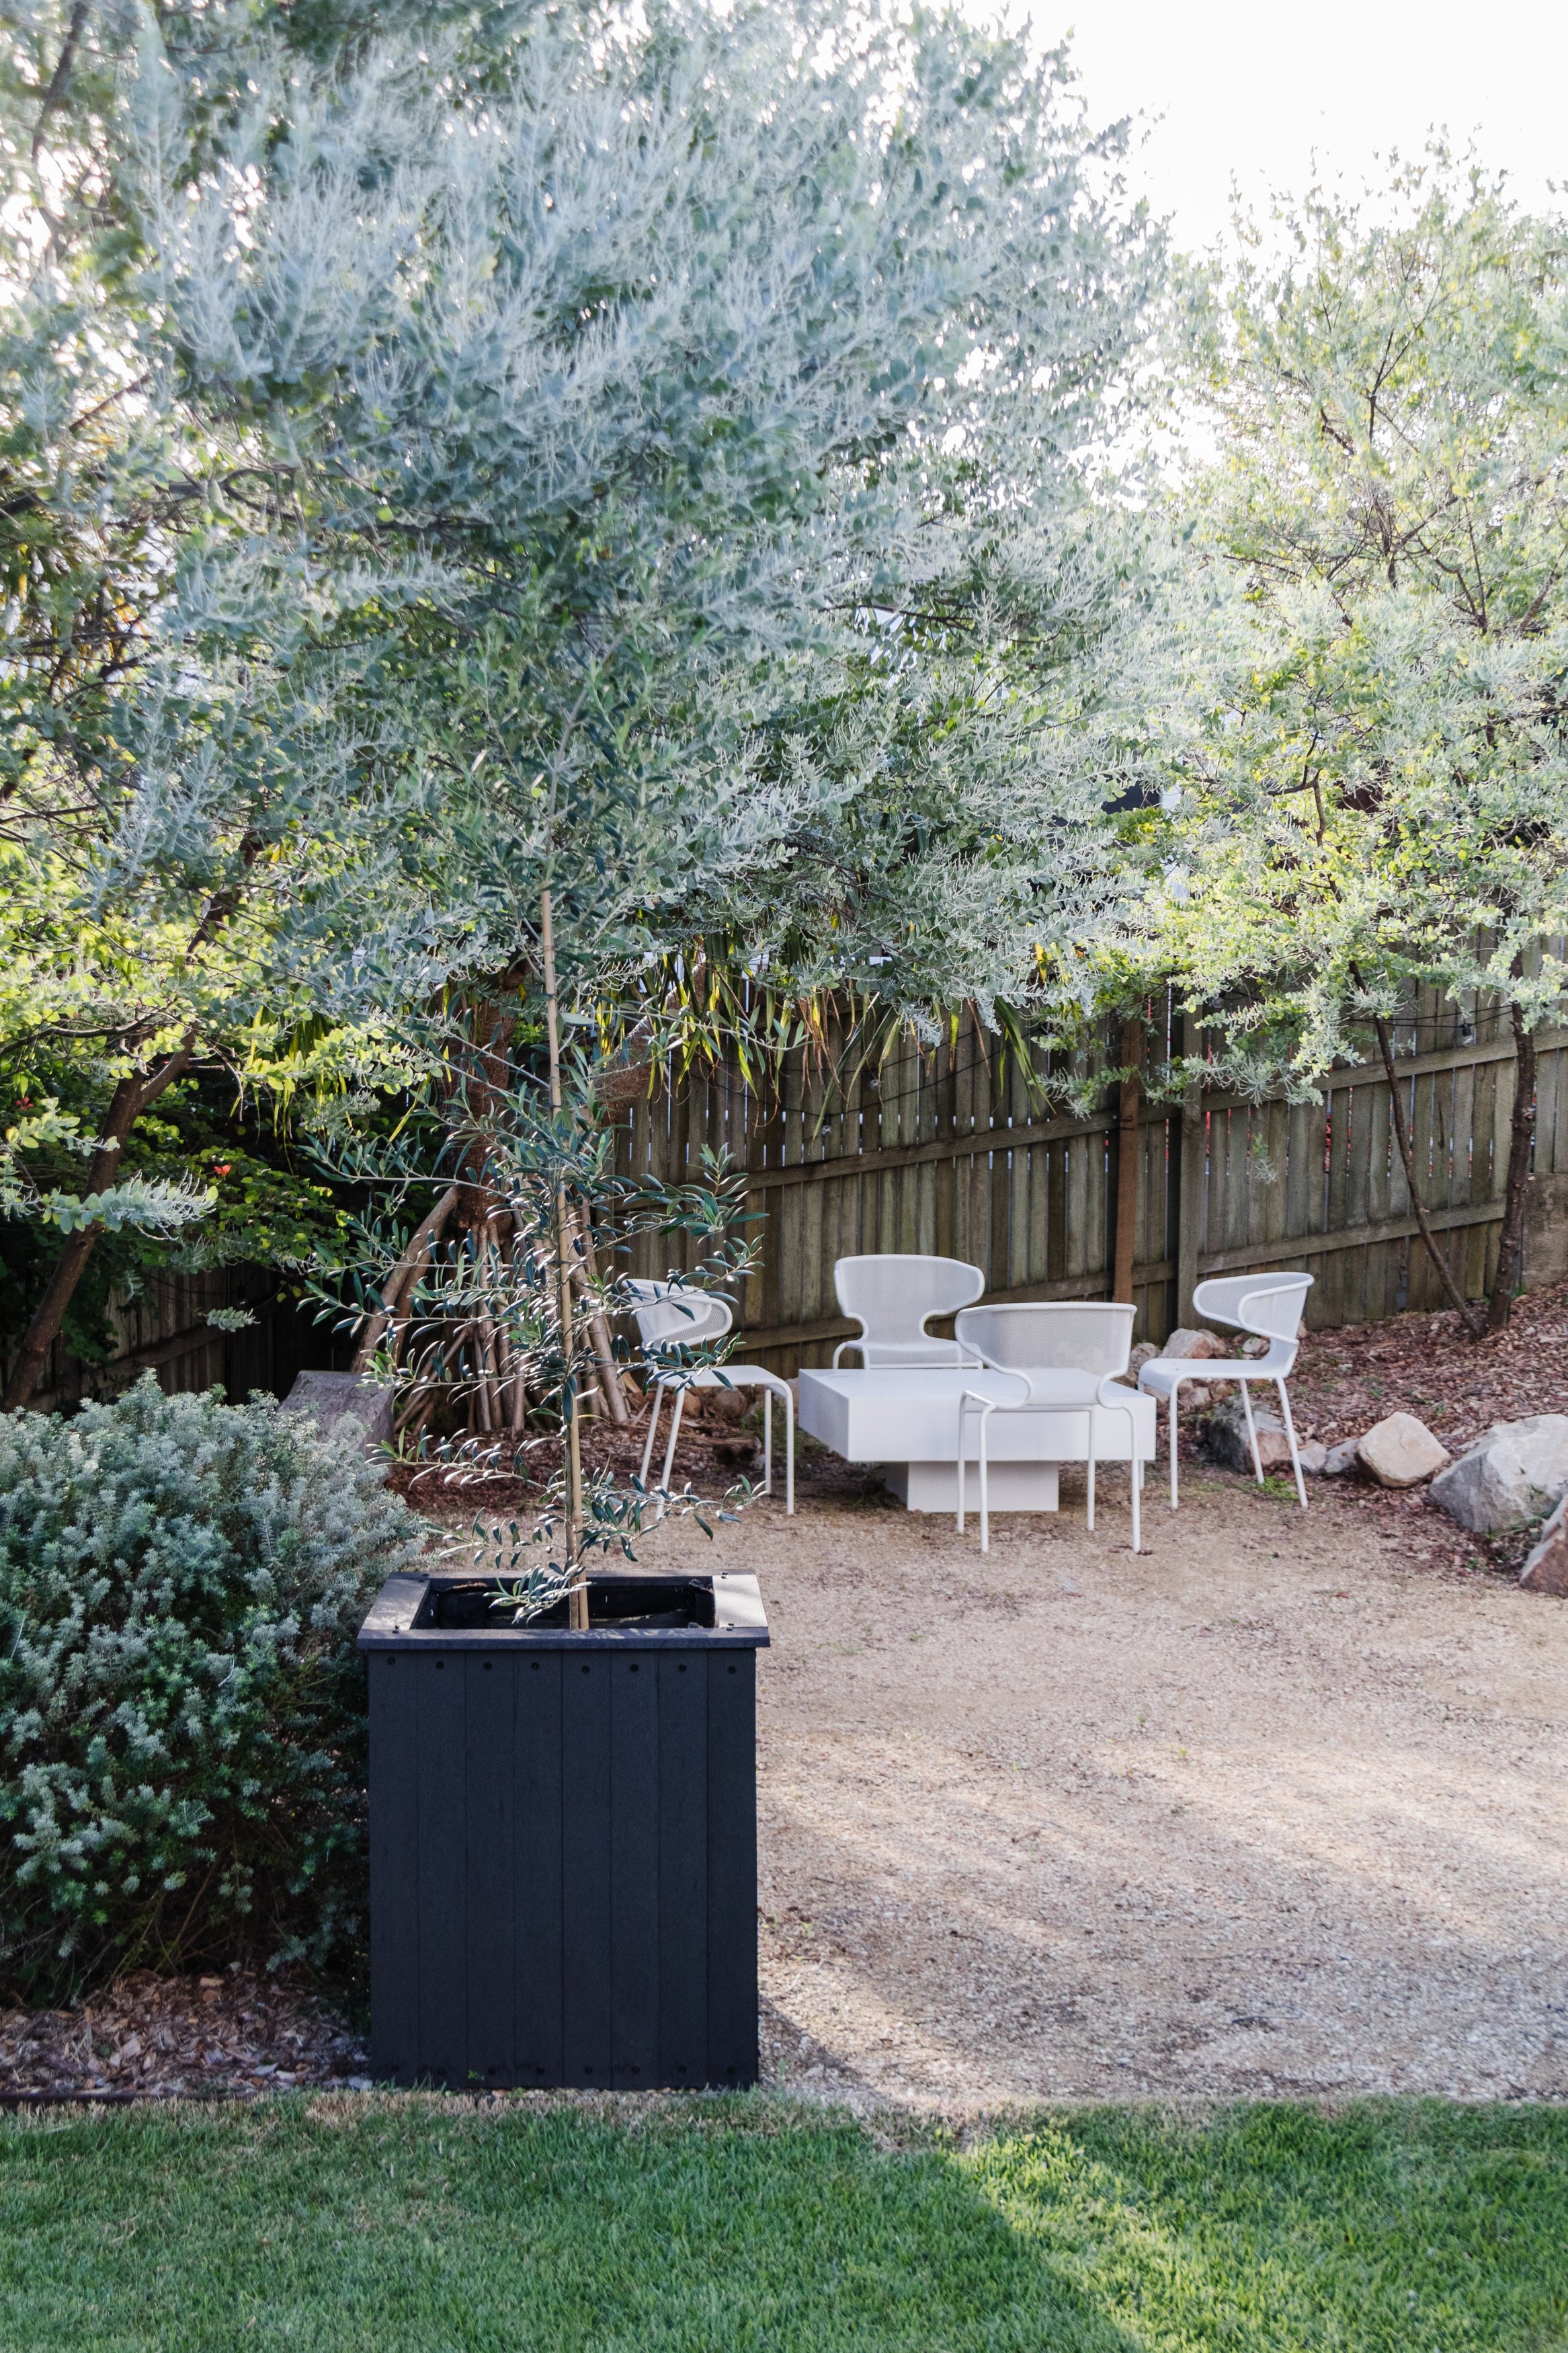
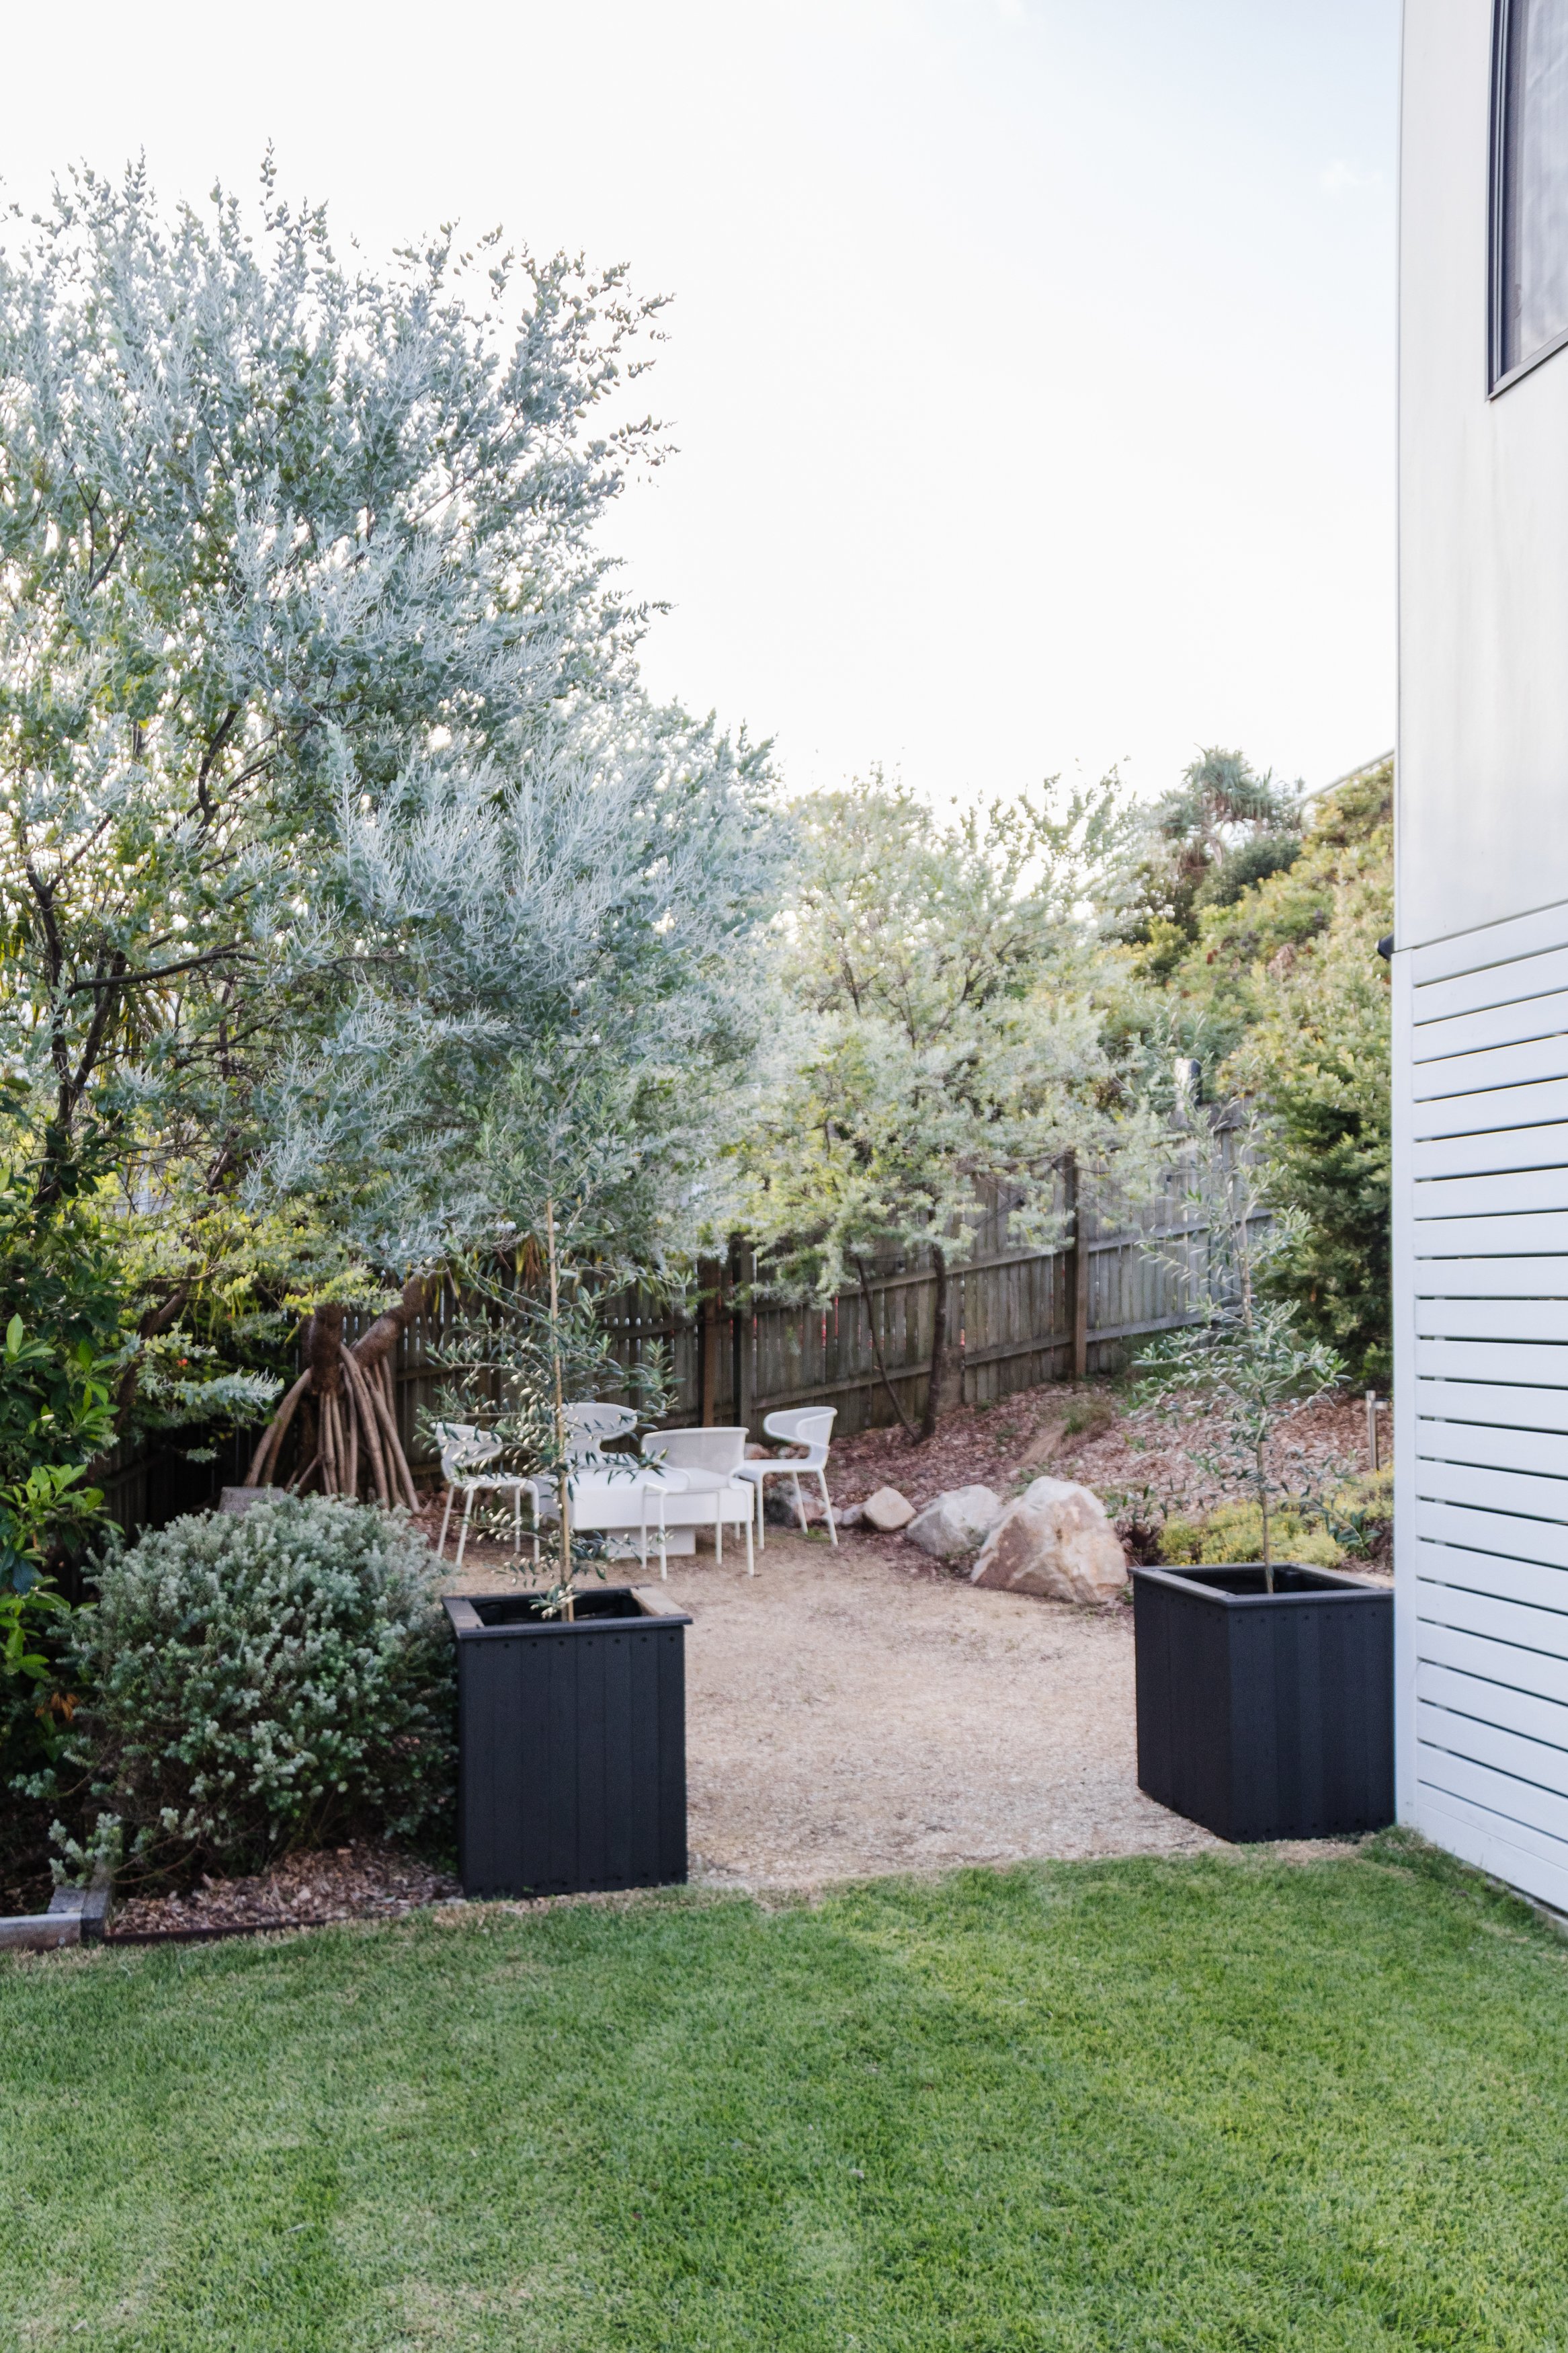
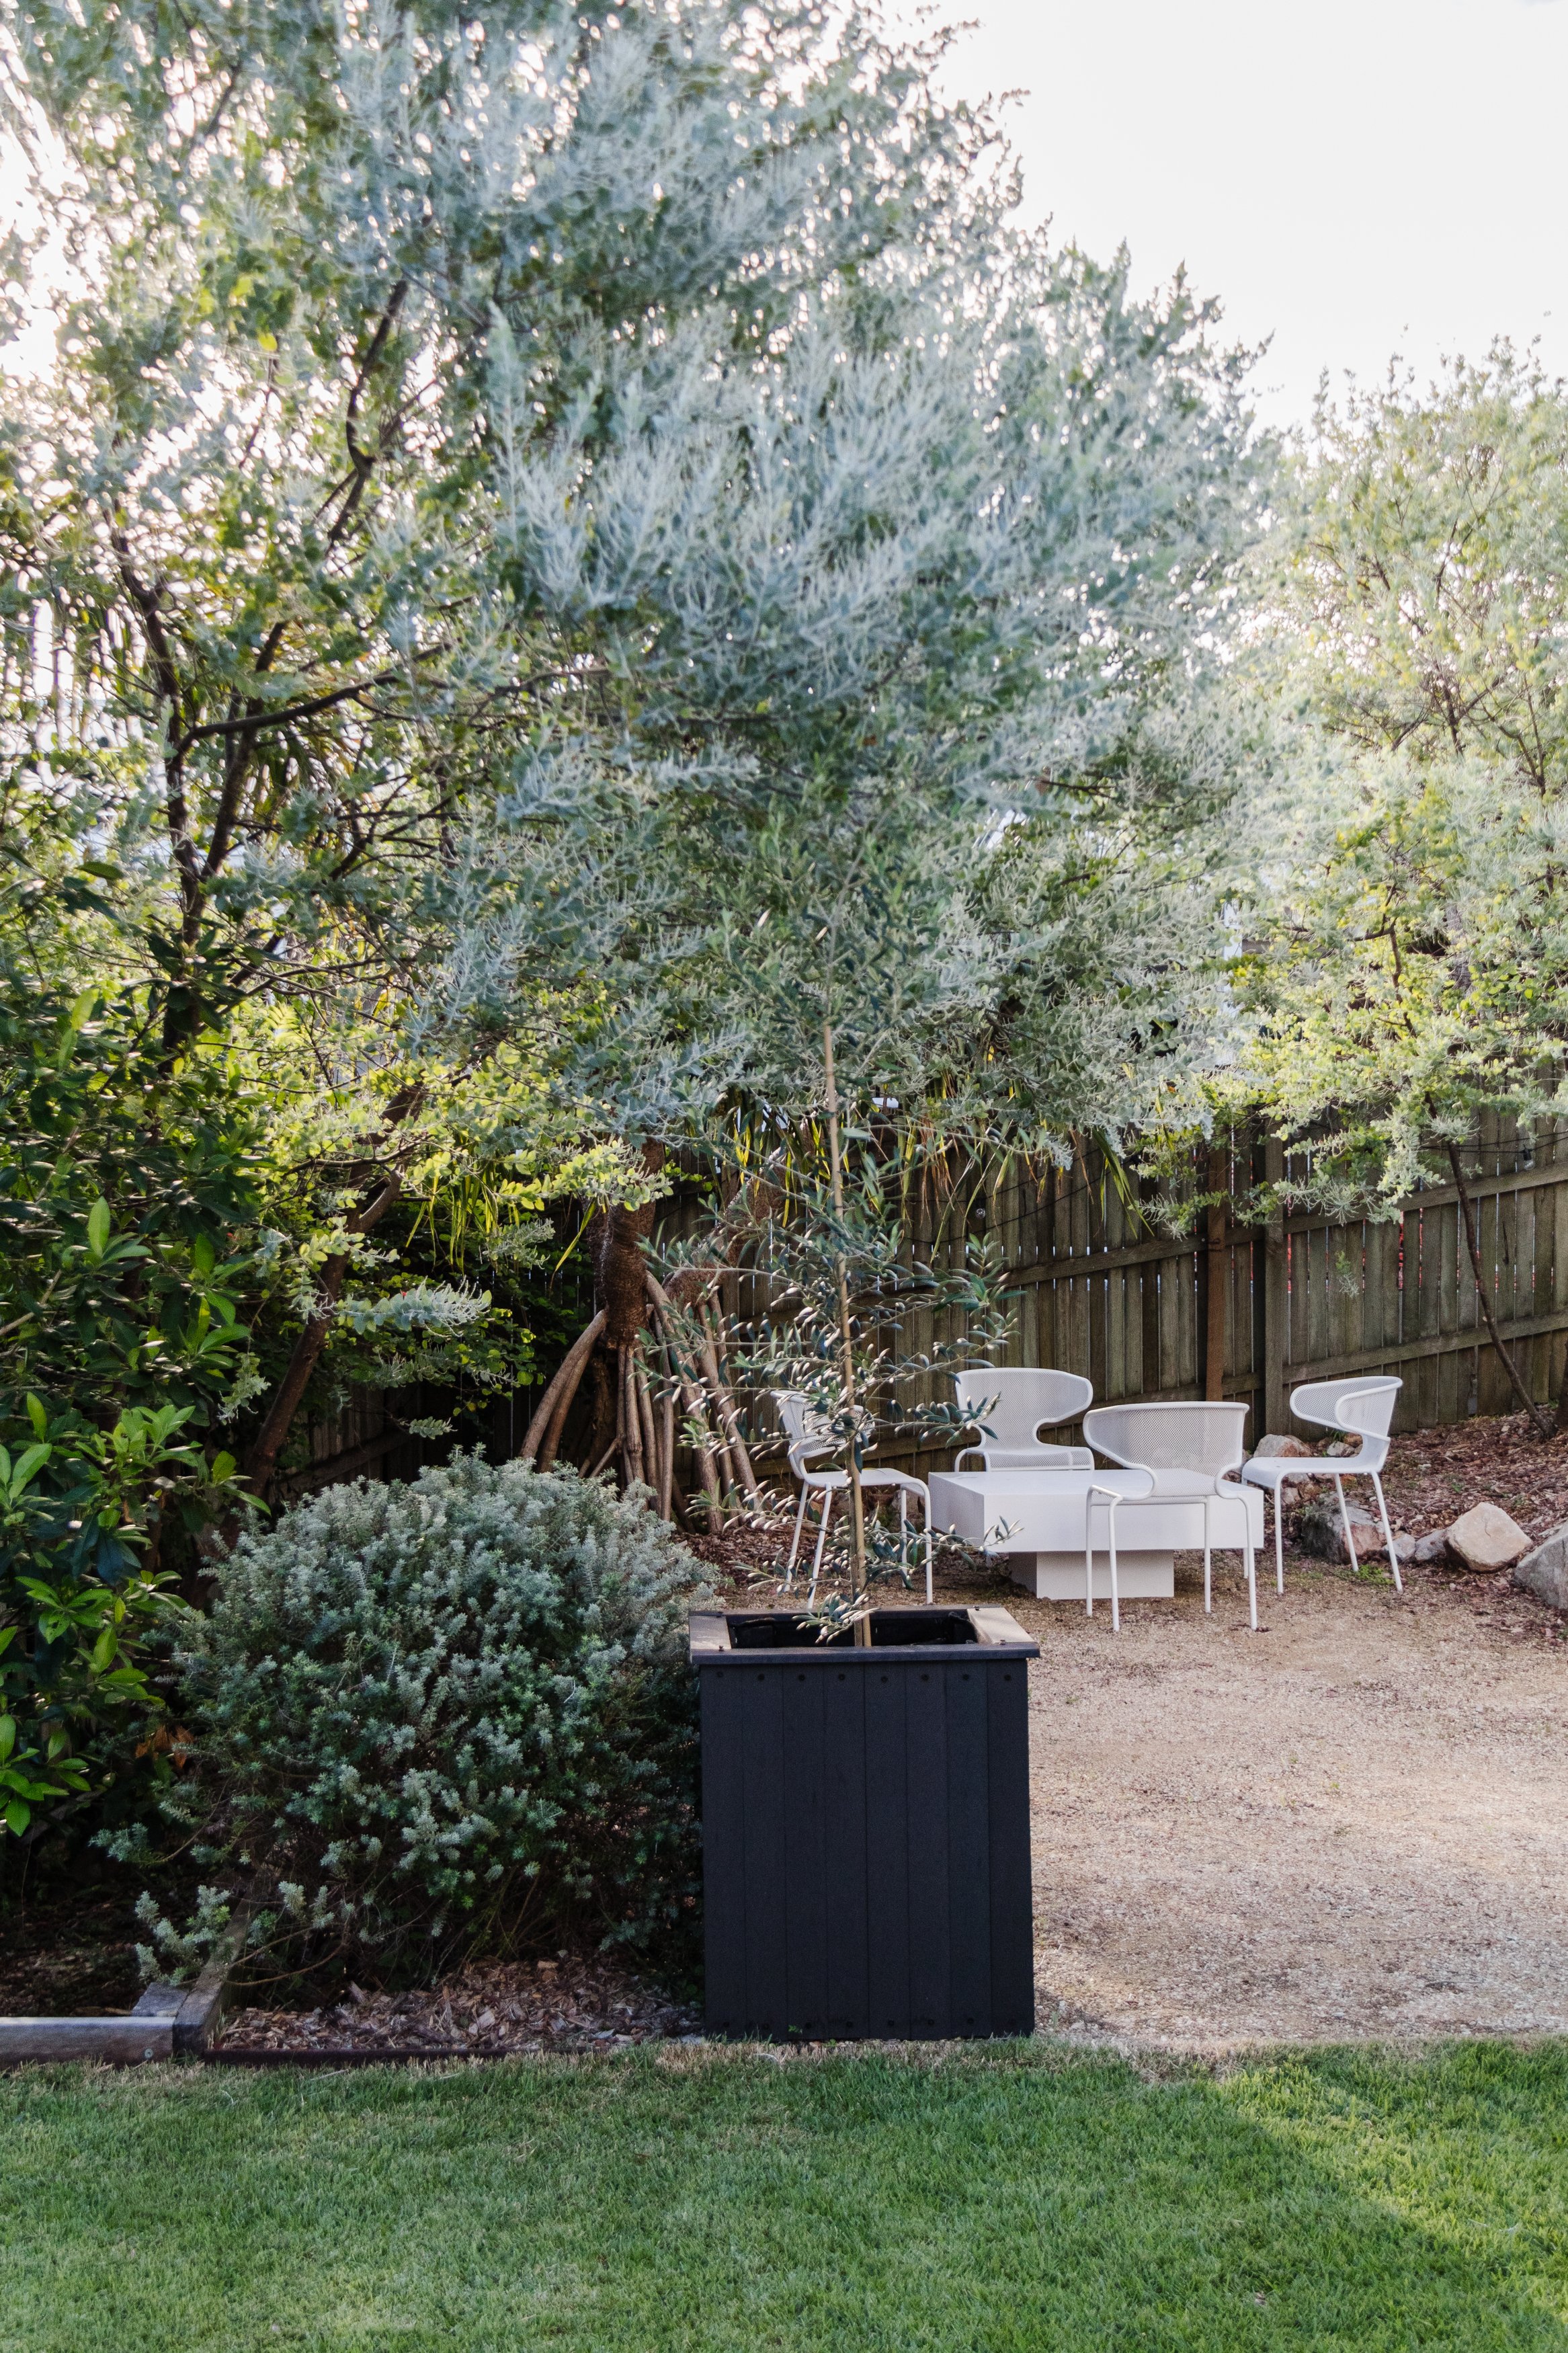
If you’ve been following along for the last few months, you’ll know we’ve been giving our fire pit area a little makeover in time for the cooler months ahead. We do lots of fire cooking and it’s become our outdoor lounge room in winter. I’ve always wanted to create a statement entrance and when I started thinking about some potential ideas, I came across composite screening at Bunnings by Ekodeck. Straight away I wondered if I could use it to make statement planter boxes. I grabbed some Ekodeck Classic Screening in Greystone, which is made from over 90% recycled materials and spent a lot of time designing the planters, drawing and measuring until I was really happy with the sleek, modern design. And then I got to work.
See how this project came together by watching this video!
DIY Planter Boxes


Project Details
♻️ Making: DIY Planter Boxes with Ekodeck
🕒 Project Time Estimate: 4 to 6 hours
💰 Materials Cost for one planter: $XXX
Tools
Drill and bits
Mitre saw
Staple gun
Materials
These are the materials for one planter box. If you’d like to make two, double the Ekodeck Screening and treated pine.
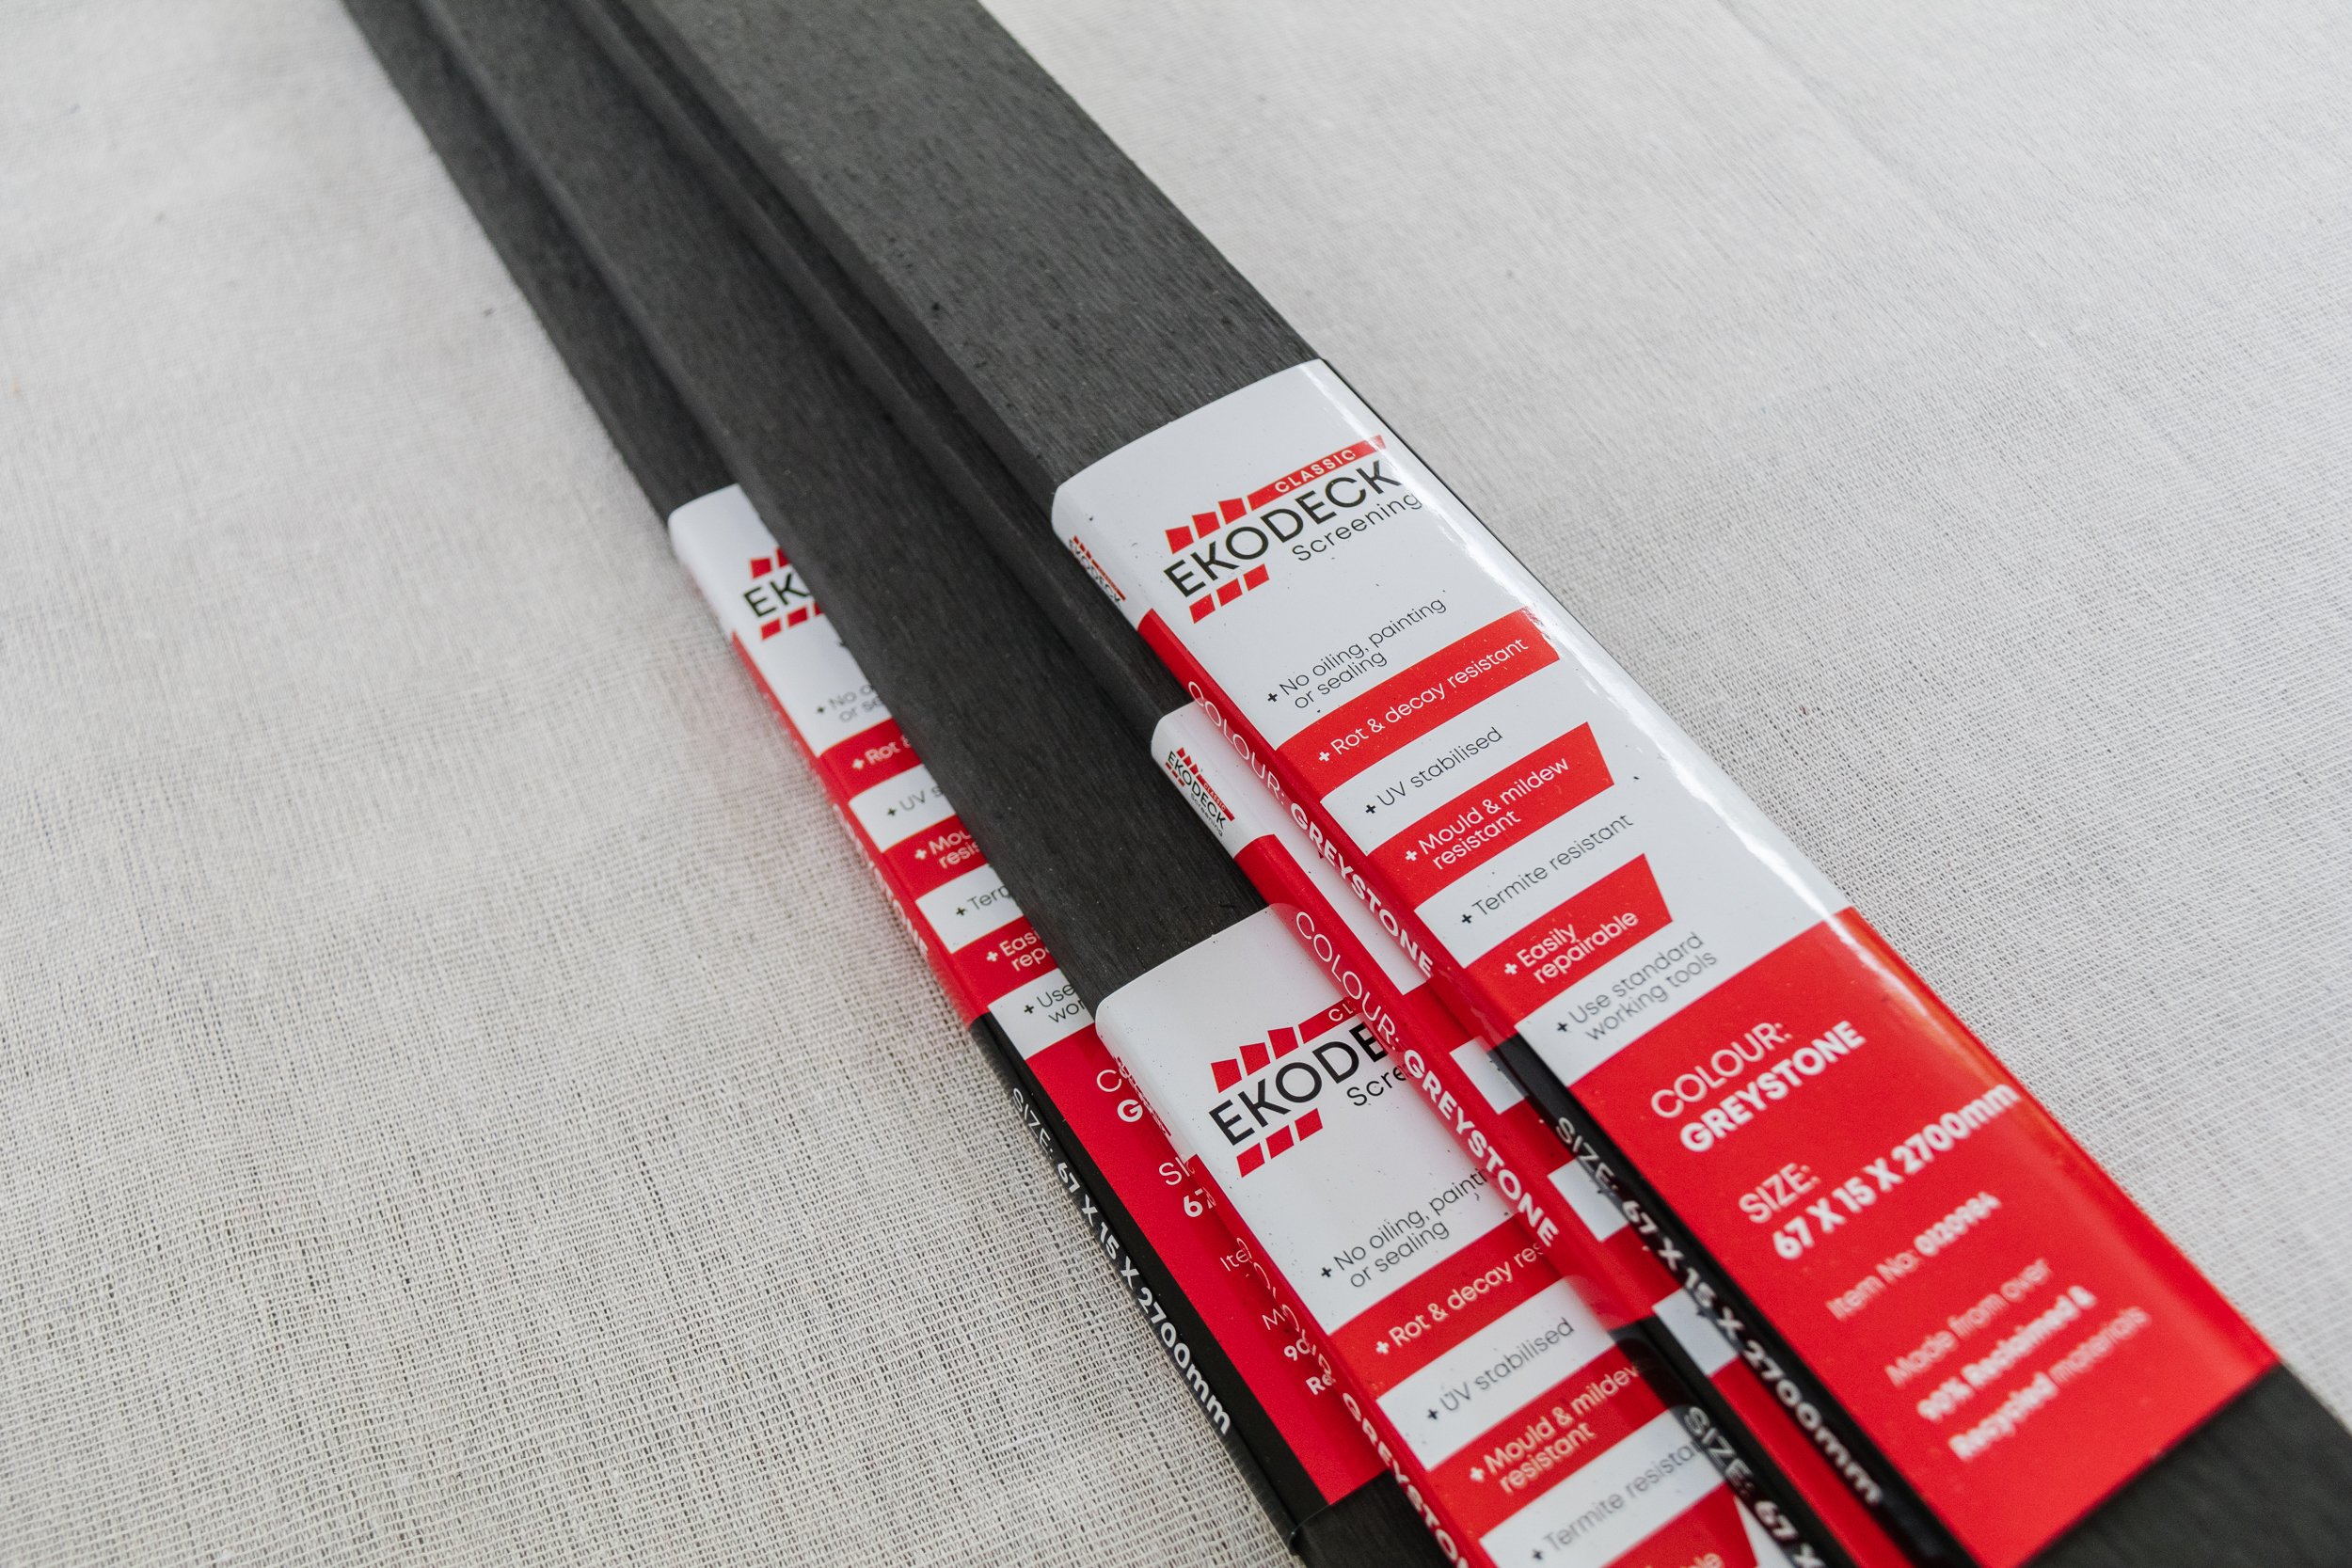
9 x Ekodeck Classic Screening pieces in Greystone from Bunnings
3 x 2400mm Outdoor Framing MGP10 H3 Treated Pine
Weed mat
External timber screws (600mm)
Black timber screws (500mm)
250ml black exterior paint
Measurements
These are the measurements and cuts for one planter. If you’d like to make two, cut double of everything below.
Treated Timber Frame
4 x 536mm
4 x 506mm
4 x 600mm
8 per side, 32 total at 620mm
2 x 565mm and 2 x 450mm for the top platform

How To
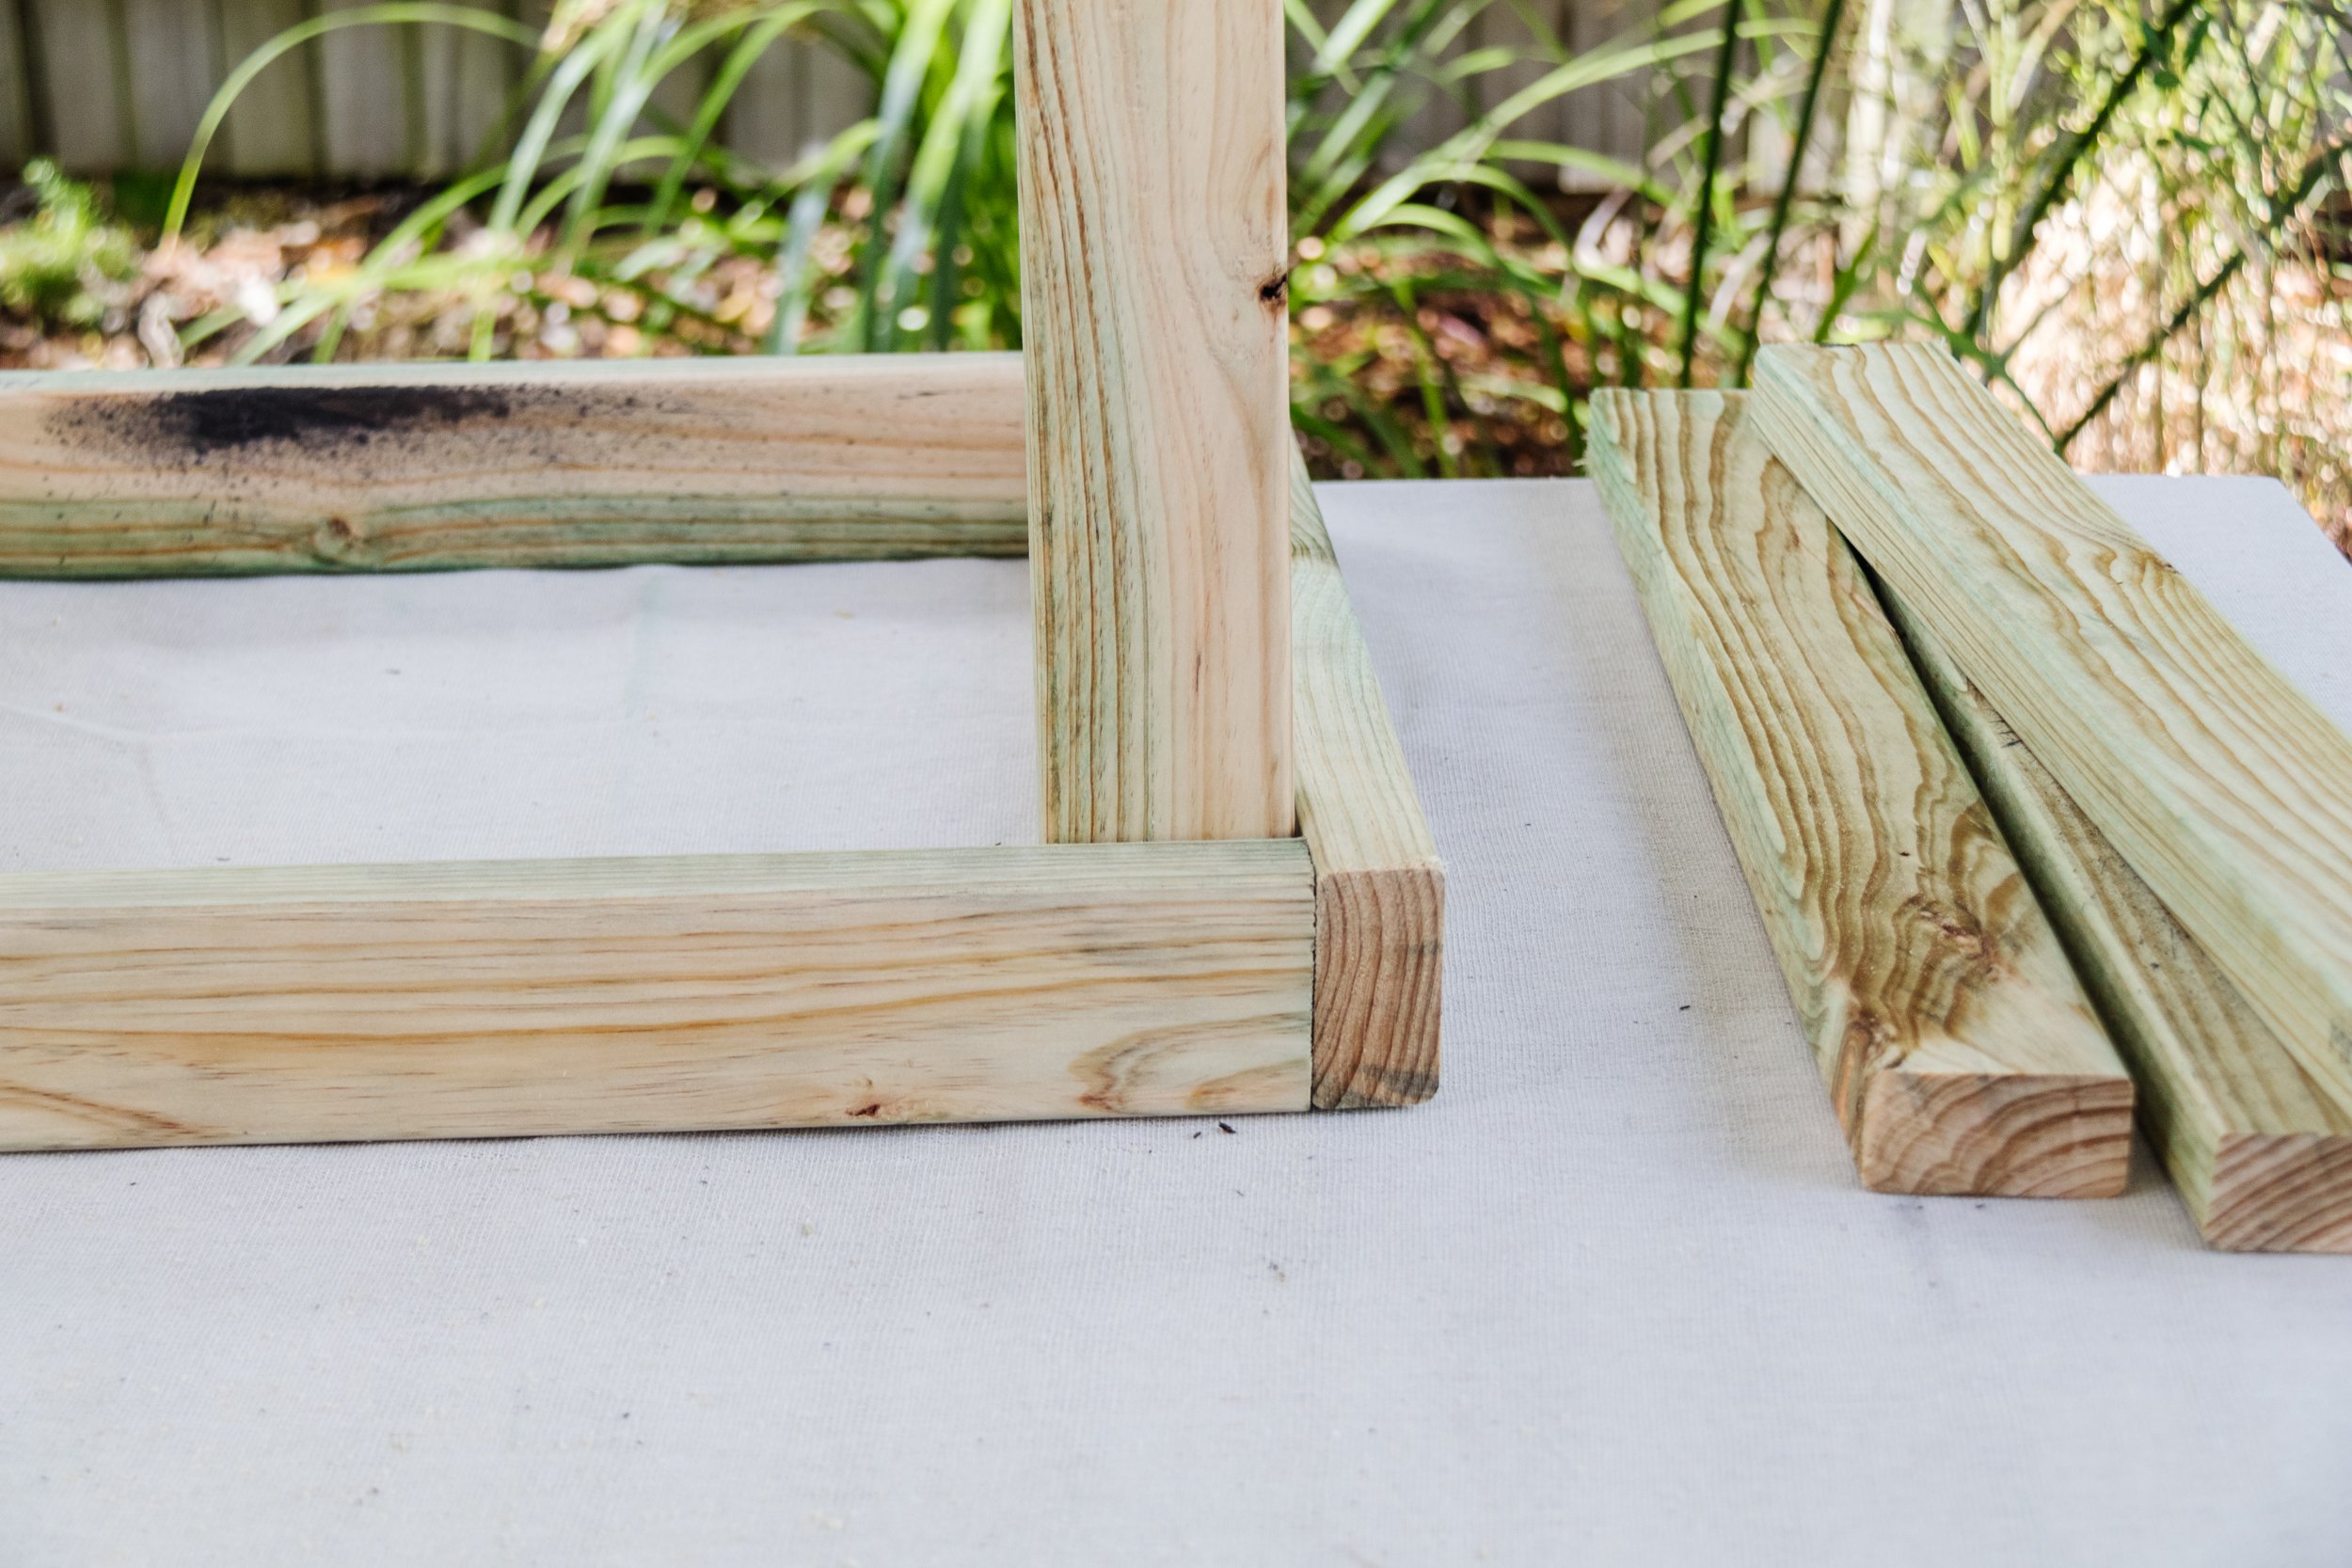
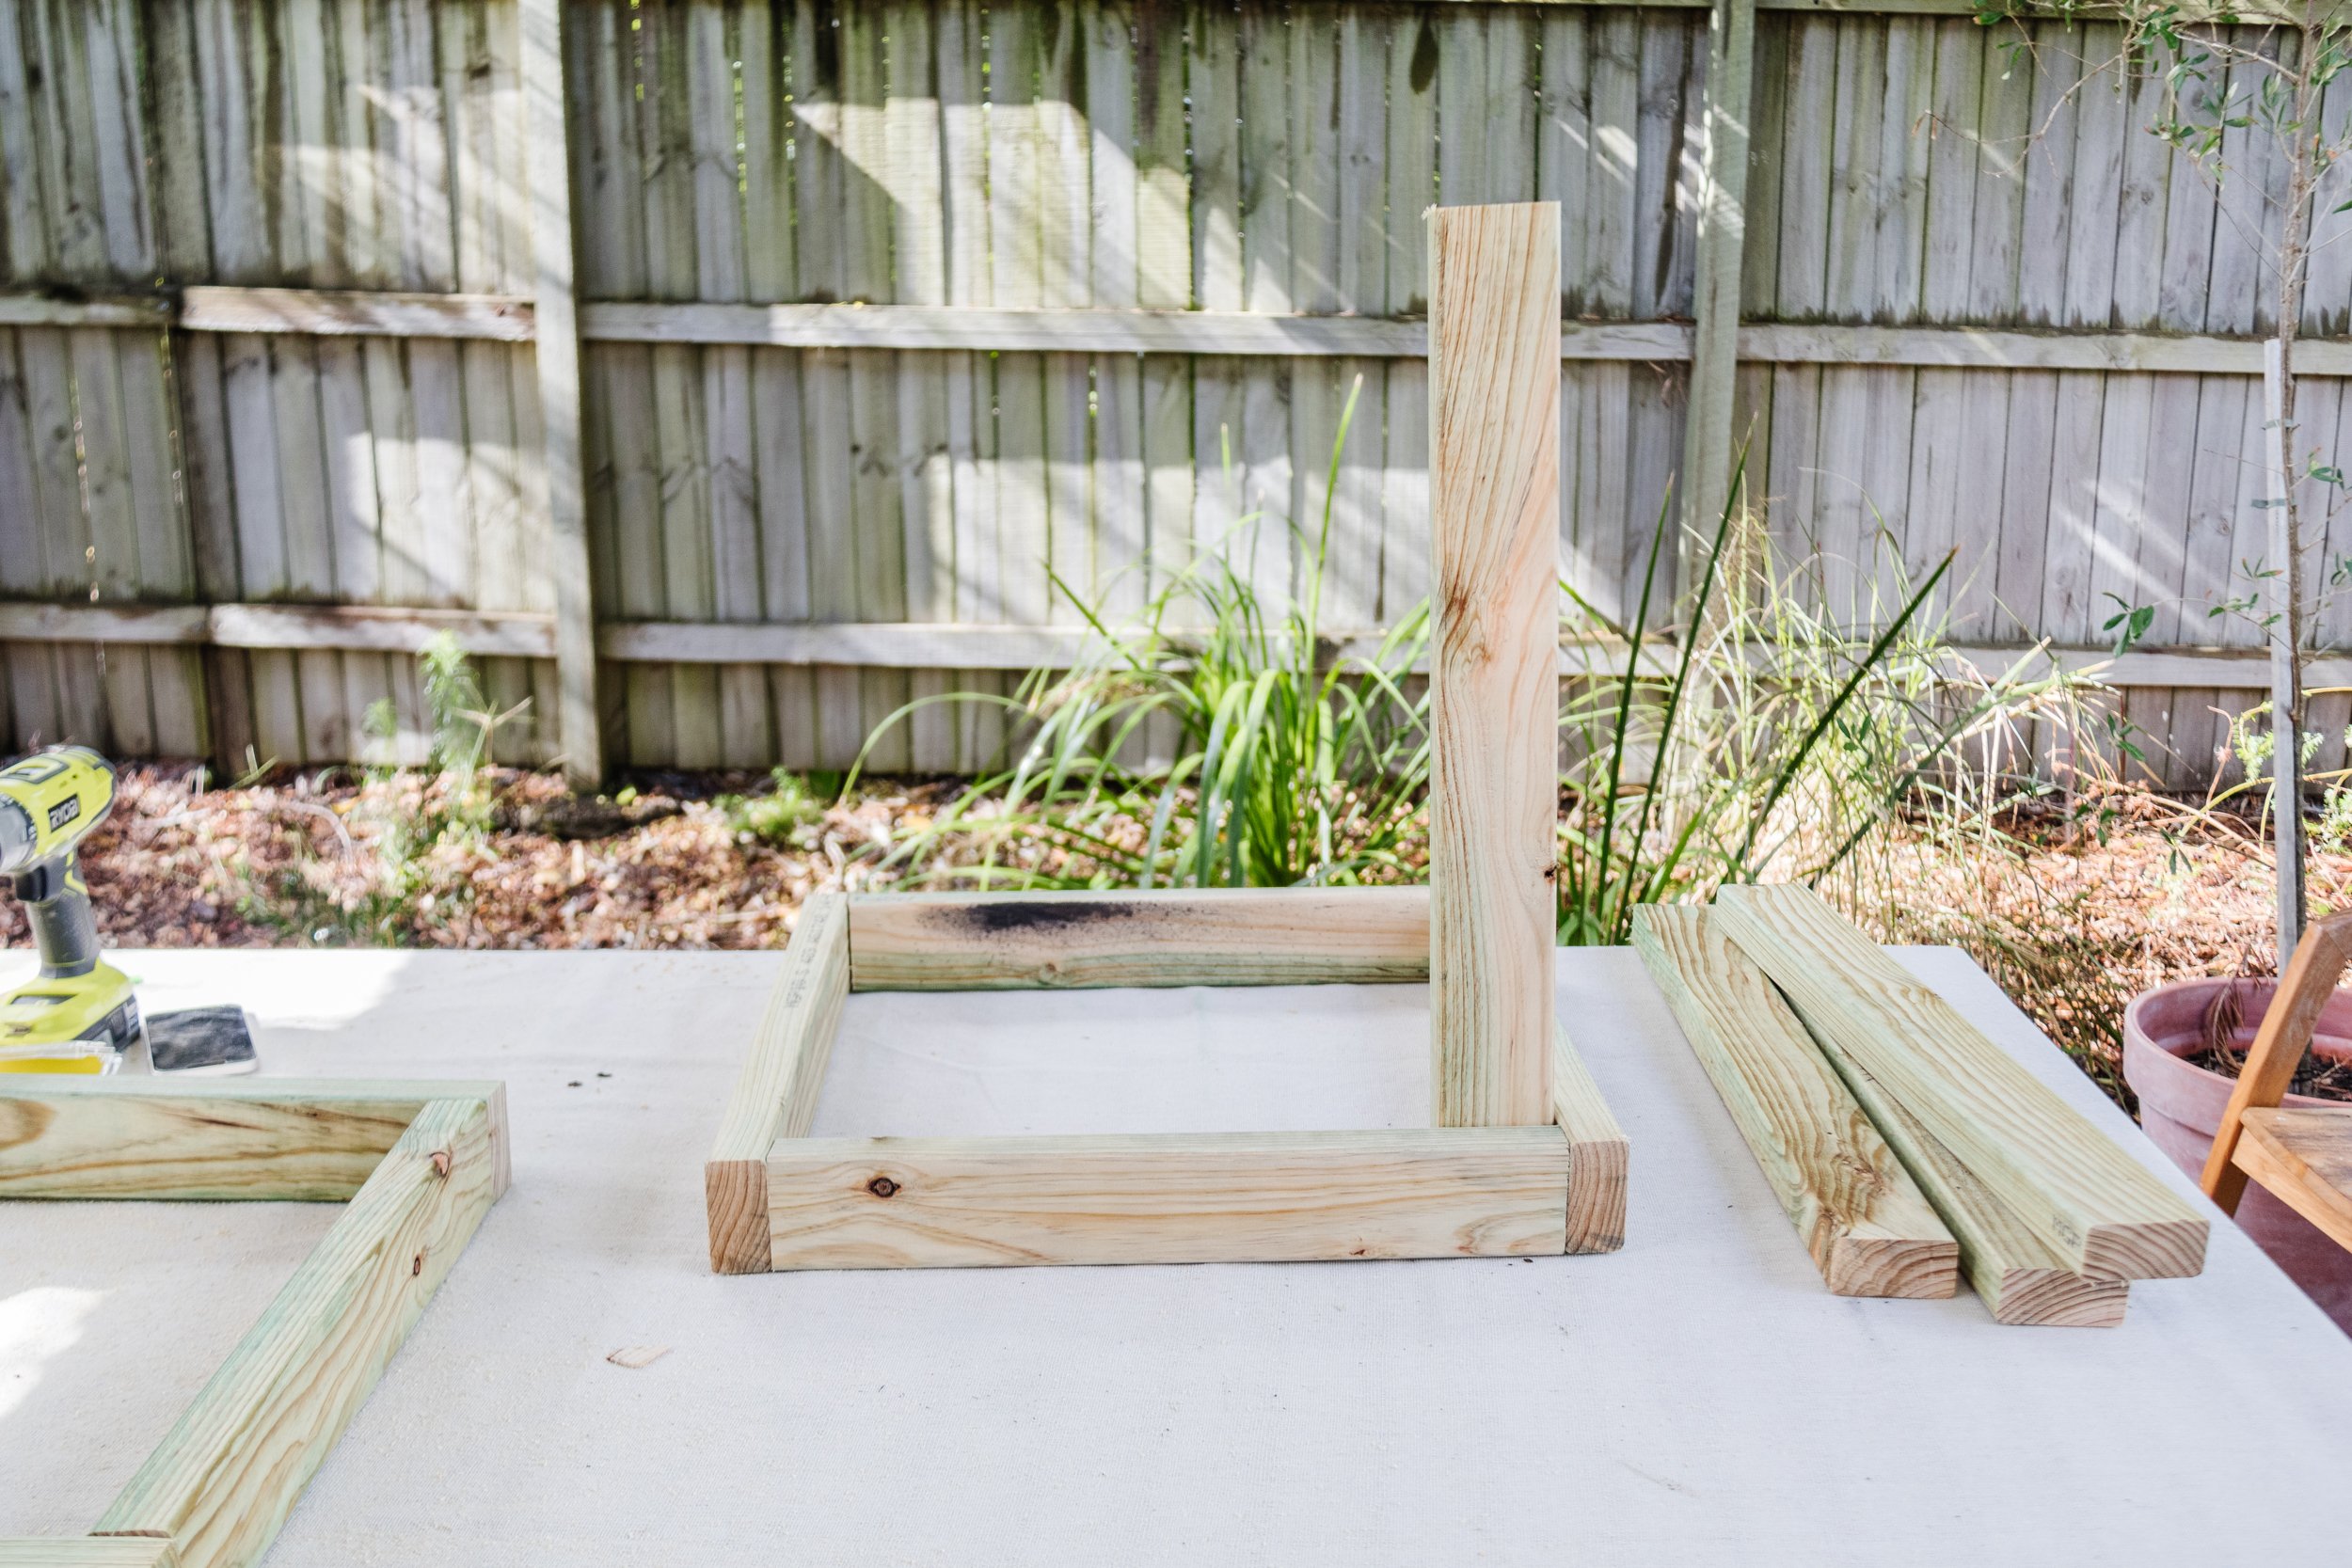
Step 1: The first step is to make the Treated Timber Frame and the Ekodeck Screening cuts using a measuring tape, pen and mitre saw. Lay out the timber when finished and set the Ekodeck Screening cuts aside. You will have some offcuts leftover so please reserve these.
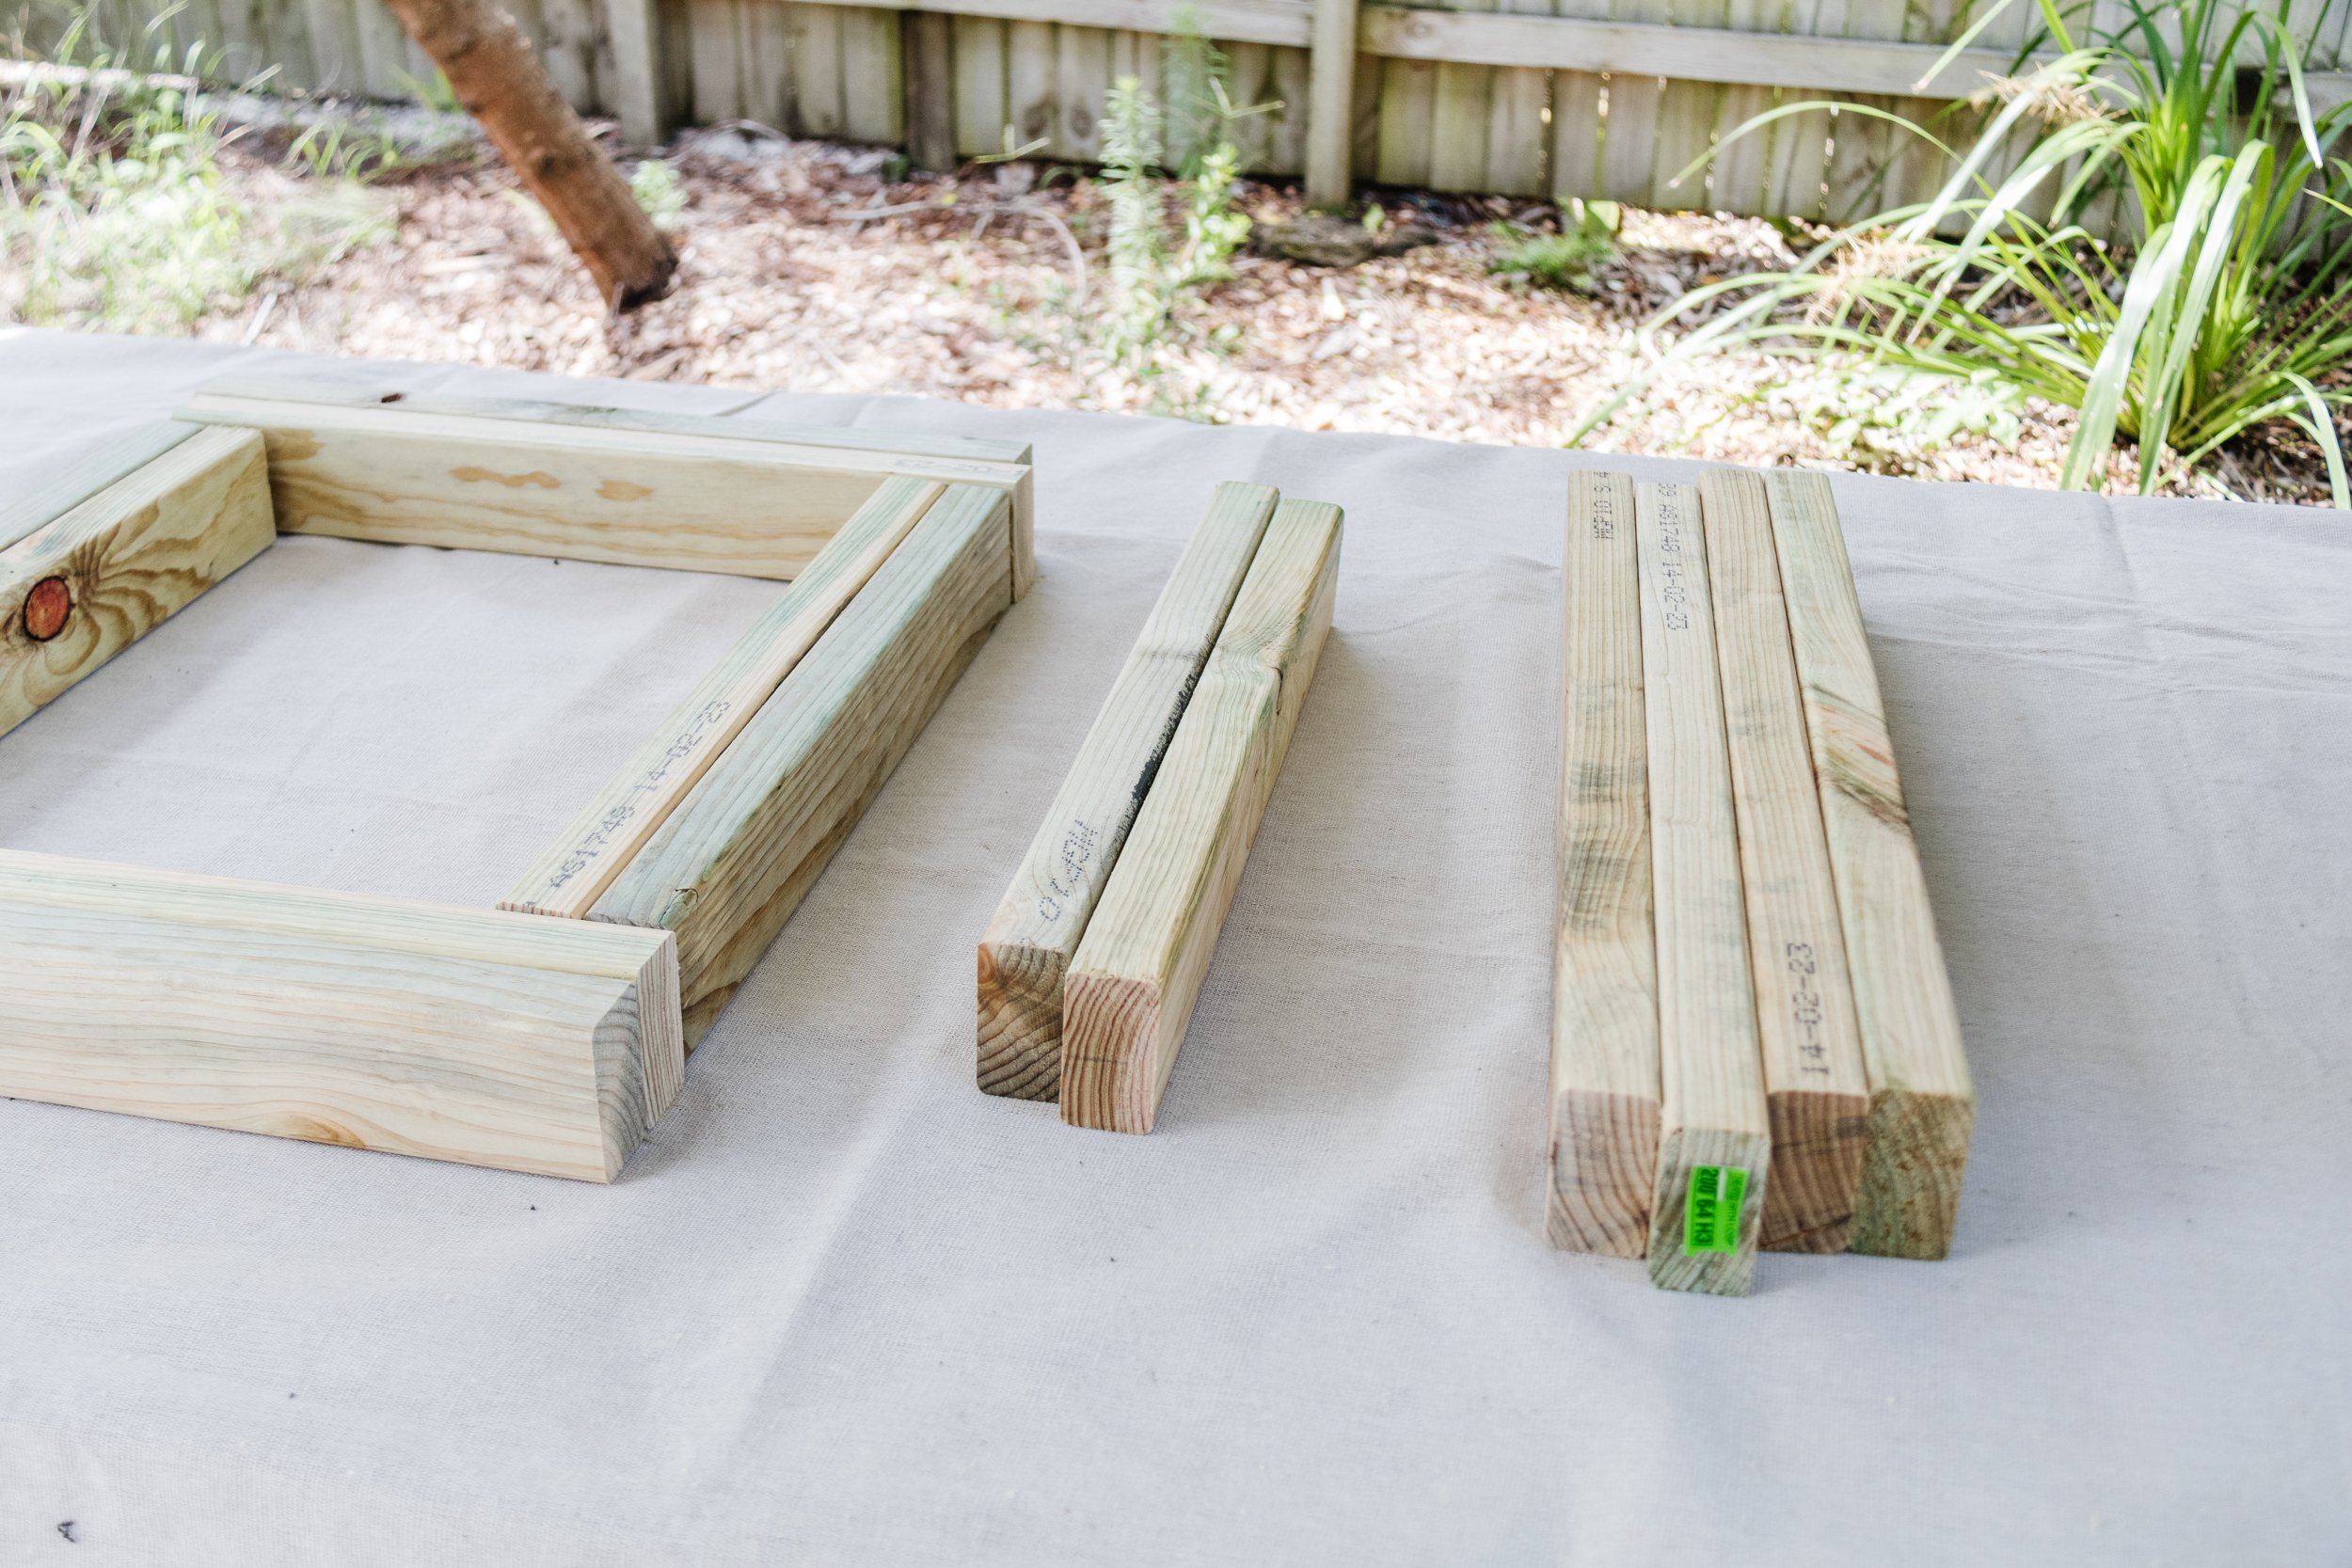
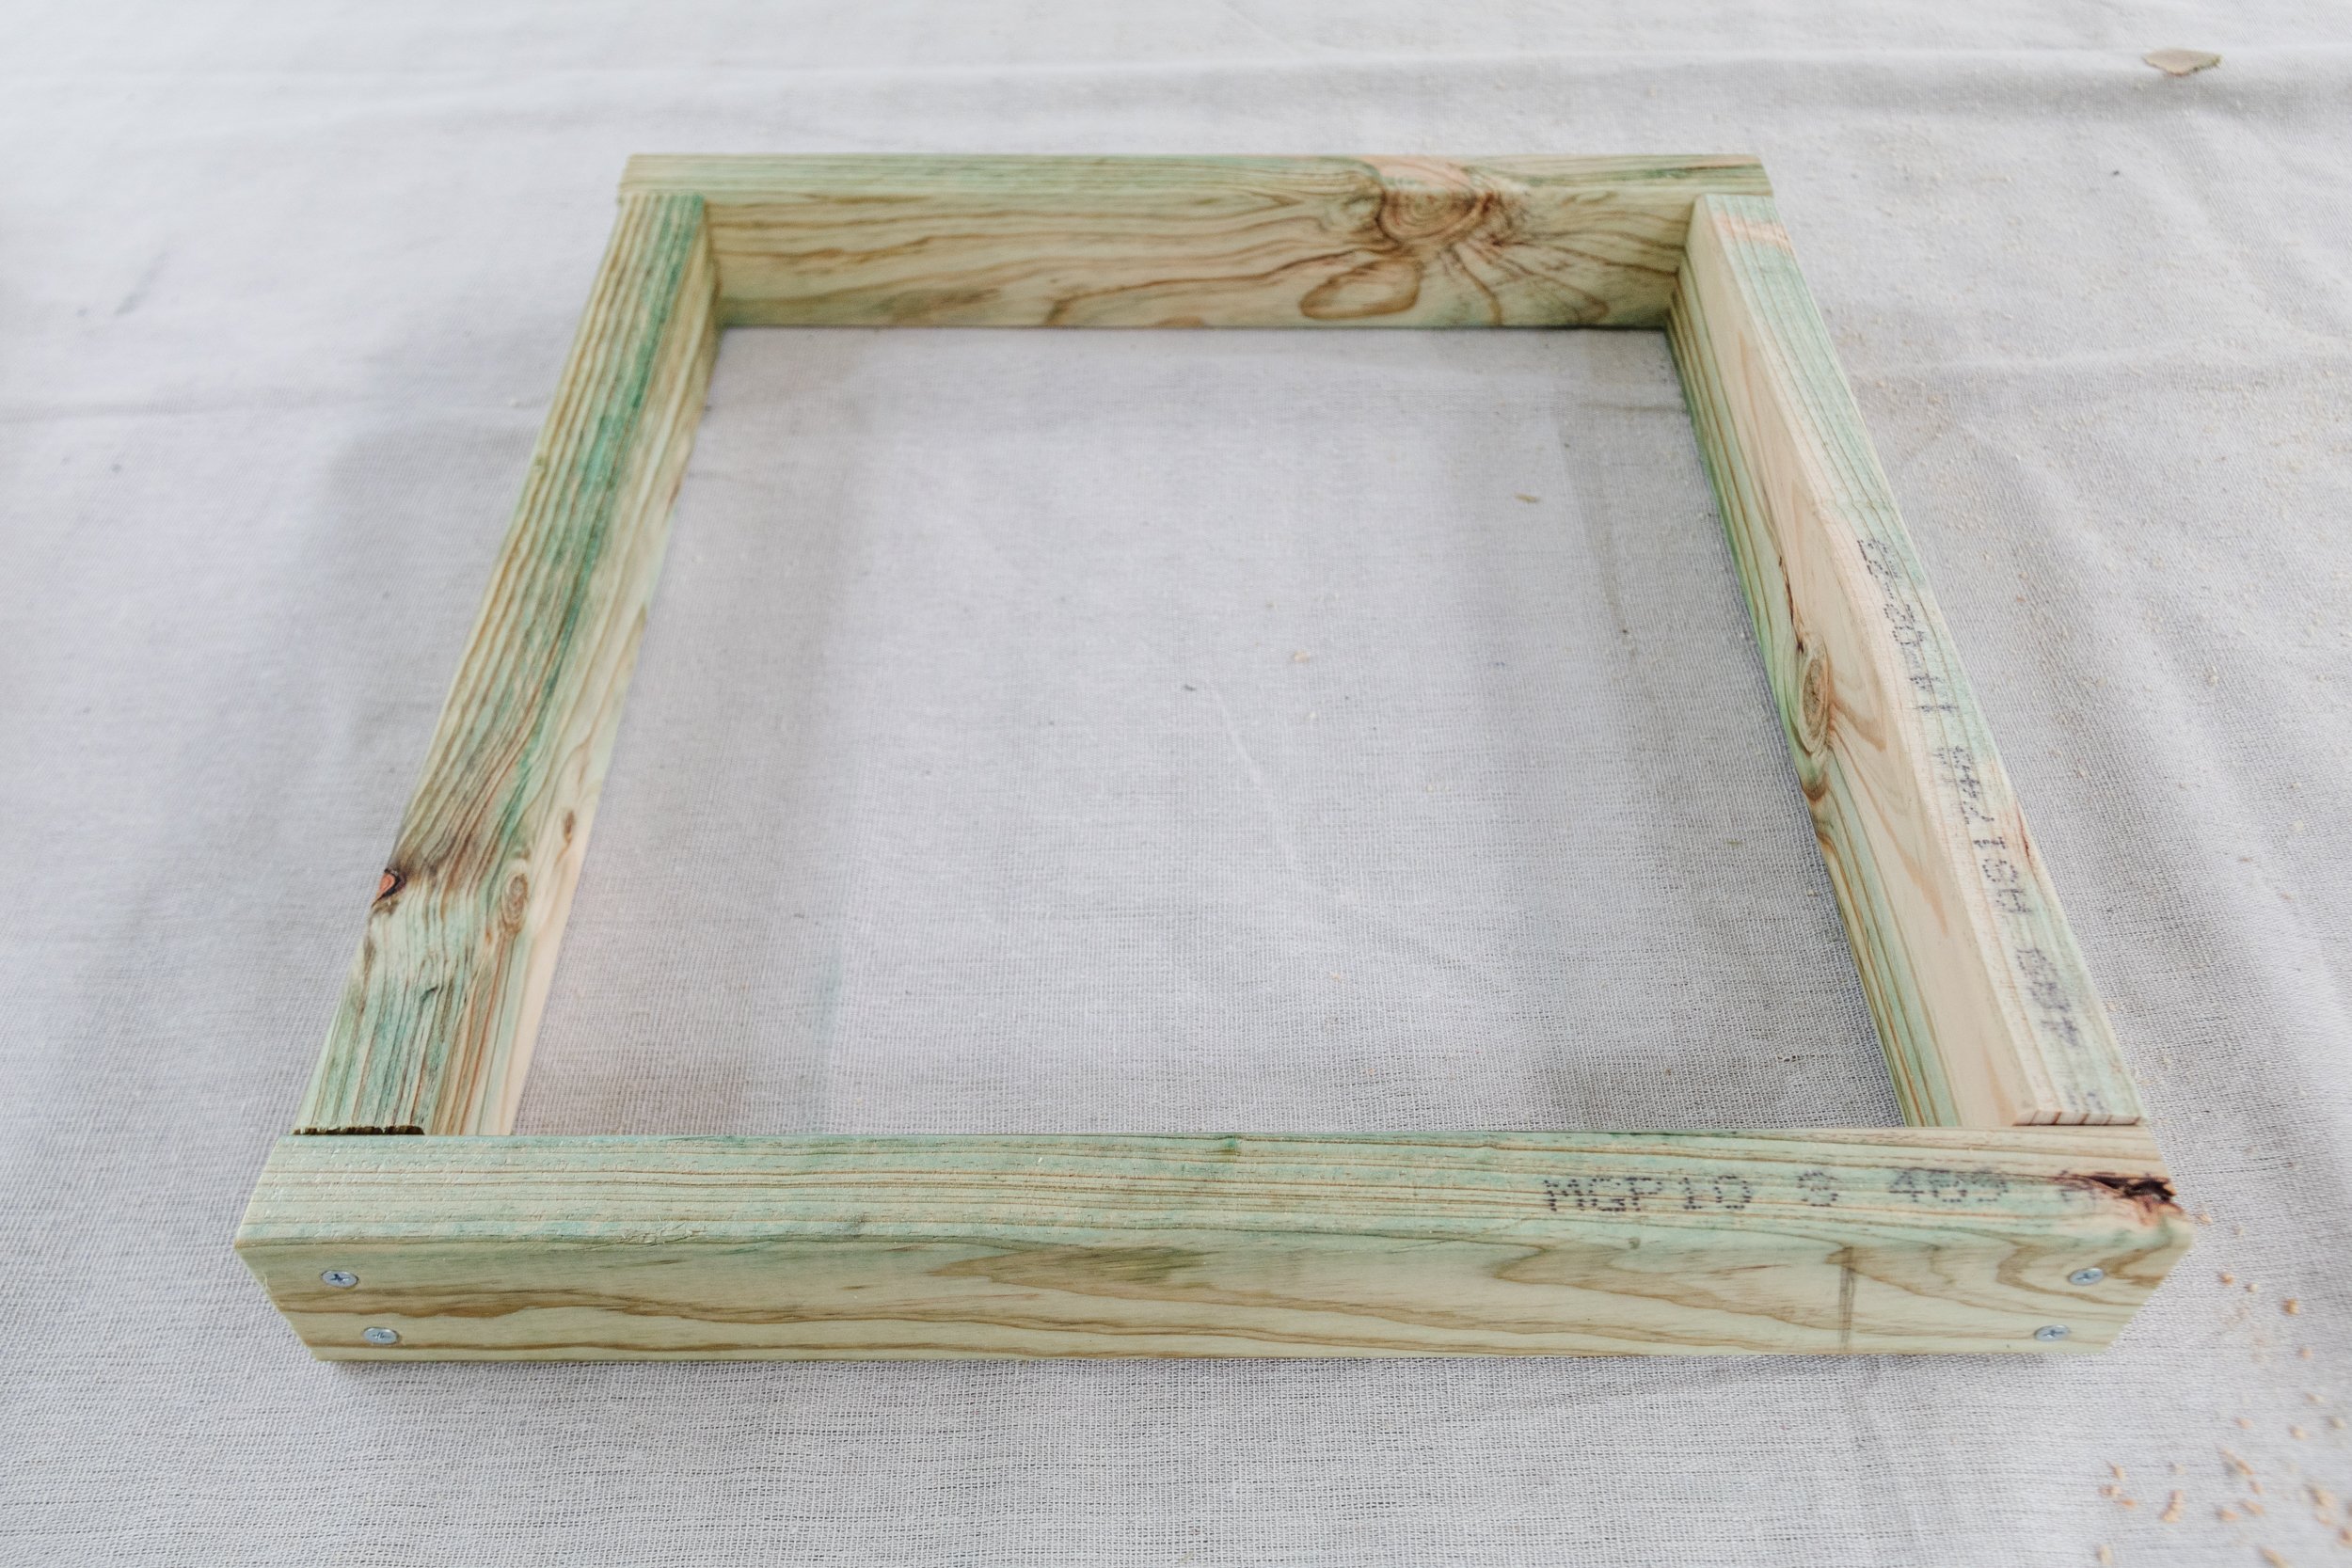
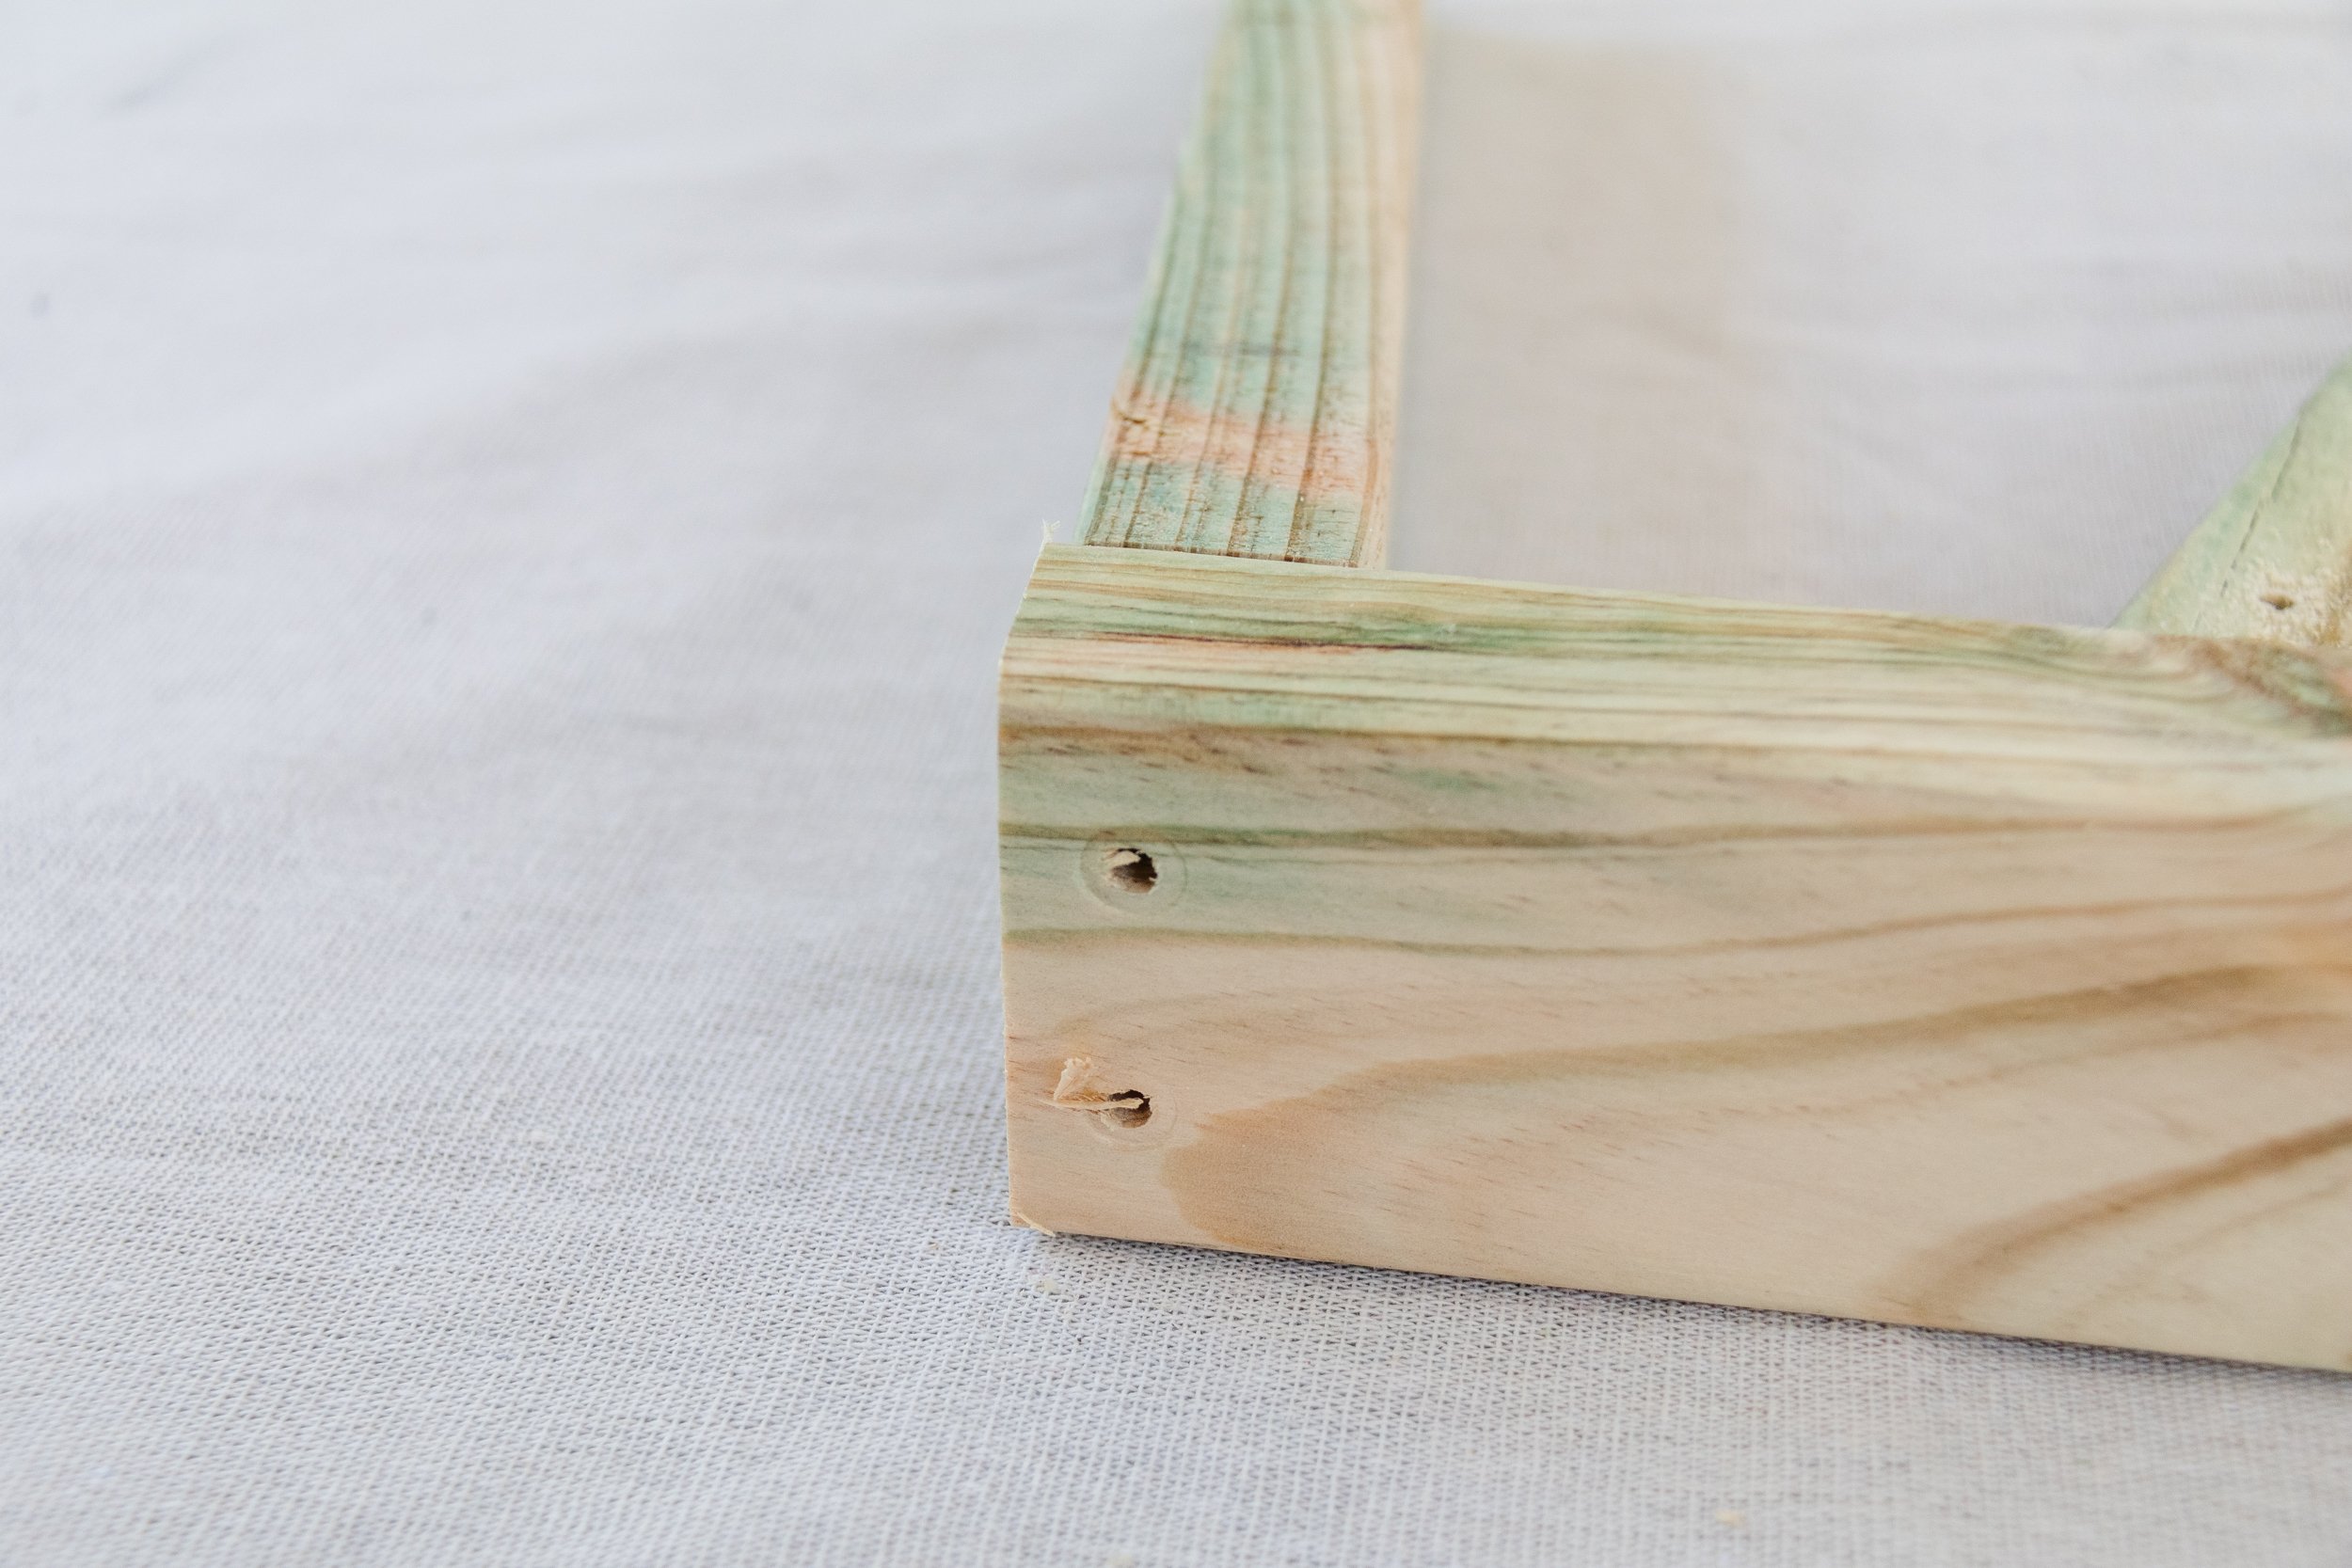
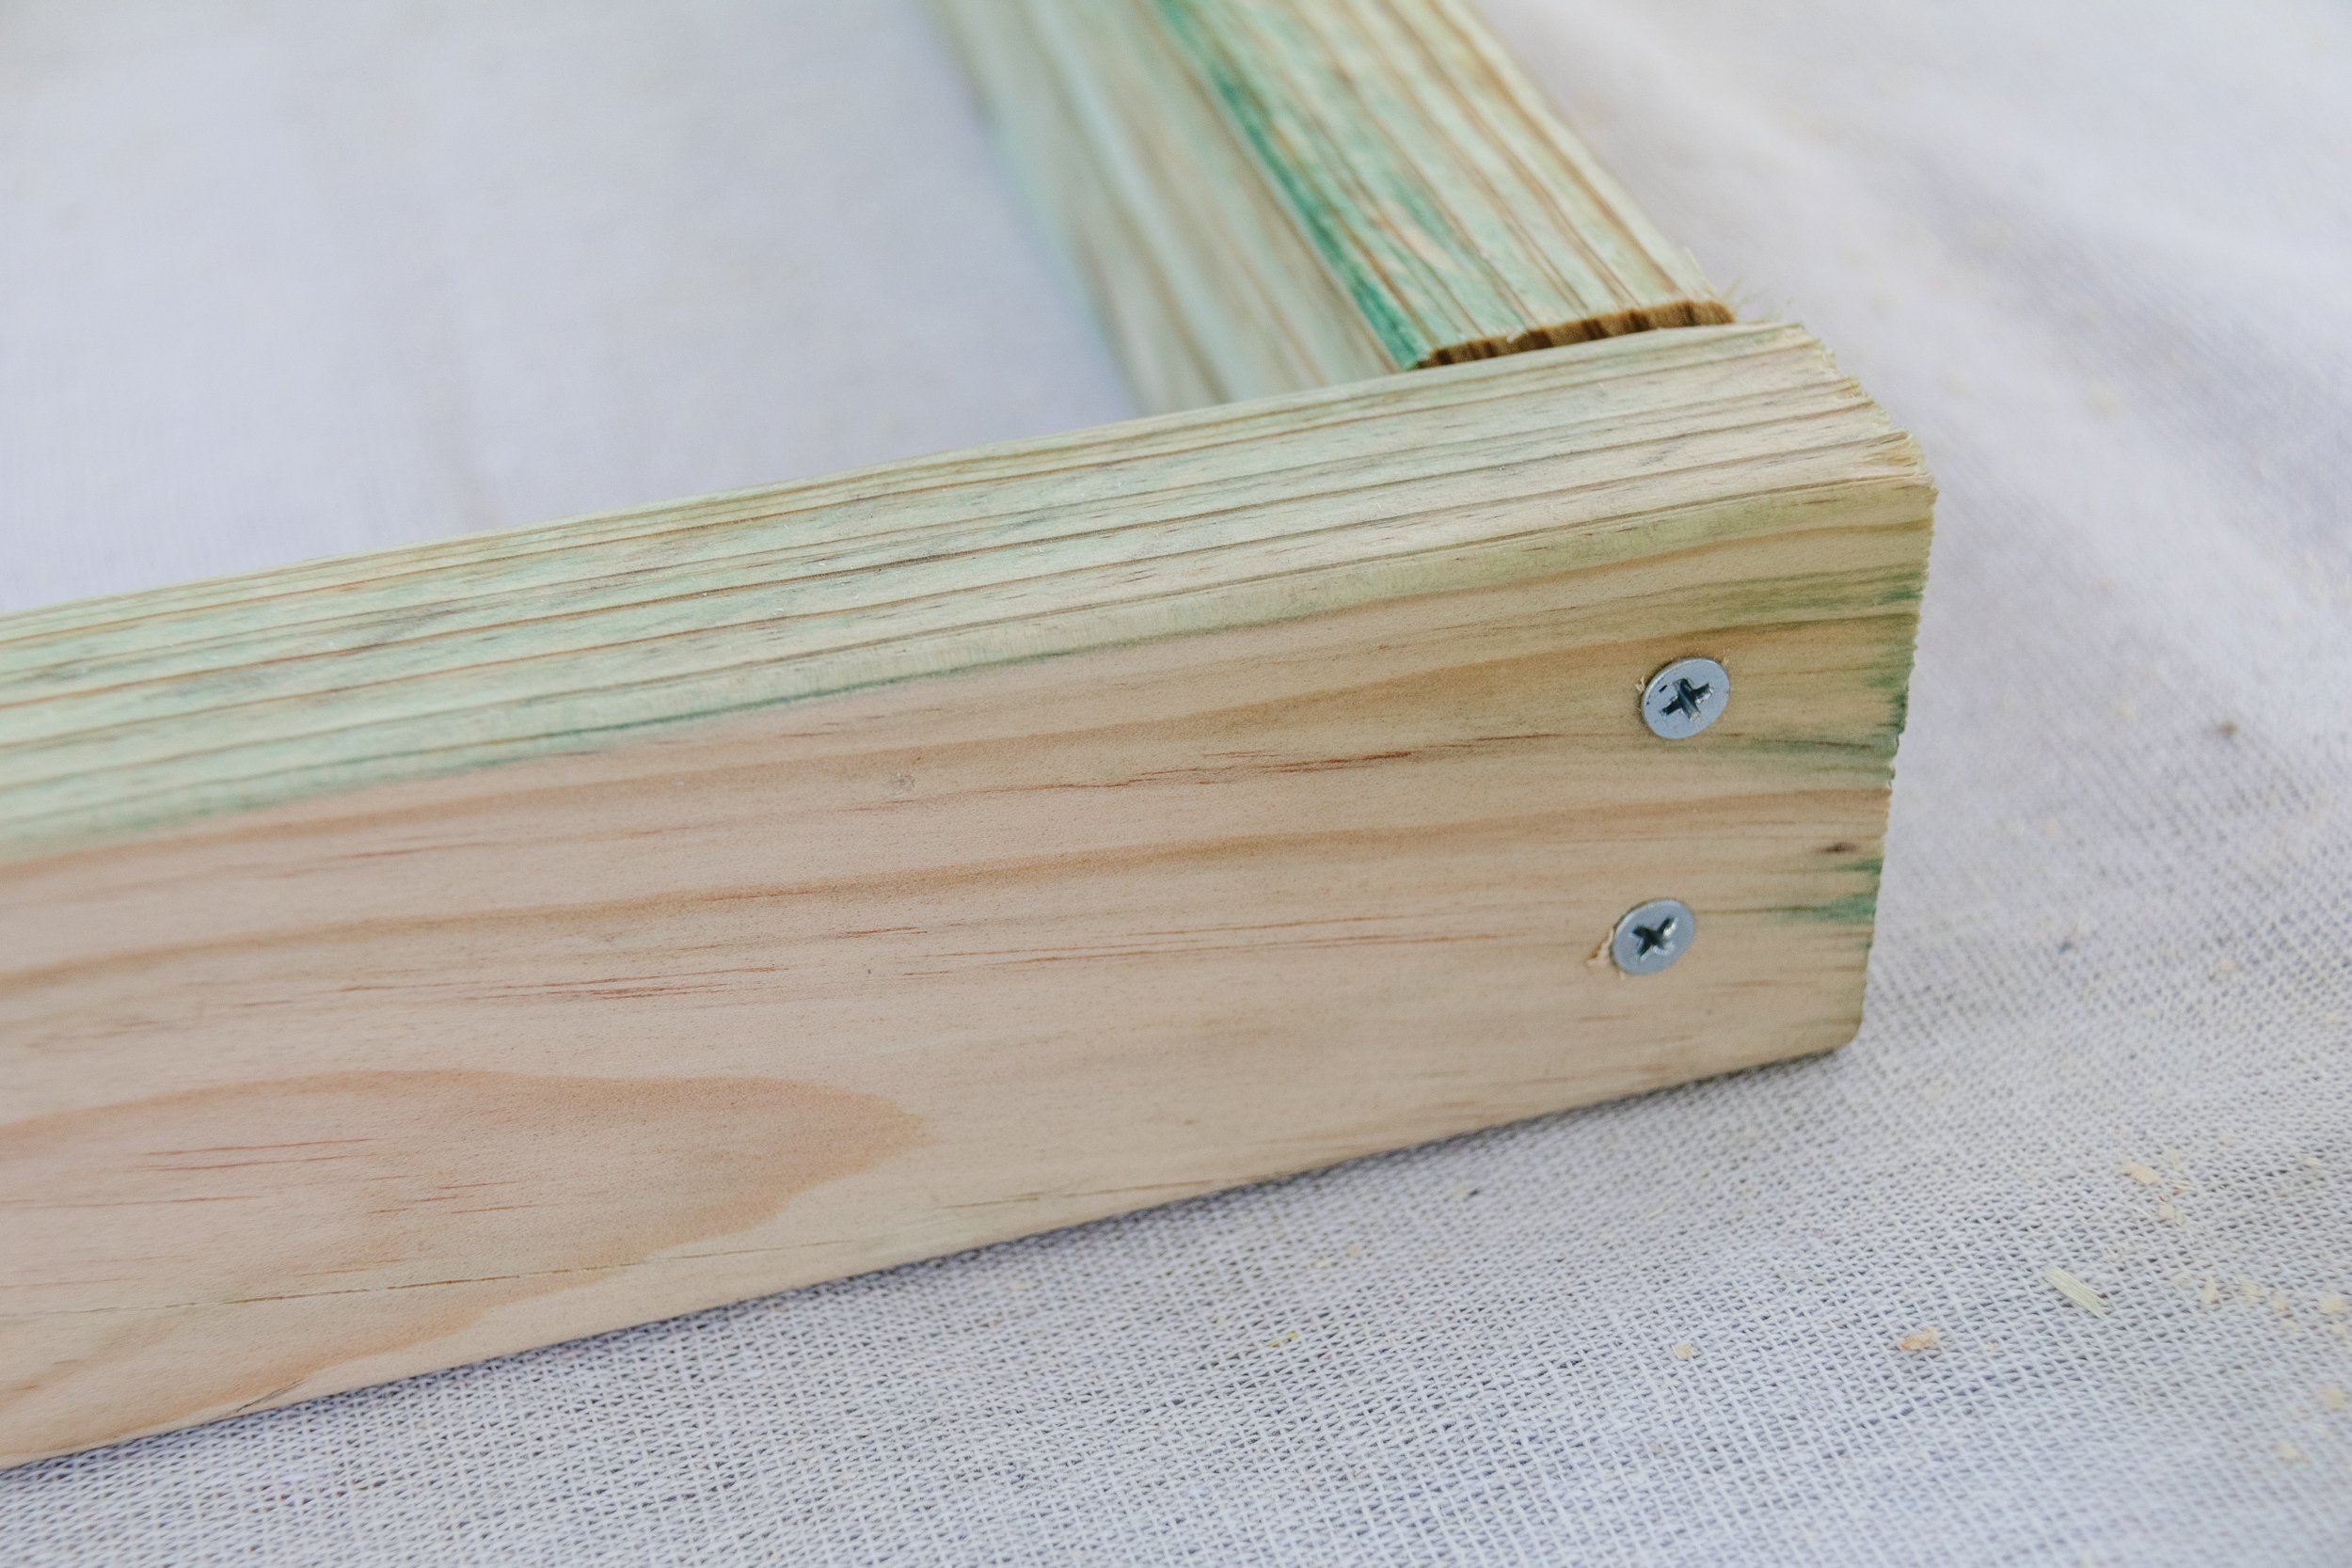
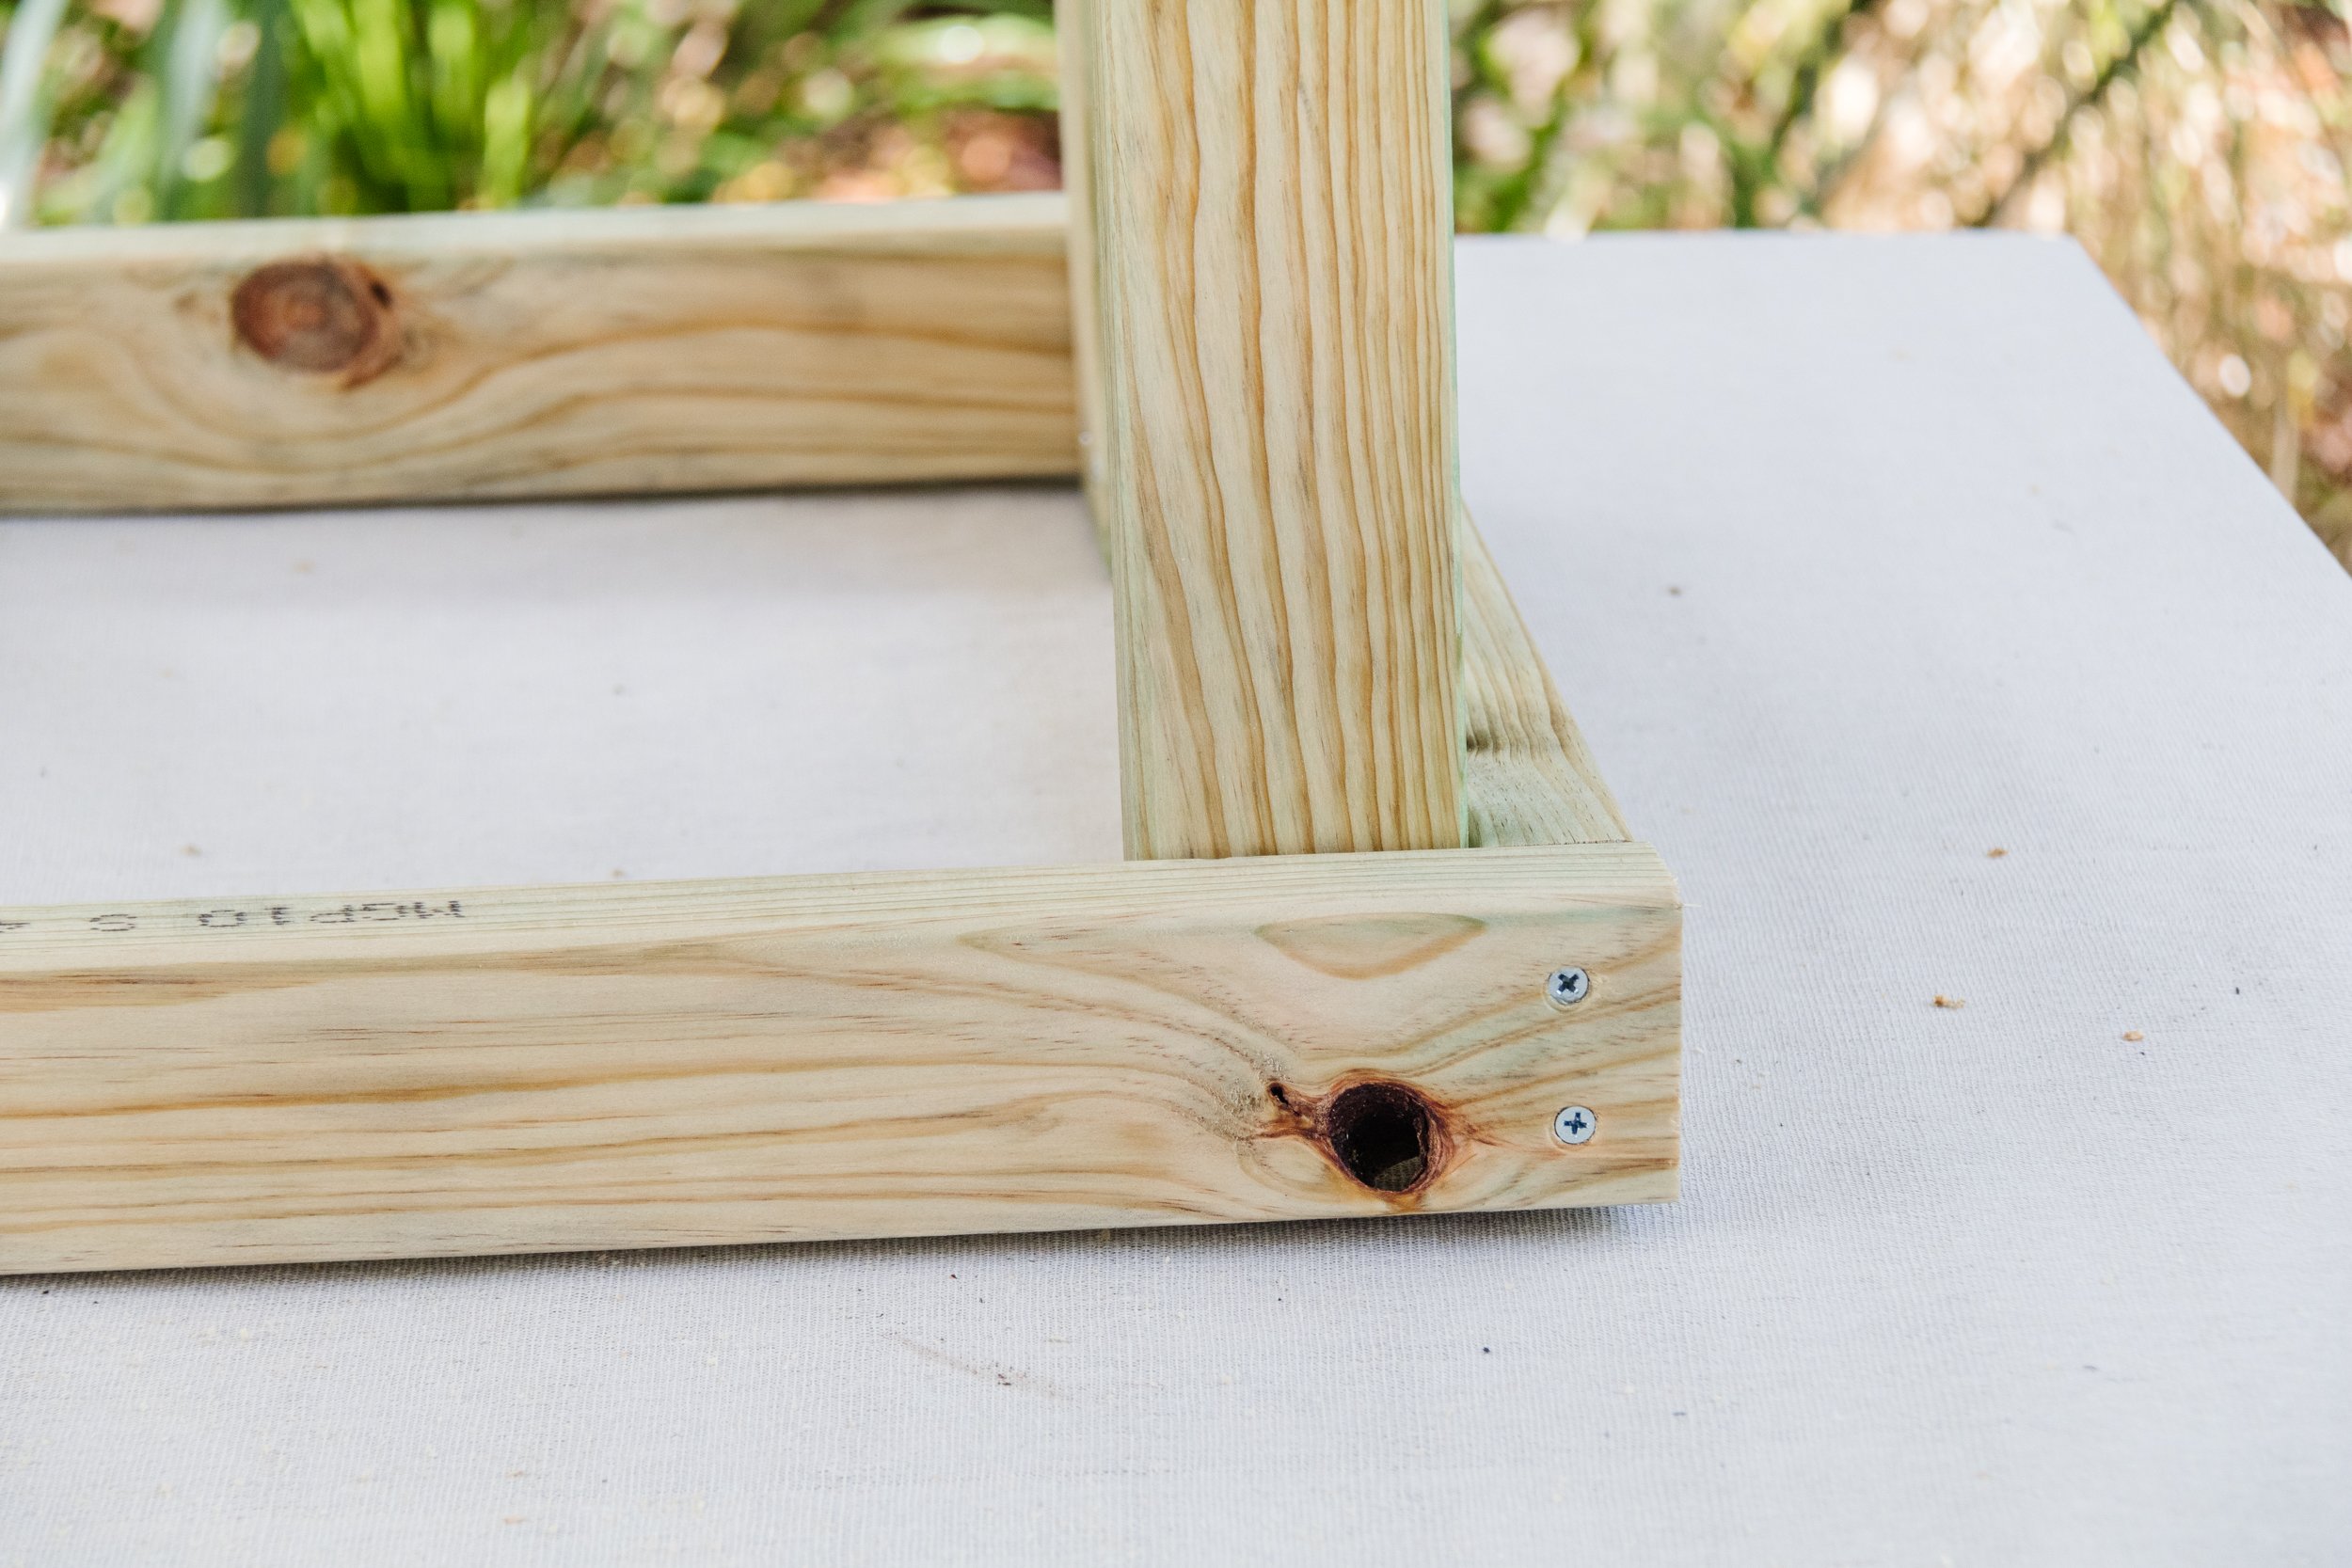
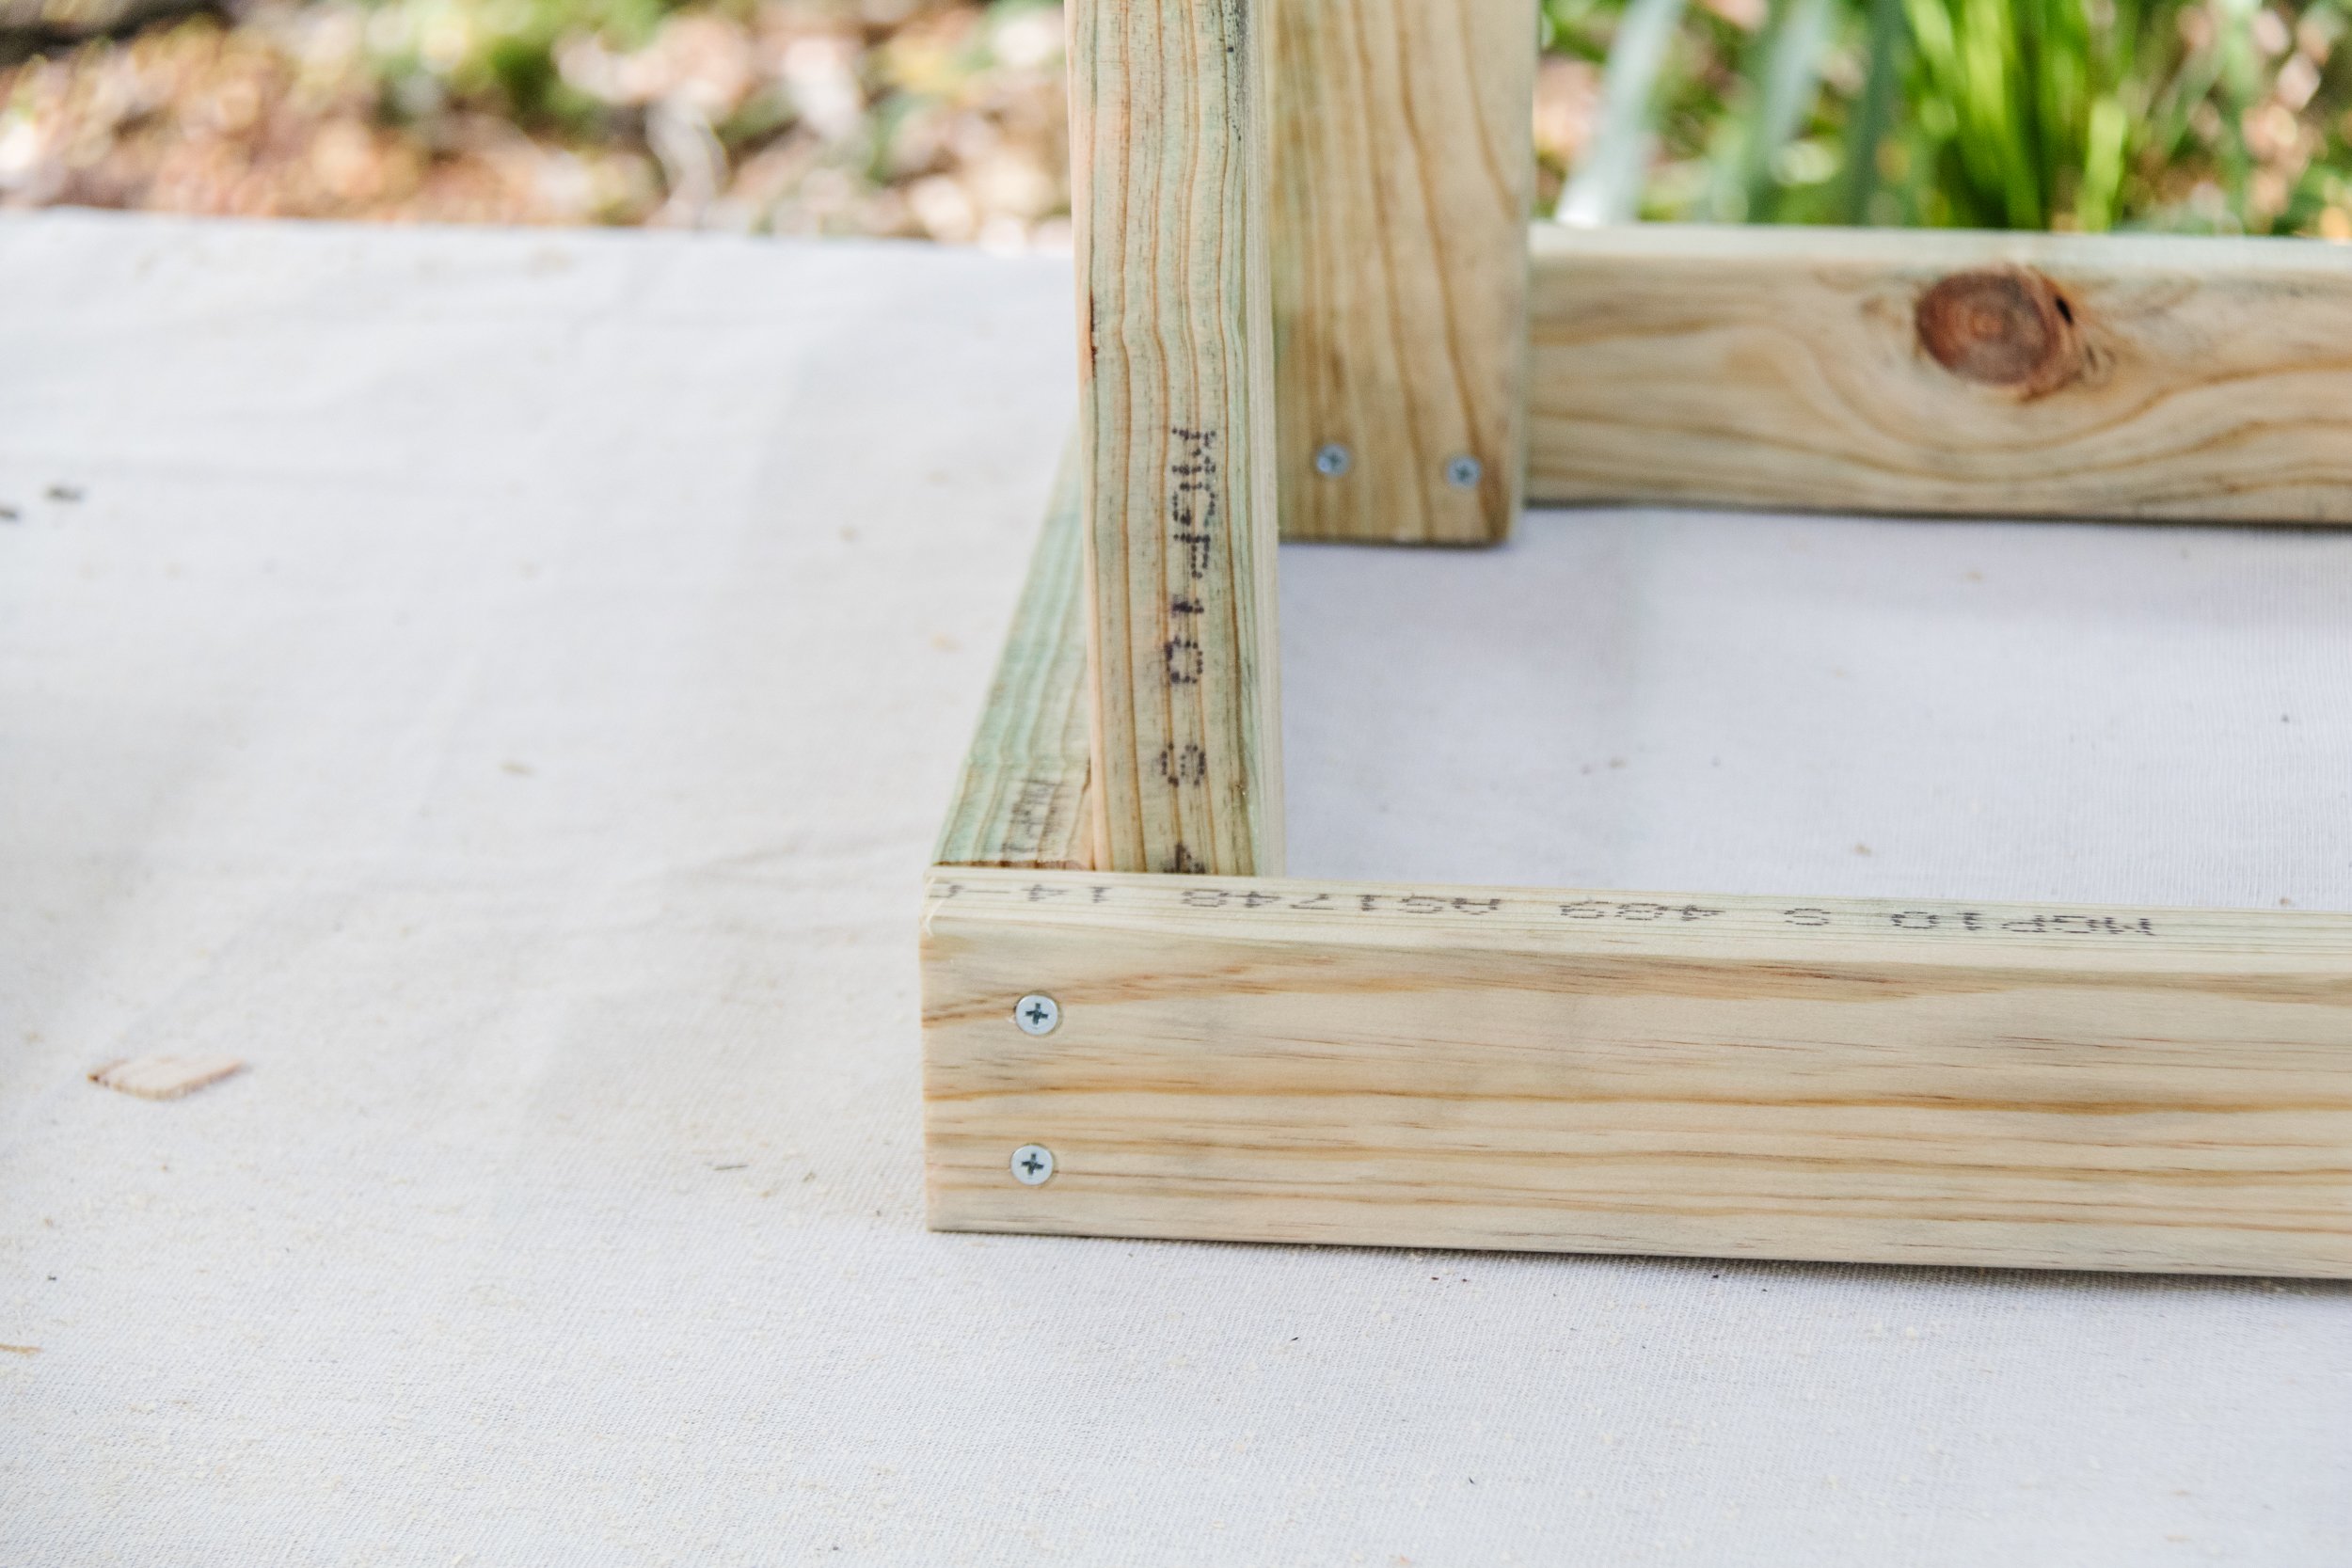
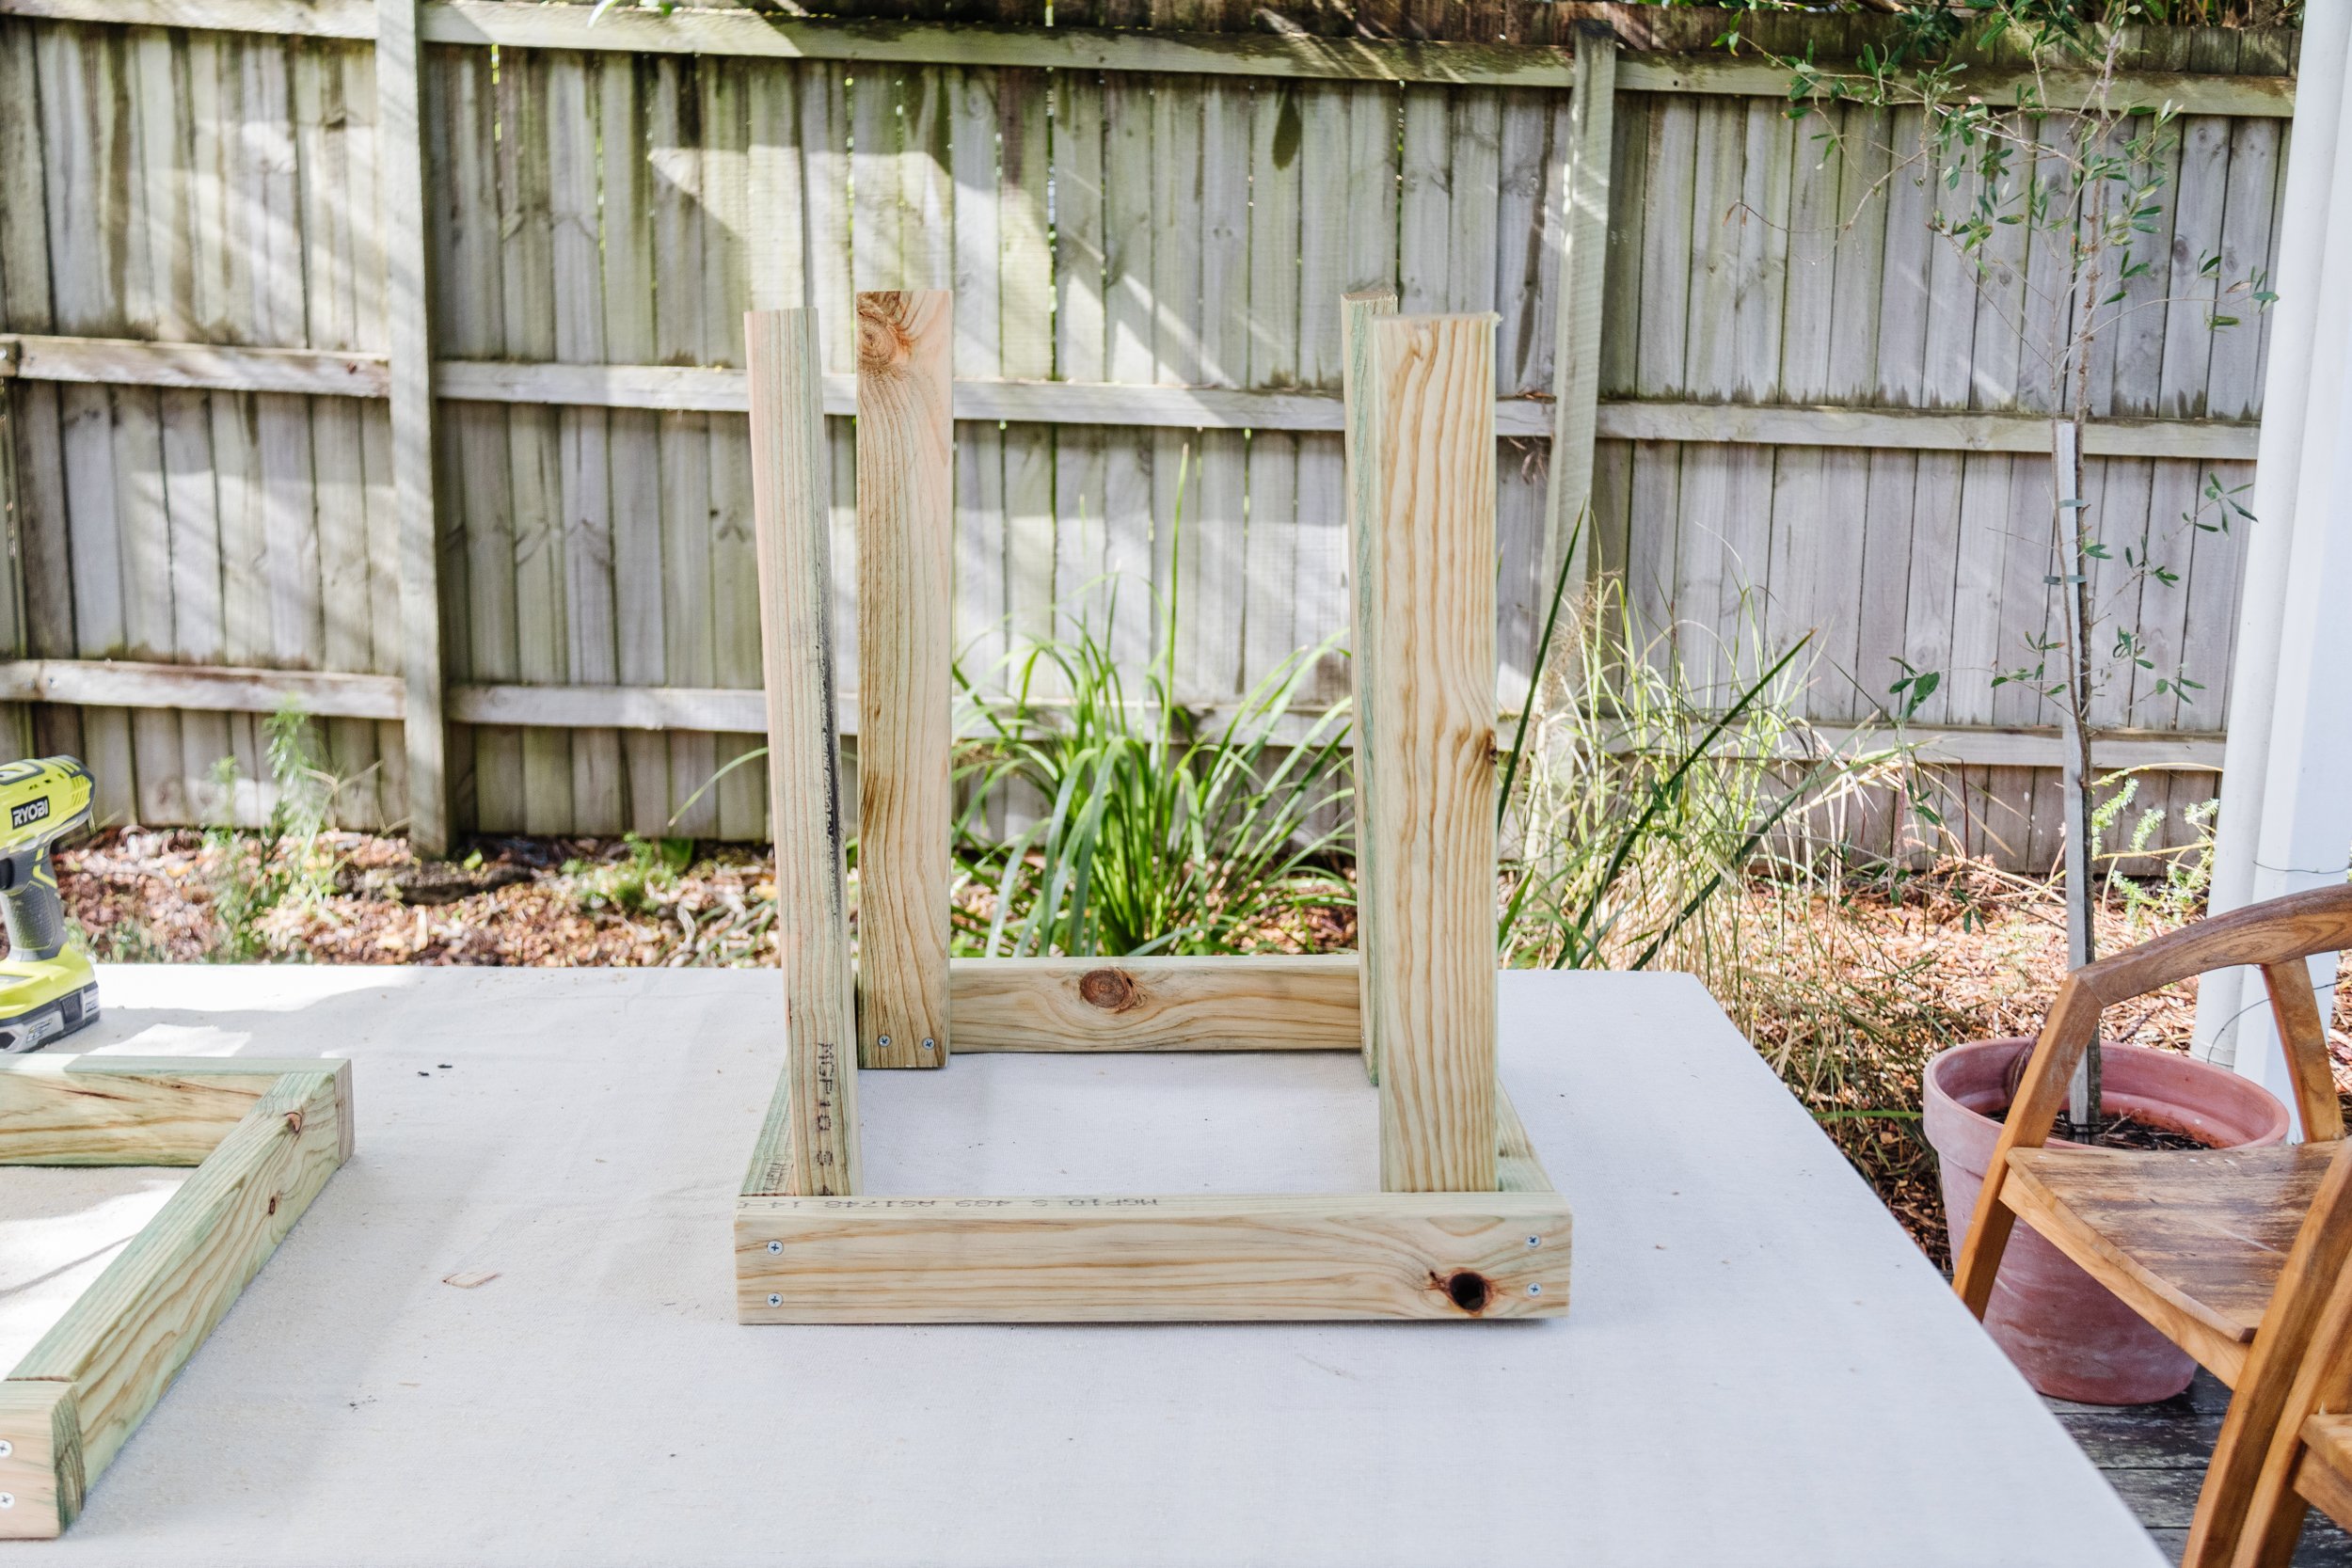
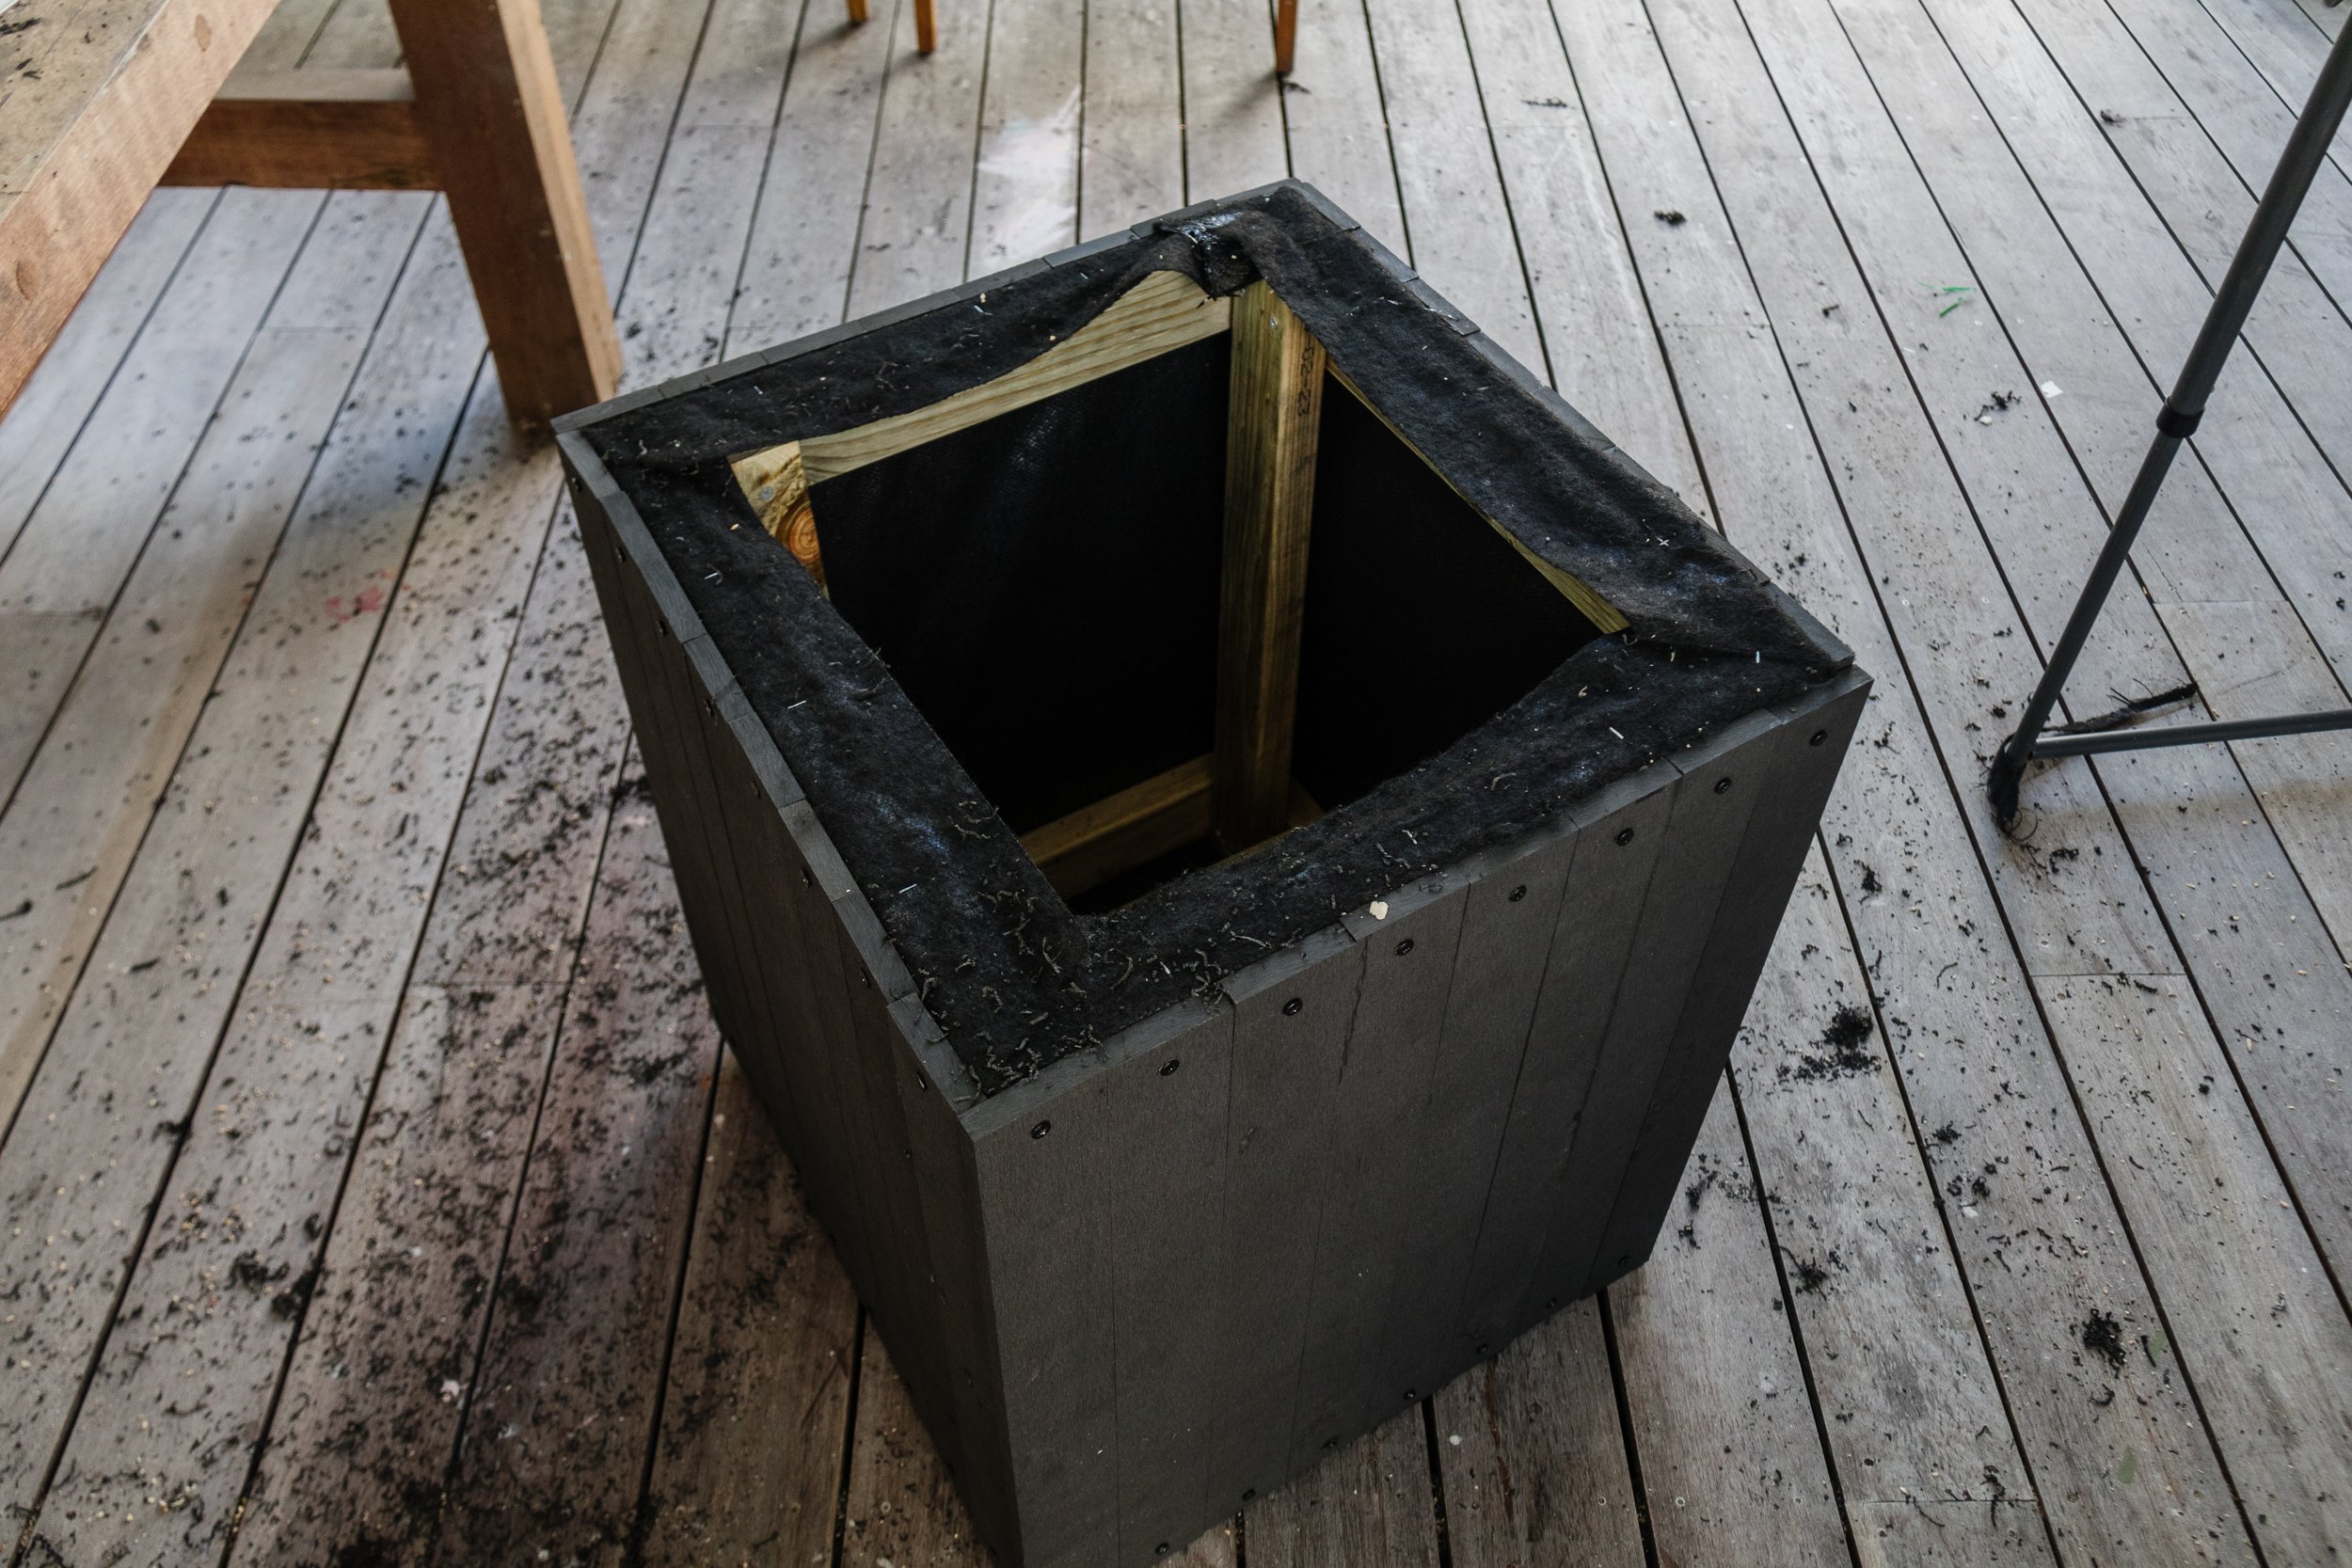
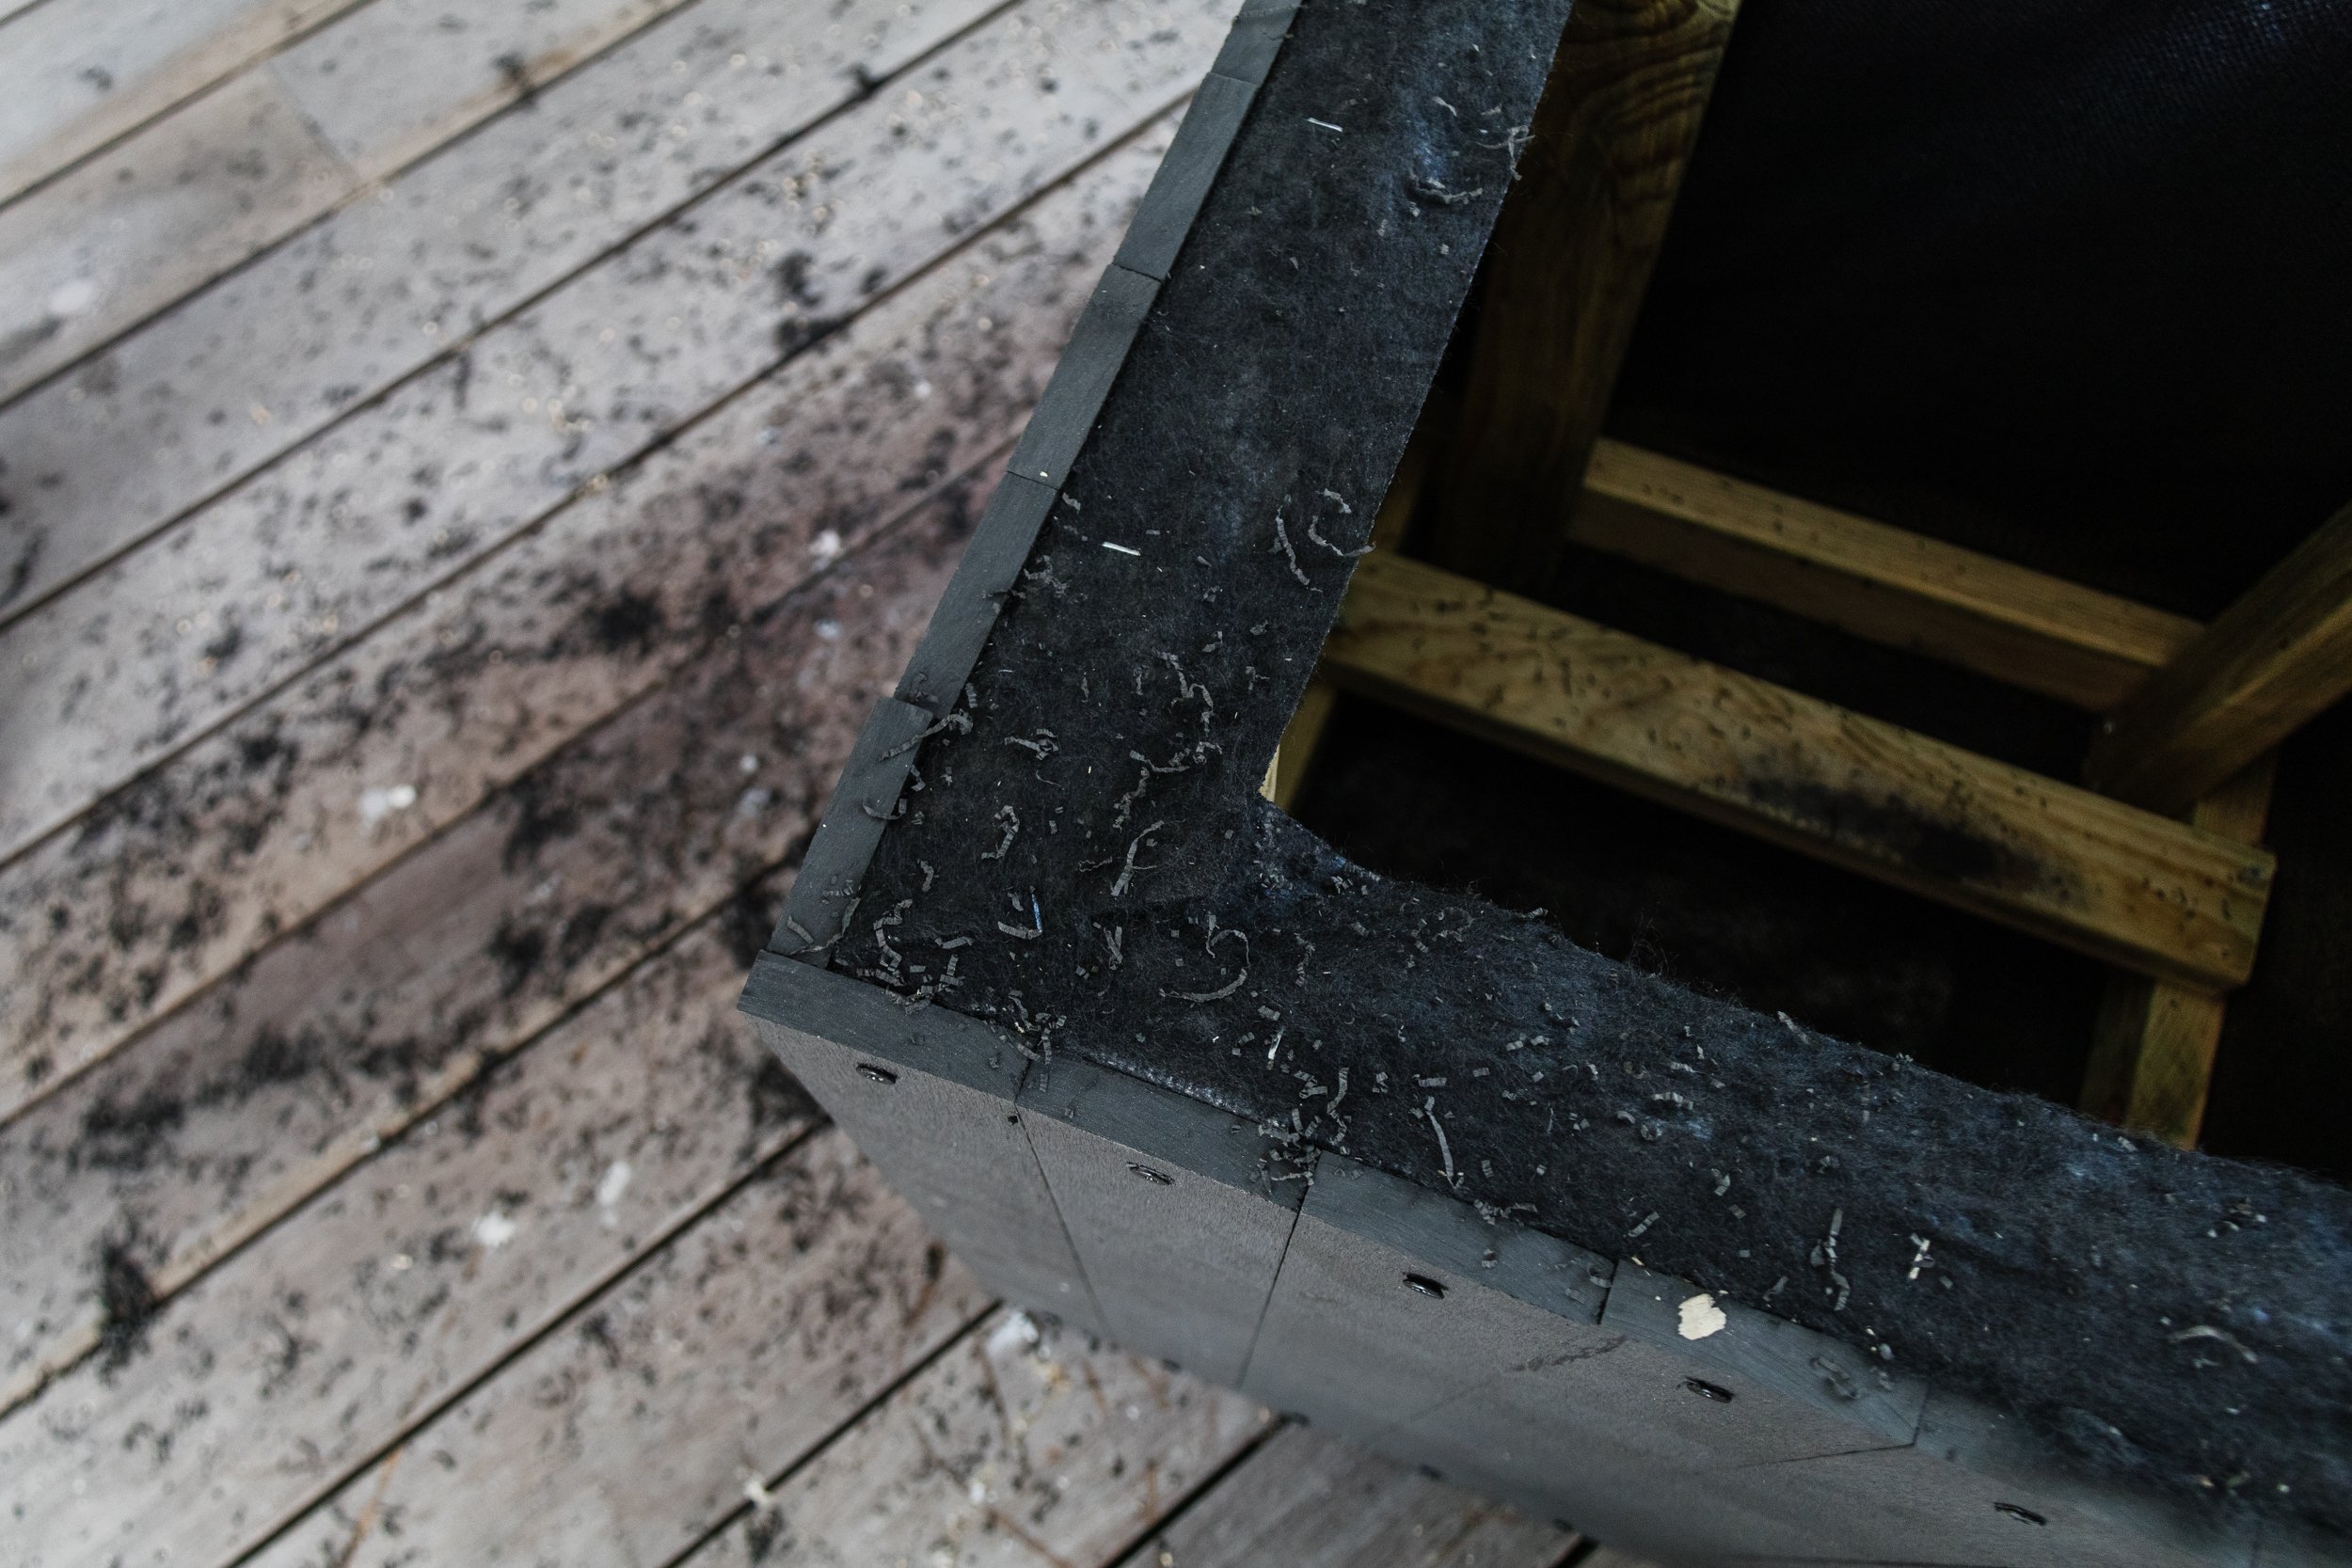
Step 2: Following this, it’s time to assemble the frame using treated pine. Drill two pilot holes on top of each other at each end of 2 x 536mm. Assemble these with 2 x 506mm on a flat surface to create a square, refer to photos. Screw the corners together using a drill and timber screws. Repeat this with the remaining 2 x 536mm and 2 x 506mm. You will now have the top and bottom base.
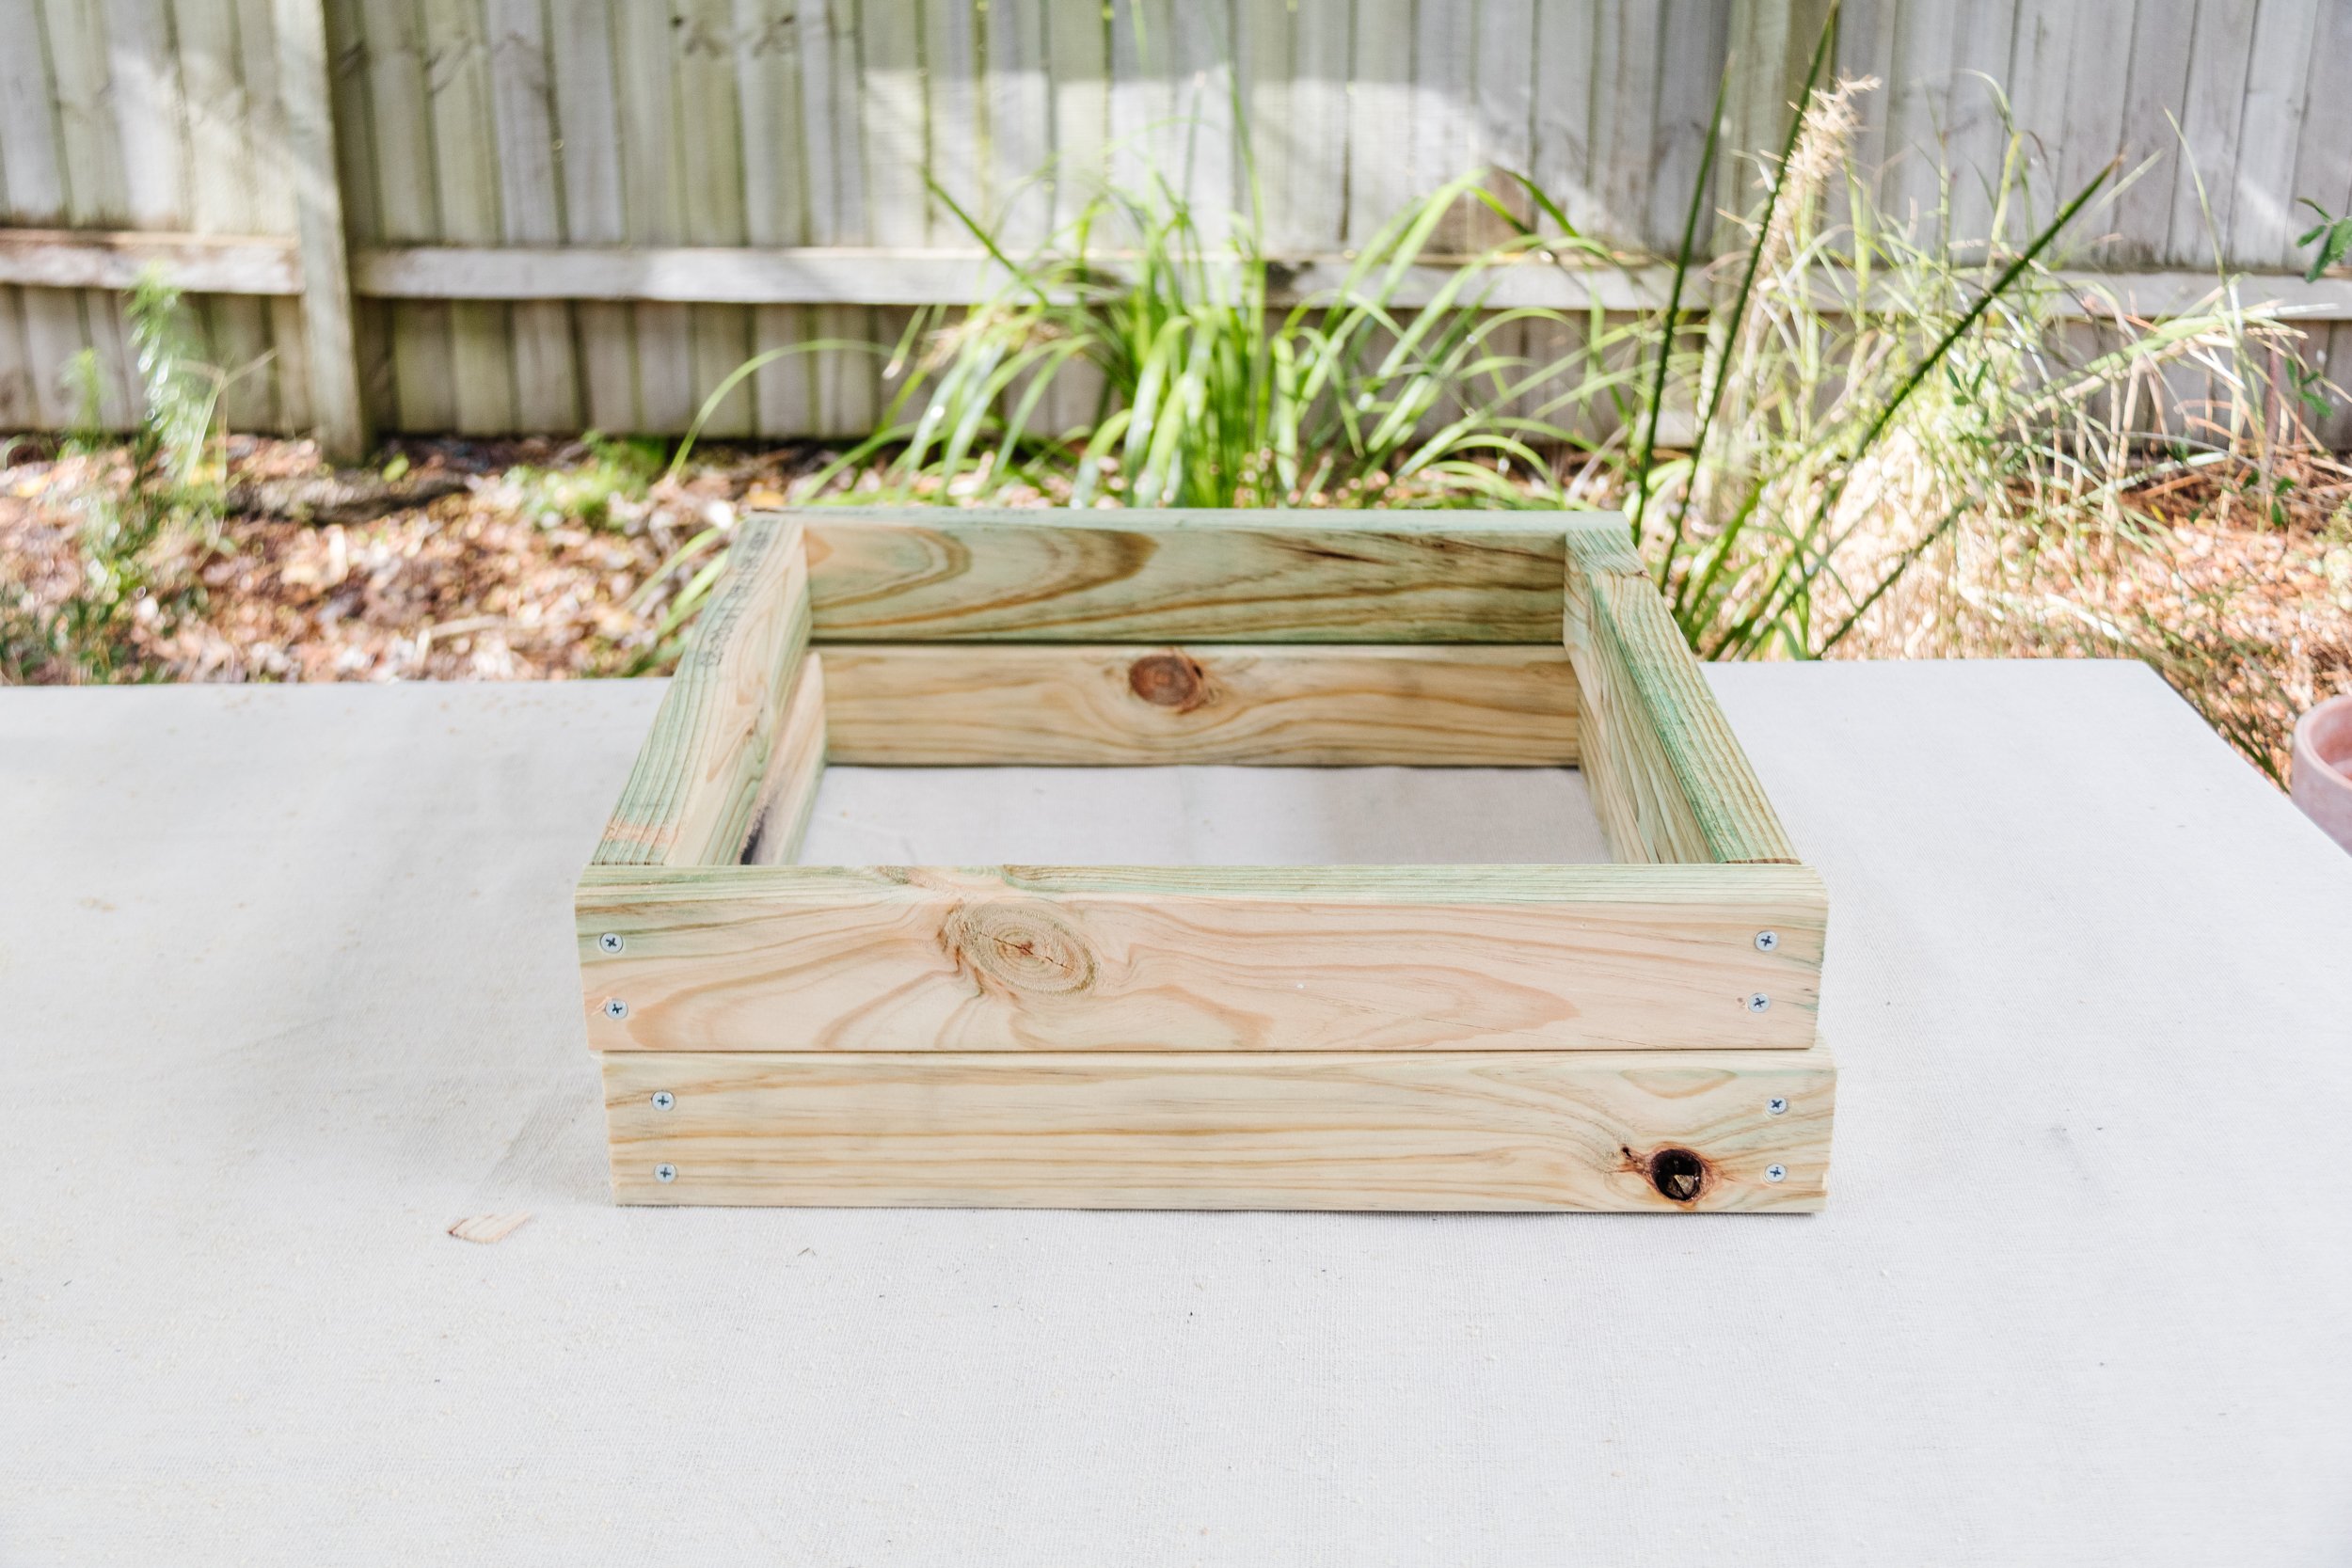
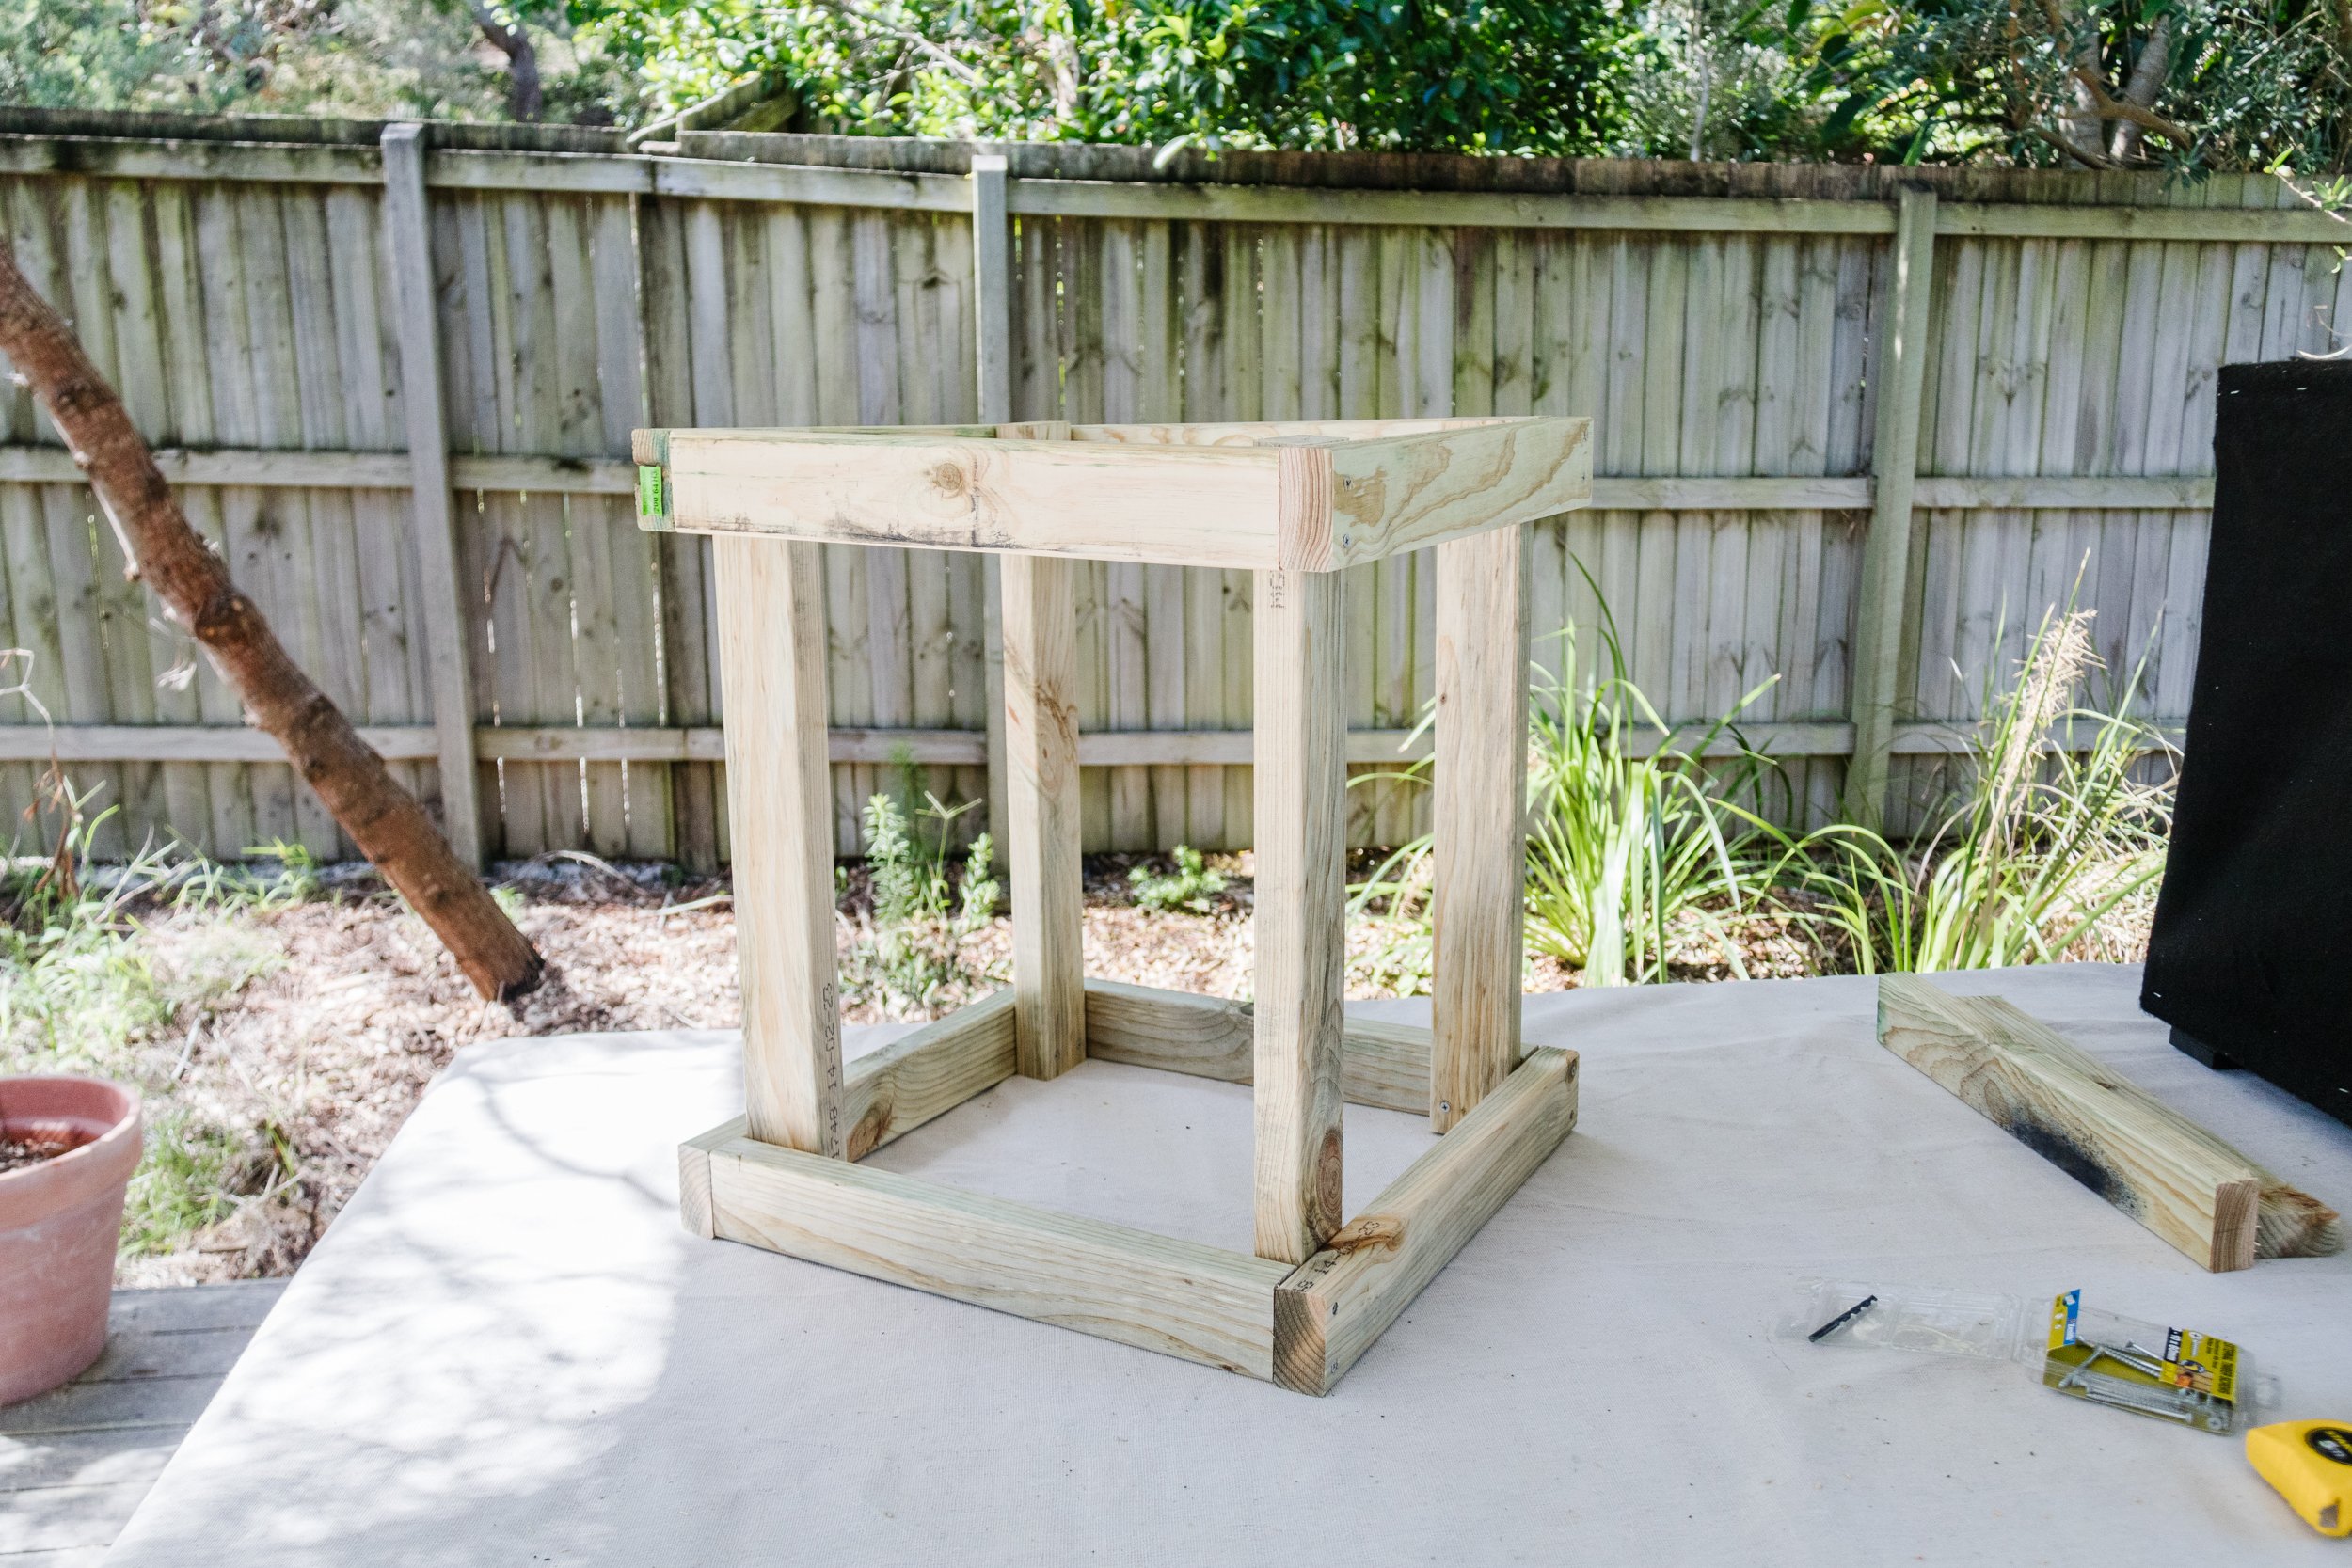
Step 3: Lay one frame flat on your work surface (this is your bottom base) and drill two pilot holes next to each other at each end of each 4 x 600mm. Stand one piece of 600mm up and place it into the corner and screw it into the bottom base using a drill and timber screws. Repeat until all 4 x 600mm are screwed into each piece of timber in the bottom base. Flip it over and repeating the process, secure the top base onto the other ends of the 4 x 600mm using a drill and timber screws, and remember to drill pilot holes first.
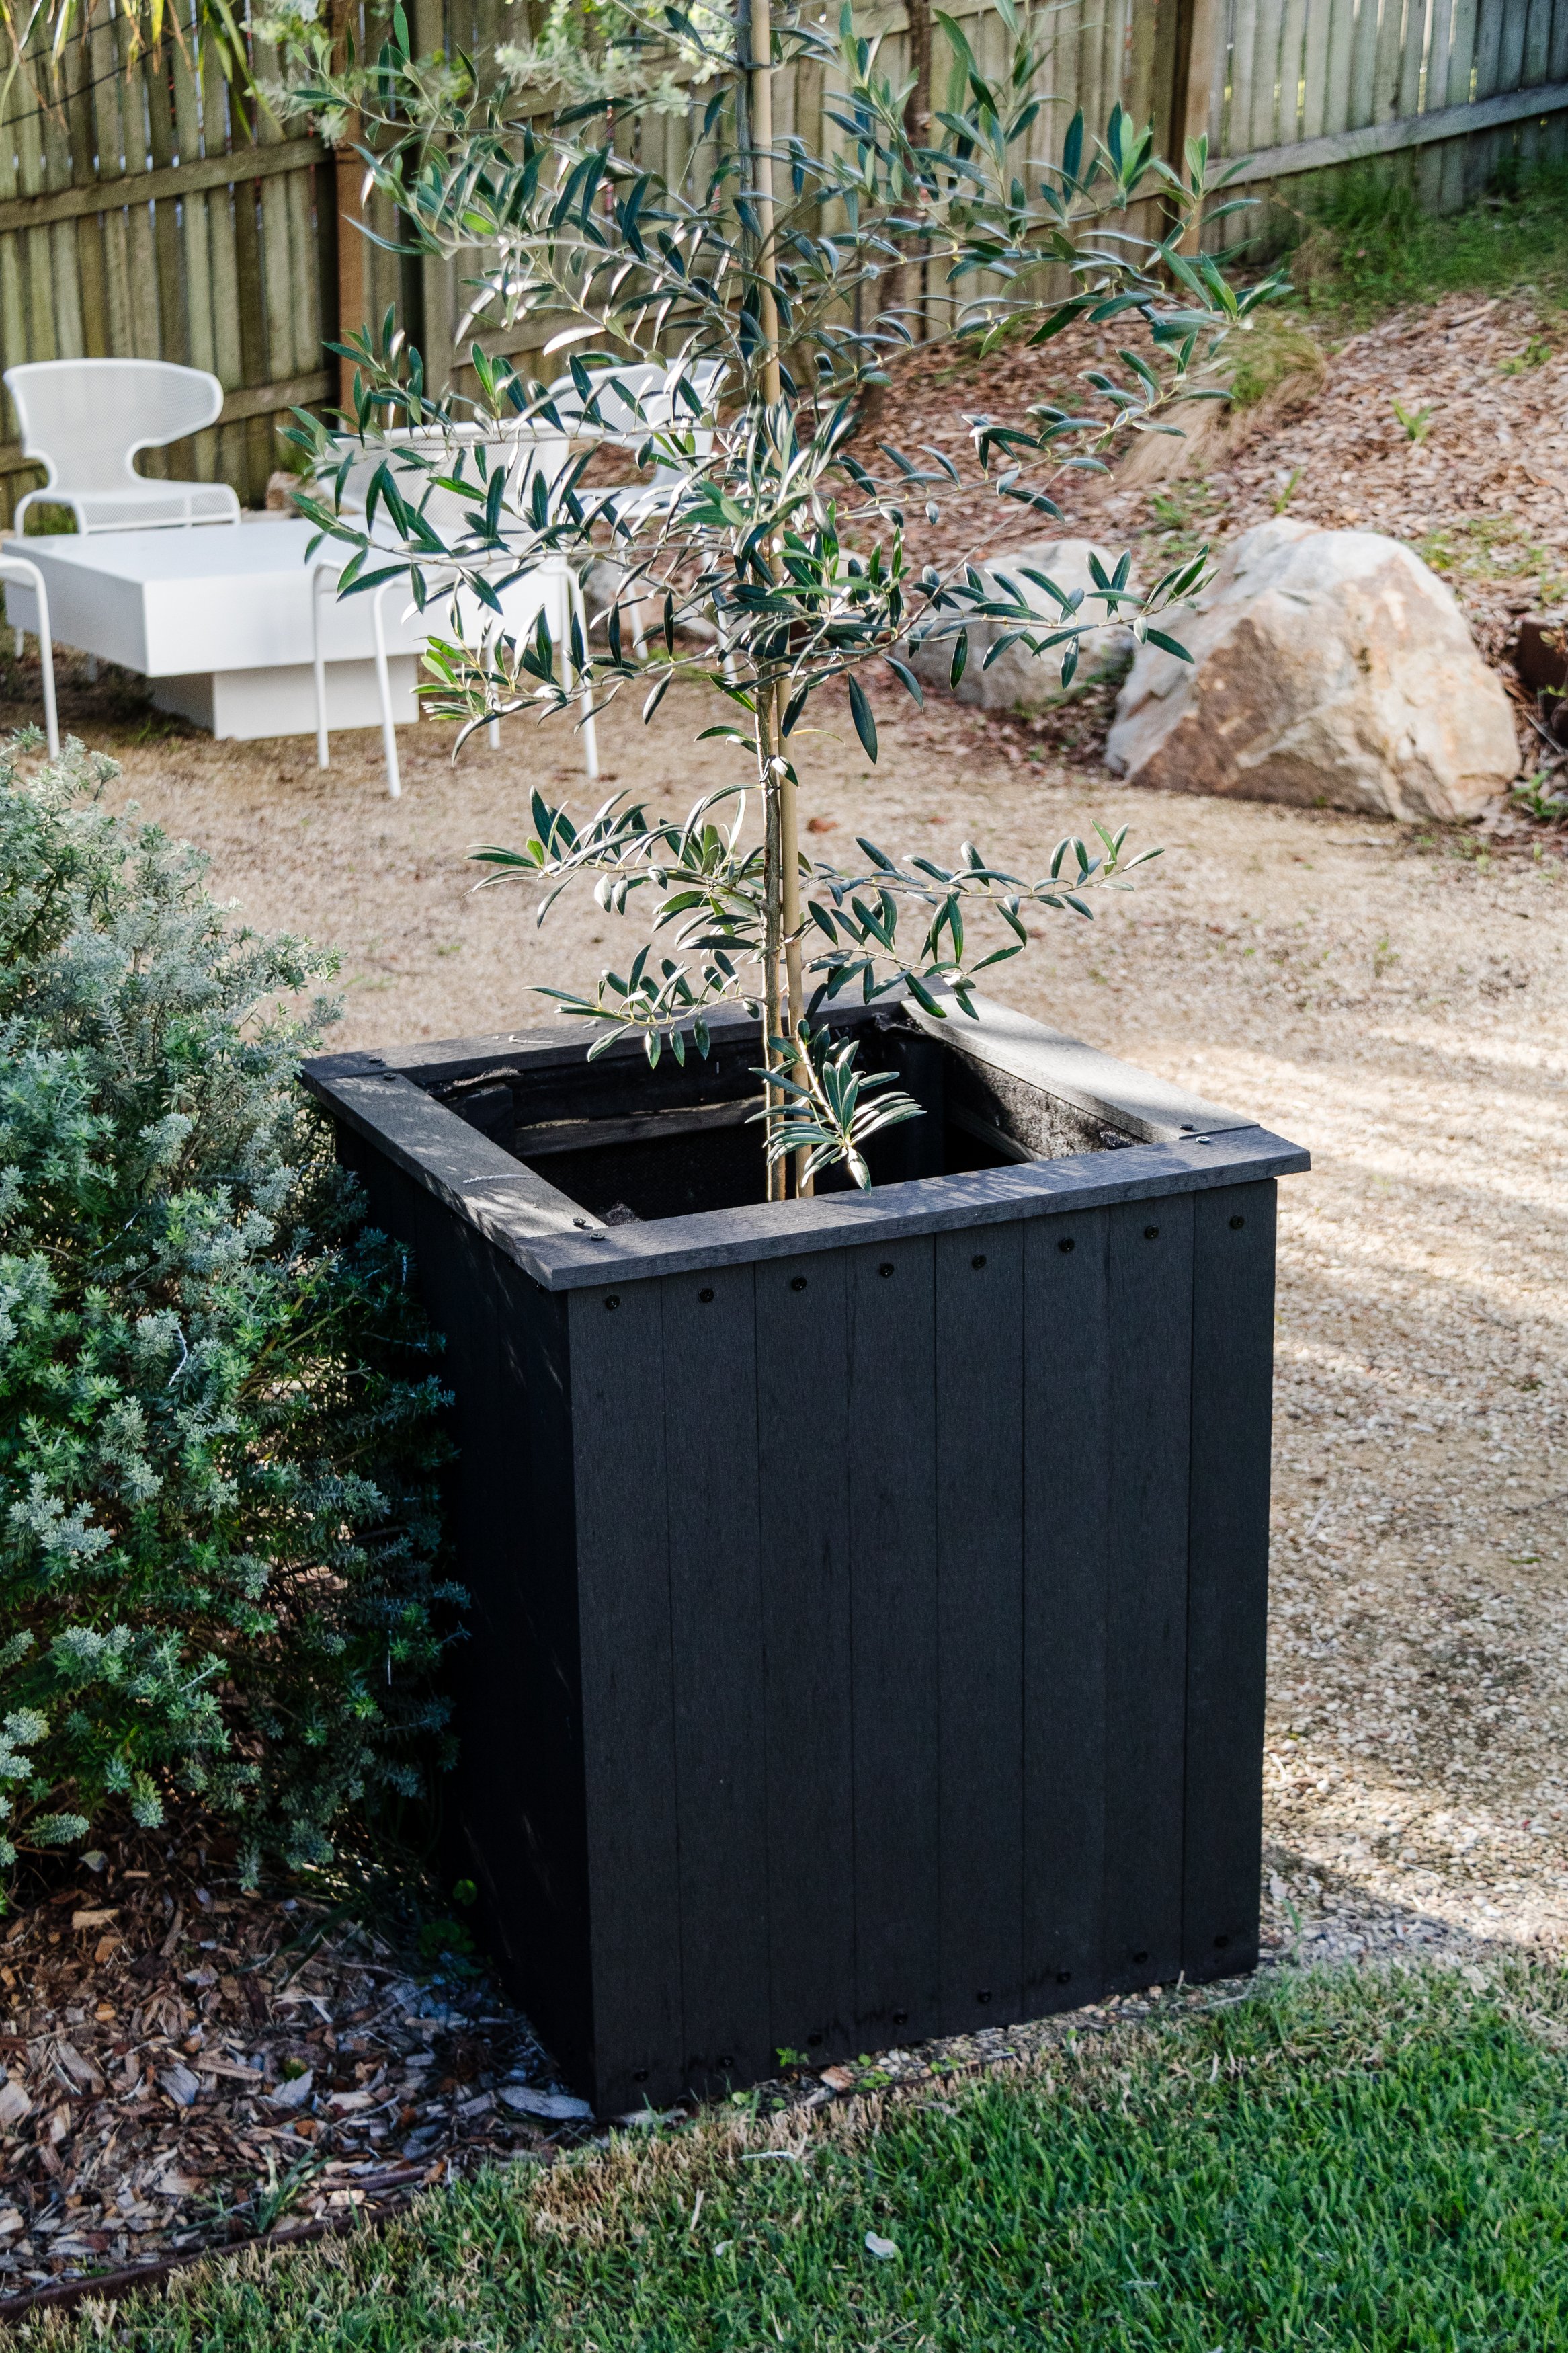
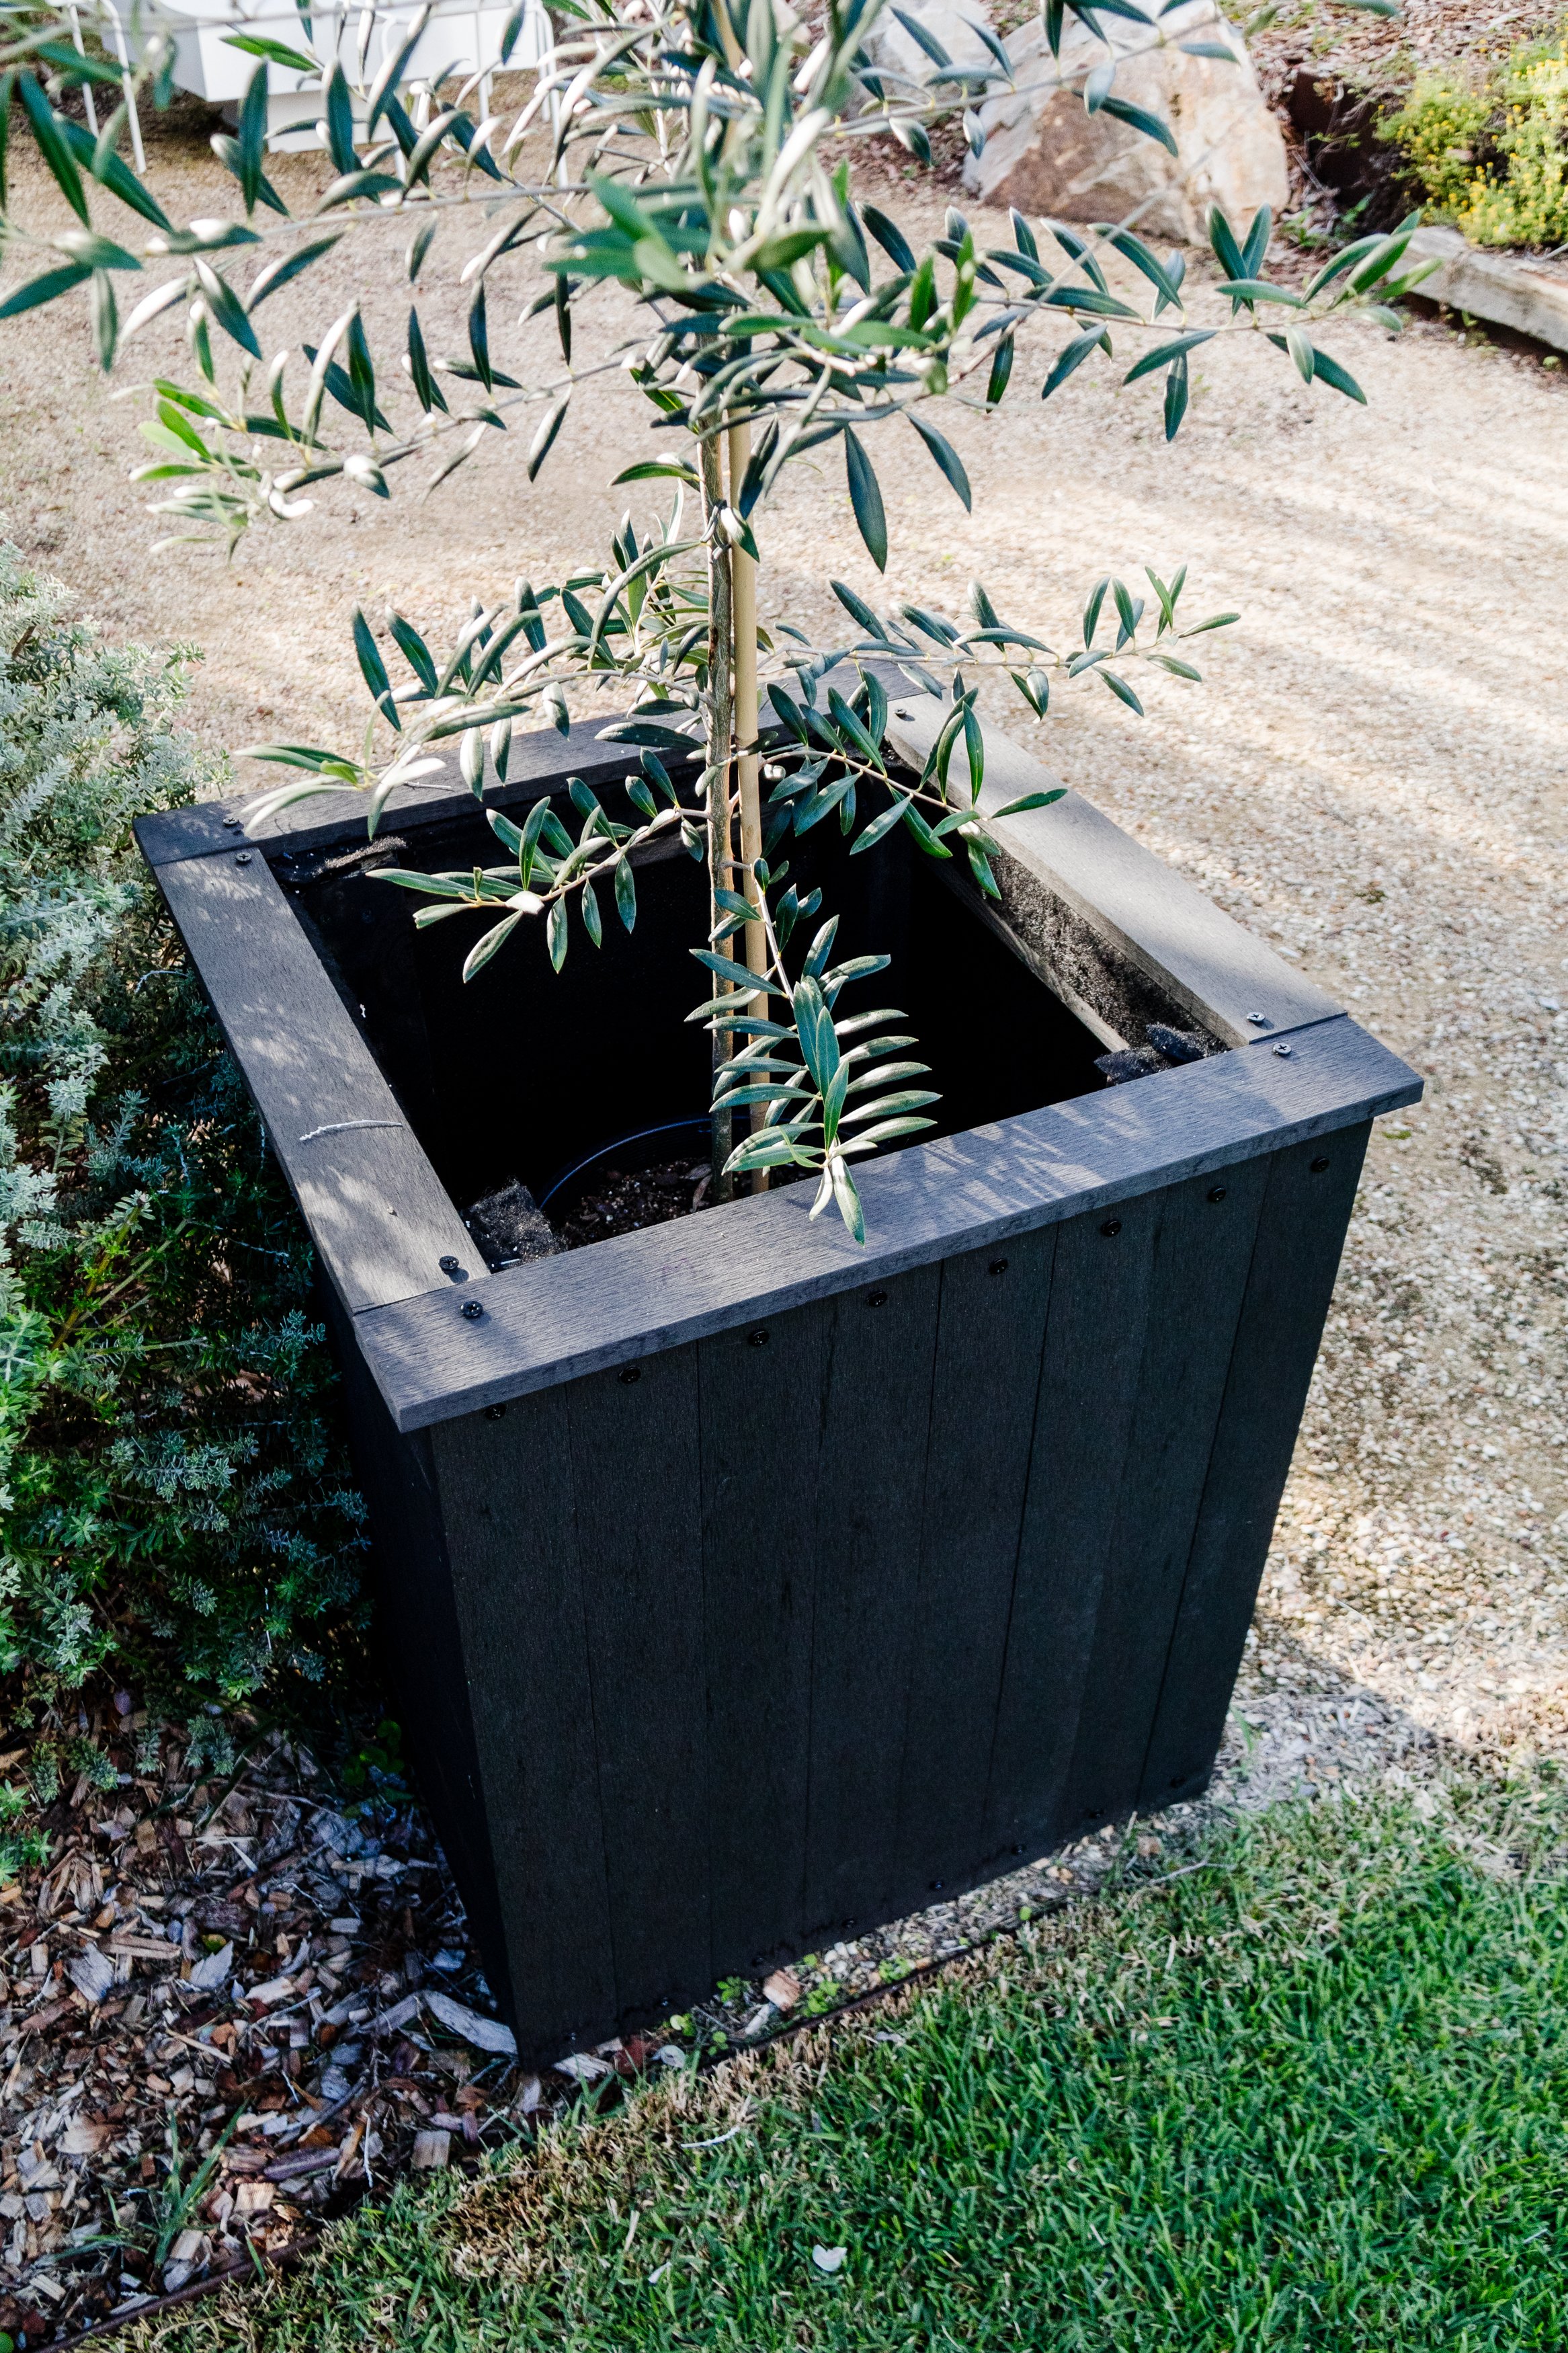
Step 4: You will have enough timber left over to screw two pieces across the inside base to create a platform for your plant pots to sit on. This step is totally optional but I think it helps to avoid your trees (in my case the olive trees) from disappearing into the large planter boxes). Please refer to my Instagram highlights to see this step.
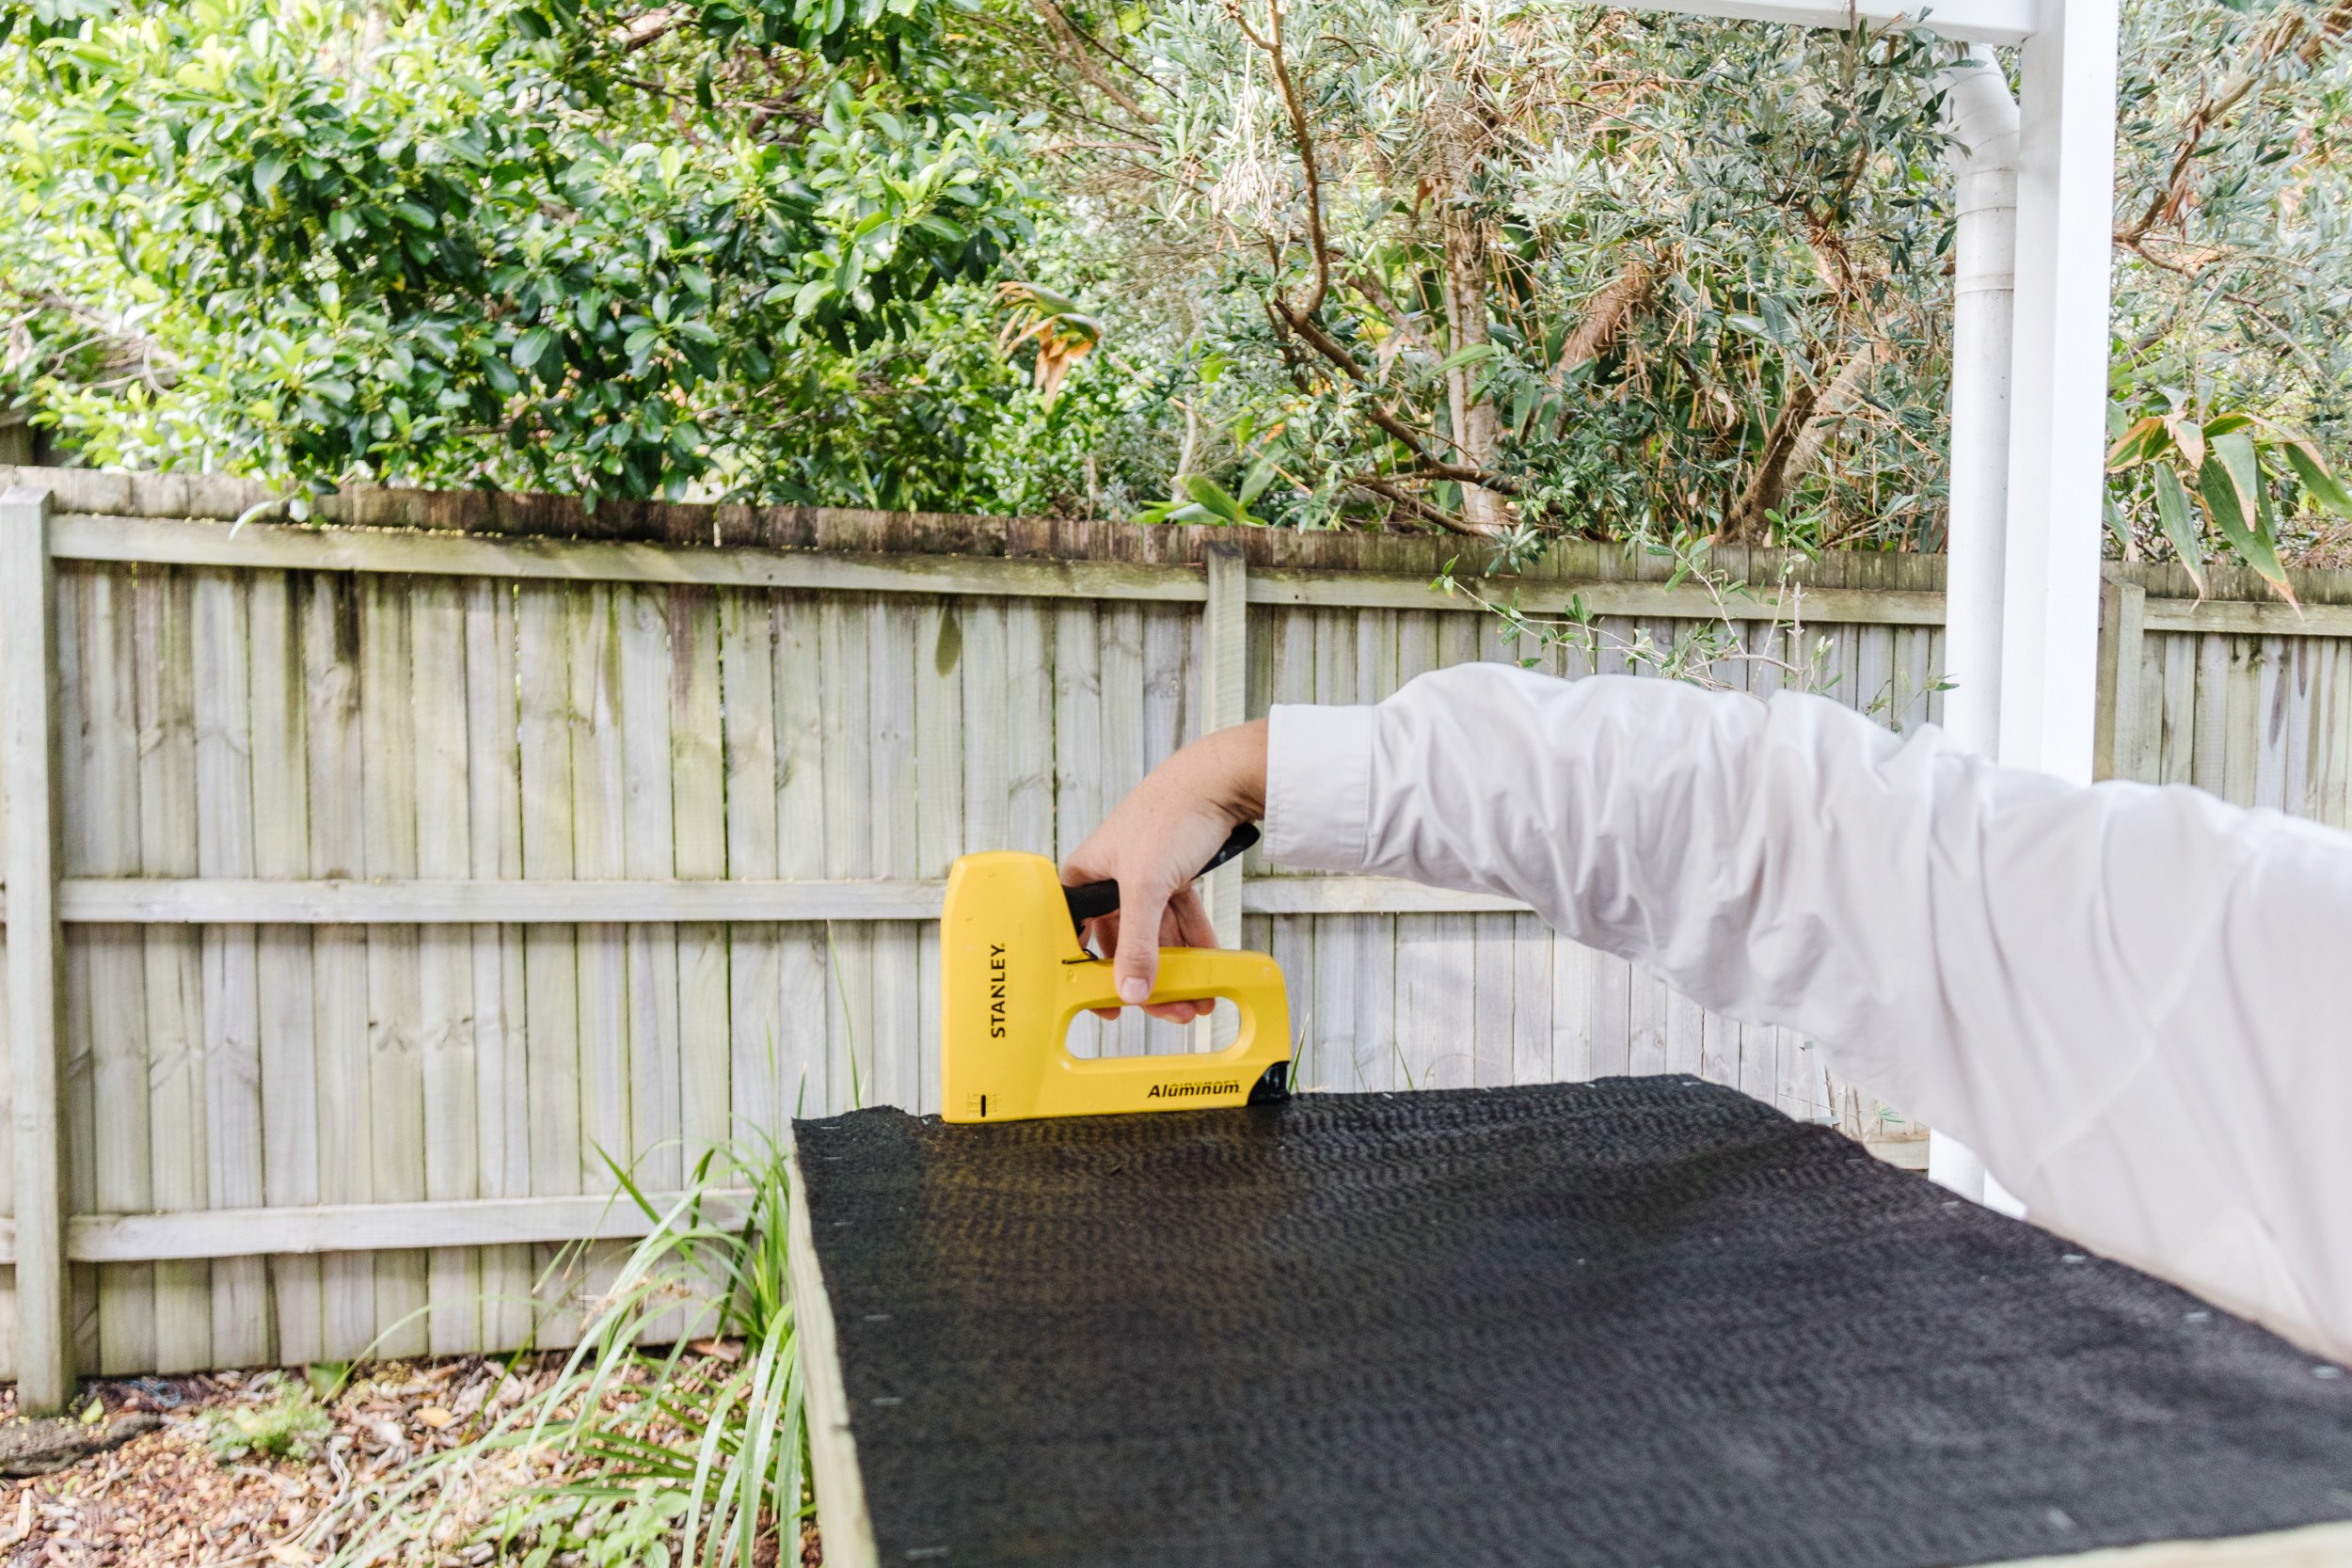
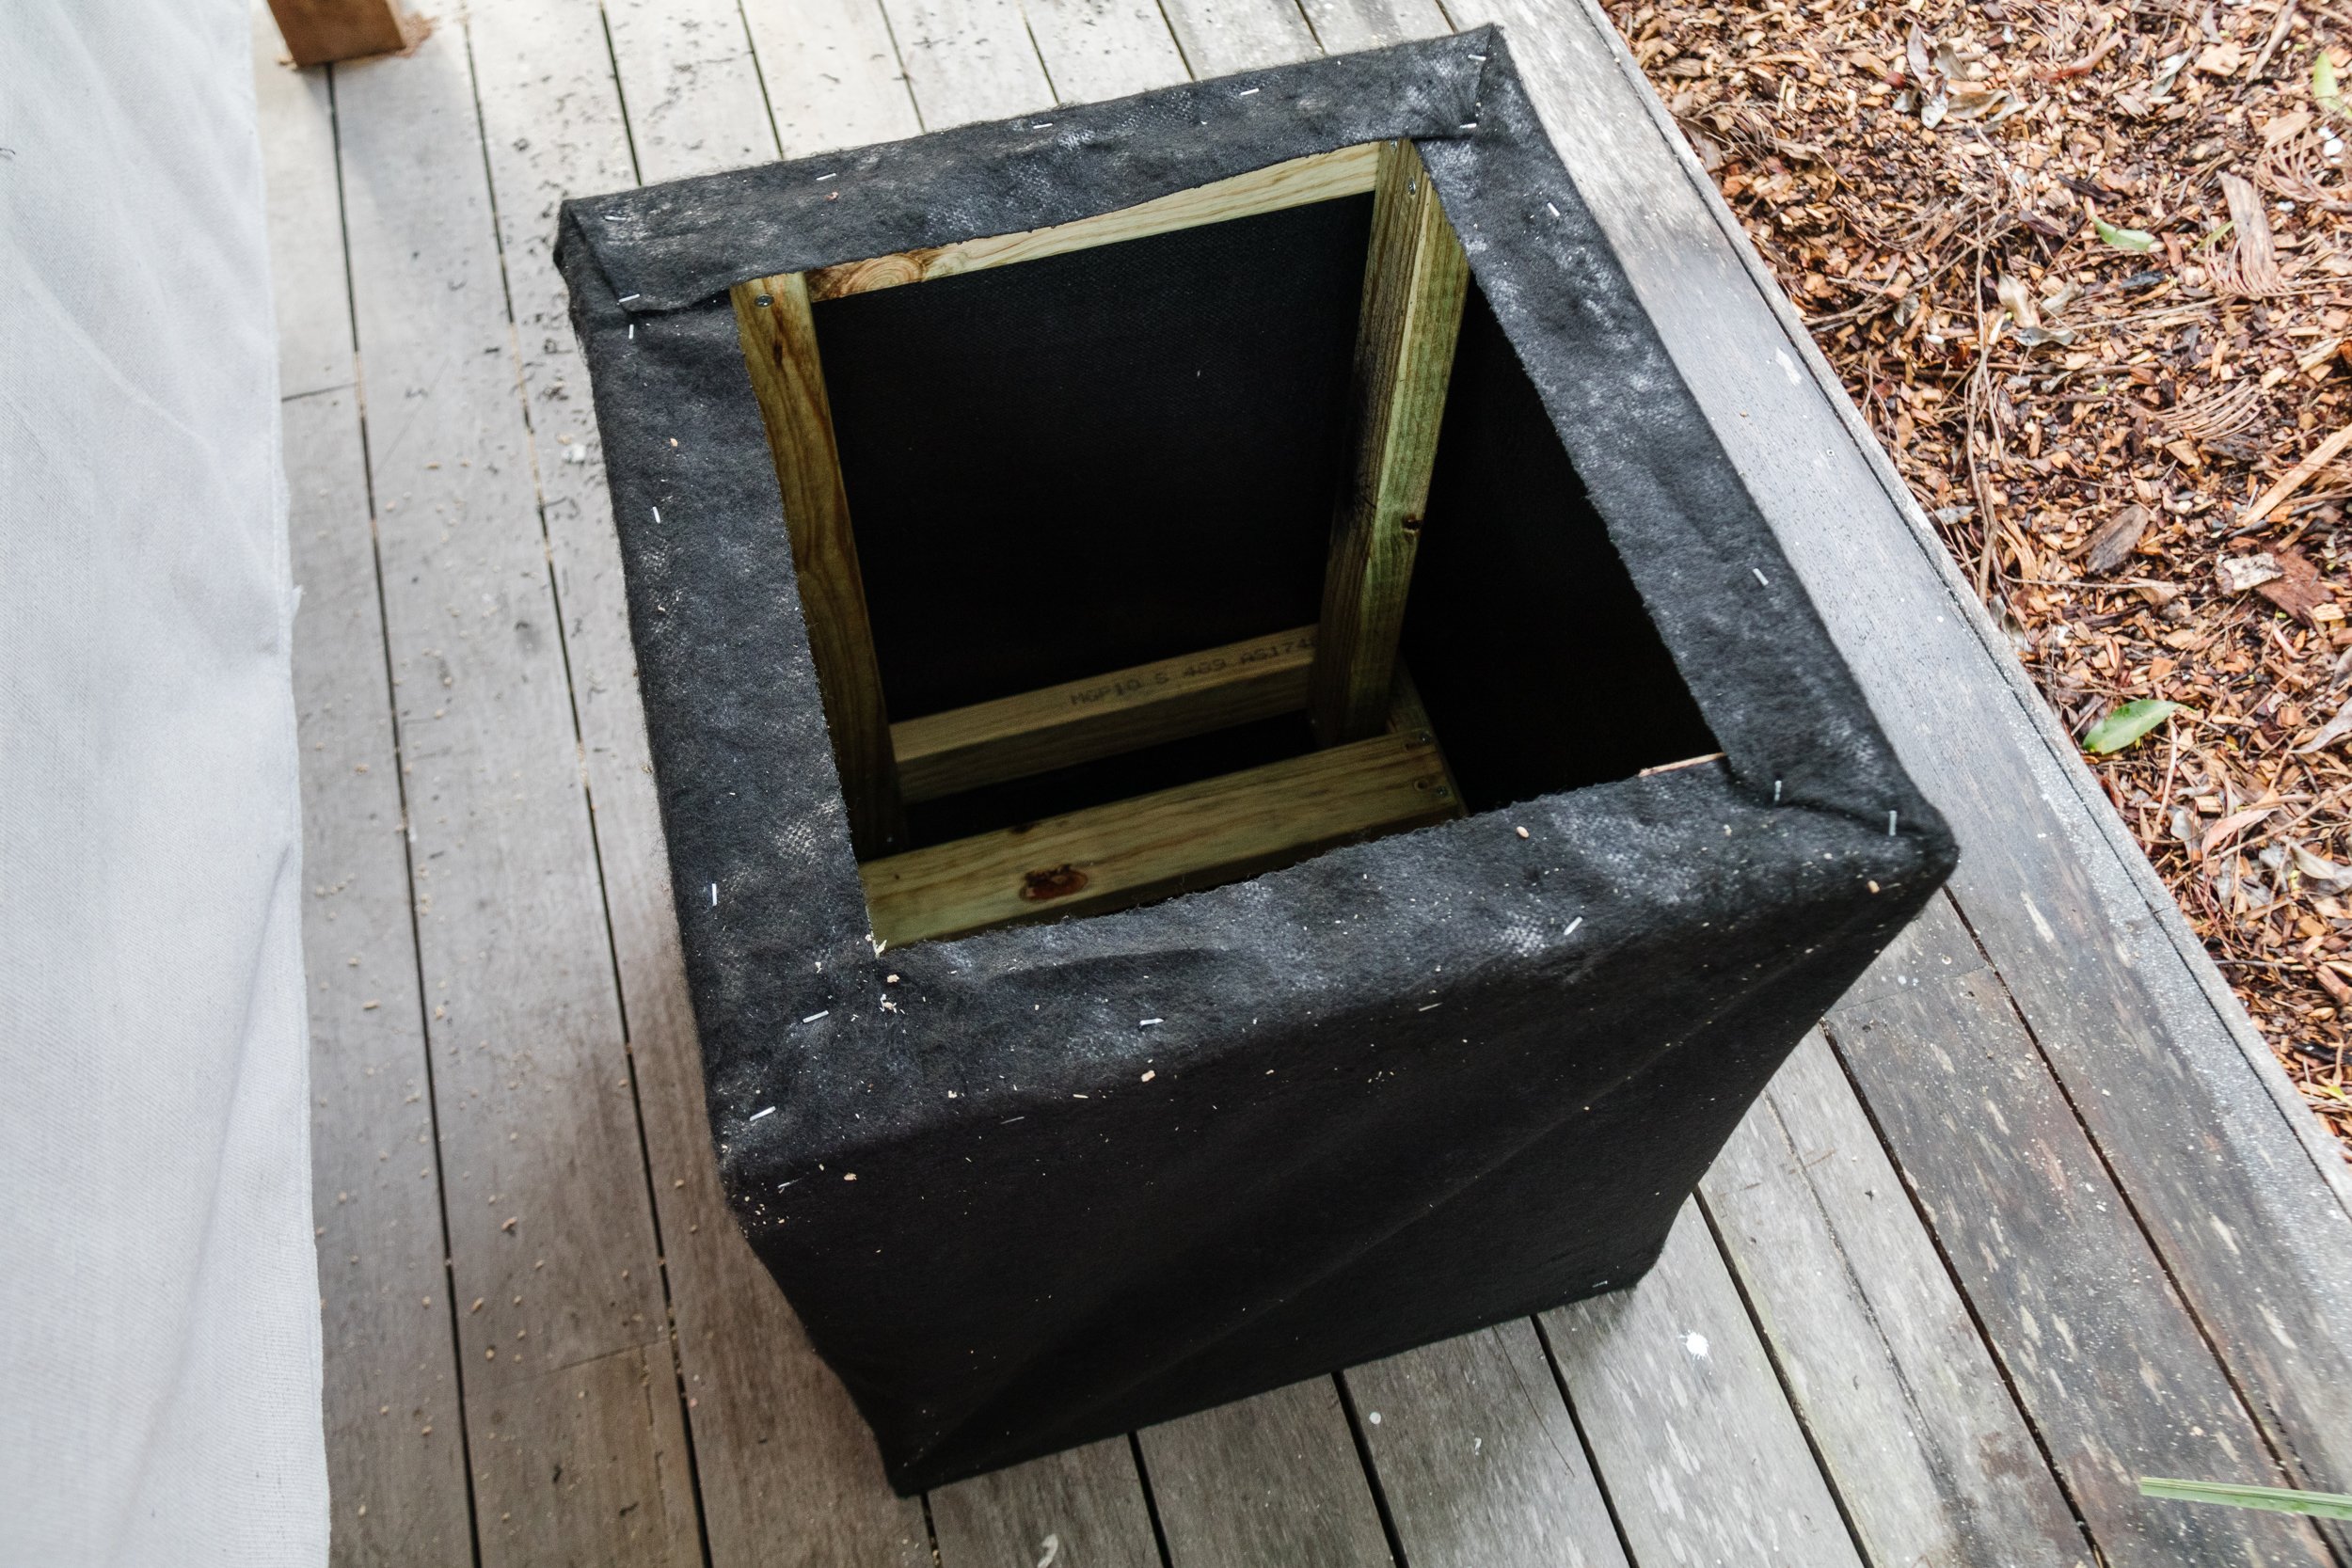
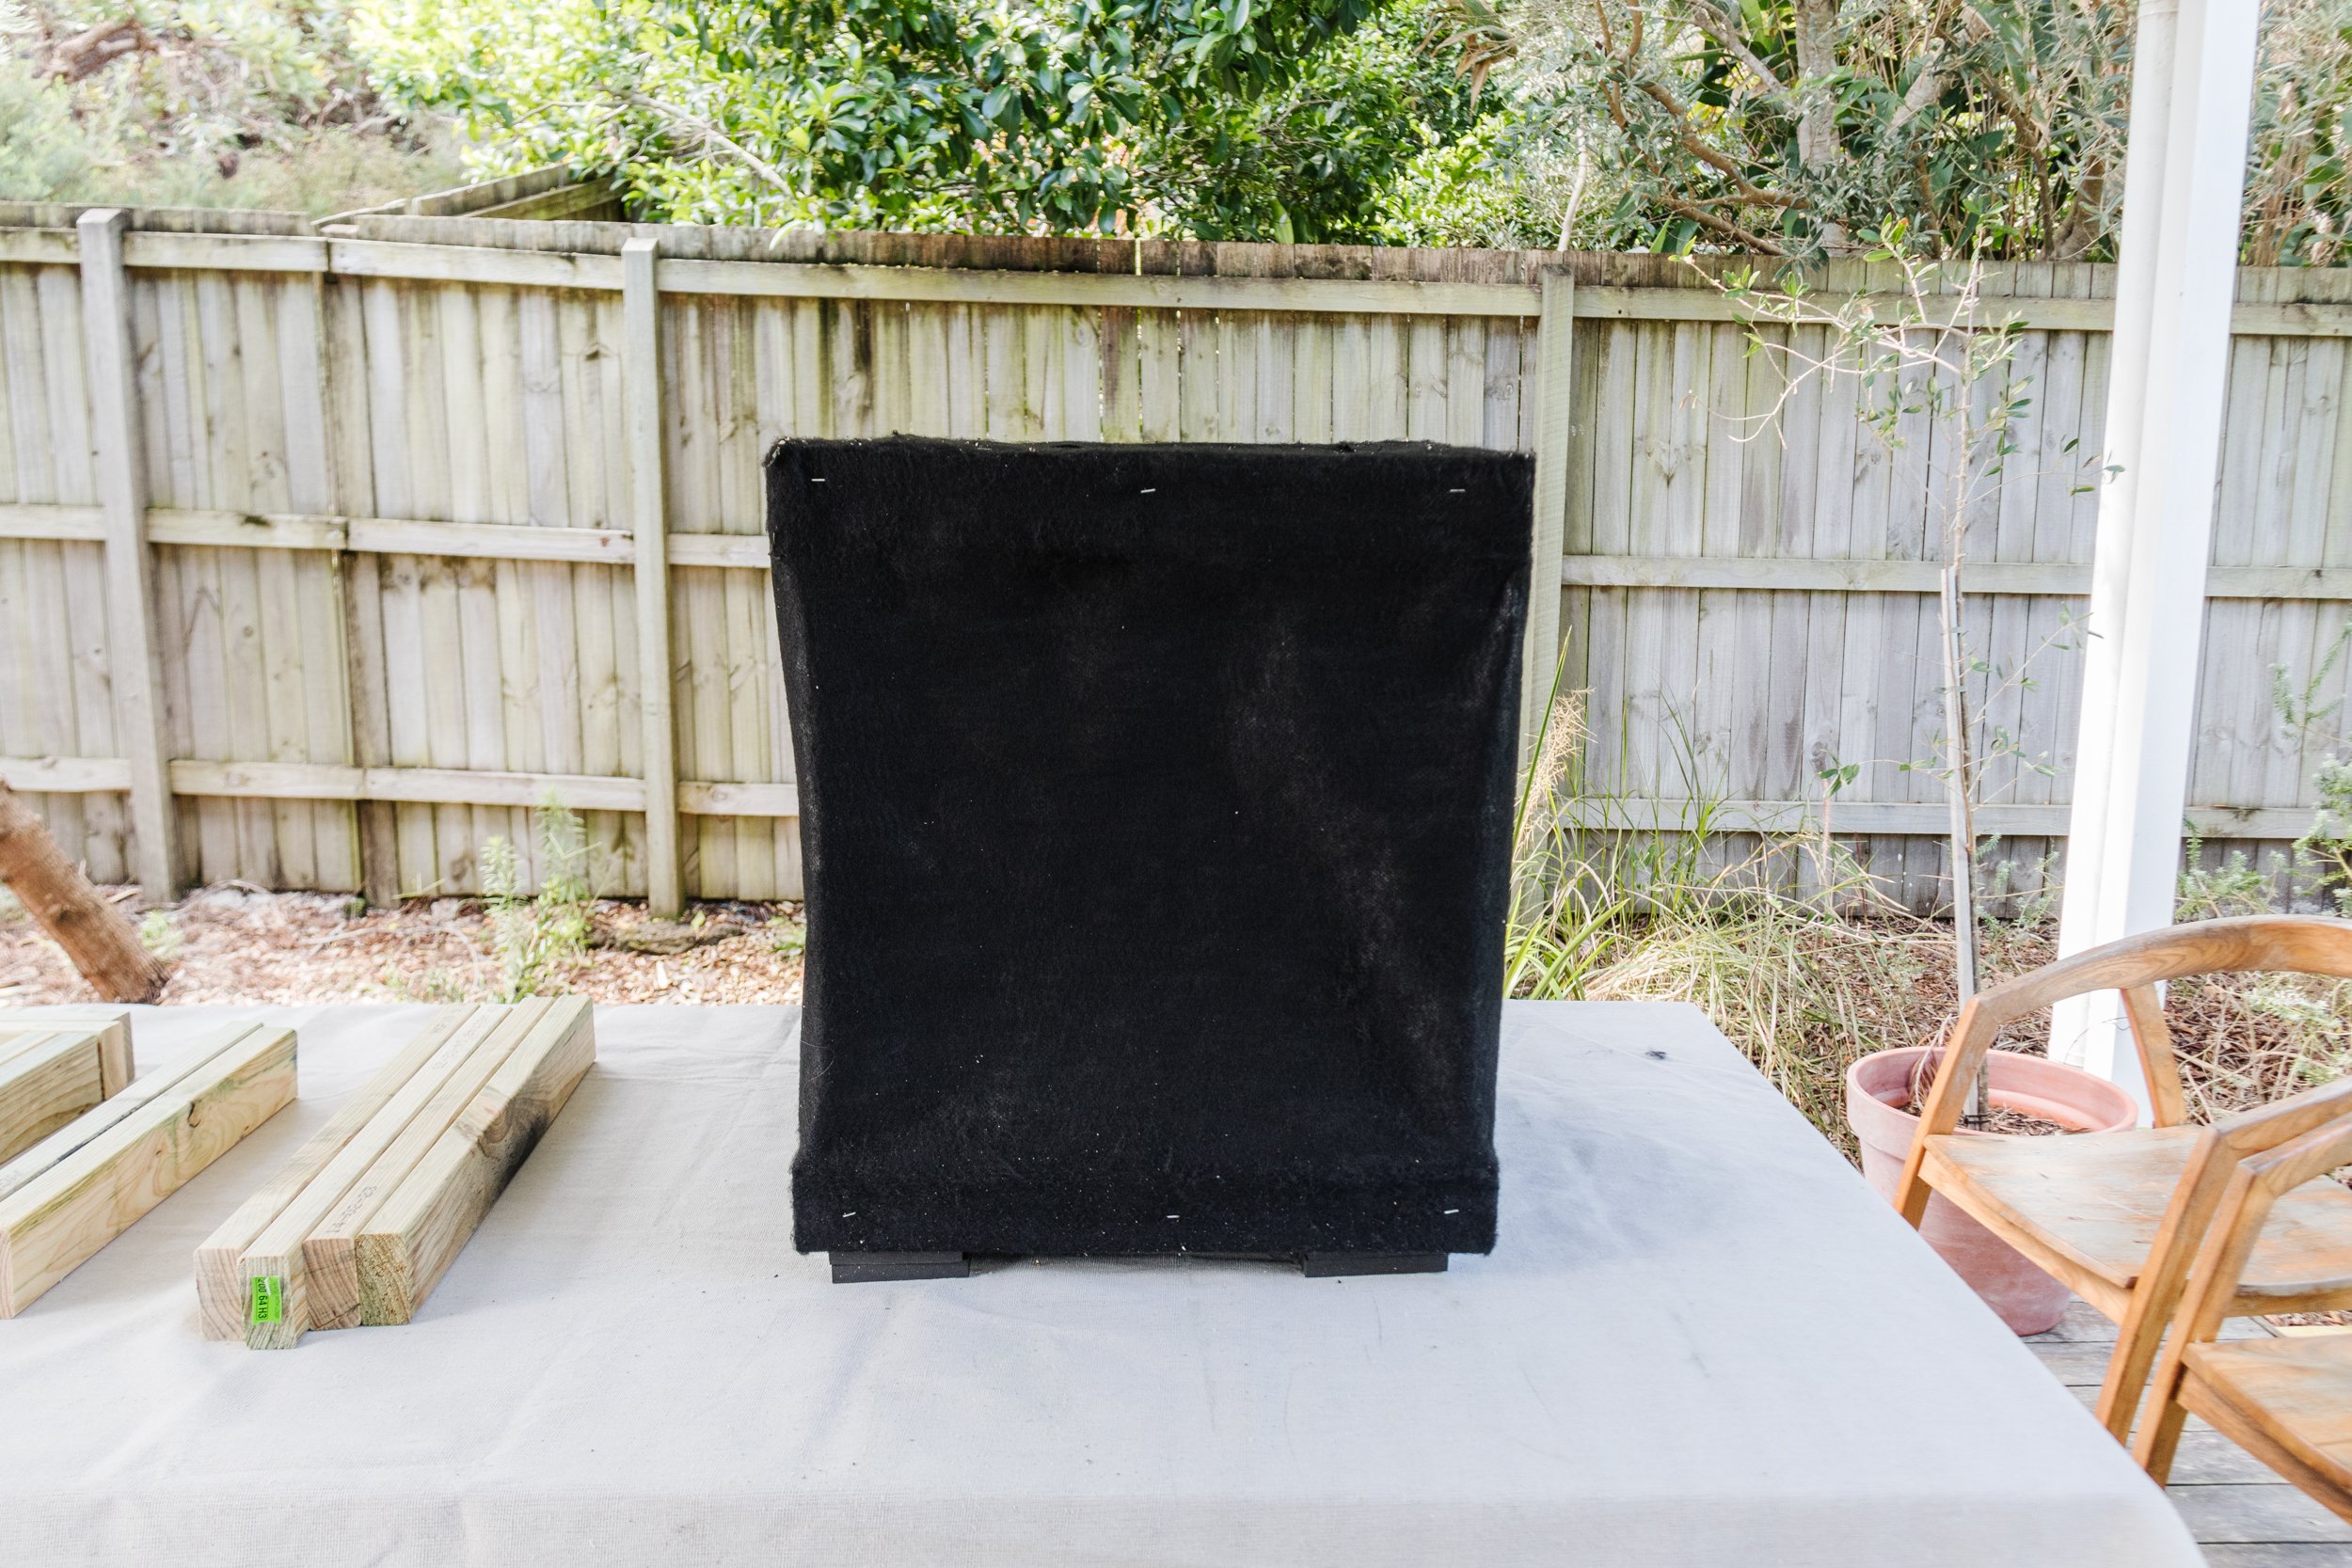
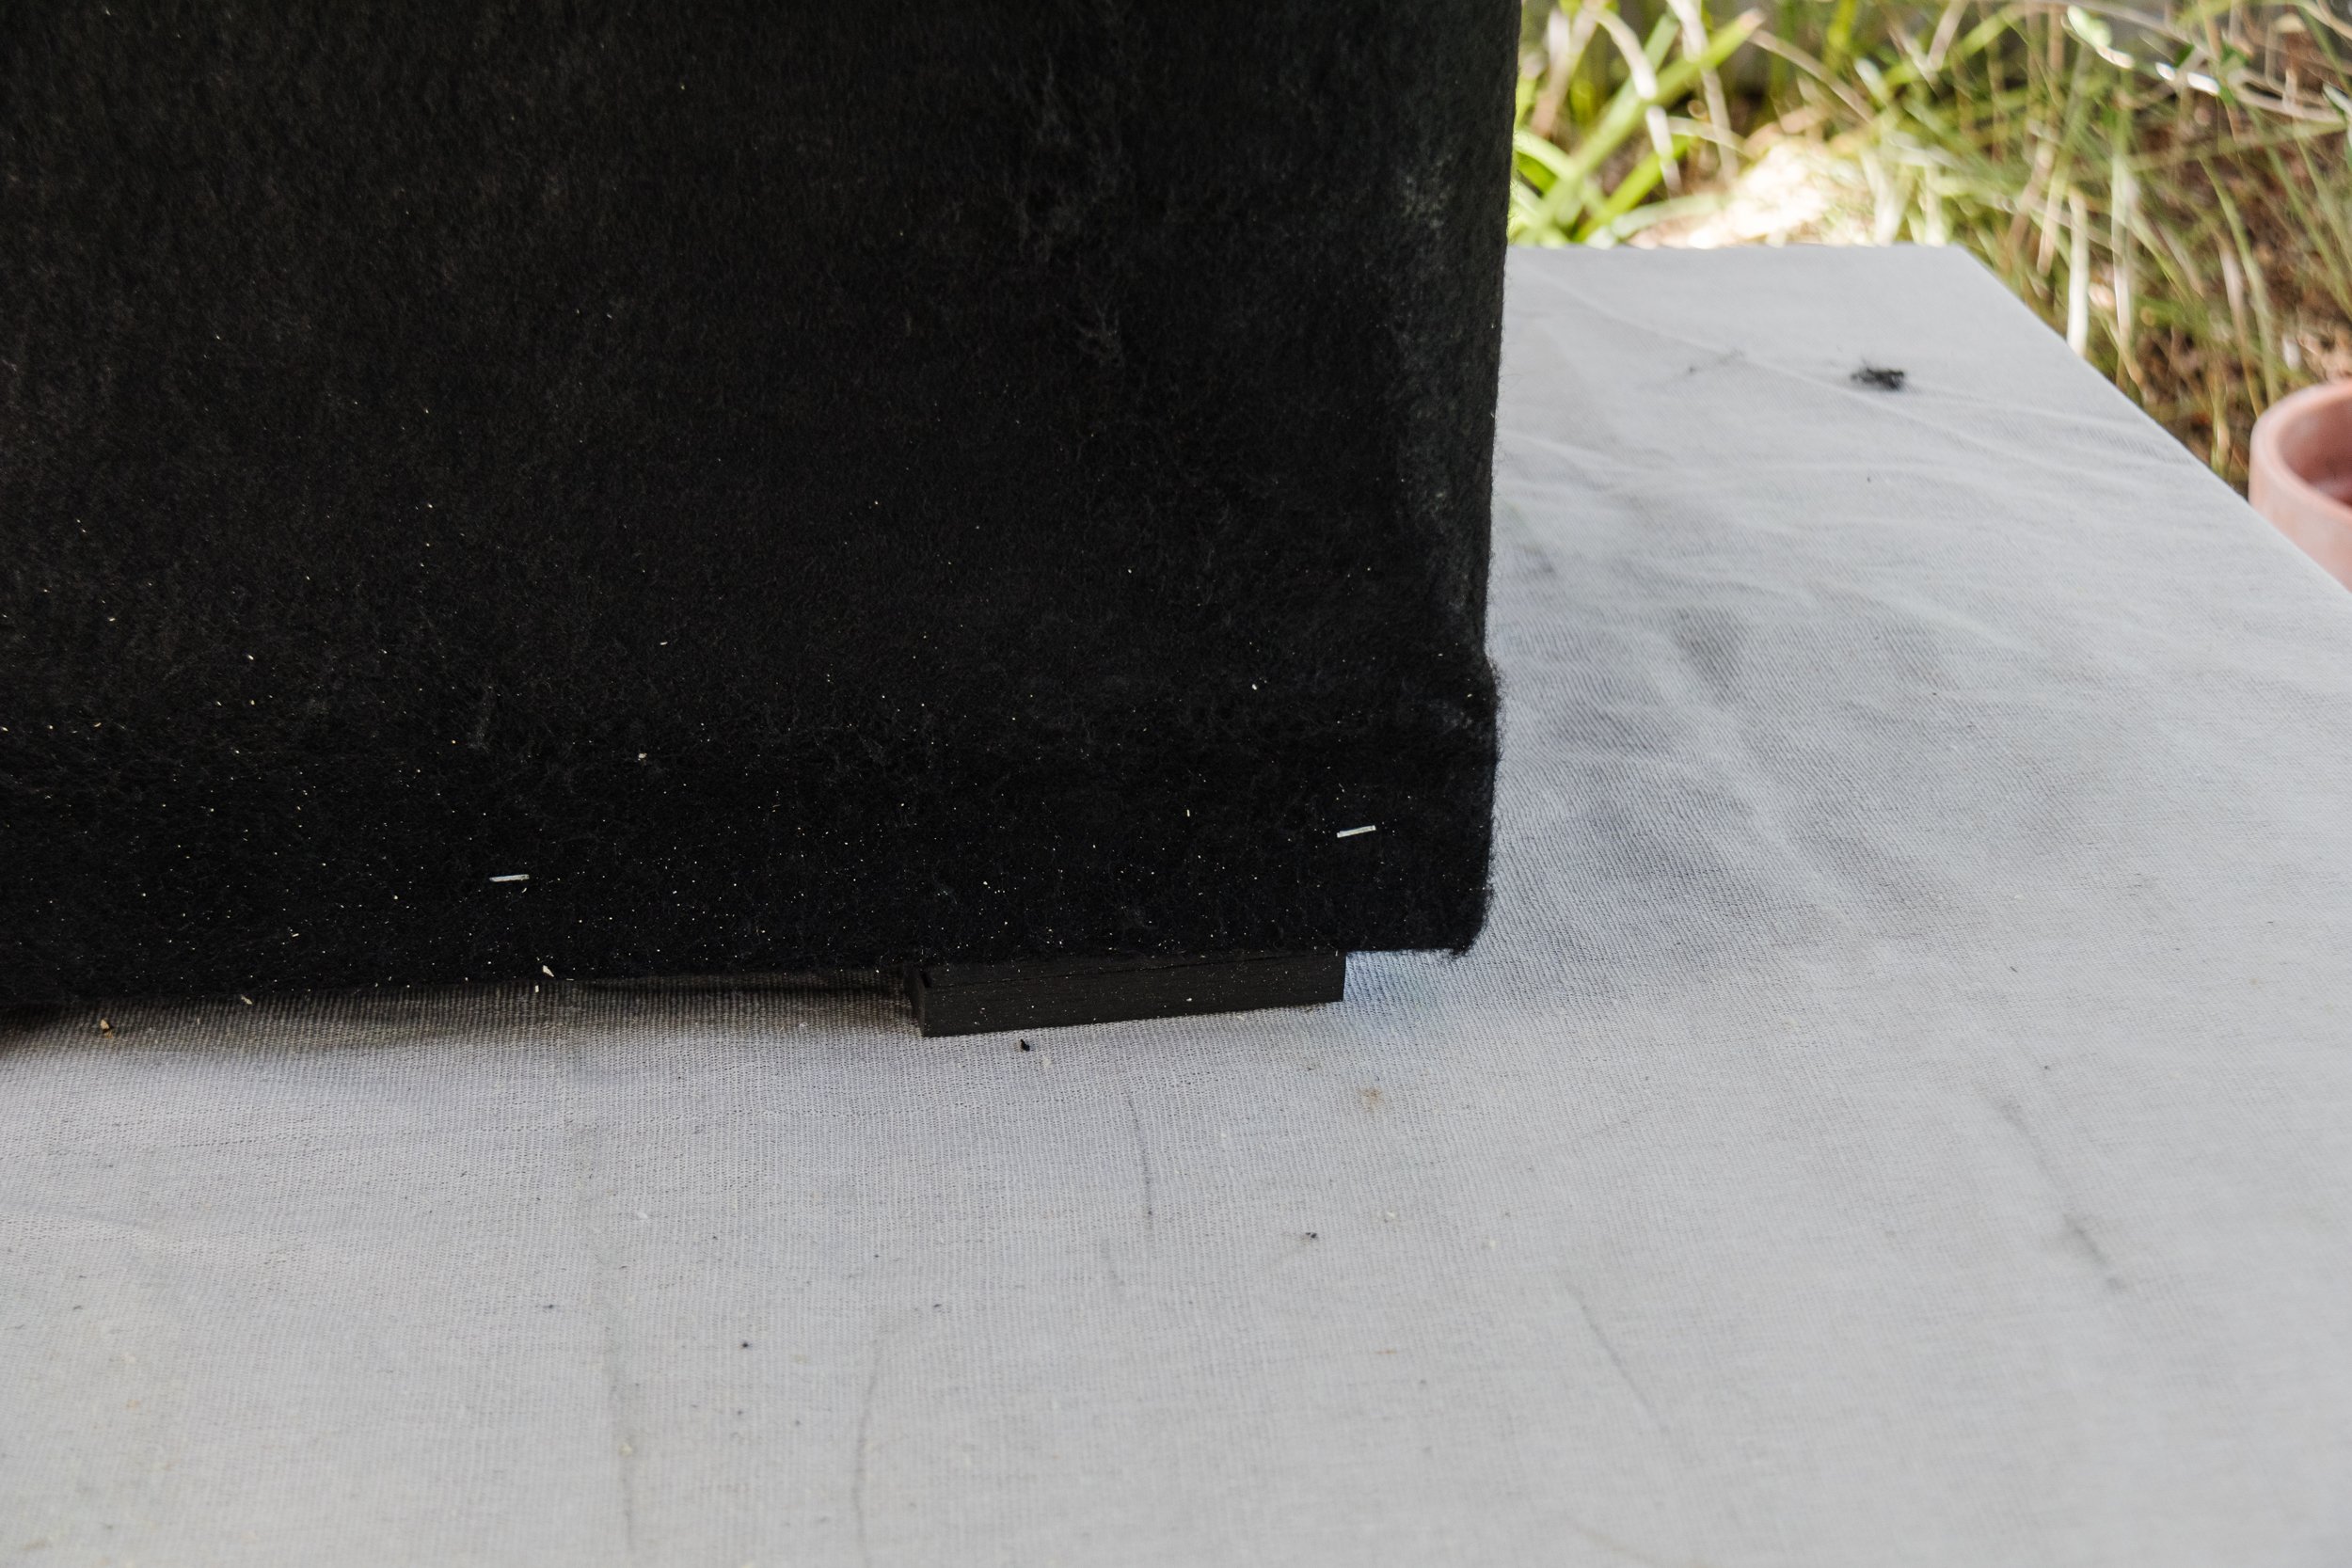
Step 5: Next, wrap the frame in weed mat using a staple gun and when finished, turn the planter upside down. Its now time to add hidden feet. You will need two Ekodeck offcuts per corner. Drill pilots holes first and then screw them into the corner of each base. Don’t worry if they’re not perfectly cut or lined up because you won’t see them. Adding hidden feet will make the planters appear more bespoke and high end.

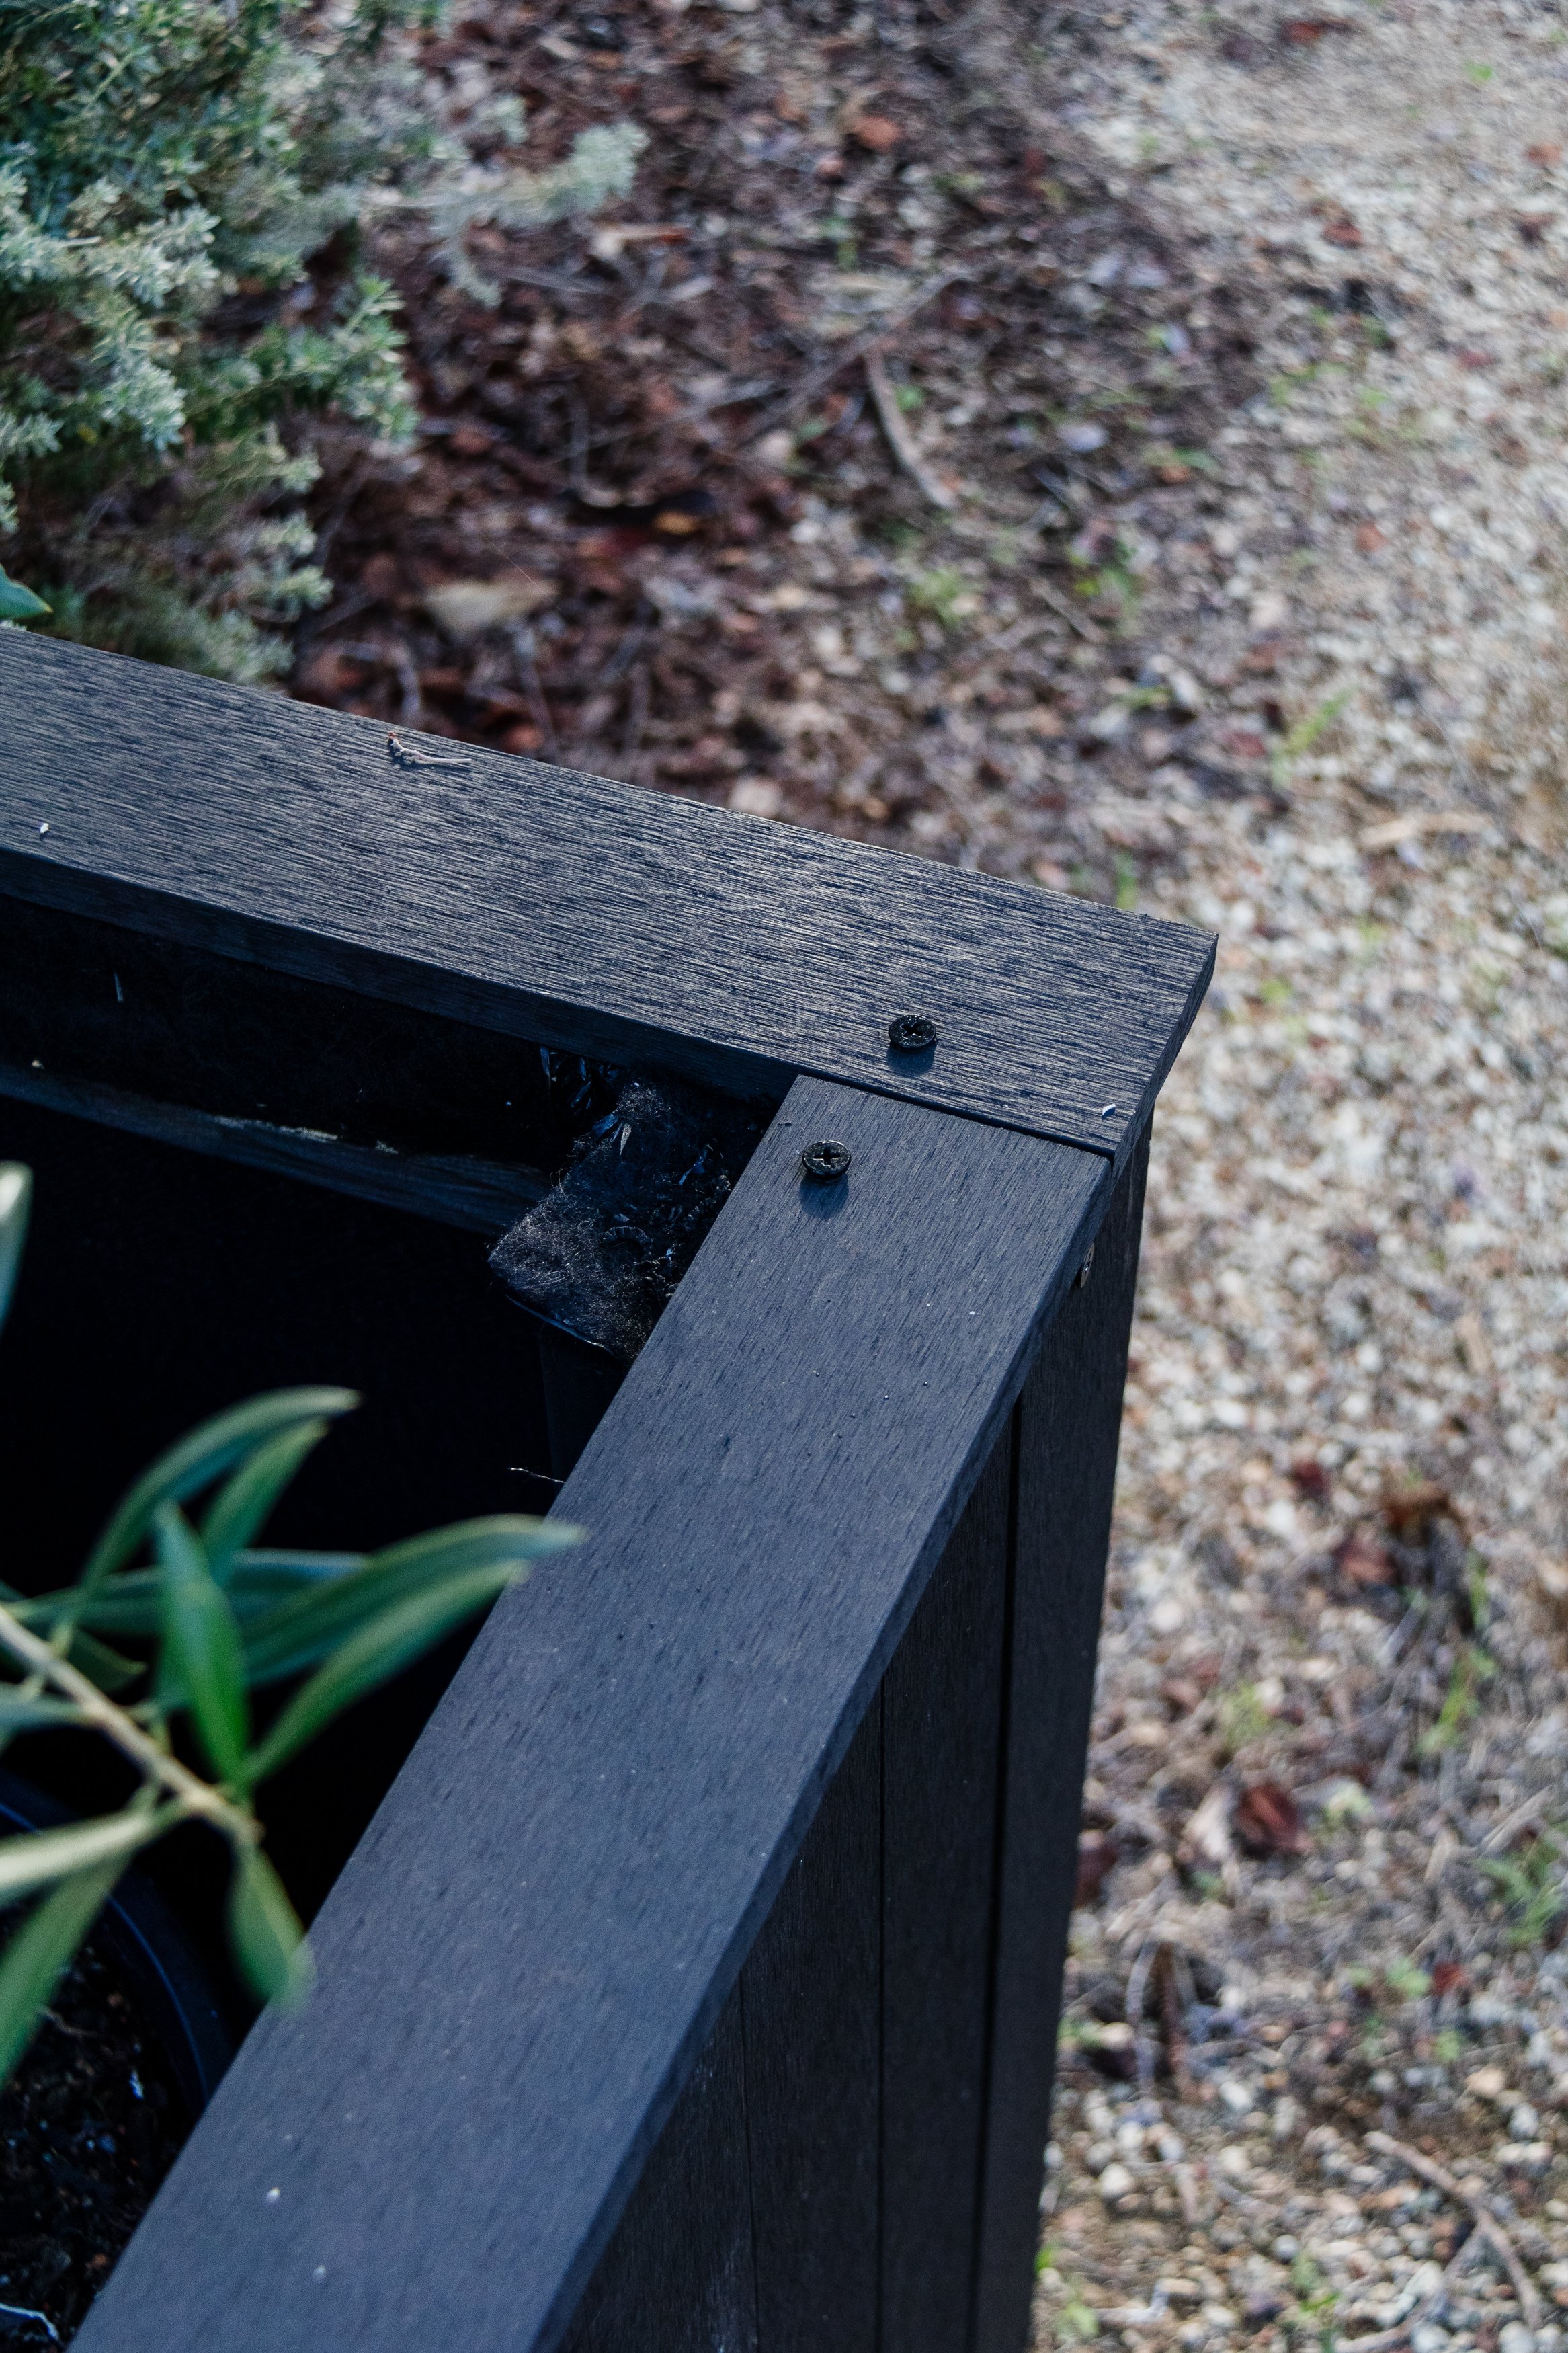
Step 6: Flip the planter onto its side and lay 8 x 620mm pieces of Ekodeck cuts across the side that is 506mm long; you’ll notice that there is about a 20mm overhang on each side. This is what you want. I worked hard to get the measurements right to ensure two sides of the plater are tucking perfectly behind the other two sides, making the corners look beautiful.
Use another piece of Ekodeck to make sure they’re perfectly lined up straight across the top. Drill pilot holes into each piece in the middle, approximately 30mm down, then drill the black screws in the pilot holes. Repeat this for the bottom of the Ekodeck pieces. Then repeat this to the opposite side of the planter. Then for the remaining two sides, you’ll tuck the 8 x 620mm pieces of Ekodeck between the front and back of the planter. Refer to the images if required.
Step 7: Stand the planter up and lay the 2 x 565mm and 2 x 450mm on top. You want a slight overhang at the front, then screw these into the top base - remember the pilot holes!
Step 8: Following this, paint the internal treated timber with black exterior paint. And that’s it!


Ta daaaa!
Honestly, building the planters myself from scratch was actually so easy! I discovered it was all about cutting the materials first, checking my measurements, and drilling lots of pilot holes. I also installed hidden feet and even though I was worried about seeing so many screws, I found some black ones and I think they look really beautiful. While all the hard work went into the design and measurements, working with Ekodeck was the easy part! Best of all? Ekodeck requires no oiling, painting or sealing. It’s maintenance free, can totally withstand the elements and it’s rot, decay and termite resistant. Yup, as you can tell by my huge smile I am really happy right now!
This project is in collaboration with Ekodeck