Making Wall Art With Dowels!
Elevate secondhand canvas using paint - and dowels!
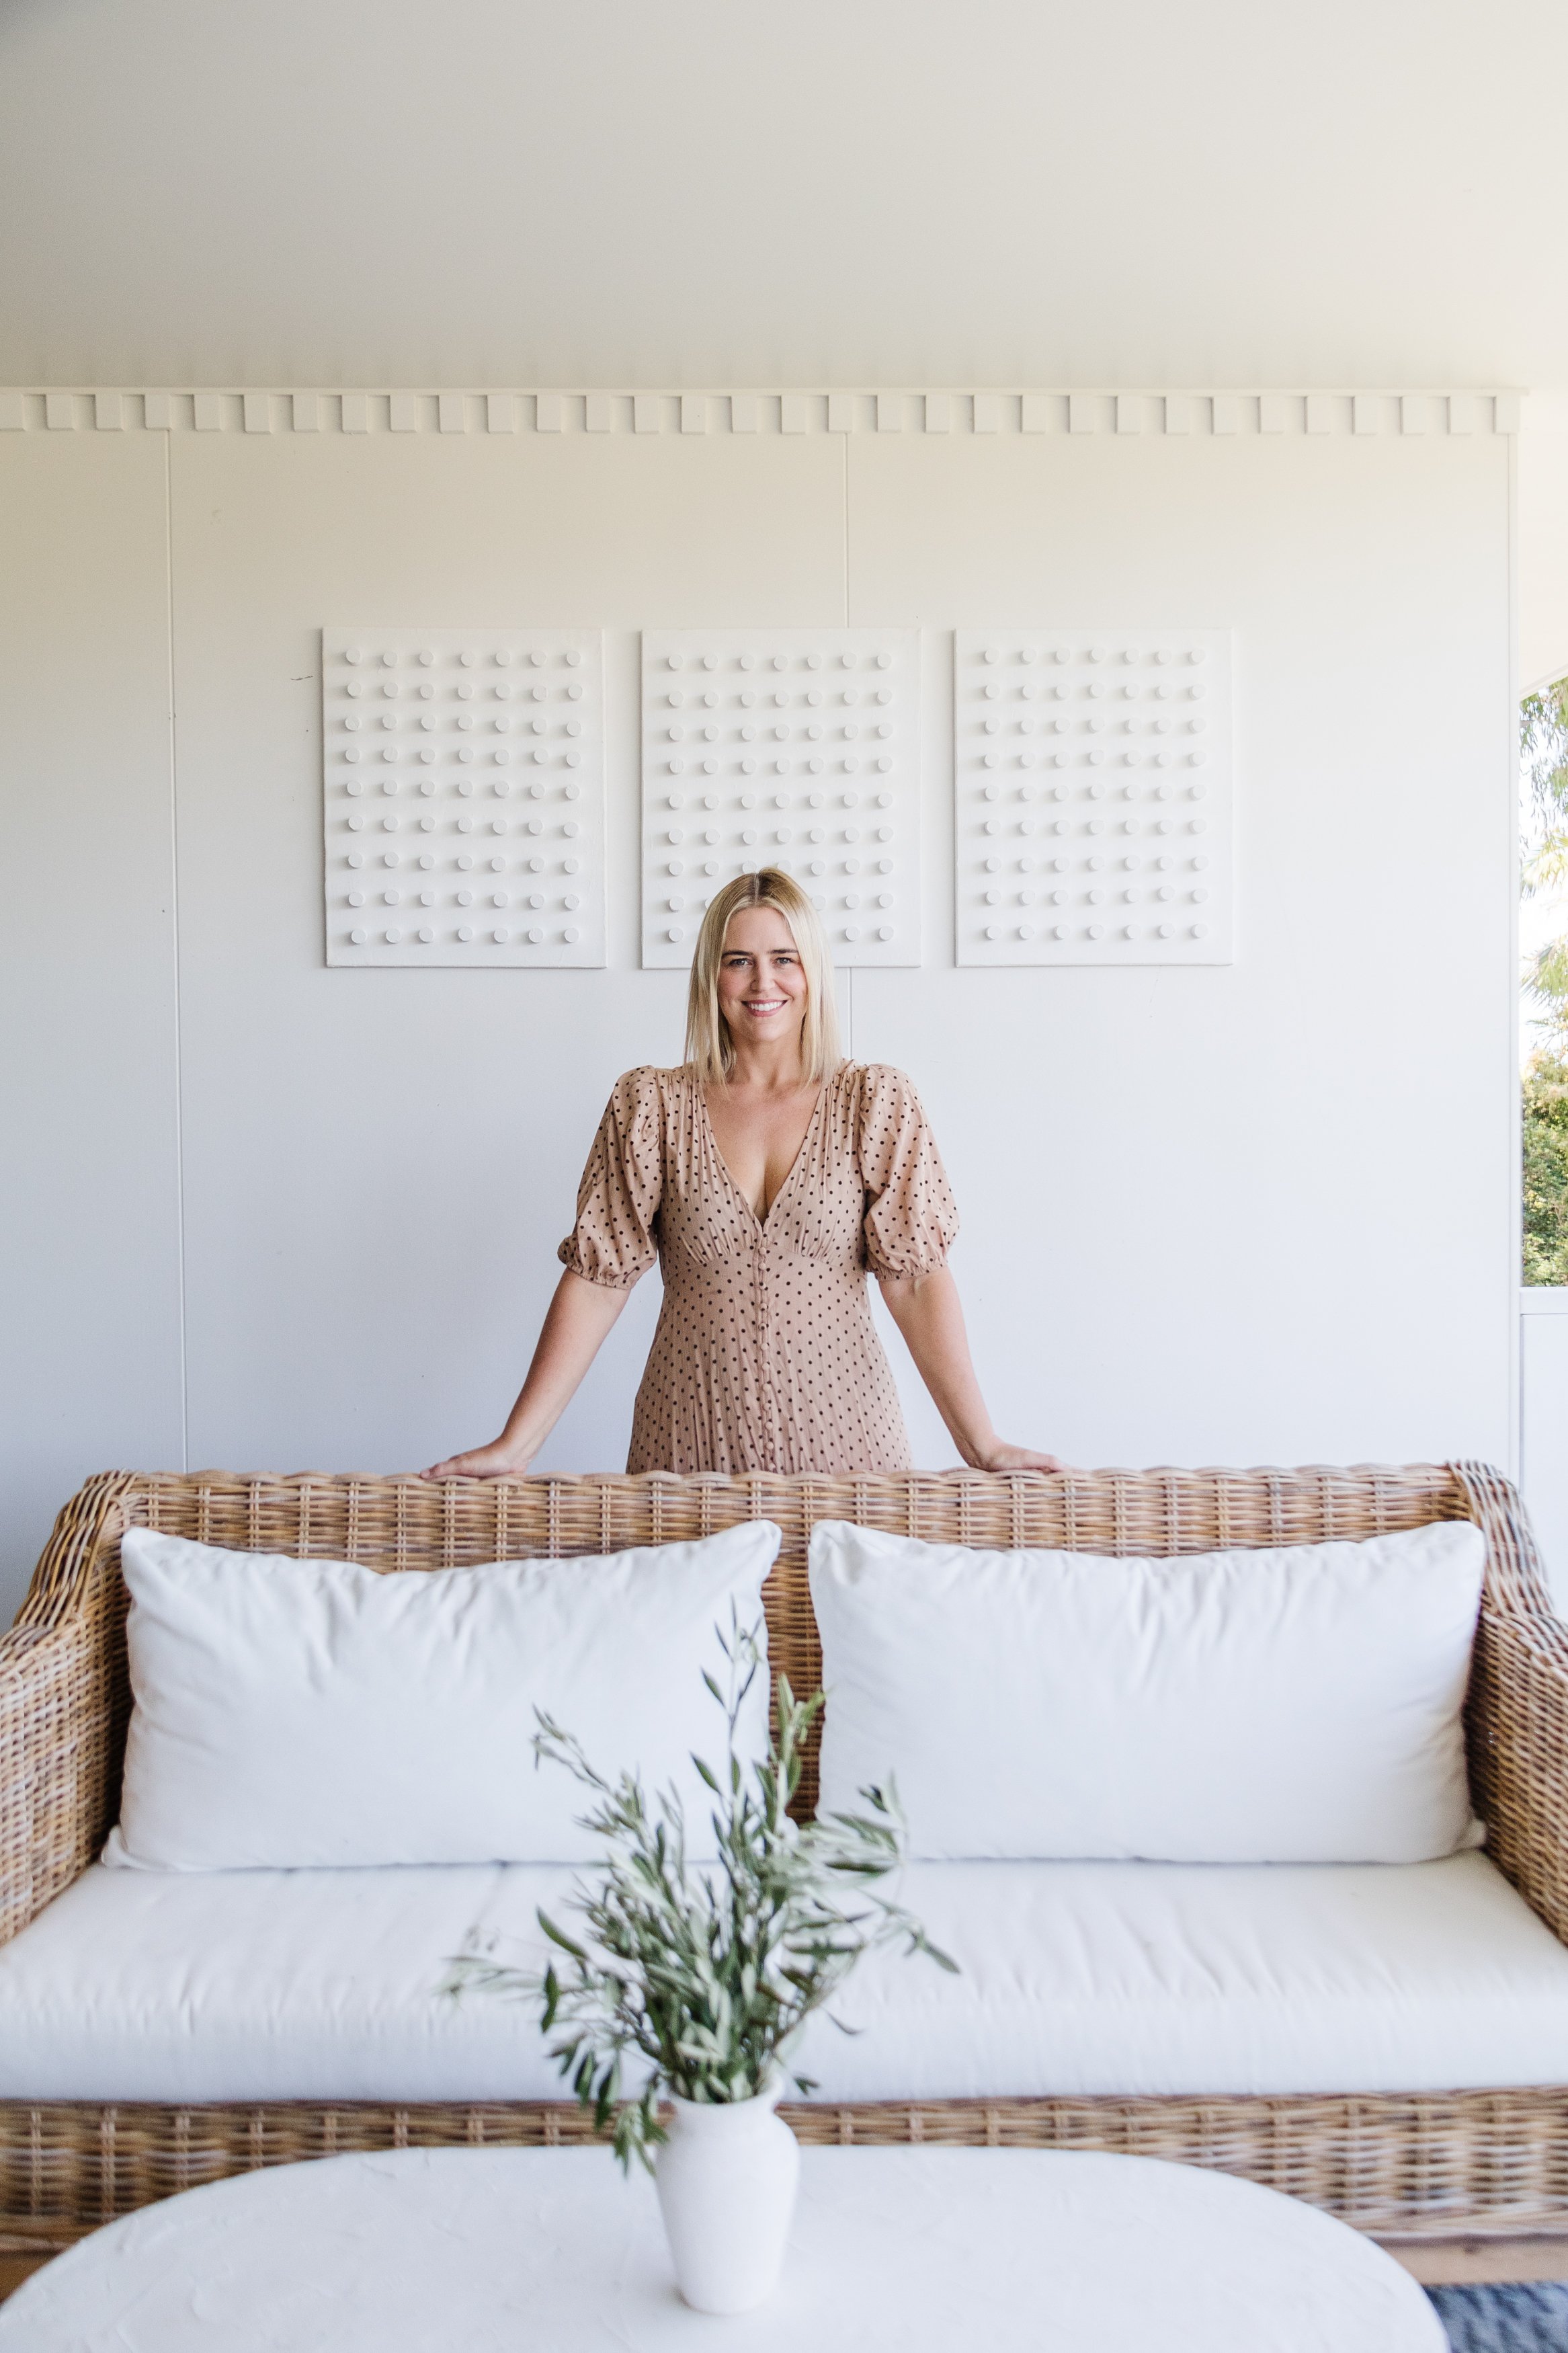
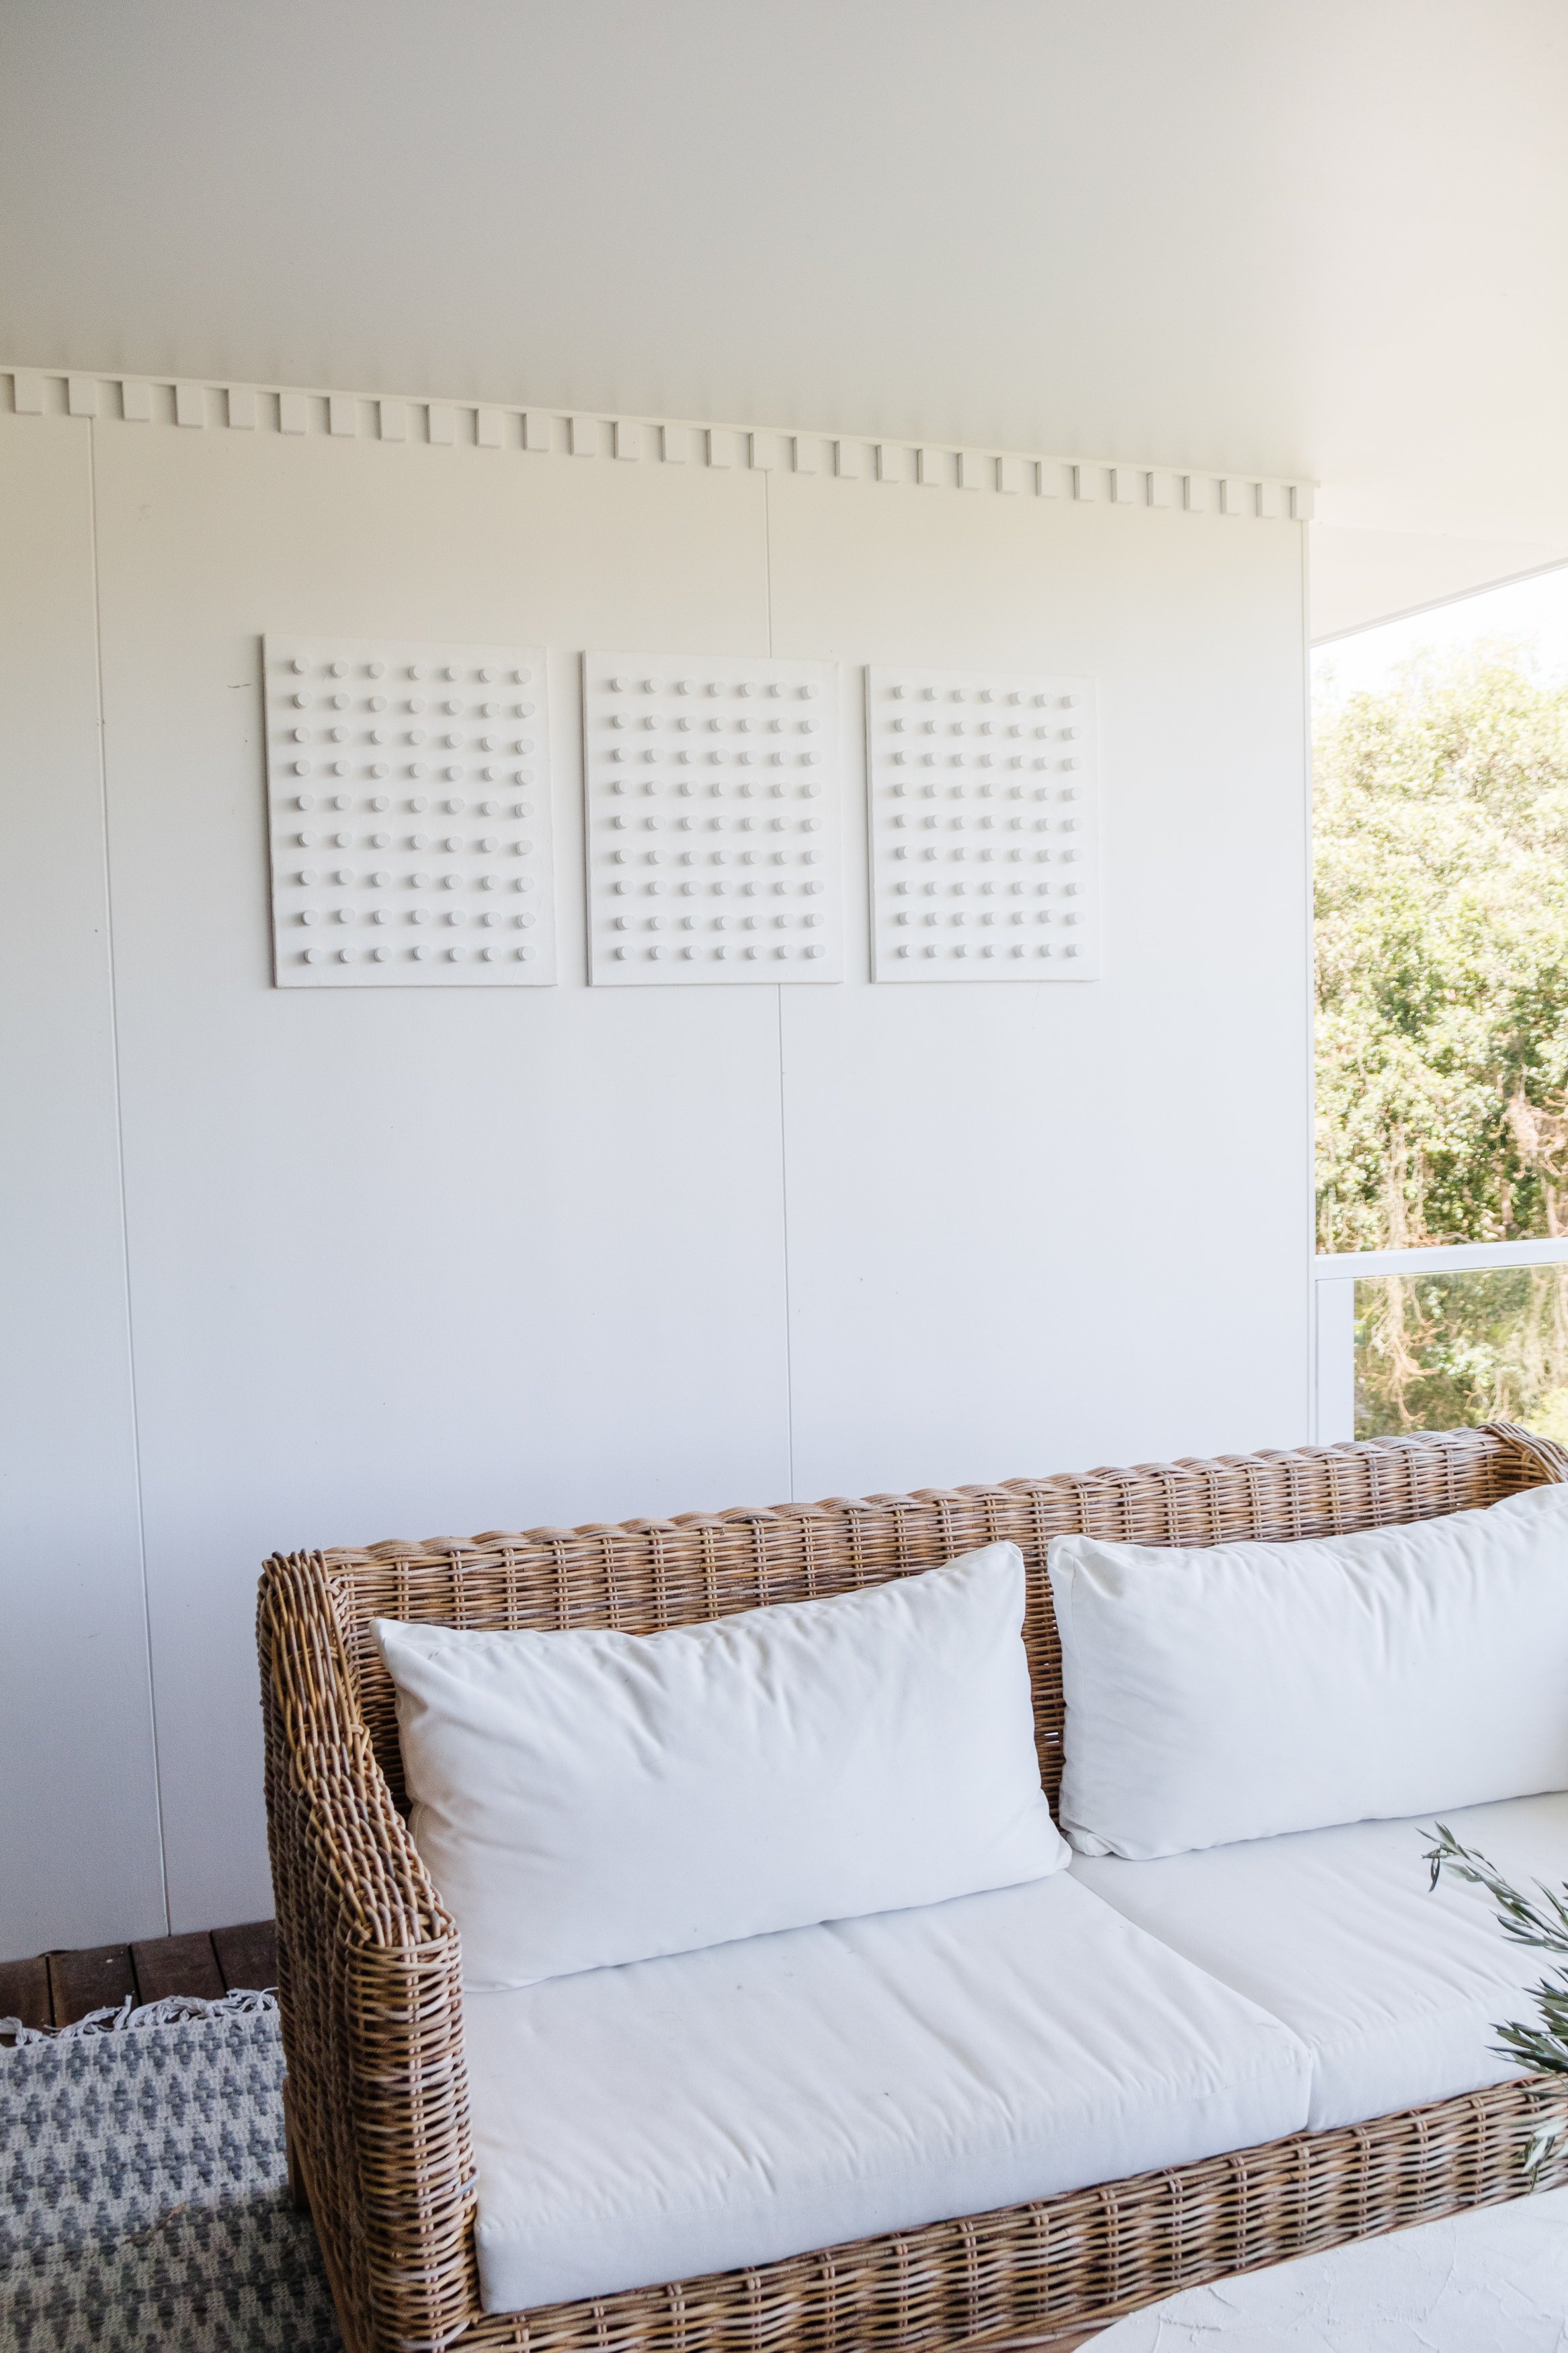
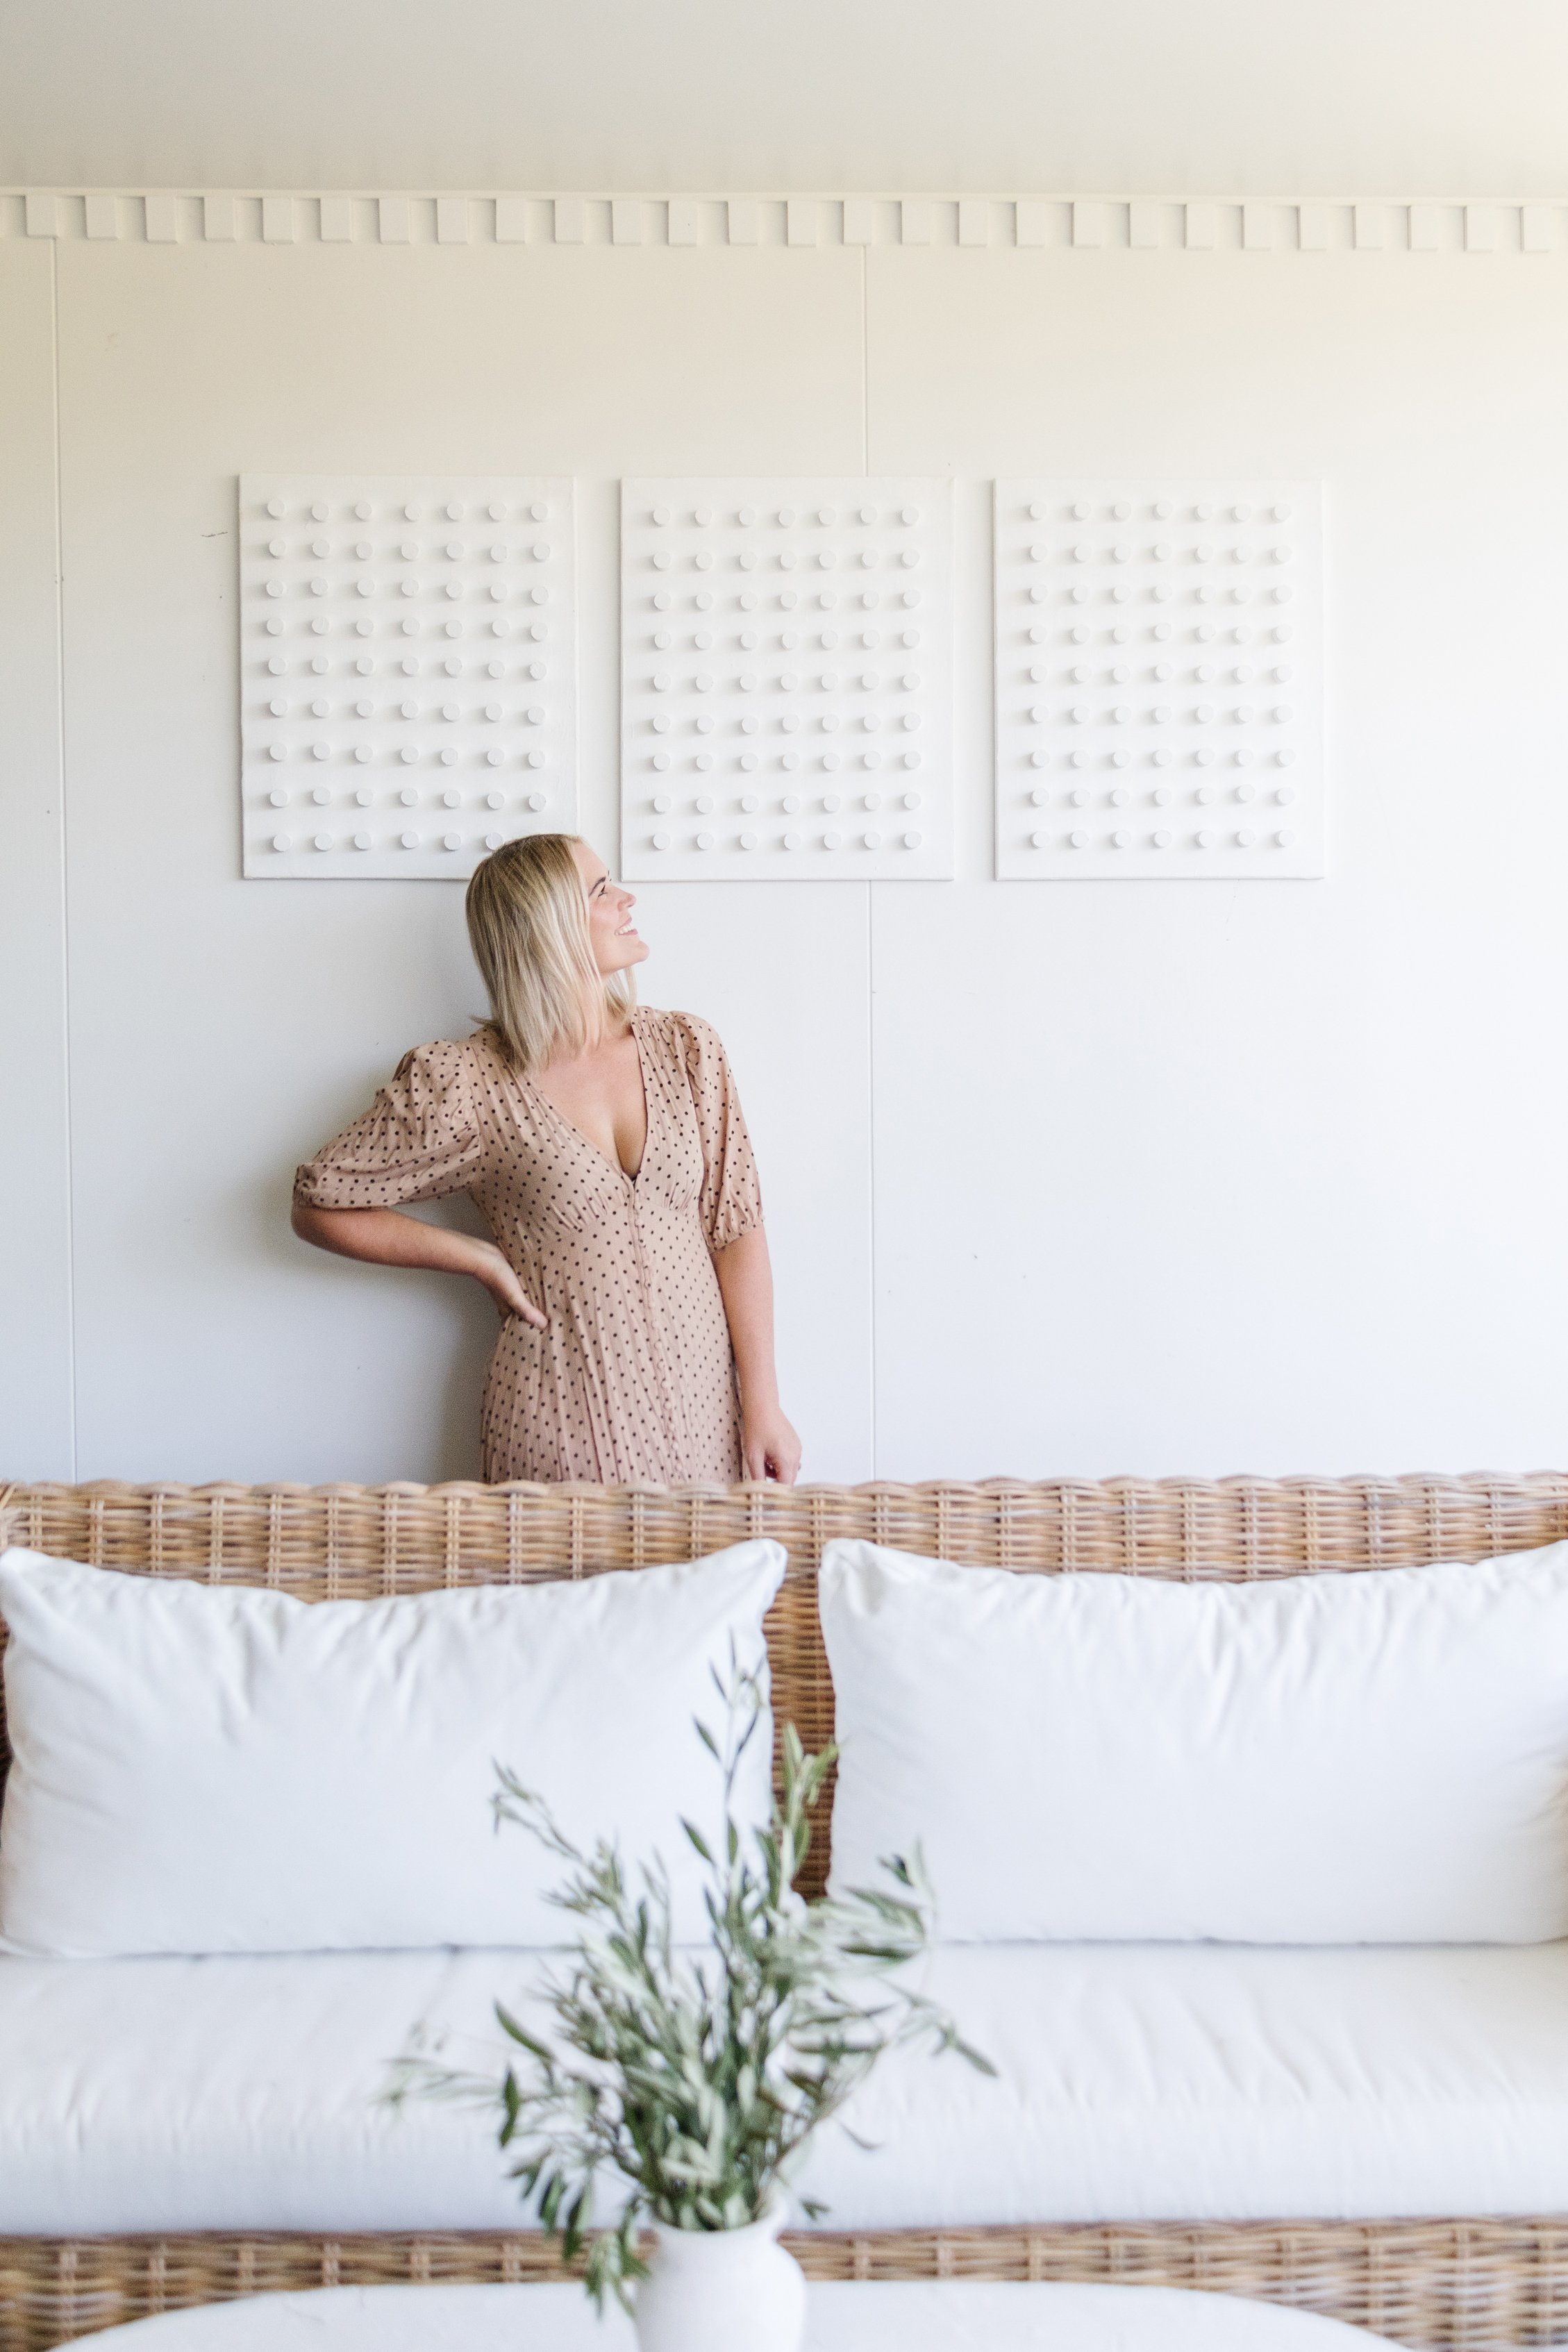
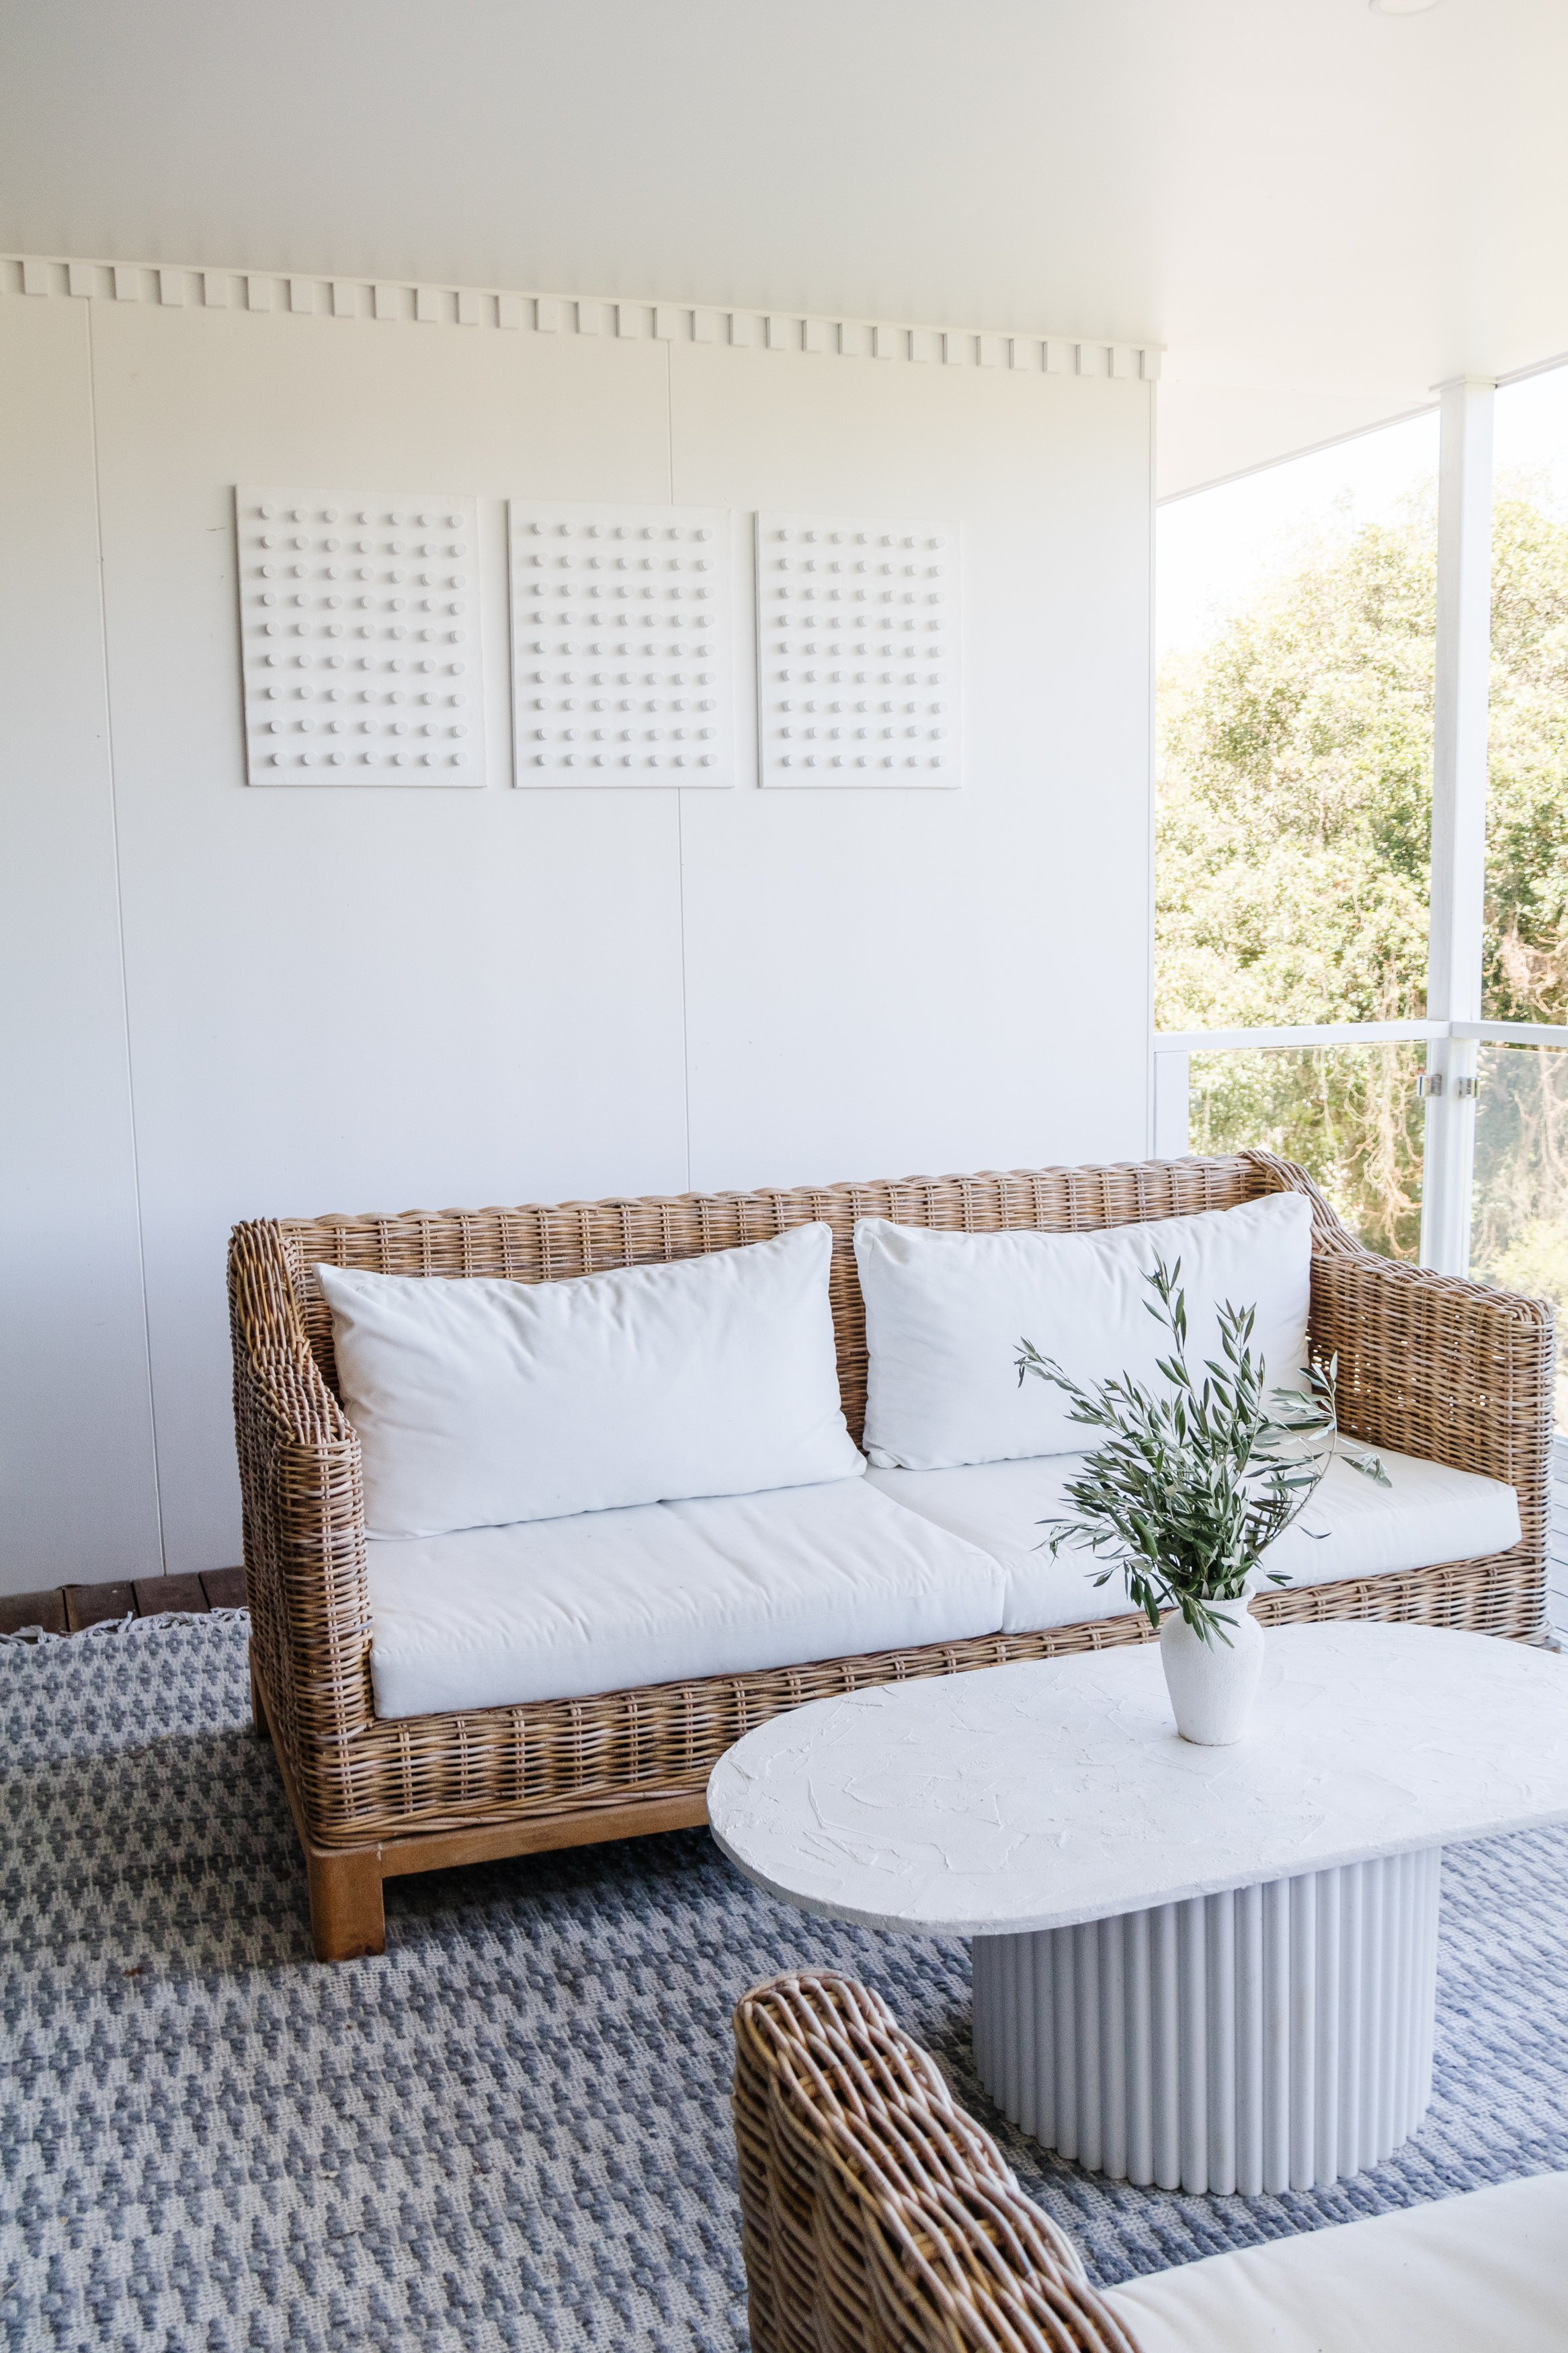
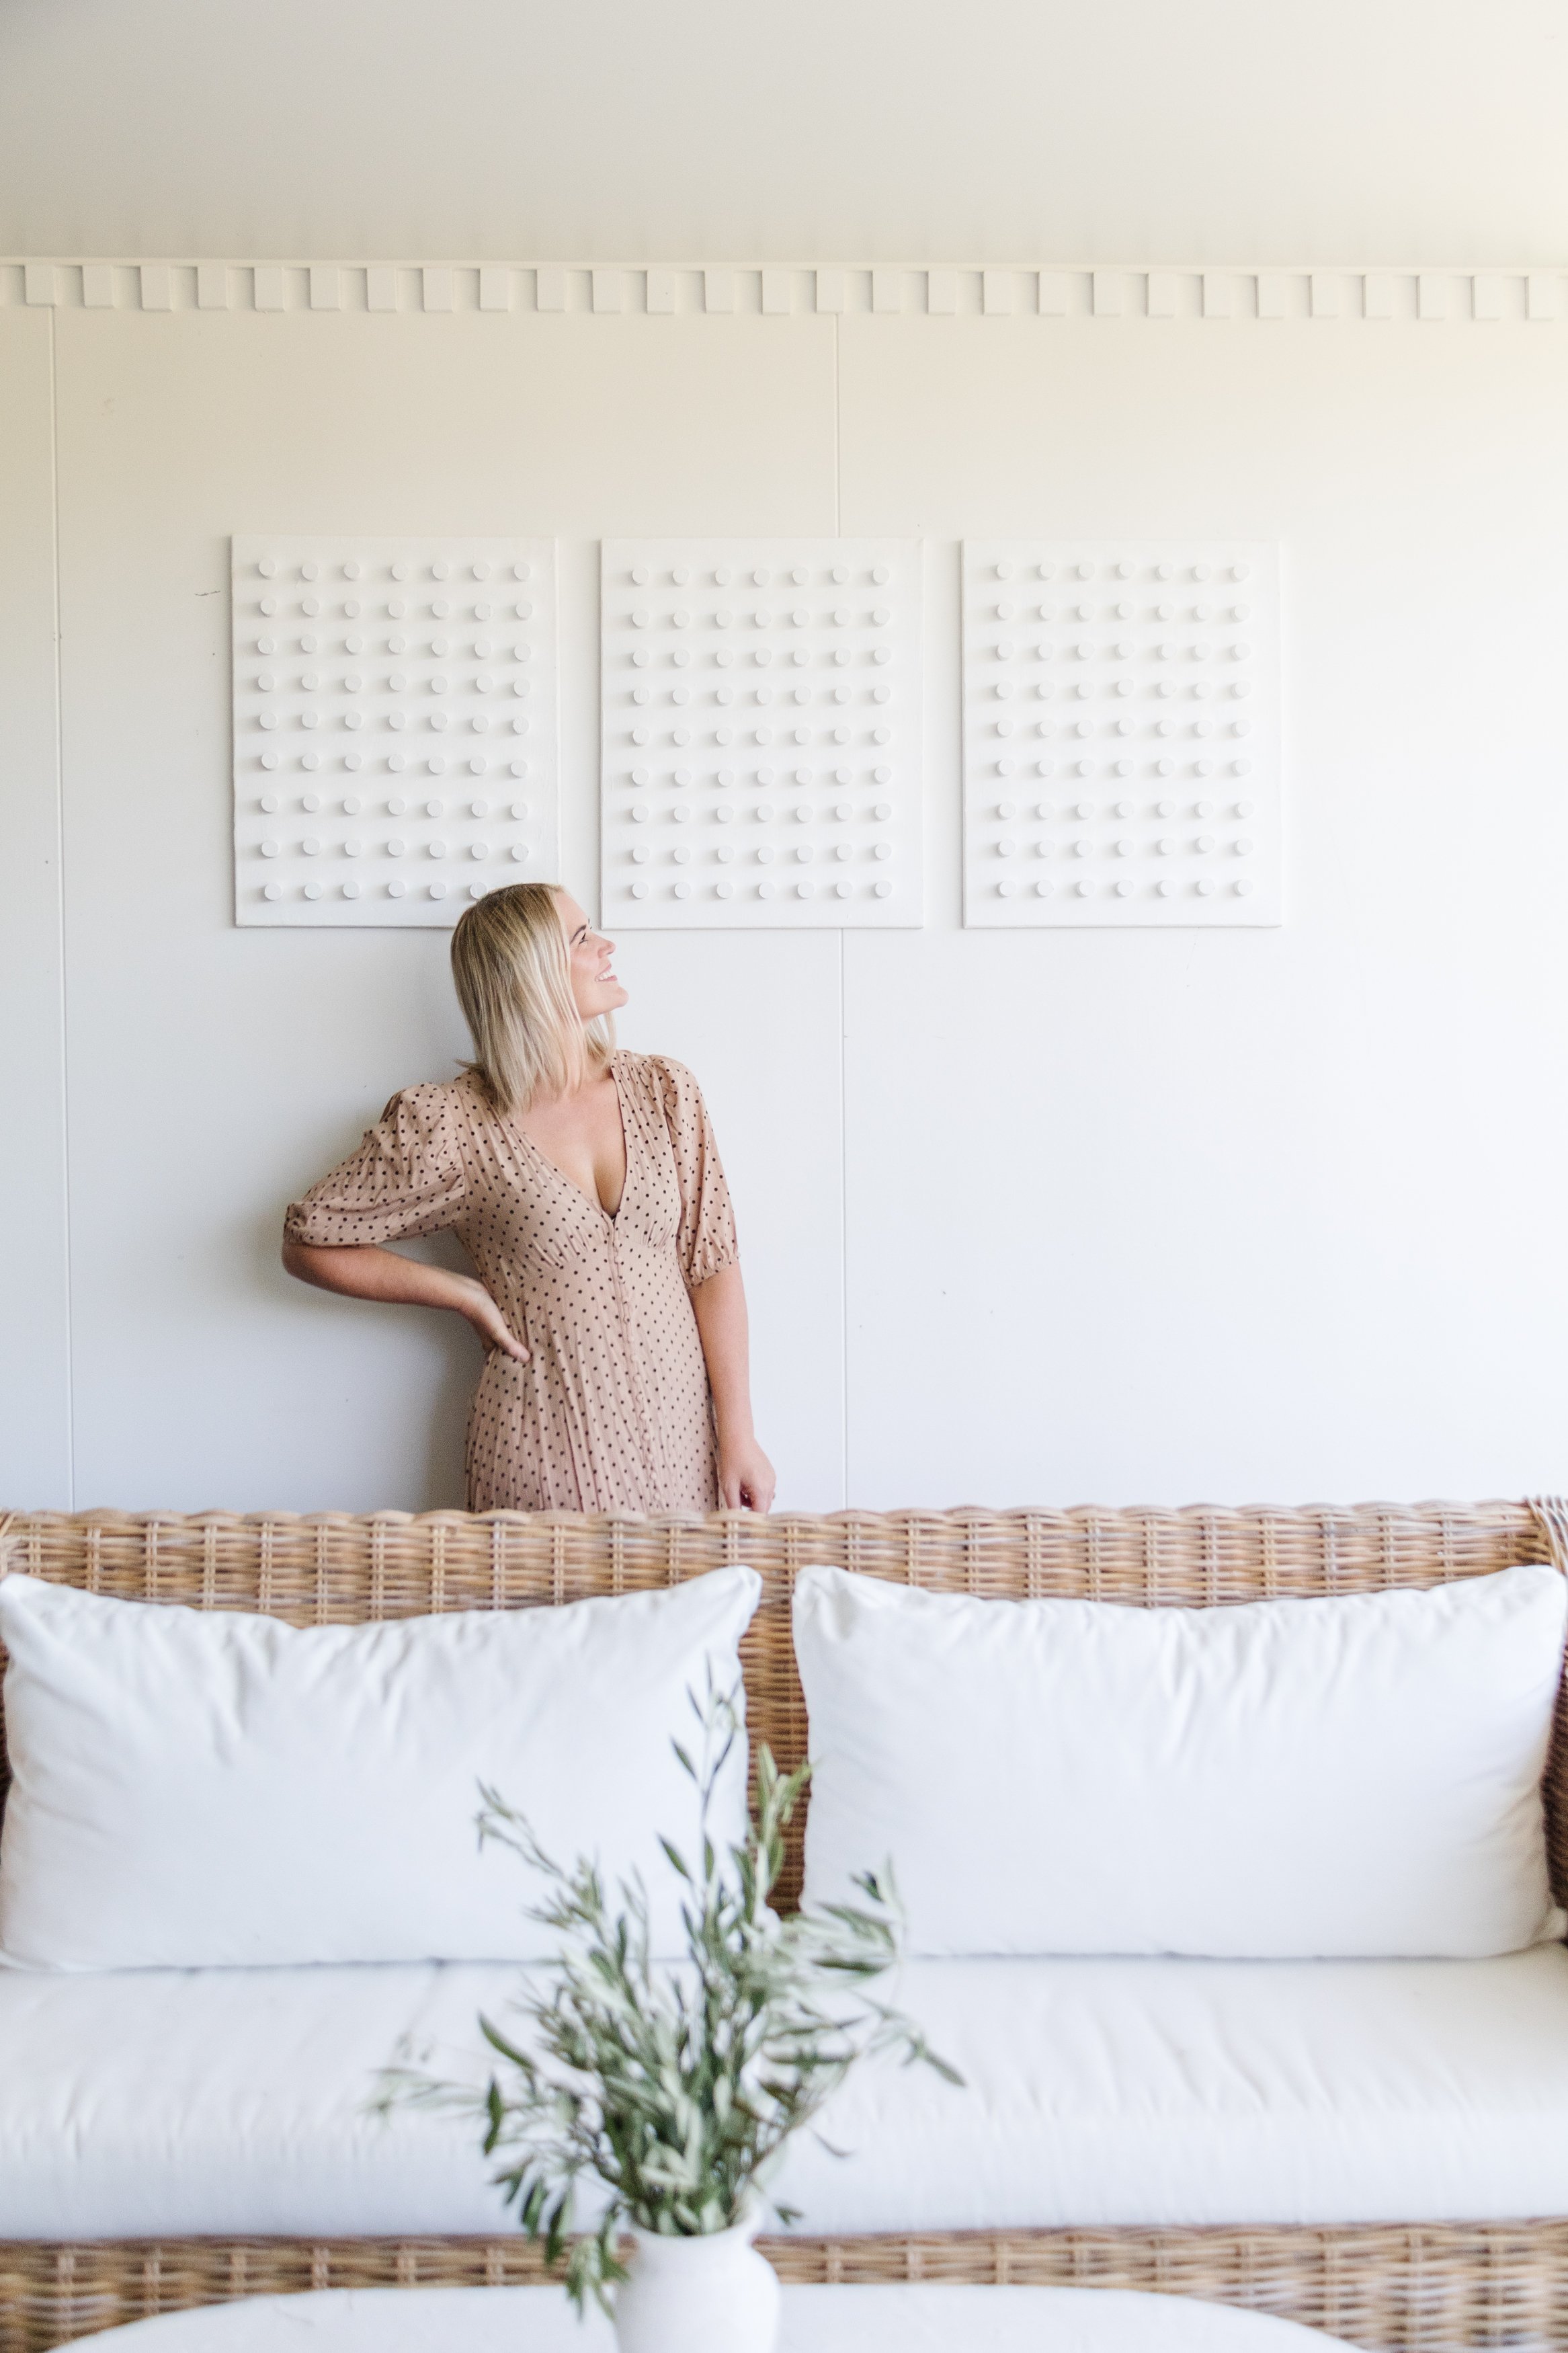
Coming to you this week with a really simple yet beautiful project that anyone can tackle - Upcycled Dowel Art. If you’ve been following along for a while, you’ll know how much I love making art using secondhand canvas pieces. Have you seen my Sculptural Plaster Wall Art, Texture Relief Art and Rope Wall Art? I made them using secondhand canvas I found at local charity stores and basic materials including paint, plaster, fabric, rope, styrofoam and glue. Oh, and by the way, I have absolutely no experience whatsoever making art. But here we are! After coming up with a hack for making my own DIY Dentil Moulding, I wanted to make some art to hand on a wall on our front deck. For this project I decided to make a series of three art pieces using canvas I picked up at a charity shop for $1 each. I always like to keep costs down, so I looked around to see what I could find at home and when I found some dowels at the back of my craft cupboard, an idea started forming. Read on to find out how I made this Upcycled Dowel Art.
To see how this project came together, watch this video and these Instagram Stories.
Before & After


Project Details
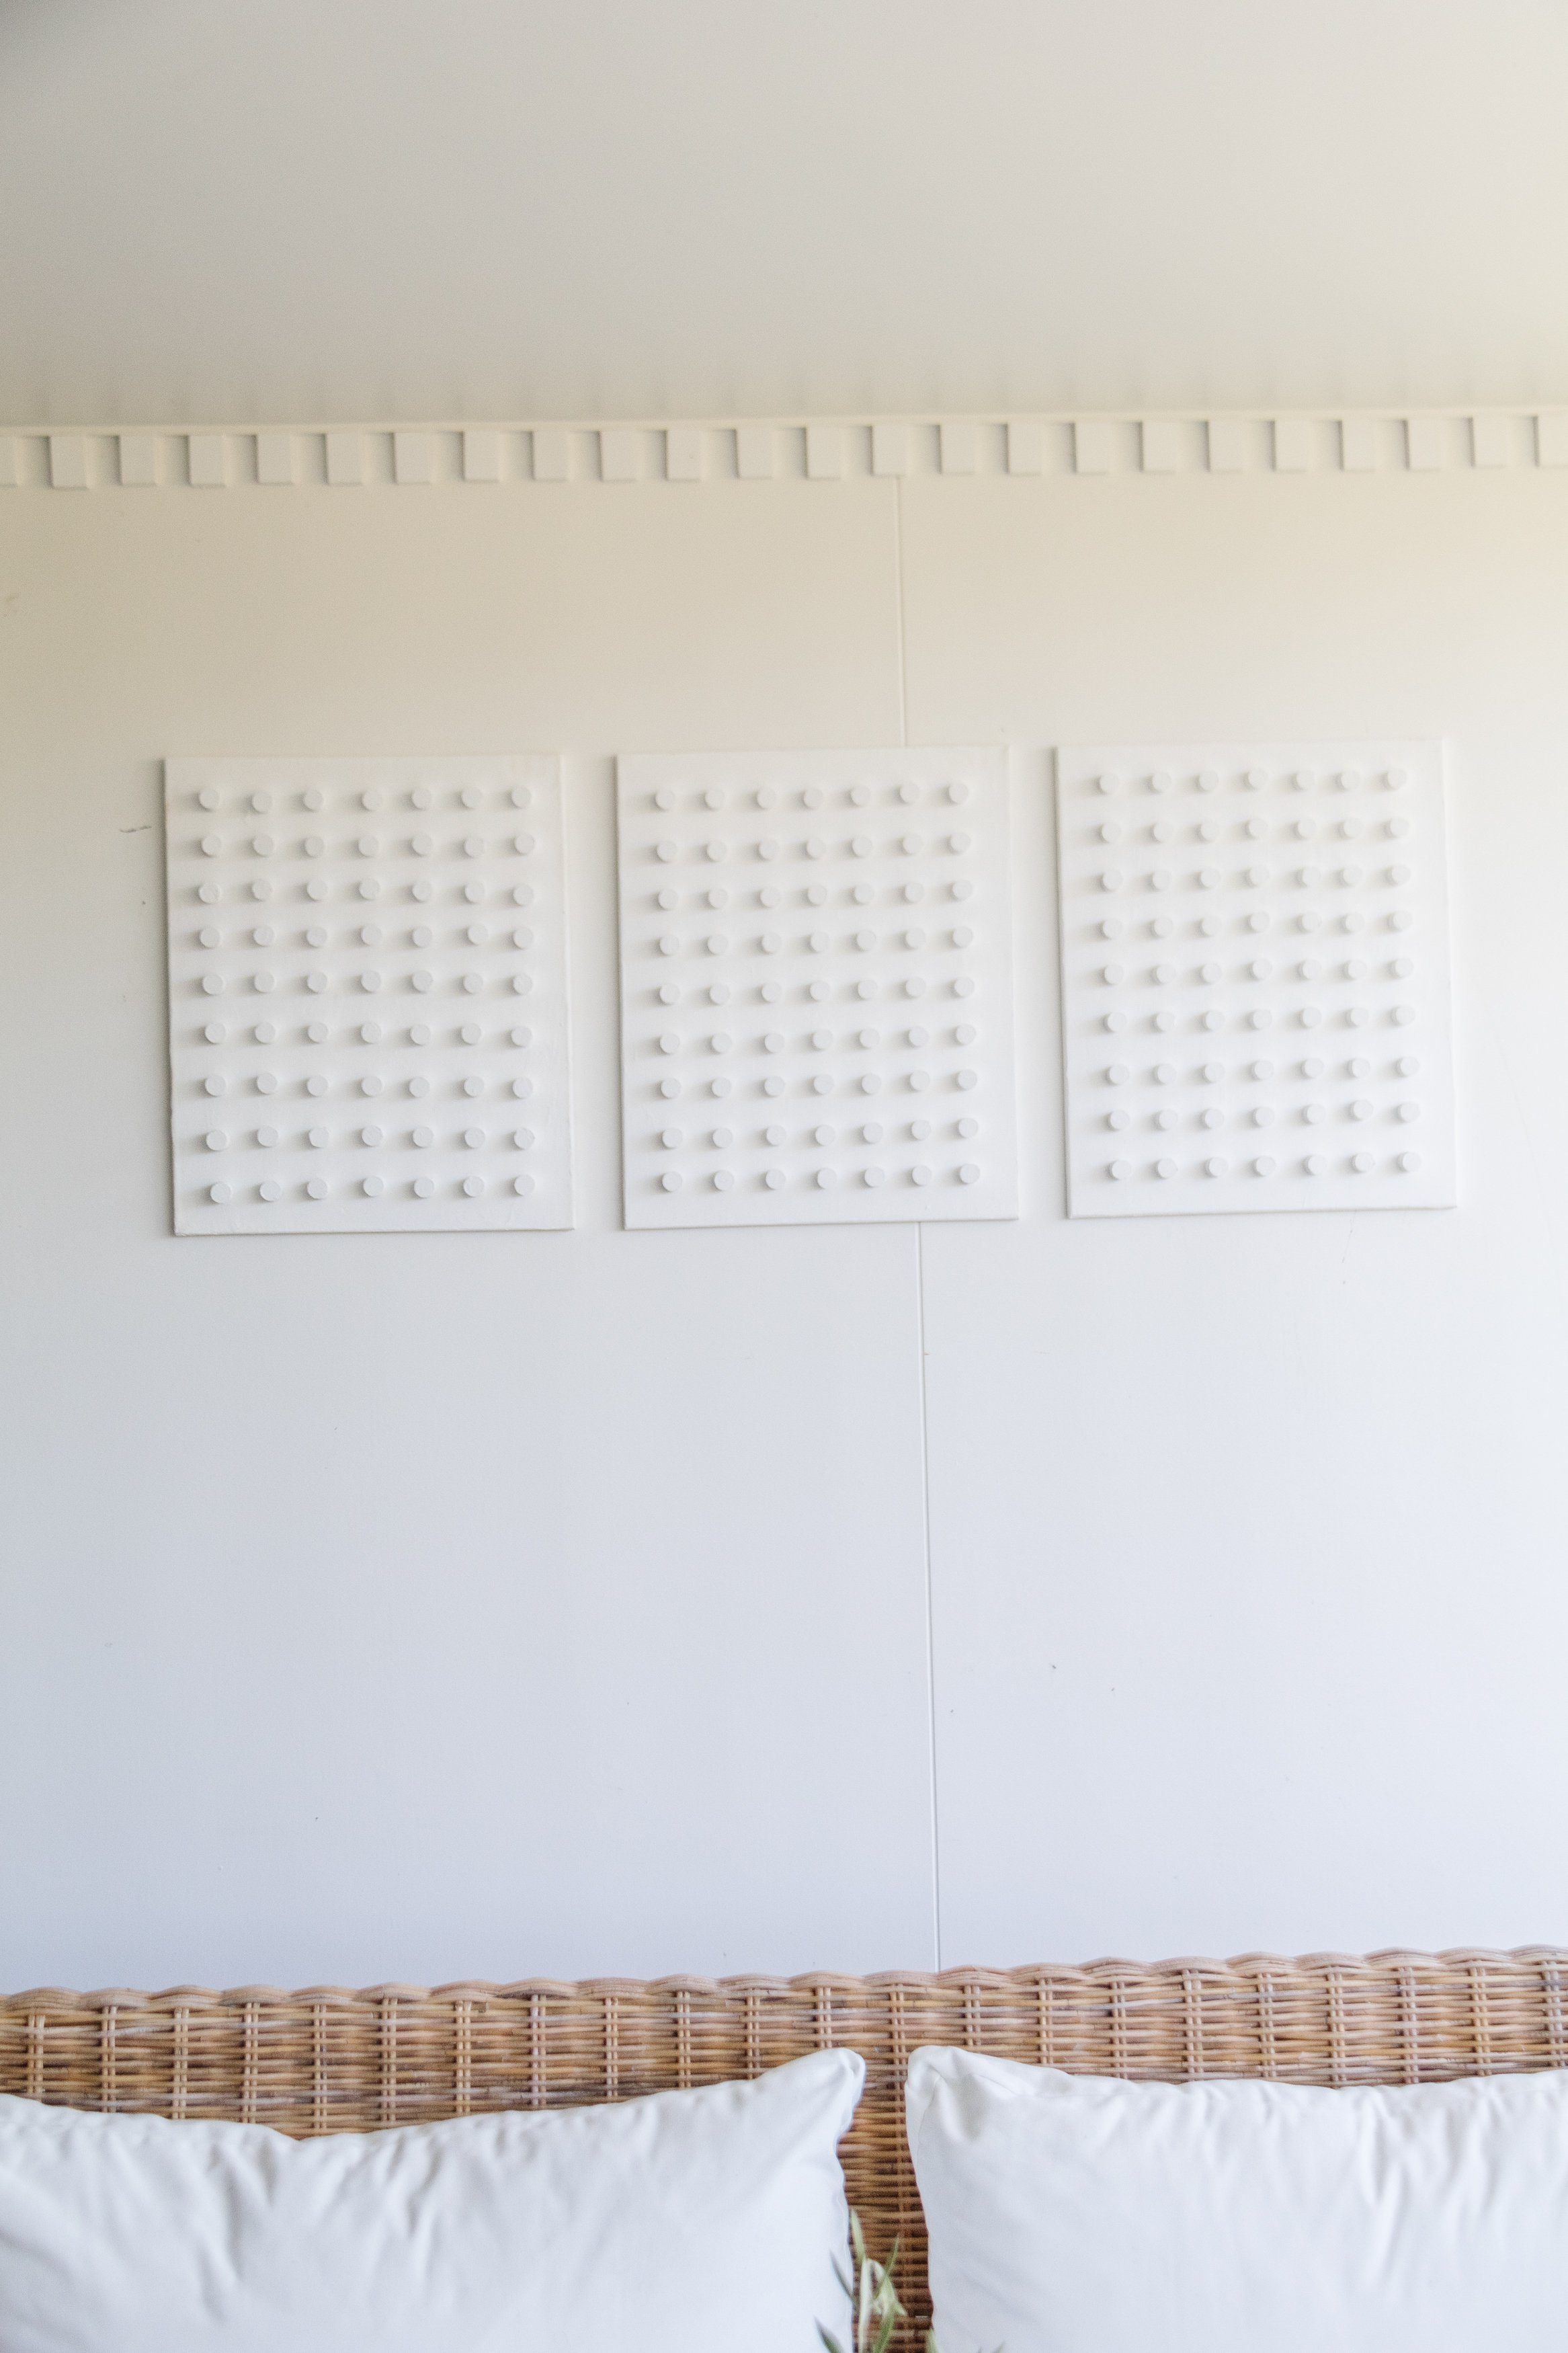
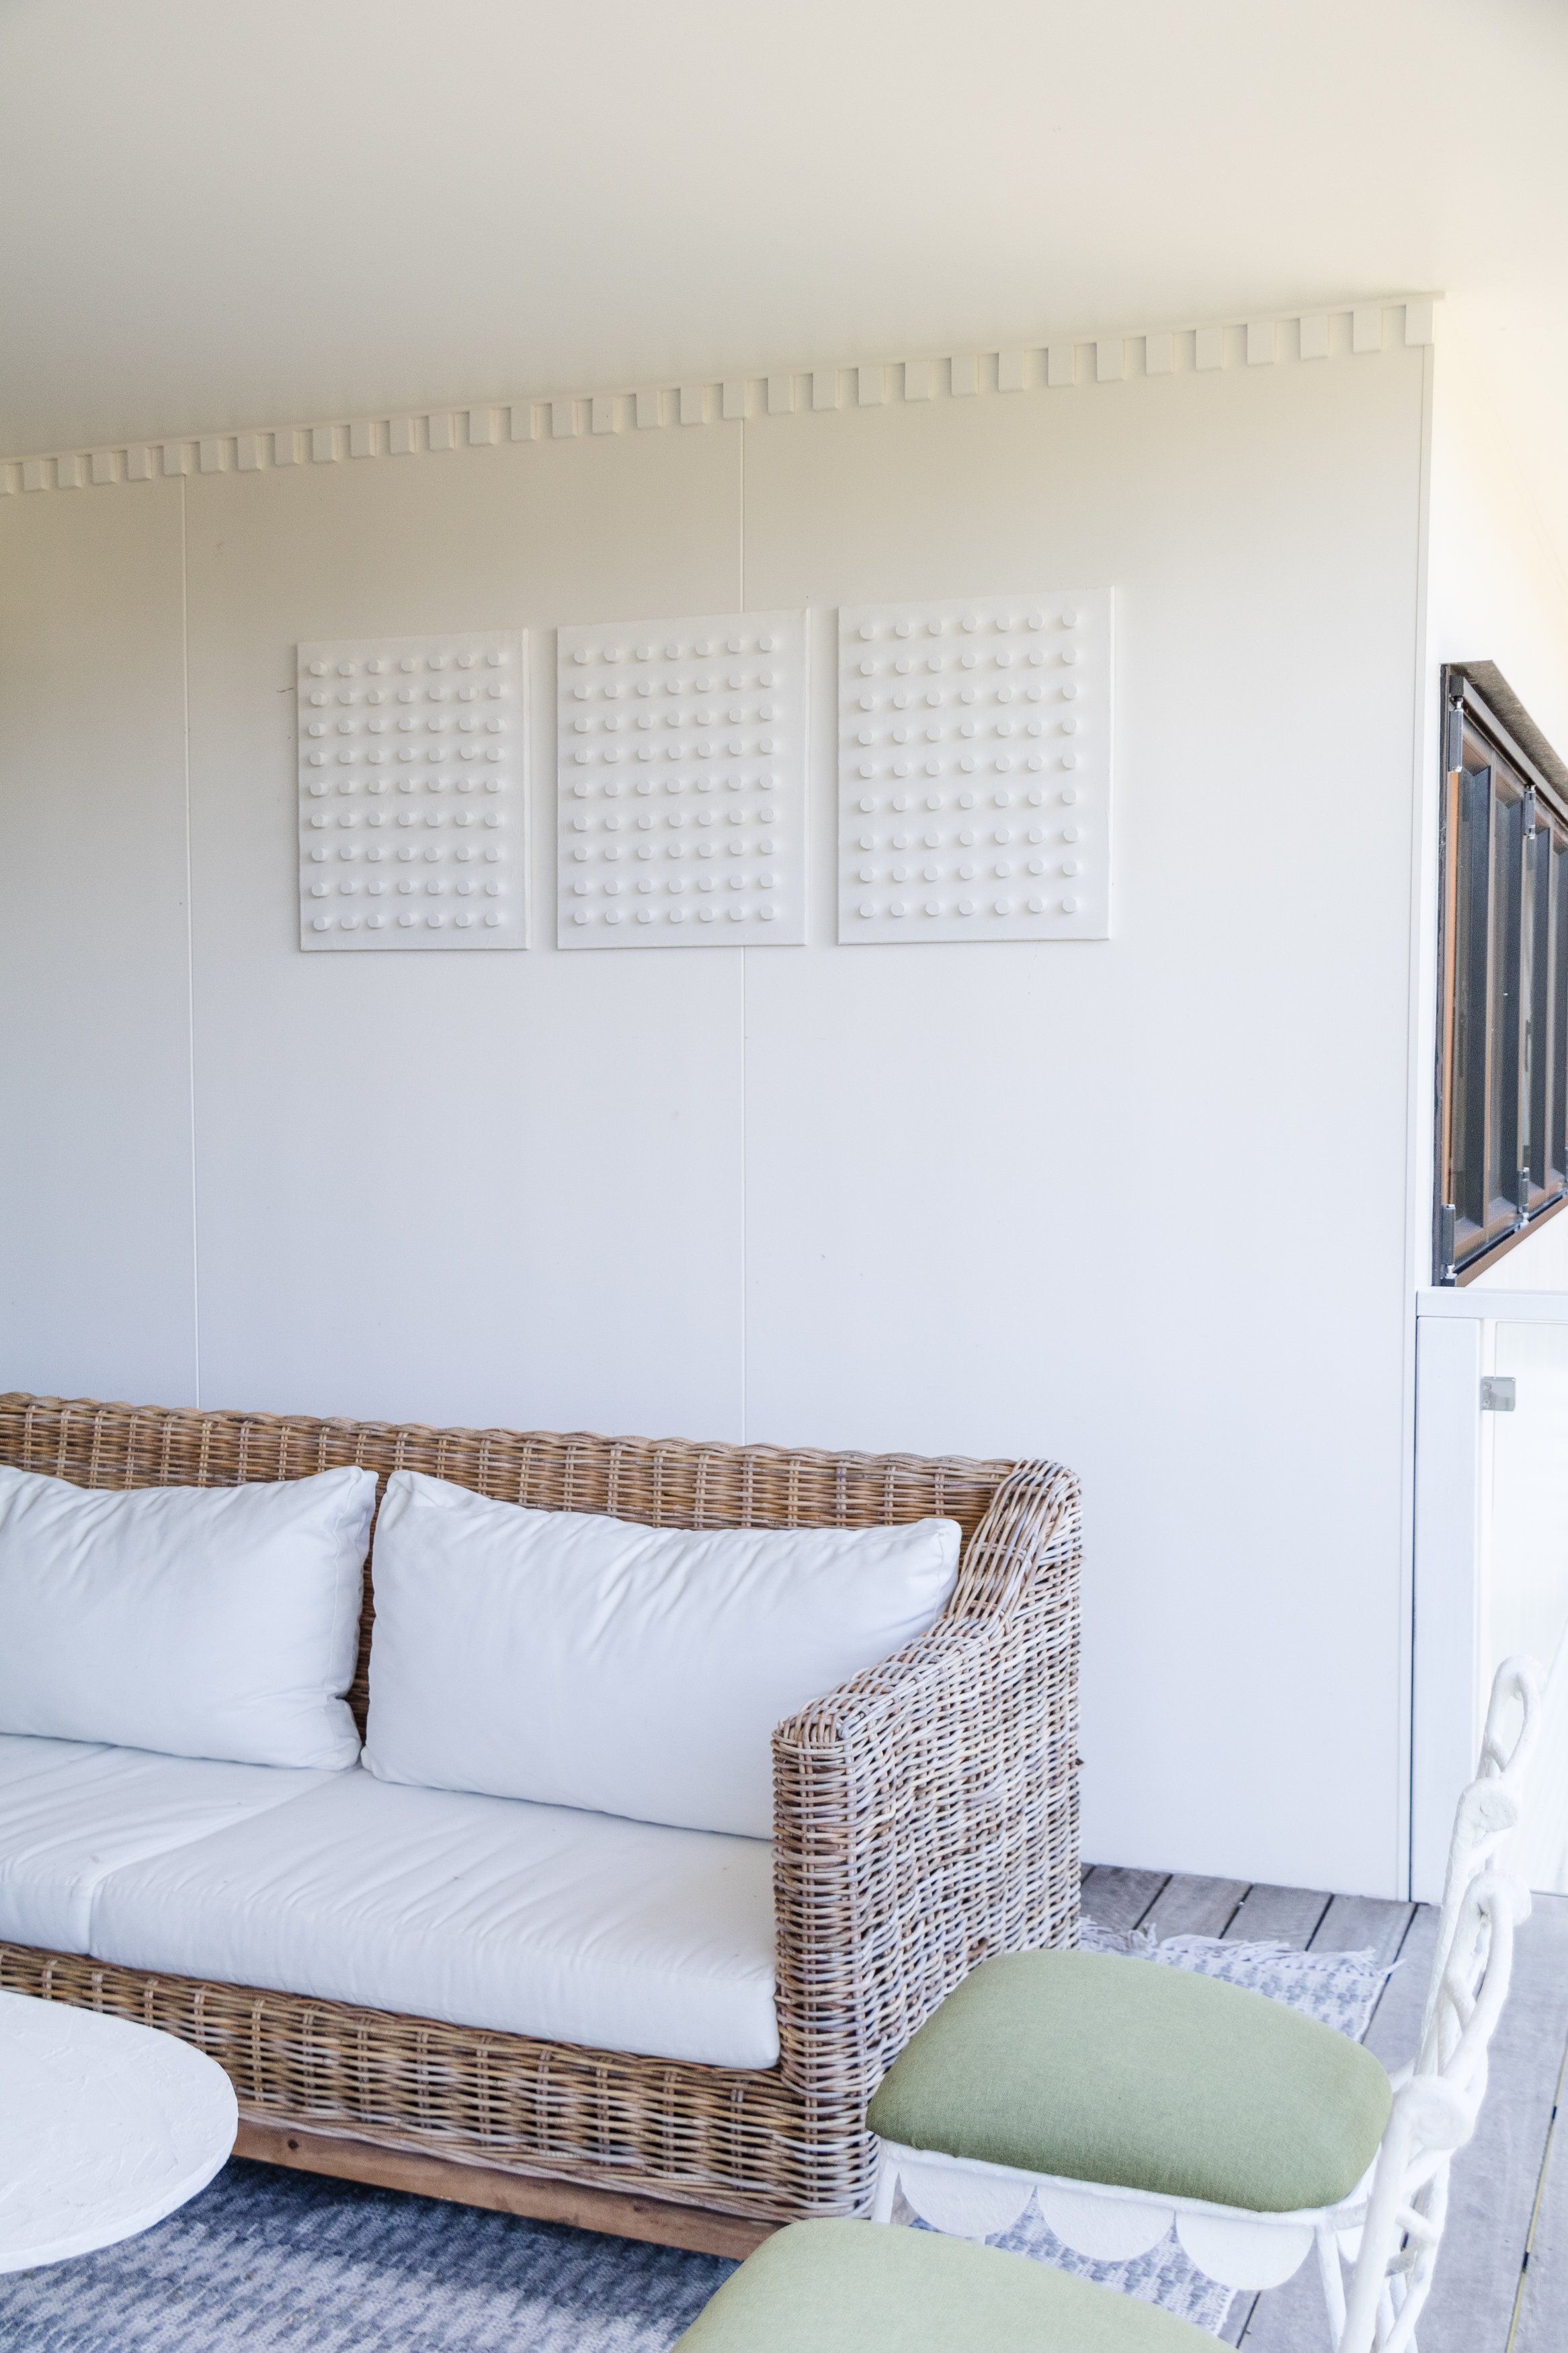
♻️ Upcycling: Art. You can use any size canvas to replicate this in your own home.
🕒 Project Time Estimate: 3 hours, not including paint drying time
💰 Materials Cost: TBC
Materials
3 x Stretched canvas
Fine sanding sheet/roll
1L Exterior paint - Dulux “Leixcon Quarter”
NB: You won’t need to use exterior paint if you’re planning on hanging your art indoors. If so, interior paint is perfect.
Tools
Measuring tape
Ruler
Pencil
Mitre saw (or handsaw)

How To
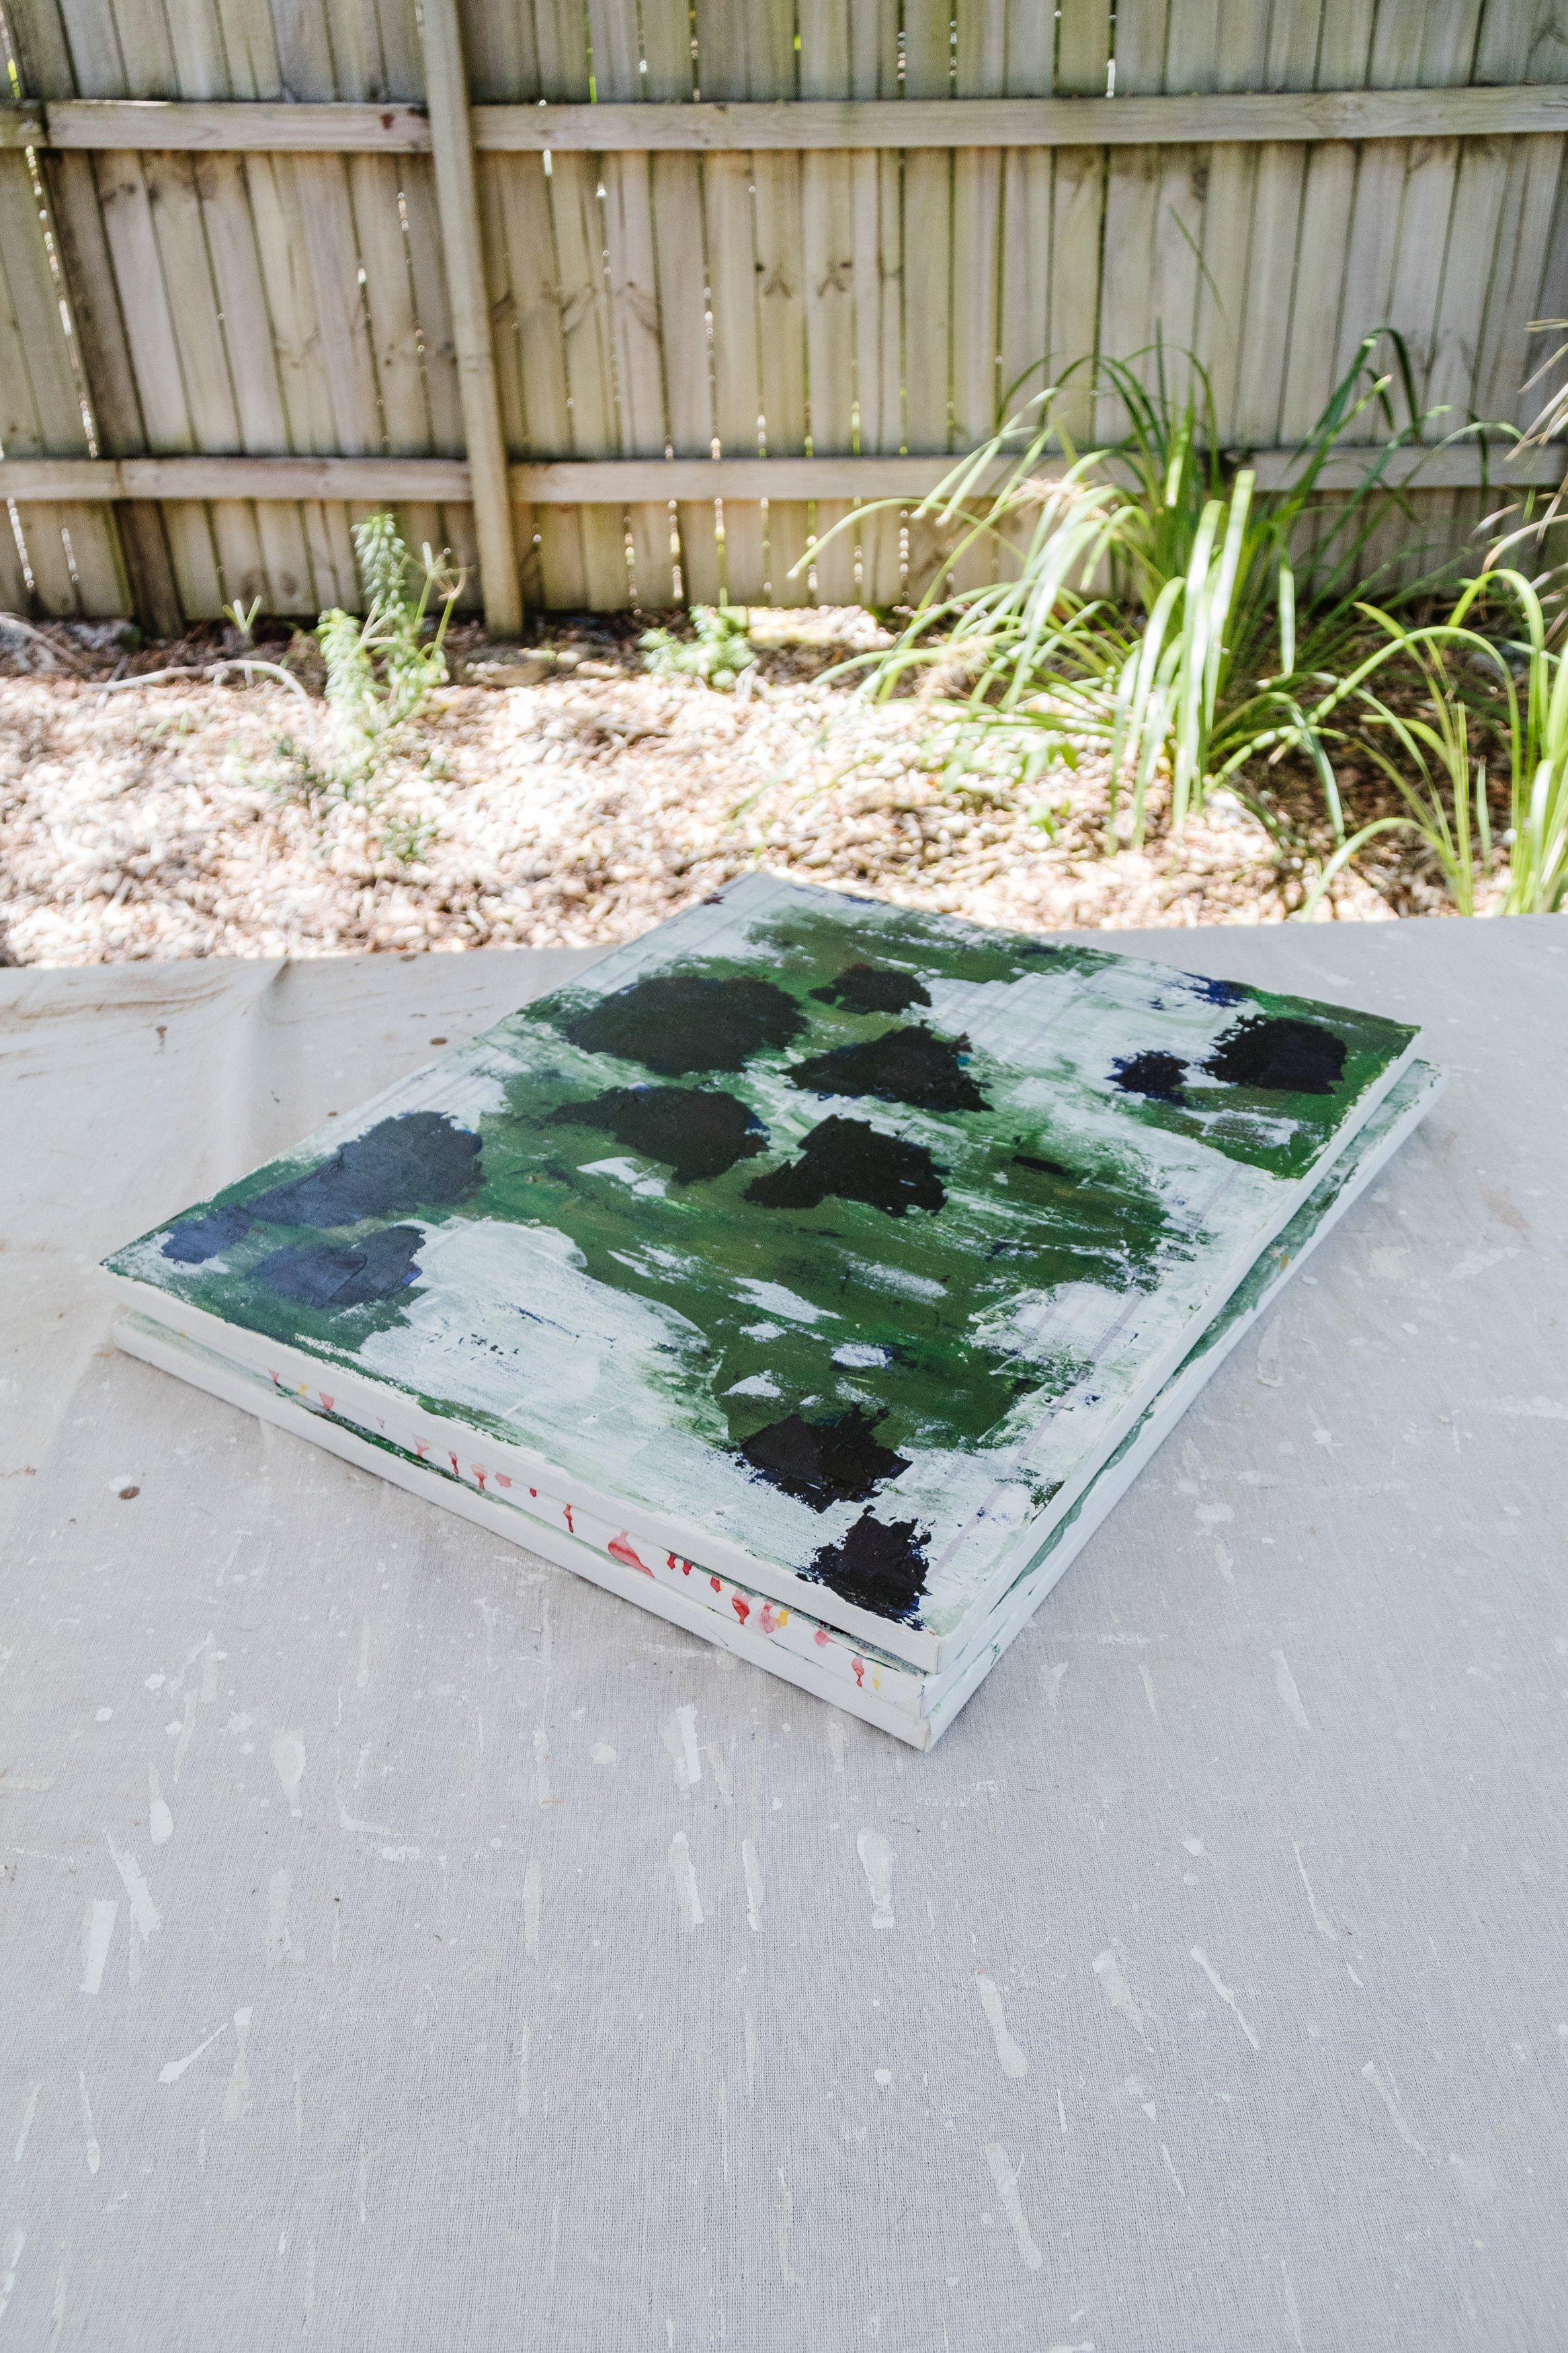
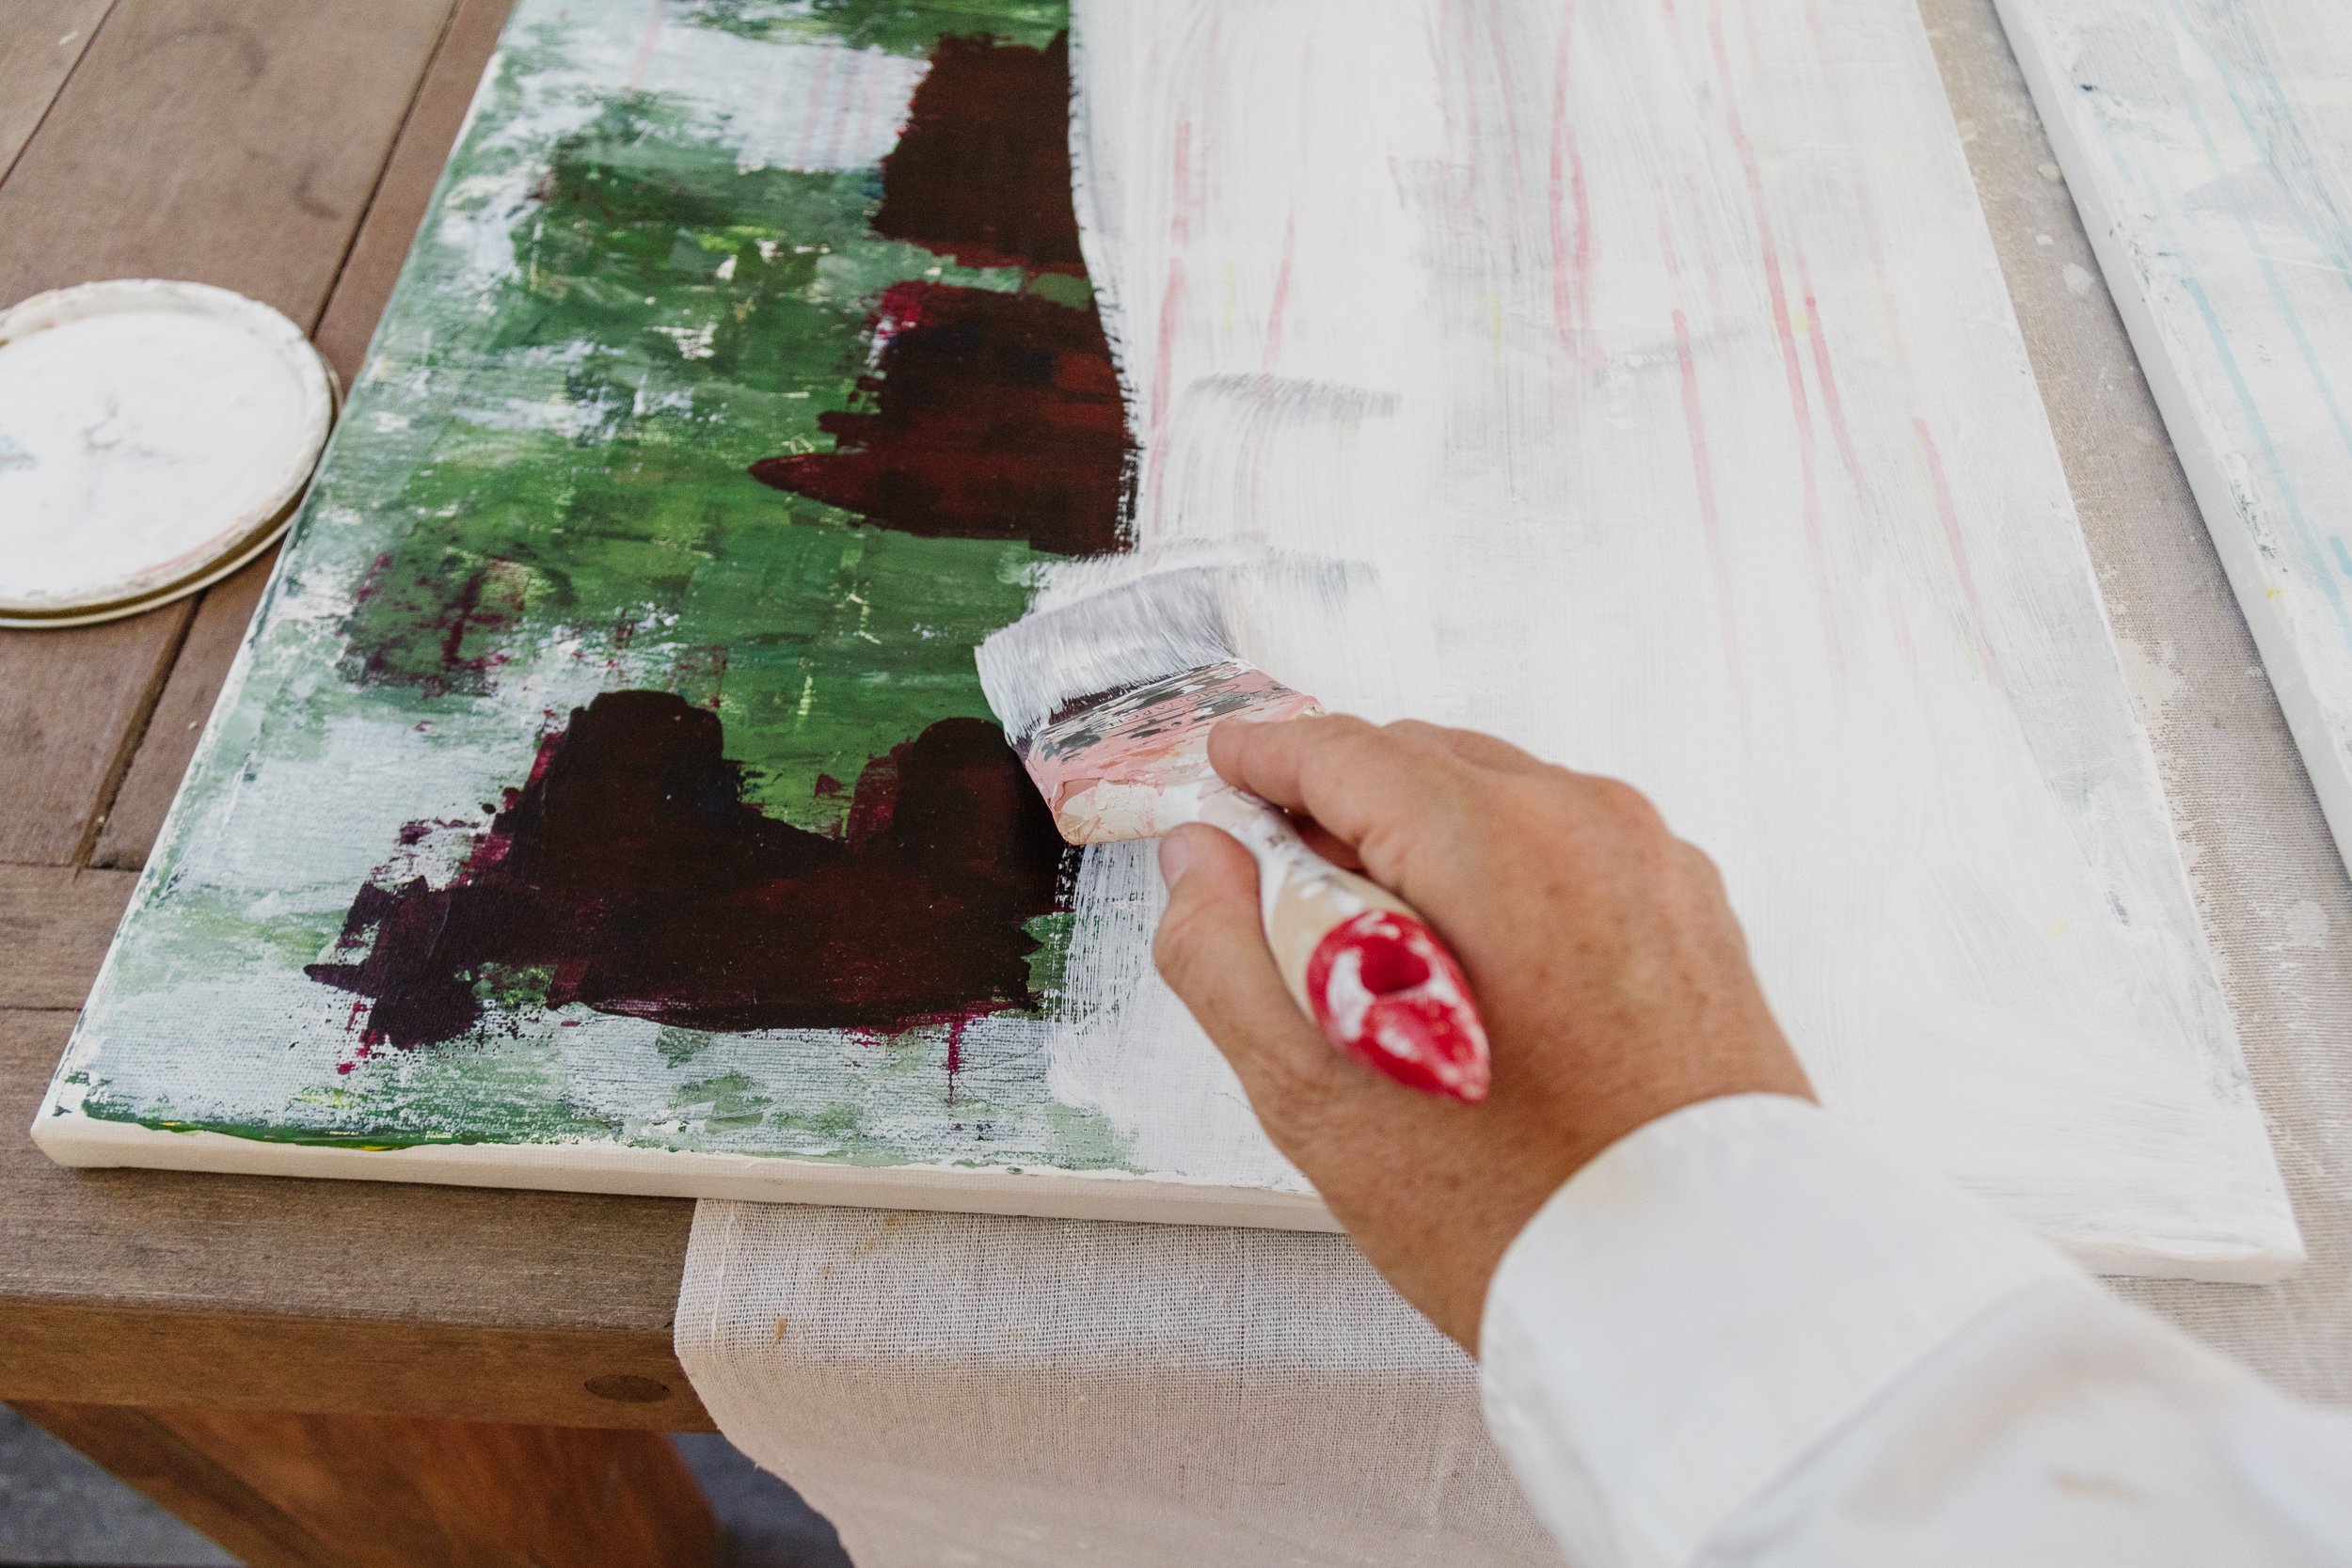
Step 1: To begin with, apply a thick coat of paint on top of each canvas using the paint brush to hide the existing artwork. If you bought new canvas, you won’t need to dow this. Set aside to dry completely.
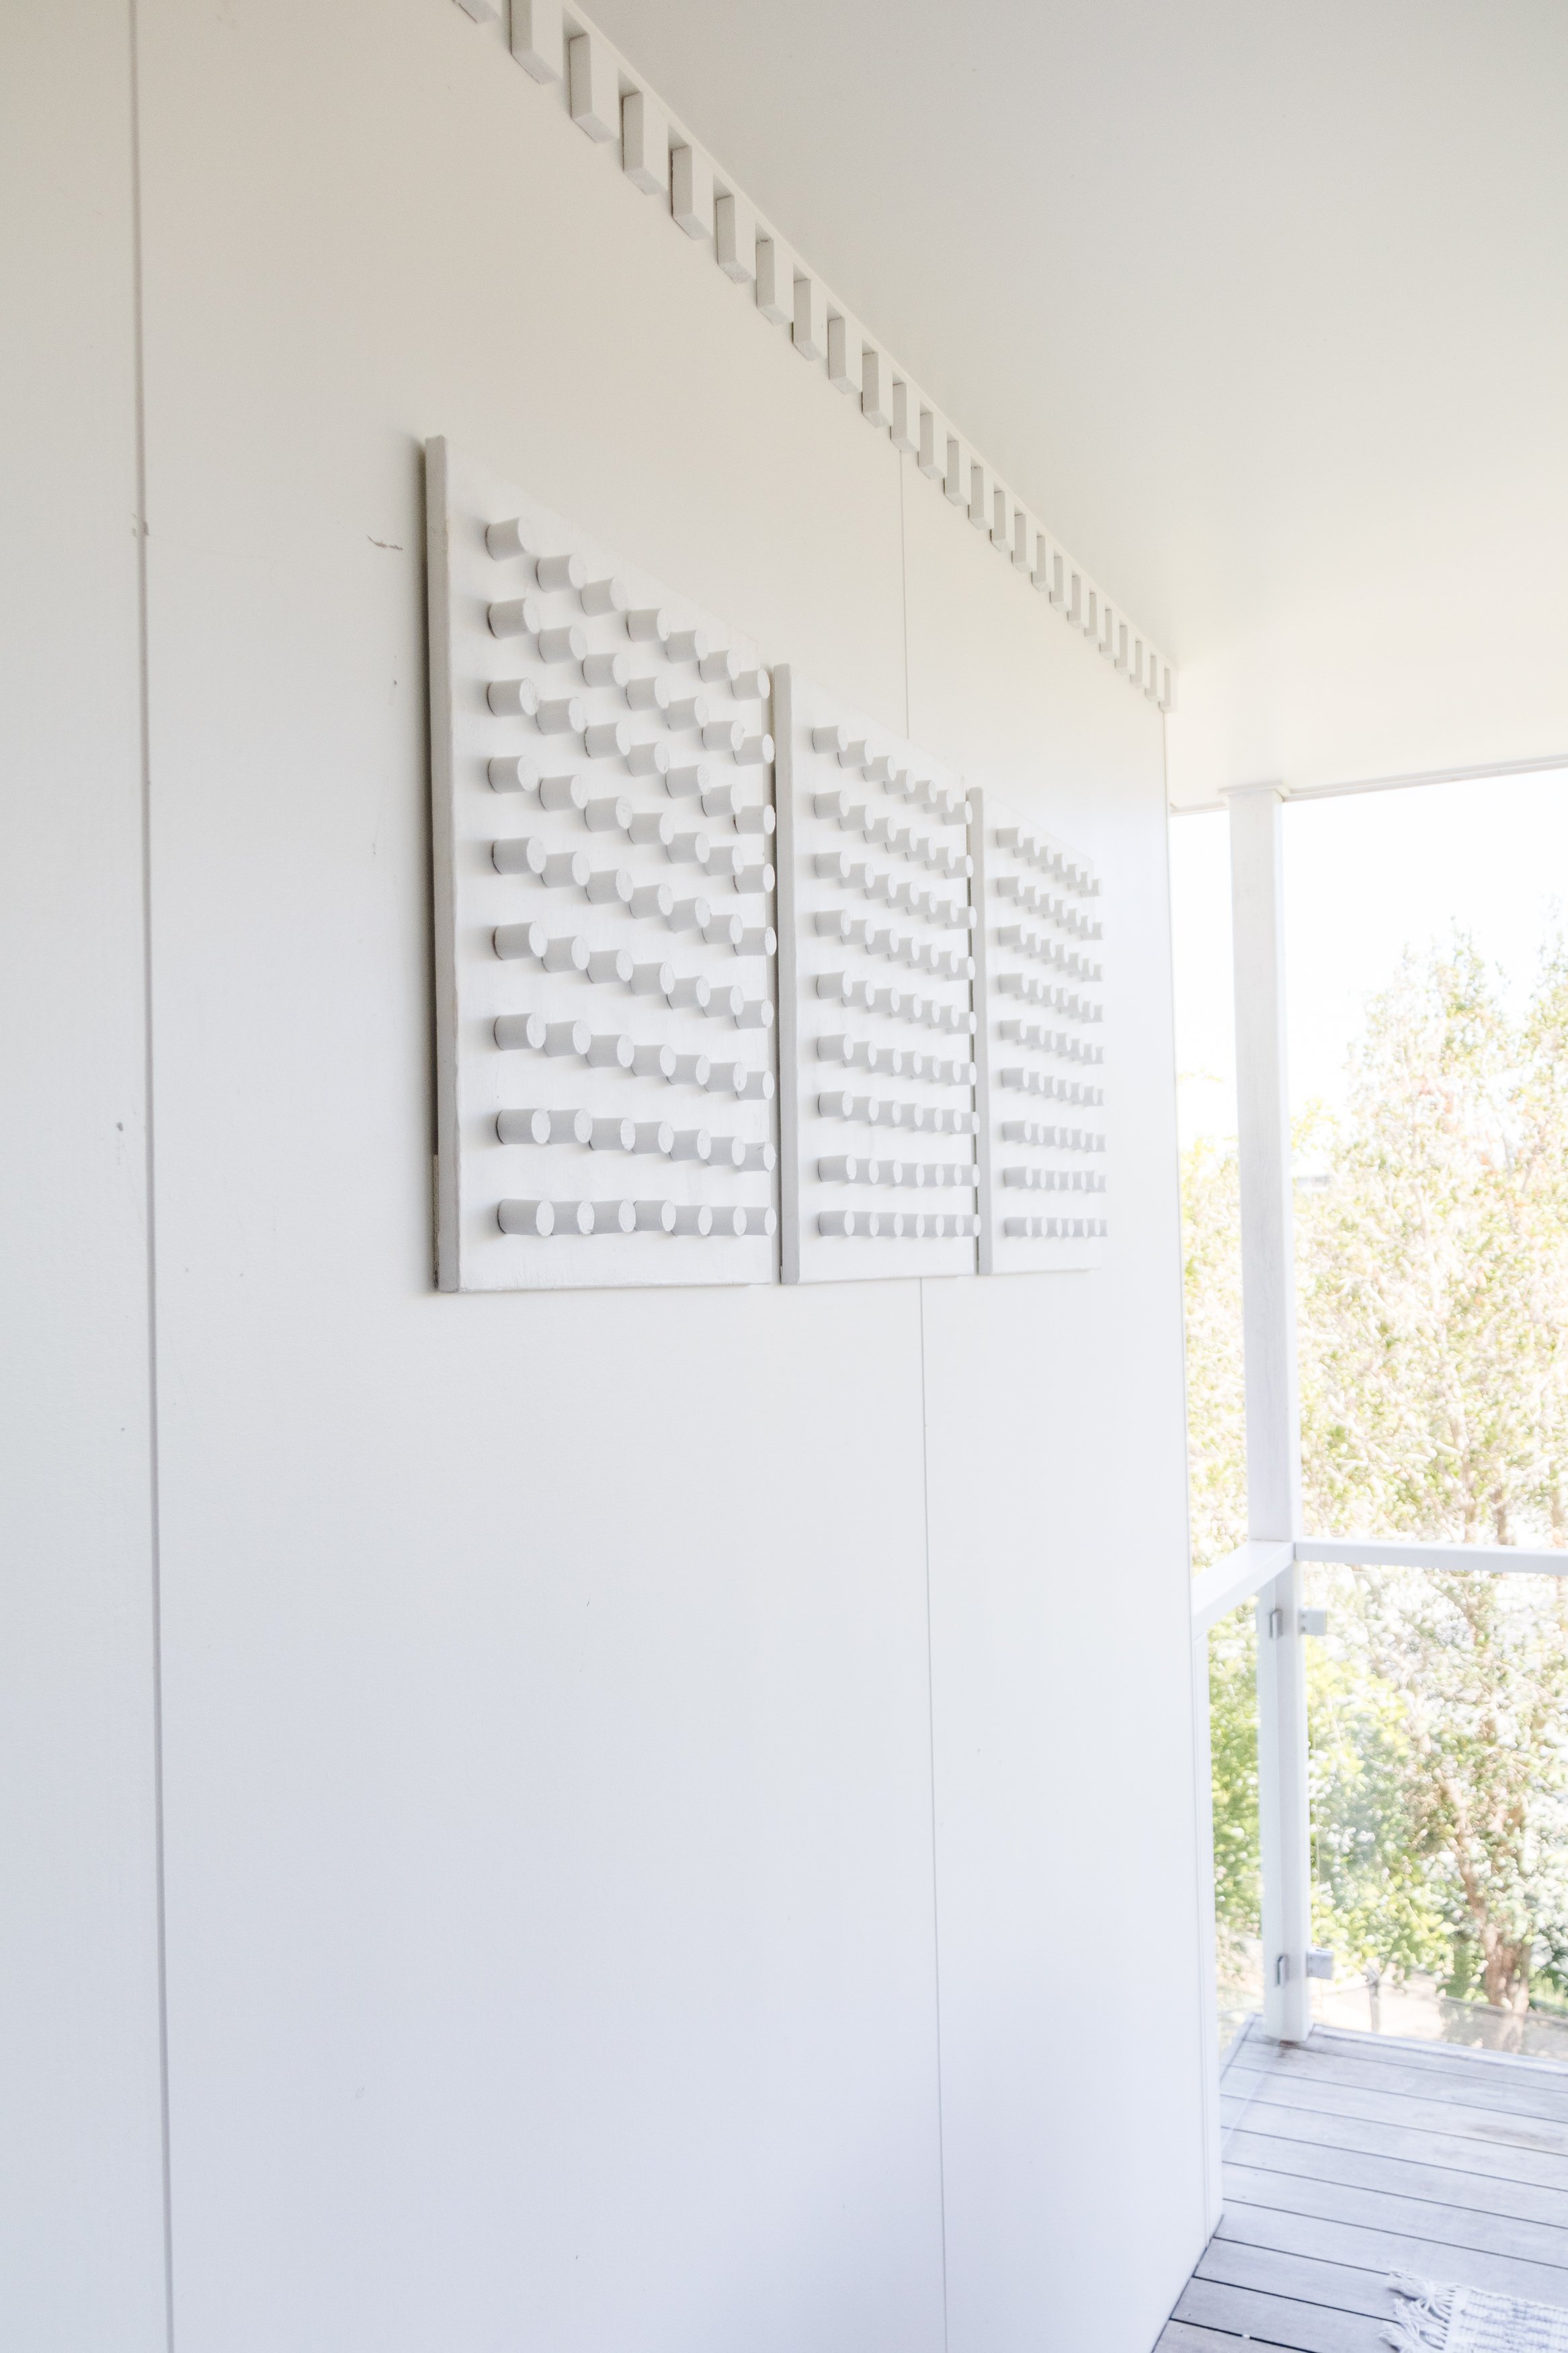
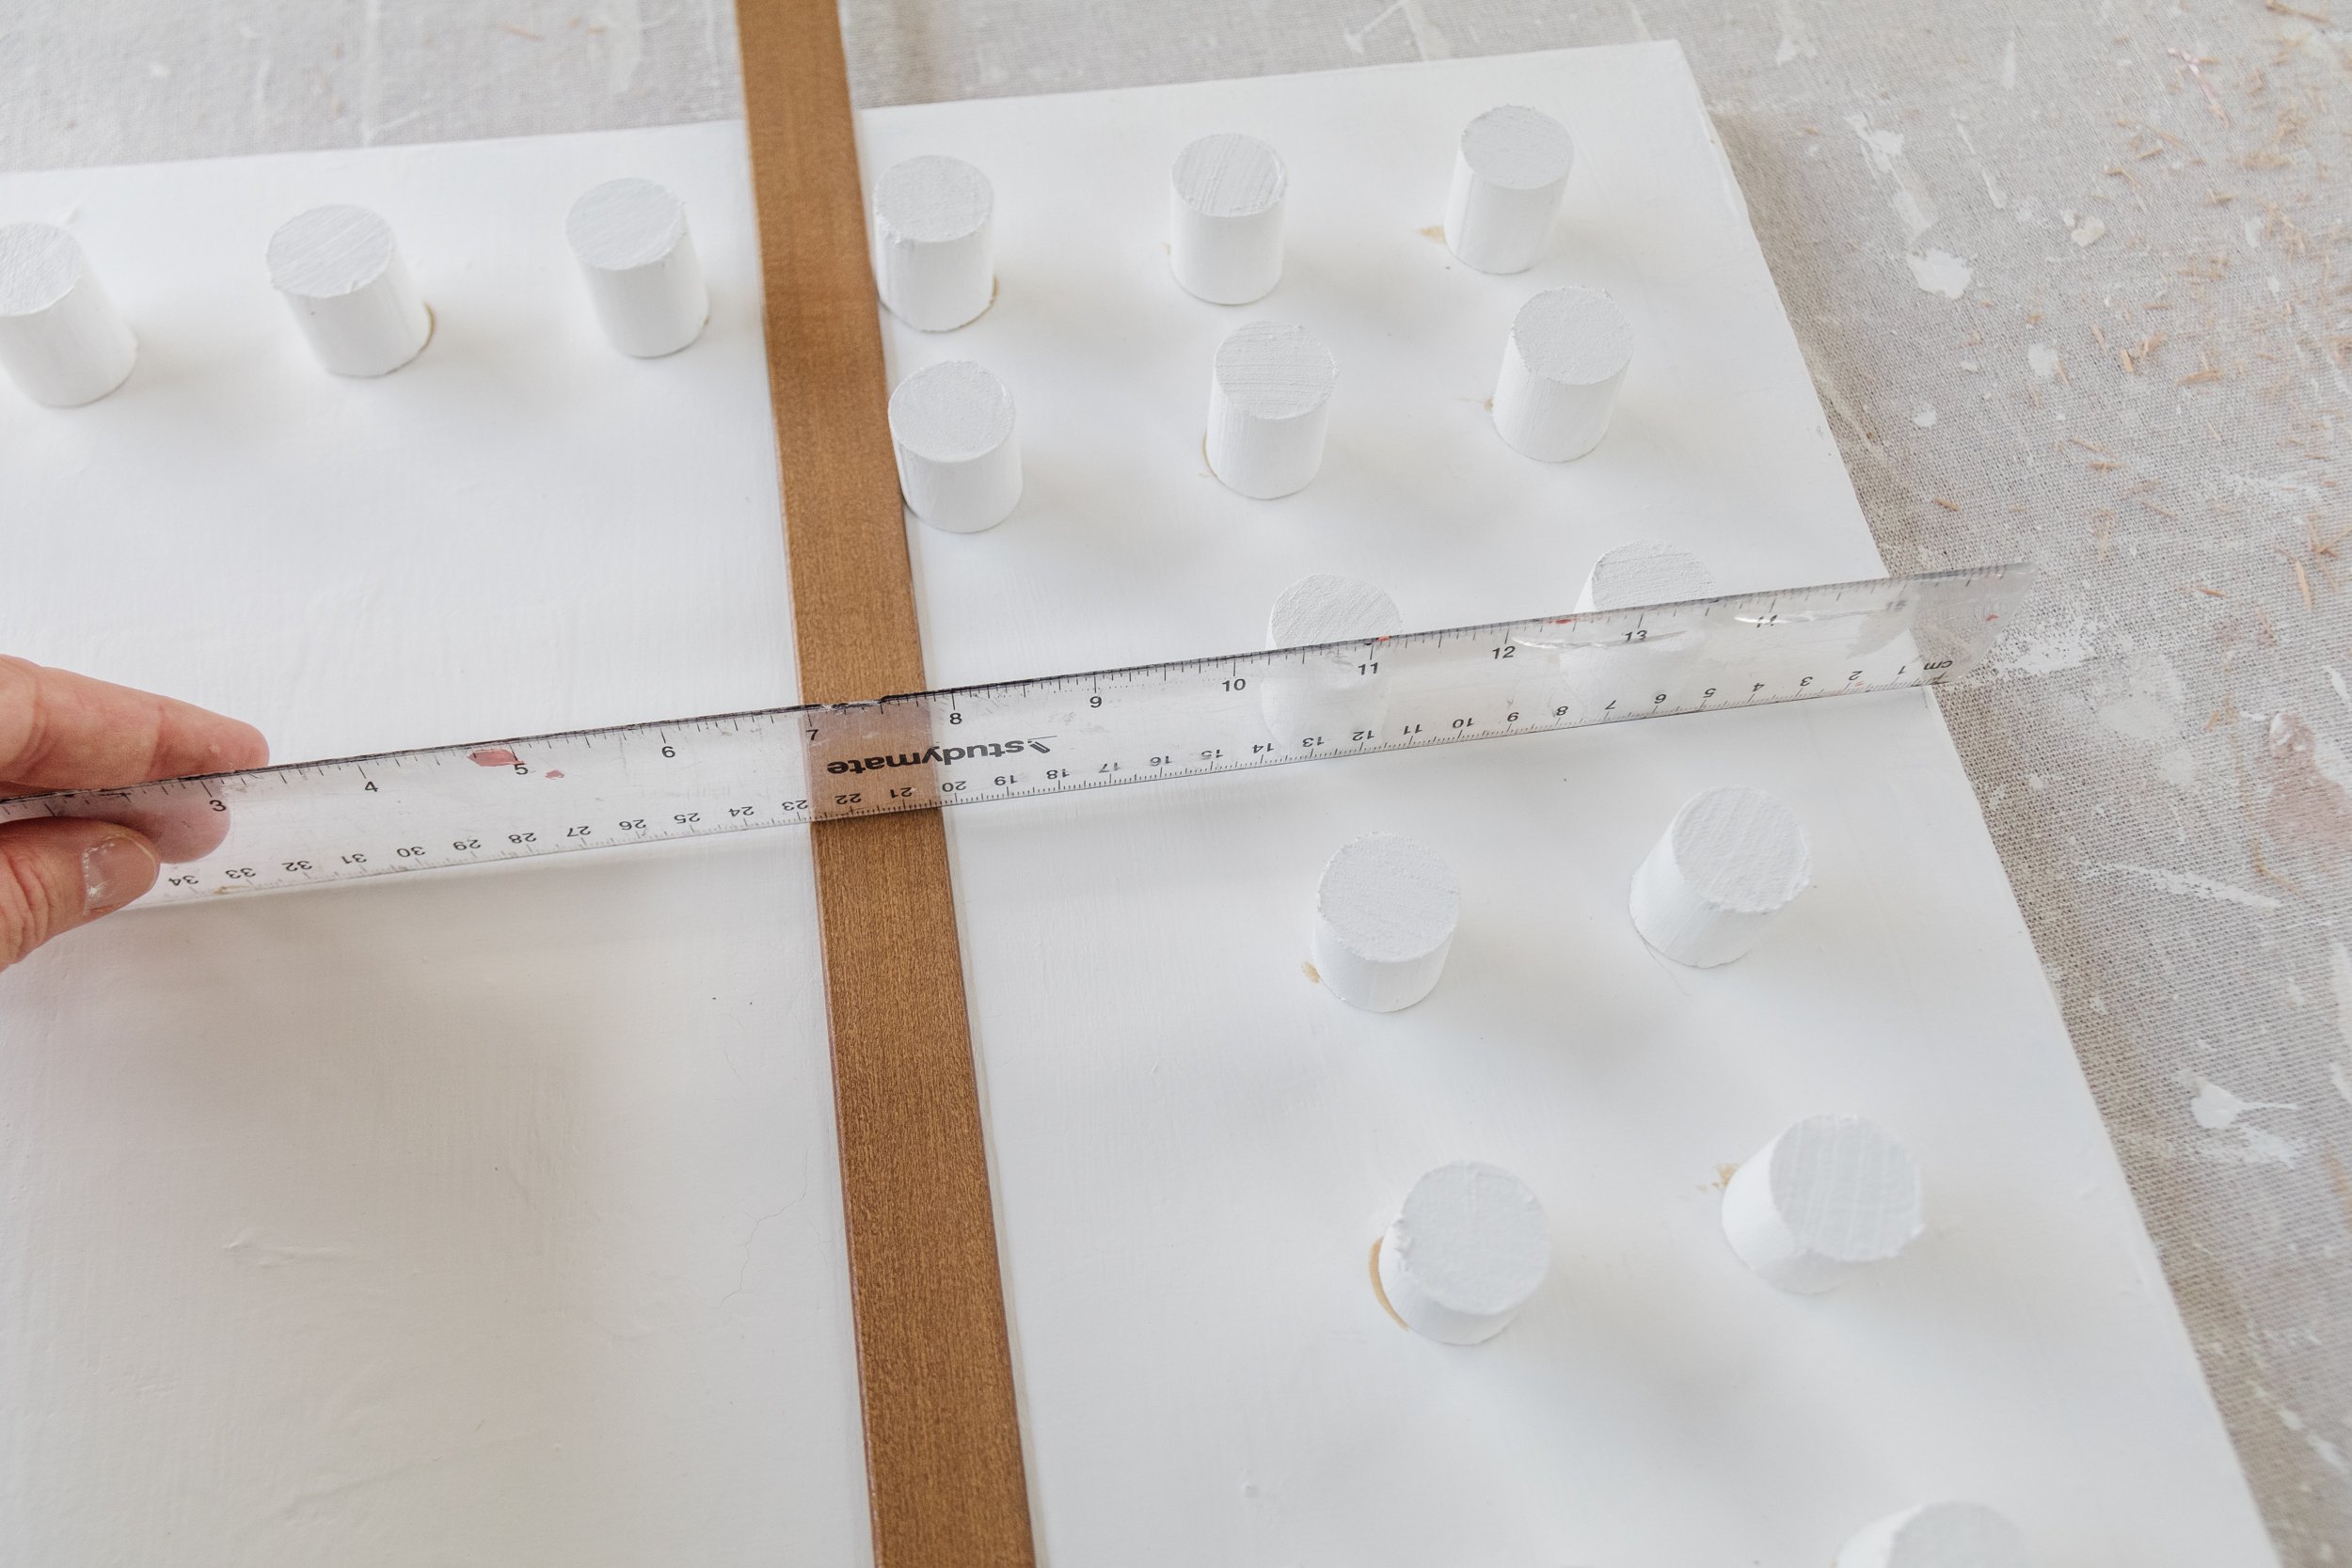
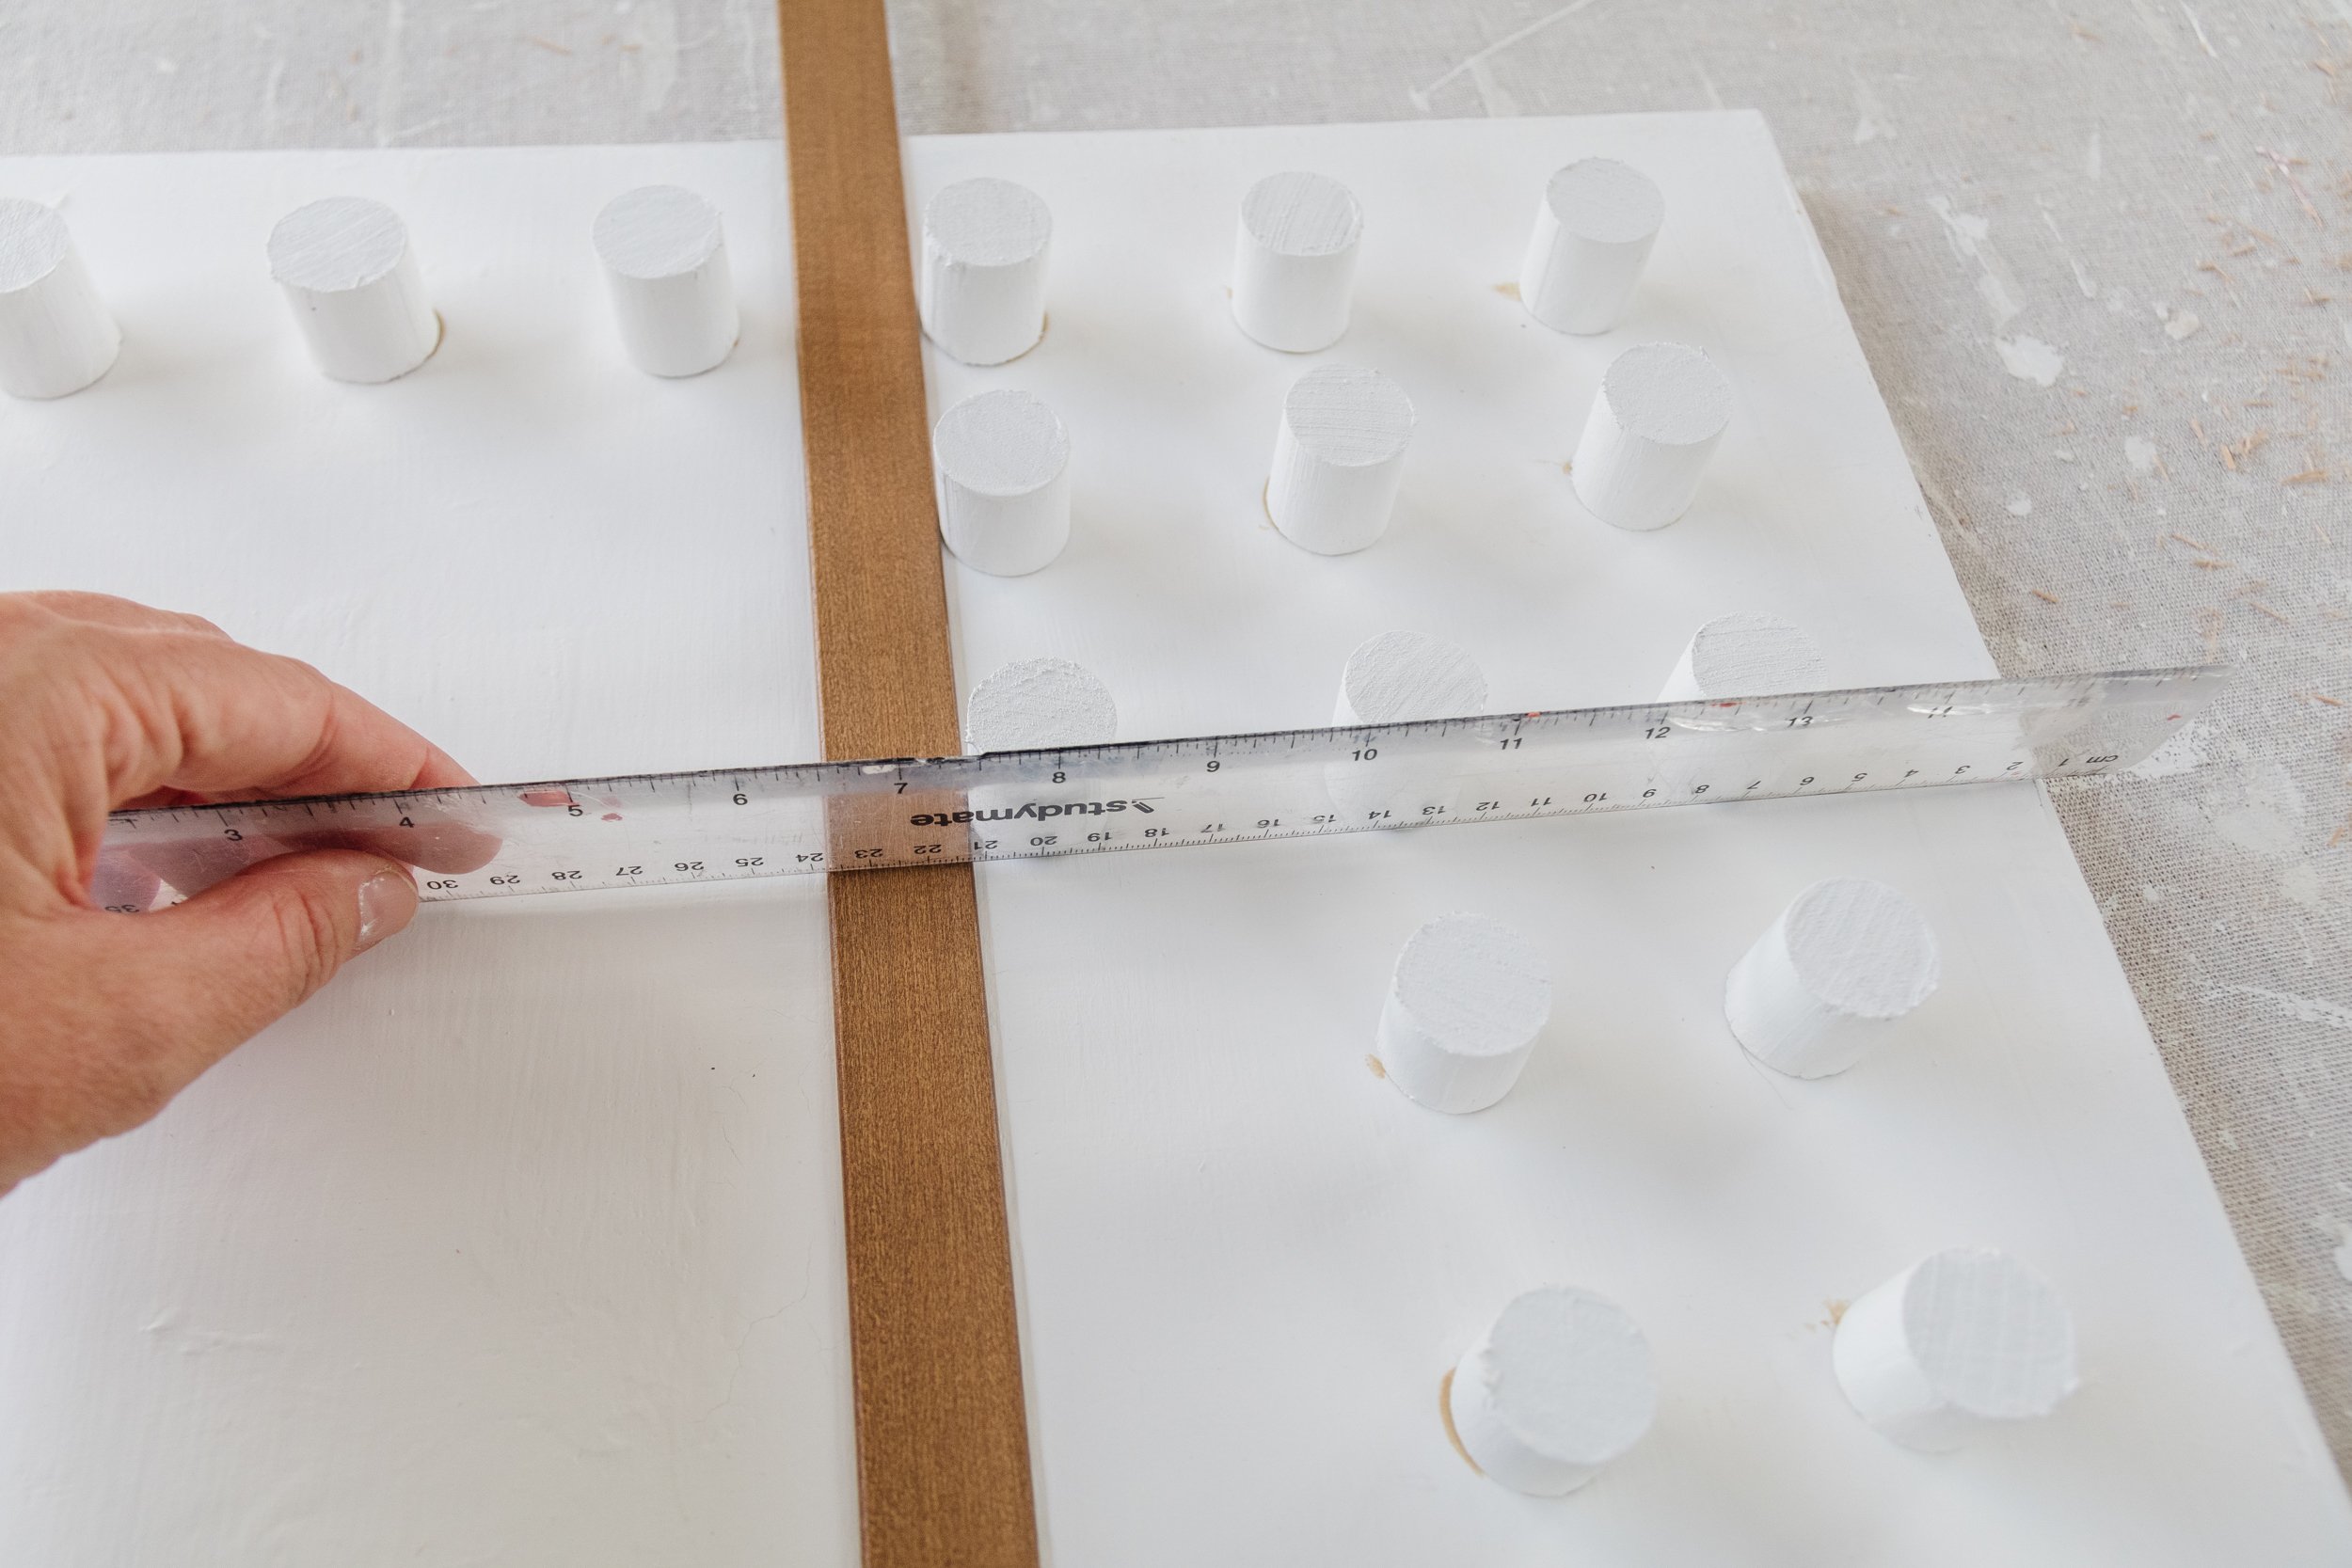
Step 2: I did some math to figure out how many pieces of the dowel I needed to cut and where to place them.
Canvas:
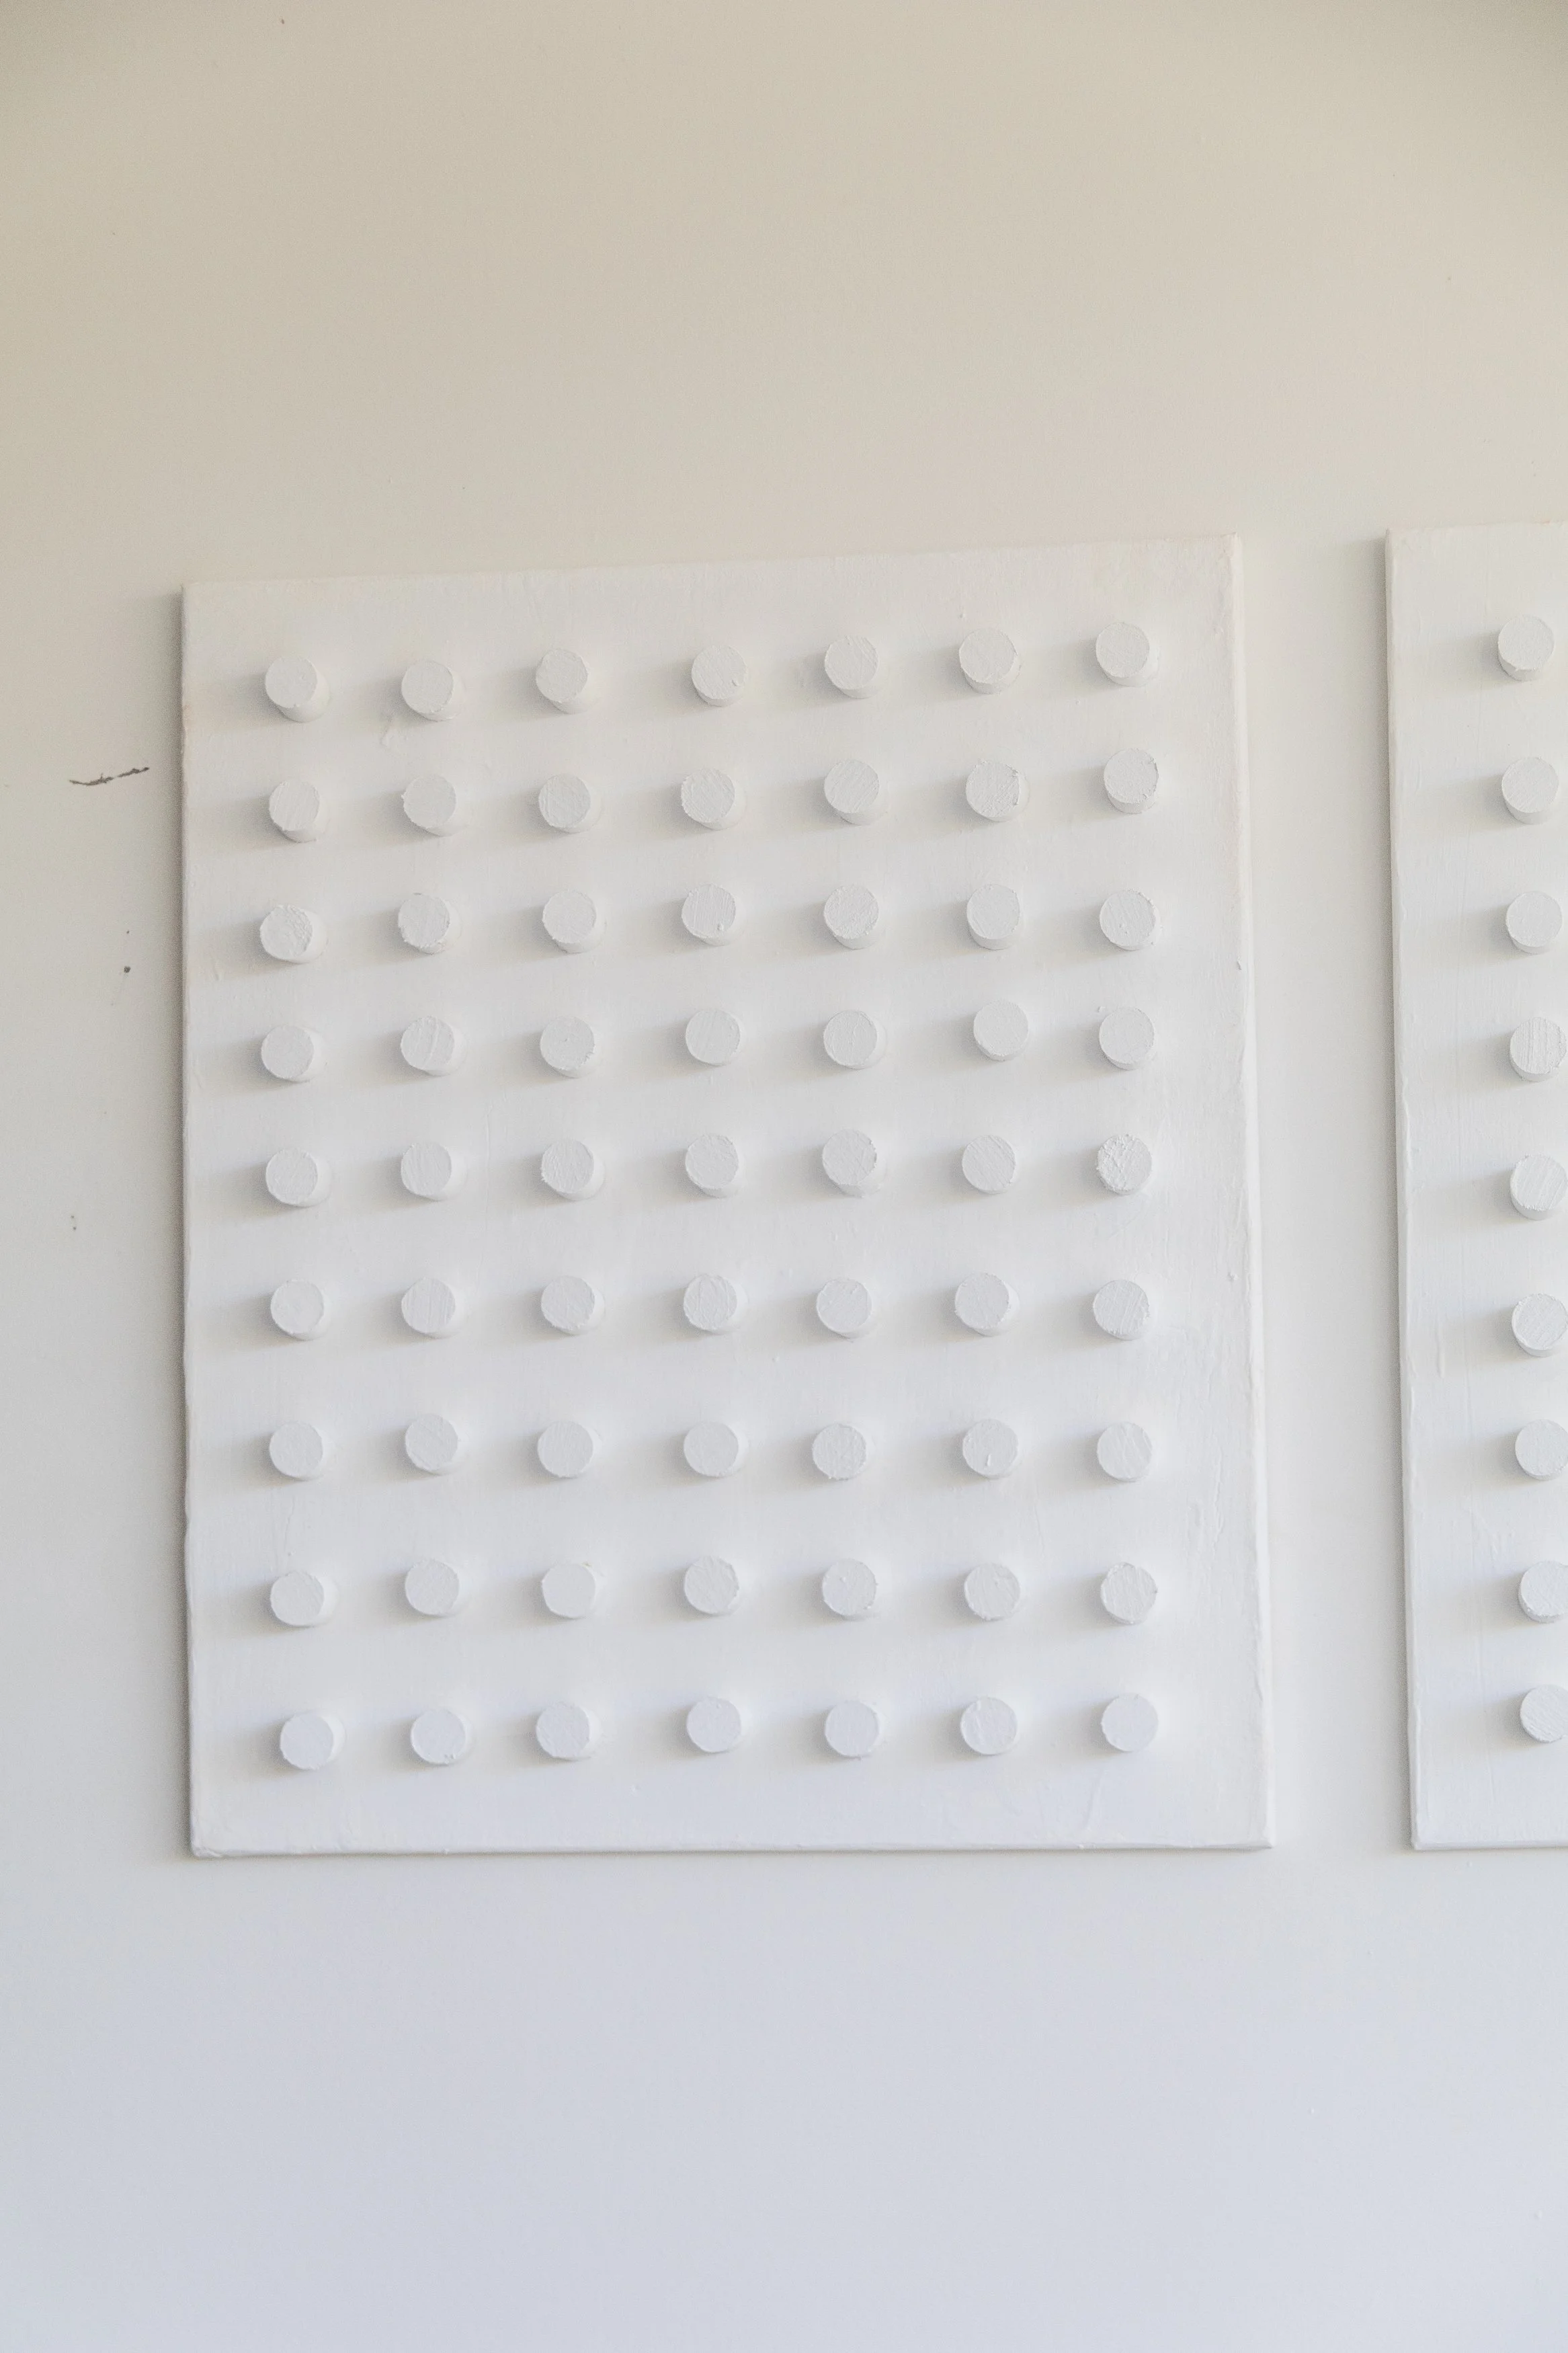
500mm x 600mm
7 columns x 9 rows
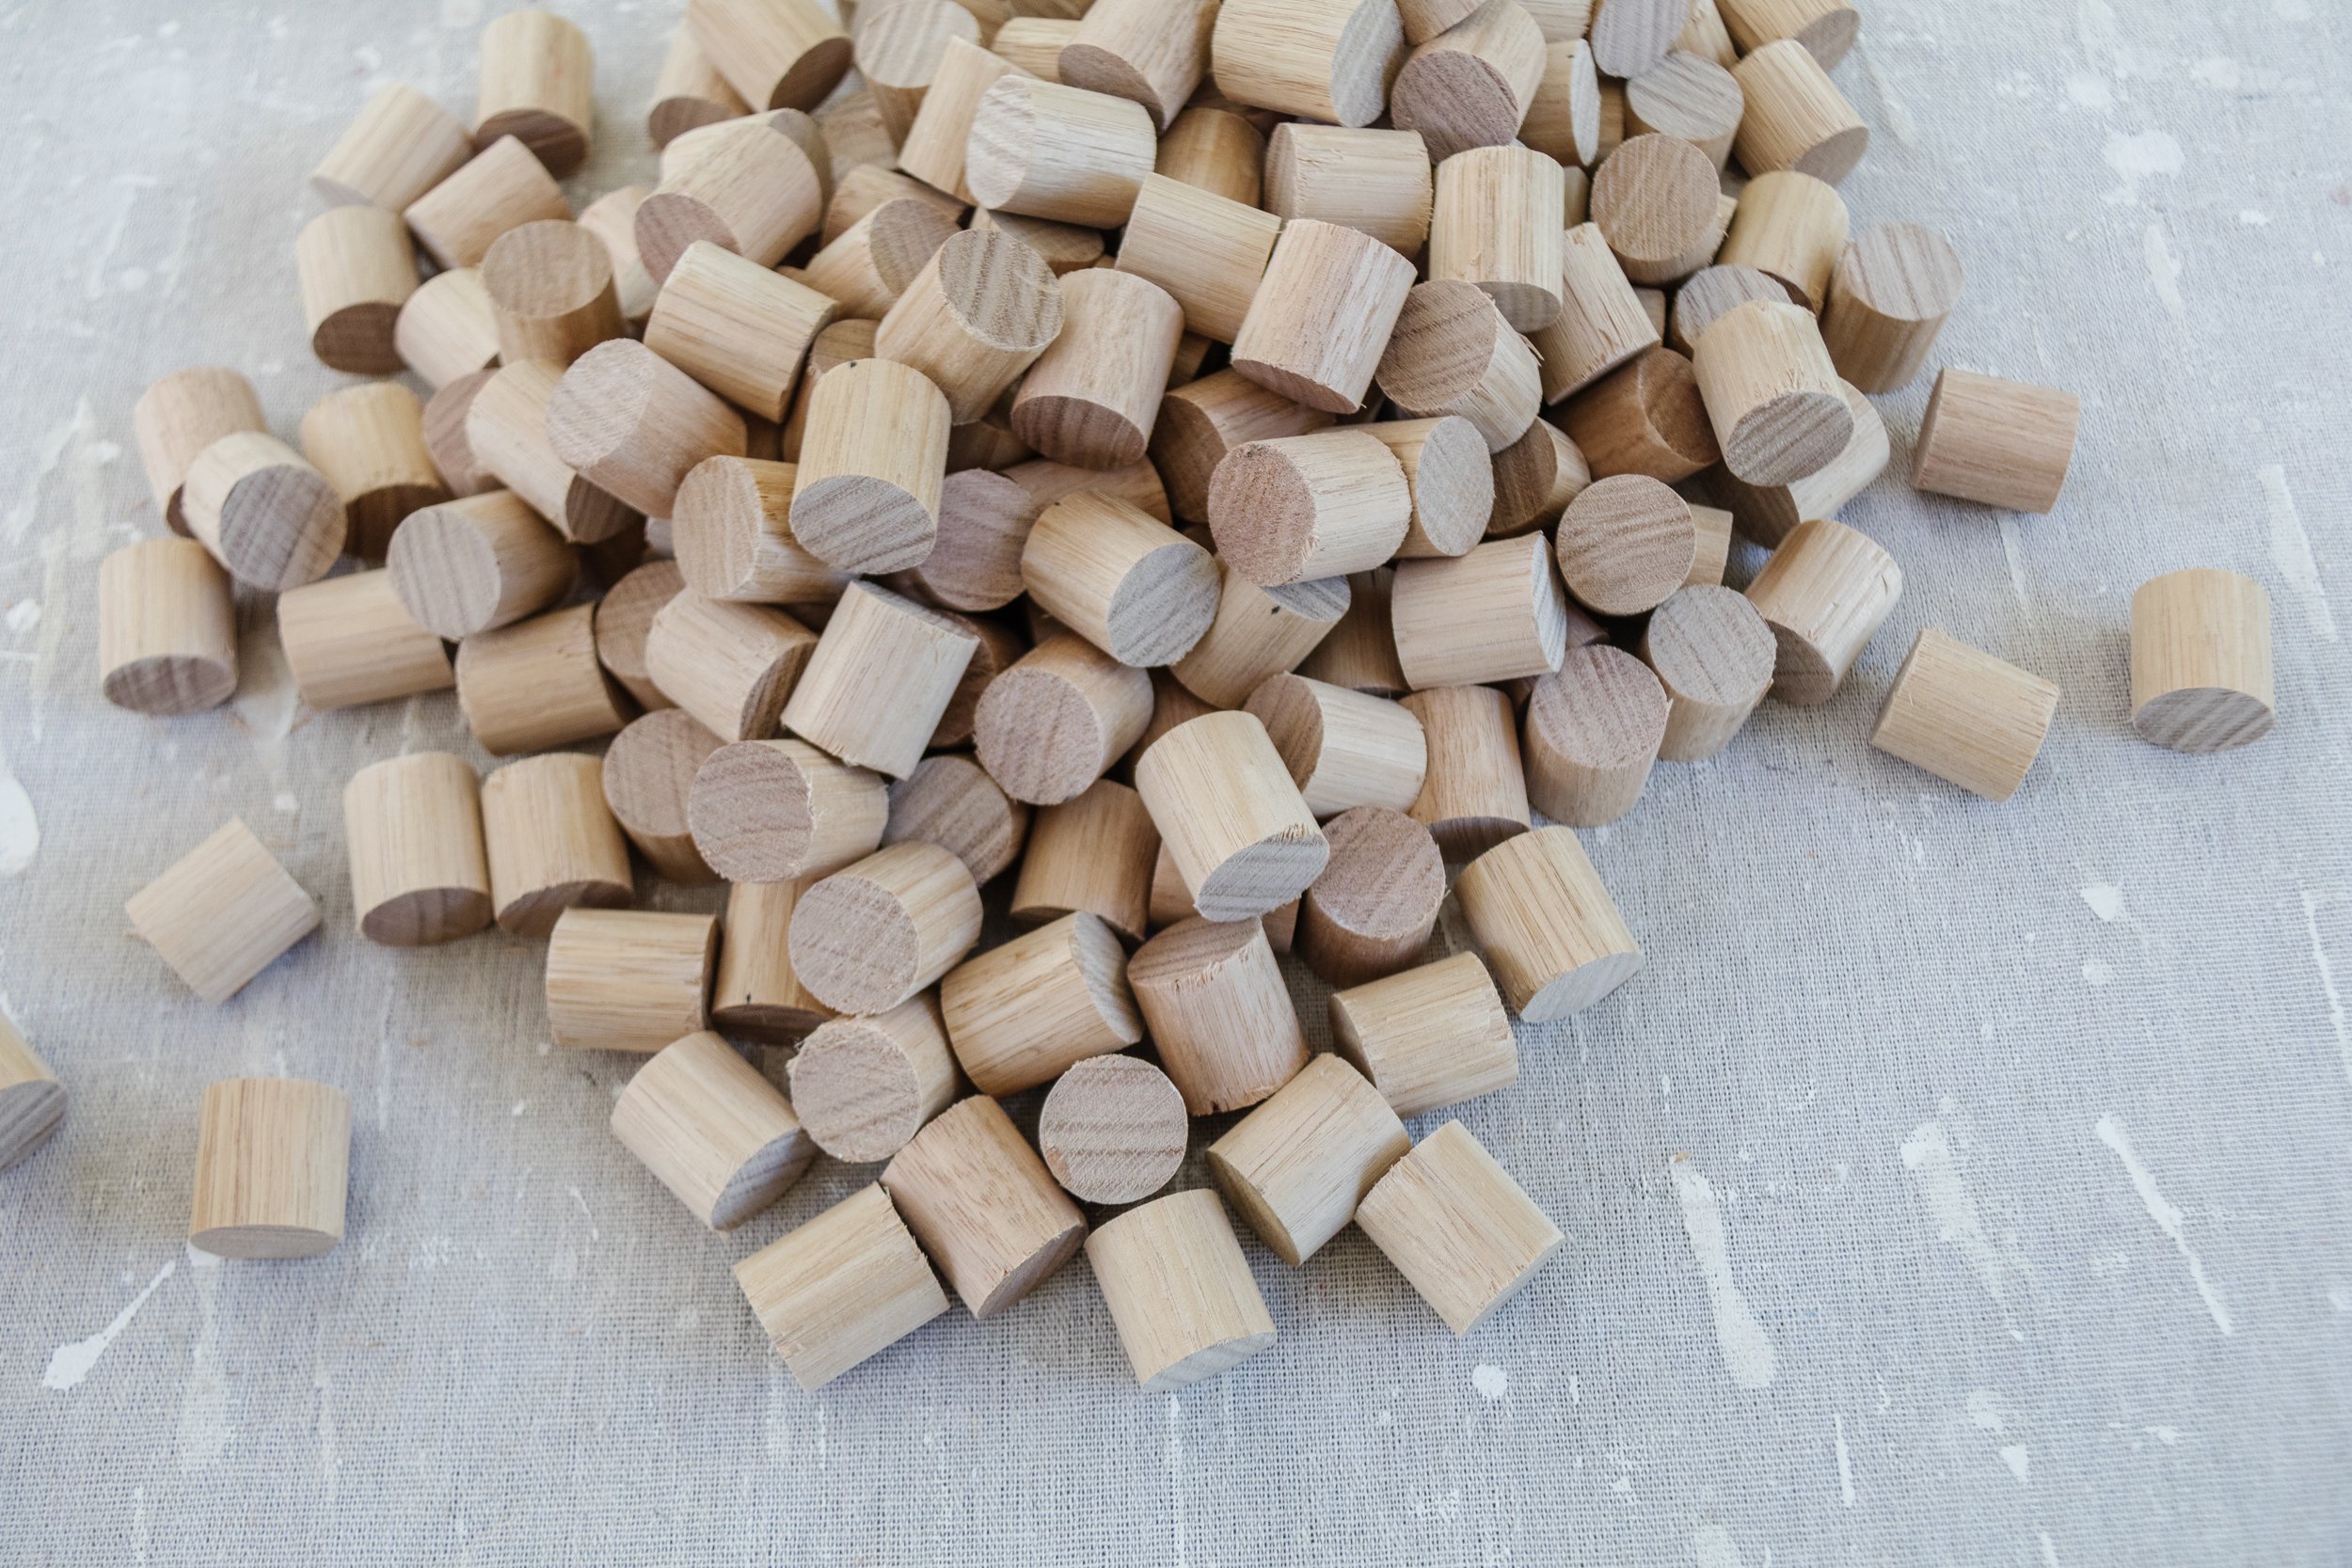
63 pieces of dowel per canvas at 2.5cm (h)
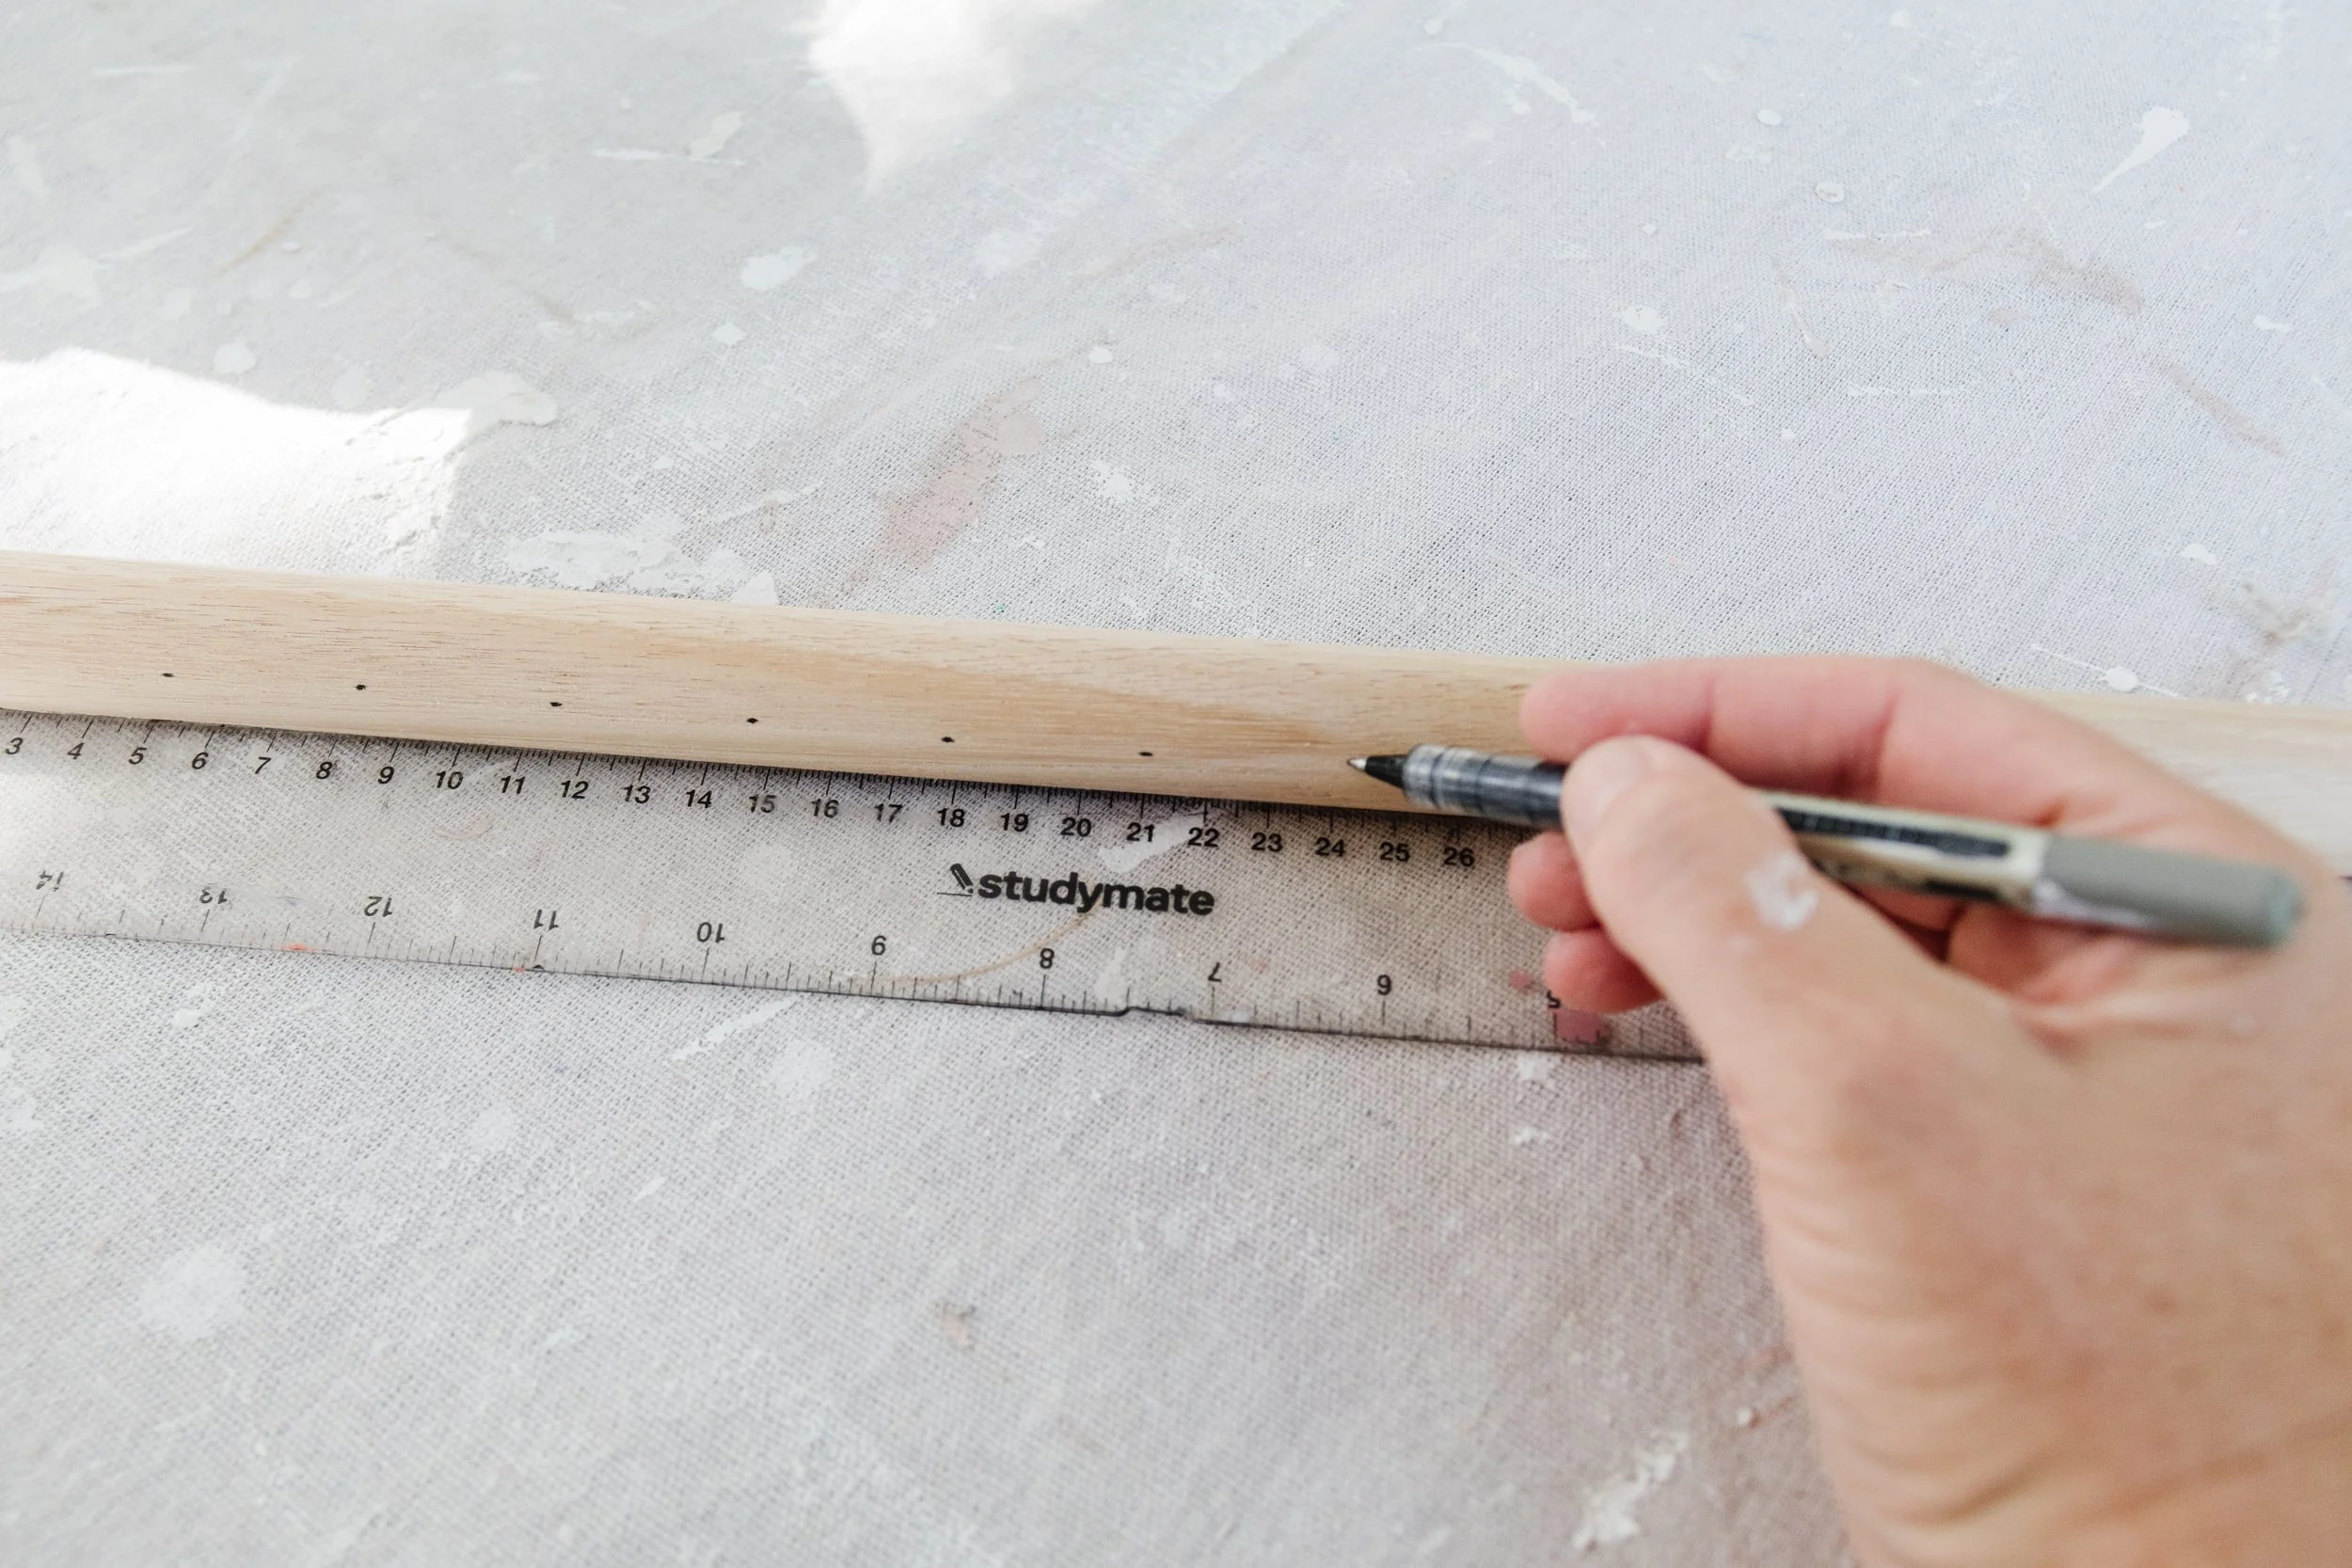
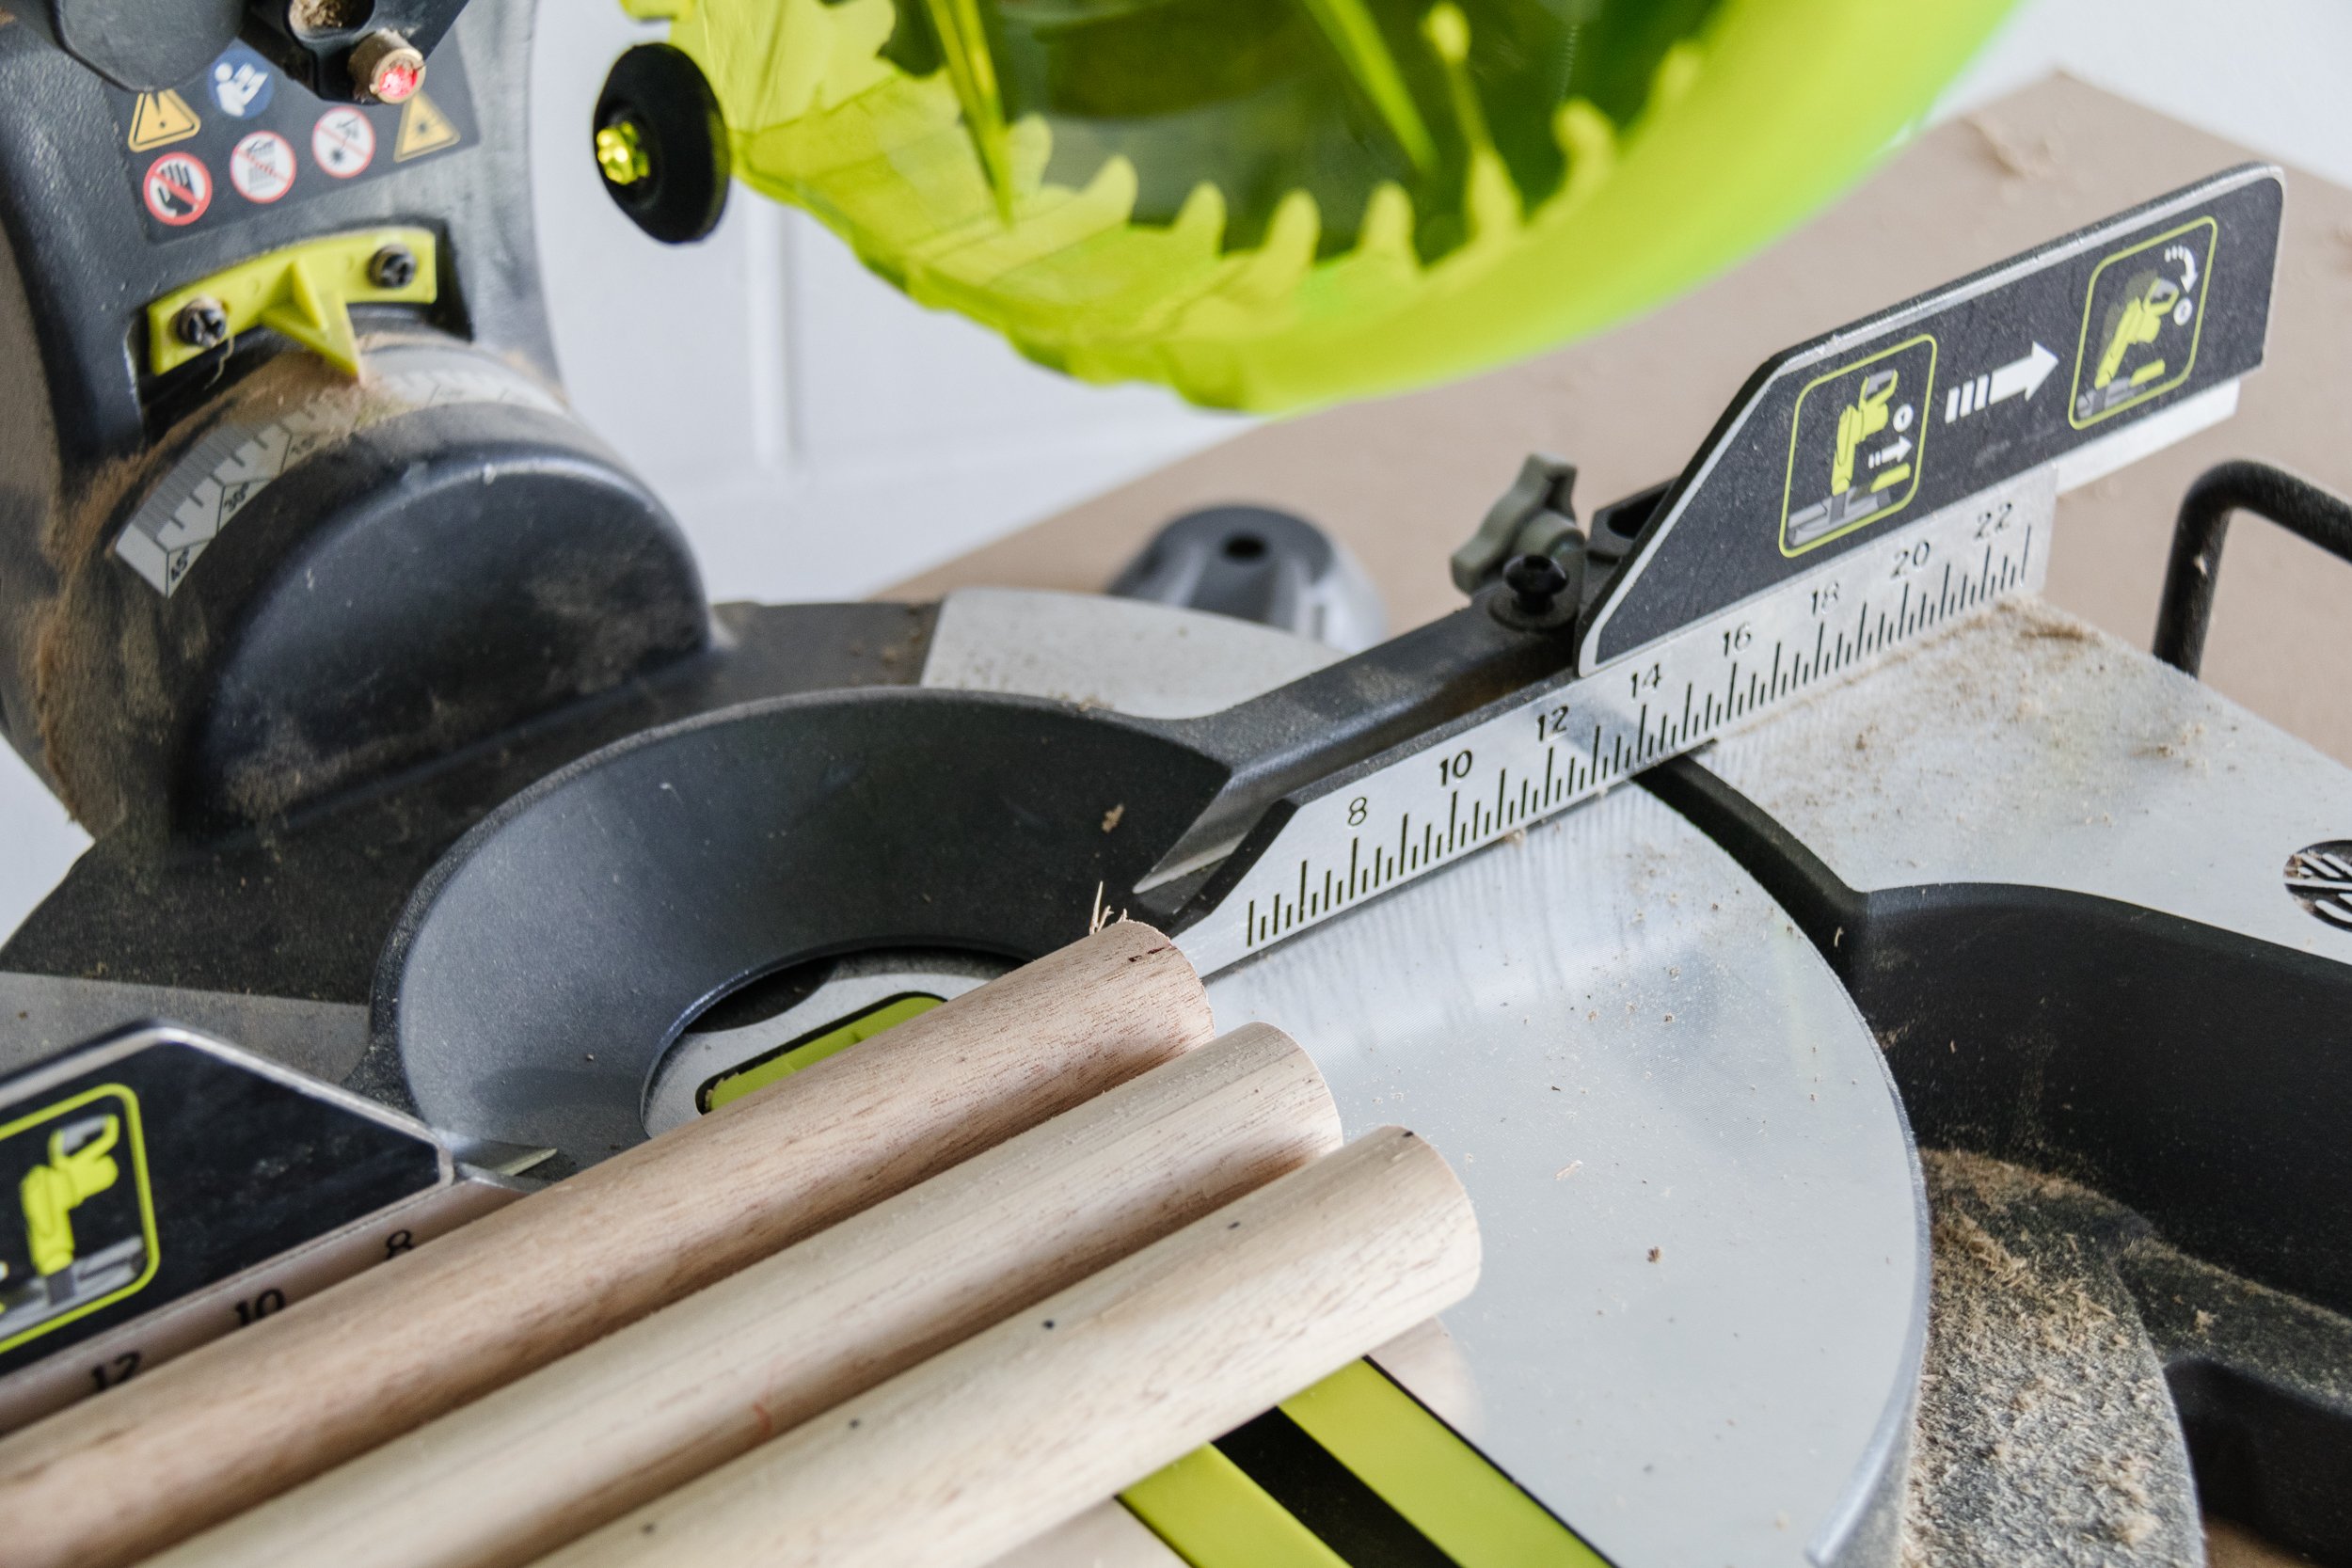
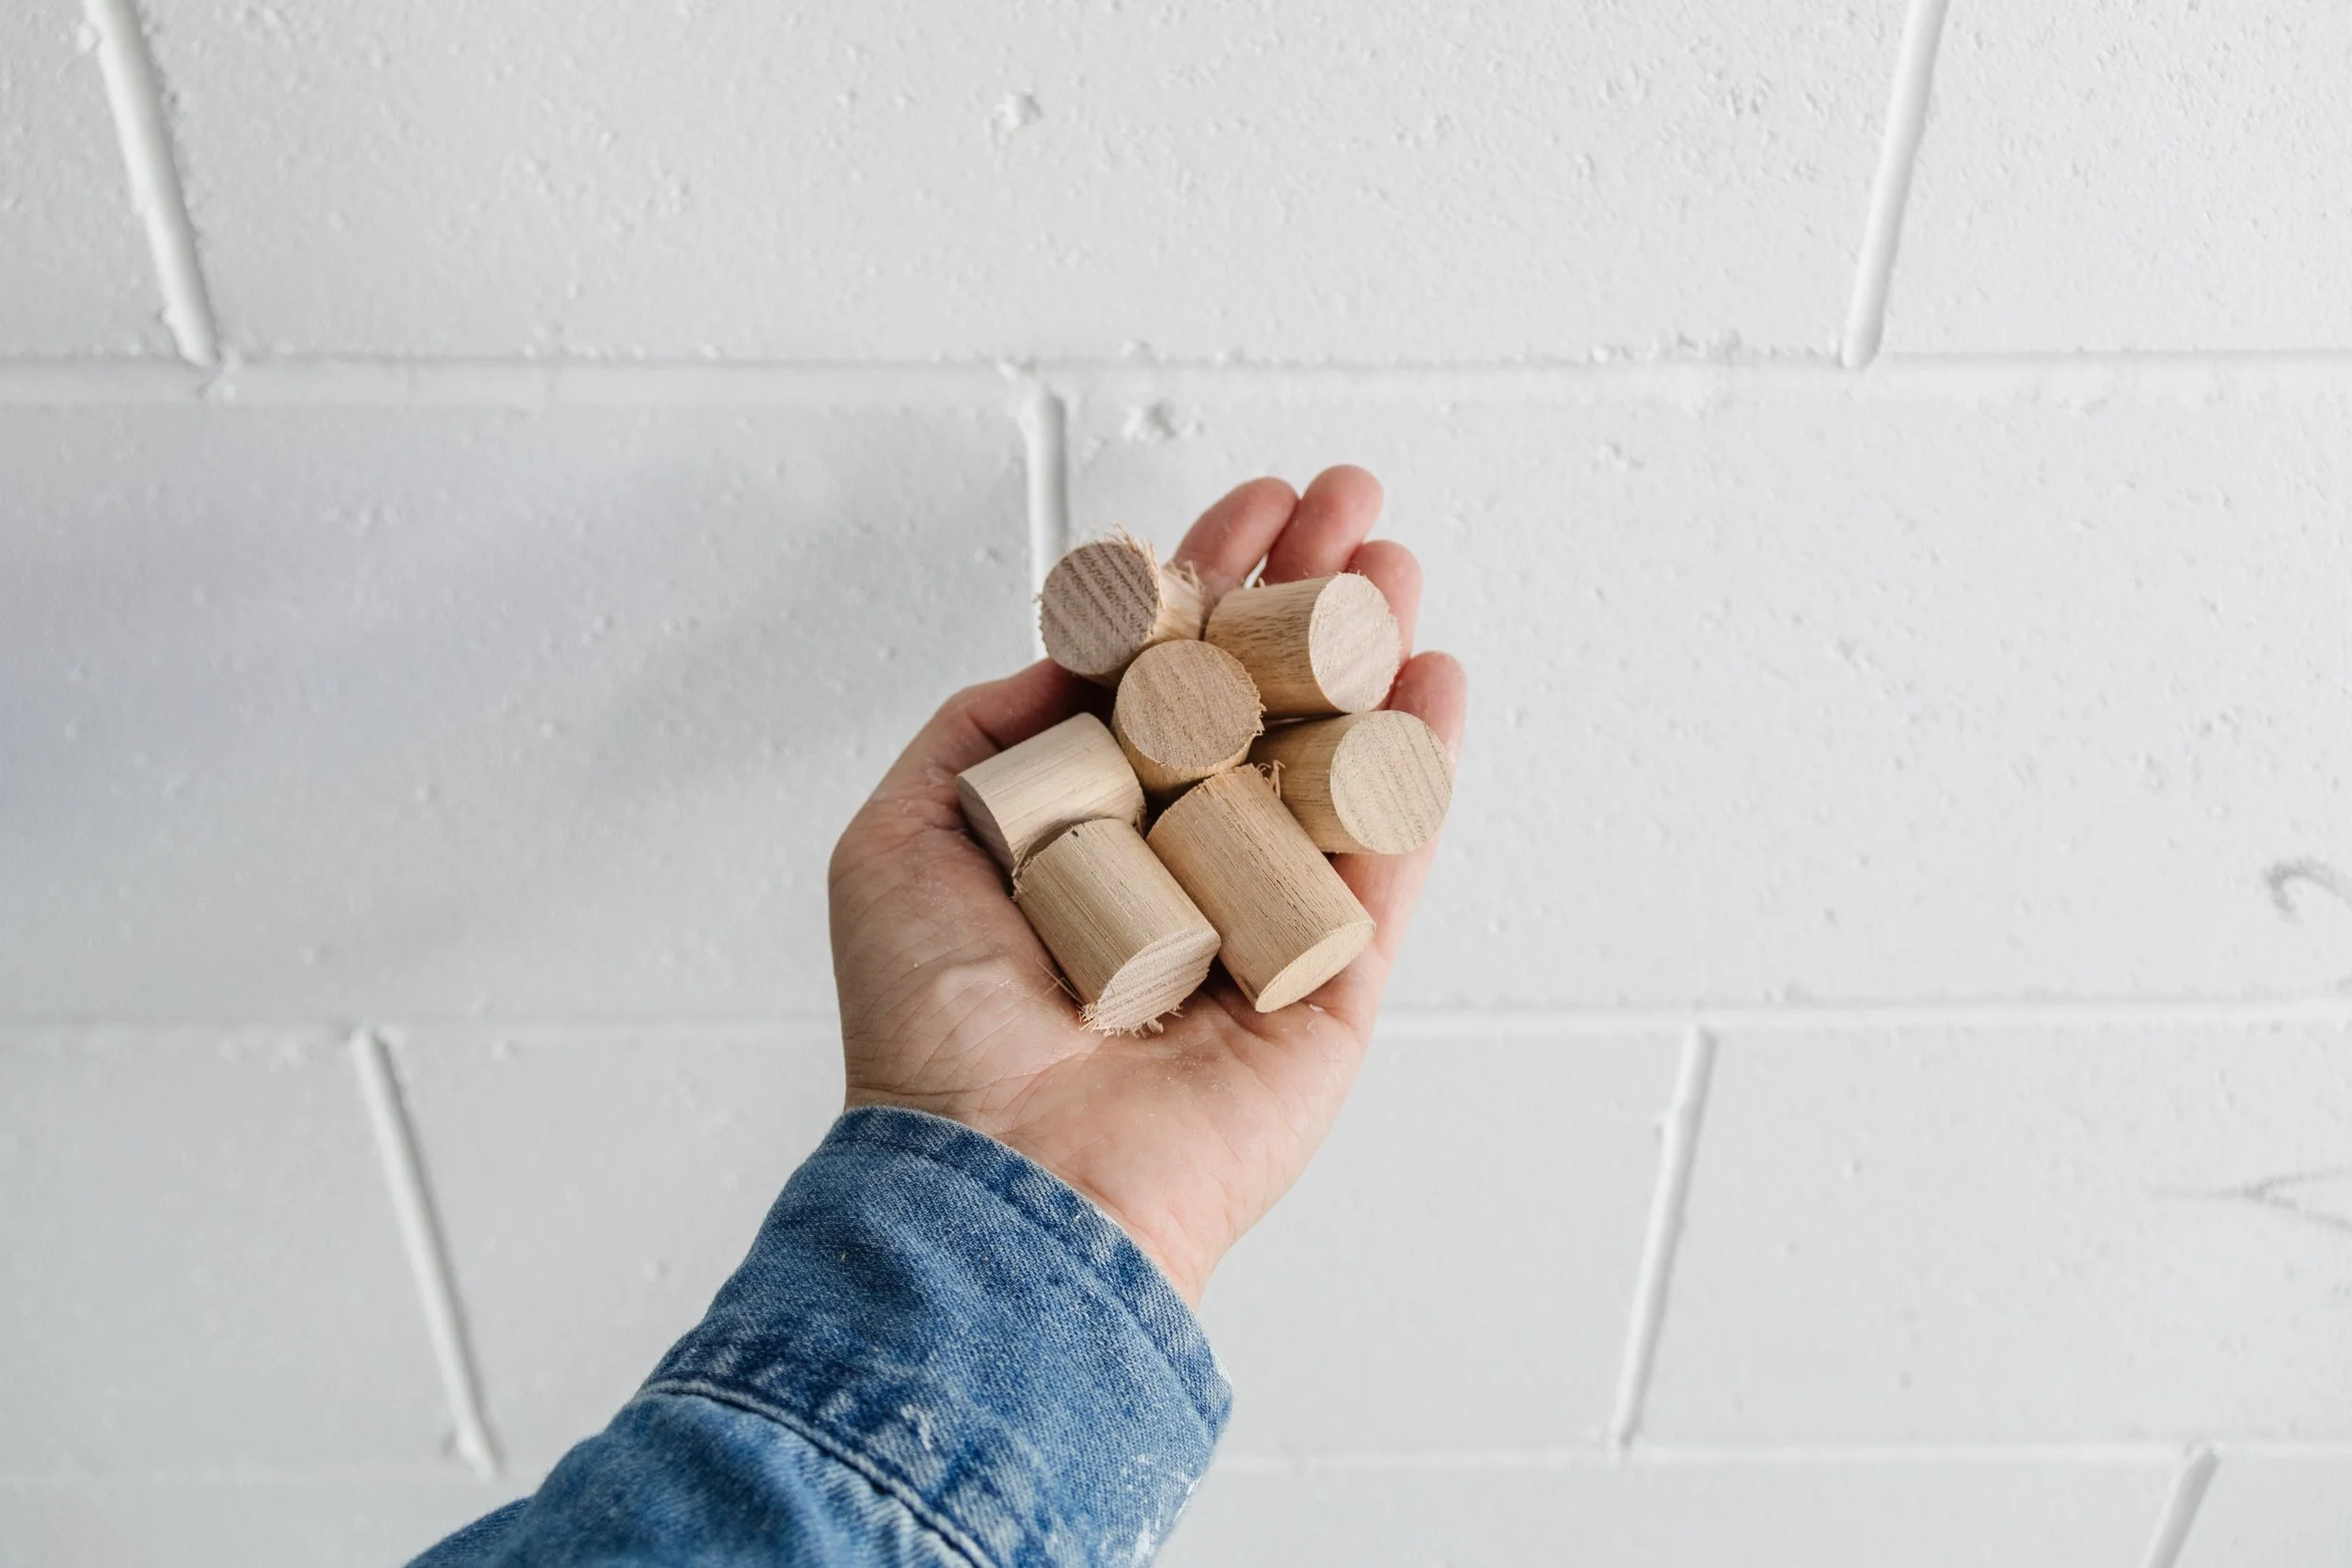
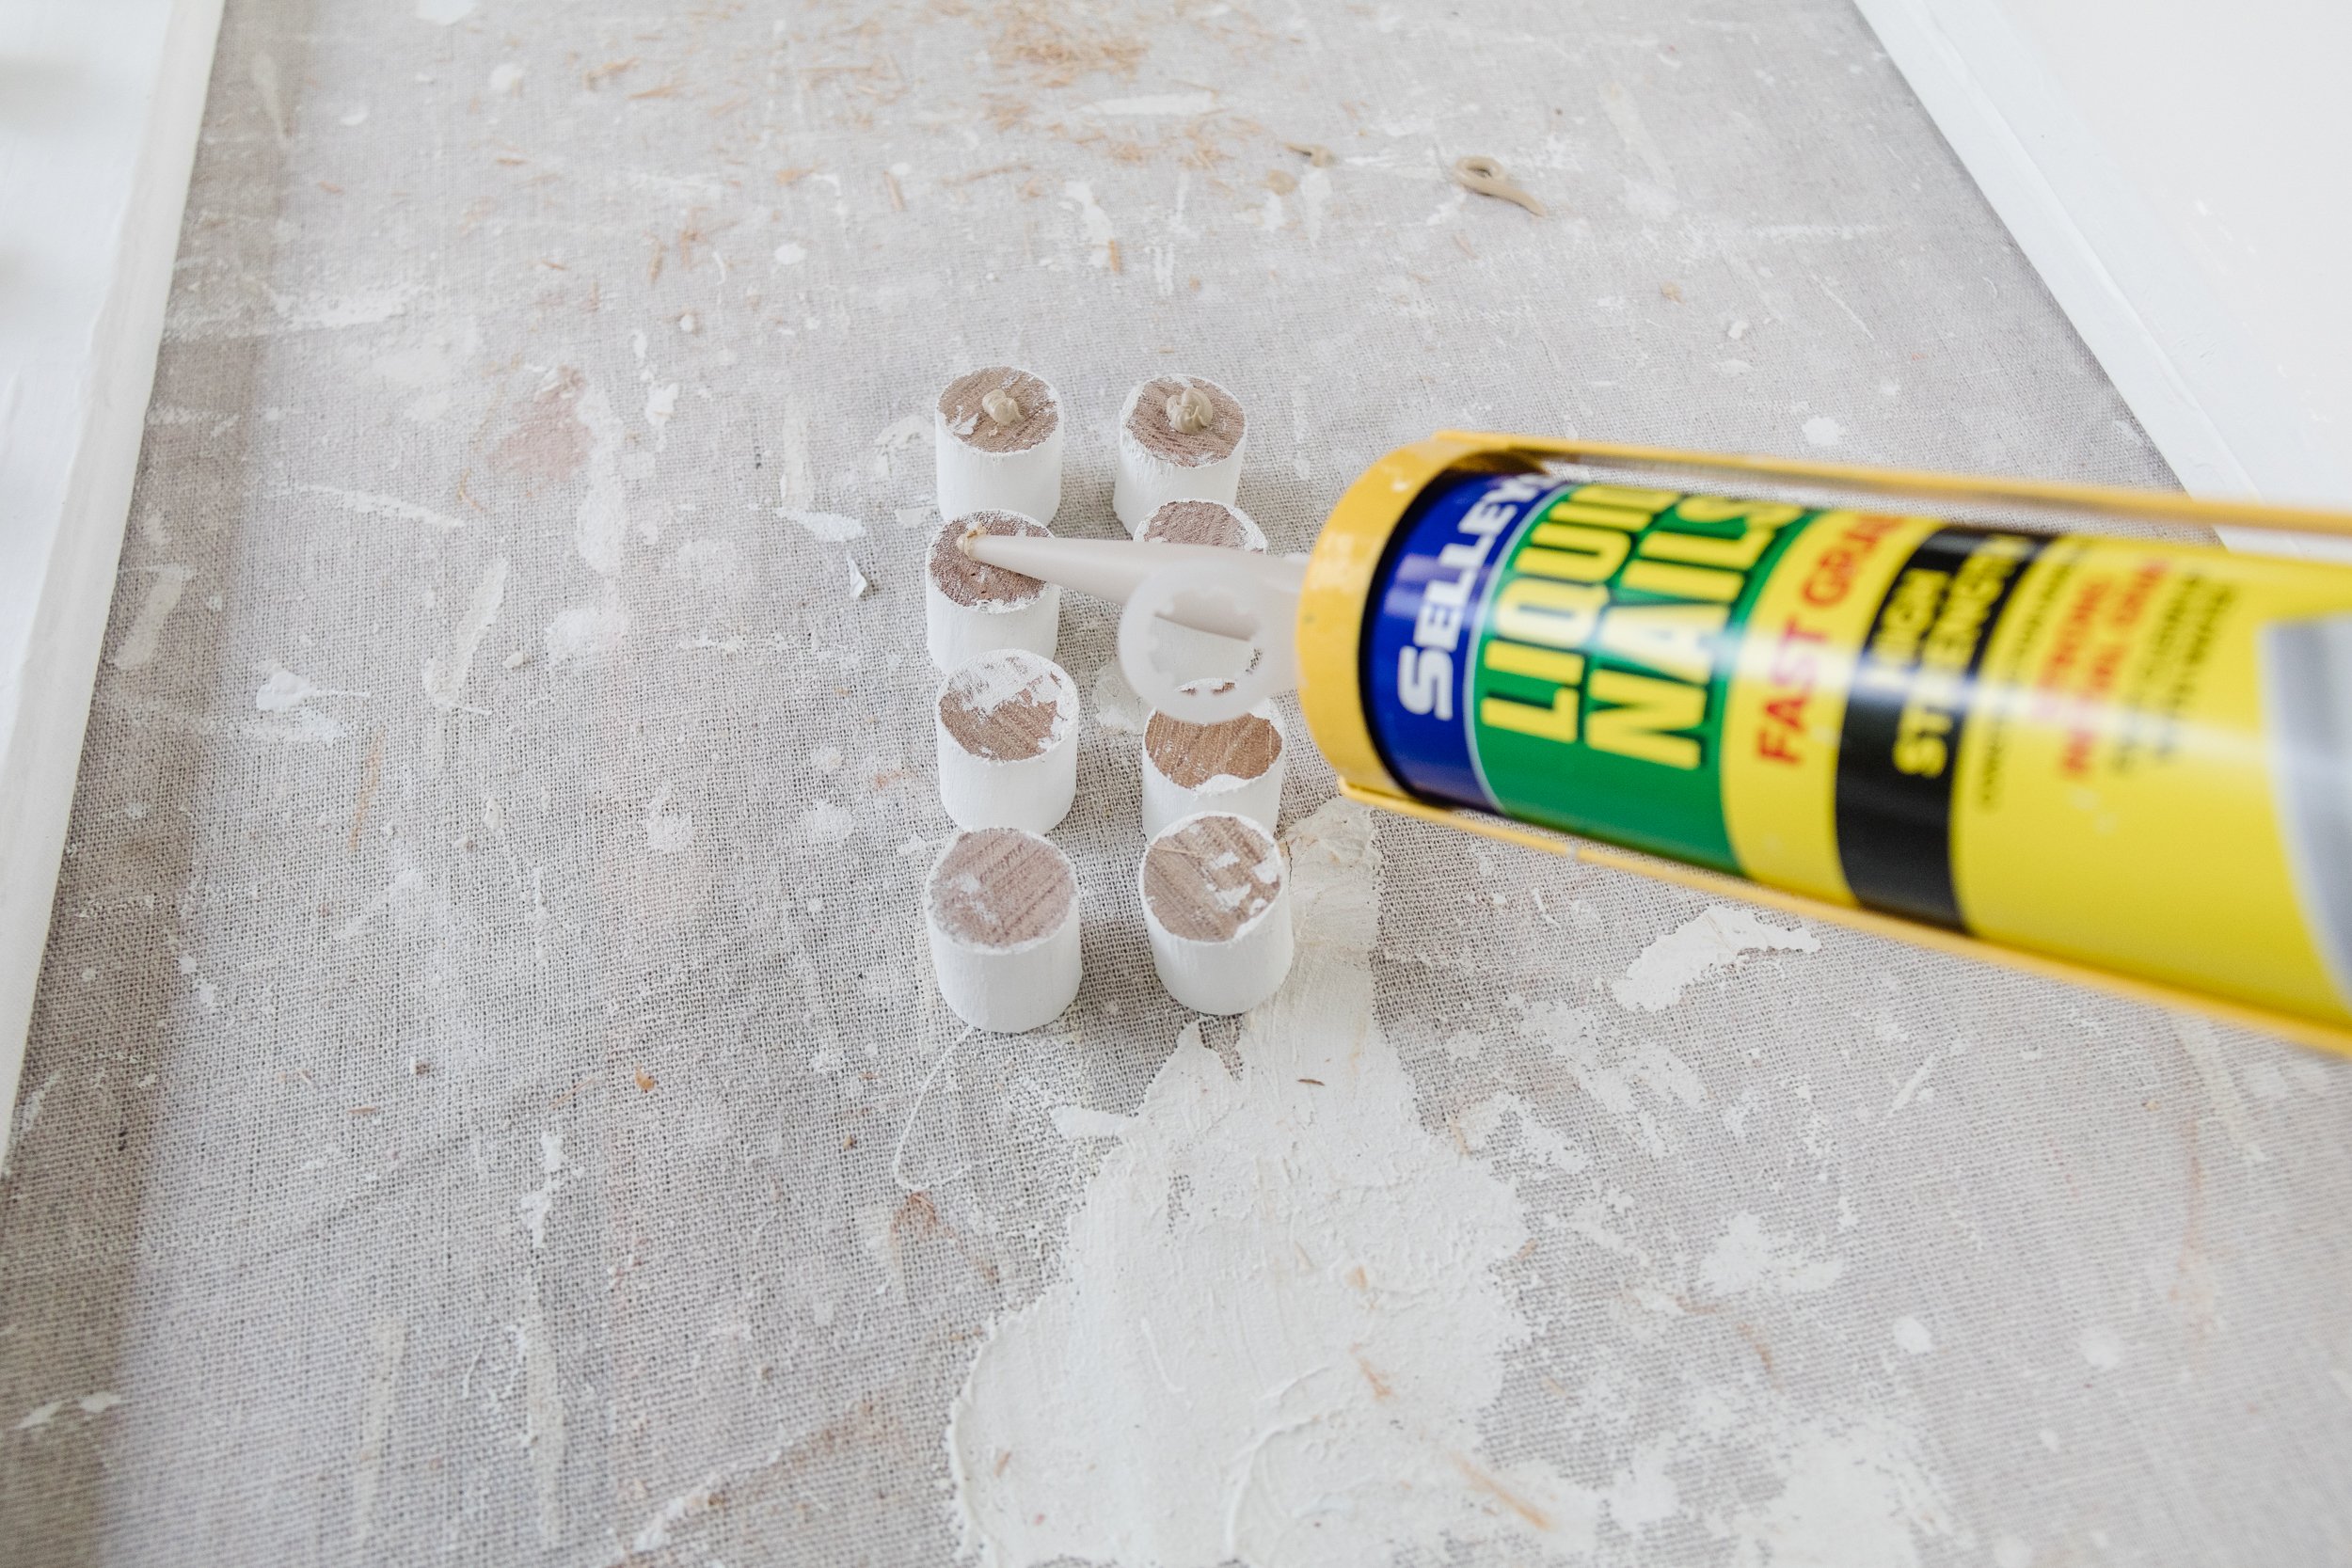
Step 3: While the paint was drying and after I had figured out the measurements and quantities, I measured and marked directly onto each dowel at 30mm intervals using a pencil and ruler. Then I cut the dowels using a mitre saw. You could use a handsaw but that would take a very long time, so if this is your only option be prepared. The mitre saw can grab the dowel as it’s cutting and result in some hanging splinters, so I individually sanded each dowel while watching Netflix. Oh the commitment!
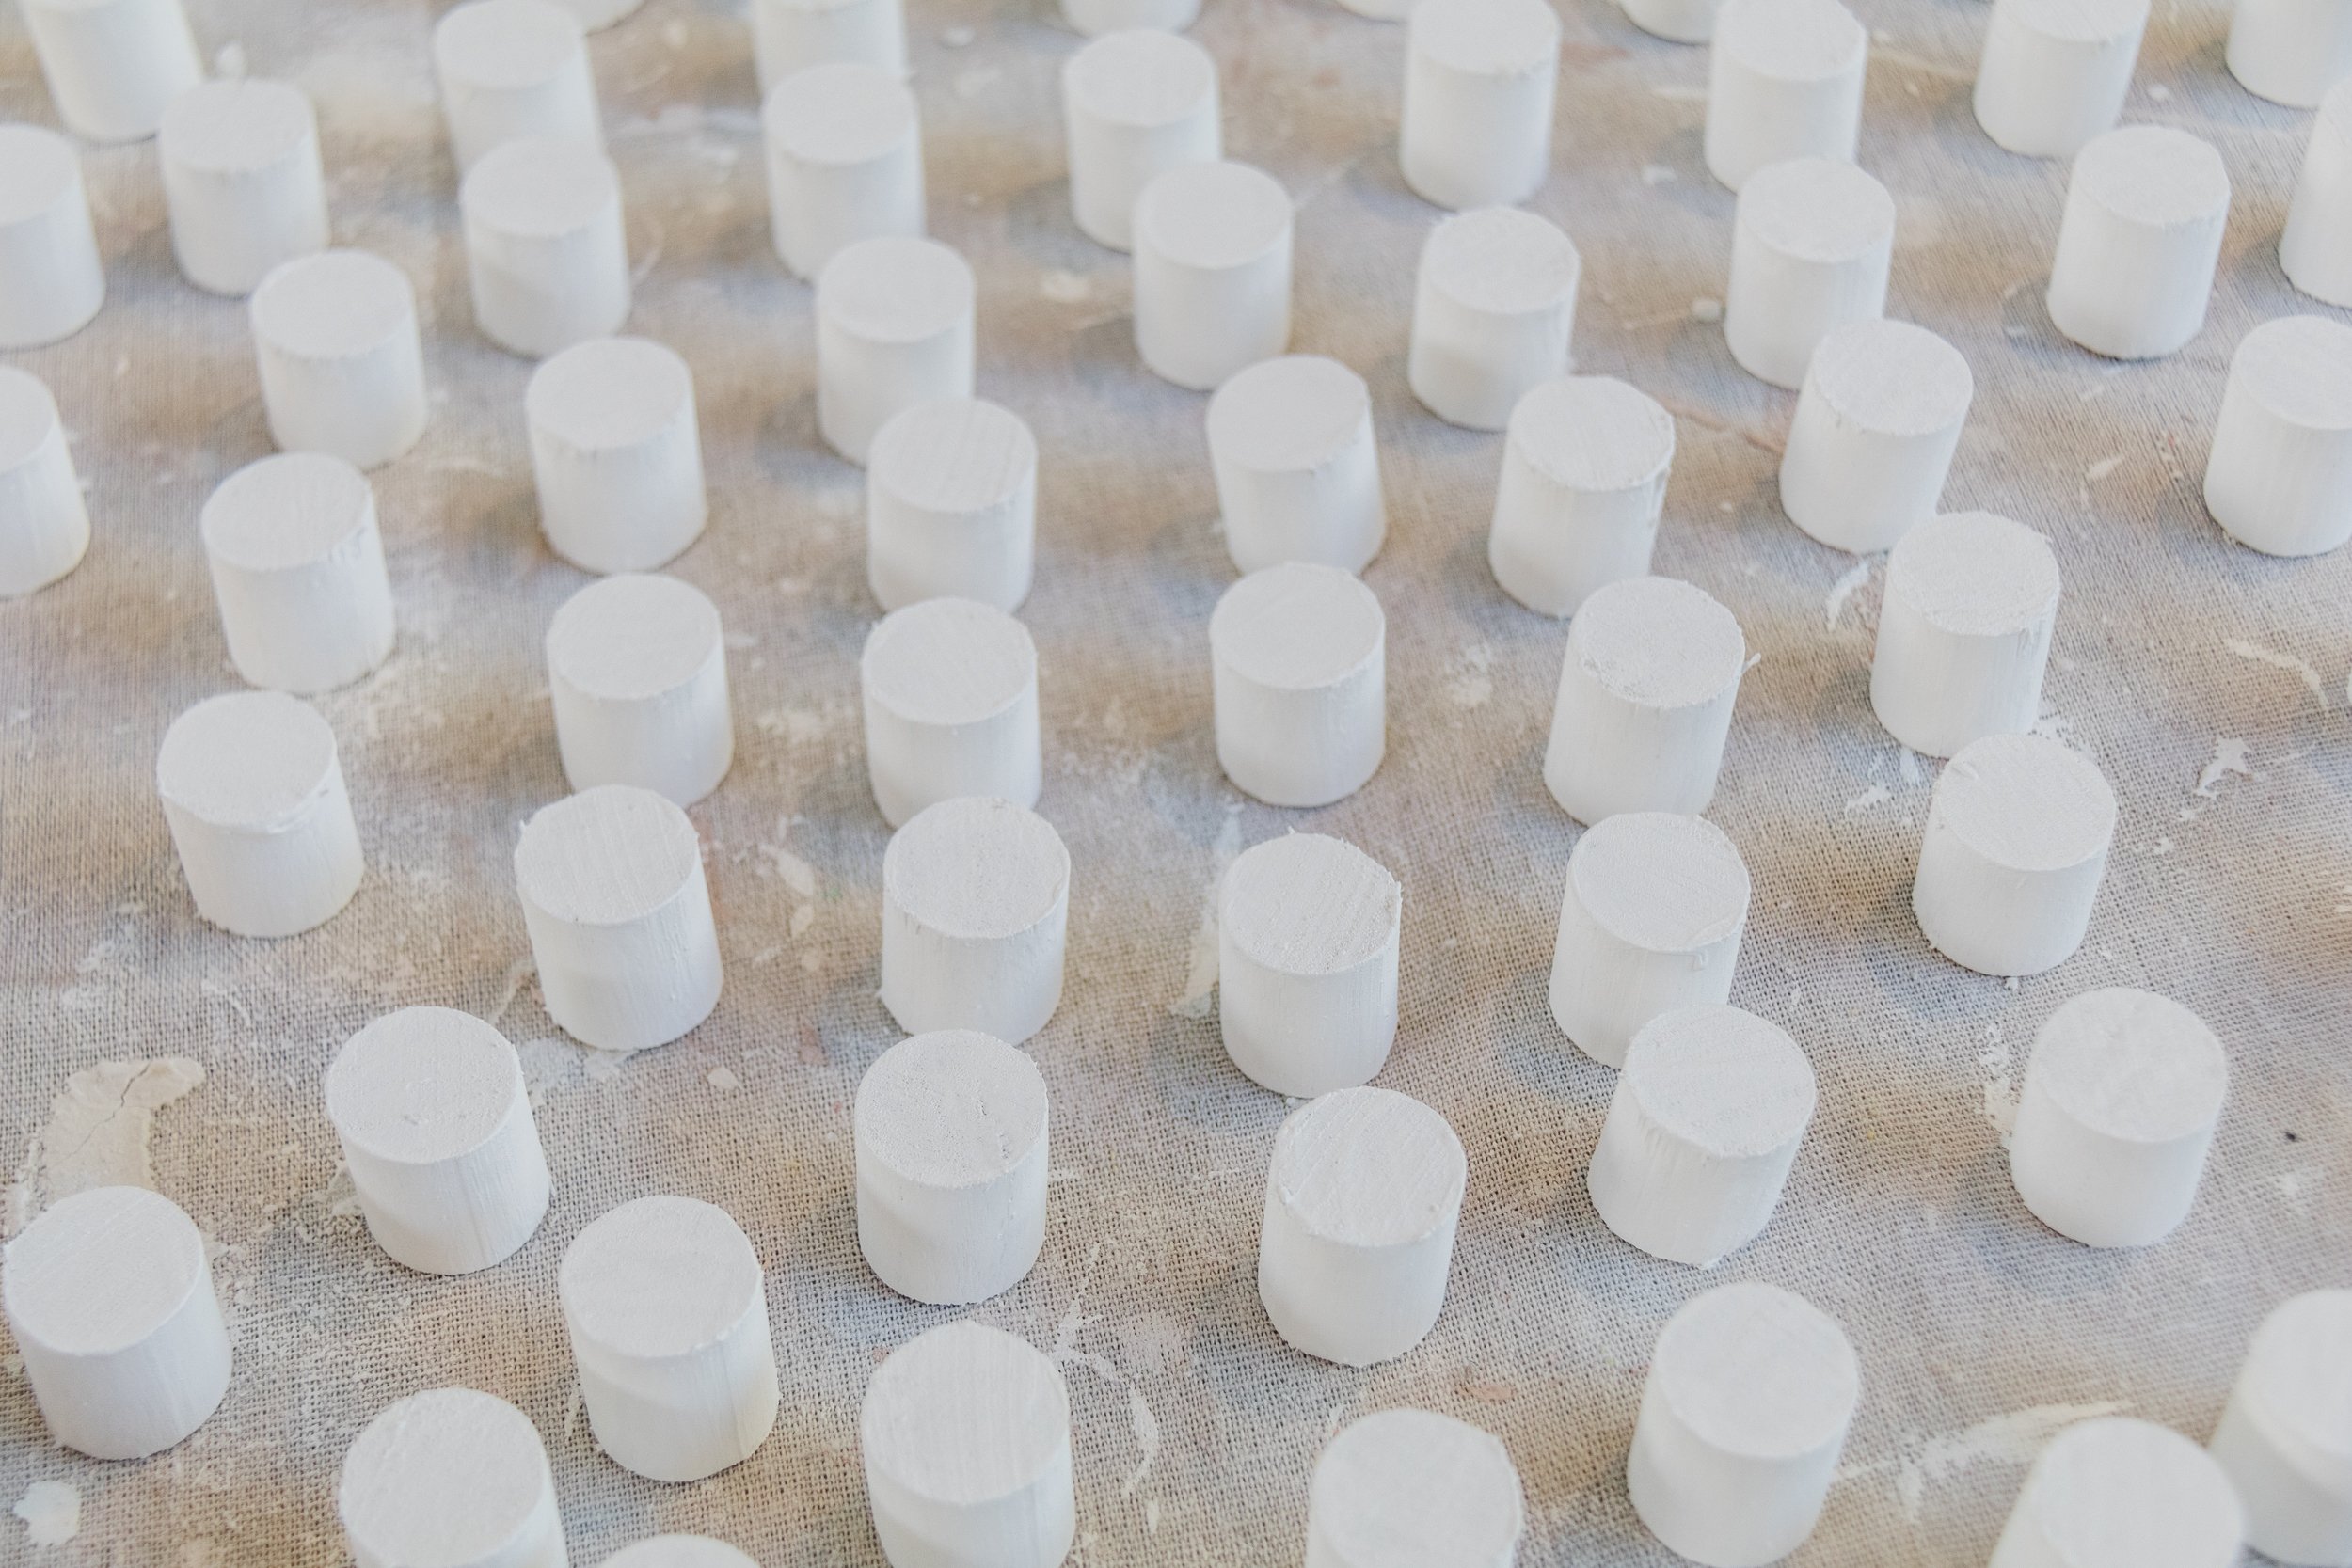
Step 4: Following this apply two coats of paint onto each dowel and set them aside to dry. And yes, I had to paint 189 dowels so thankfully I had a great podcast to listen to while I did this! But this is only because I did 3 pieces of art; if I had just done one, it would have been a lot quicker.
NB: Mitre saws are a great power tool and worth the investment. I have this one; it costs $199 and it’s a great time saver. In fact, it has paid for itself given how many projects I have used it for.
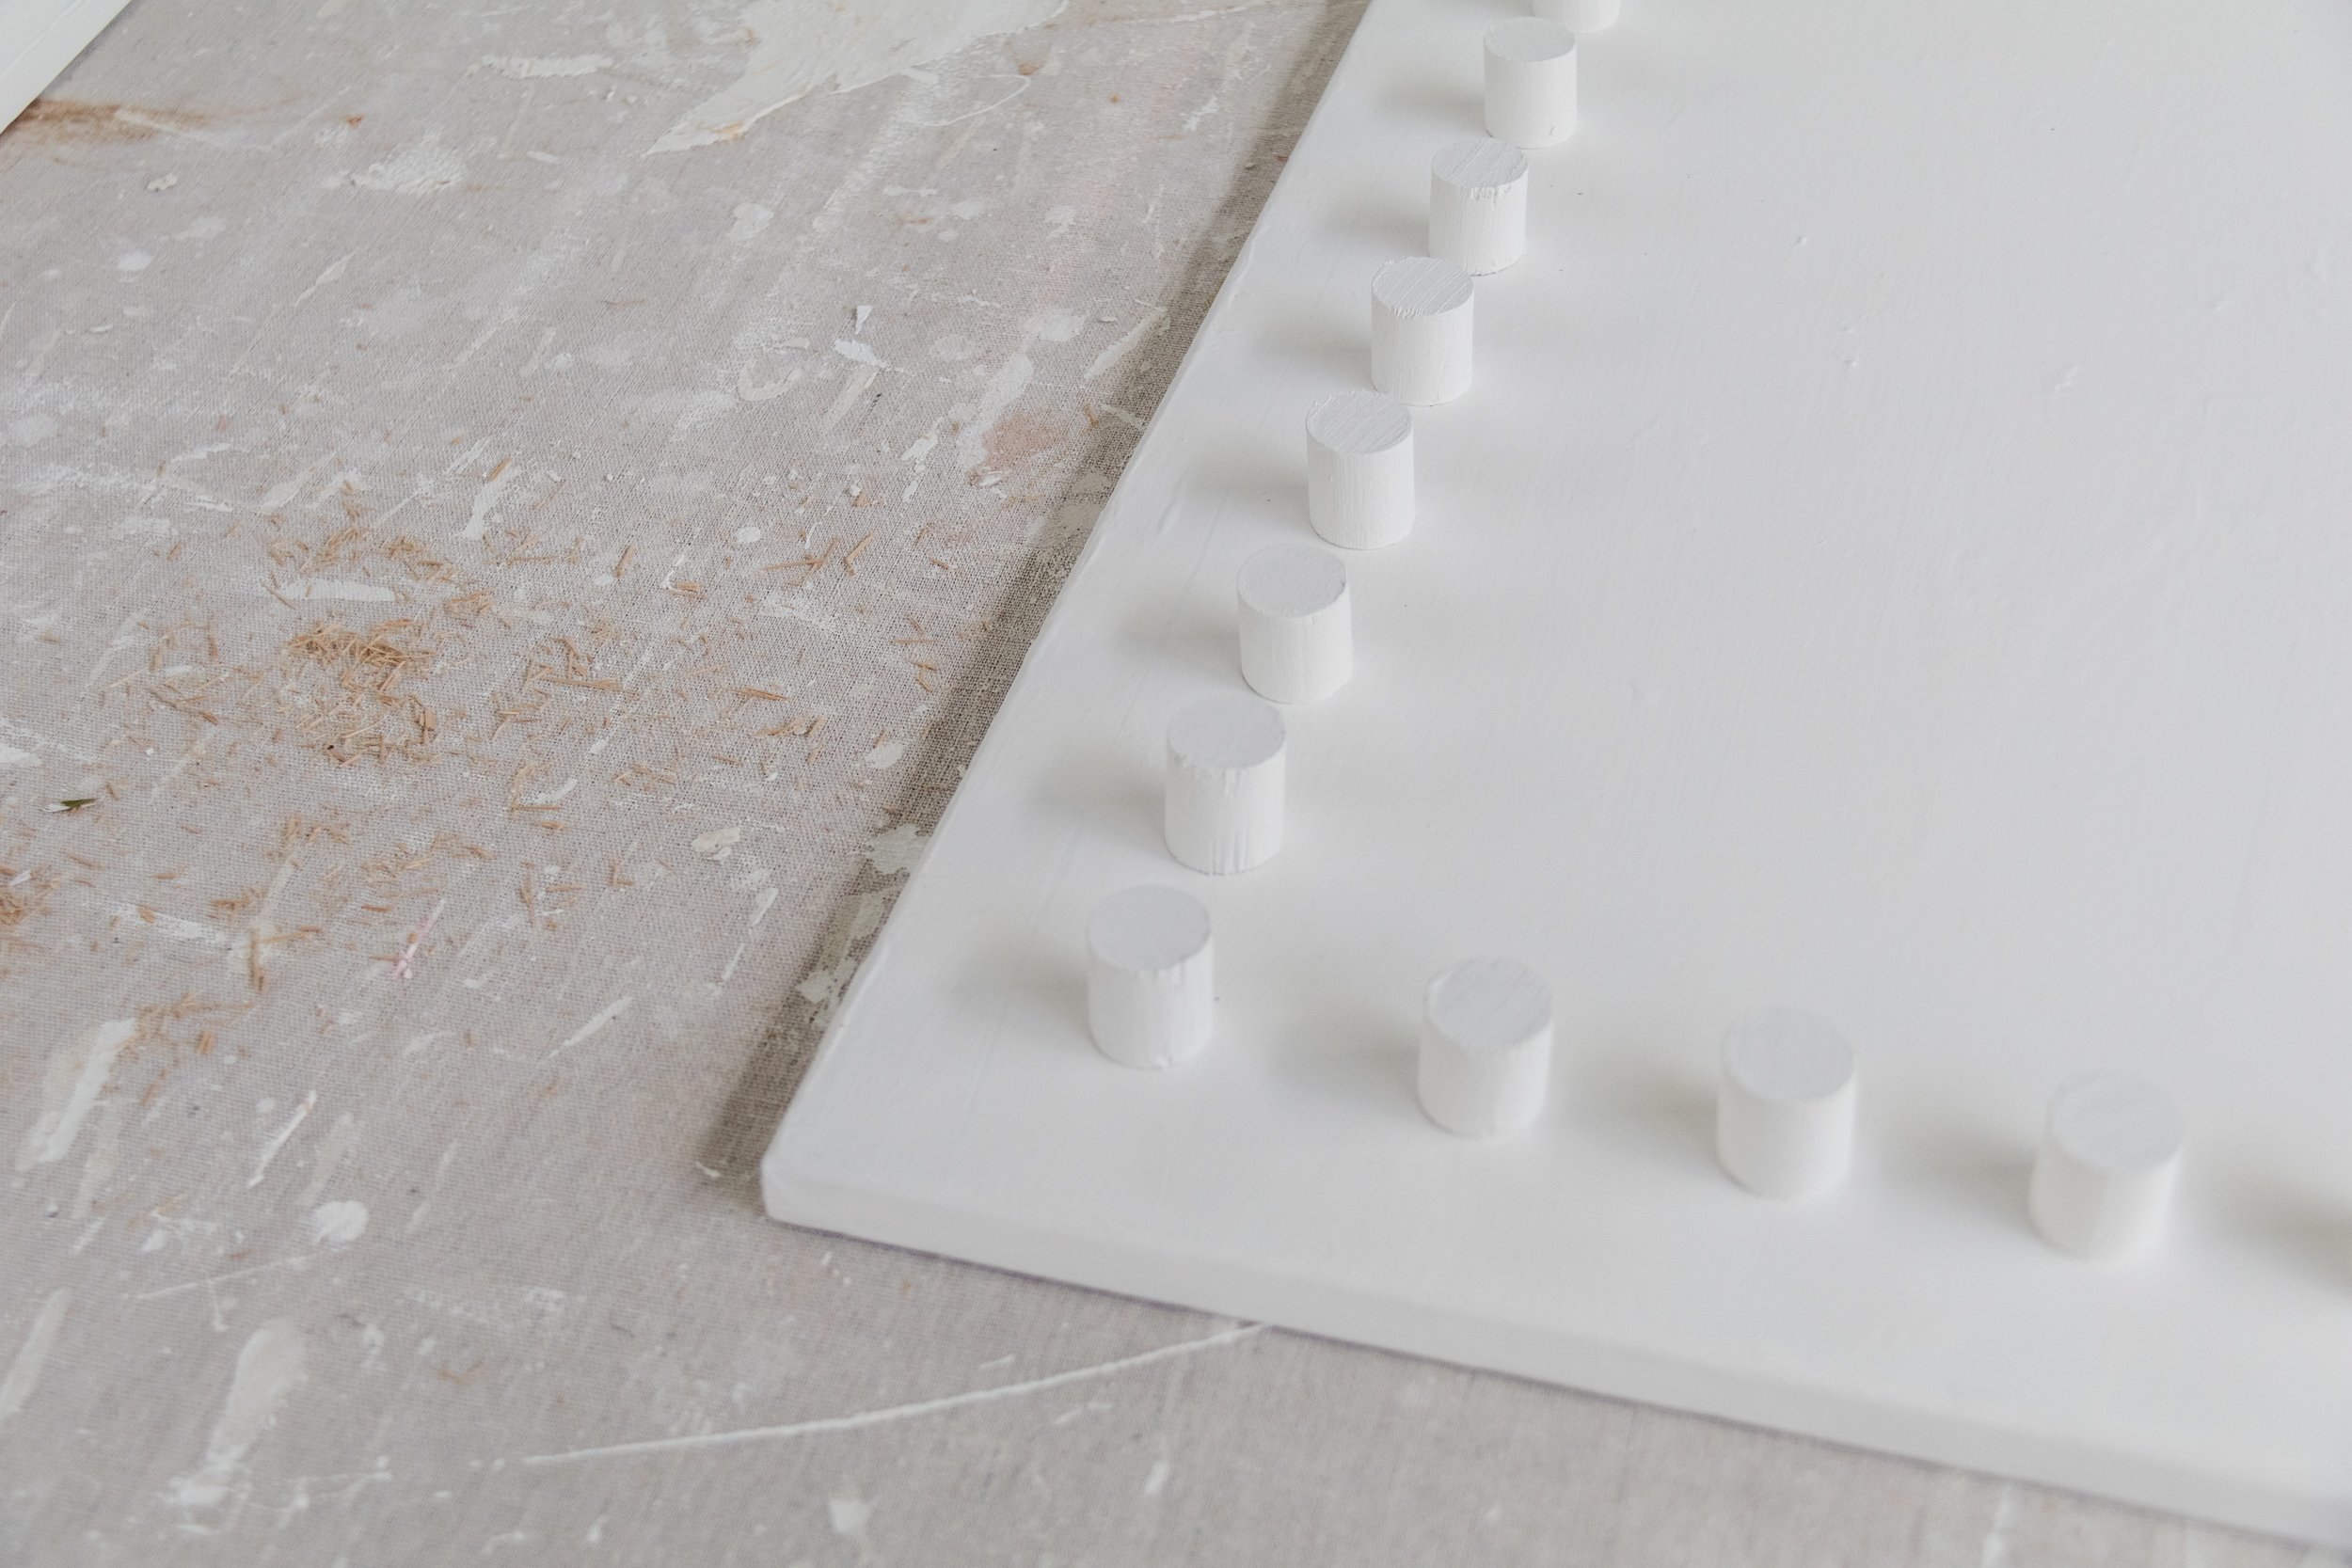
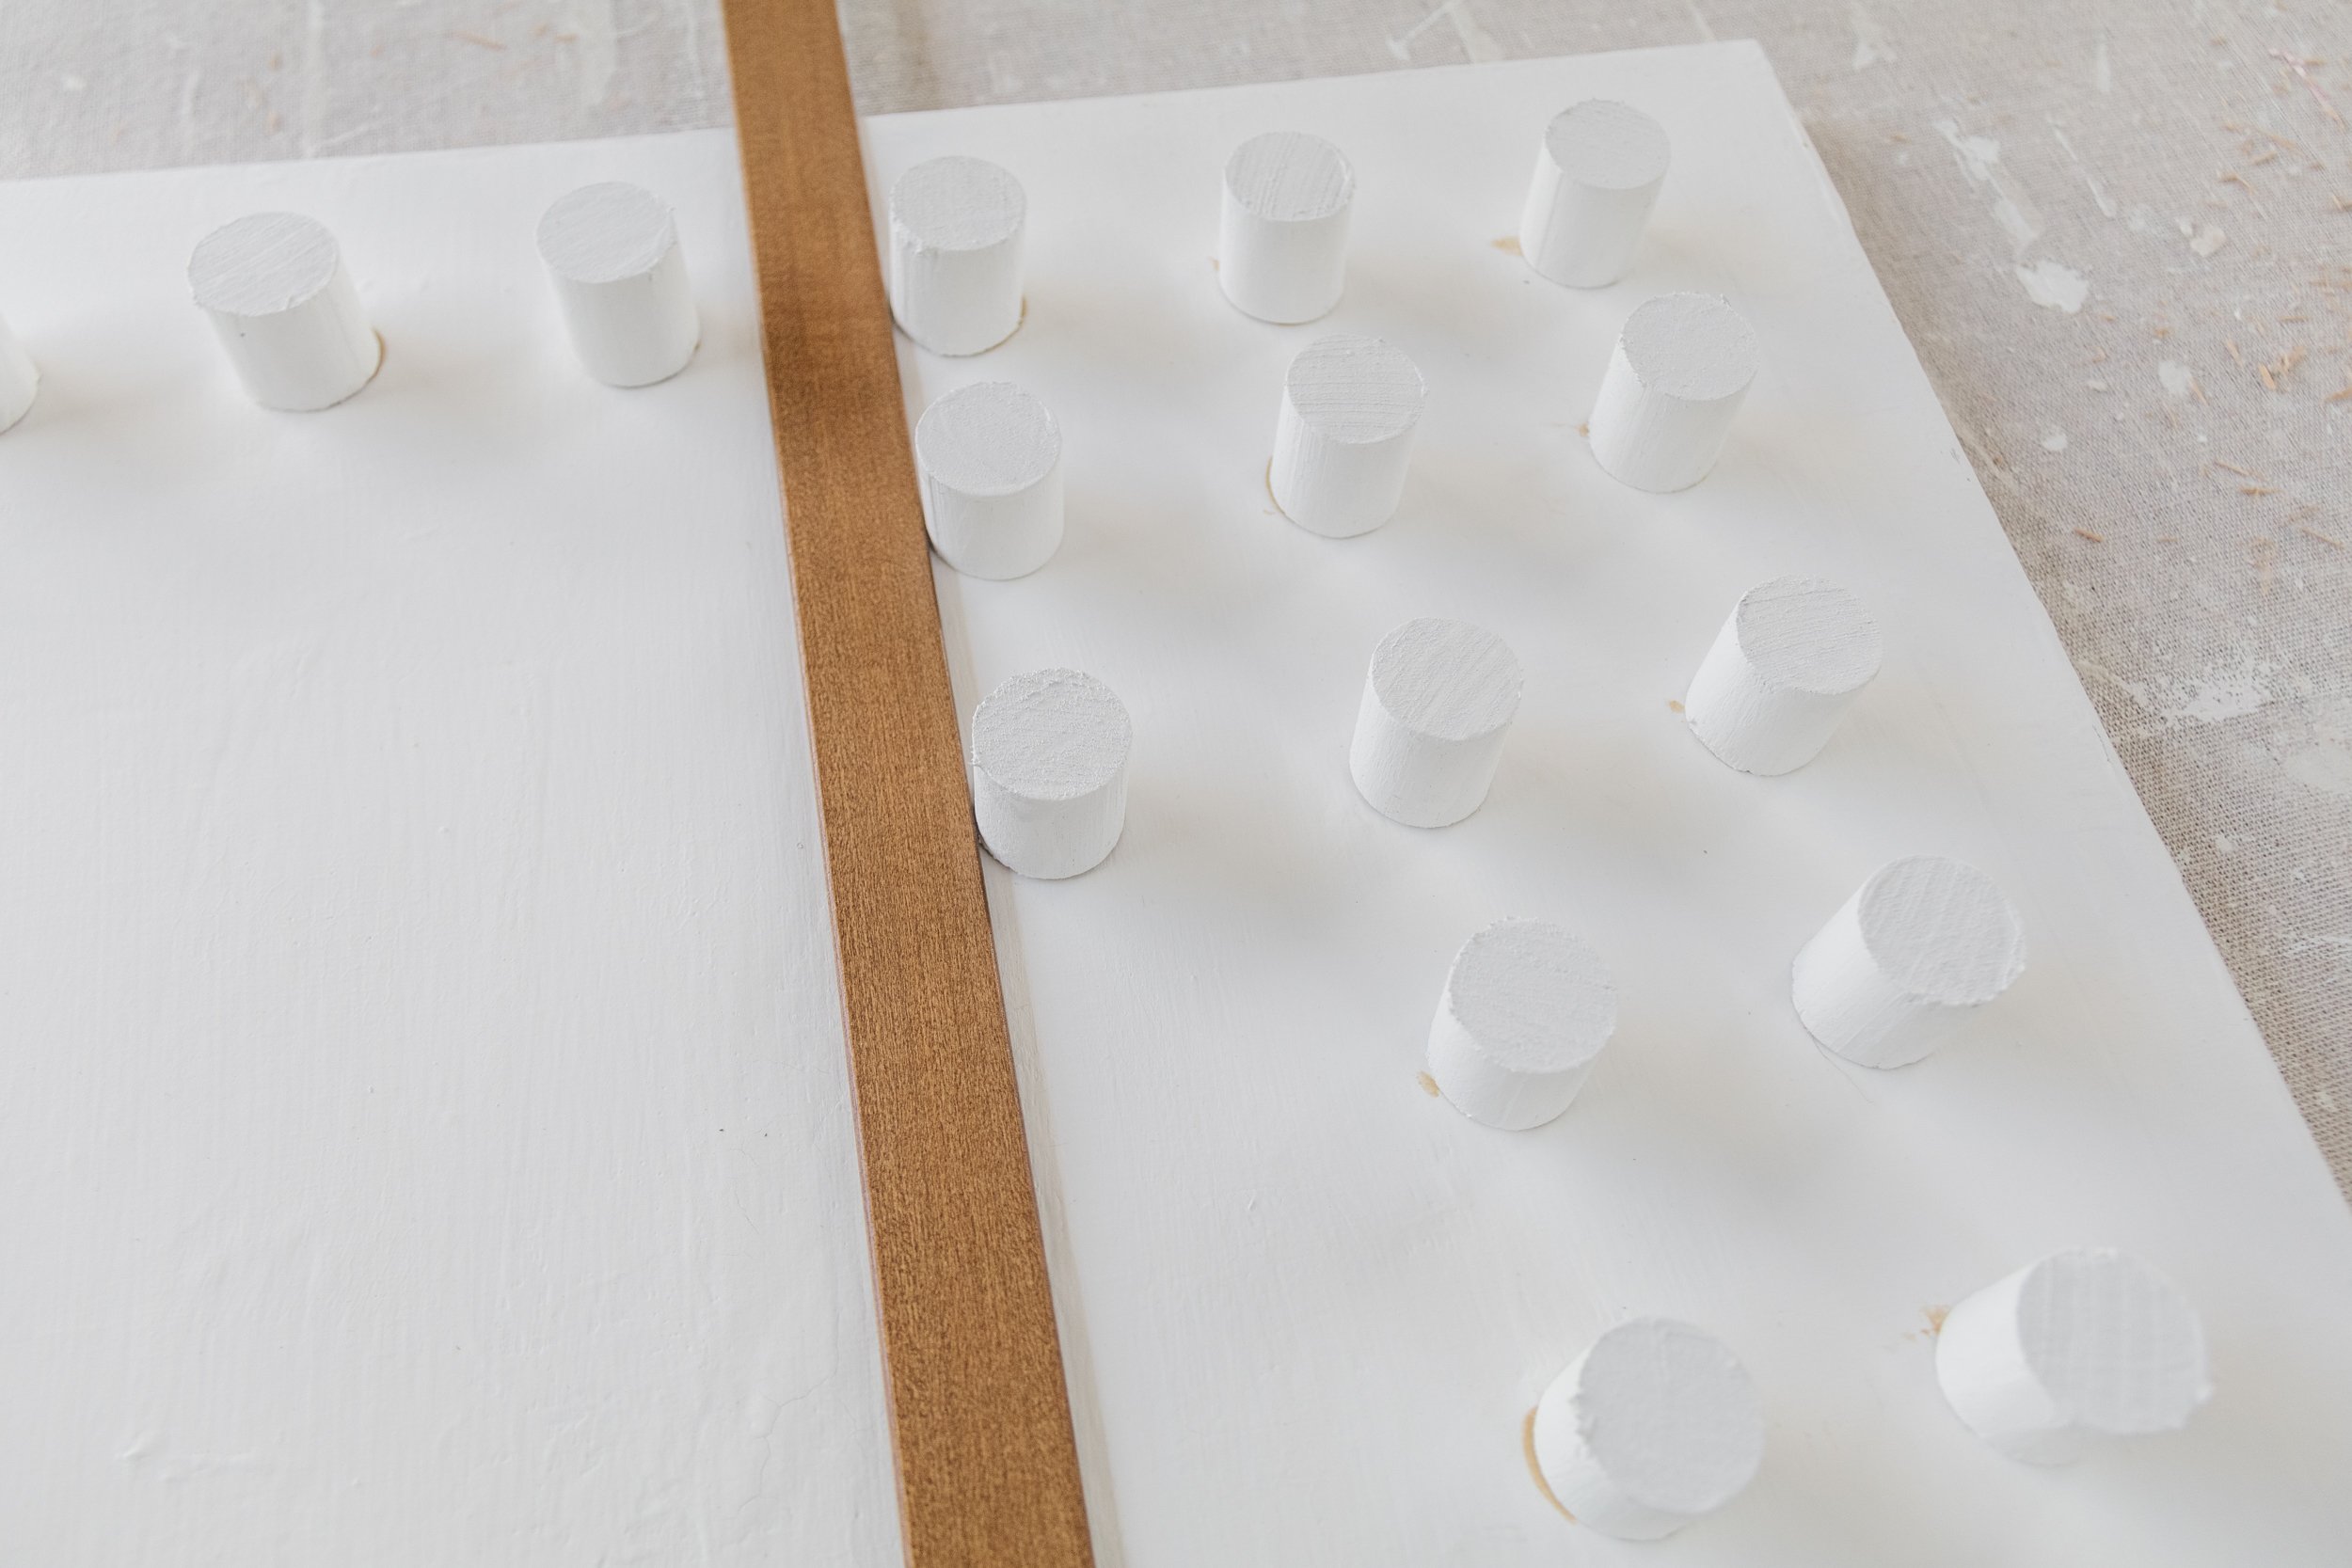
Step 5: When the paint on the canvas and dowels has dried, using a ruler evenly place the first column and the first row of dowels onto the canvas. Glue these dowels onto the canvas using the construction glue and caulking gun. Continue until each canvas is finished. The construction glue is fast holding, so you can touch up any spots when they’re finished using a paint brush without having to worry too much about the dowels moving or getting knocked by the paint brush.
Step 6: When the glue and paint has dried, hang the art using these picture velcro strips.
If you would like to frame your upcycled dowel wall, use my easy to follow tutorial “How To Make Your Own Floating Timber Frames”

Ta daaaa!
This upcycled art is the stuff dreams of made of! Yet all it took to make was some thrifted canvas pieces, paint, glue and dowels. To top it off, I used exterior paint so we could hang this on our front deck and I am so happy as I love the contrasting textures between the art and my DIY Dentil Moulding. Not only is this art beautiful, it’s affordable and sustainable! And I can’t wait to see your own Upcycled Dowel Art, so make sure to tag me over on Instagram. I love seeing your projects, they bring me so much joy!