
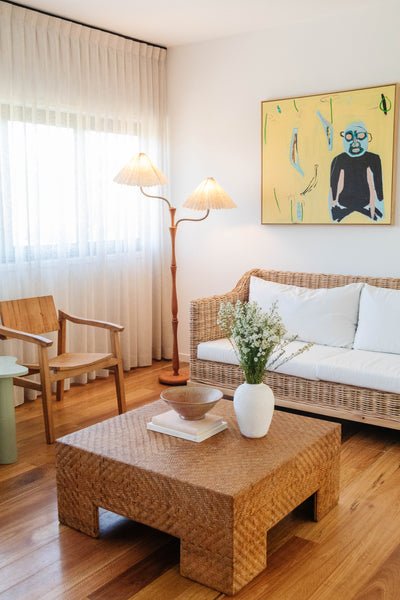
Upcycled: The DIY Pleated Lamp (Using Pillowcases!)
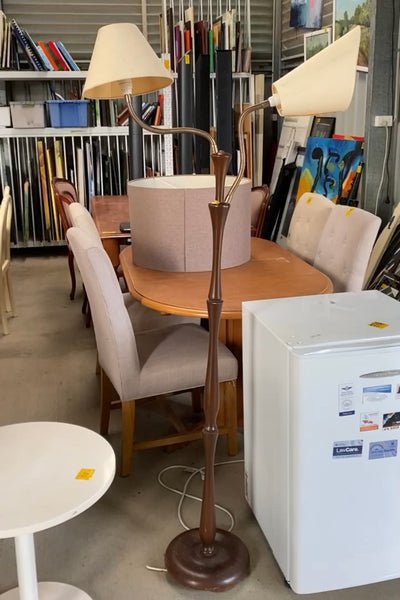
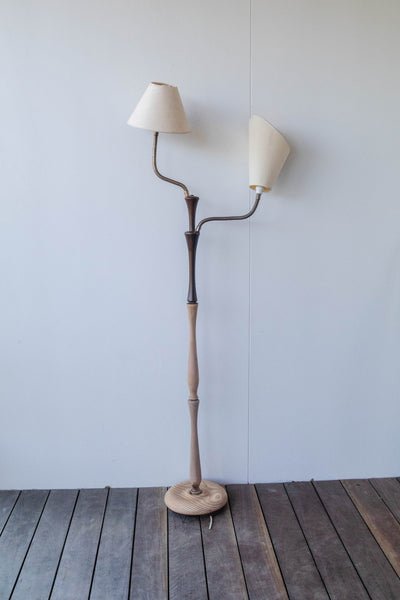
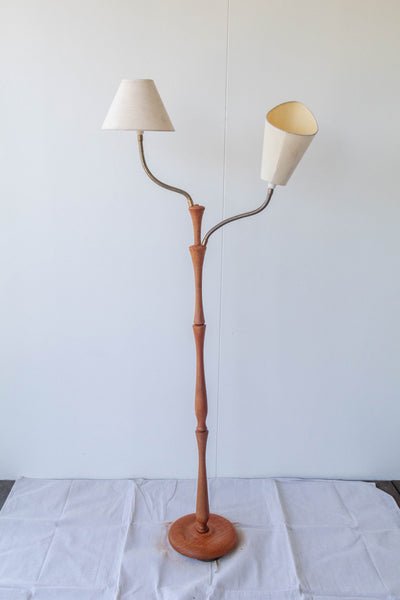
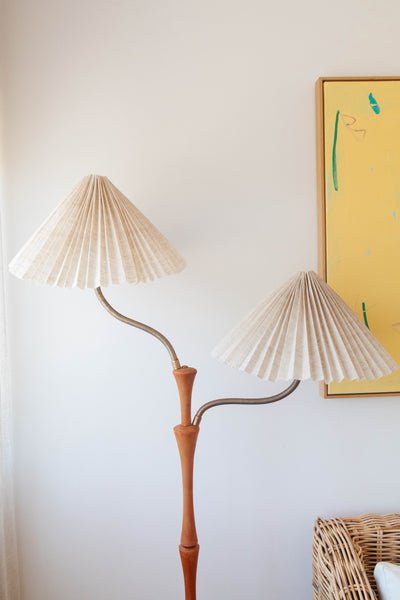
Coming to you today with my latest home DIY project - the DIY Pleated Lamp. I stumbled across this mid century modern beauty at my local tip shop; I was there to pick up a side table (which I have recently flipped into a DIY Tiled Chubby Table). It's a beautifully shaped stand, bendy patina brass arms and double lampshade situation, and it got me good, like really good. But I noticed the electrical cord had been cut and my heart dropped. As luck would have it, one of the guys working at the tip shop came by and told me it was donated by an old man who'd had it for a very long time. No one in his family wanted it, so he wanted to donate it to the tip shop. He explained that the lamp would work ad that all I needed was an electrician to wire it up. One of my friends is an electrician, so I knew this would be possible but I was still uncertain. What if I brought it home and he couldn't wire it up? Then I noticed that it only cost $12, so I decided to grab it. If it couldn't be rewired, then it's not like I had lost a lot of money.
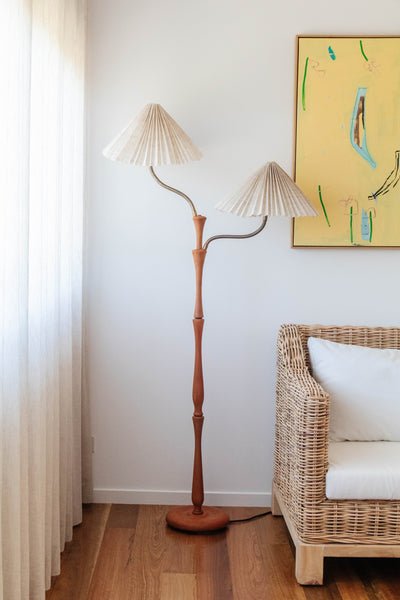
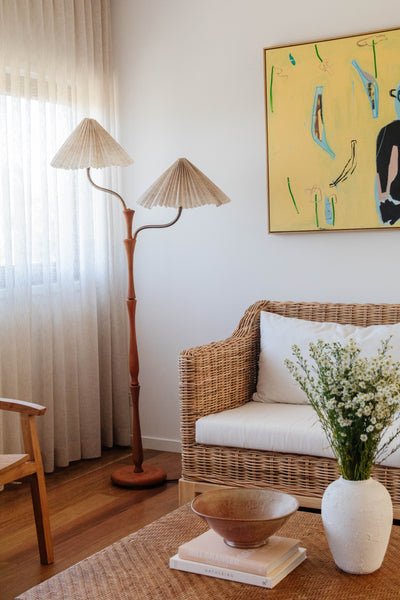
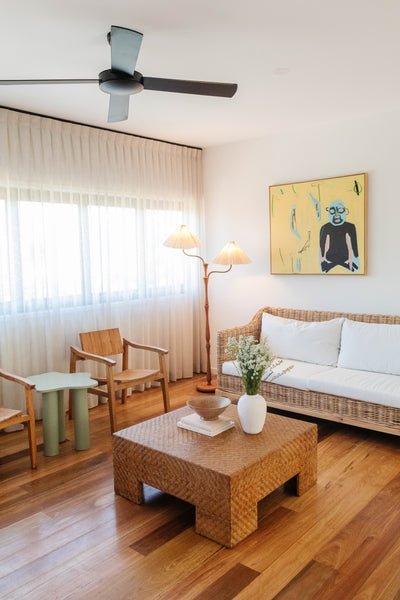
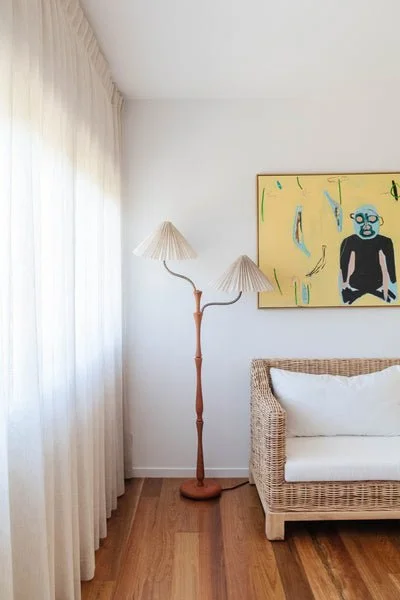
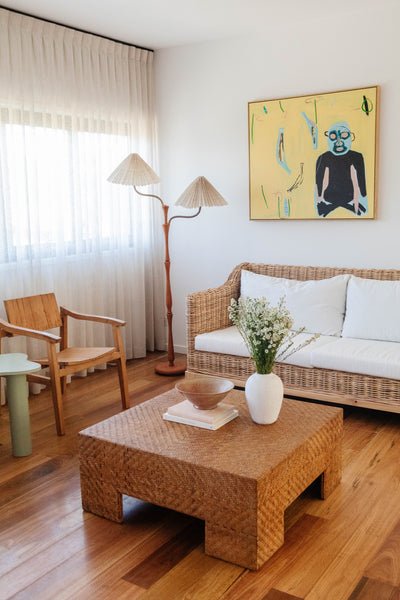
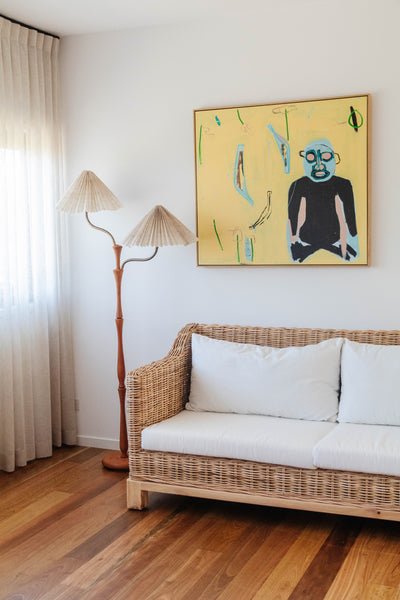
Before & After
The DIY Pleated Lamp (using pillowcases!)
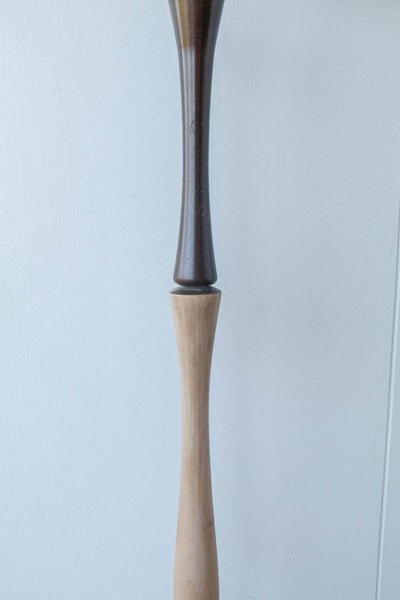
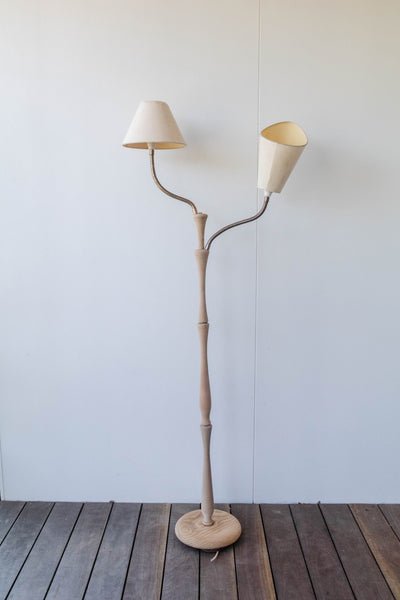
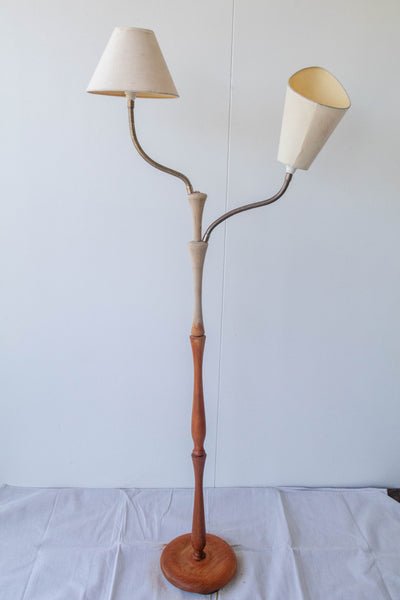
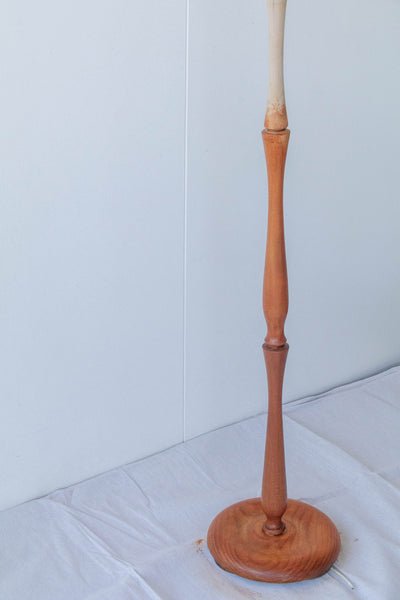
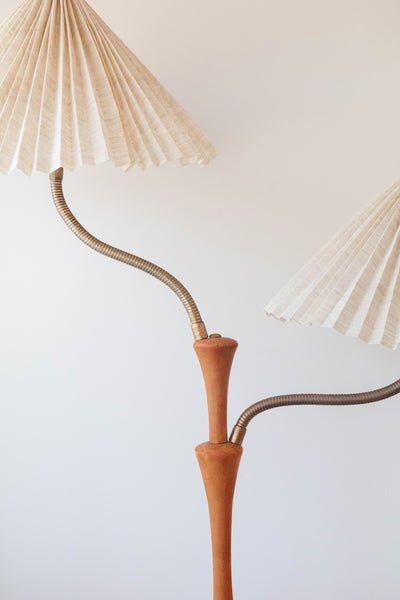
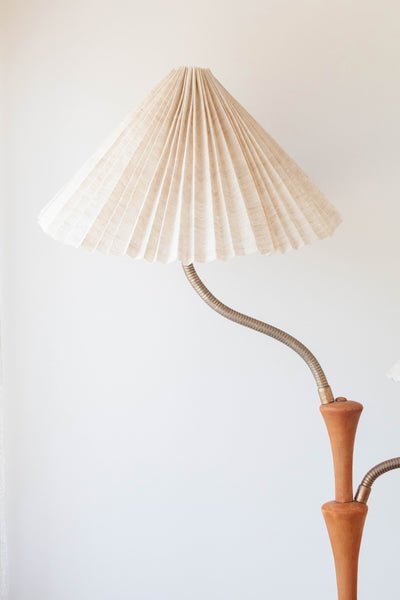
In my mind, I knew I wanted to sand the lamp stand to see what timber lay underneath. And I wasn't left disappointed. The timber underneath was stunning and many of you suggested I leave it raw, but while I used a sanding tool and a rotary tool to sand it back and get in between some pesky nooks, I could't quite sand all of the original paint from the stand. From a distance it looks incredible, but up close in some places, it didn't look as perfect. So in keeping with the mid century modern vibes, I decided to stain it using matt decking oil. A friend on suggested I use Feast Watson. I umm'd and ahh'd over which colour to get and in the end I chose a small pot of Meribau and I applied one layer of the oil.
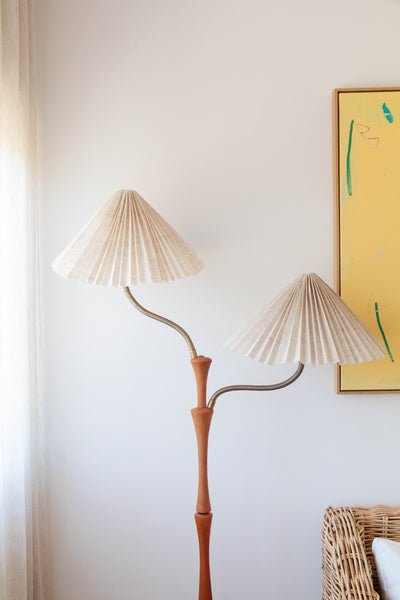
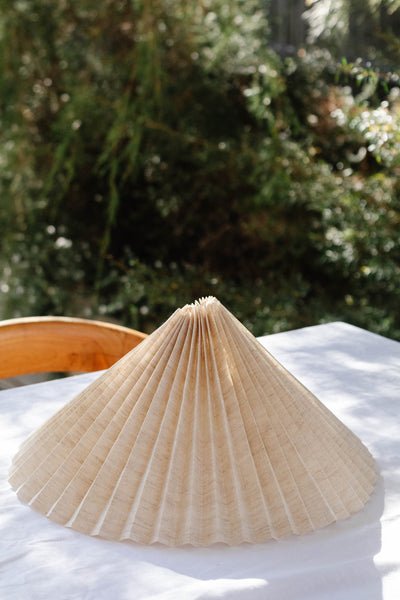
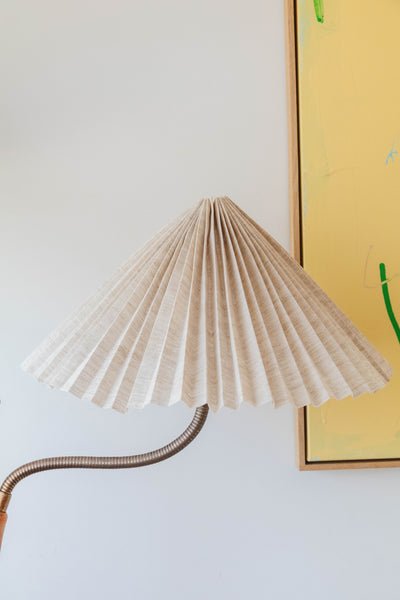
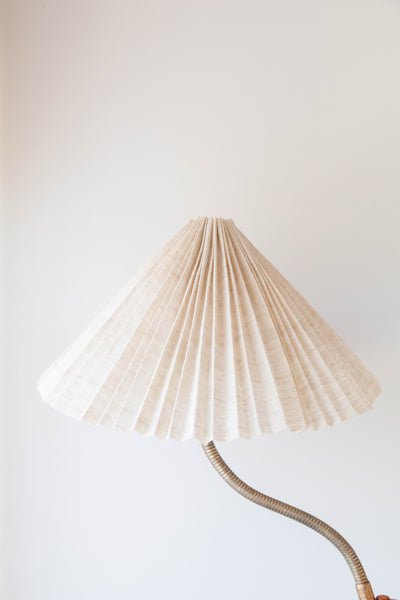
Onto the lampshades! I truly fell in love with the double lampshades but they were very old, tired and dirty. I've always loved pleated lampshades and I jumped onto Etsy to buy two, but couldn't find anything I loved. Plus I was nervous about the colour. Then I thought, why buy when I can DIY? I had natural linen pillowcases at home and decided to use the fabric from these to make my own pleated lampshades. I dropped into Spotlight and a lady suggested I used Fabric Stiffener Glue to stiffen the fabric and therefore be able to easily fold the accordion pleats. And as they say, the rest is history. Read on below to find out how I flipped this pre-loved mid century modern lamp for less than $50.
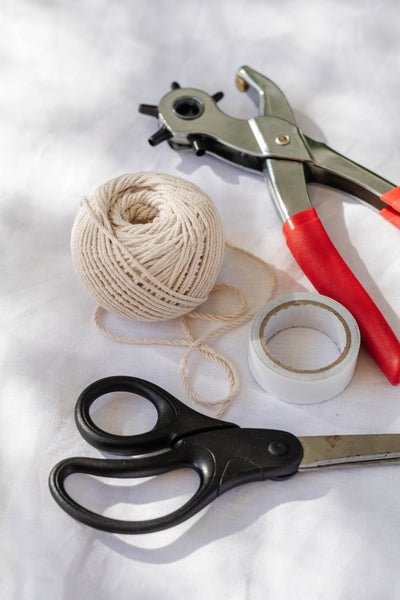
Materials
Secondhand lamp
Medium grit sanding sponge - available from Bunnings
Sanding tool -available from Bunnings
Rotary tool -available from Super Cheap Auto
Feast Watson matt decking oil in Meribau -available from Bunnings (you can use furniture oil but don't use furniture wax)
Uni Pro sheepskin applicator mitt -available from Bunnings
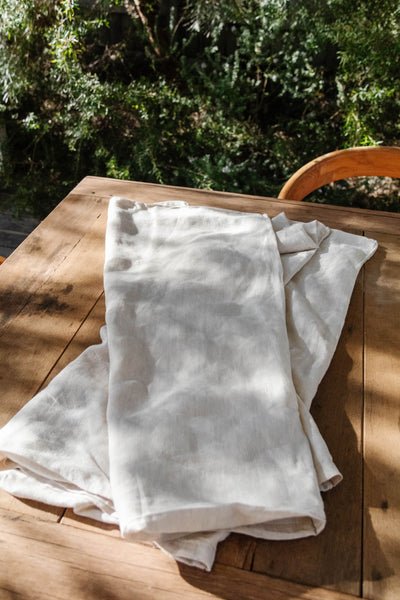
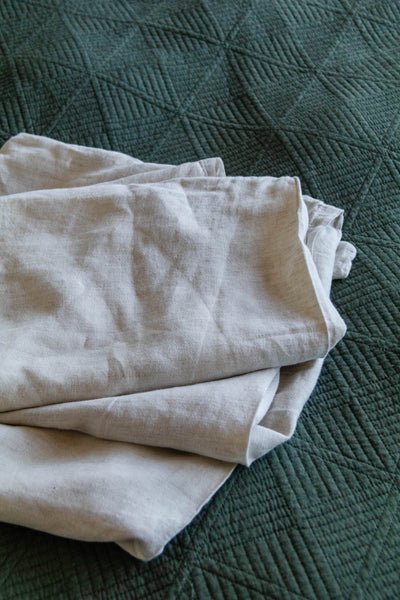
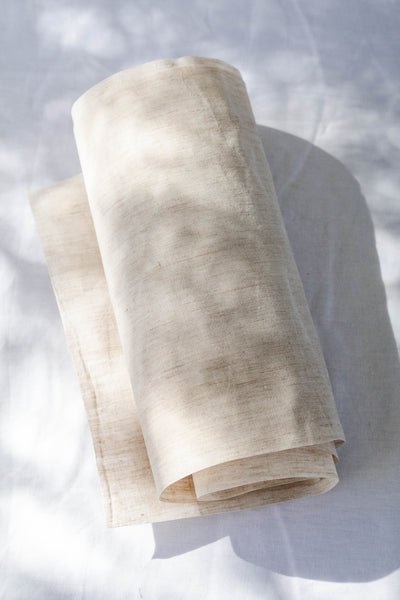
Linen fabric (you can also use cotton)
Iron
Scissors
Measuring tape
Ruler
Plastic drop sheet -available from Bunnings
Fabric Stiffener Glue - available from Spotlight
Disposable gloves
Double sided tape - available from Woolworths
Hole punch -available from Bunnings
String to match your fabric -available from Bunnings
LED lights bulbs (these won't get hot)
Steps
Sand the stand back using a sanding tool and a rotary tool.
Wipe the stand down with a wet cloth to remove dust from sanding and wait for it to dry.
Apply one coat of decking or furniture oil with a sheepskin applicator mitt, and set it aside to dry completely.
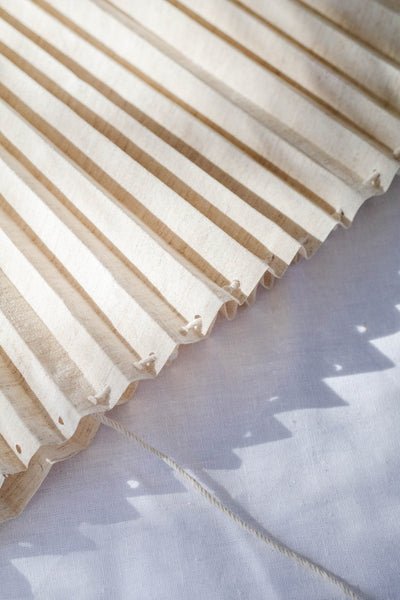
Cut the linen fabric to size using a tape measure and scissors. Iron the fabric to get rid of any creases or wrinkles.
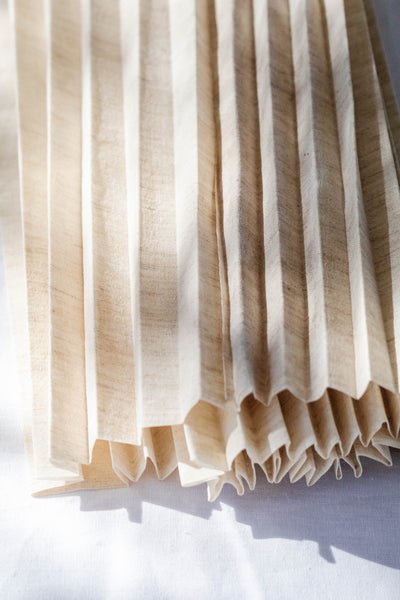
Lay a plastic drop sheet over your work surface and place your fabric onto it, laying flat. Liberally and thoroughly coat the in the Fabric Stiffener Glue Lift and let it dry flat on a clothes line.
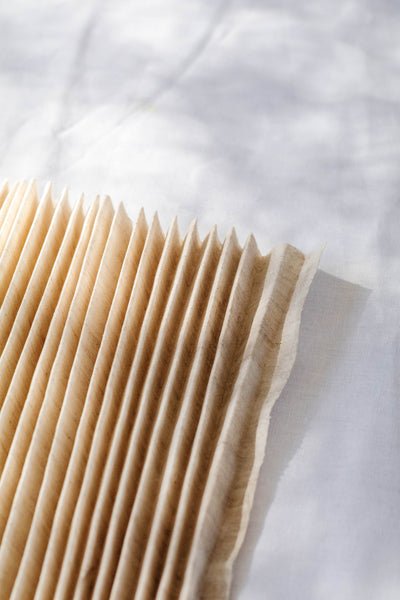
When the fabric is dry, it'll feel like a stiff piece of paper. Trim the edges if you think it needs it.
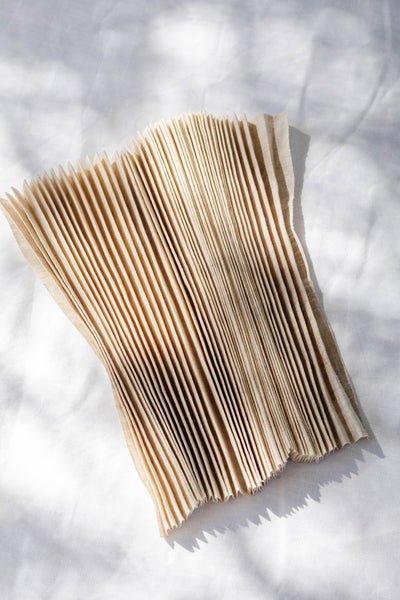
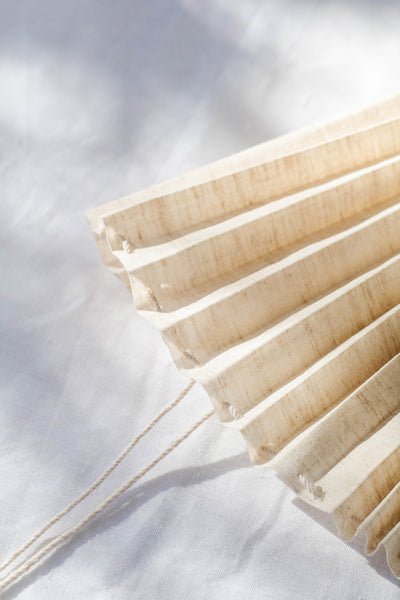
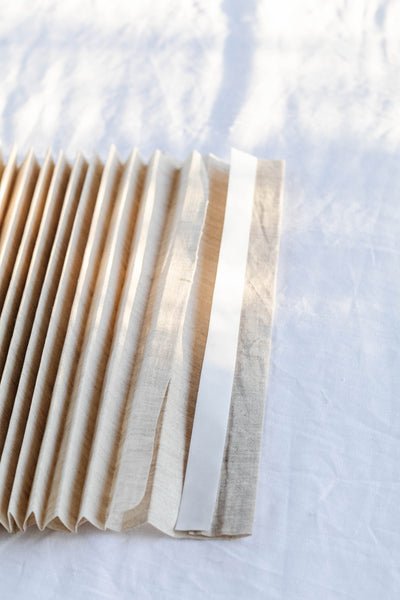
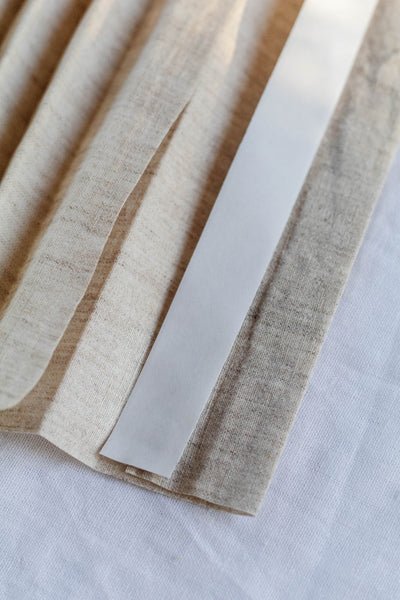
Starting folding the pleats accordion style. I wanted smaller pleats as the lampshades are tiny, so I made my folds about 1.5cm wide. Take your time with this step.
Measure and cut the double sided tape to the width of your fabric. Follow the instructions on the packet and connect the first fold to the last, bringing the fabric together in one loop. (I had to do this twice as the length of the linen pillow cases was too short.)
Check your string and select the right size hole punch. Punch a hole in all of the inner folds. Thread your string through each hole but don't pull it tight. Make sure the string is long.
Remove the existing shade from the lampshade structure and slip the pleated lampshade over your pendant lamp. Pull the string tight and knot from underneath the lampshades secure. Cut off any extra string, plug your light in, turn it on and enjoy!
And that's it!
I love that this project repurposes old pillowcases into beautiful pleated lampshades. And I know of lot of you are in lockdown at the moment, so if you are looking for a sign to get creative at home - this is it. You can refresh any lampshade with pillowcases. Jump online, order your materials online and get creative the moment it arrives on your doorstep. And if you’re looking for a distraction, I've got find lots of creative home DIY projects and simple, seasonal recipes to keep you busy.
Important
You need a qualified and certified electrician to re-wire any lamp if it's not in working condition. Do not attempt to re-wire a lamp yourself. An electrician can ensure the wiring is set up legally, safely and that it is earthed. Because the wire in this lamp goes through metal arms, it needed to be earthed and thankfully, it already was.
A little note from me
Thank you so much for taking the time to read through this tutorial. I hope you enjoyed it and feel inspired to make your own DIY Pleated Lamp! You can also stay in touch with me by following along on Instagram and Pinterest, or sending me an email at jaharn@smorkitchen.com. Happy cooking, happy making!


