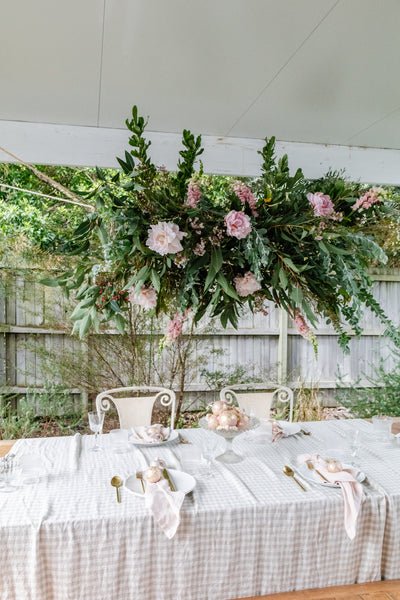
How To Make A DIY Festive Floral Hanging Arrangement
I am so happy the festive season is here! Last year I made a Native Leaf Garland to enjoy while entertaining at home over the Christmas holidays. This year I wanted to push myself out of my comfort zone and make a festive DIY Floral Hanging Arrangement. Who doesn't love that dreamy look of flowers and greenery hanging from the ceiling; they're so beautiful and can transform any space. I've always loved working with flowers and greenery, but I have never made anything to this scale before, but I love a challenge and seeing as it's the festive season, I thought - why not? Read on to find out how to make your own DIY Floral Hanging Arrangement. I share lots of tips to create a simple yet elegant arrangement that'll wow during the festive season (and let's be honest - any time of the year!).
Pick a location
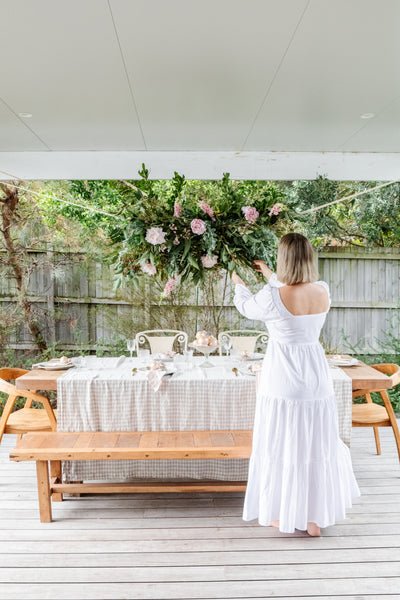
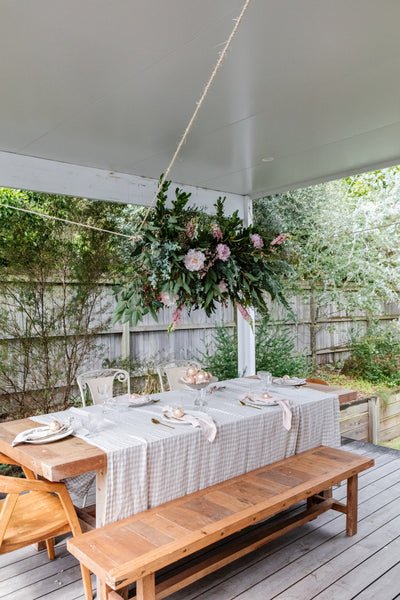
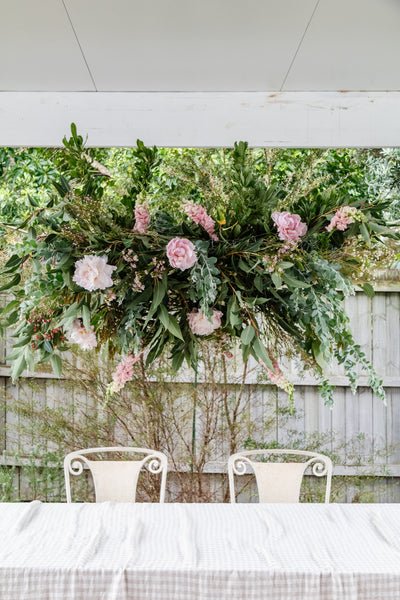
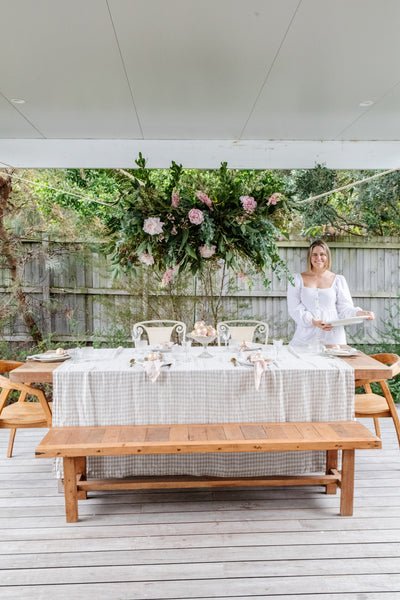
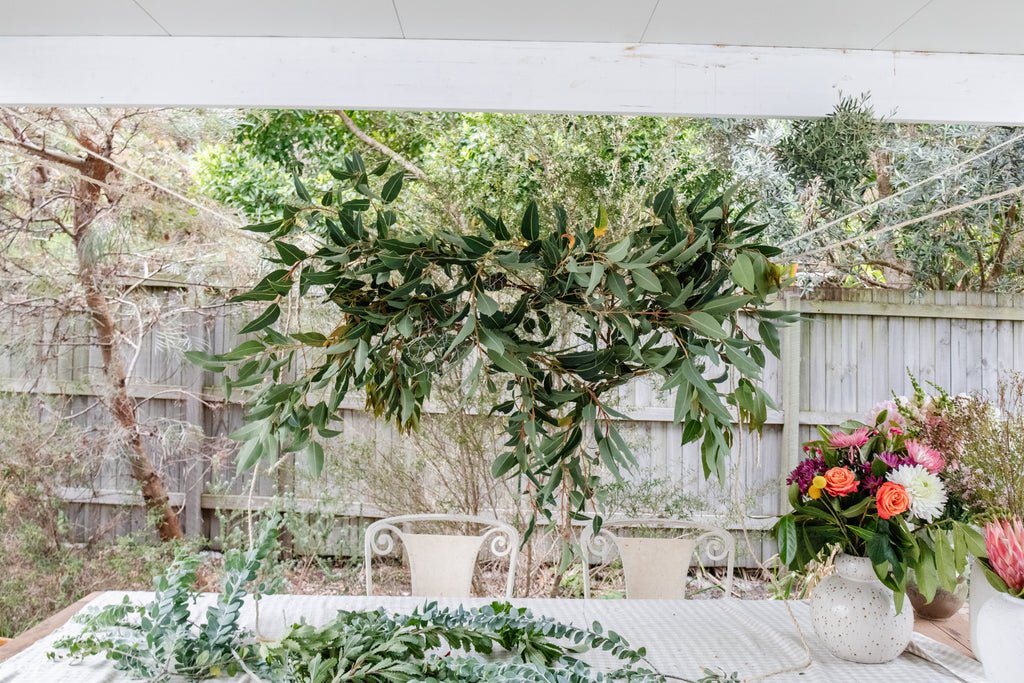
Before you buy flowers and forage in your garden (and your neighbours), make sure you pick the right location. For my centrepiece, I wanted it to hang over the table on our back deck but I did face some challenges. I couldn't suspend the arrangment directly above as the deck cover is made with metal sheeting, so I had to use a bit of brain power to figure out how I could actually make it work. You may need to use strong 3M hooks, a staple gun or even a drill. So when picking the location, make sure you can actually hang a floral arrangement in the space.
Choose a colour theme
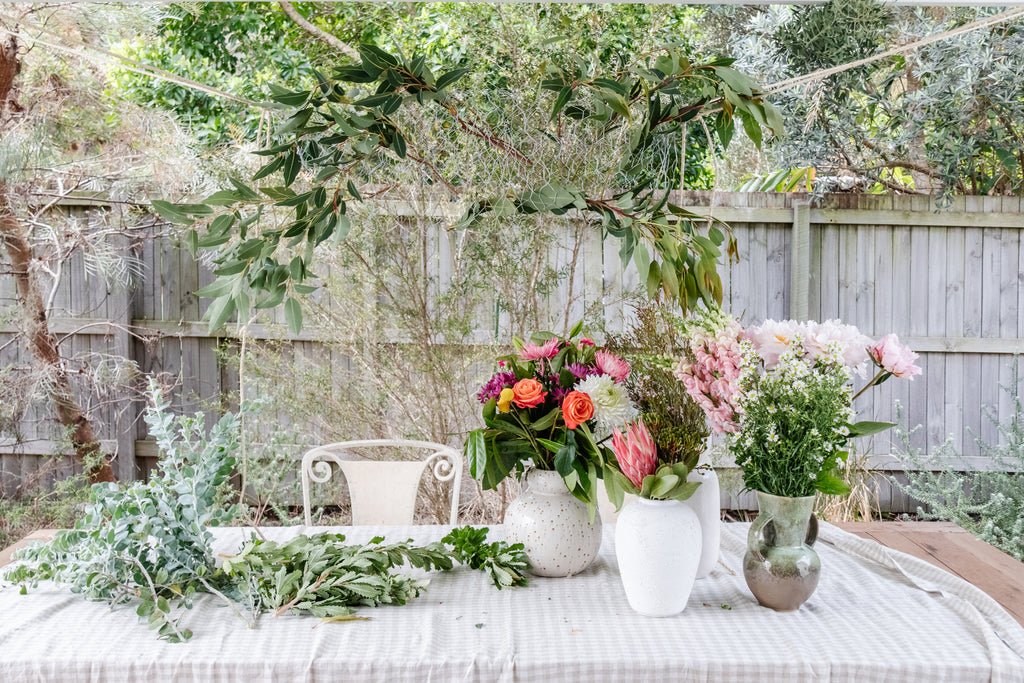
There are a LOT of flowers to choose from, so I found it really helpful to choose a colour theme. Pink and green are my go to colours, so I grabbed a variety of flowers in different pinks, and foraged in my garden for branches and cuttings in different shades of green. If you wanted to go a step further, you could also choose a theme for your arrangement - such as natives or dried.
Think about the rest of the space
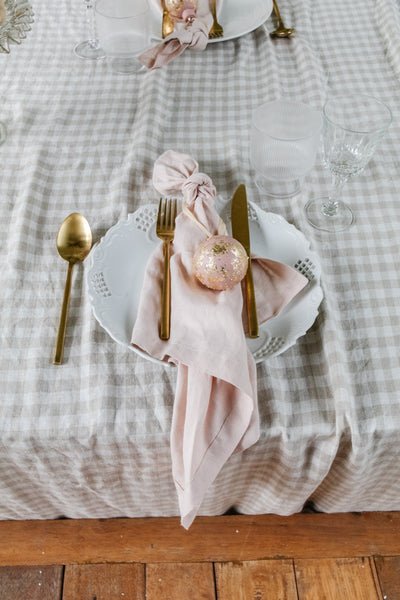
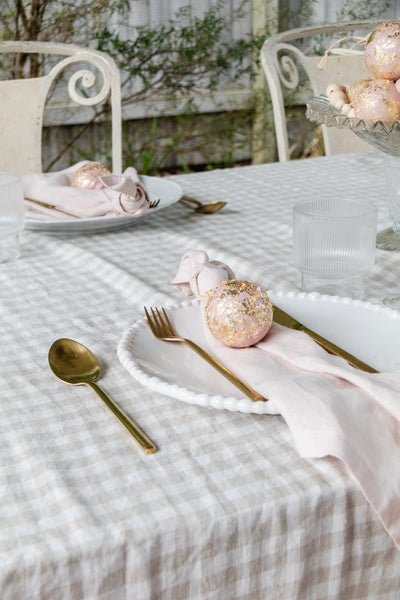
Have a look around the space you are styling, and think about what else you'll be bringing in. Start collecting your props and accessories, and make sure they tie in with your colour theme. Something I found really helpful was choosing the tablecloth before getting started. This helped guide the colours of the flowers and was also a great reminder as to how I was going to style the table.
Enlist a friend to help
You could try this DIY on your own but it will be a lot easier if you enlist a friend to help you, especially with hanging the chicken wire frame and with arranging the flowers.
Ok let's get started!
Now that you have picked a suitable location, you have chosen a colour theme and you have enlisted a friend to help you, it's time to get started. The great thing about this project is that you only need a few tools and you can make it as big or as small as you like.
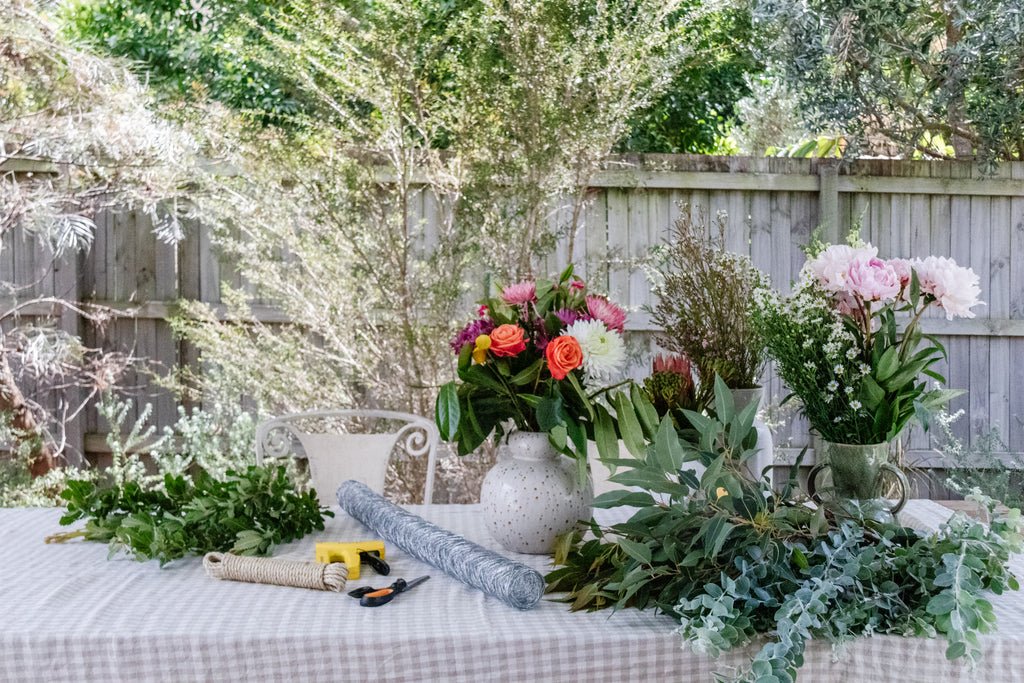
Materials
Greenery - branches, leaves and cuttings
Flowers - in the colours and variety to match your theme
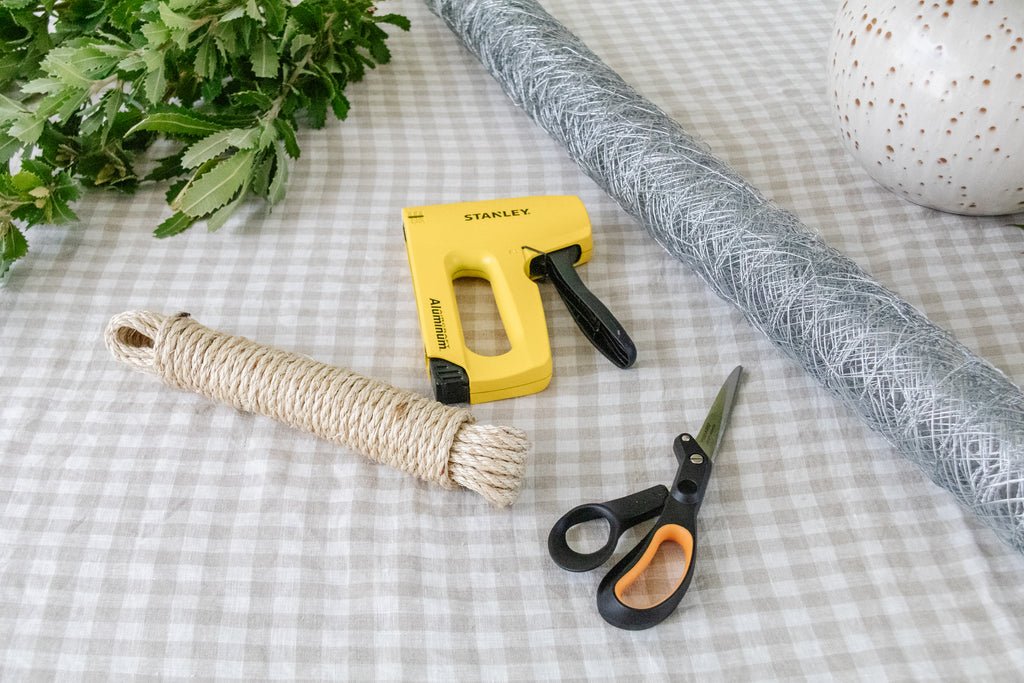
Chicken wire
Rope
Staple gun
Scissors
How To
Assemble the materials and make sure to keep your greenery and flowers in water. You won't necessarily need to do this if you've just cut the greenery.

Start by cutting and shaping the chicken wire into your desired length and shape. Set aside.

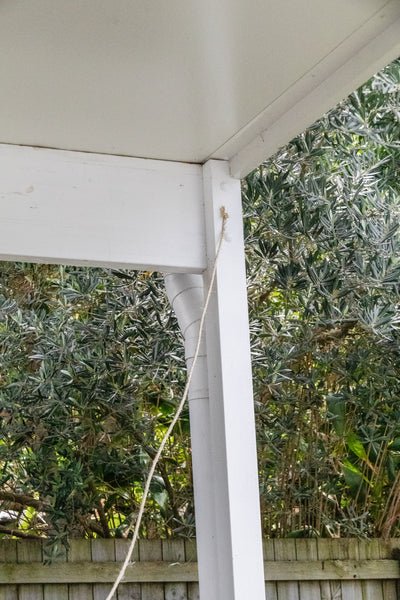
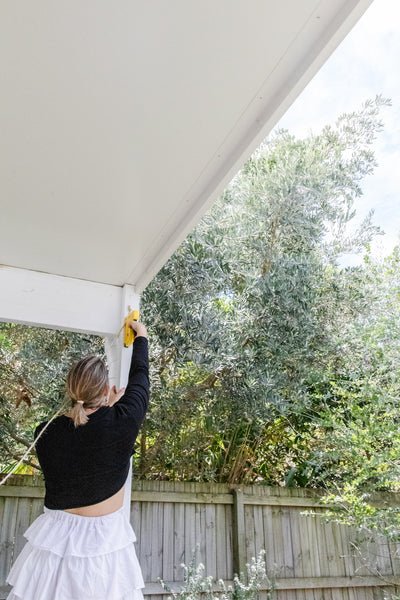
Measure and cut the rope. Tie a knot at each end of the rope, then staple the first piece of rope into position using the staple gun. The knot help keep the rope in place and prevent it from slipping later on. Tie the rope onto the shaped chicken wire and set it down. Staple the second piece of rope into position using the staple gun and tie the other end to the shaped chicken wire. You may need t adjust the rope to get the right height. If you are suspending the chicken wire across more than two points, repeat the steps above until the chicken wire is suspended completely. For my floral hanging, I affixed rope to four points - the deck and the house.


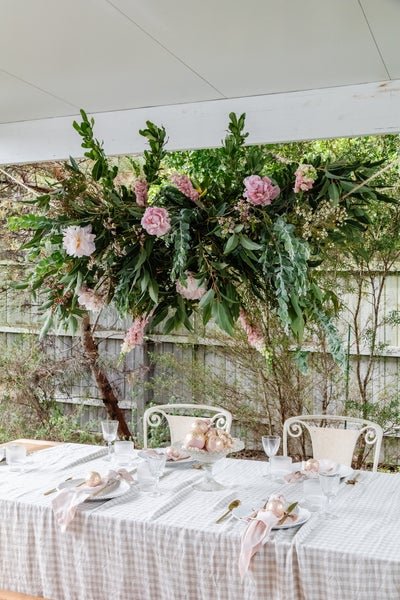
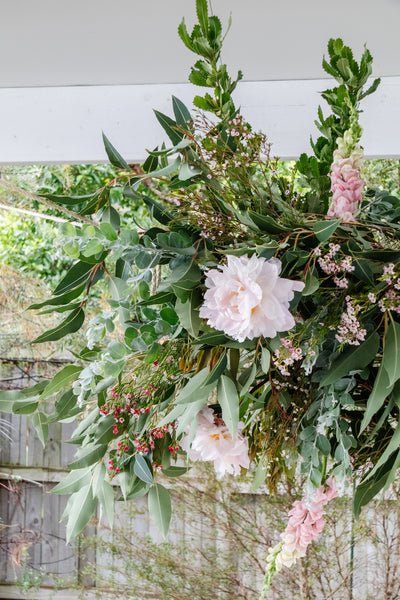
Start by poking the green branches into the wire at either end and keep twisting, moving and editing until the chicken wire is mostly hidden and the greenery is full and lovely. This is your "background"

Start layering the flowers according to their variety and keep editing until you are happy. You could easily find yourself tweaking and changing things around non stop, so don't stress to much. Once you're happy, trim the excess rope off using scissors and it's finished!


Extra tips
If you can't "hide" the rope, make it a feature. Choose a beautiful organic rope made from sisal, jute or cotton.
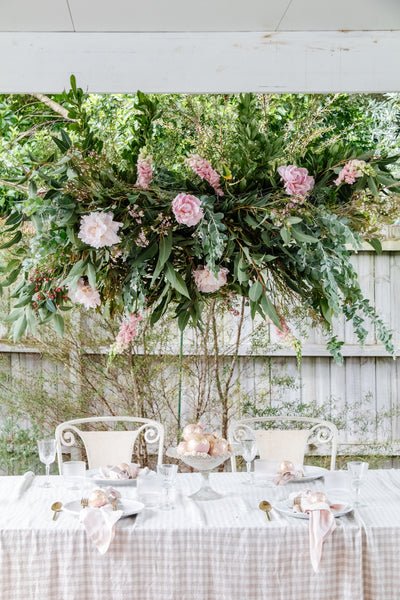
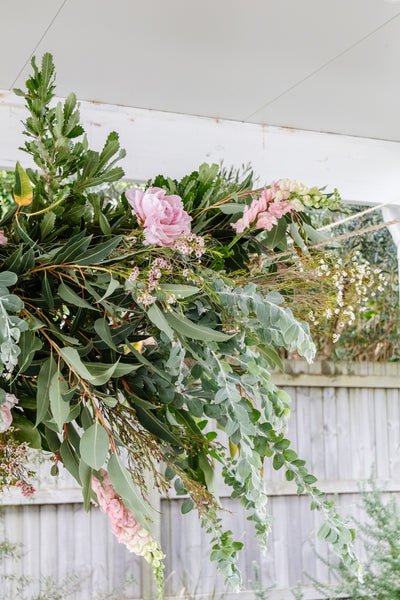
Showcasing the different profiles of the larger flowers. Don't feel like you always need to place them front on. Pointing them down and so you can see their side profile adds another dimension to the floral hanging installation.
Hide some flowers behind the greenery so the floral hanging installation didn't look too staged.
Remember to evenly place flowers to the front and back of the floral hanging installation as this will evenly weight the structure.
Don't be afraid to edit, and edit some more. That's part of the fun! But be careful not to let it make you go crazy.
Floral hanging arrangements don't need to be symmetrical. Play with threes, create drama and have fun.
Save long pieces of greenery and taller flowers for the end. Poke this in and around the floral hanging arrangement to create high at the top and down the bottom.
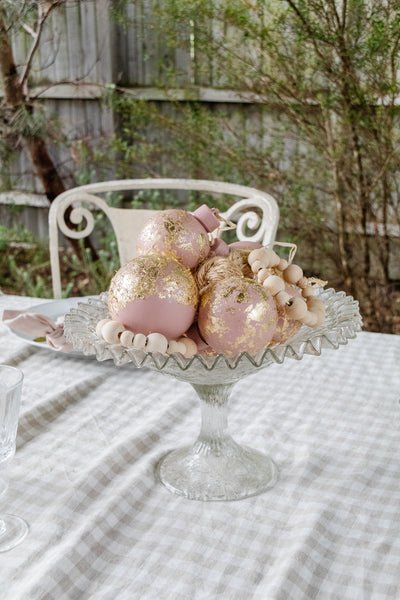
Add Christmas elements like ornaments and baubles to the table setting to add that extra festive cheer.
Ta daaaaa! A gorgeous festive moment.
I am absolutely thrilled with this festive DIY Floral Hanging Arrangement. Considering neither myself or my friend have ever done anything like this before, I am suitably impressed with our efforts IMHO. It was a pleasure being able to create this moment of total joy, creatively problem solve how best to approach this DIY, and work with beautiful flowers and greenery foraged from my own garden. I'll be leaving this up for as long as I can!