DIY Bonbon Advent Calendar
If you've been following along over on Instagram, you'll know I absolutely love the festive season. Our Christmas tree is up and it's decked with DIY ornaments, I've been busy making a festive Floral Hanging Arrangement and I am also working on a beautiful native floral wreath. And that's just the DIYs. I have also been cooking up a storm in the kitchen and have two beautiful desserts coming to you very soon, and some meal ideas for entertaining during the holidays. It's all happening.
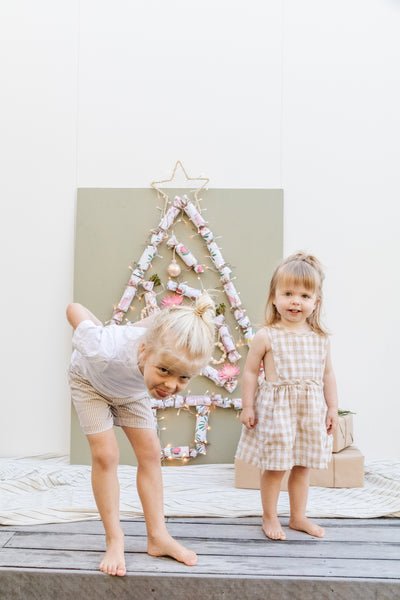
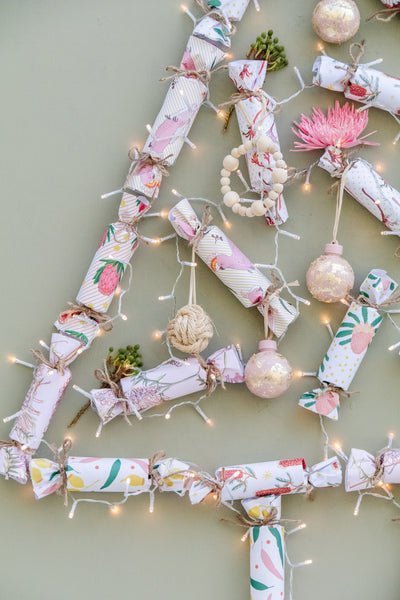
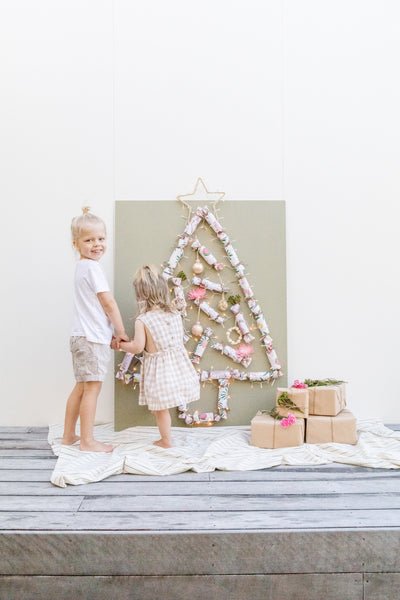
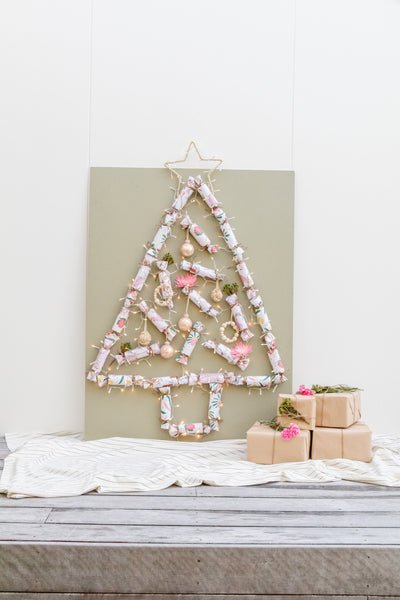
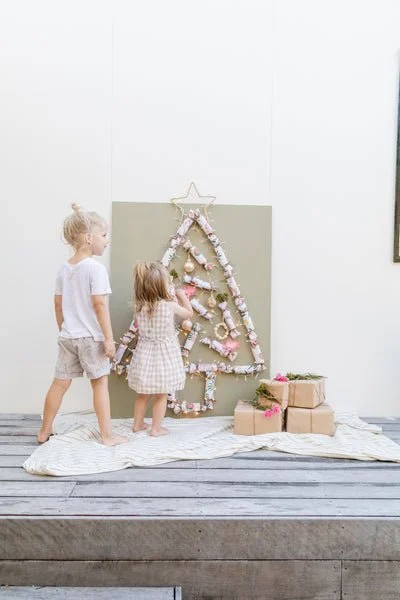
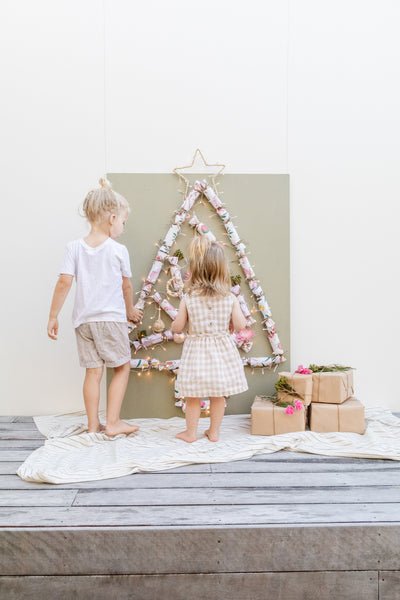
For the last 3 years I have made Dusty an Advent Calendar and he absolutely loves them; check out last year's! This year, Celeste is well and truly on the move so she is included from this year onwards. I've been giving a lot of thought about what I will make this year and it's important I reuse and repurpose what we already have at home. I kept the plywood sheet from last year's Advent Calendar, so I decided to use it again this year; it was so convenient as it allowed us to move it around the house (which is great when you have a very active and inquisitive toddler). This year I decided to sand and paint the plywood a beautiful sage green and make beautiful Paper Bonbons with toilet rolls, wrapping paper and twine, and fill them with little toys and chocolates. I actually made DIY Fabric Bonbons a couple of years ago, so I recreated these with paper and twine instead of fabric and macrame cord.
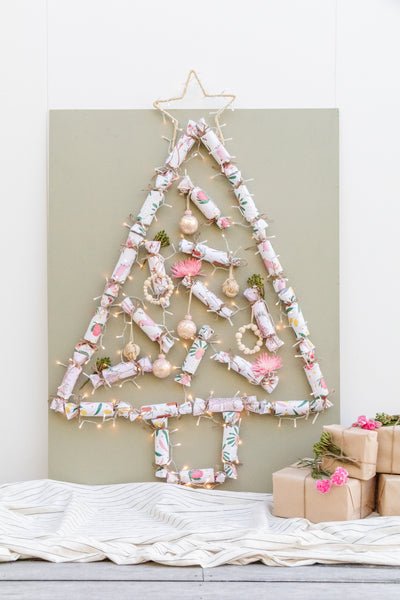
I umm'd and ahh'd about what shape I would make with the bonbons and was torn between a star and a Christmas tree. I decided to do a poll over on Instagram with my lovely little community, and the Christmas tree won the majority of votes - thank you to everyone how voted! I made some more of my DIY Christmas Tree Ornaments, added beautiful fairy lights and wrapped last year's tinsel star in raffia. And I have to say, it's my favourite DIY Advent Calendar to date! Read on to find out how you can make your own.
Materials
Drop sheet
90cm x 1.2m plywood board from Bunnings
Sage green paint
Paint brush
26 toilet rolls (I want to give each kid their own bonbon on Christmas day)
Wrapping paper
Twine
Sticky tape
Hot glue gun
Battery operated "warm white" fairy lights from Bunnings
Wire
Raffia
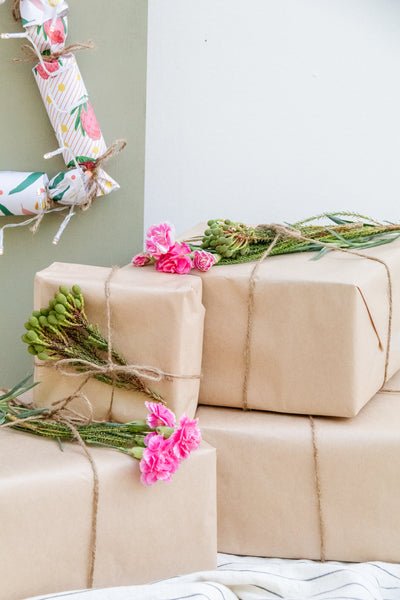
Repurposed Rope Baubles - scroll down to the bottom of the page
How To
Lay the drop sheet over your work surface and place the plywood board on top. Paint one thick coat of sage green paint and leave it to dry.
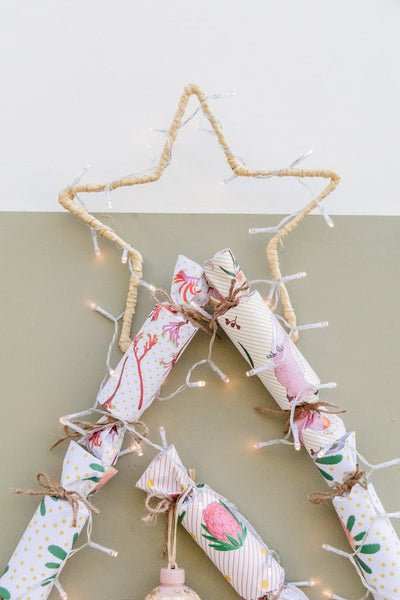
While the paint is drying, shape a star with the wire and wrap it in raffia. Set aside.
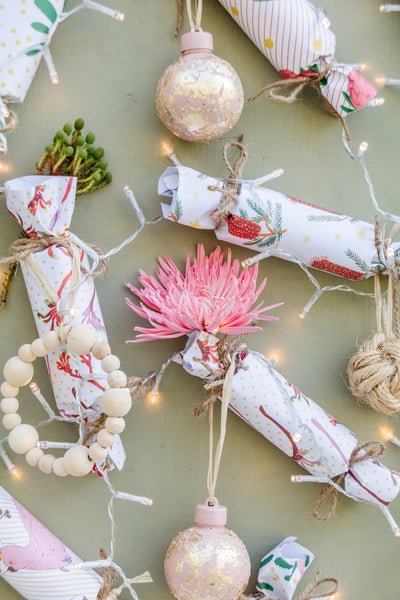
To make the Bonbons follow these steps, however use wrapping paper and twine instead of fabric and macrame rope. Fill the bonbons with small toys and wrapped sweets, such as lollies and chocolates. I have put two toys and two sweets in each bonbon so Dusty and Celeste get a little gift each day in December.
When the paint on the plywood has dried, arrange the paper bonbons into the shape of a Christmas tree and place the remaining 9 bonbons in the middle of the tree as "ornaments". When you are happy with the arrangement, glue them down with a hot glue gun.
Decorate the bonbons with ornaments and wrap the fairy lights around the tree and the ornaments.
Ta daaaaa! Turn the fairy lights on and enjoy!
An Advent Calendar is the gift that keeps on giving, but it's even more satisfying when you've made it yourself. Nothing warms your heart more than seeing smiles light up your kids little faces, it's the best! The kids absolutely love opening their gift each day (as well as finding Elf on the Shelf) and it's a nice little tradition to start with your family. It certainly keeps the festive cheer alive throughout December!
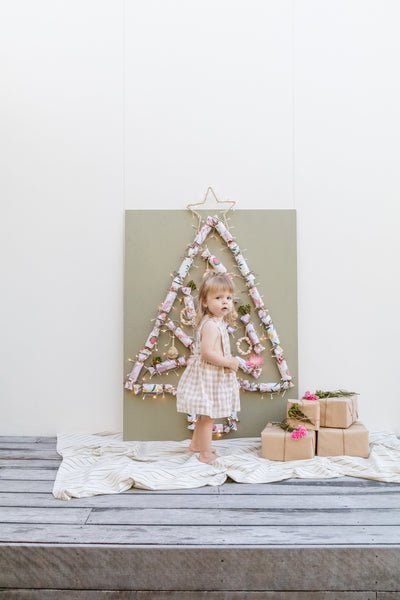
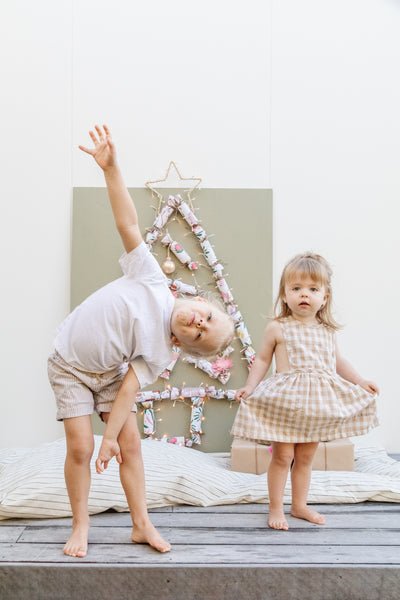
And here are some cute outtakes of my little monsters.
Because let's be honest, taking the "perfect photo" with kids is never the reality!