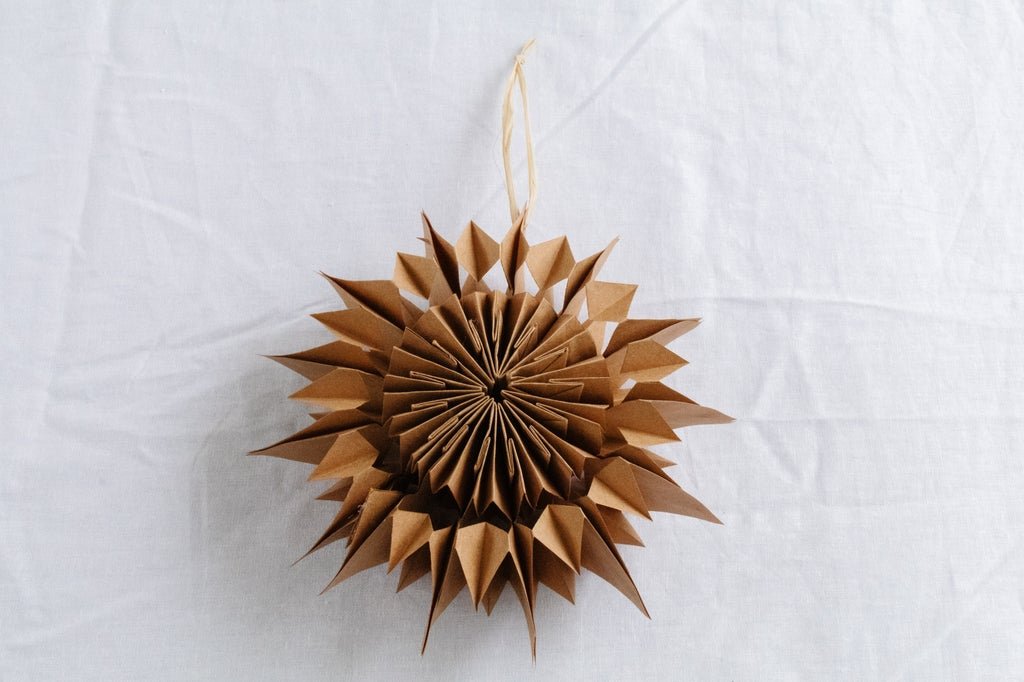
DIY Christmas Ornaments: Paper Bag Stars
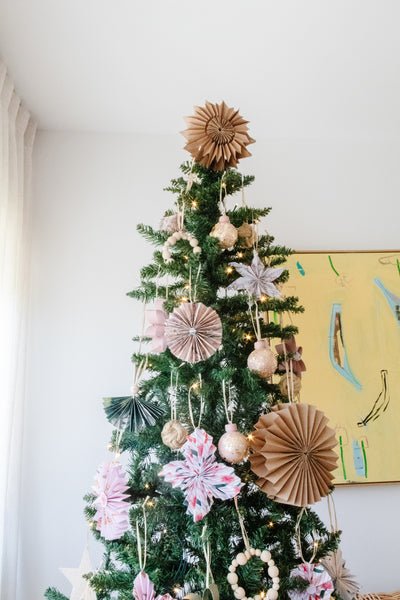
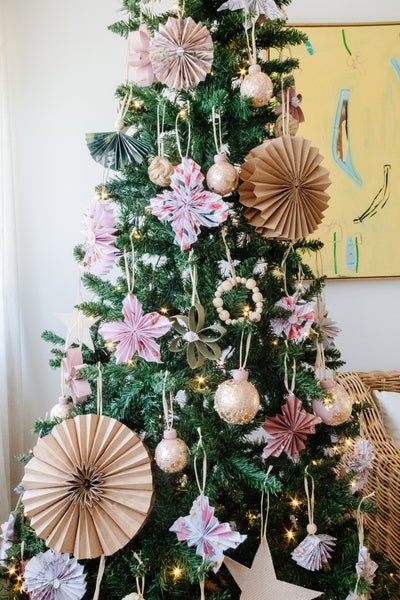
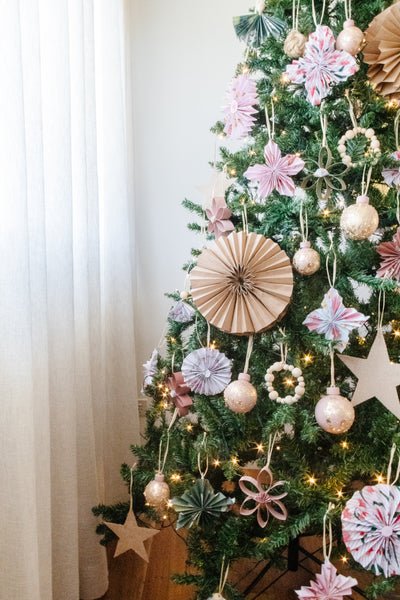
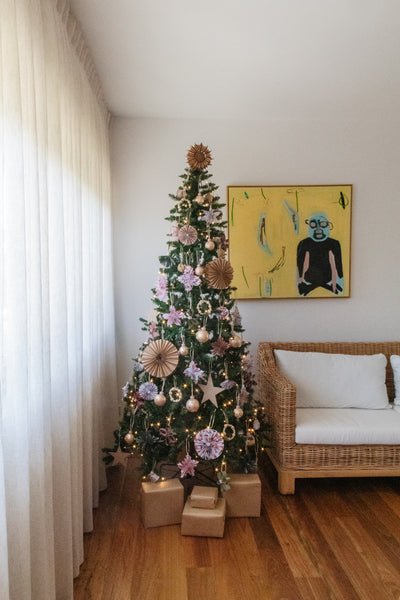
I am so excited to show you how to make Paper Bag Stars! I've seen so many ways to make these DIY Christmas Ornaments over on Pinterest and Instagram, and what I love most about them is that you can totally make them your own by the size of the paper bags you use, the shapes you cut out and how many paper bags you use. The larger the paper bags you use, the bigger the star will be. Start collecting different sized paper bags and give this a try over the festive season. The process is the same and you'll be quite surprised that even the tiniest bags can create a beautiful well sized paper star. And I am actually so surprised how beautiful they look on our Christmas tree. Like, I can't imagine putting our tree up each year for the festive season and not have one of these beautiful DIY Paper Bag Stars handing from the branches.
Materials
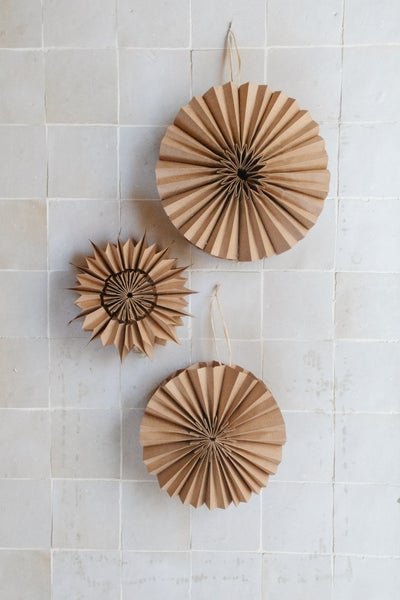
Paper bags. The bigger the paper bags, the less you will need. For smaller stars, you'll need more. For the star I have made for this tutorial, I use 14 super small paper bags from Choice Discount. I've also made bigger ones using some paper bags we had at home - stay tuned for my Star & Wreath Wall!
Scissors
Hot glue gun
Bulldog clip (optional)
Raffia
Hole punch
Raffia
How To
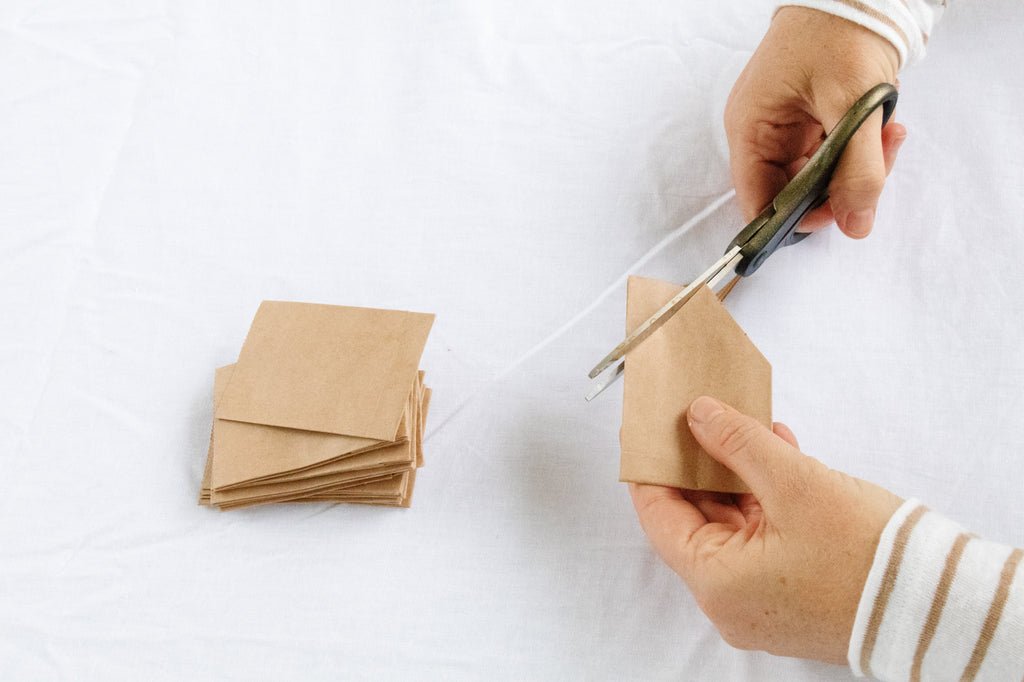
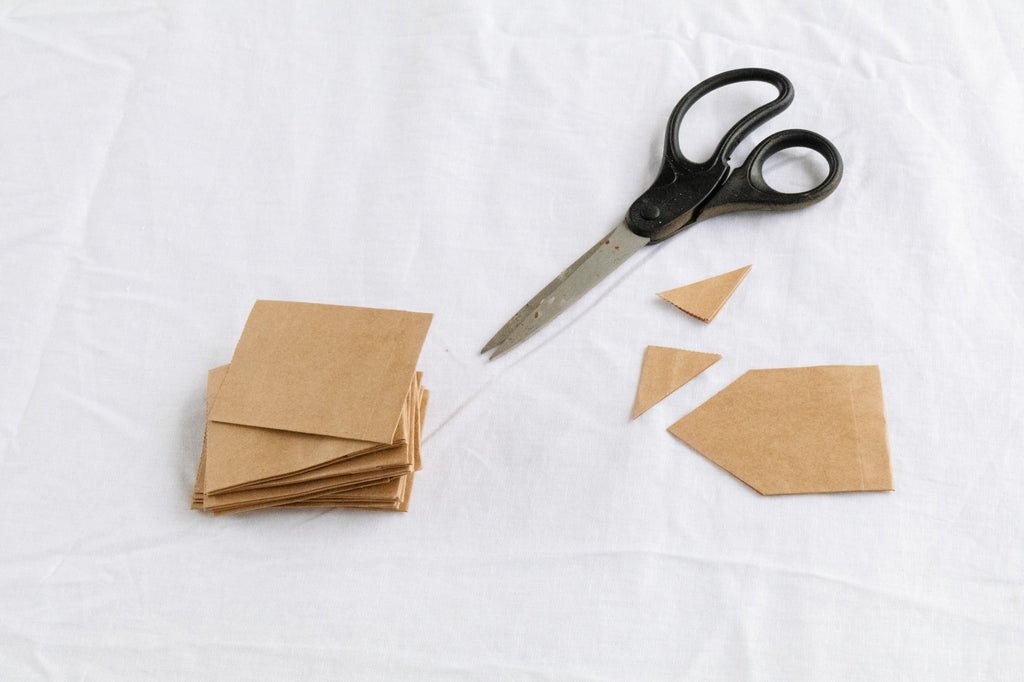
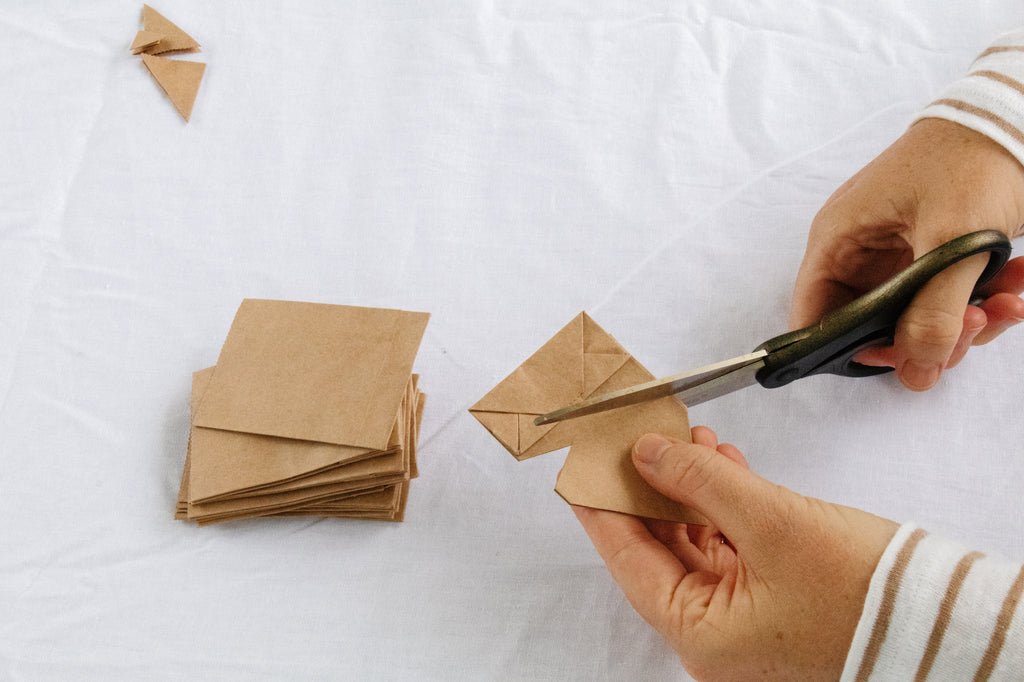
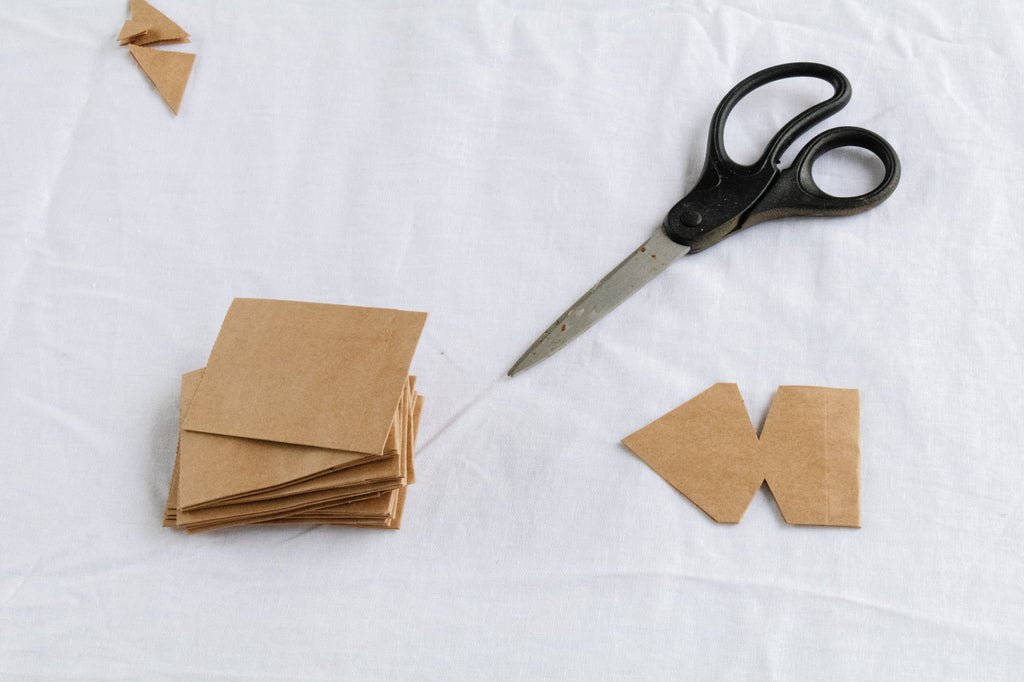
1. Trim the tops of each paper bag into a triangle. Cut small shapes into the sides of the paper bags - circles, triangles, squares and rectangles work really well. Just make sure you leave space in between each cut out shape.
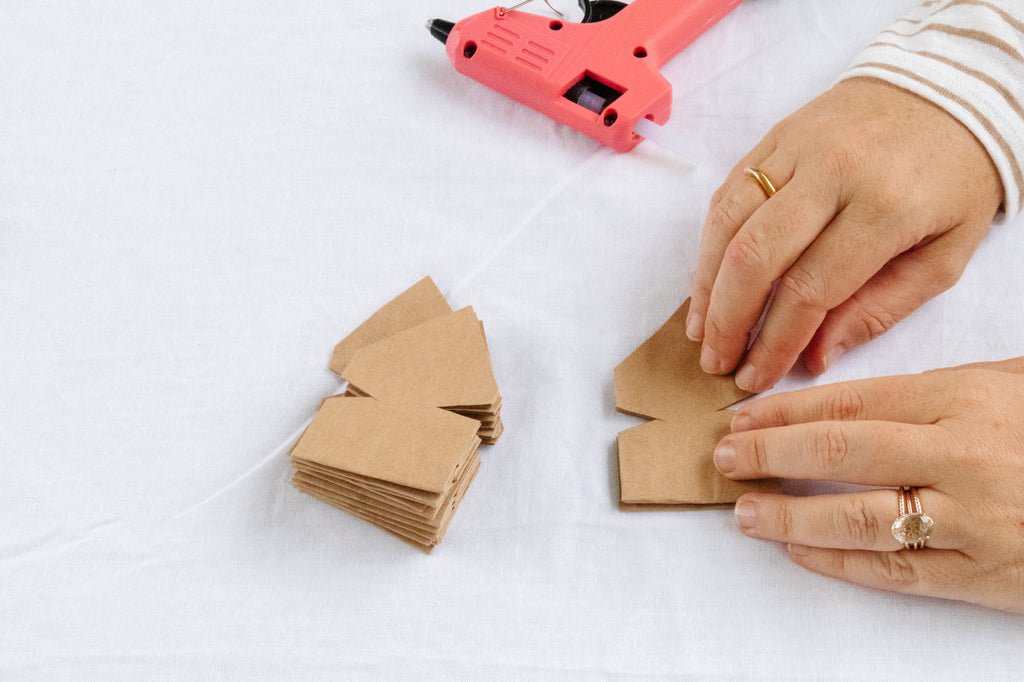
2. Using the hot glue gun, apply a strip of hot glue in the middle and down the length of the paper bag. Firmly press another paper bag on top. Repeat until you have glued all of the paper bags together. Wait 5 minutes for the glue to dry. Optional: Place a bulldog clip over the bottom of the paper bags as this will help the hot glue set firmly.


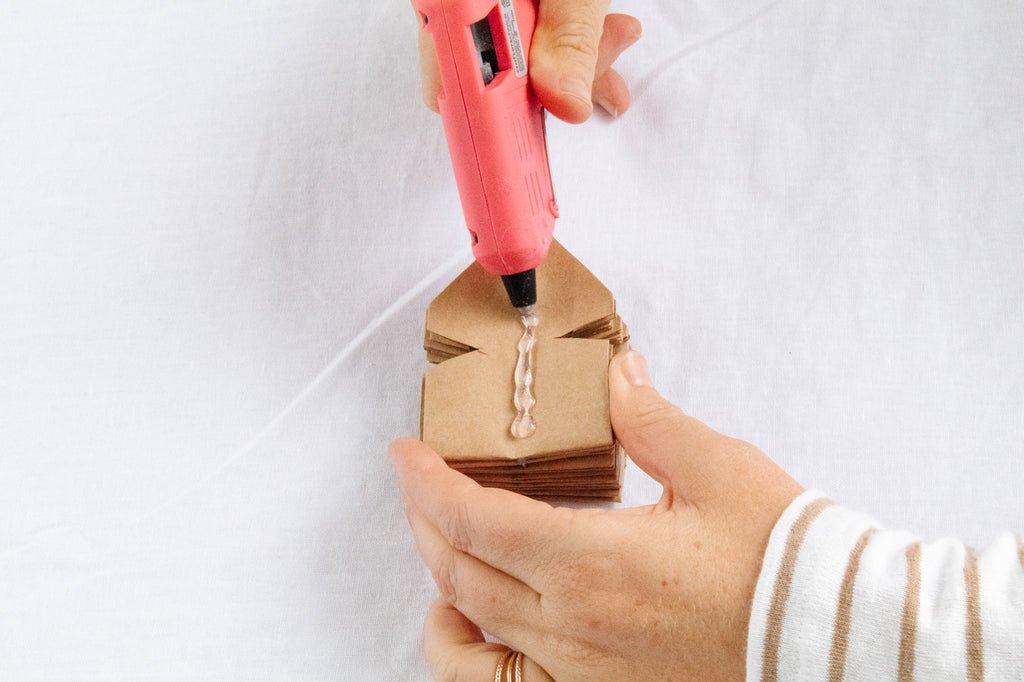
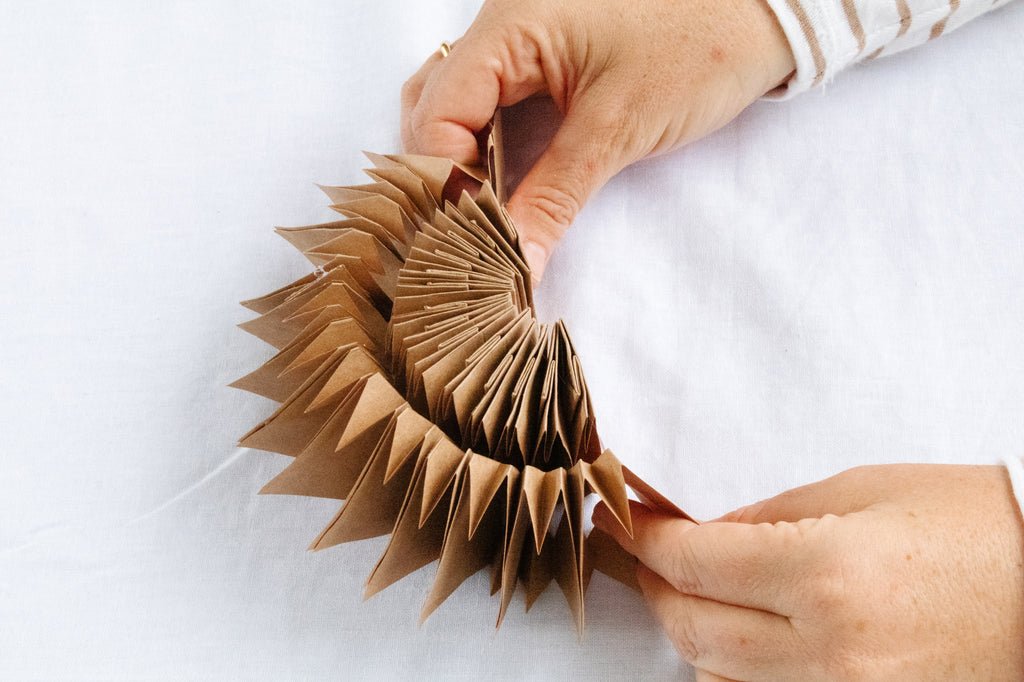
3. Apply a strip of hot glue in the middle and down the length of one of the ends of the paper bags. Grab the paper bags on each end and unfold them around to meet each other, which will reveal your beautiful star shape! Use the bulldog clip to hold the newly glued sections together. Set aside to dry for 5 minutes.

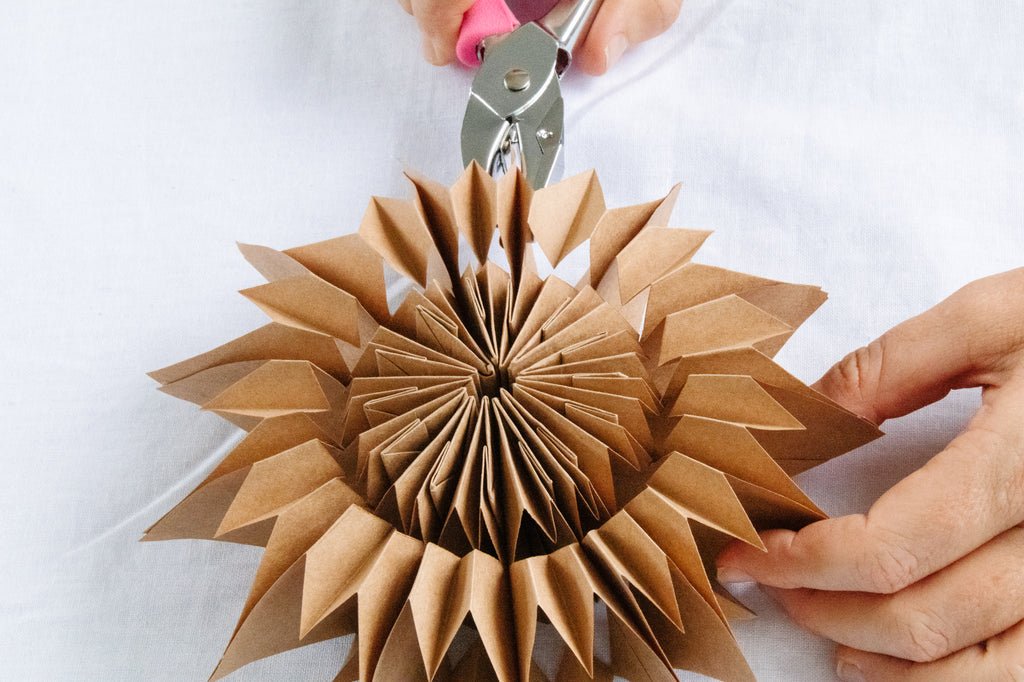
4. If you are making a Paper Bag Star as an ornament, punch a hole through the tip of the star and thread a piece of raffia through. Tie it in a double knot and trim any excess raffia off with scissors.
If you are making a Paper Bag Star to top your Christmas tree, place a piece of raffia lengthways across the star. Apply hot glue to the centre of the star to firmly glue the raffia in place. Apply a small piece of left over paper on top of the glue and set aside to dry. This will enable you to tie the Paper Bag Star around the top branch of your Christmas tree.
Ta daaaa! Happy Christmas!
Can you believe just a few paper bags can make such a beautiful Christmas tree ornament? I have been eyeing these off for years but had always thought they were too difficult to make. But I am really surprised to find out that they couldn't be more simple to create. If brown paper is not your thing, you could also spray paint the stars once they're done. I think this would look really lovely!