DIY Christmas Ornaments: Folded Star (using toilet rolls!)
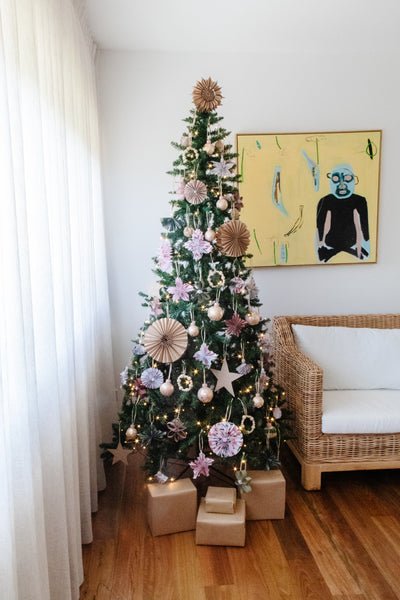
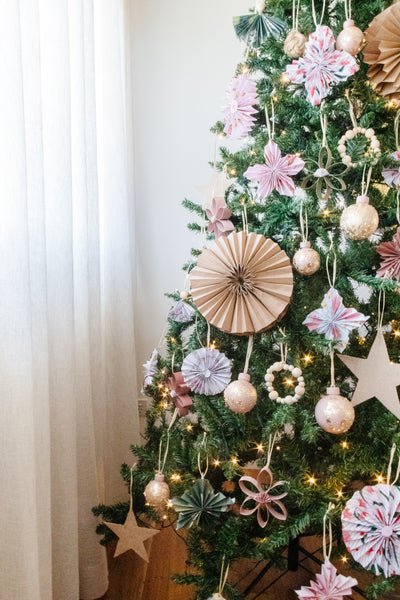
Out of all the Christmas ornaments I have made this festive season, this Folded Star would have to be the most fun (and random). Why? Because I used toilet rolls! As you guys know I love repurposing materials we have at home and throughout the year I always save our toilet rolls to use for craft projects with the kids. Now I have to give Dusty credit for this DIY because a while back we were cutting up toilet rolls and gluing them together to make a dinosaur, and then I saw he was making what looked like a star (but it was really a triceratops). Then the idea clicked - I could use toilet rolls to make star ornaments for our Christmas tree. The inside of the toilet rolls are white so I knew I'd have to paint them. But then I got inspiration from my Folded Paper Star Ornament and Folded Paper Circle Ornament to make a little paper fan to glue in the middle (and hide where the toilet rolls are glued together). Tie it off with a piece of raffia (which is what I decided to use as the consistent material to link allllll the ornaments together) and there you have it. A DIY Folded Star using toilet rolls...and no one will ever know. Read on to find out how you can make your own.

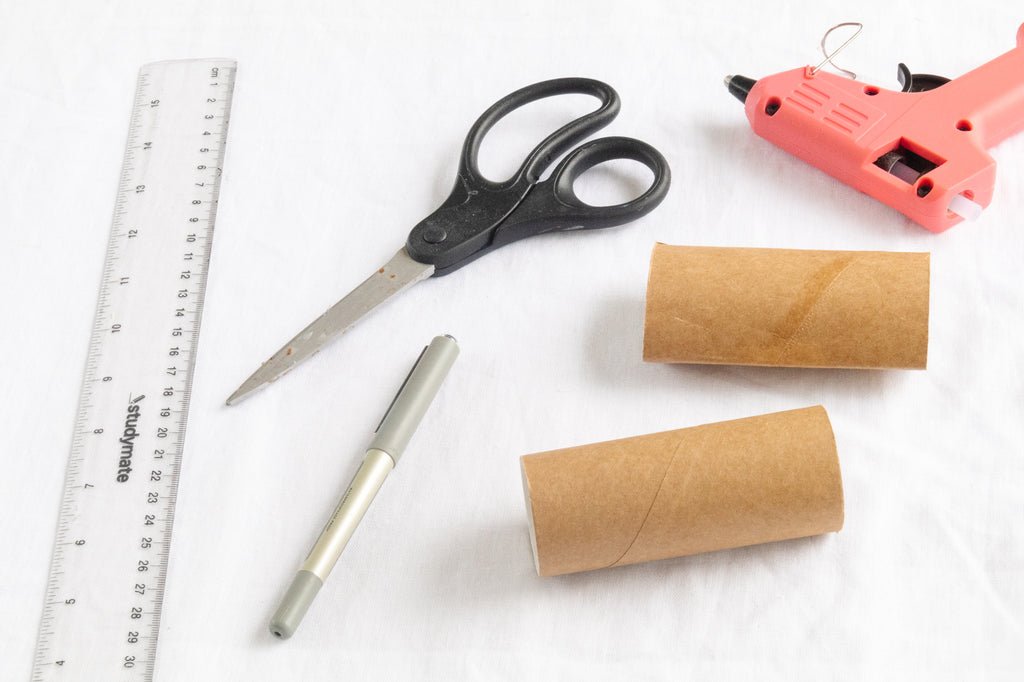
Materials
Toilet rolls. You will need 1.5 toilet rolls to make one star.
Pen
Ruler
Scissors
Hot glue gun
Drop sheet, or an old sheet, or a paper bag/piece of cardboard
Paint
Paint brush
Paper
Raffia
How To
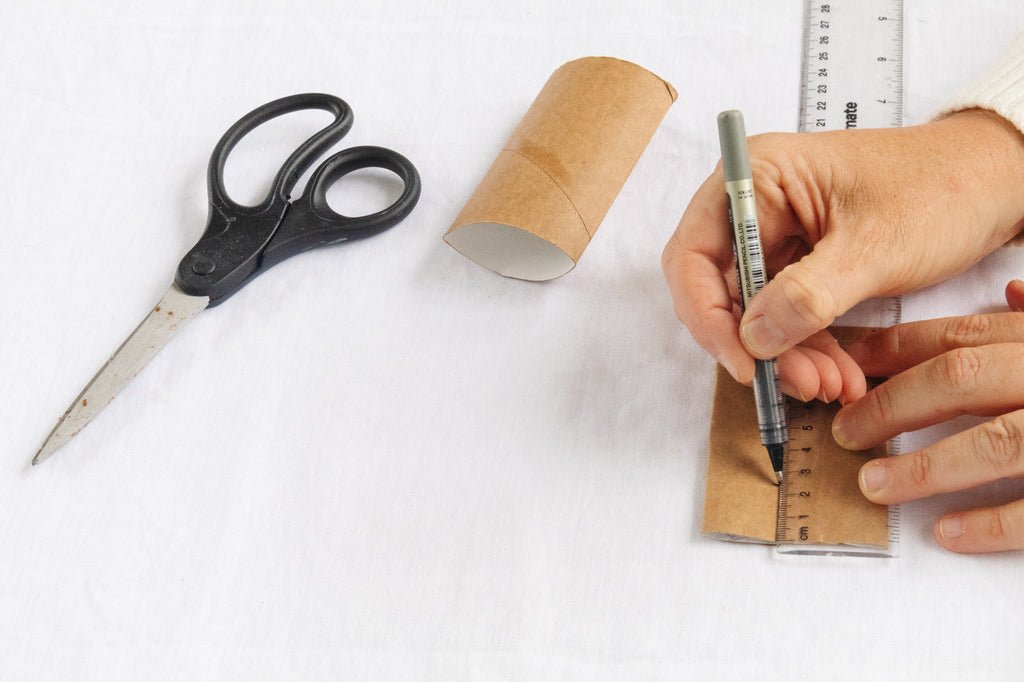
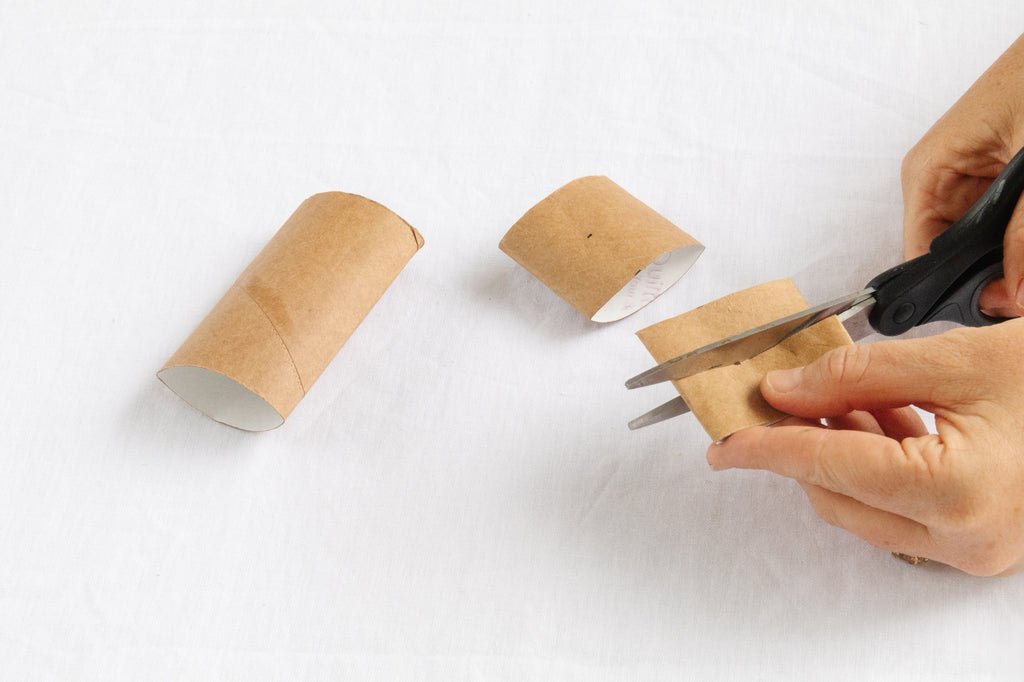
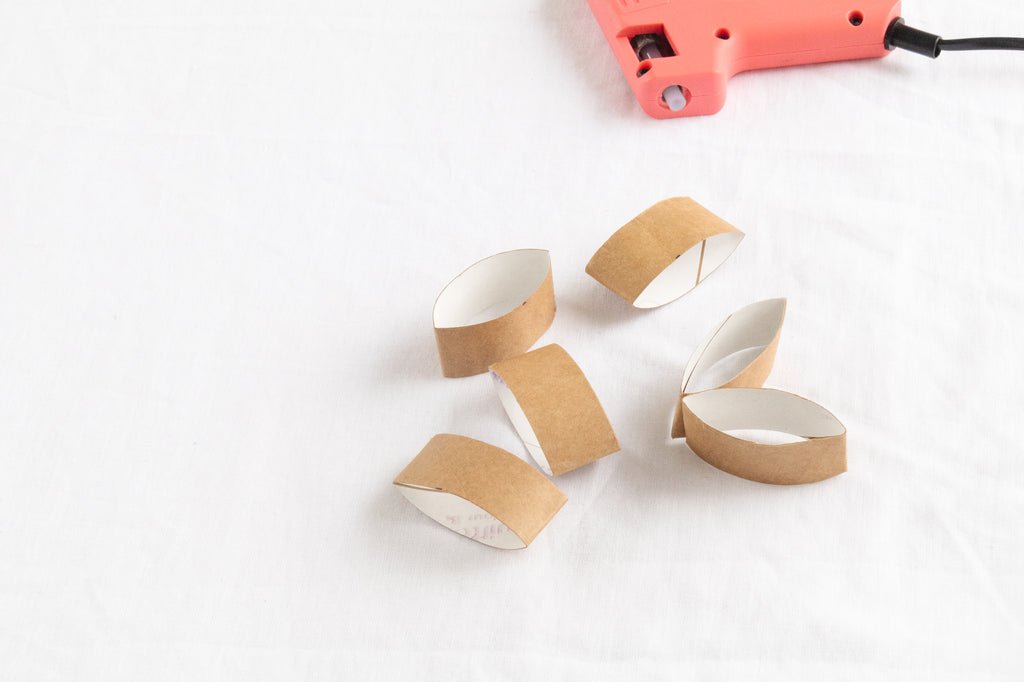
1. Start by press down each toilet roll flat. Firmly press against the edges so it's nice and flat. measuring 4 equal sections across two toilet rolls. The toilet rolls I used were 10cm long so I marked each section a 2.5cm. Cut the toilet rolls and you'll have 8 pieces. You will only need 6 but you can use 8 if you like!
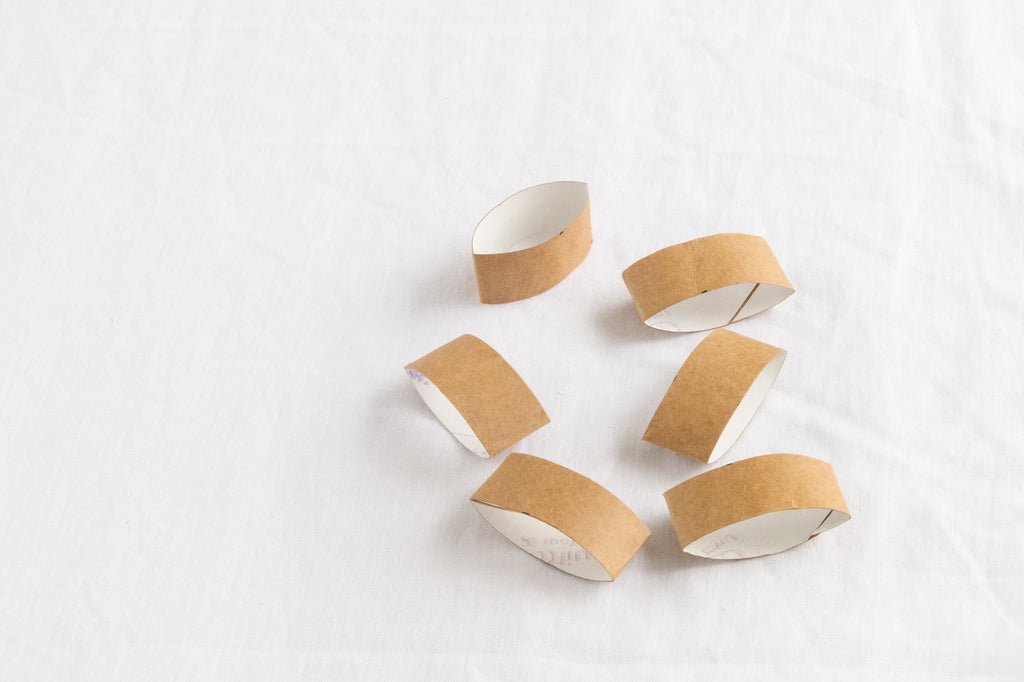
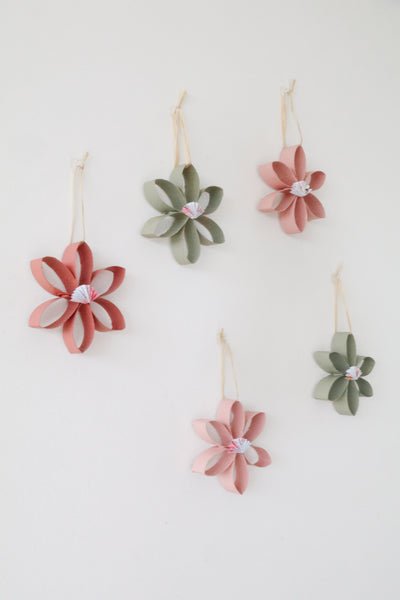
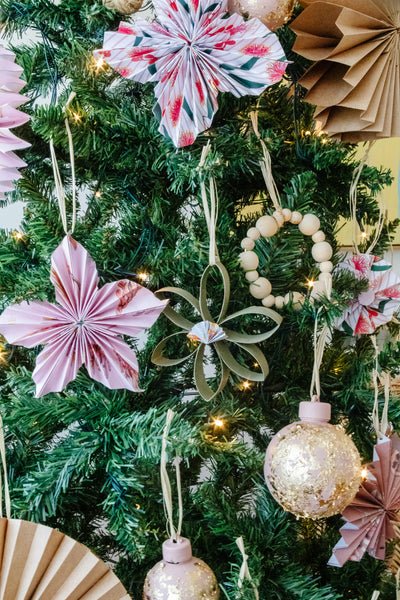
2. Glue the bottom section of one piece toilet toll to the bottom section of another piece of toilet roll. Press firmly. The hot glue dries quickly so you can move onto gluing the next piece until you have 6 glued together and you'll then see the star shape. It's so pretty!


3. Lay down a drop sheet, or an old sheet, or a paper bag/piece of cardboard on your work surface. Paint the toilet roll star all over, inside and out. Set aside to dry.
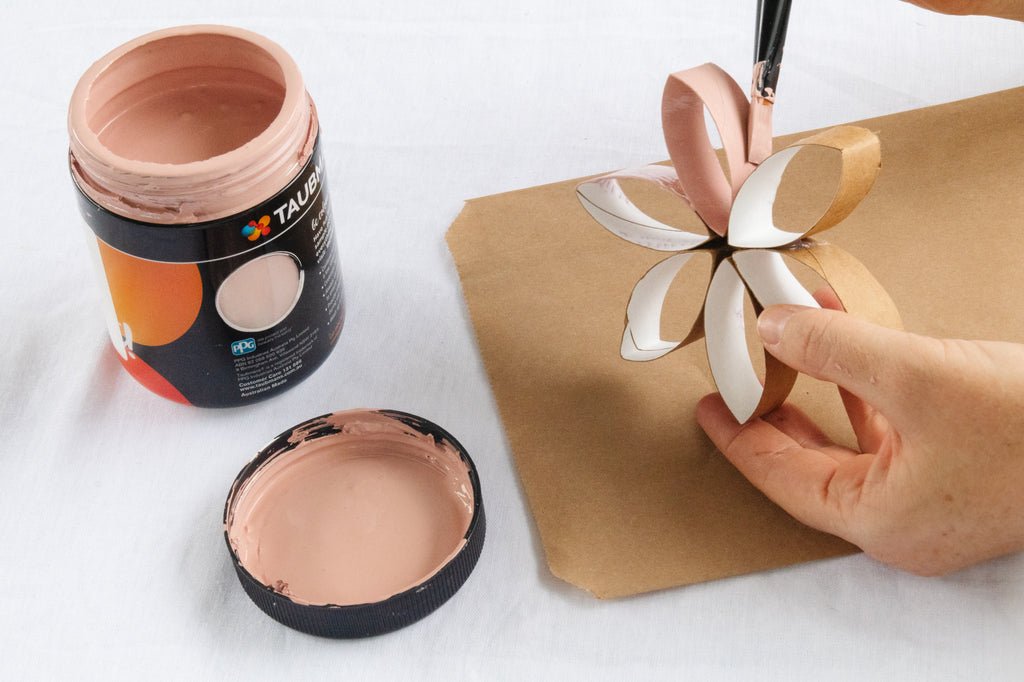
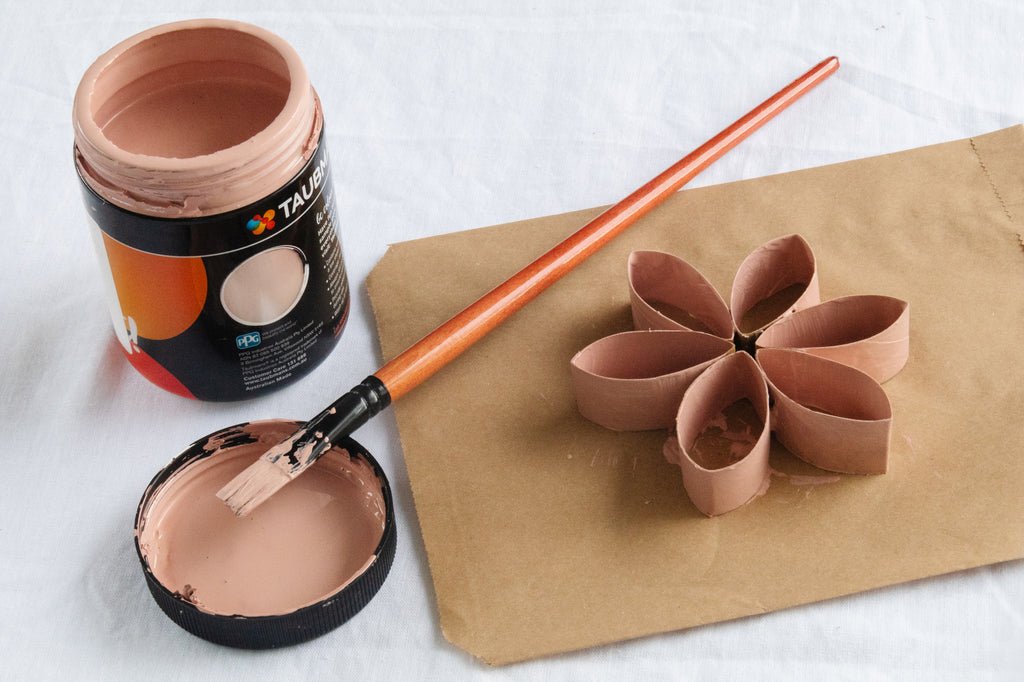
4. While the paint is drying, make small fans by folding a piece of paper 3cm x 3cm into small folds. Fold it in half and run a strip of glue along the inside. Bring the edges together and spread the folds out to make a beautiful folded fan. When the paint has dried, use the hot glue gun to glue the fan down over the middle of the star (and to hide the middle of the star where the toilet roll pieces come together).

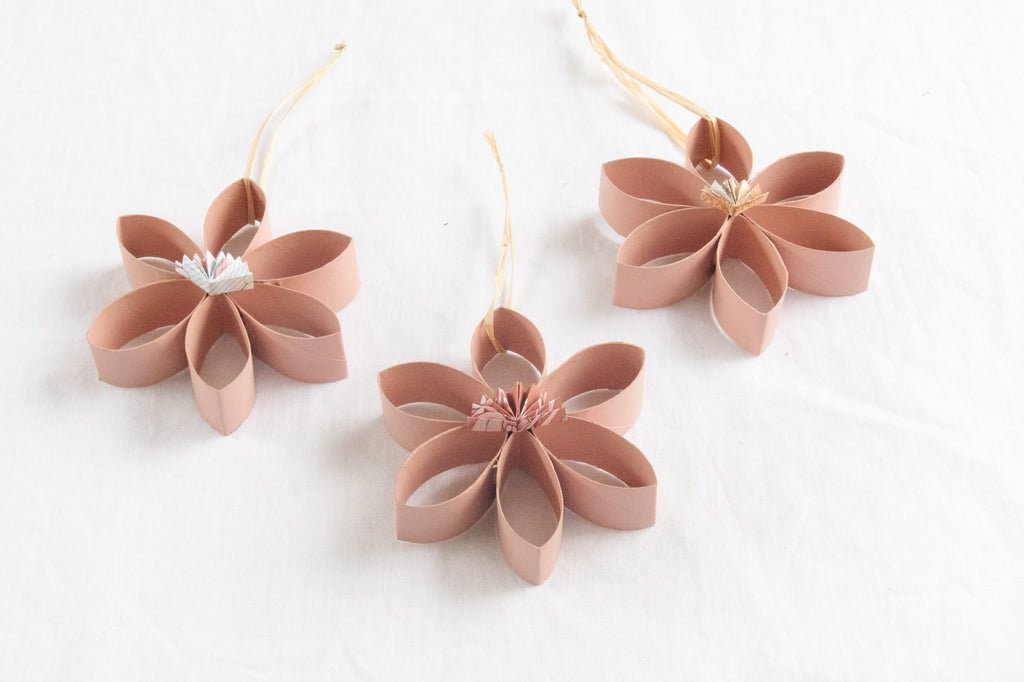
6. Thread a piece of raffia through the top of the star, tie a double knot at the end and trim the excess raffia off.

Ta daaaaa! Merry Christmas!
It's mind boggling to think this beautiful folded star was made using toilet rolls. TOILET ROLLS. You could also use the rolls from paper towels as well for this project! Add a lick of paint, glue something pretty to the middle of the star (think creatively as you like!), tie some raffia on and hang it on your Christmas tree (and no one will even know). I decided to use three different coloured paints for these stars - a dusty pink, a dark pink and green. I like the variation and it looks so beautiful and interesting on the Christmas tree. Now I can't help but think "what else can I make with toilet rolls?" Well, obviously Bonbons! Make sure you check out my DIY Fabric Bonbons right here.