Make This Festive Star Wall
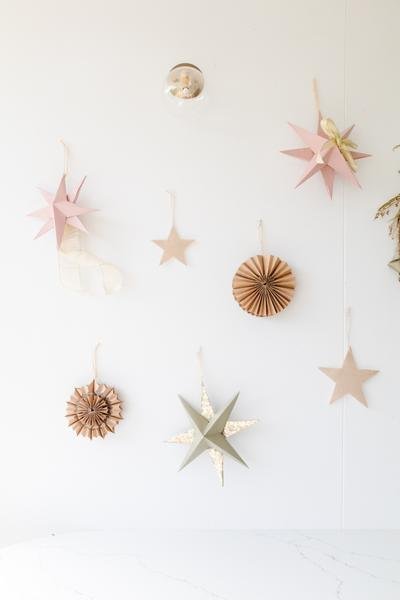
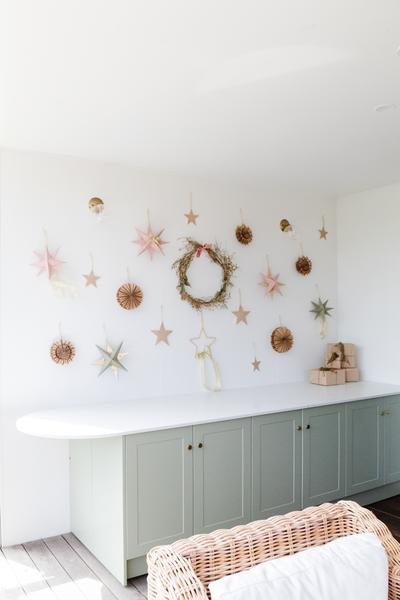
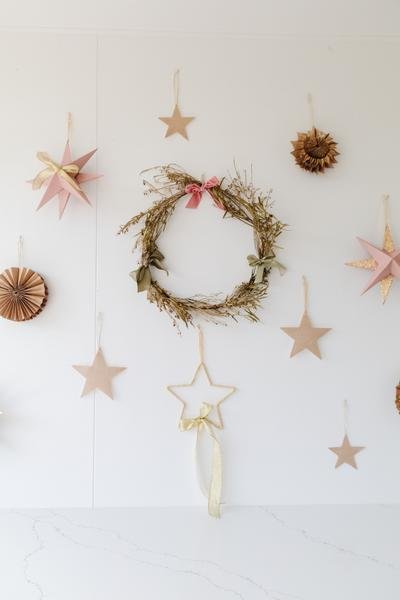
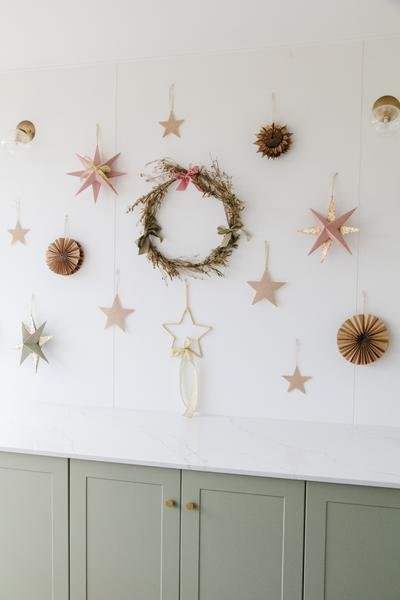
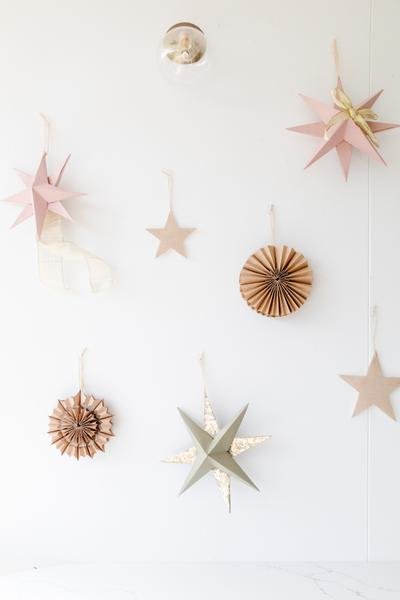
With just over two weeks until Christmas Day, I couldn't help but decorate our home just a little bit more today. Introducing the Festive Star Wall! This Christmas has been so creative, and I've been loving making my decorations this year. I have been feeling really inspired after hanging the wreath on the wall on our front deck, I couldn't help but think this space just needed a little extra holiday sparkle. Enter - STARS.
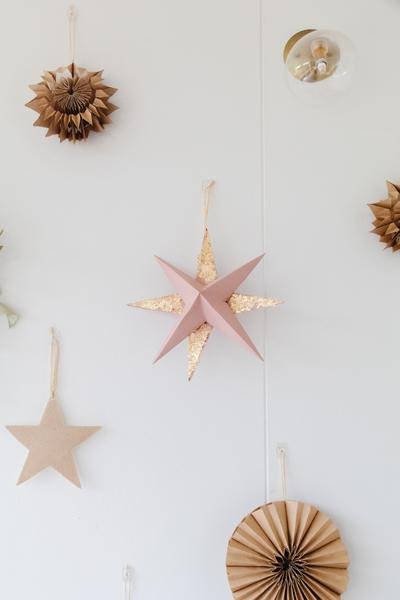
I made some more DIY Paper Bag Stars and DIY Hessian Stars (that I made for our Christmas Tree this year) and decided to make some a Decorative Stars as well. Can't stop, won't stop. Naturally I stuck with my pink and green theme, but I also added some extra sparkle by way of gold leaf foil and gold ribbons. I hung the stars on the wall using 3M wall hooks I picked up from Bunnings and I have to say this Festive Star Wall has certainly increased the Christmas cheer at home! Read on to make your own Festive Star Wall.

DIY Paper Bag Star
I am so excited to show you how to make Paper Bag Stars! I've seen so many ways to make these DIY Christmas Ornaments over on Pinterest and Instagram, and what I love most about them is that you can totally make them your own by the size of the paper bags you use, the shapes you cut out and how many paper bags you use. The larger the paper bags you use, the bigger the star will be. Start collecting different sized paper bags andgive these DIY Christmas tree ornaments a try over the festive season.

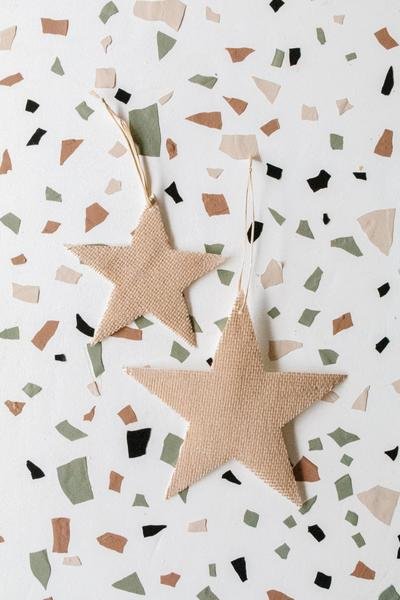
DIY Hessian Star
The idea for this DIY Christmas tree ornament came to me right at the last minute. It's simple and oh so easy. All you need to do is simply cut a star from cardboard, glue some hessian on top using a hot glue gun, pierce one of the tips with a hole punch, thread and tie off some raffia and there you have it. A beautiful Hessian Star that will look beautiful on any Christmas tree. If hessian isn't your vibe, you can use wrapping paper, pages pulled out of old books you no longer want or read, or fabric! Get as creative as you like.

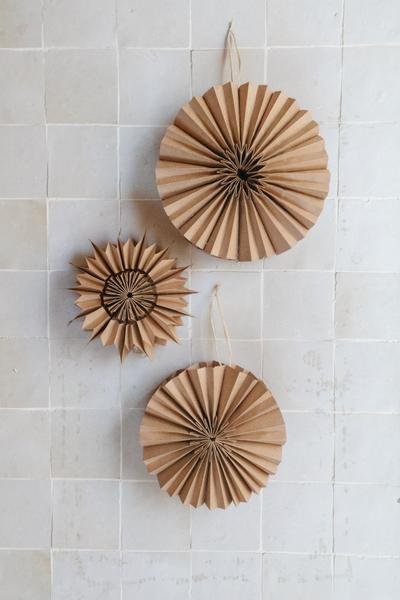
Decorative Star
I originally saw this technique over on Instagram using brown paper, but I was excited to make it my own. And you can use any size paper as long as it's square. I used cardboard, paint, gold leaf foil, gold ribbons and raffia for these Decorative Star Ornaments and they couldn't be easier to make!

MATERIALS
2 x sheets of square cardboard or paper
Scissors
Hot glue gun
Paint
Gold leaf foil
Gold ribbons
Hole punch
Raffia
3M removable wall hooks
METHOD
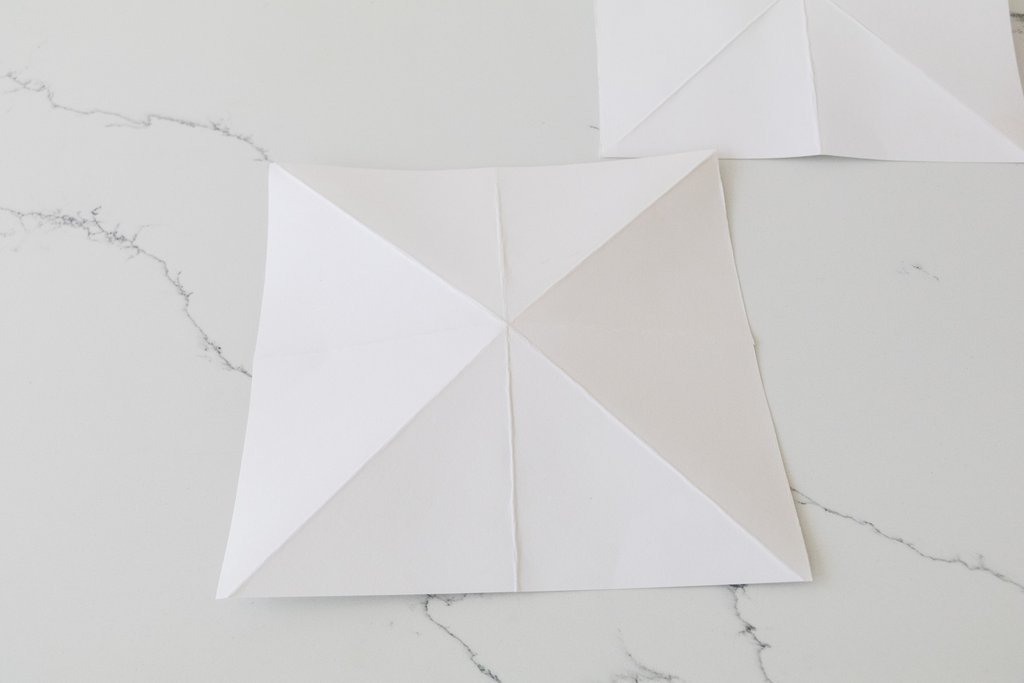
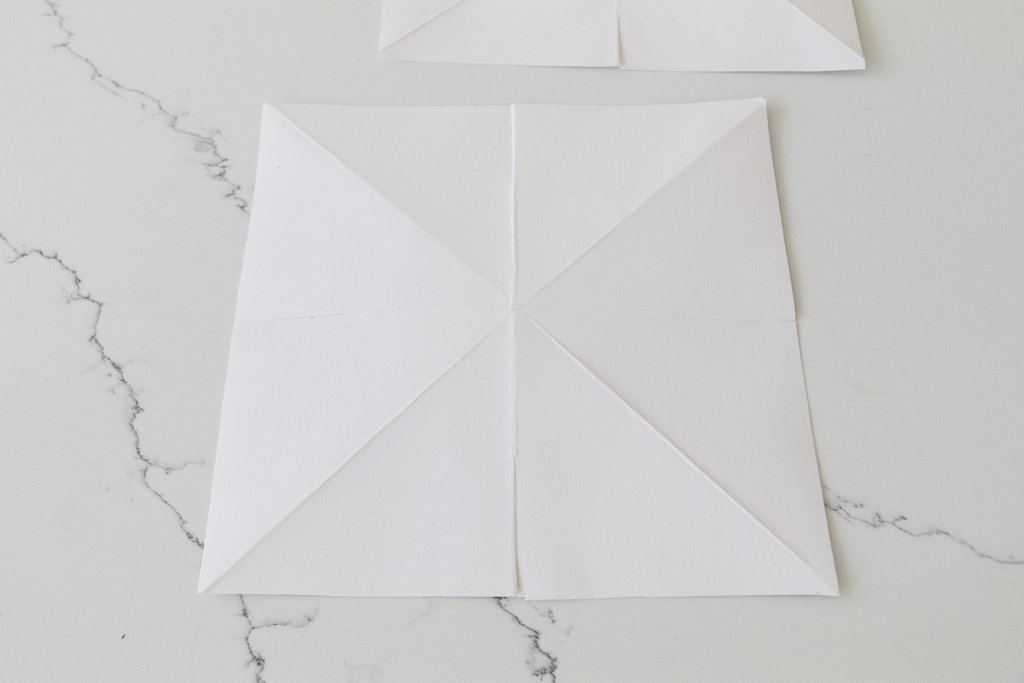
The first thing you need to do is create creases in the cardboard. Fold both sheets of square cardboard up and down, and diagonally across both ways.

Using the scissors cut the paper along the 4 straight lines equally. Depending on the size of your cardboard, you may need to make bigger cuts.
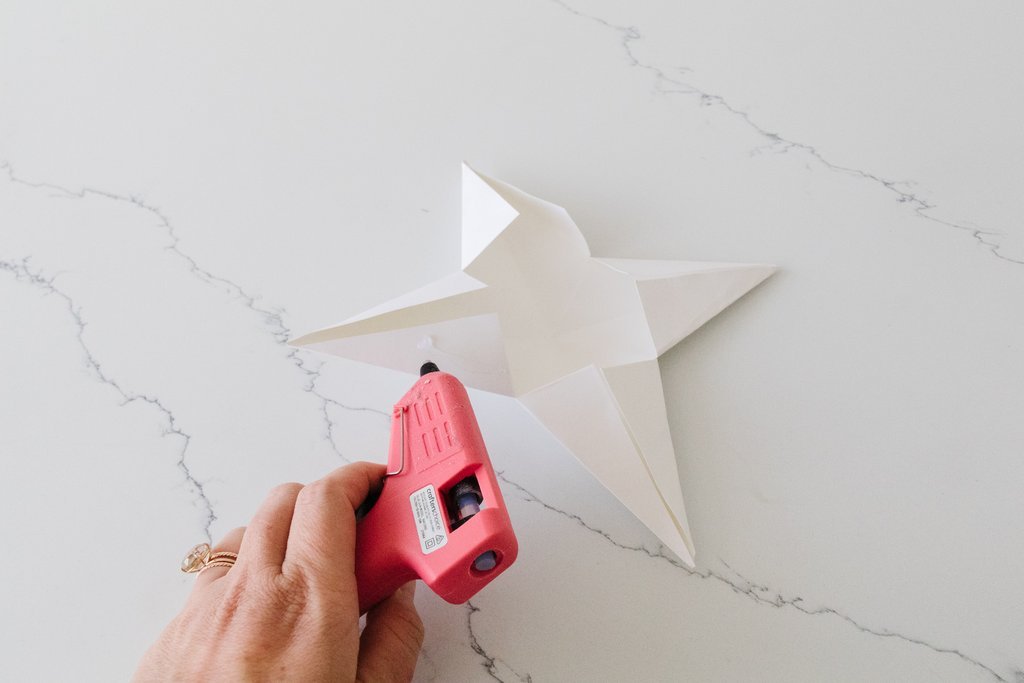
Fold the tip into each other and you will start to see the star coming together.

Glue down the folds with the hot glue gun and you'll now have two 3D stars.

Glue the stars together. They are no ready for you to paint and decorate! And remember to use a hole punch or a knife to punch a hole through one of the tips of the star and thread a piece of raffia through and tie it off.

Ta daaaa! The most festival wall you'll ever see.
Put a star on it! That's my motto this Christmas and I couldn't be happier. What I love most about this Festive Star Wall is that you can make any number of stars, in your favourite colours and decorate them to your liking. And I think committing to a colour theme and consistently using raffia for the ties helps bring it all together. Thankfully there's still plenty of time to get festive and decorate your home. If you're looking for some other fun and festive ideas, make sure you check out my: