Upcycled Abstract Chair
Transform an outdated office chair using MDF and fabric!
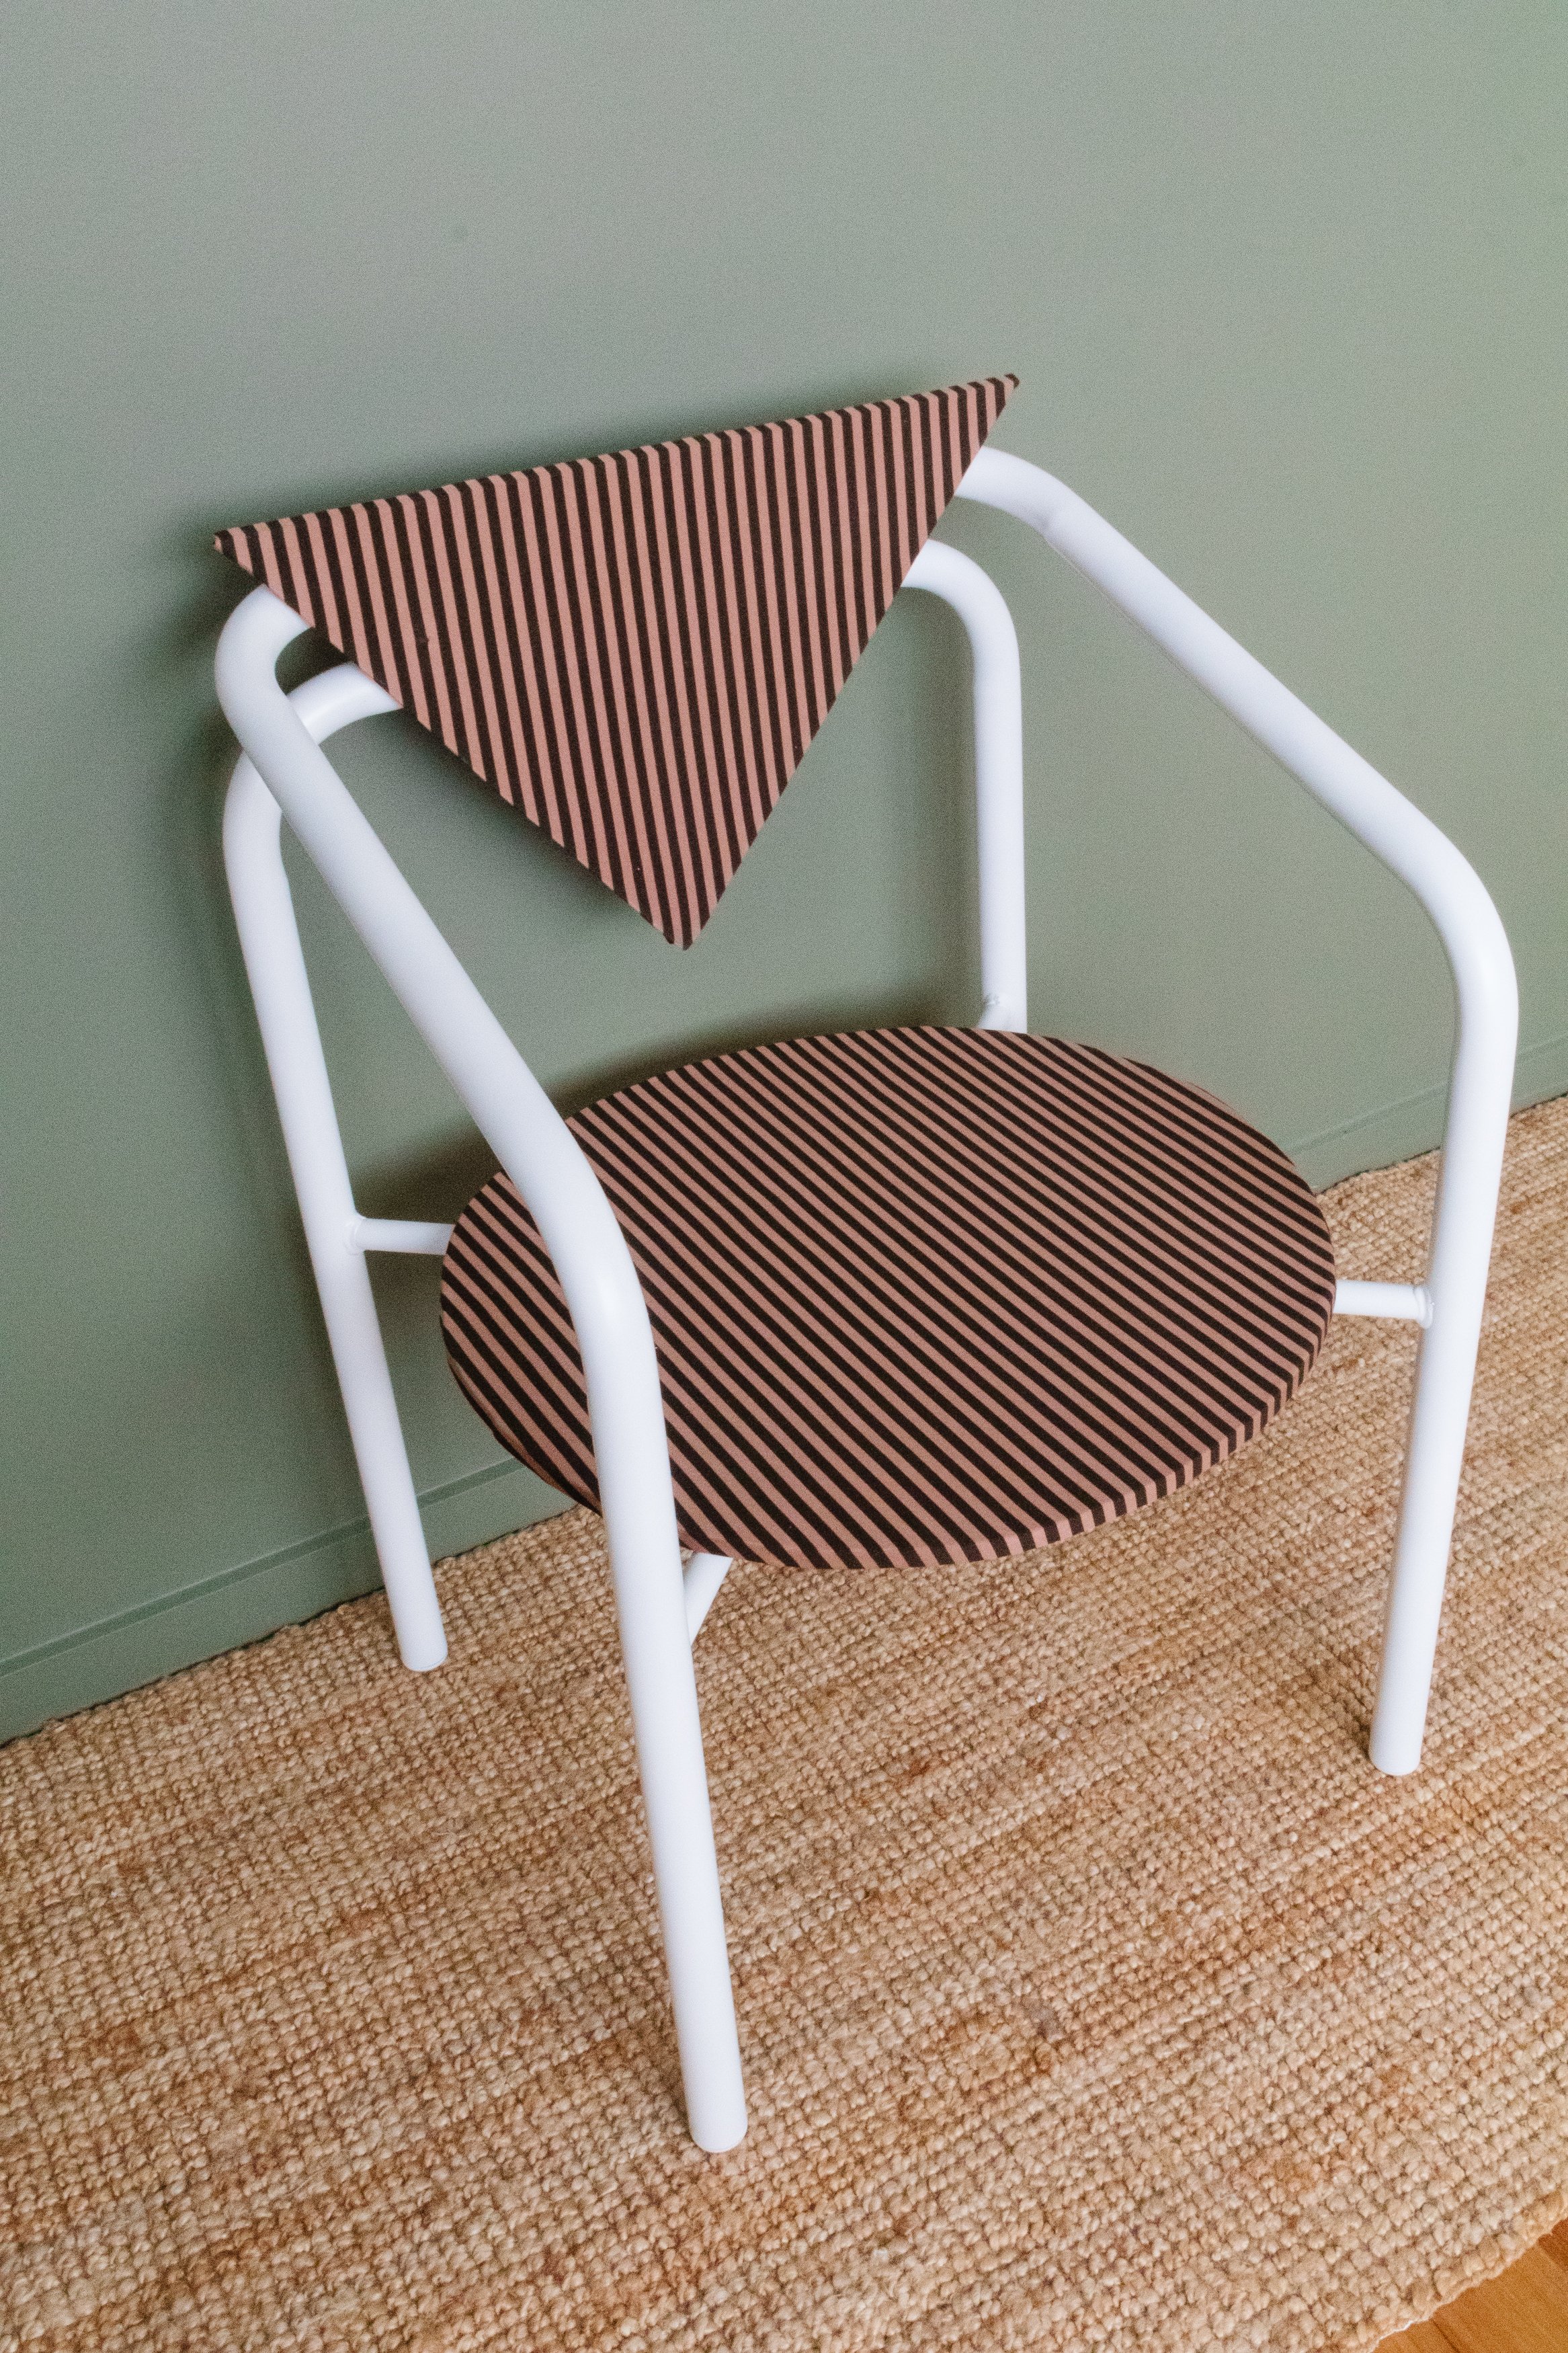
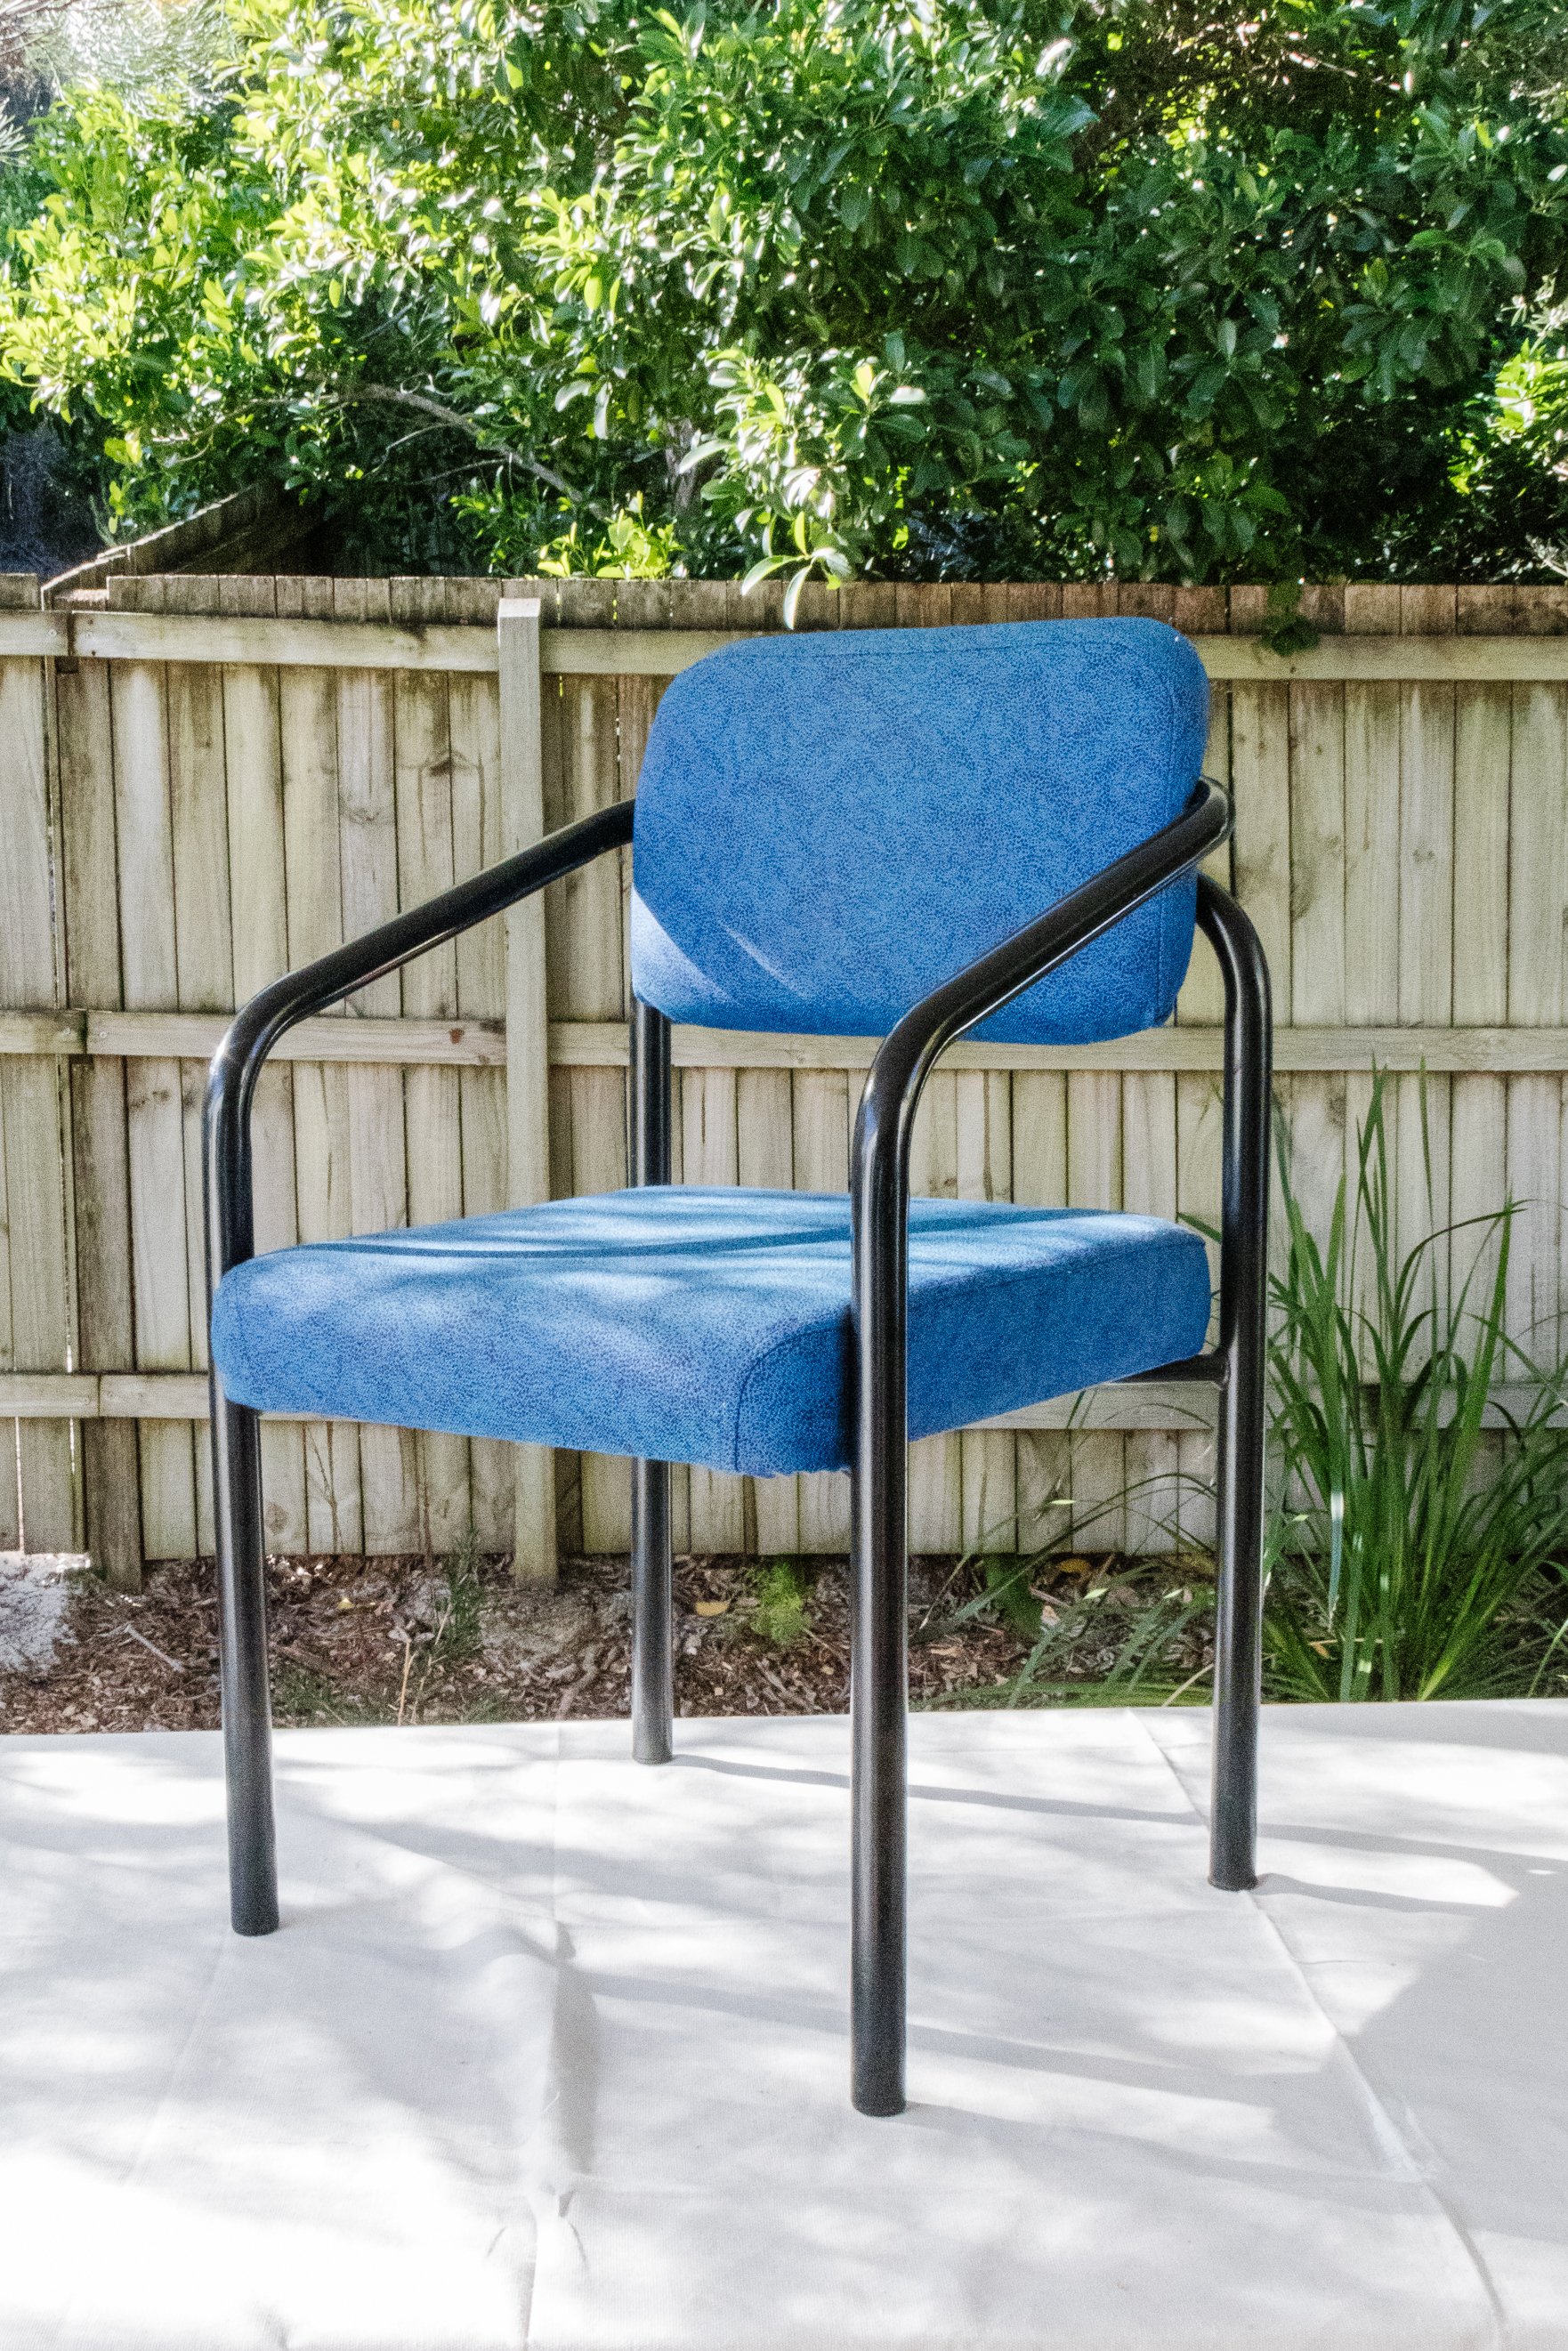
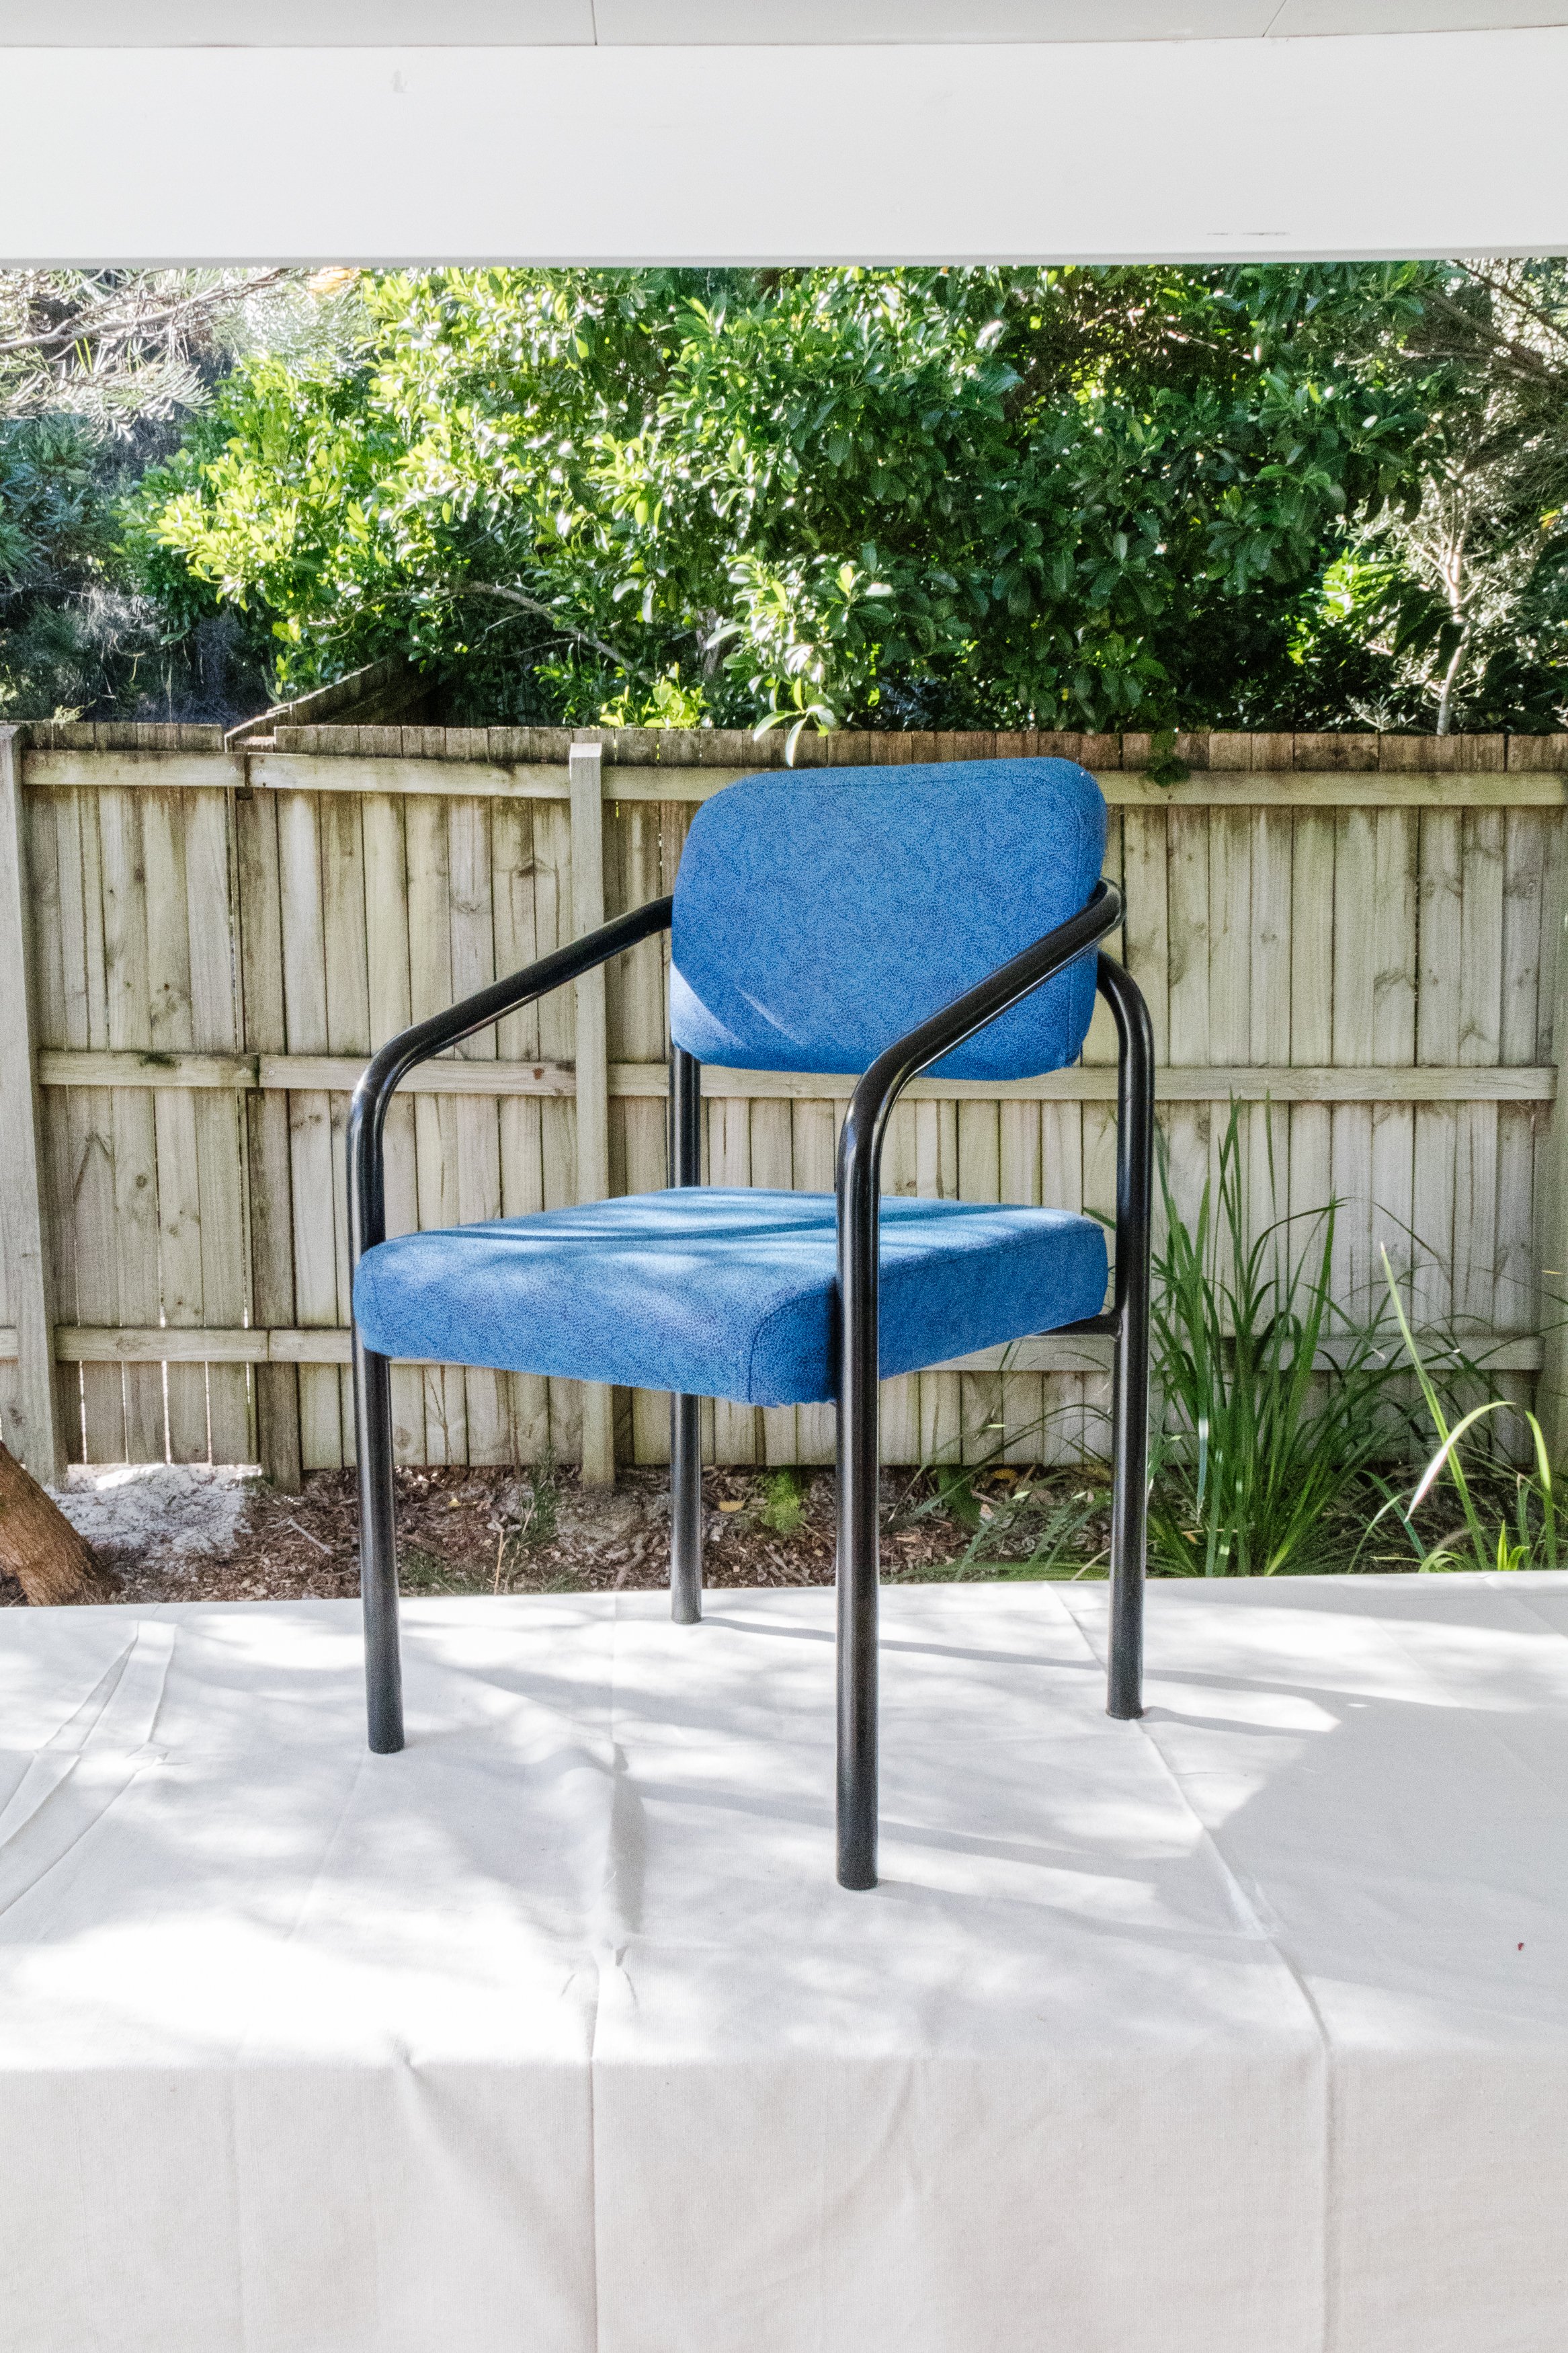
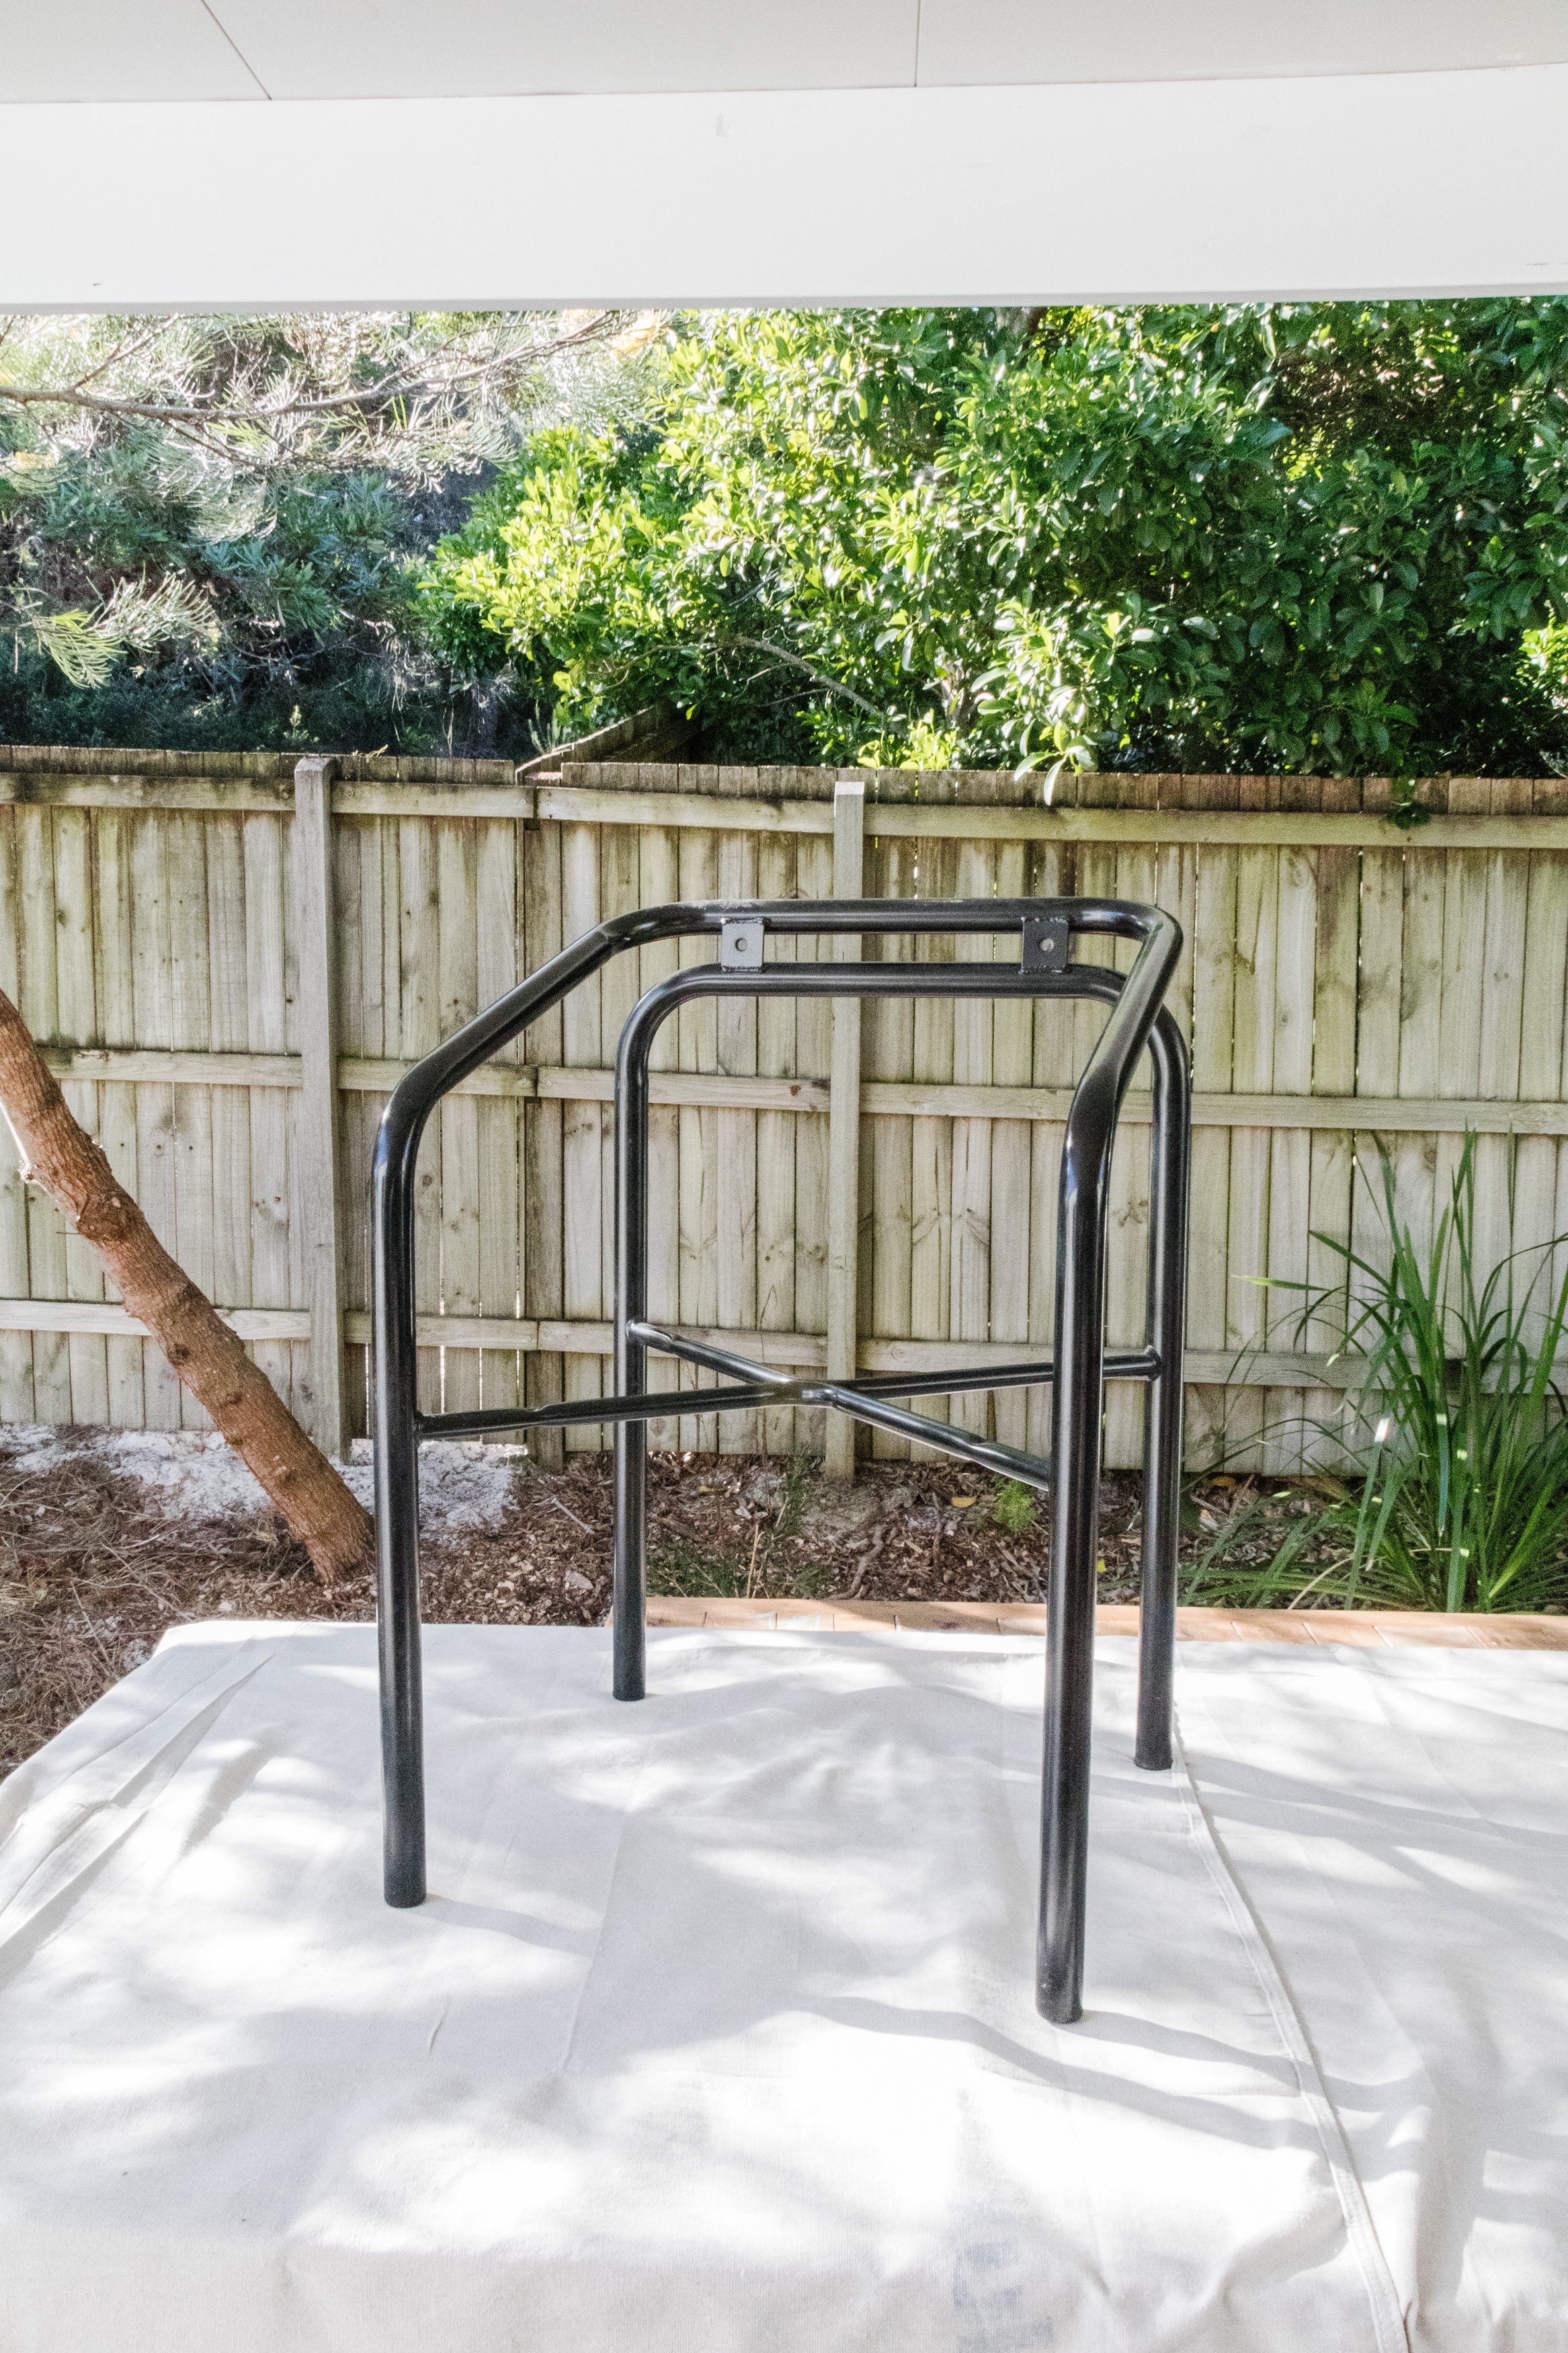
When I go thrifting I always come across these ugly, outdated office chairs. You know, the ones used in conference rooms and receptions. I noticed another one last week, but there was something about the curved armrests that caught my attention. I’ve had an idea to upcycle a chair like this for ages and knew it would be perfect to make an Upcycled Abstract Chair.
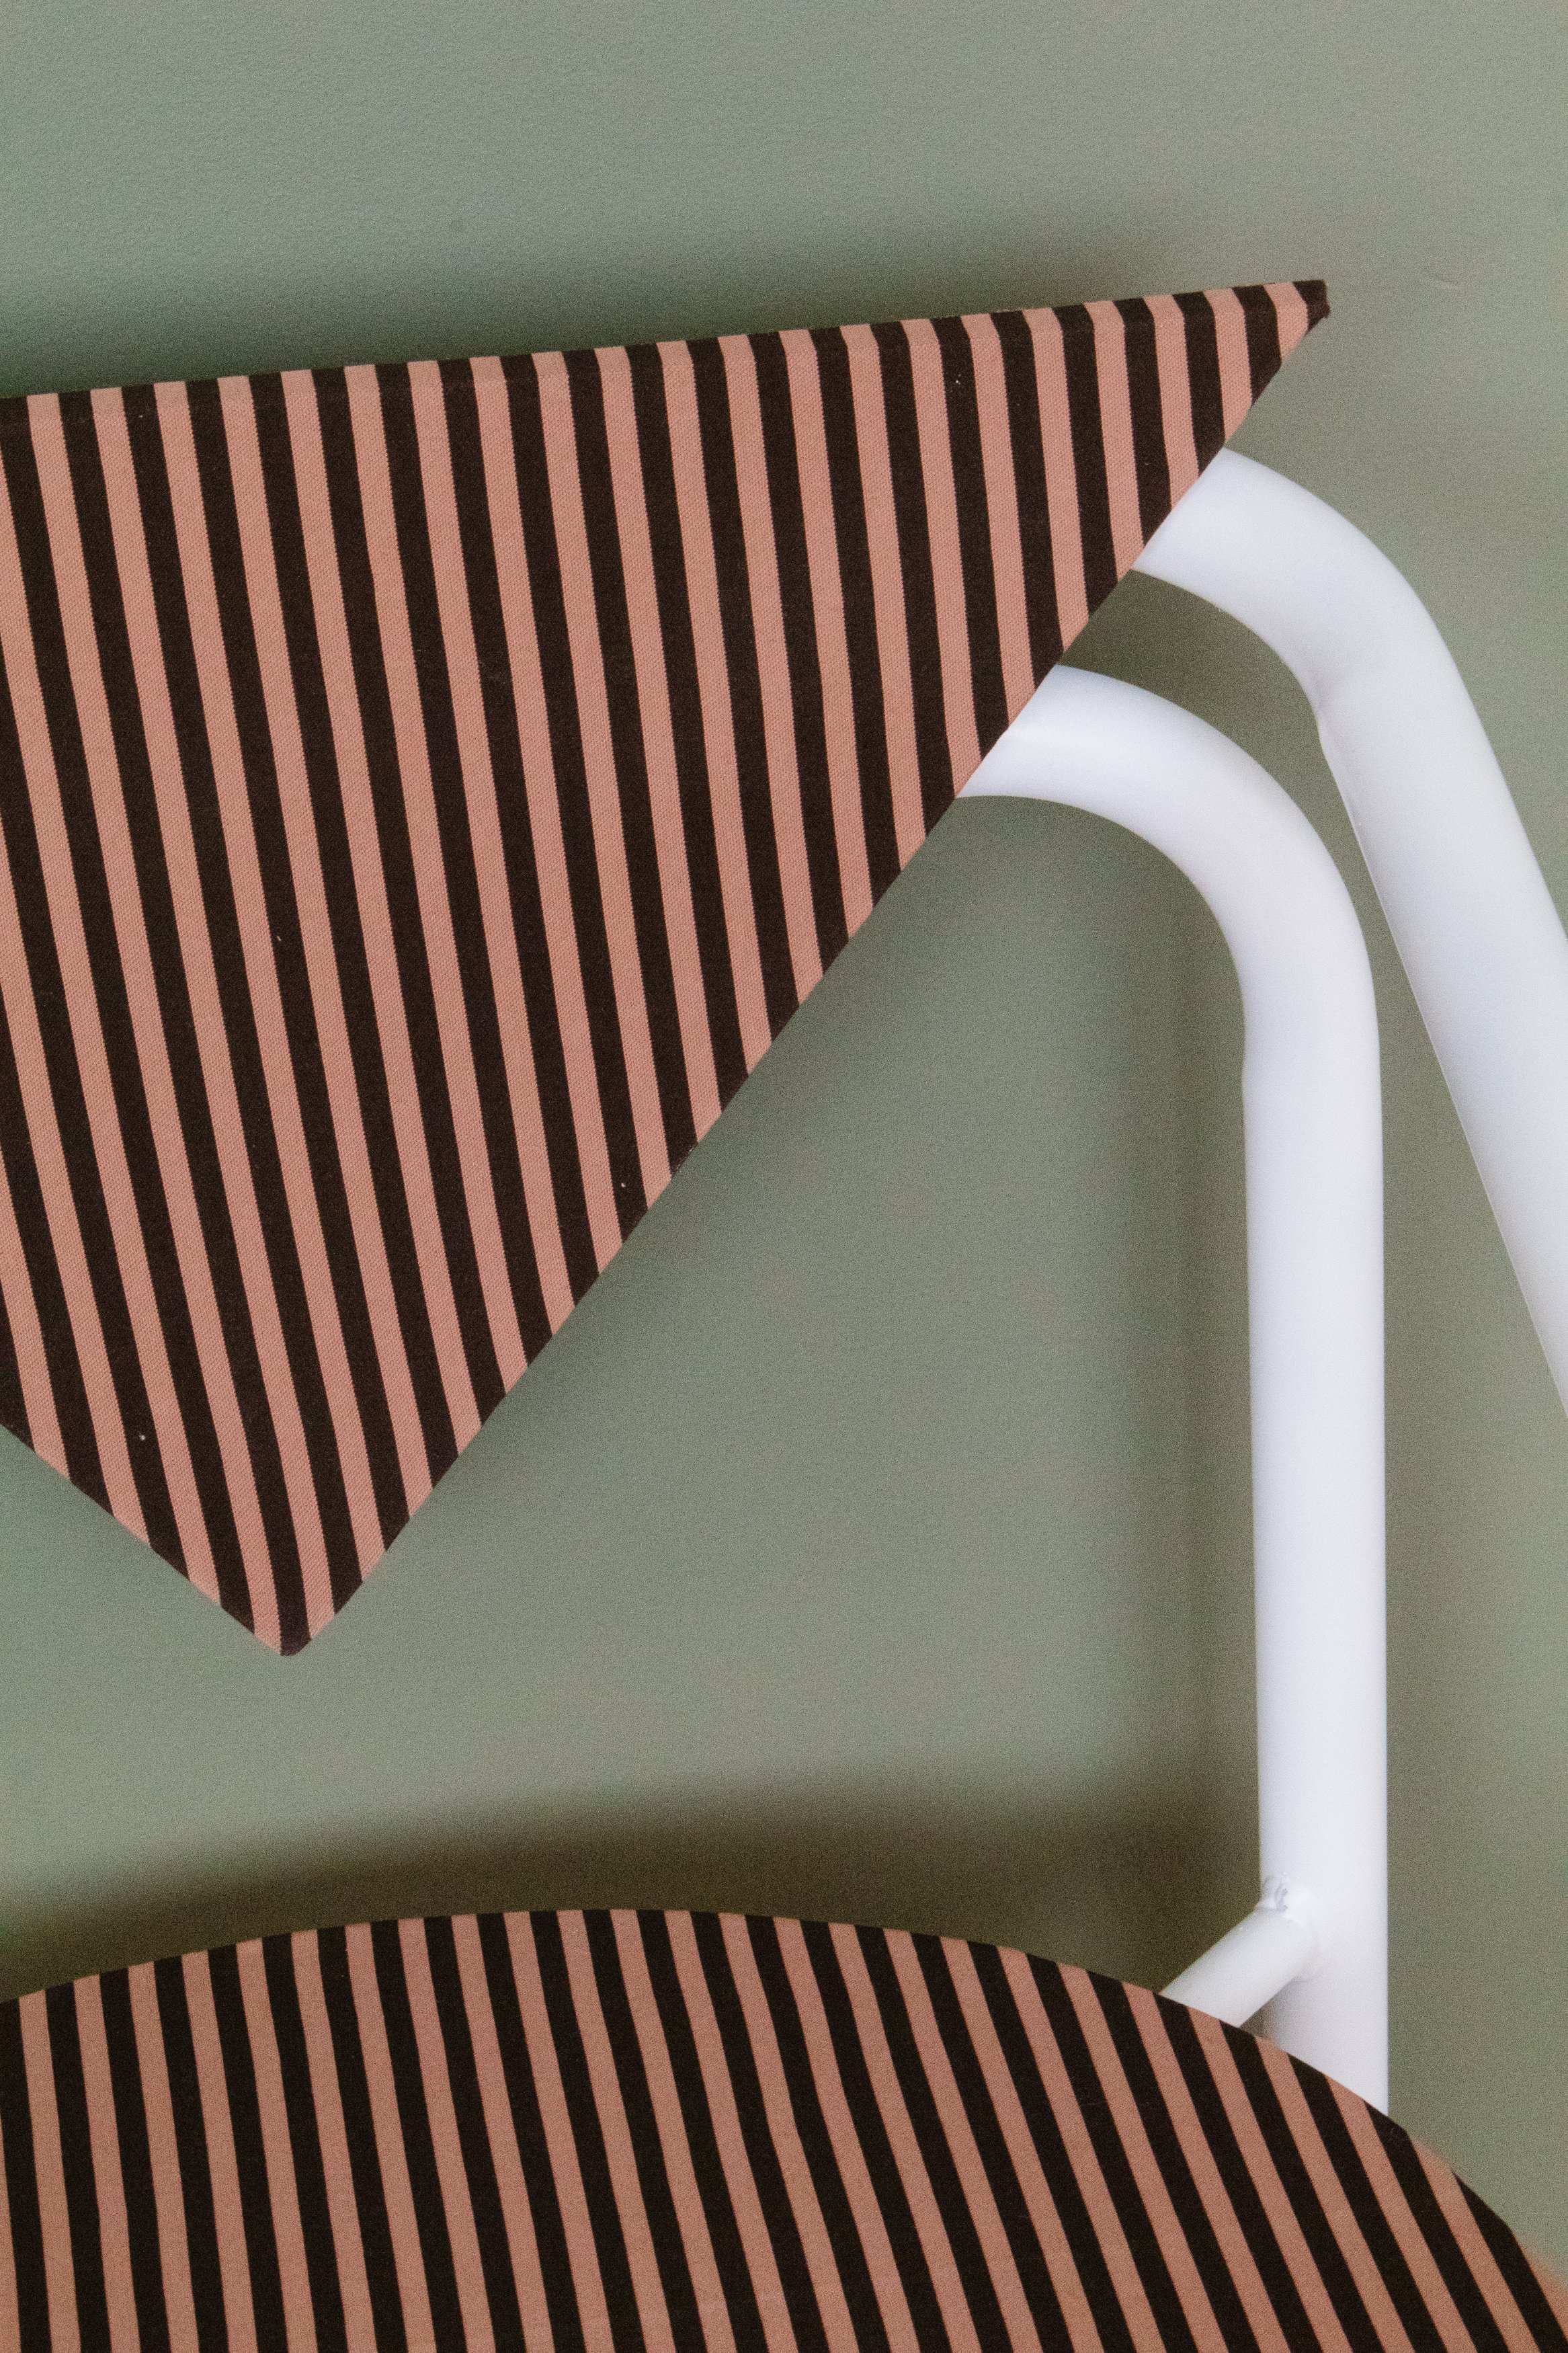
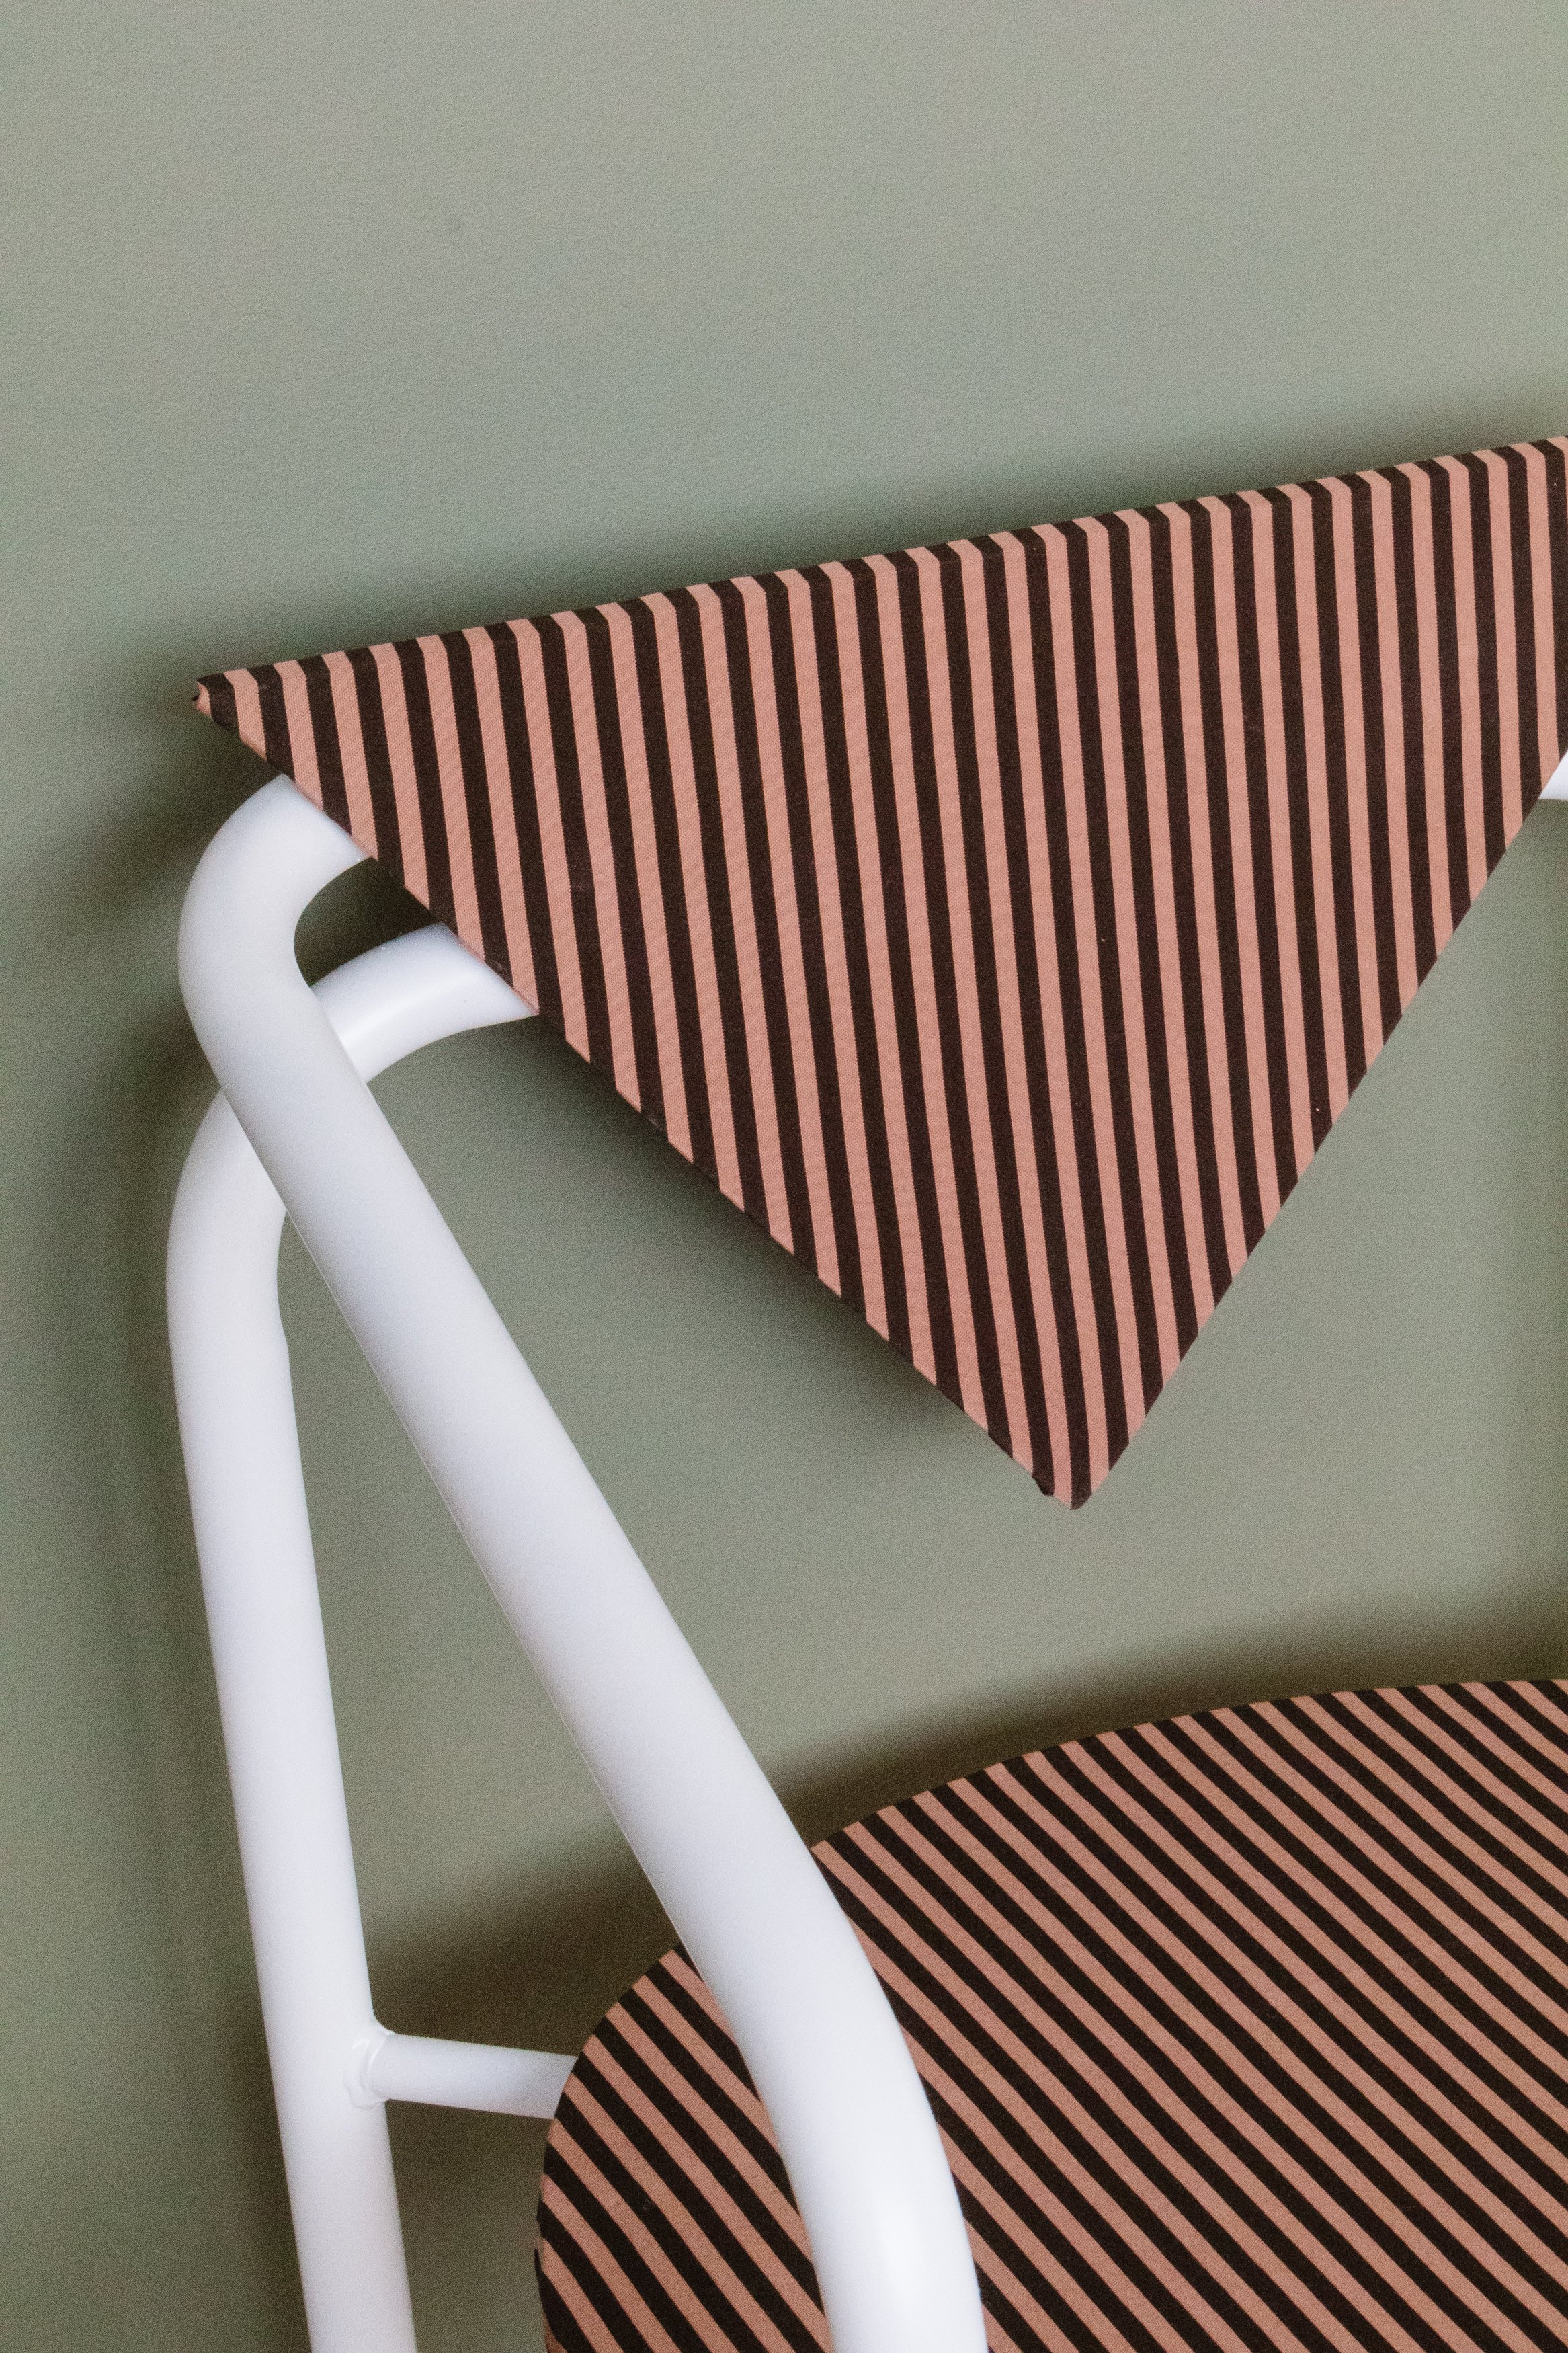
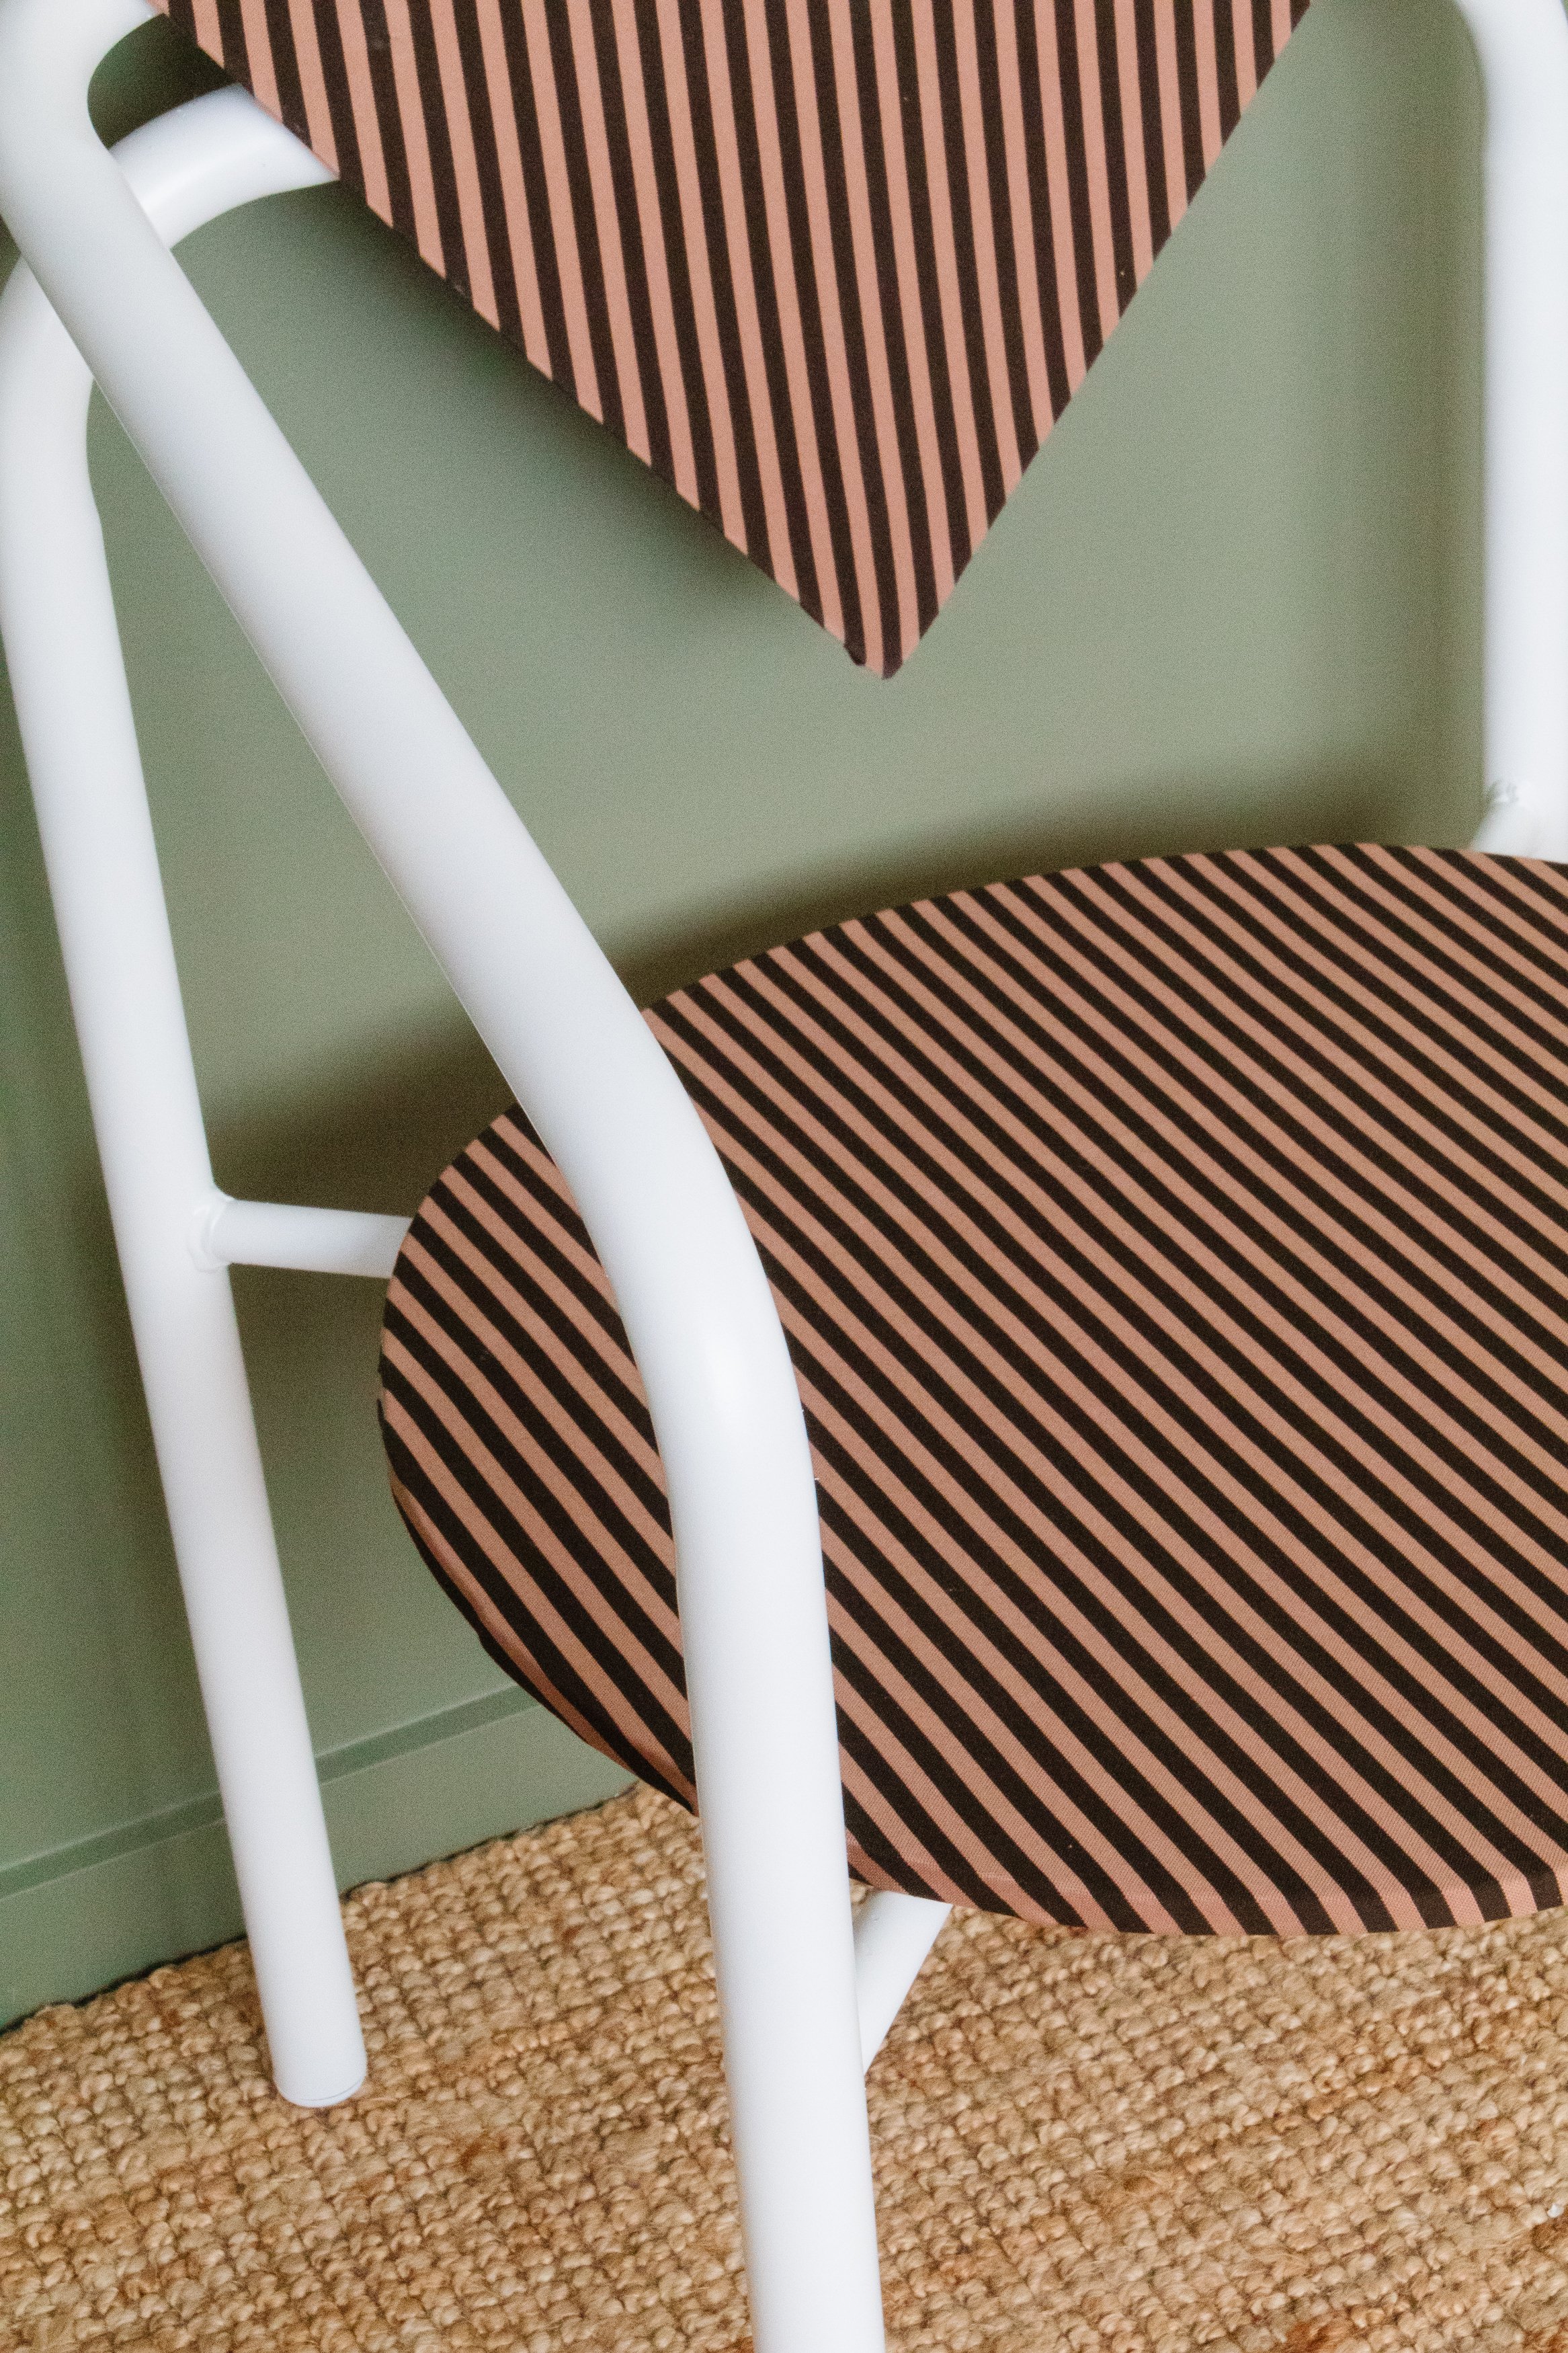
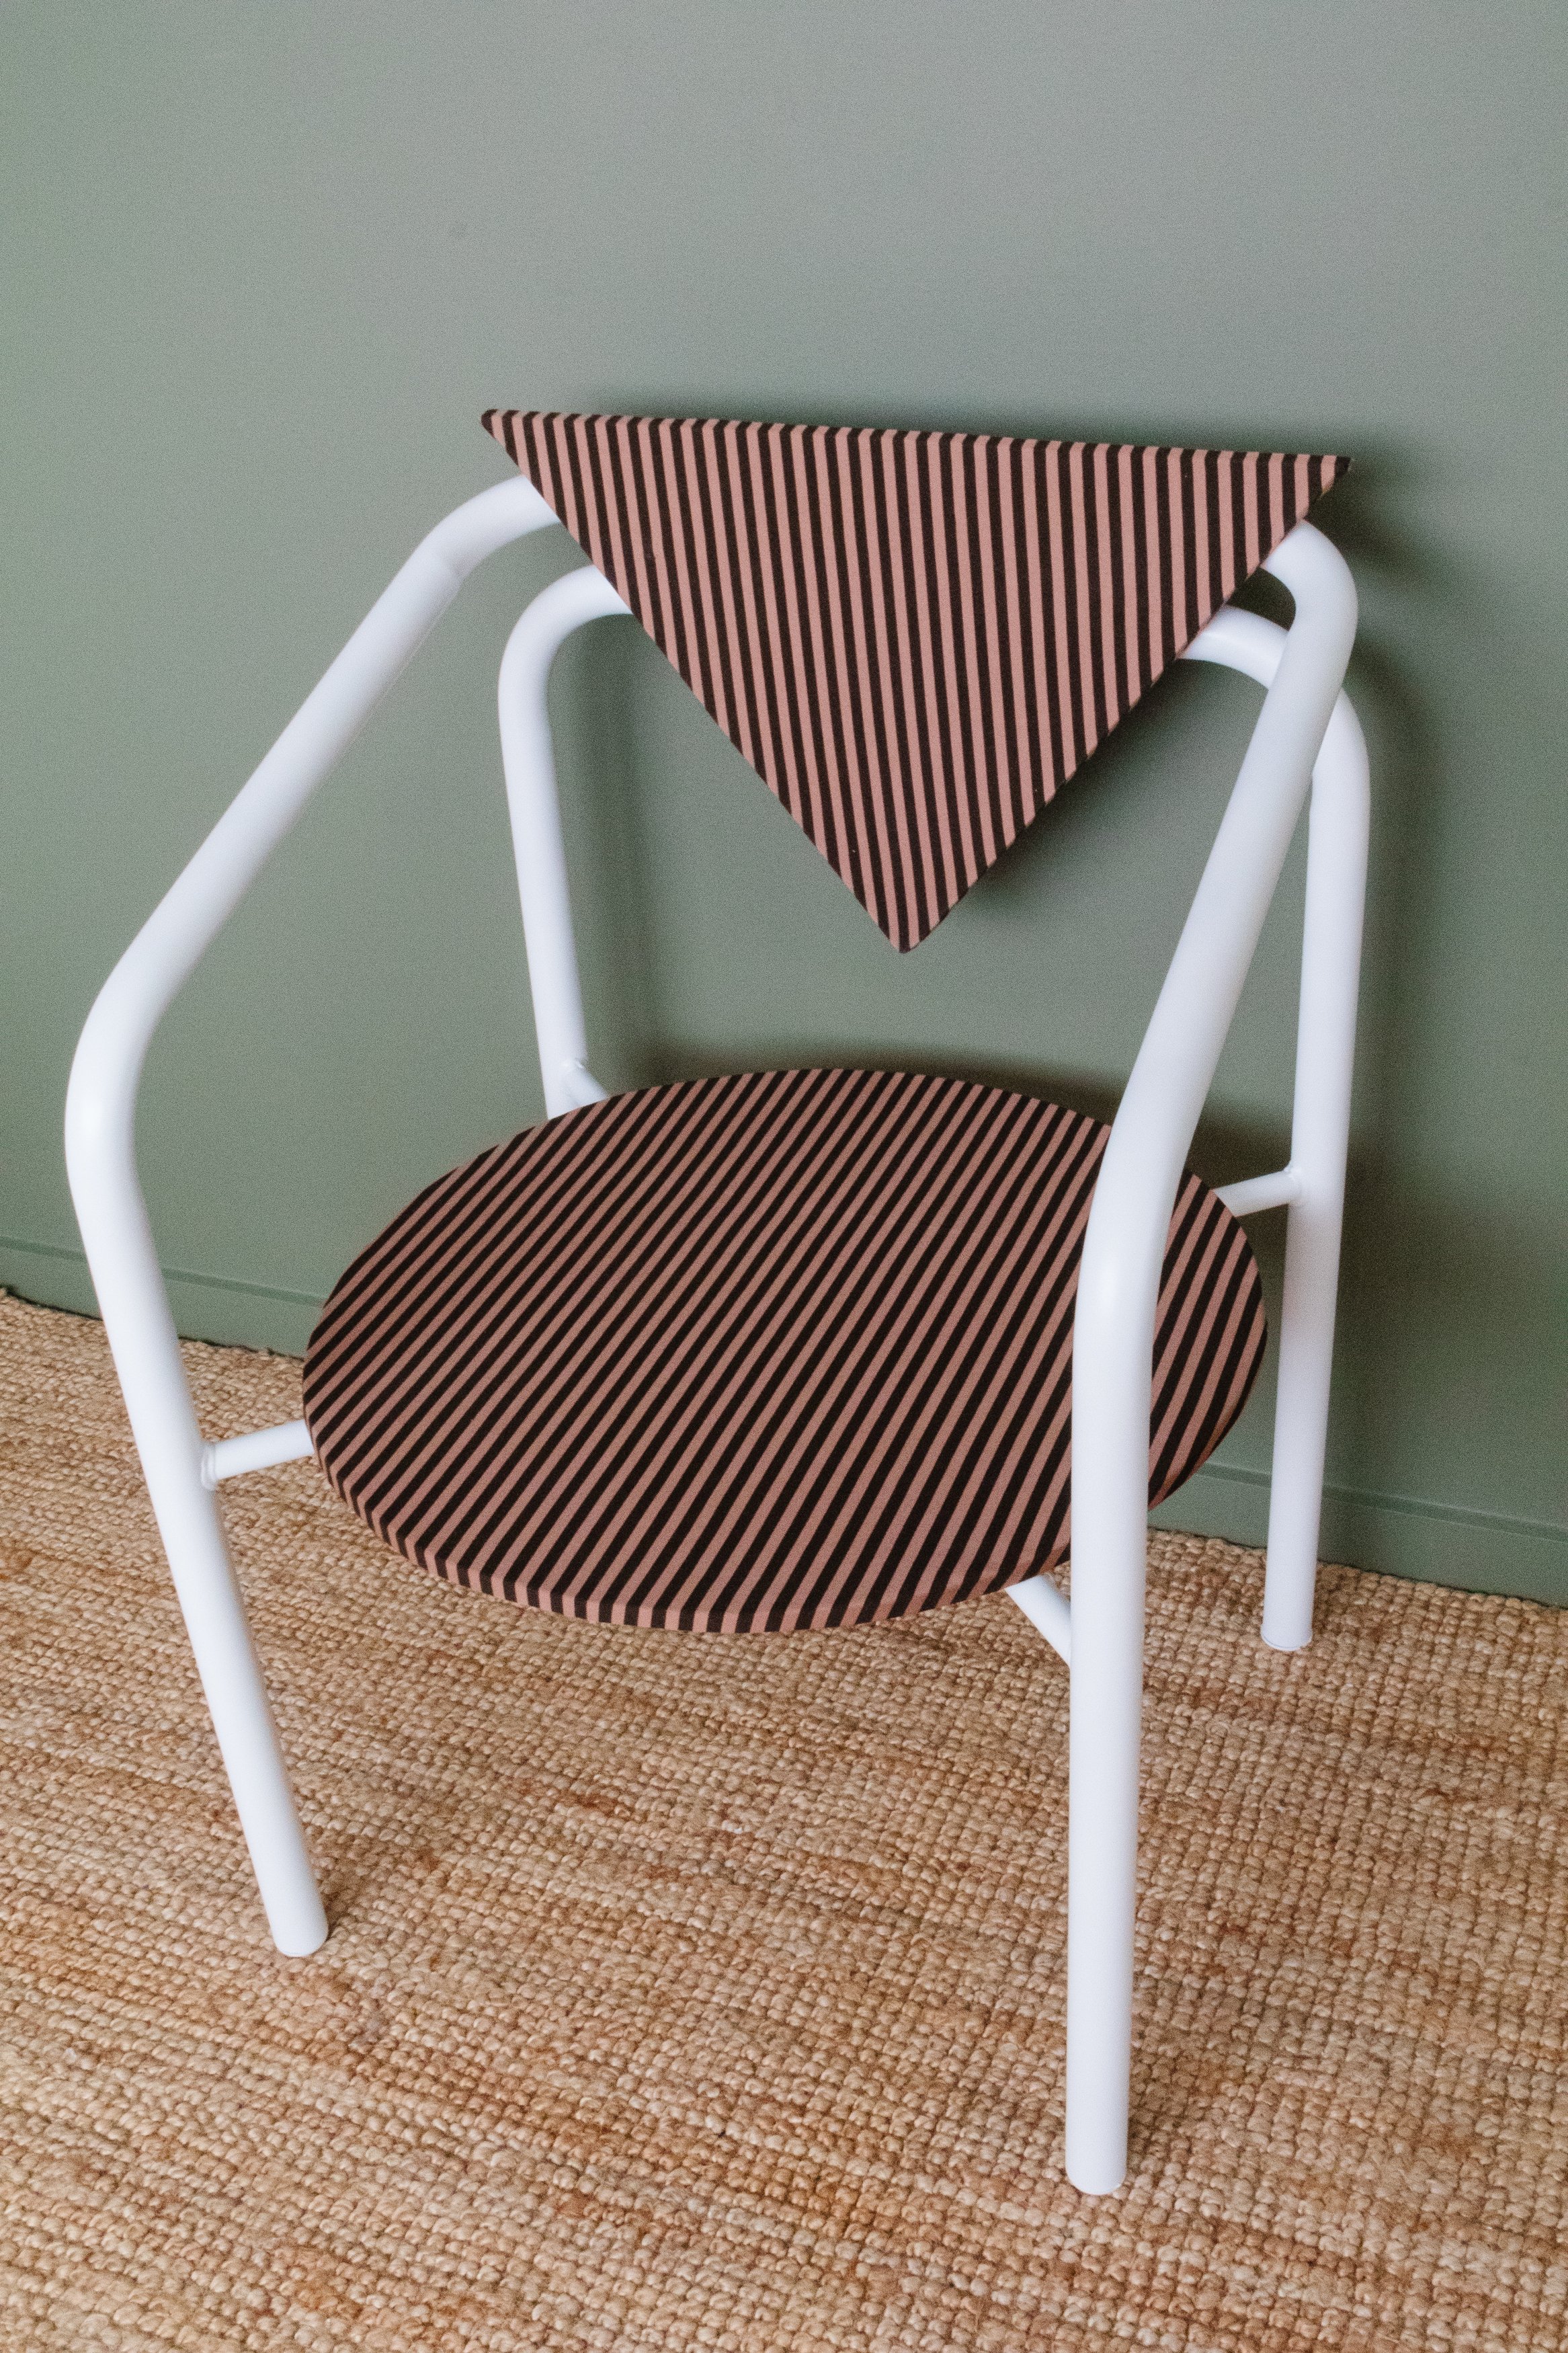
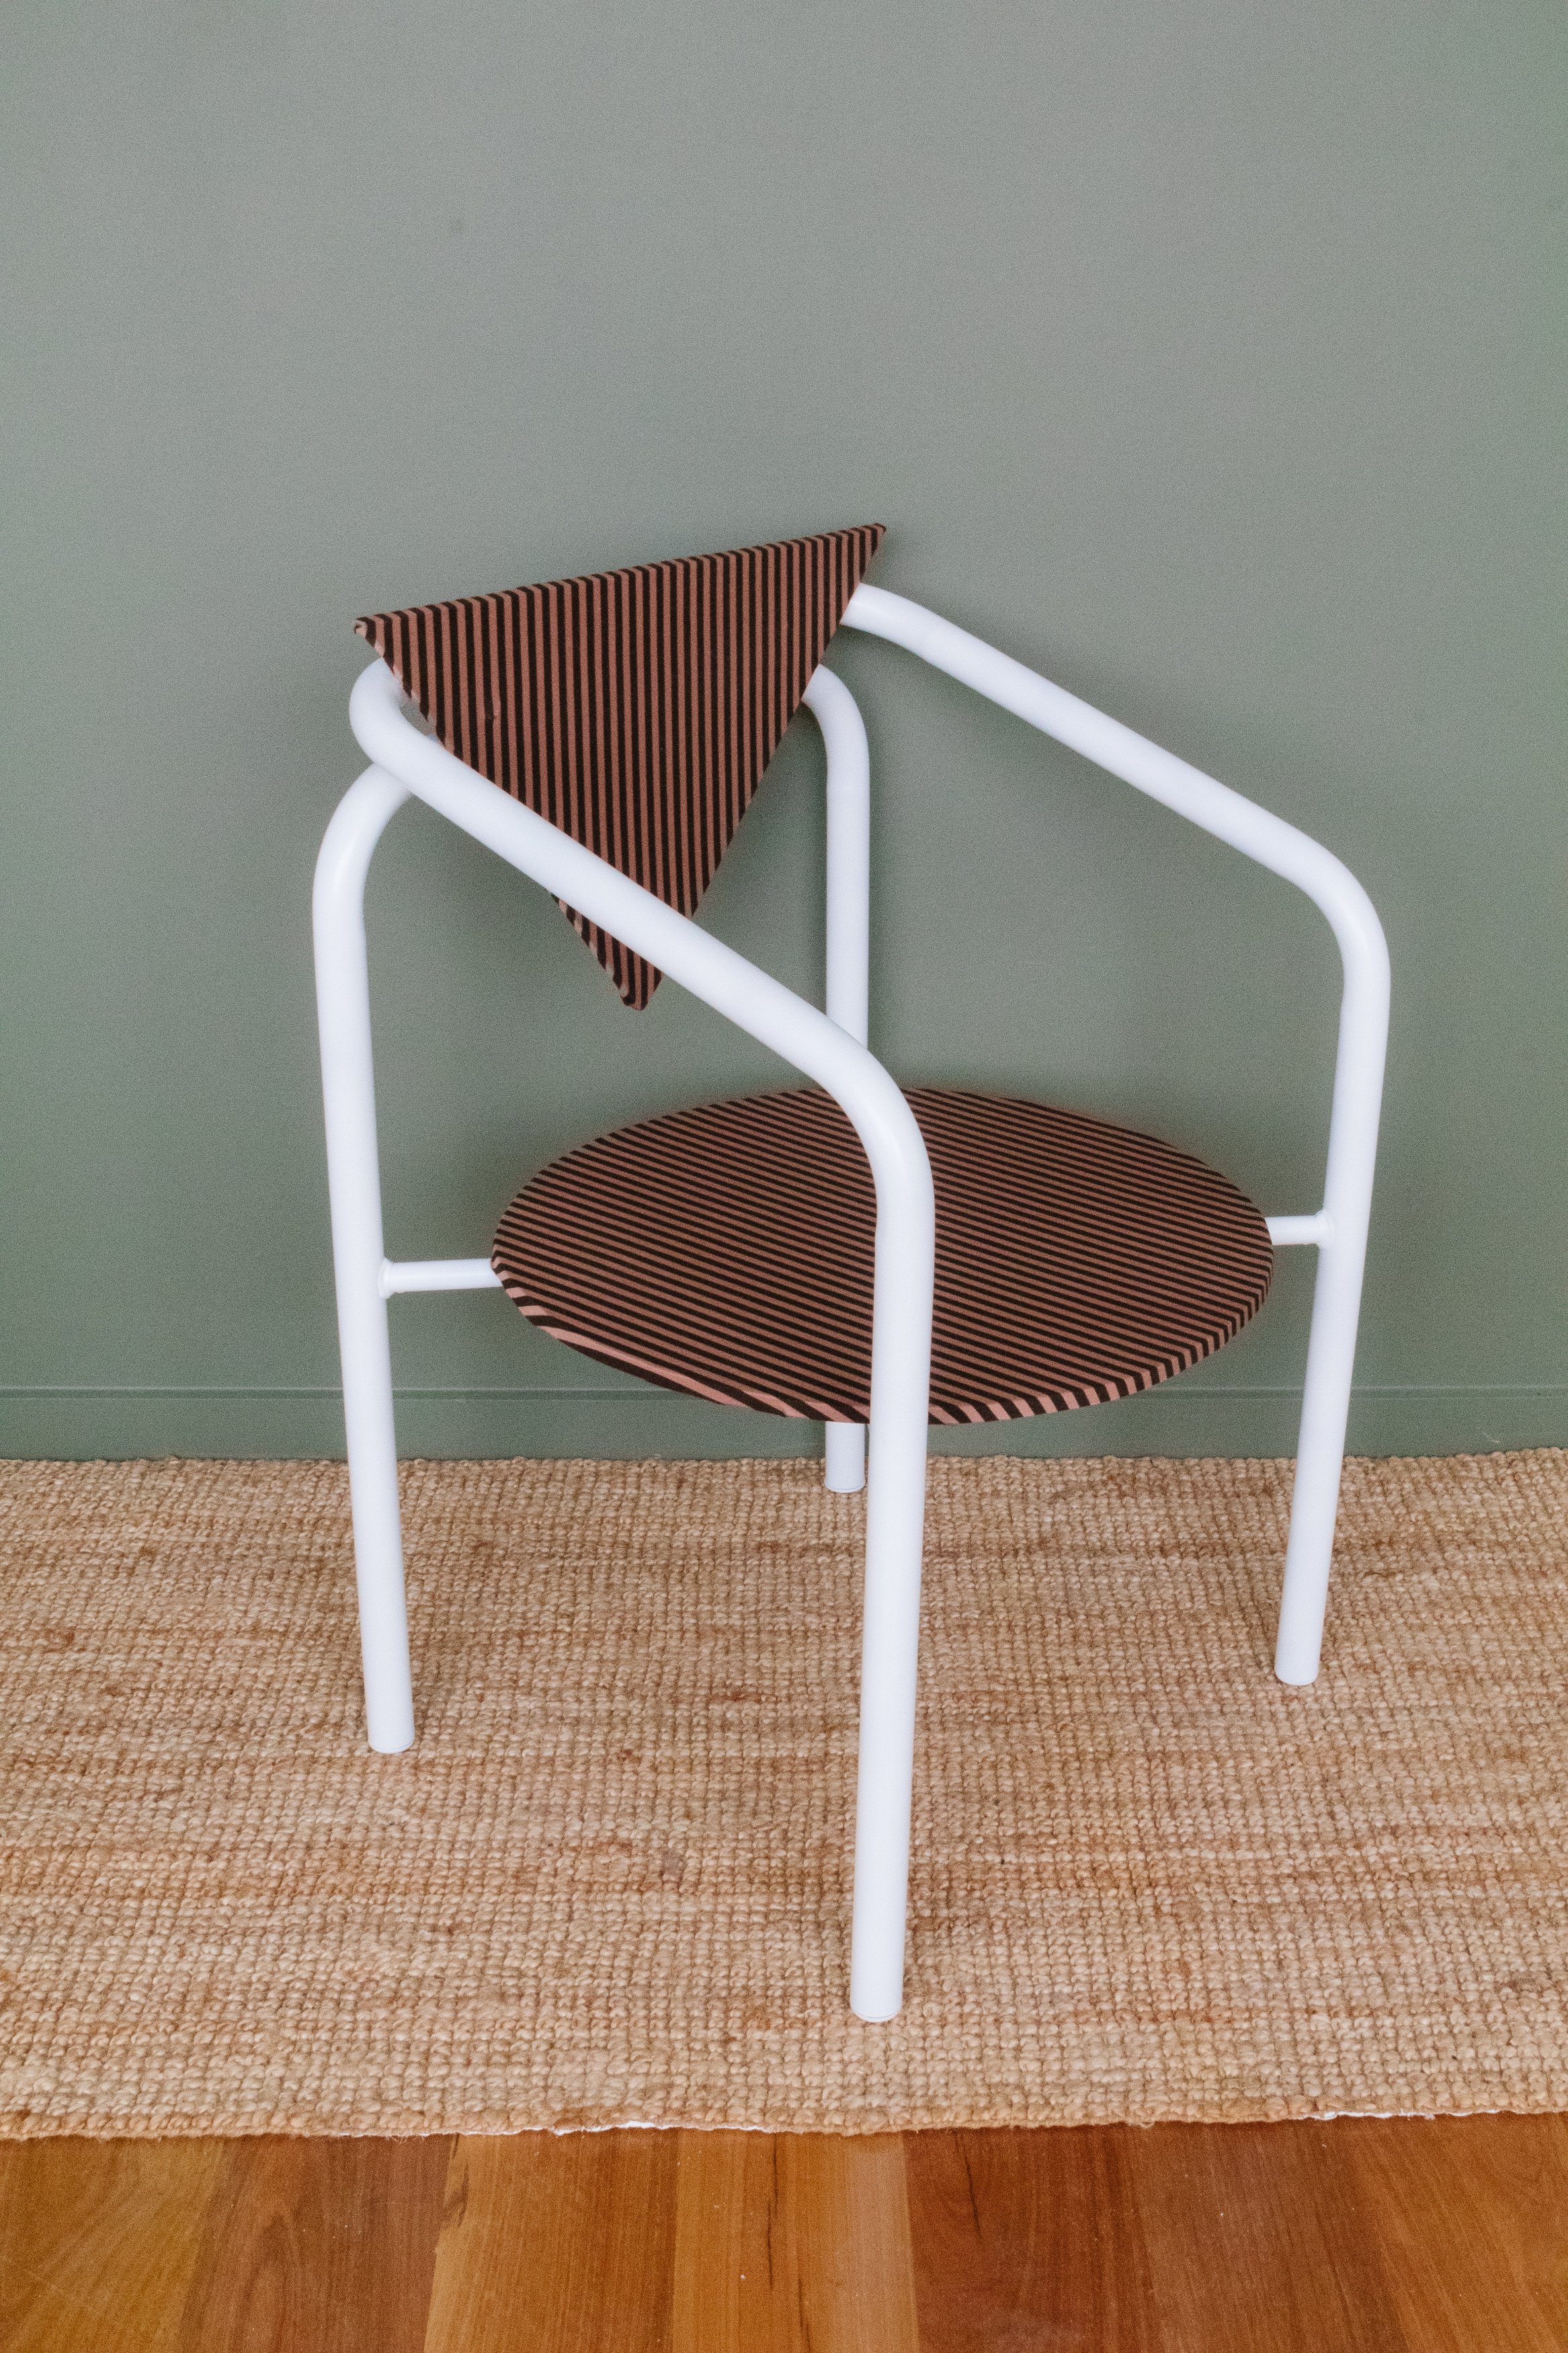
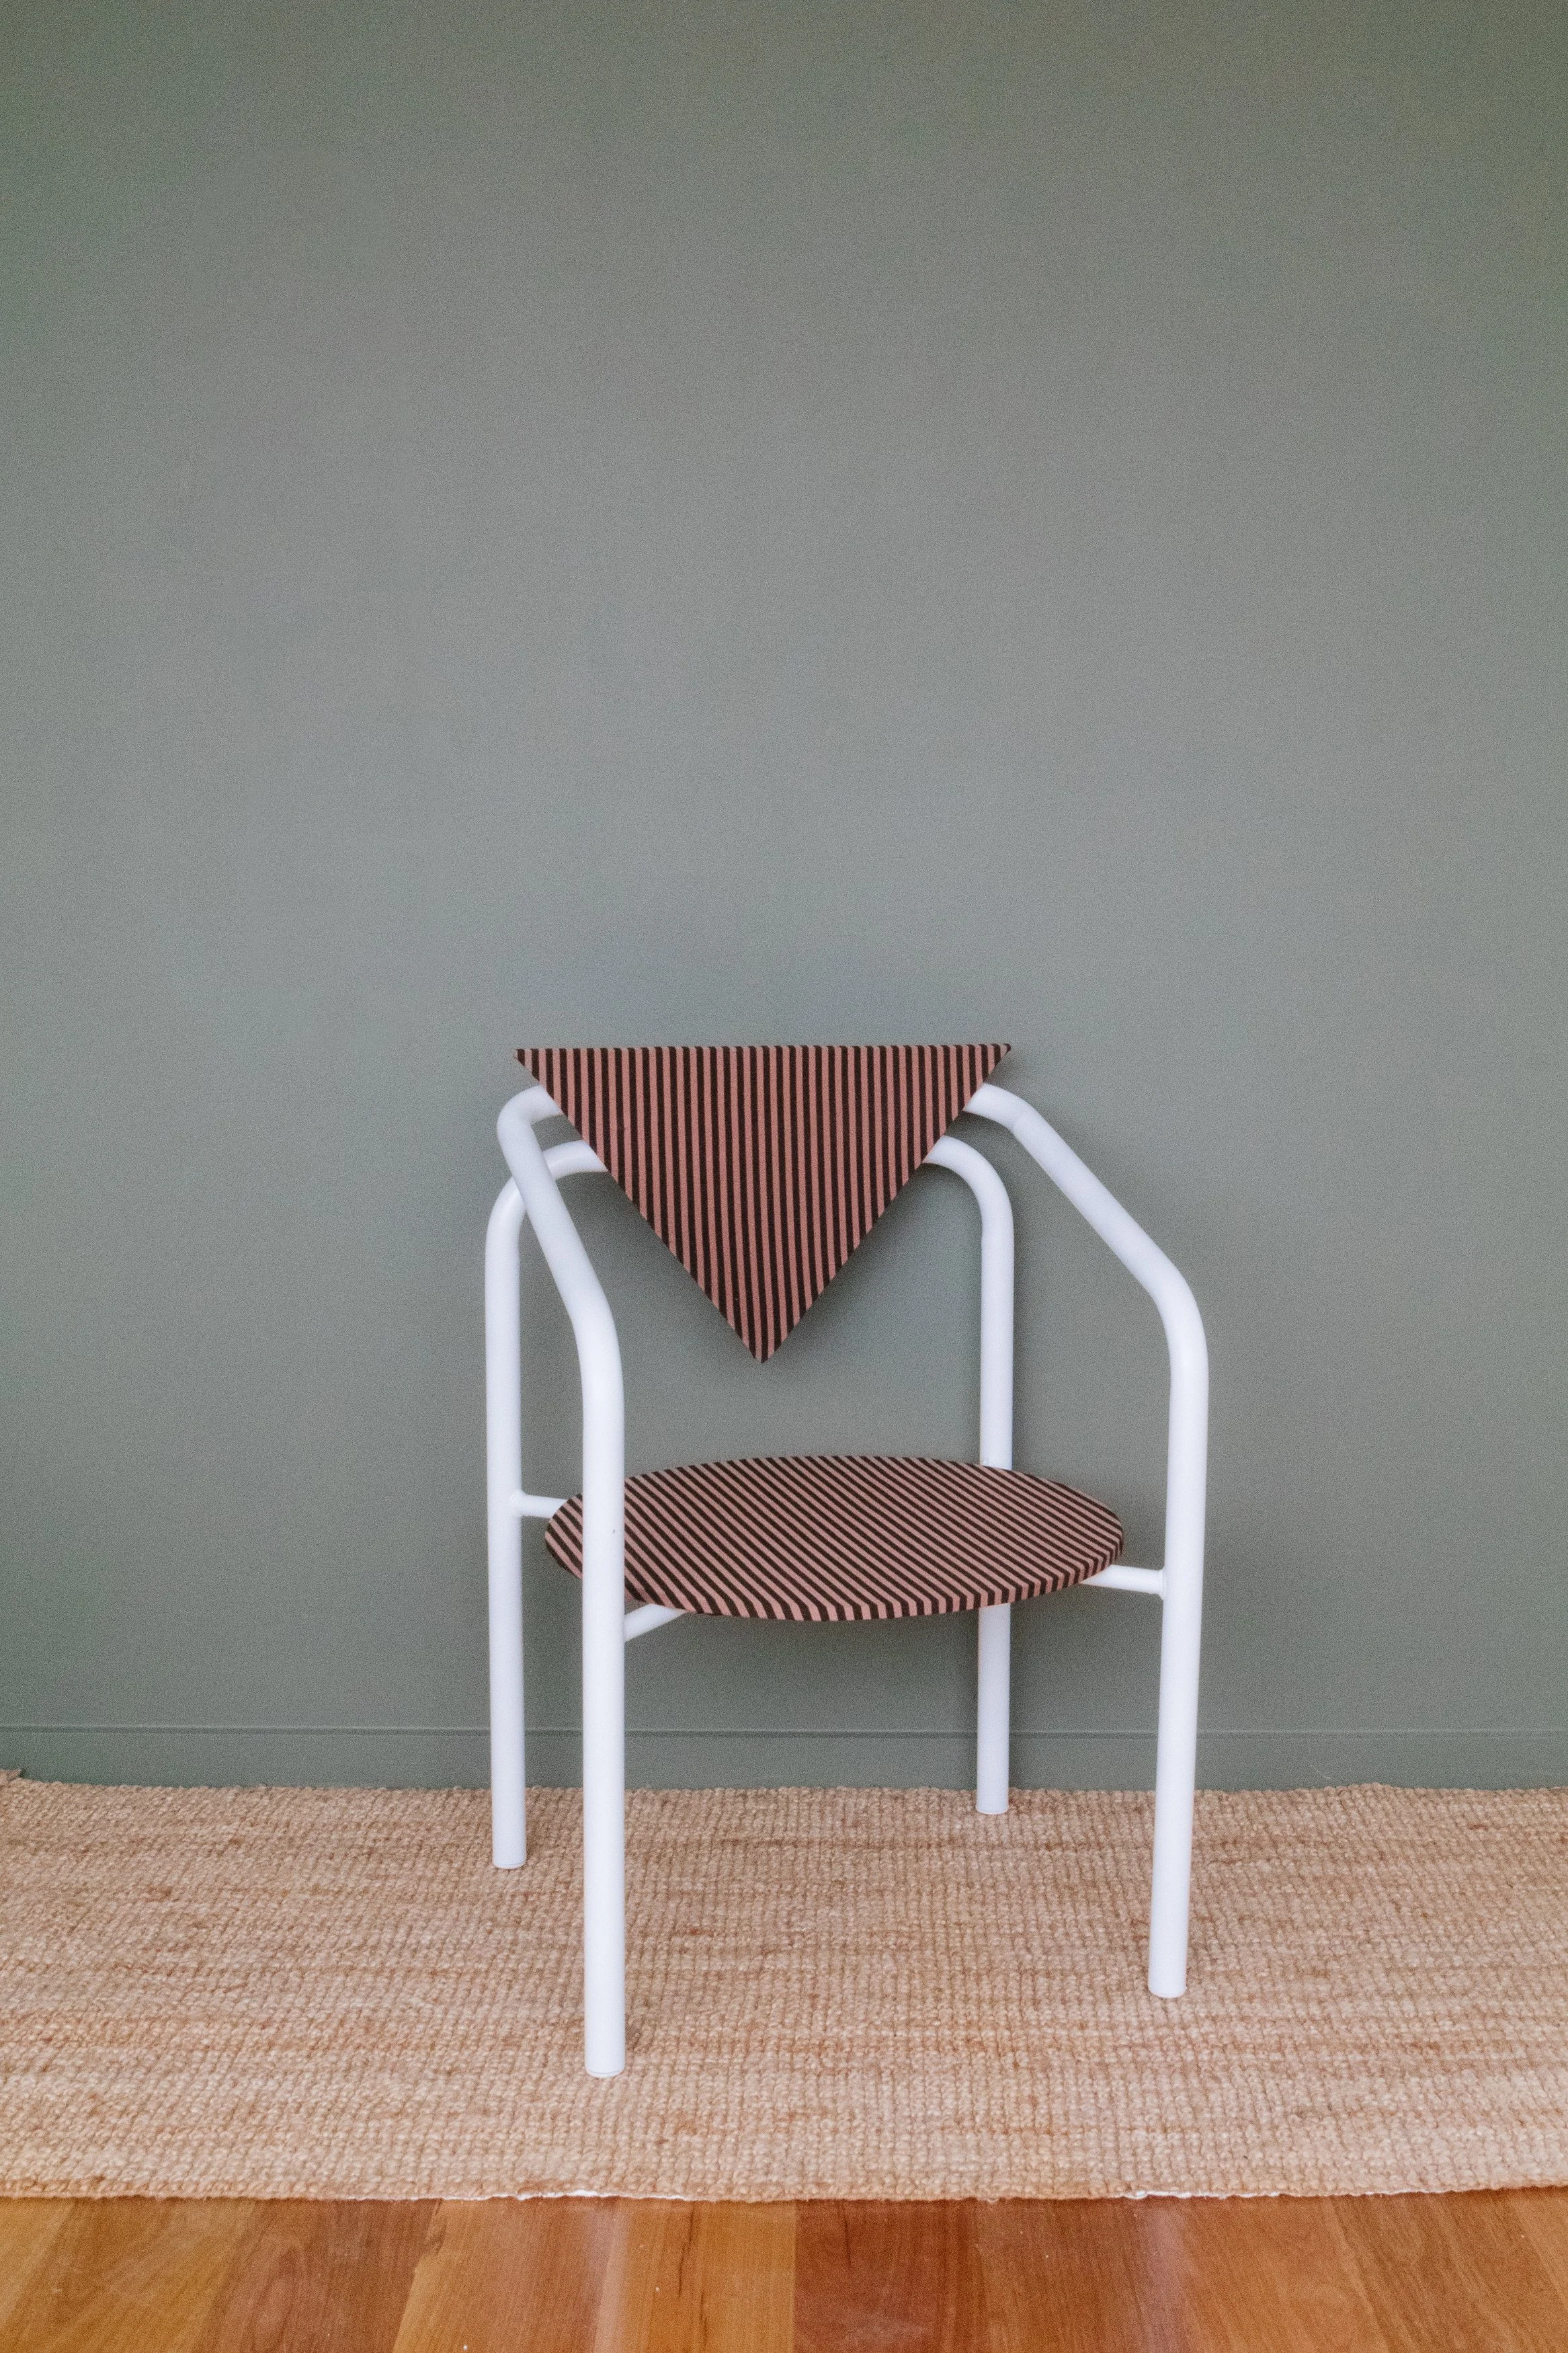
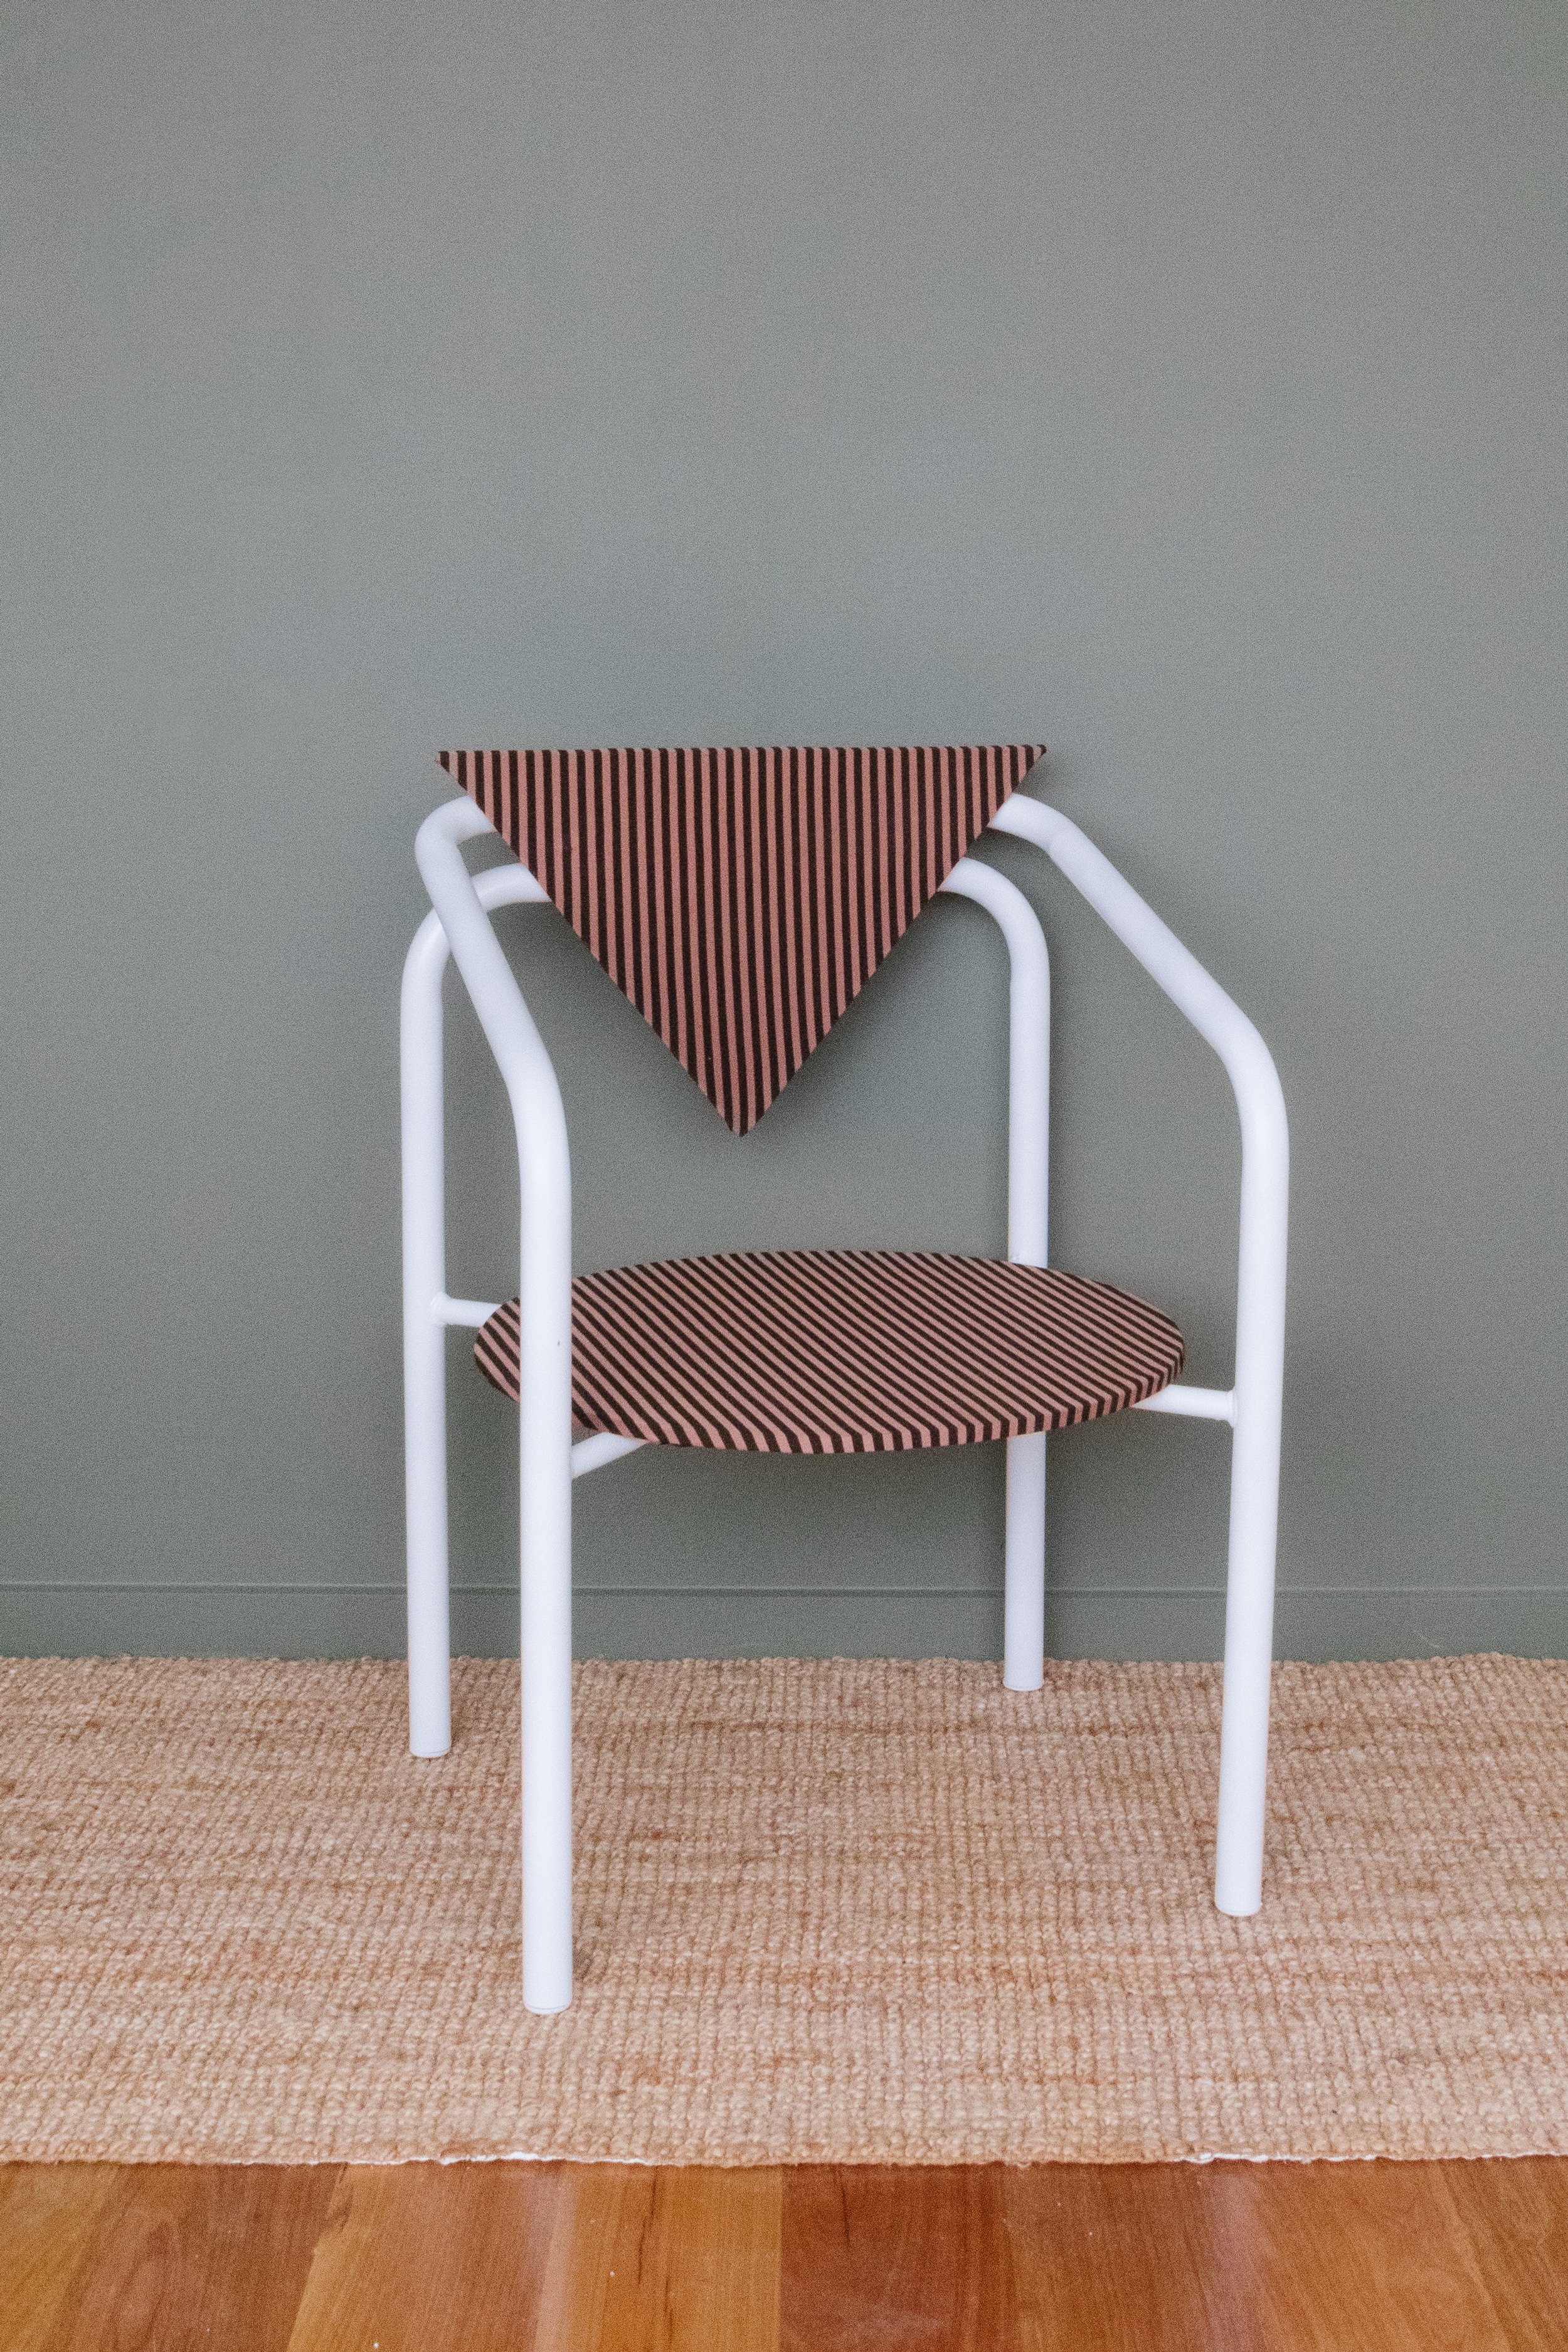
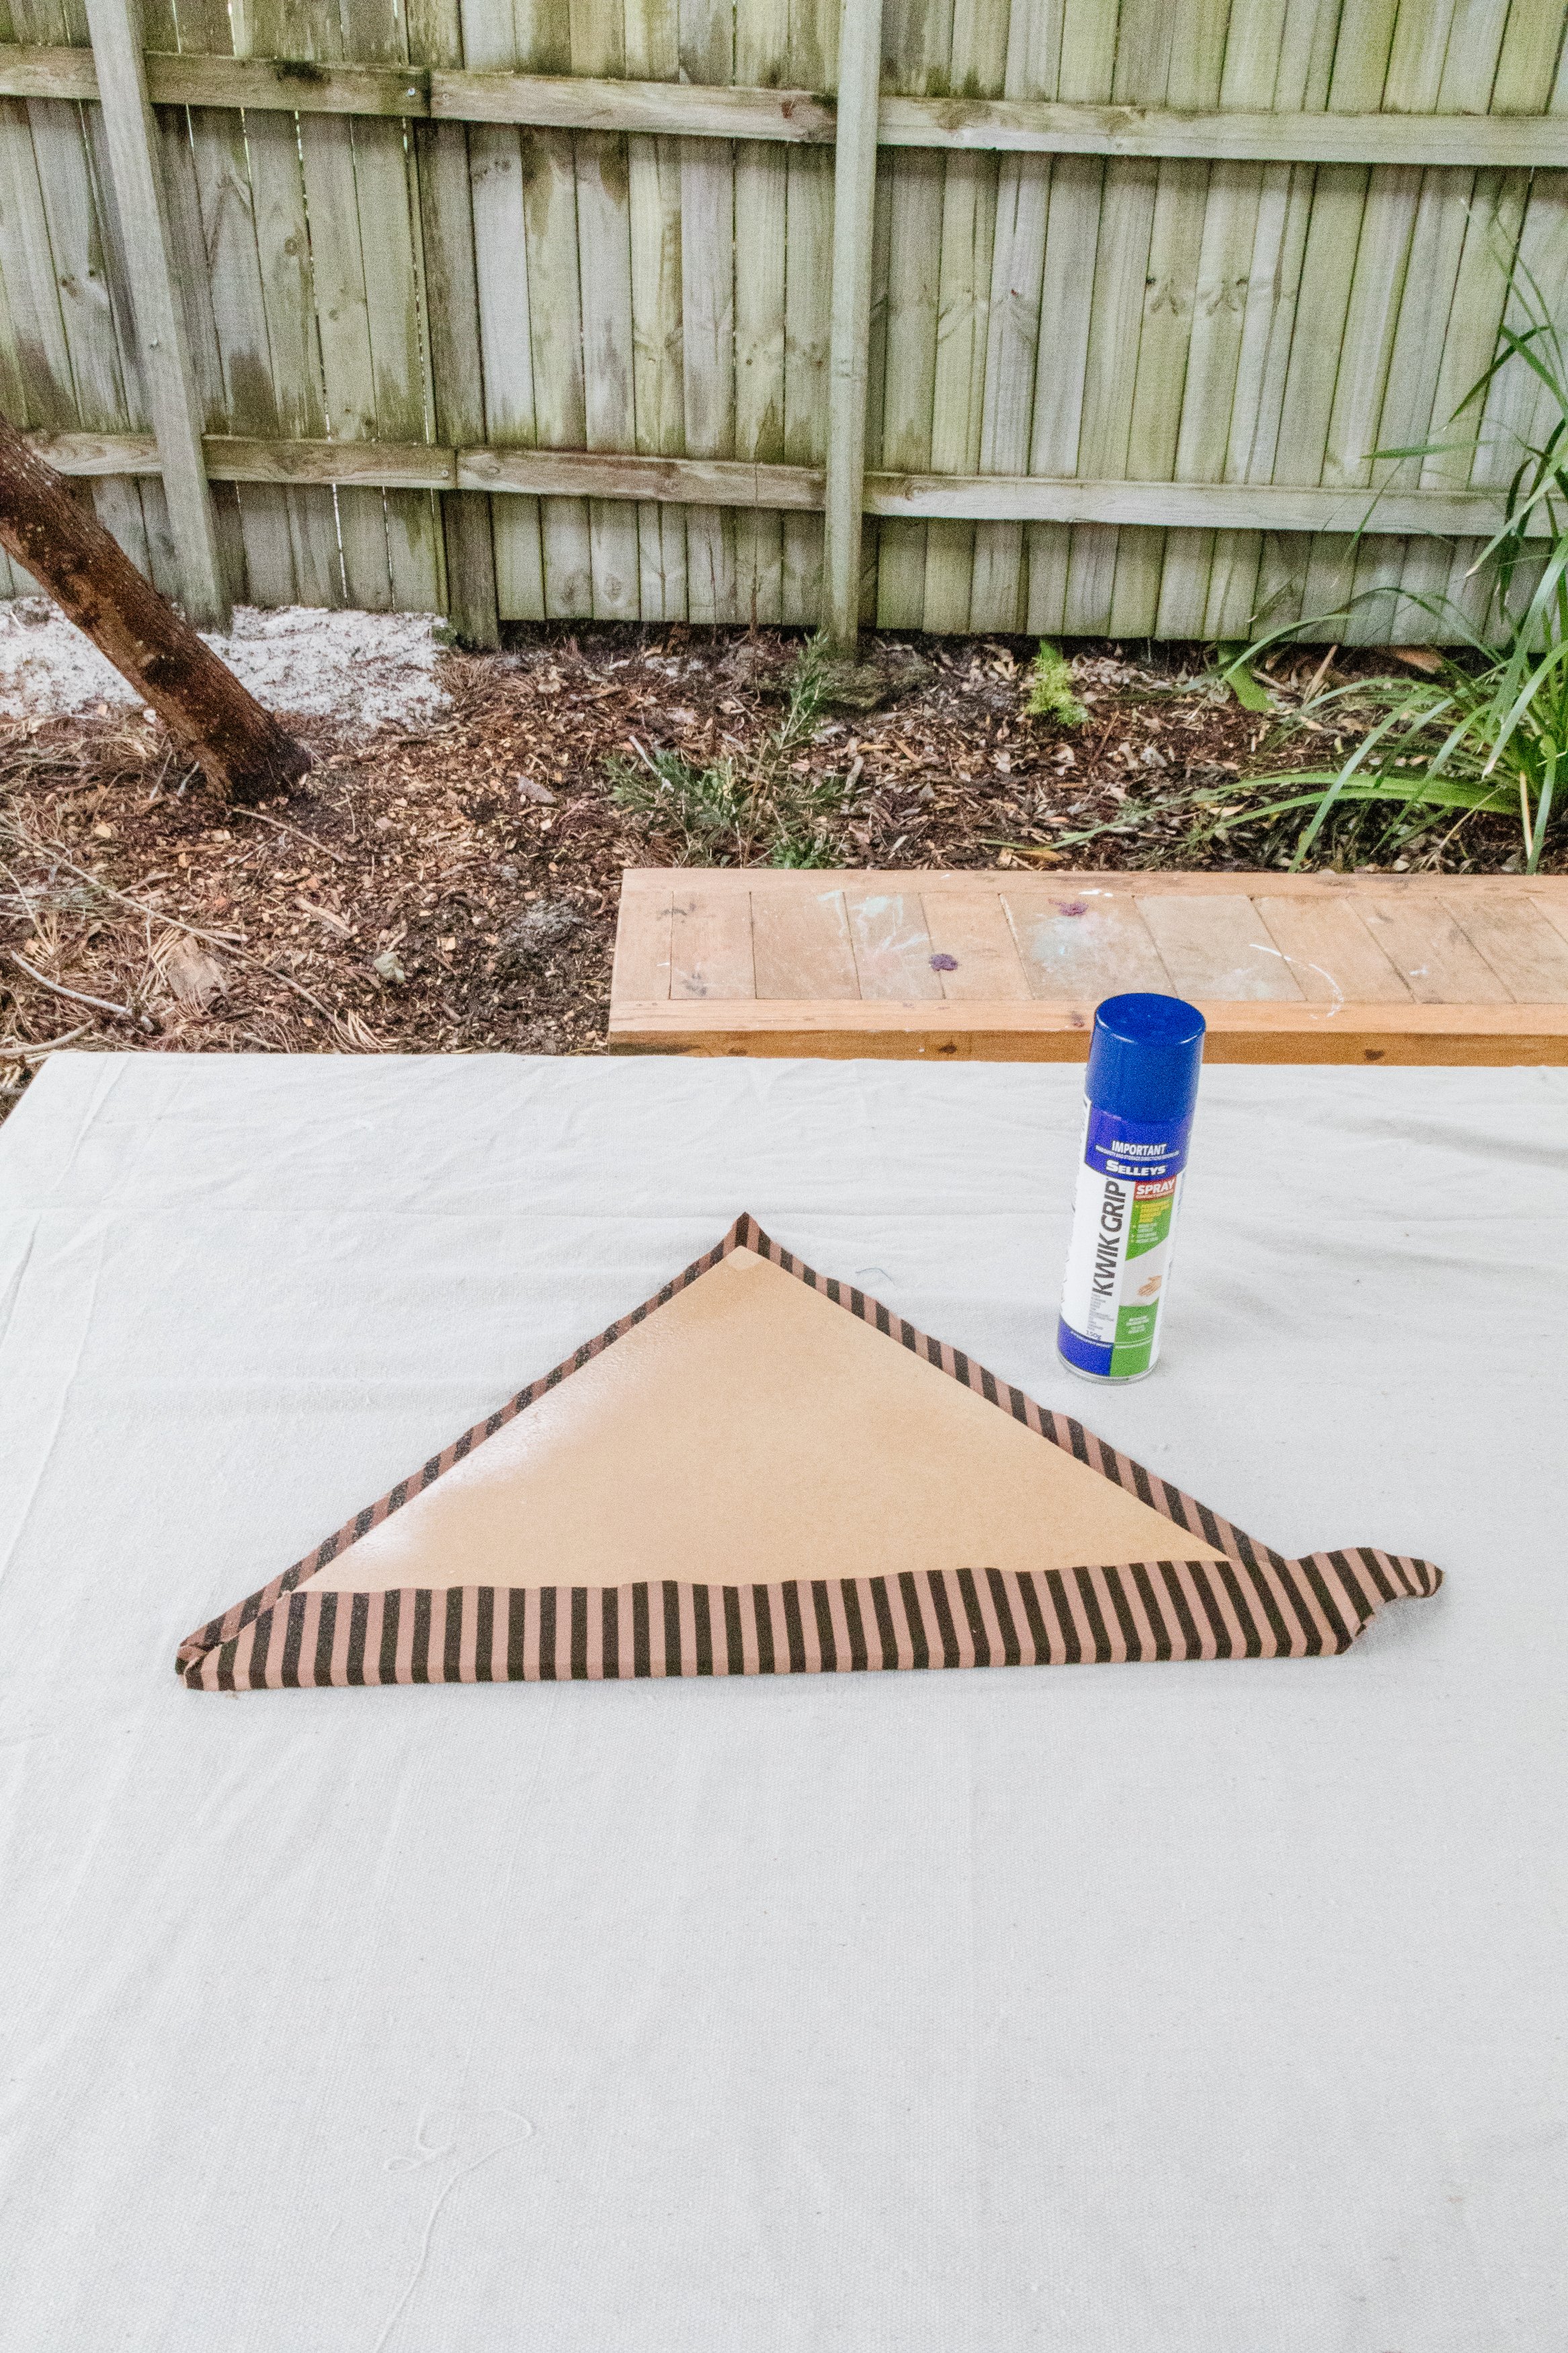
When I sadly realised I was unable to reuse the existing cushions or salvage the foam to make the new shapes (they were too small to make the shapes with), I used a piece of MDF and was surprised to discover how remarkably comfortable it was without cushioning, so I decided to keep the MDF as it was. I thought about painting the shapes but remembered I had some gorgeous fabric in my studio. I couldn’t decide between white or stripes, so I asked my community on Instagram and stripes was the clear winner, so I covered the MDF with the striped fabric using adhesive spray.
And I'm obsessssed!
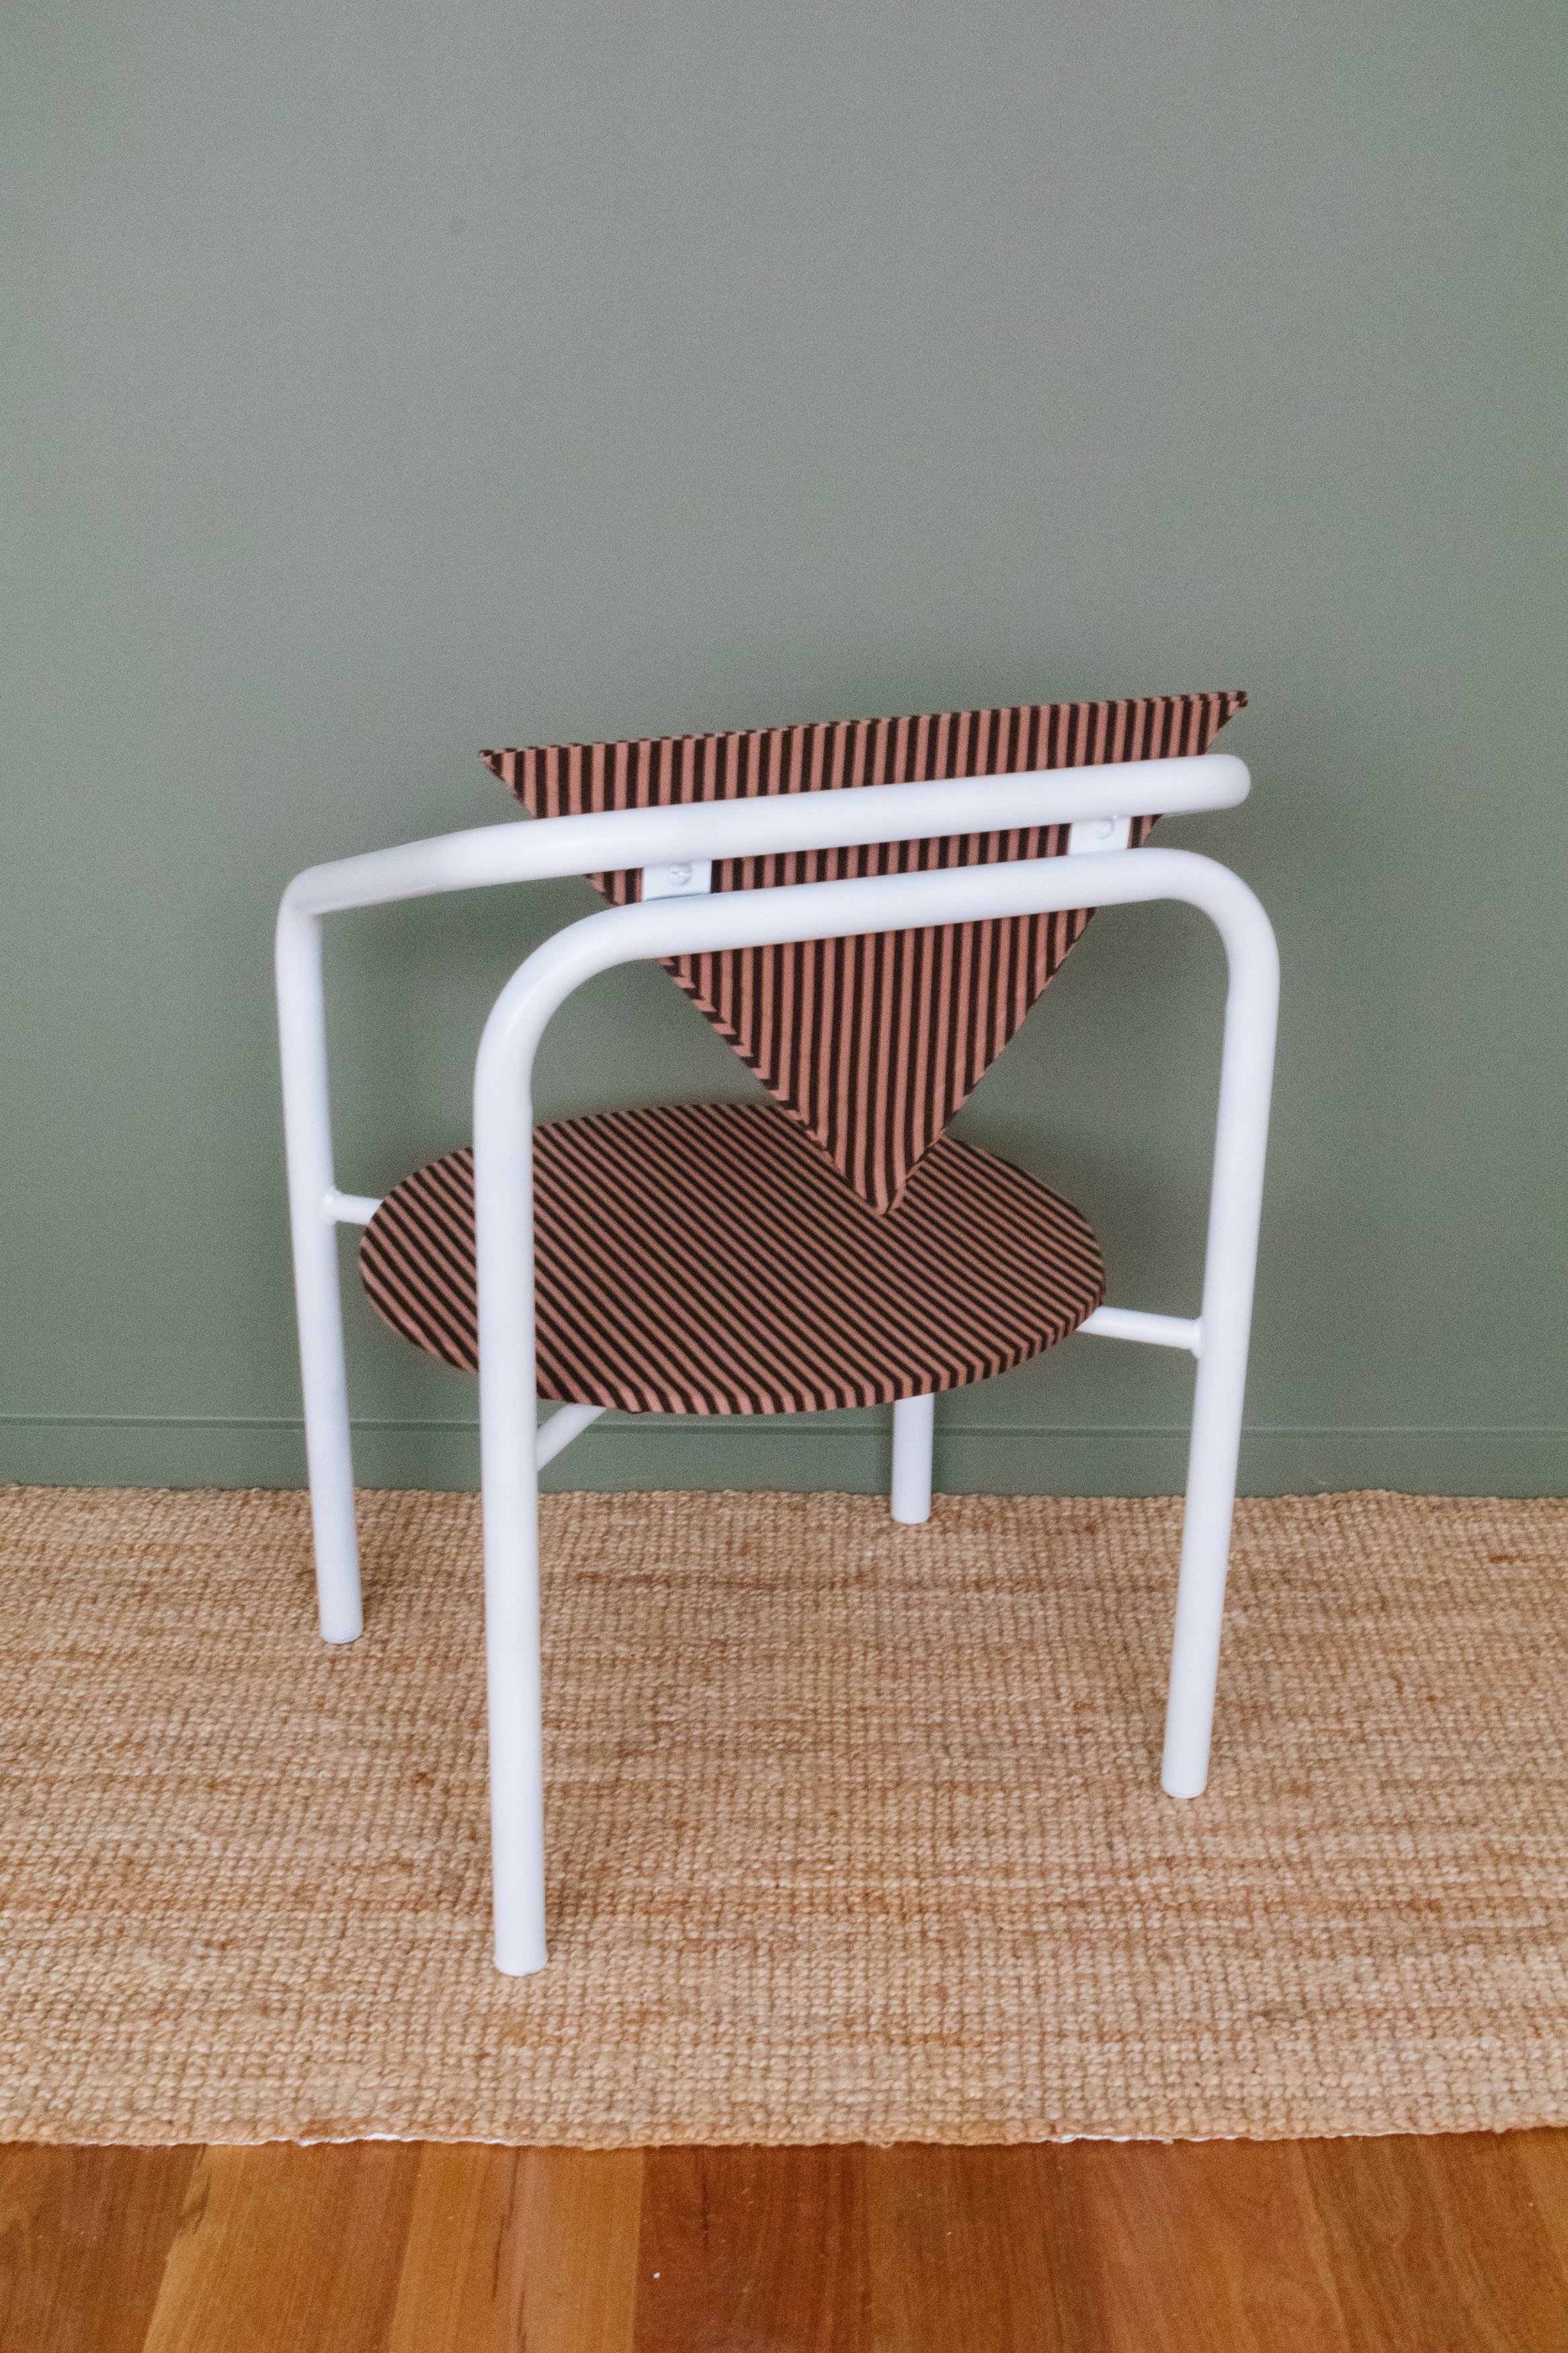
I love the contrast between the thick curved frame with the slimline abstract shapes, It’s always so nice seeing an idea I’ve had for ages come to life. And all it took was finding the right chair, which sometimes takes months even years! I hope this project has inspired you to transform some ugly office chairs and as always, tap the link in my bio for the tutorial.
To see this project come to life check out this video.
Before & After

Project Details
♻️ Making: Upcycled Abstract Chair
🕒 Project Time Estimate: 1 hour
💰 Materials Cost: $100
💡 Inspiration: Modern abstract chairs
Materials
MDF
Fabric
Adhesive spray
Screws
Tools
Drill
Jigsaw
Table clamps
Scissors


How To
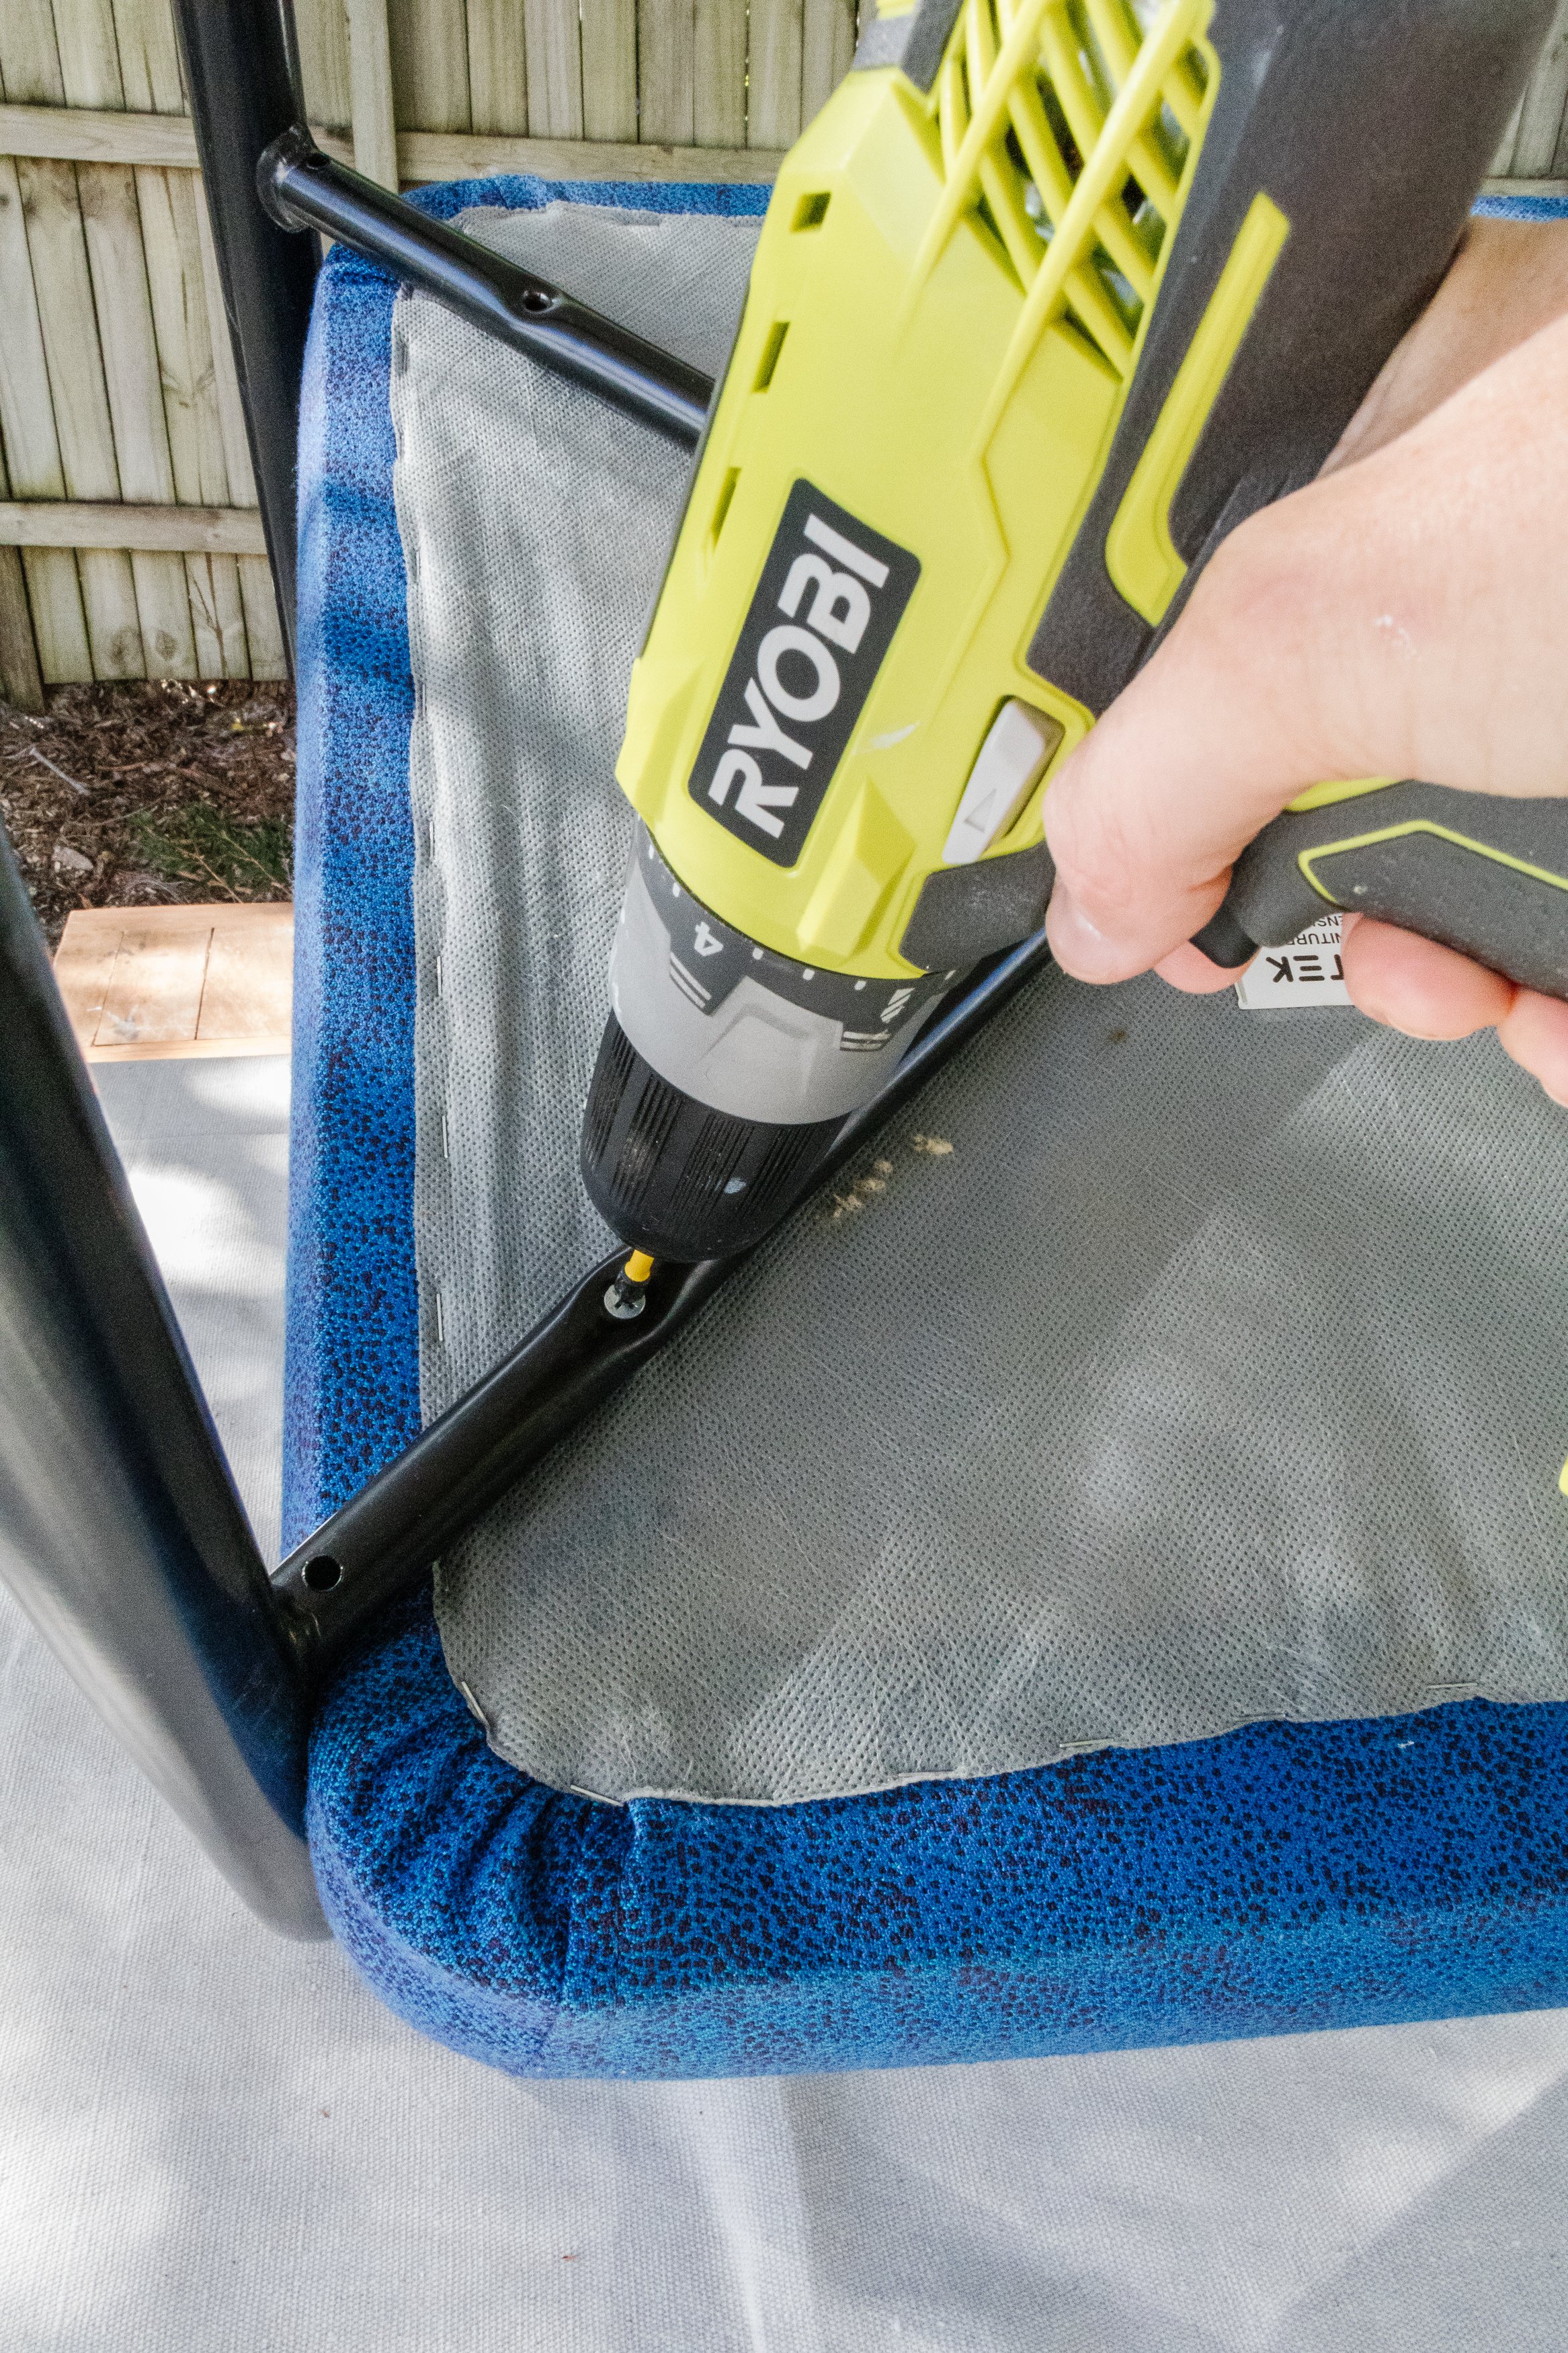
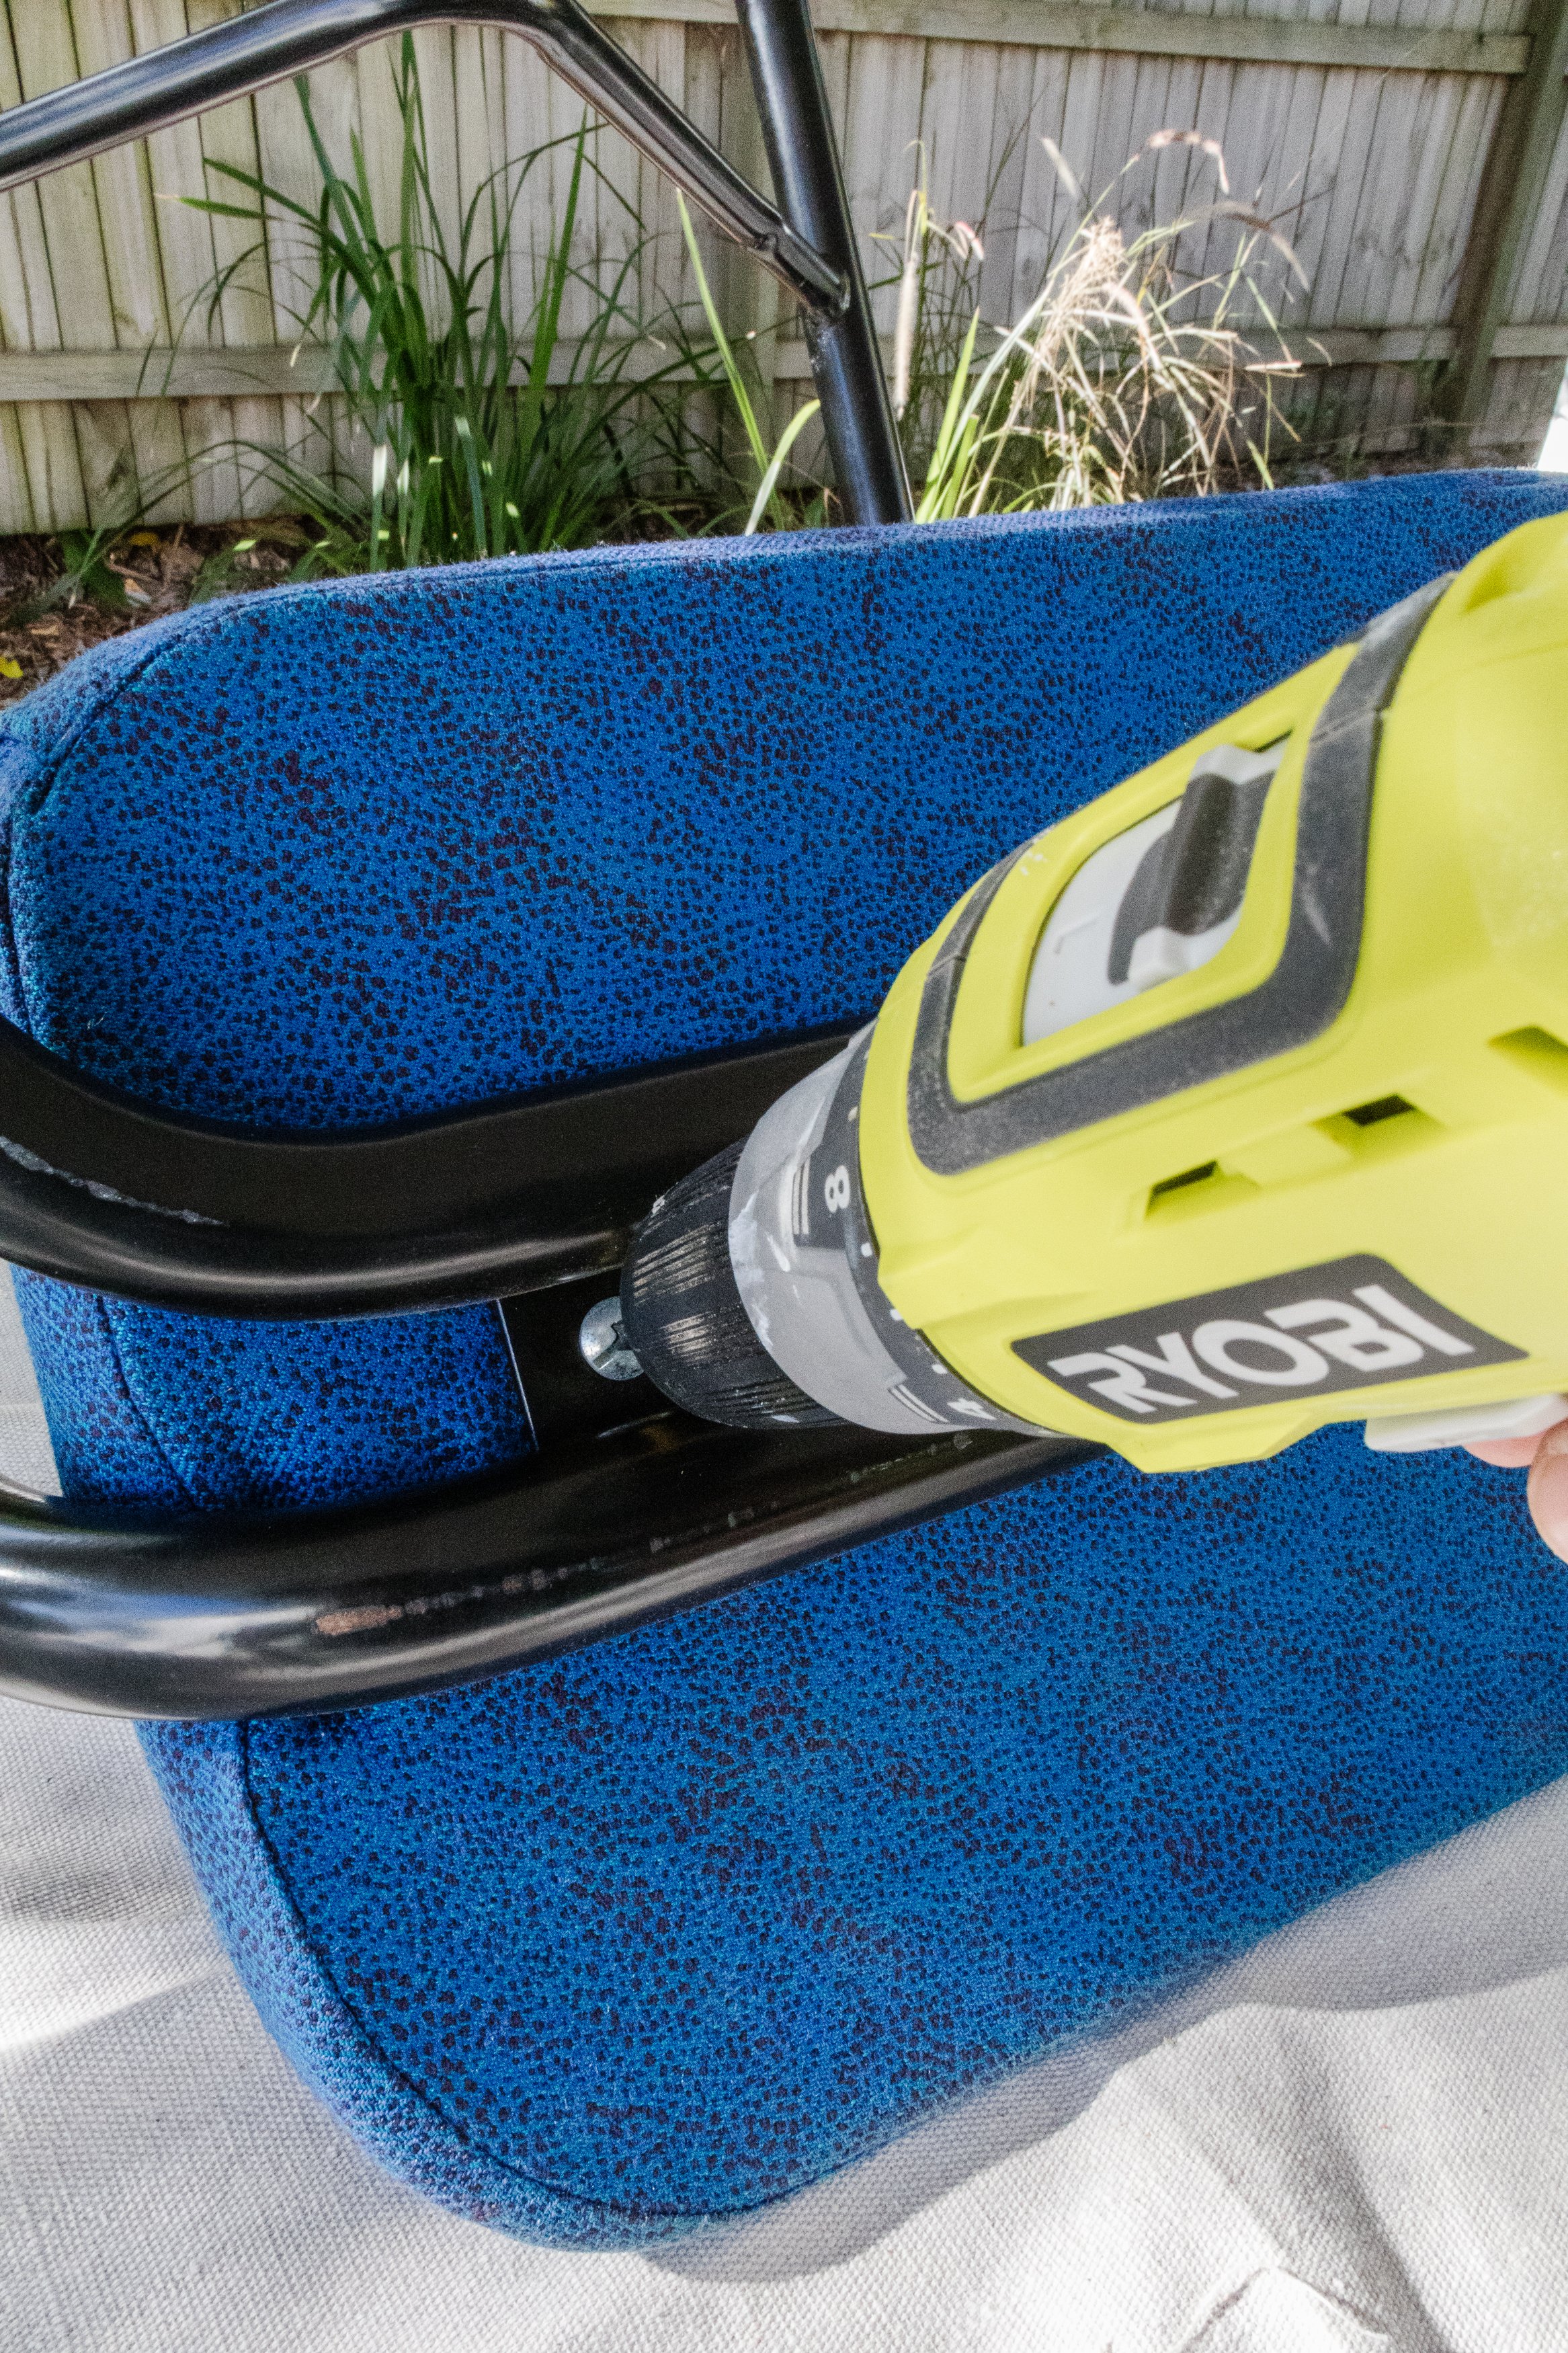
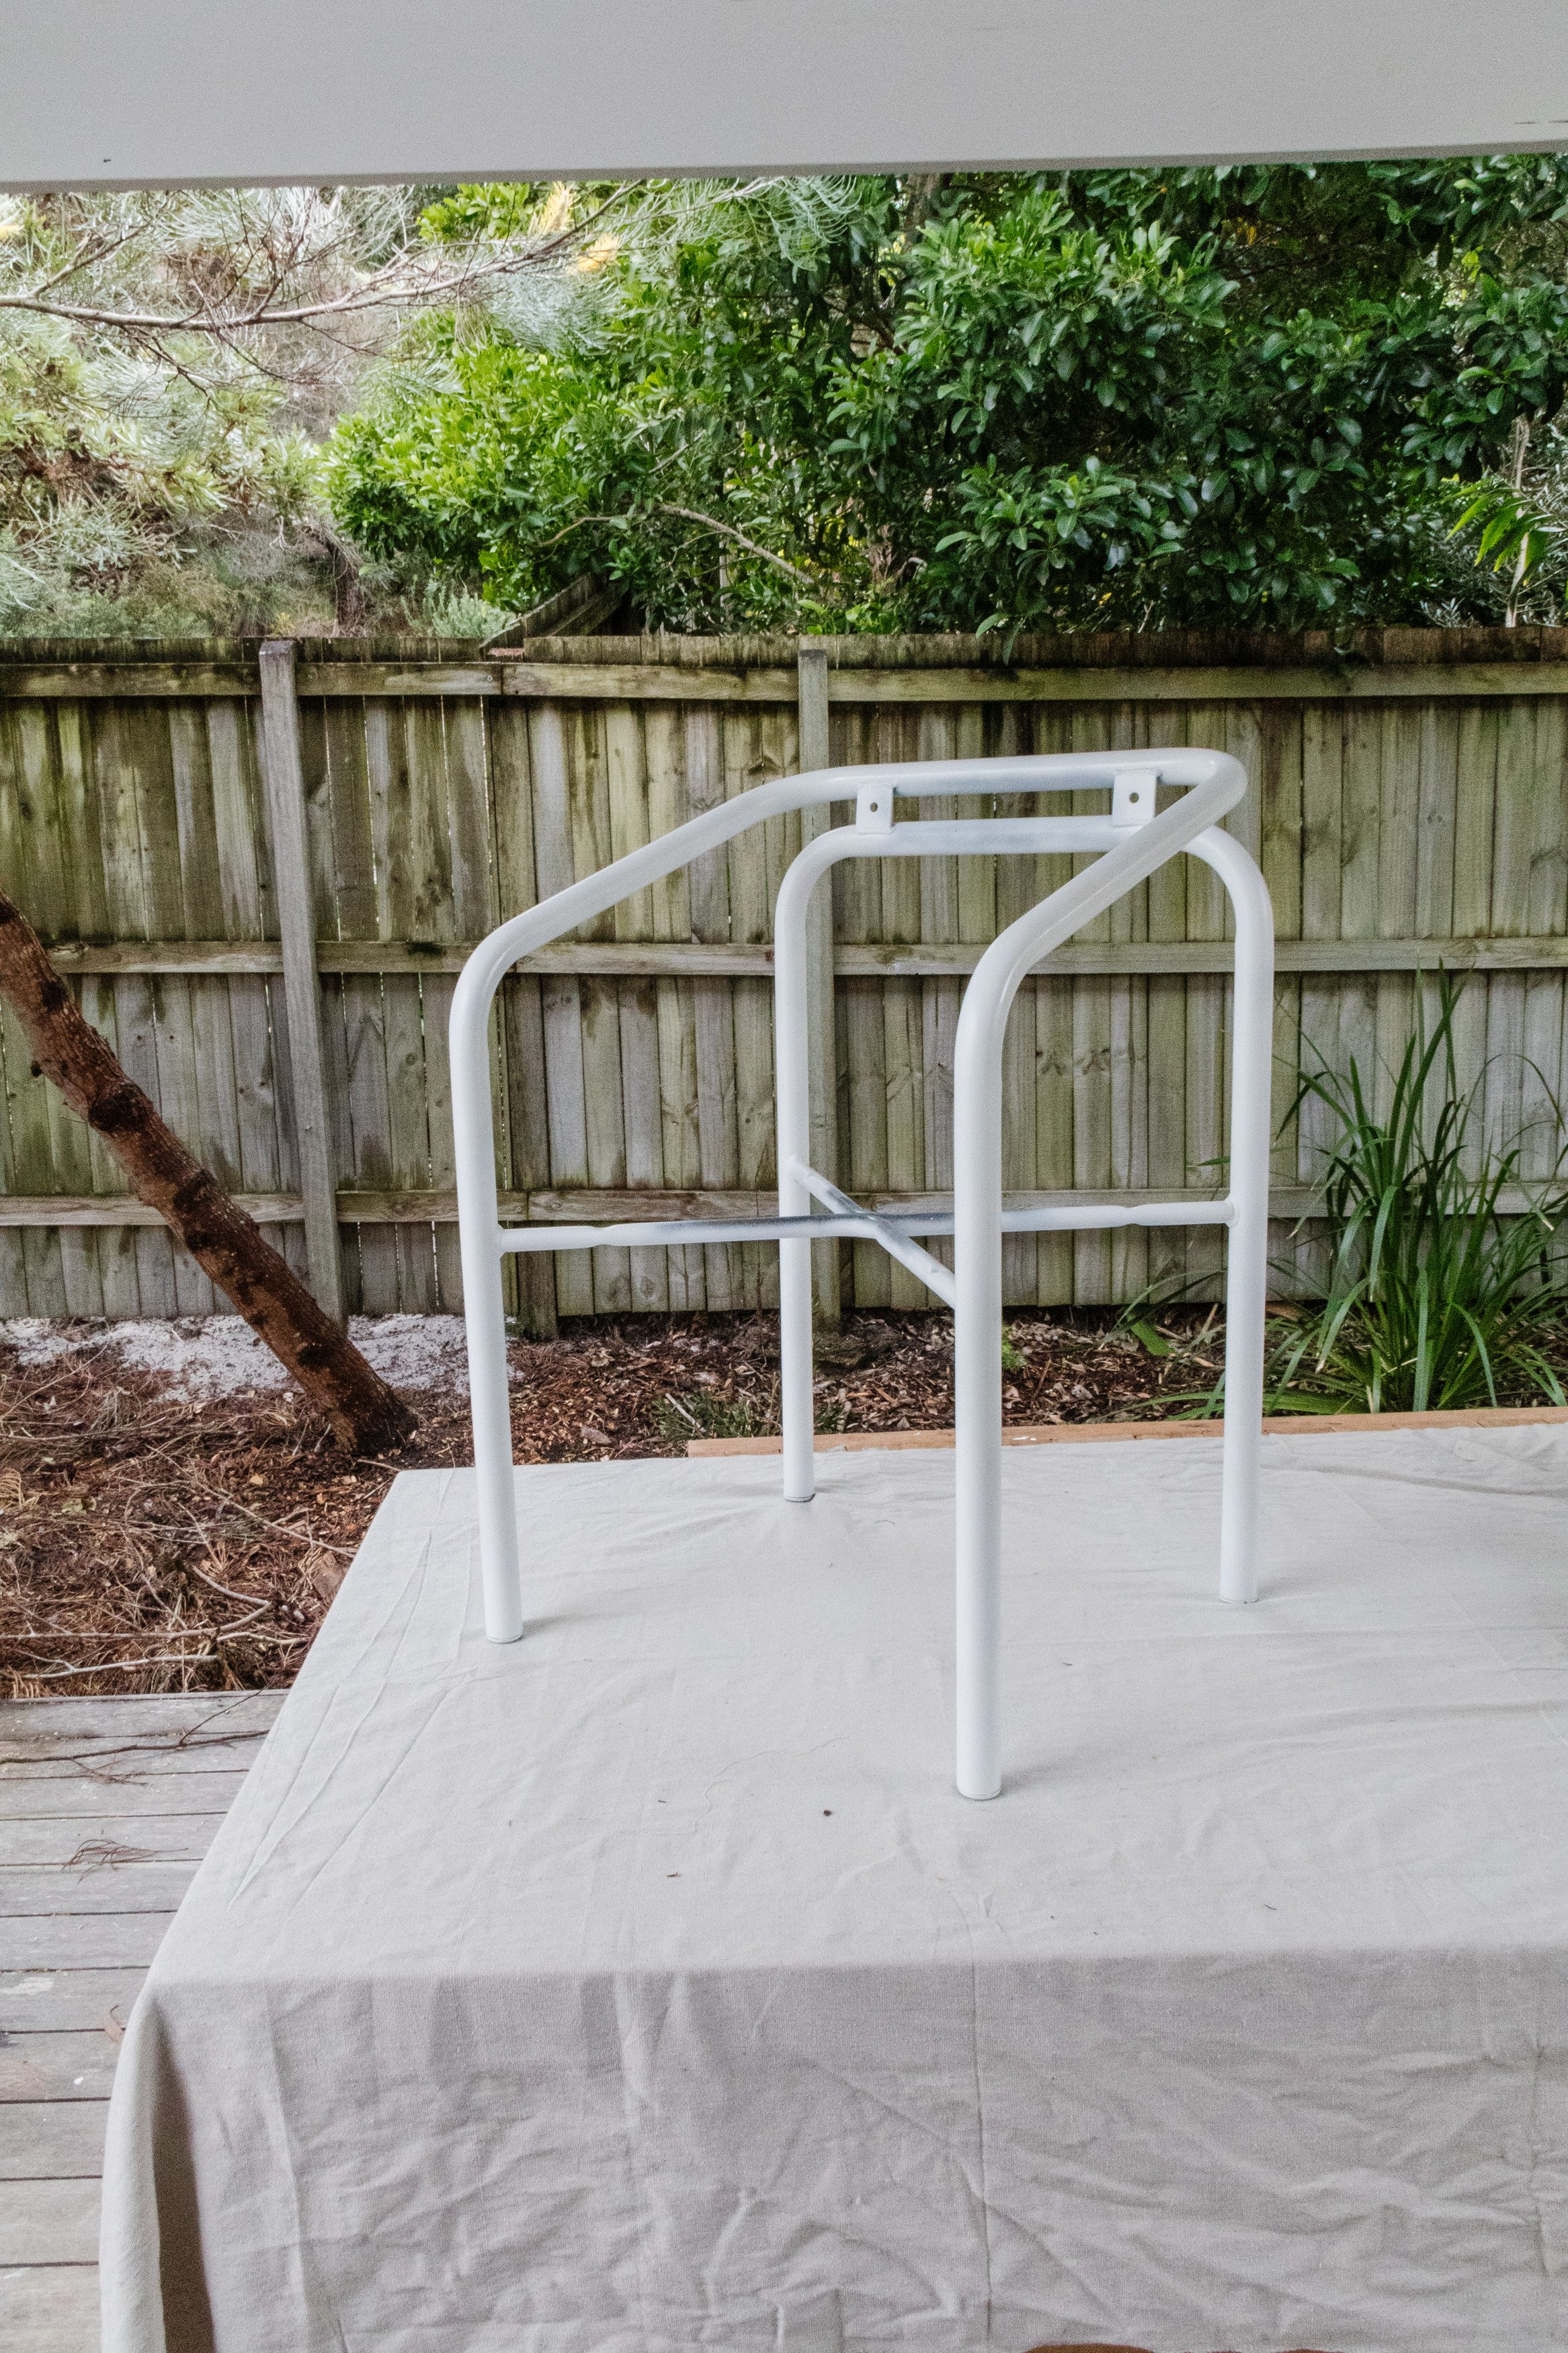
Step 1: I removed the seat and back cushions from the chair using my drill.
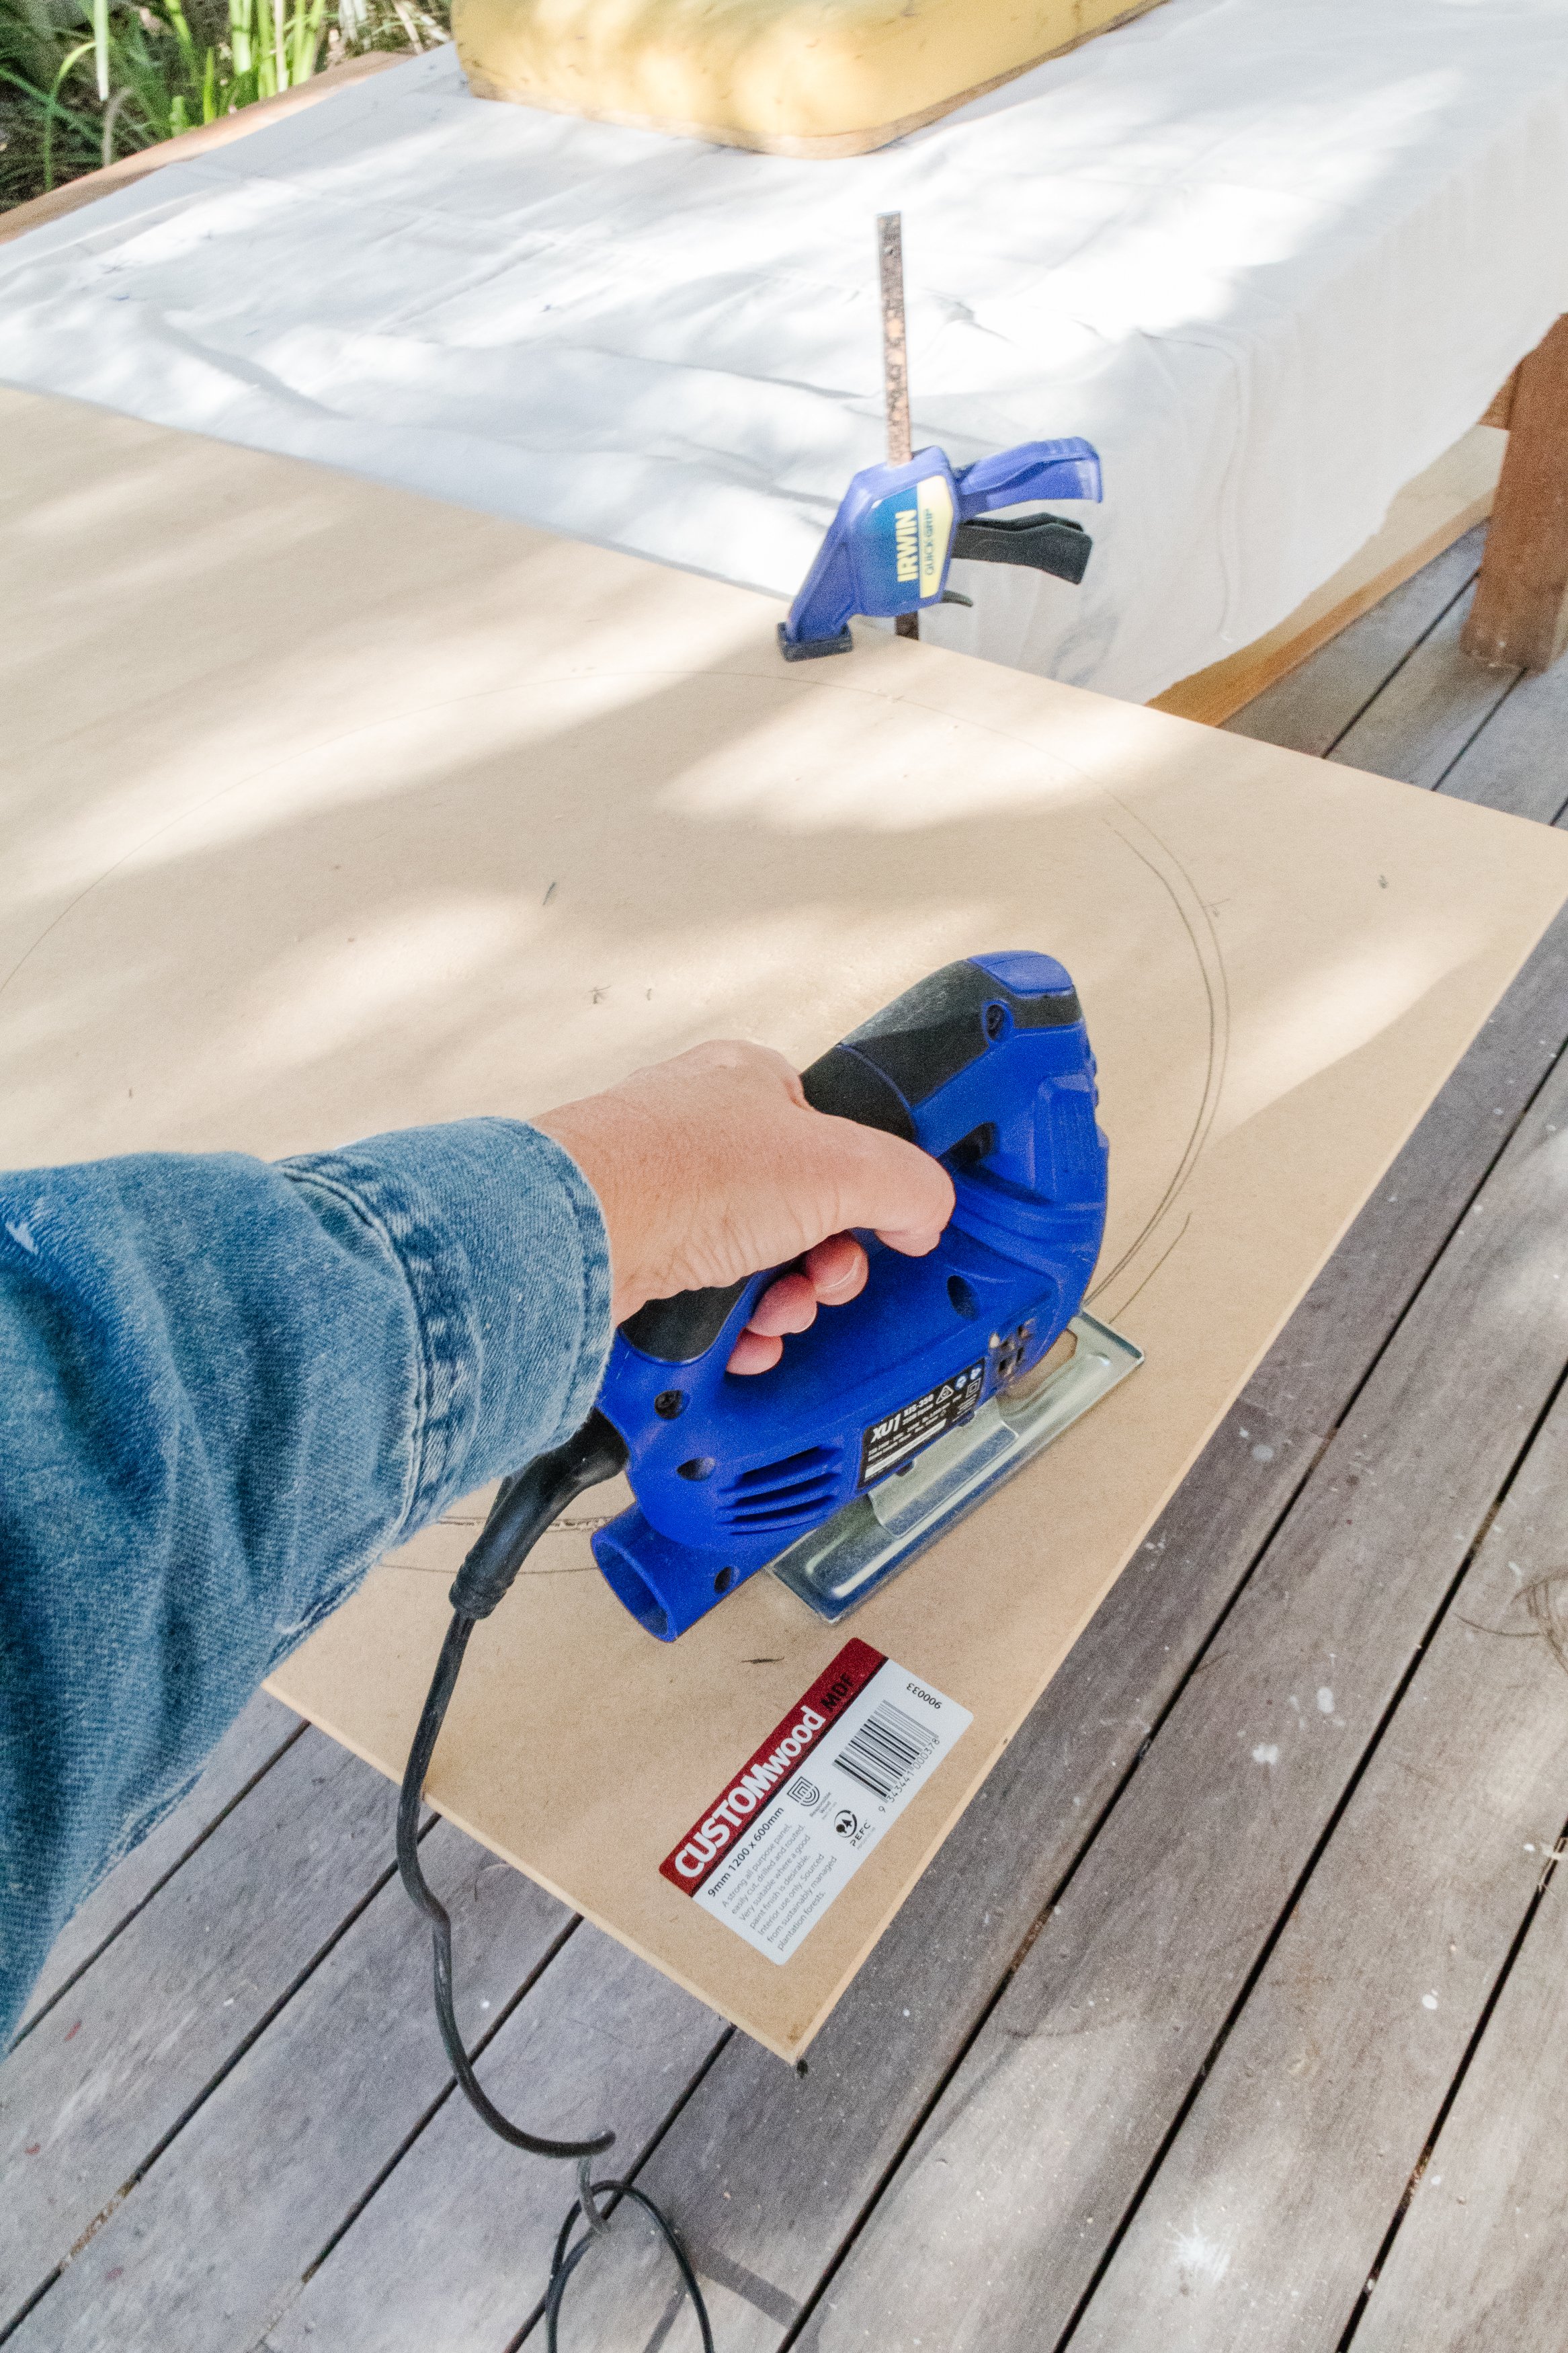
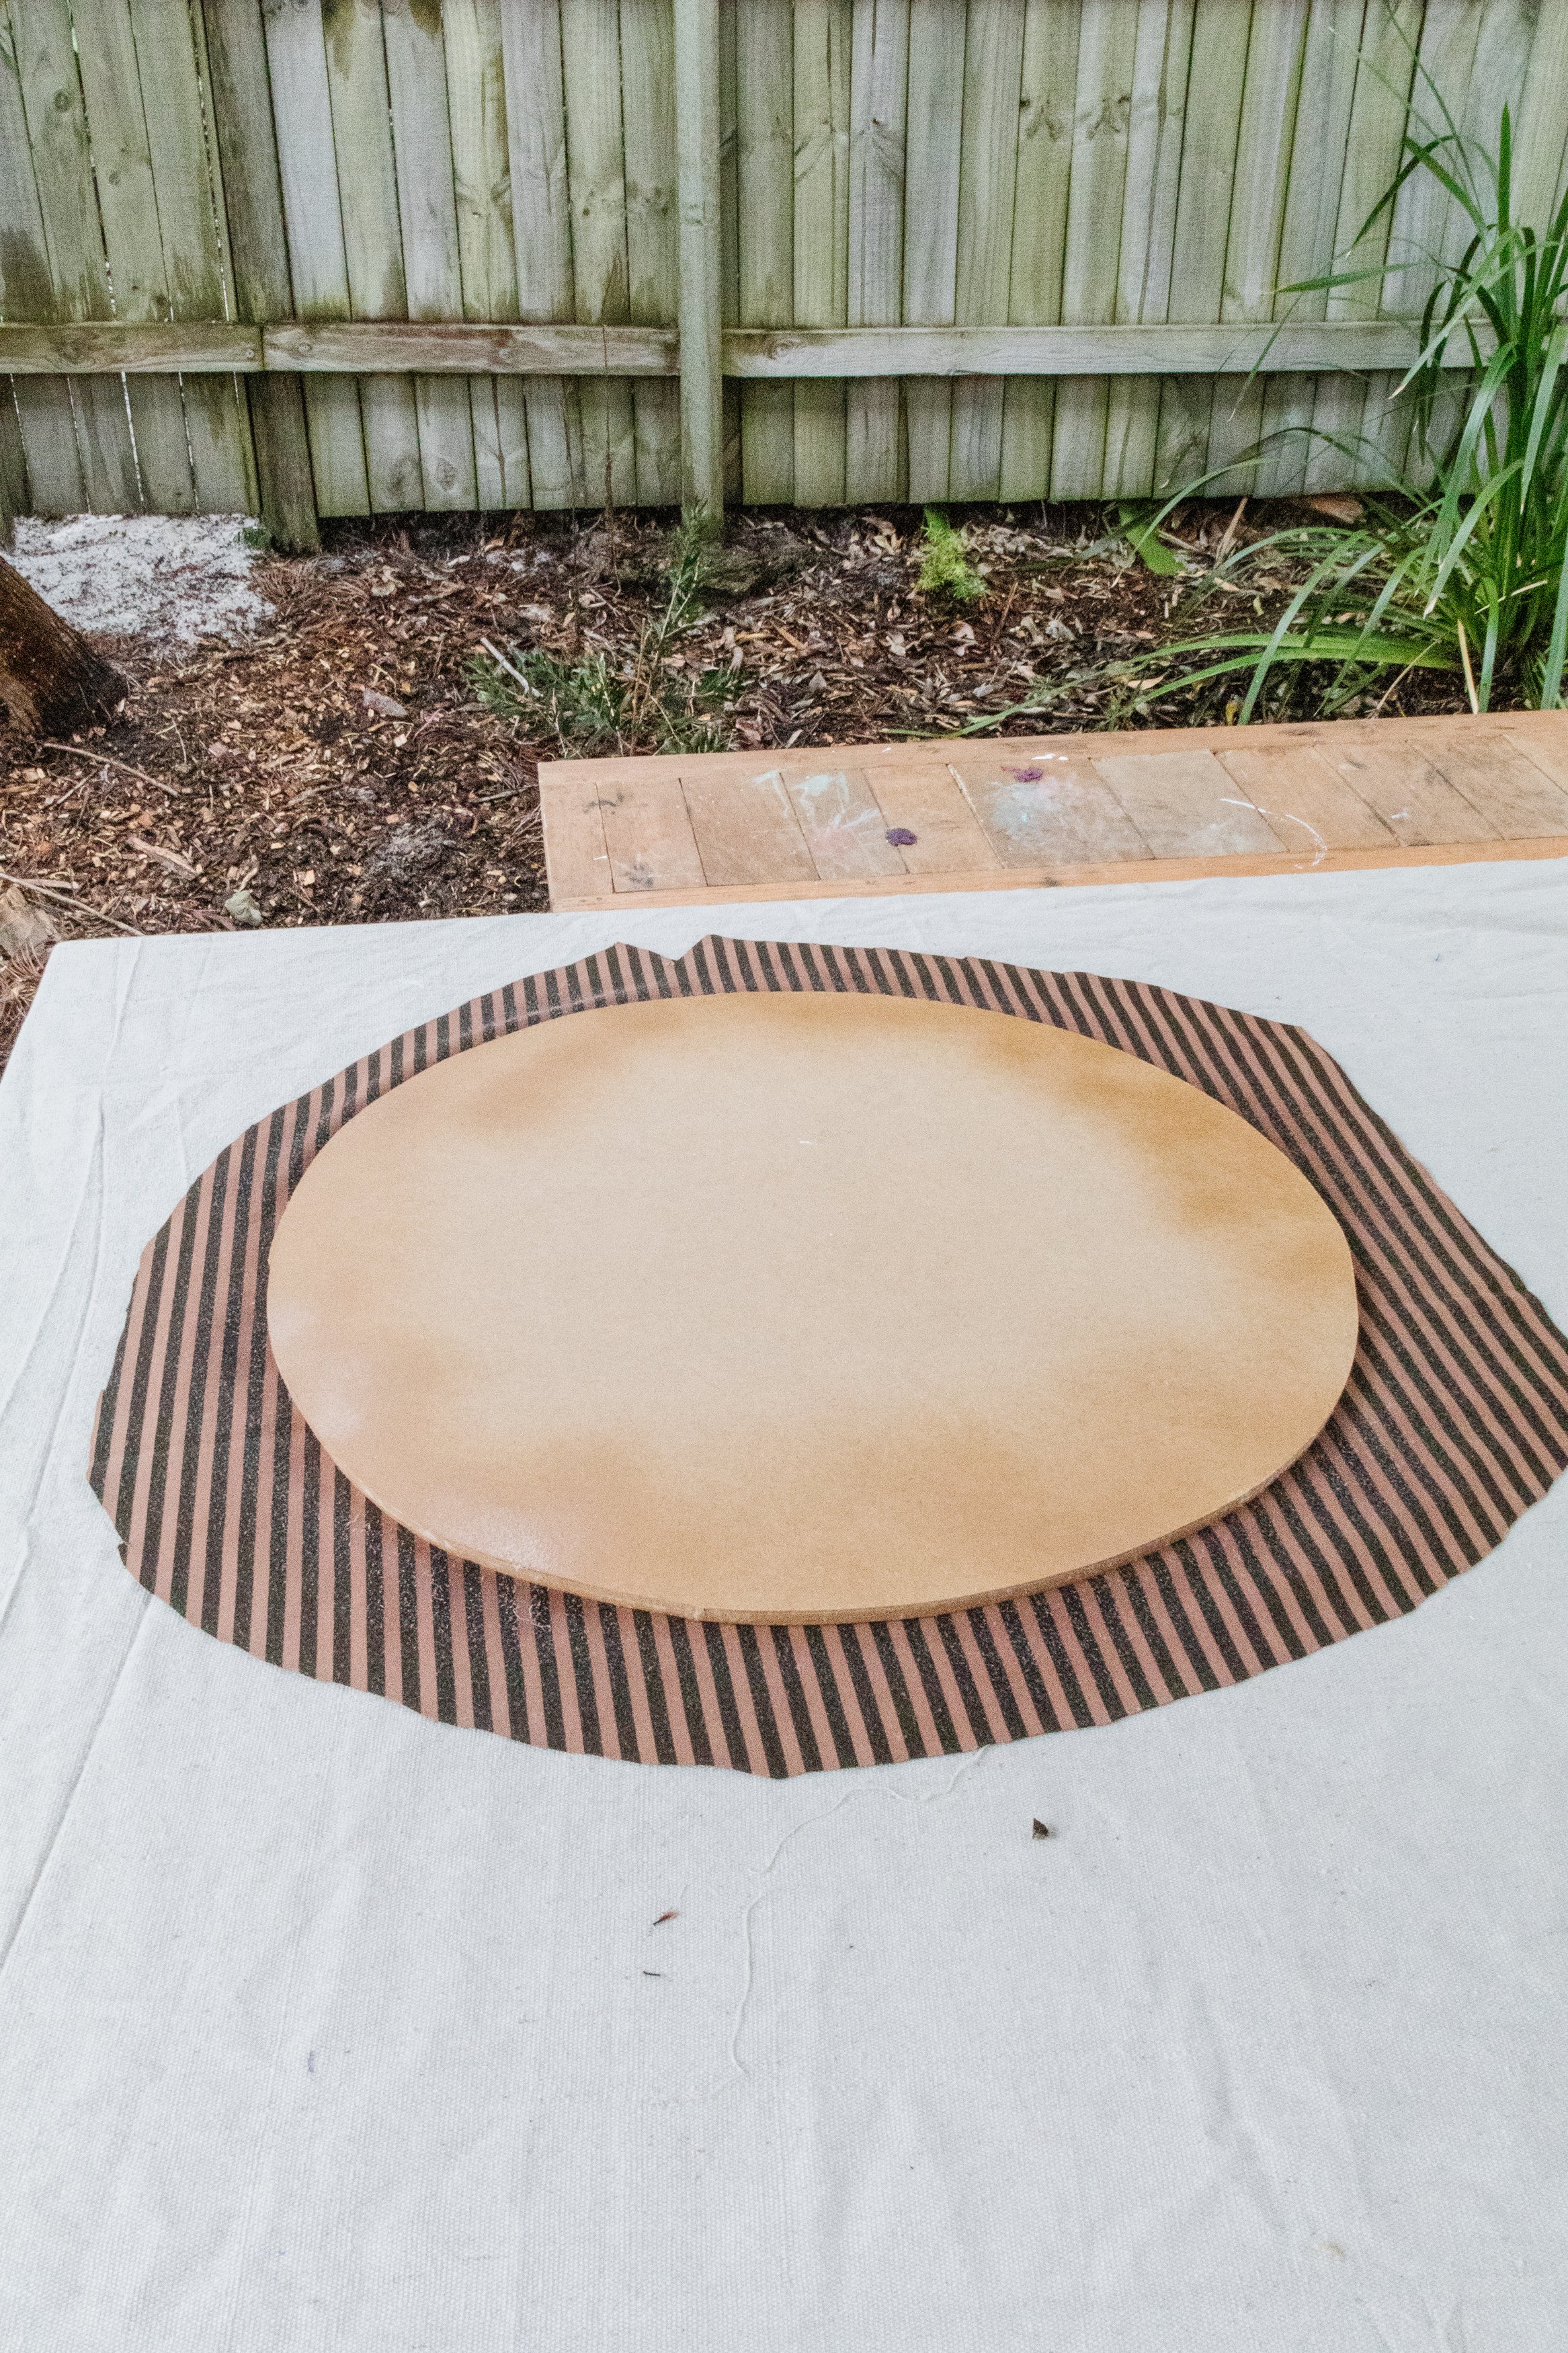
Step 2: I measured the frame to work out how big I could make the circle for the seat and the triangle, for the back which I cut using a piece of MDF clamped to my work bench and a jigsaw.
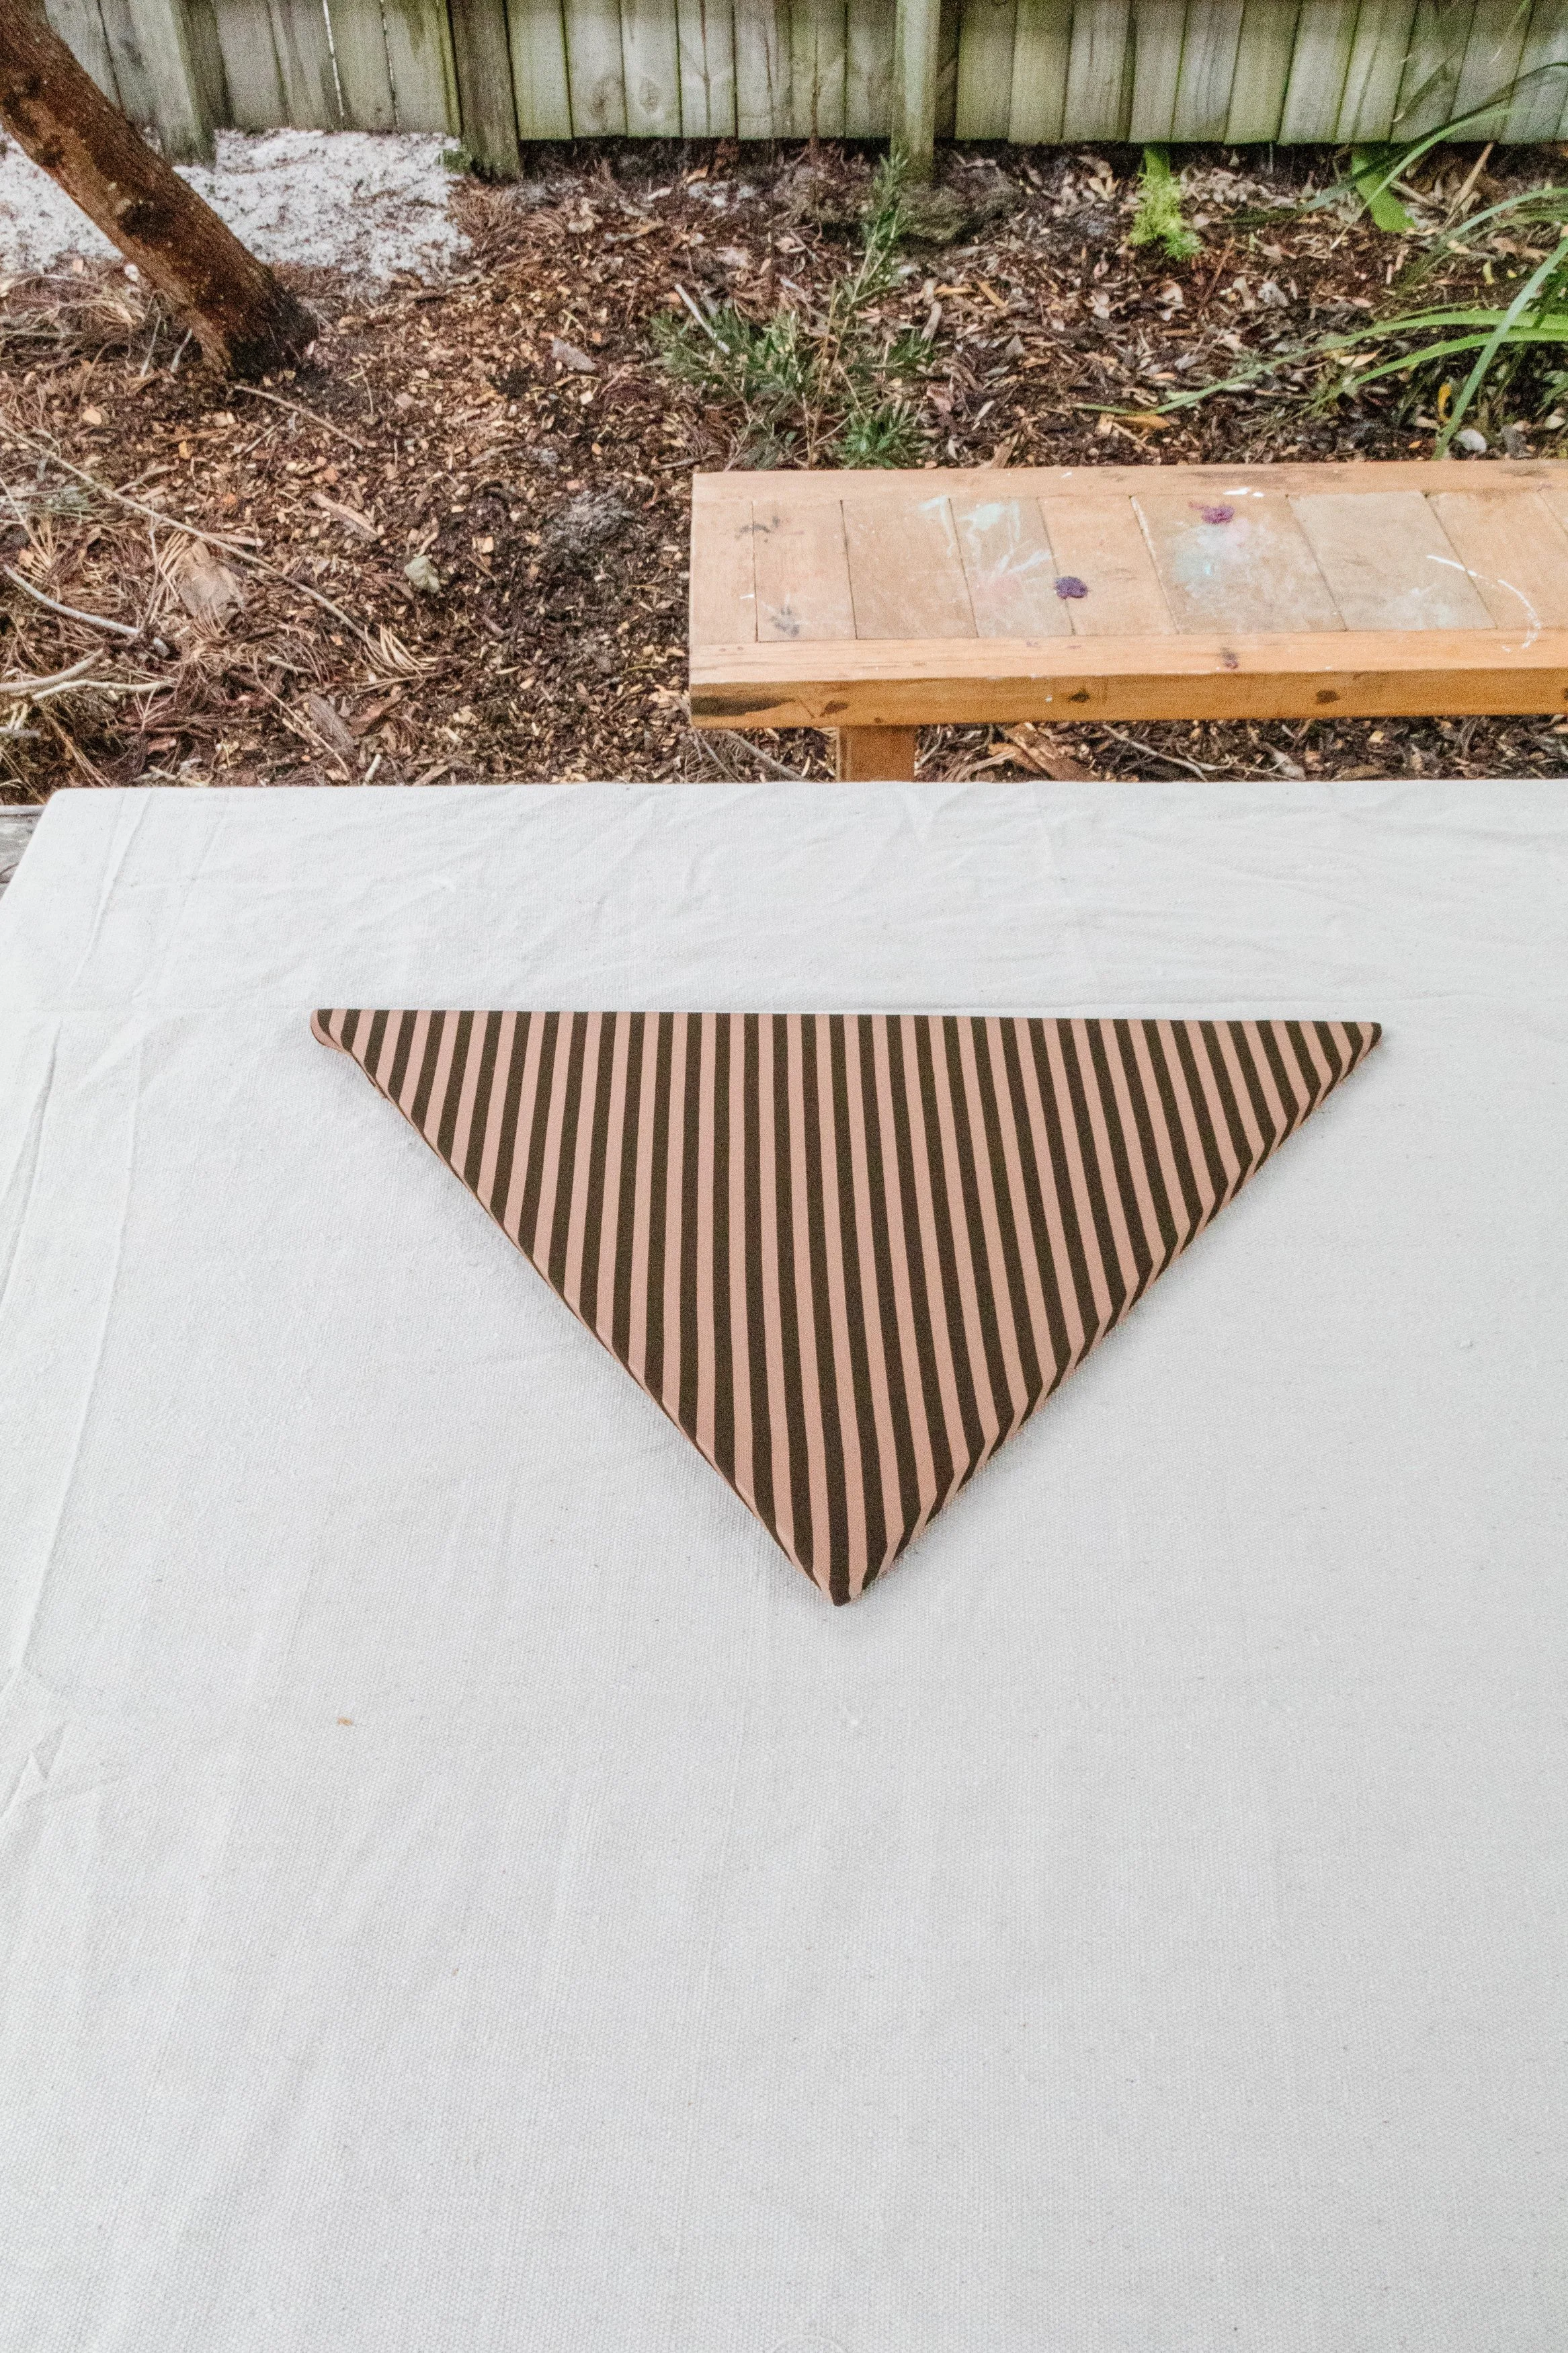
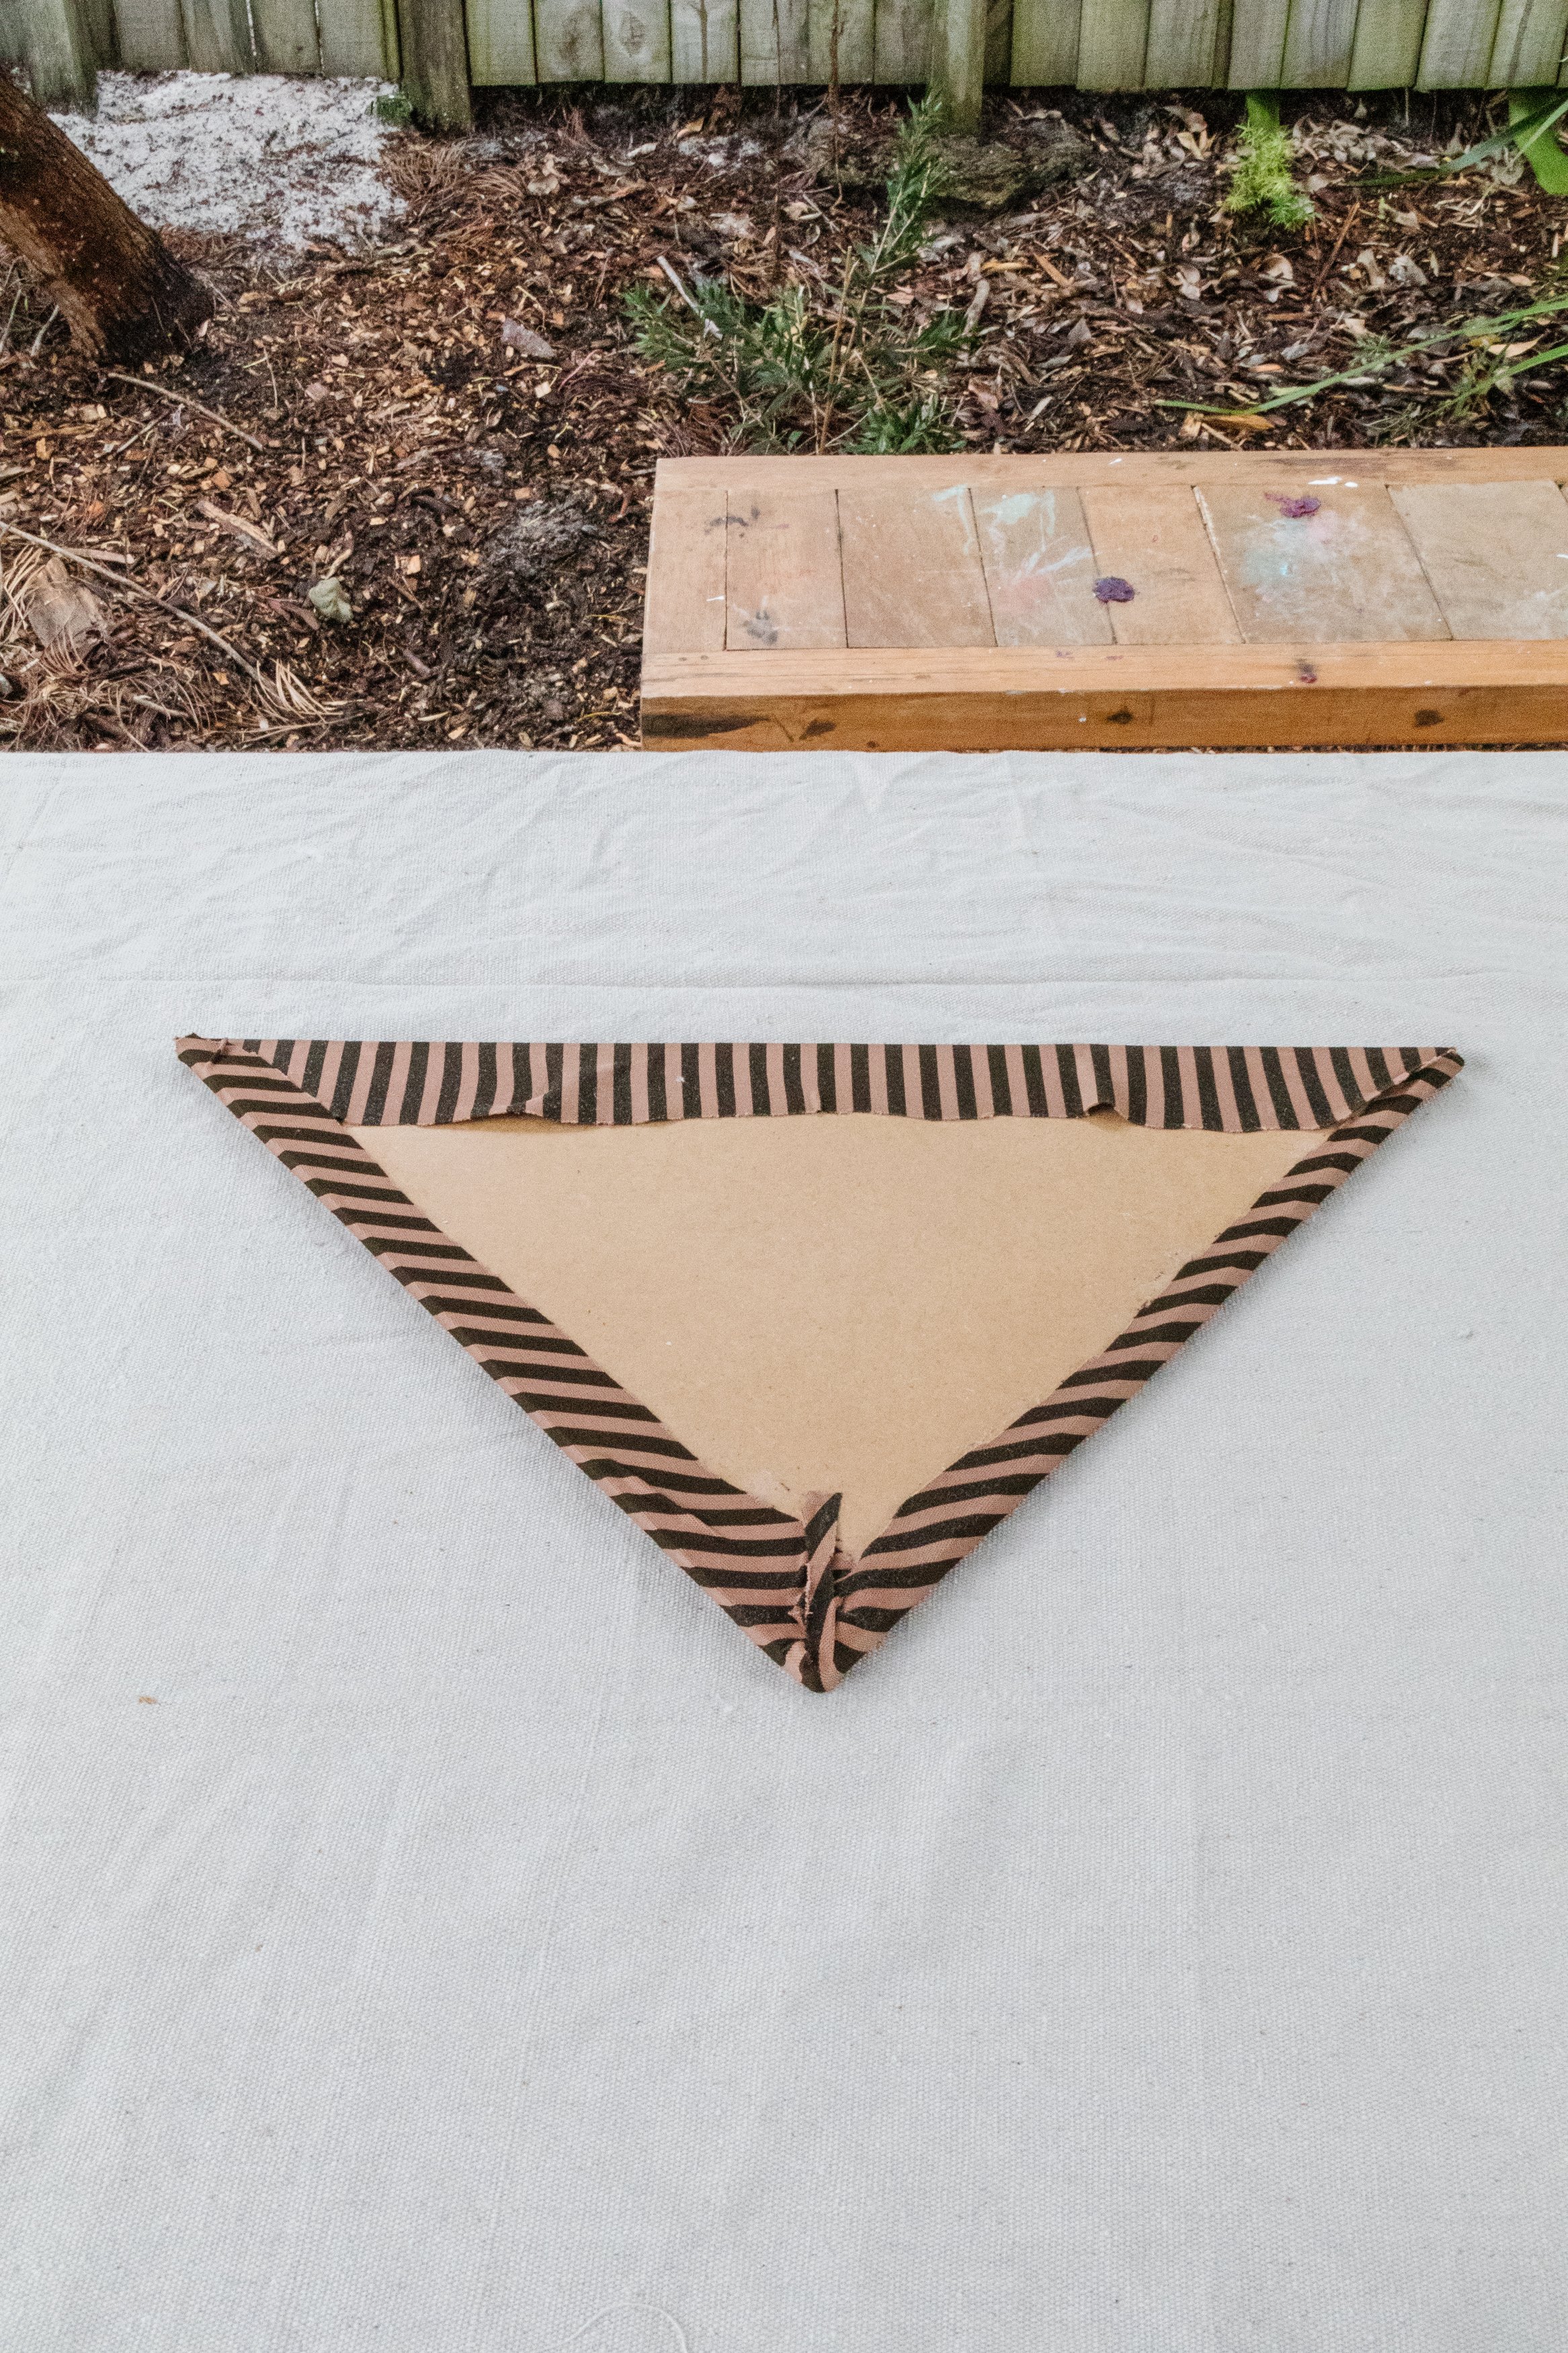
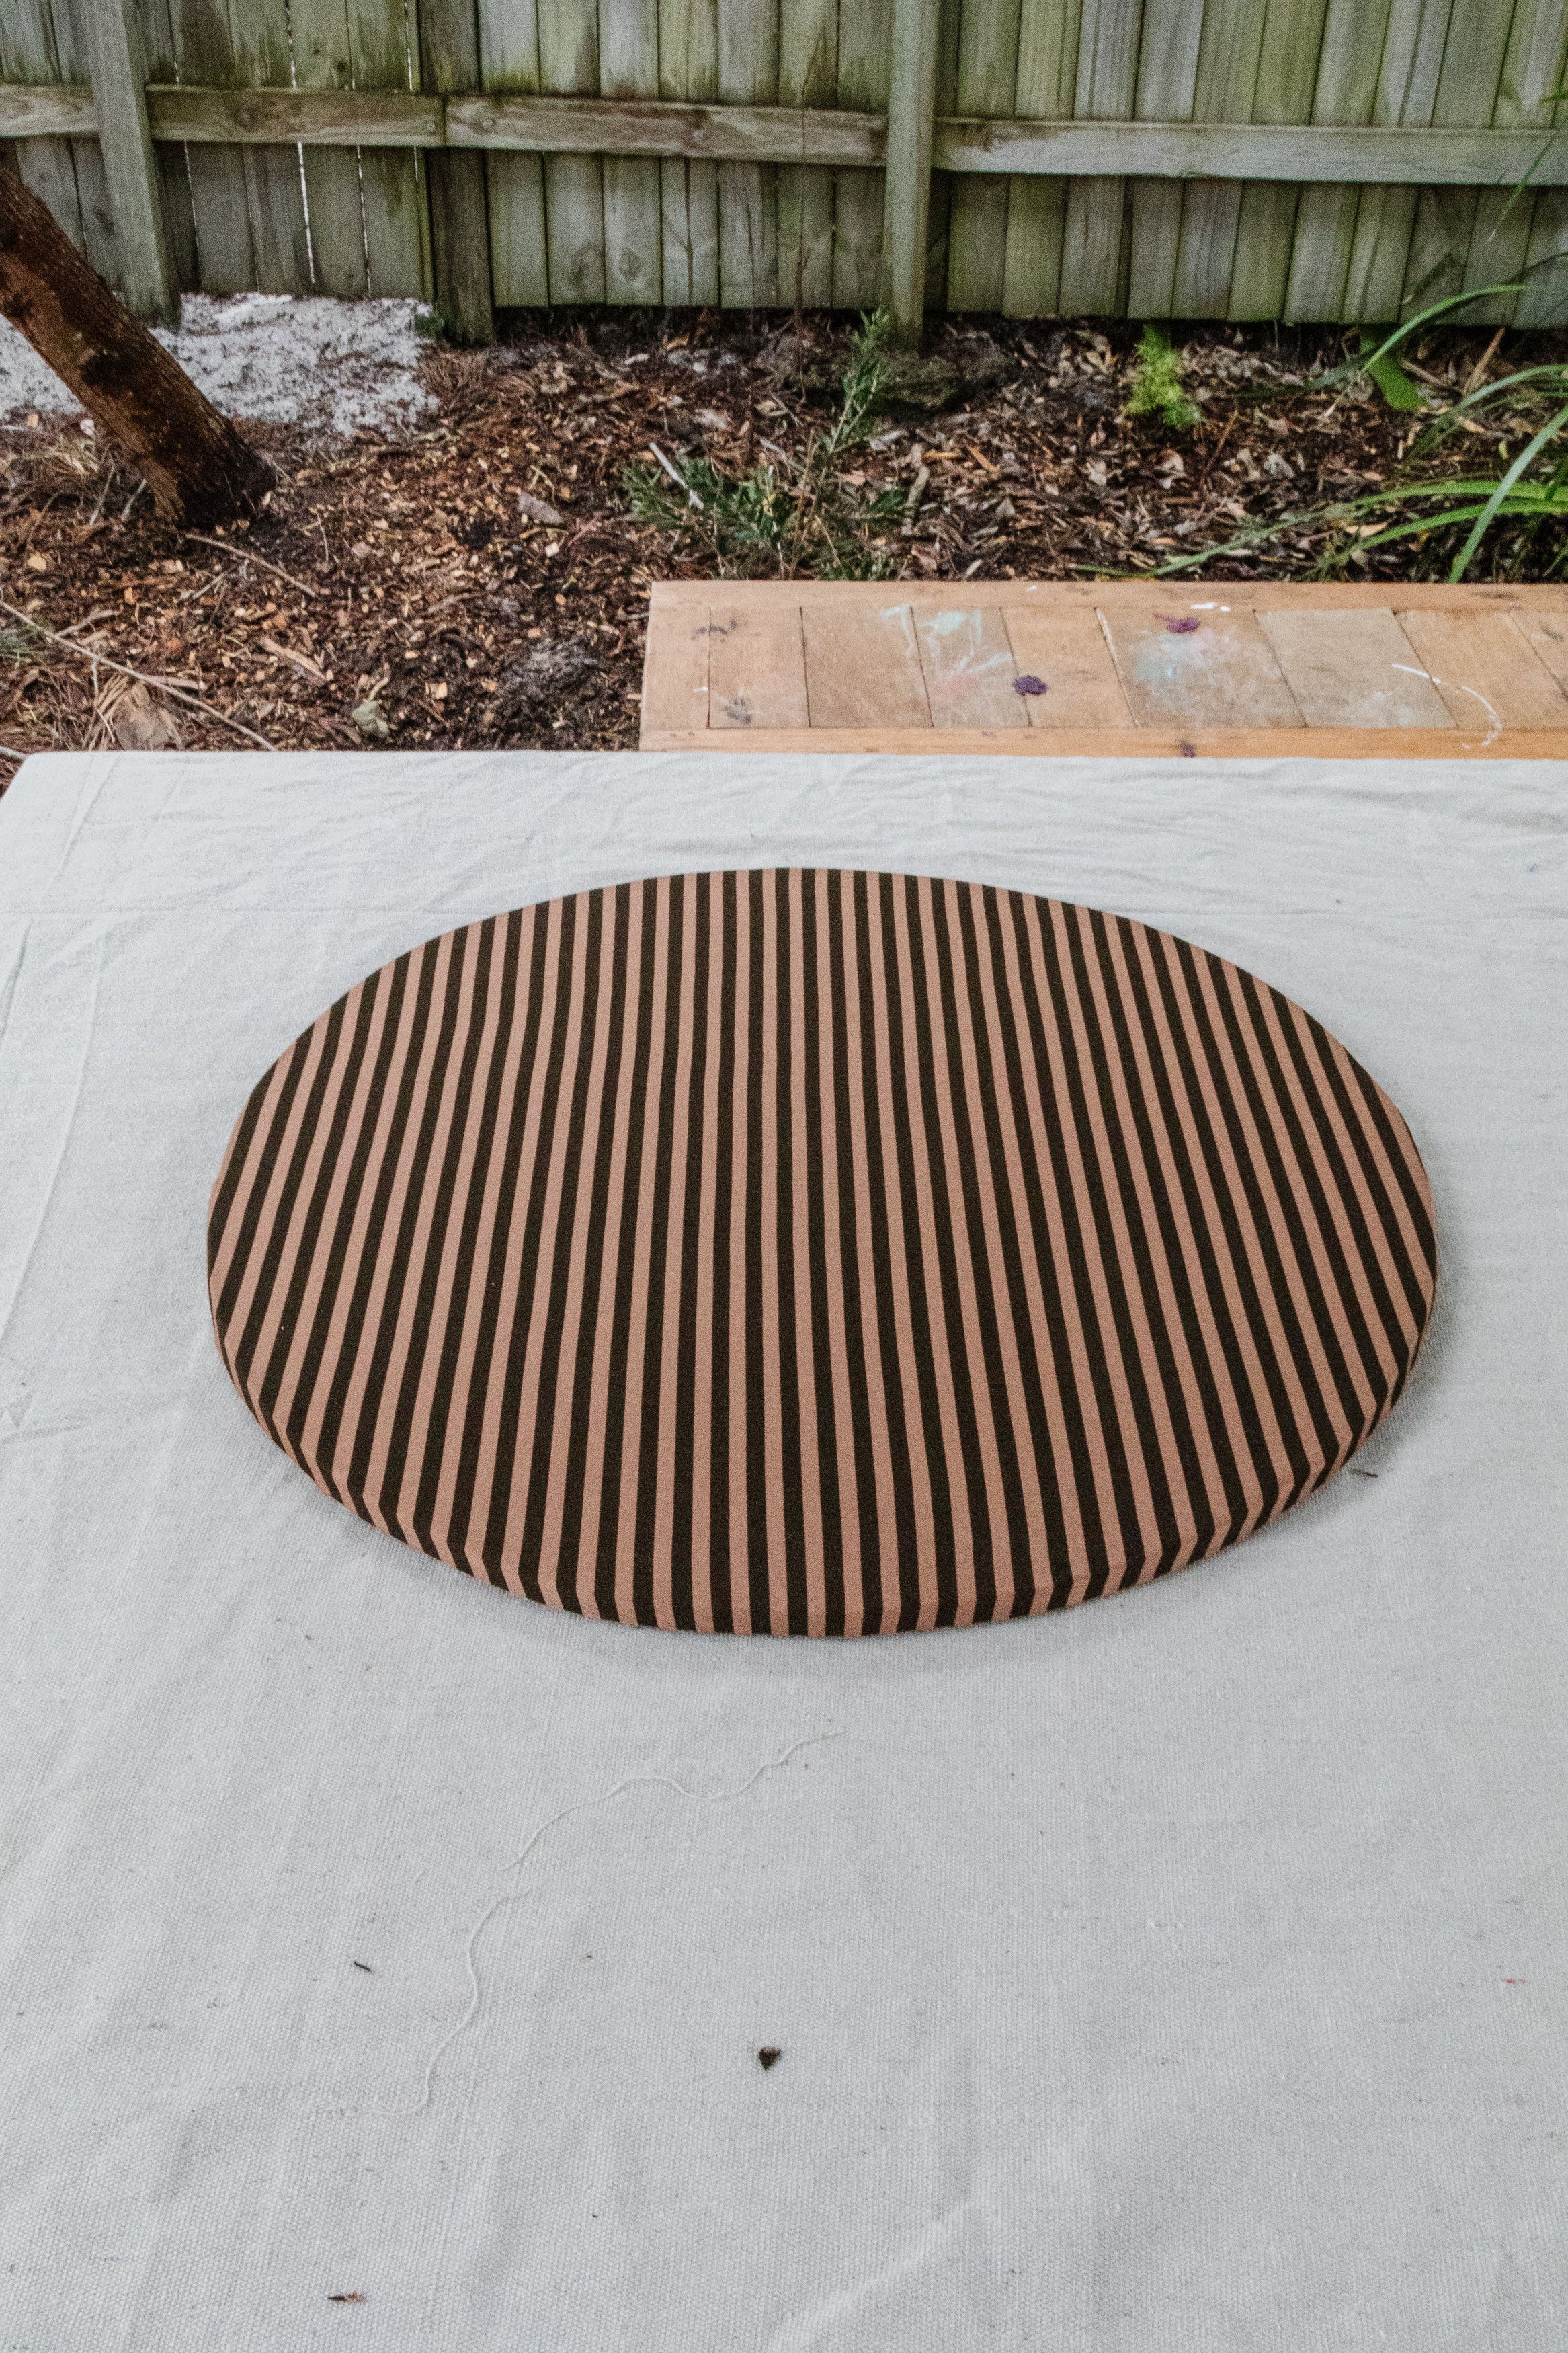
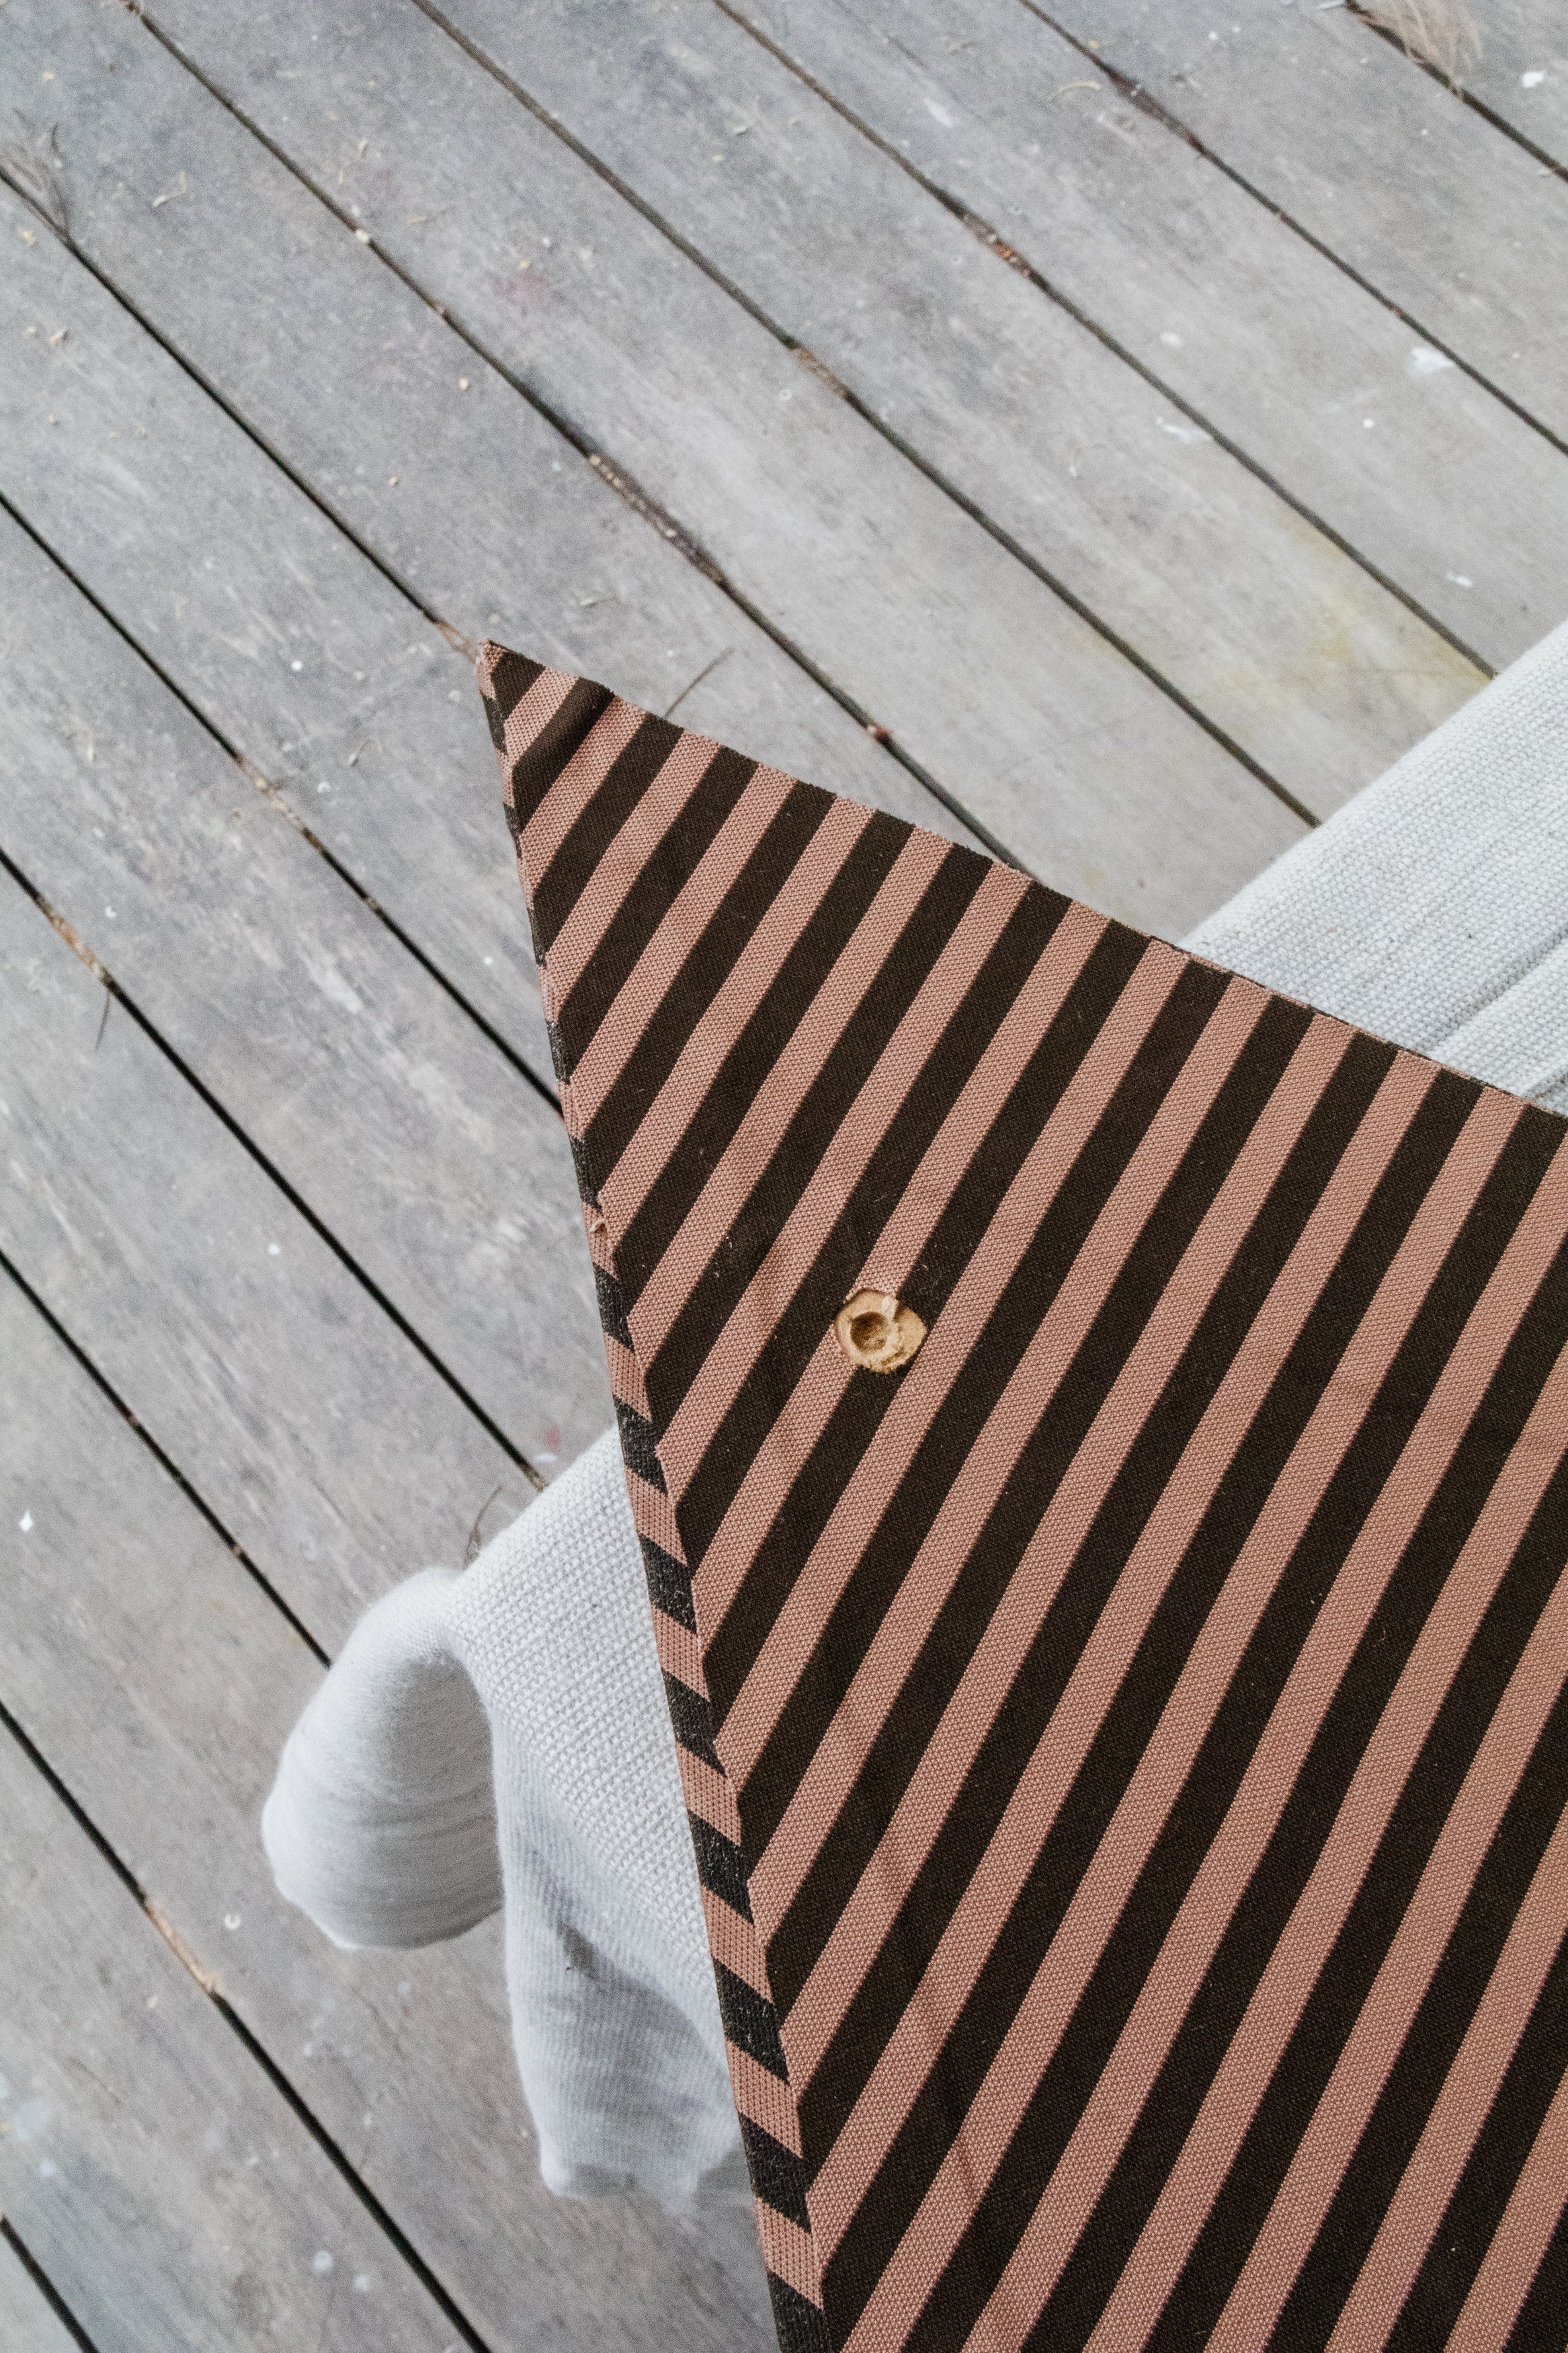
Step 3: I cut the fabric to size and using adhesive spray, I glued it to the shapes. I glued one side down and folded the edges over, and repeated this on the other side. I also made sure the stripes were positioned vertically.
Step 4: I used new, smaller screws to drill the fabric covered MDF back onto the chair. And that’s it!


Ta daaaa!
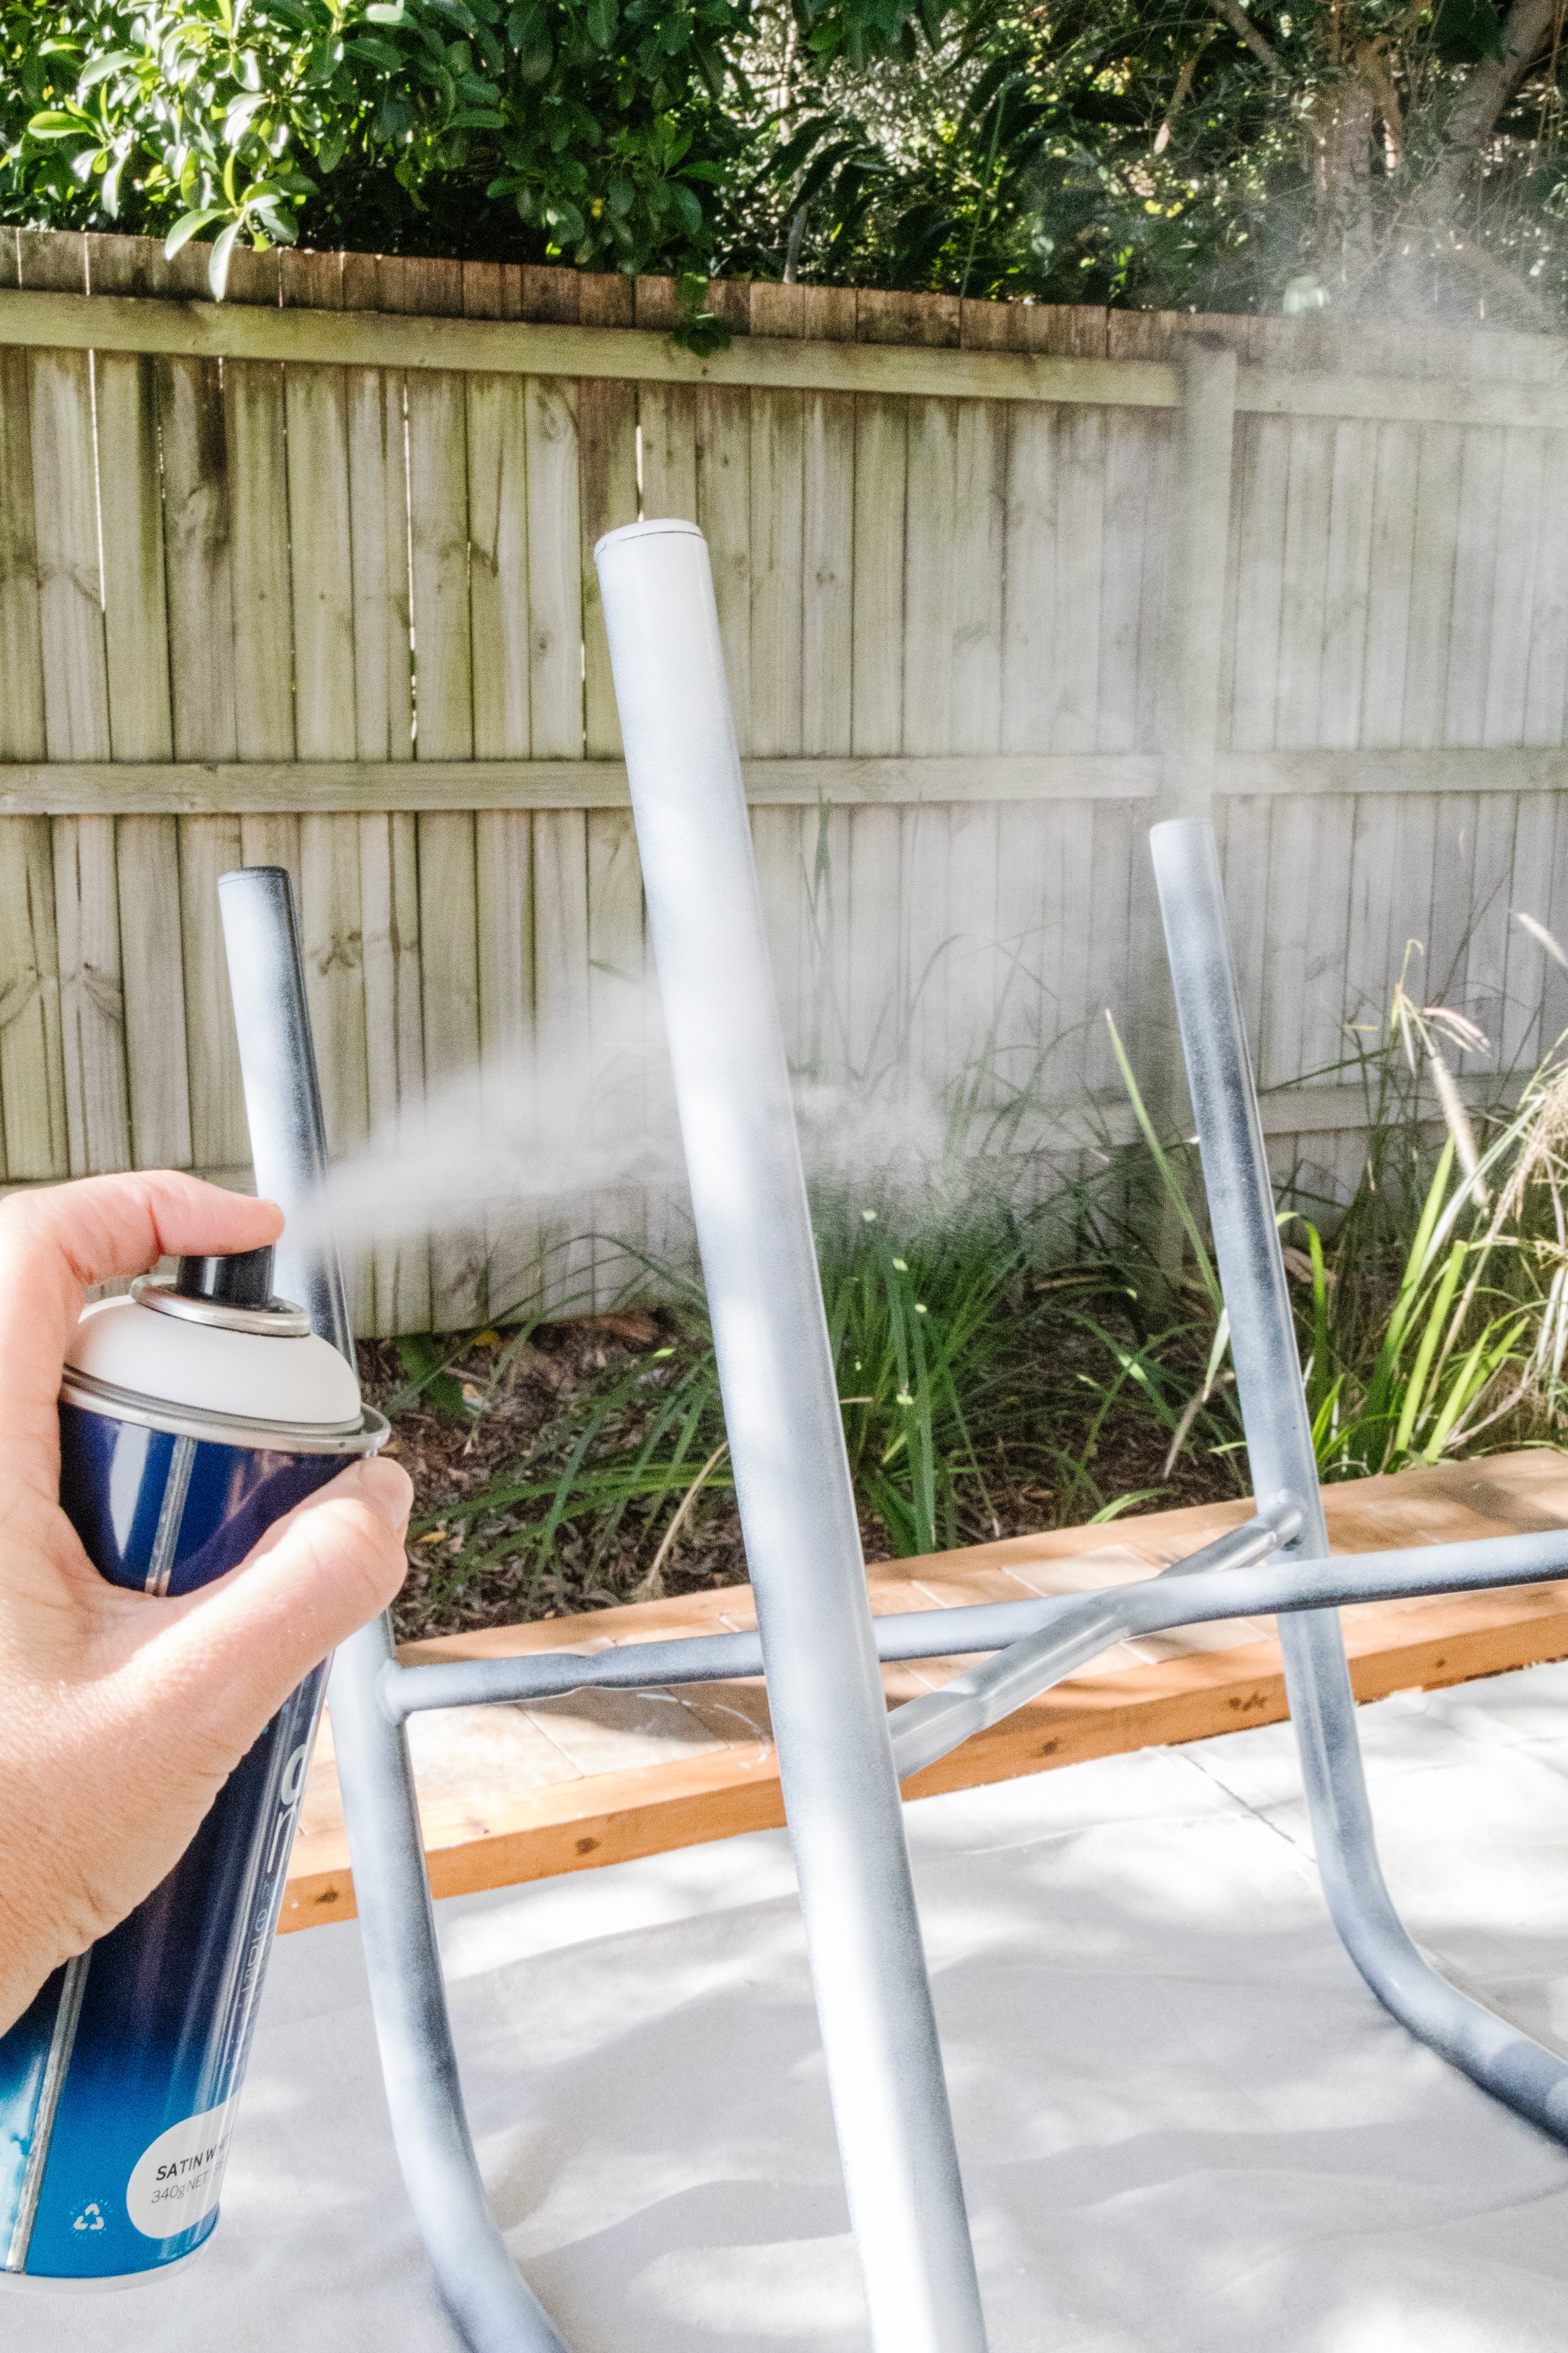
It’s always so nice seeing an idea I’ve had for ages come to life. And all it took was finding the right chair to make it happen, which sometimes takes months - even a year! I always knew the frame would look a LOT better if it was white (instead of black) and while I sadly wasn’t able to reuse the existing cushions, I realised that I was actually a lot happier with the design using thinner MDF. There’s just something special about the contrast between the thick, curvy frame and the thin MDF, as well as the contrast between the stark white frame and the warm brown tones in the striped fabric. Honestly, I am obsessed with this project! Can you imagine 6 of these around a dining table? So lush! I hope this project has inspired you to transform some ugly office chairs you come across on your own thrifting adventures.