How To: Upcycled Plaster Dining Chairs
Transform $5 dining chairs using plaster!
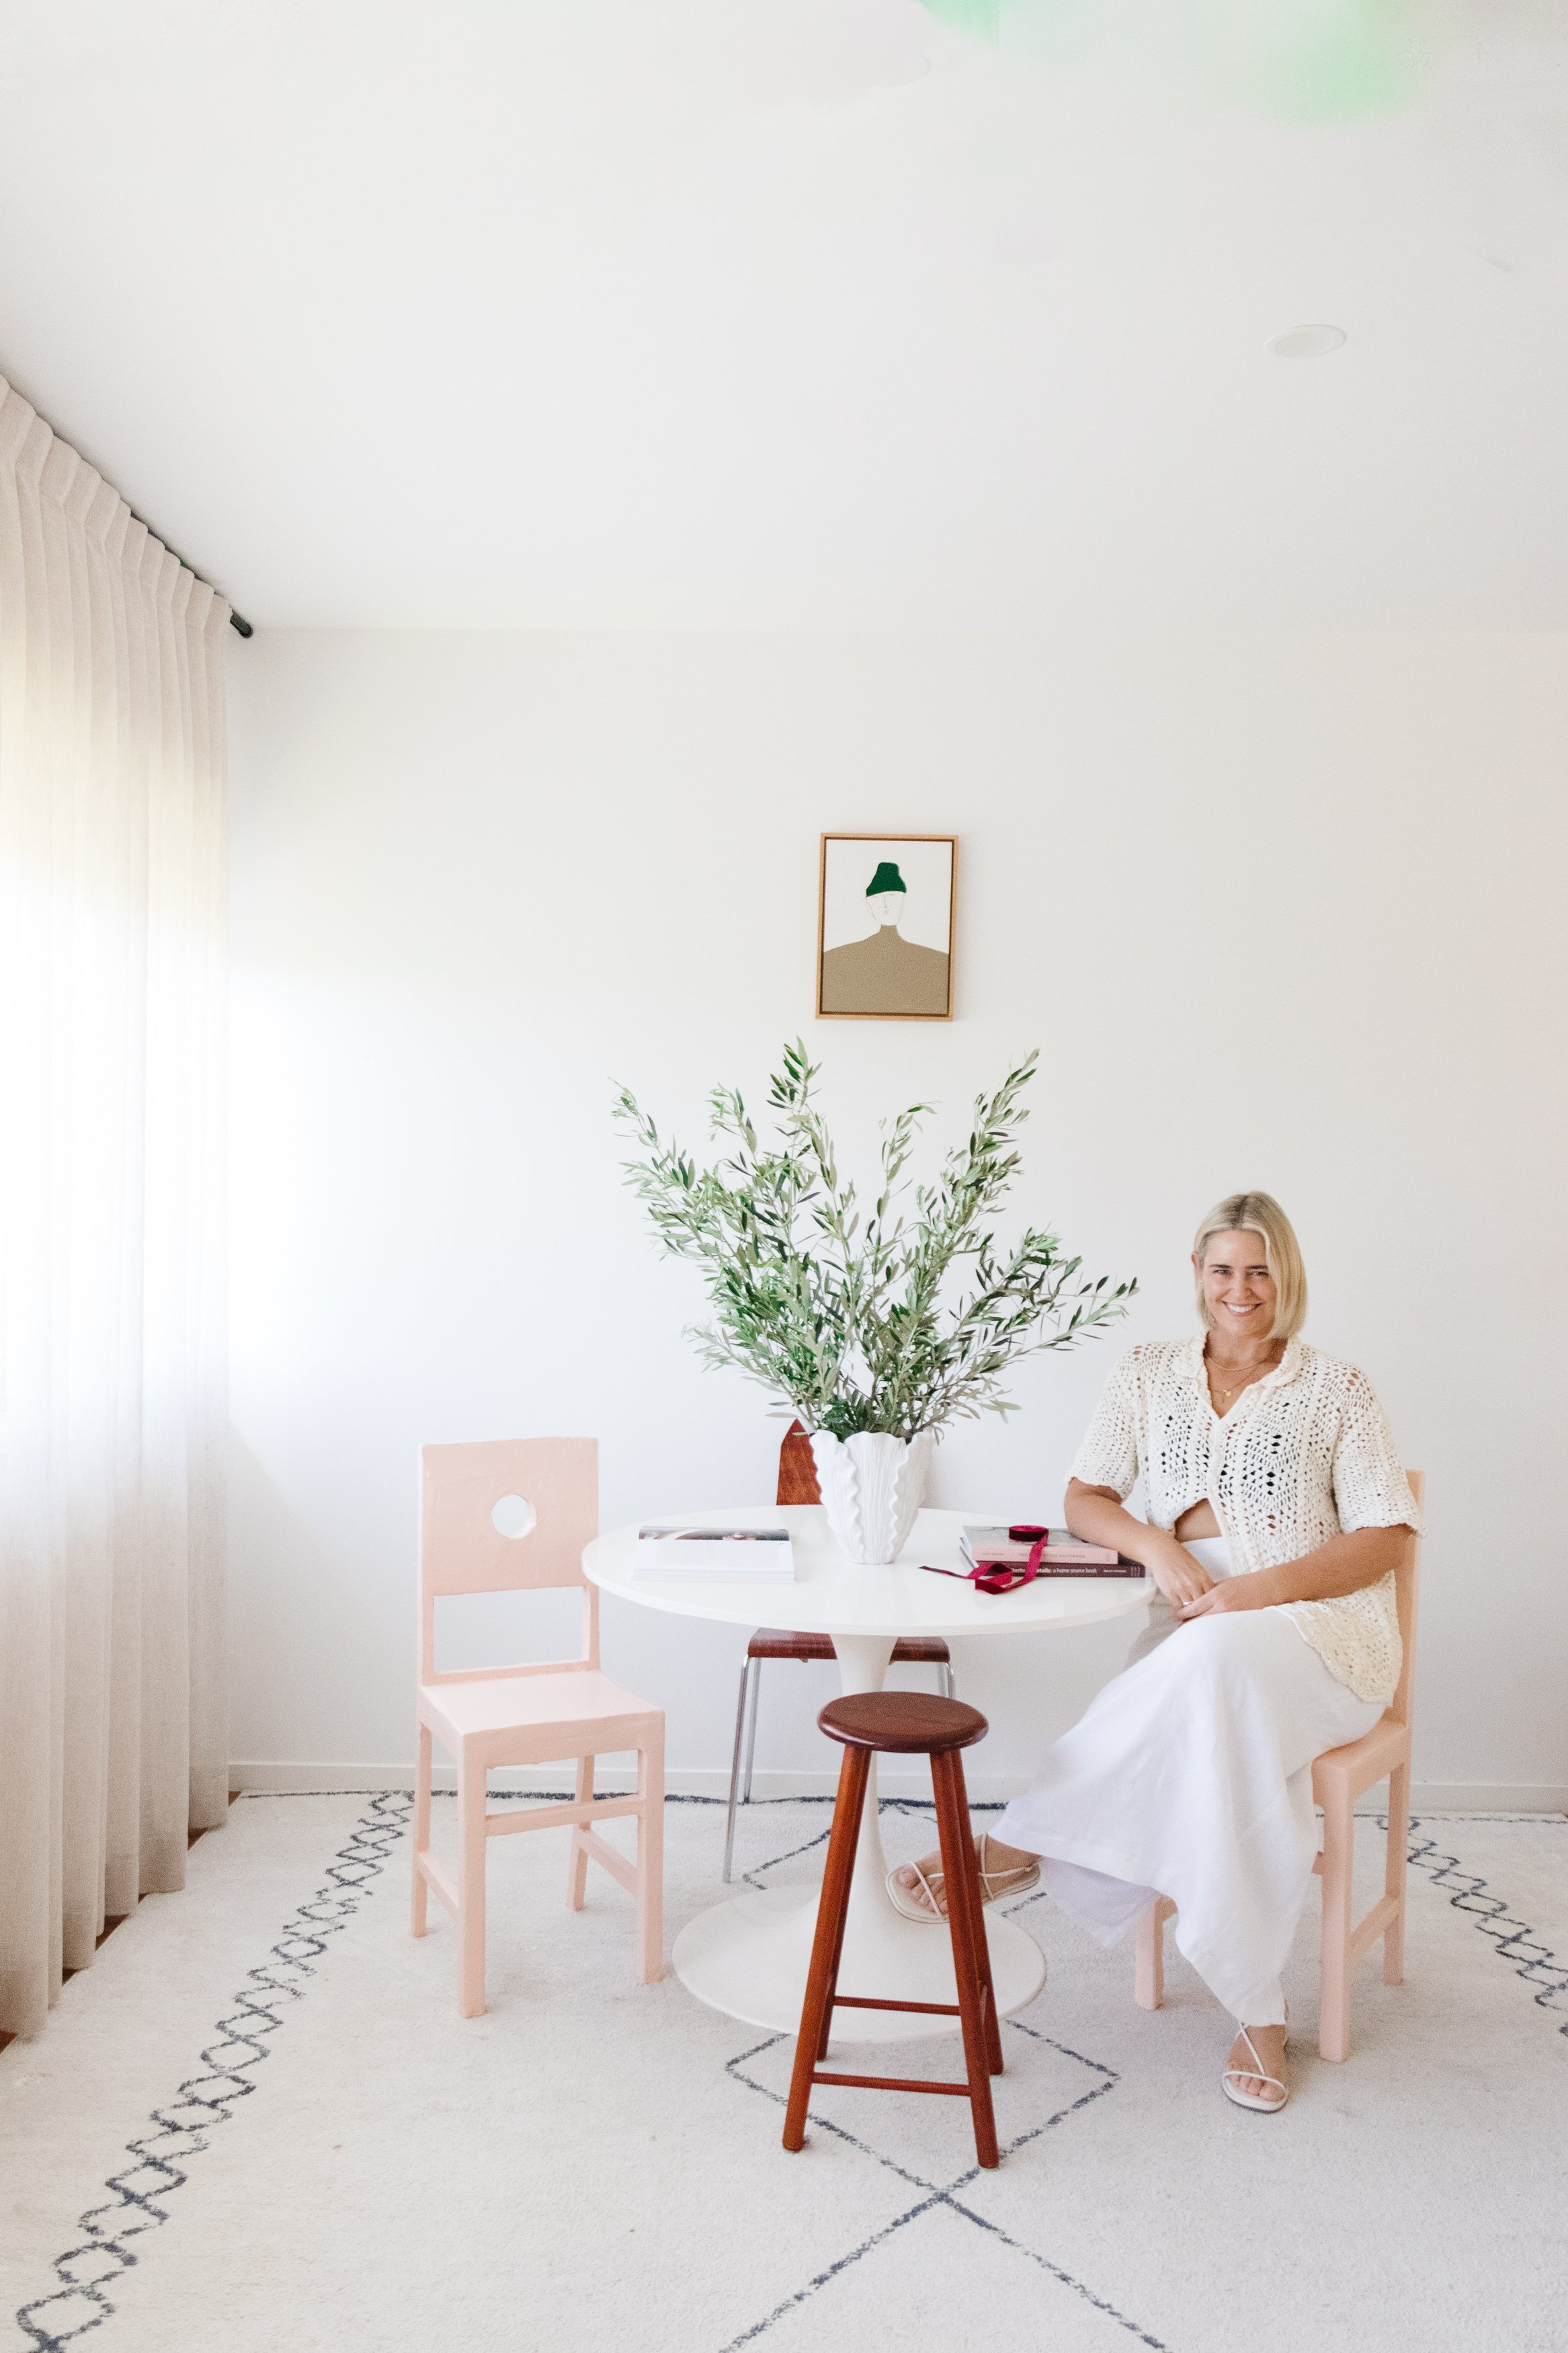
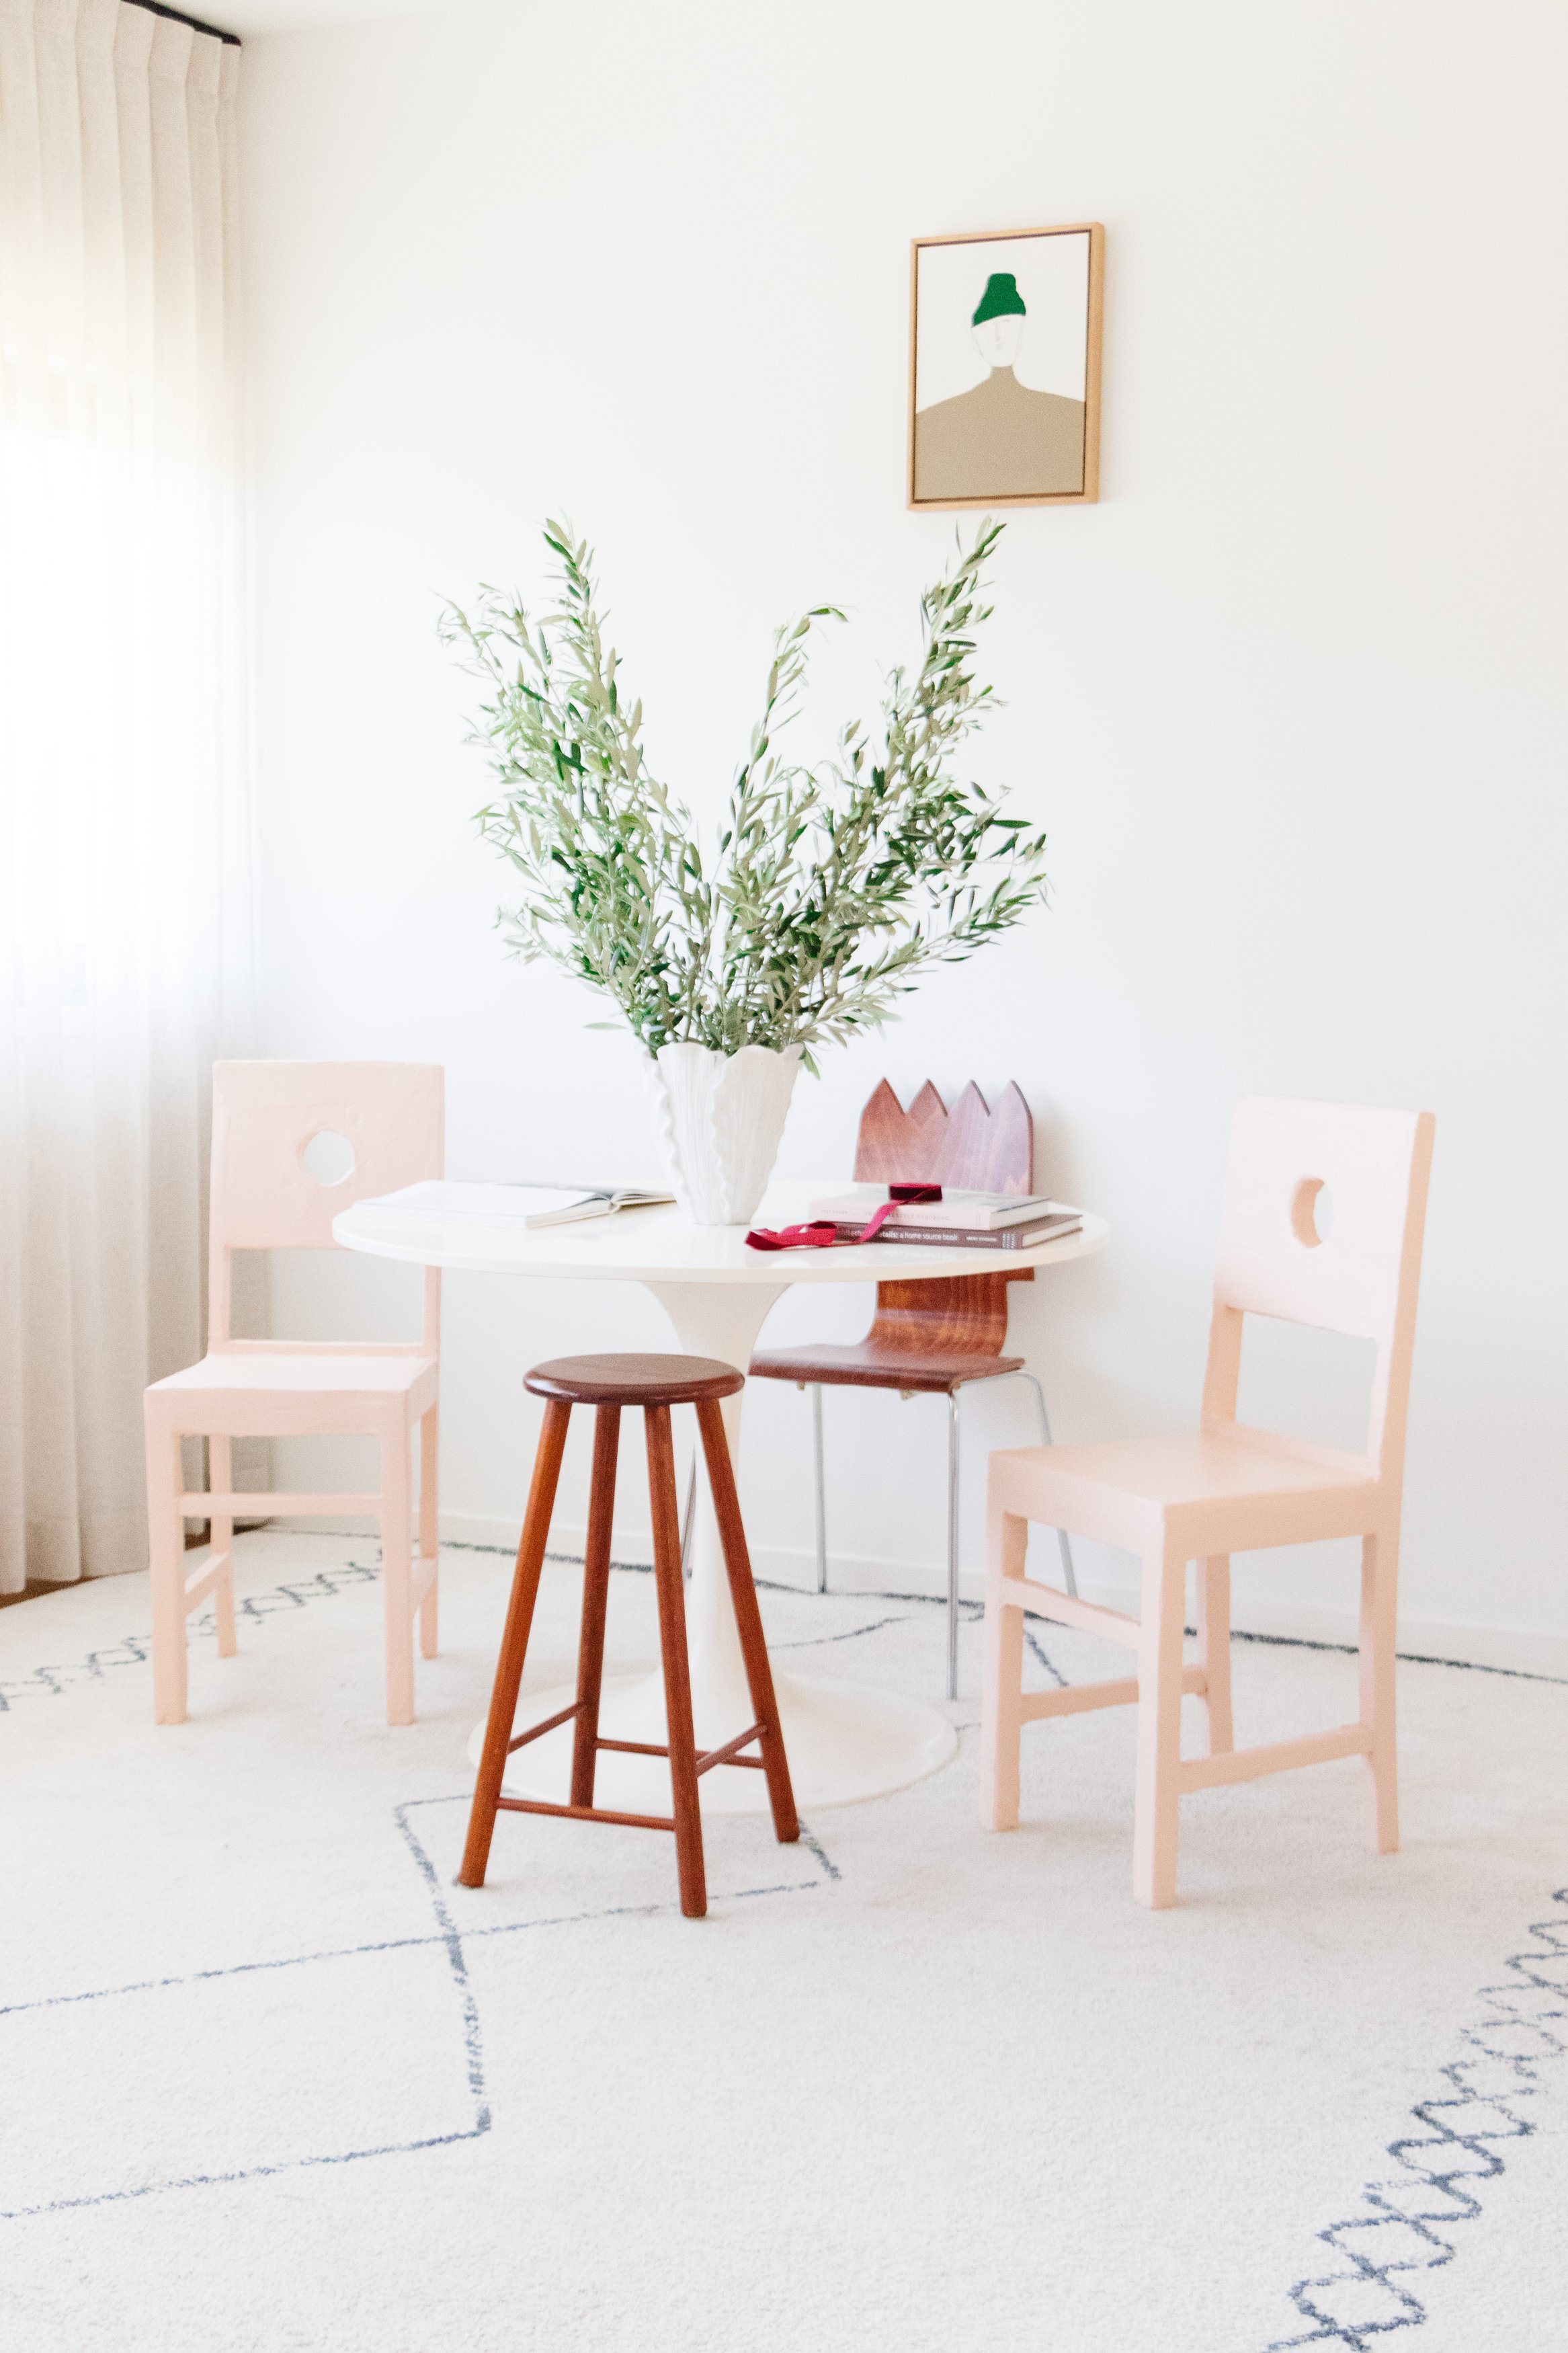
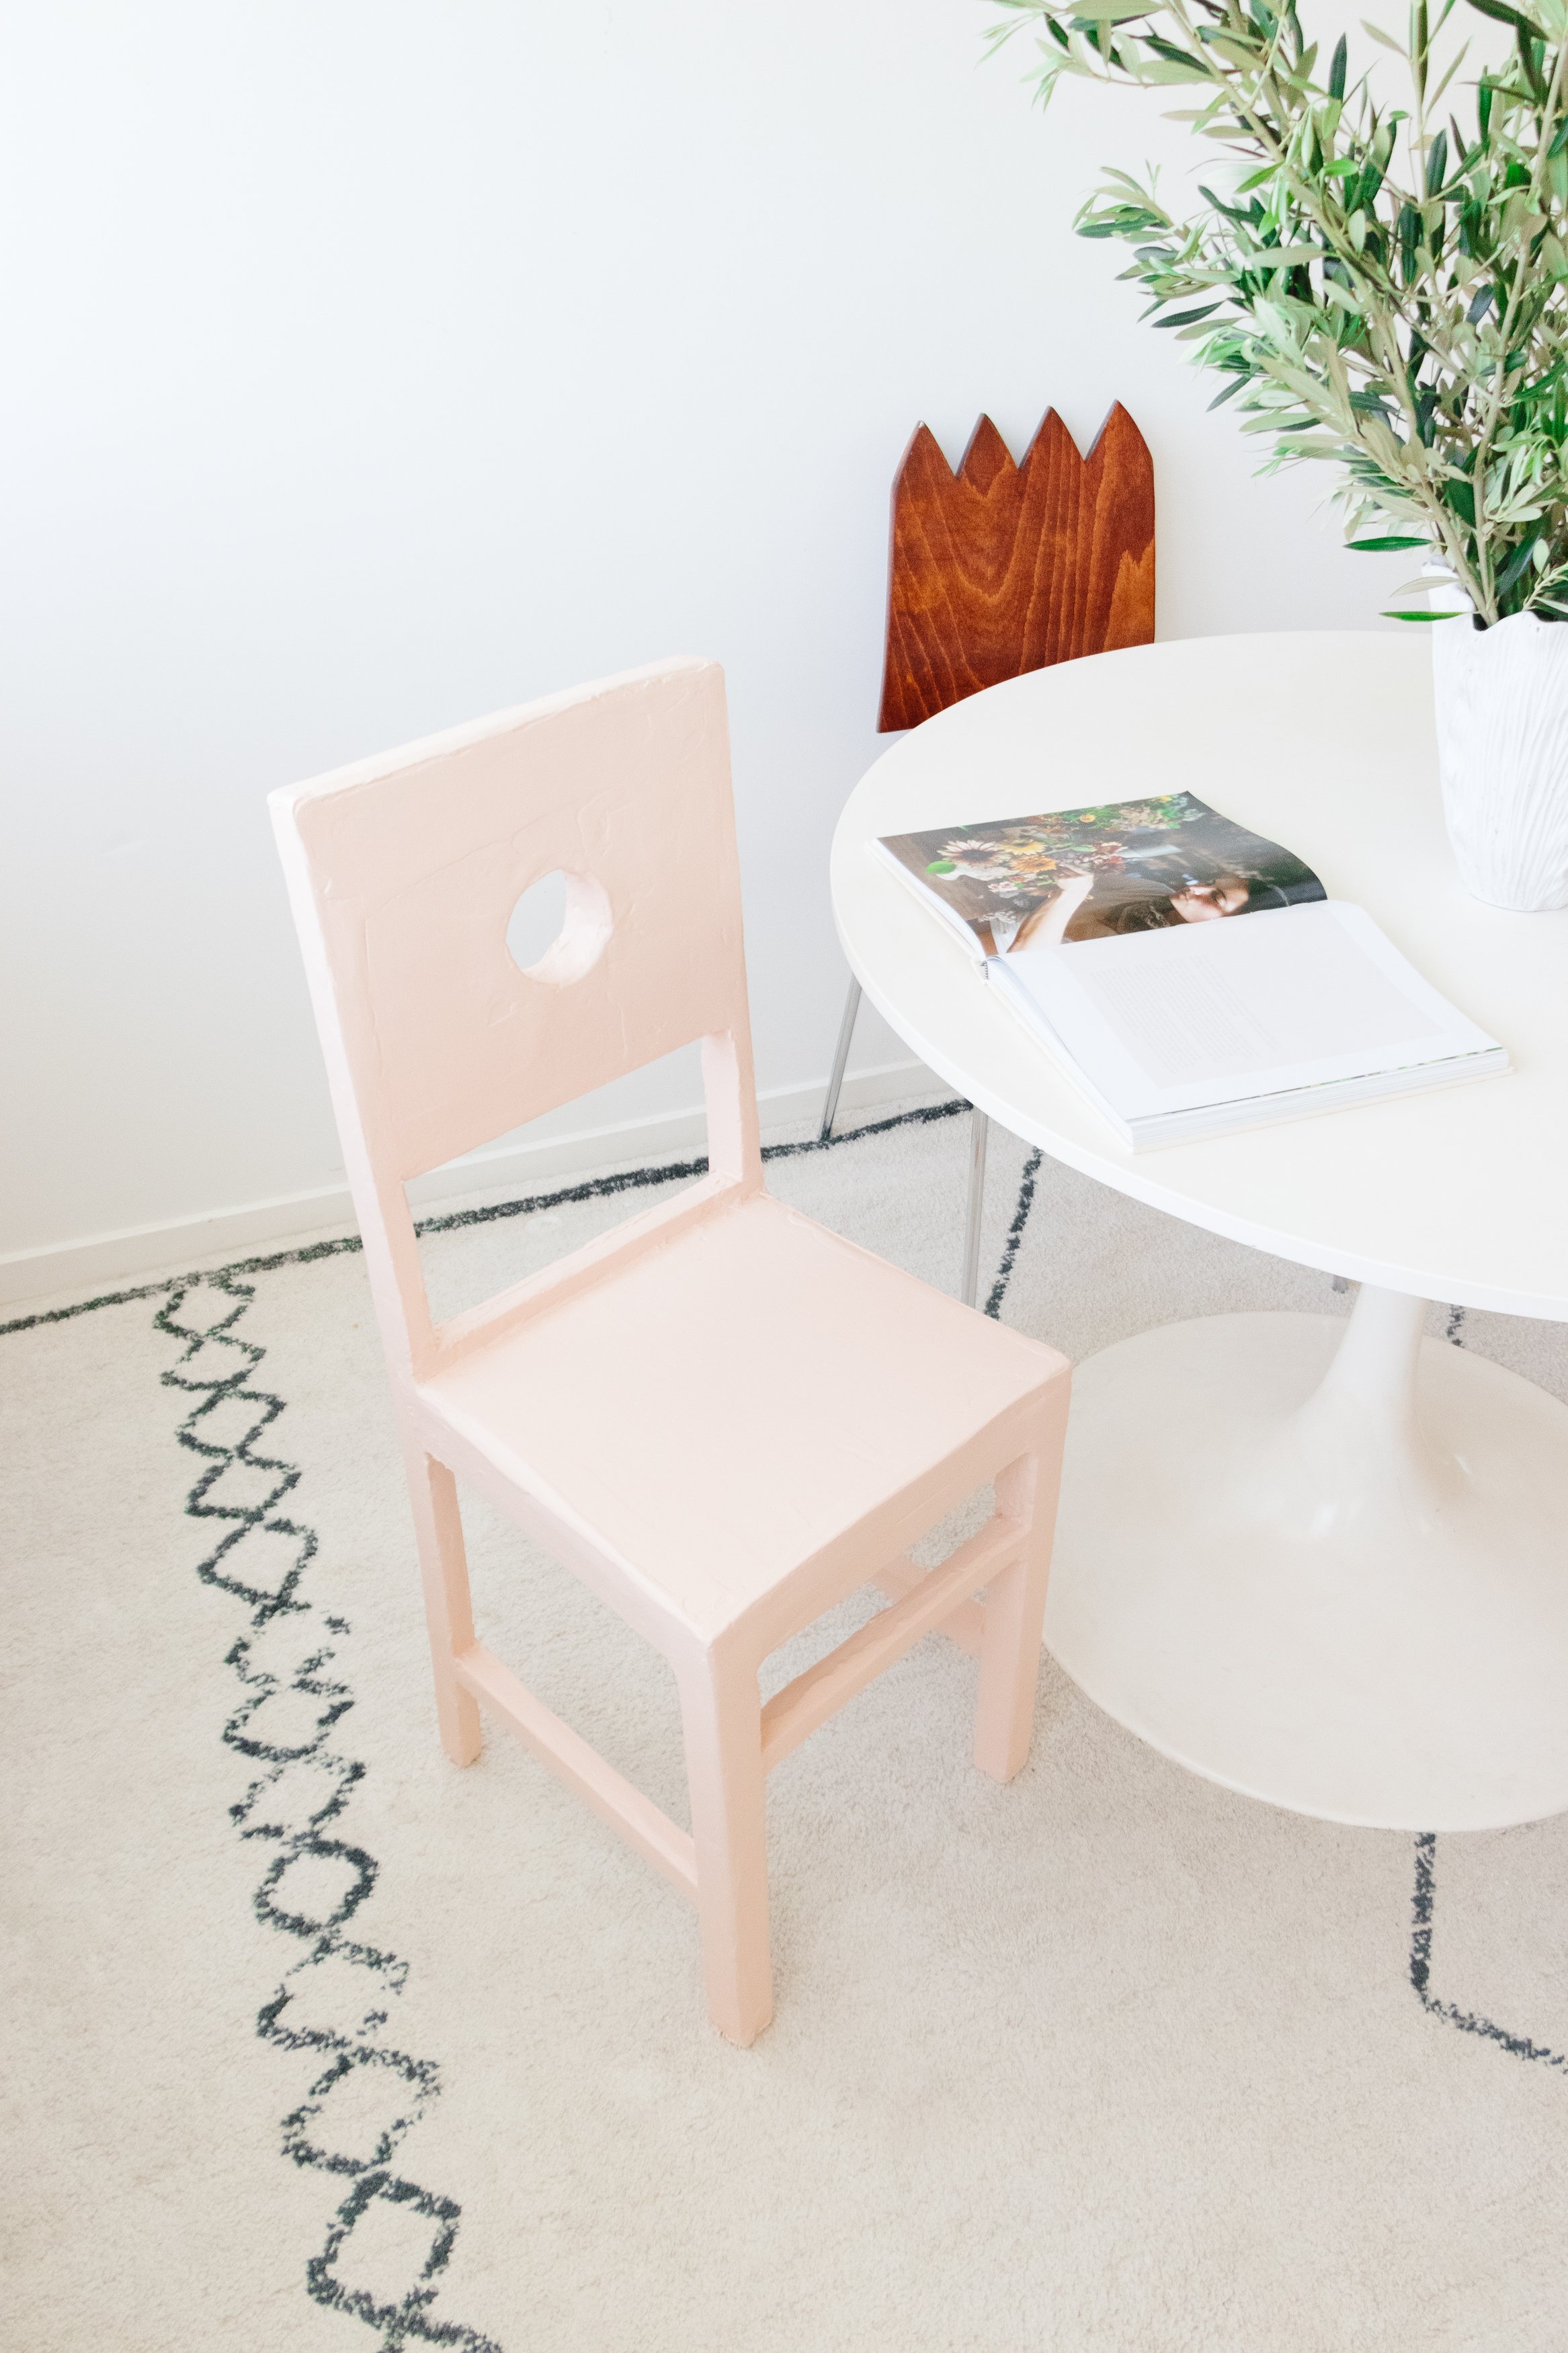
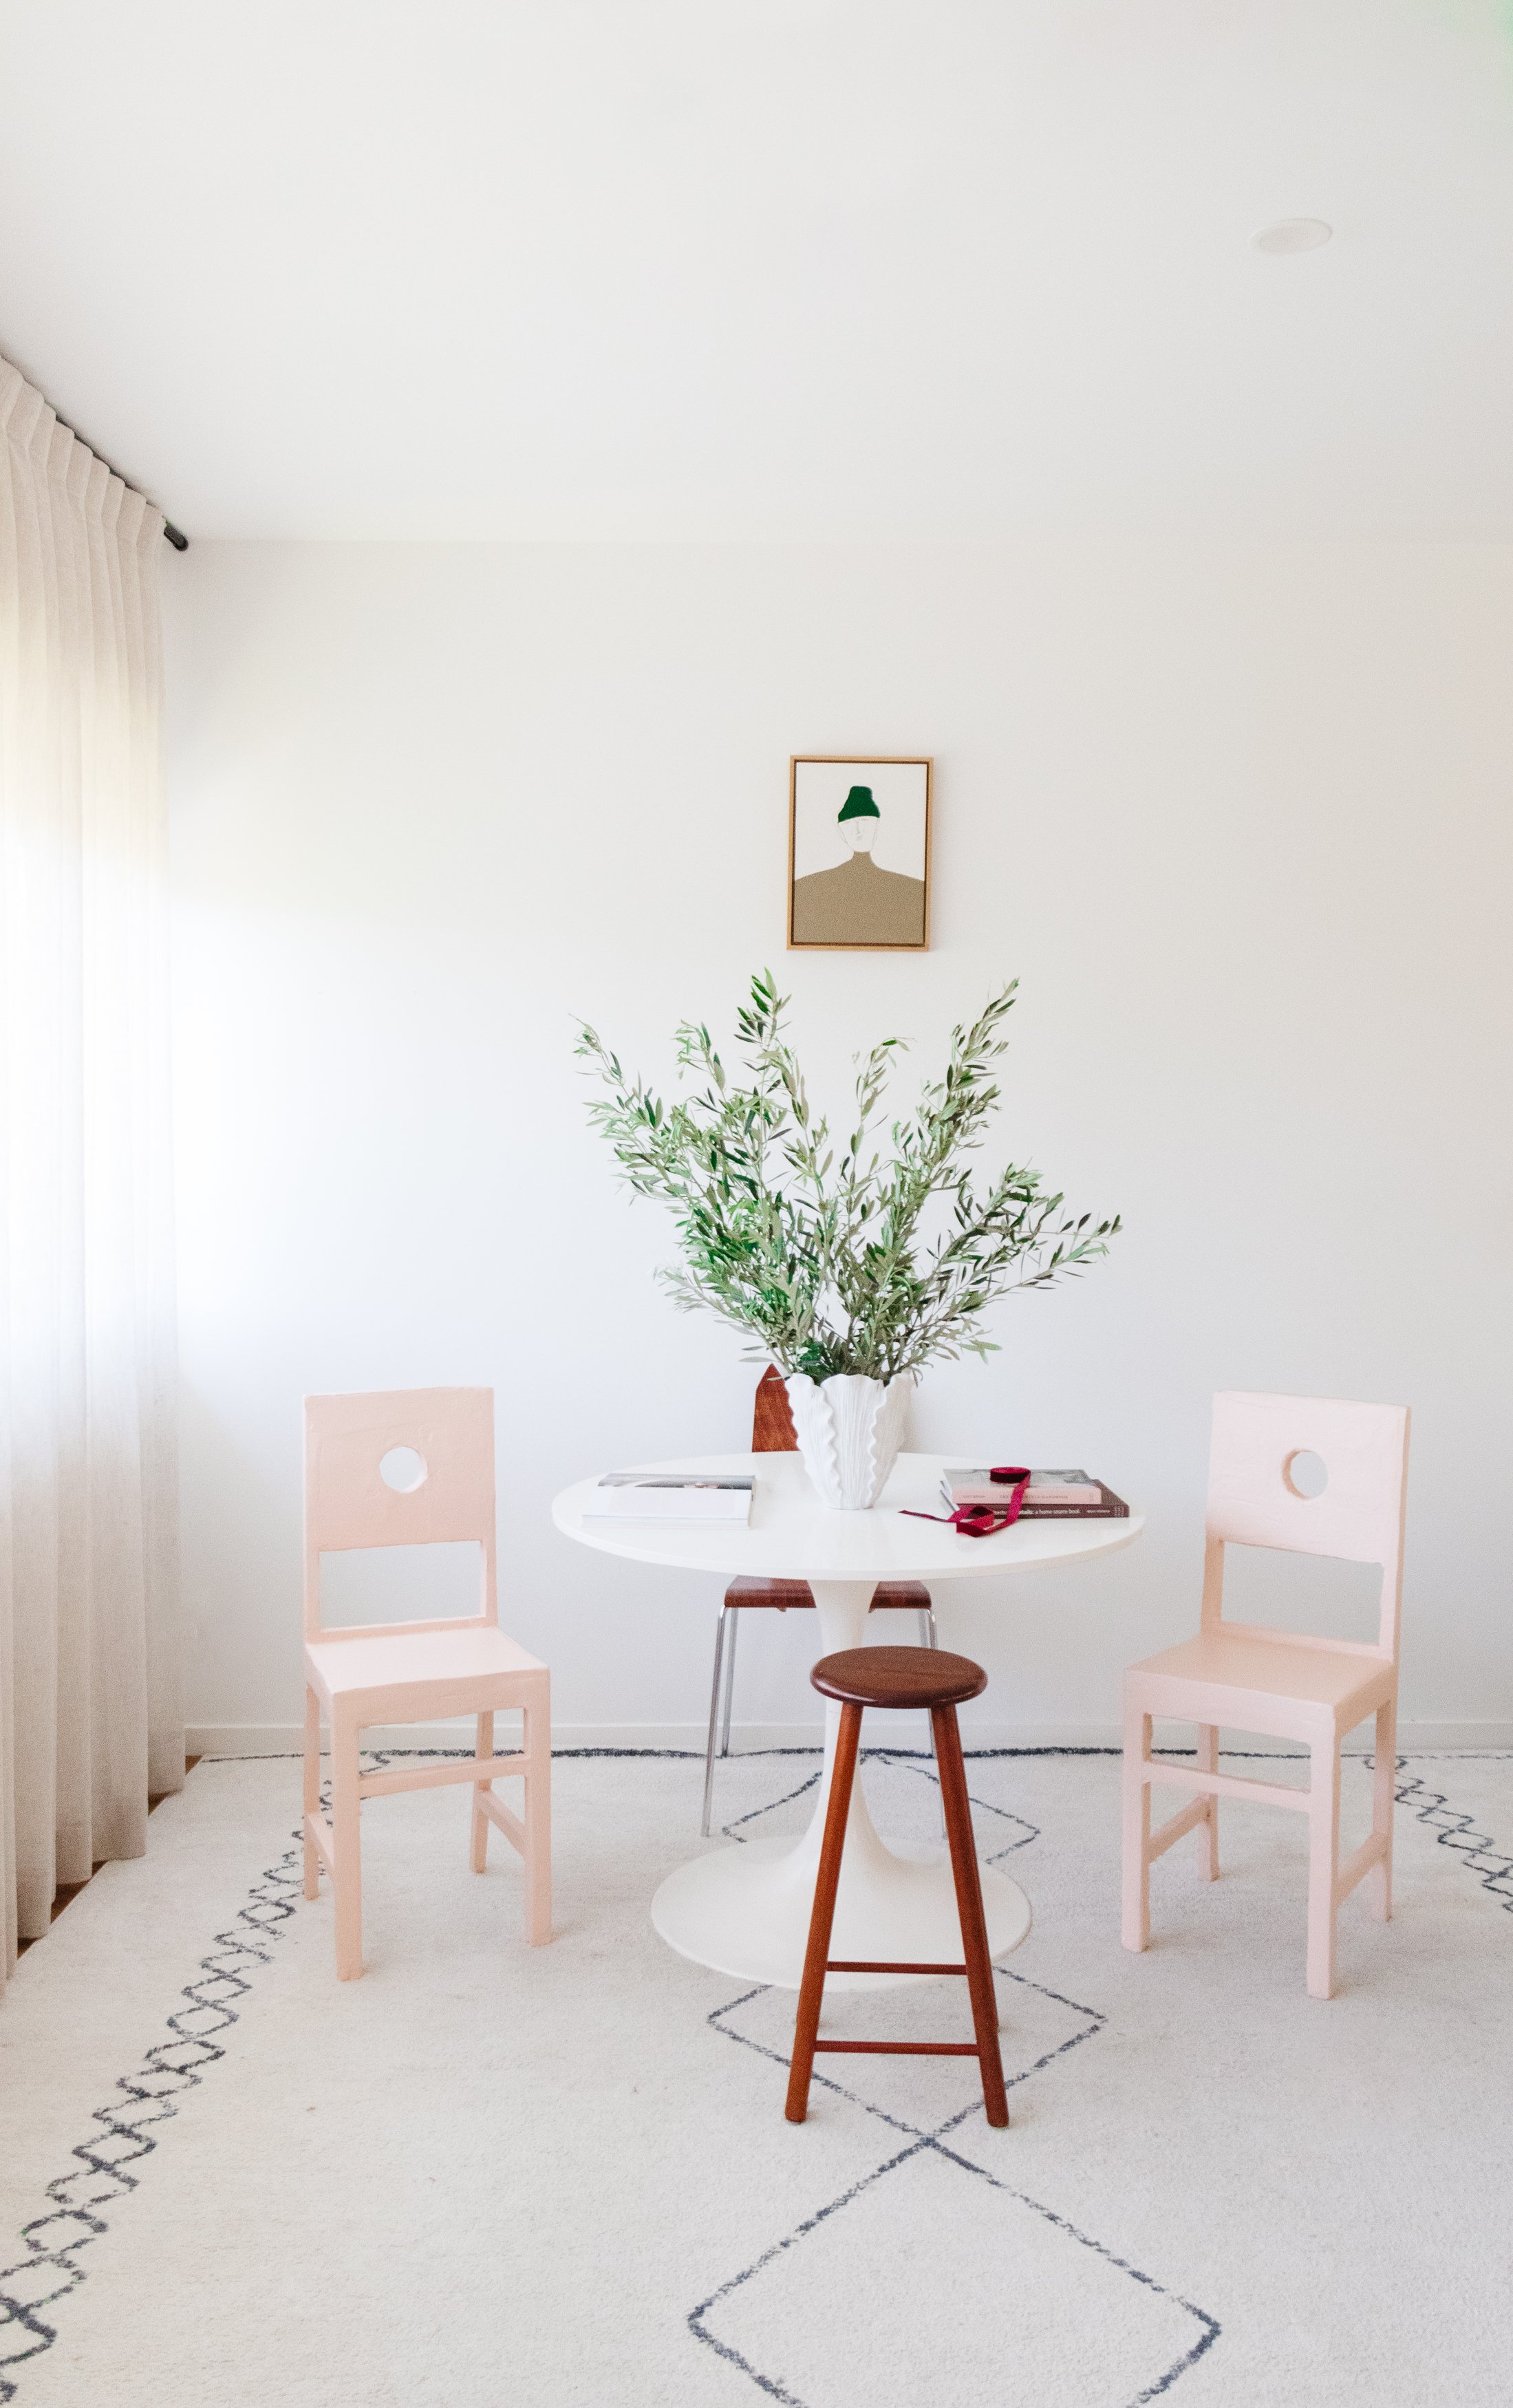
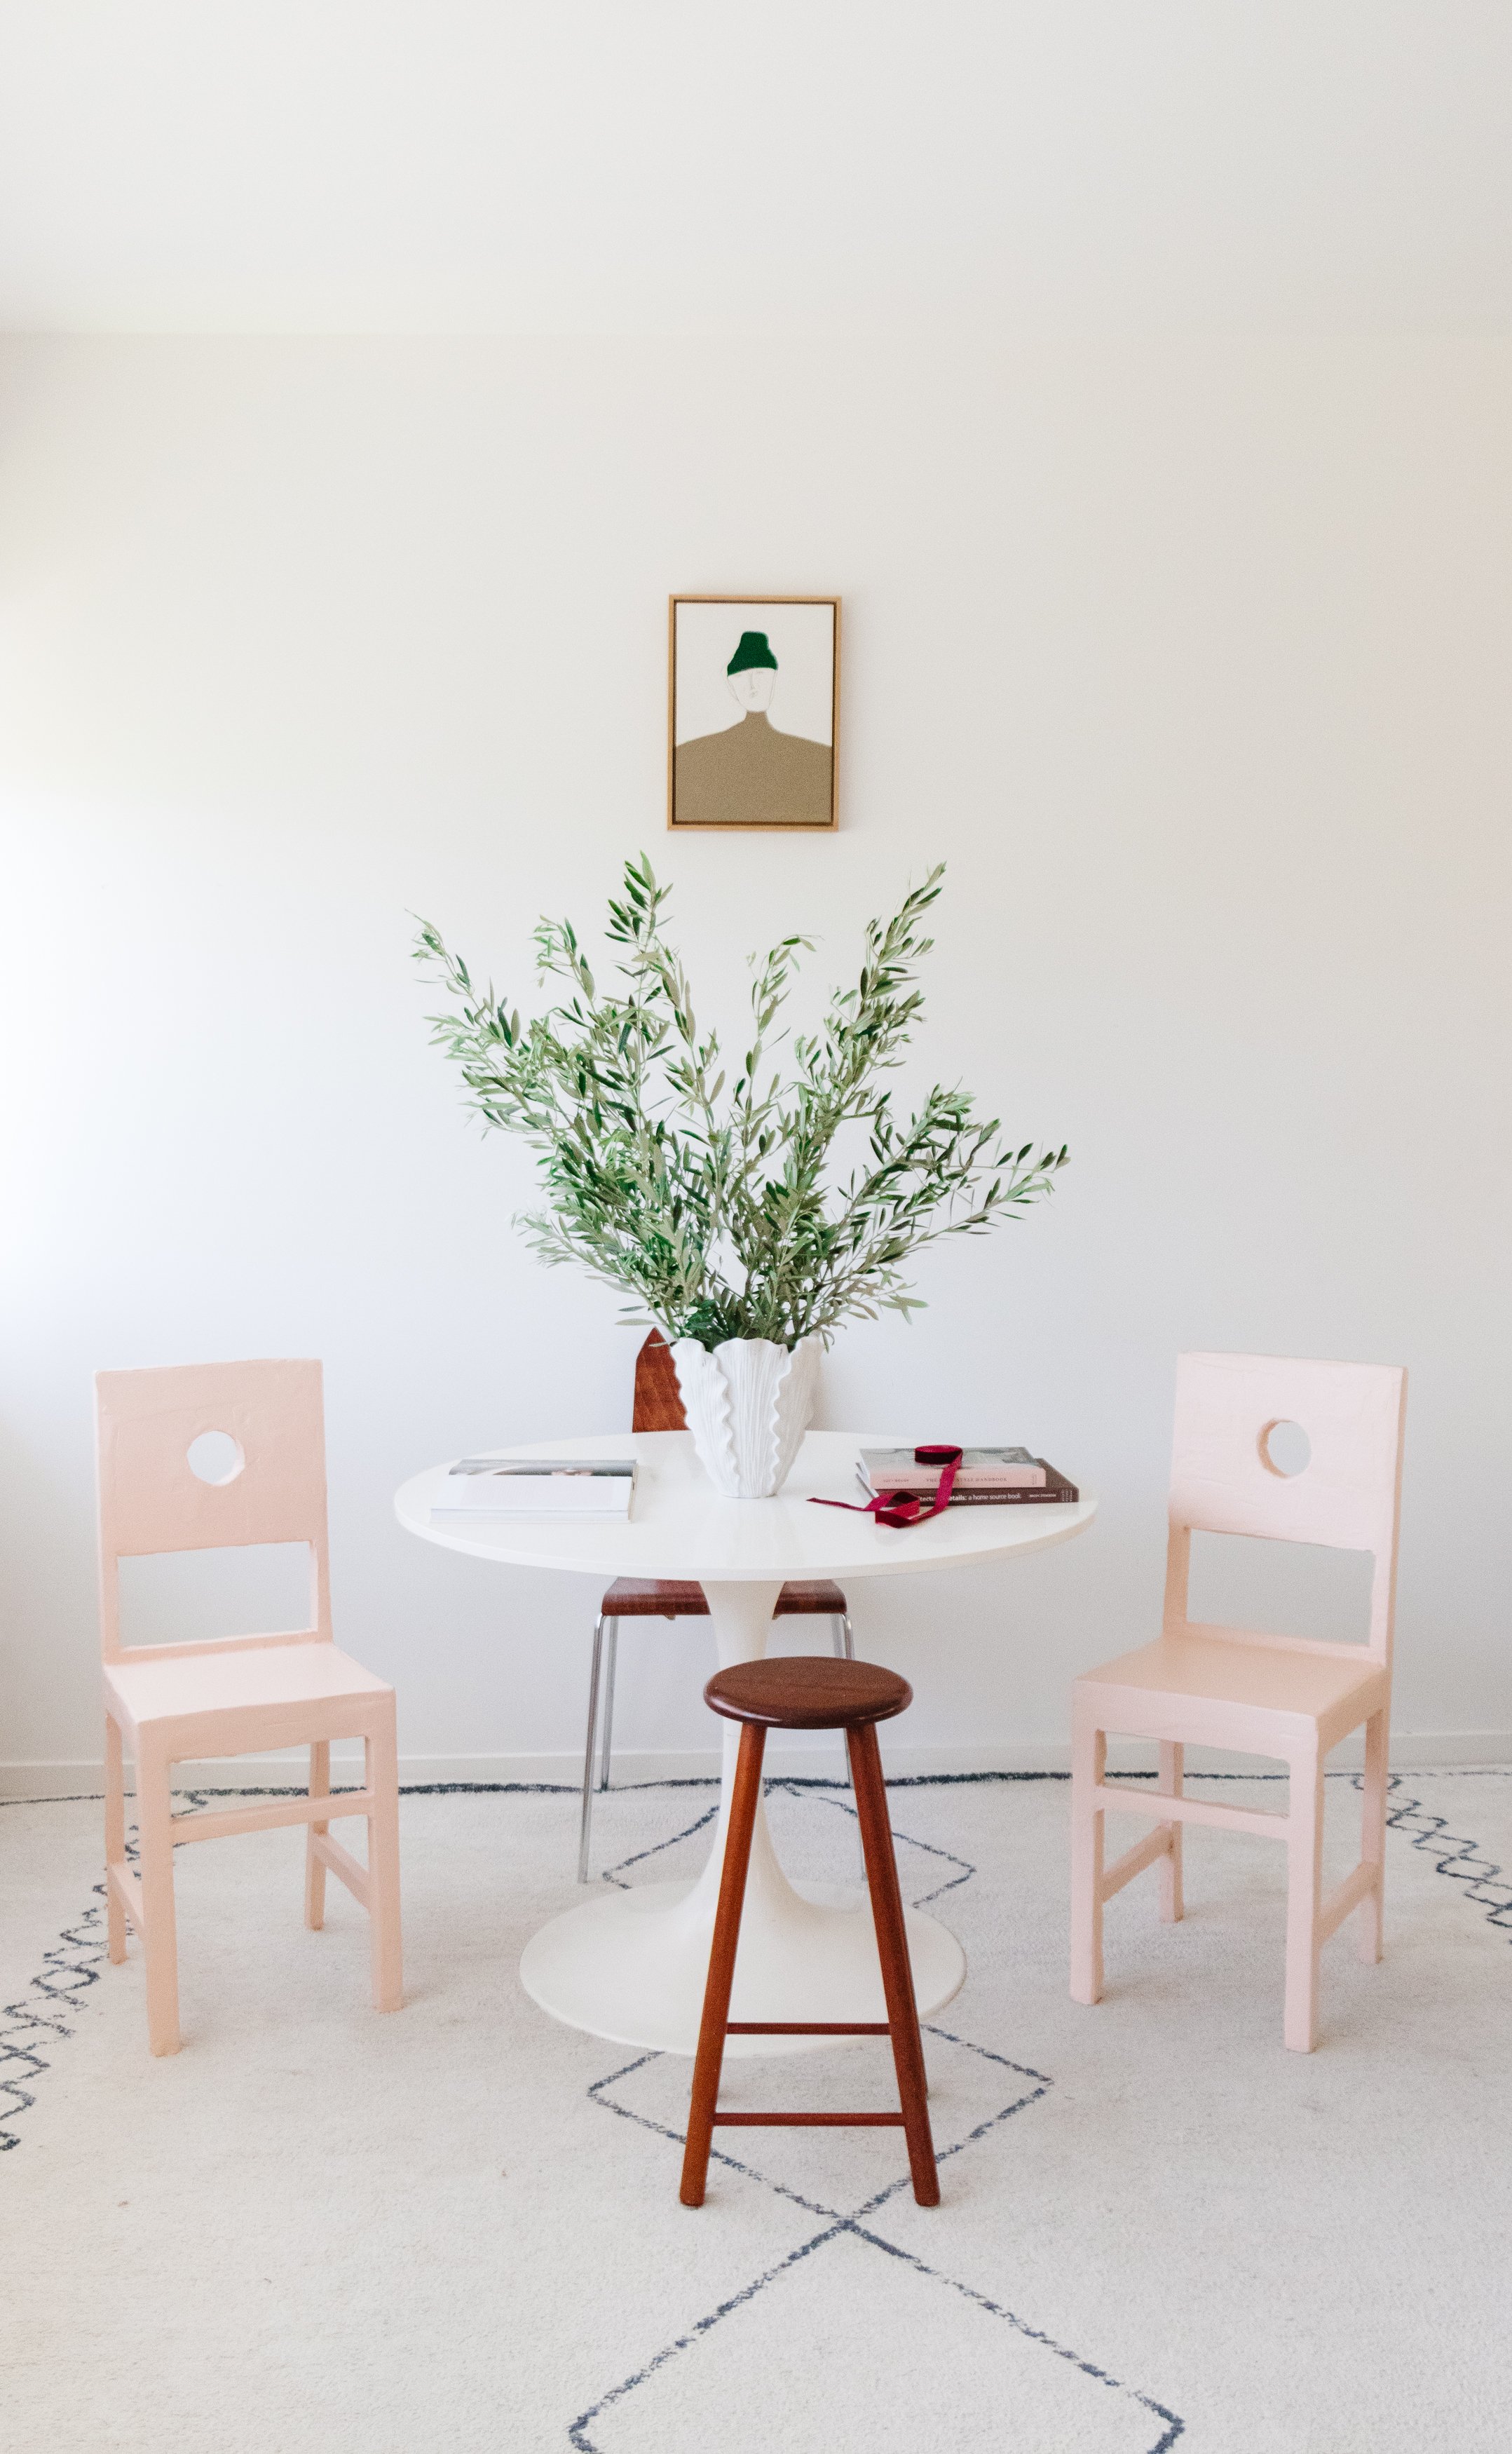
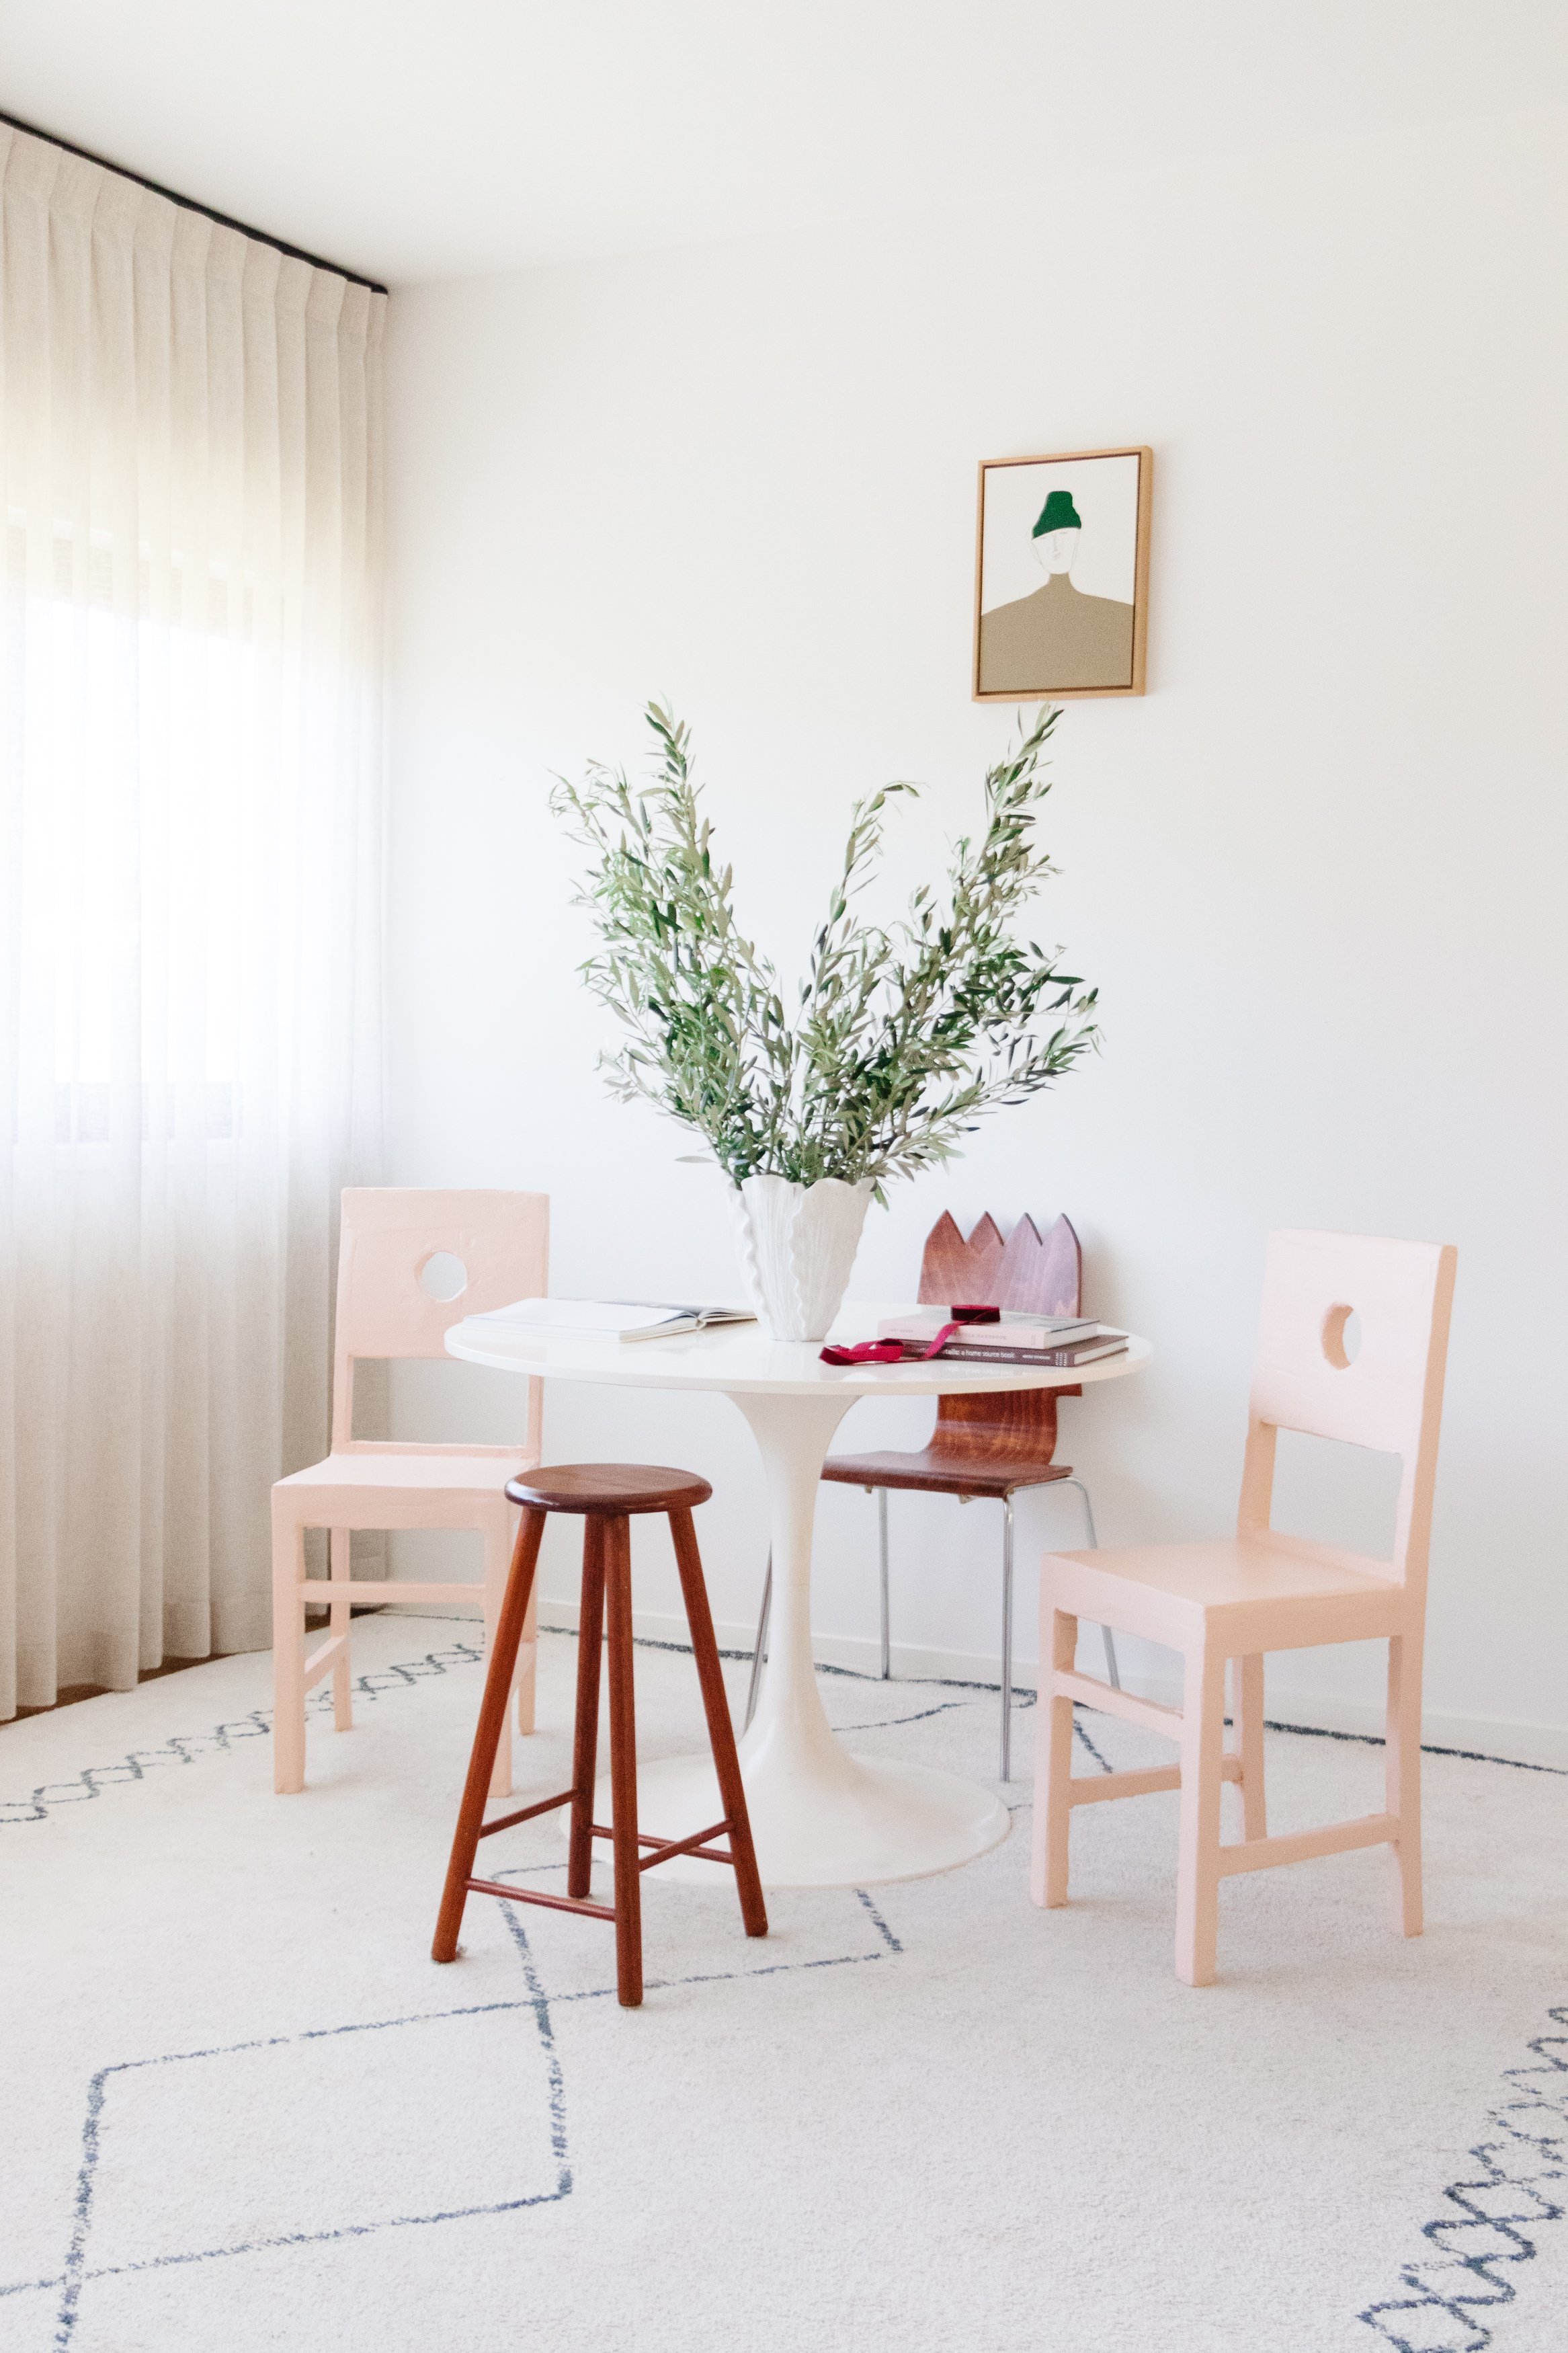
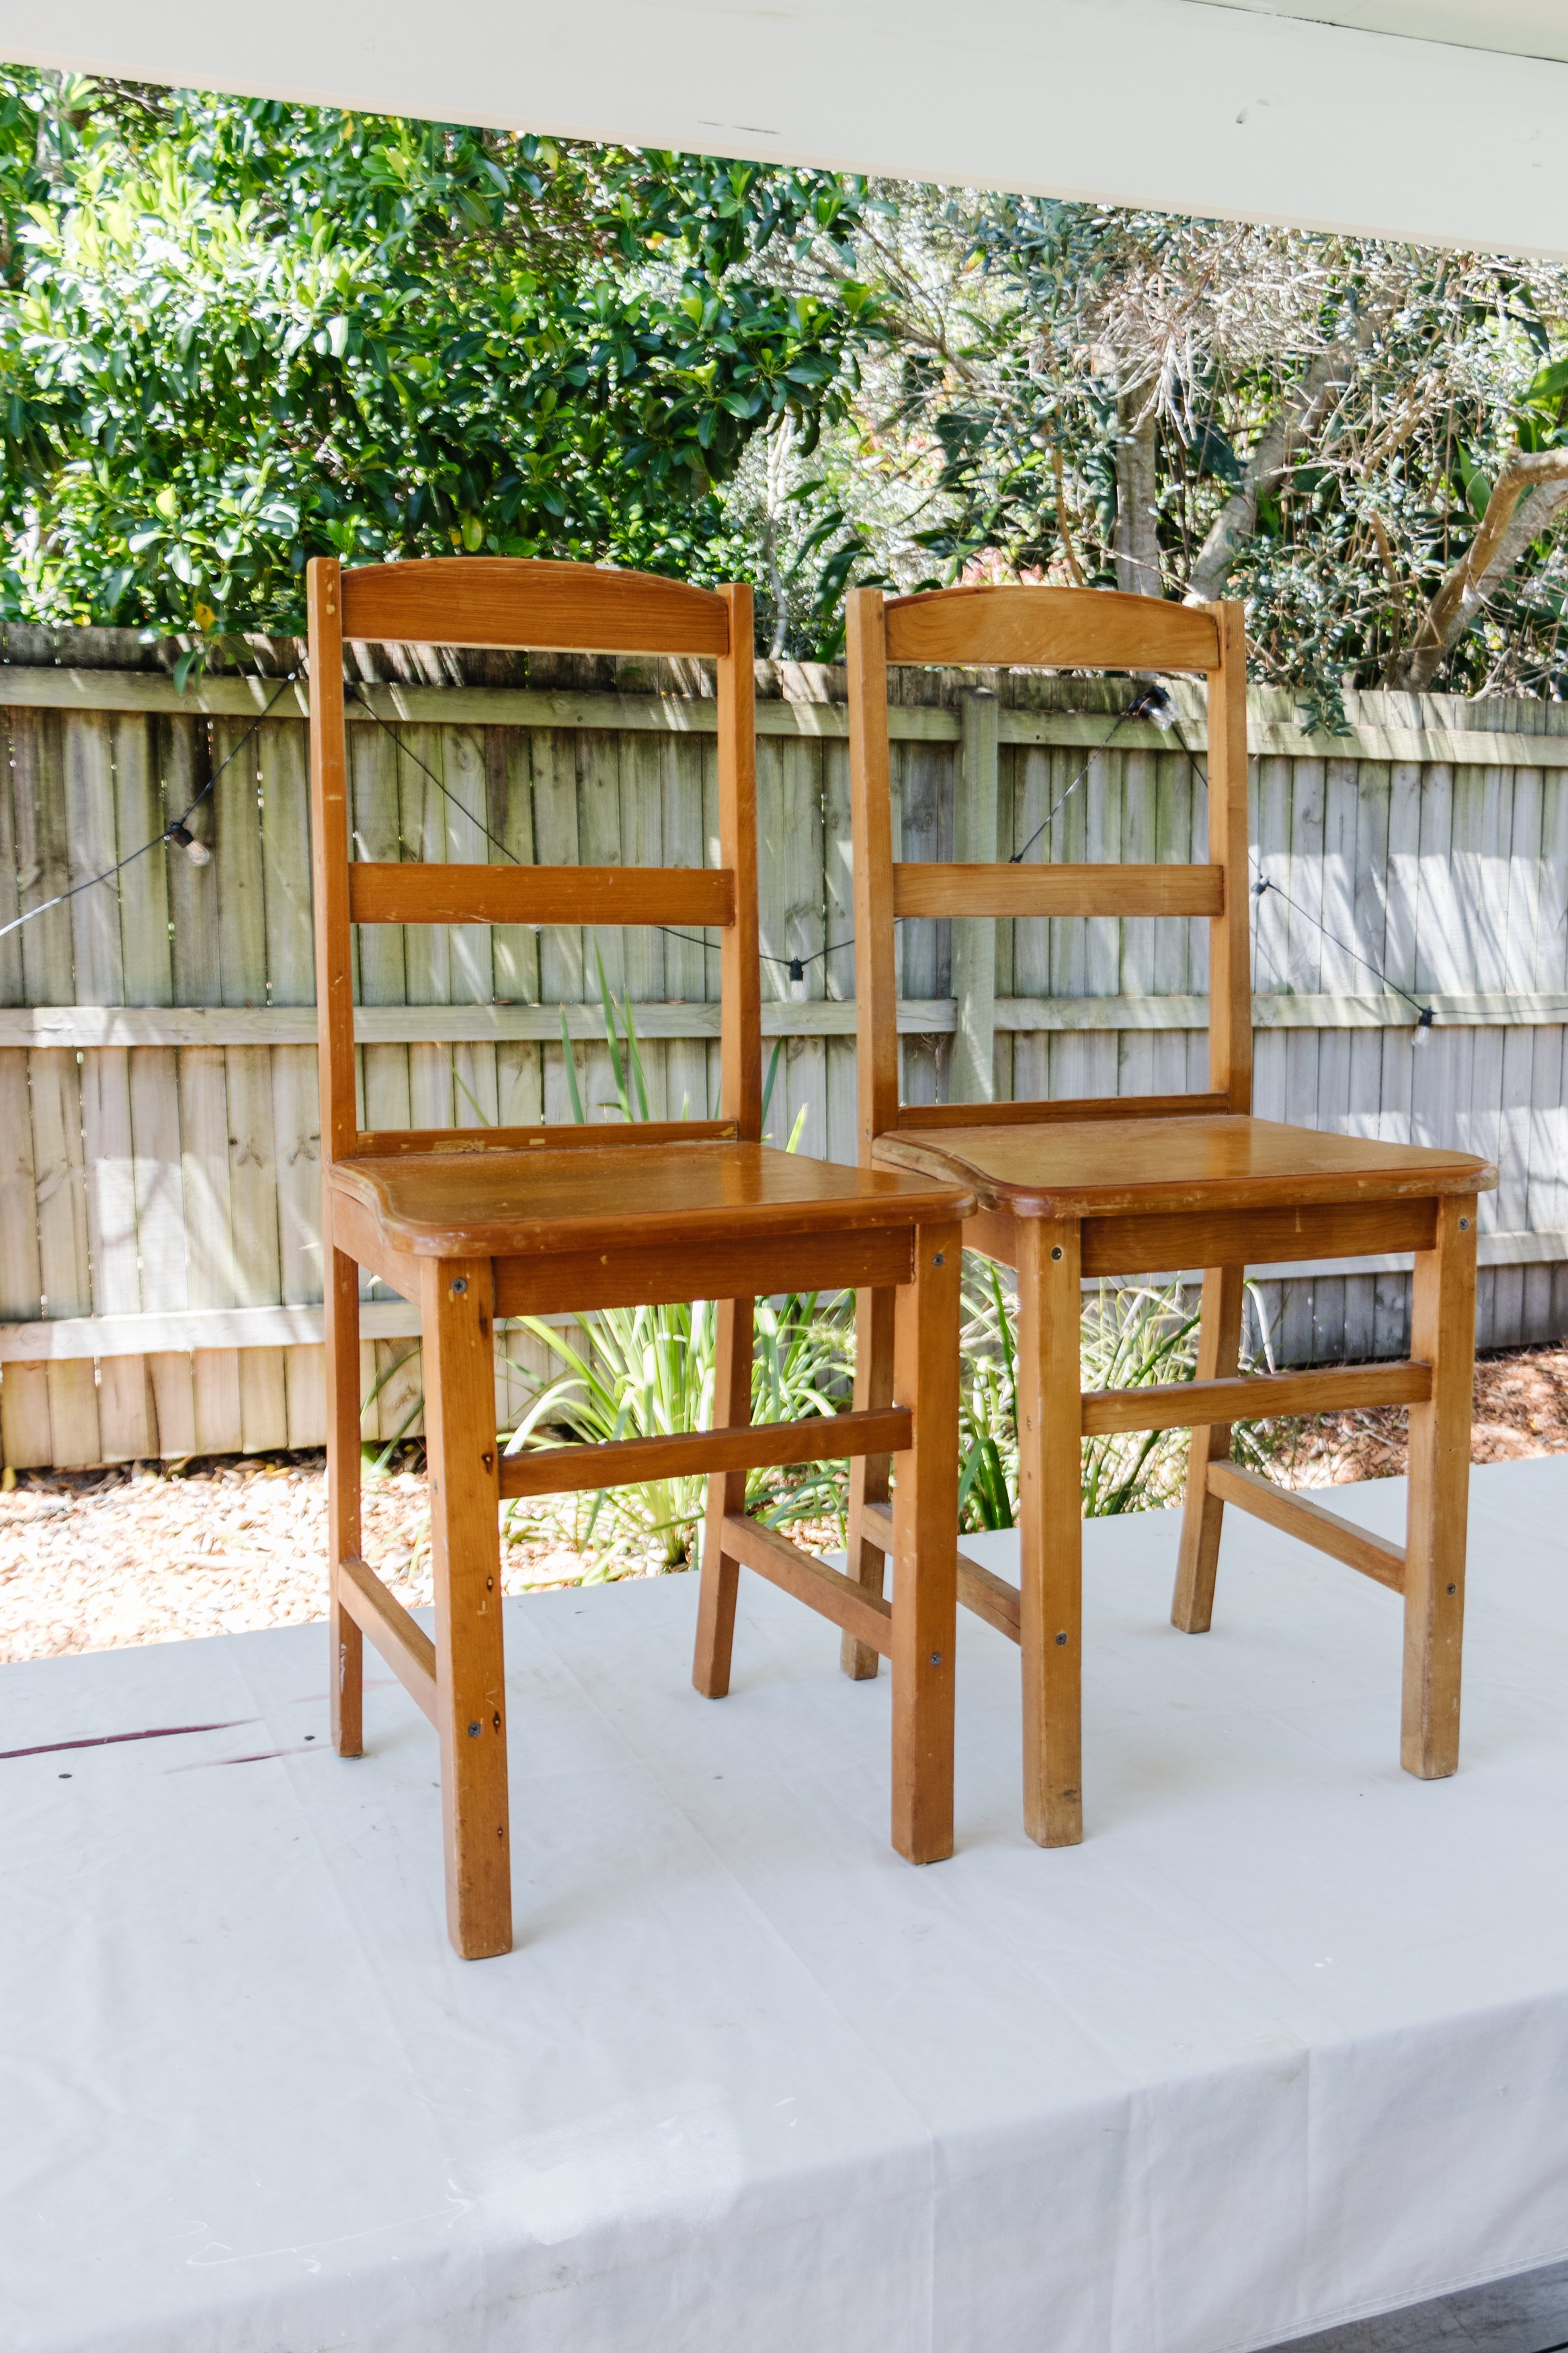
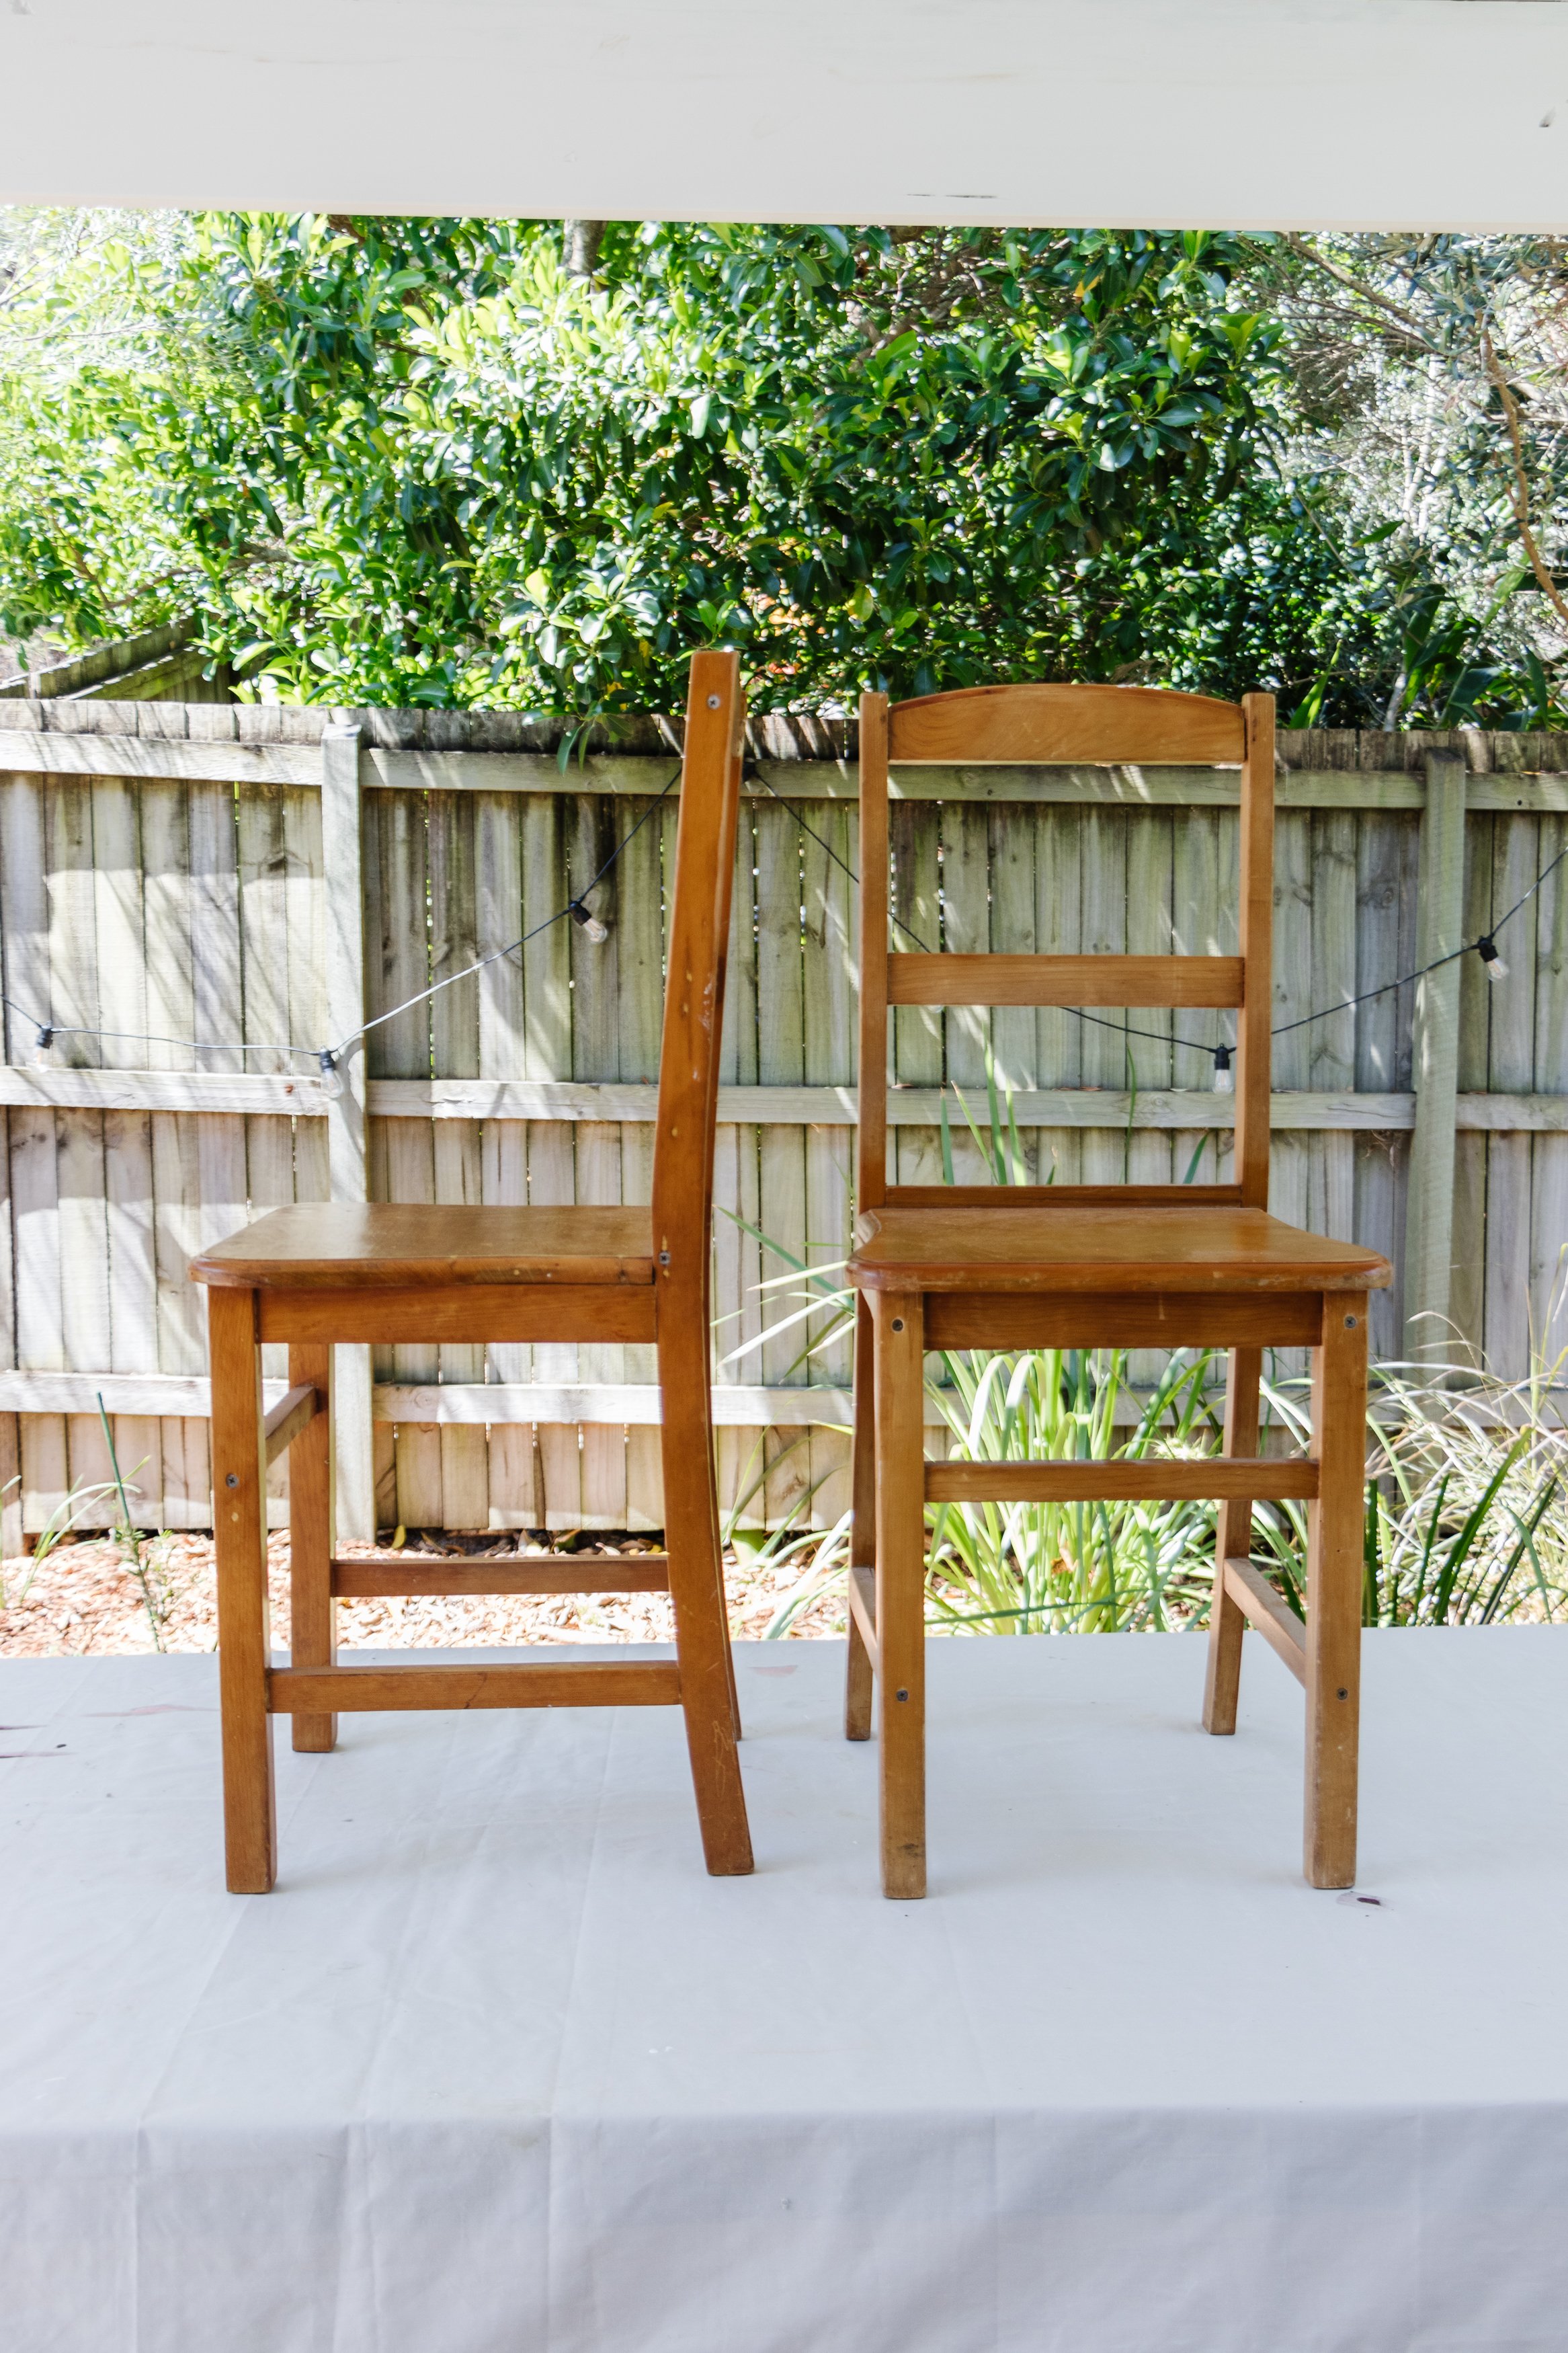
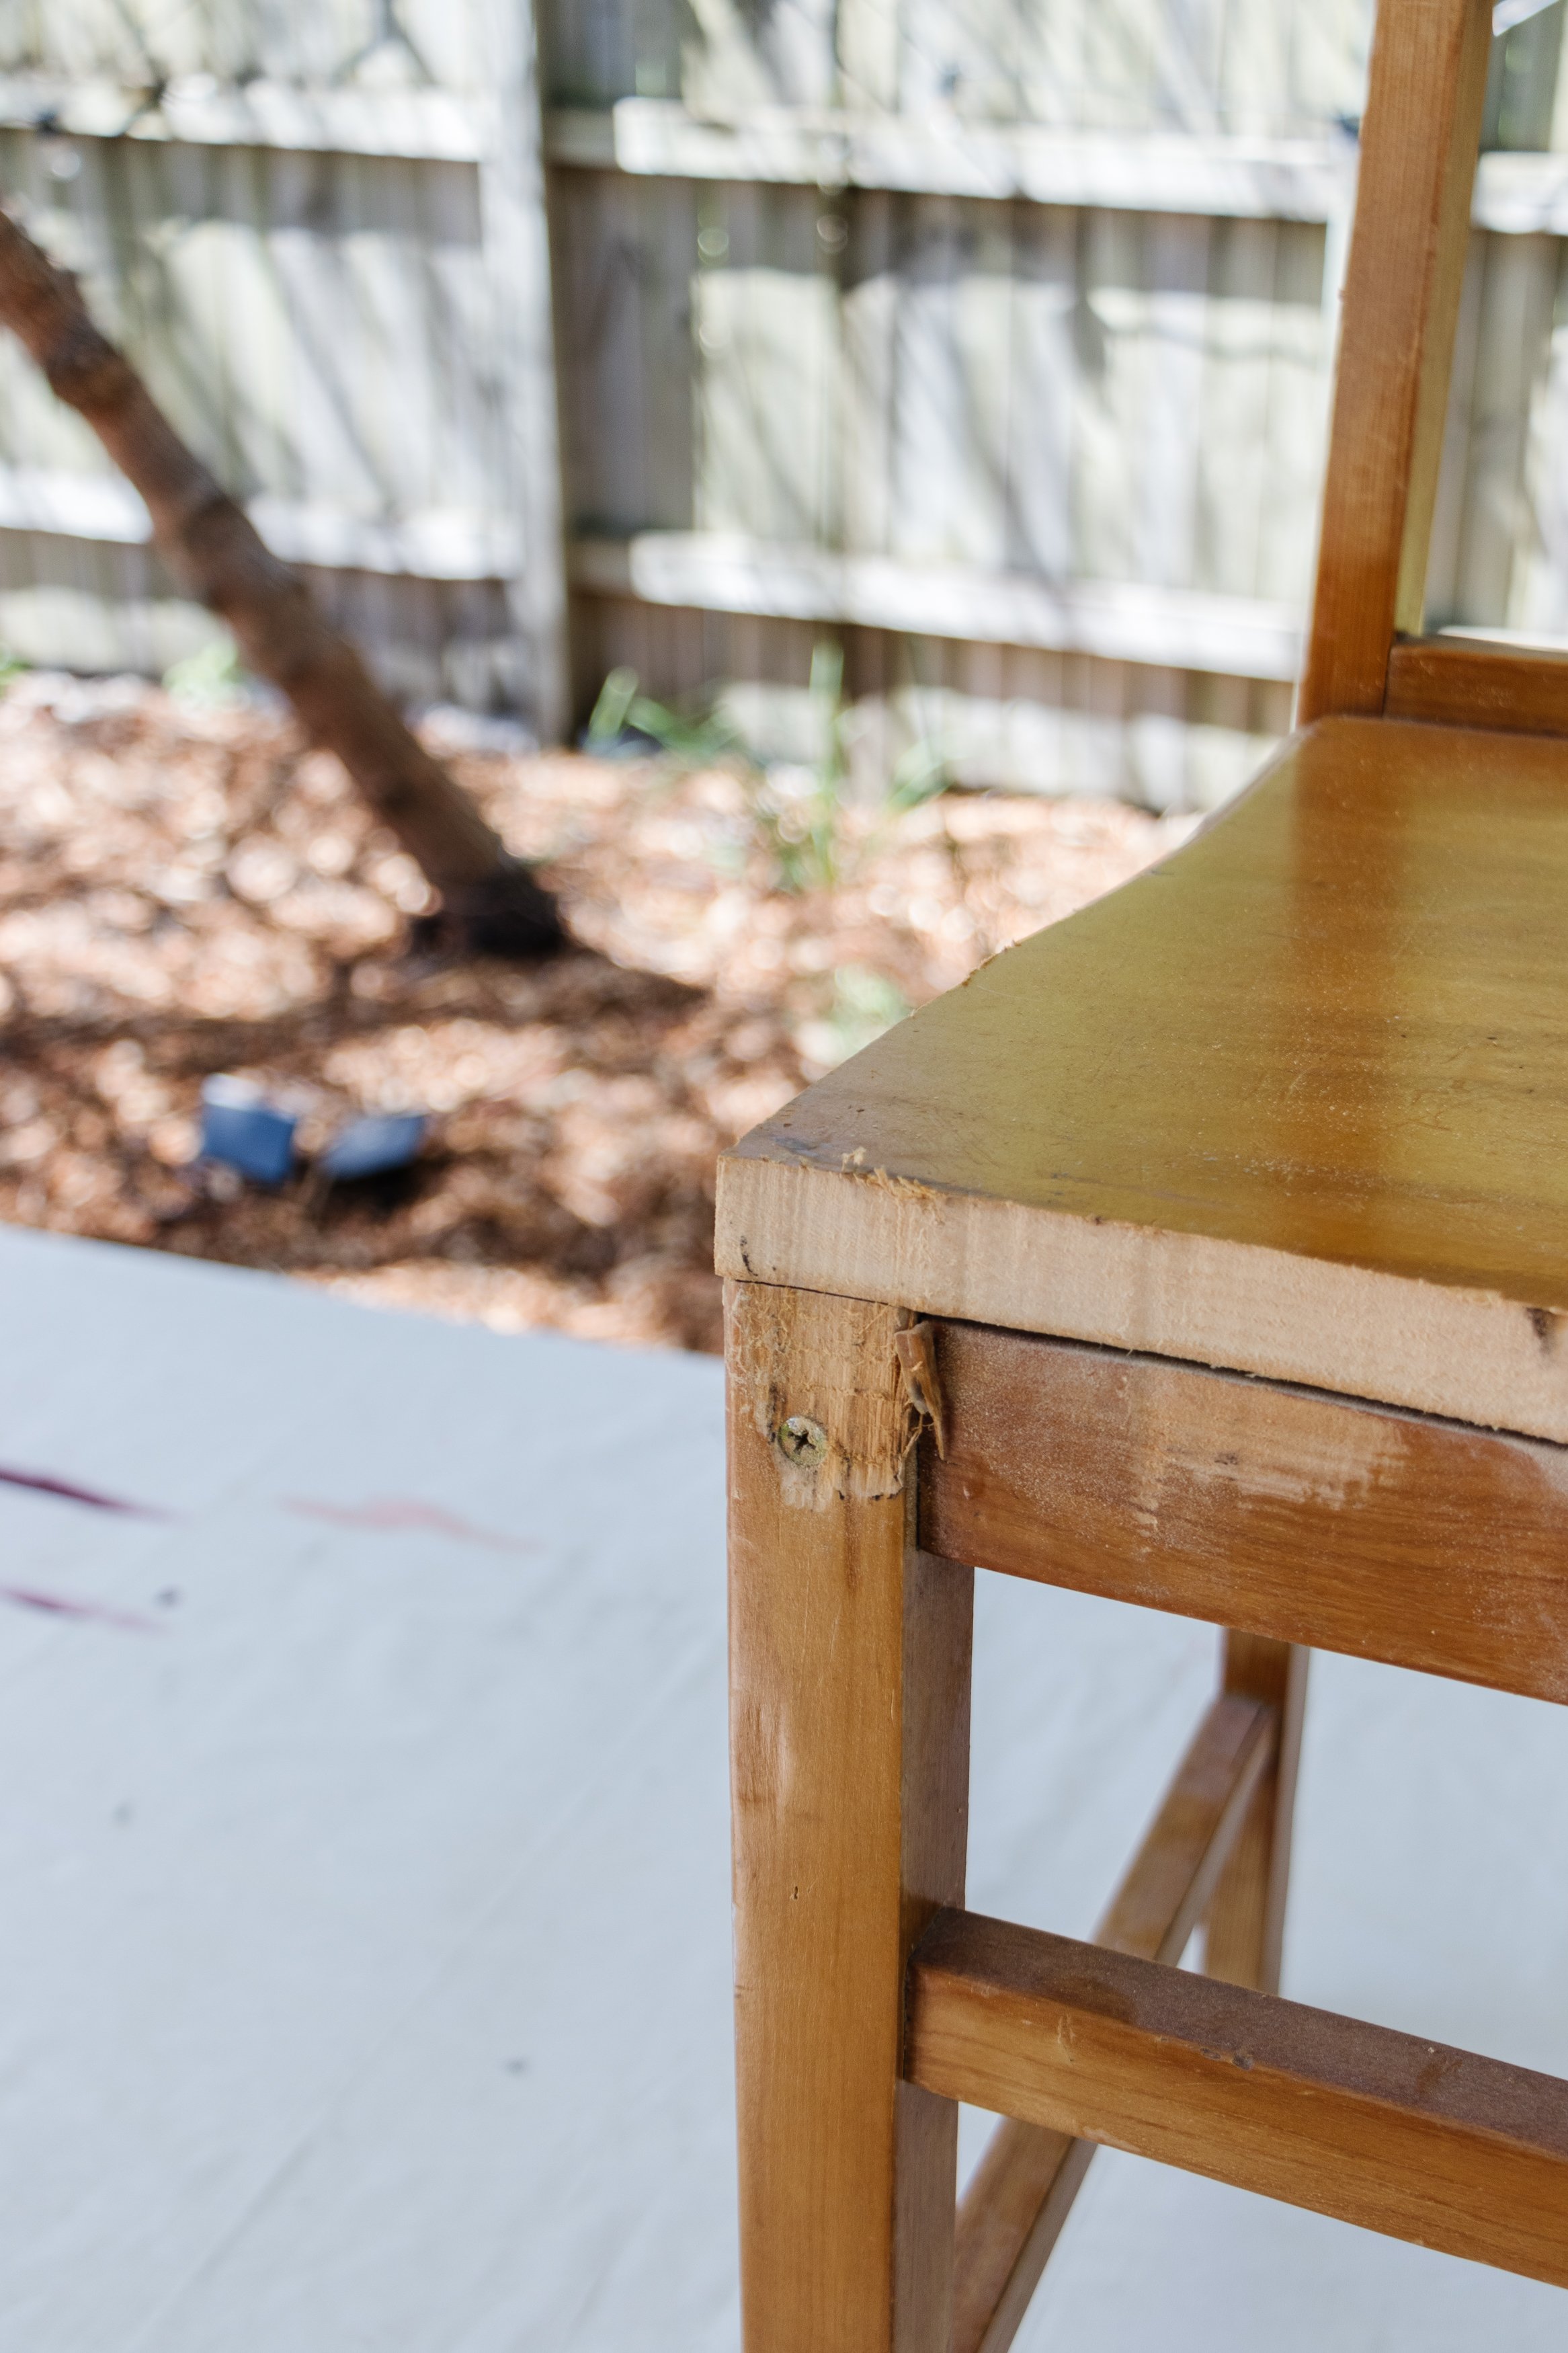
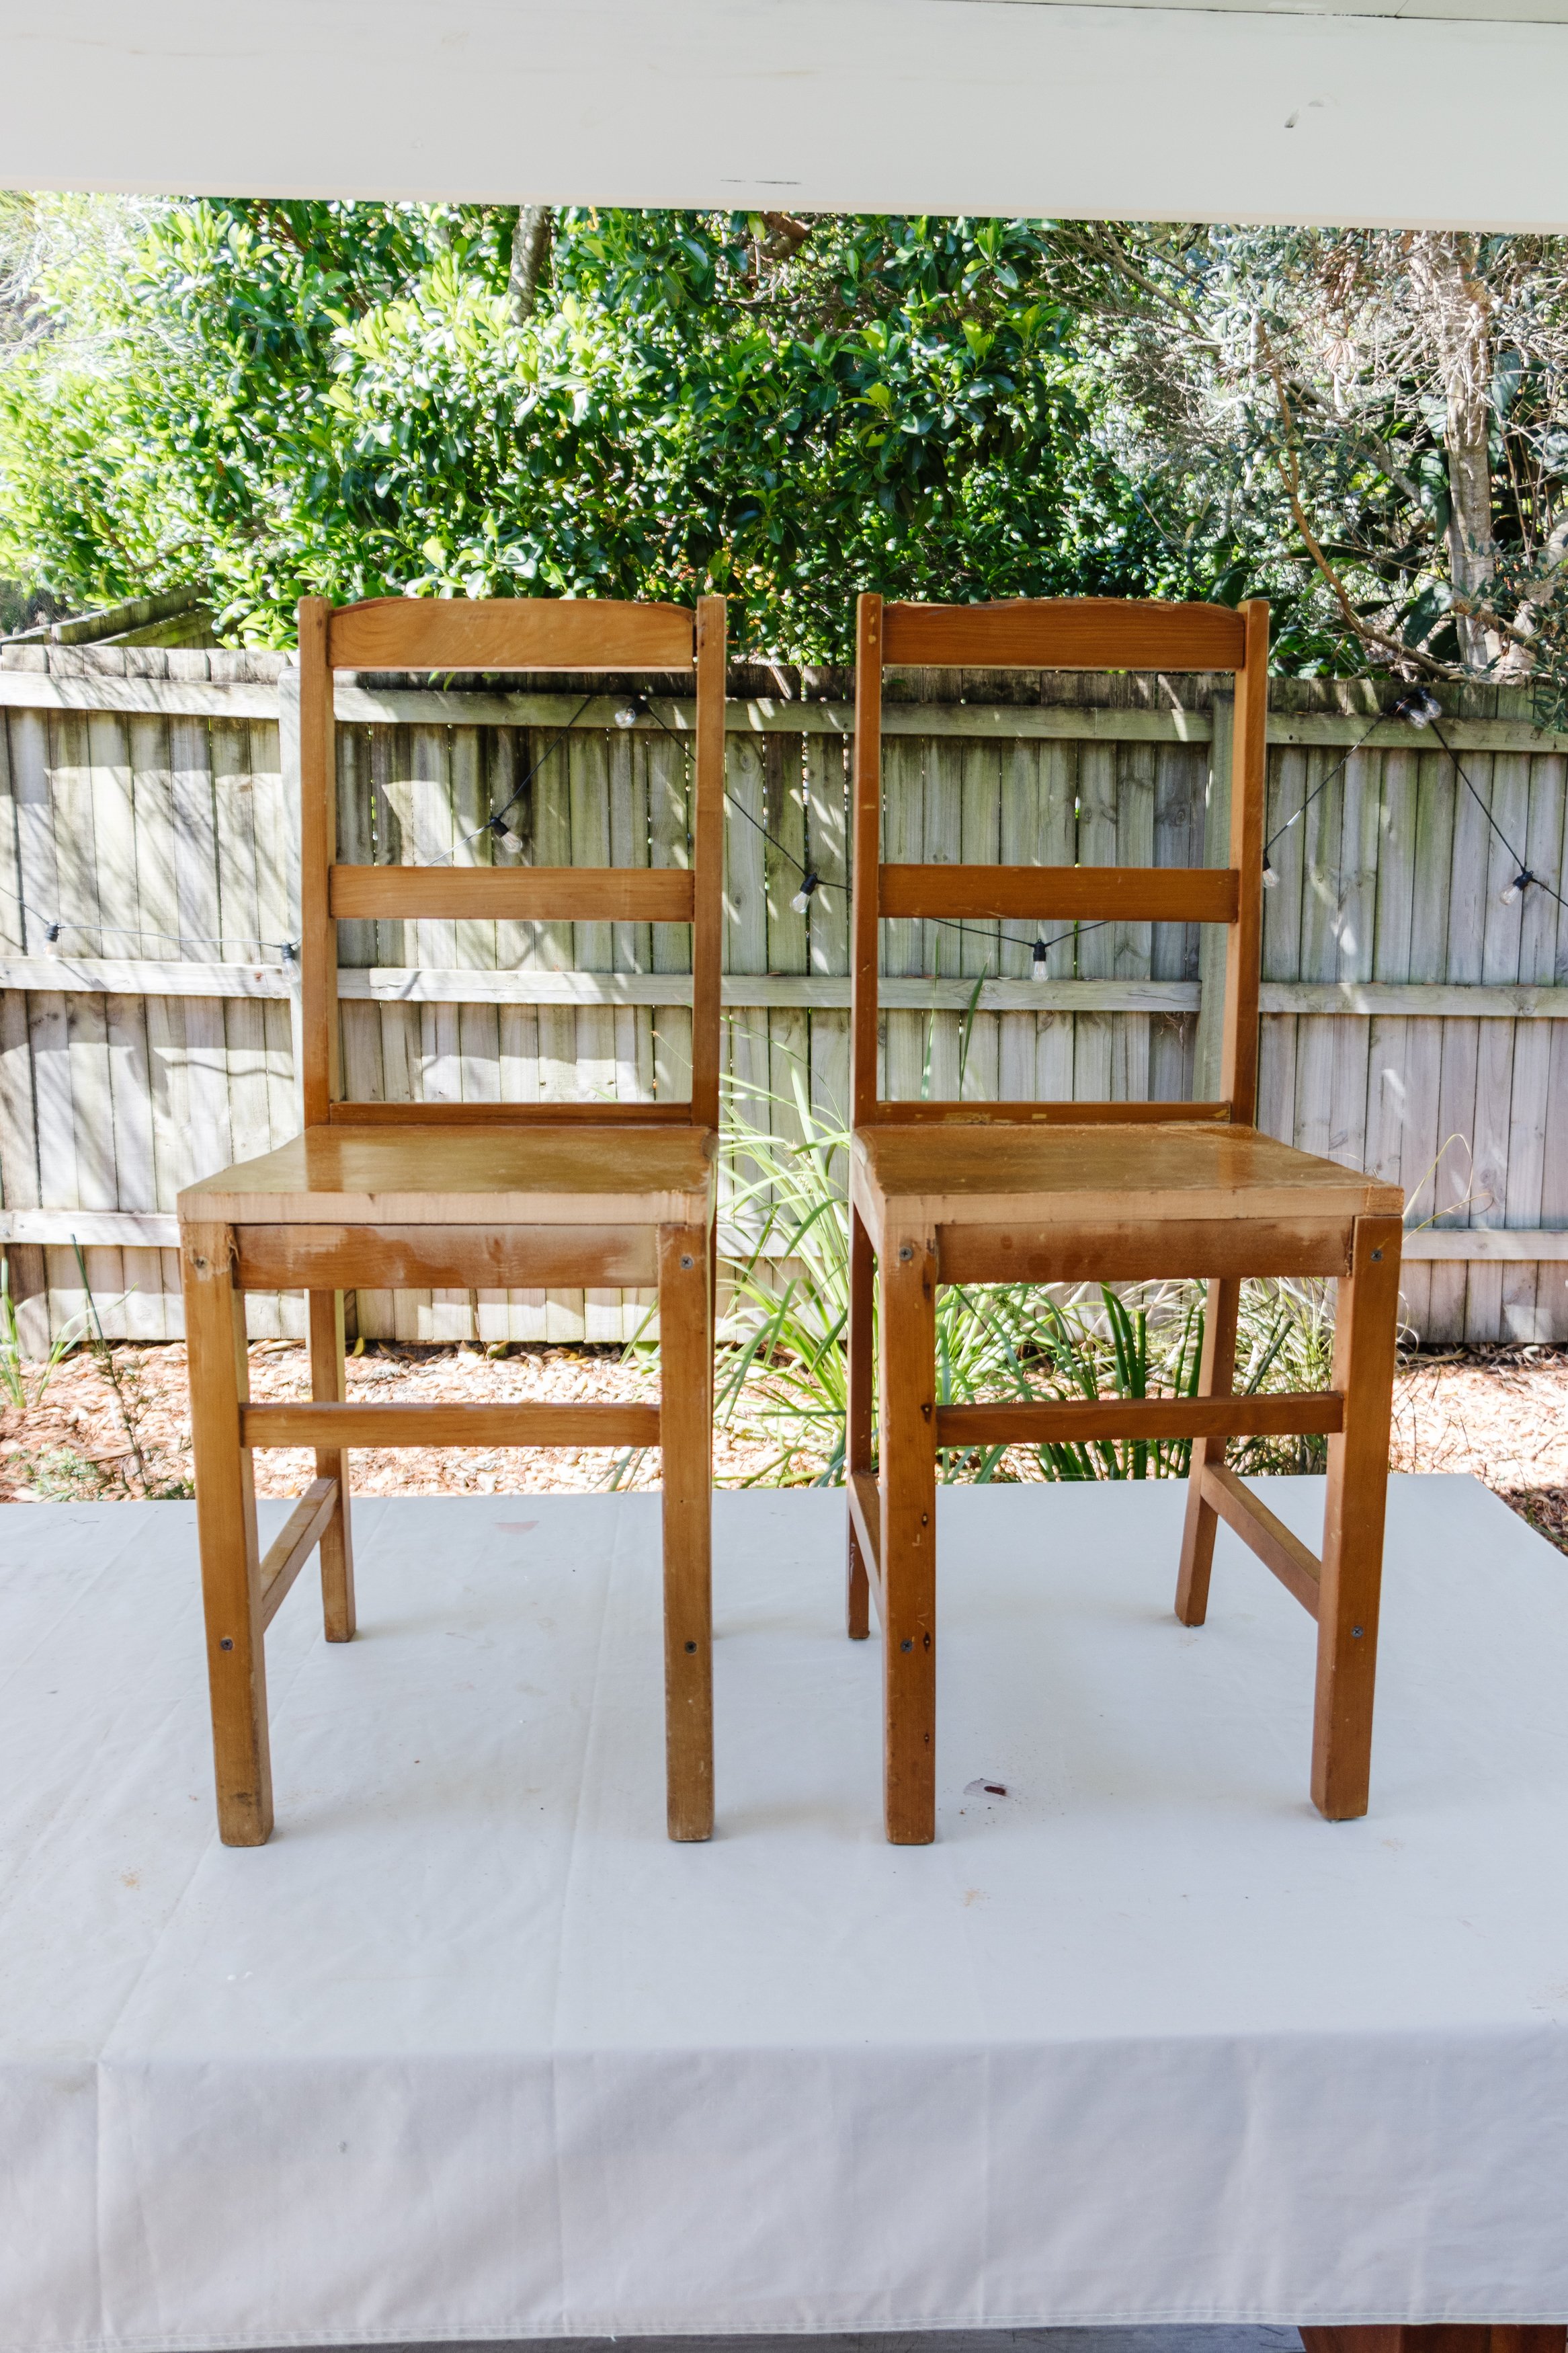
When I found this secondhand tulip table at a charity shop it was $100 and more than I would usually spend, but I fell in love with it and knew it was a forever piece. It didn’t come with any chairs, but I had recently upcycled these Crown Chairs and they looked perfect with the table. The thing is, I need at least four chairs for meetings (and let’s be honest, the kids when they want to do colouring with me while I’m working) and I knew I would eventually need two more. As you know I am all about buying secondhand wherever possible and a little while ago I found two timber chairs for $5 each at a charity shop and I started getting an idea. I wonder if I could plaster them? I had seen this chair on Pinterest a while ago and it stuck in my mind. So, off I went. And here we are. Read on to find out how I used plaster to upcycle two wooden chairs.
And make sure to watch this video to see how it all came together
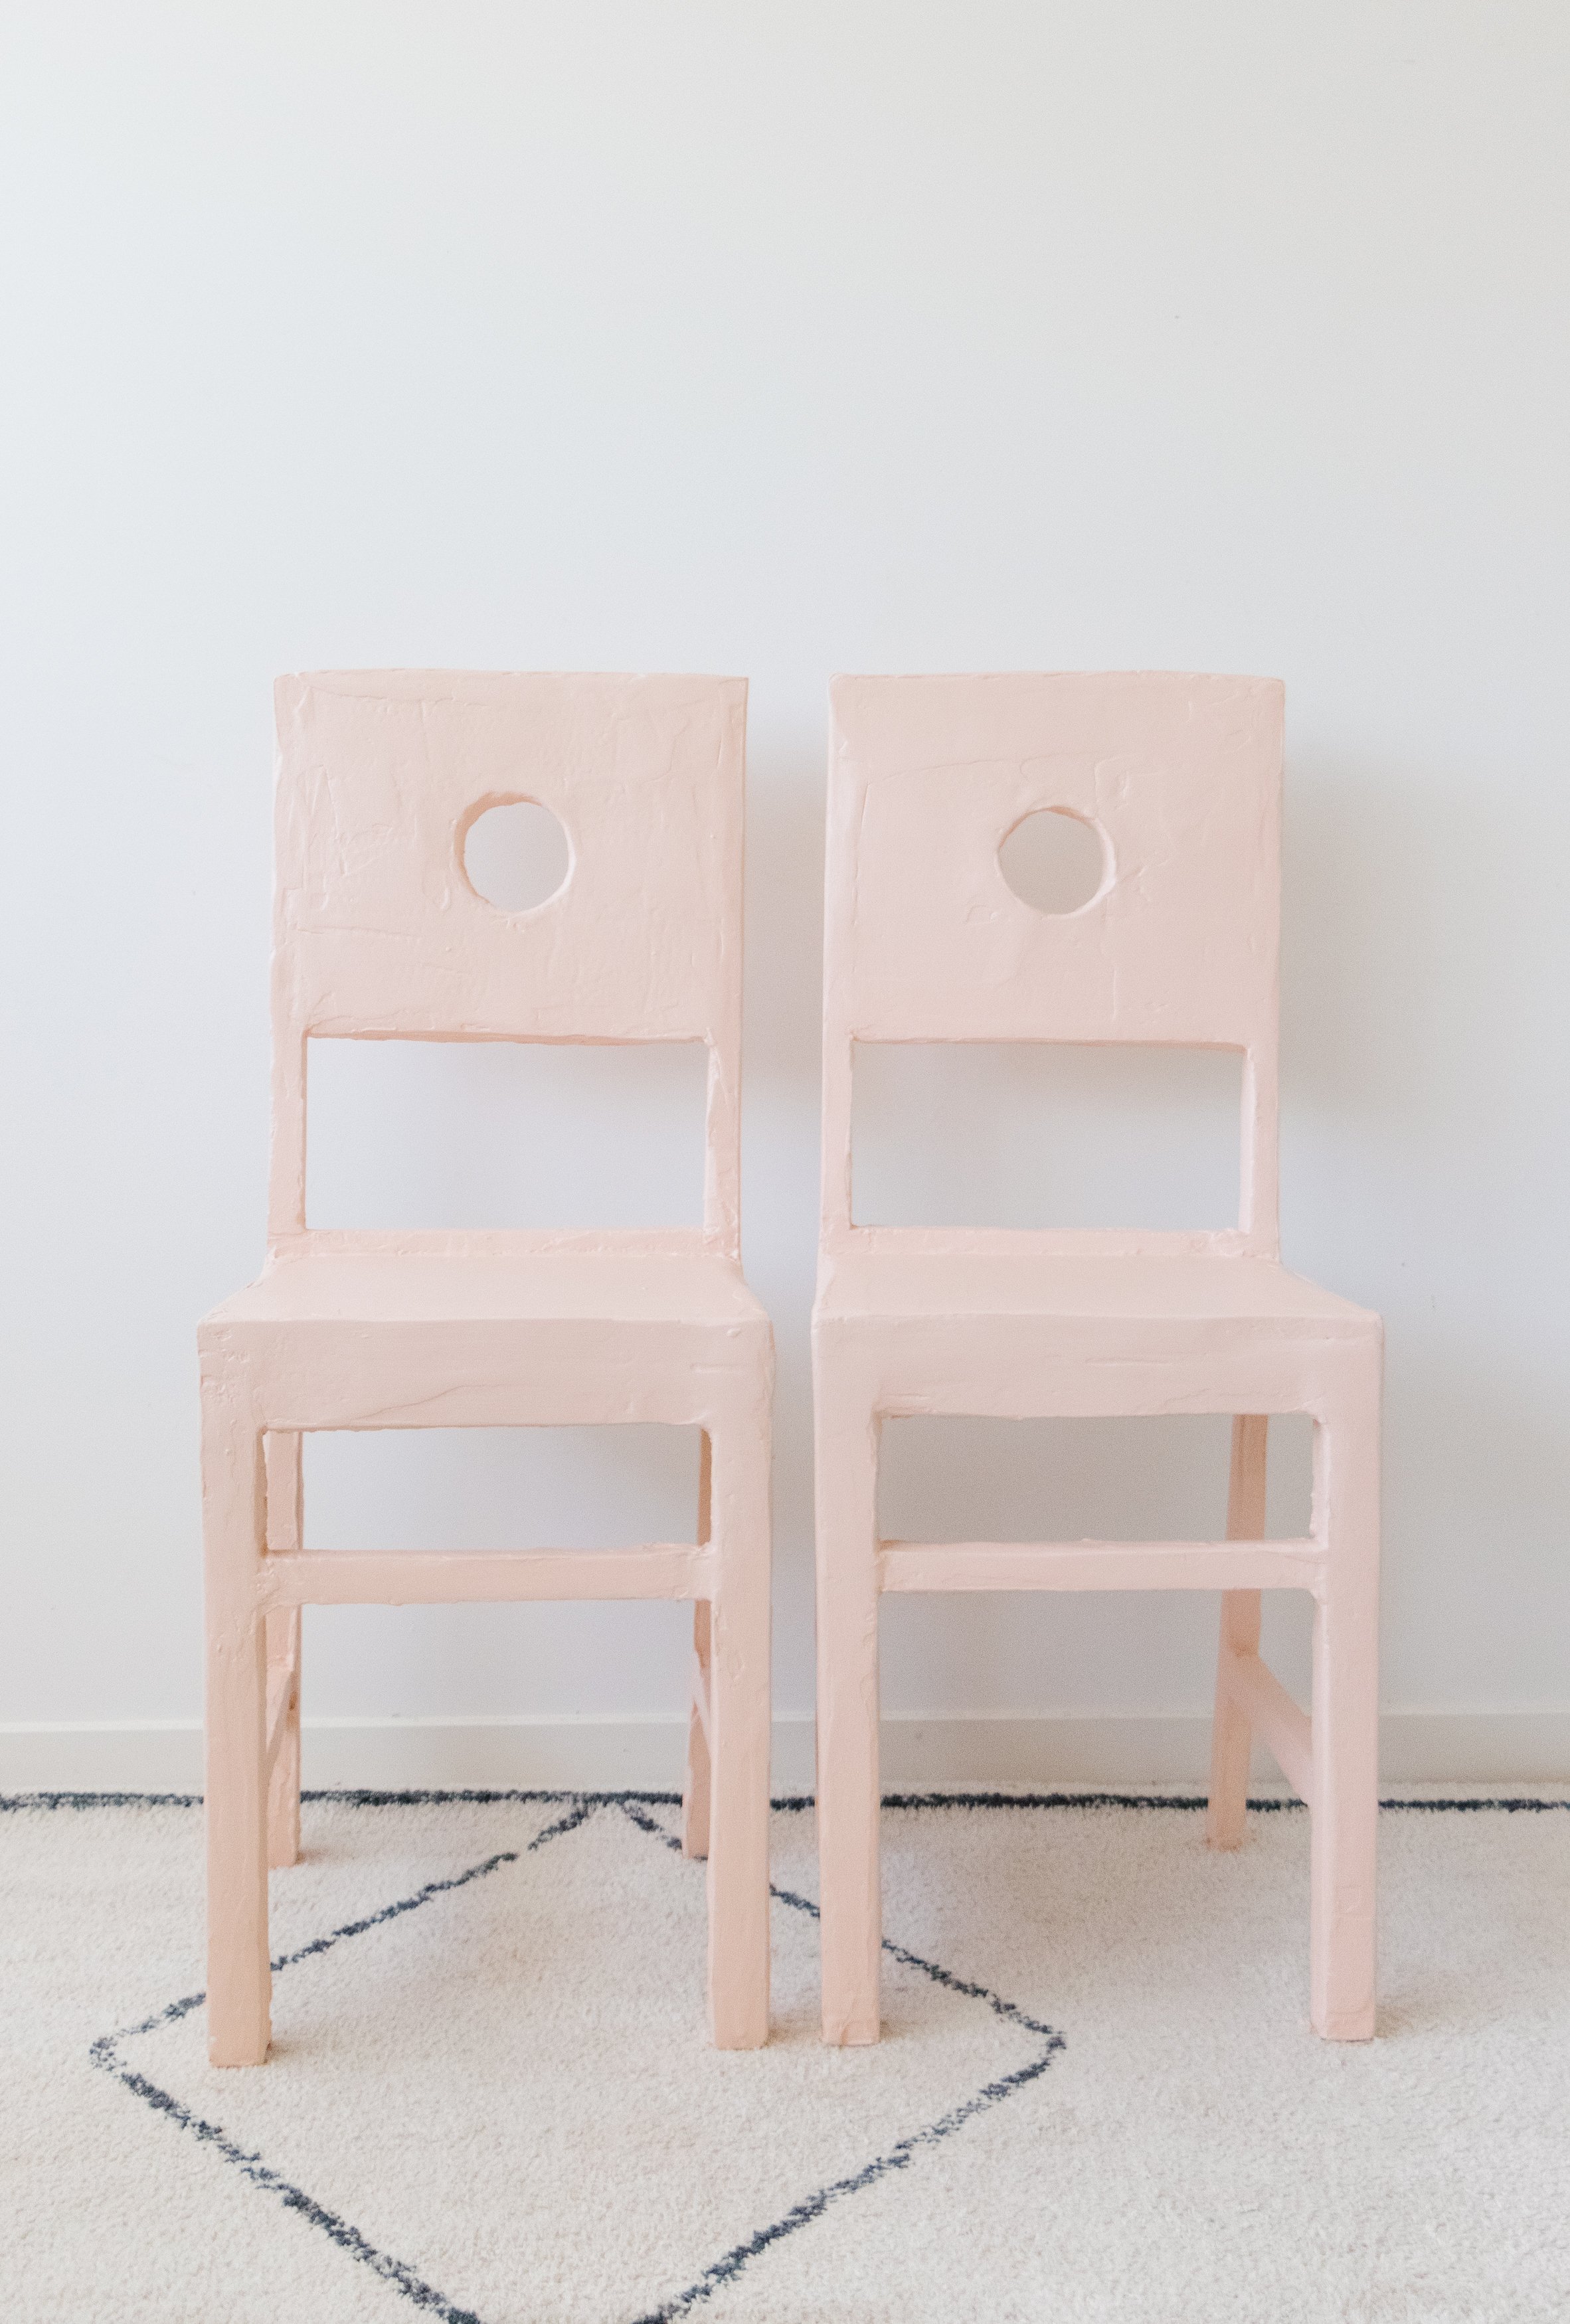
Before & After

Project Details
♻️ Upcycling: Two wooden dining chairs
🕒 Project Time Estimate: 4 to 6 hours total over two days
🪑 Skill Level: Beginner to intermediate
👷♀️ Protective Gear: Safety eyewear, safety mask and ear plugs
💰 Materials Cost: $60
Materials
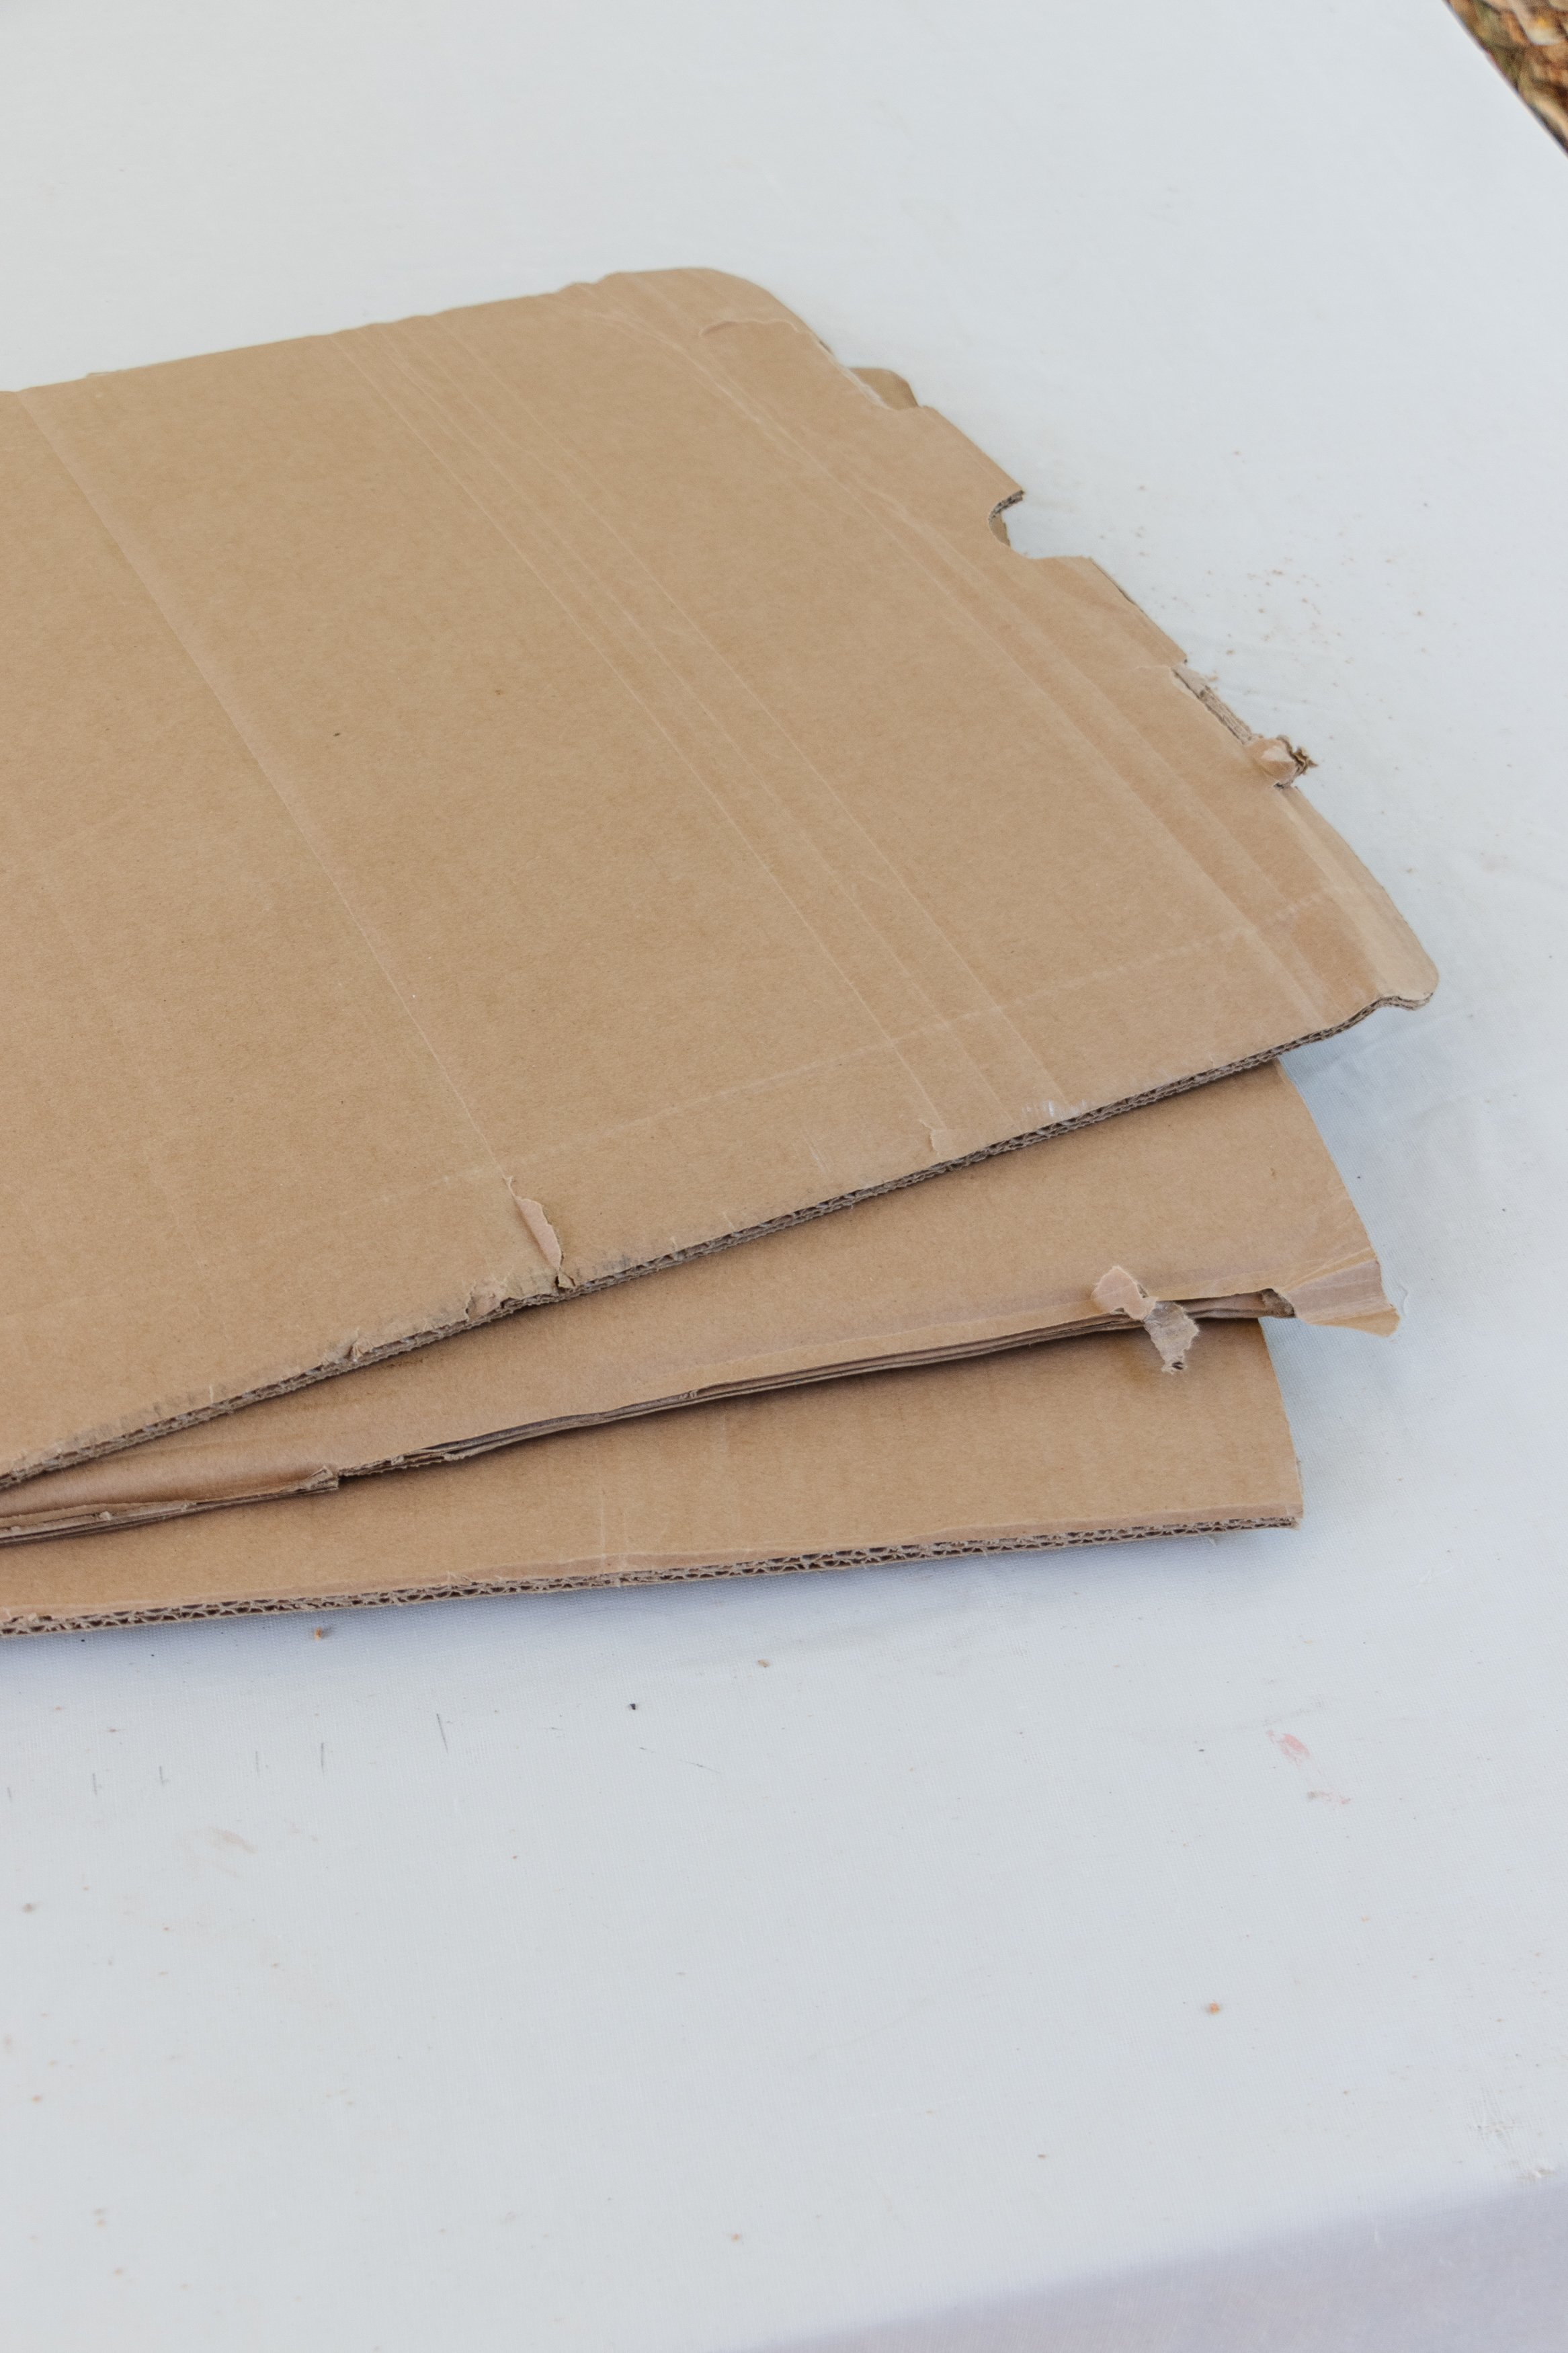
Cardboard box
Pen
Painters tape
Packing paper
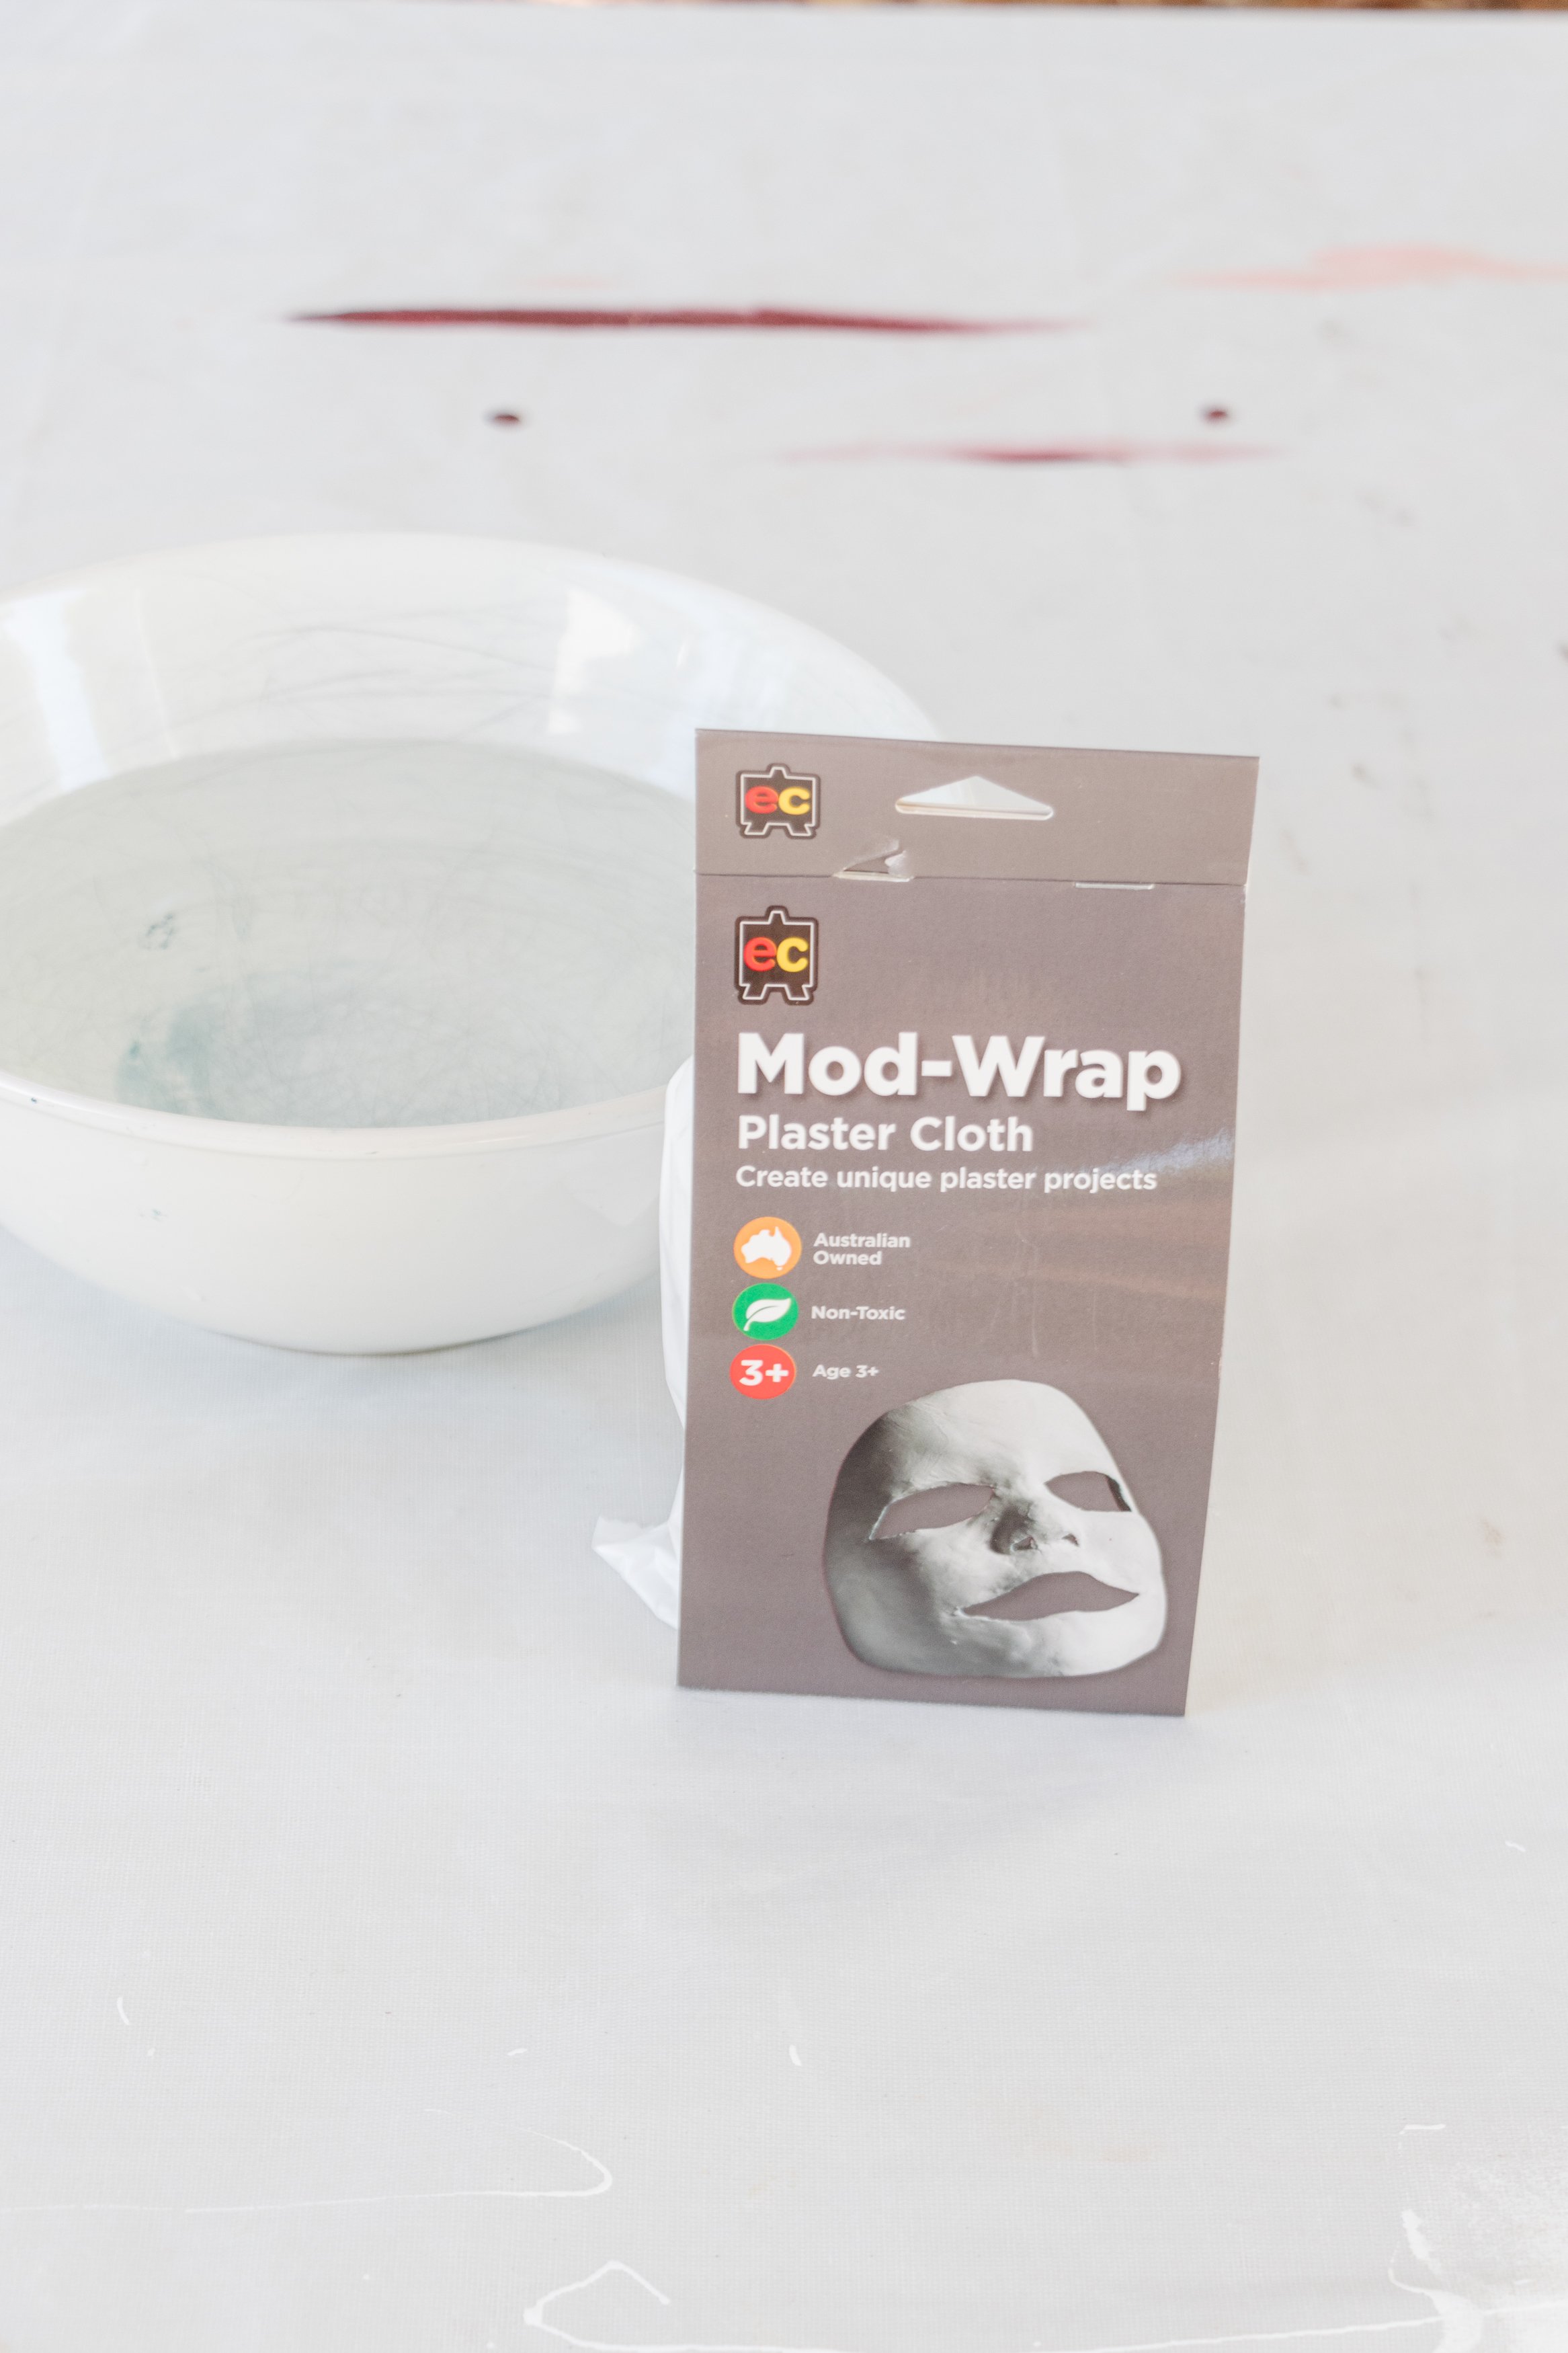
Plaster gauze
Multi-purpose joint compound
250ml White exterior paint
Tools
Handsaw
Jigsaw
Utility knife
Plaster scraper
Paint brush

How To
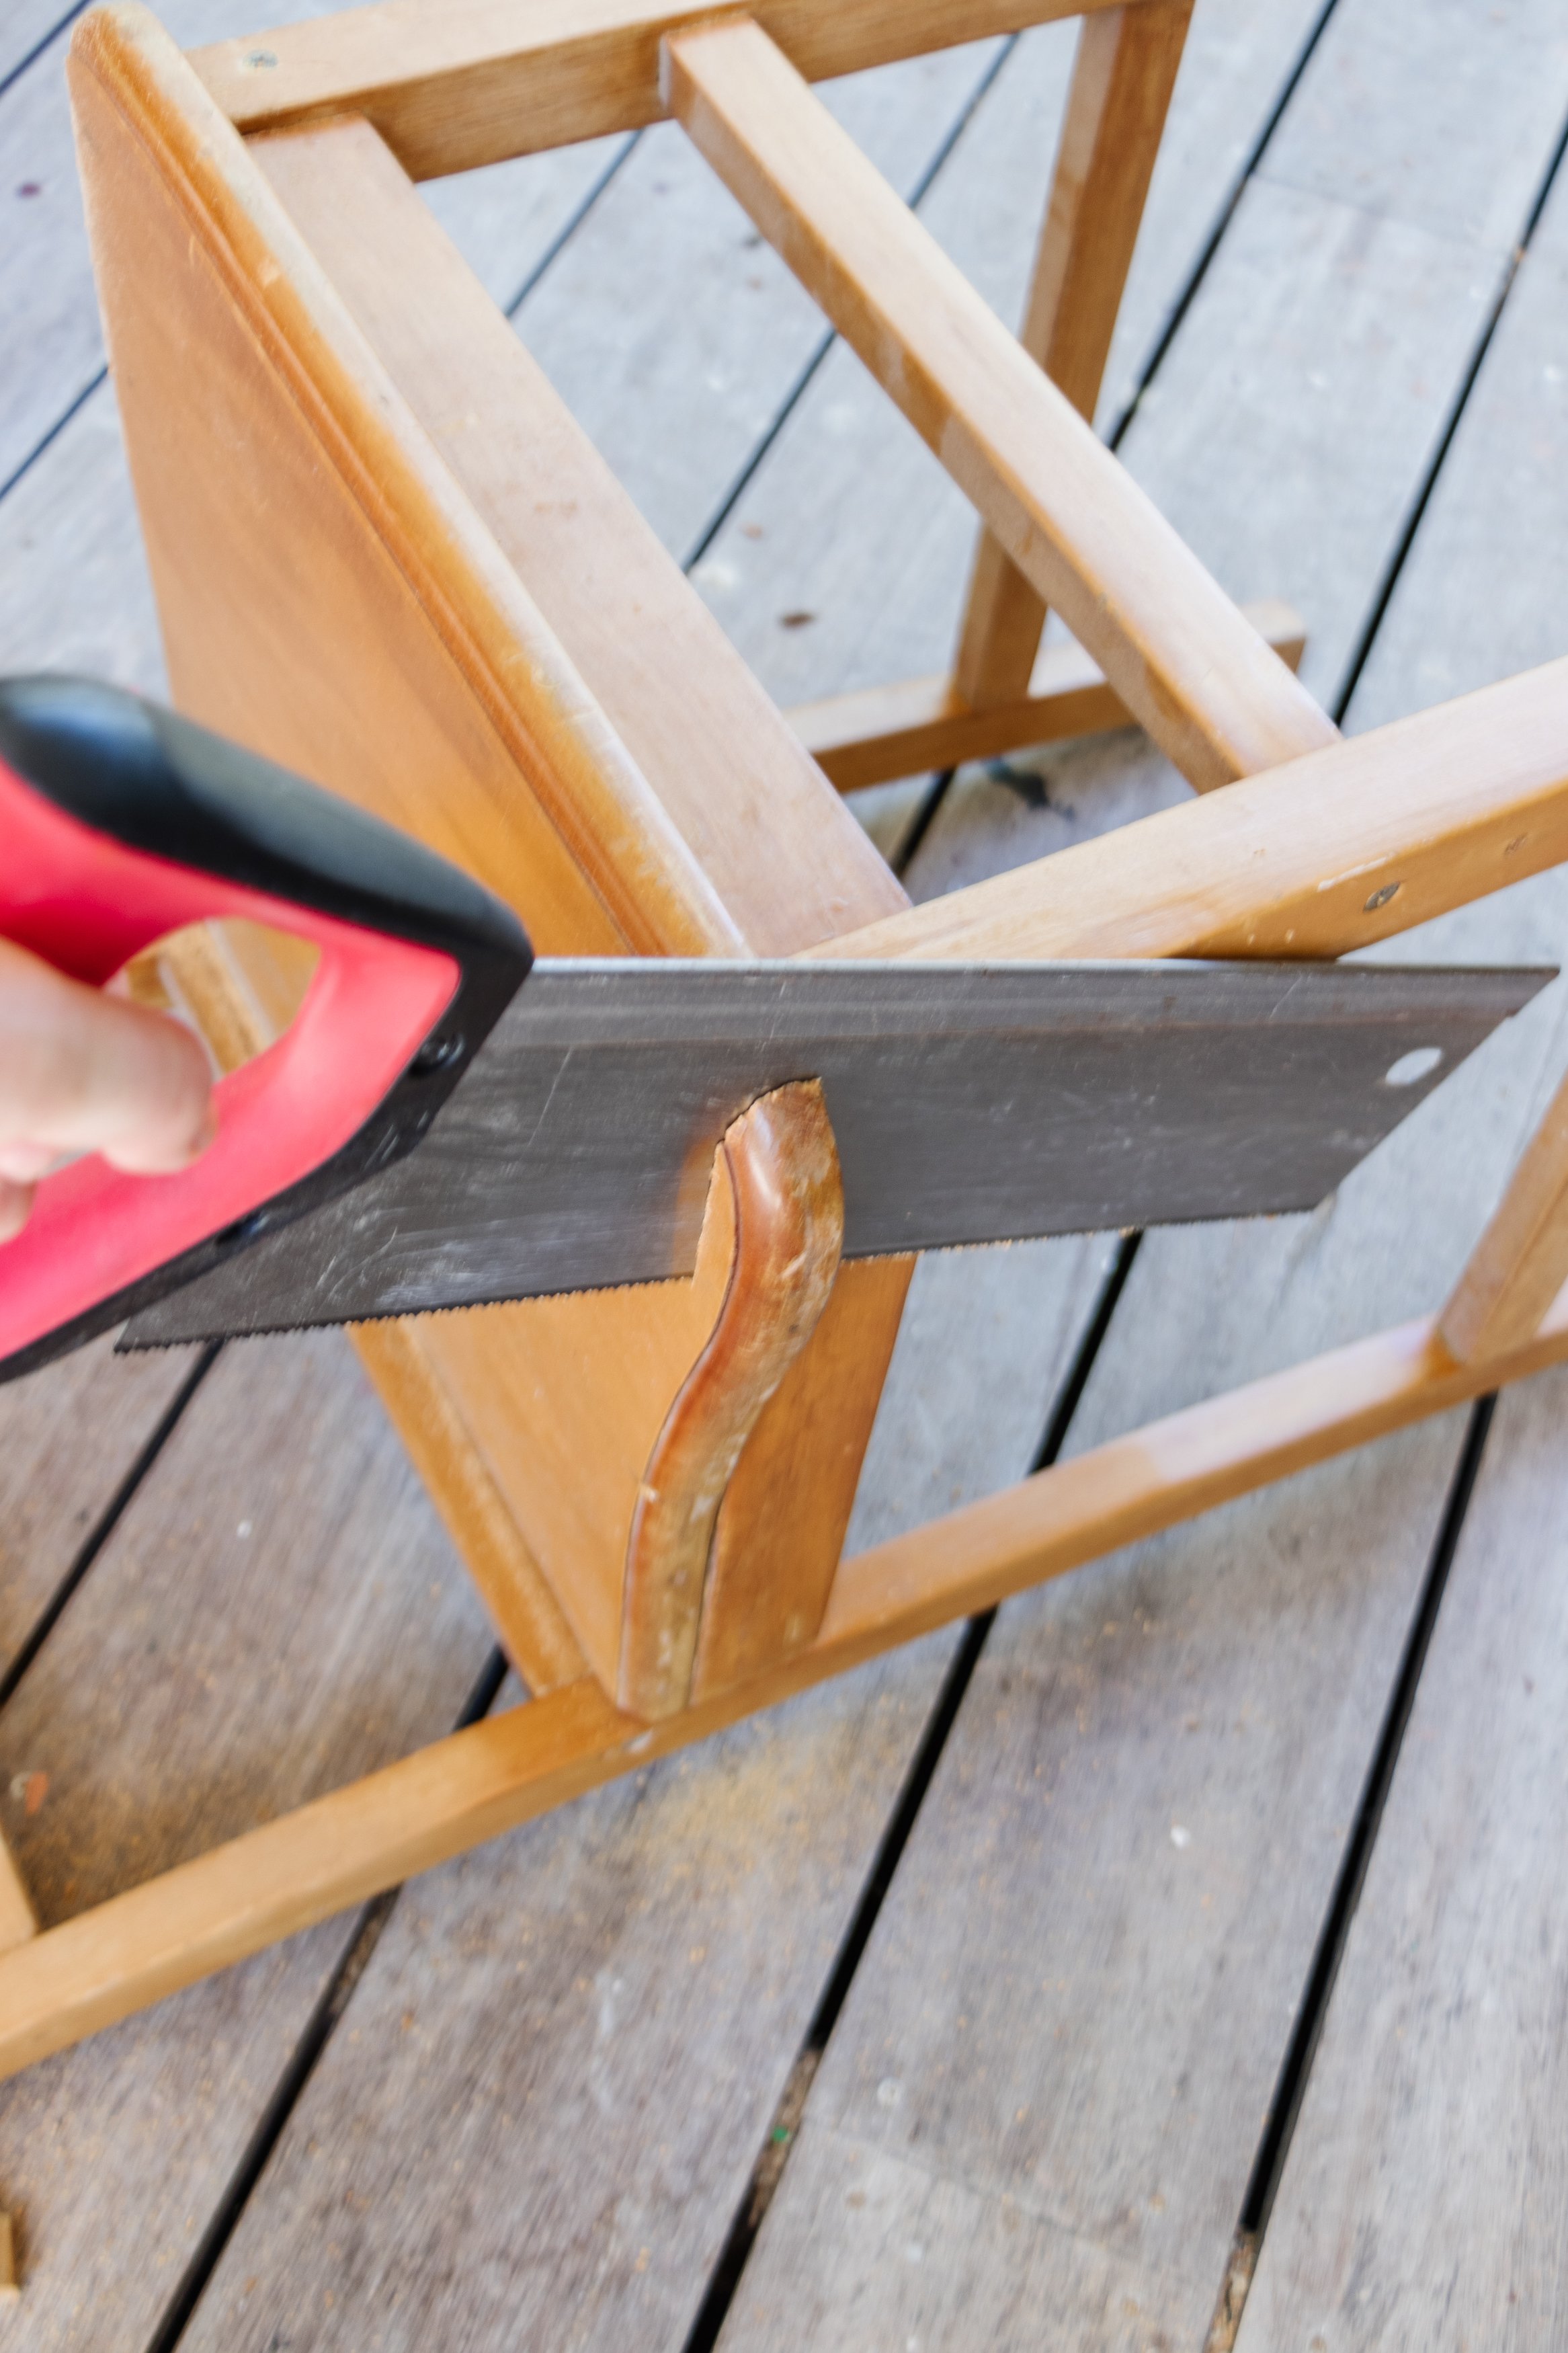
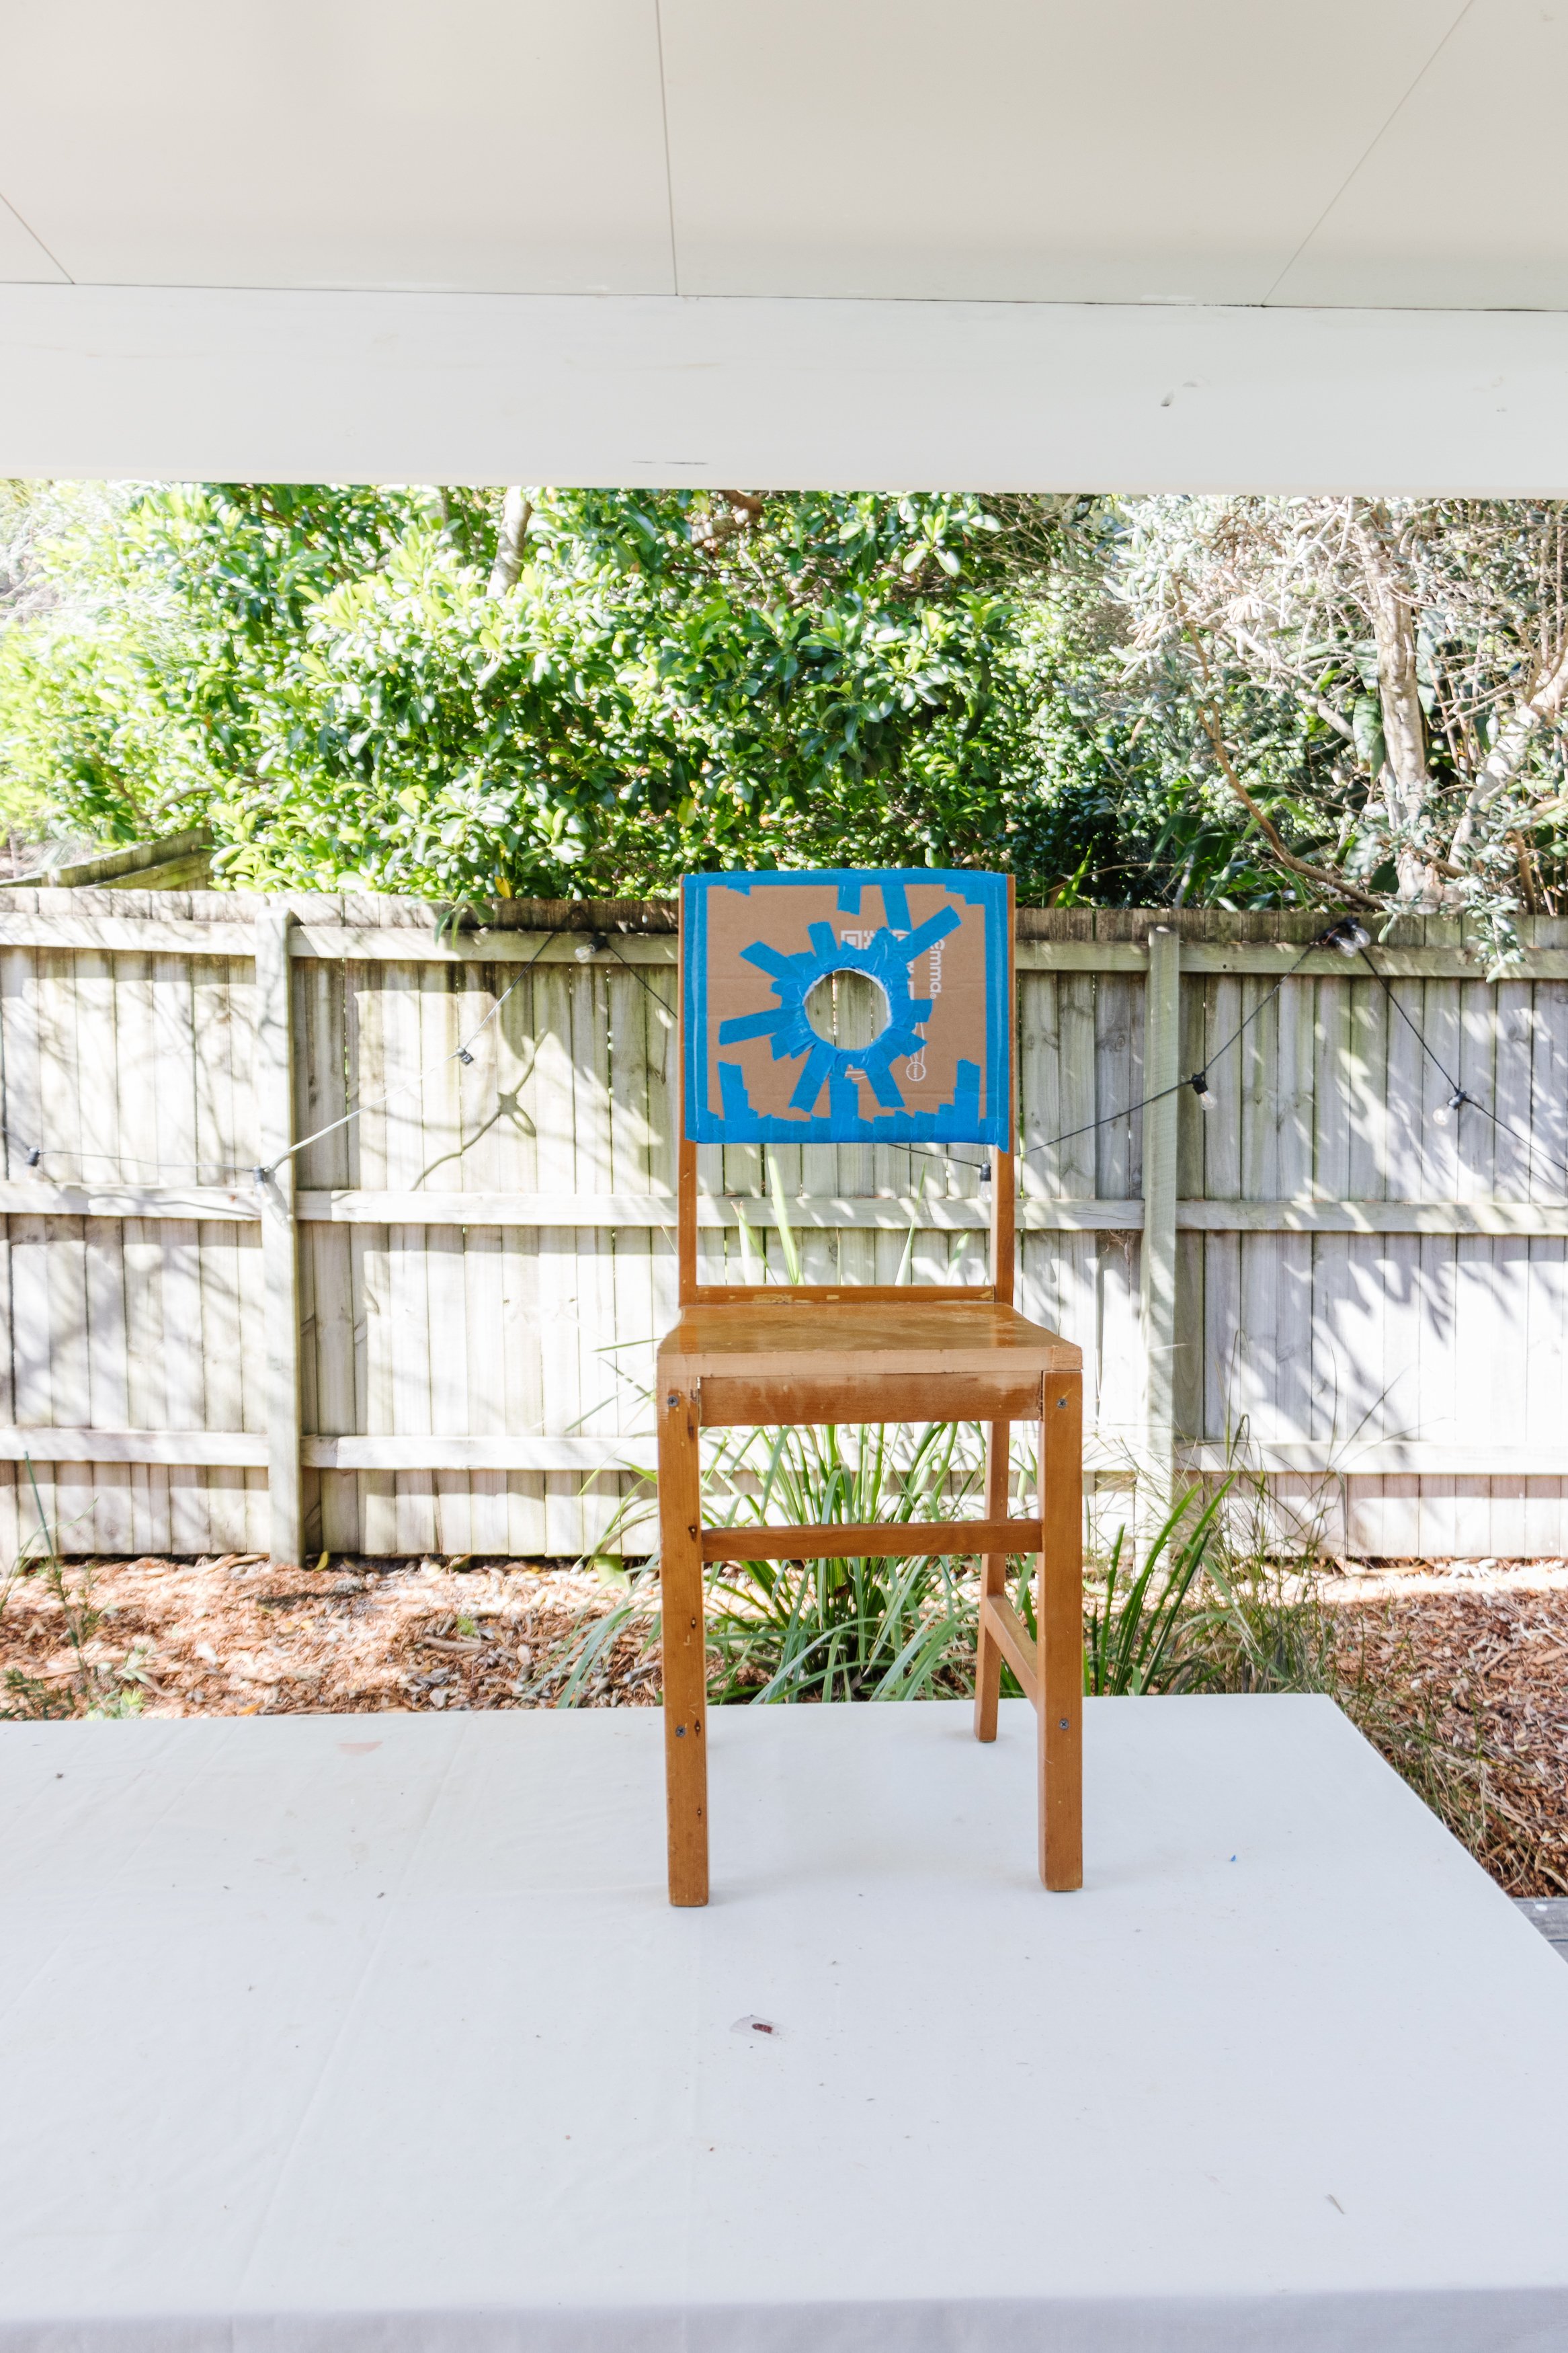
Step 1: To begin with I put on my safety gear and used my handsaw and jigsaw to remove the curved details on the chairs.


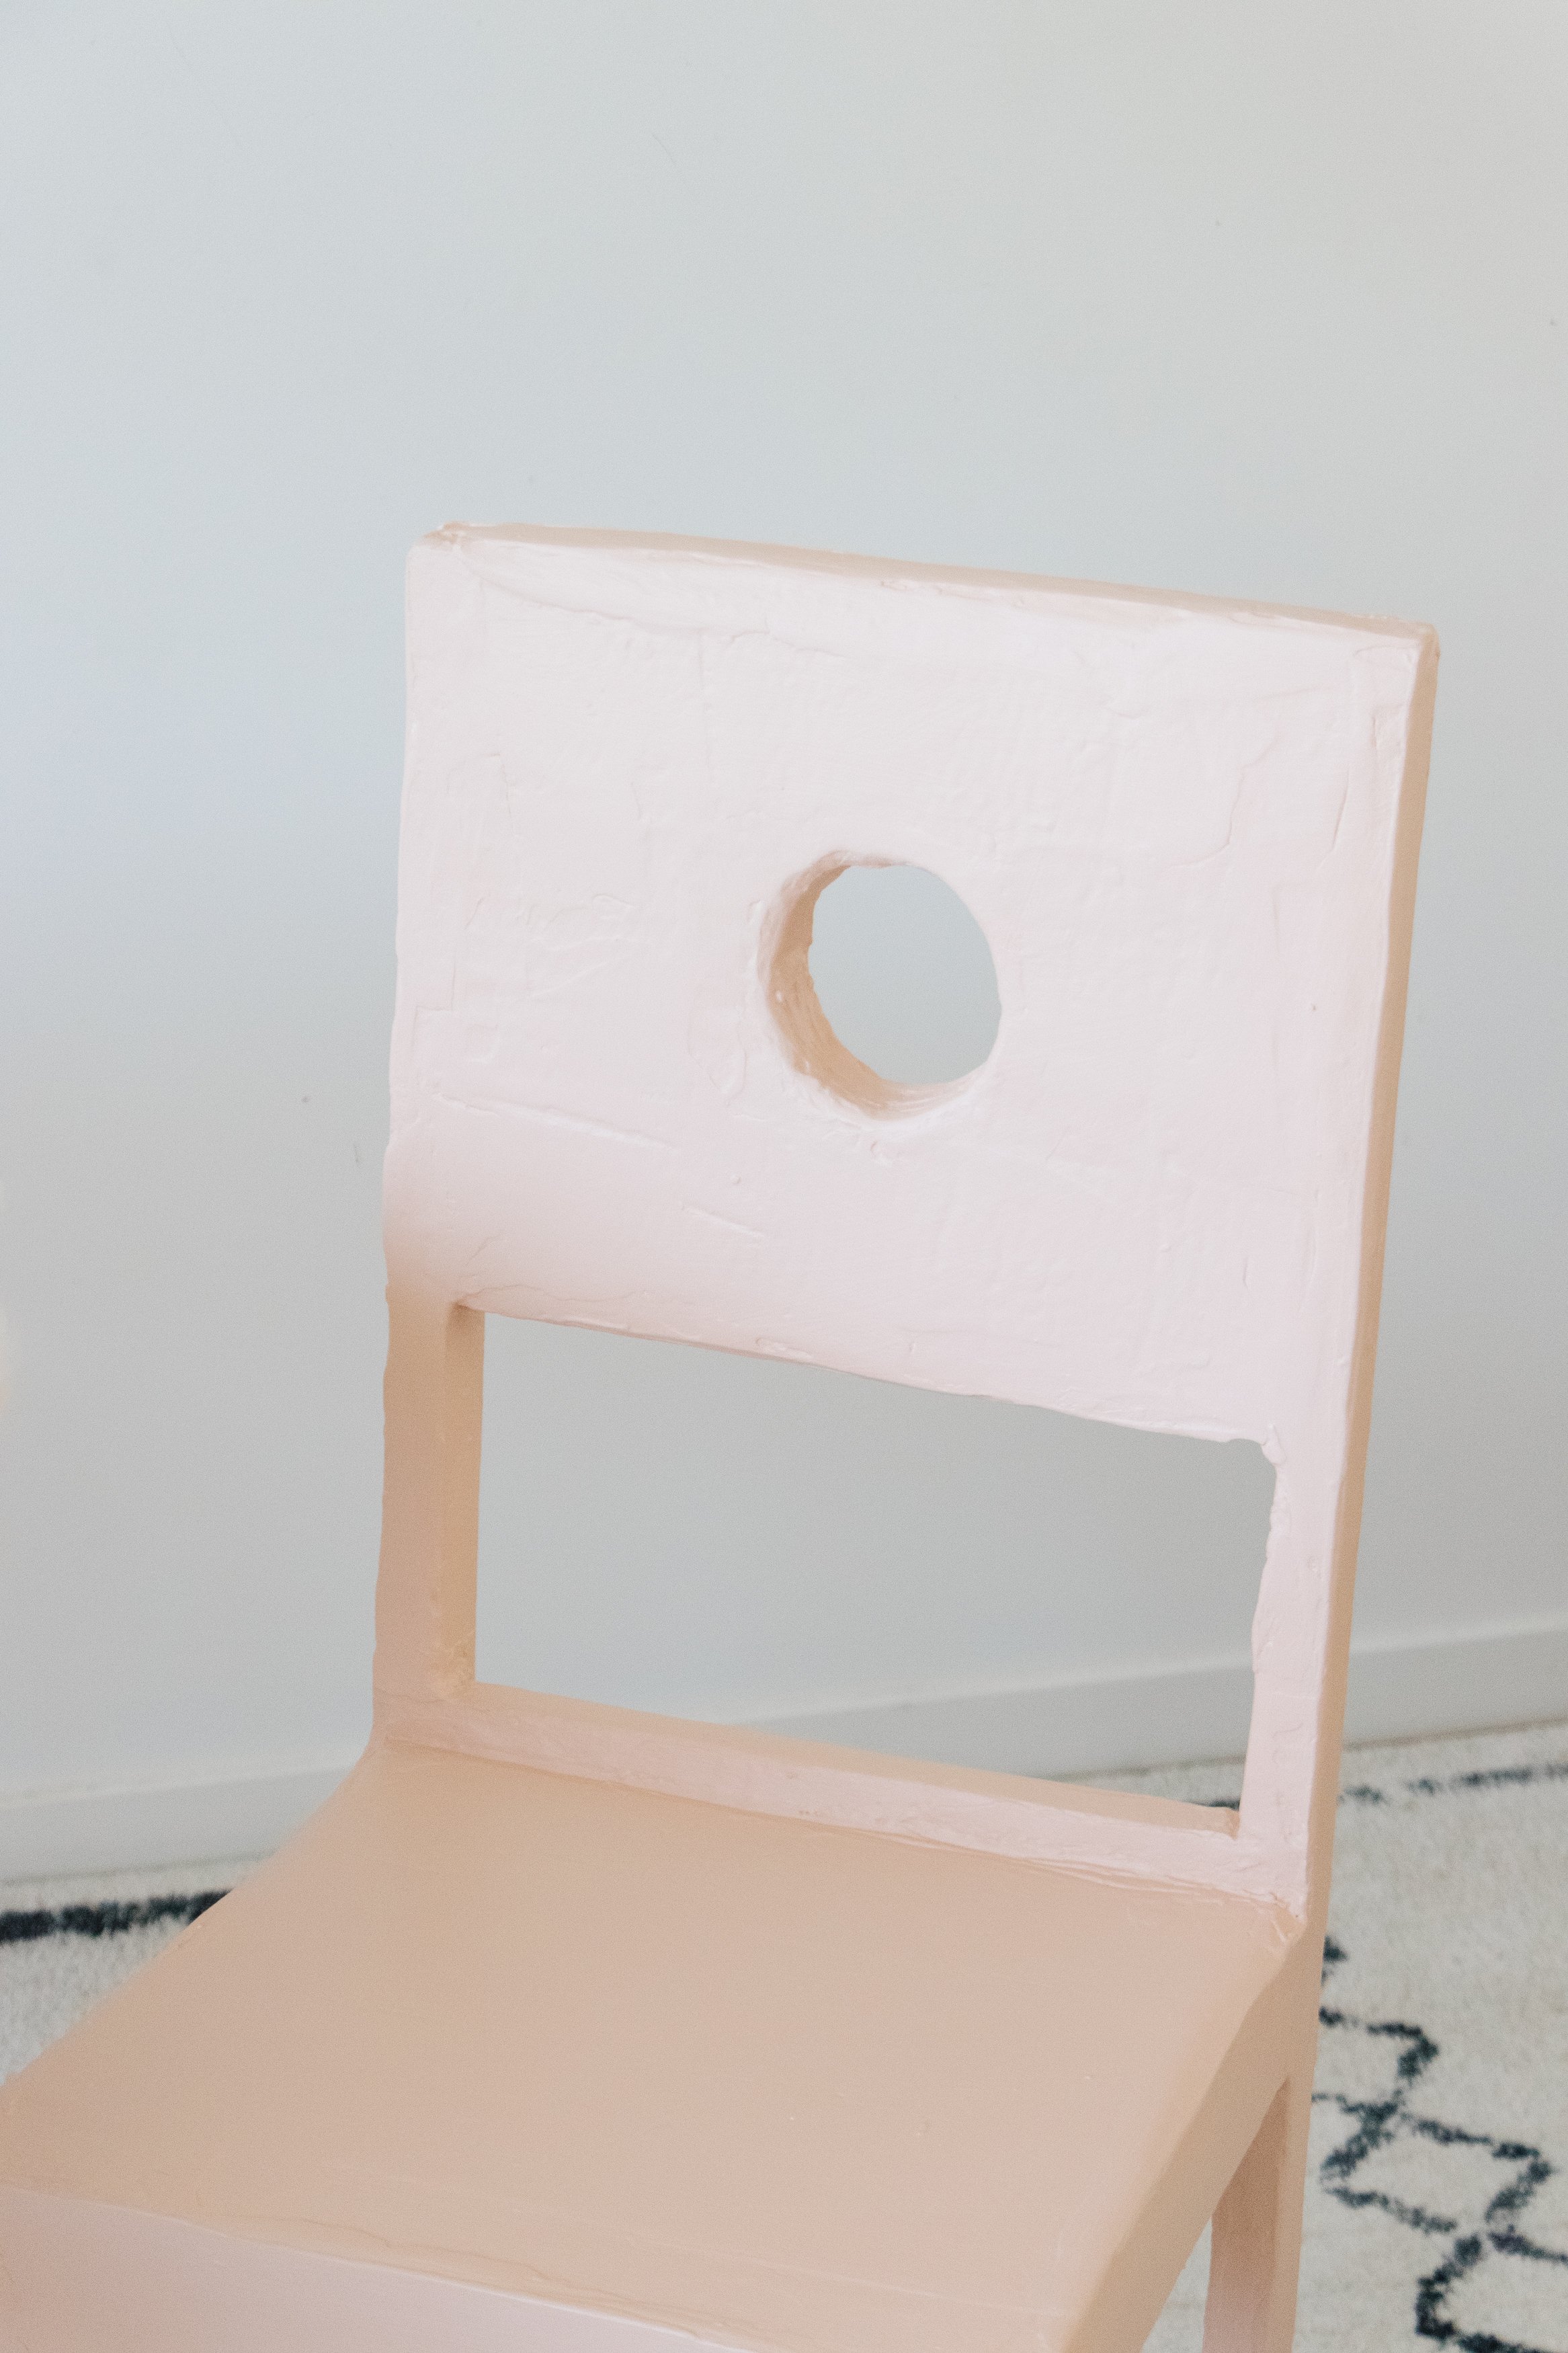
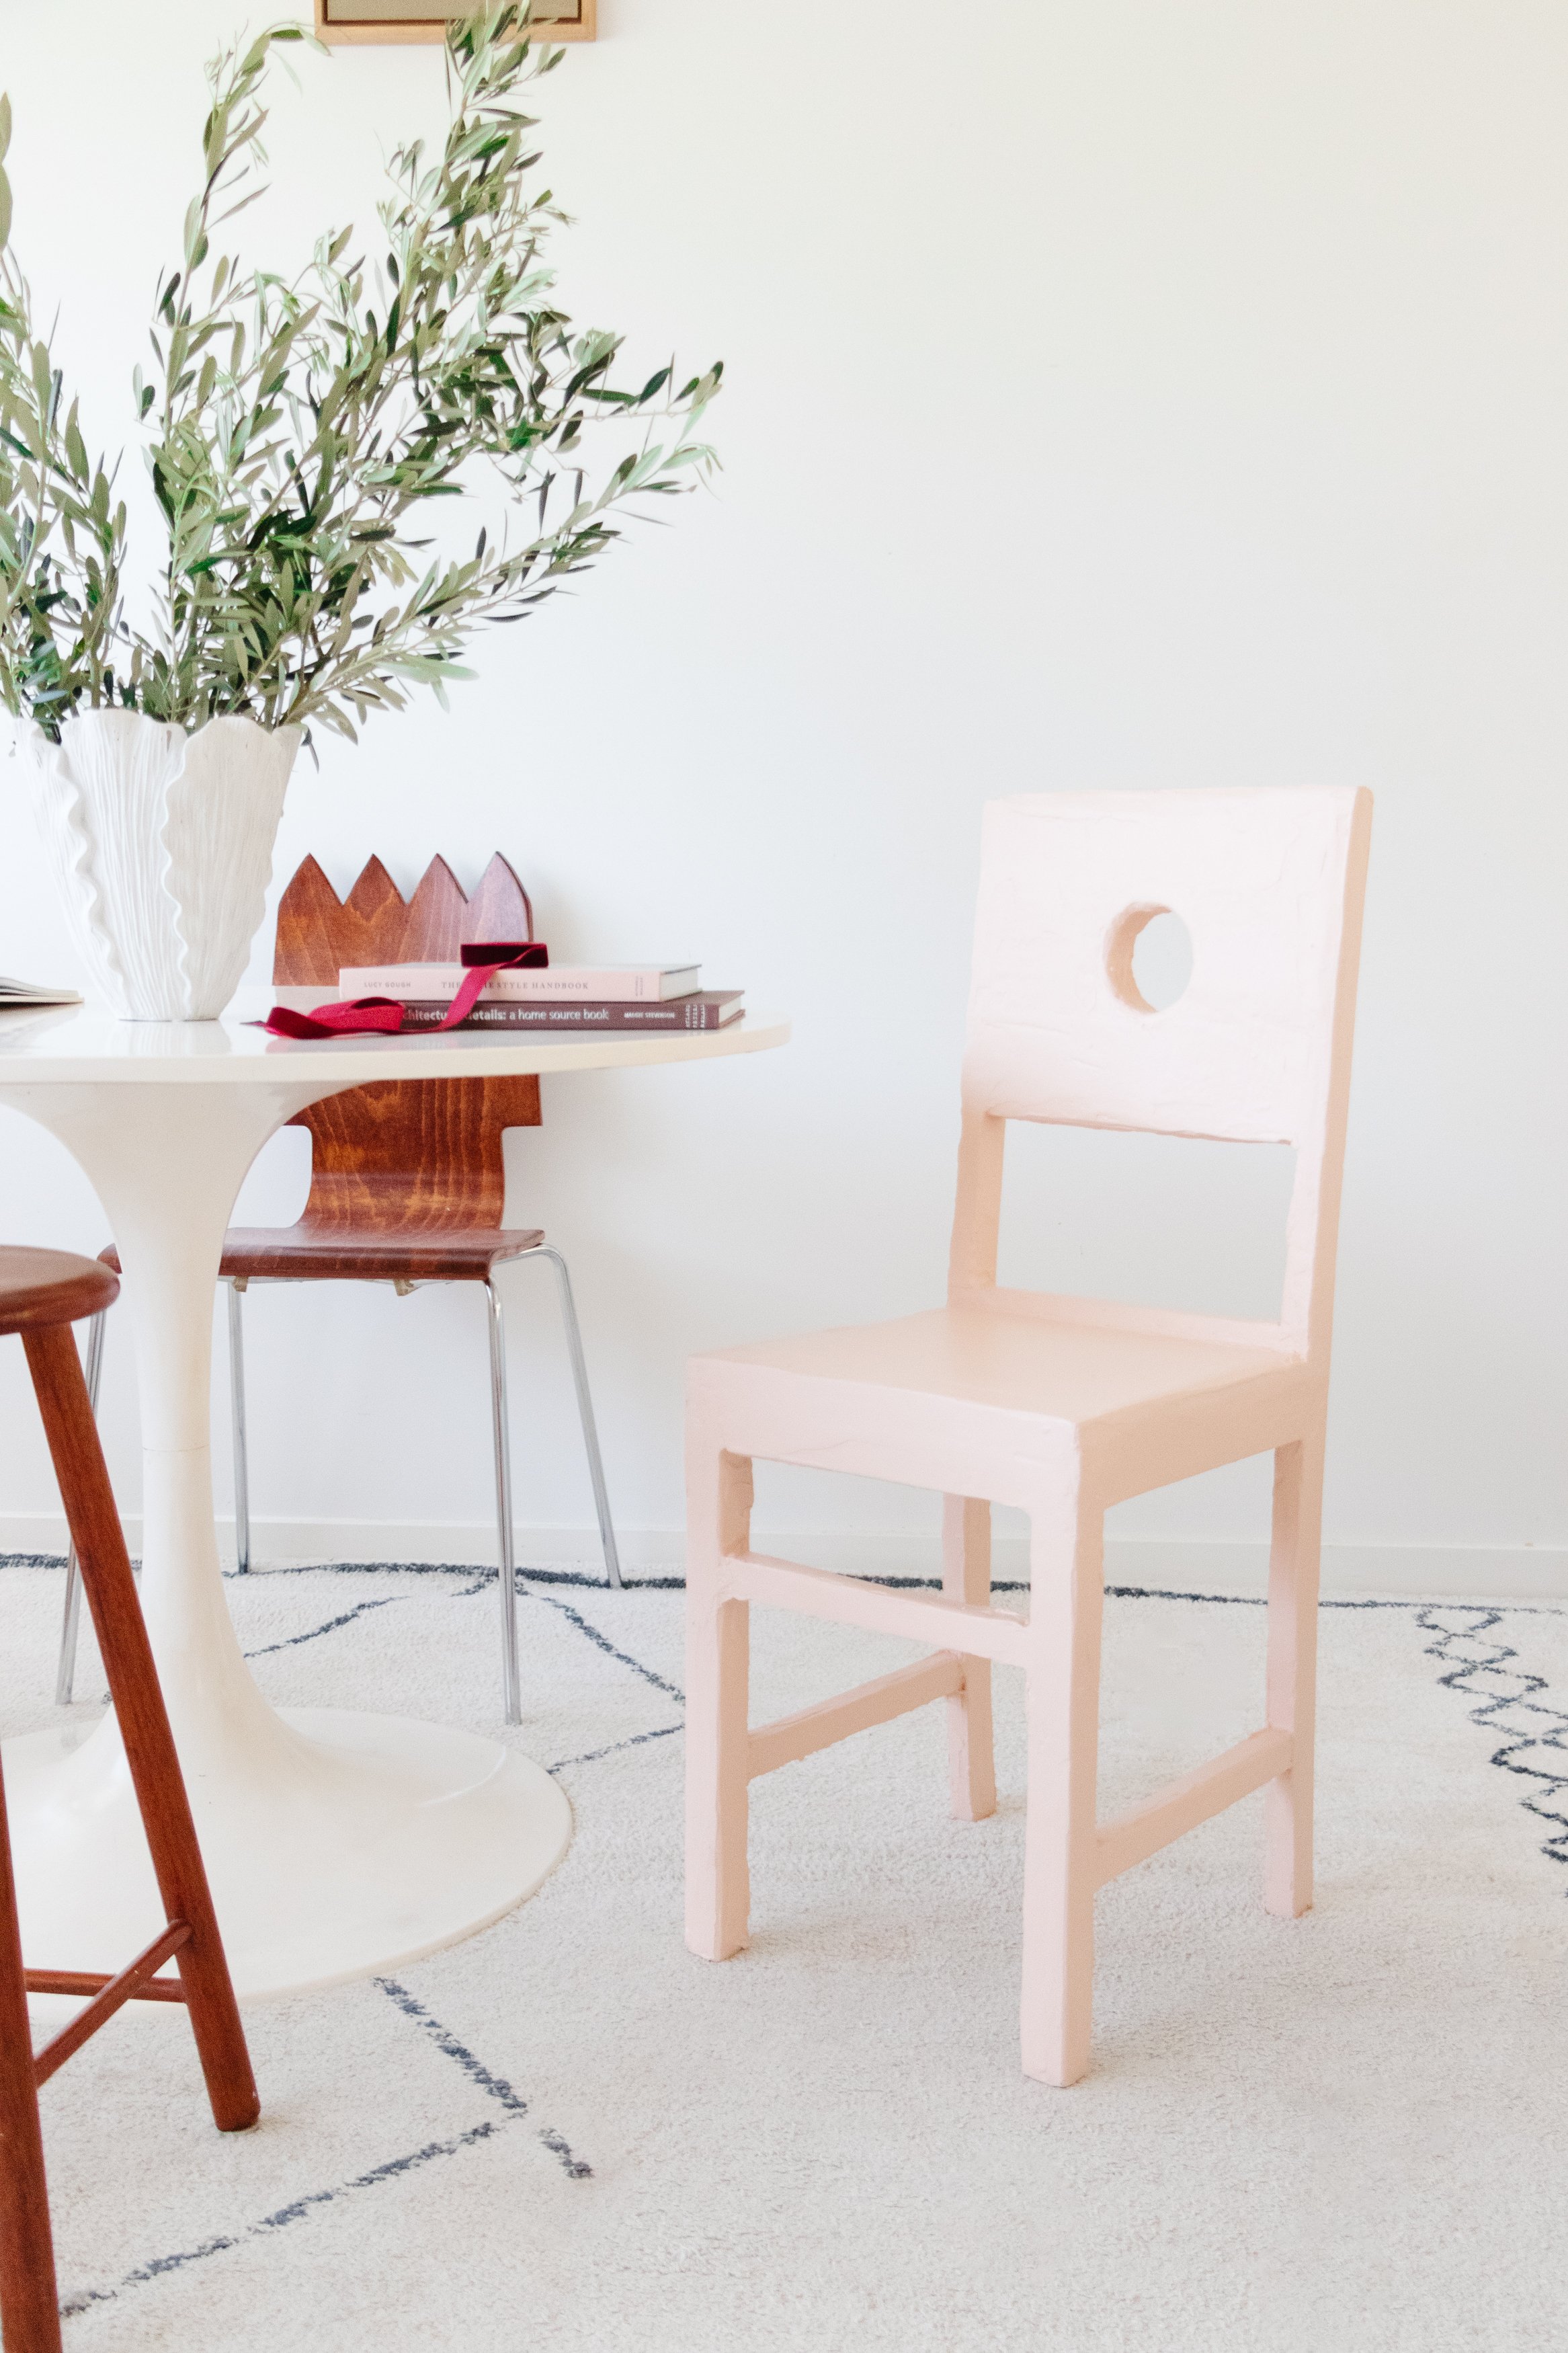
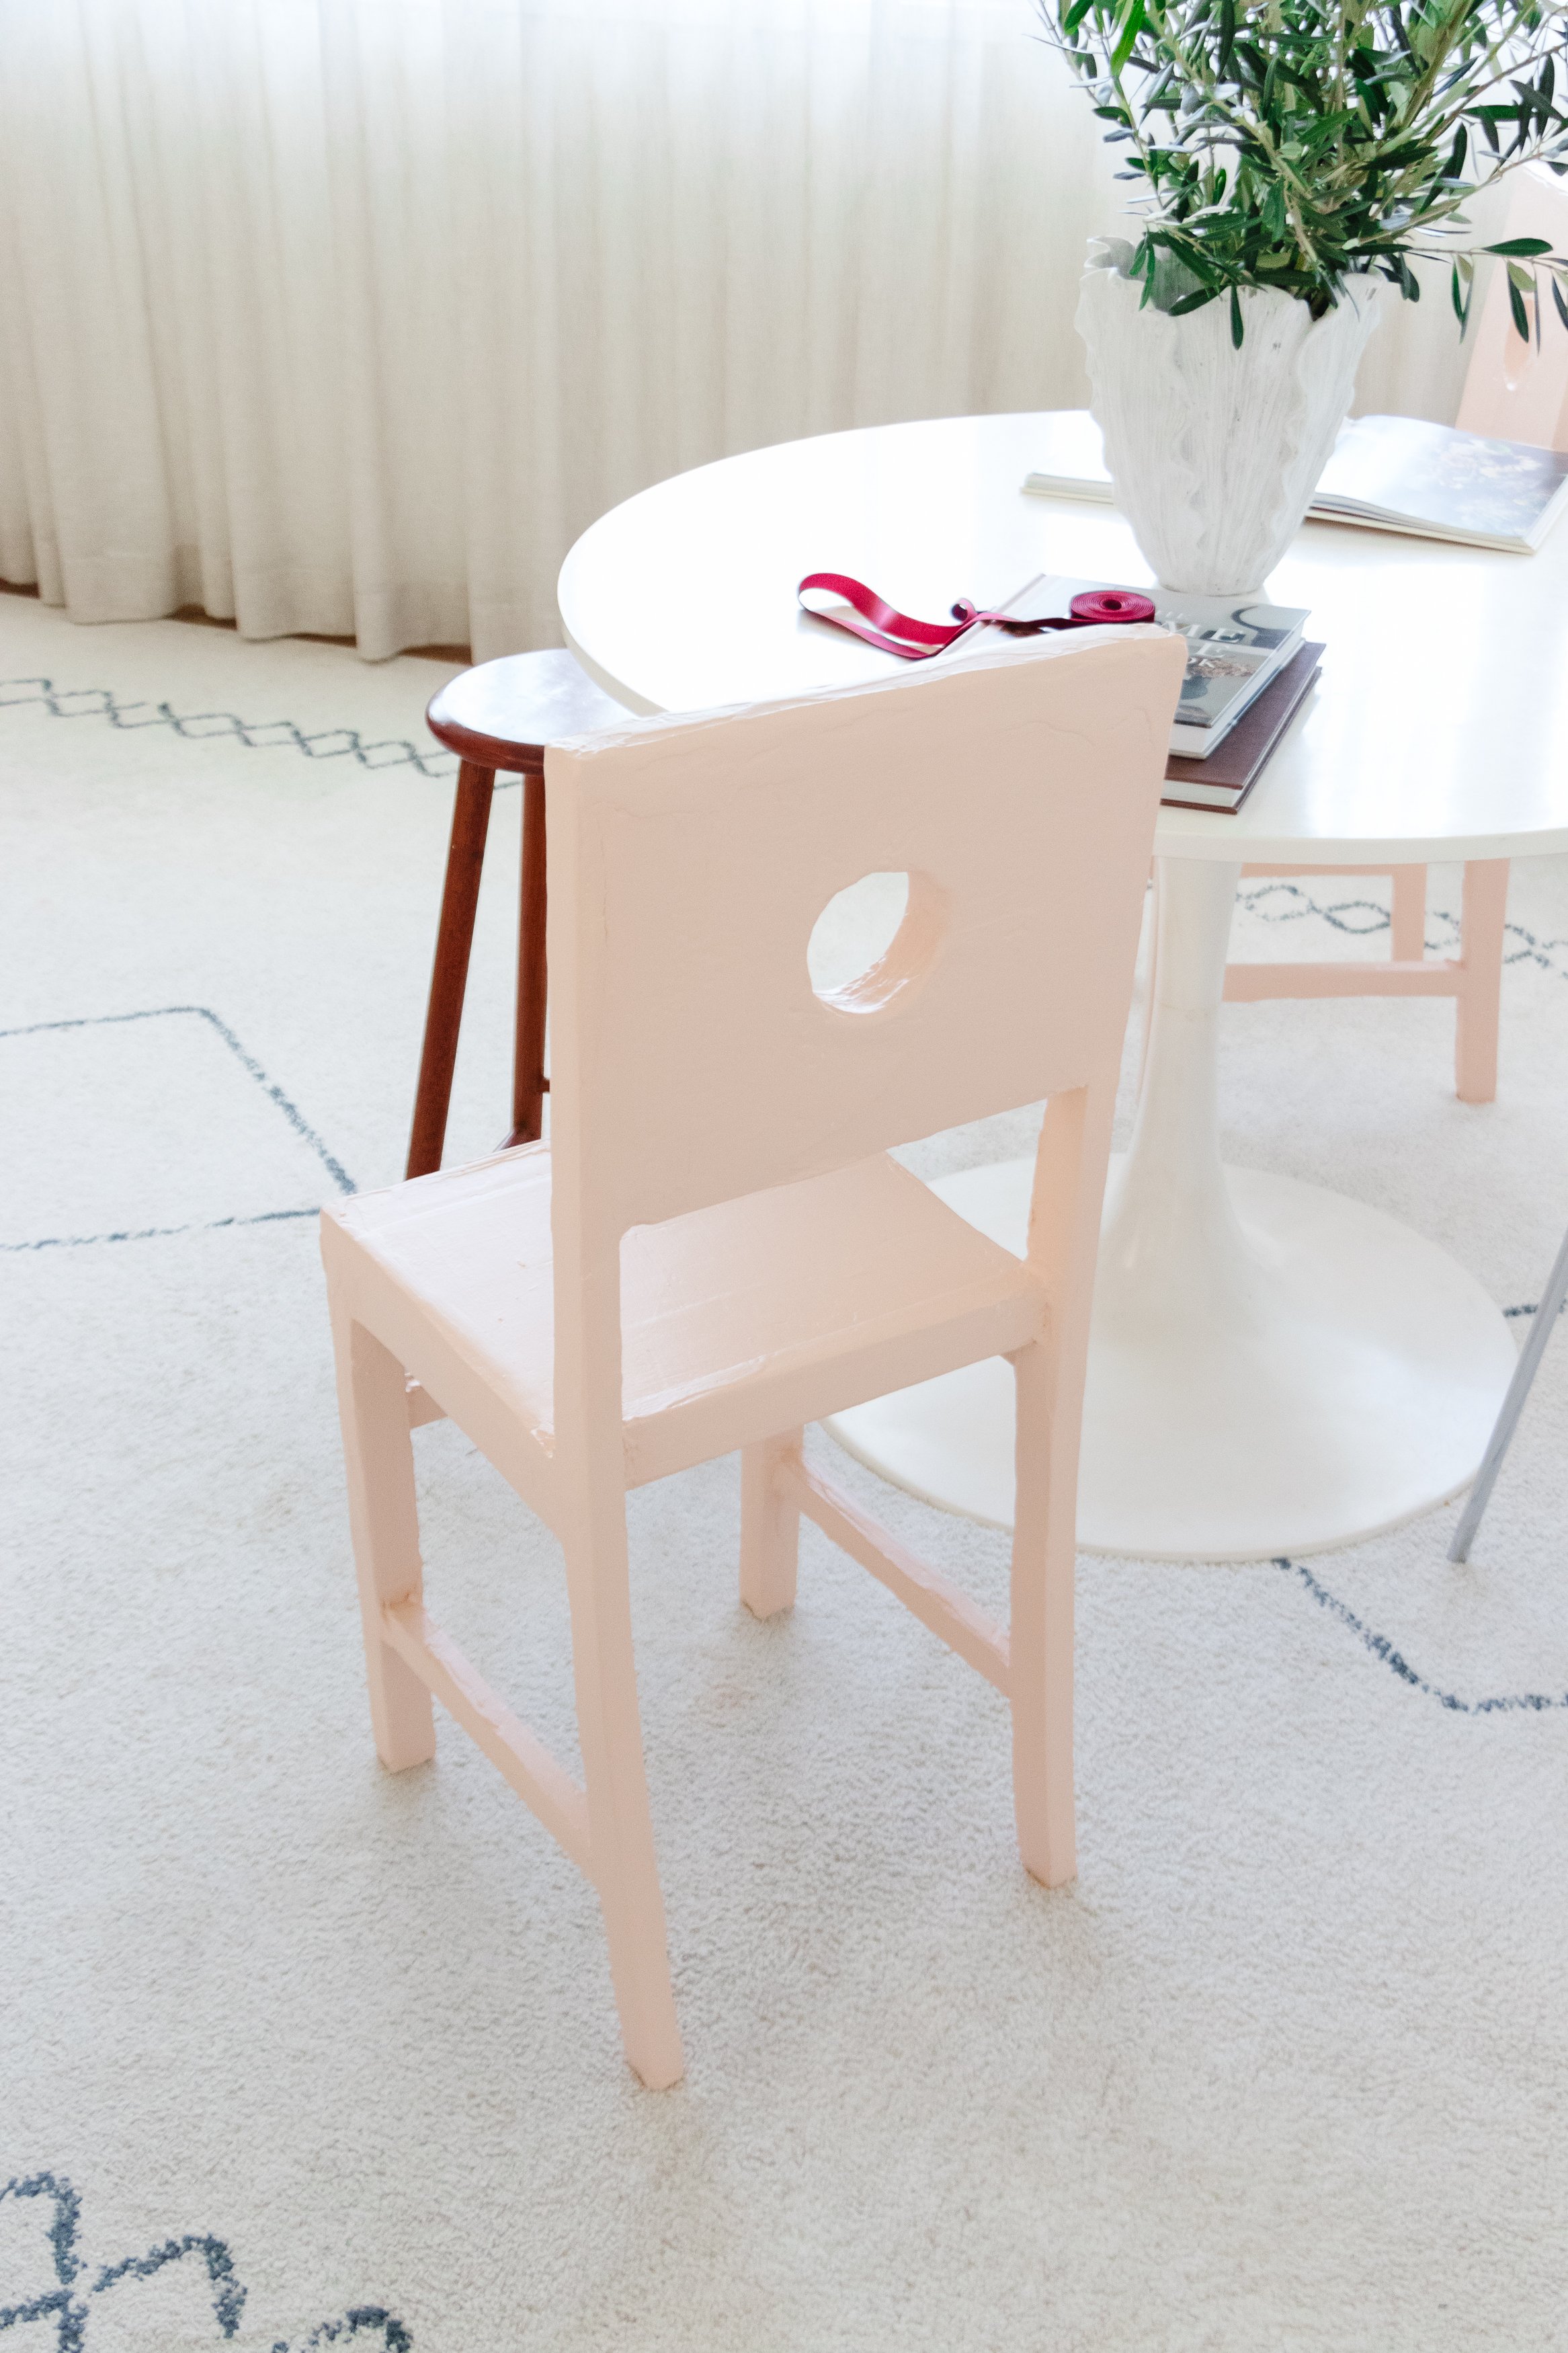
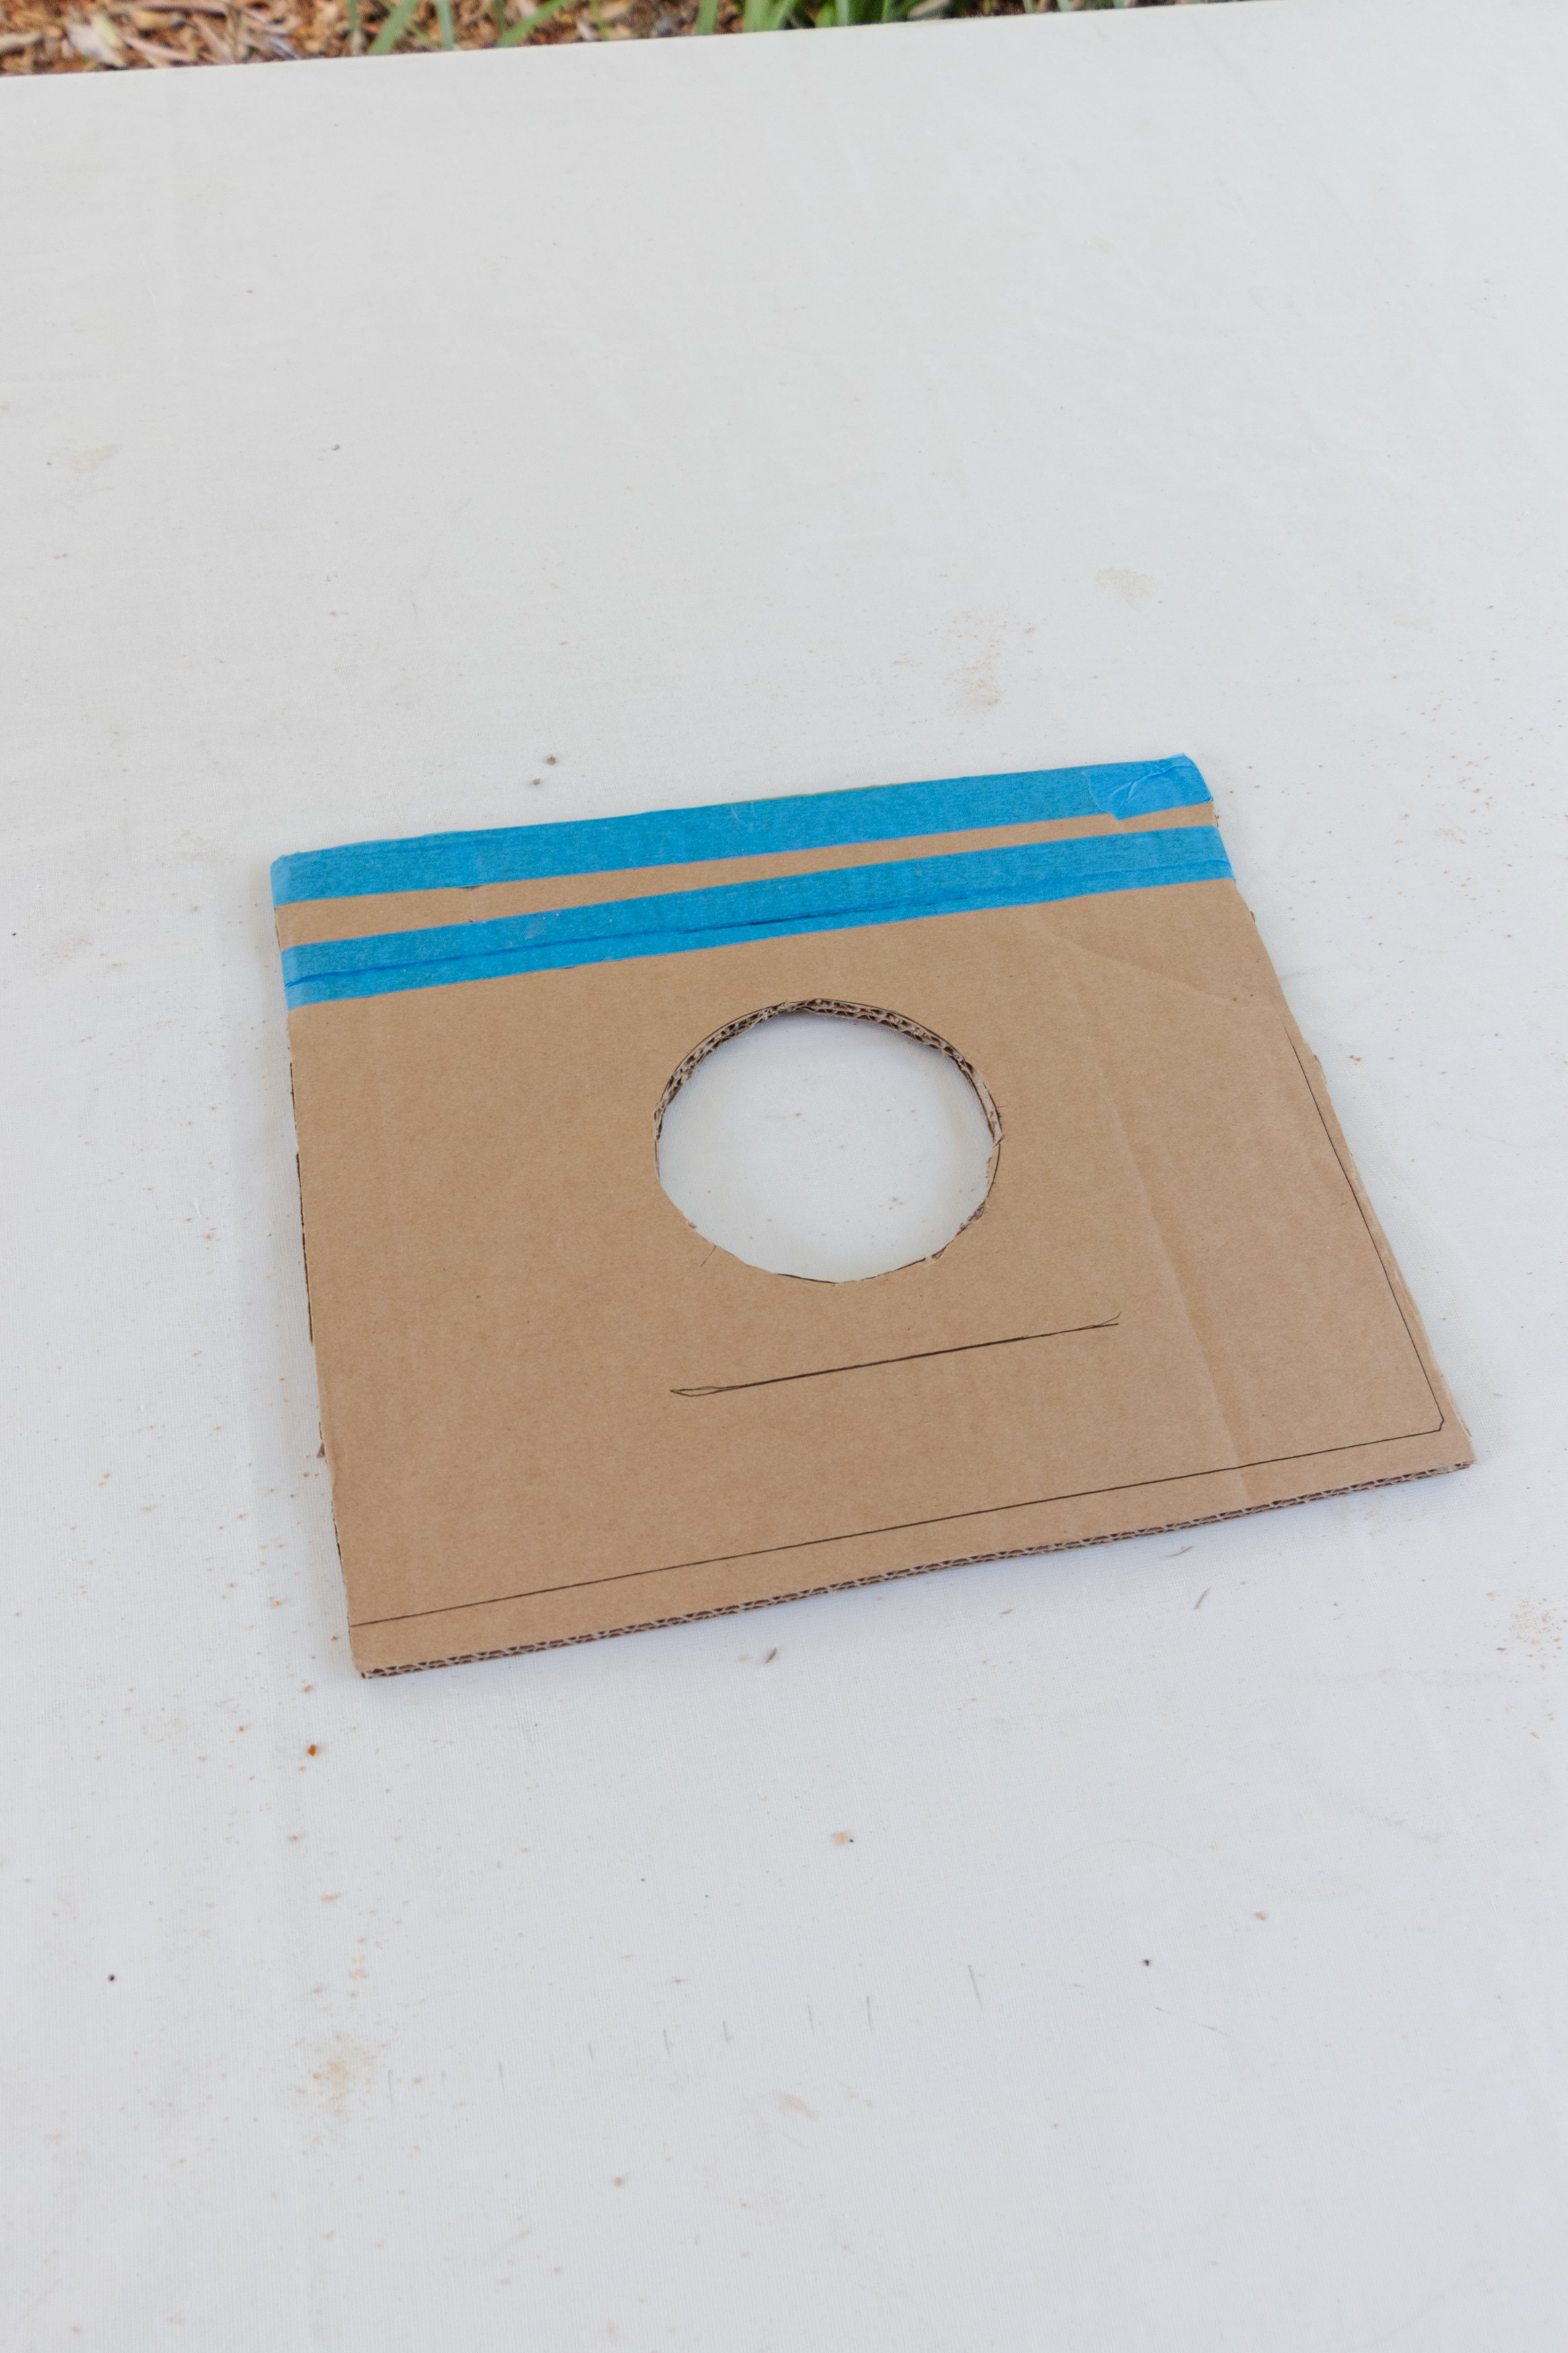
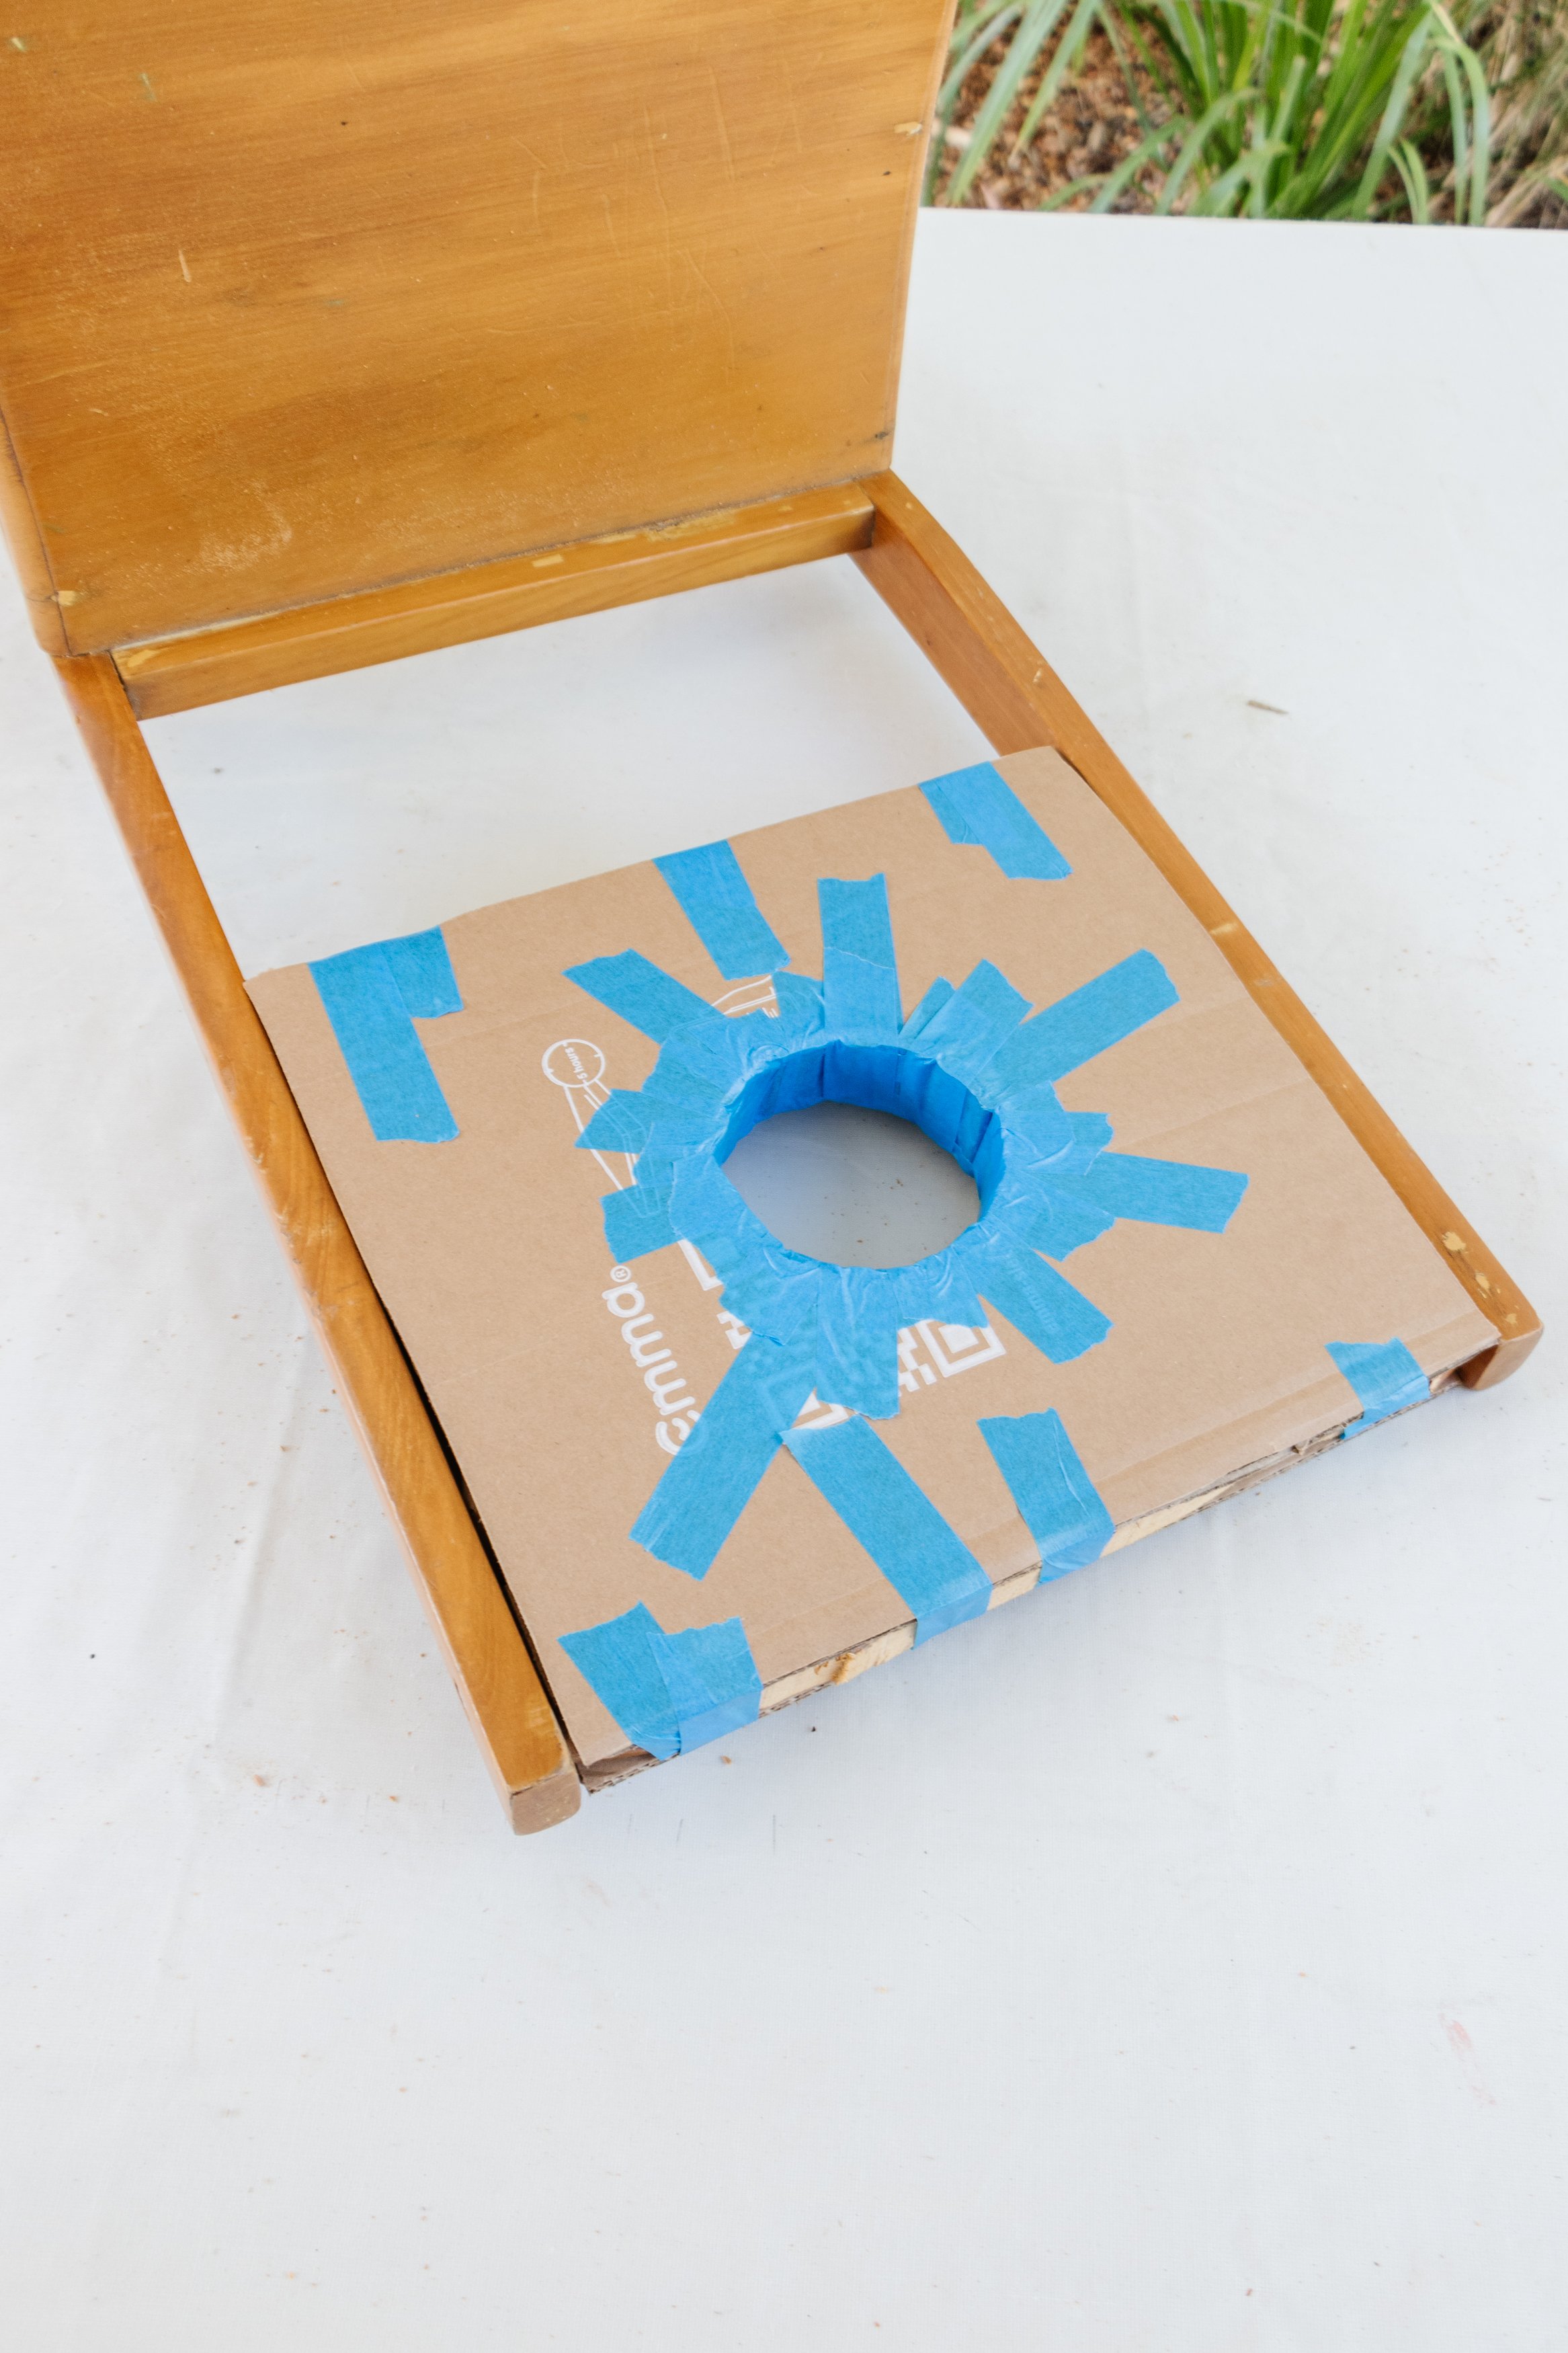
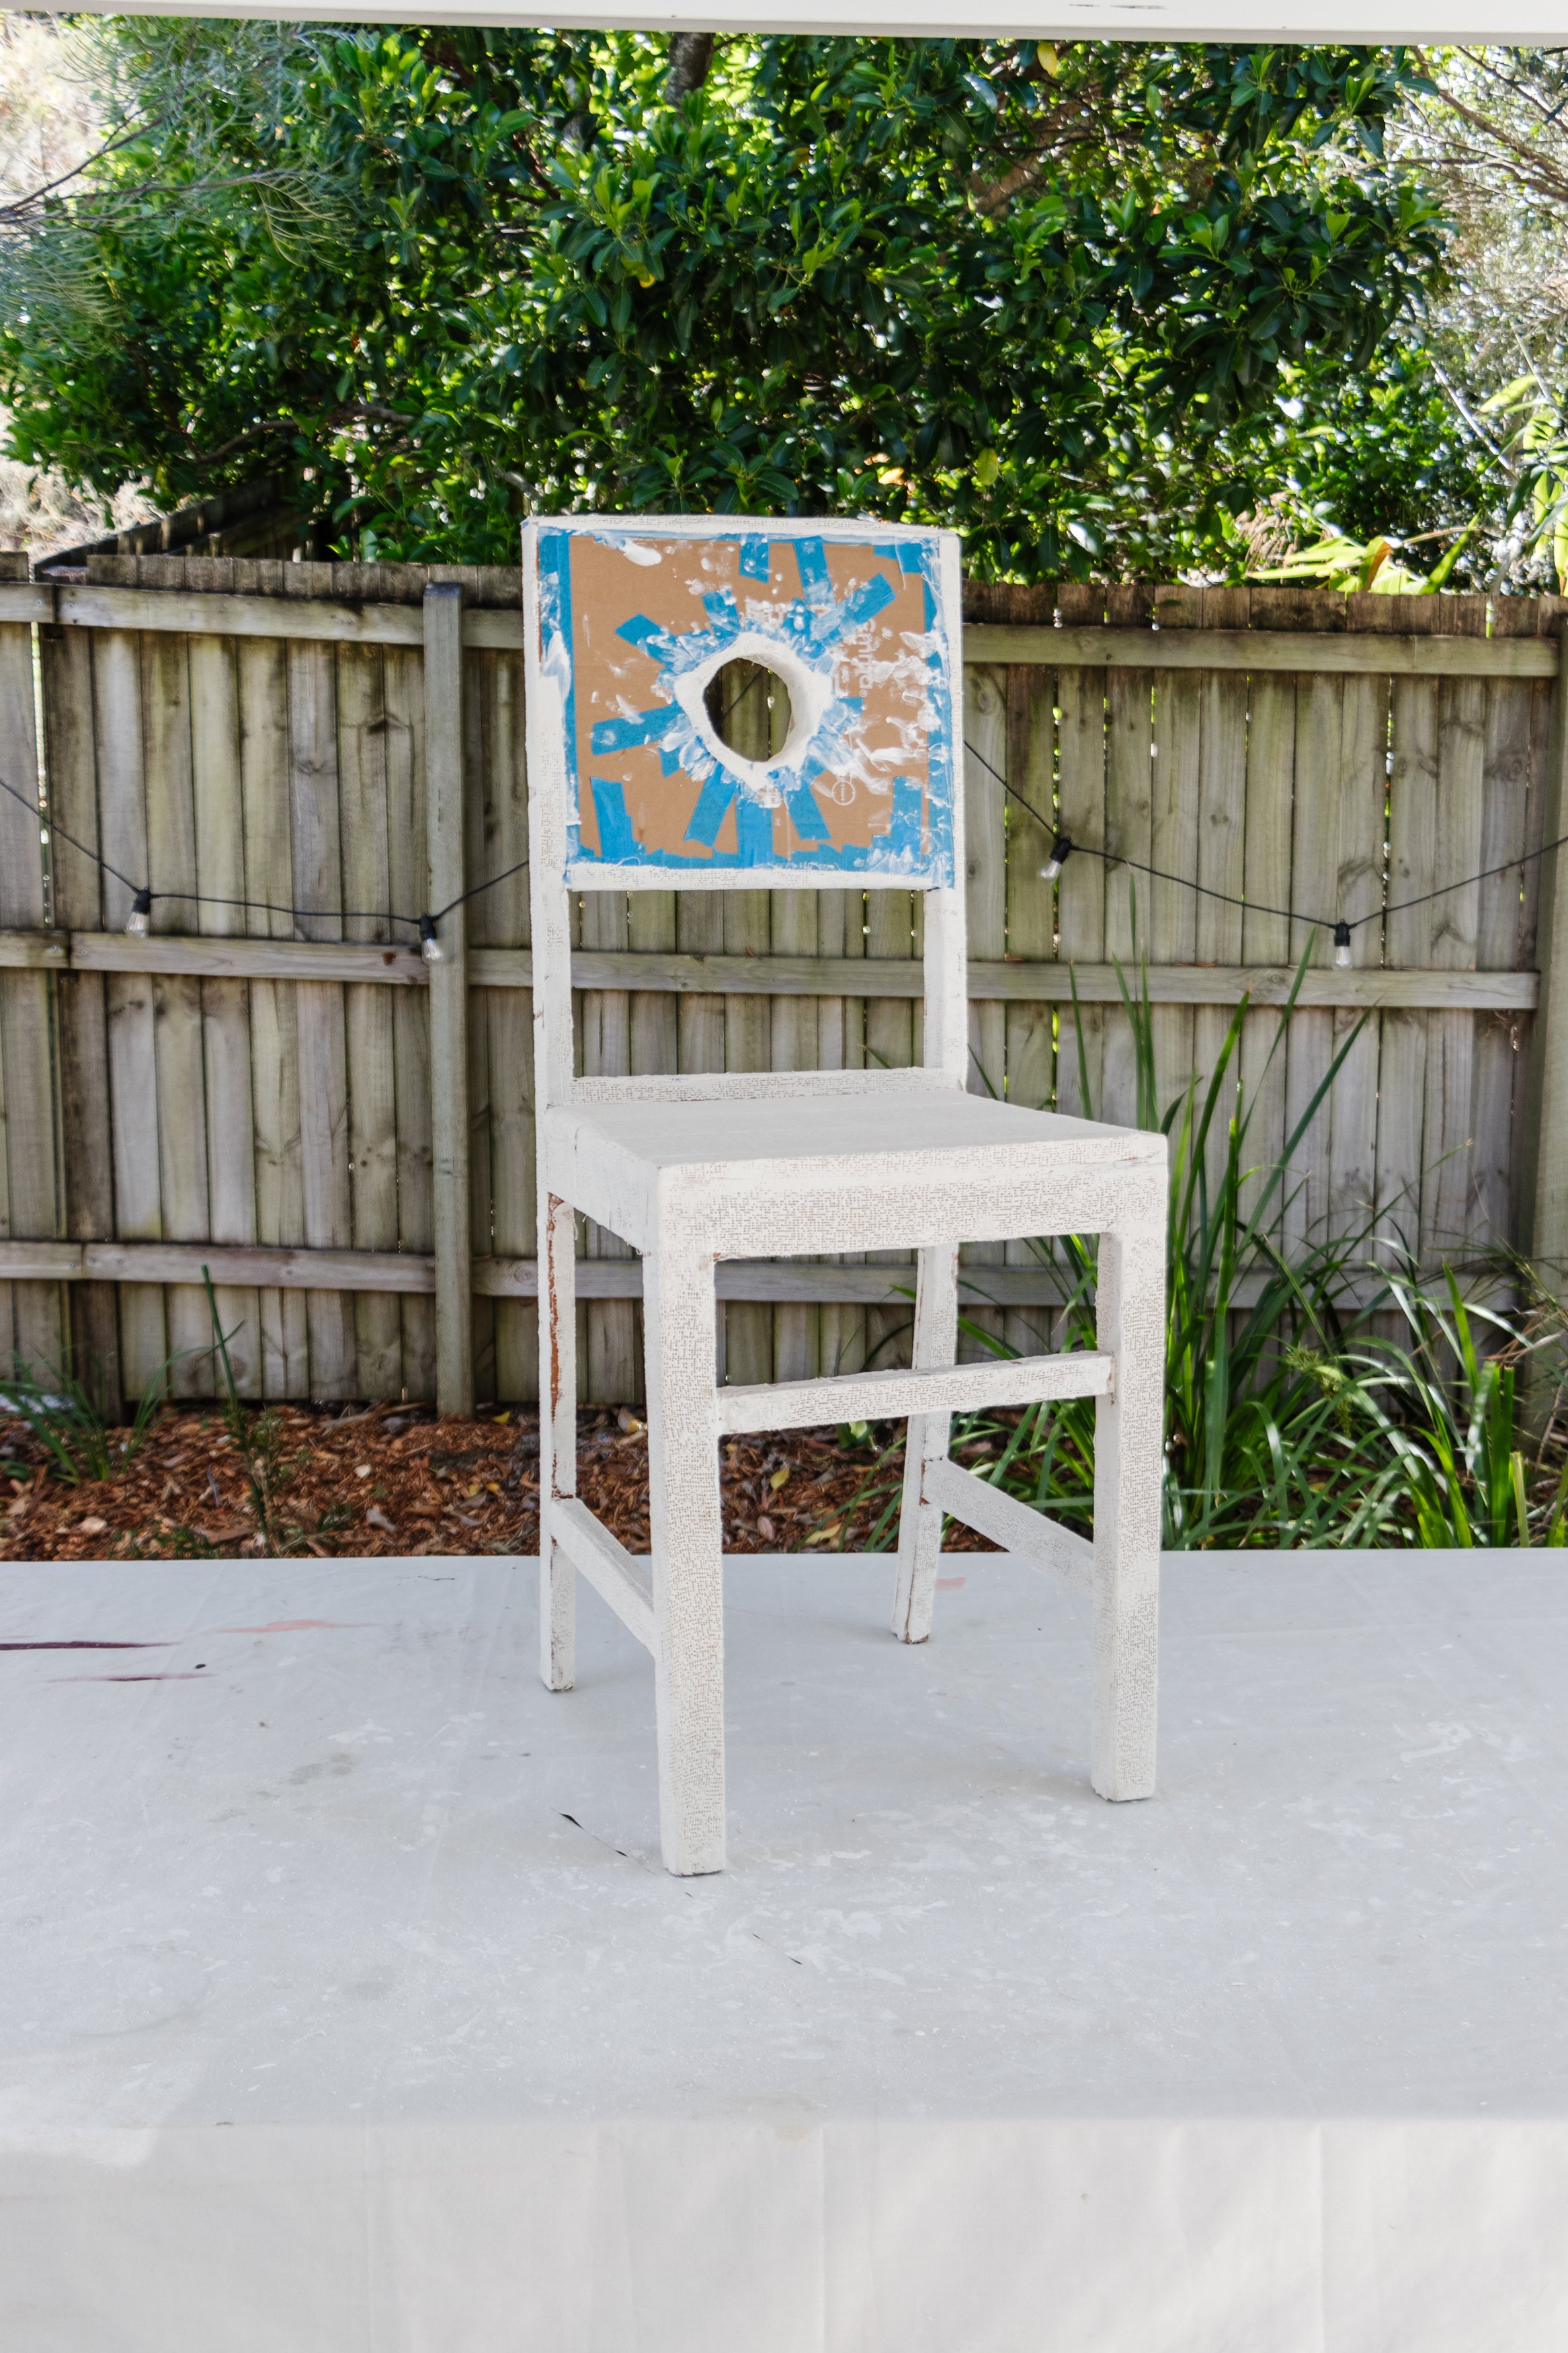
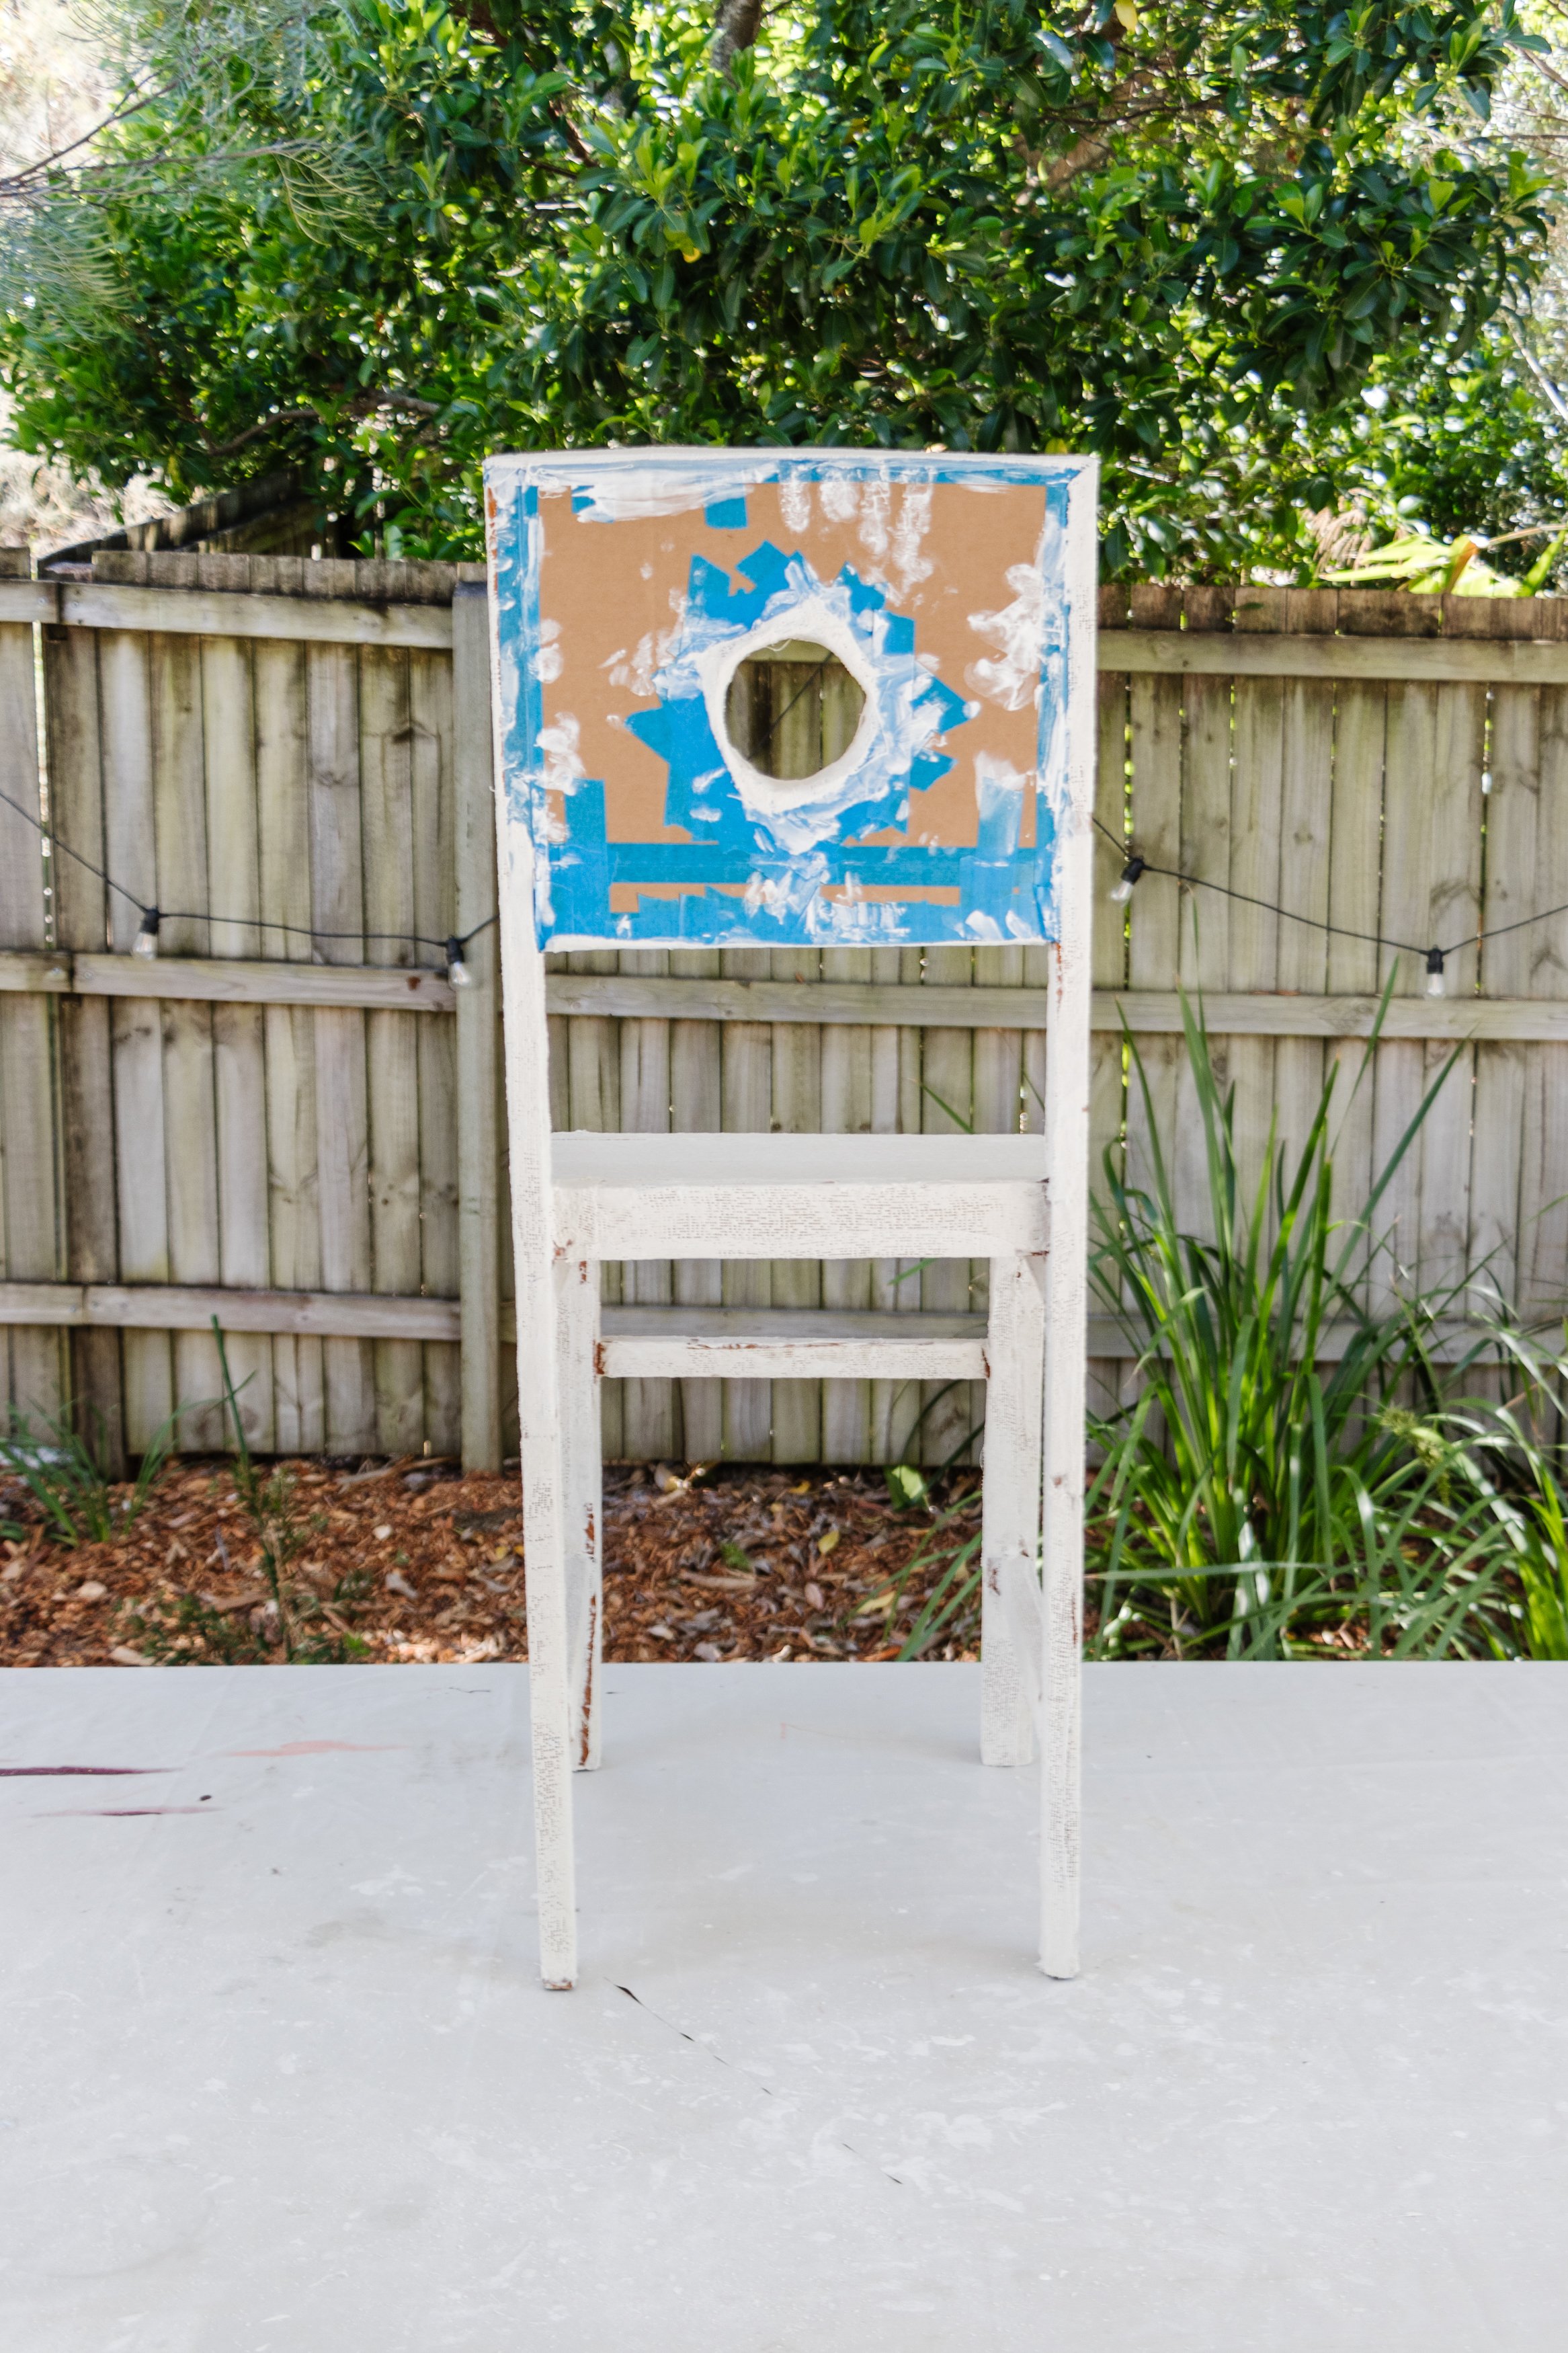
Step 2: Following this I used an old Emma Mattress cardboard to make a template for the circle feature to place onto the back rest. I did this using a pen, utility knife and painters tape and I made 4 cardboard templates. Following this I used more cardboard to create support for inside the circle and stuck this on one template using painters tape, and repeated this for the final 3 templates.

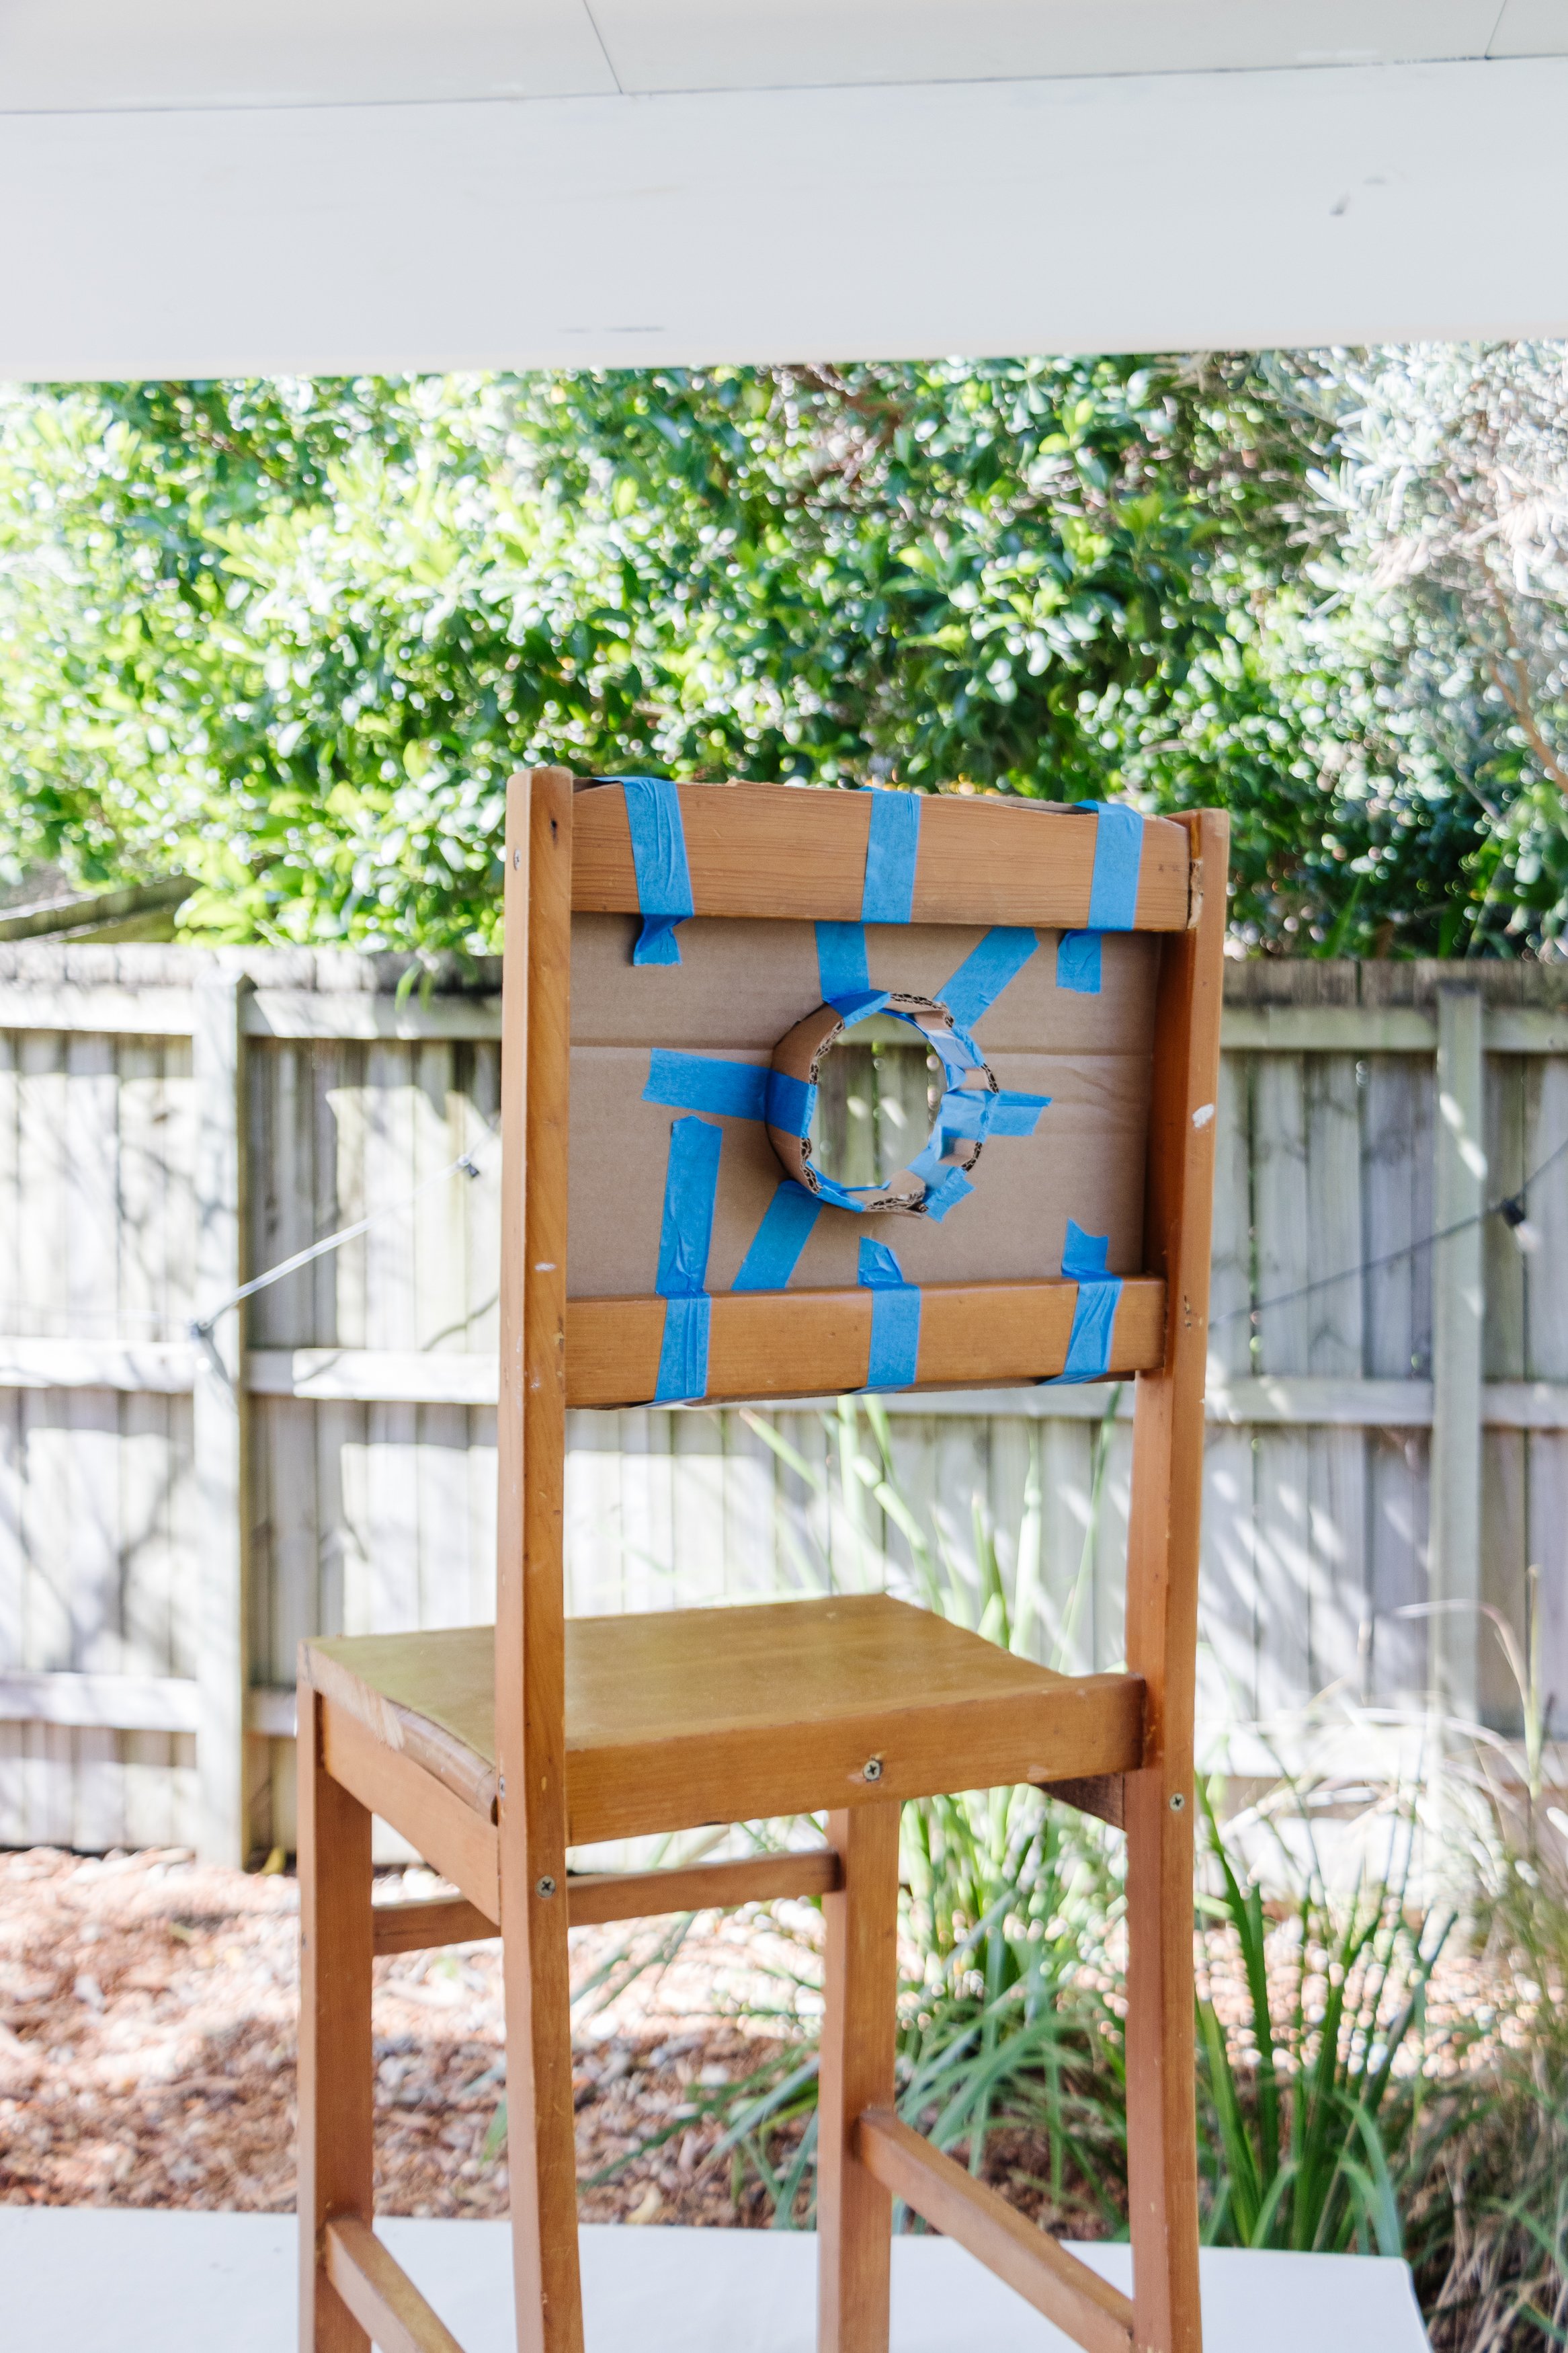
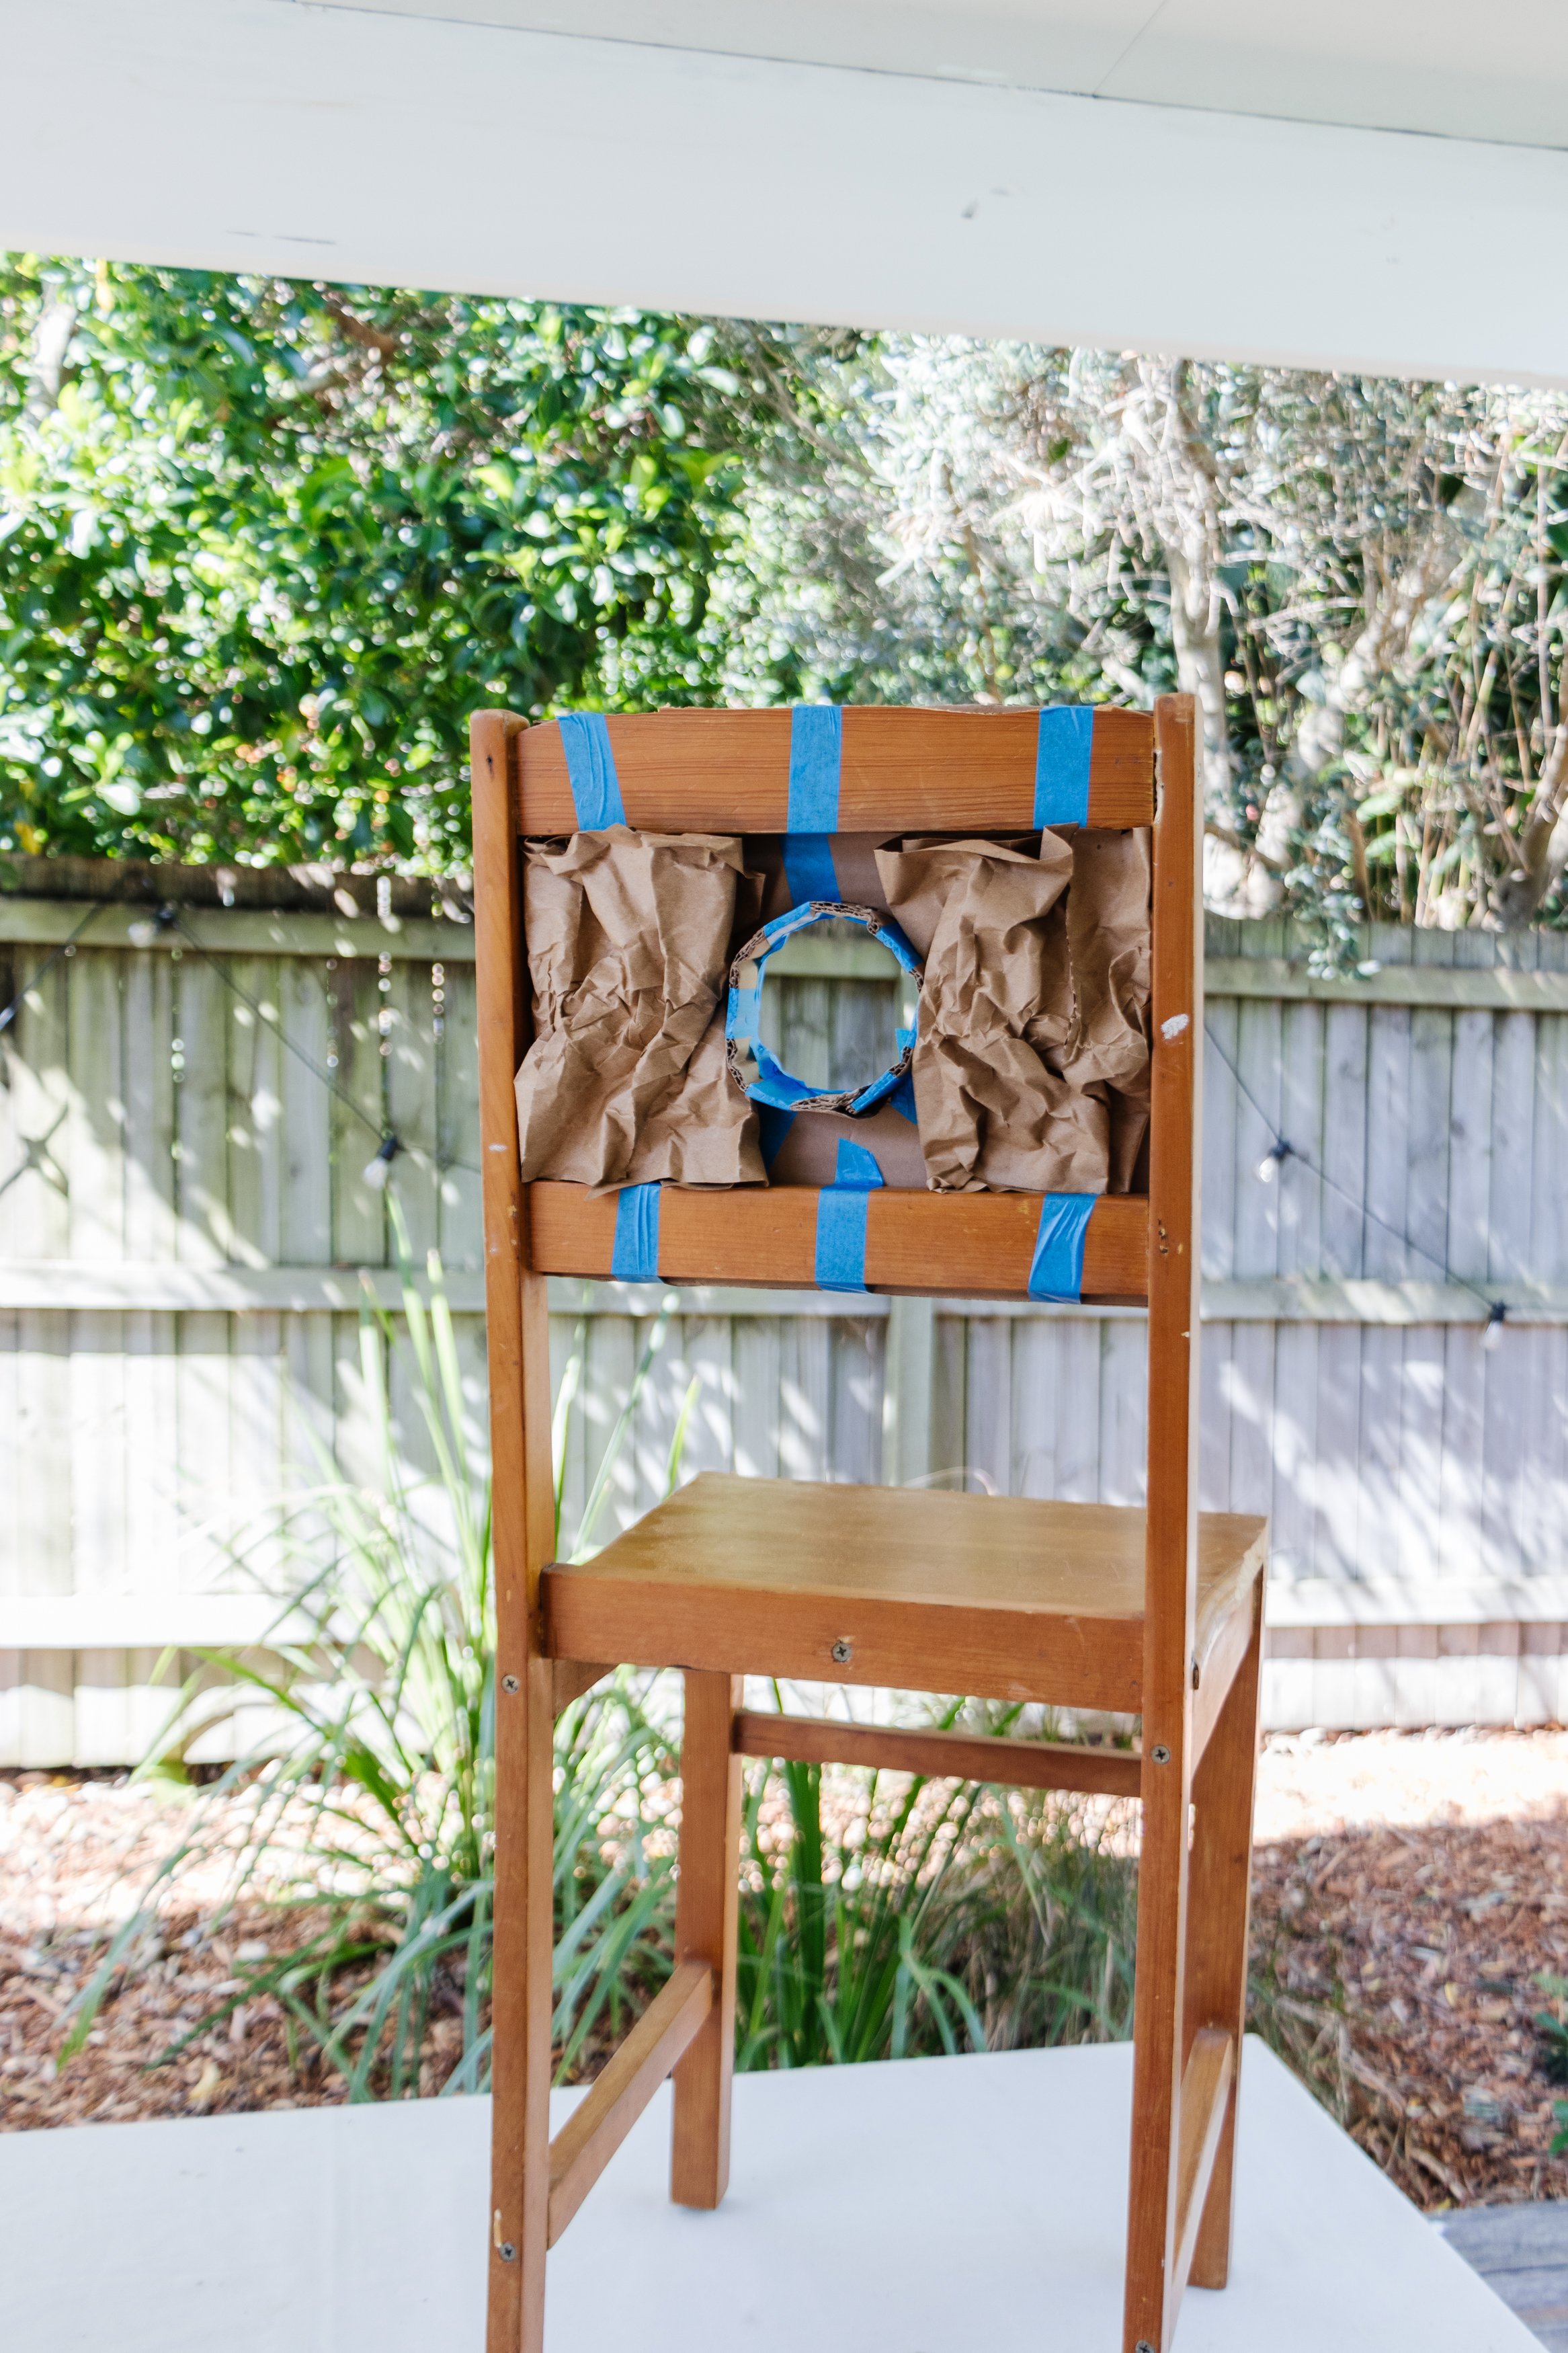
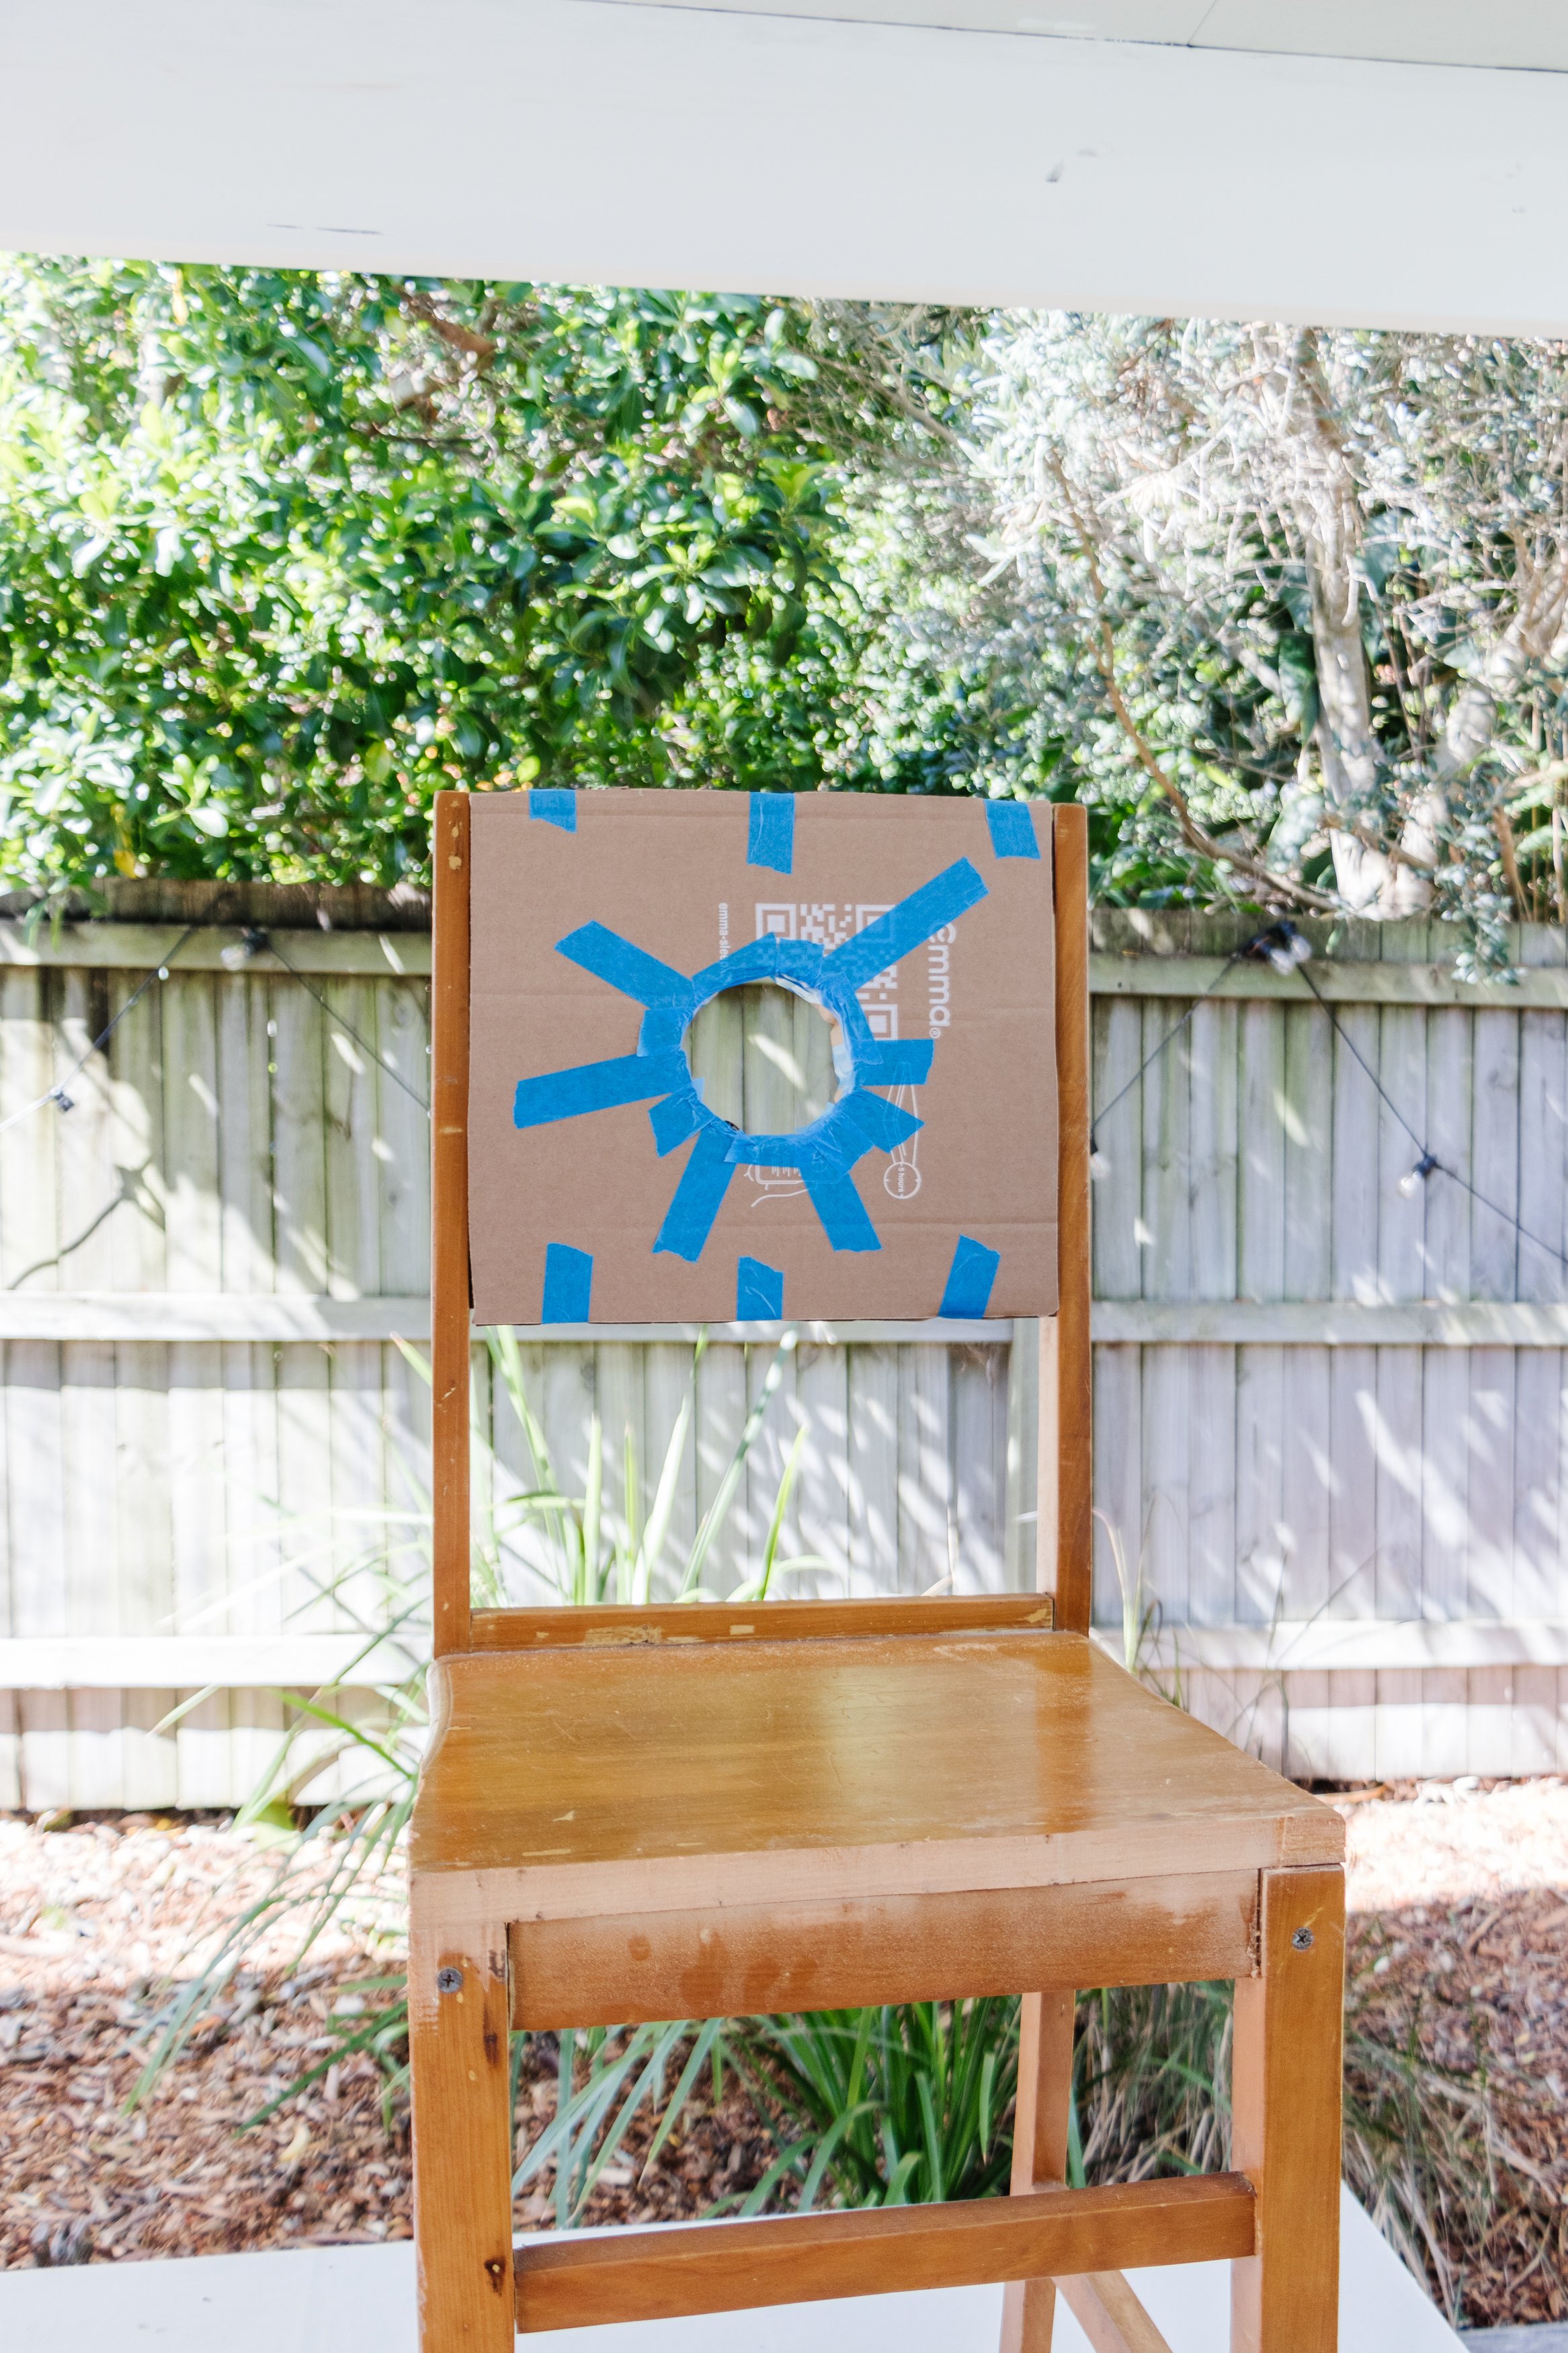
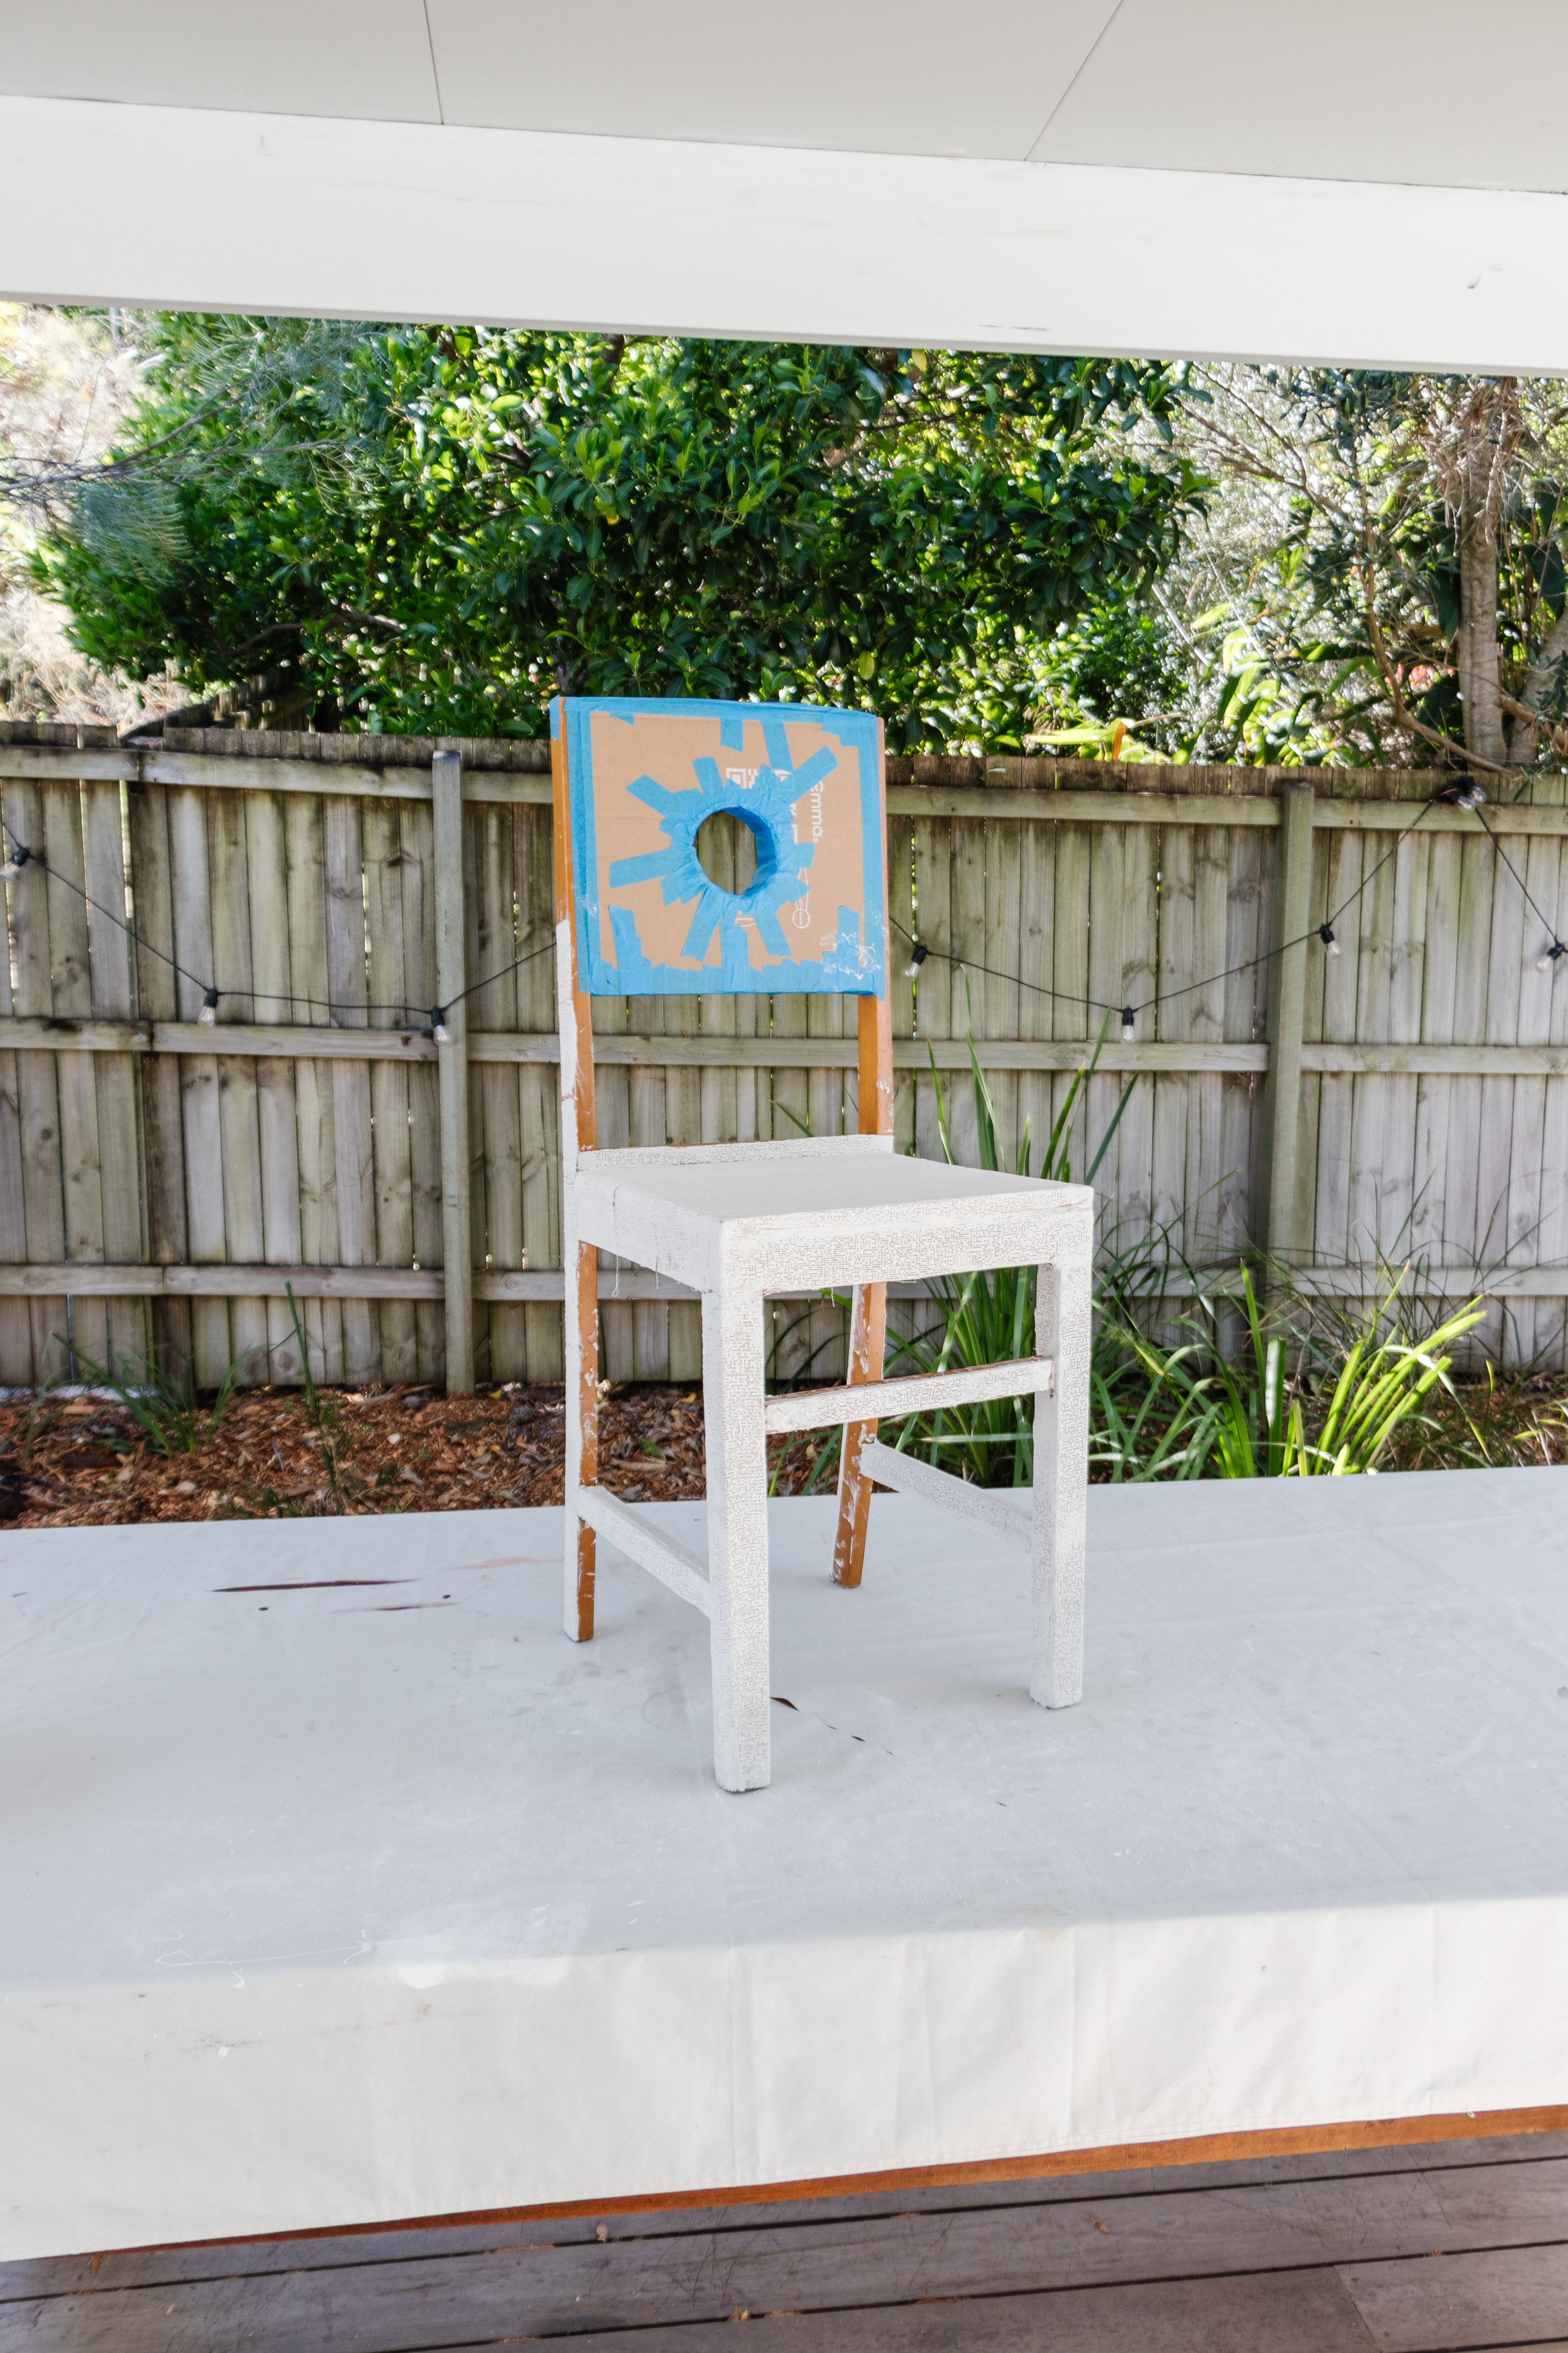
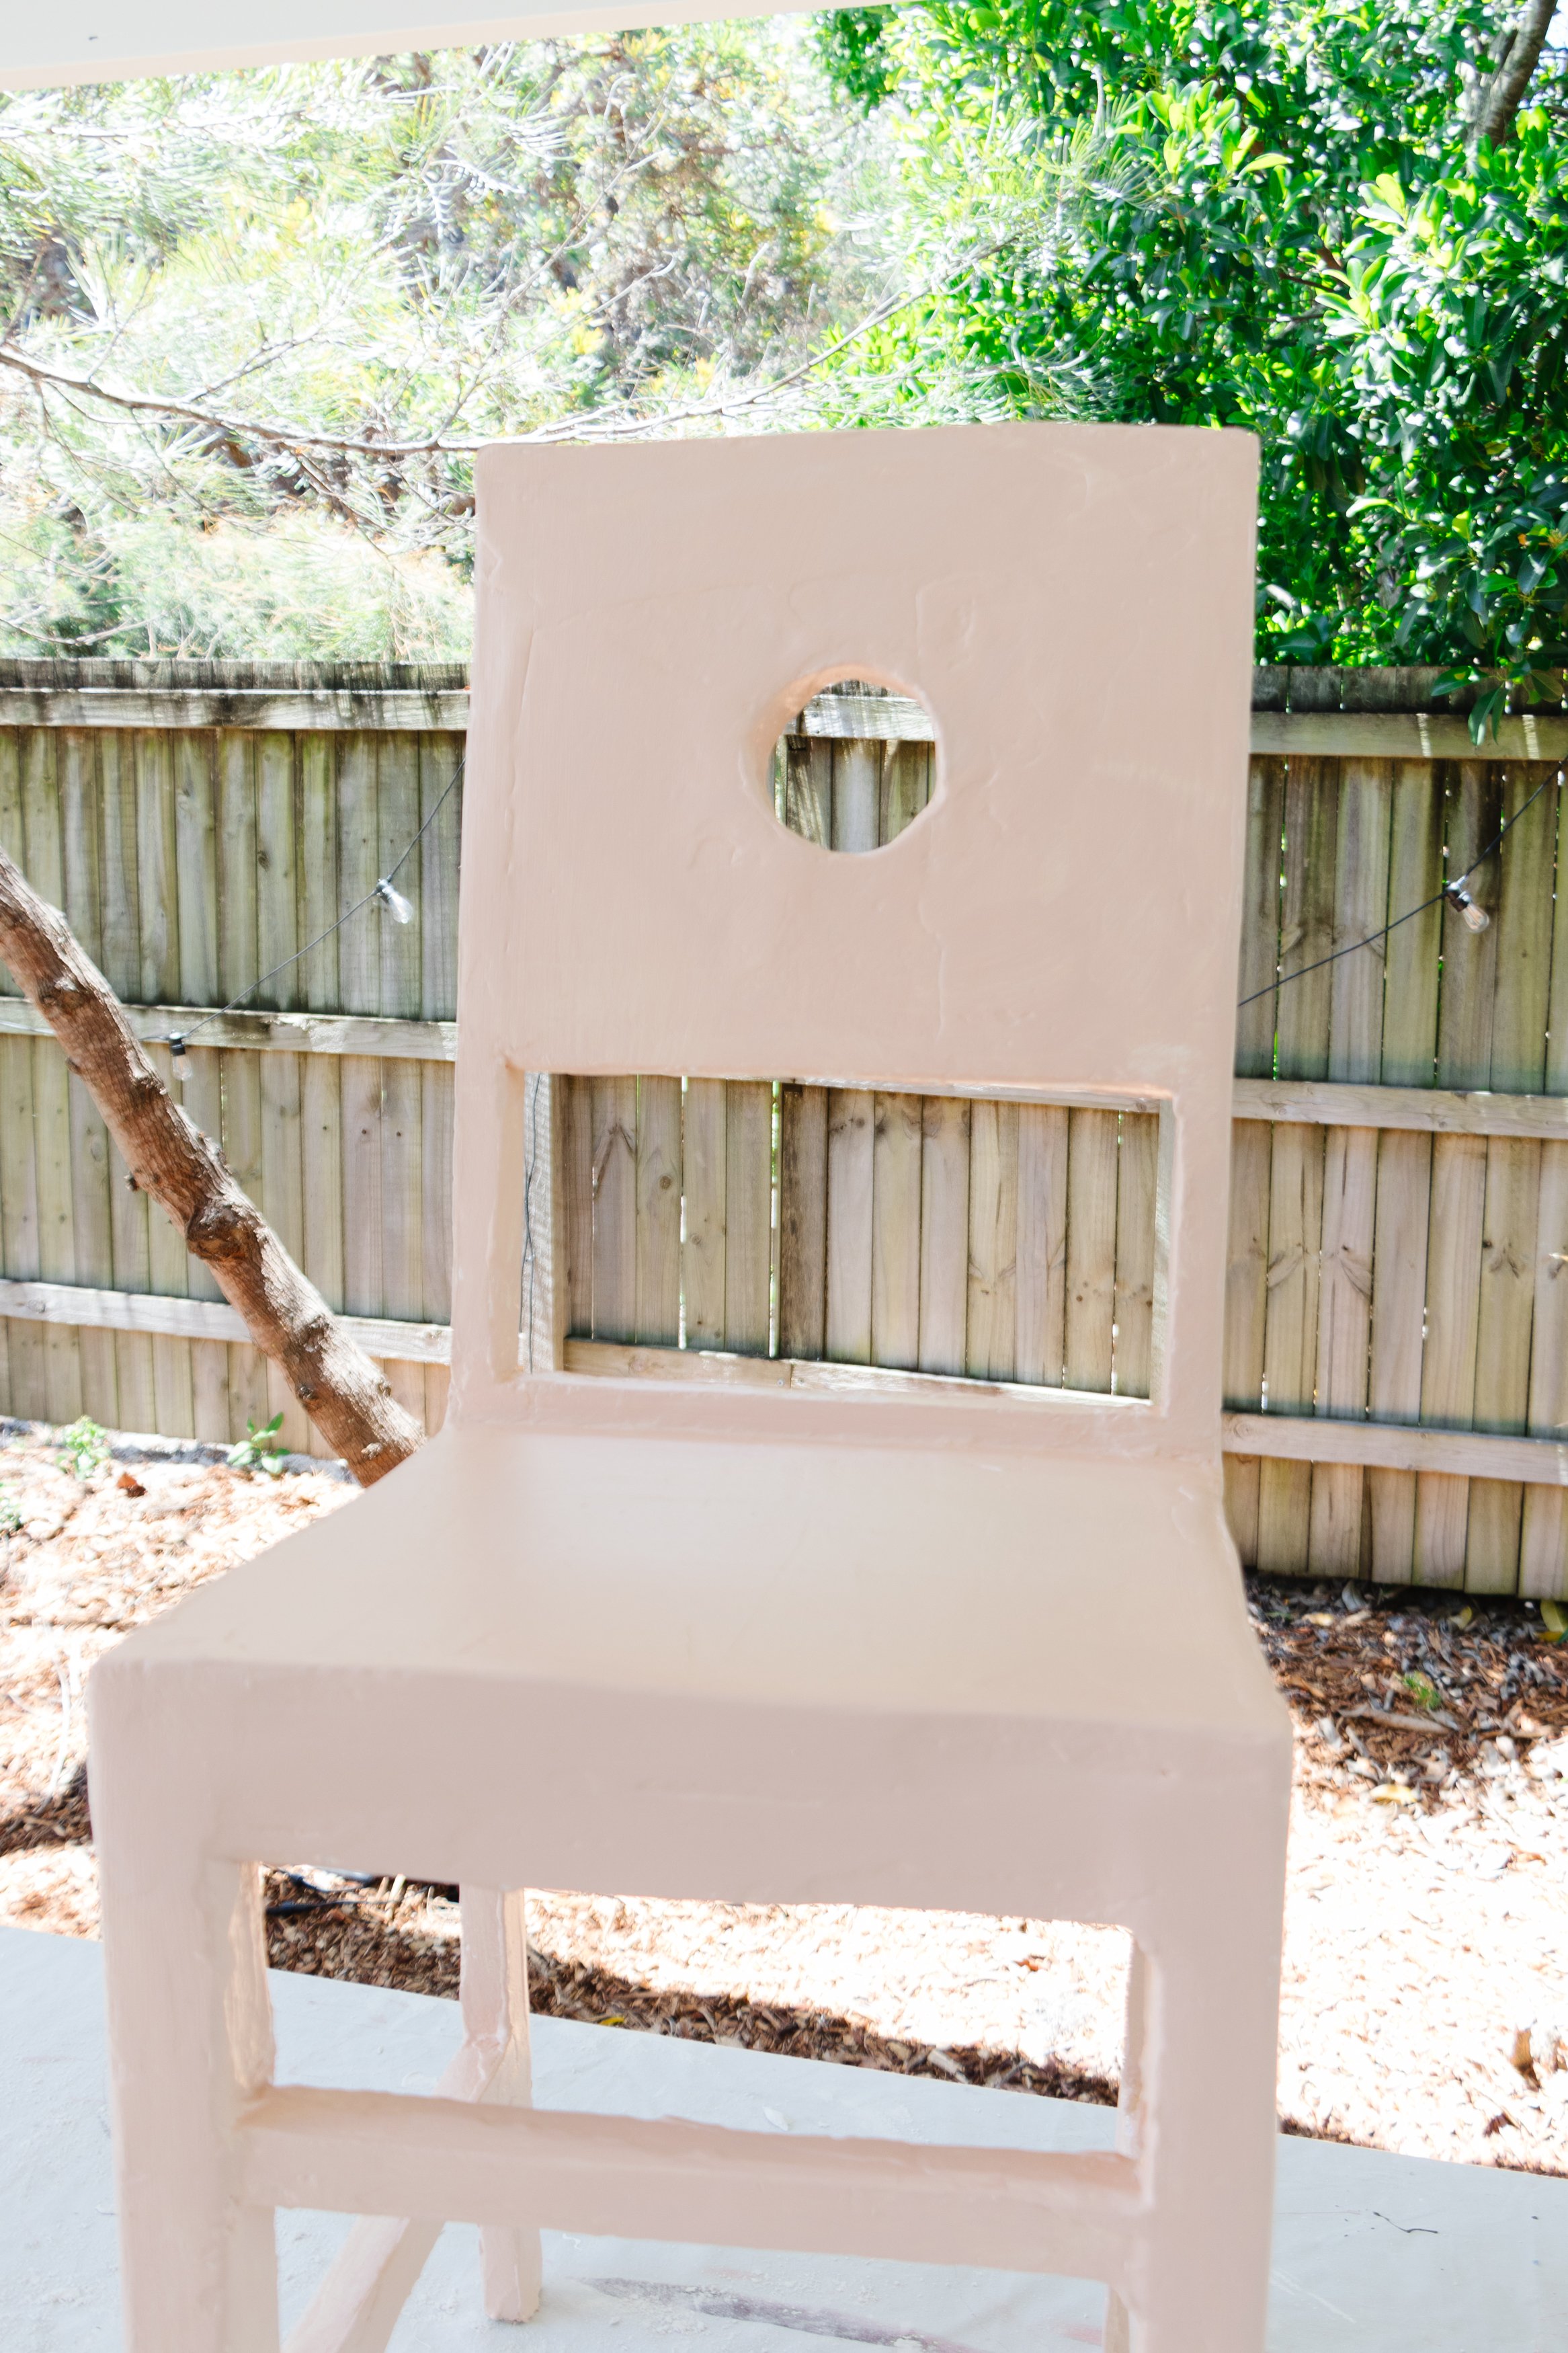
Step 3: Starting on one chair, I stuck the first template on the back using painters tape. I reused packing paper and placed it inside. Following this I placed a template onto the front of the chair and attached it using painters tape to enclose the circle feature. Following this I used cardboard to cover the top and underside of the chair back and used more painters tape to cover up any gaps along the frame of the chair, the top and bottom, as well as the circle feature. The look I am going for is “organic” so it doesn’t matter if it’s not perfect because I don’t want it to be.
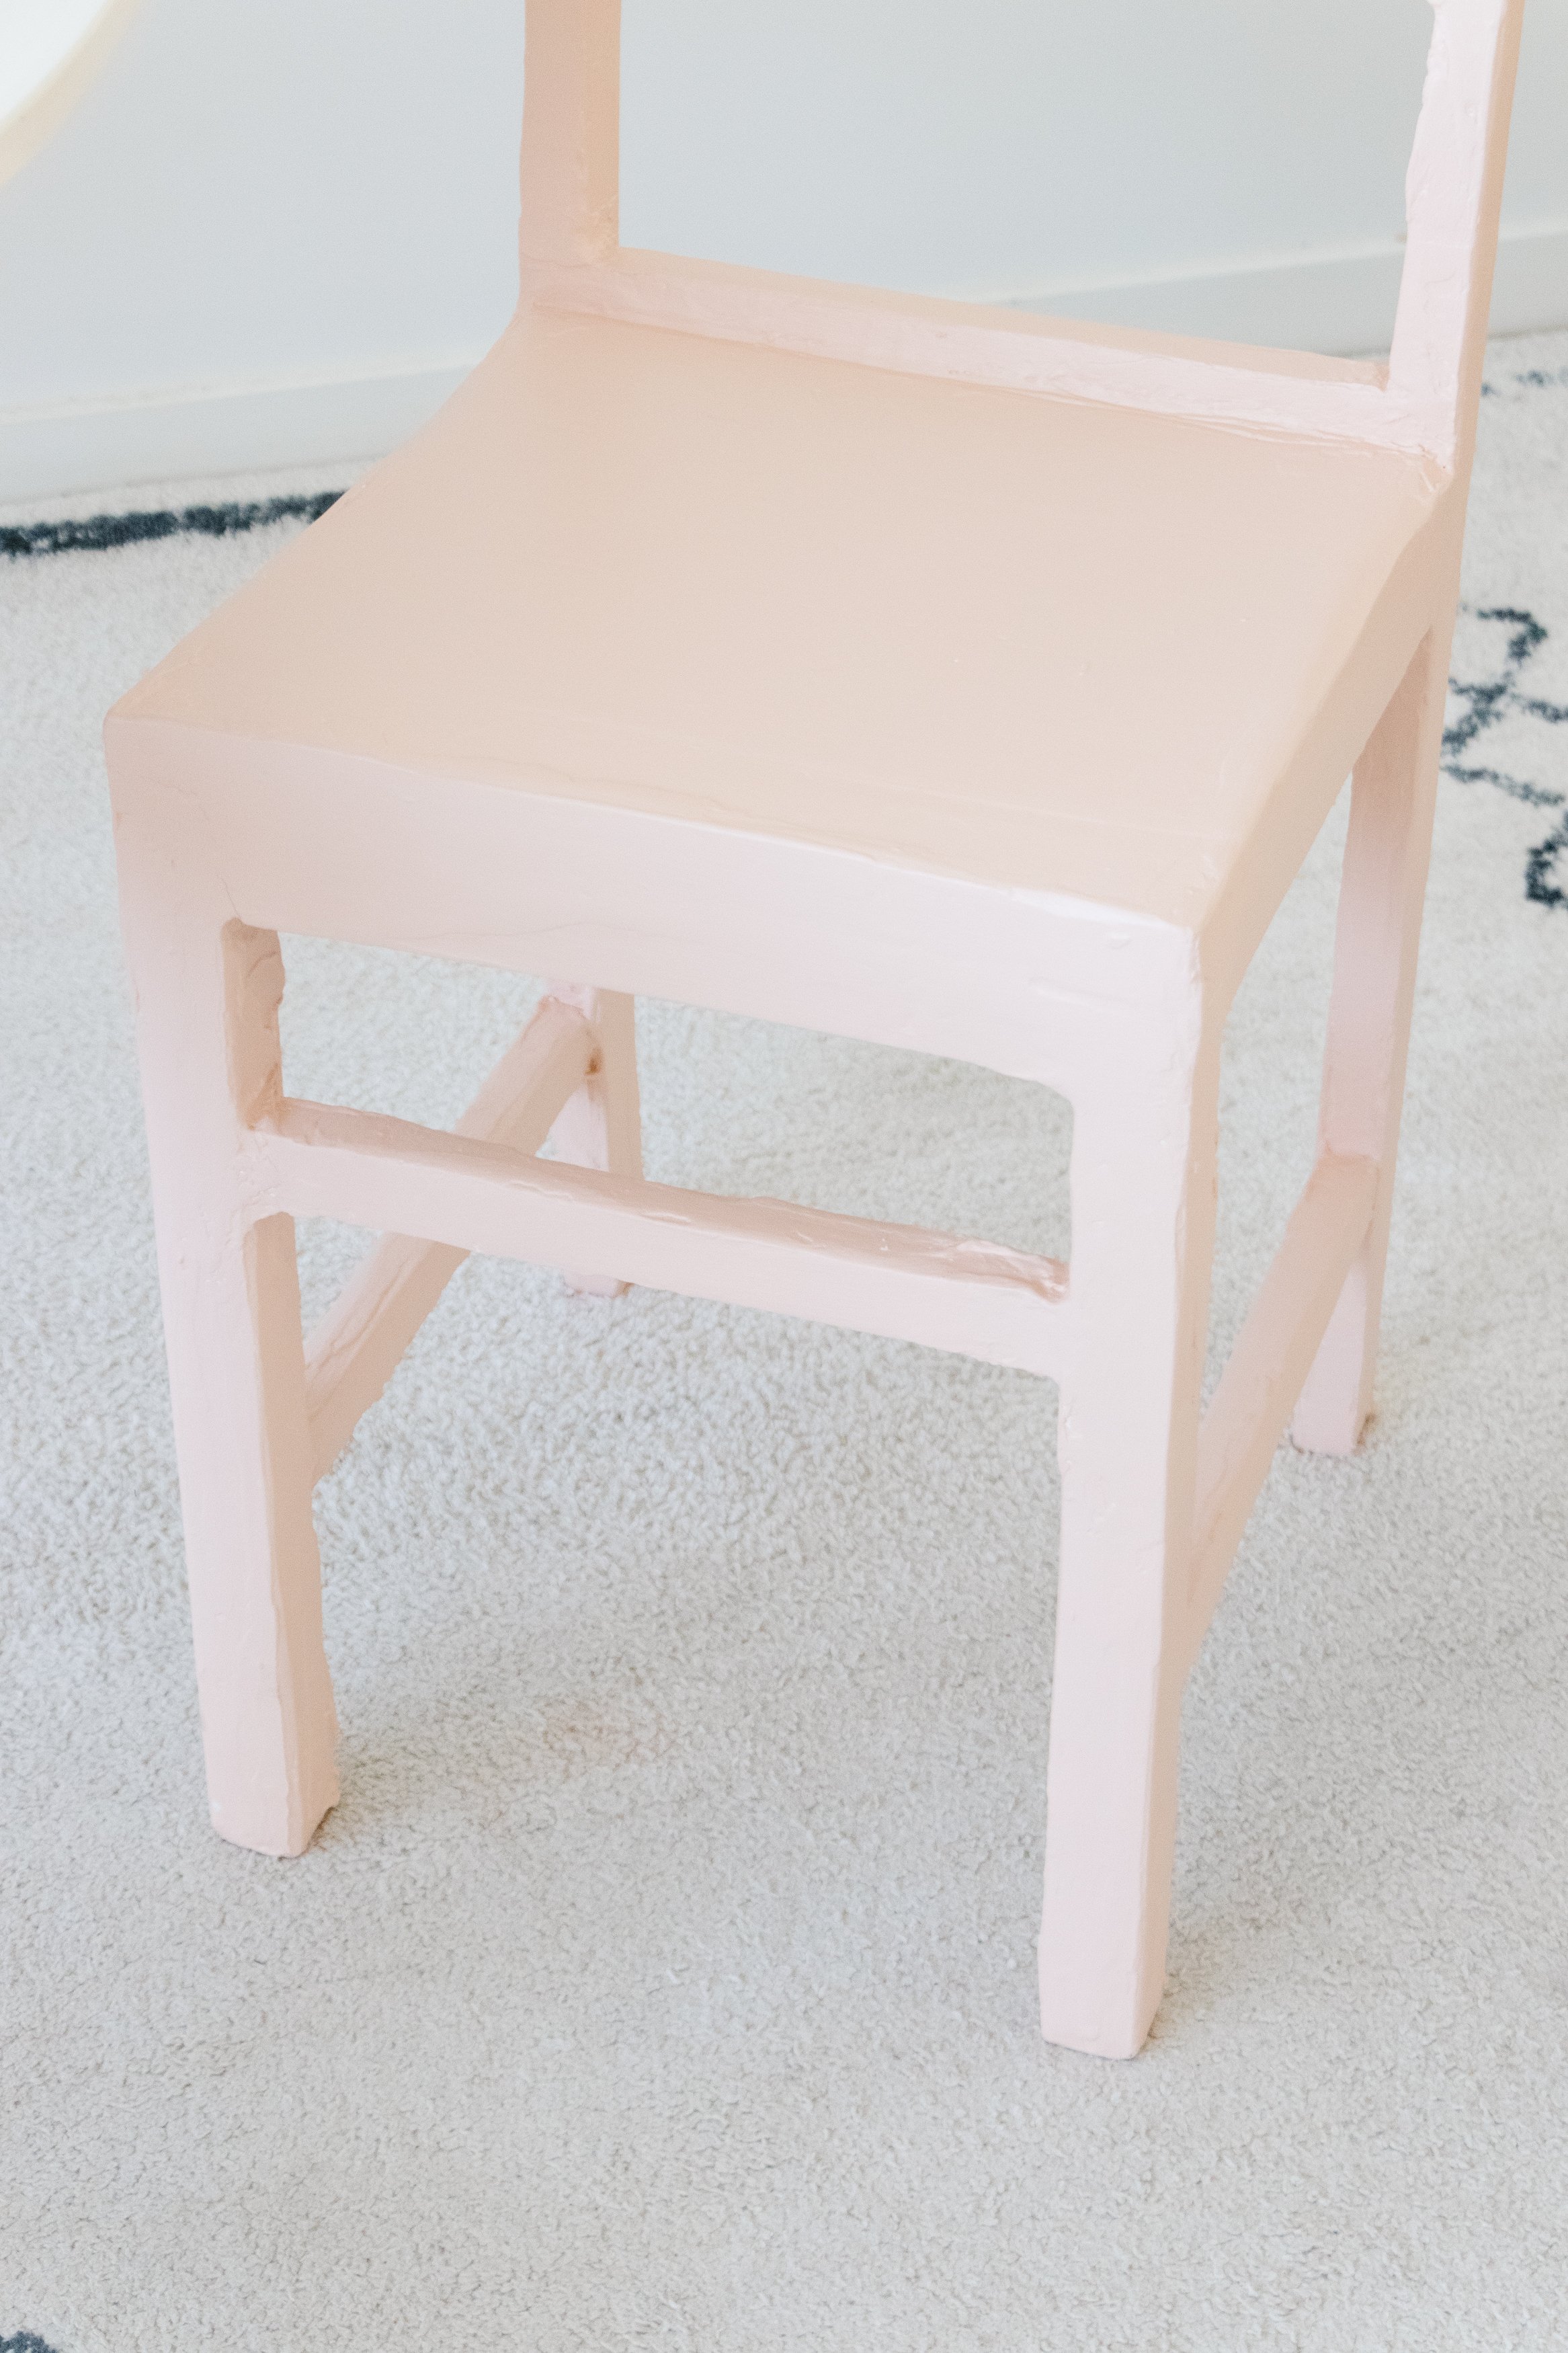
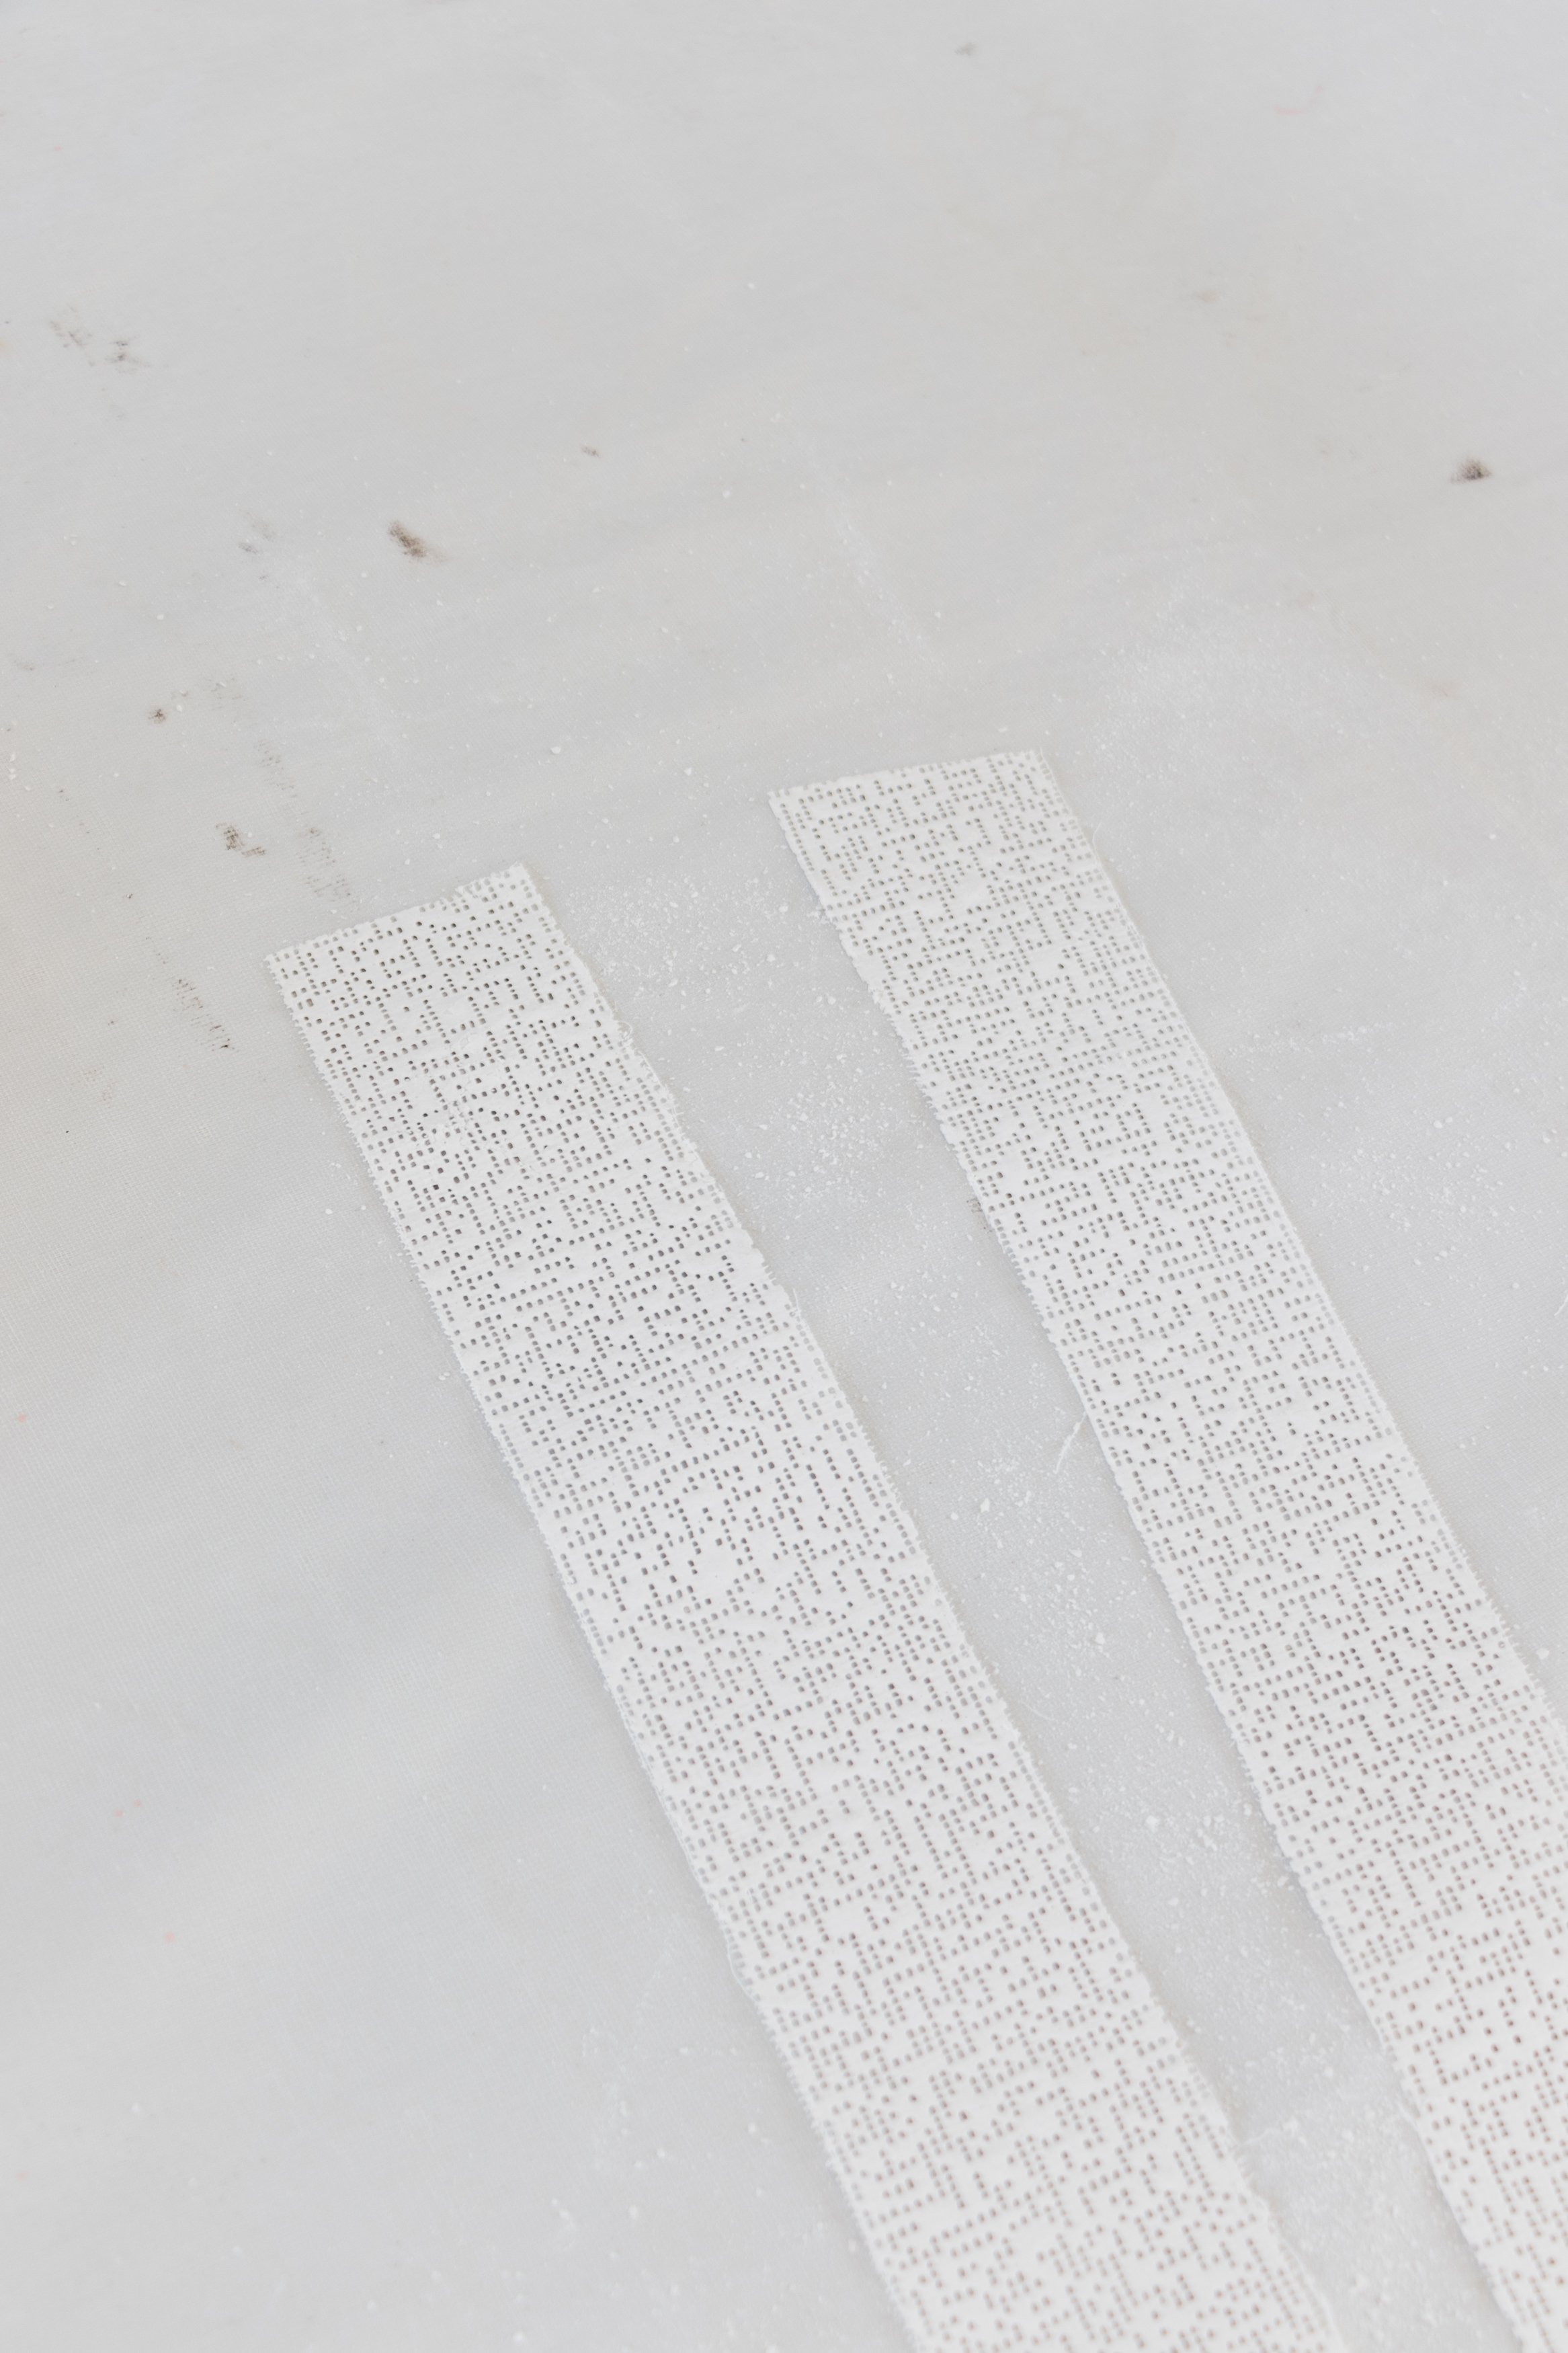
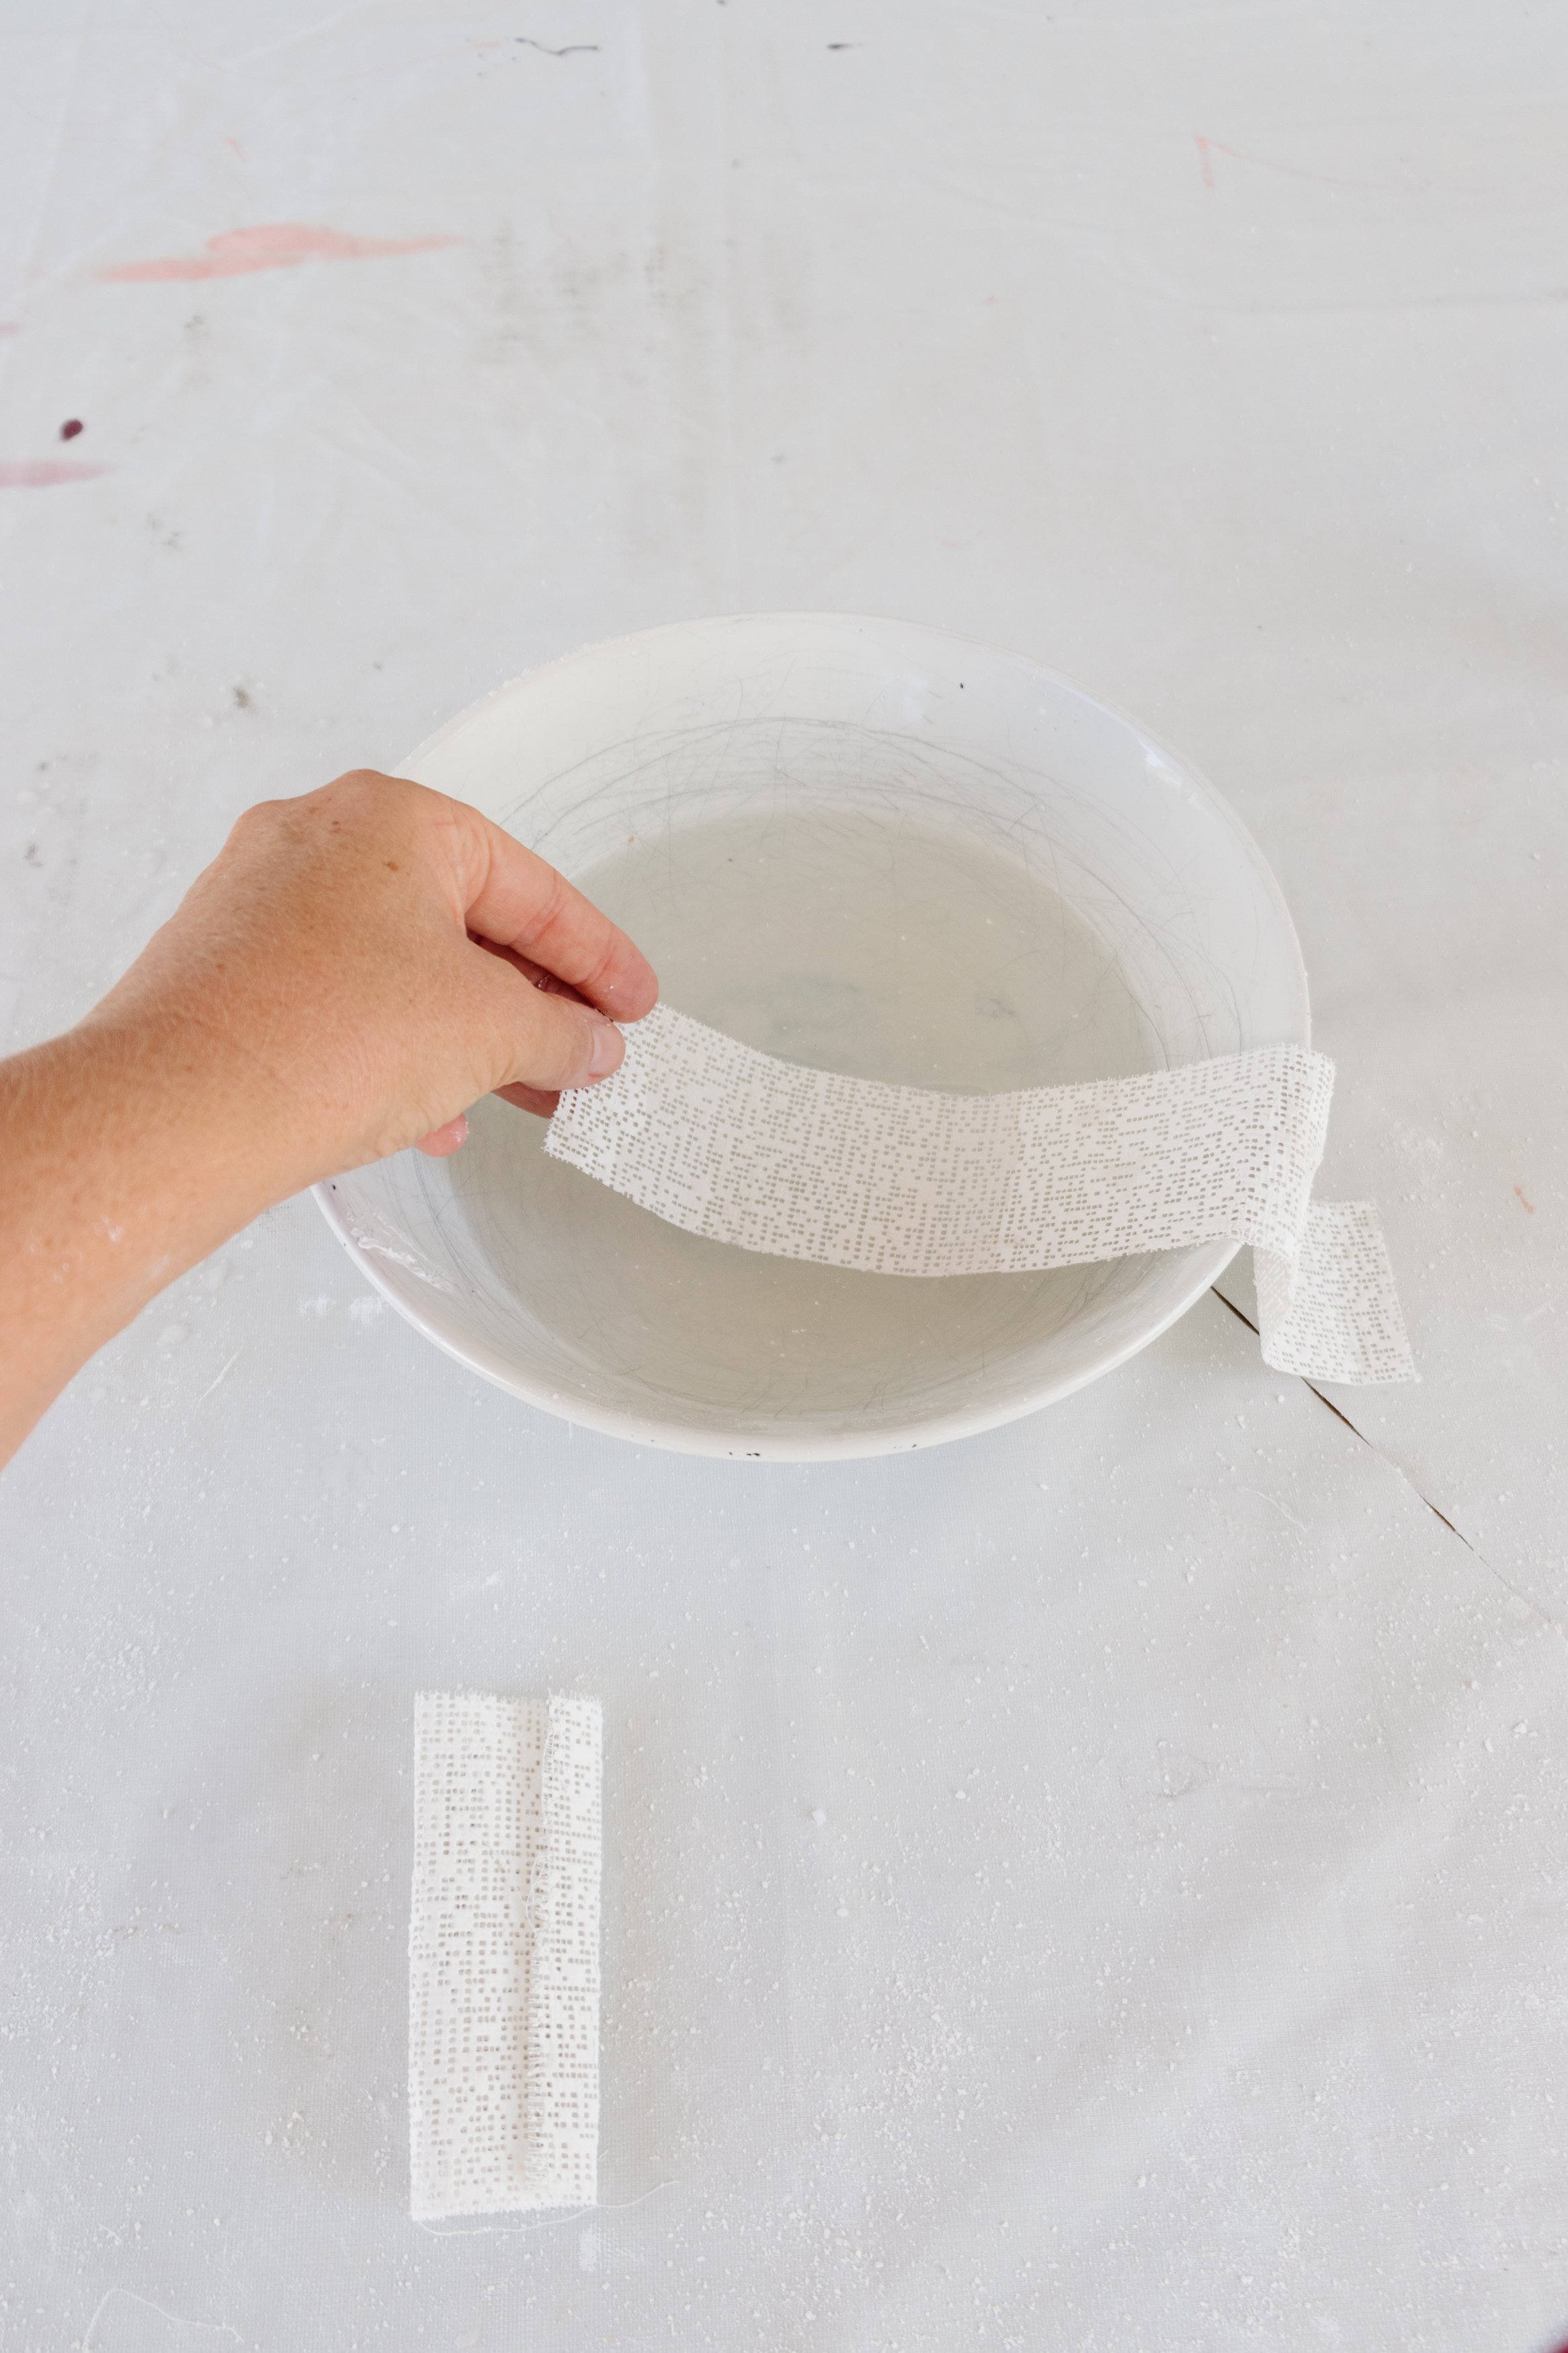
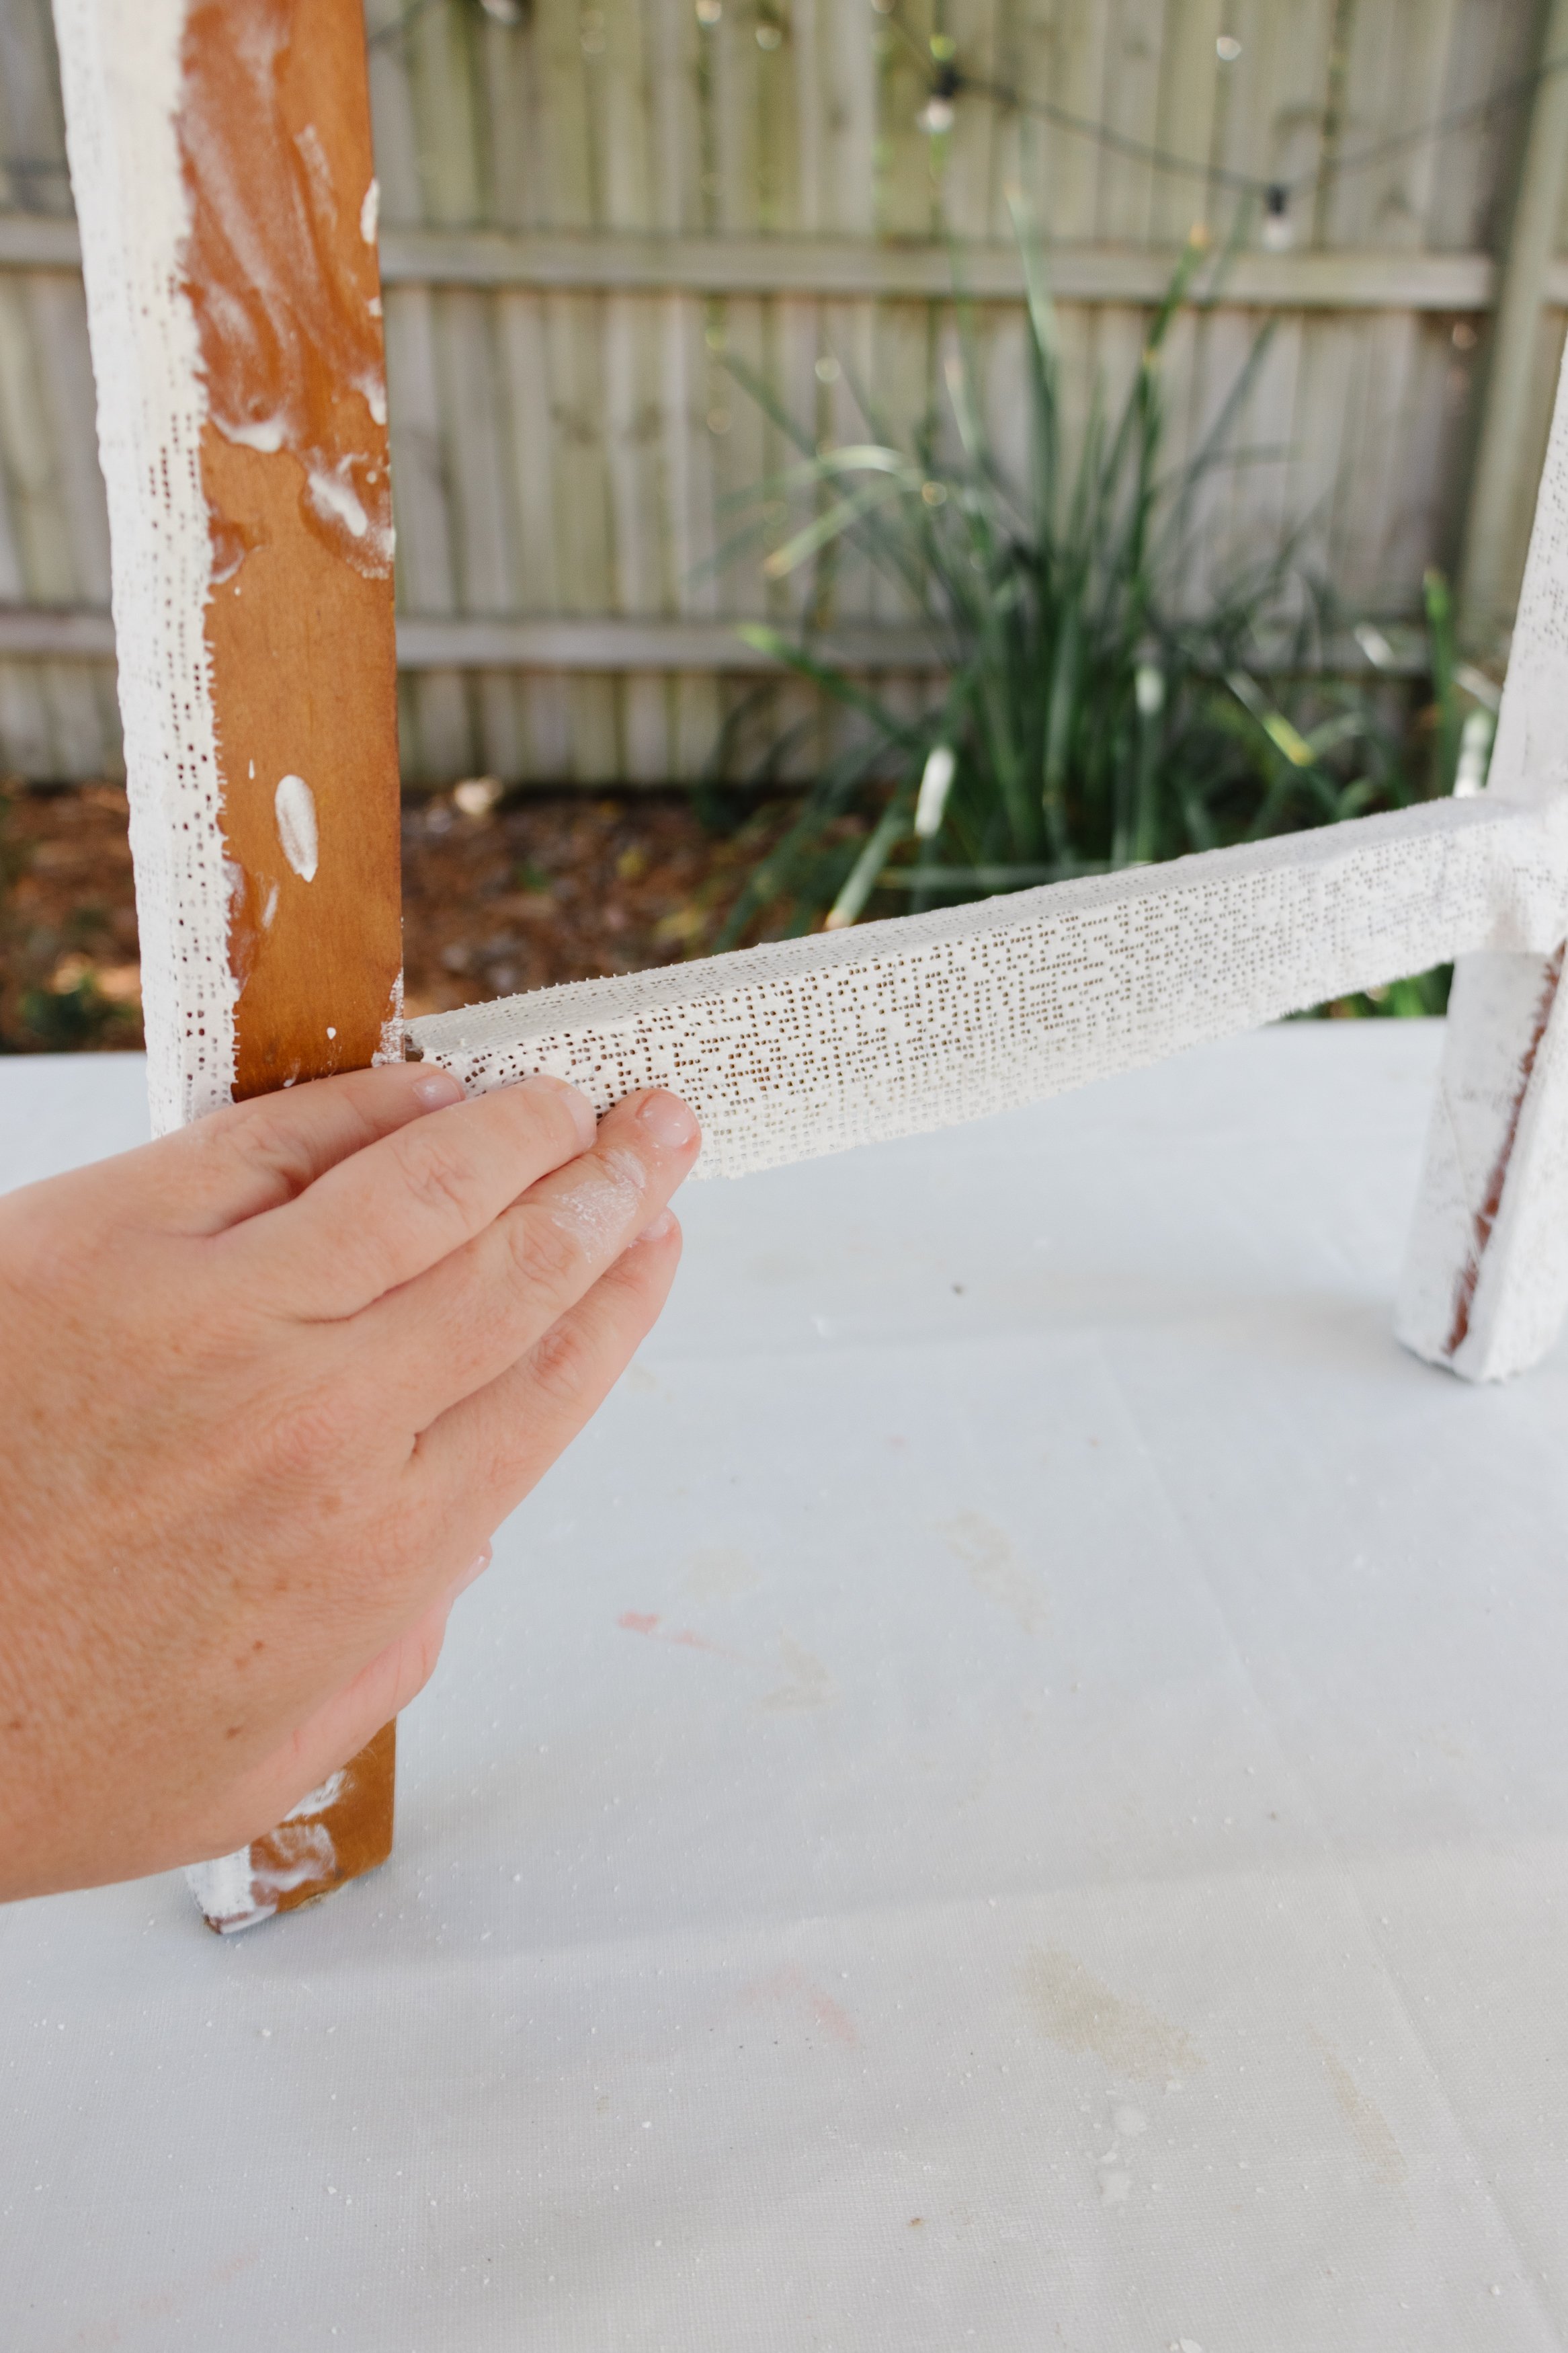
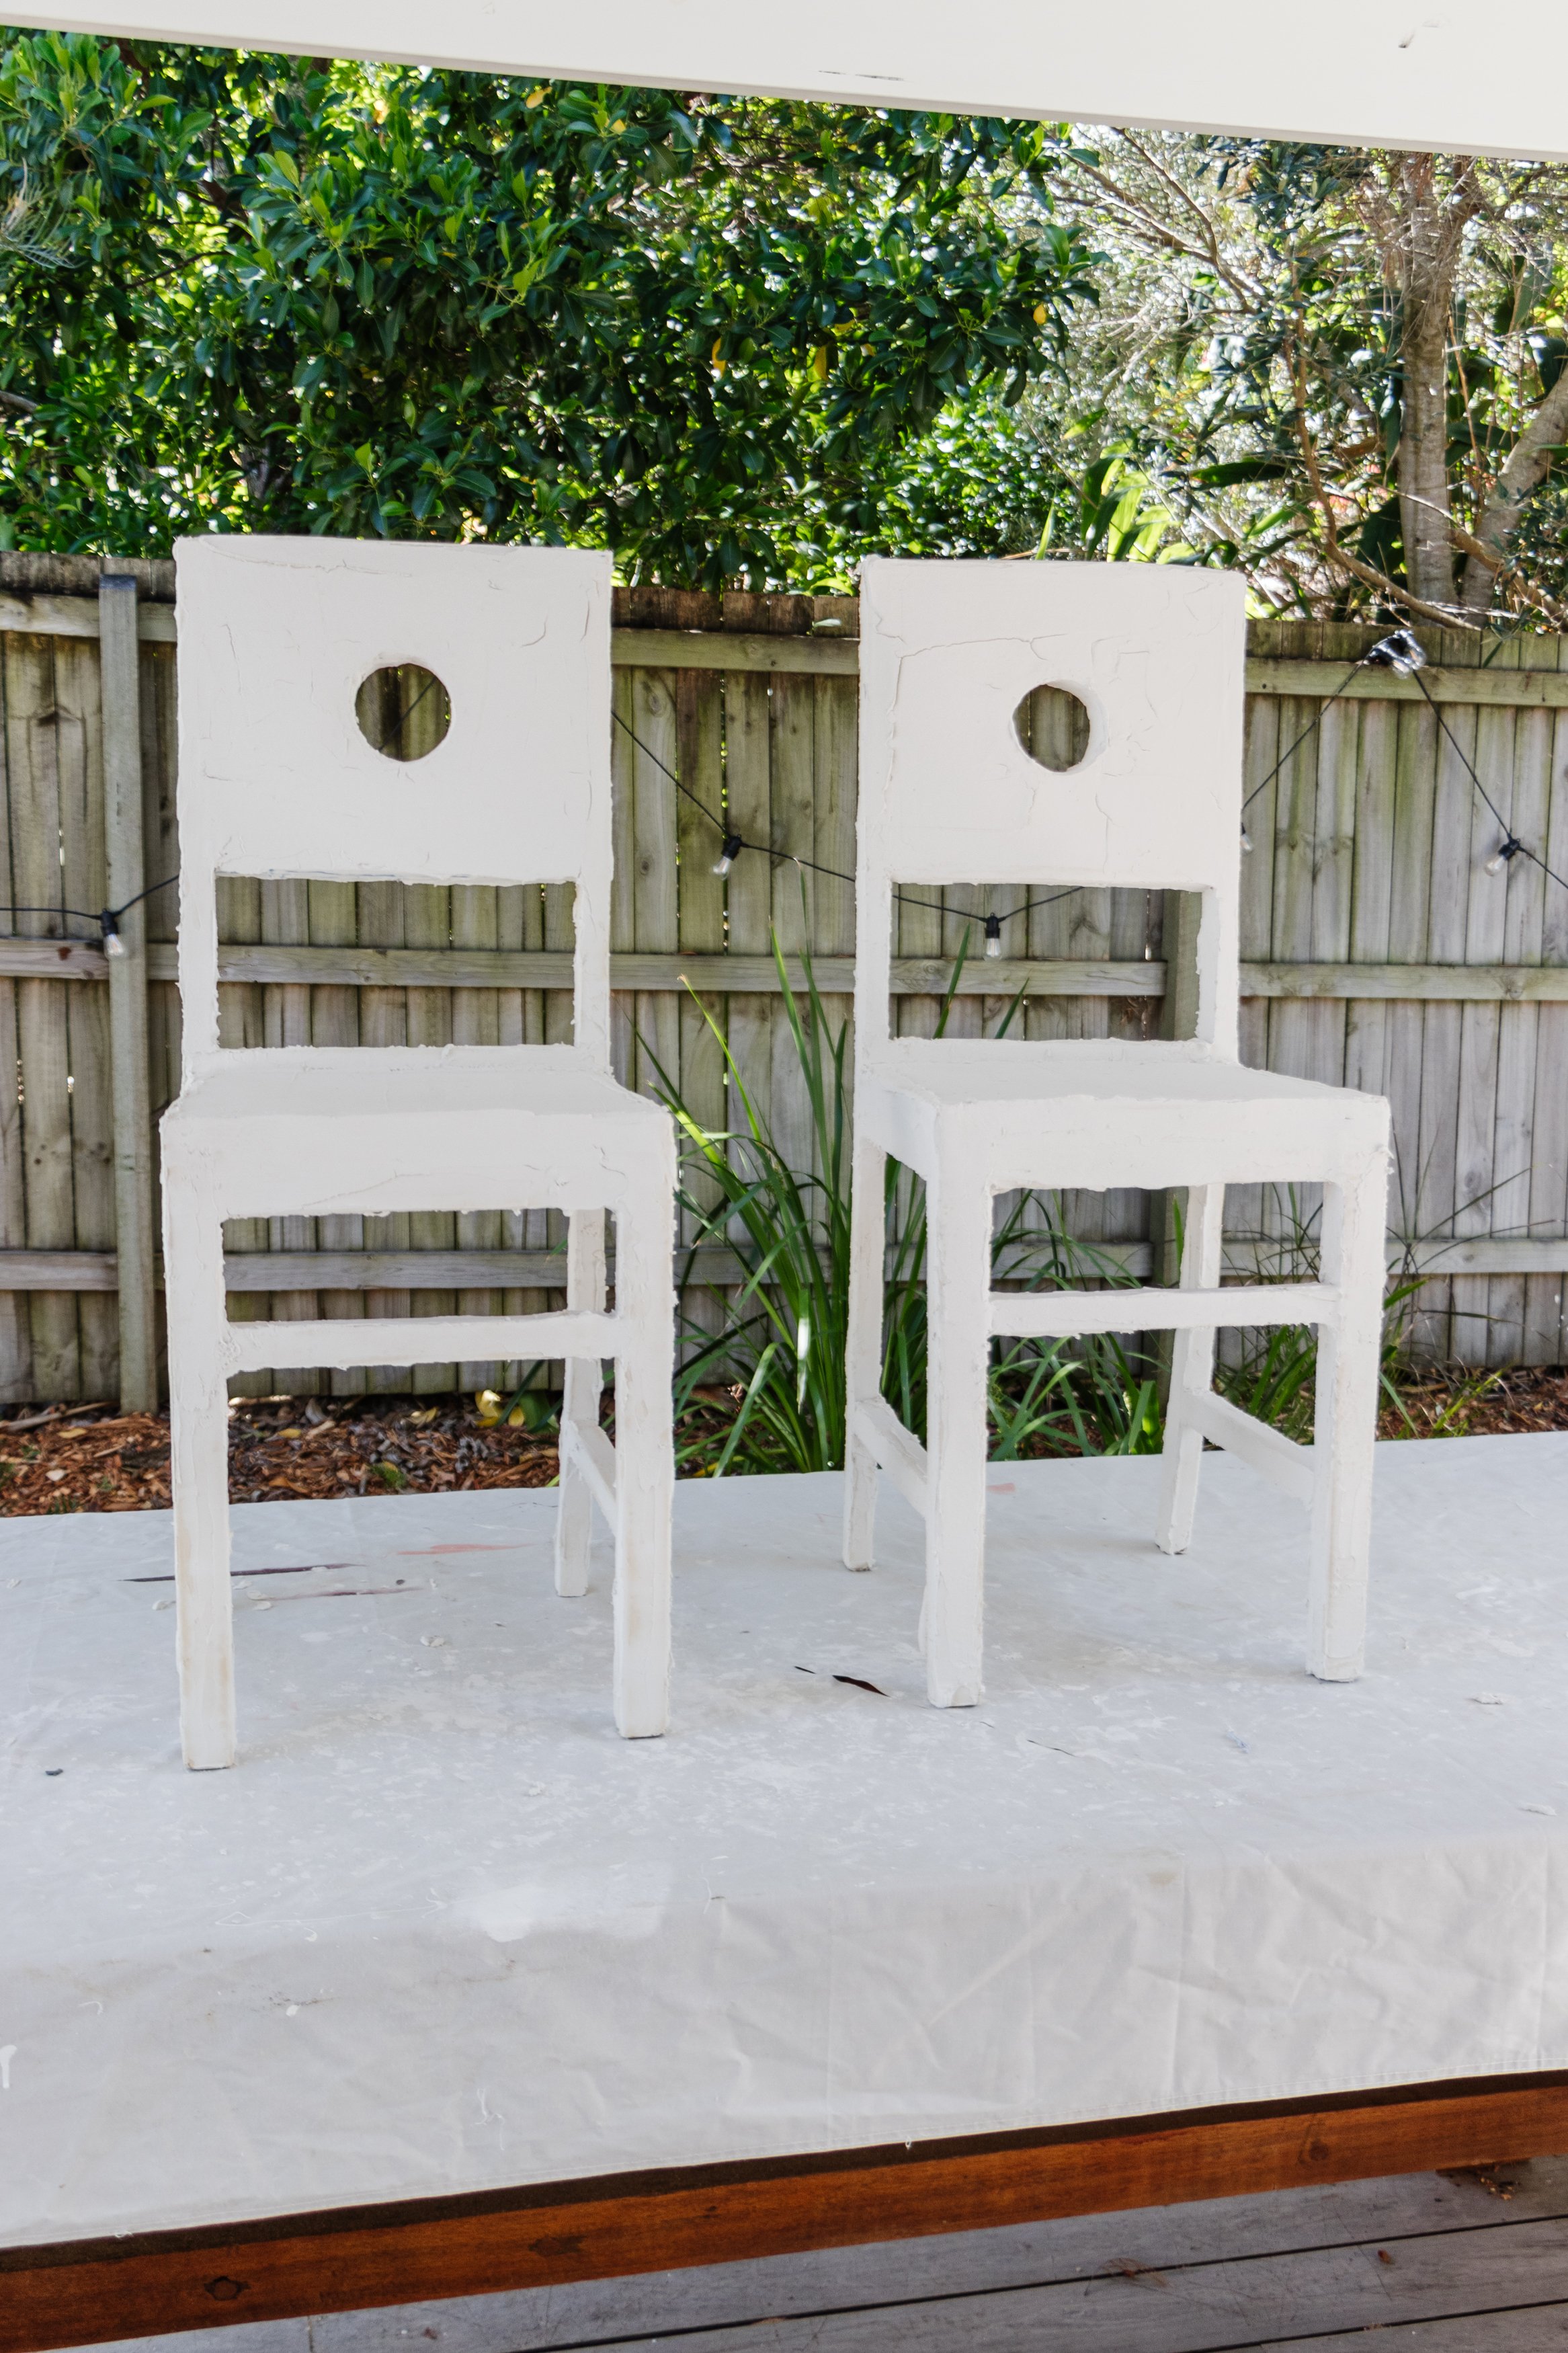
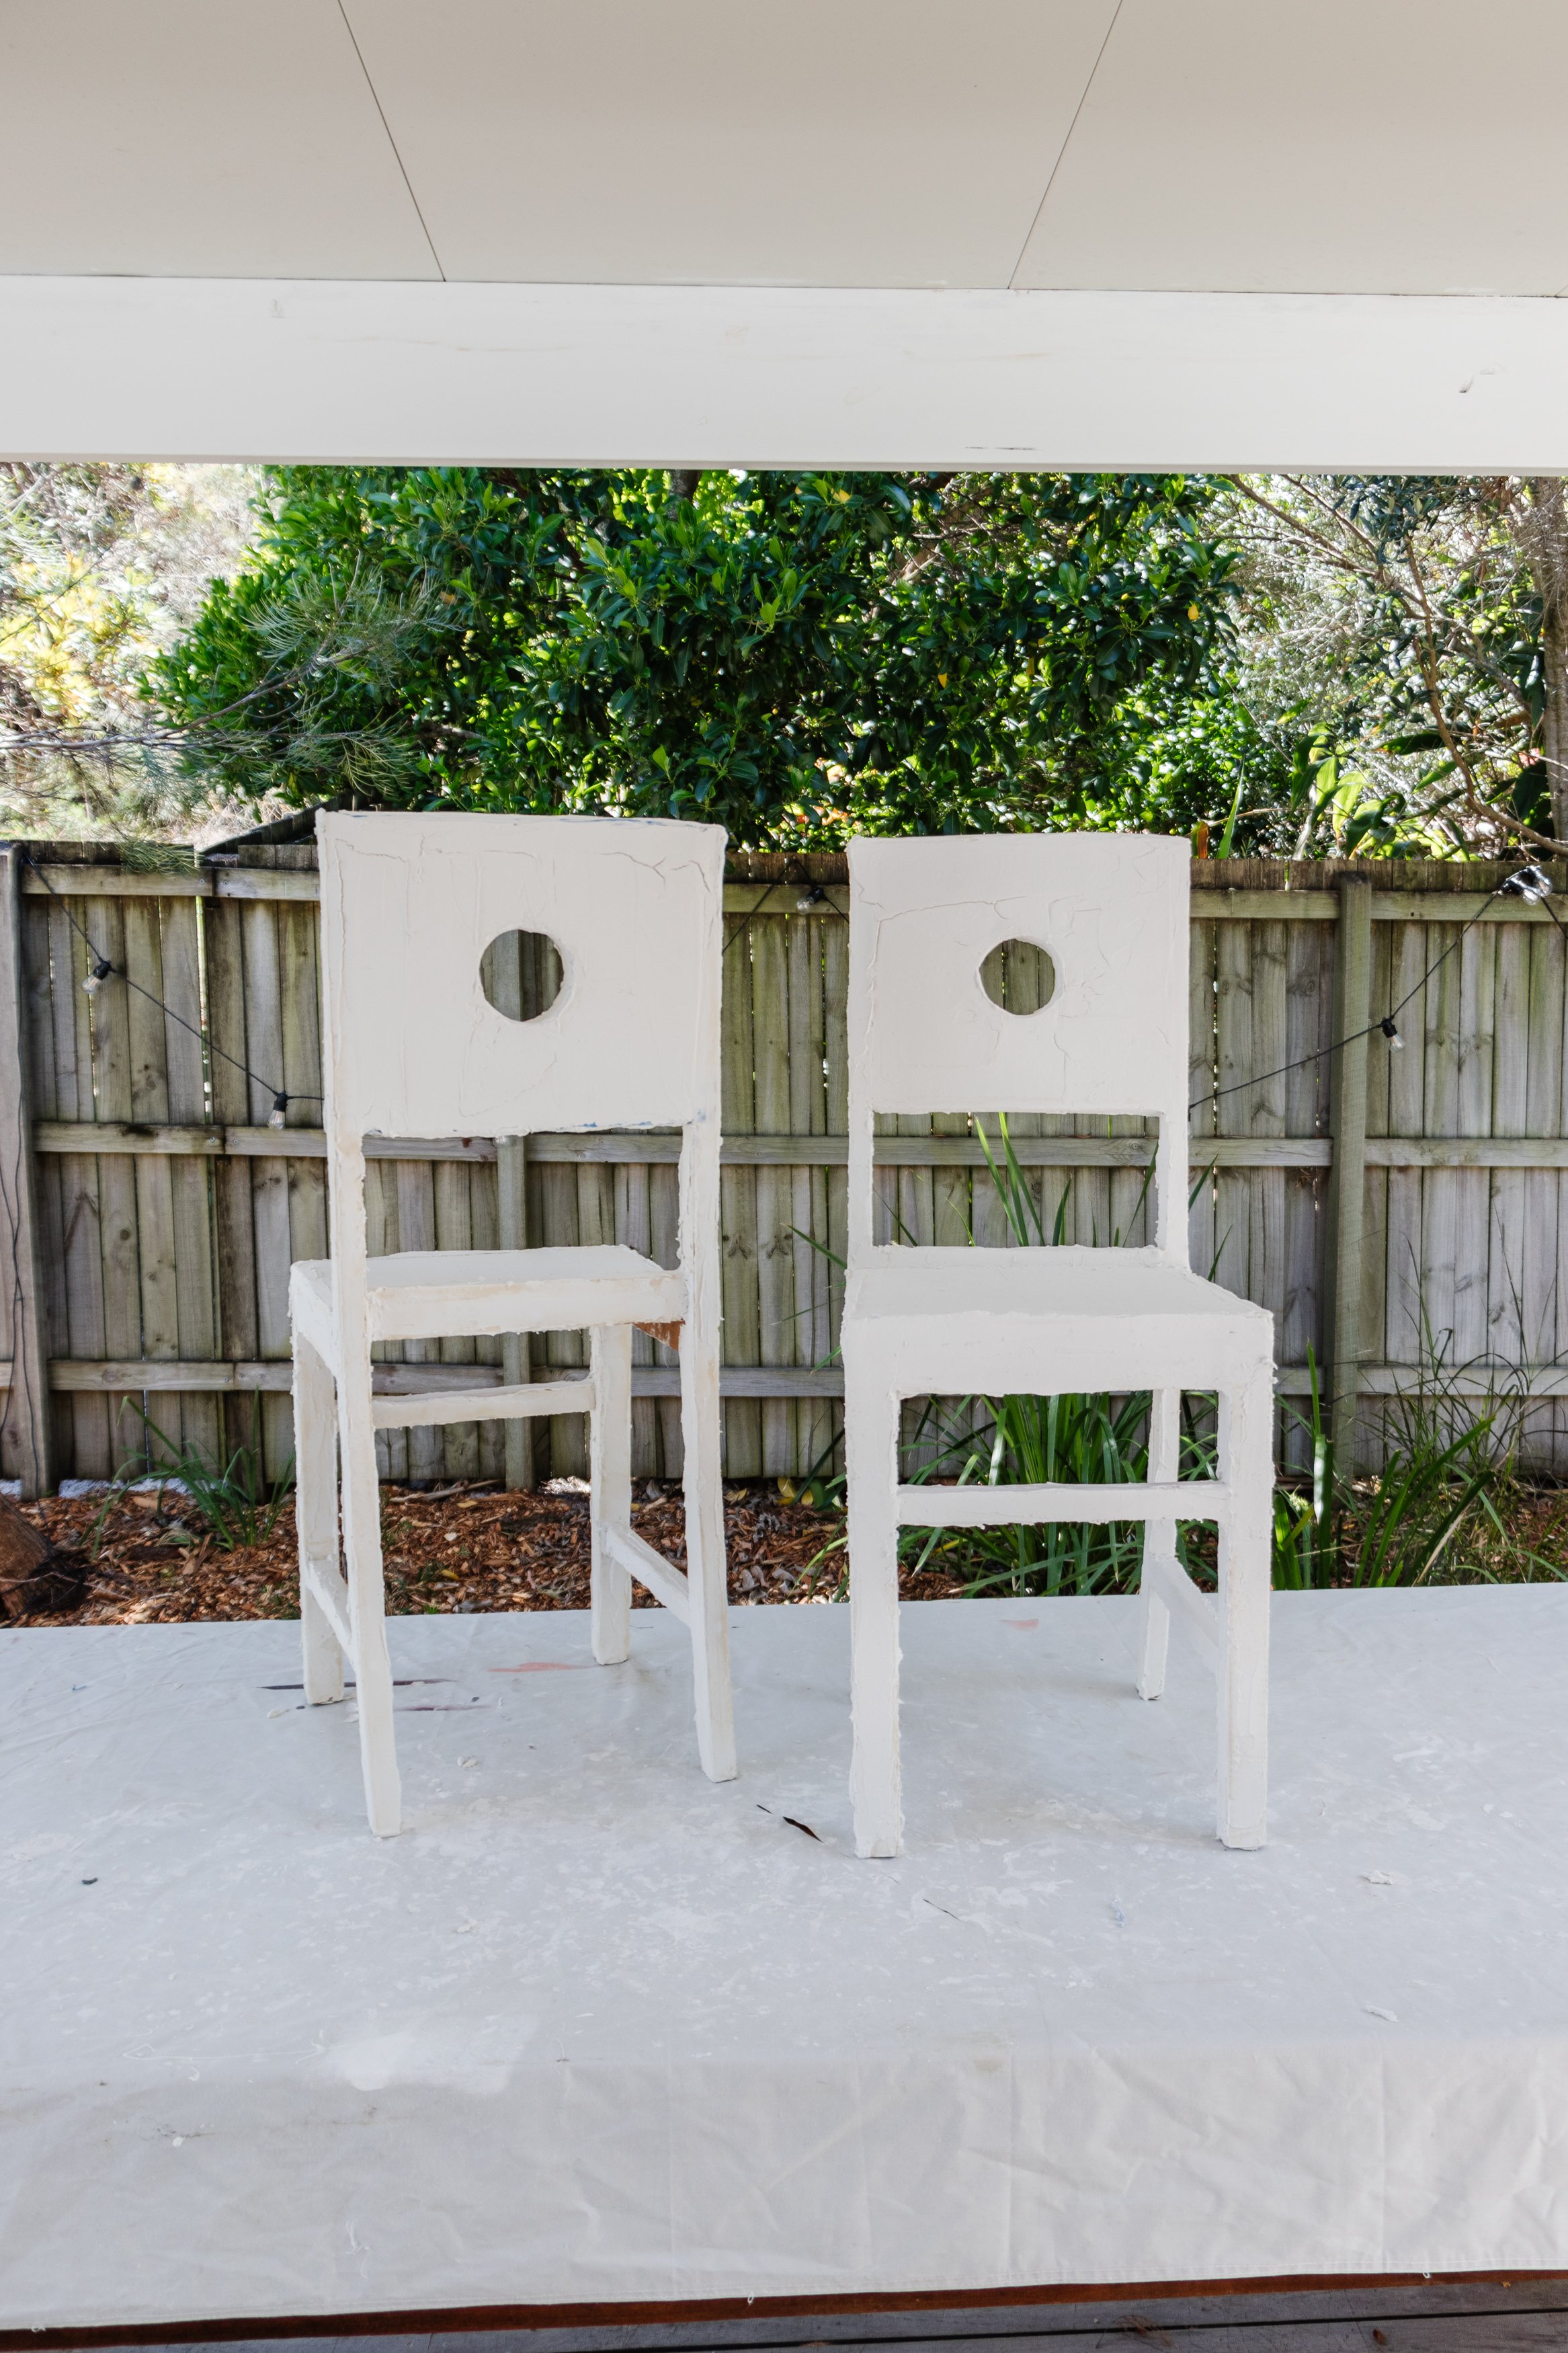
Step 4: I applied plaster gauze all over the wooden chair frames and set them both aside to completely dry. I didn’t cover the cardboard with the gauze because plaster adheres very well to cardboard.

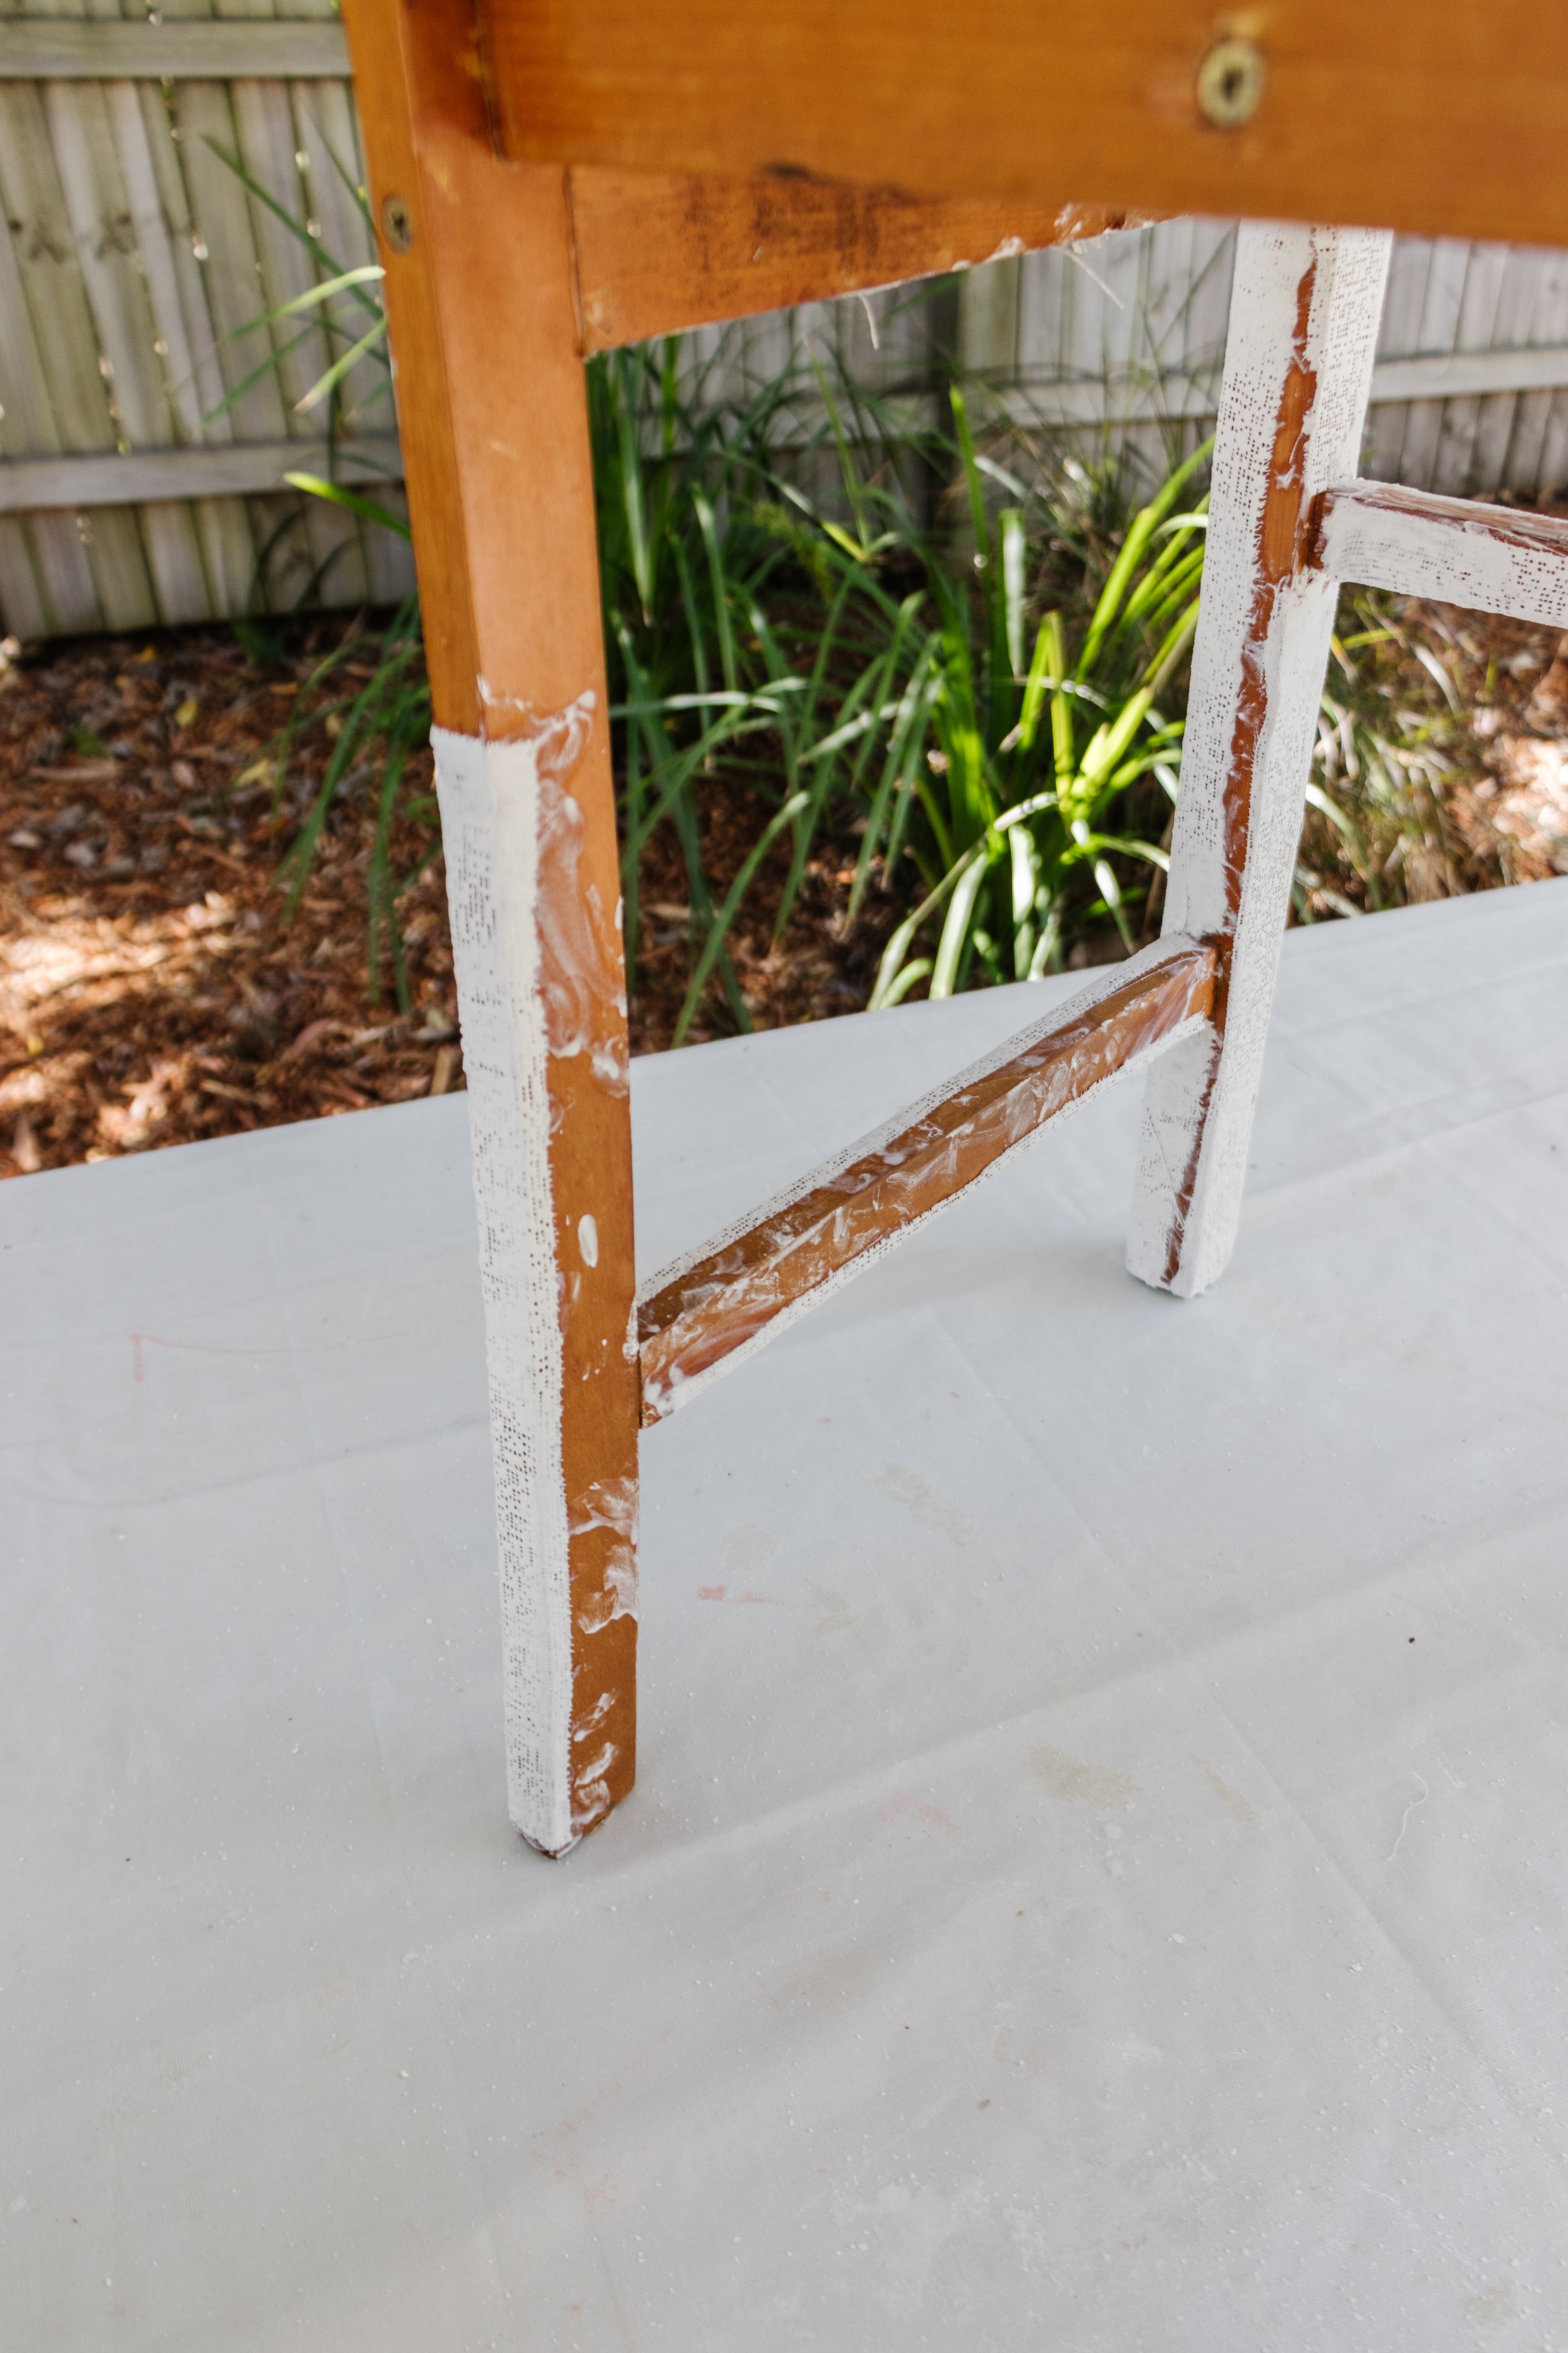
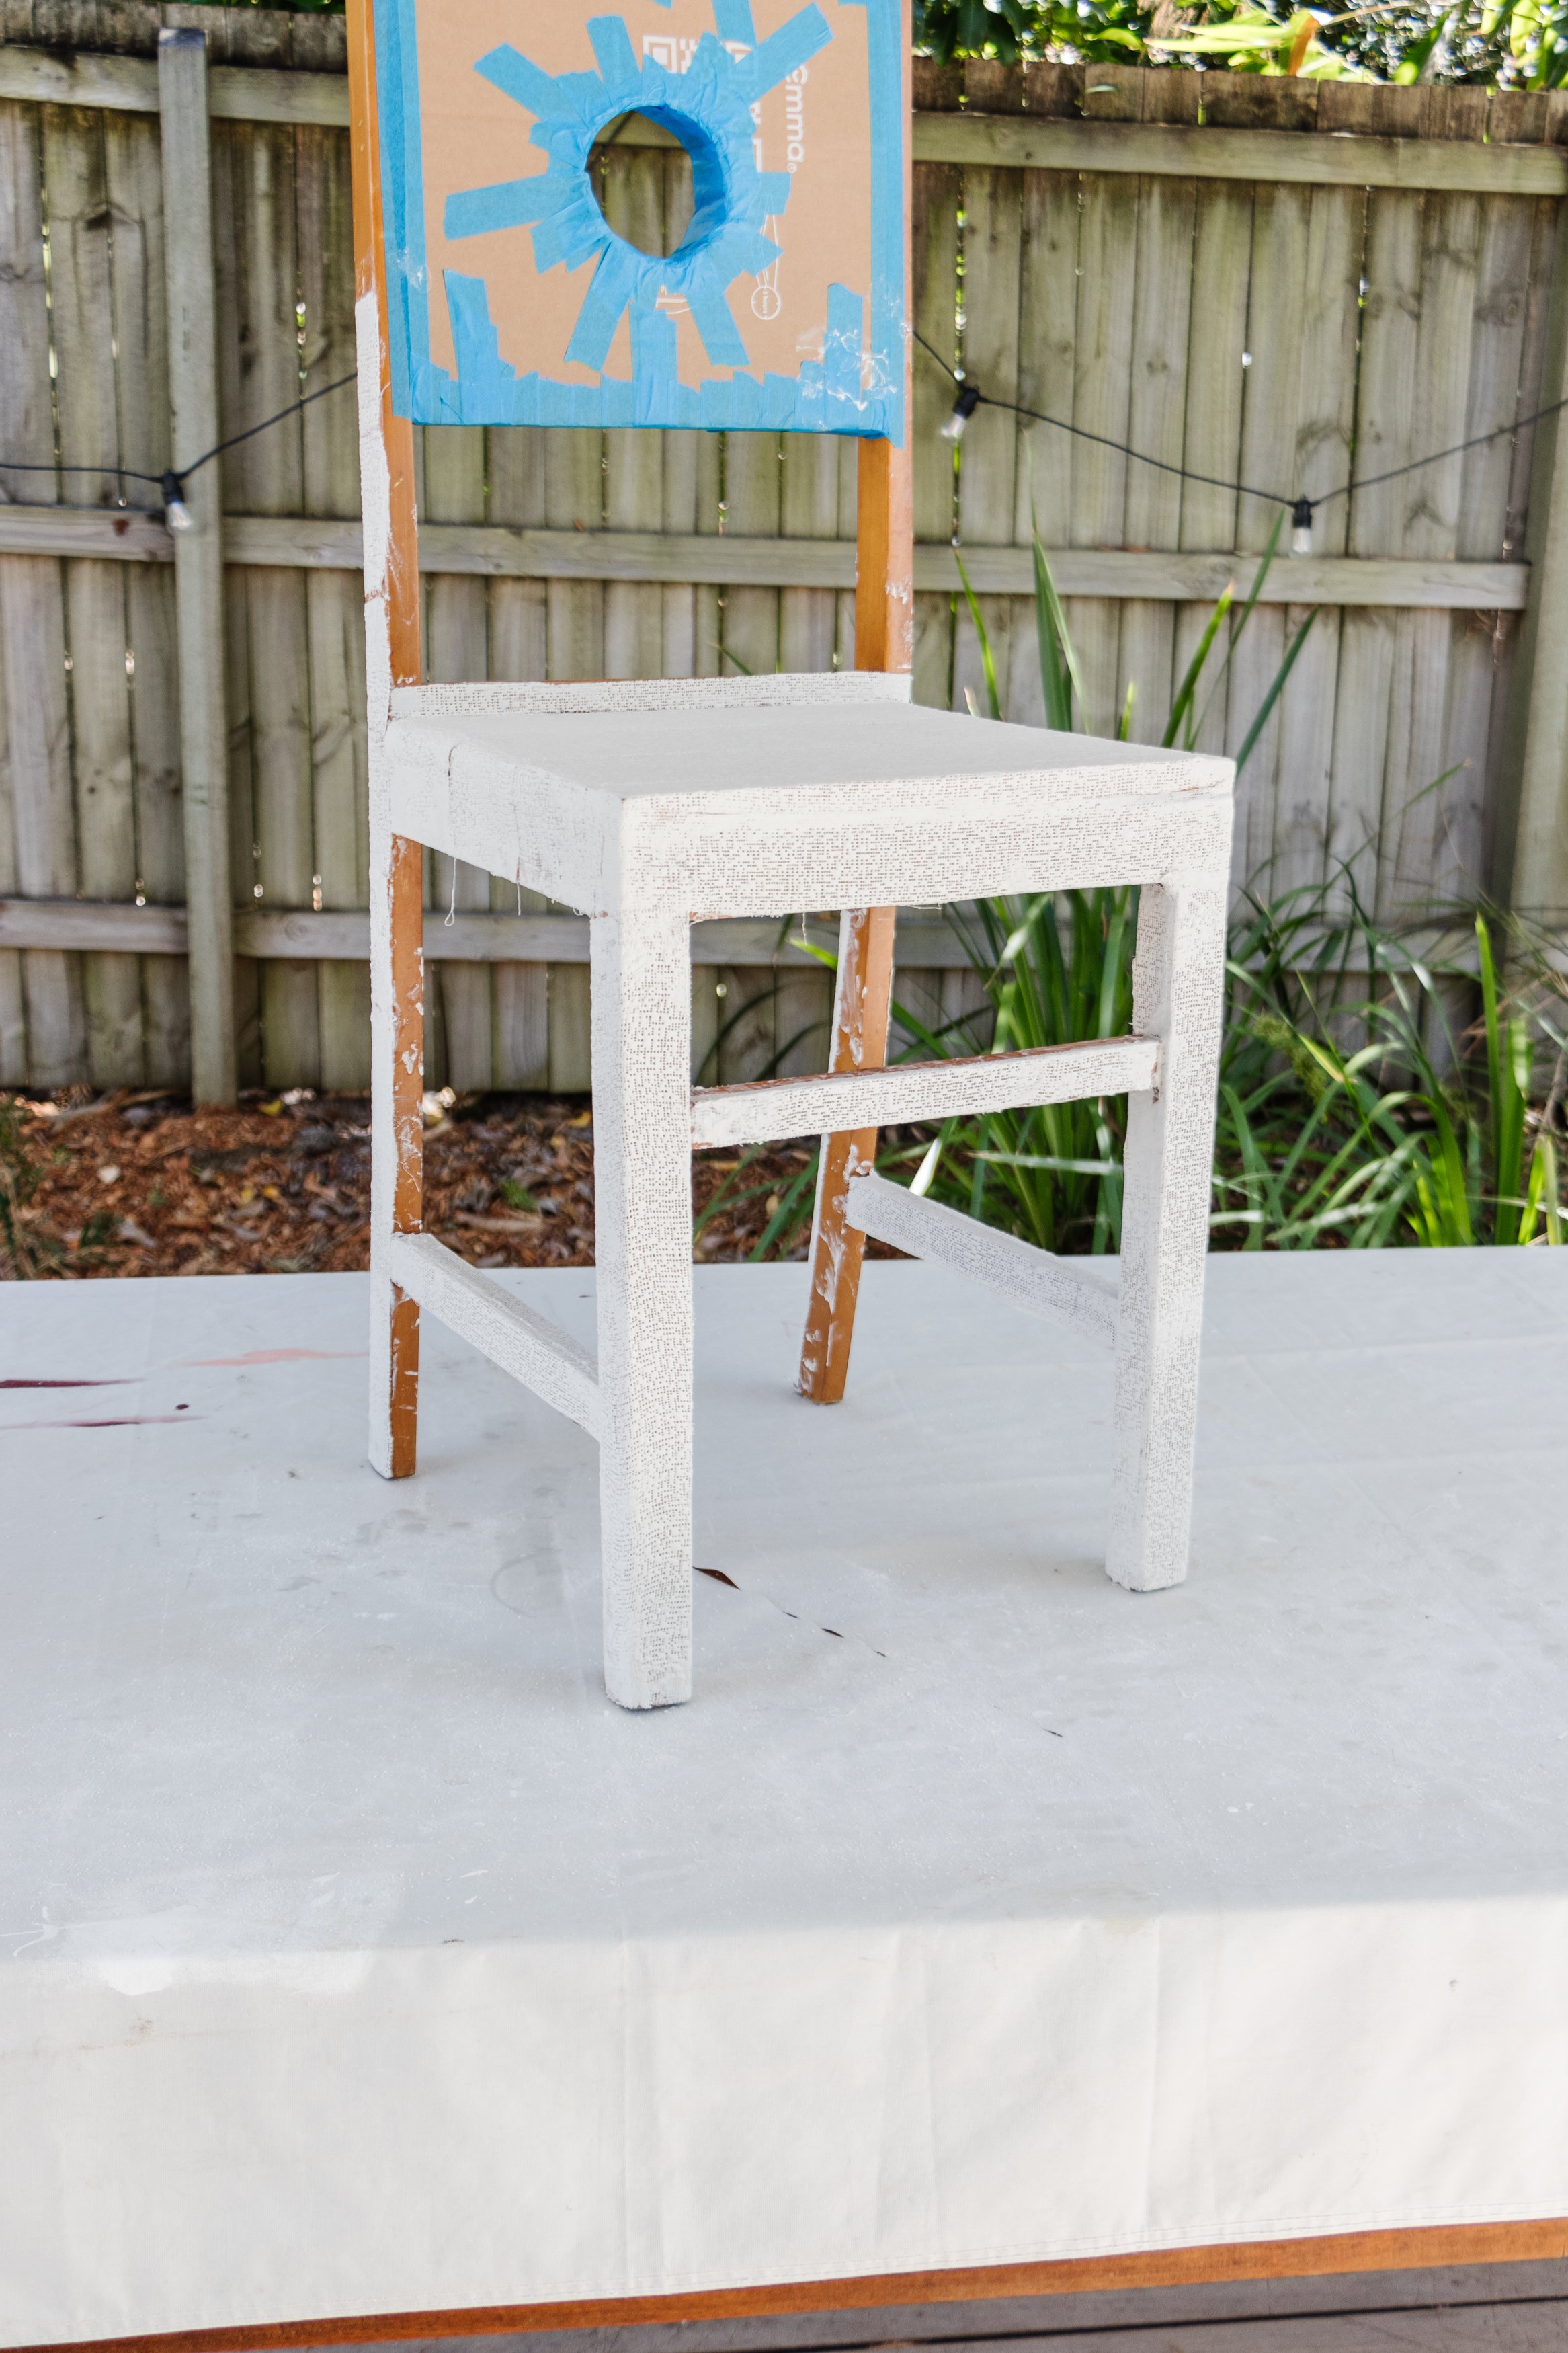
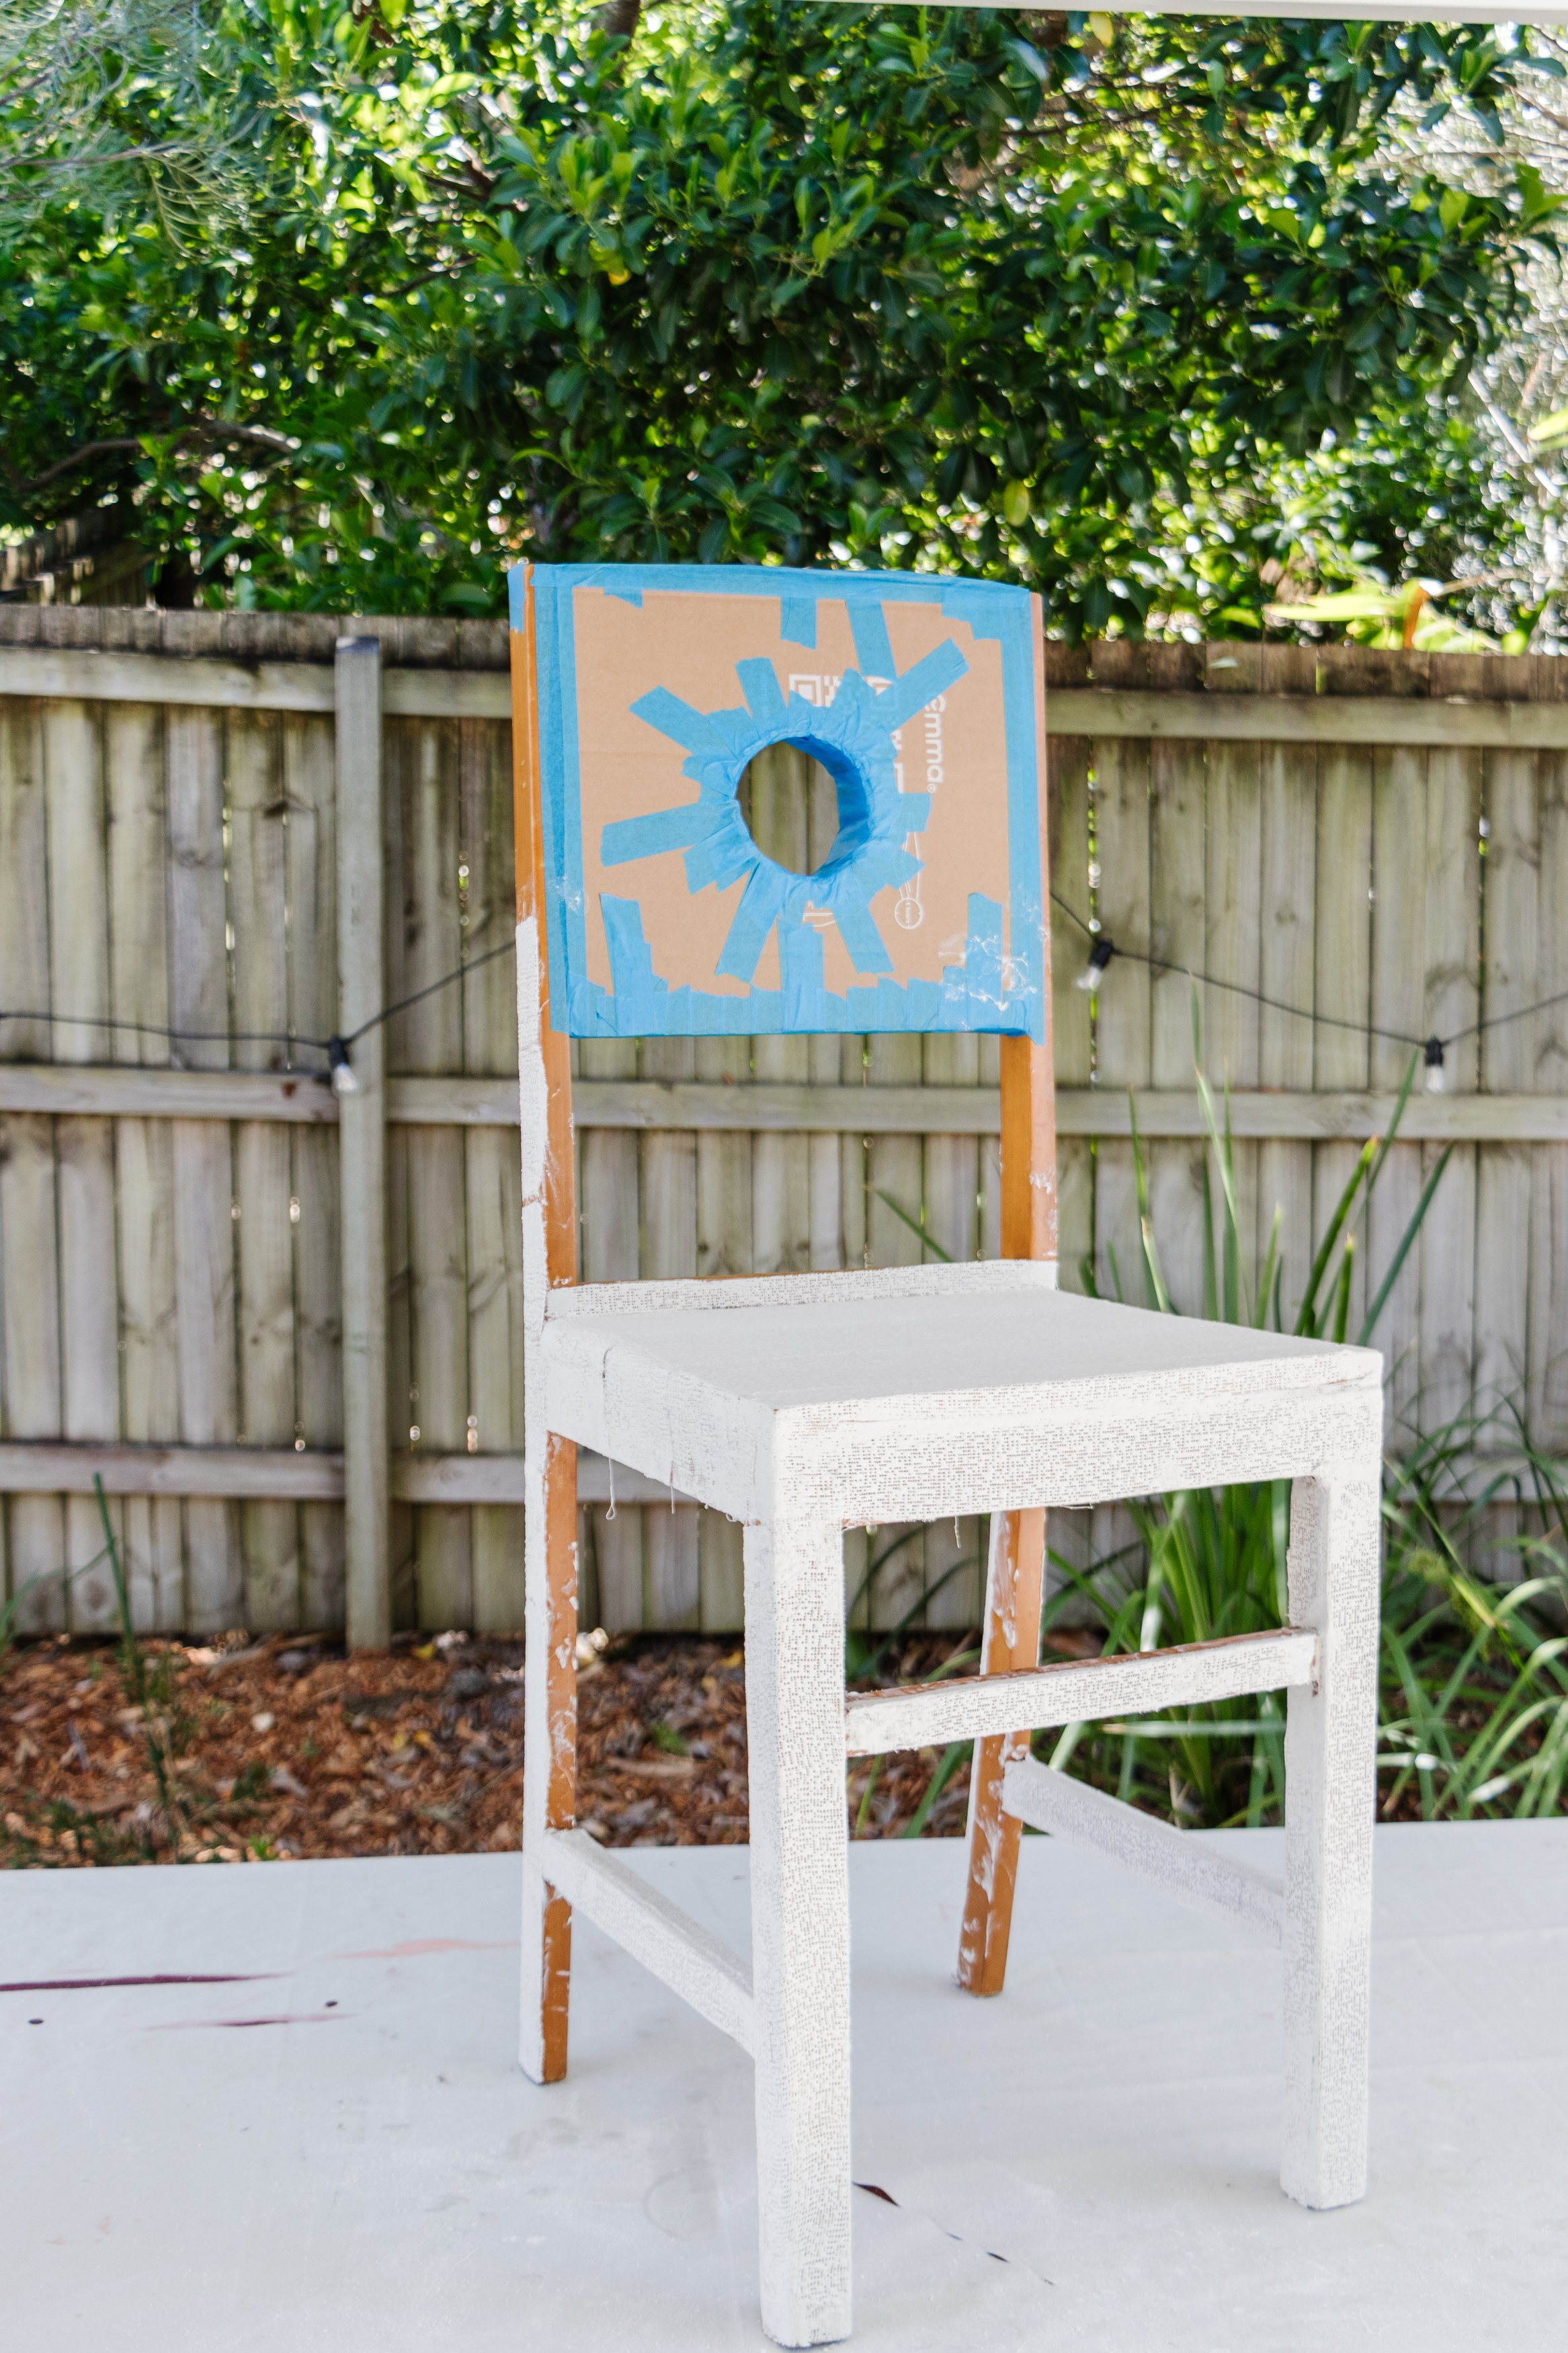
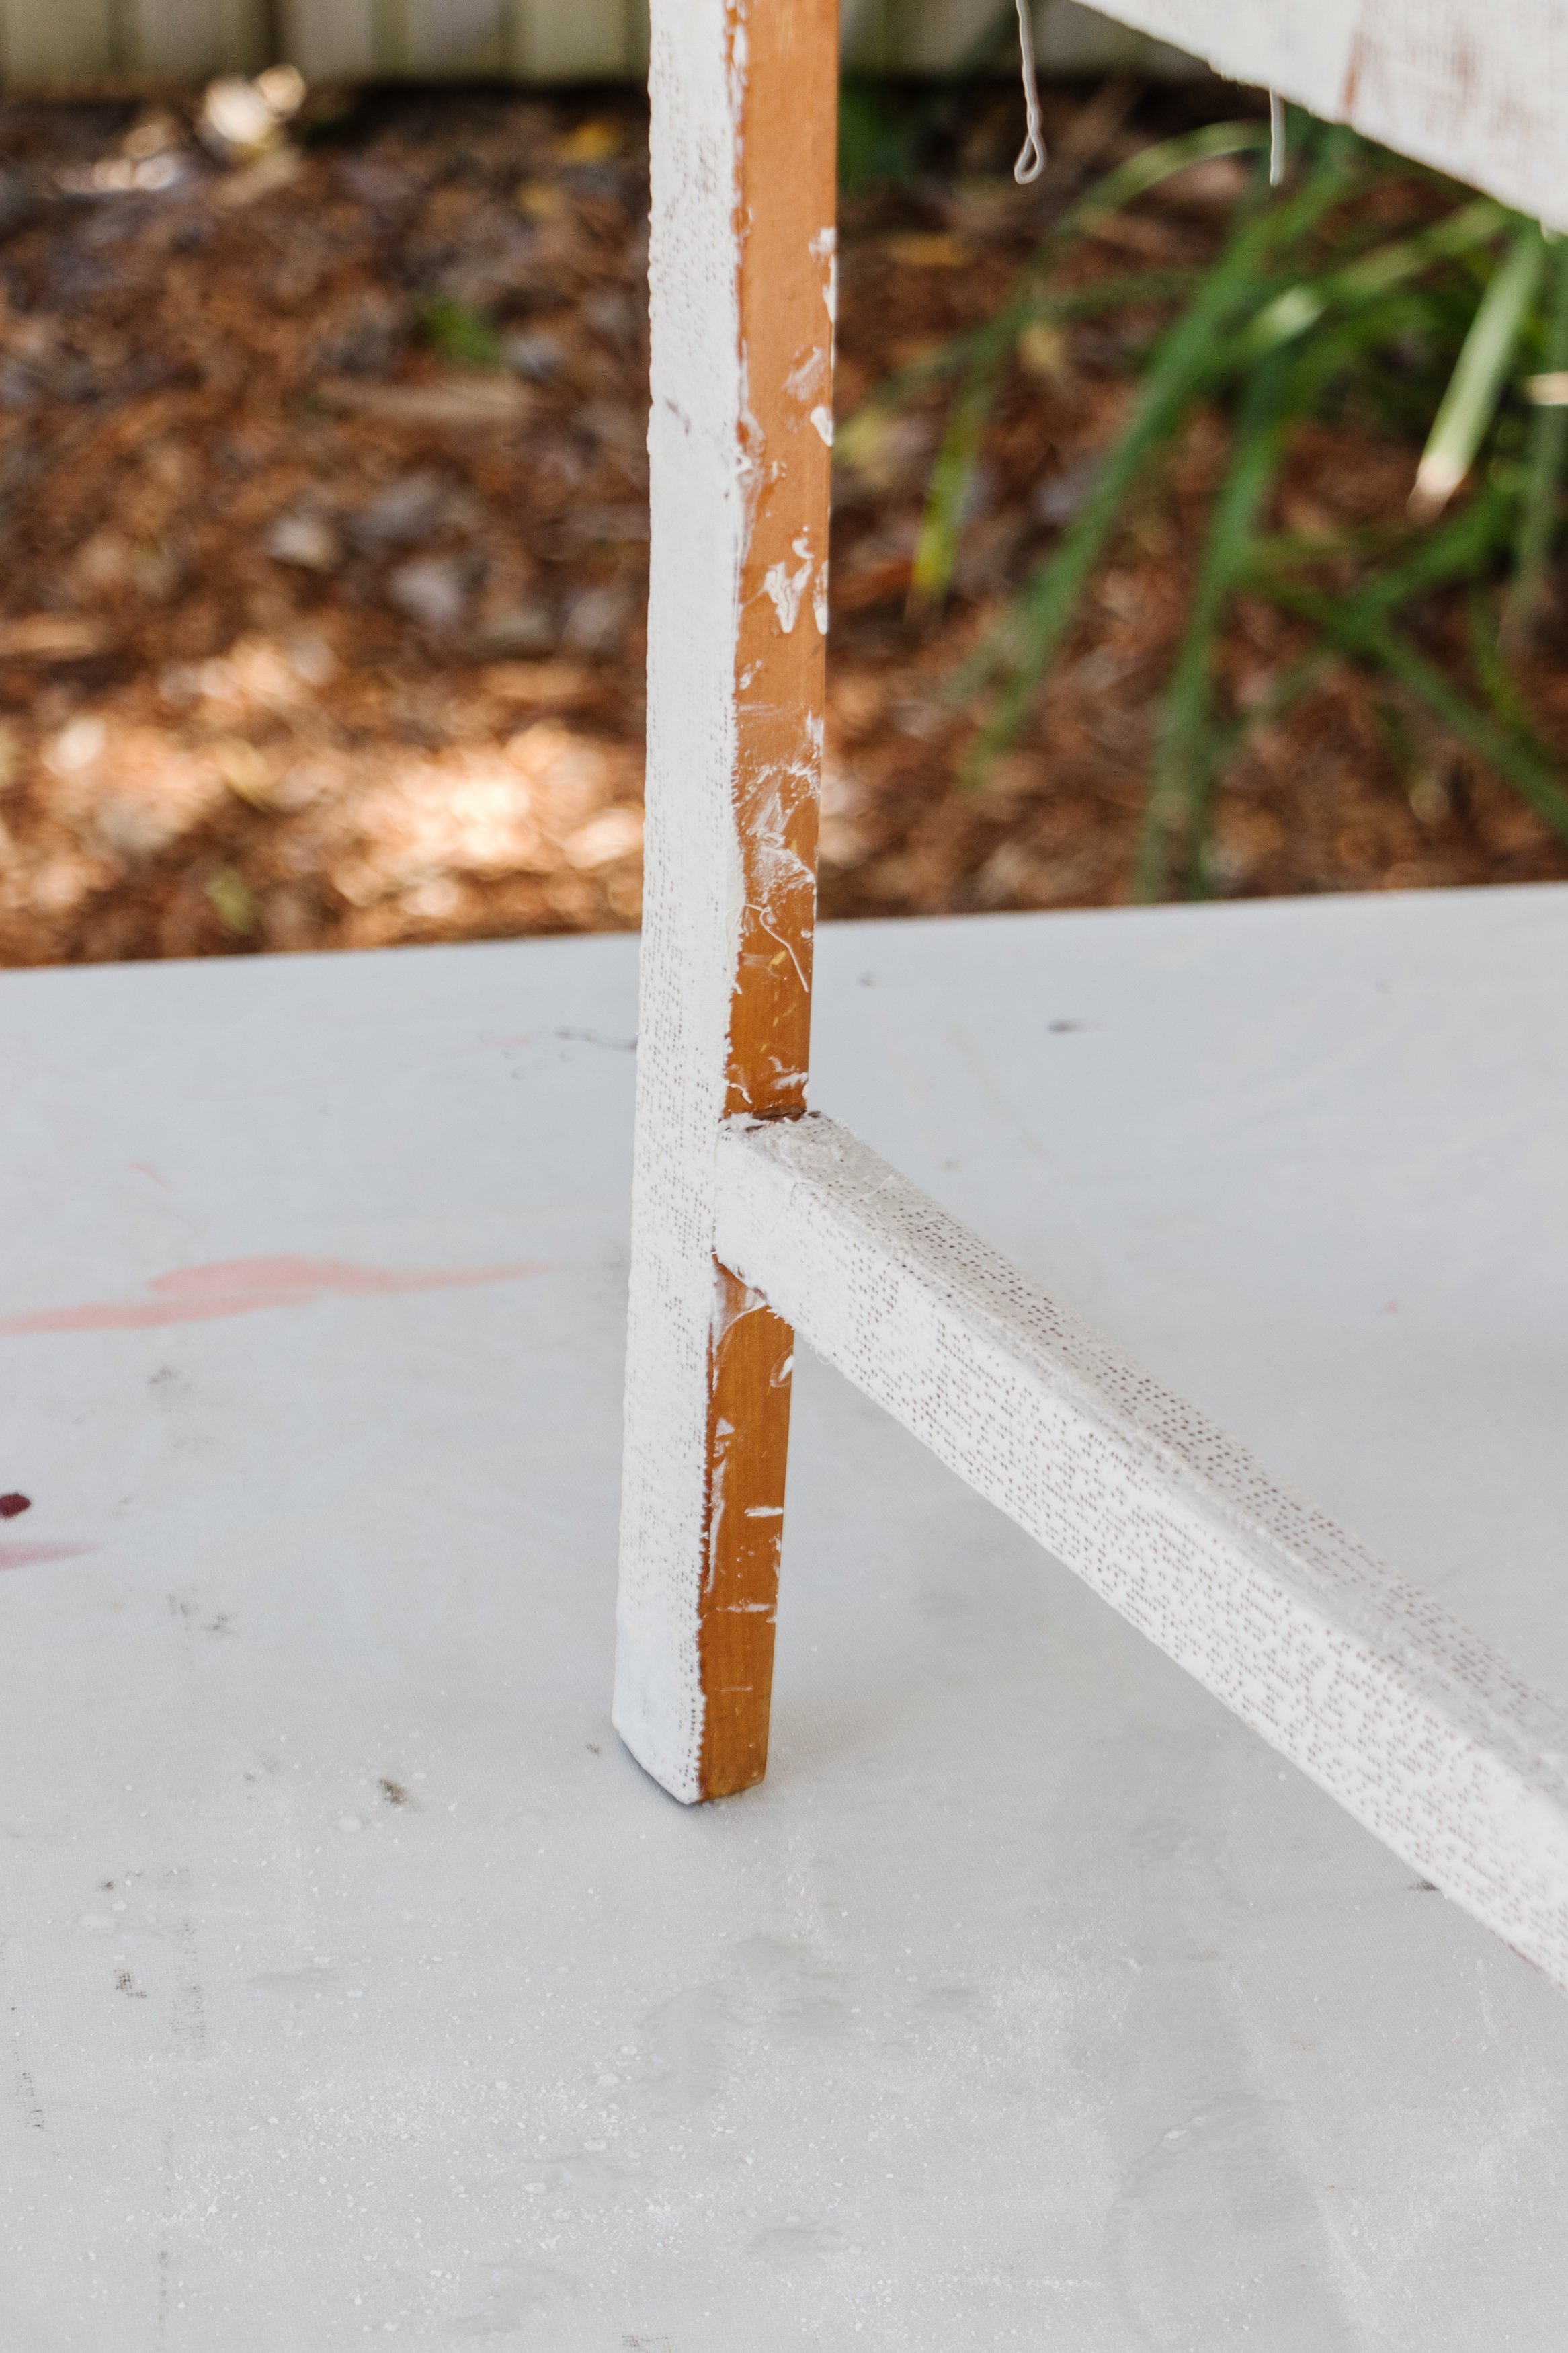
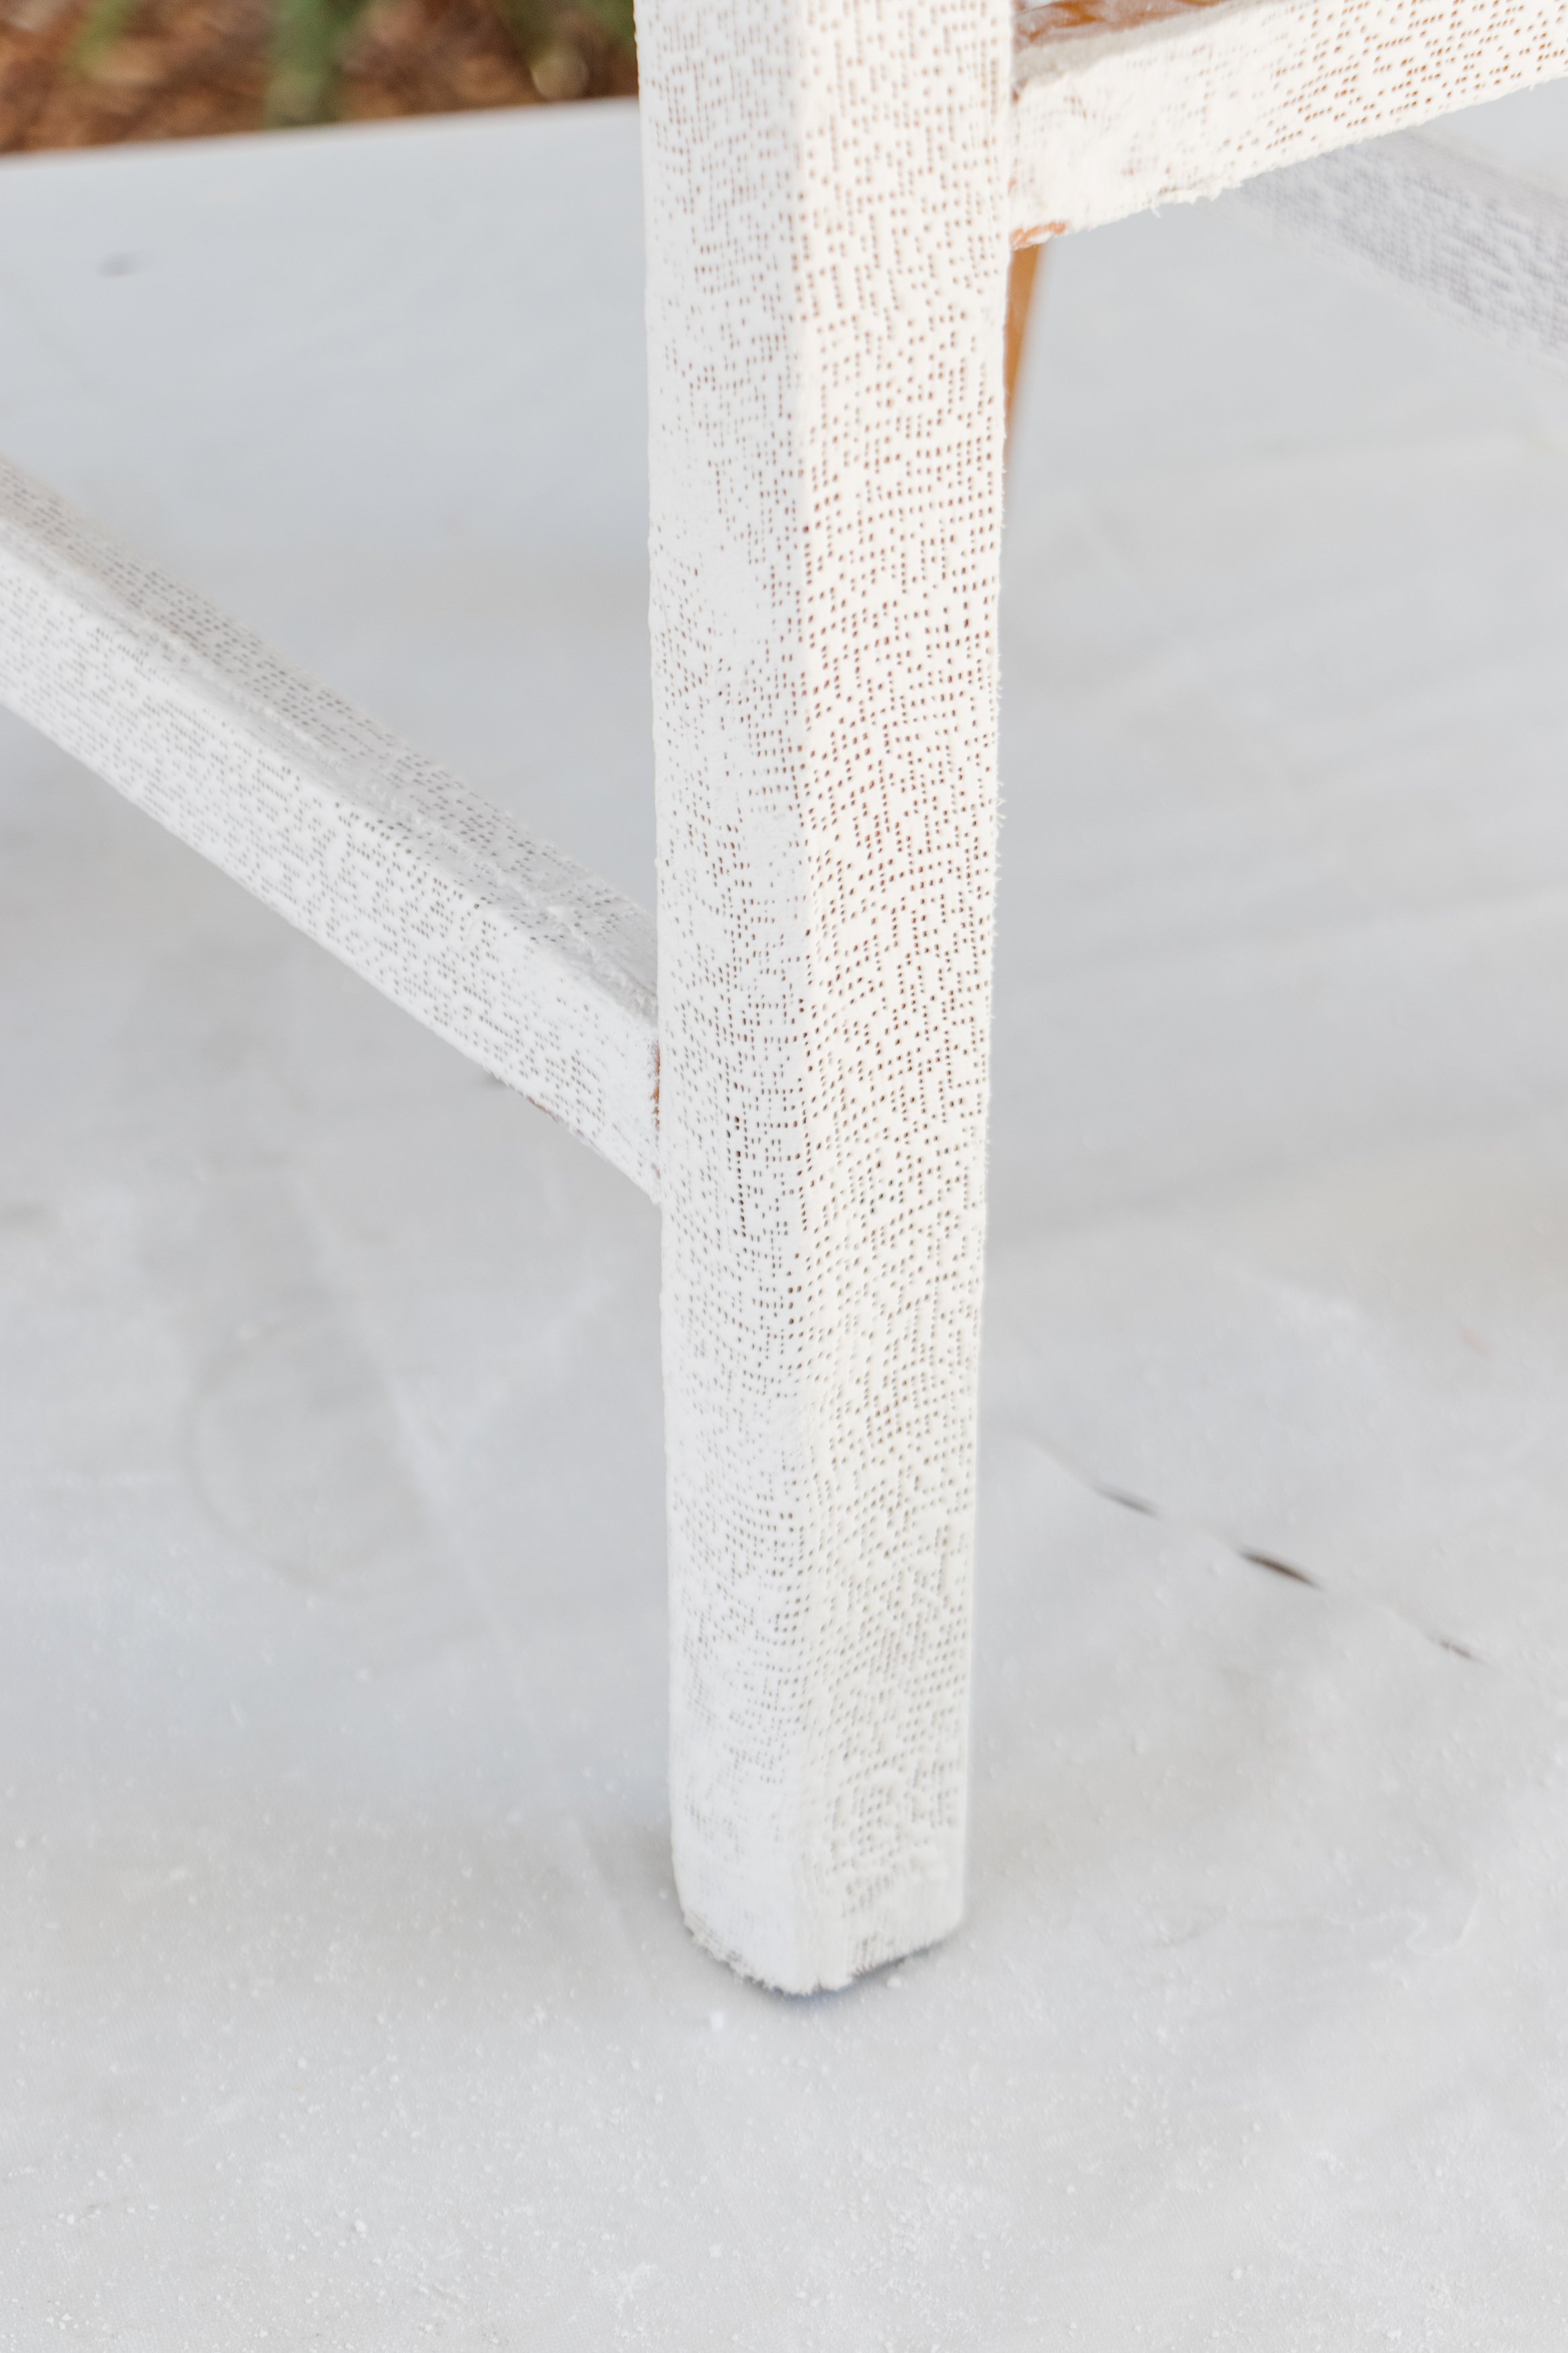
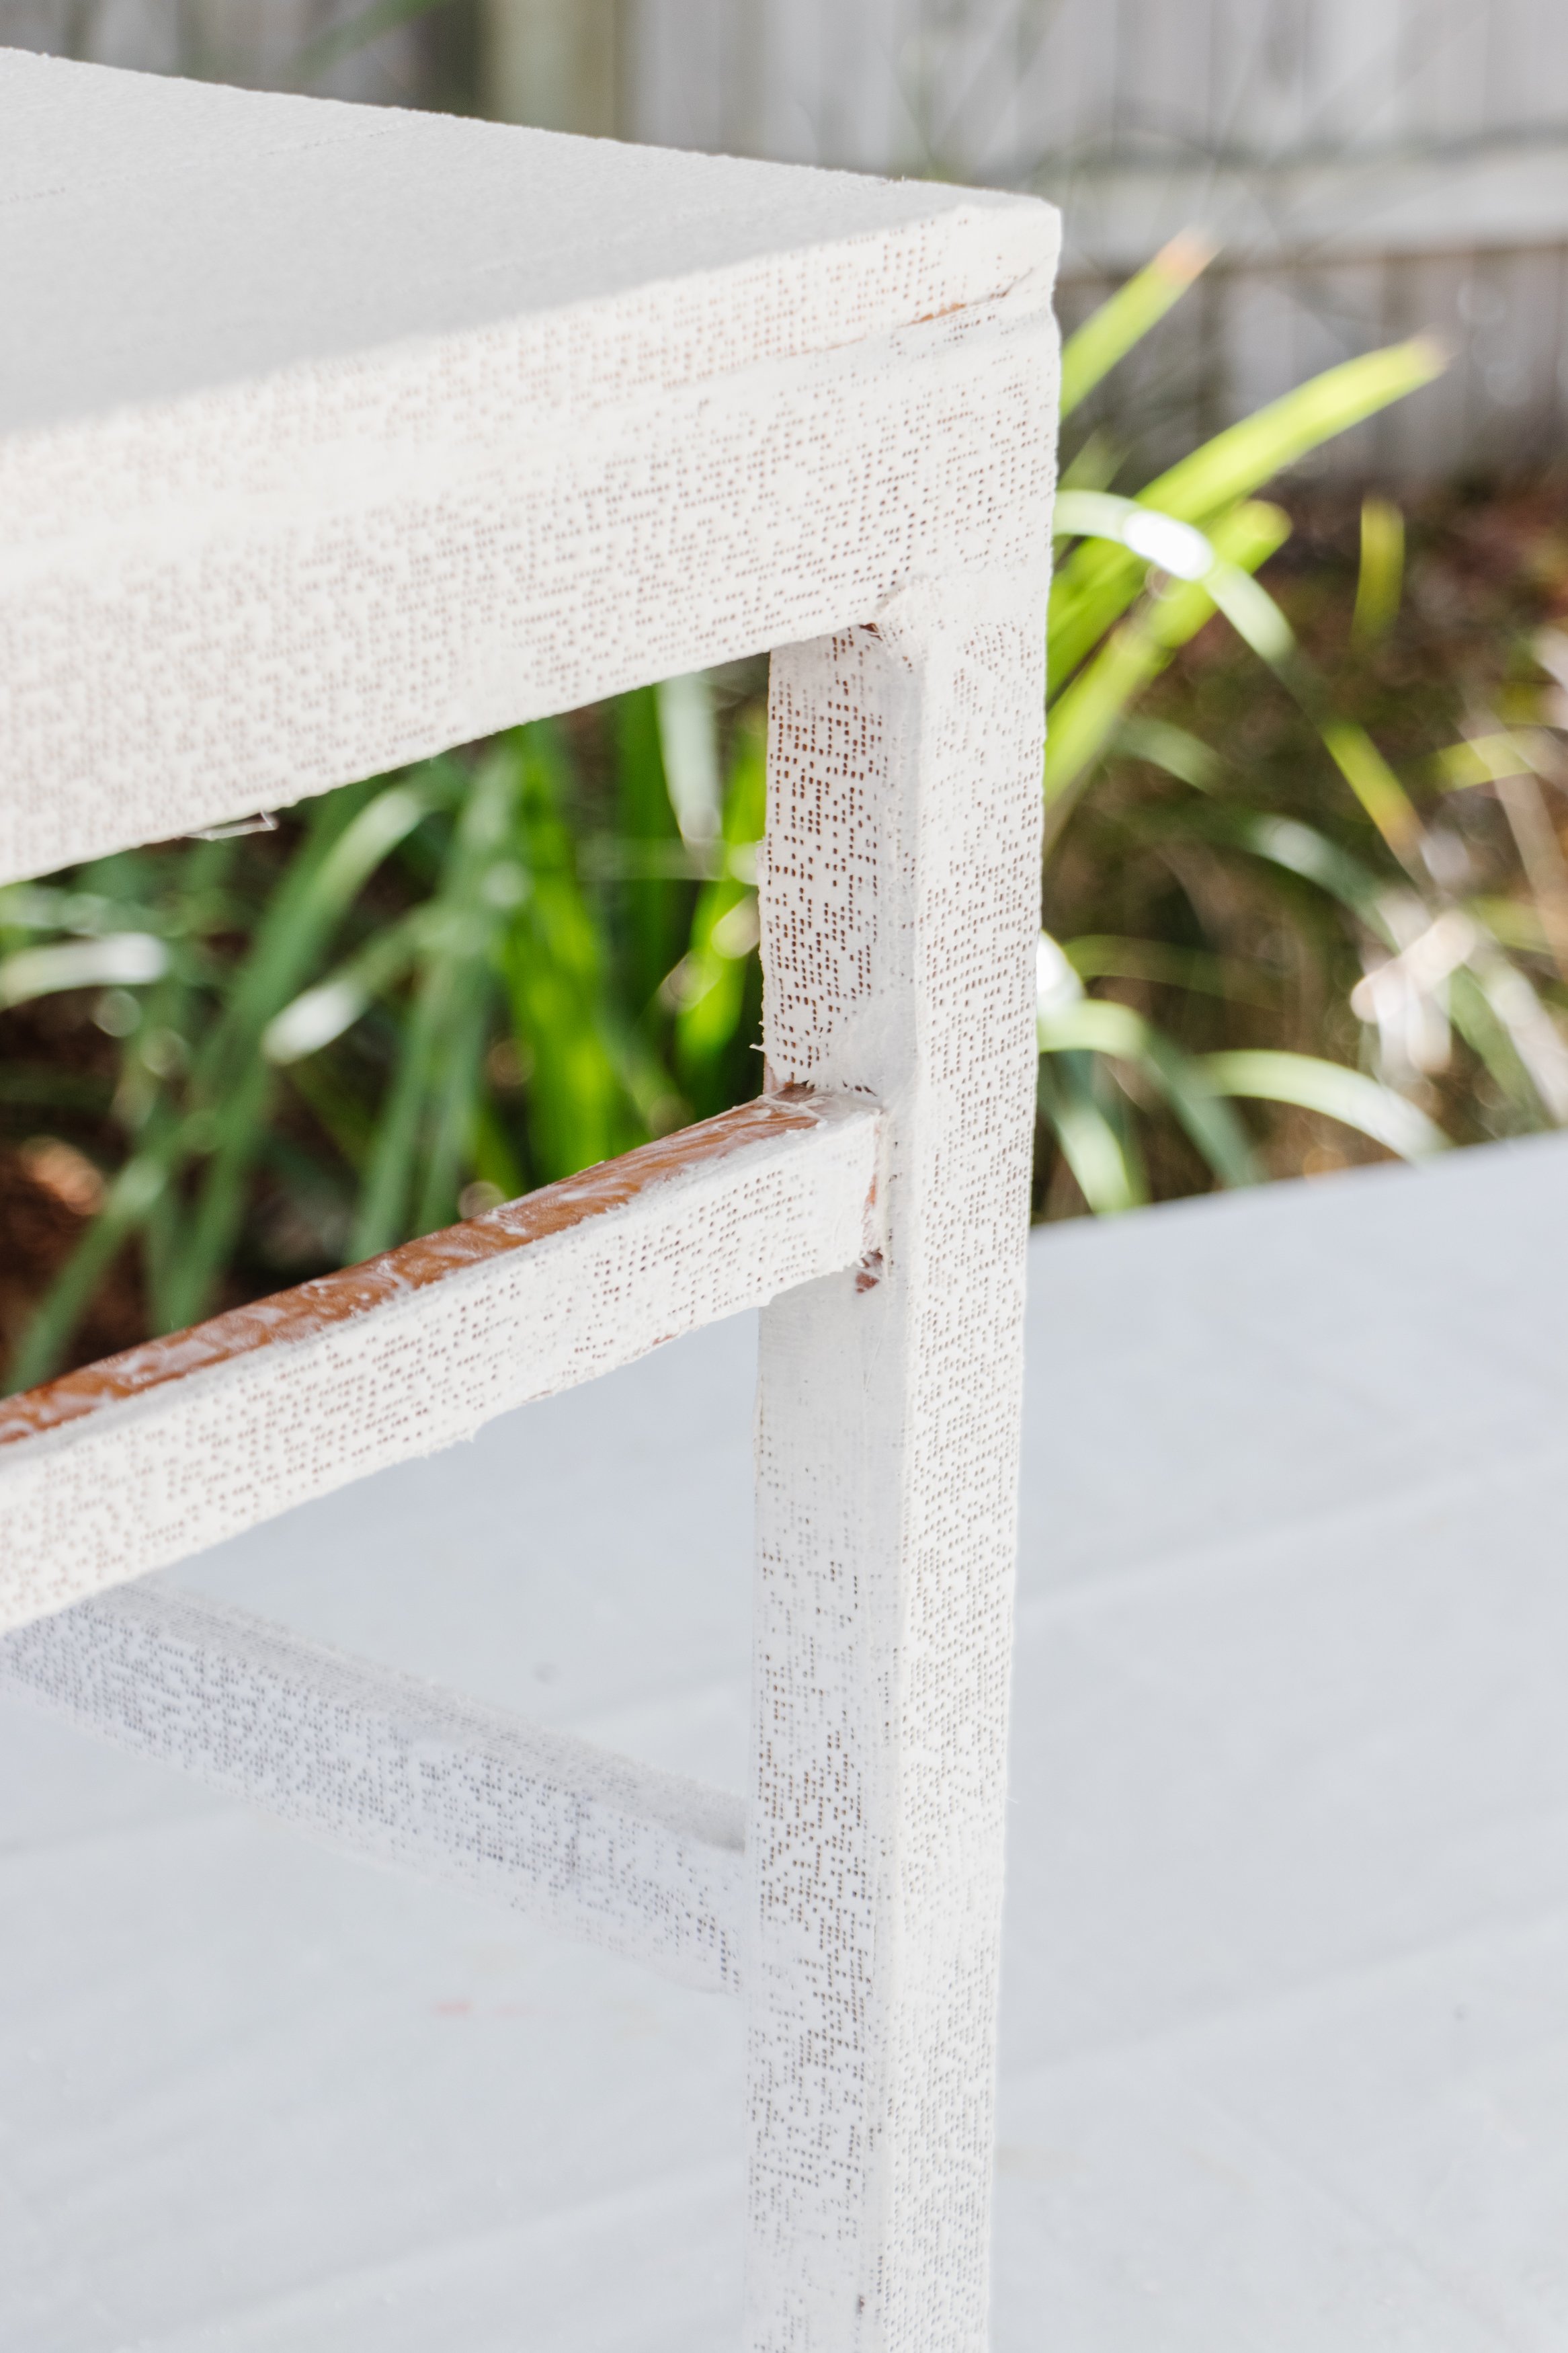

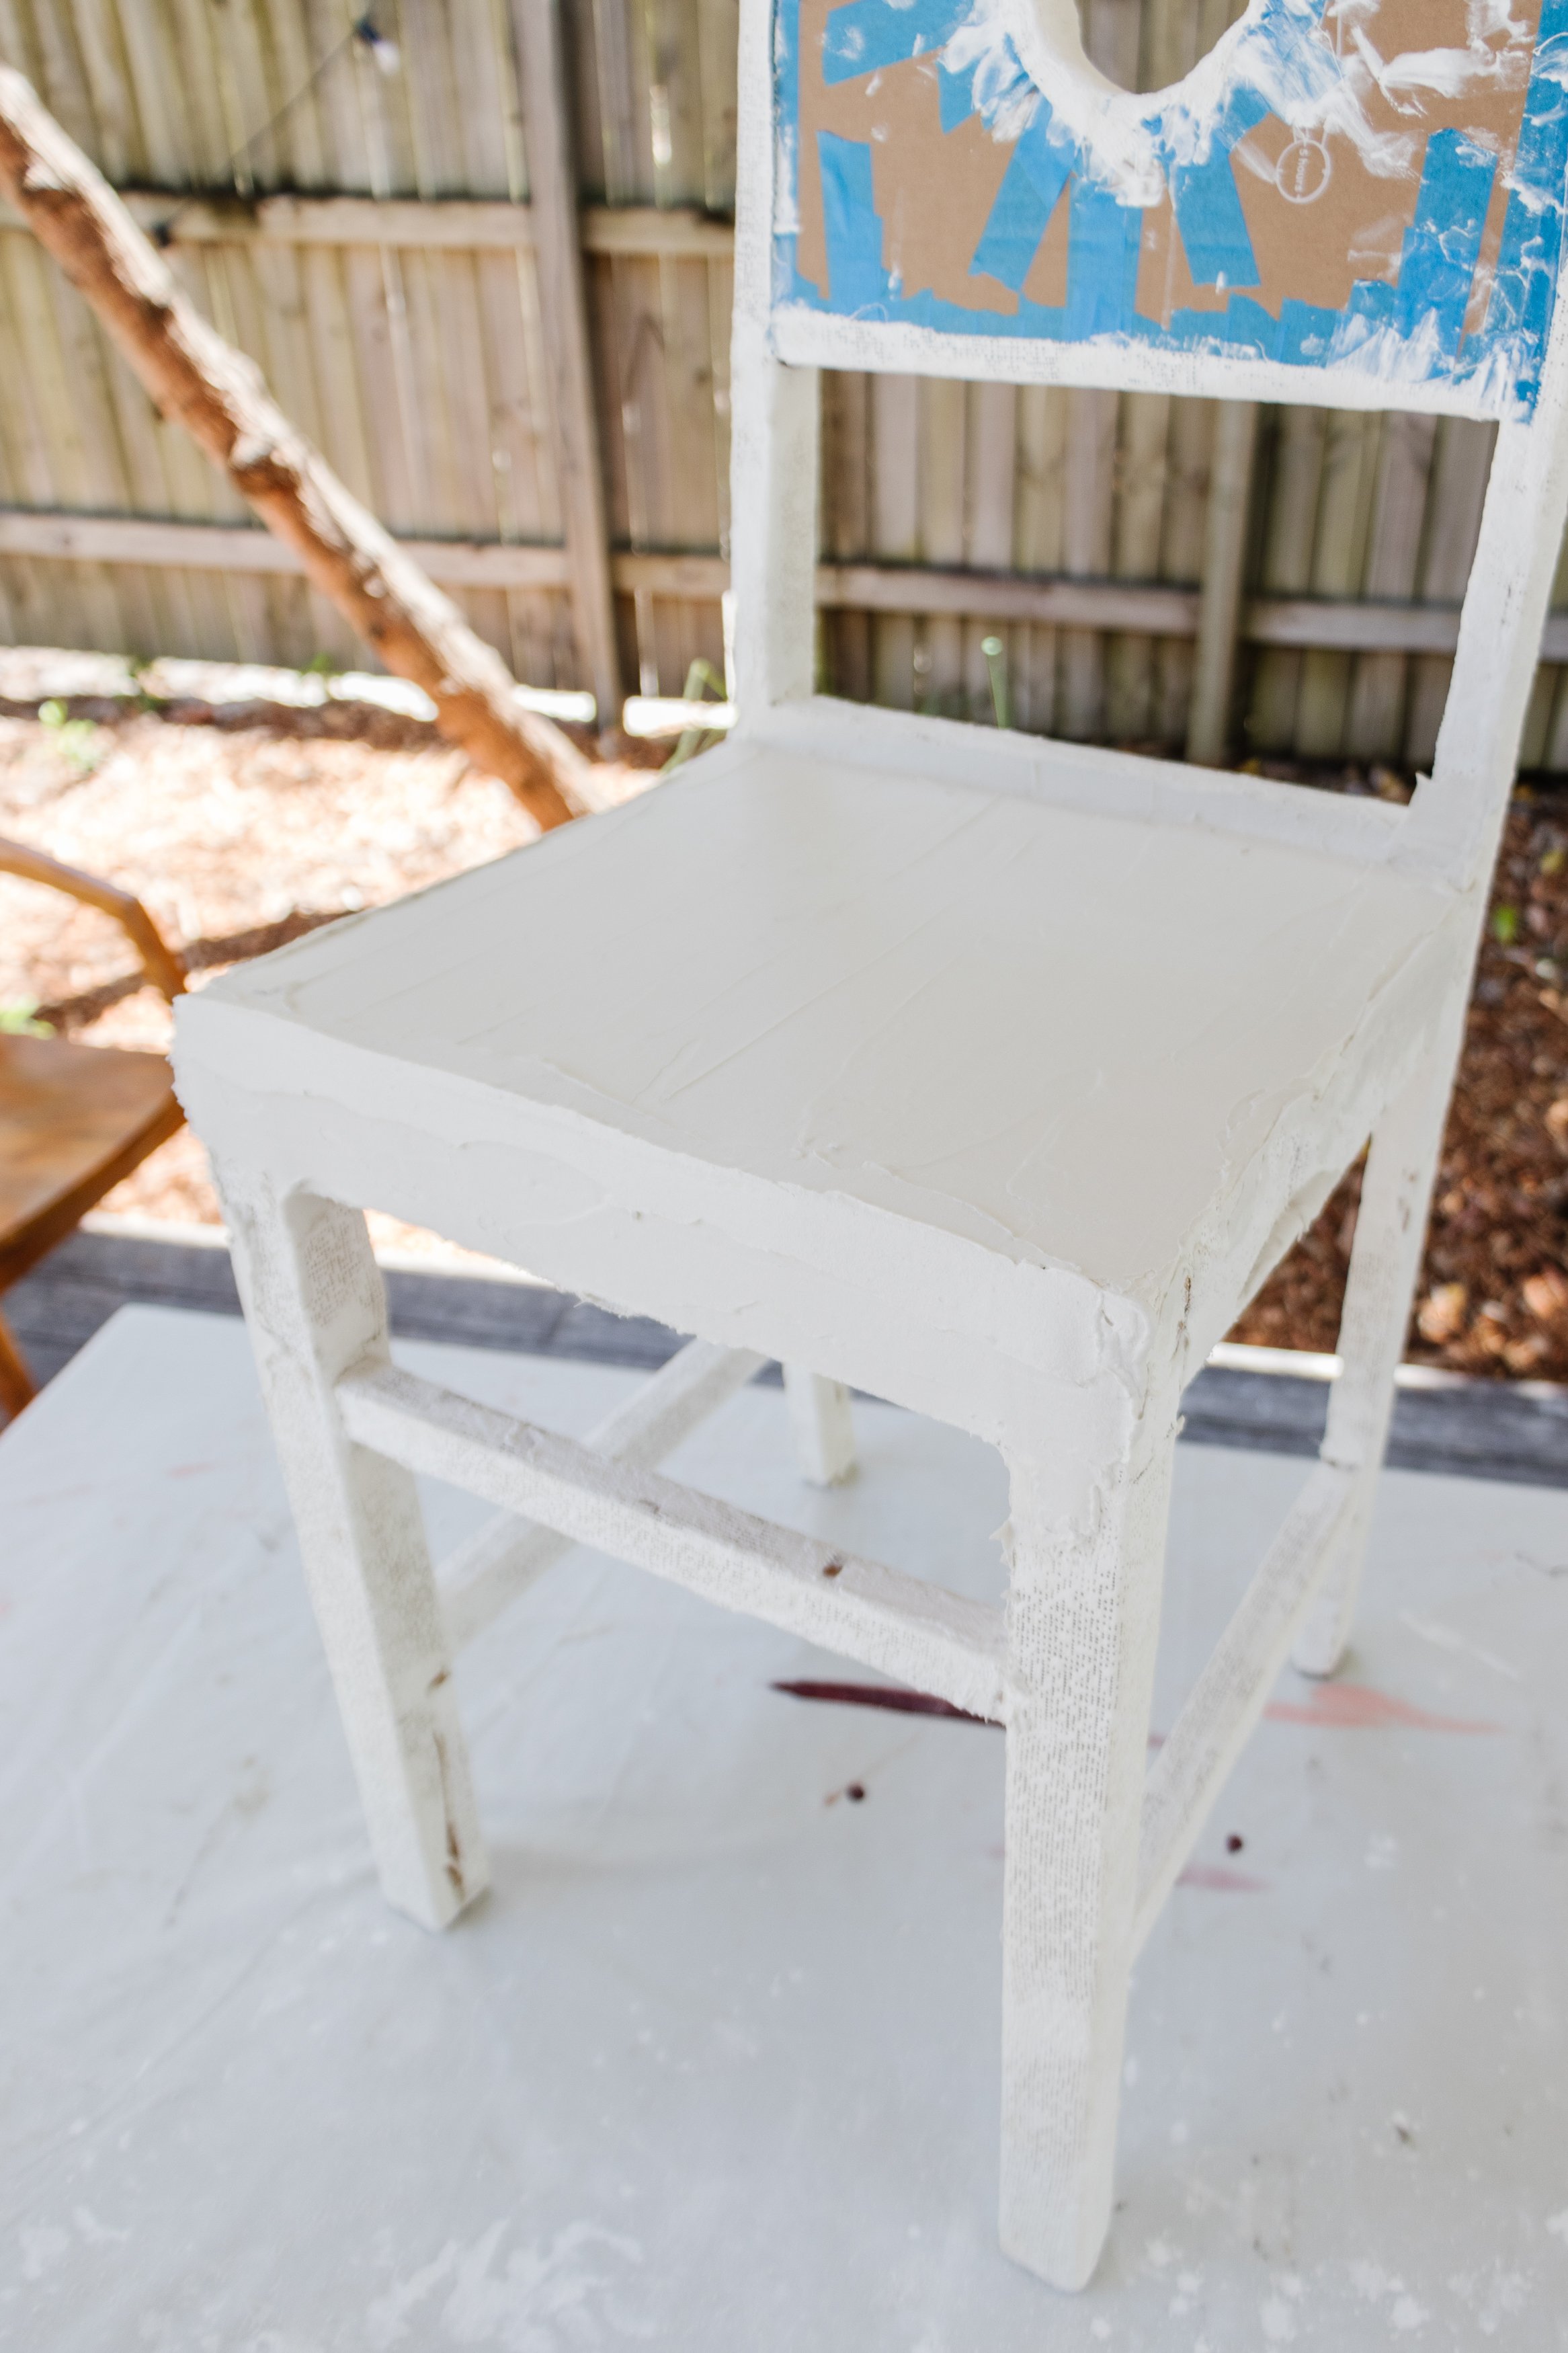
Step 5: When the gauze completely dried, I applied one coat of plaster all over the chair using a plaster scraper. After years of experience, I know it’s best to take my time and apply the plaster with the scraper in even strokes, but not to stress too much about it because sanding it in the next step will smooth out any imperfections. Then I set the chairs aside for the plaster to completely dry.
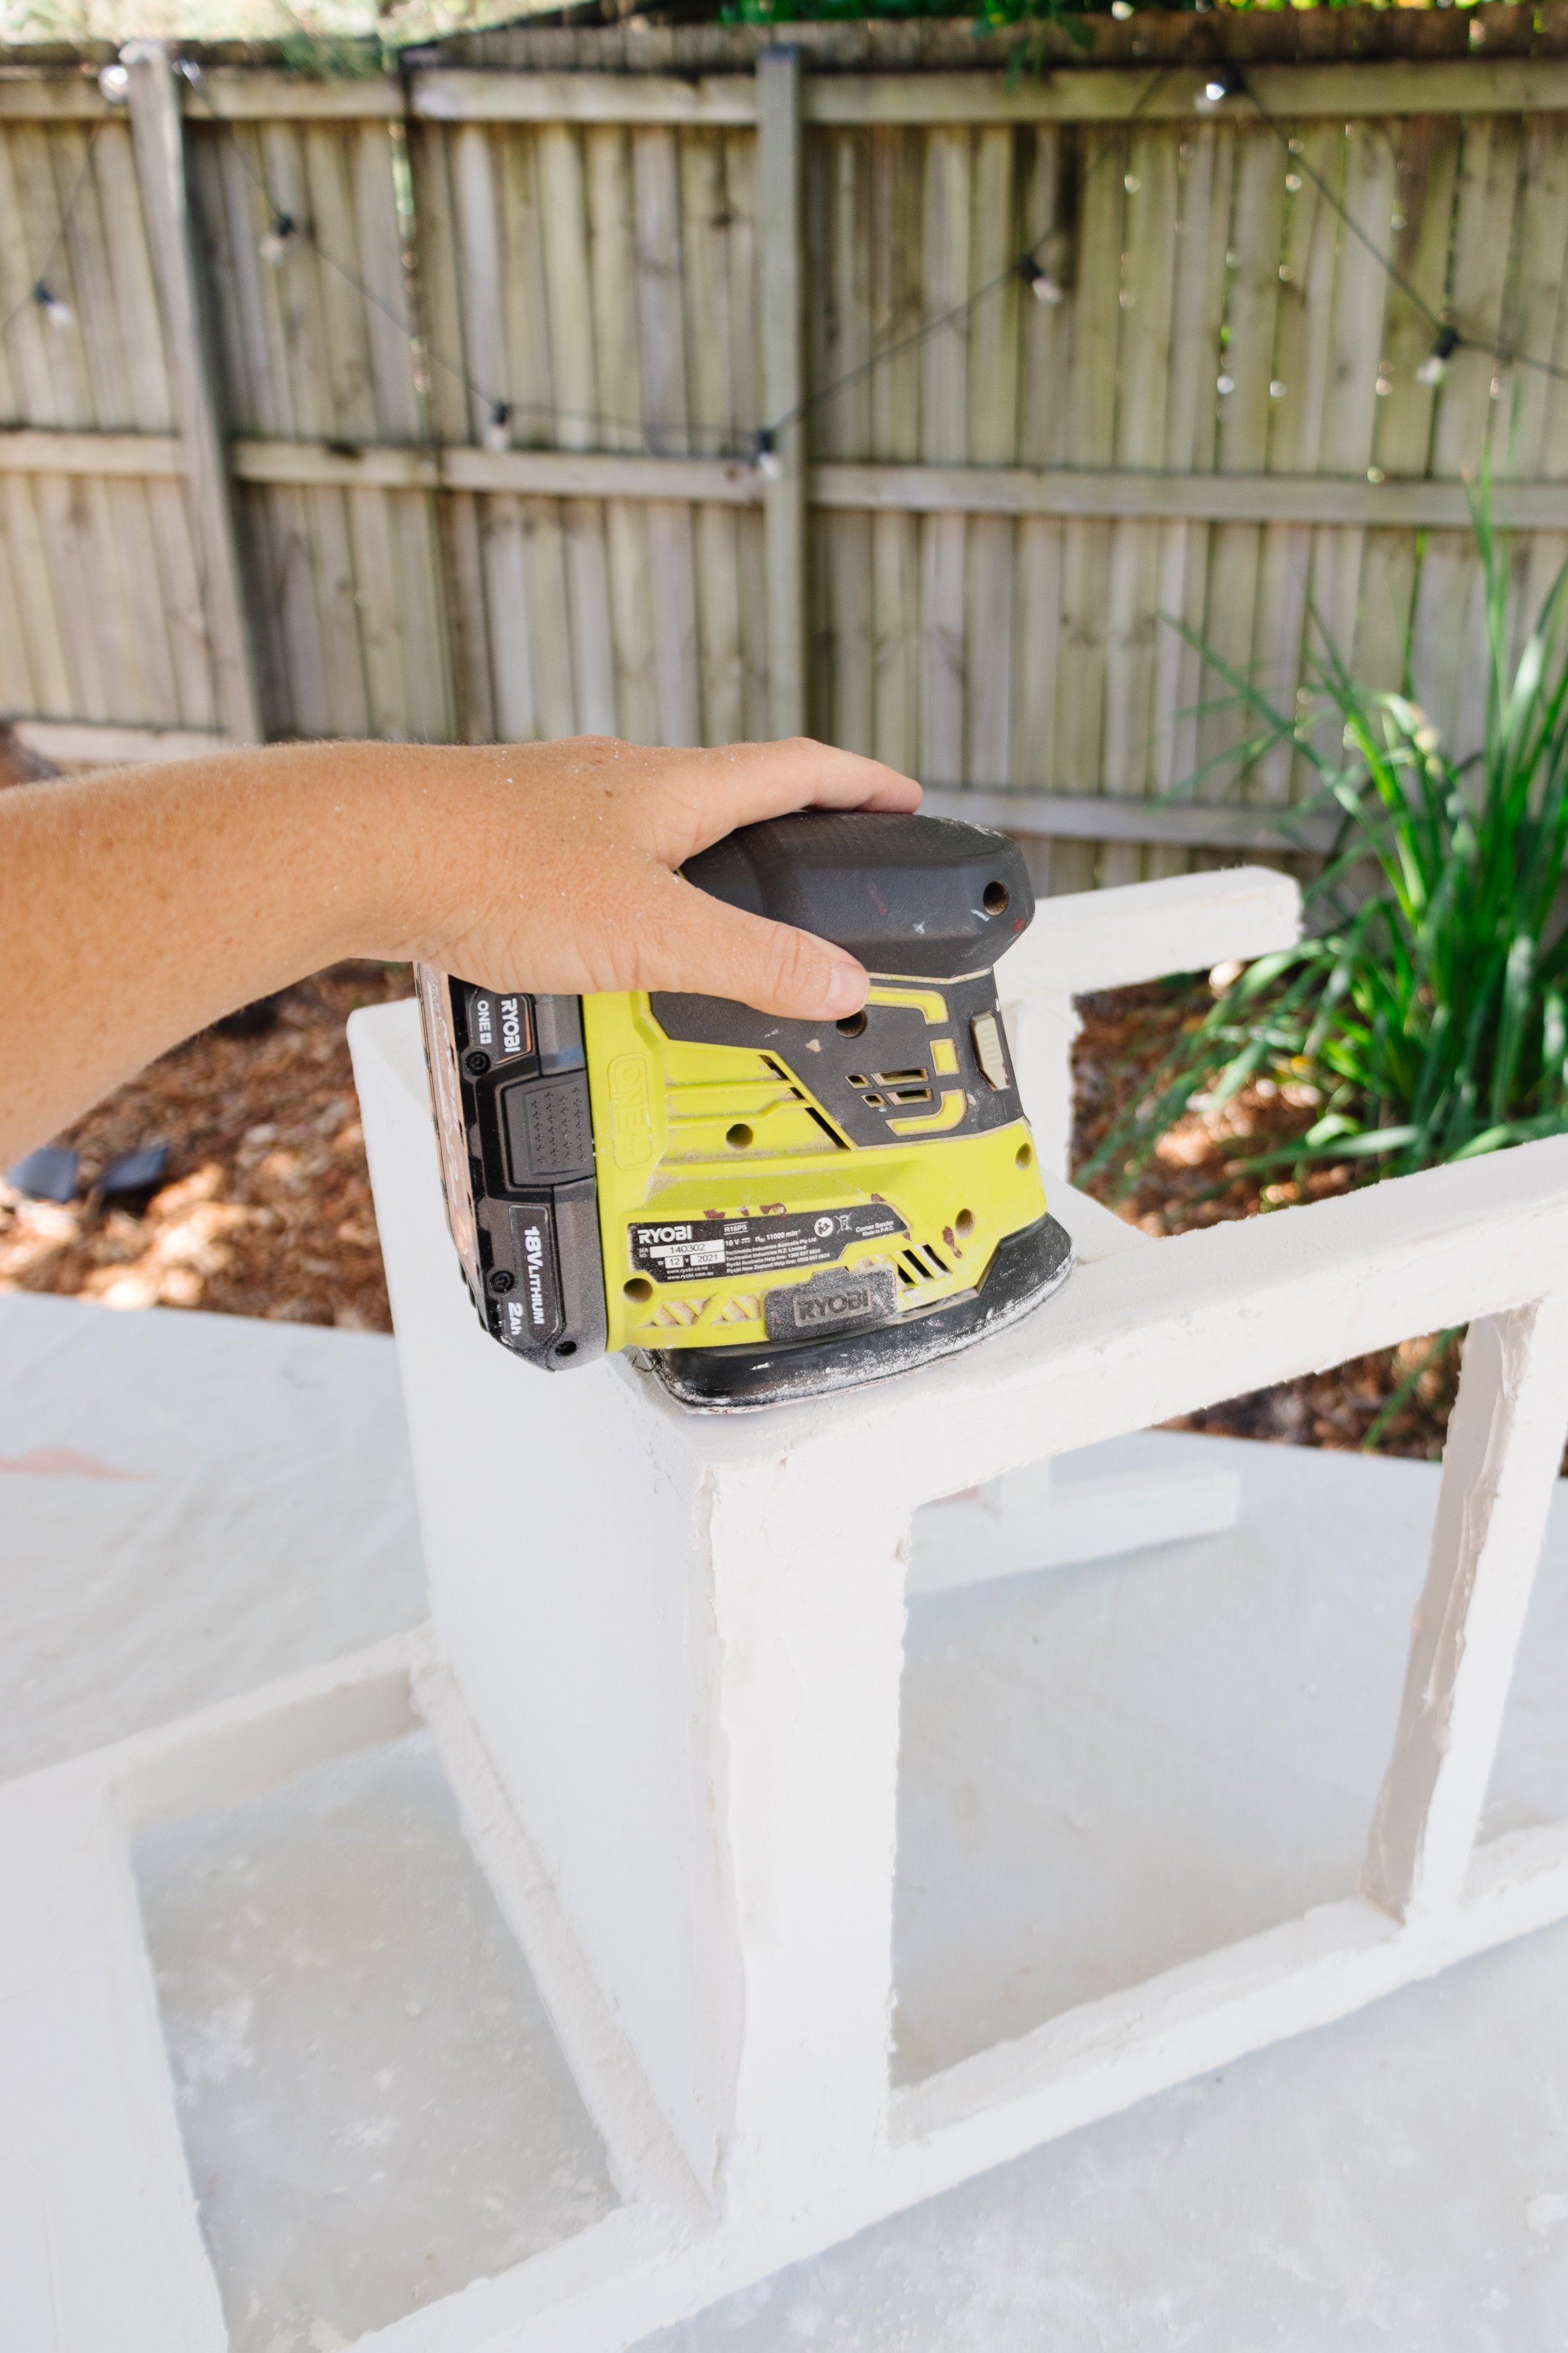
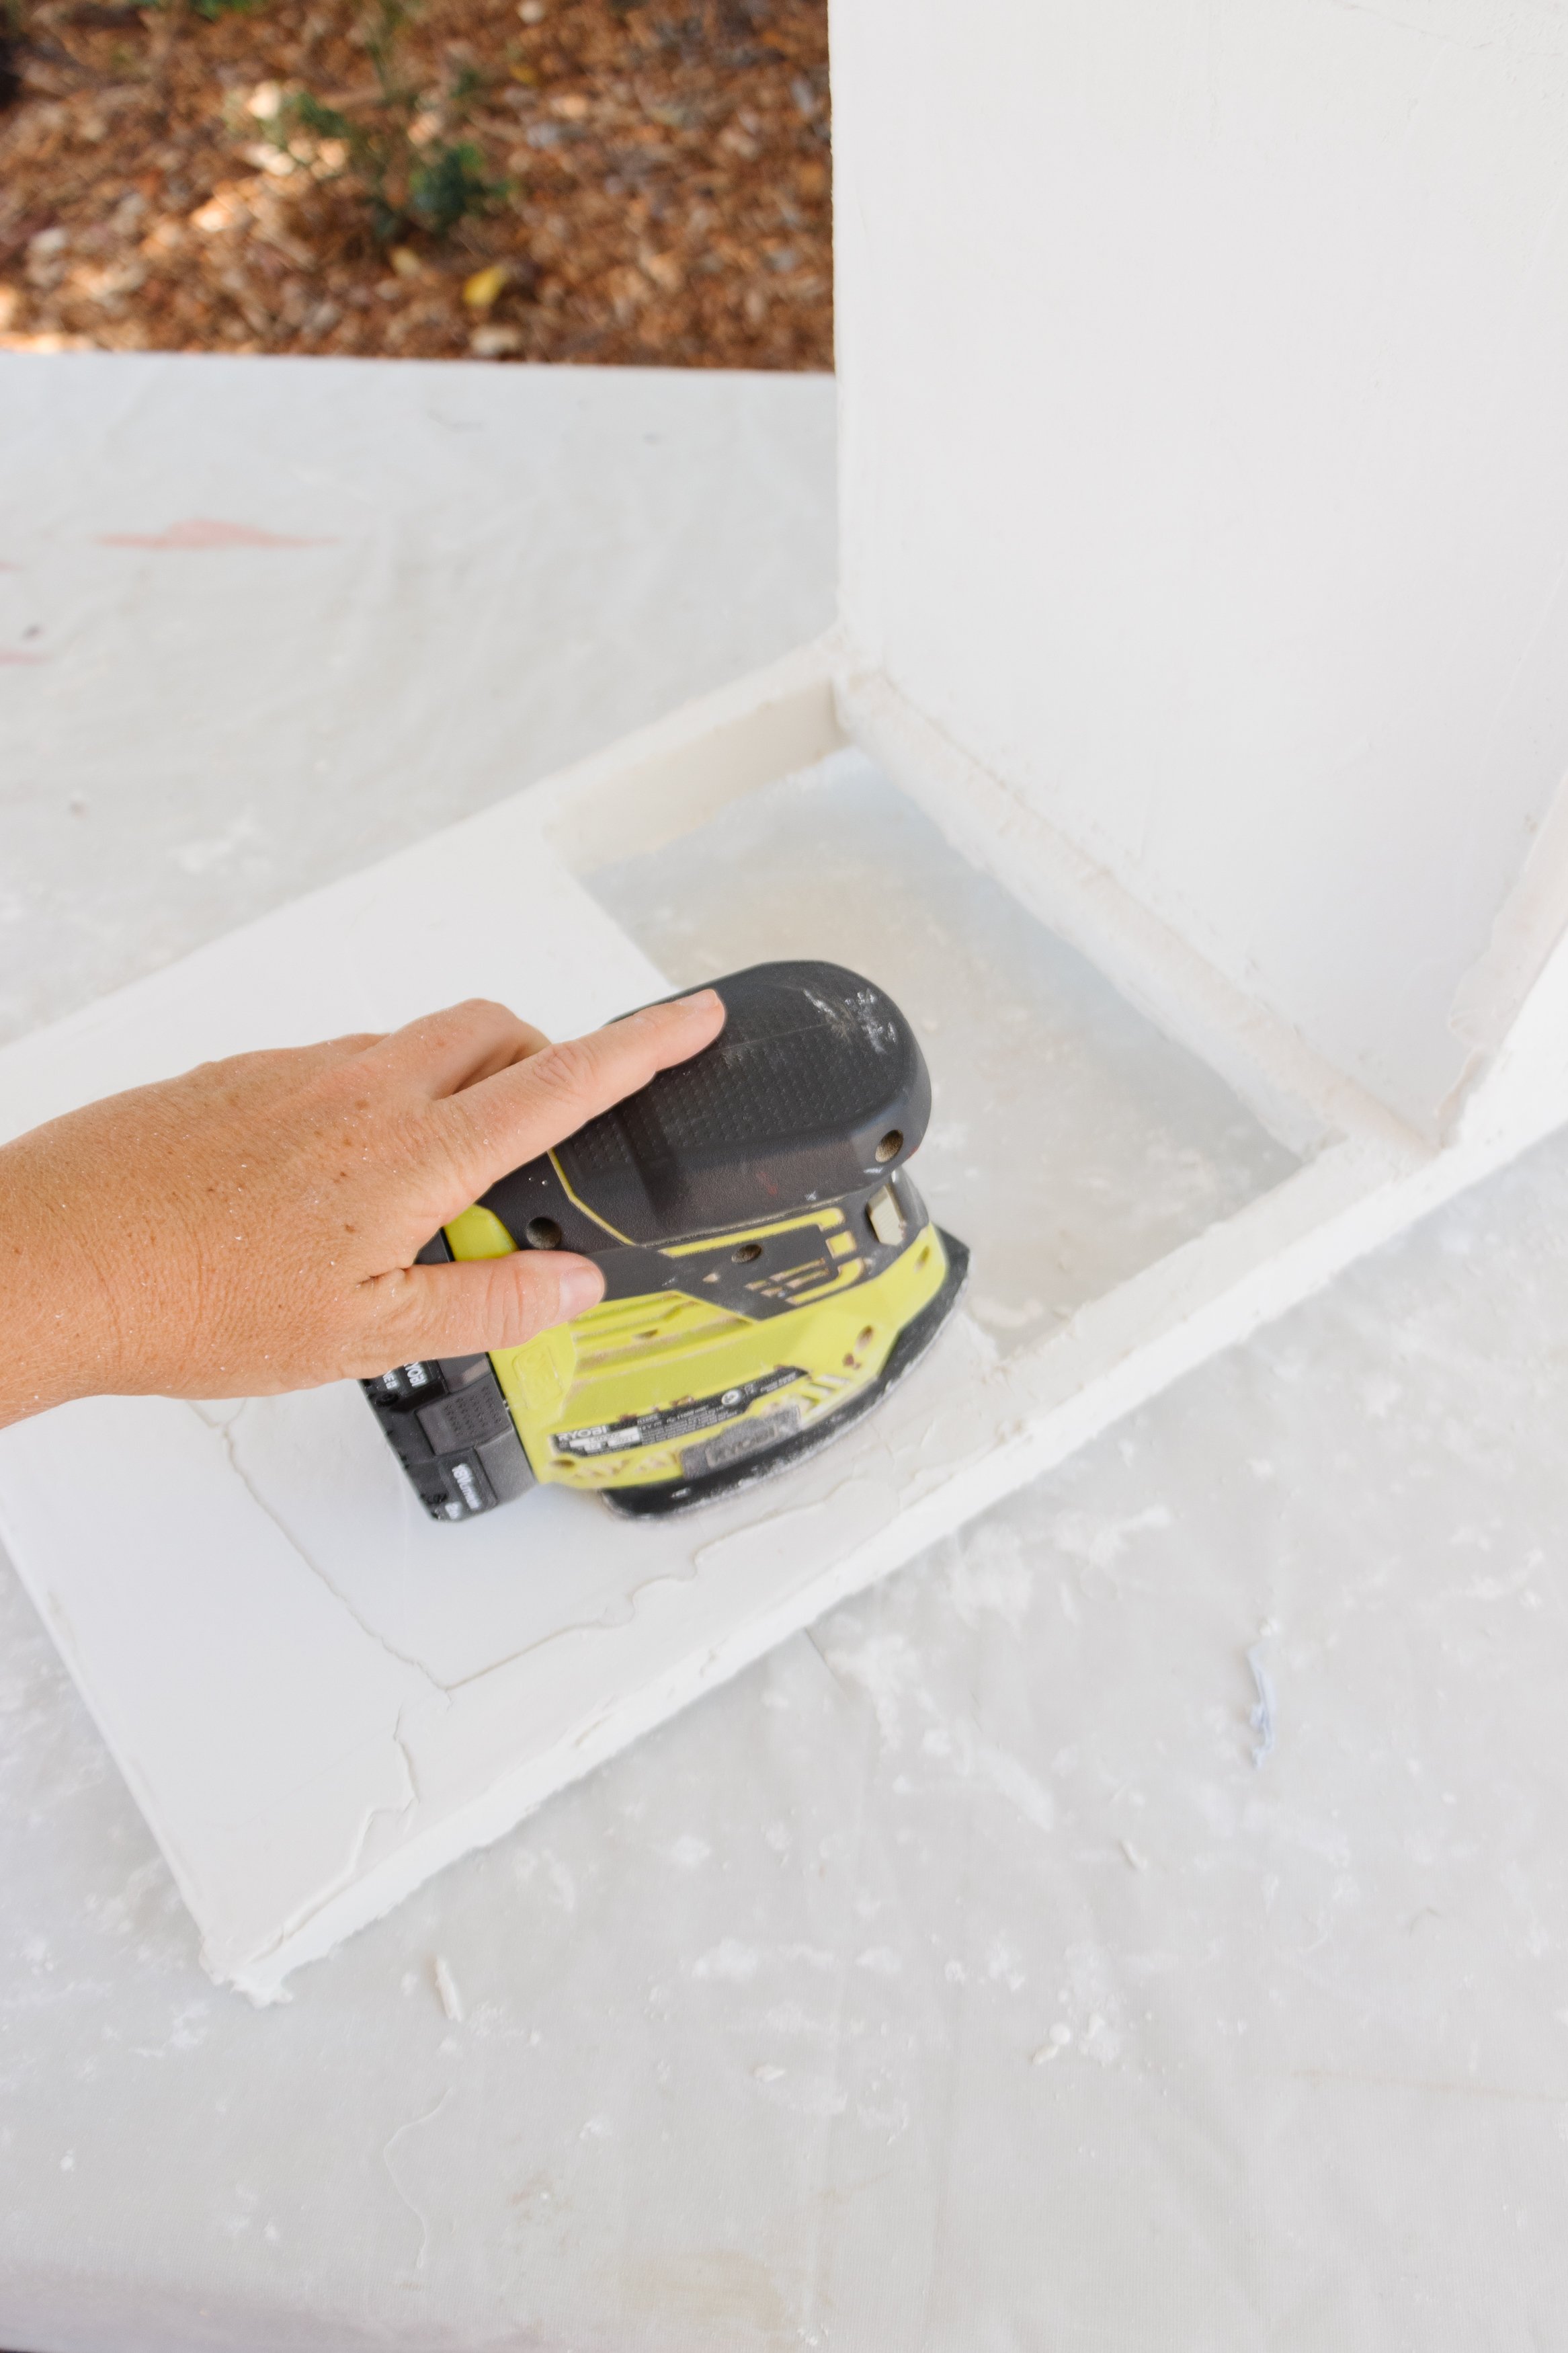
Step 6: When the plaster had dried I lightly sanded the chairs until they were nice and smooth, and I dusted off the plaster powder using a duster.


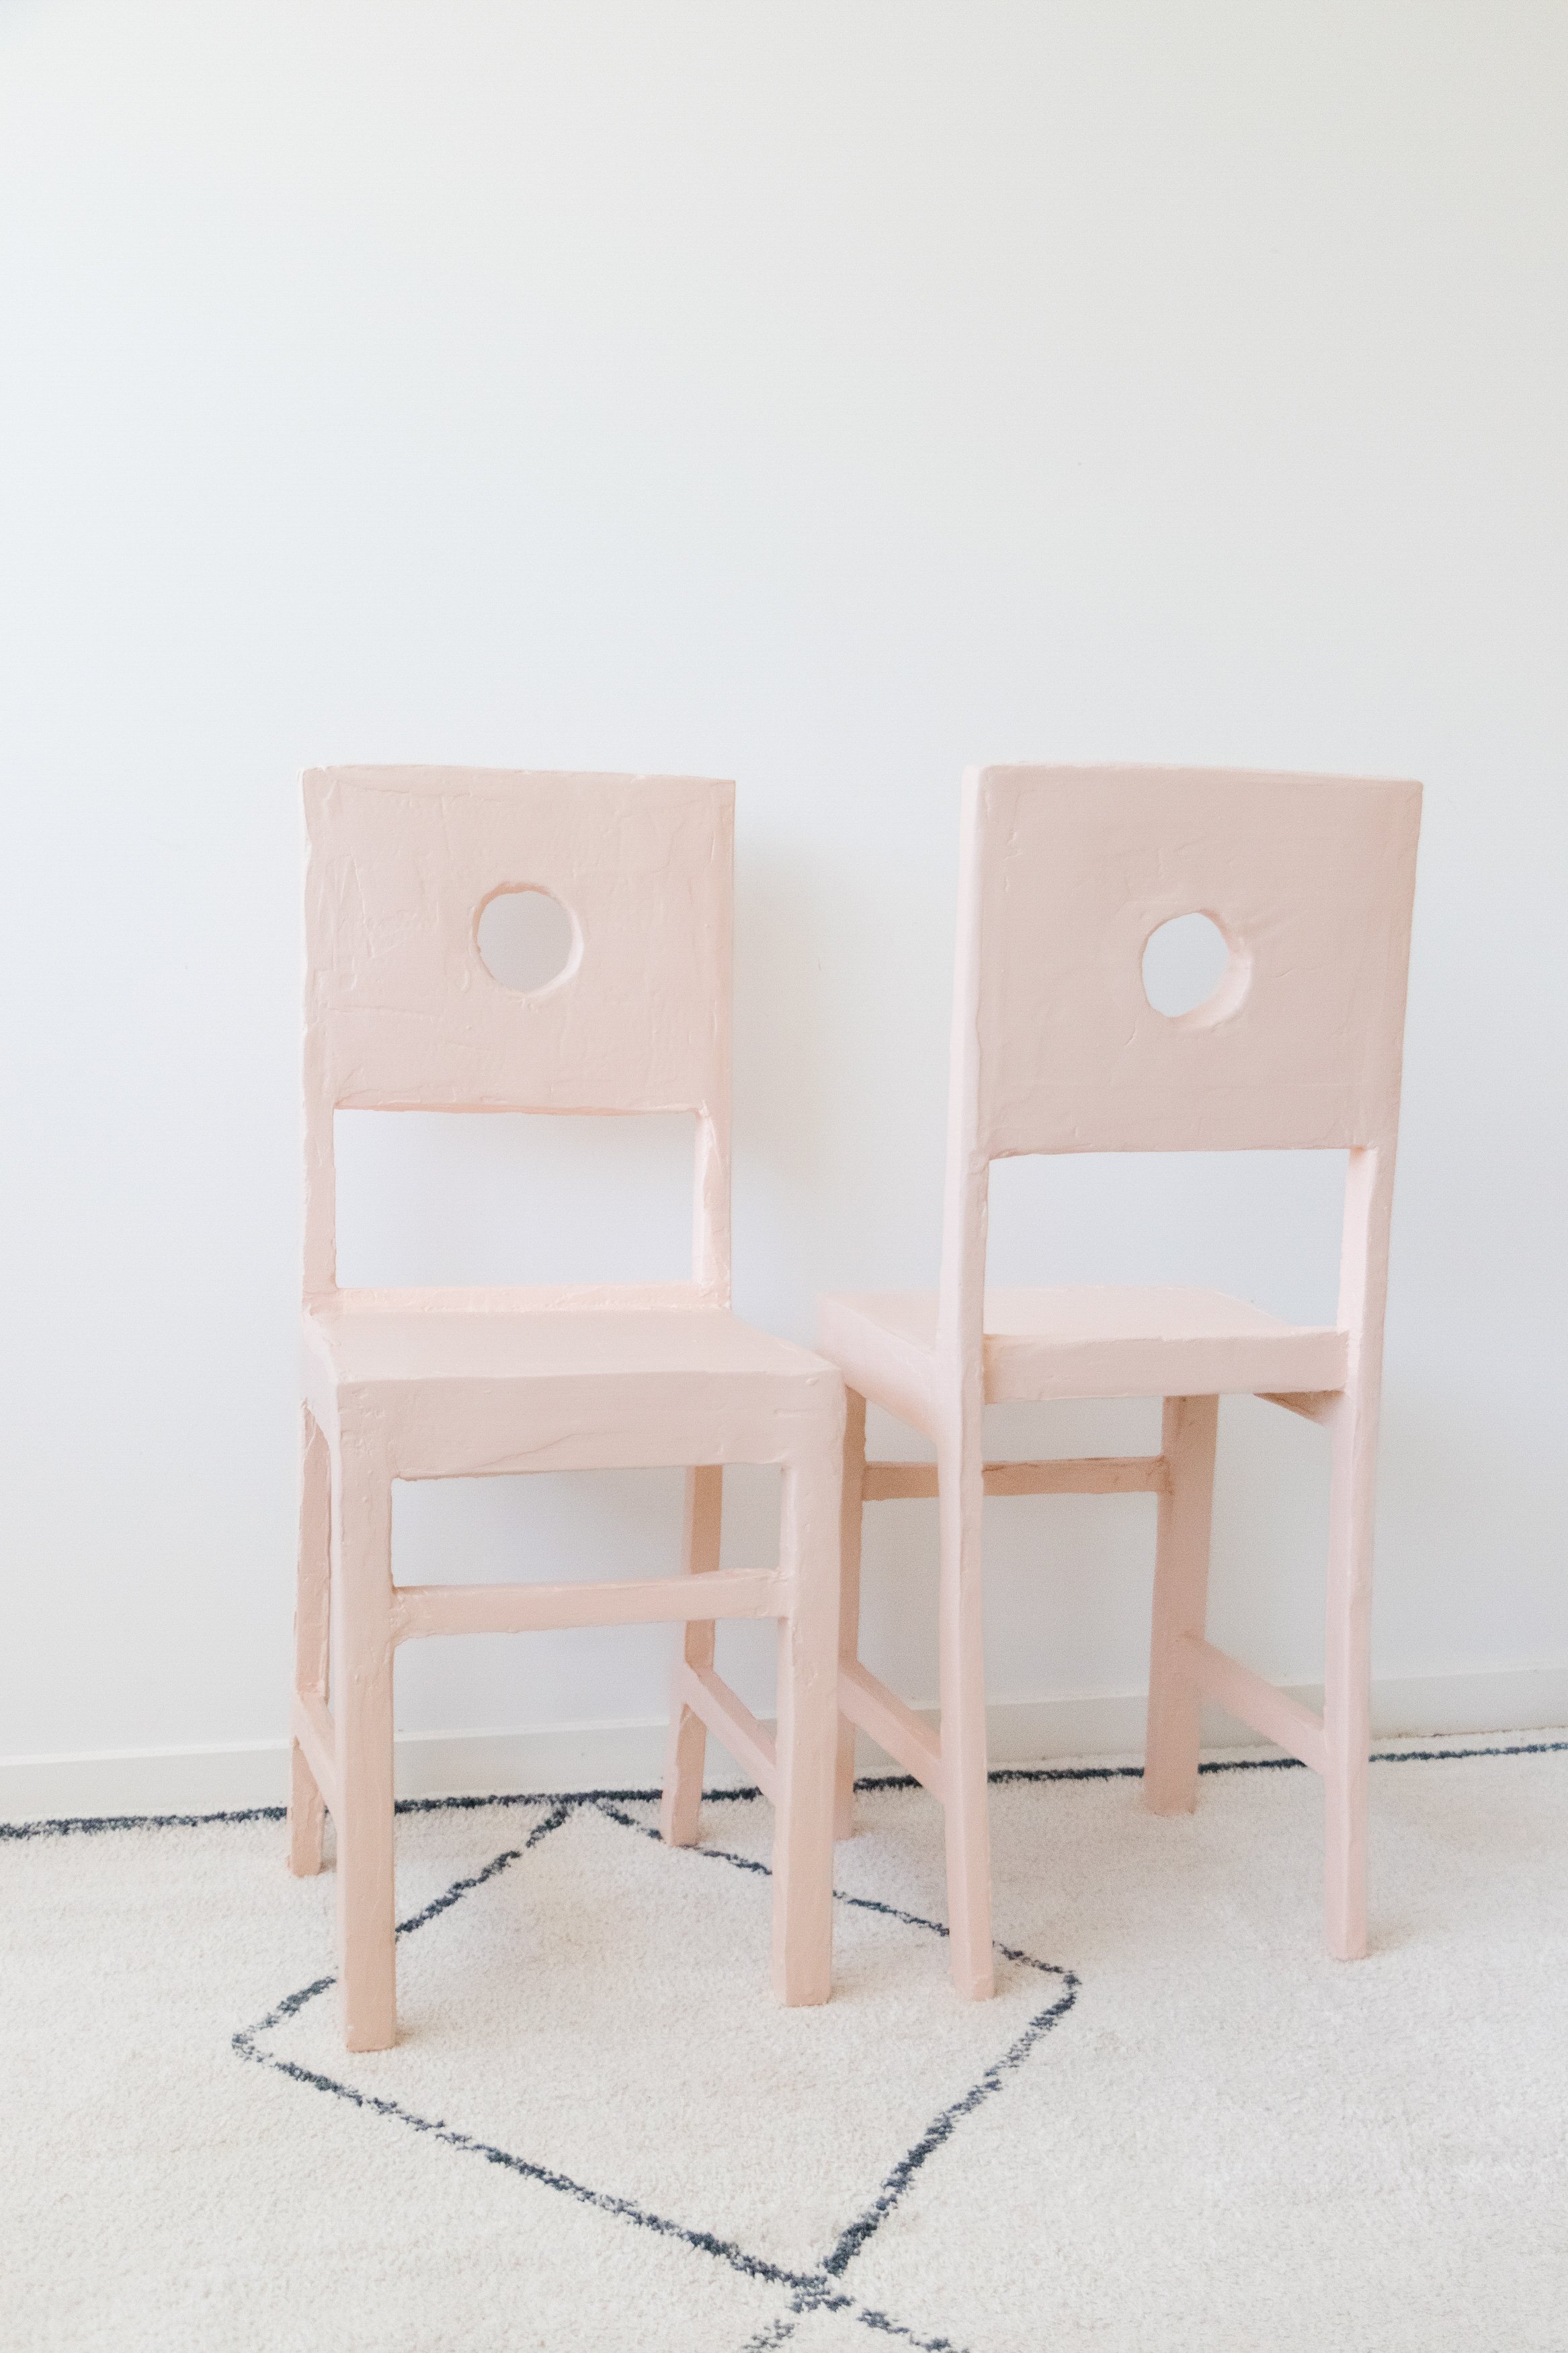
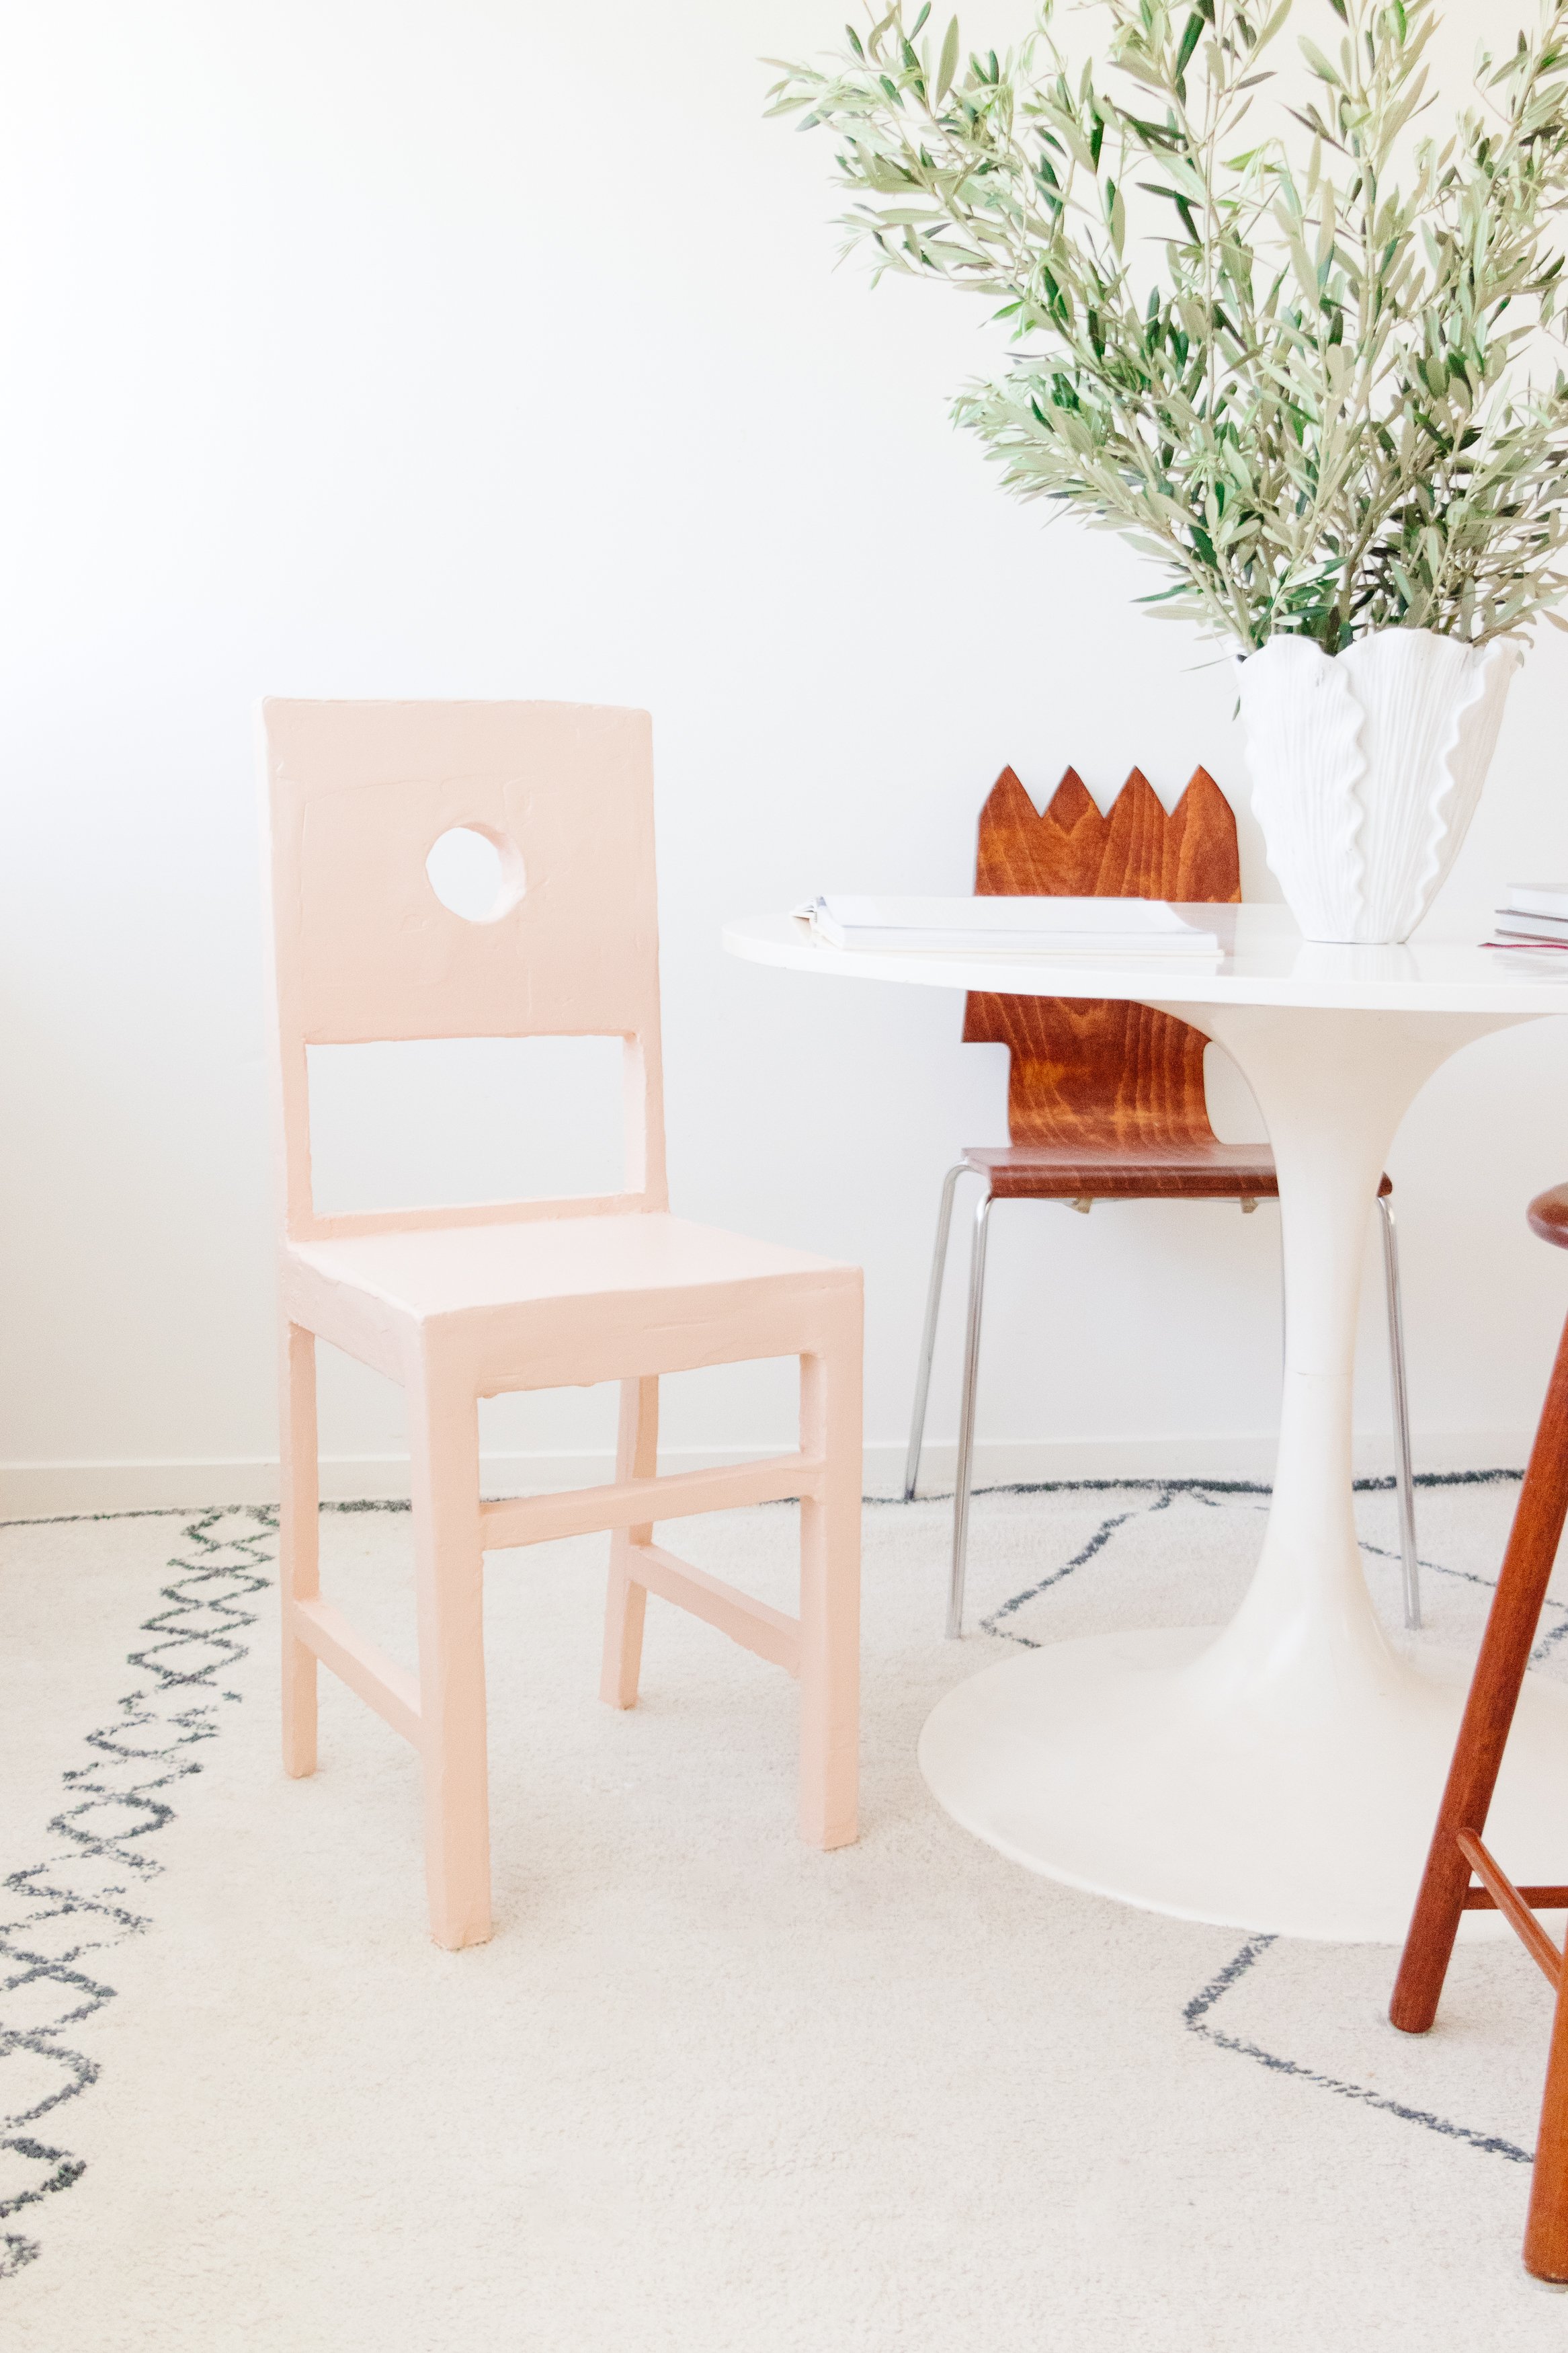
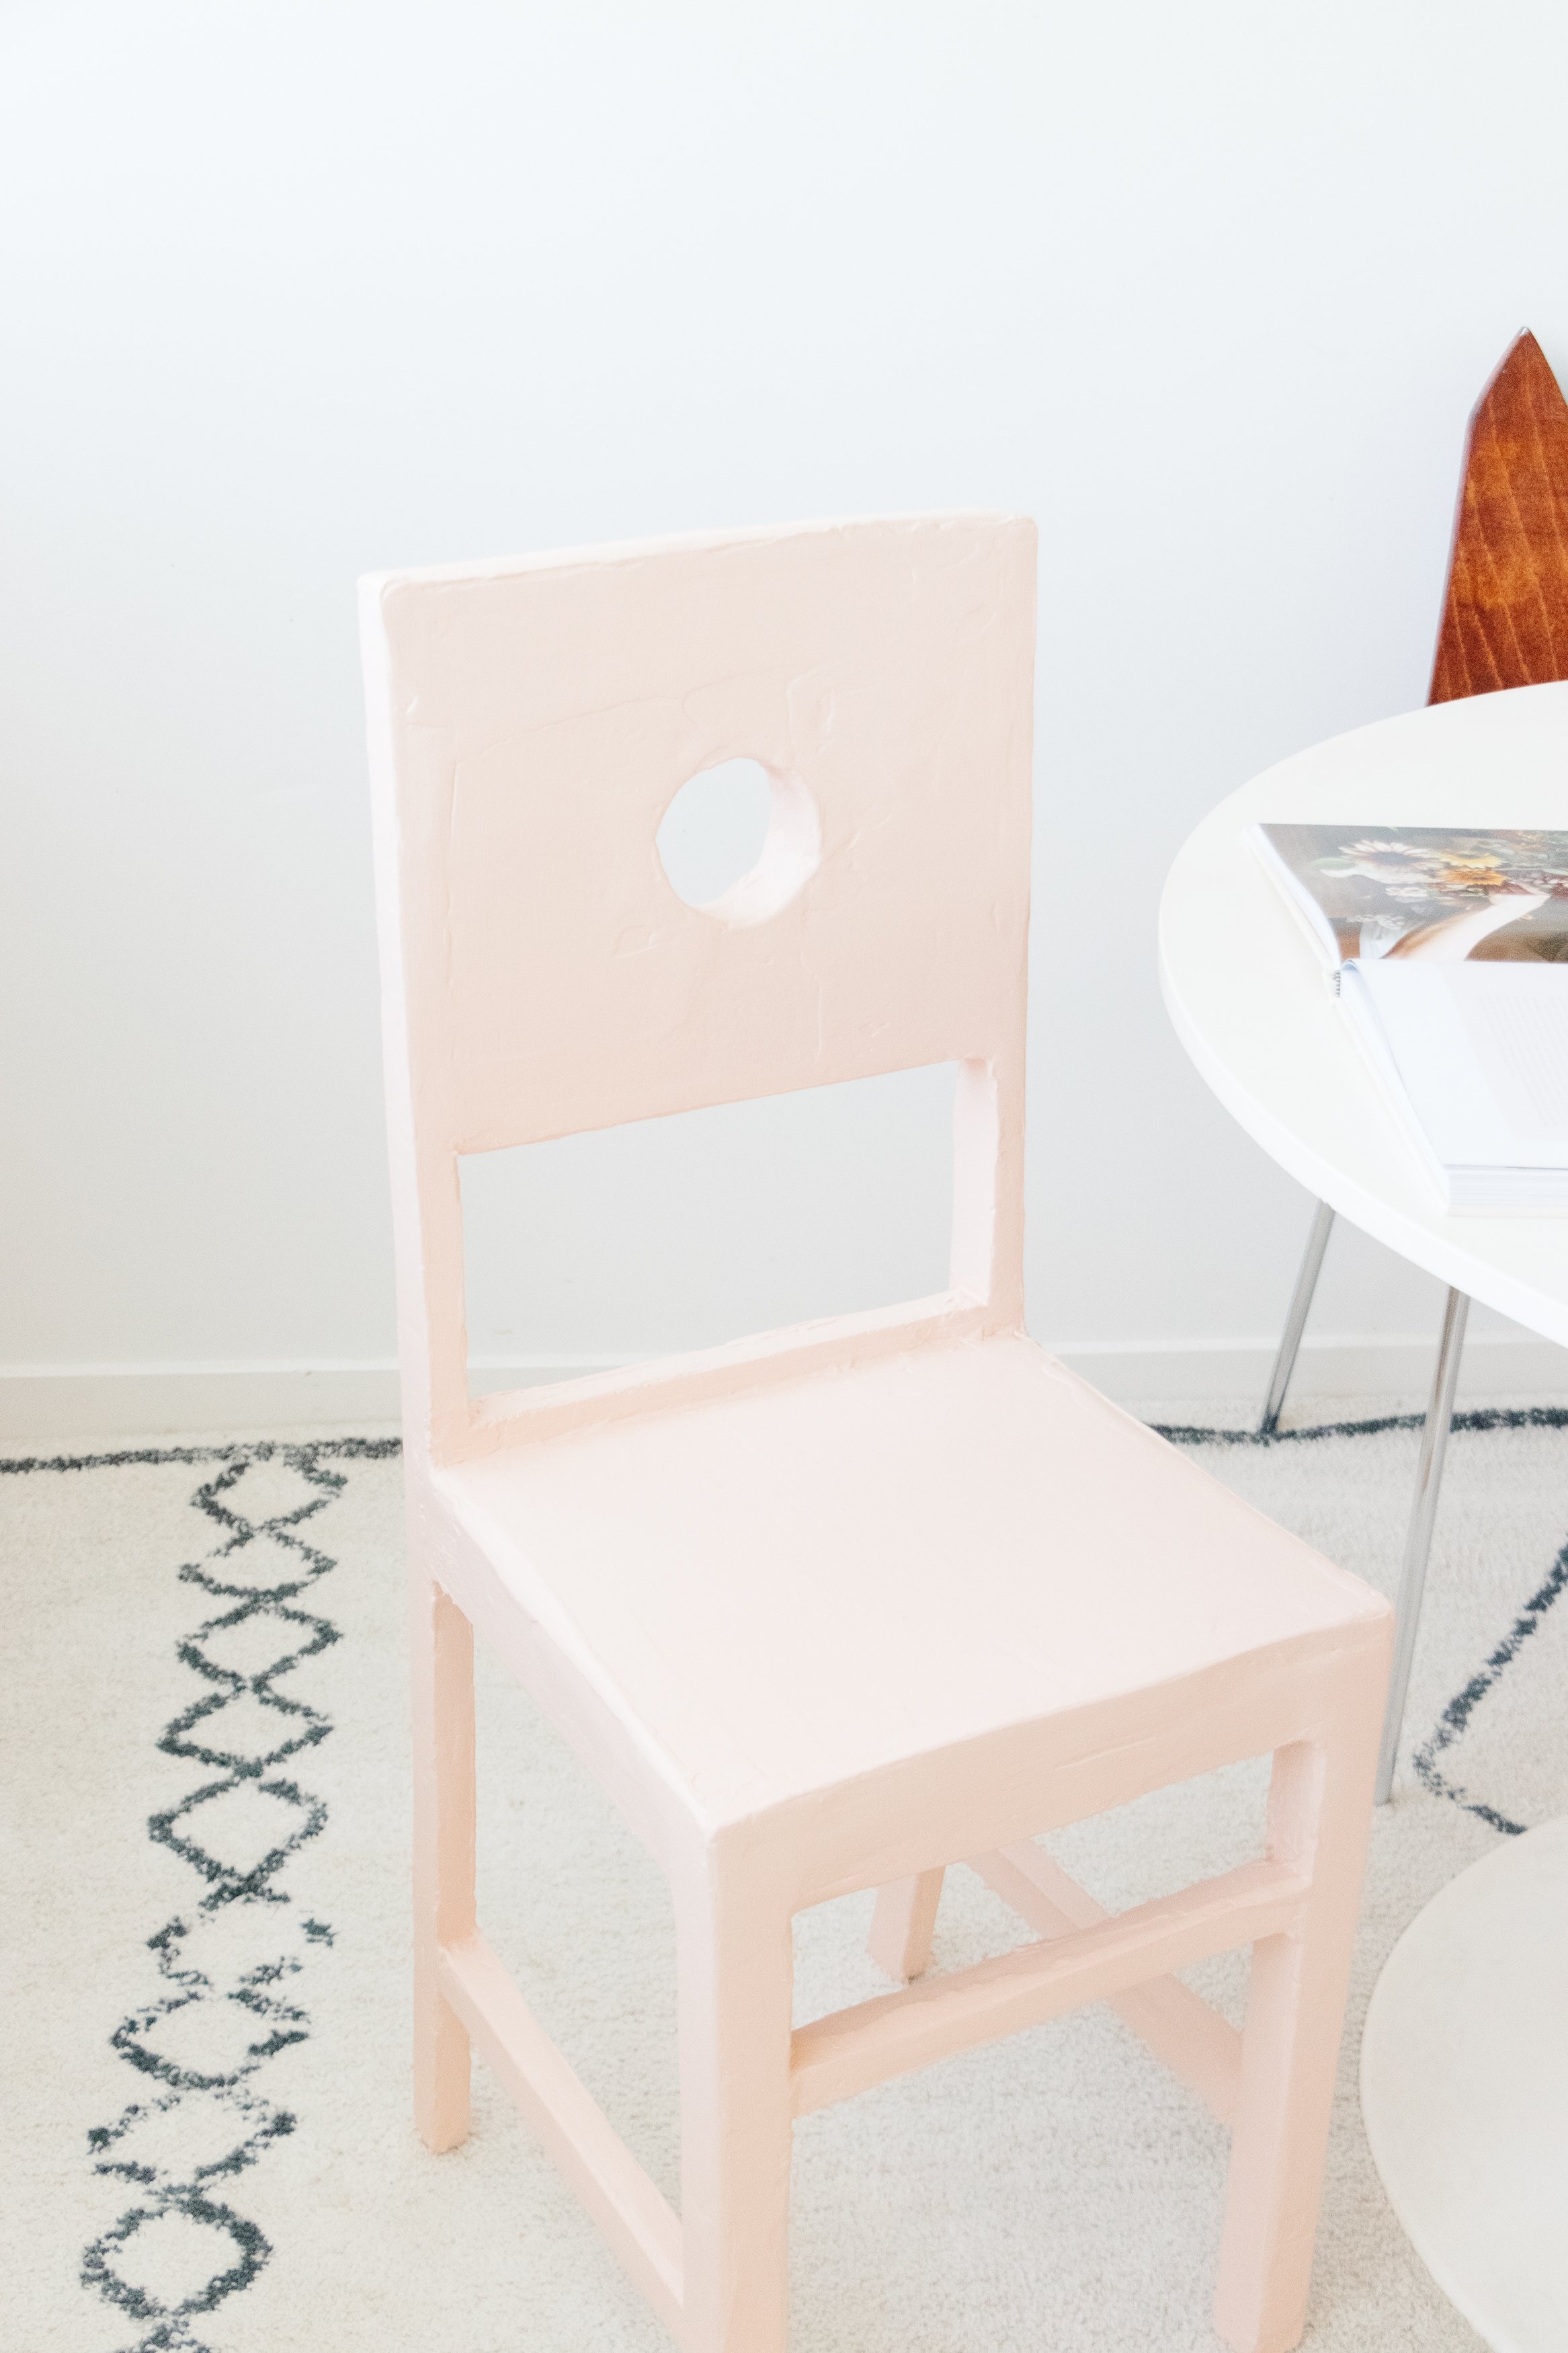
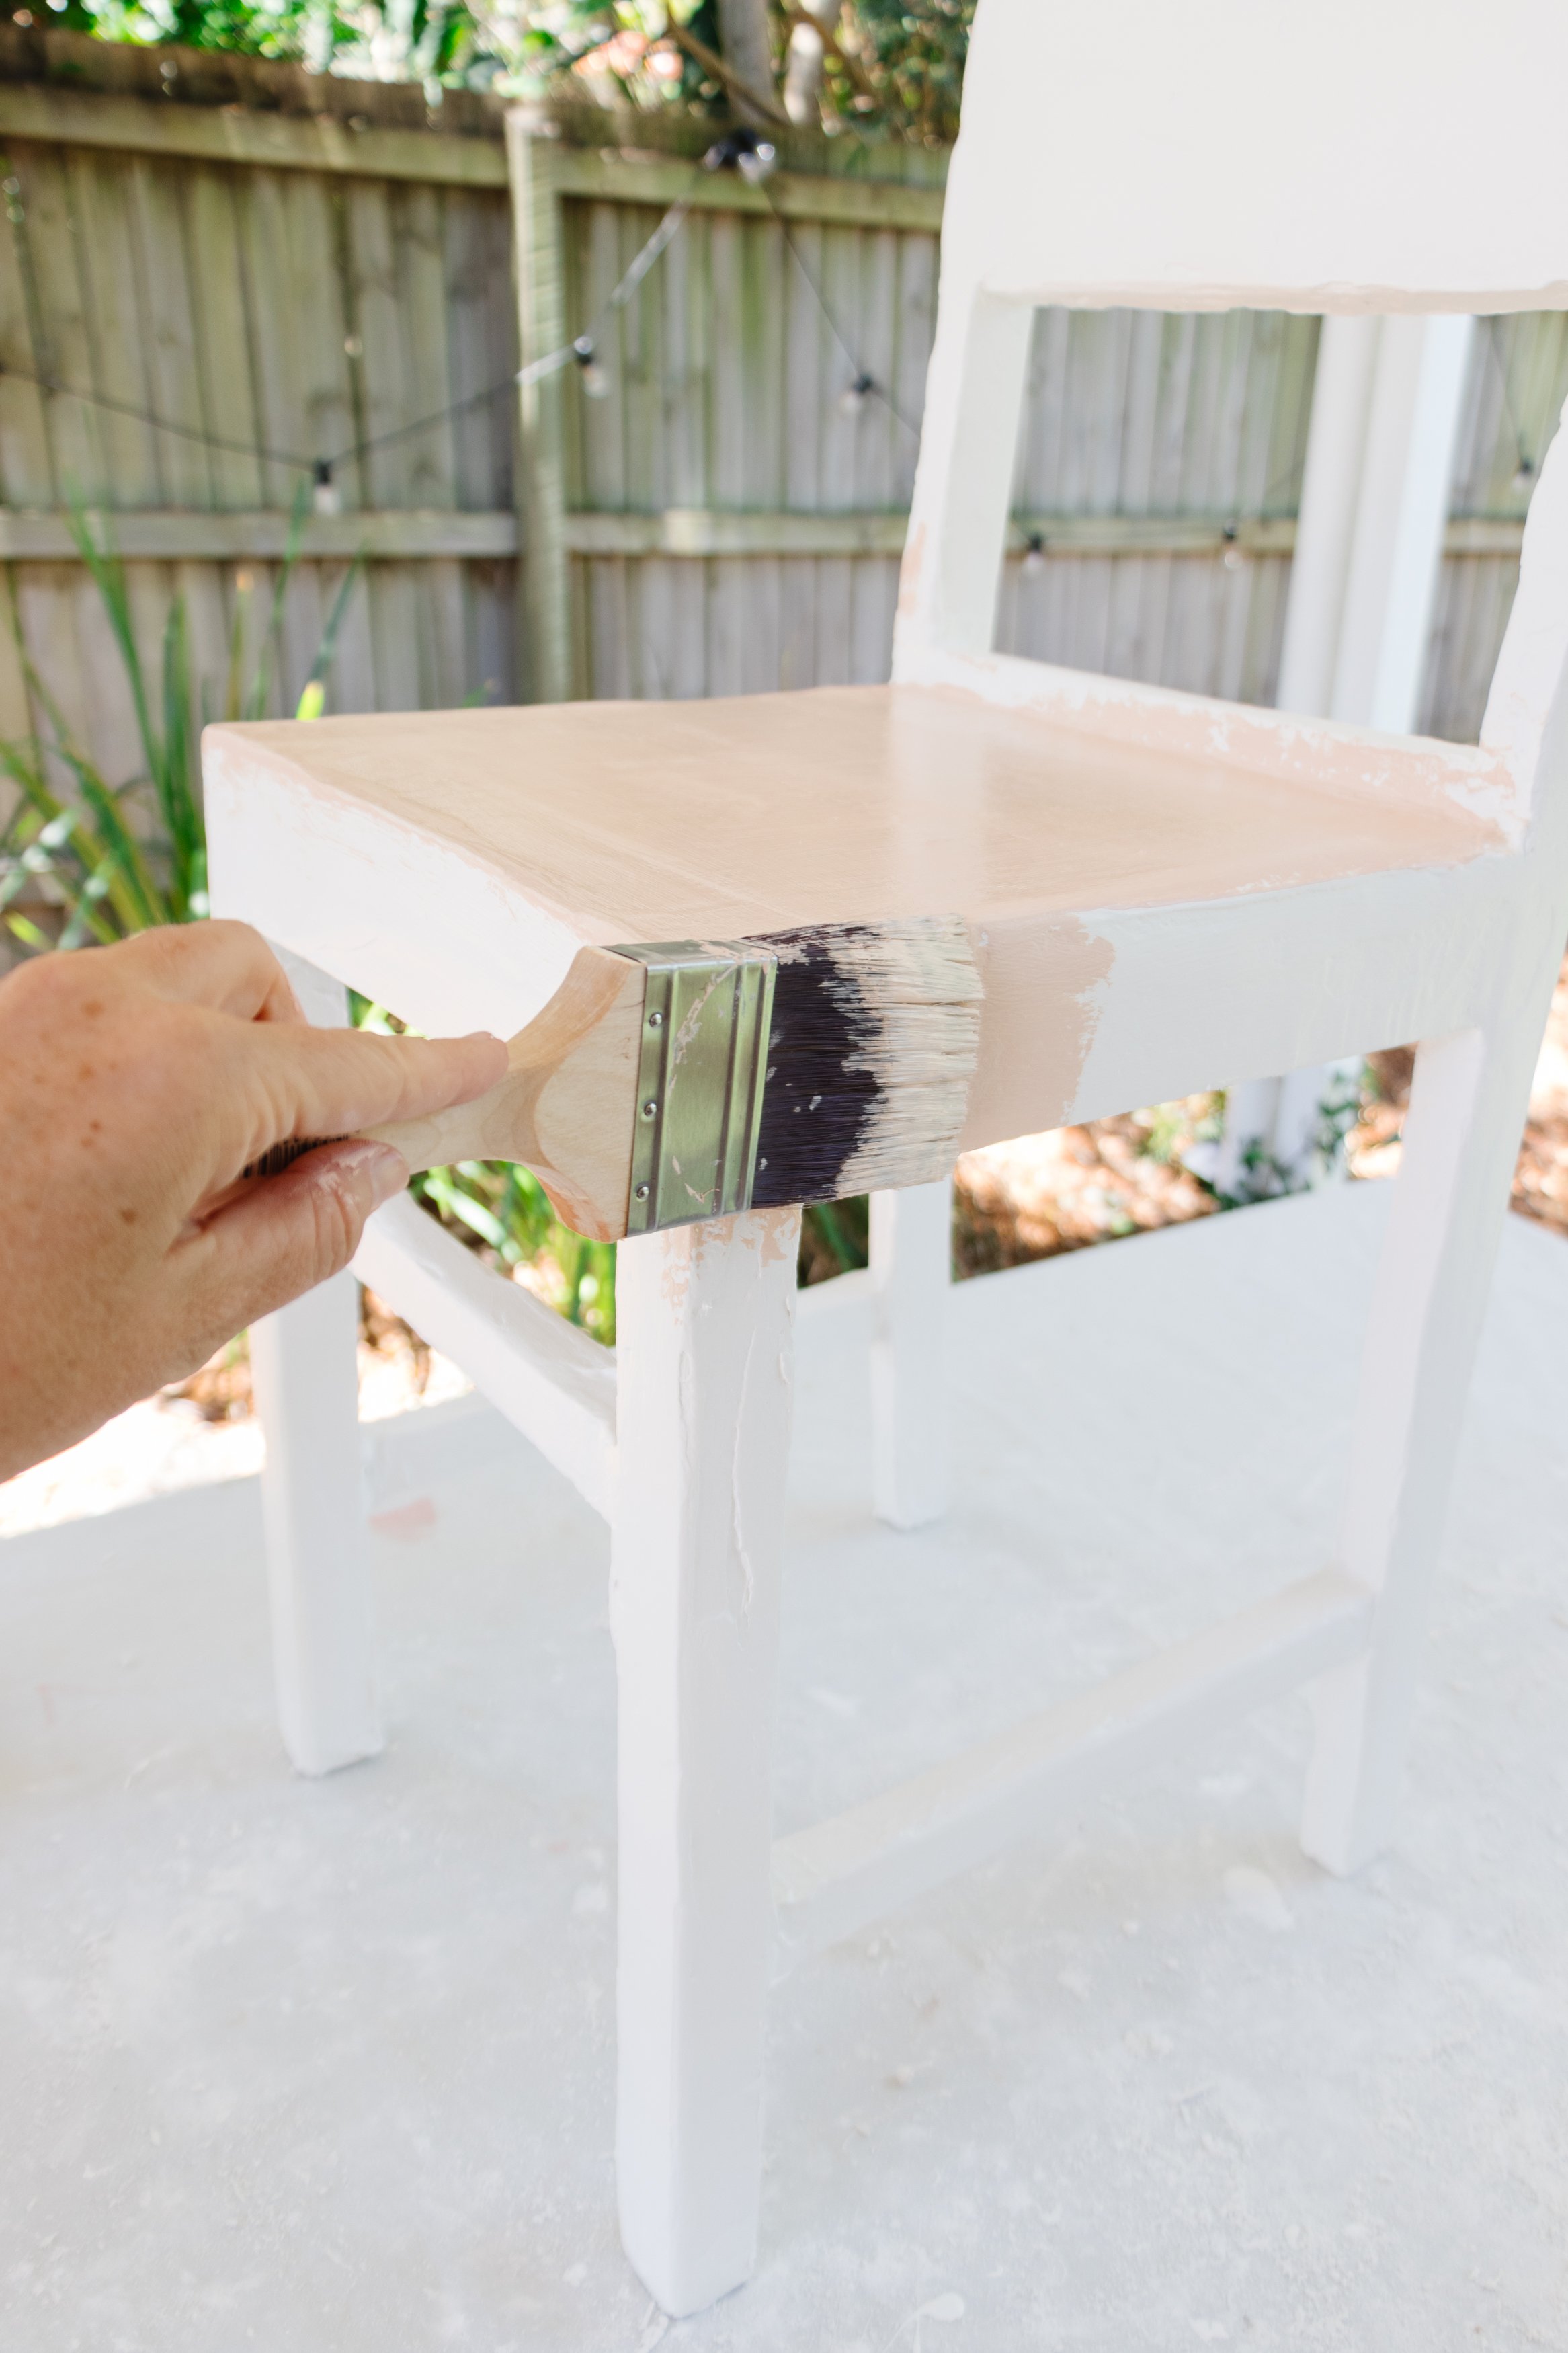
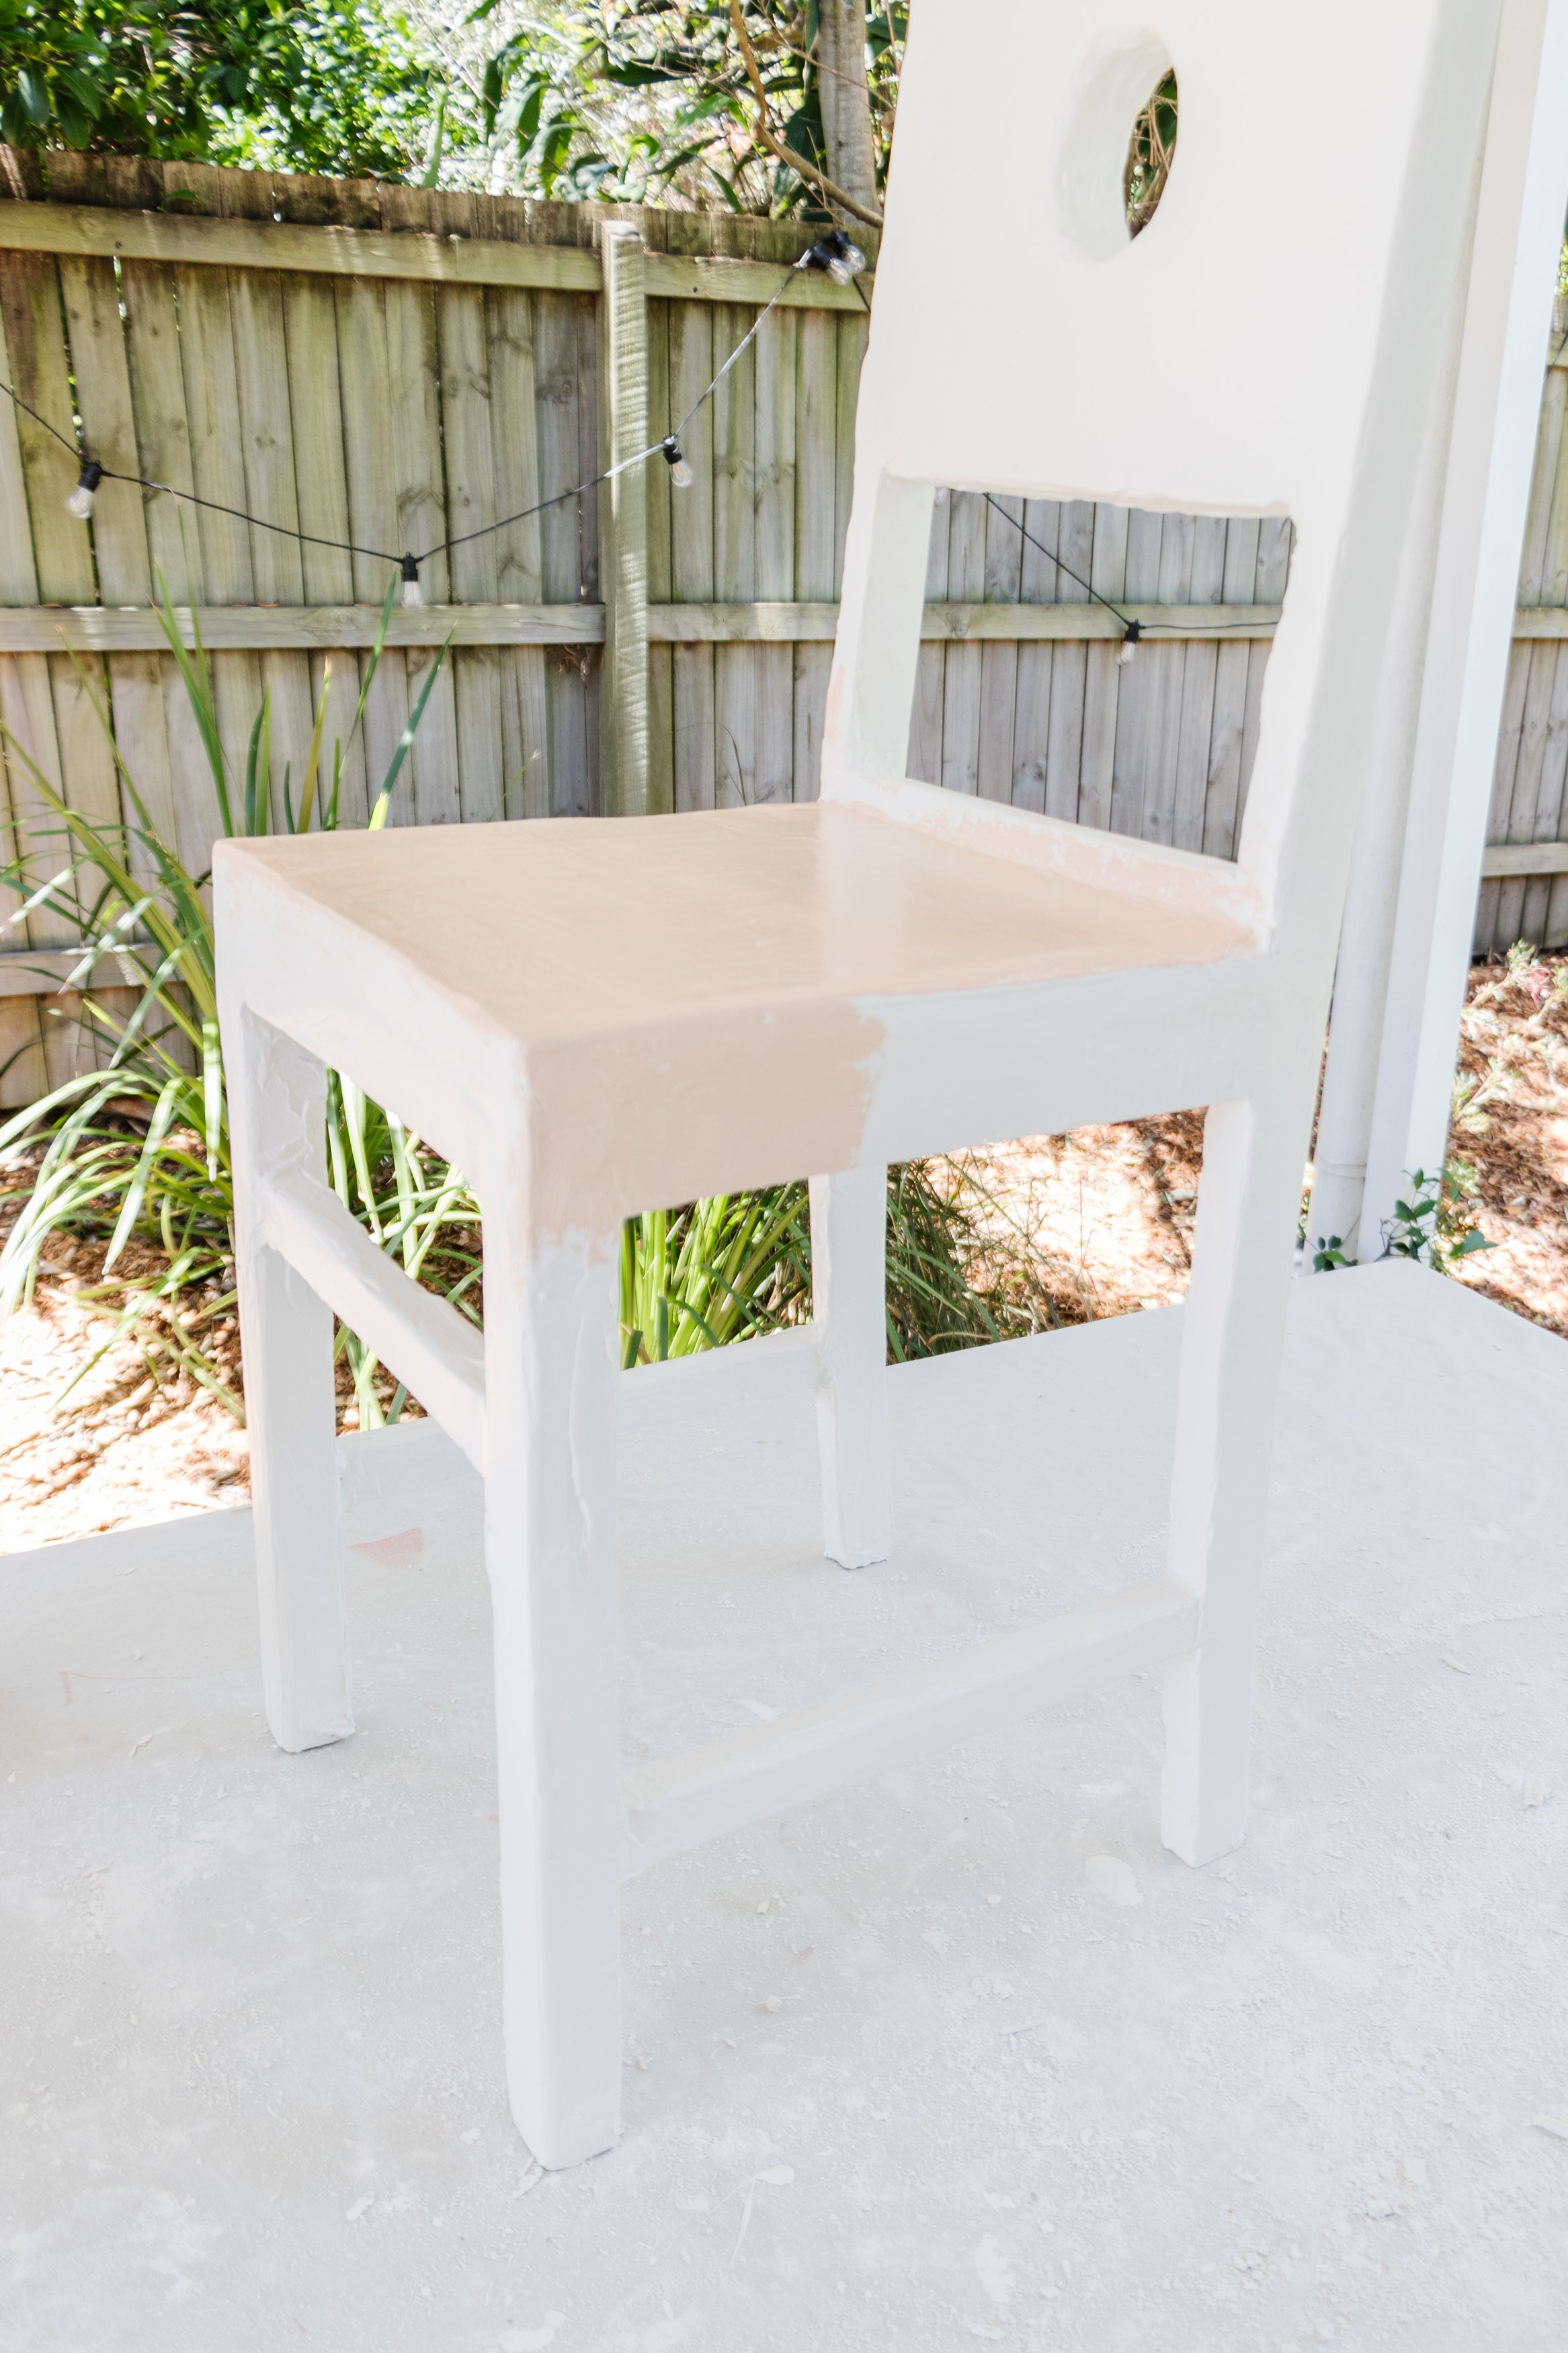
Step 7: To ensure the longevity and durability of the chairs, I applied one coat of white exterior paint using a paint brush and waited for the paint to completely dry before applying two coats of my favourite colour right now, Retro Peach by British Paints!

The Reveal
What a transformation! It’s been a while since I’ve worked with cardboard and plaster, and upcycling these chairs for my studio brought me a lot of joy! Cardboard and plaster are versatile materials to upcycle with and they’ve inspired me to use them more in my upcoming projects. I think these plaster chairs look so good with my thrifted table and Upcycled Crown Chairs, don’t you think?
If you’d like to see some of my other cardboard and plaster projects, feel free to check them out here.