How To Cover Furniture With Fabric
Elevate secondhand pieces of furniture with fabric!
A few weeks ago I upcycled an outdated mirror using fabric and it got me thinking, would it be possible to upcycle a large piece of secondhand furniture with fabric? To celebrate Spotlight’s Make It March I decided to give it a go! Make It March at Spotlight is about celebrating all things creative, no matter your skill or ability. Whether you’re building on skills or picking up a paint brush for the first time, it’s about giving it ago, having fun and learning lots of new skills. I’ve upcycled many pieces of furniture using paint, timber, glue, plaster, raffia, texture paint, foam, PVC pipes, MDF and more, but I’ve never covered a large piece in fabric, so I was up for the challenge! So, let’s get making!
And to see how this project came together, check out this video!
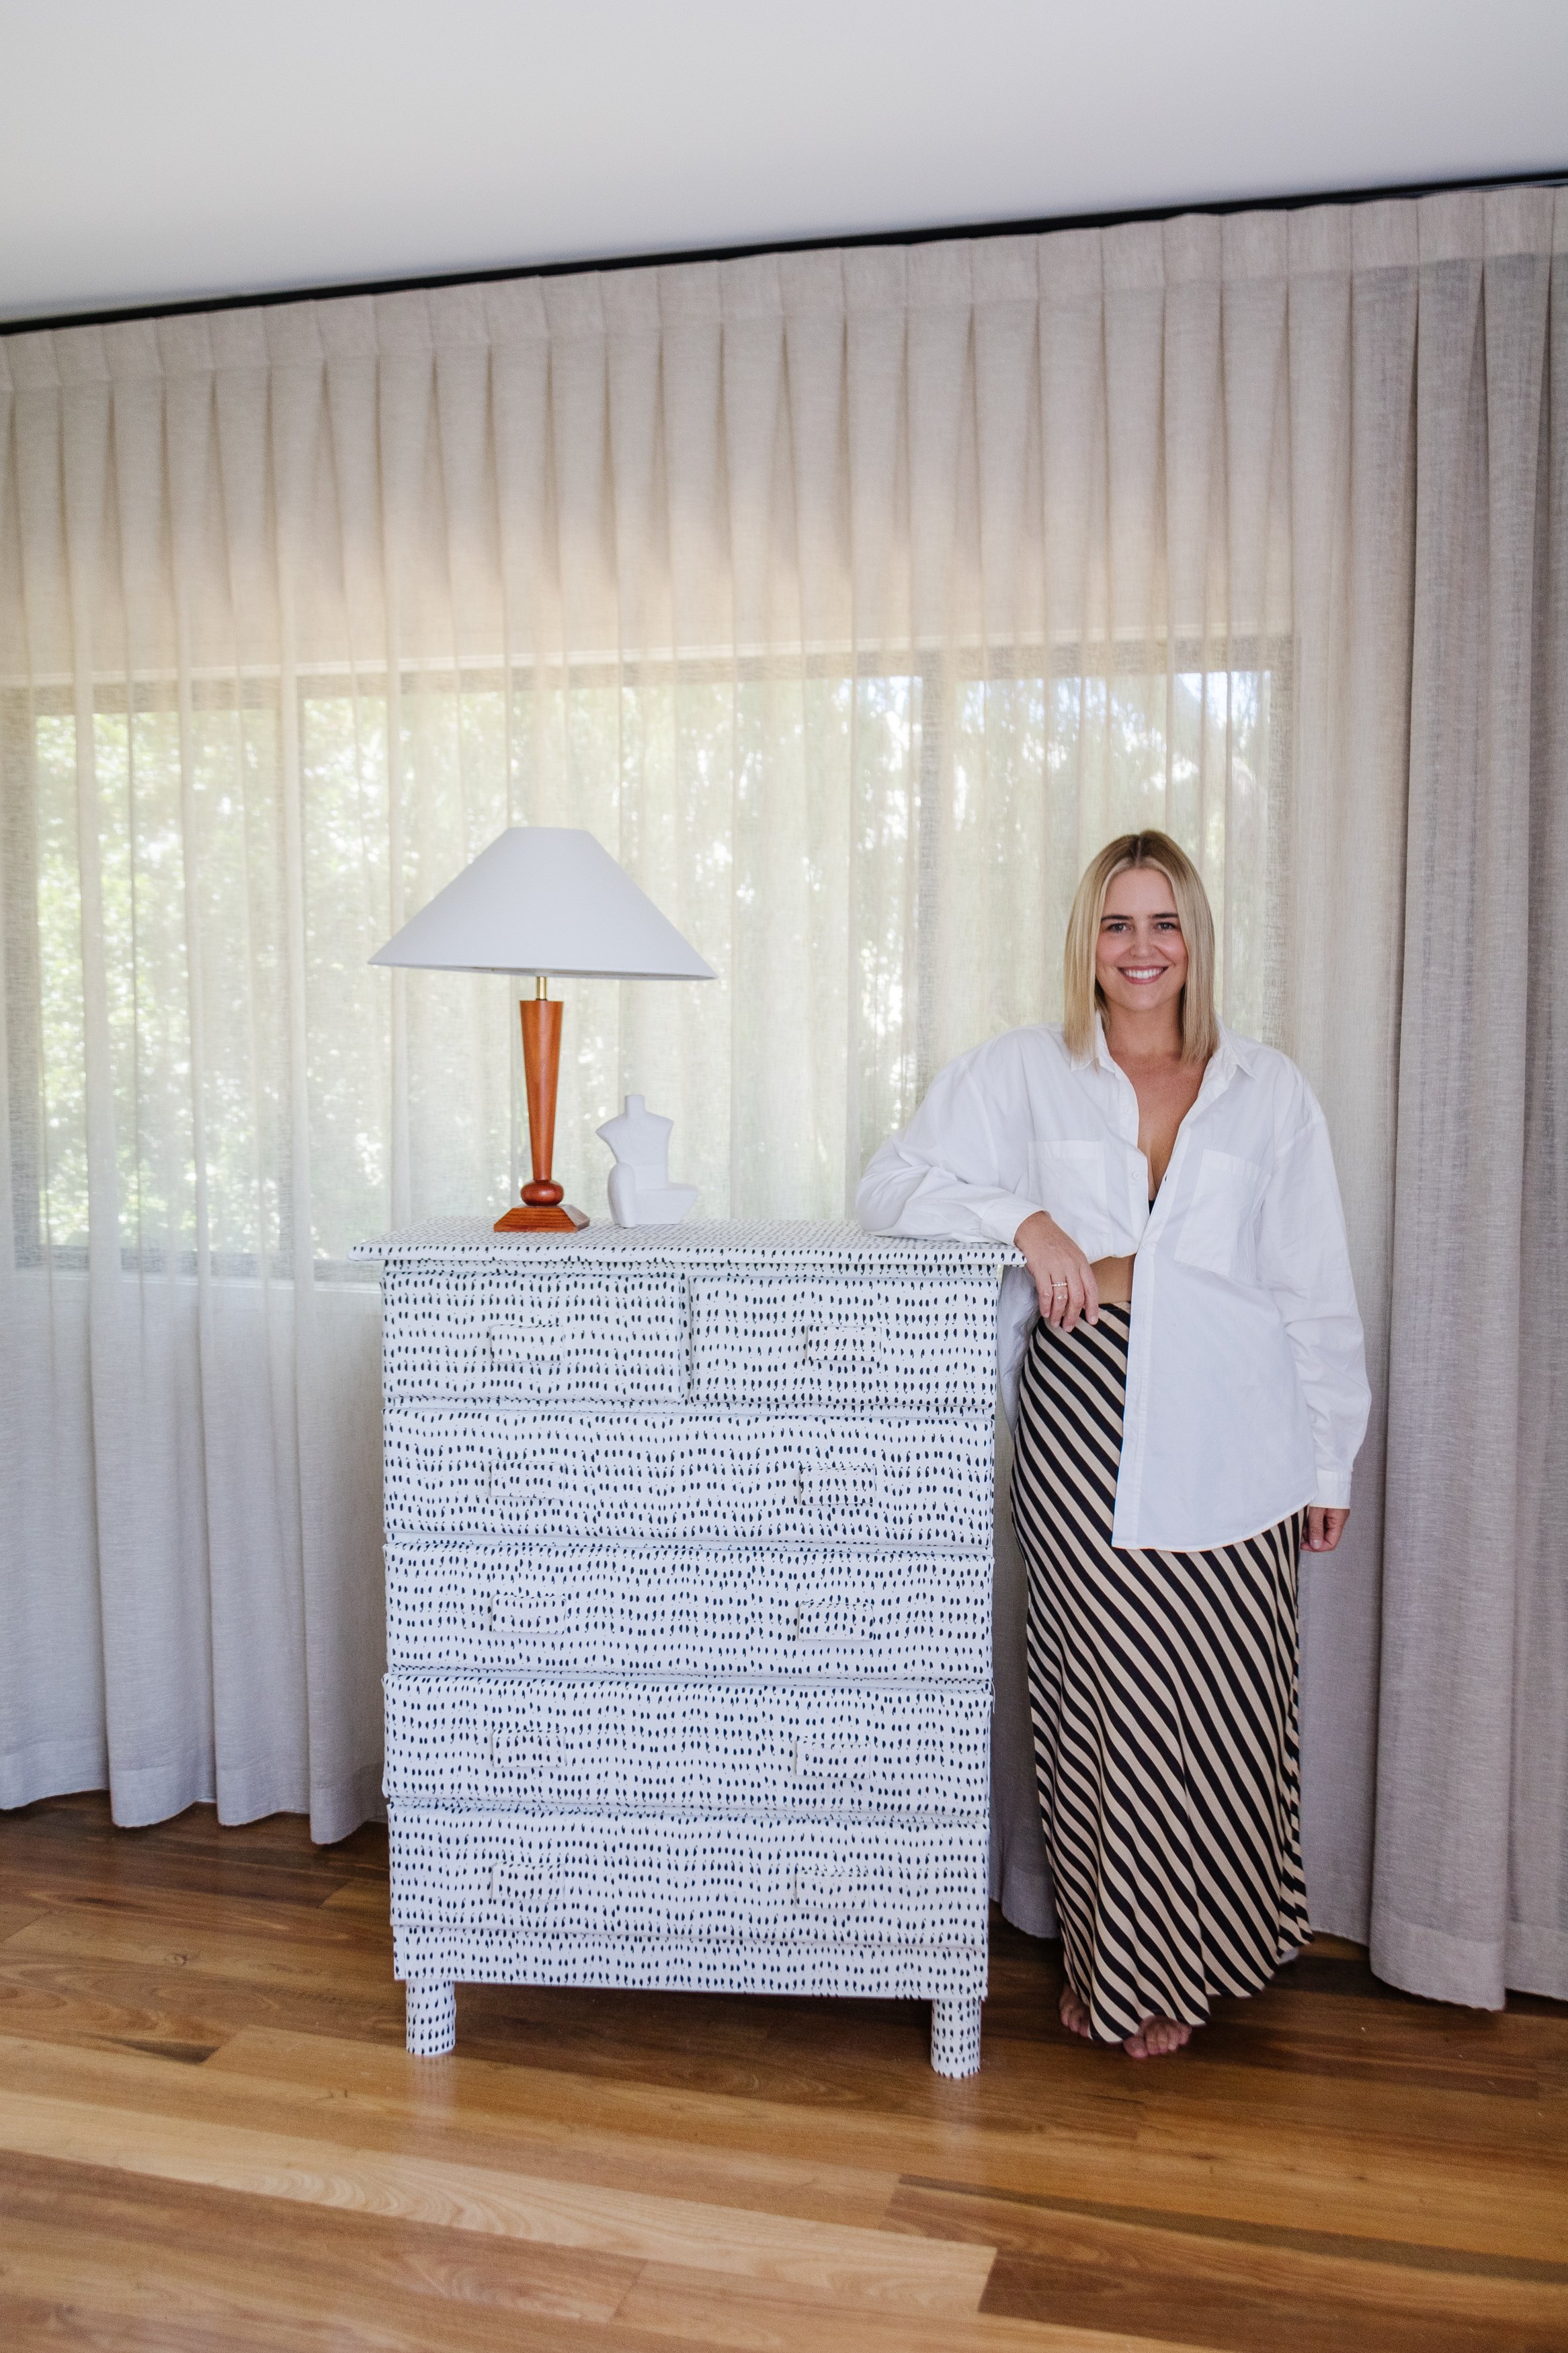
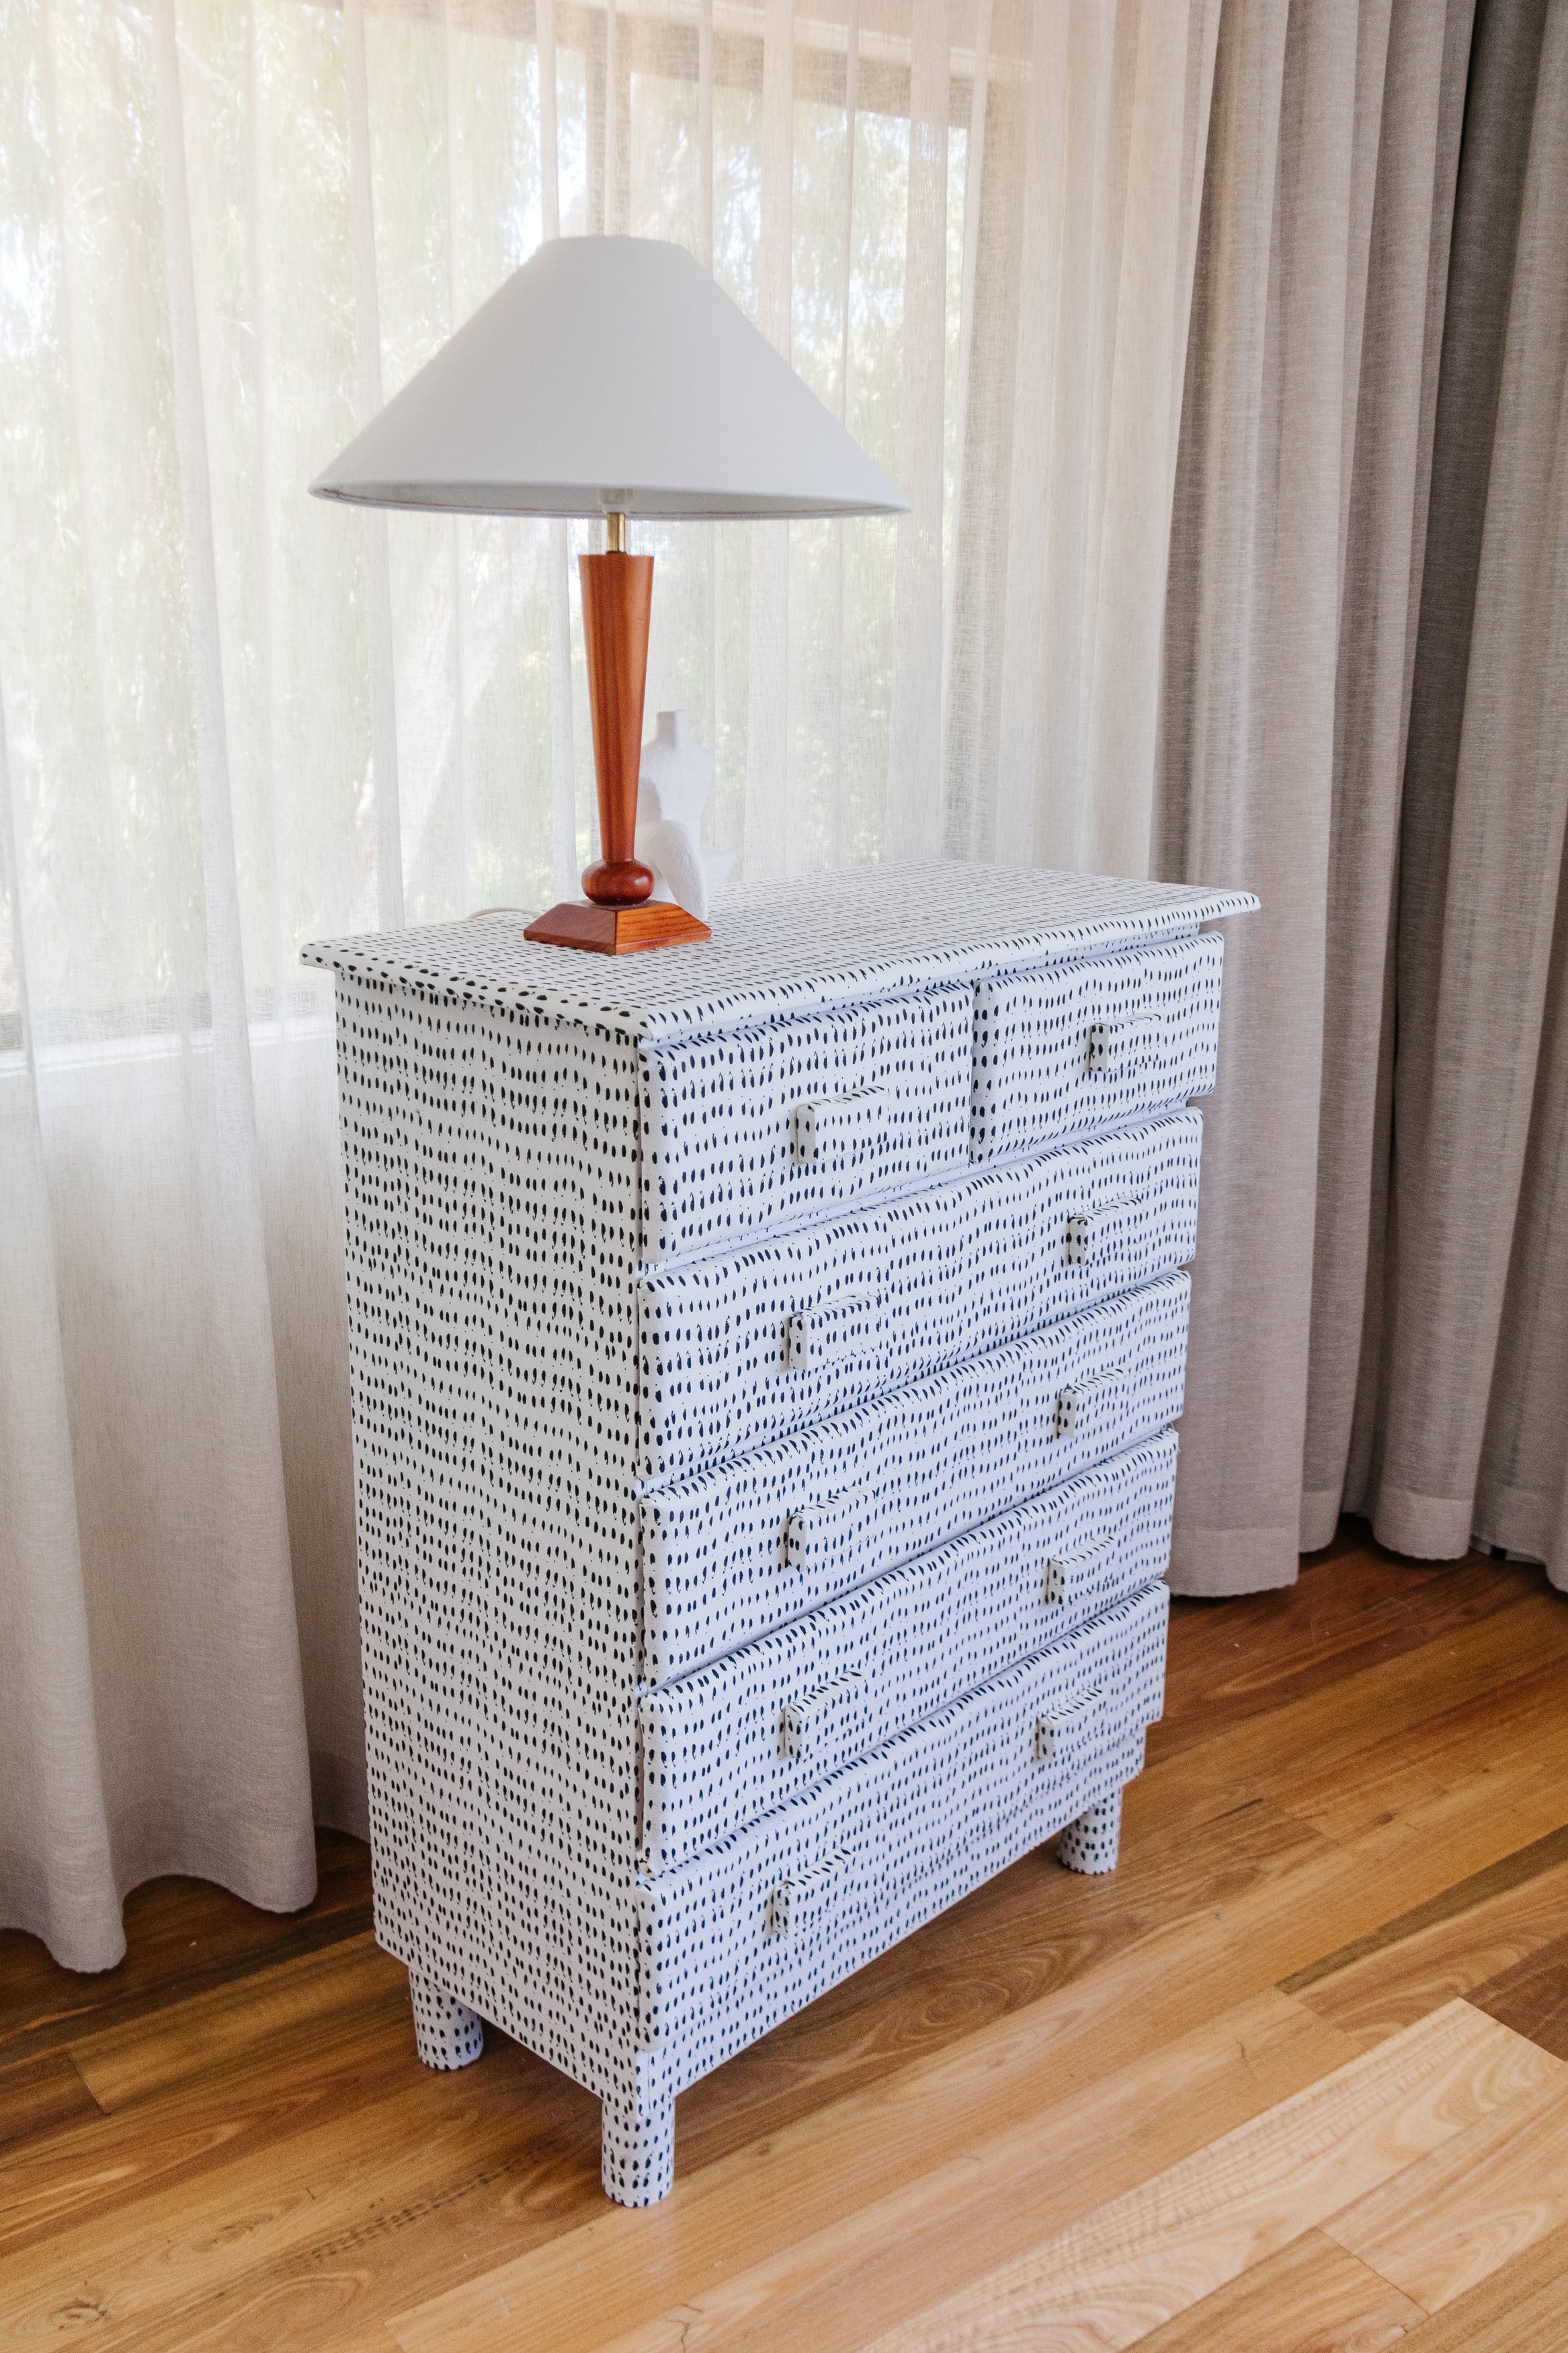
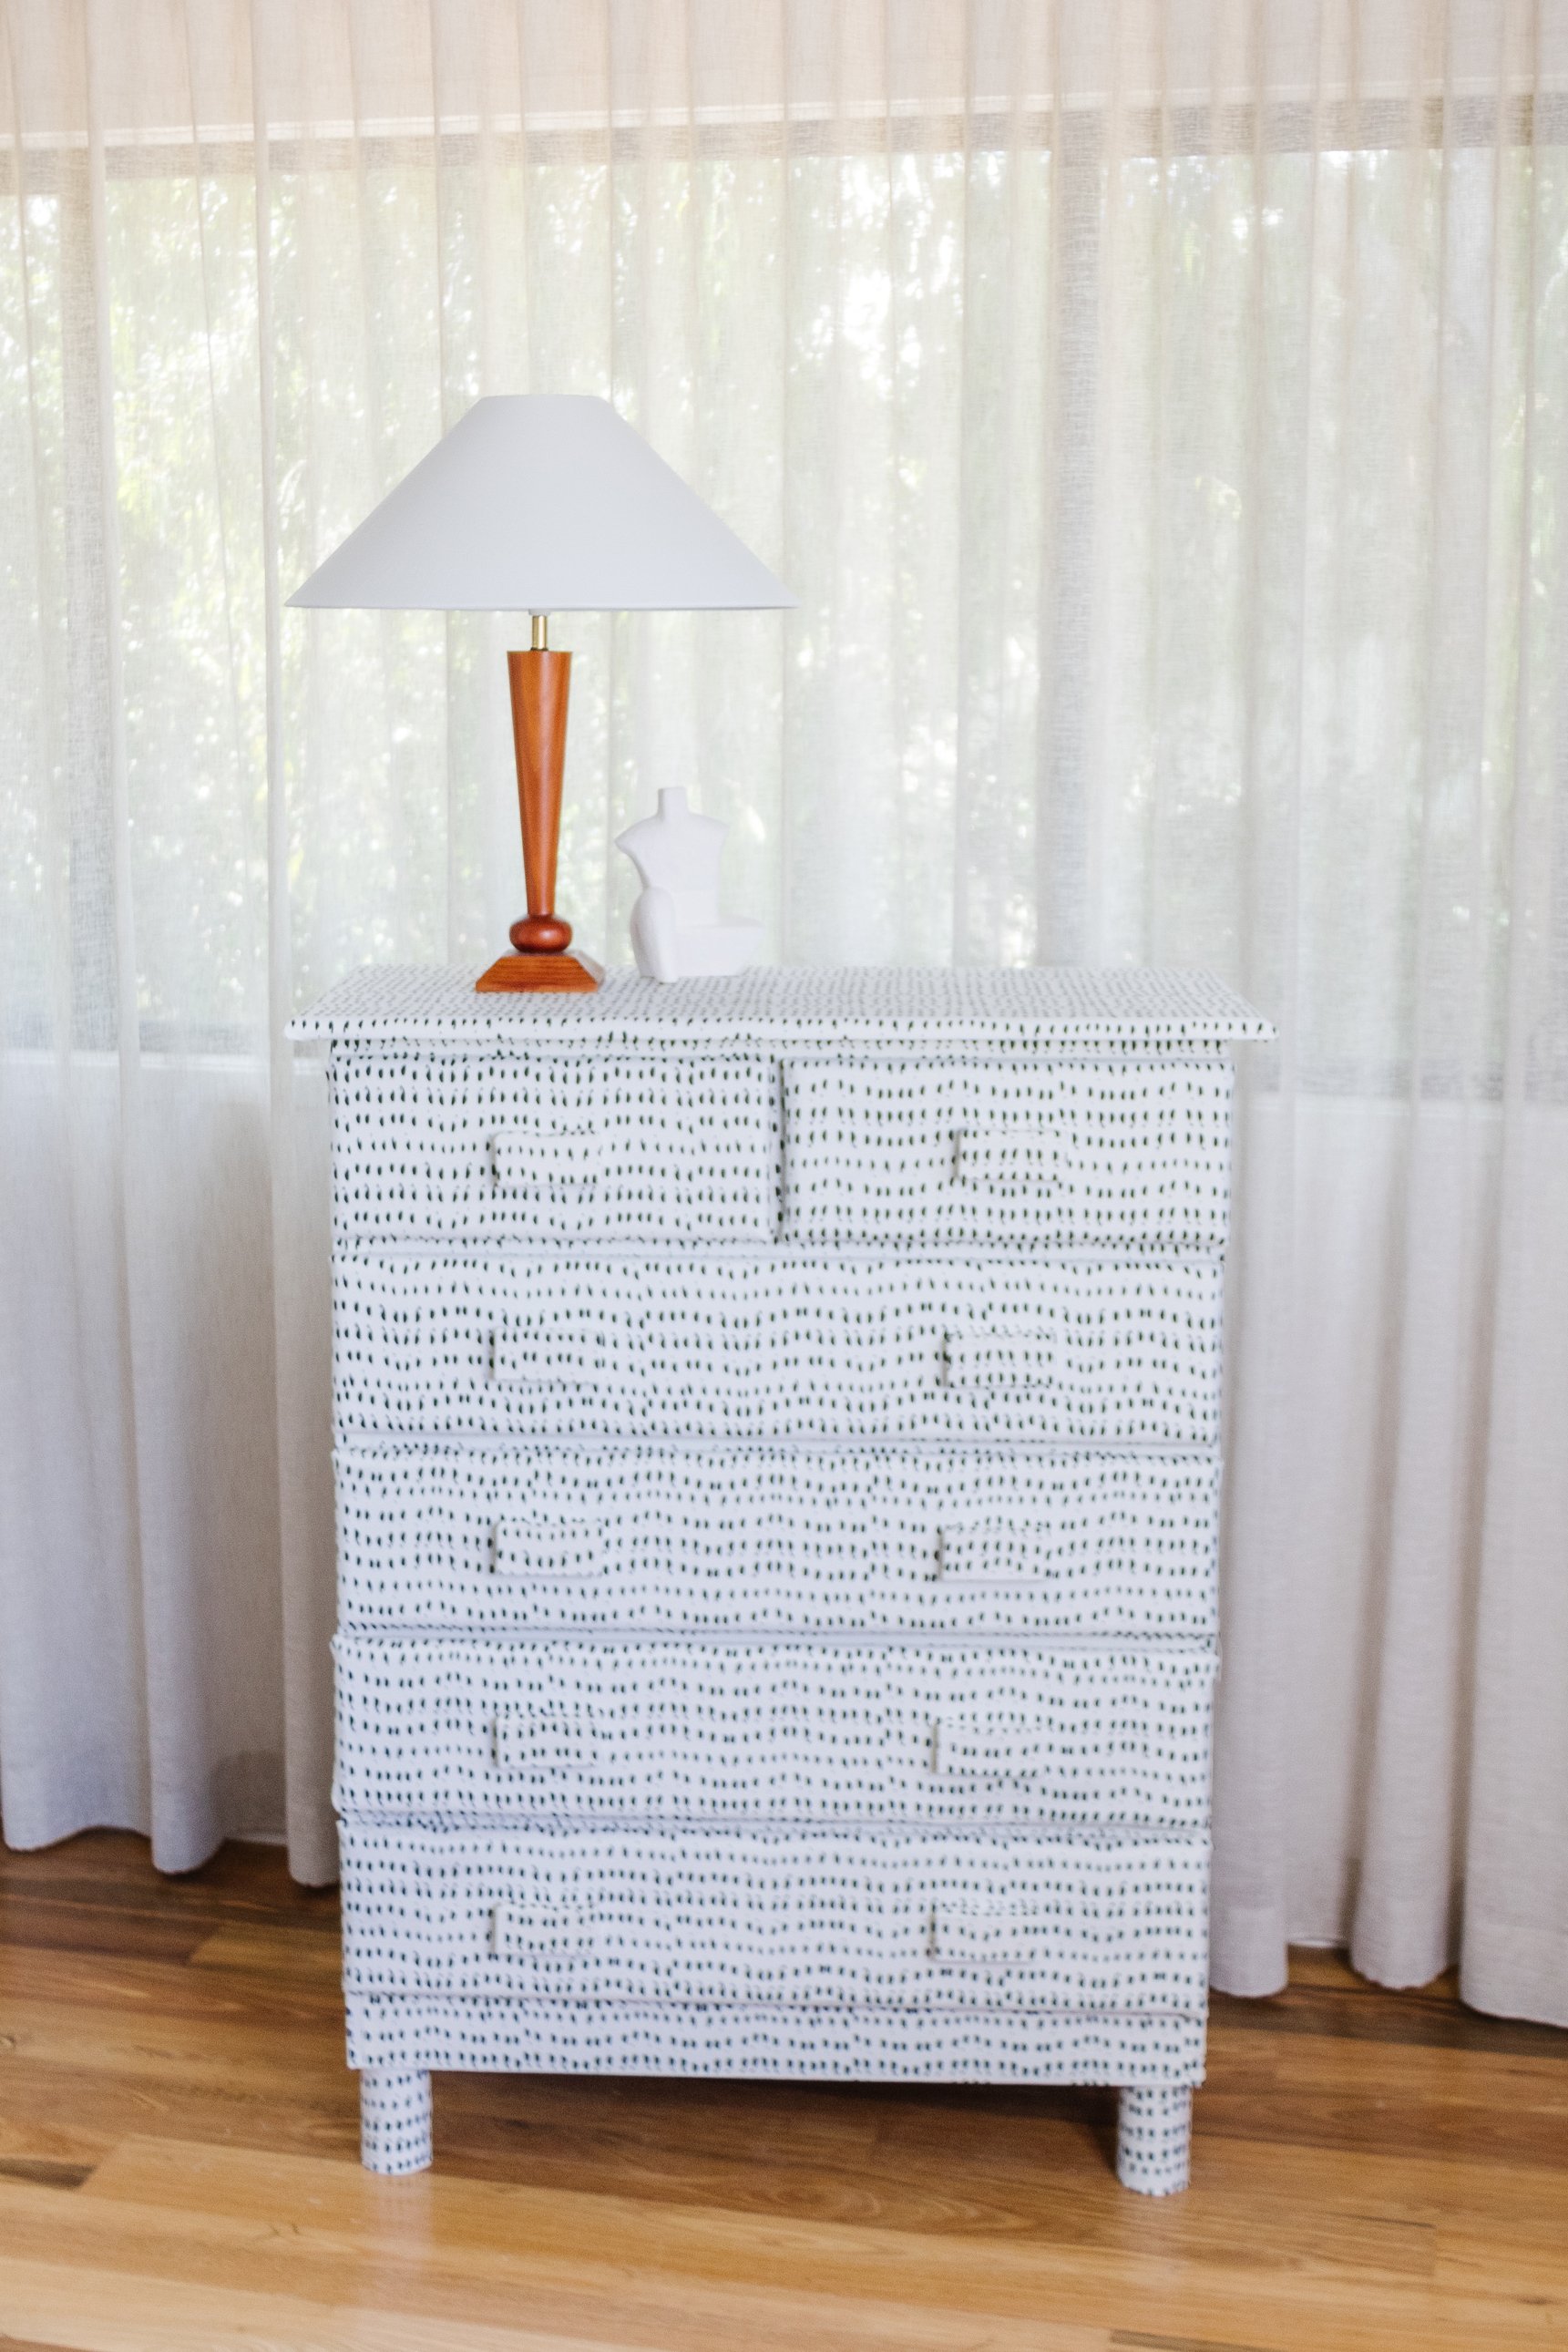
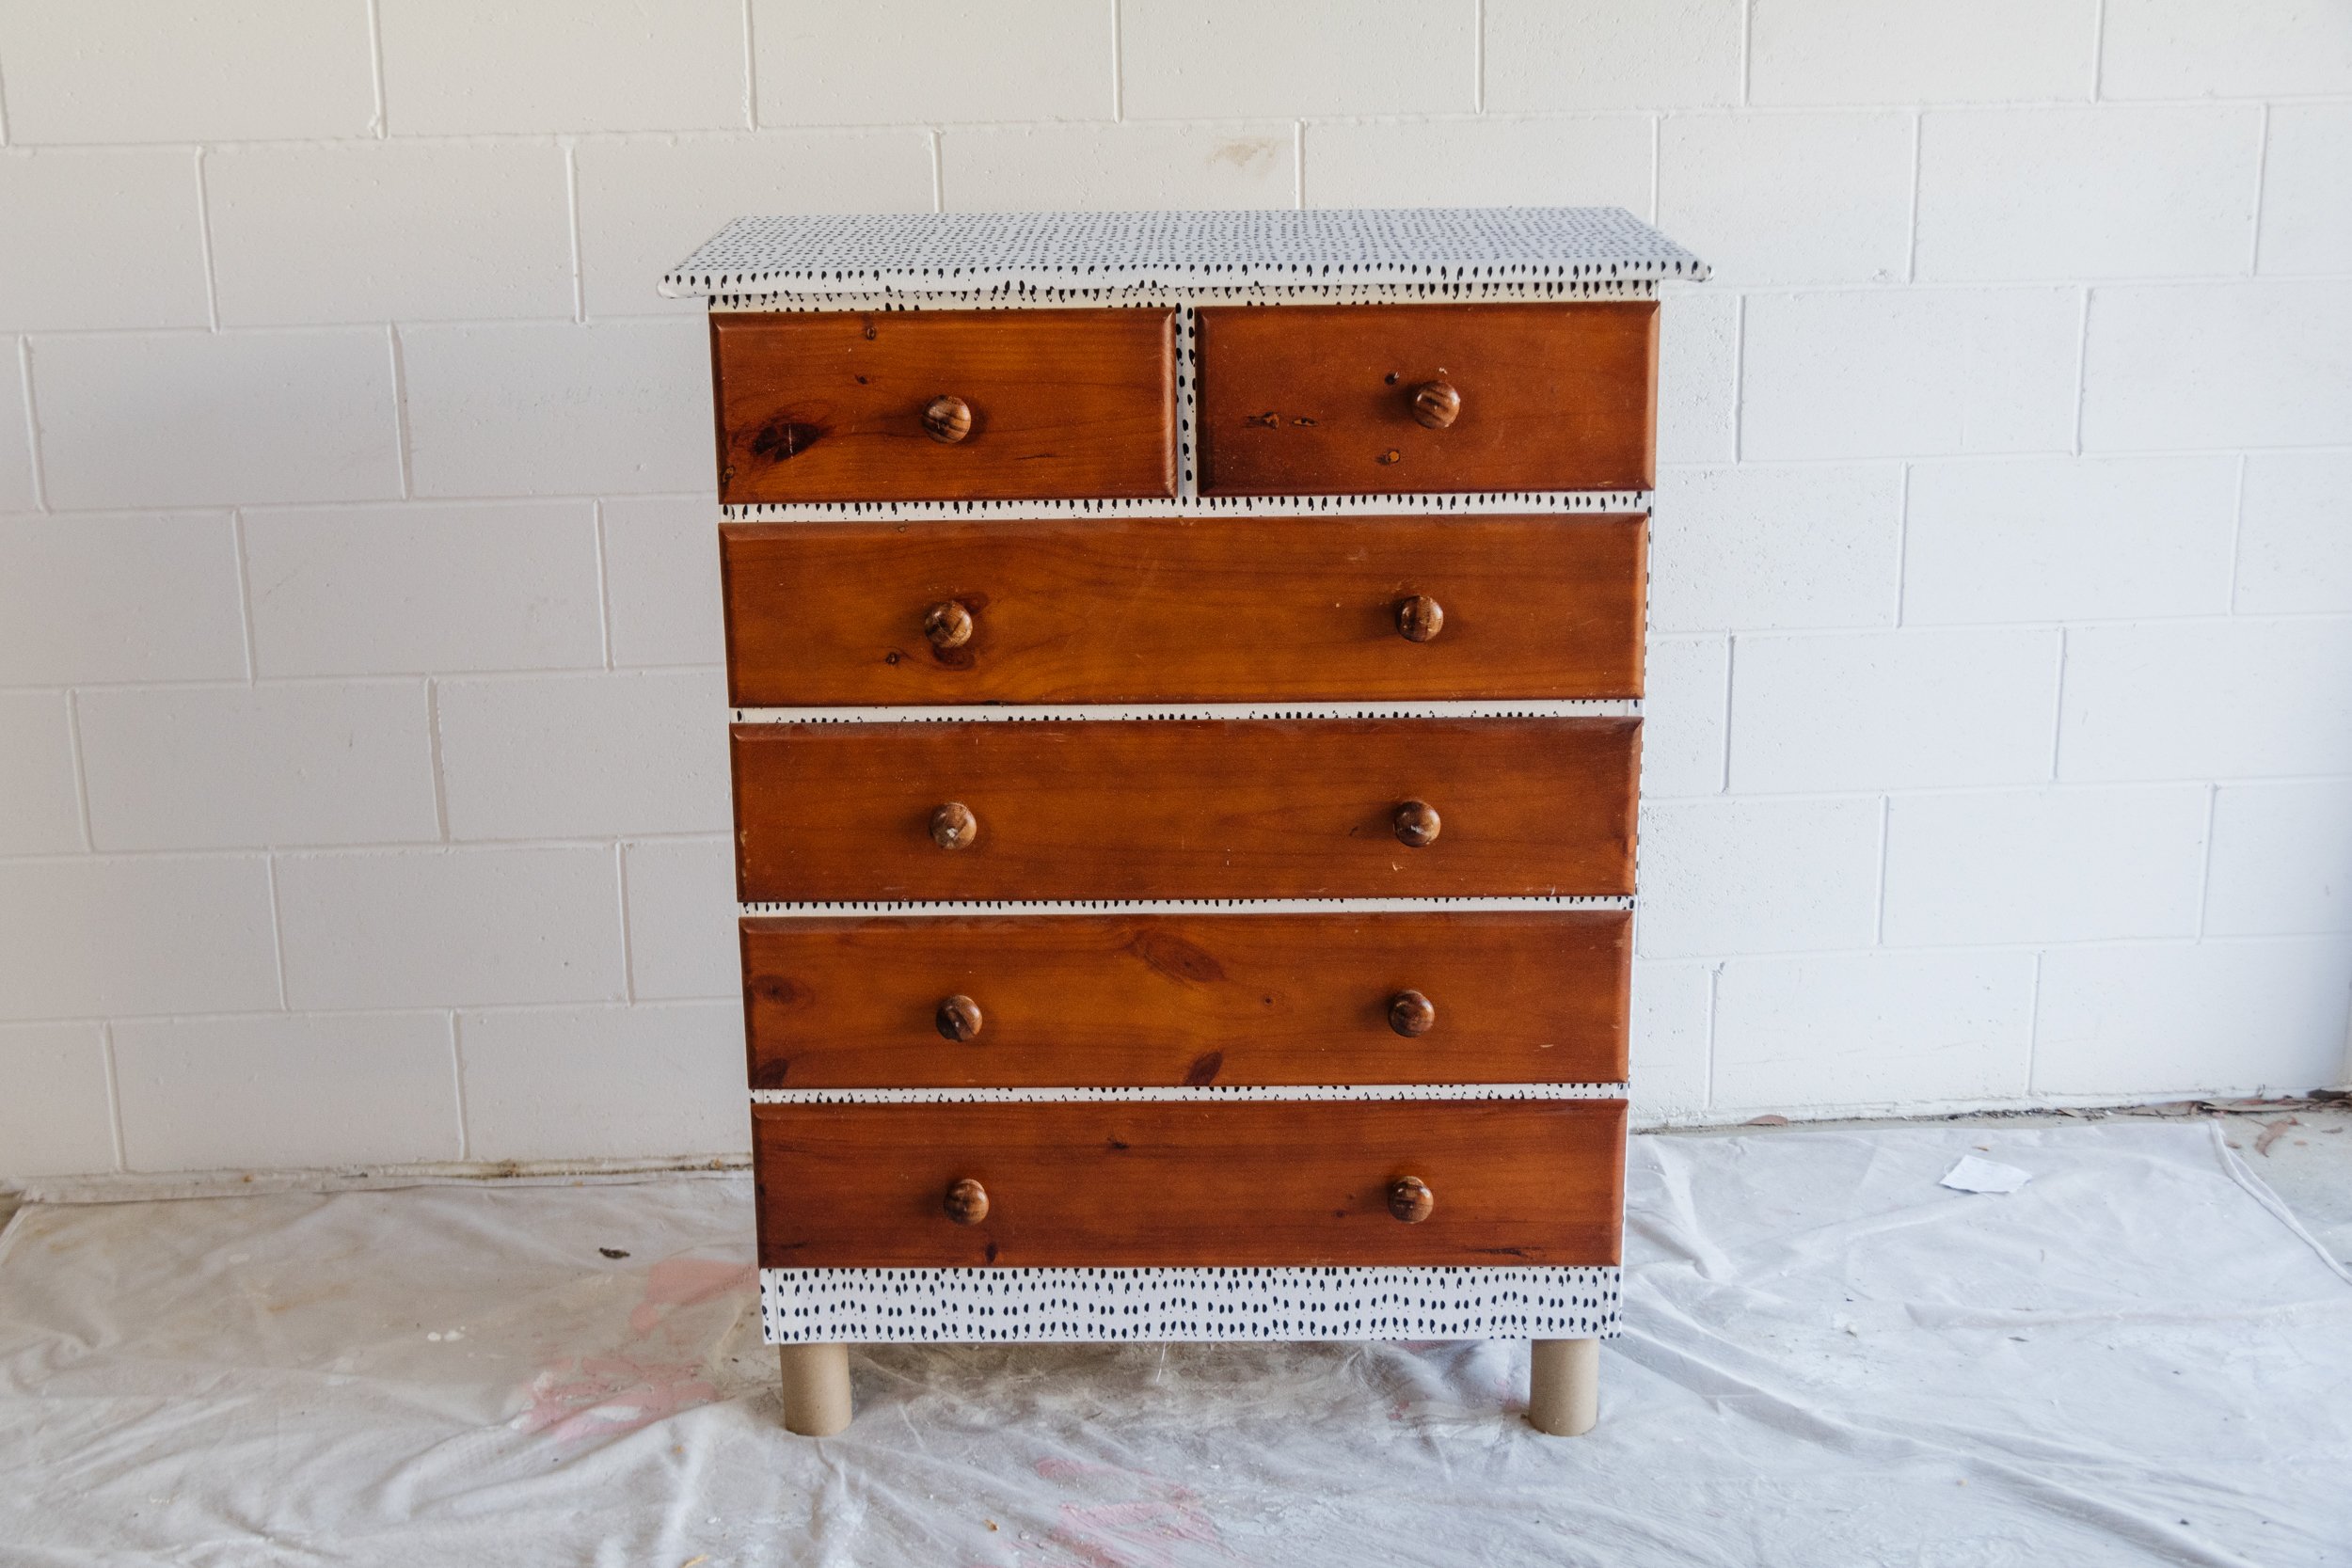
Before & After

Project Details
🕒 Project Time Estimate: 2 hours
💰 Materials Cost: $70
👷♀️ Skill Level: Beginner DIYer
Tools
Drill/screwdriver
Scissors
Paint brush
Handsaw or mitre saw
Materials
Thick patterned fabric. I used “Asher Mini Prints” from Spotlight
10 x 10 cm (L) thin pine (I used leftover timber I had from another project)
Timber screws
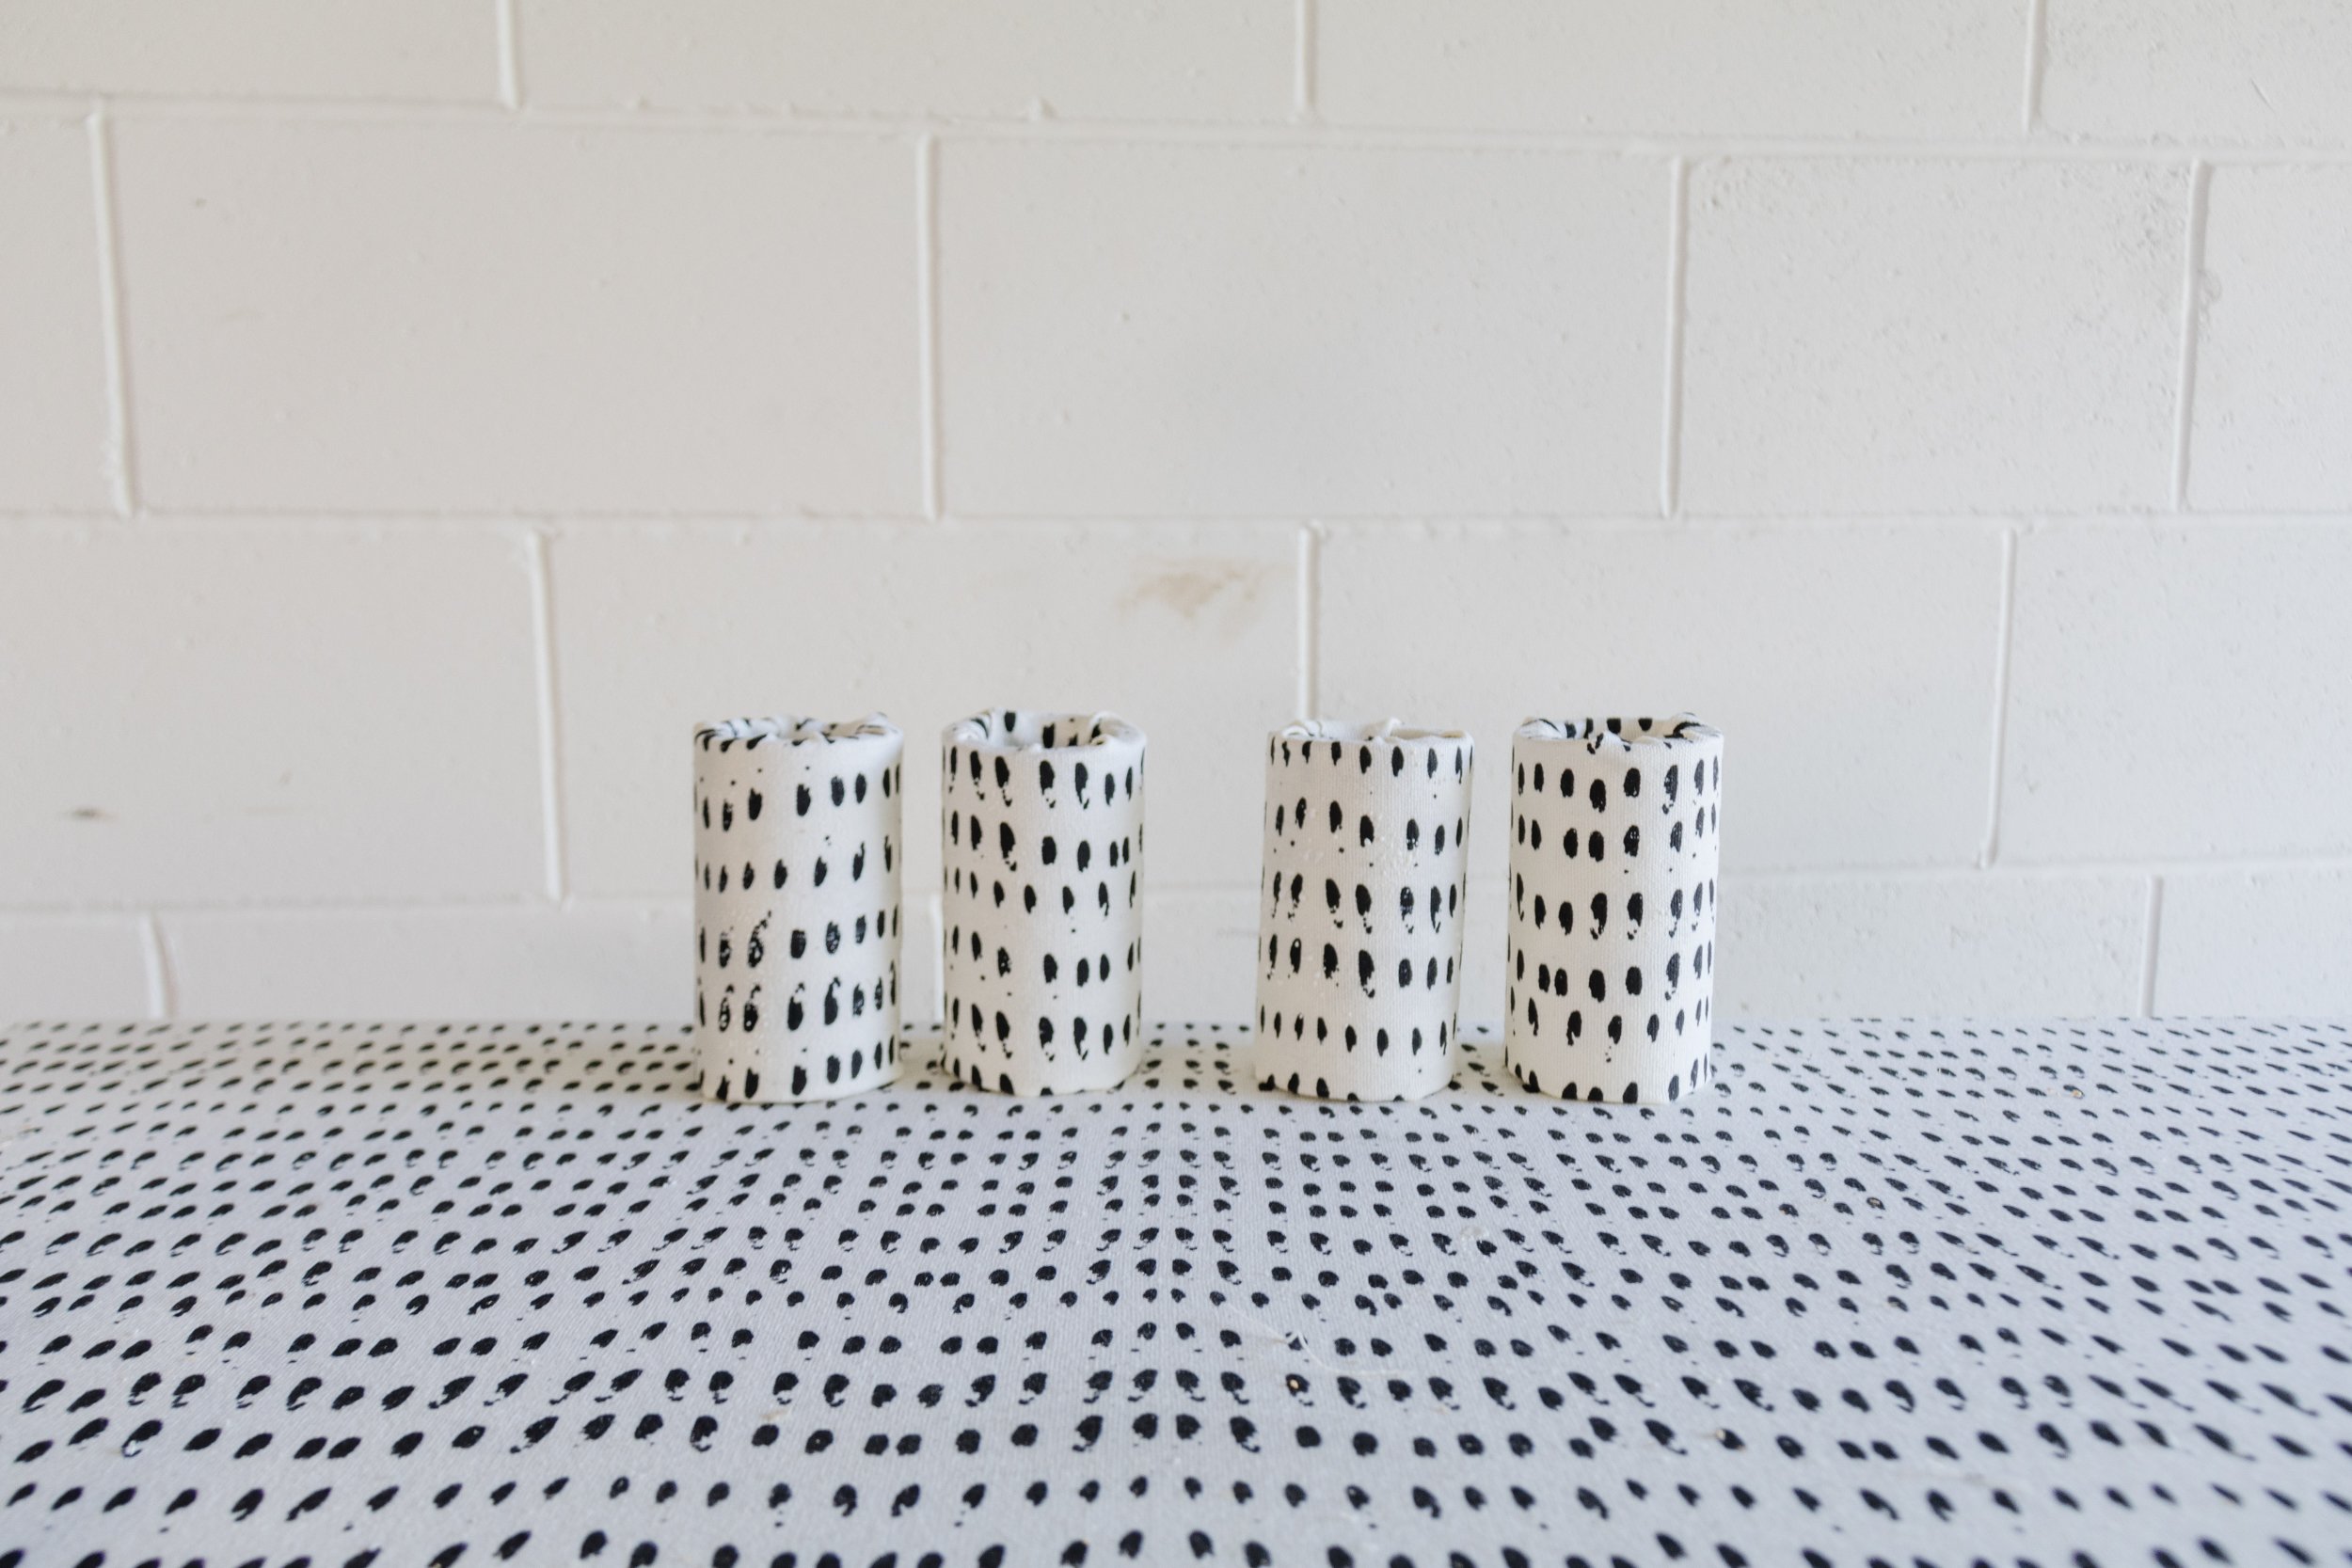
Thick cardboard tube
Construction adhesive
L brackets
Timber screws
Tips & Tricks
The trick to covering large pieces of furniture is to use abstract patterned fabric so it all blends together no matter where the seams and folds are. If you use striped fabric, as an example, you will need to spend more time carefully lining it up so it looks like on piece of fabric. It’s doable, but will take you more time to complete.
I didn’t seal the fabric because we keep the tall chest in our bedroom and it’s not a high use piece of furniture. If you would like to seal the fabric, I recommend this Waterbase Sealer by Mod Podge.

How To
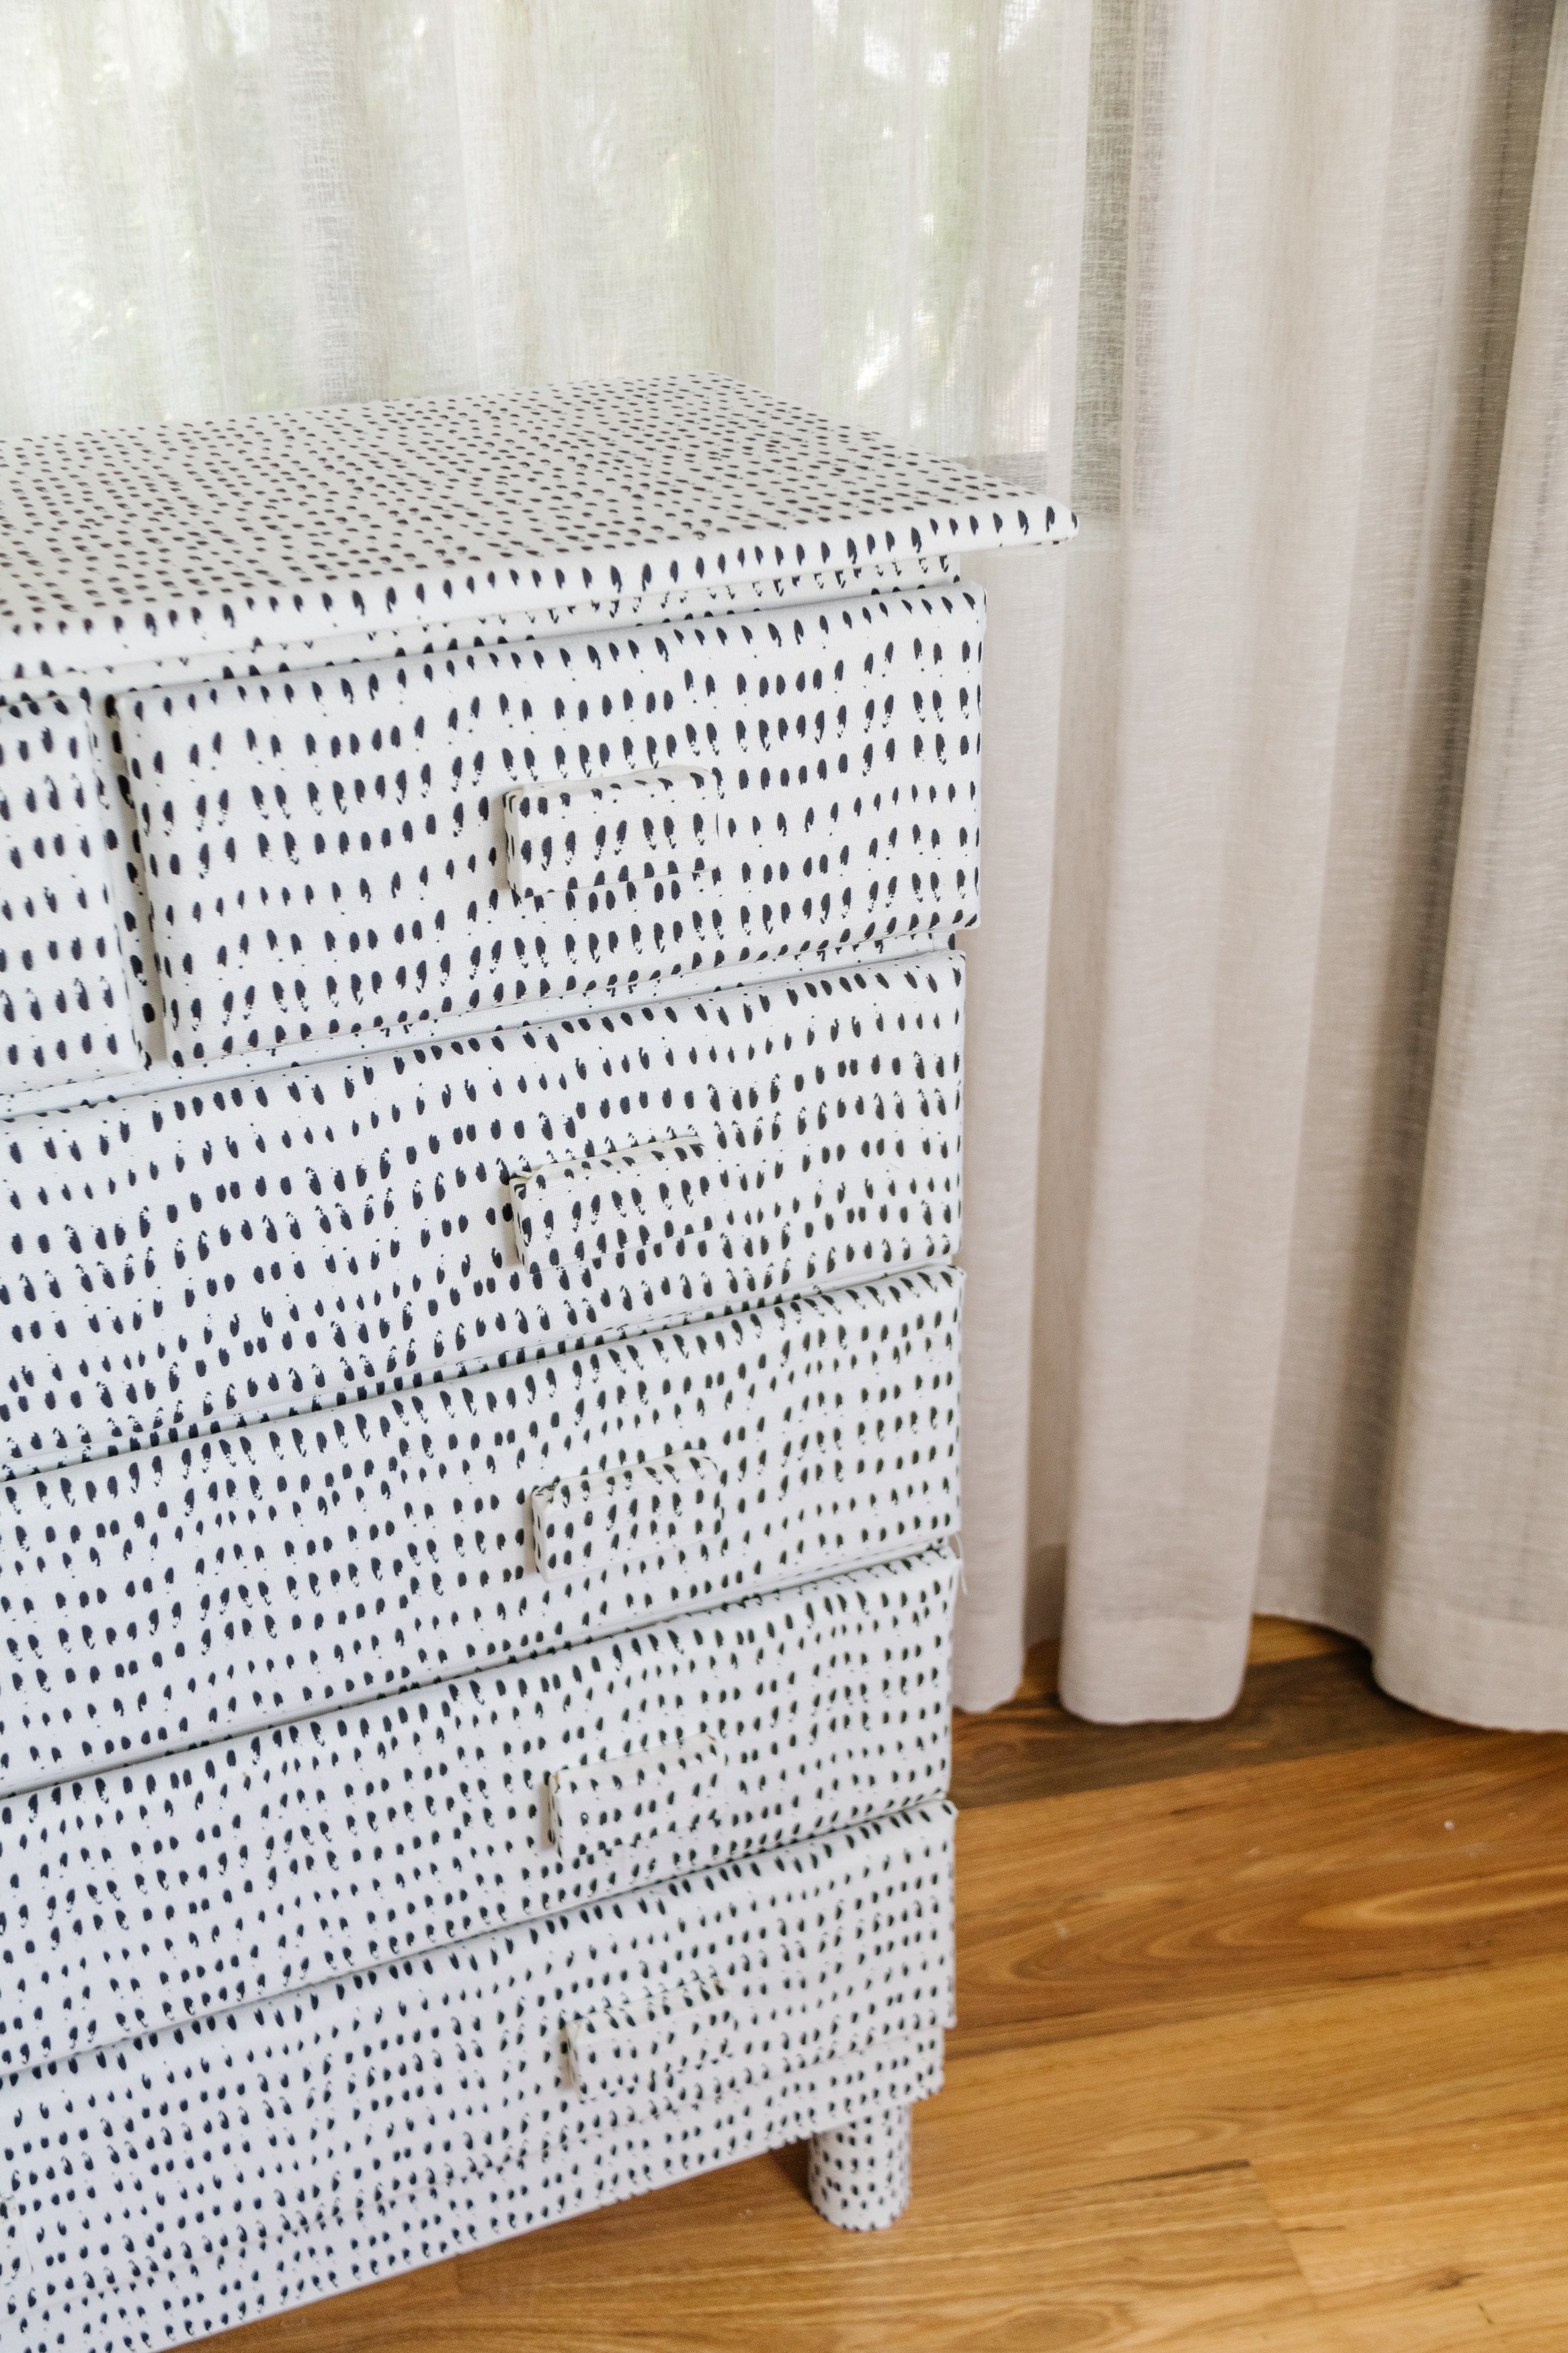
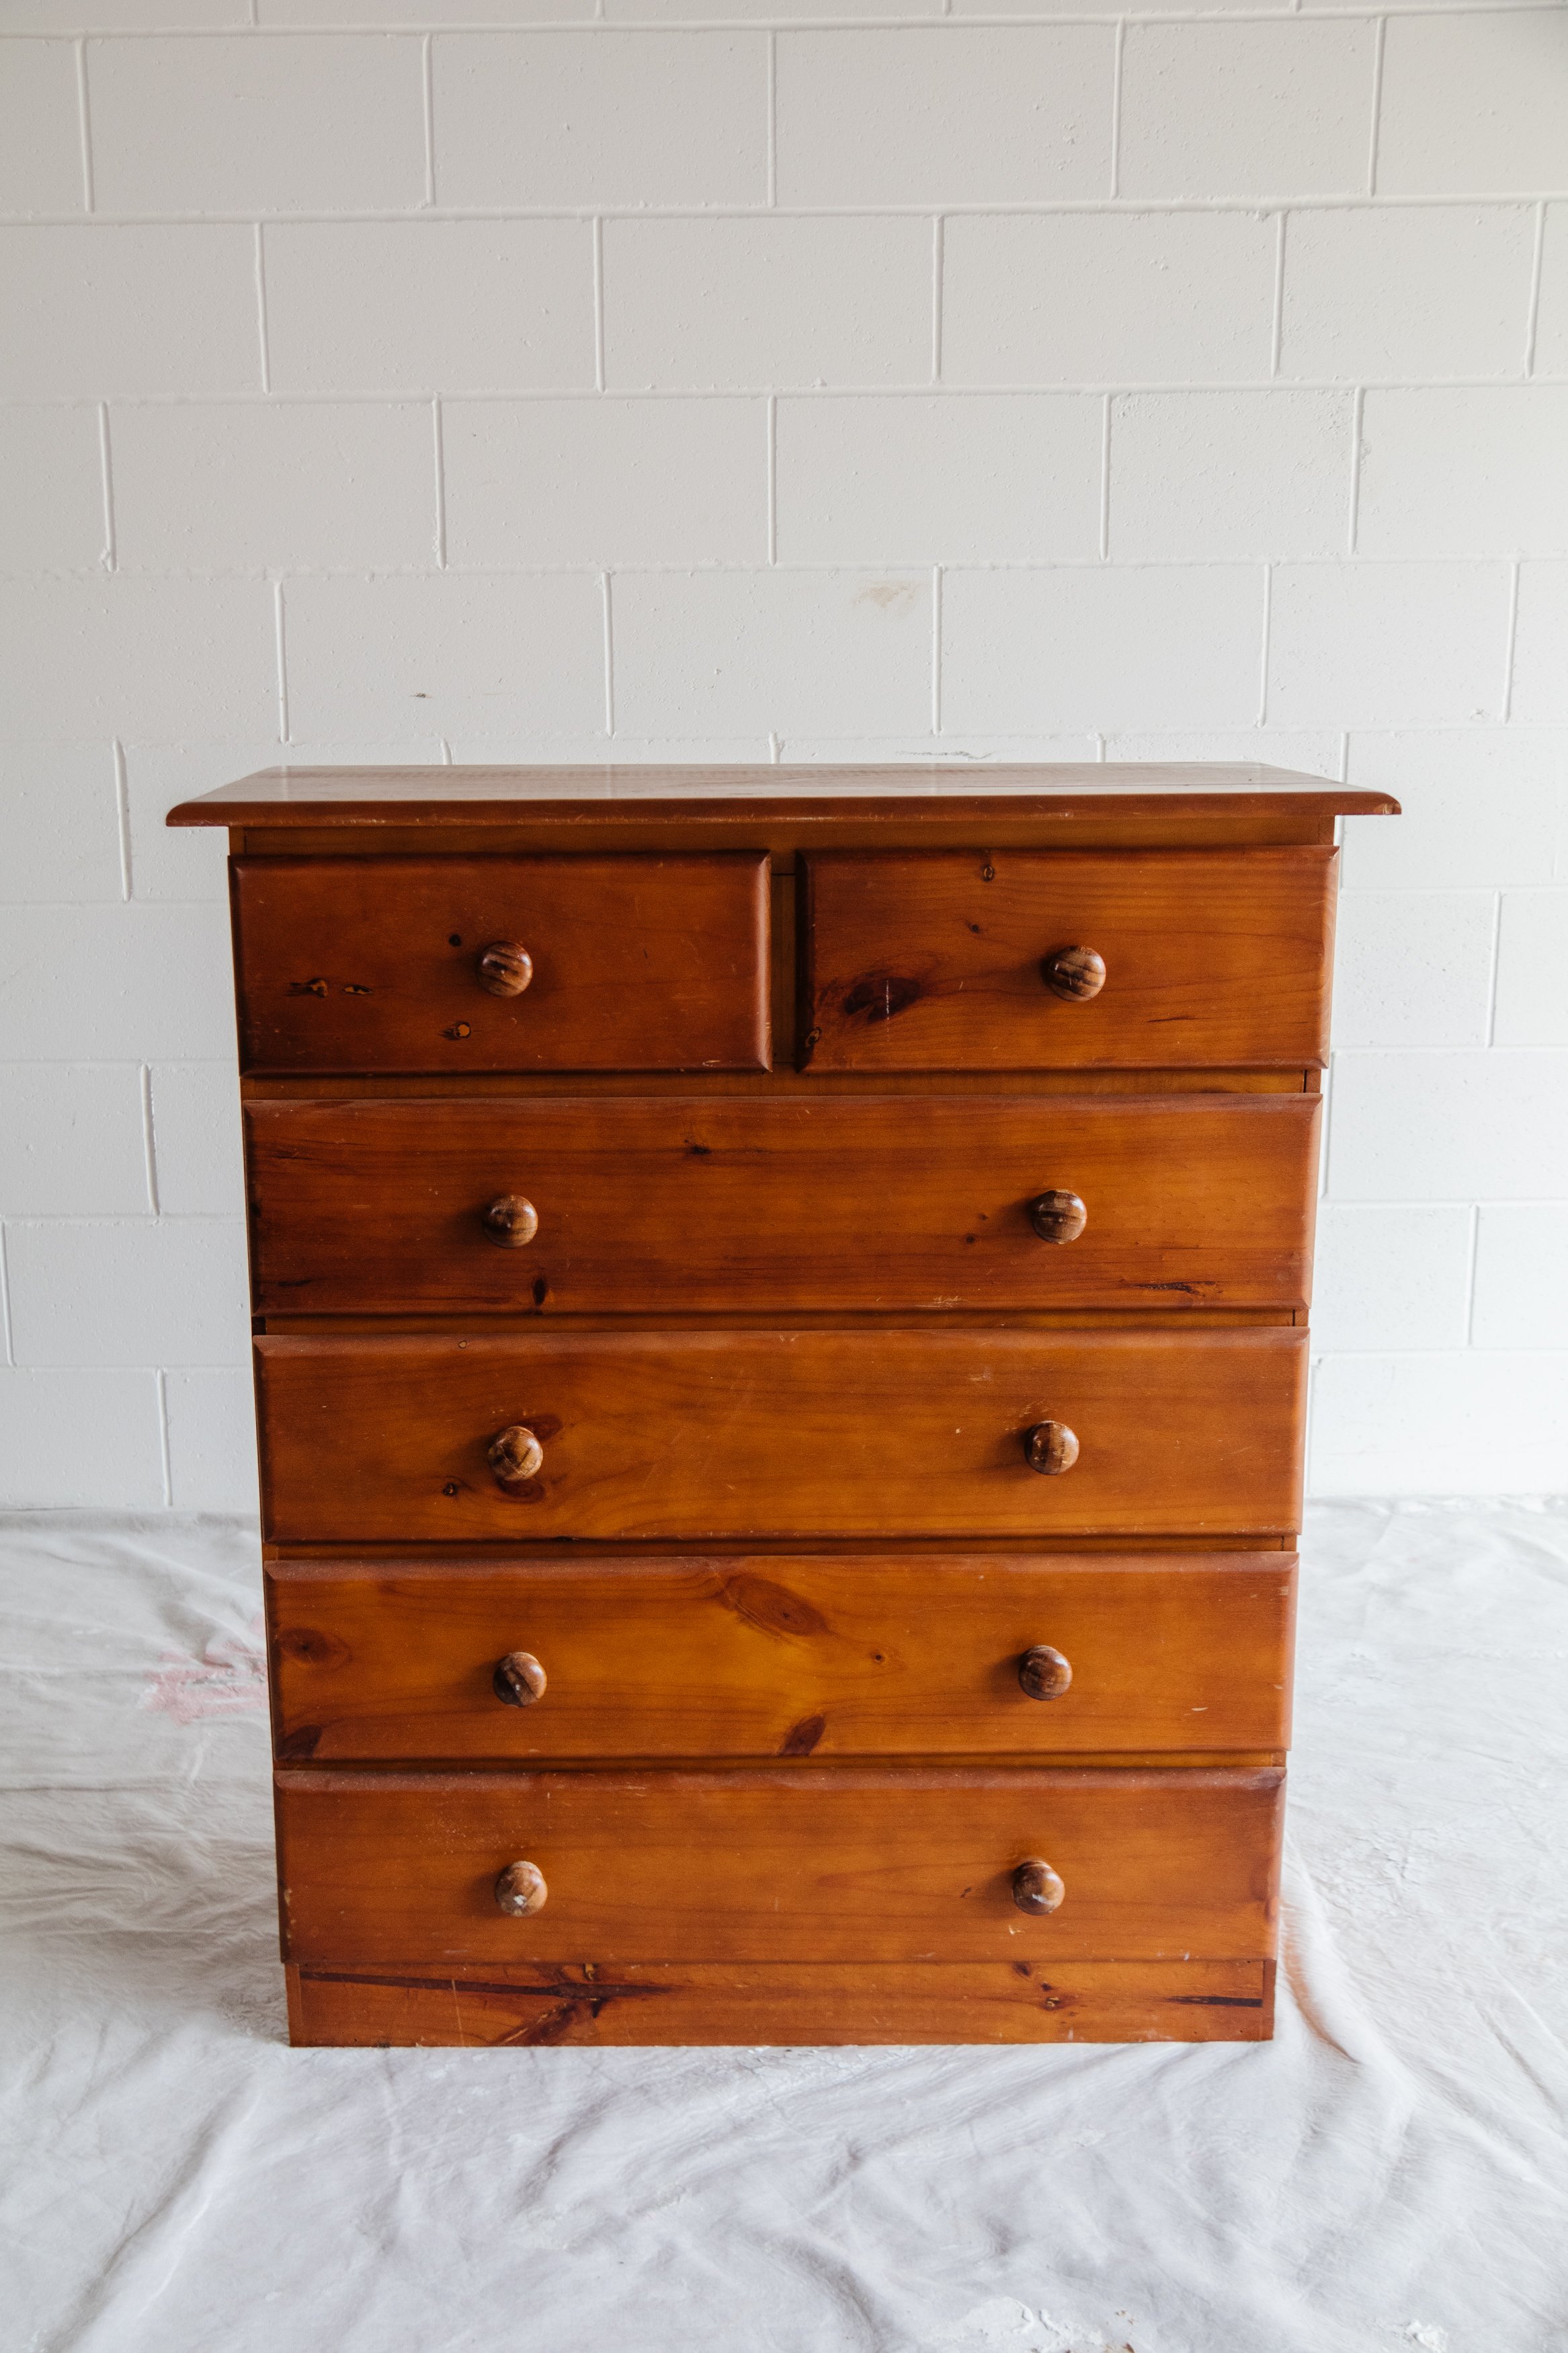
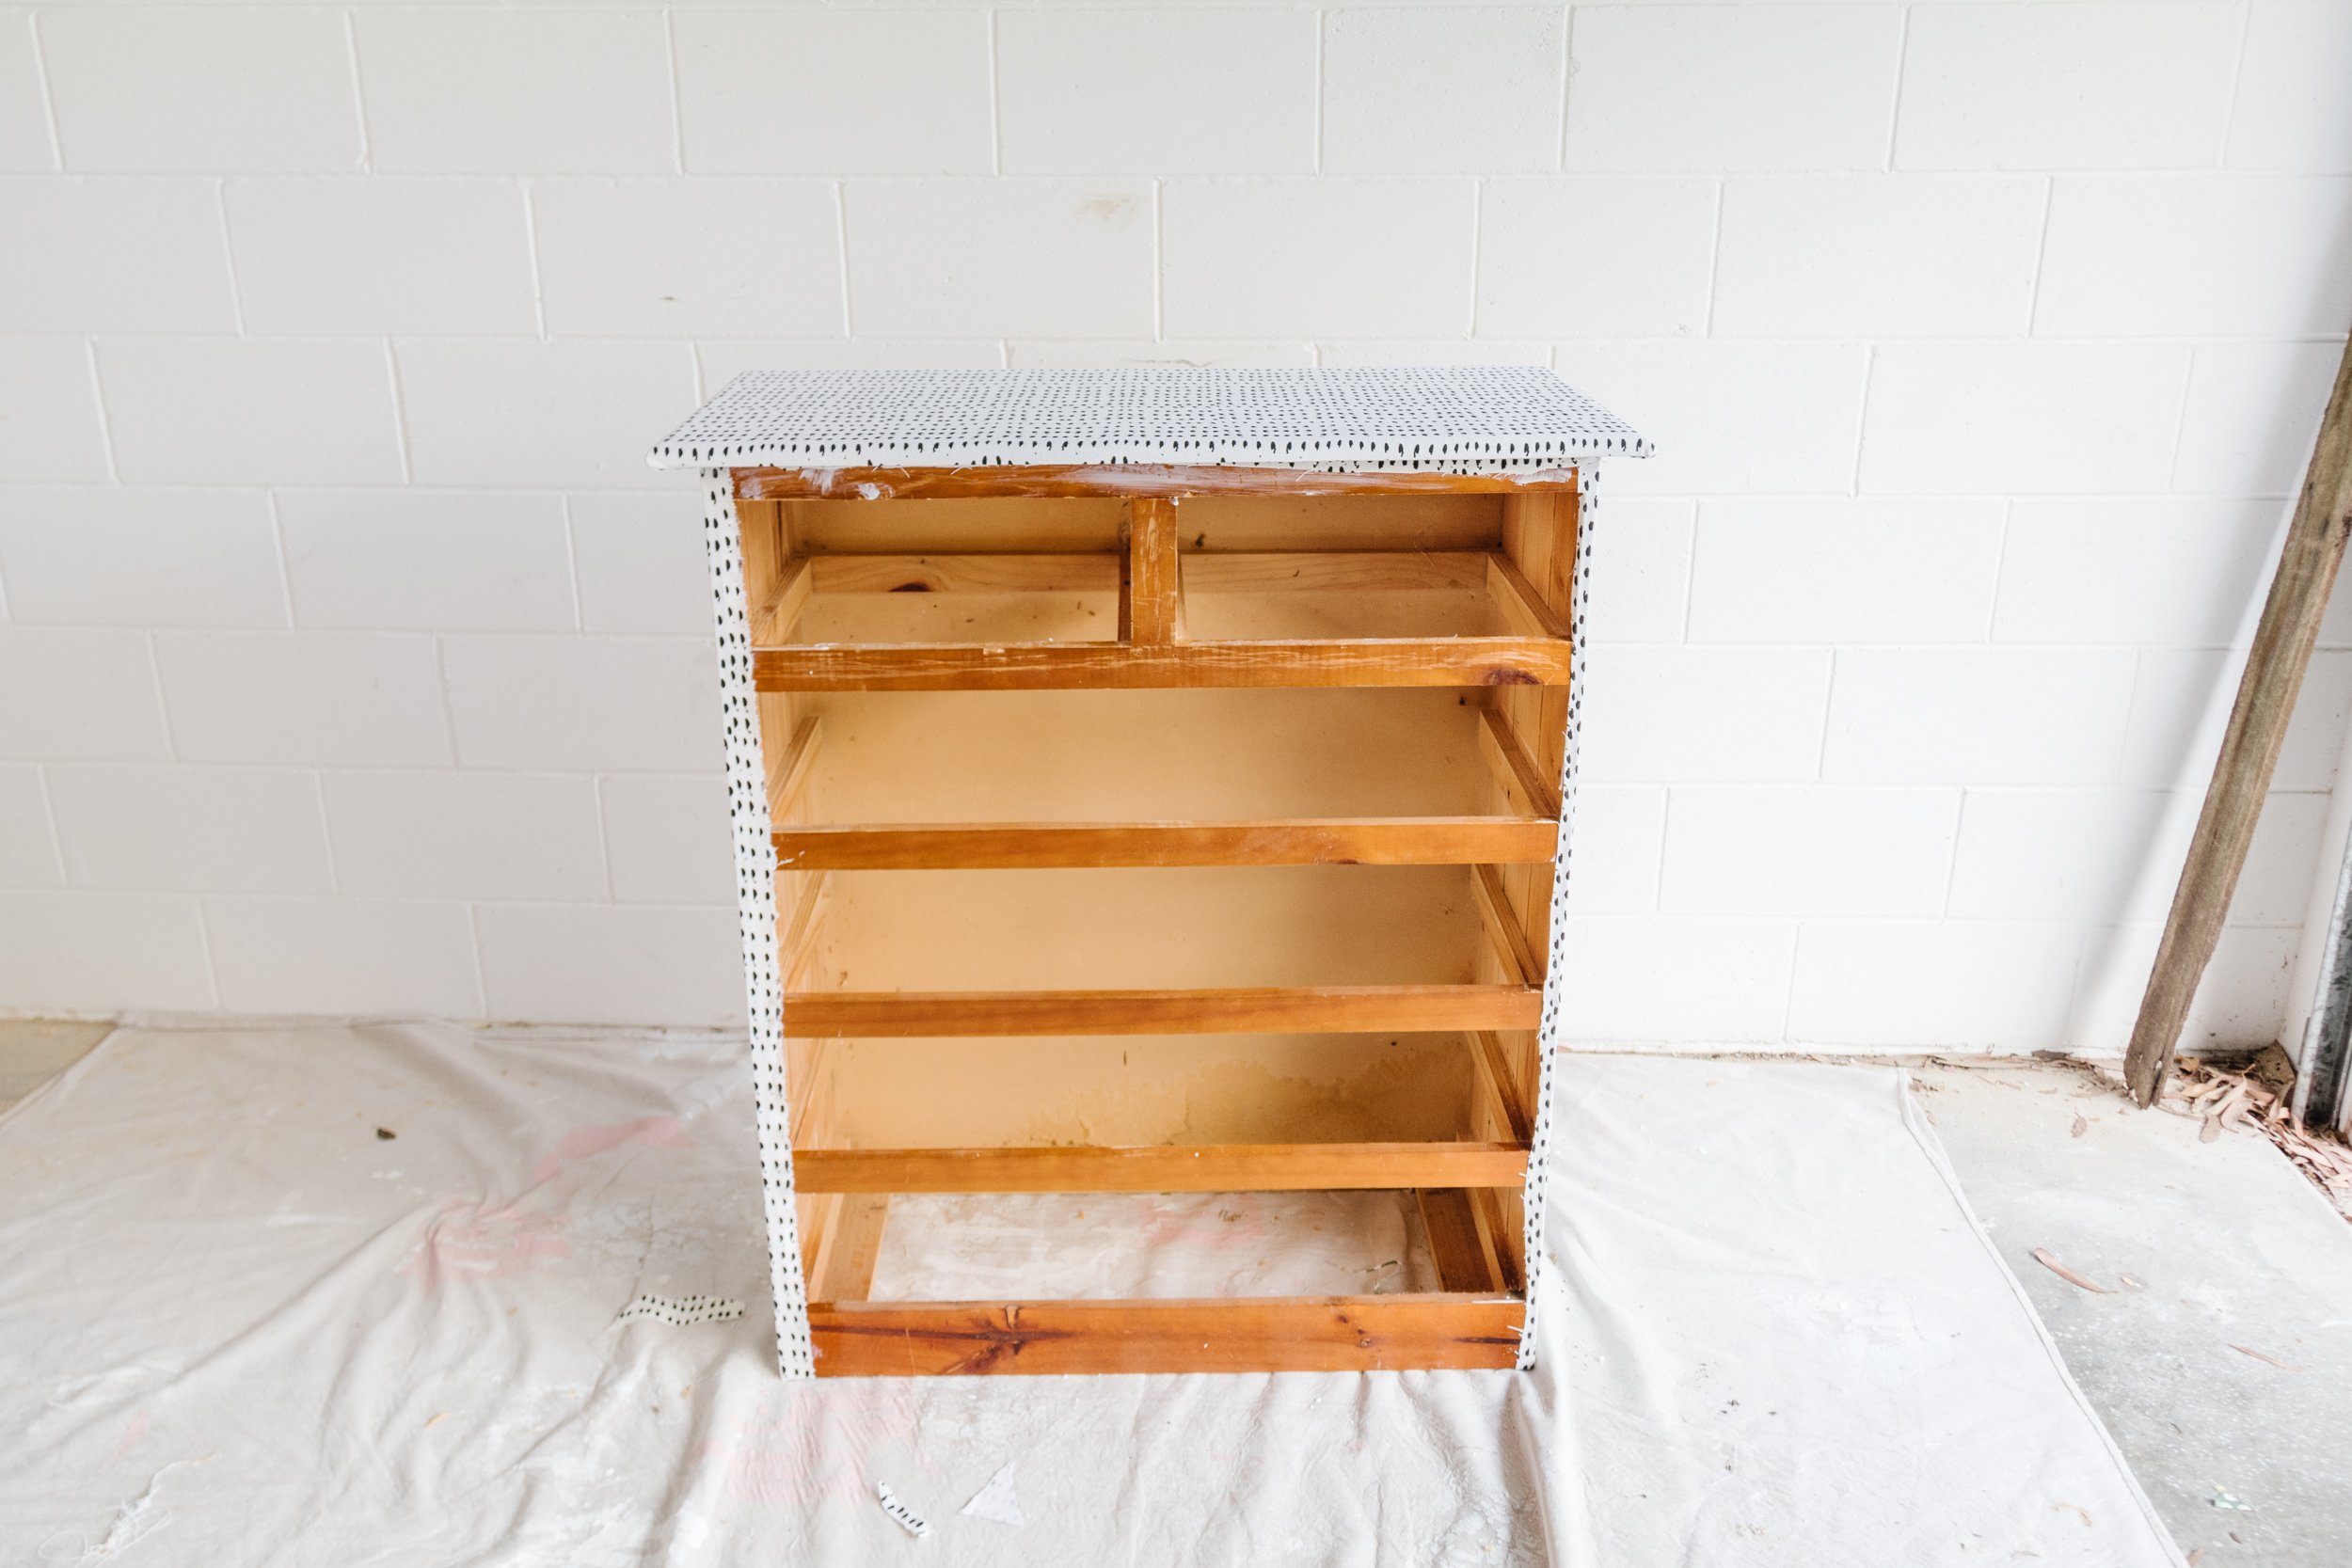
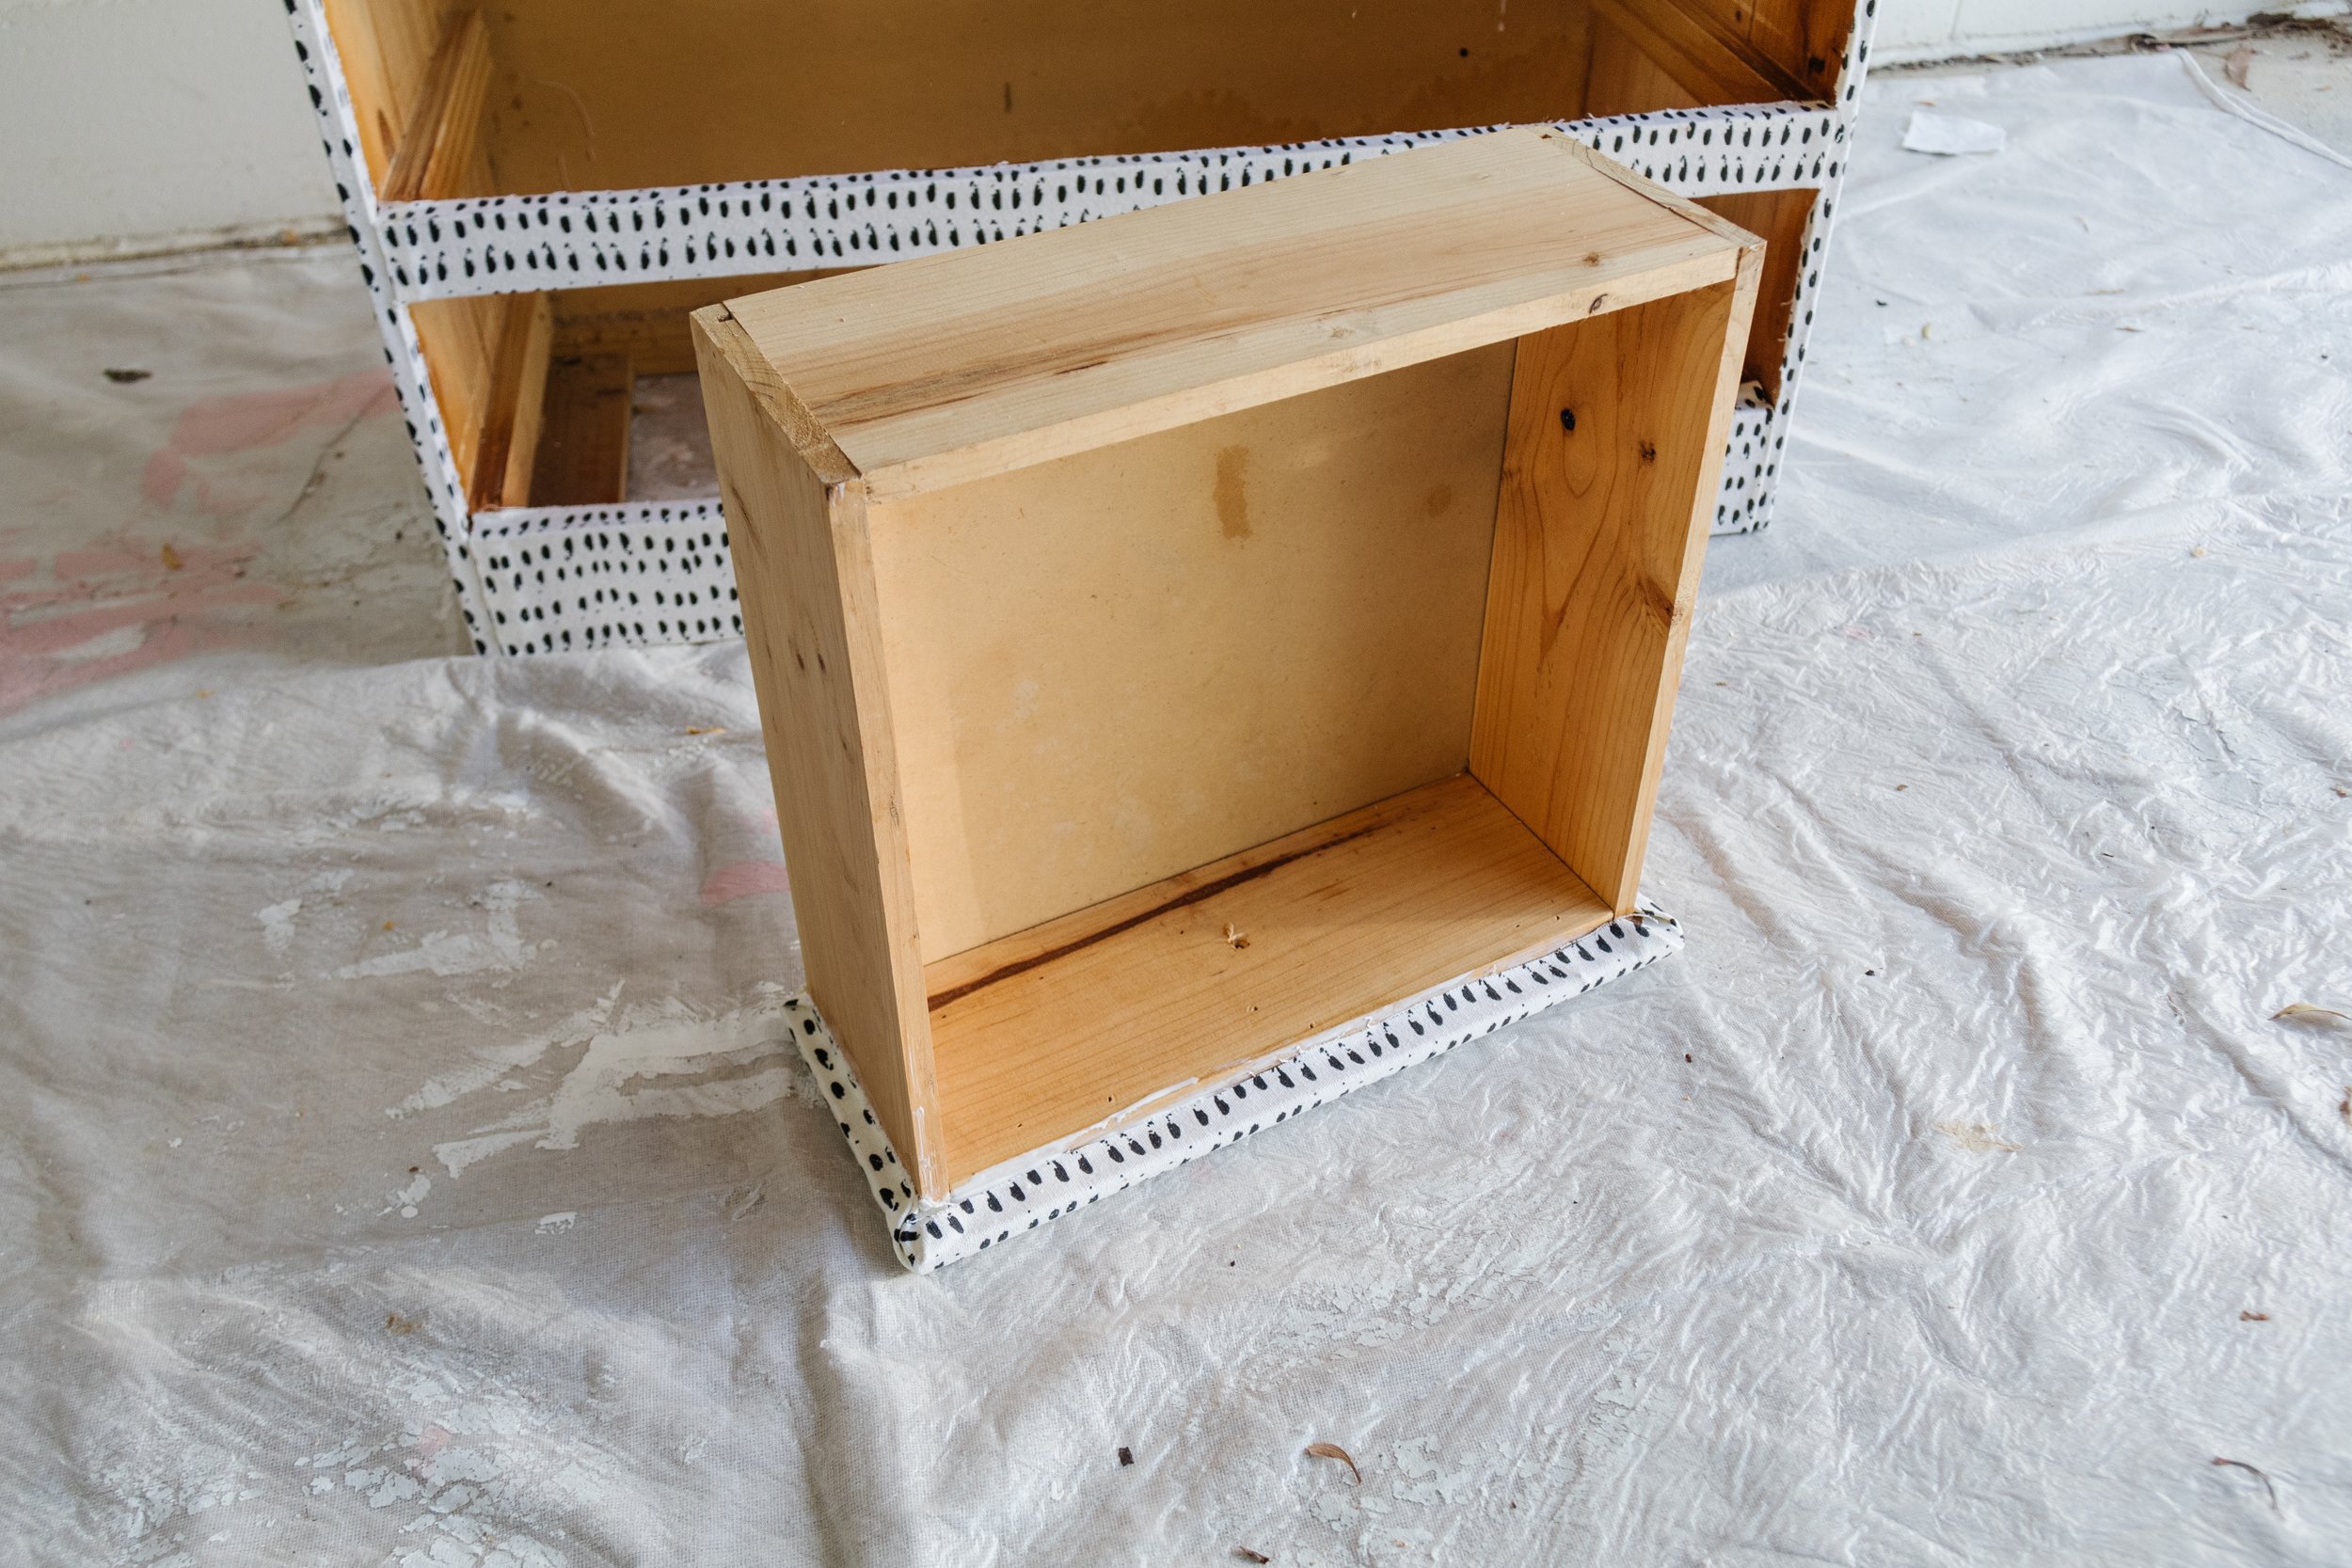
Step 1: To start, remove dust and dirt from the tall chest using a clean cloth. Remove the drawers and set them aside.
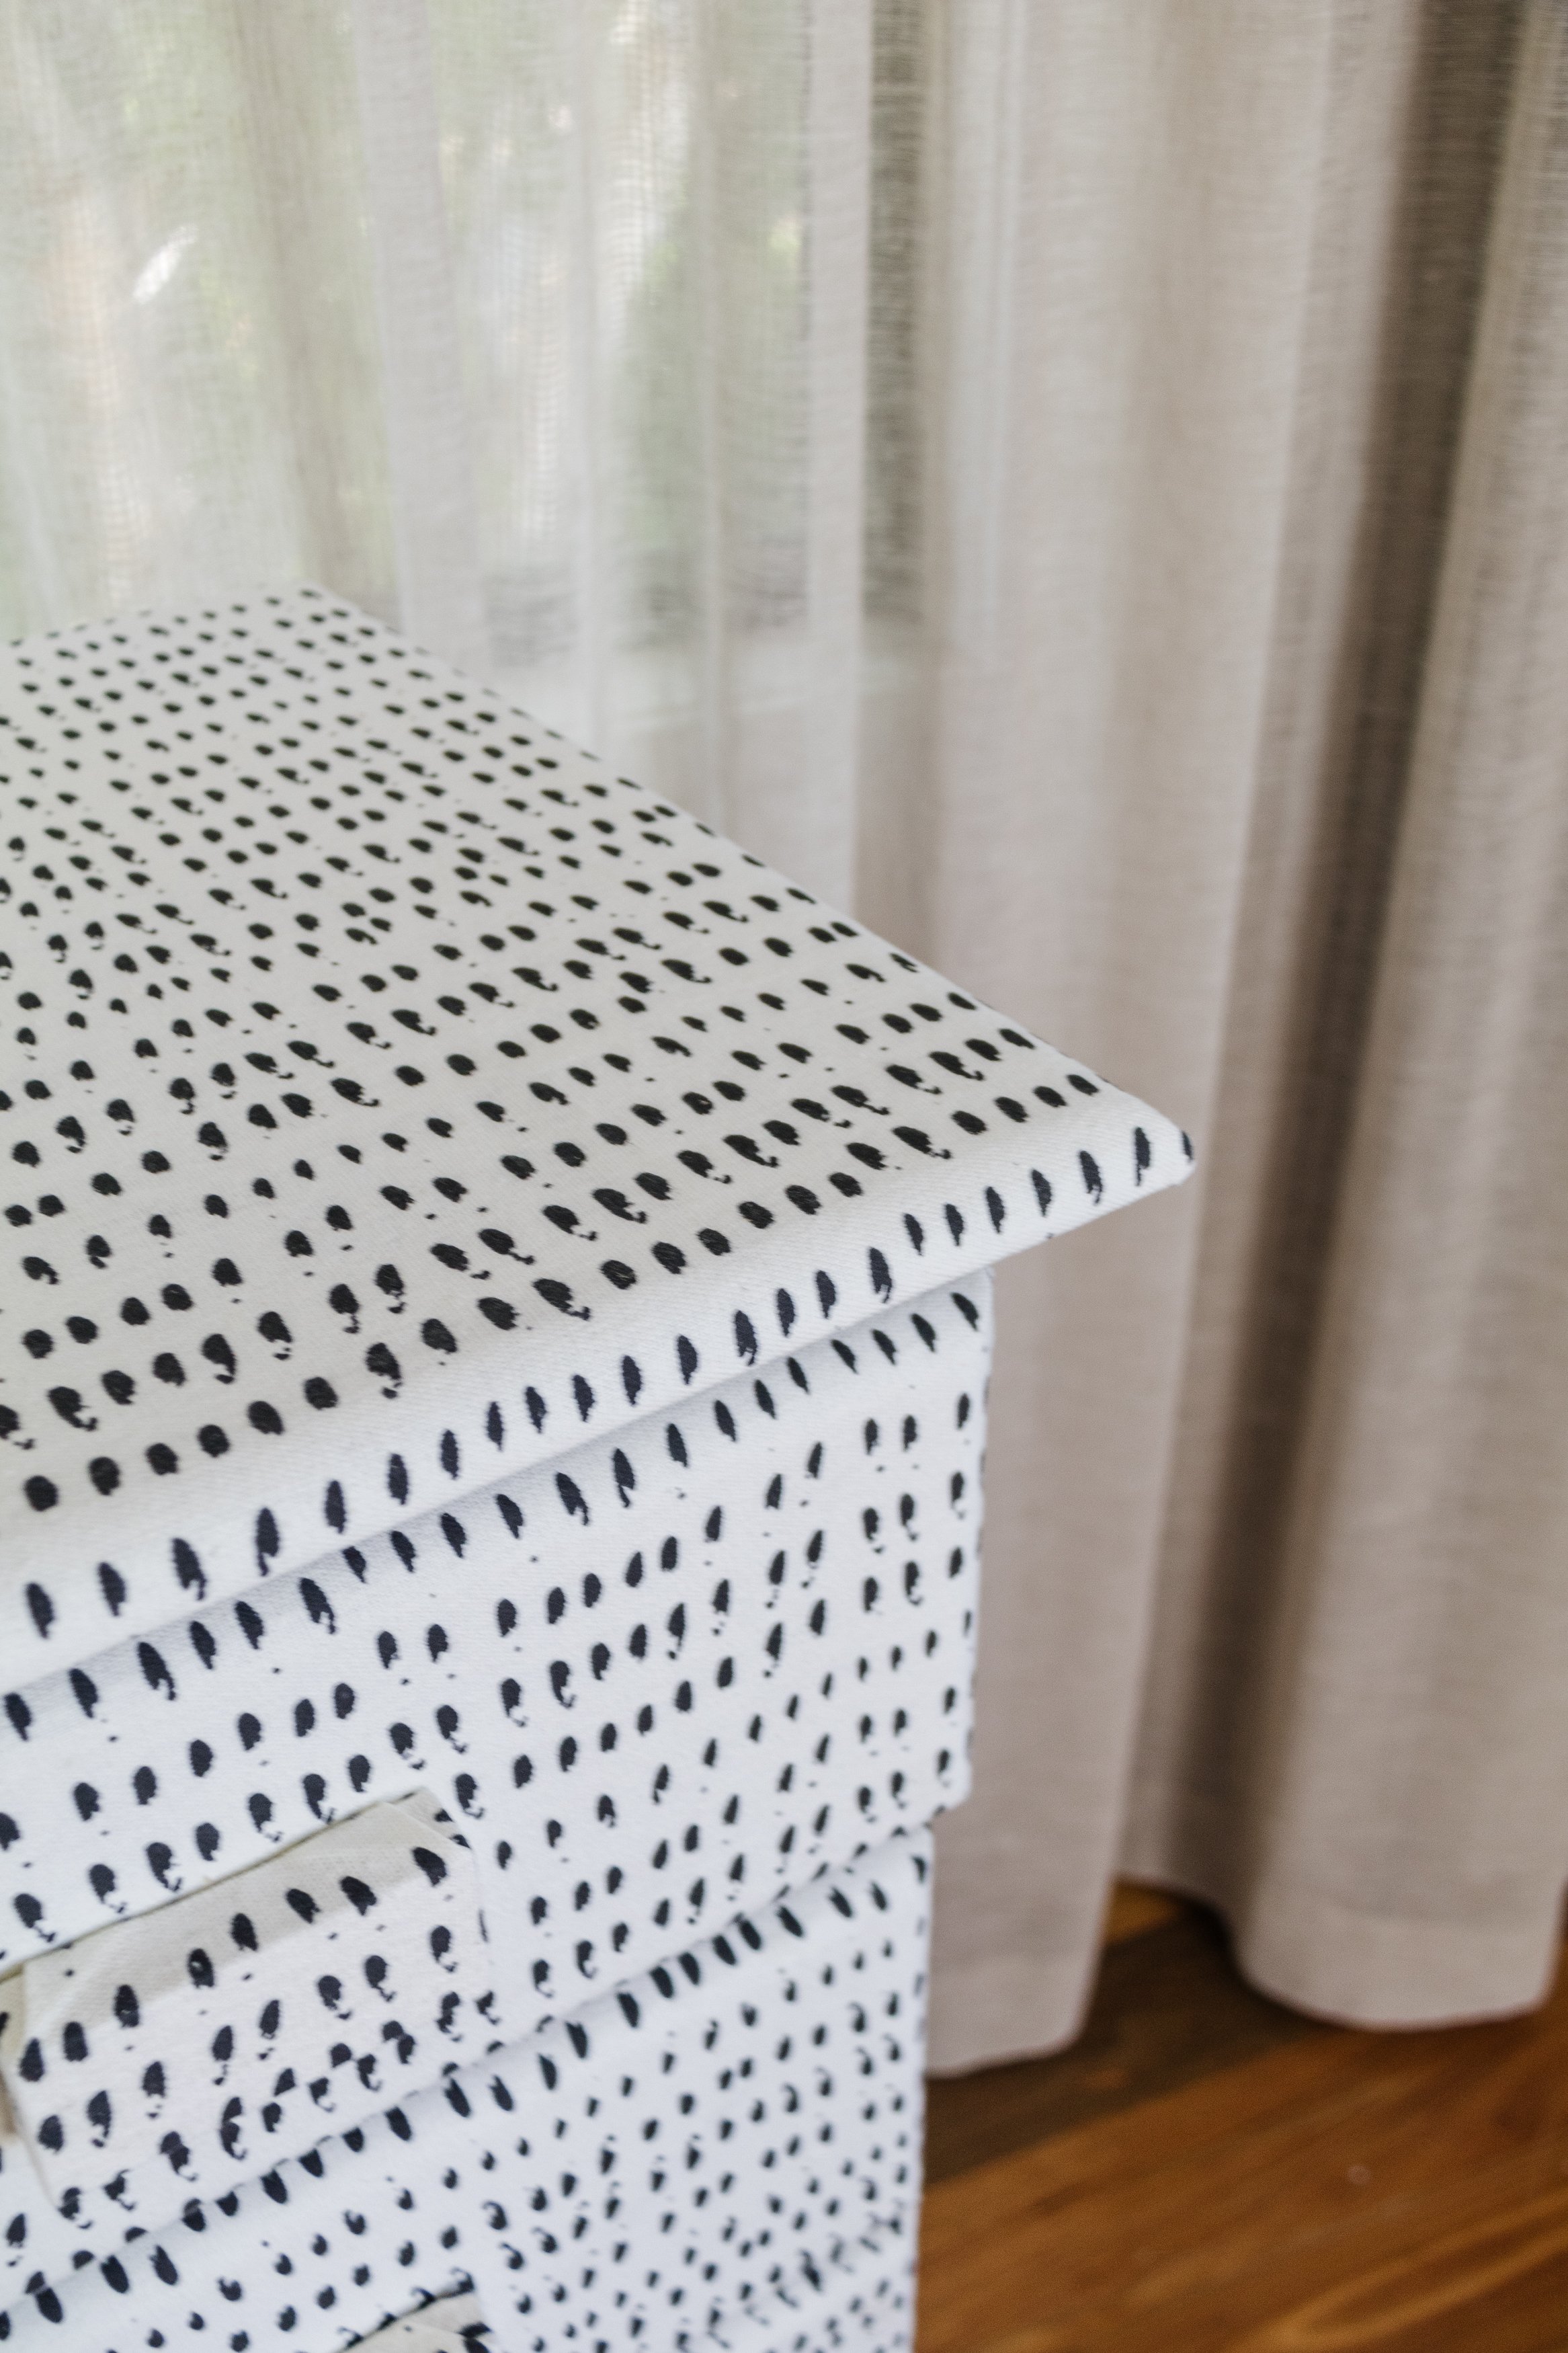
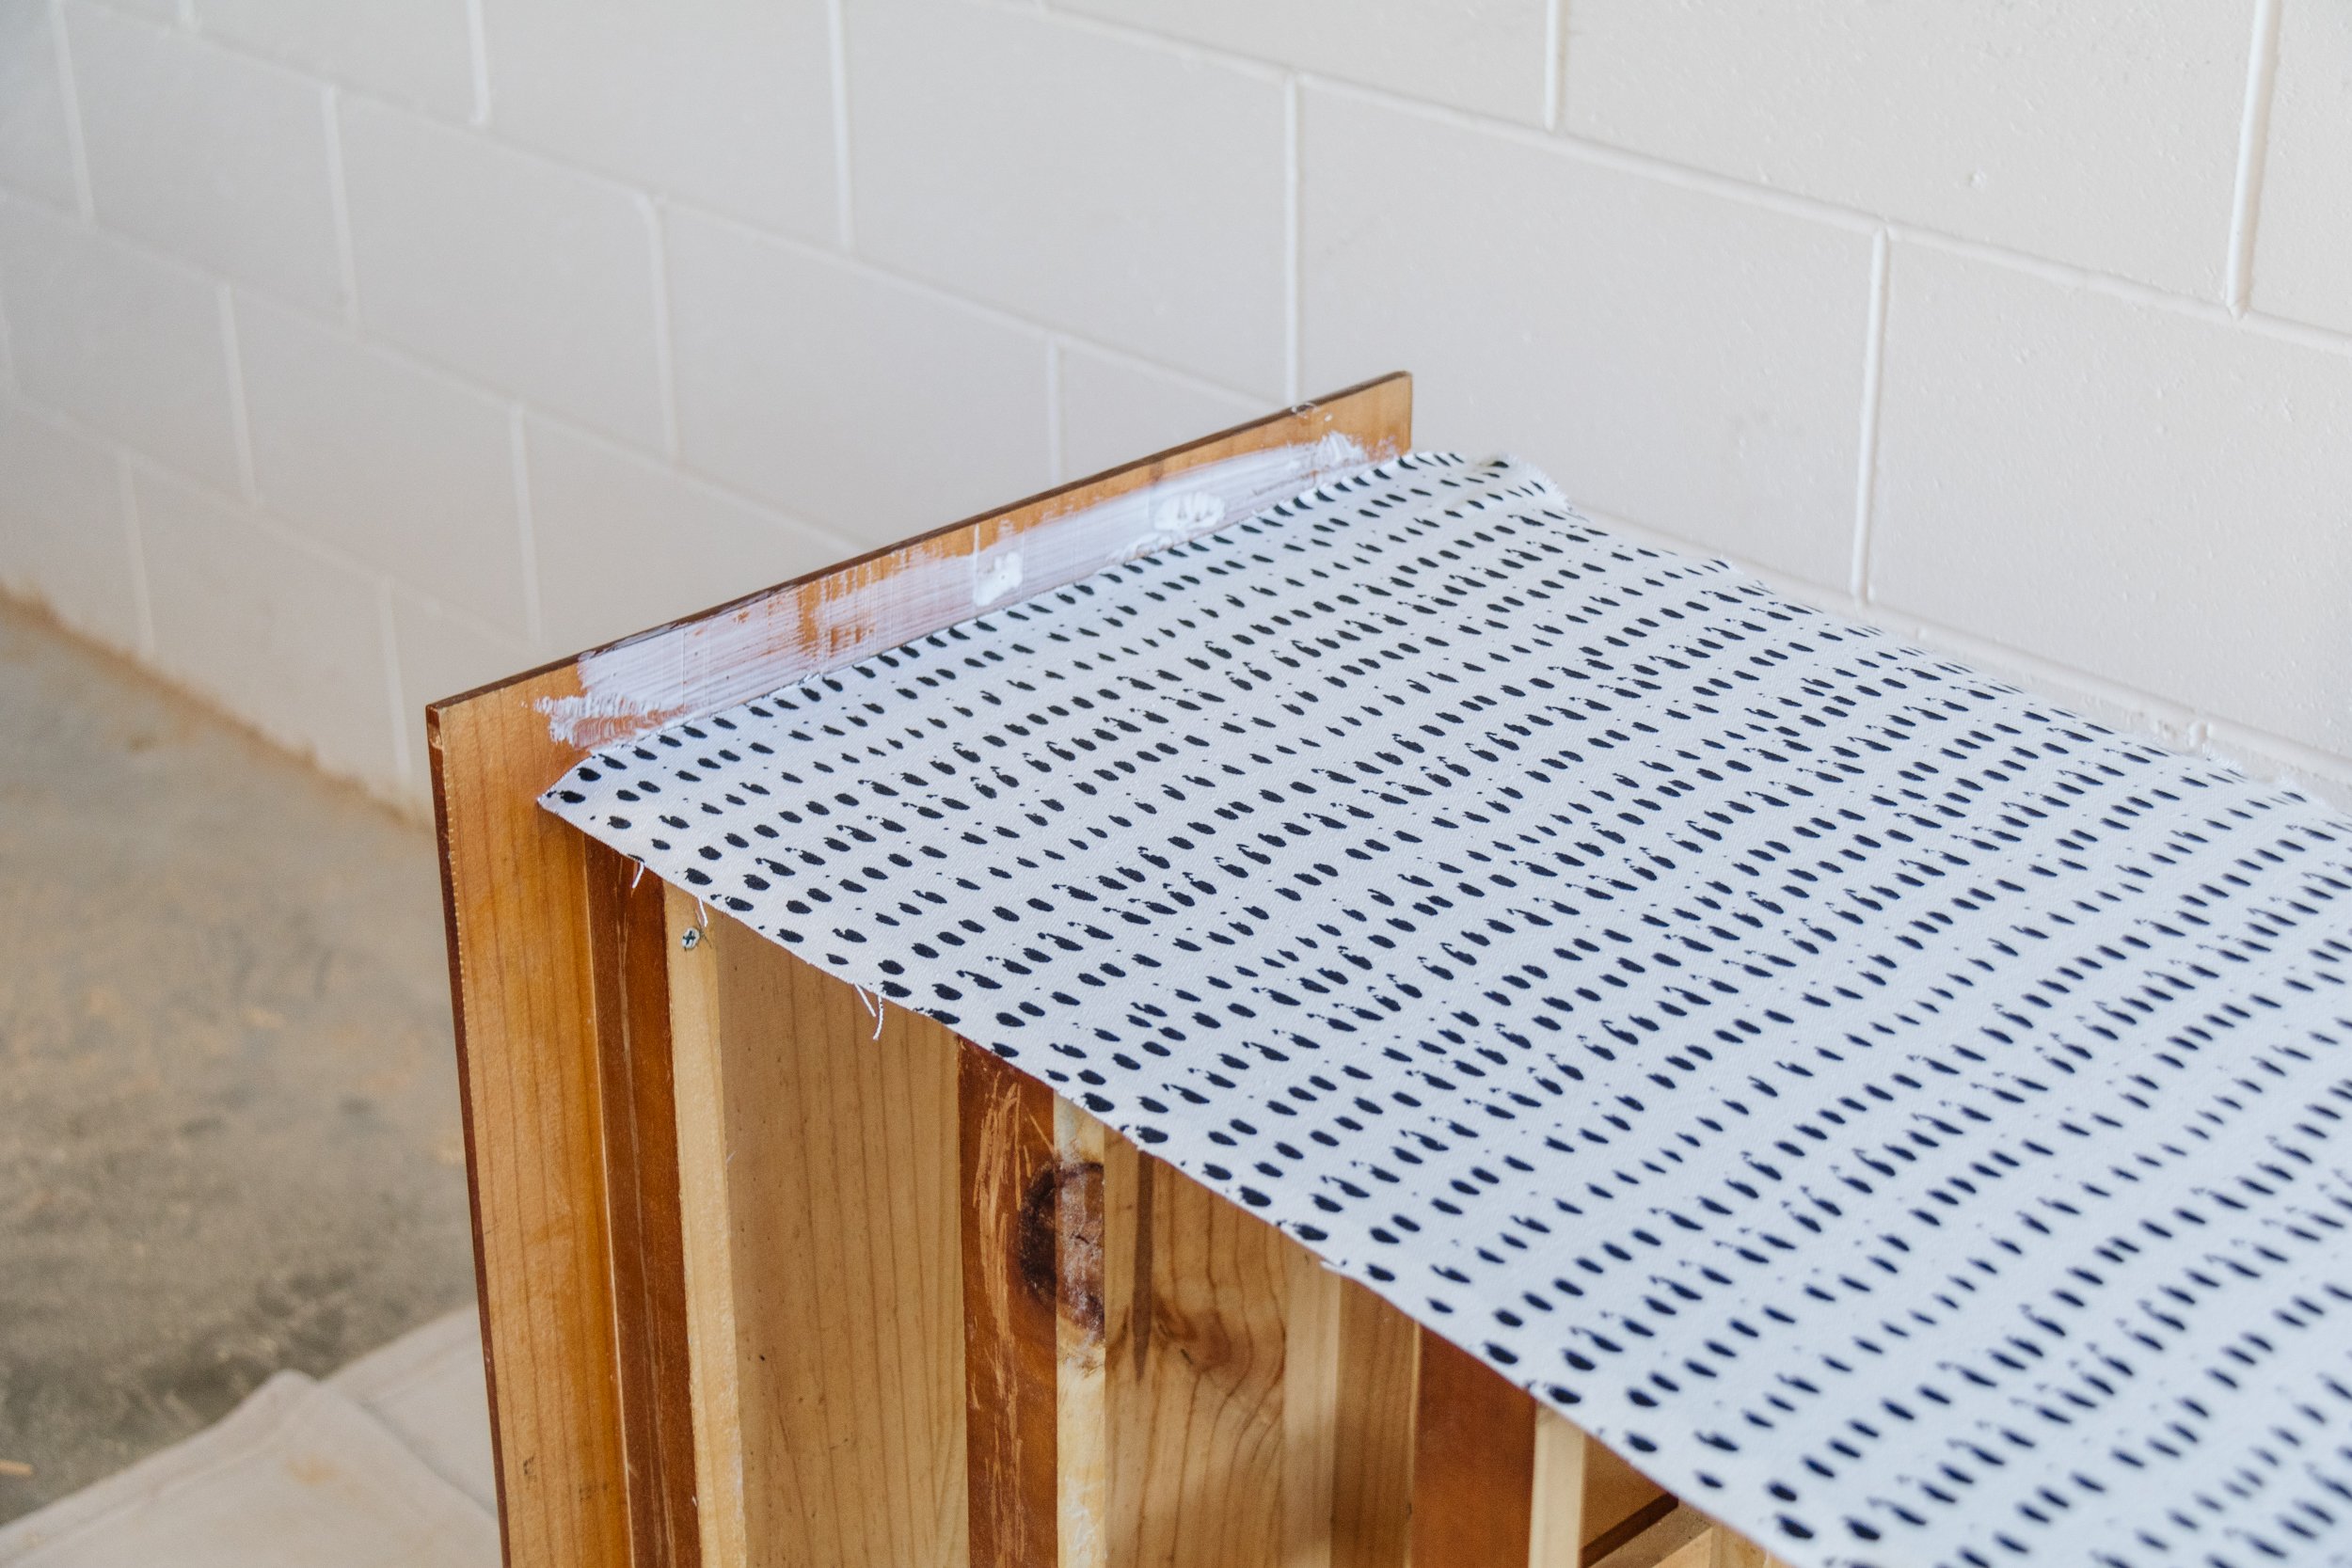
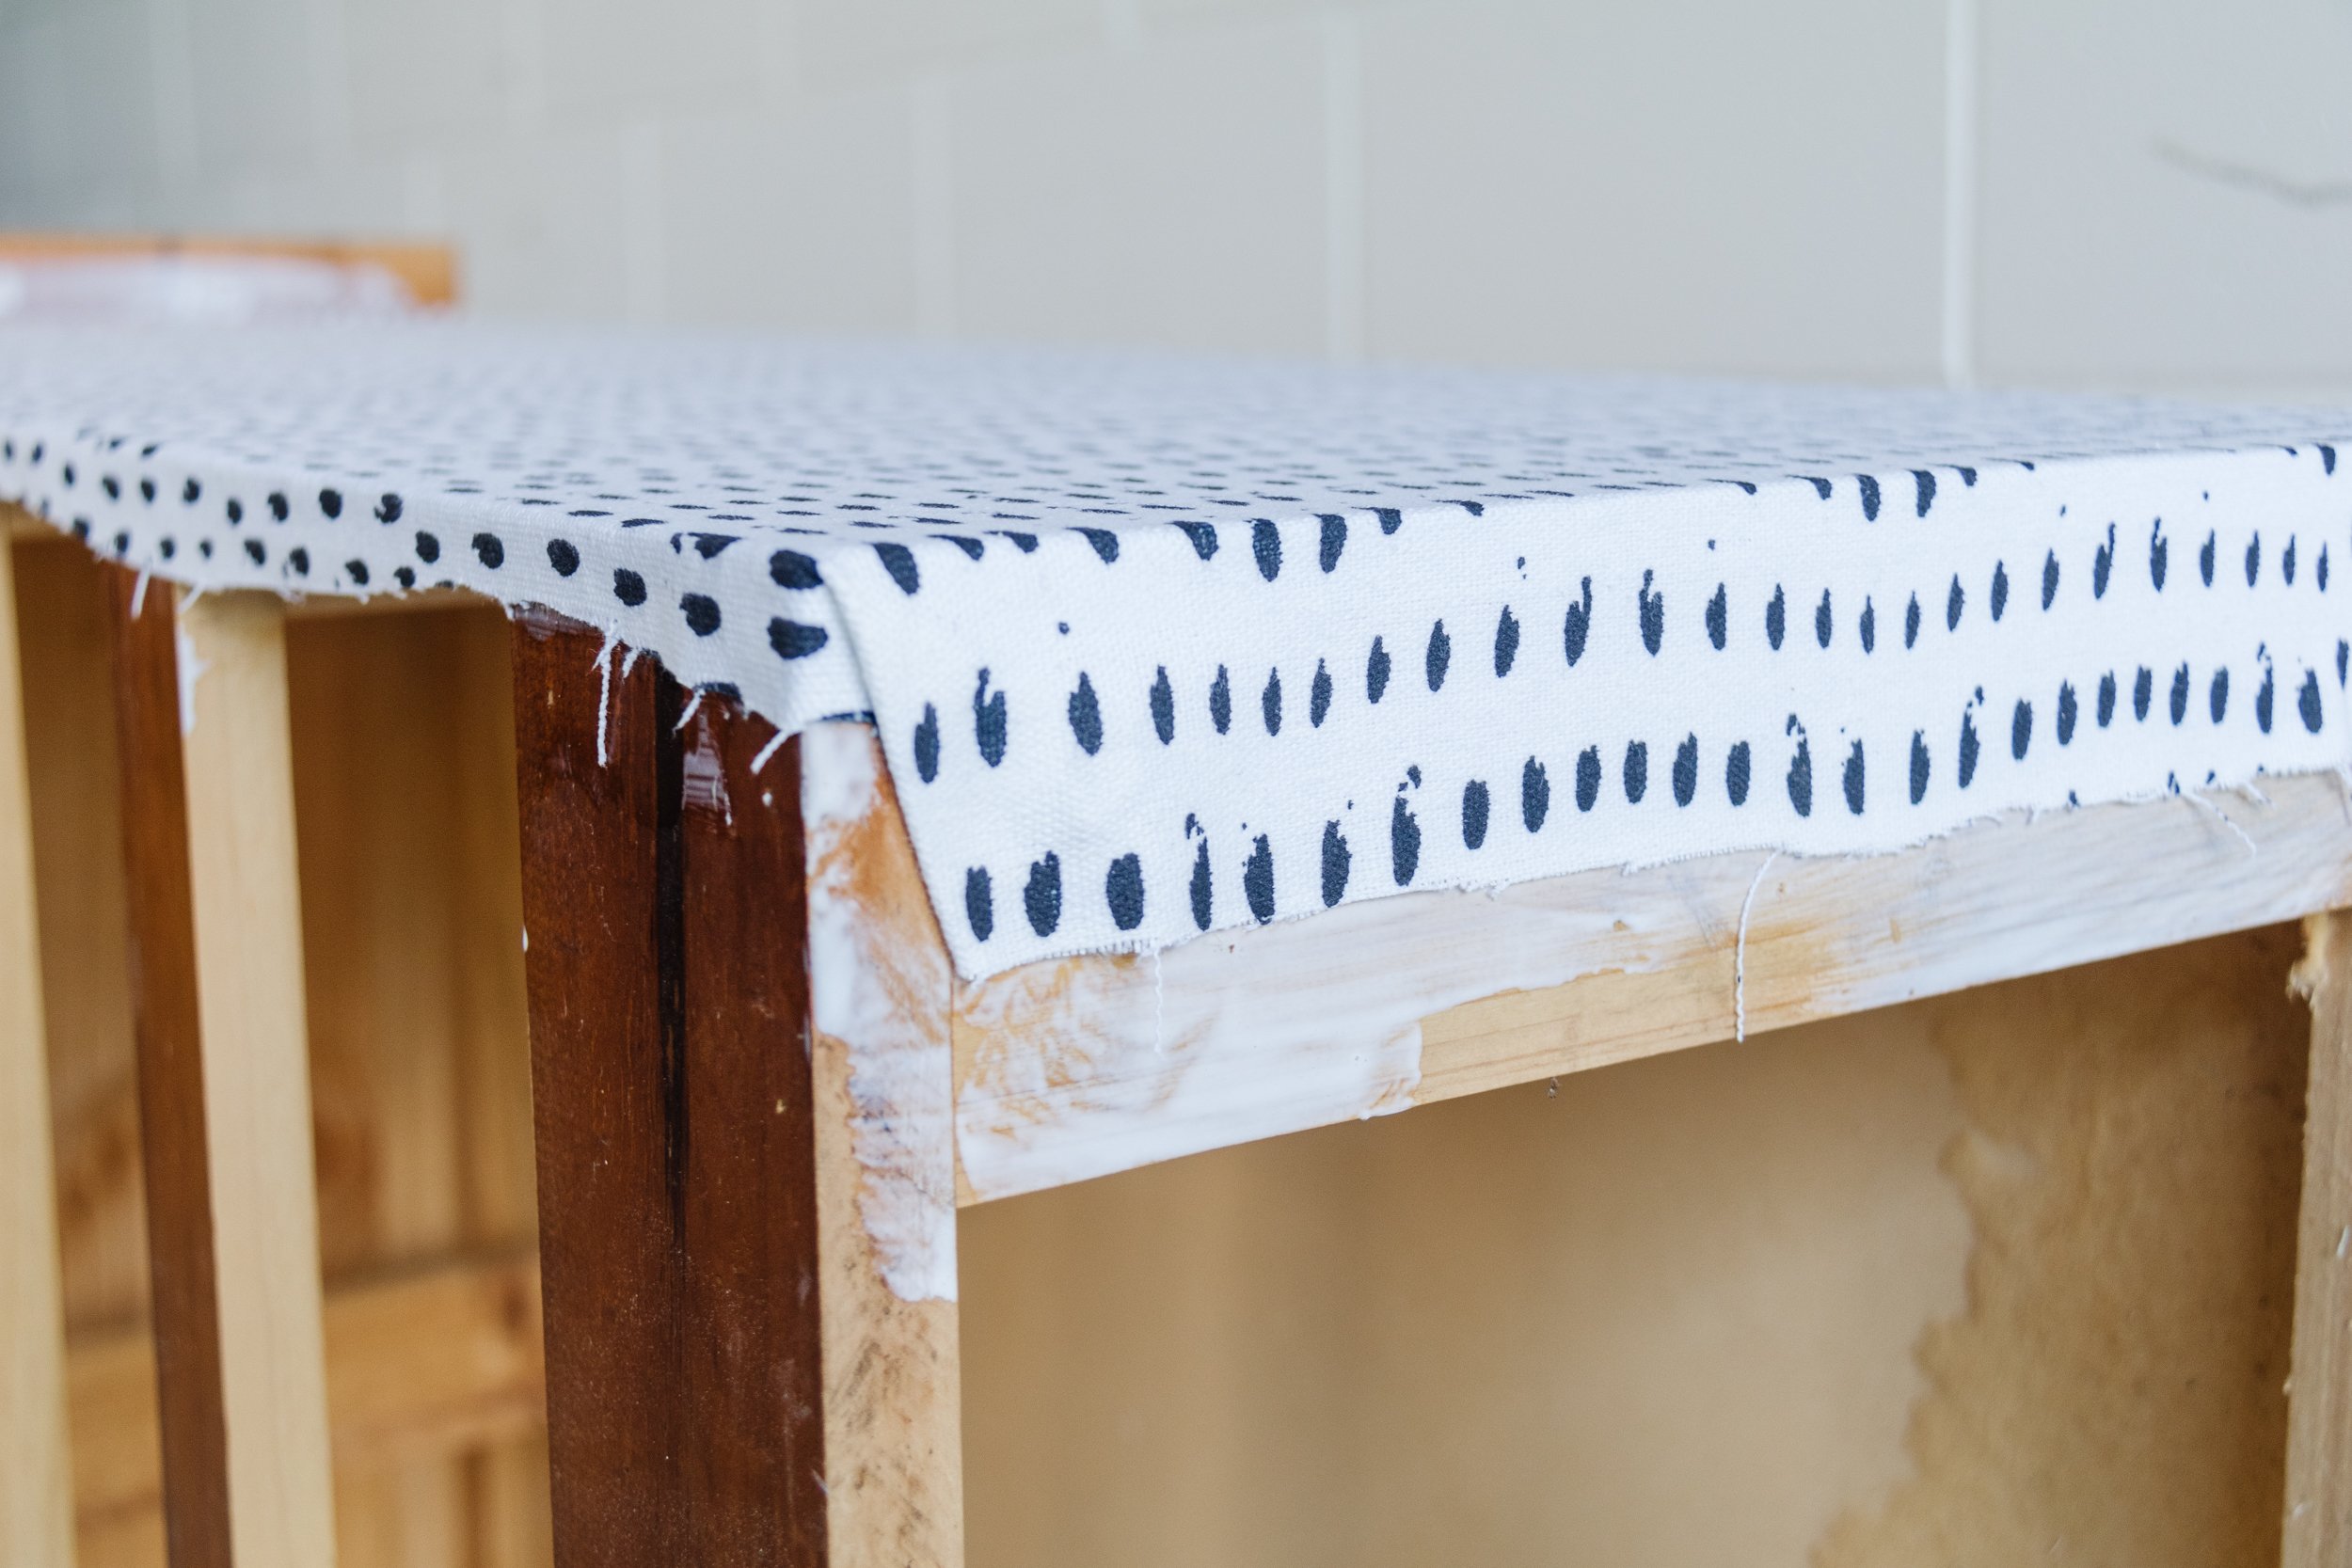
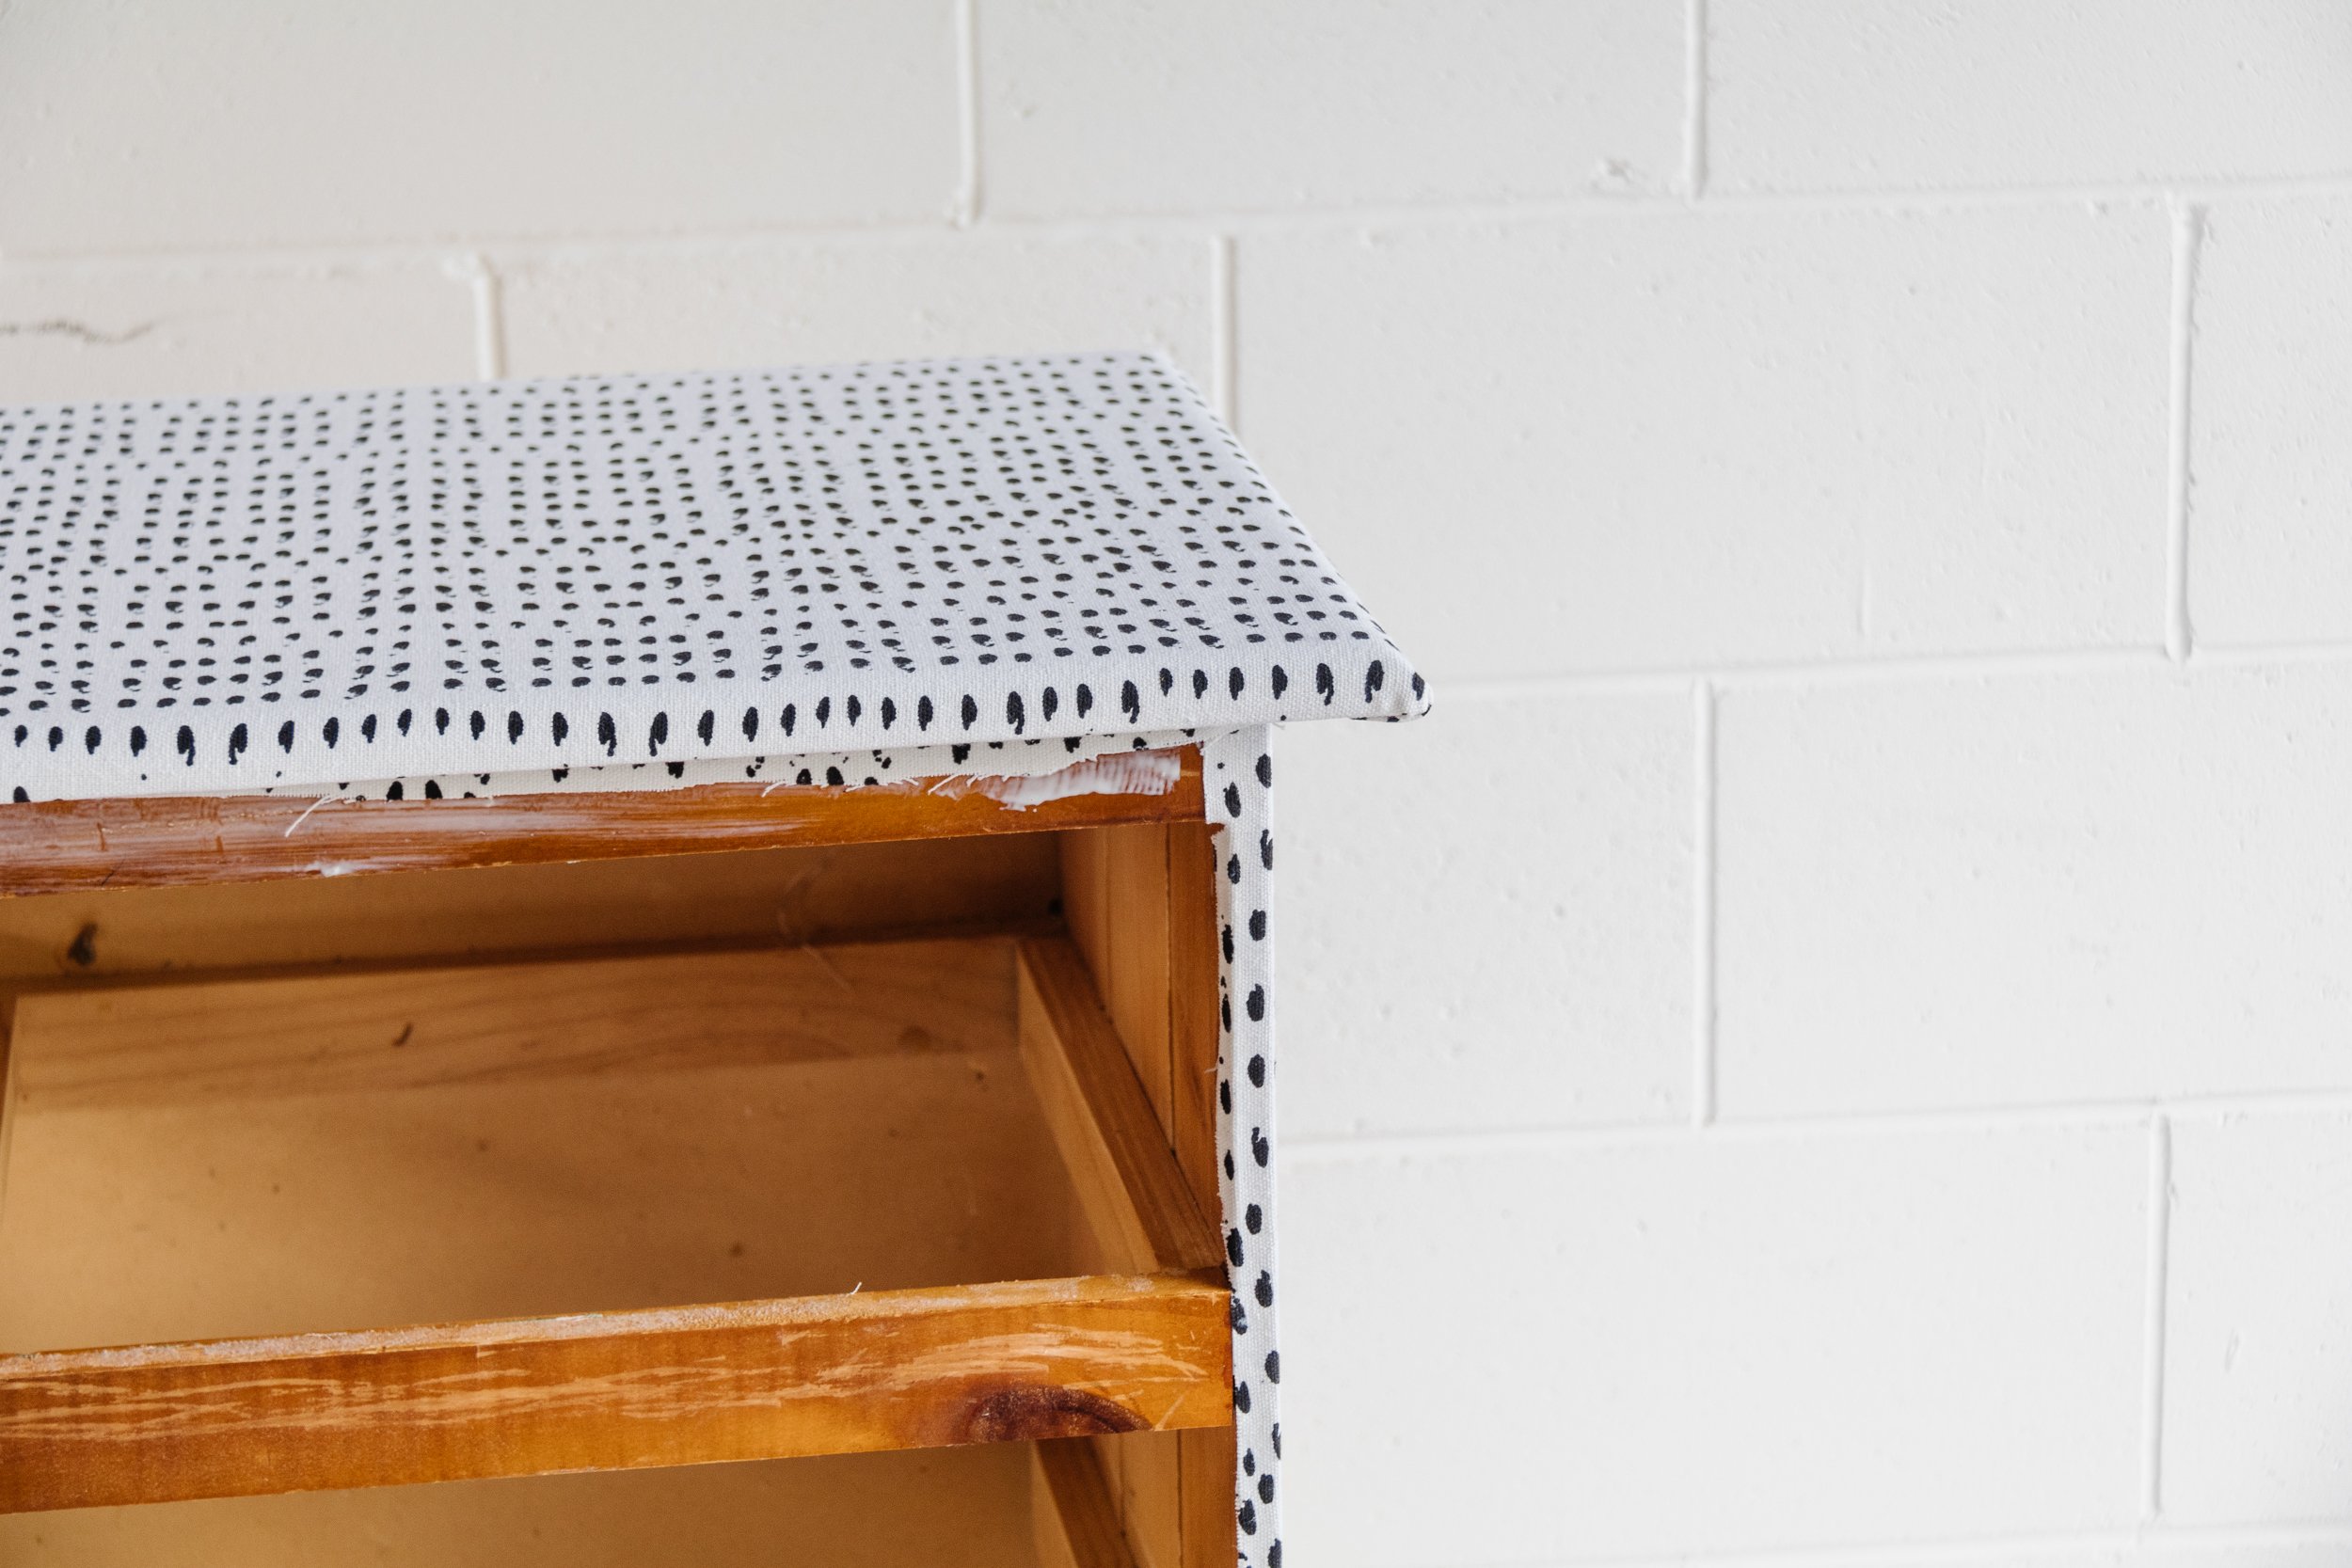
Step 2: Turn the tall chest on its side and measure the side using a measuring tape. Add on at least 5cm to each side because when you are gluing the fabric onto the side, you’ll need to overlap the fabric on the edges and corners. Cut the fabric using scissors.
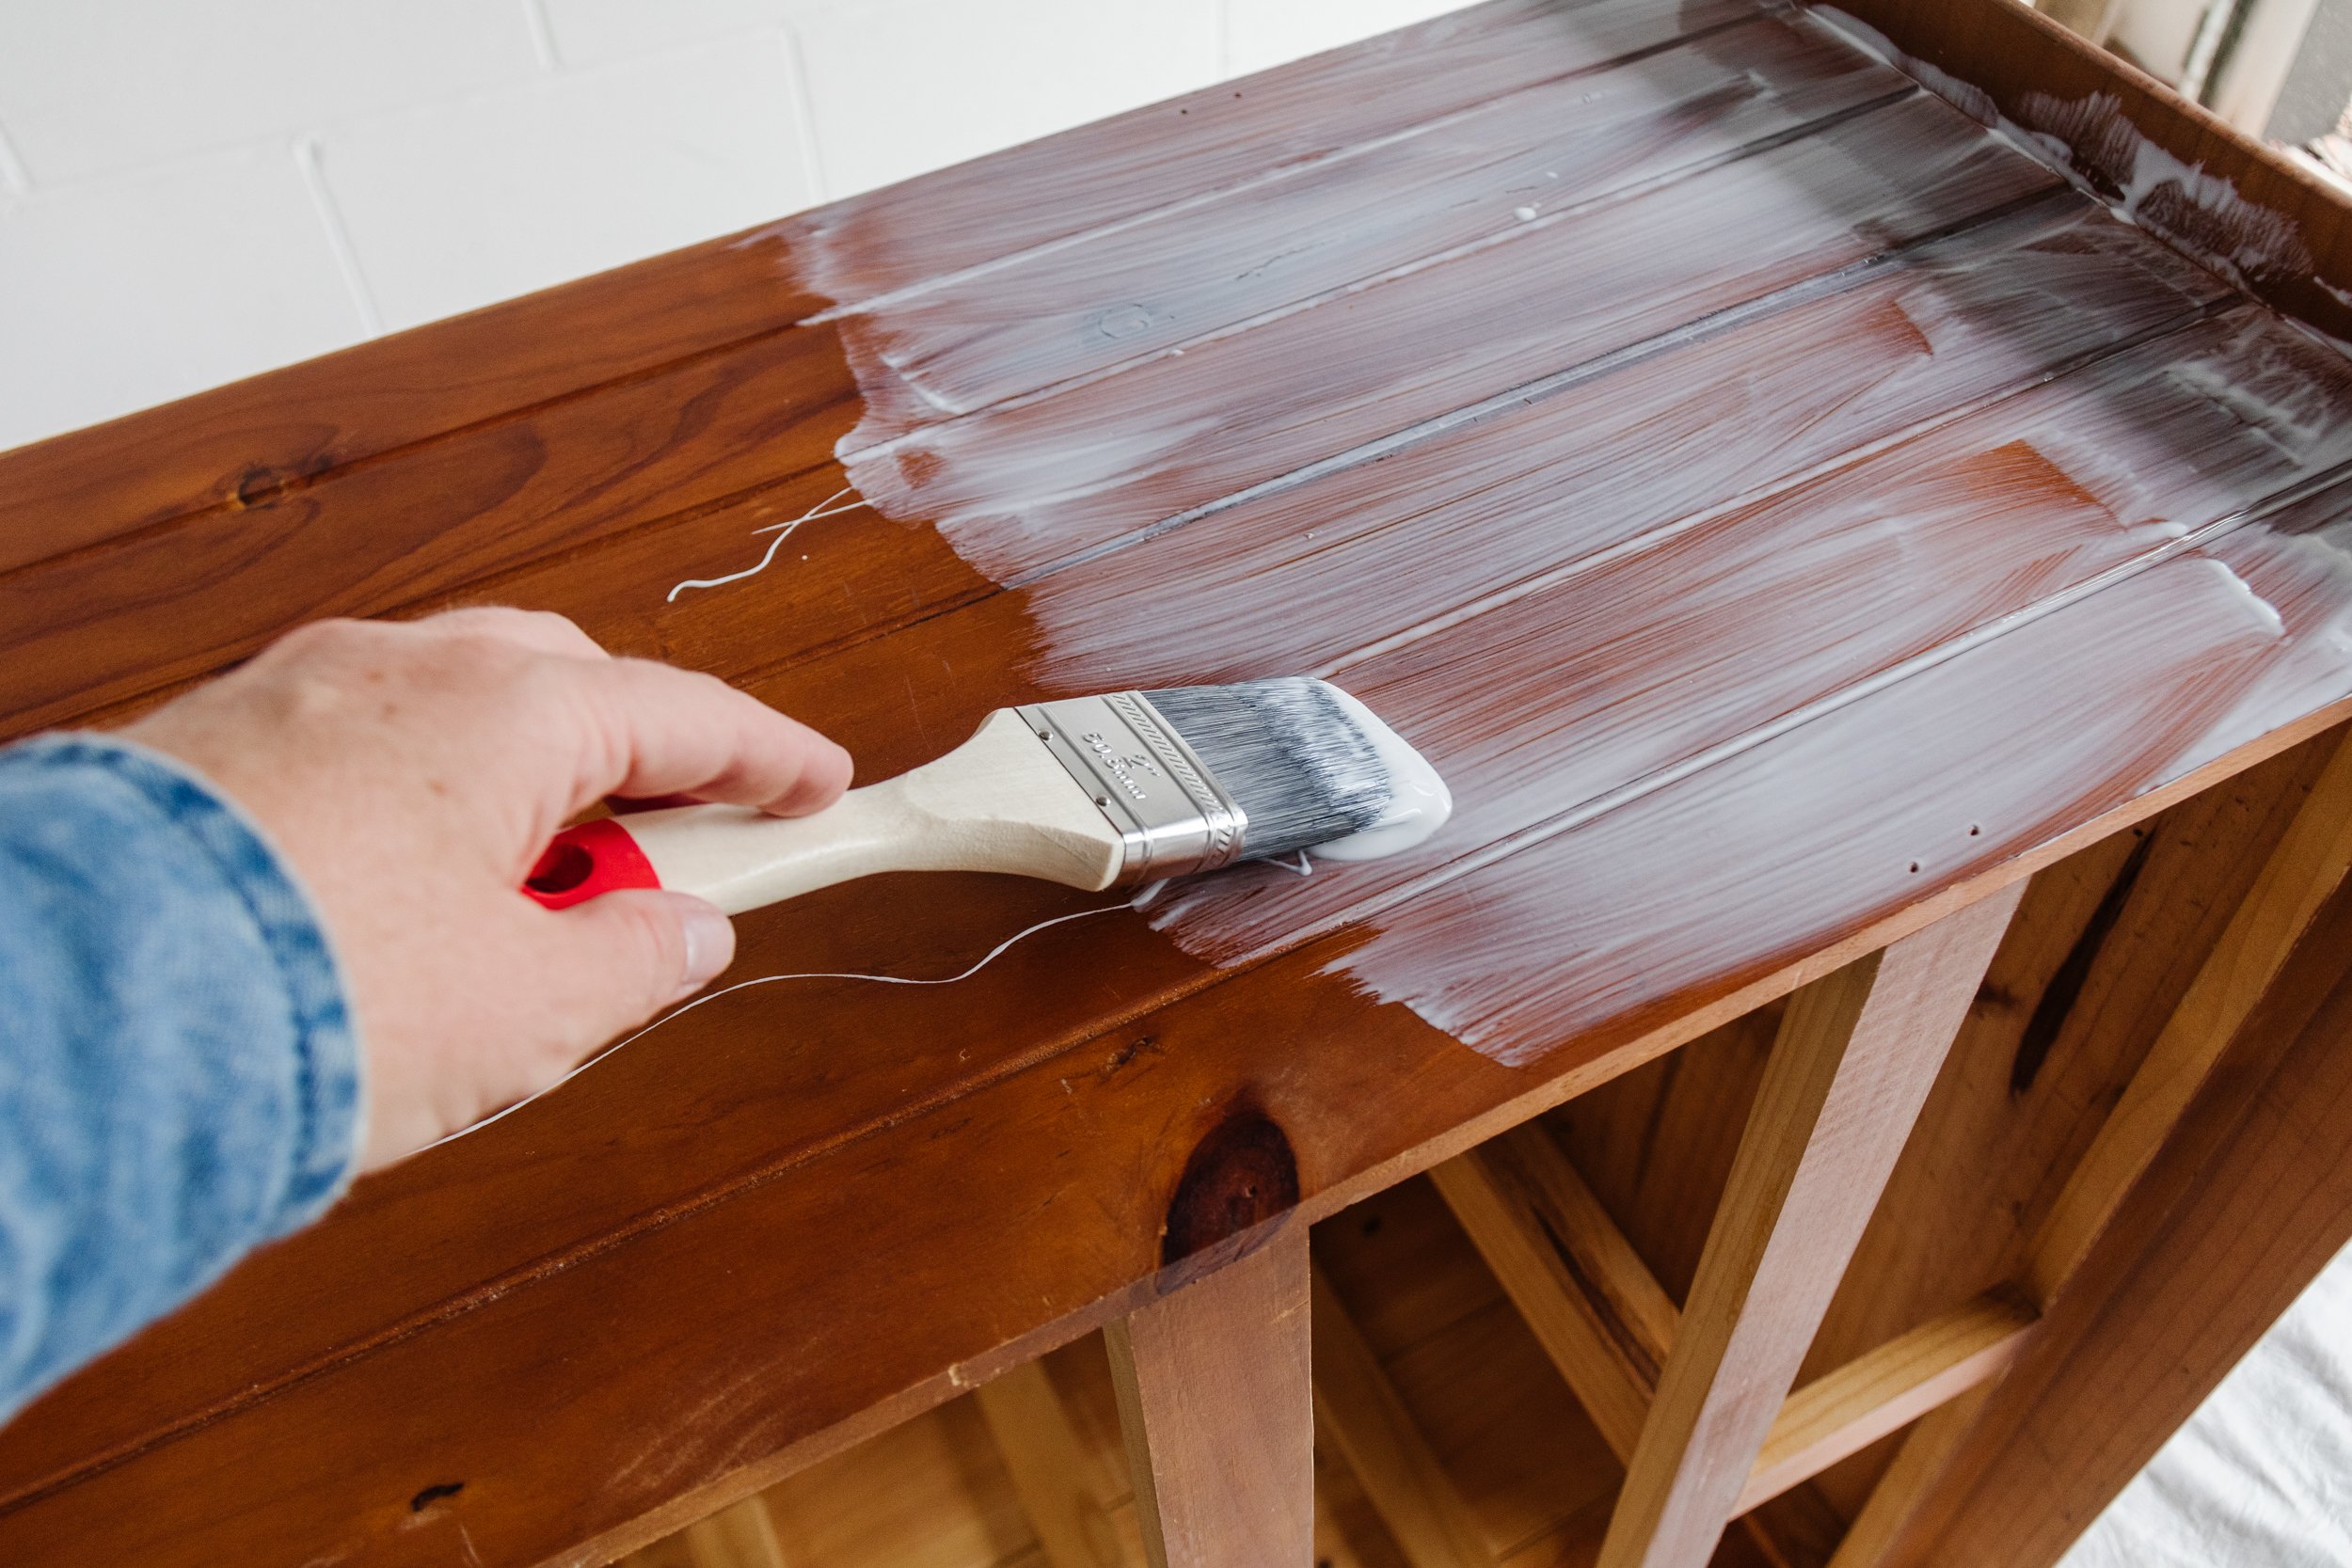
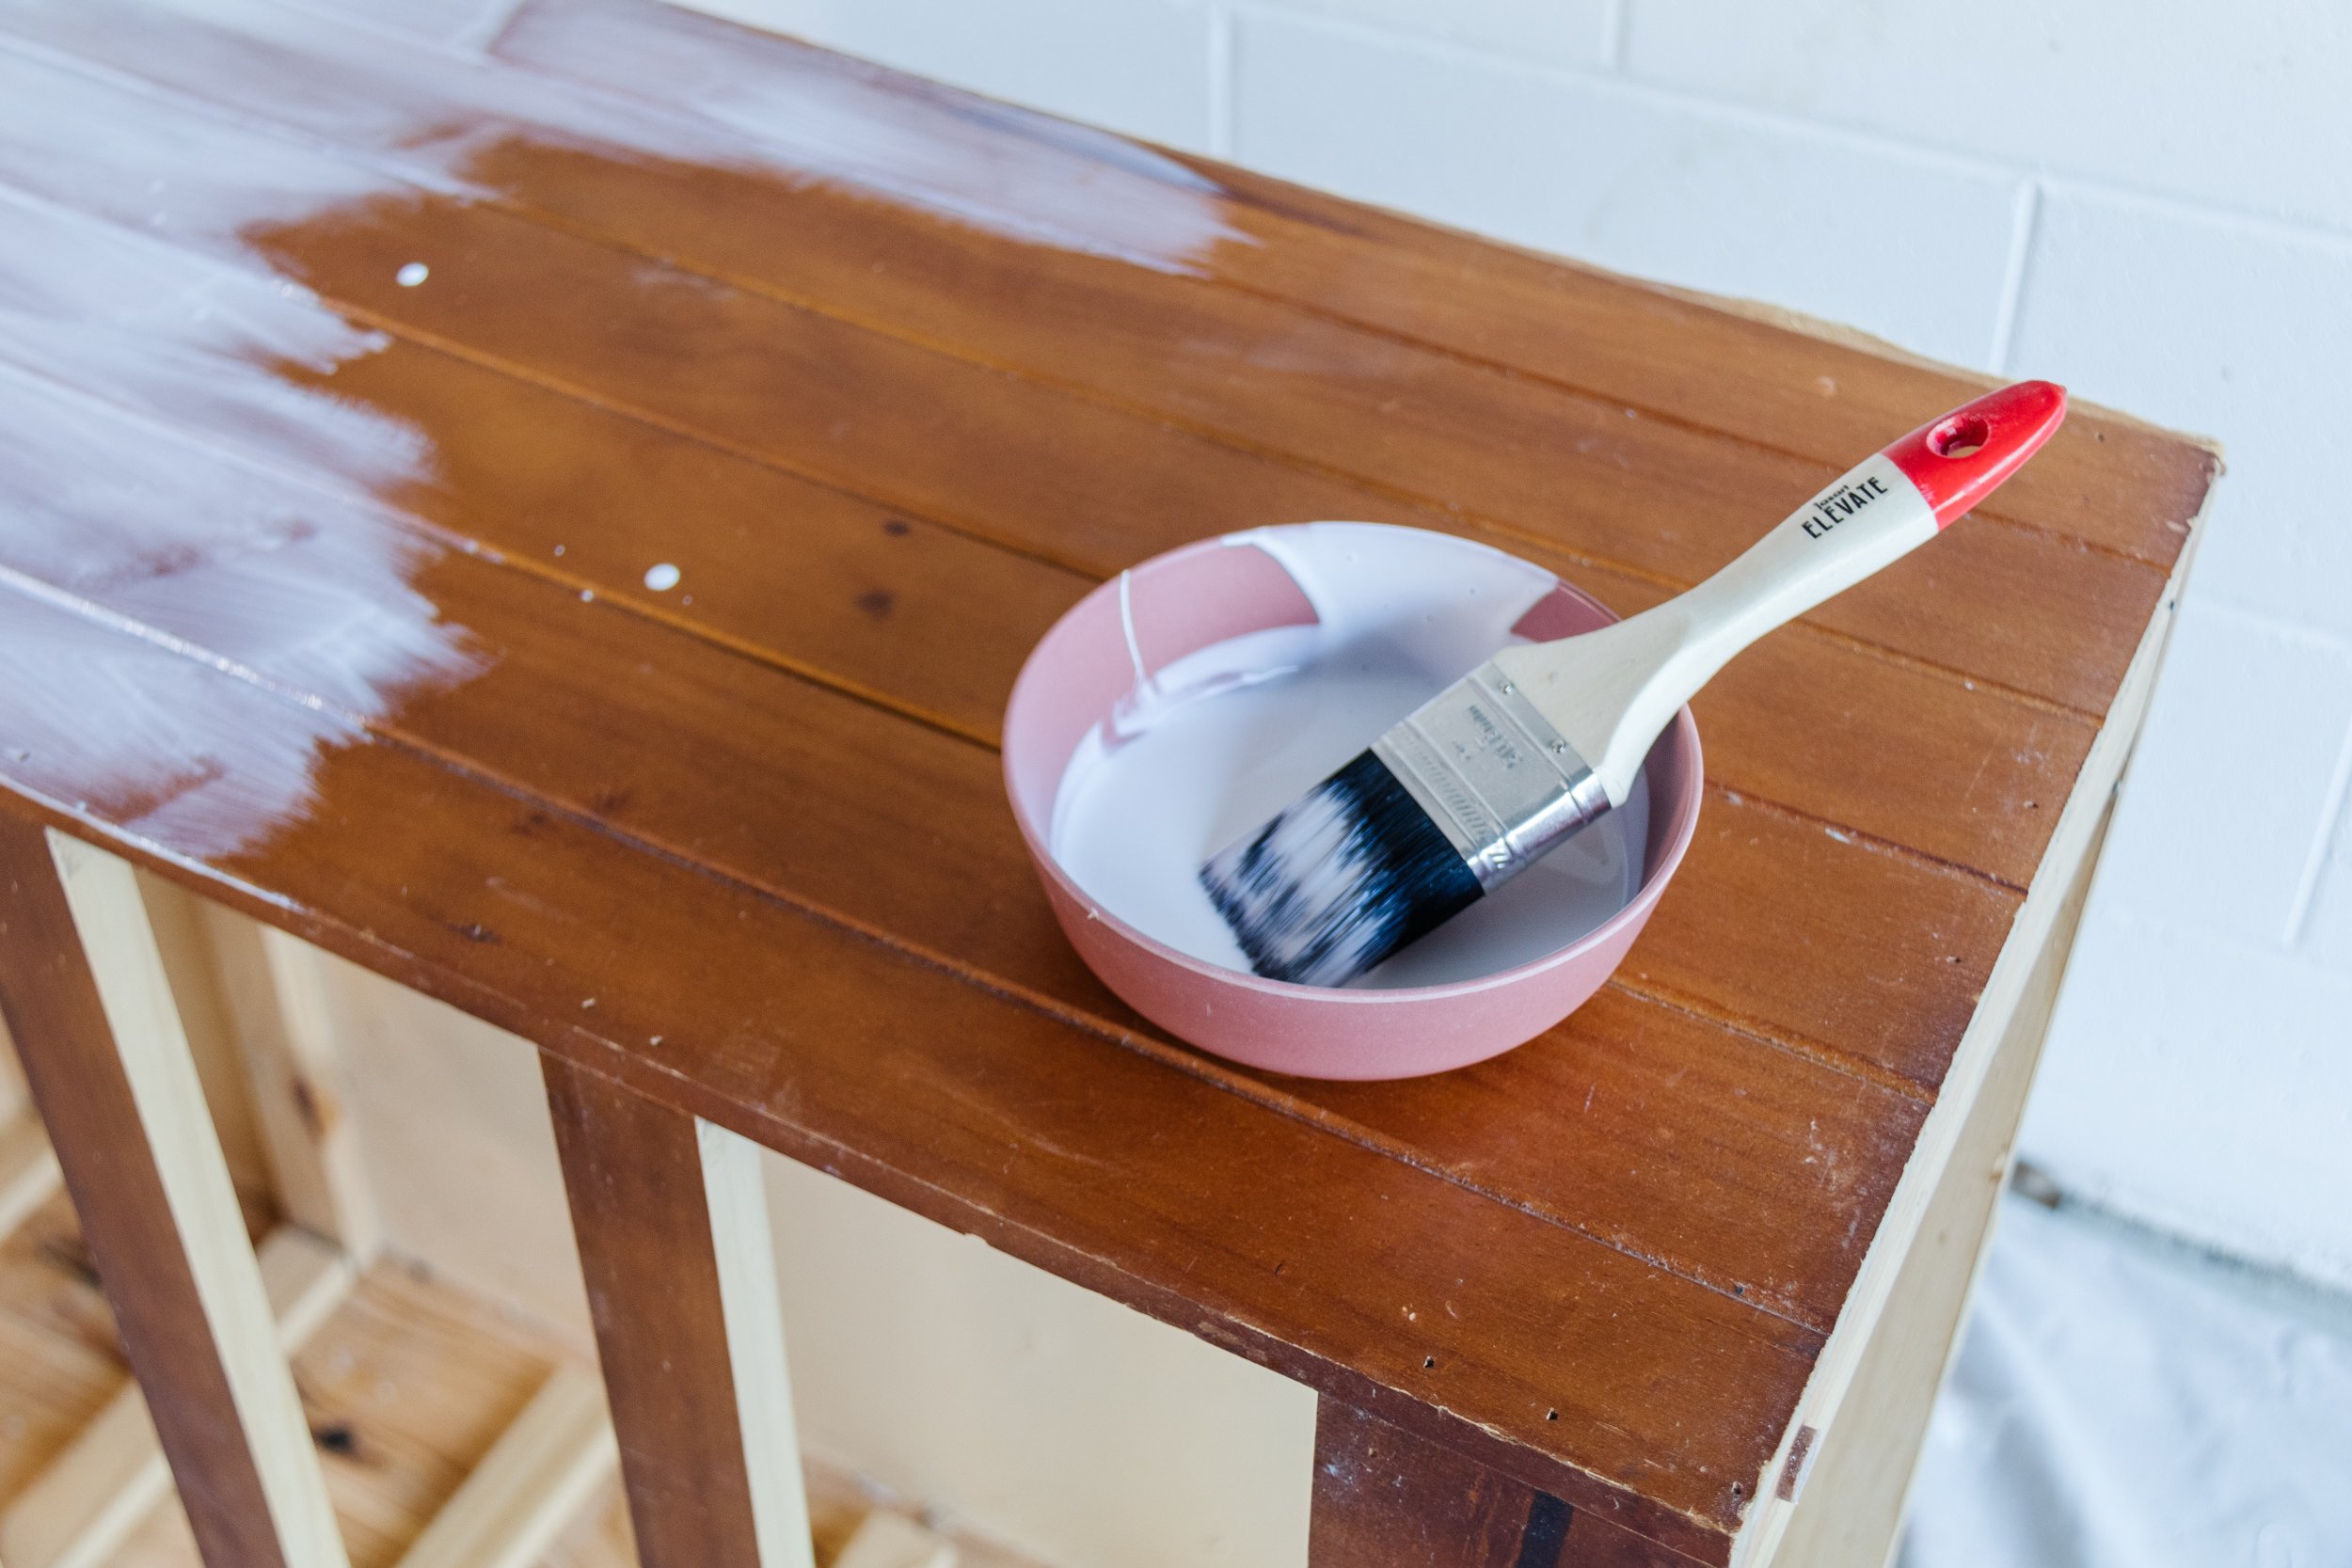
Step 3: Using a paint brush, apply a generous amount of glue directly onto to the side of the tall chest. Carefully place the fabric directly onto the glue and starting from the top, gently smooth the fabric down with the palm of your hands and work your way down until you reach the bottom.
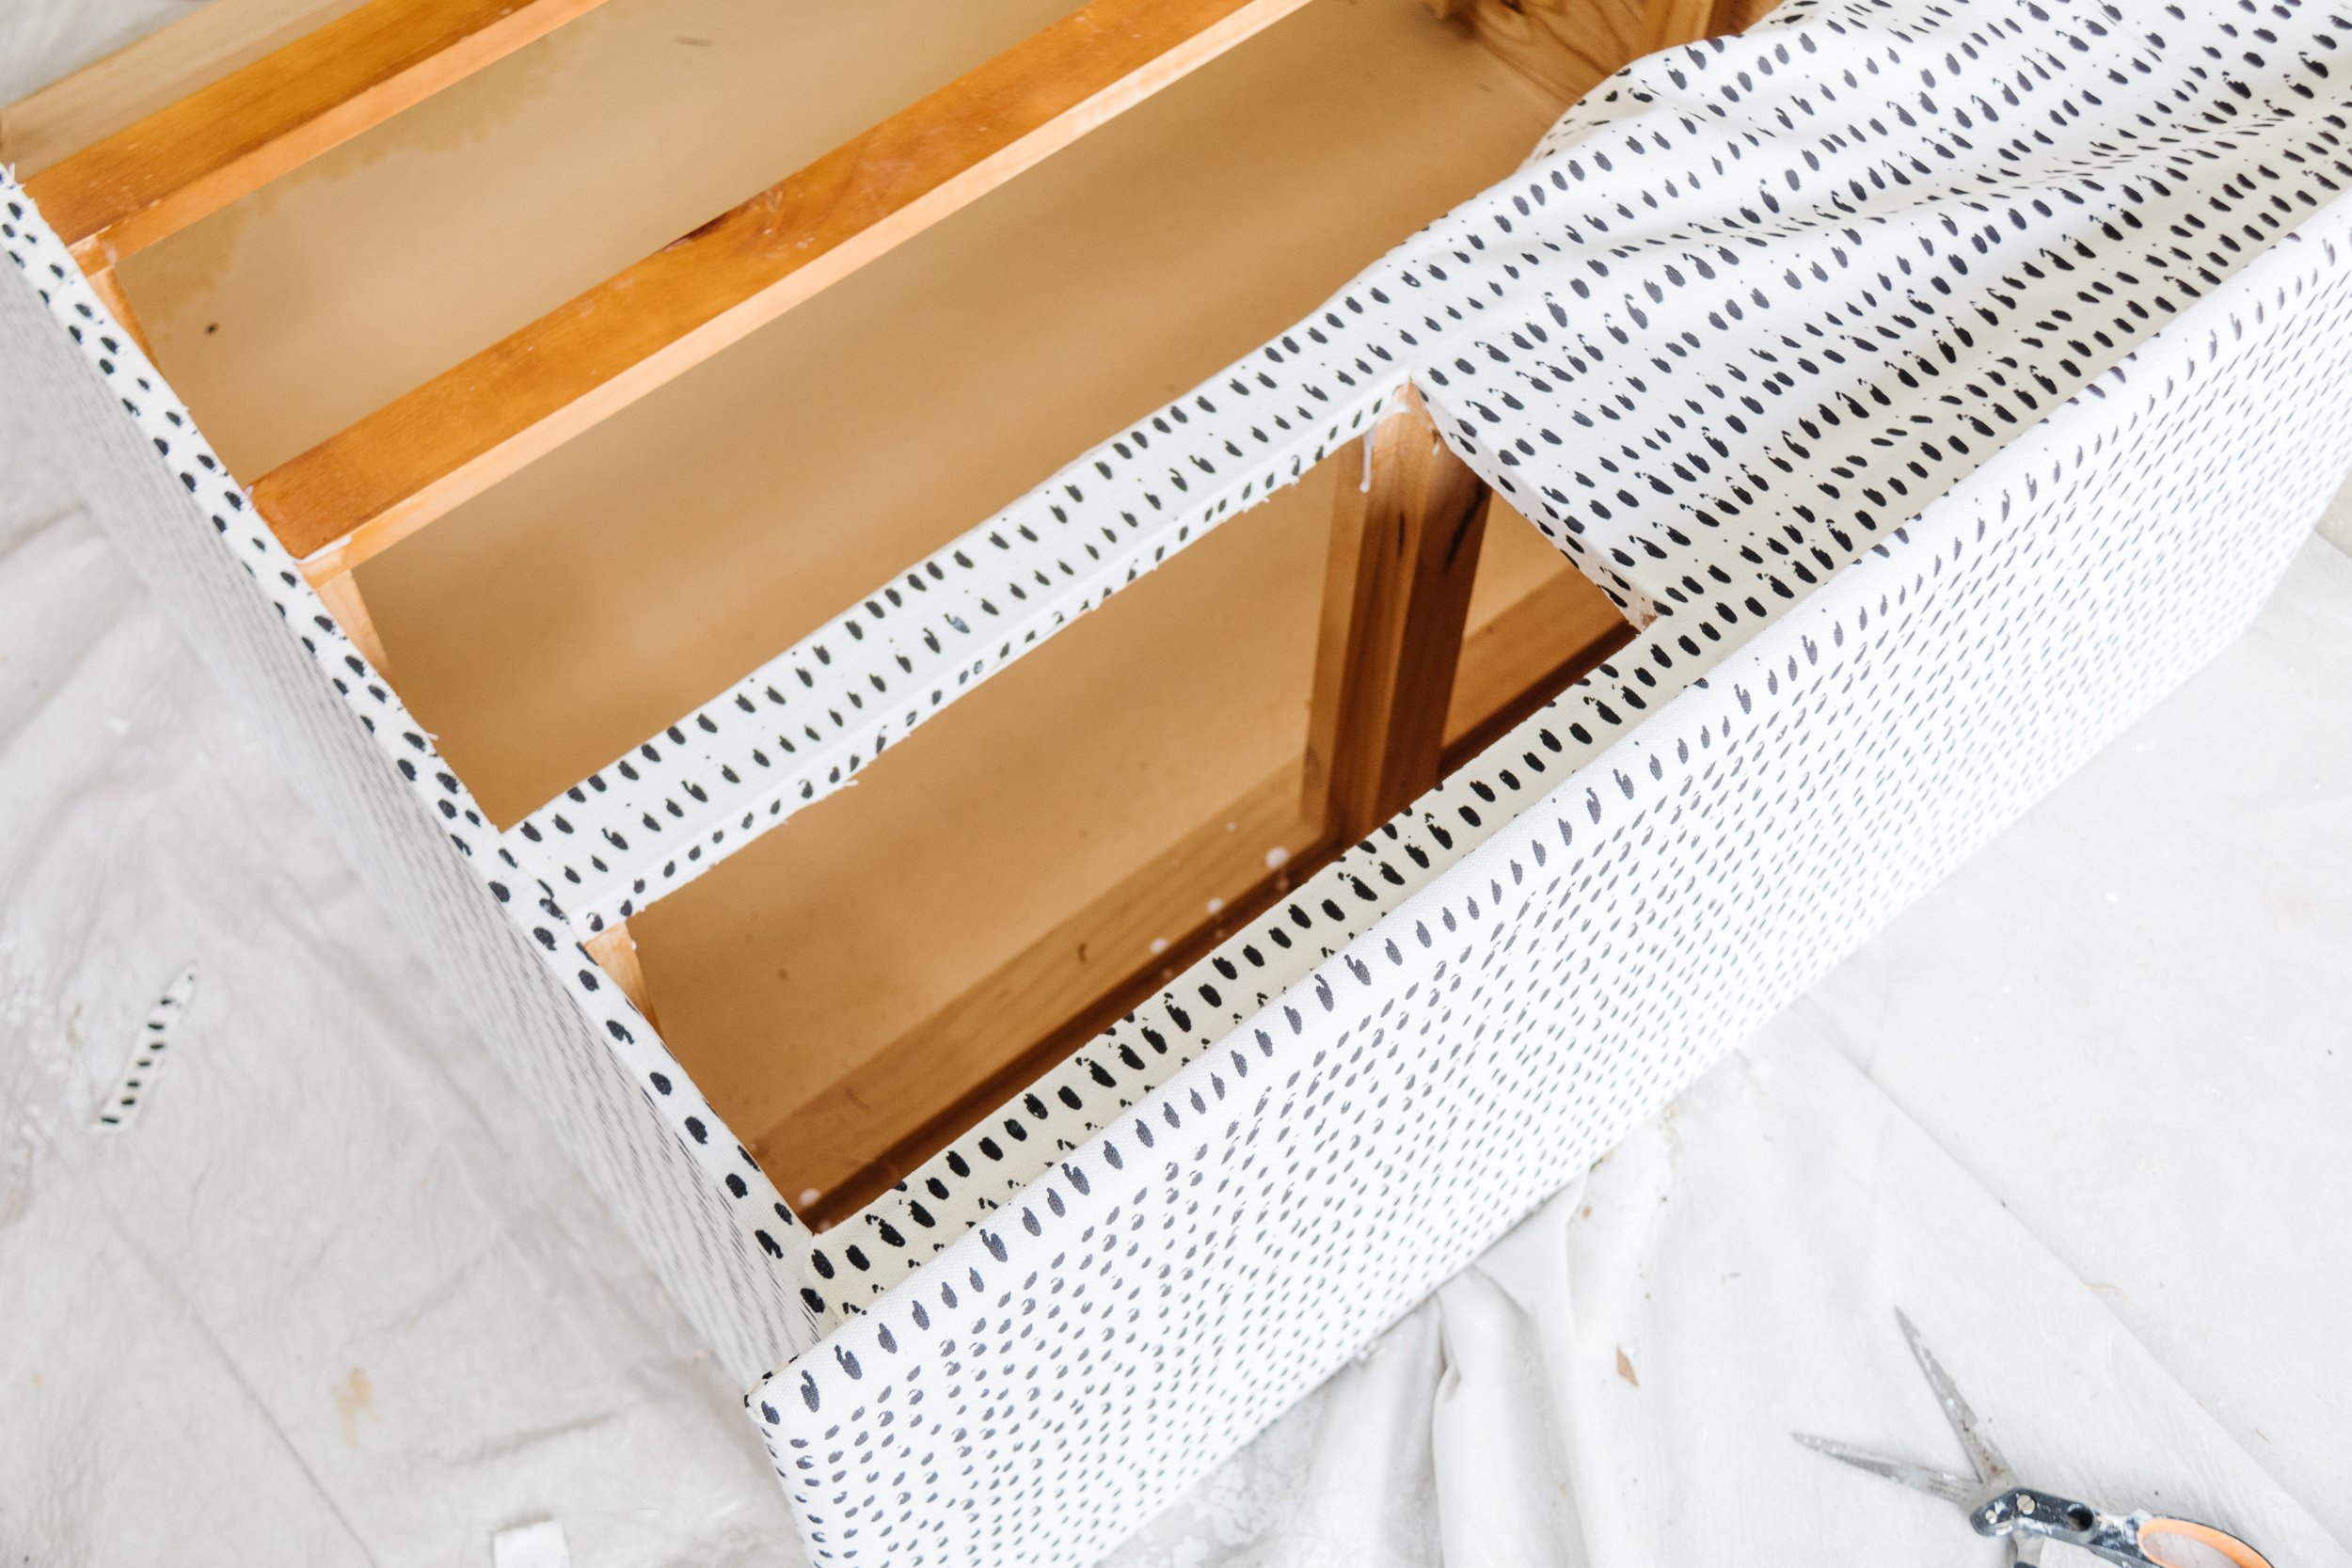
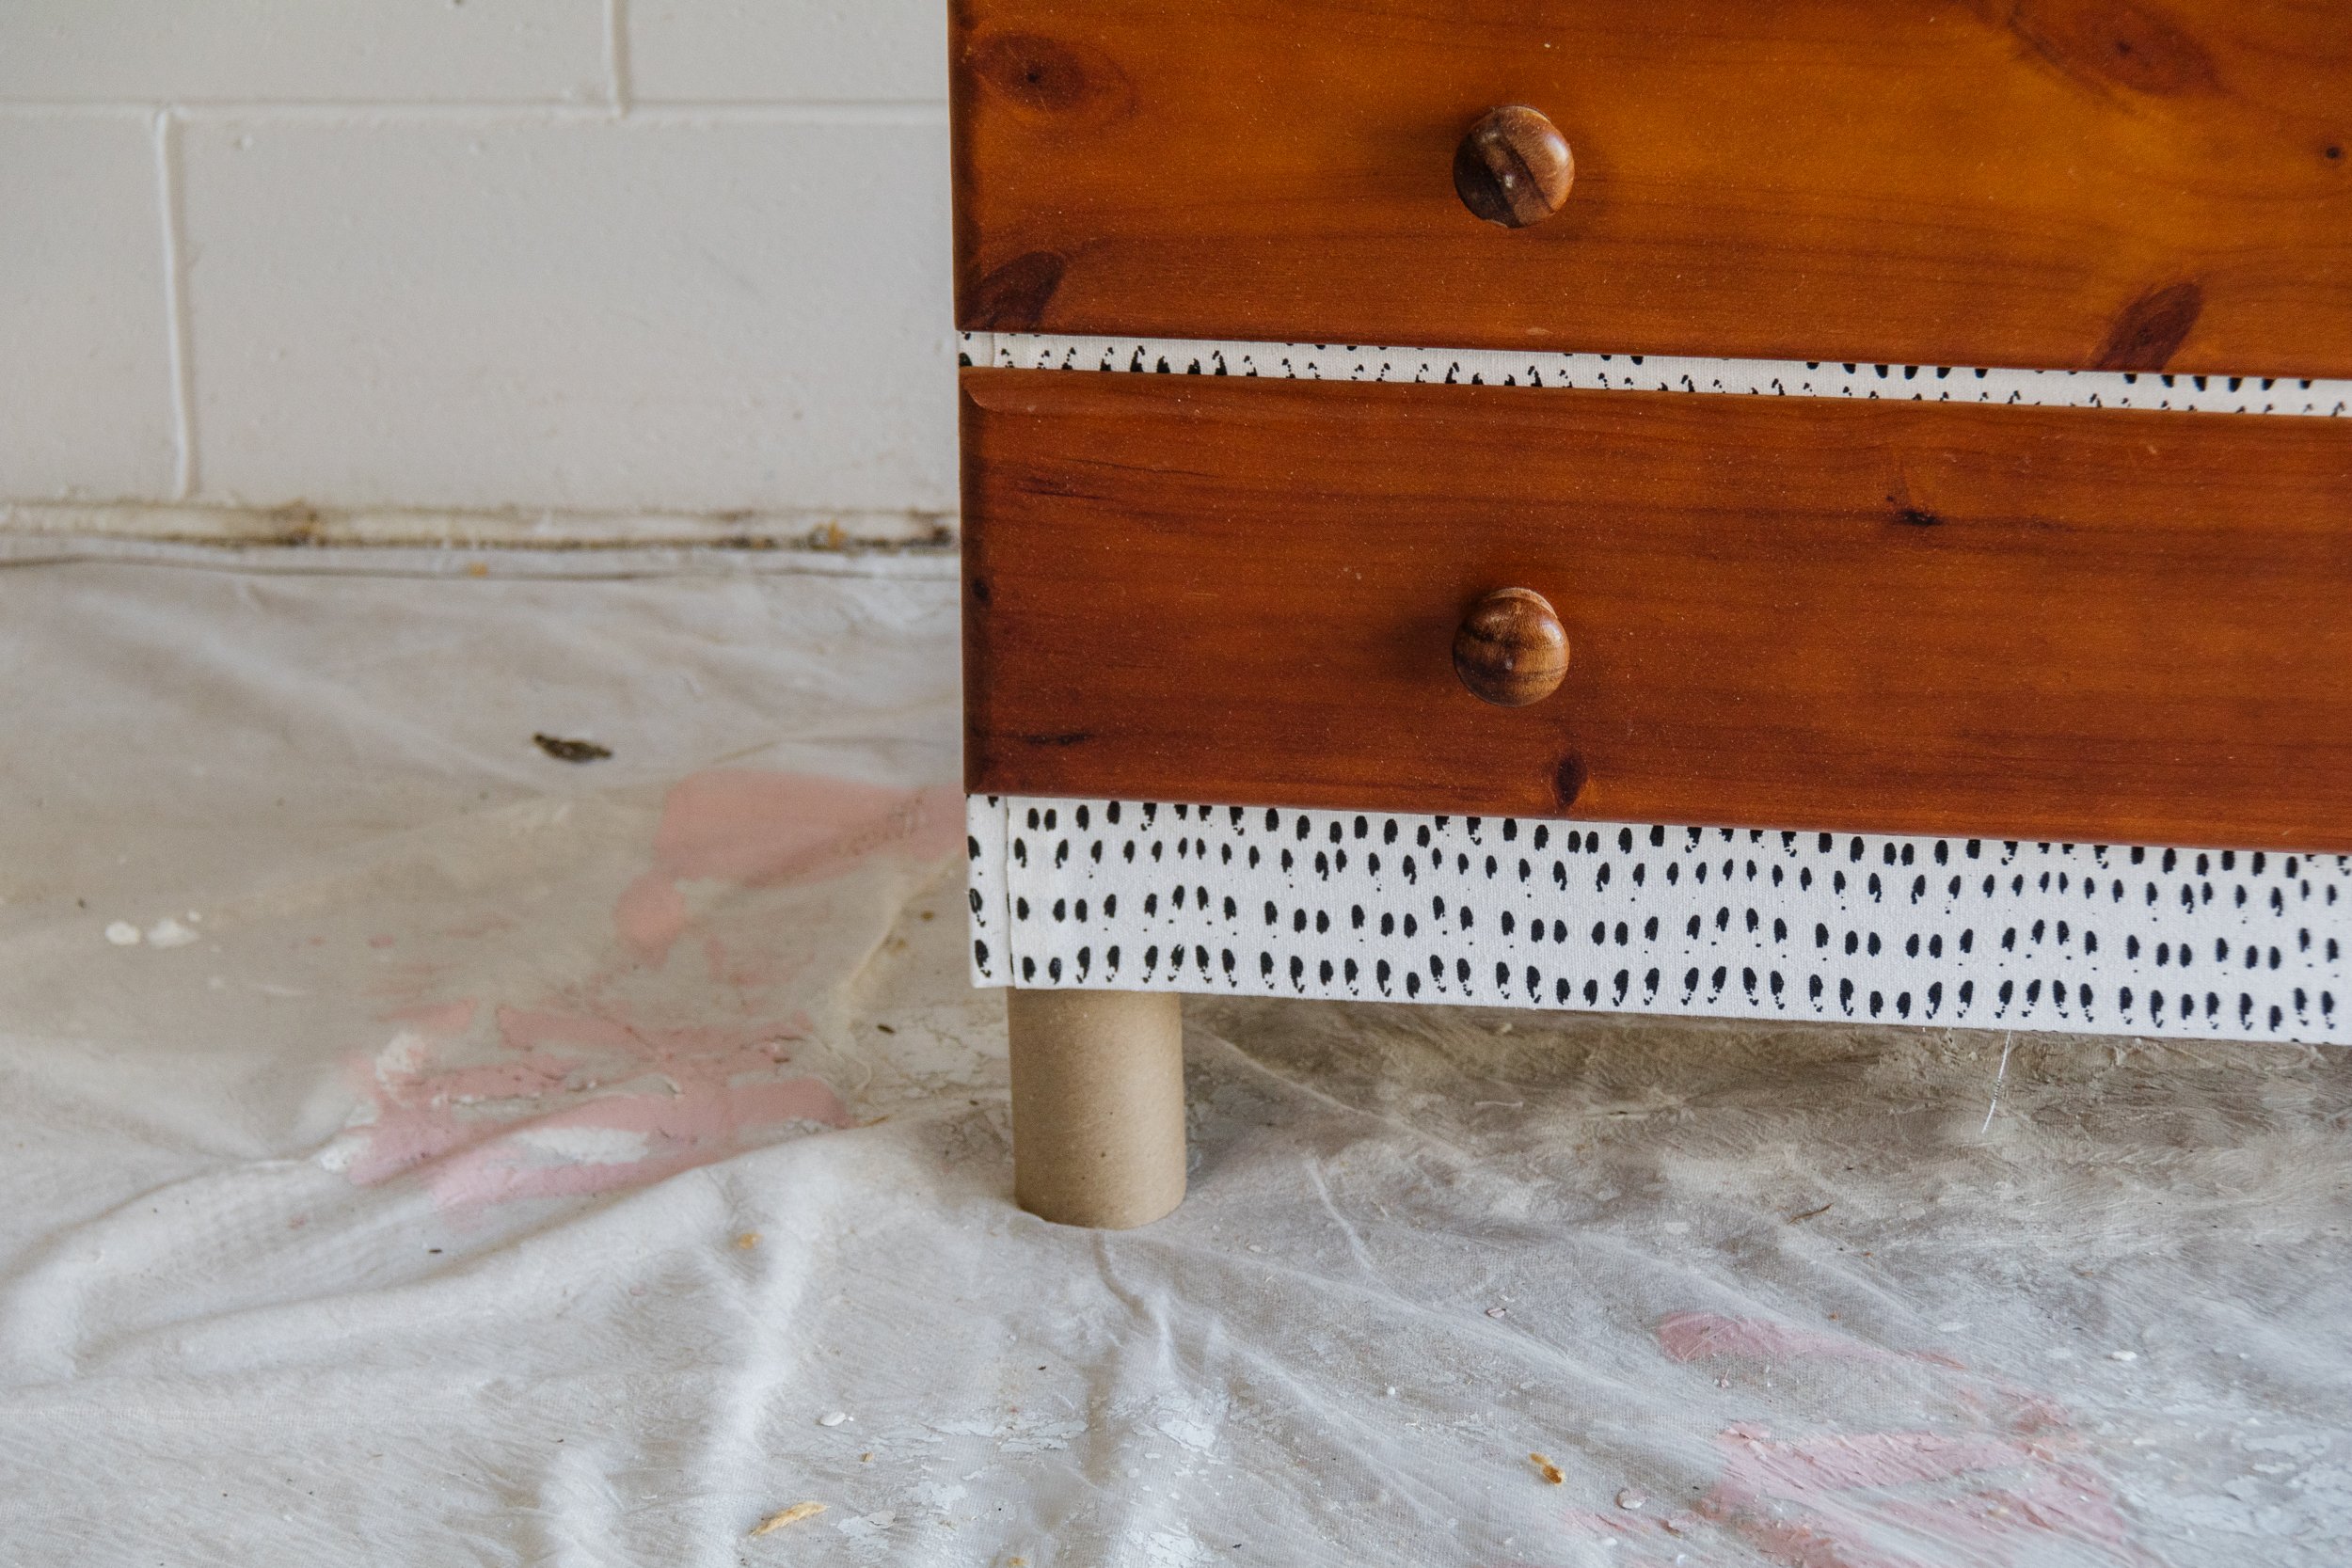
Note: When placing the fabric onto the side, I made sure to allow 1cm of fabric overlap across the front as I didn’t want the fabric to cover the drawer cavities. Depending on what piece of furniture you' cover with fabric, it’ll have it’s own unique elements.
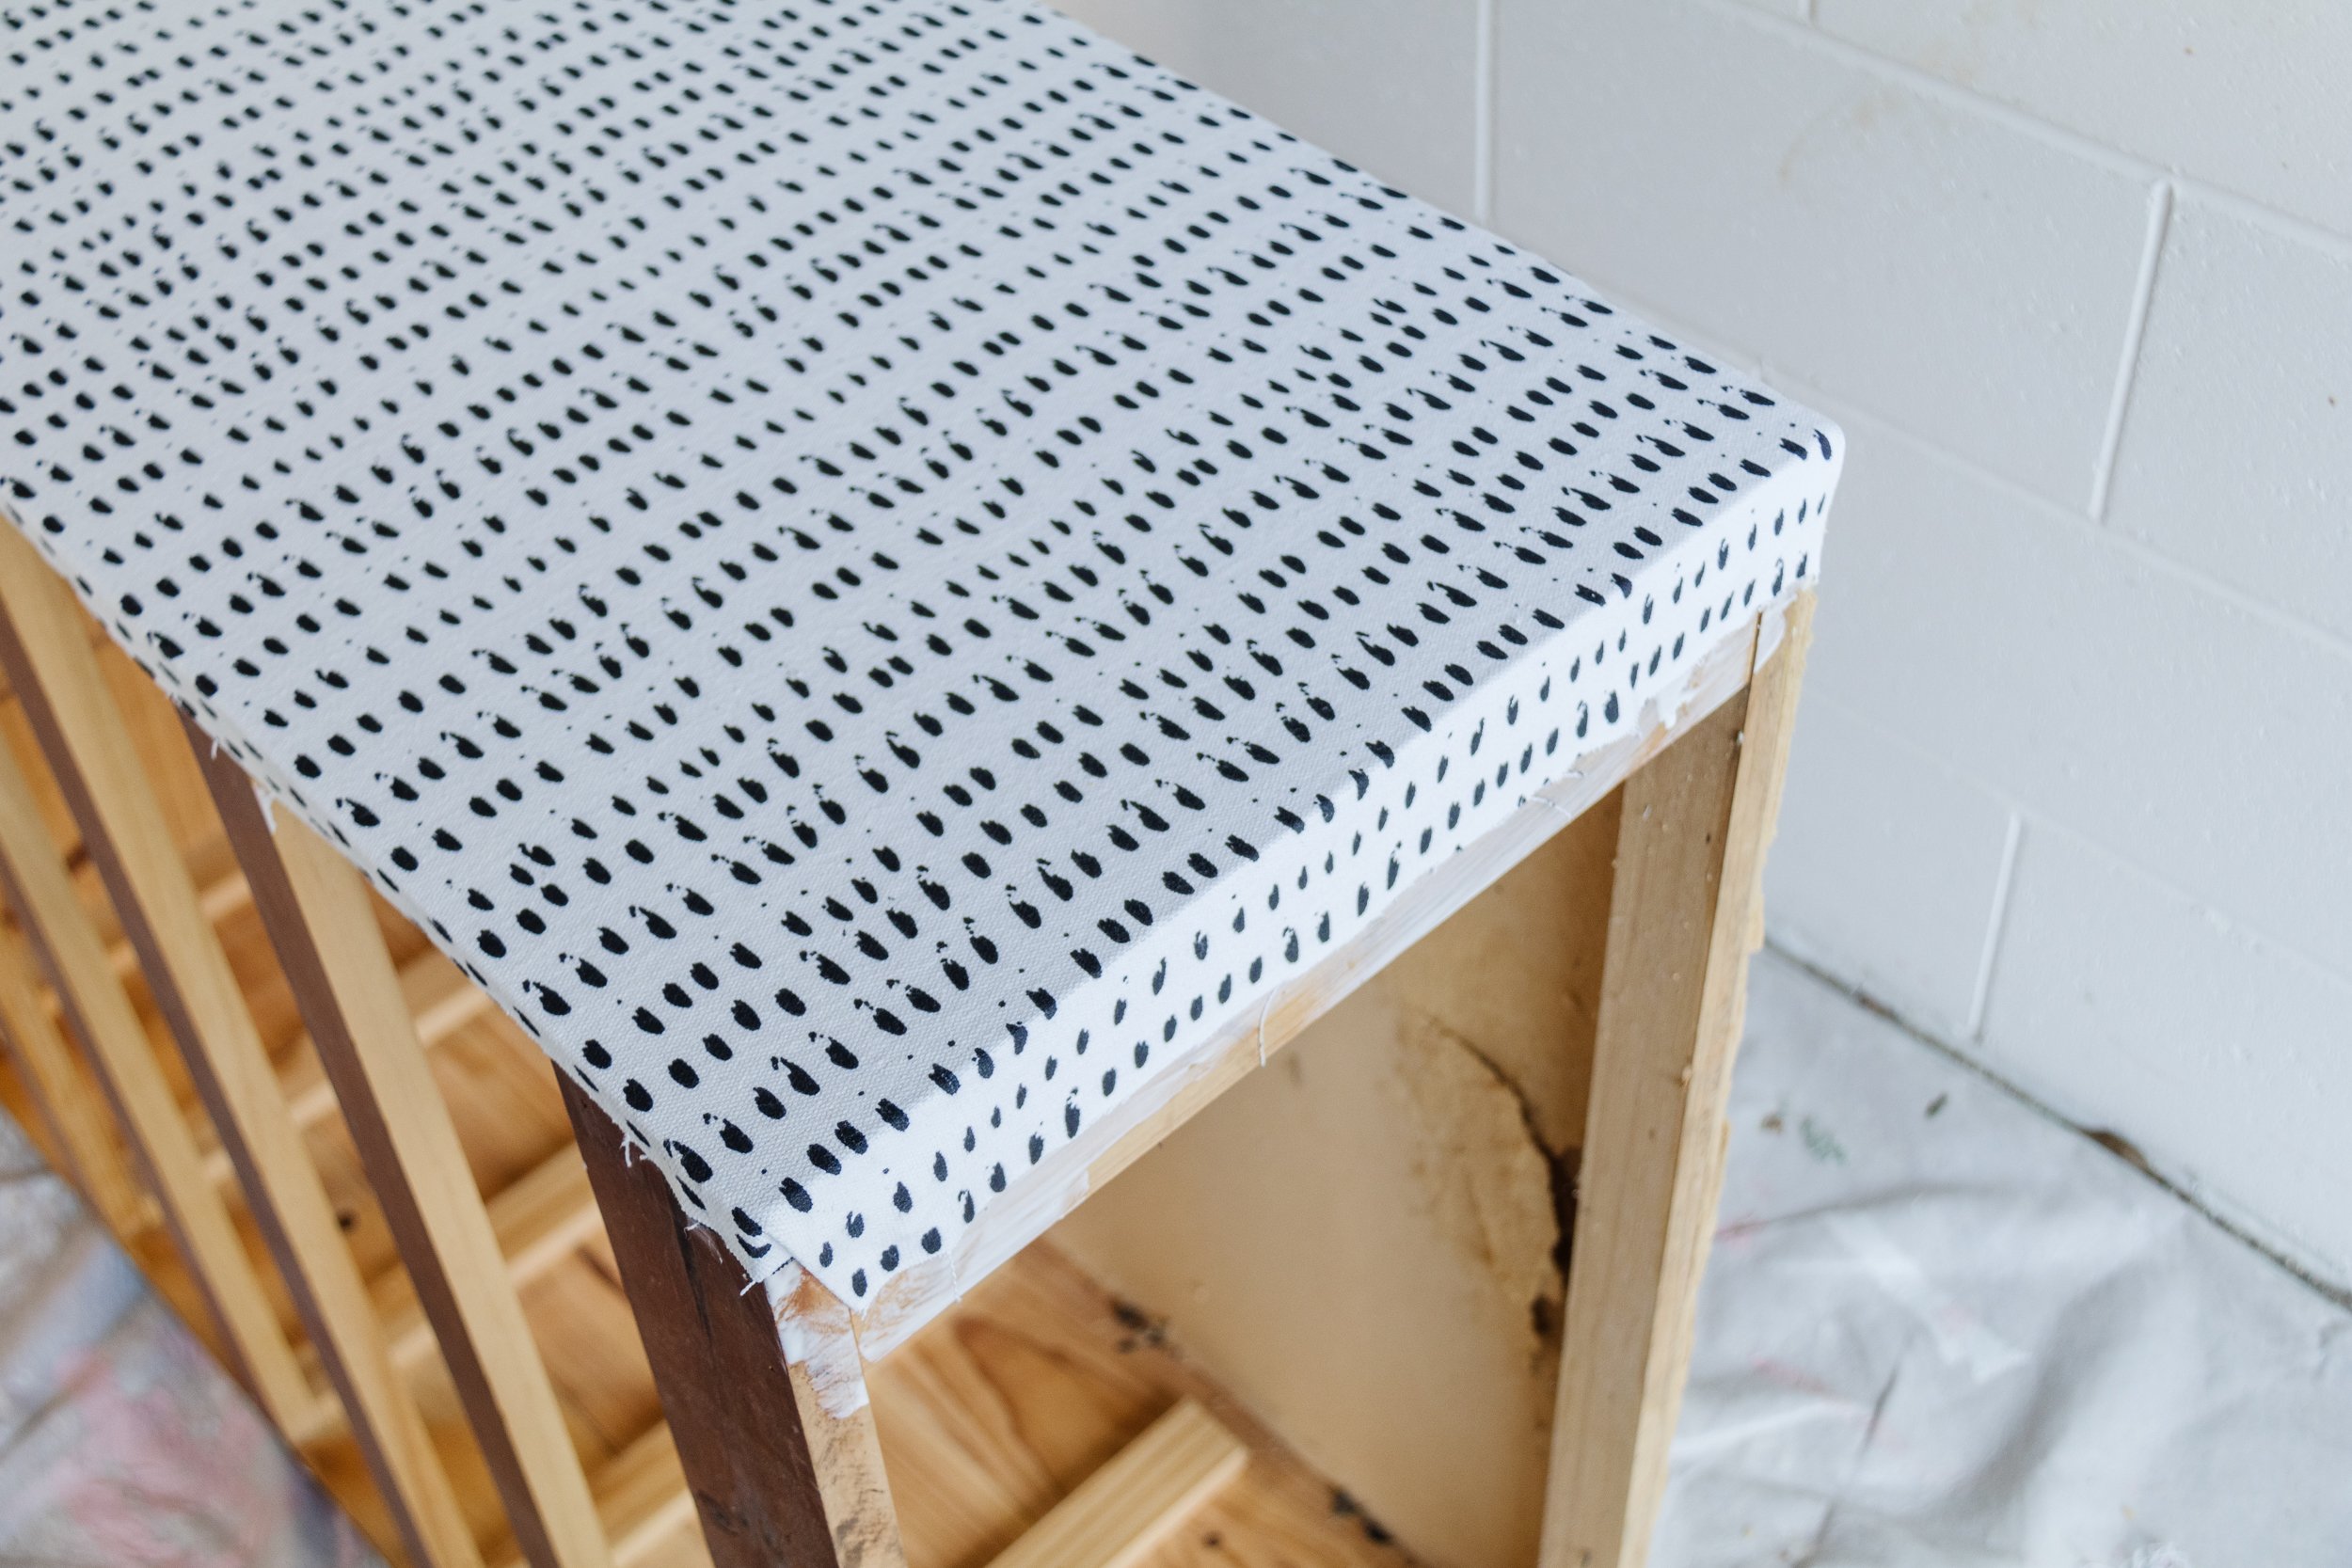
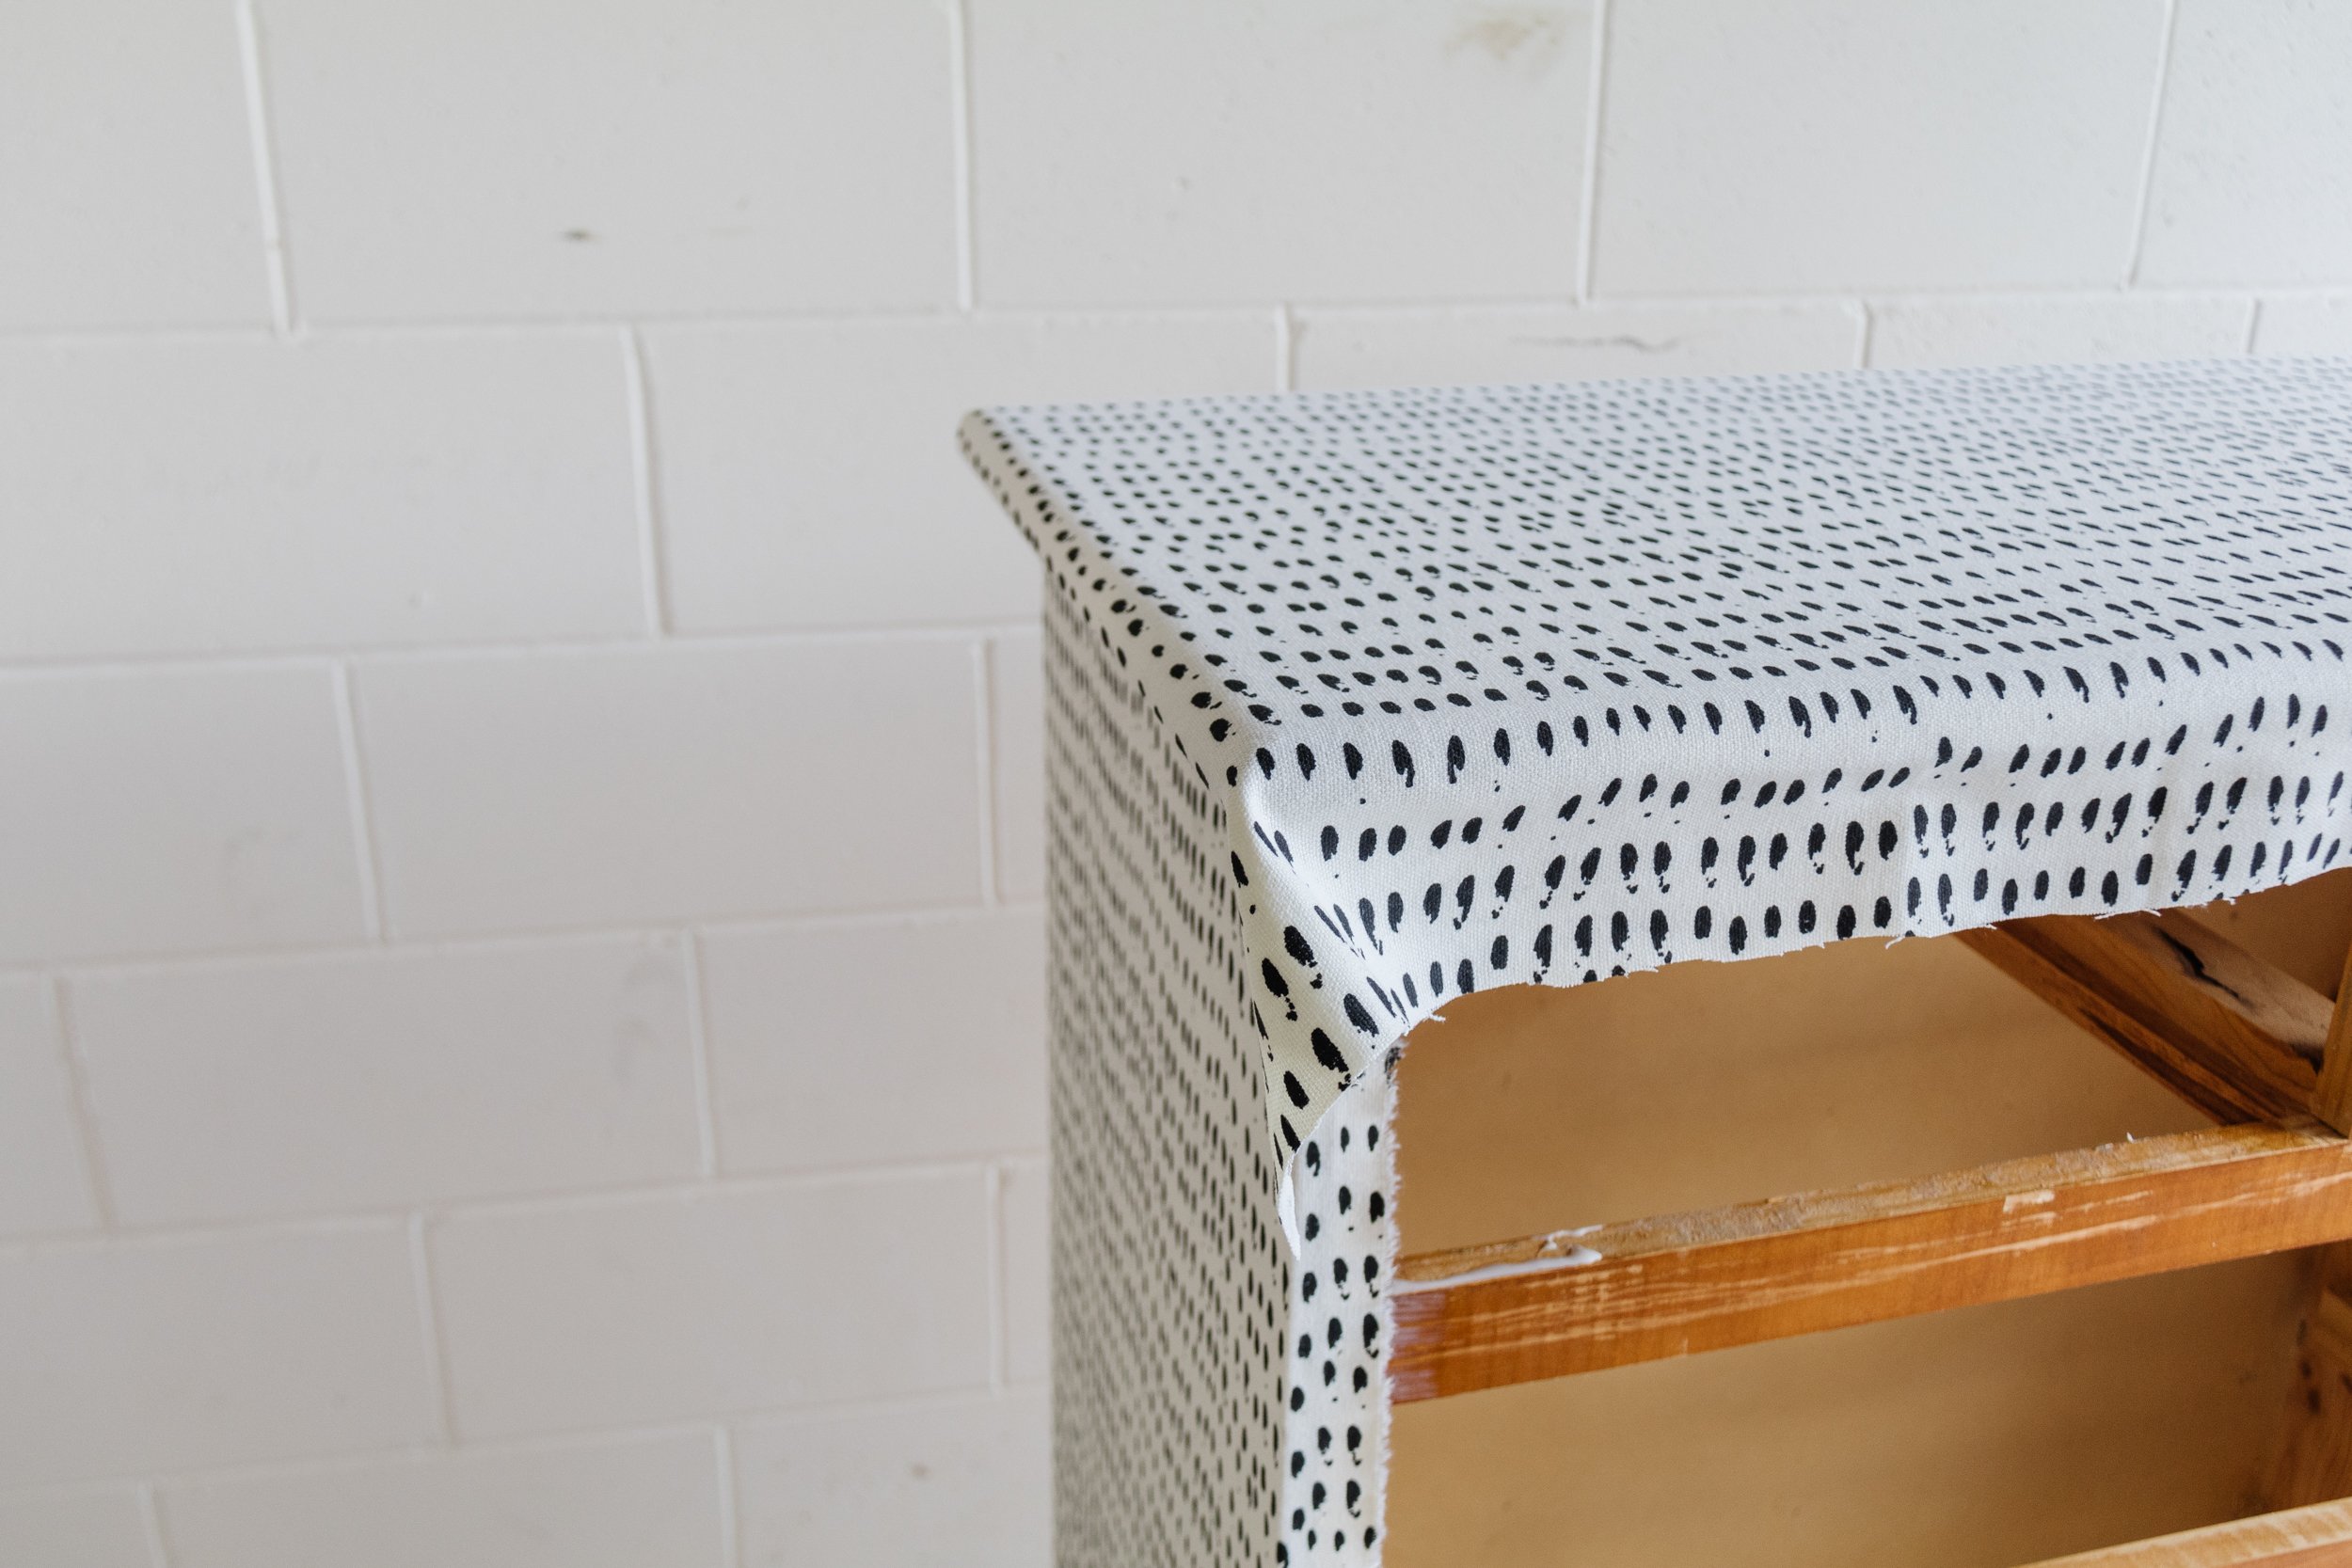
Step 4: Apply glue to the underside of the overhanging fabric, then fold it over the edges and press it down firmly. Fold the fabric neatly at the corners, apply more glue and press it down firmly. Turn the tall chest onto it’s other side and repeat.
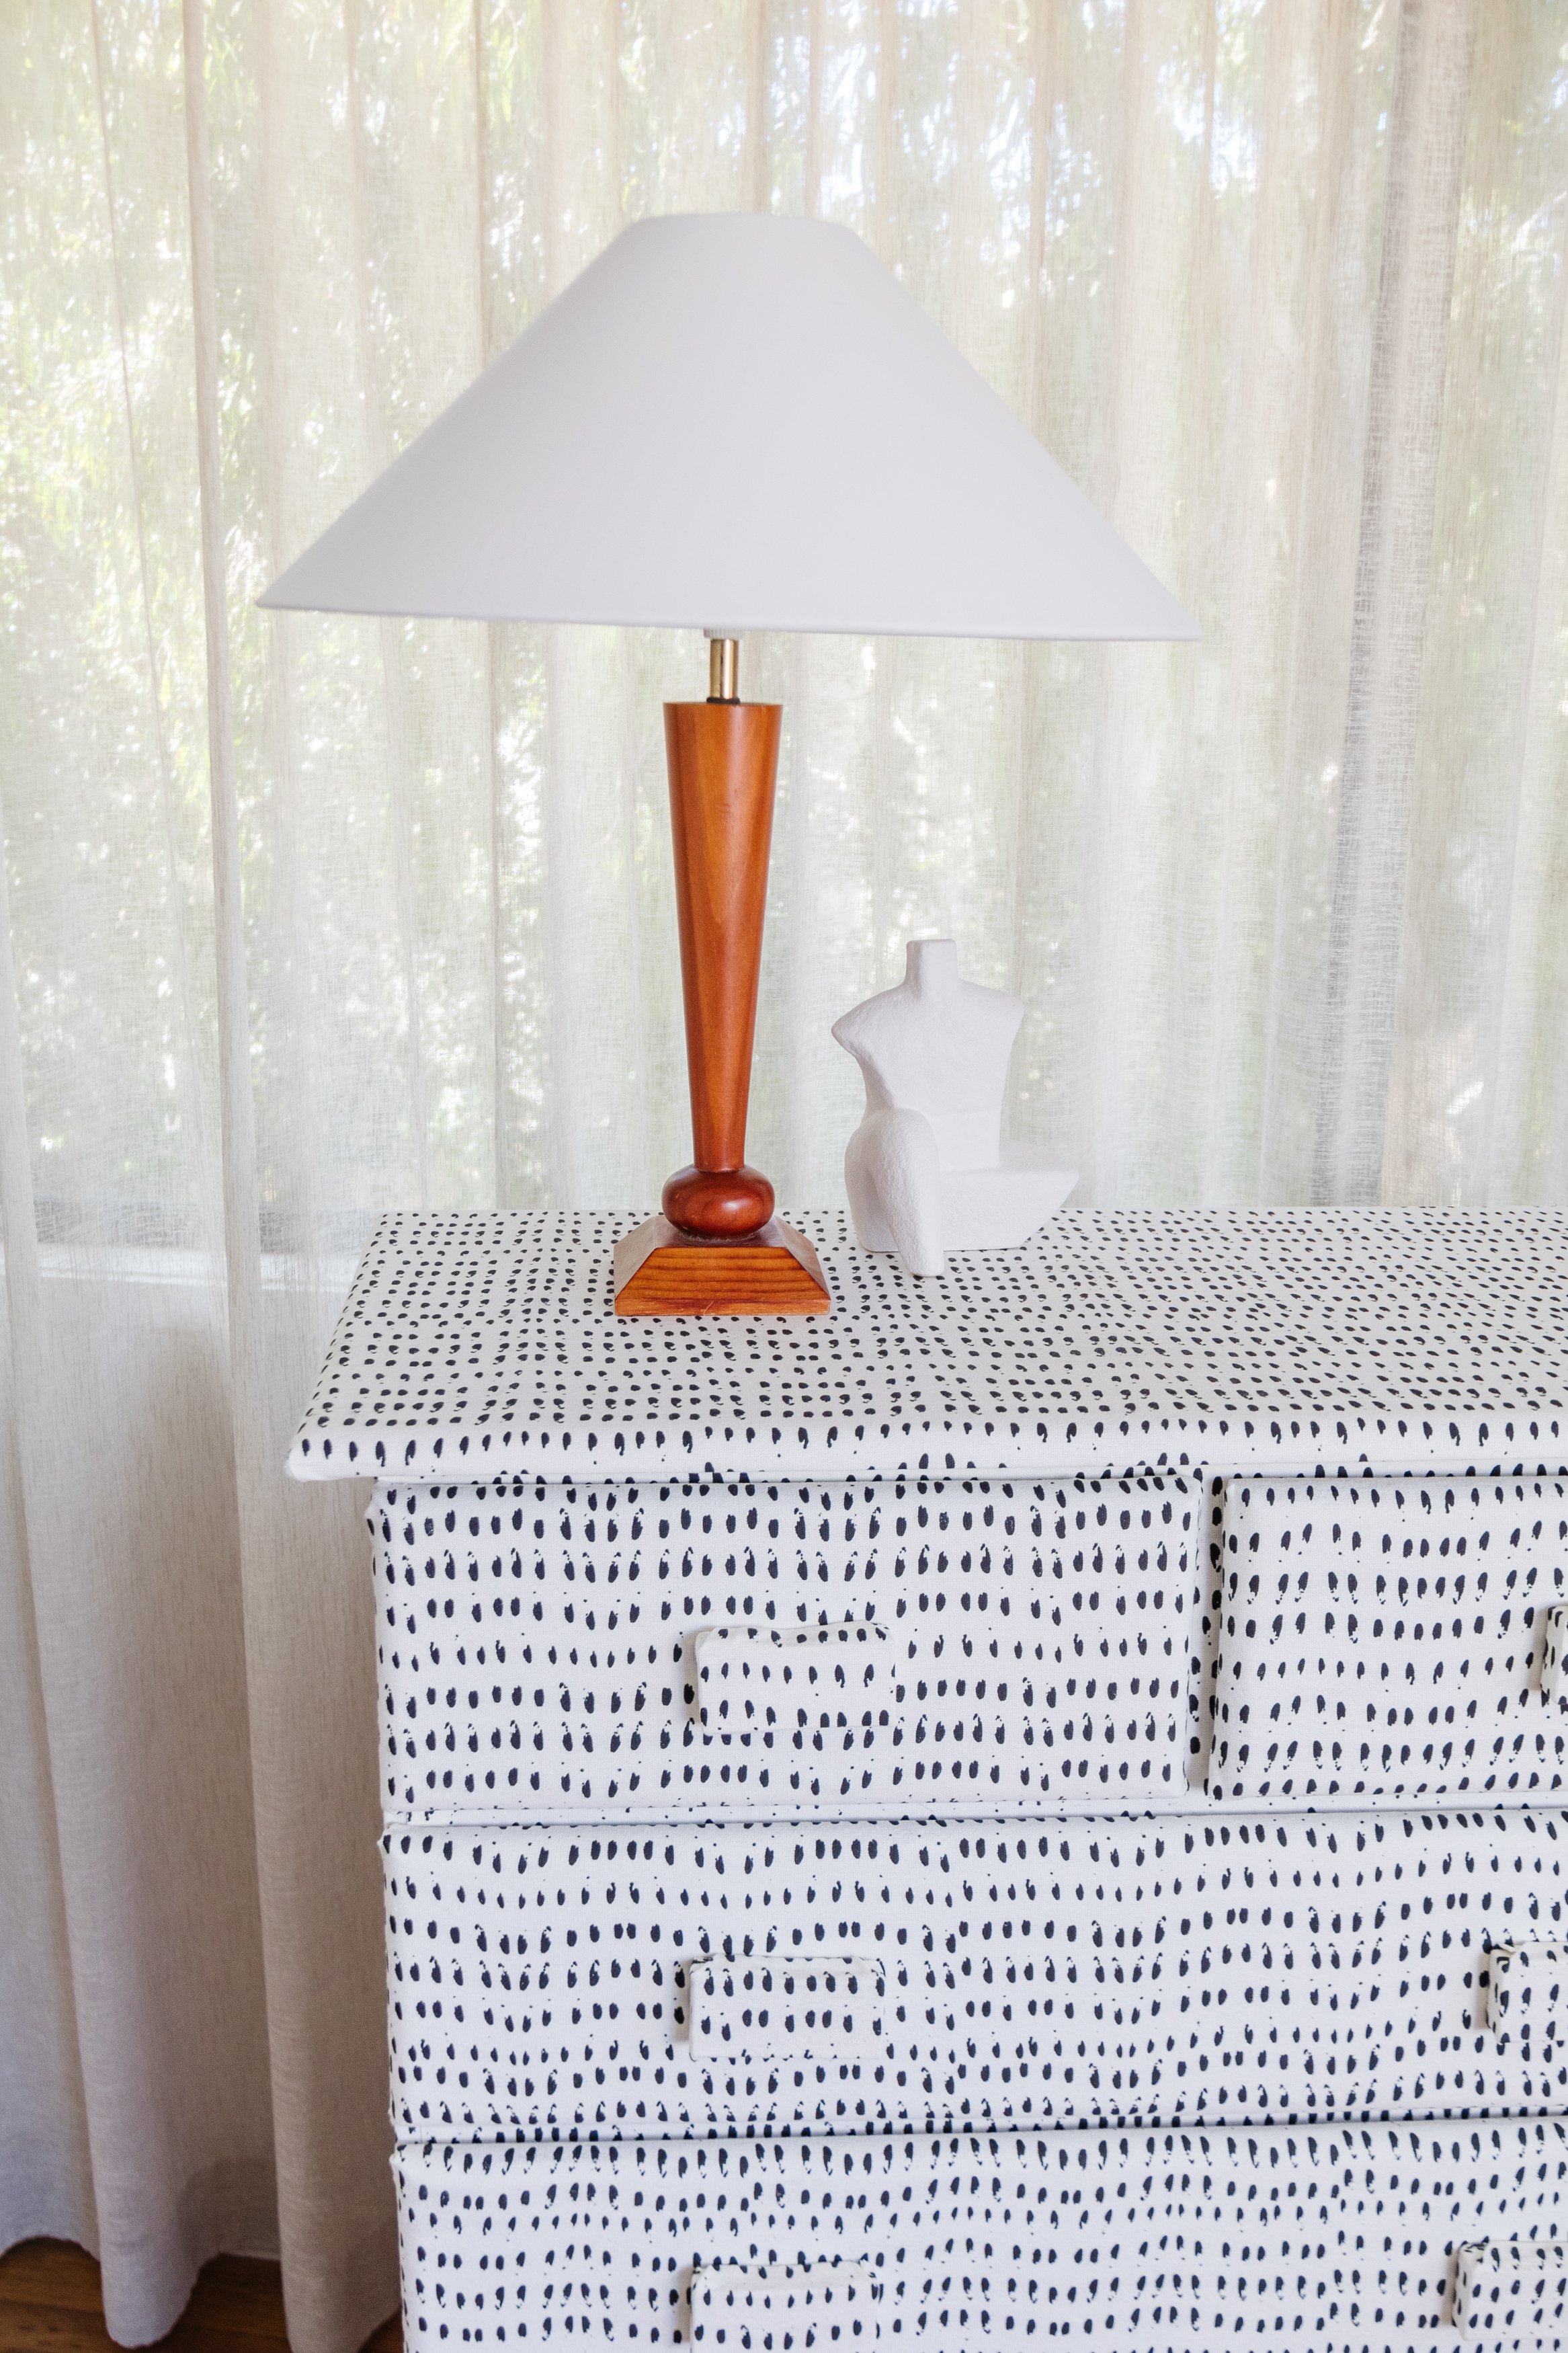
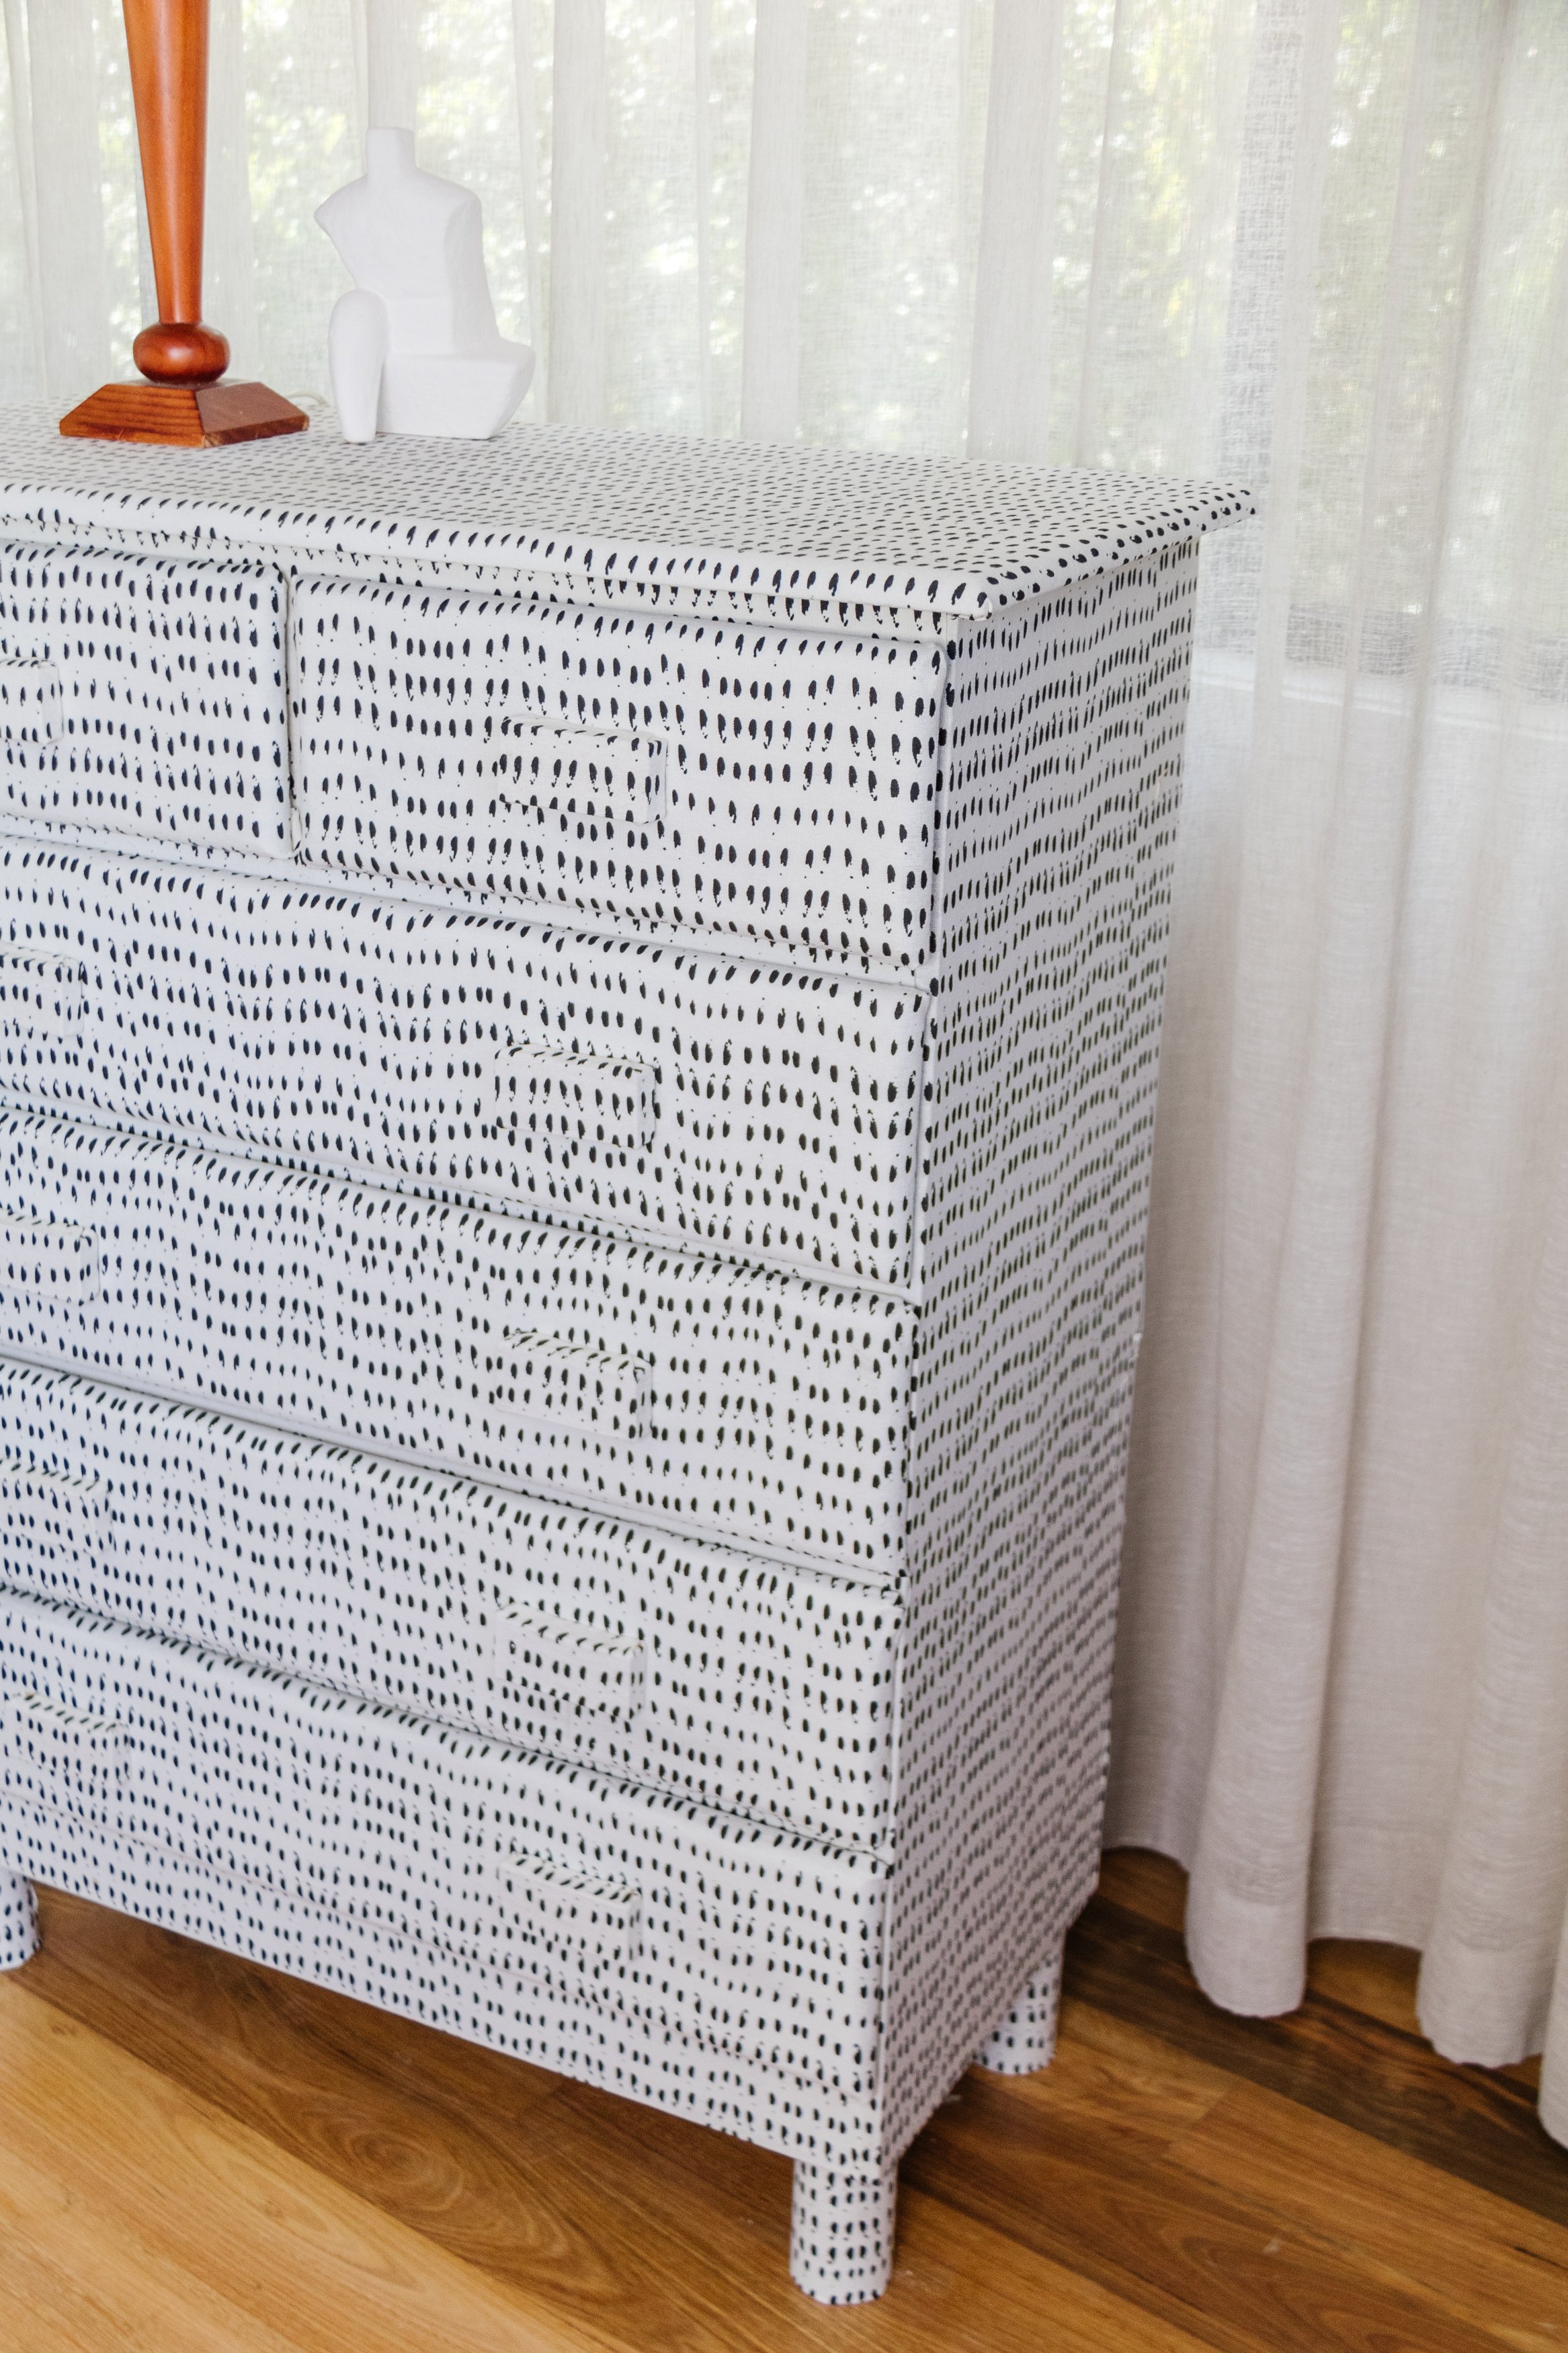
Step 5: Using the same steps as above, cover the front of the chest and the top of the chest using fabric and glue. When the two sides, front and top of the chest has been covered in fabric, stand the tall chest upright. You’ll see it’s coming together nicely! Refer to these step by step videos to see how I did this, if you like. And if you make a mistake along the way, don’t worry. You can easily peel the fabric off before the glue dries.
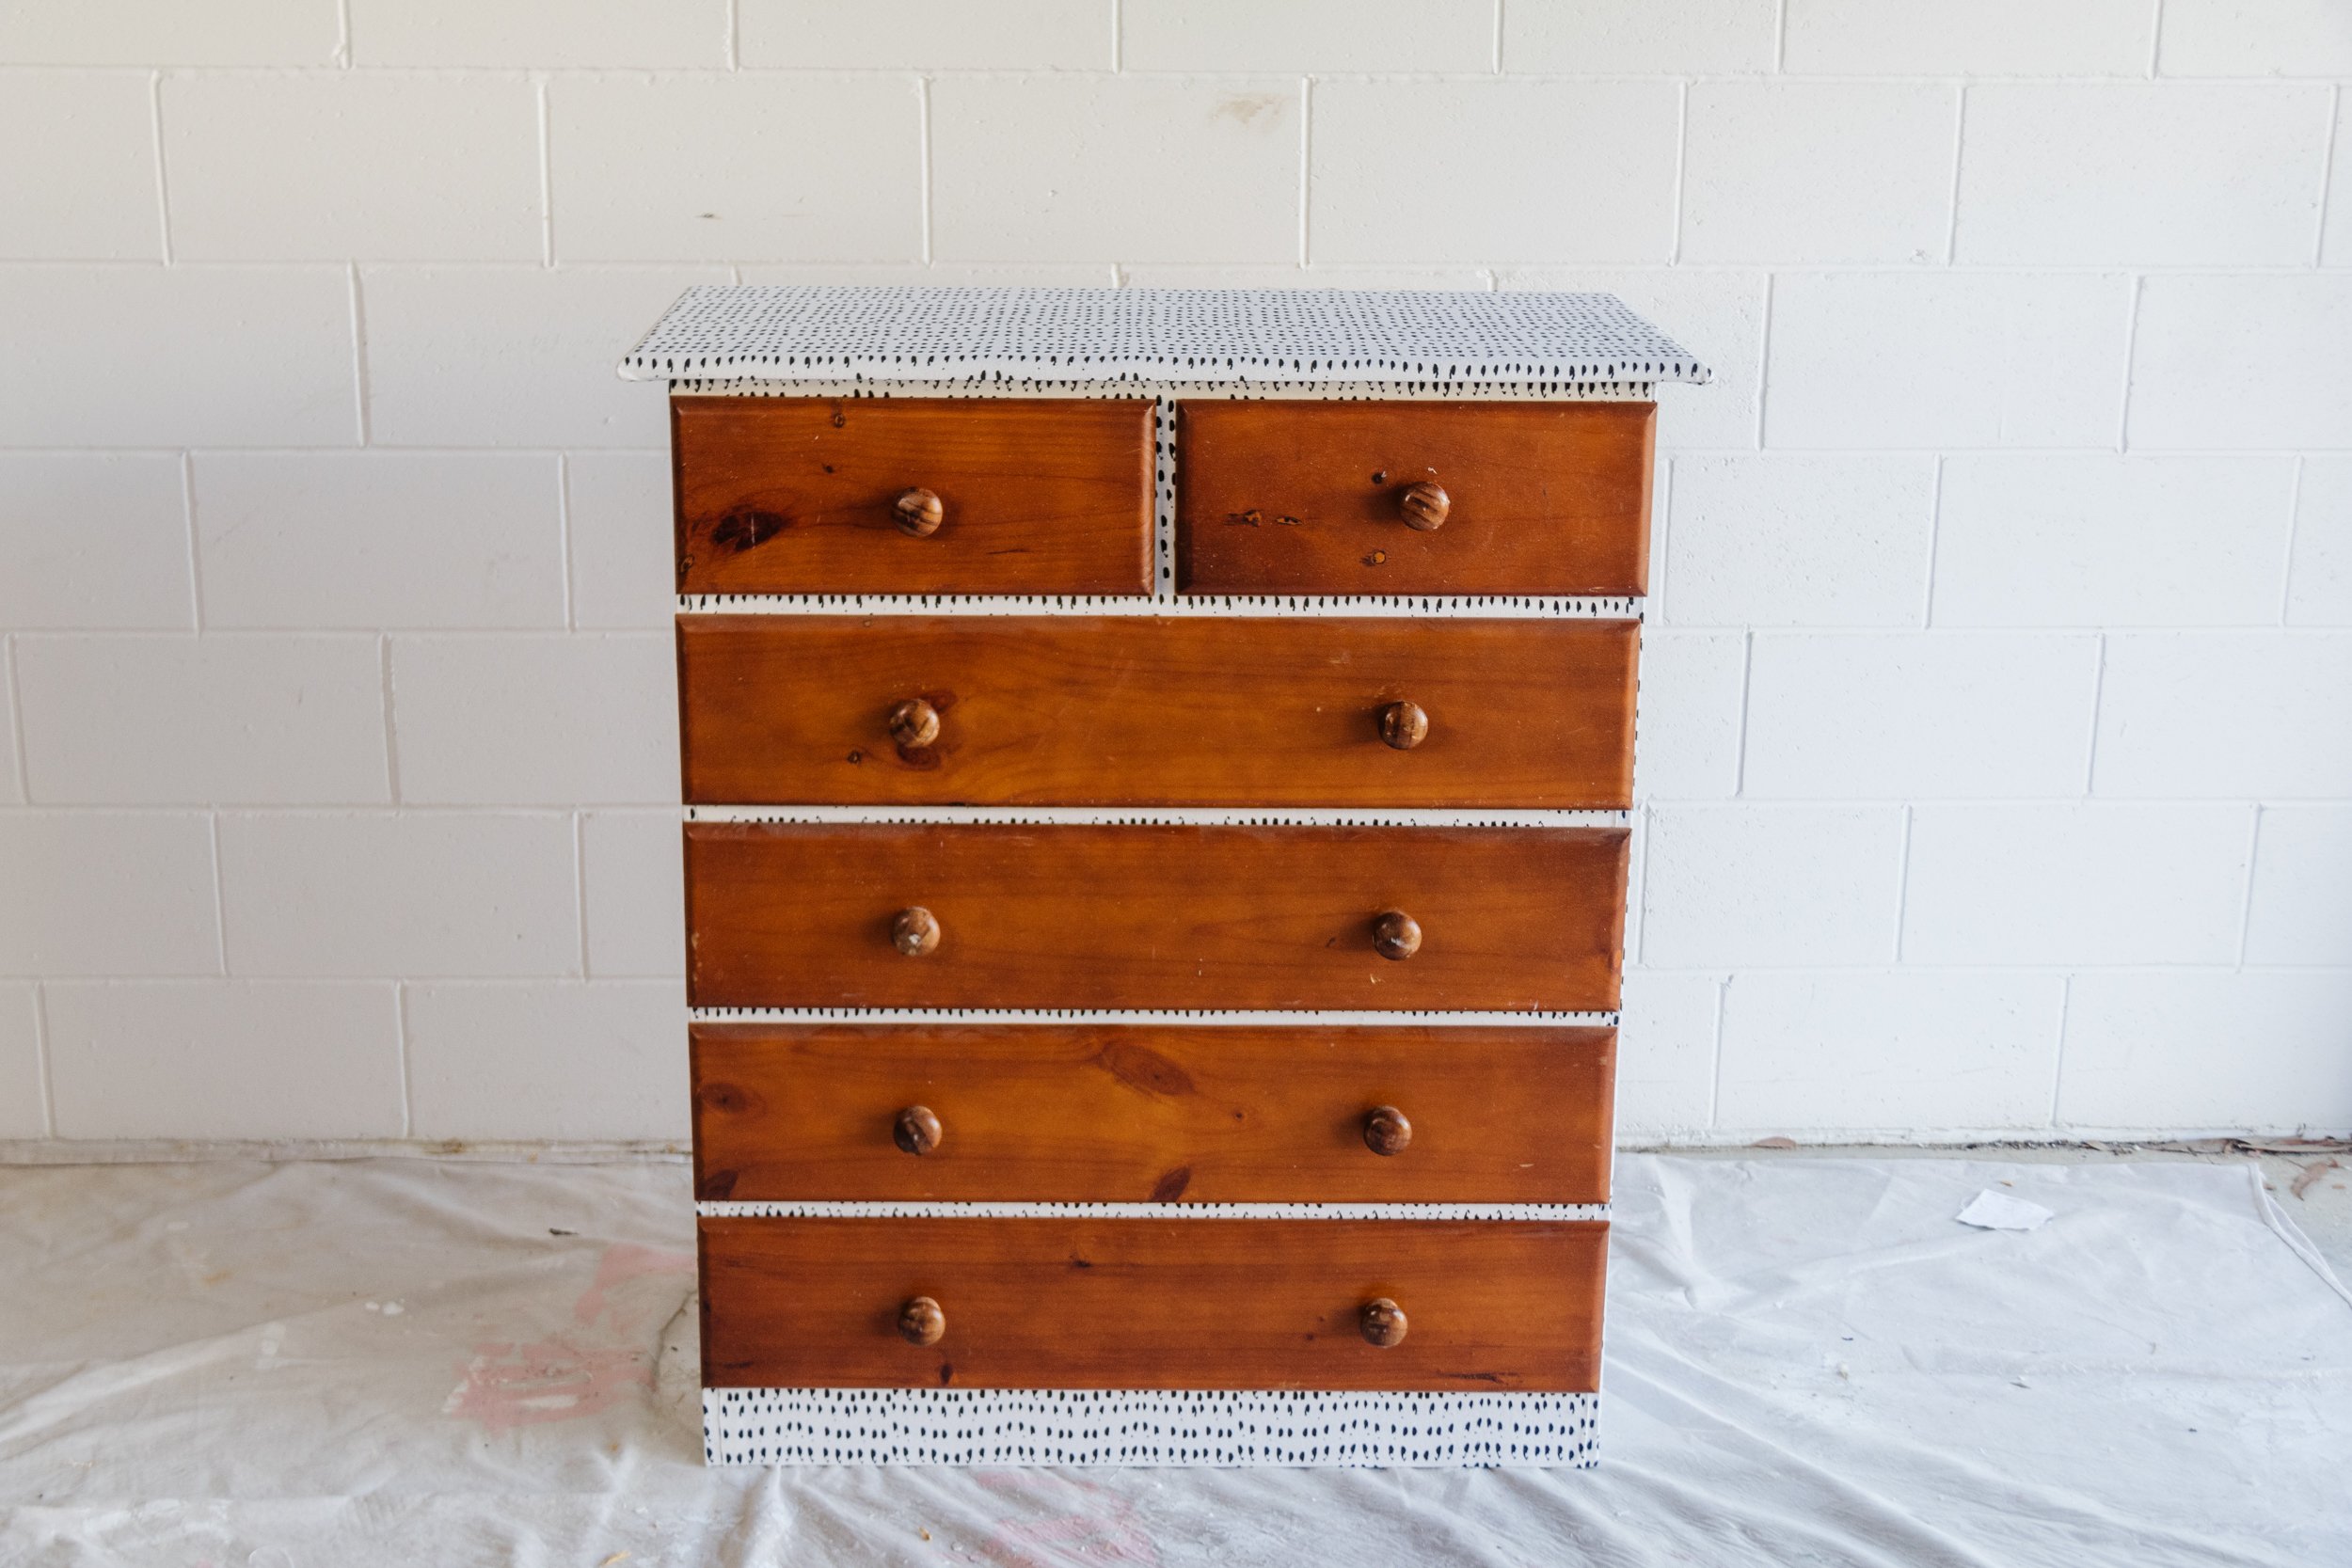
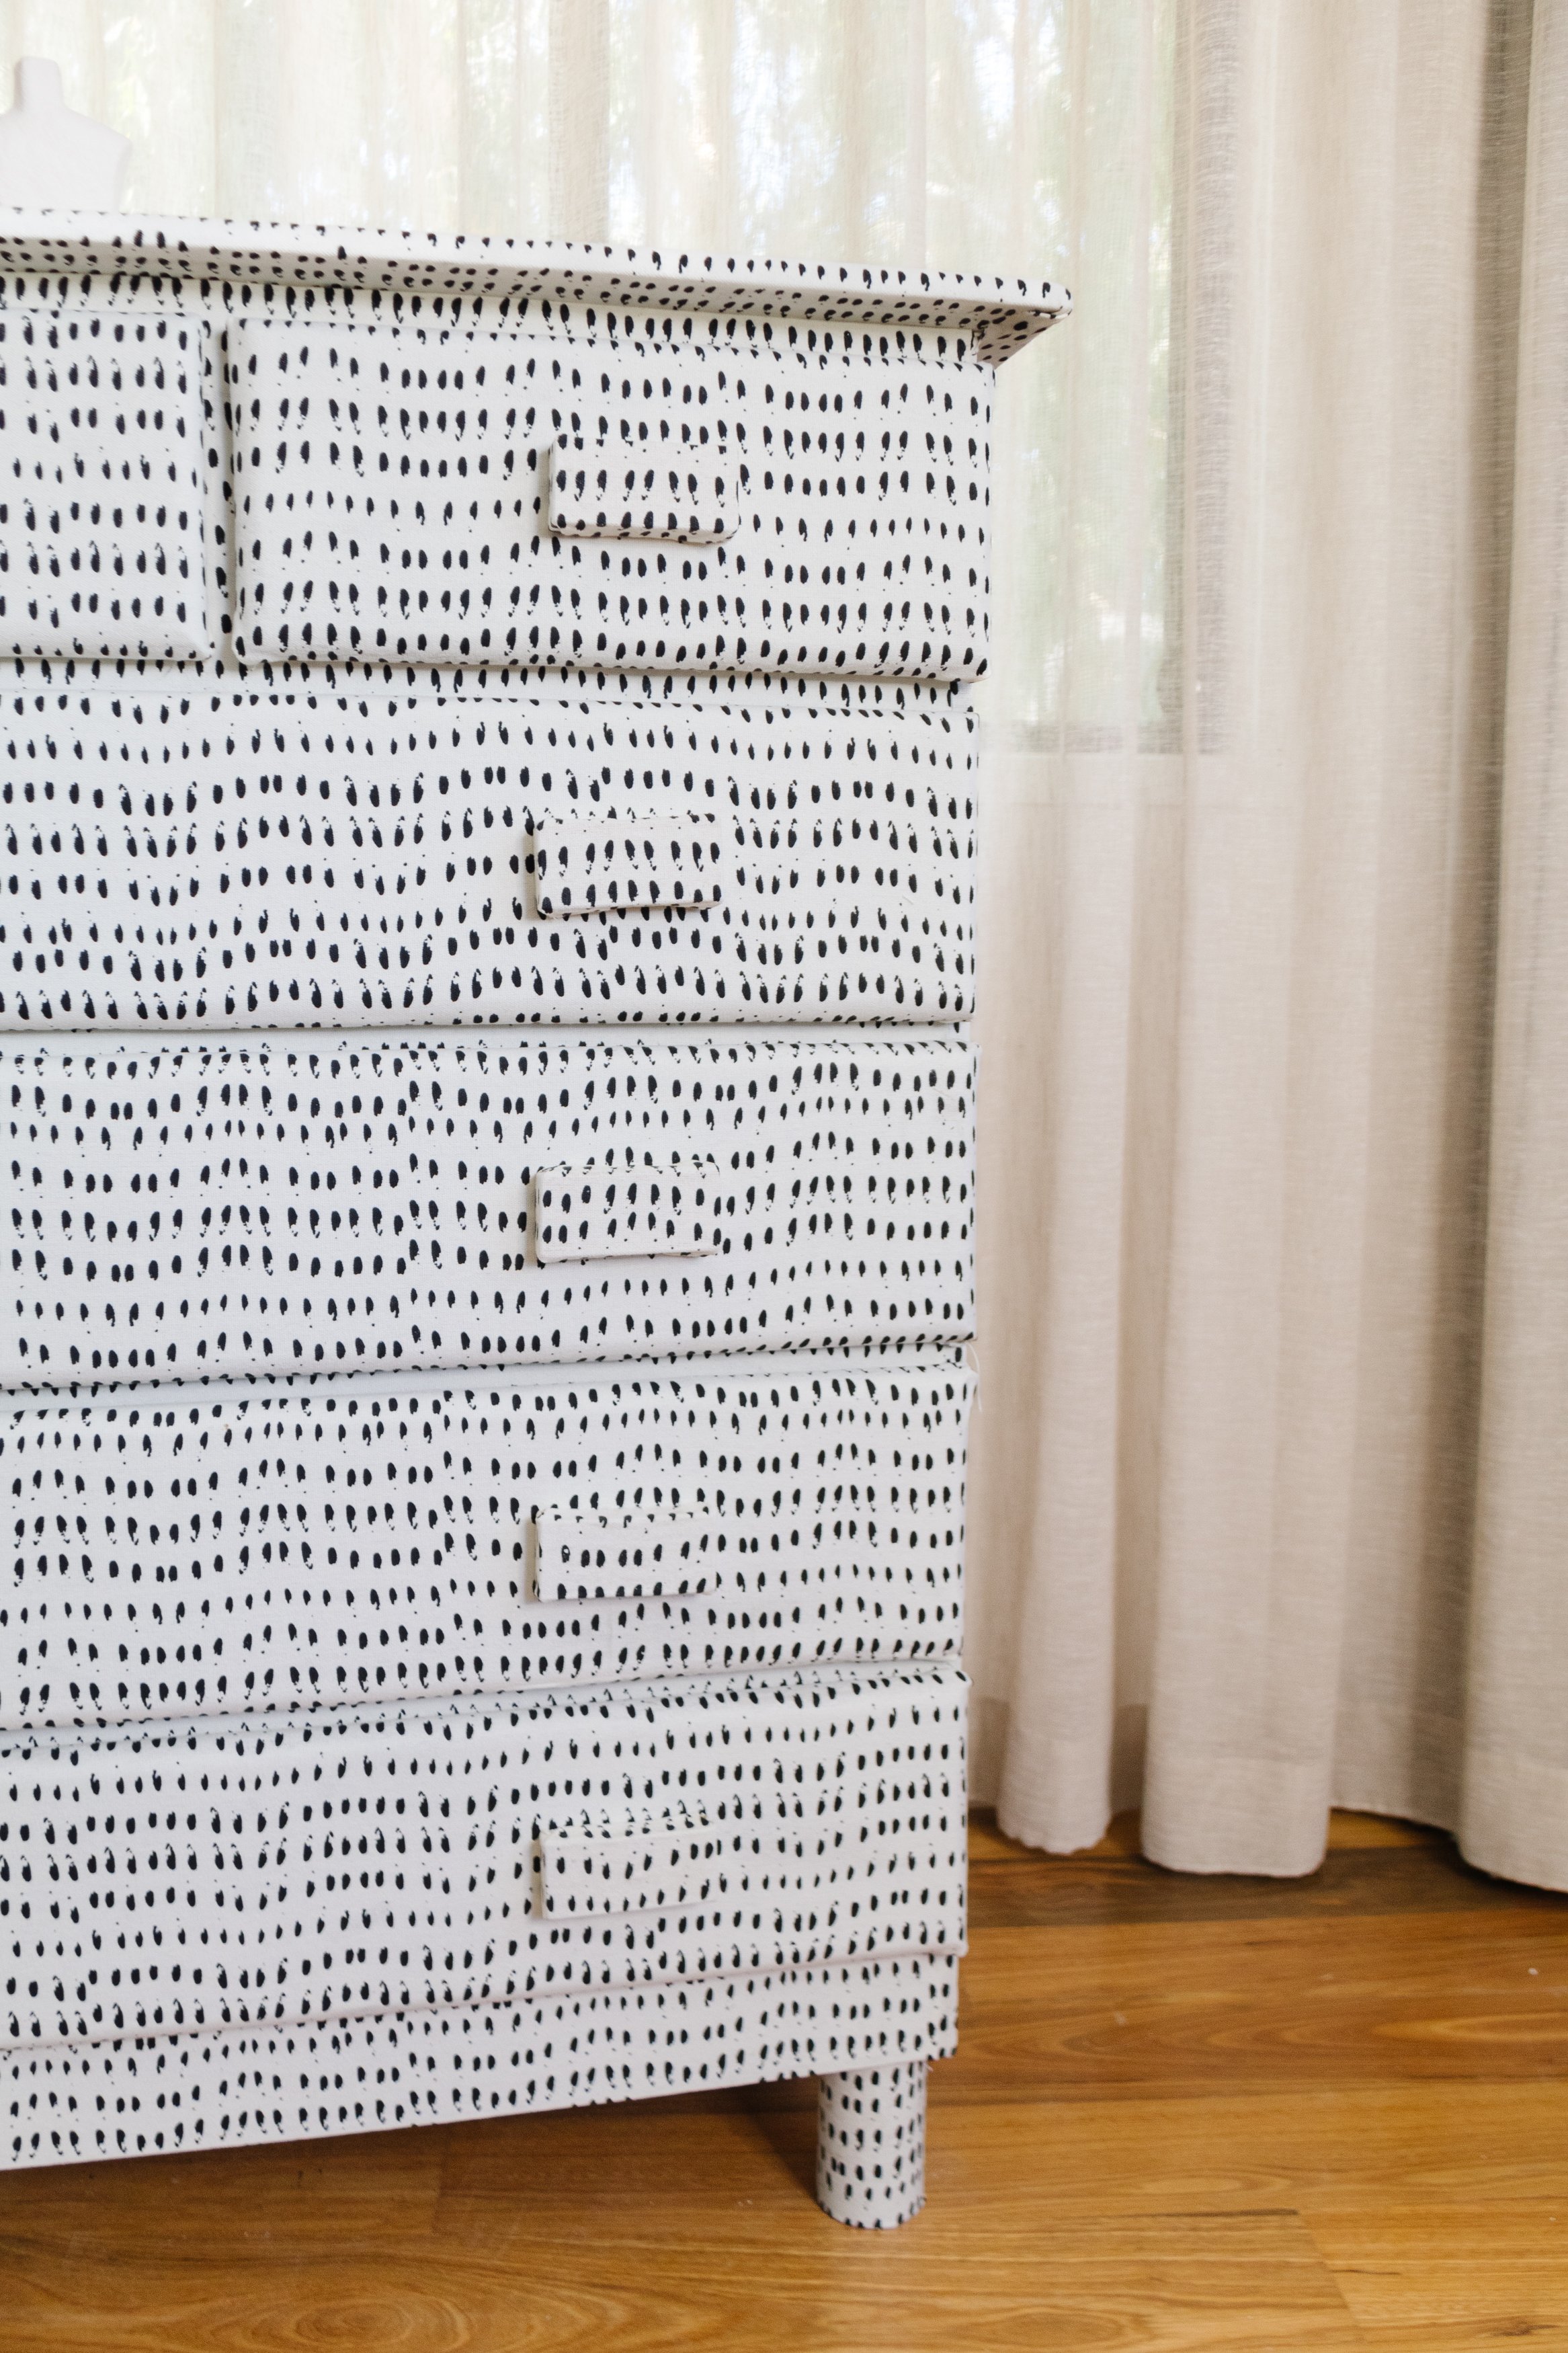
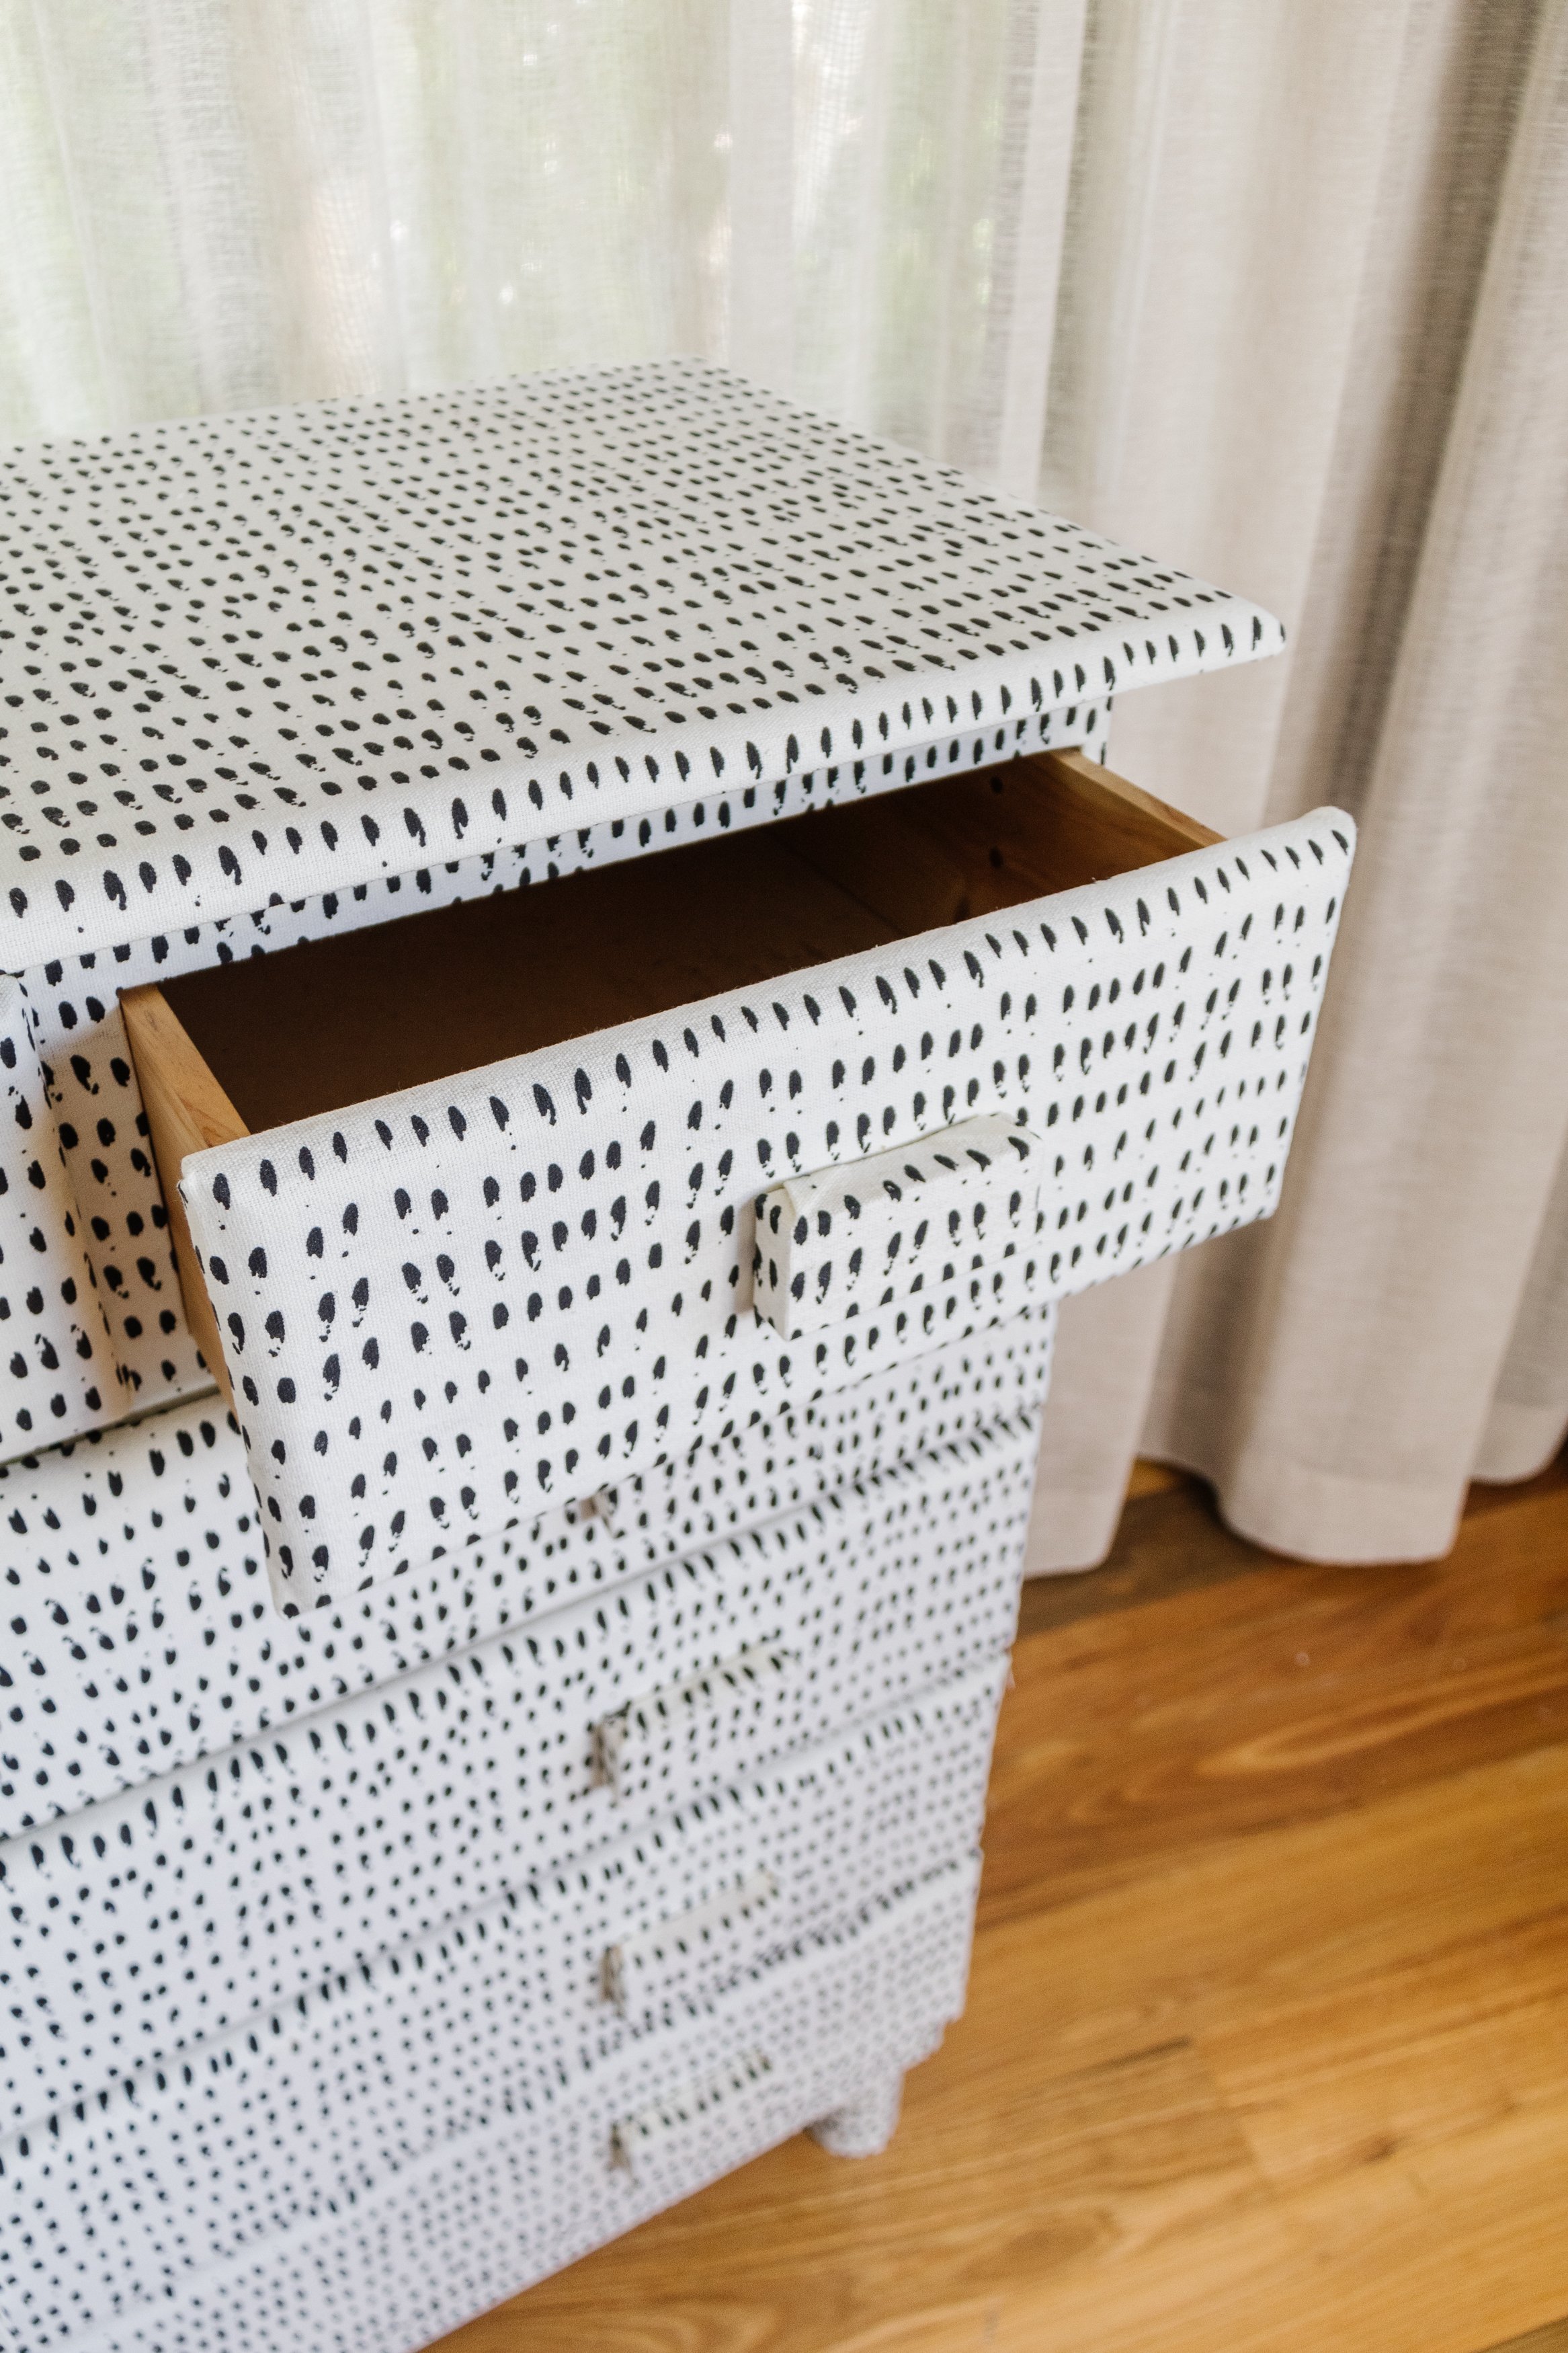
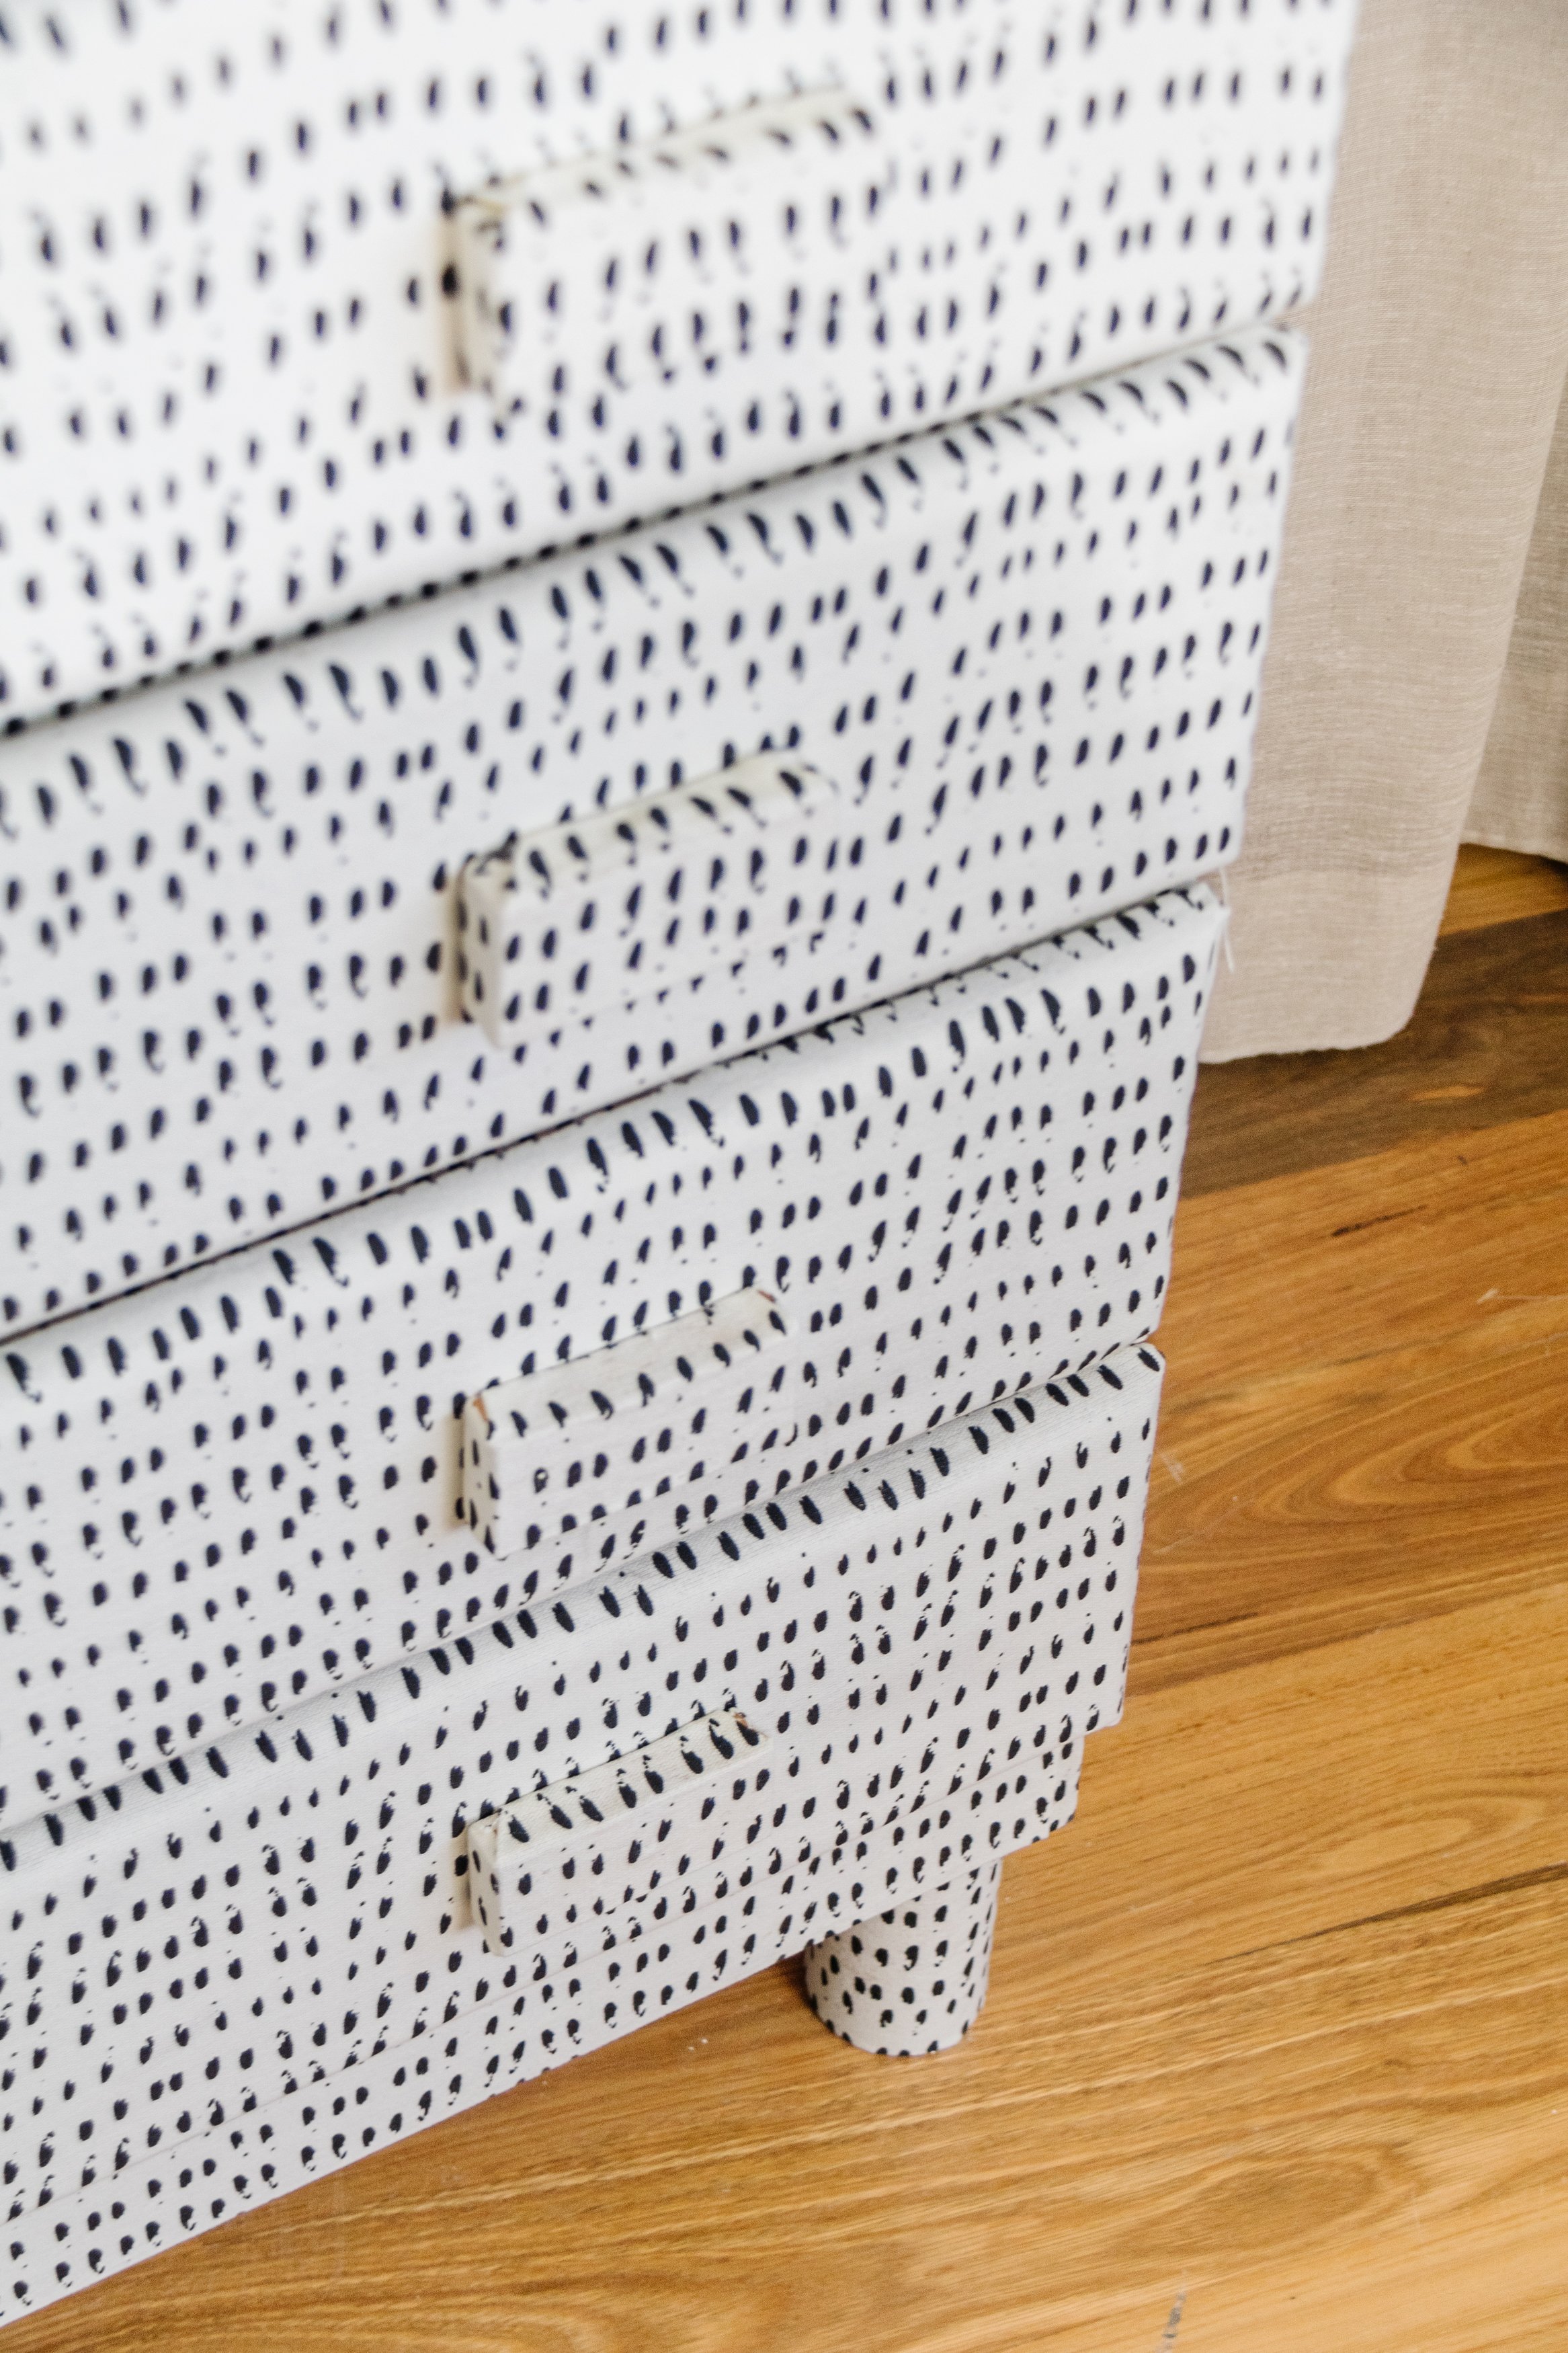
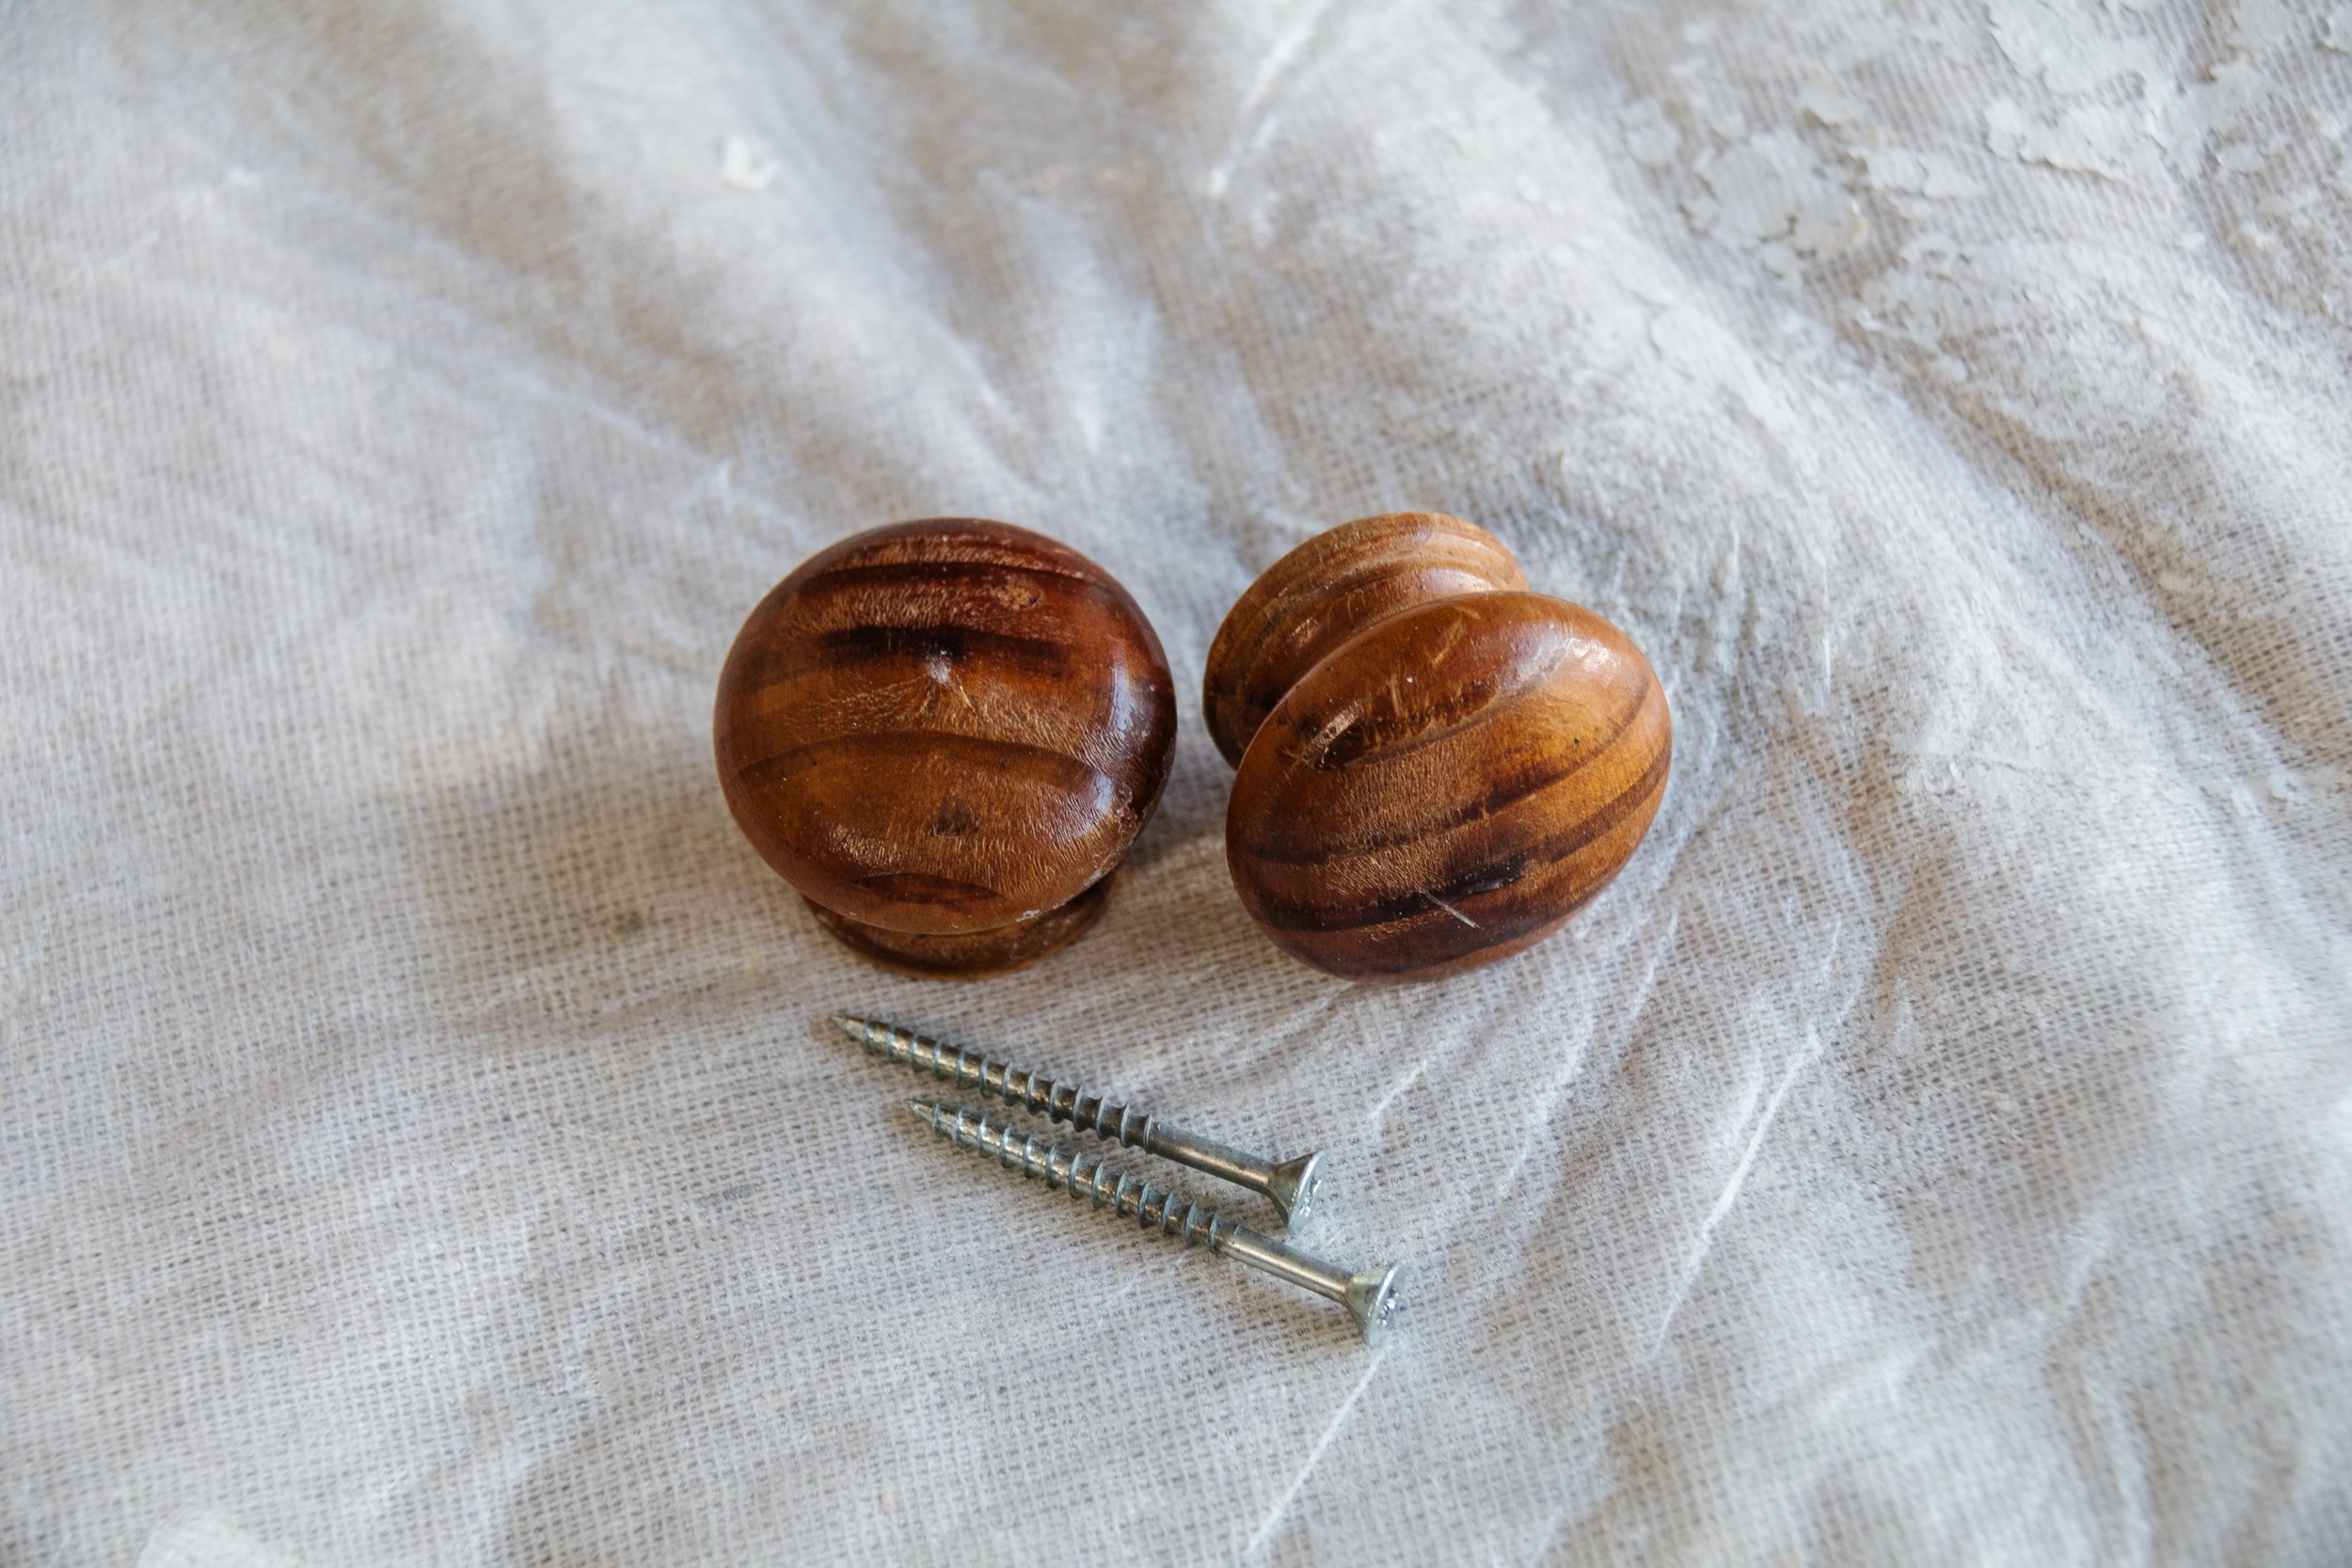
Step 6: Using a drill (or a screwdriver) remove the knobs from the drawers and set them aside for safe keeping to use on another project. Using the same steps as above, cover the face of the drawers using fabric and glue. When finished, place the drawers back into the tall chest.
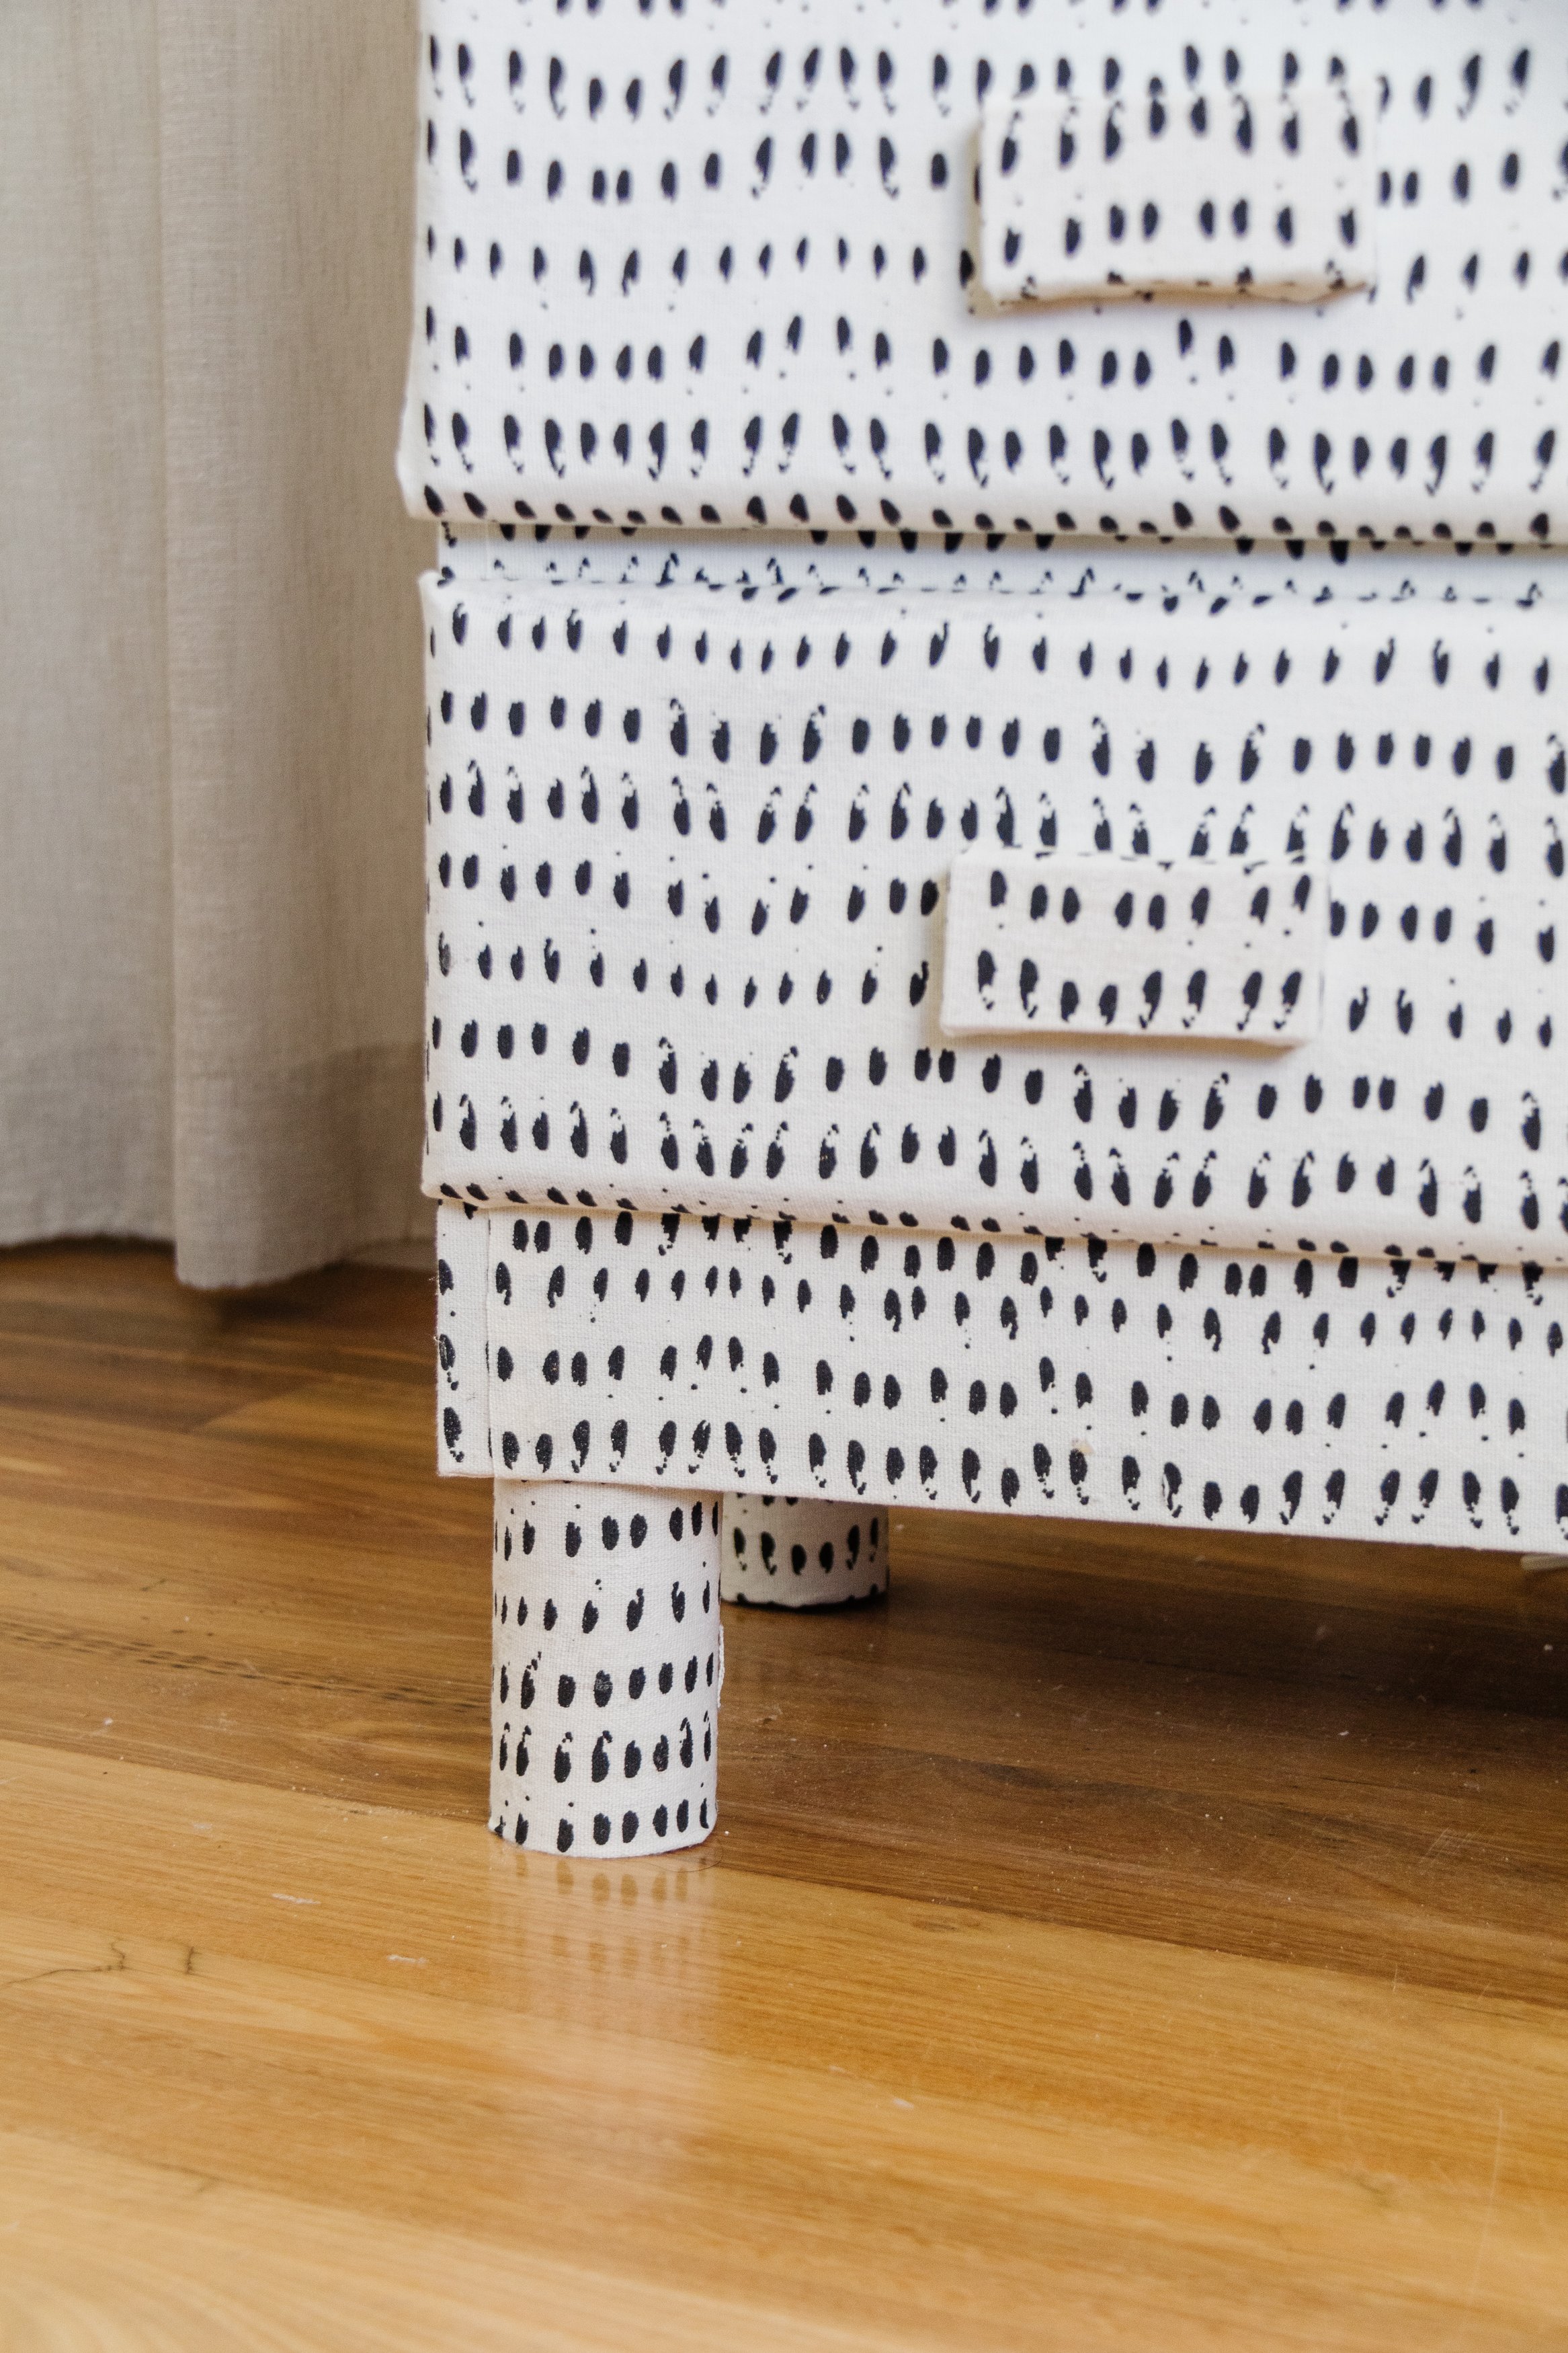
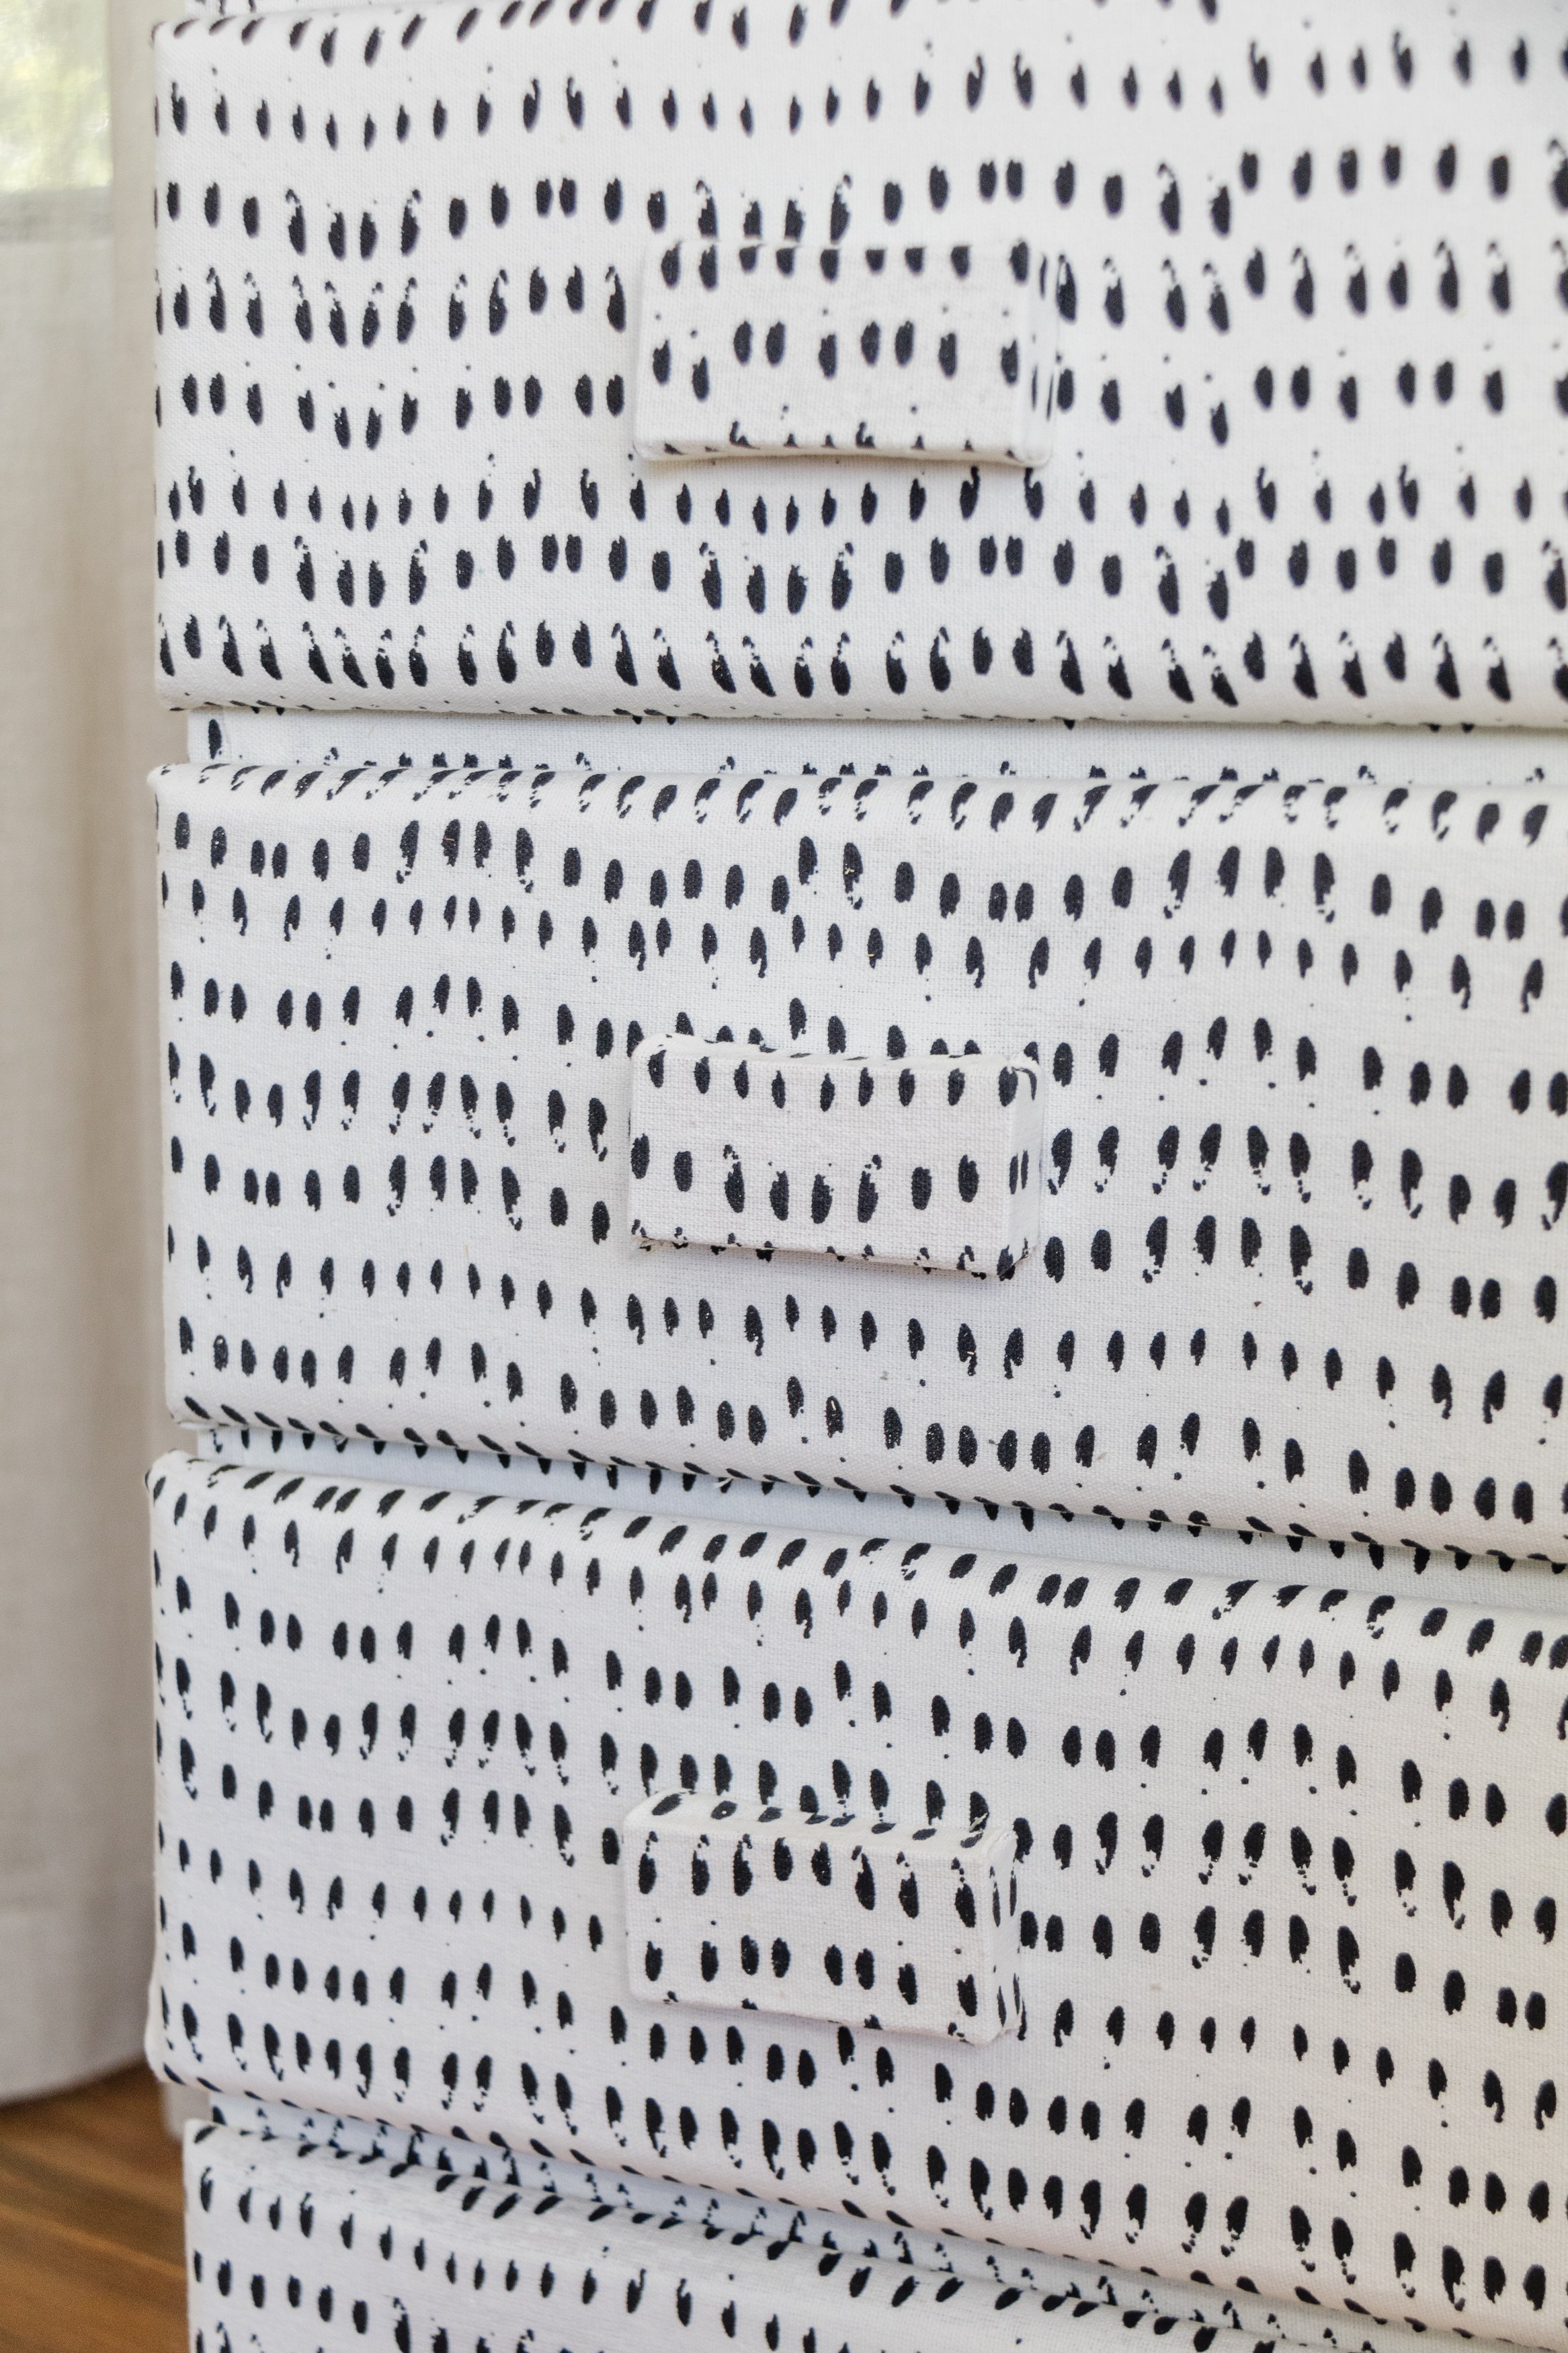
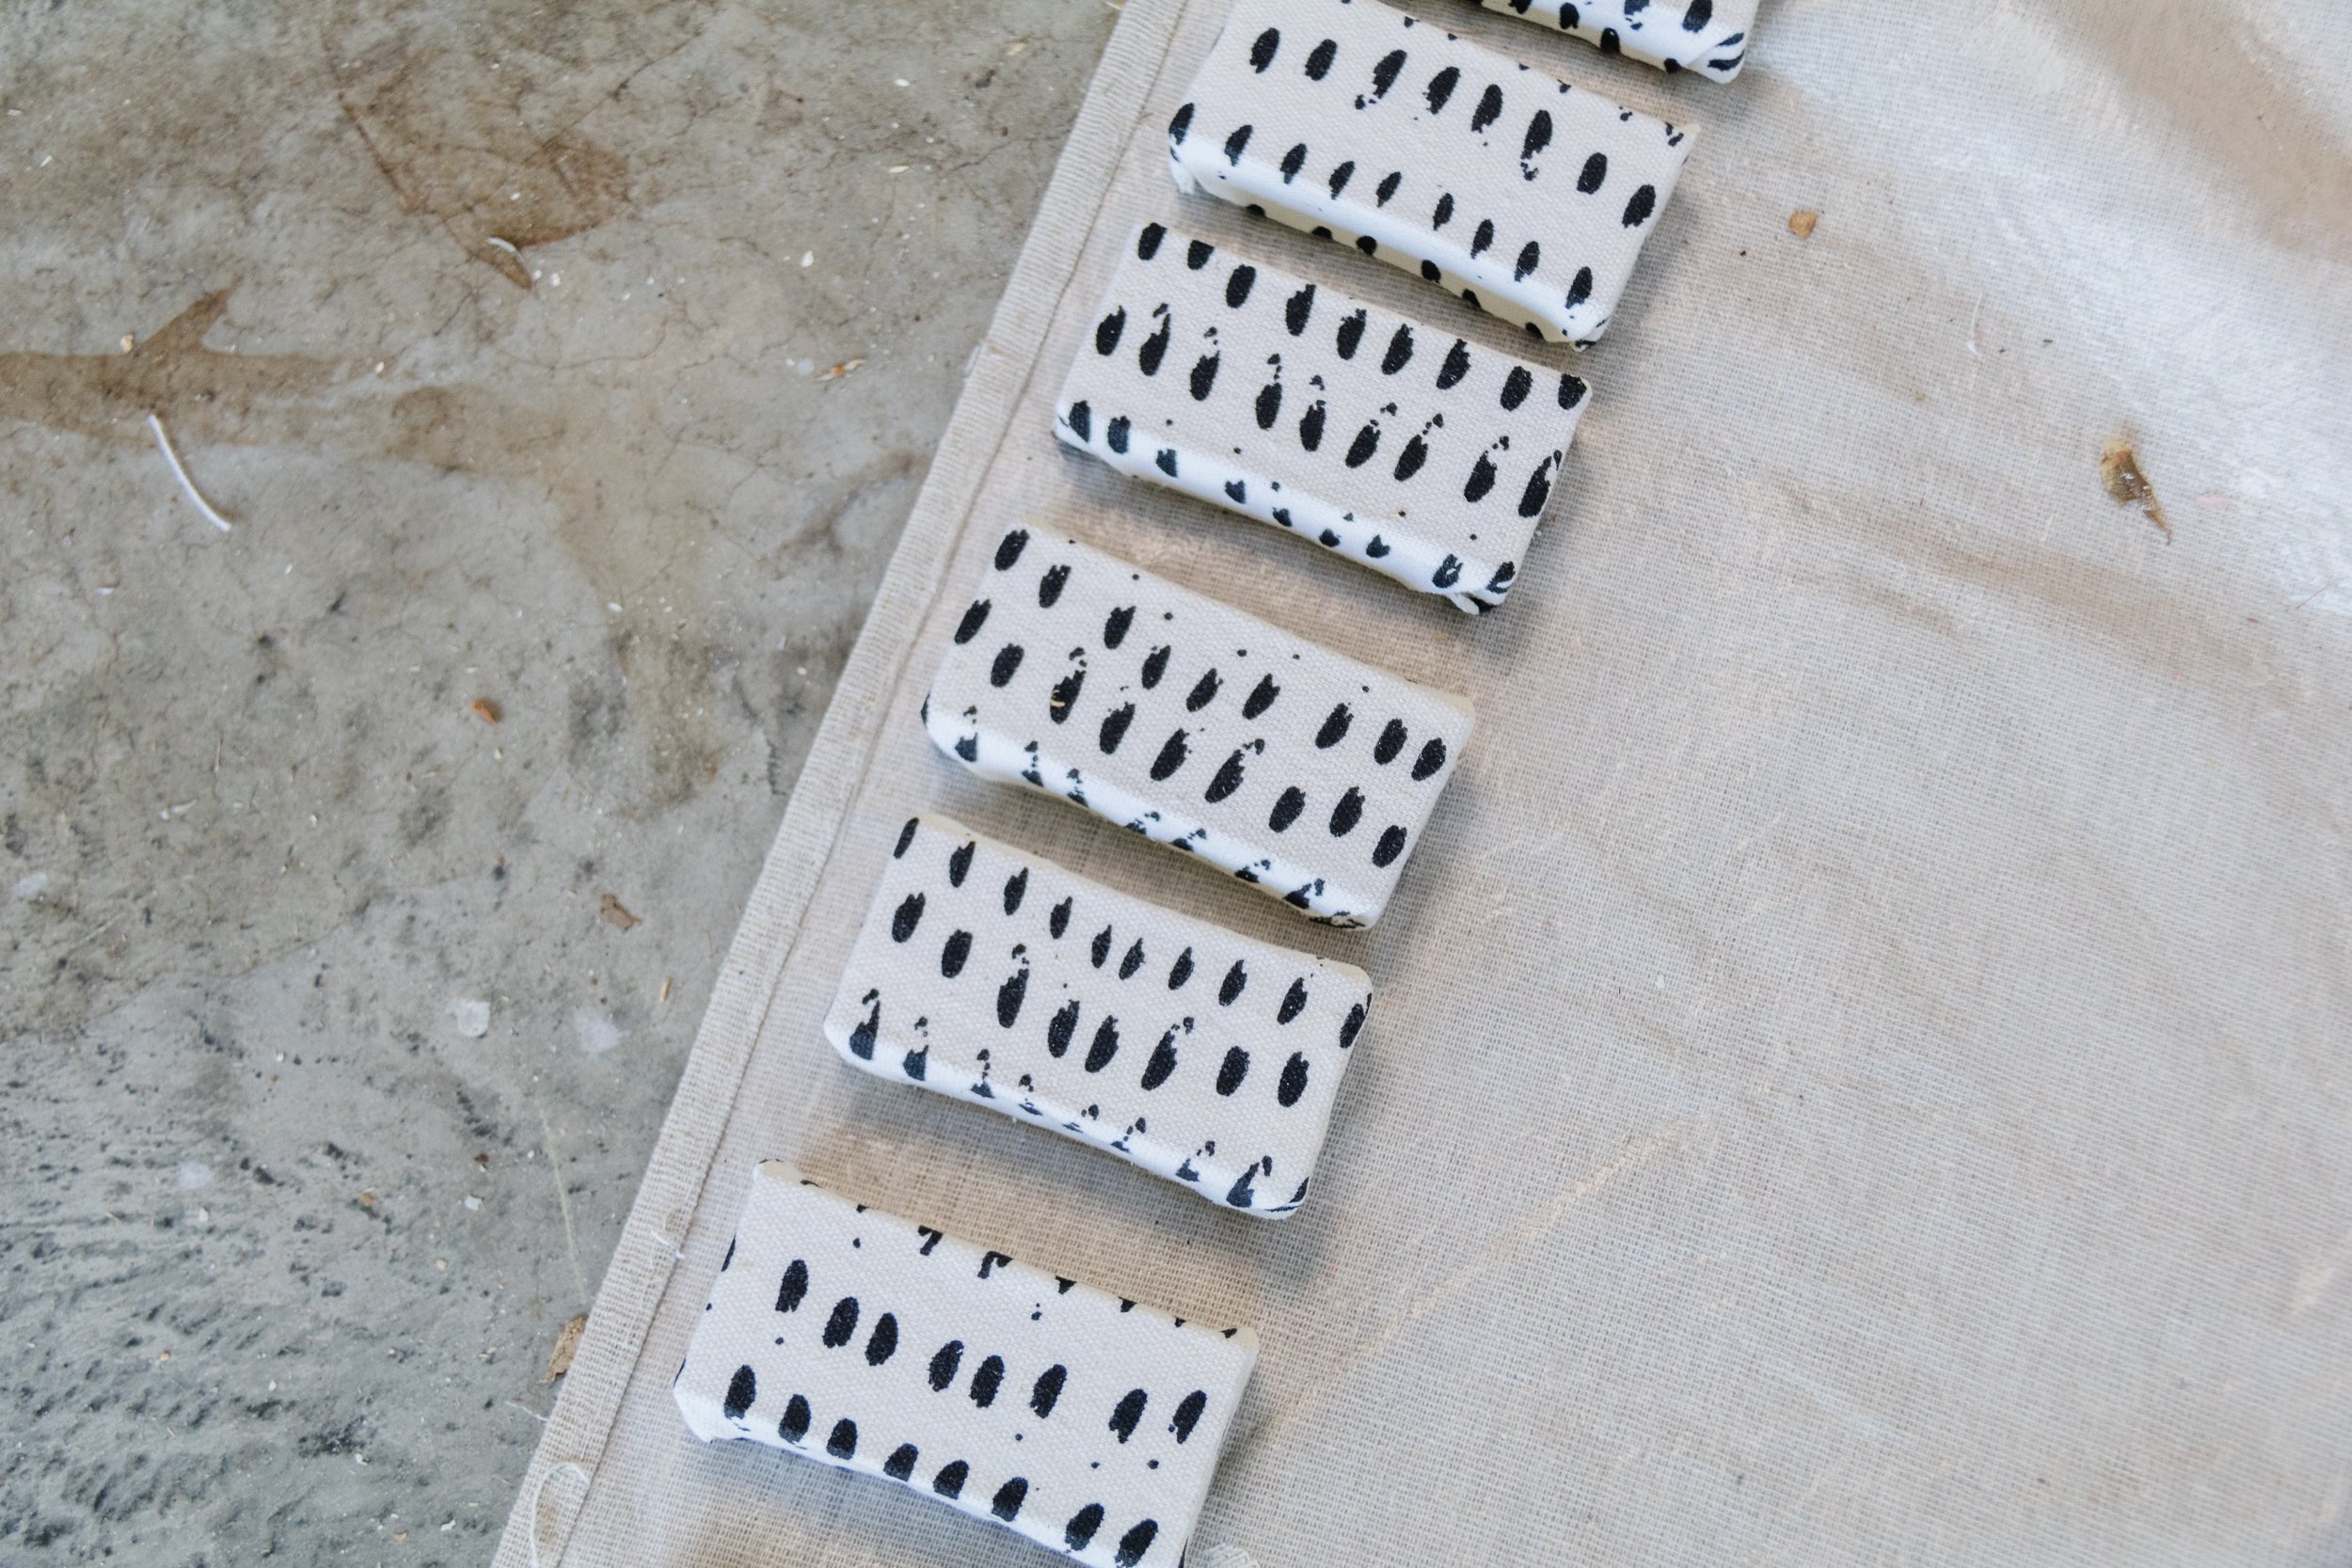
Step 7: Using the same steps as above, cover the 10 x pieces of timber using fabric and glue. Ensure the folds come together neatly at the sides as you will be able to see this when the handles are on the tall chest (because the fabric is patterned, it won’t be as noticeable). Carefully fold the fabric as neatly as possible at the back of the timber and note this is the side that will be drilled into the drawers and you won’t see it. To see this step in detail, check out my Instagram Stories.
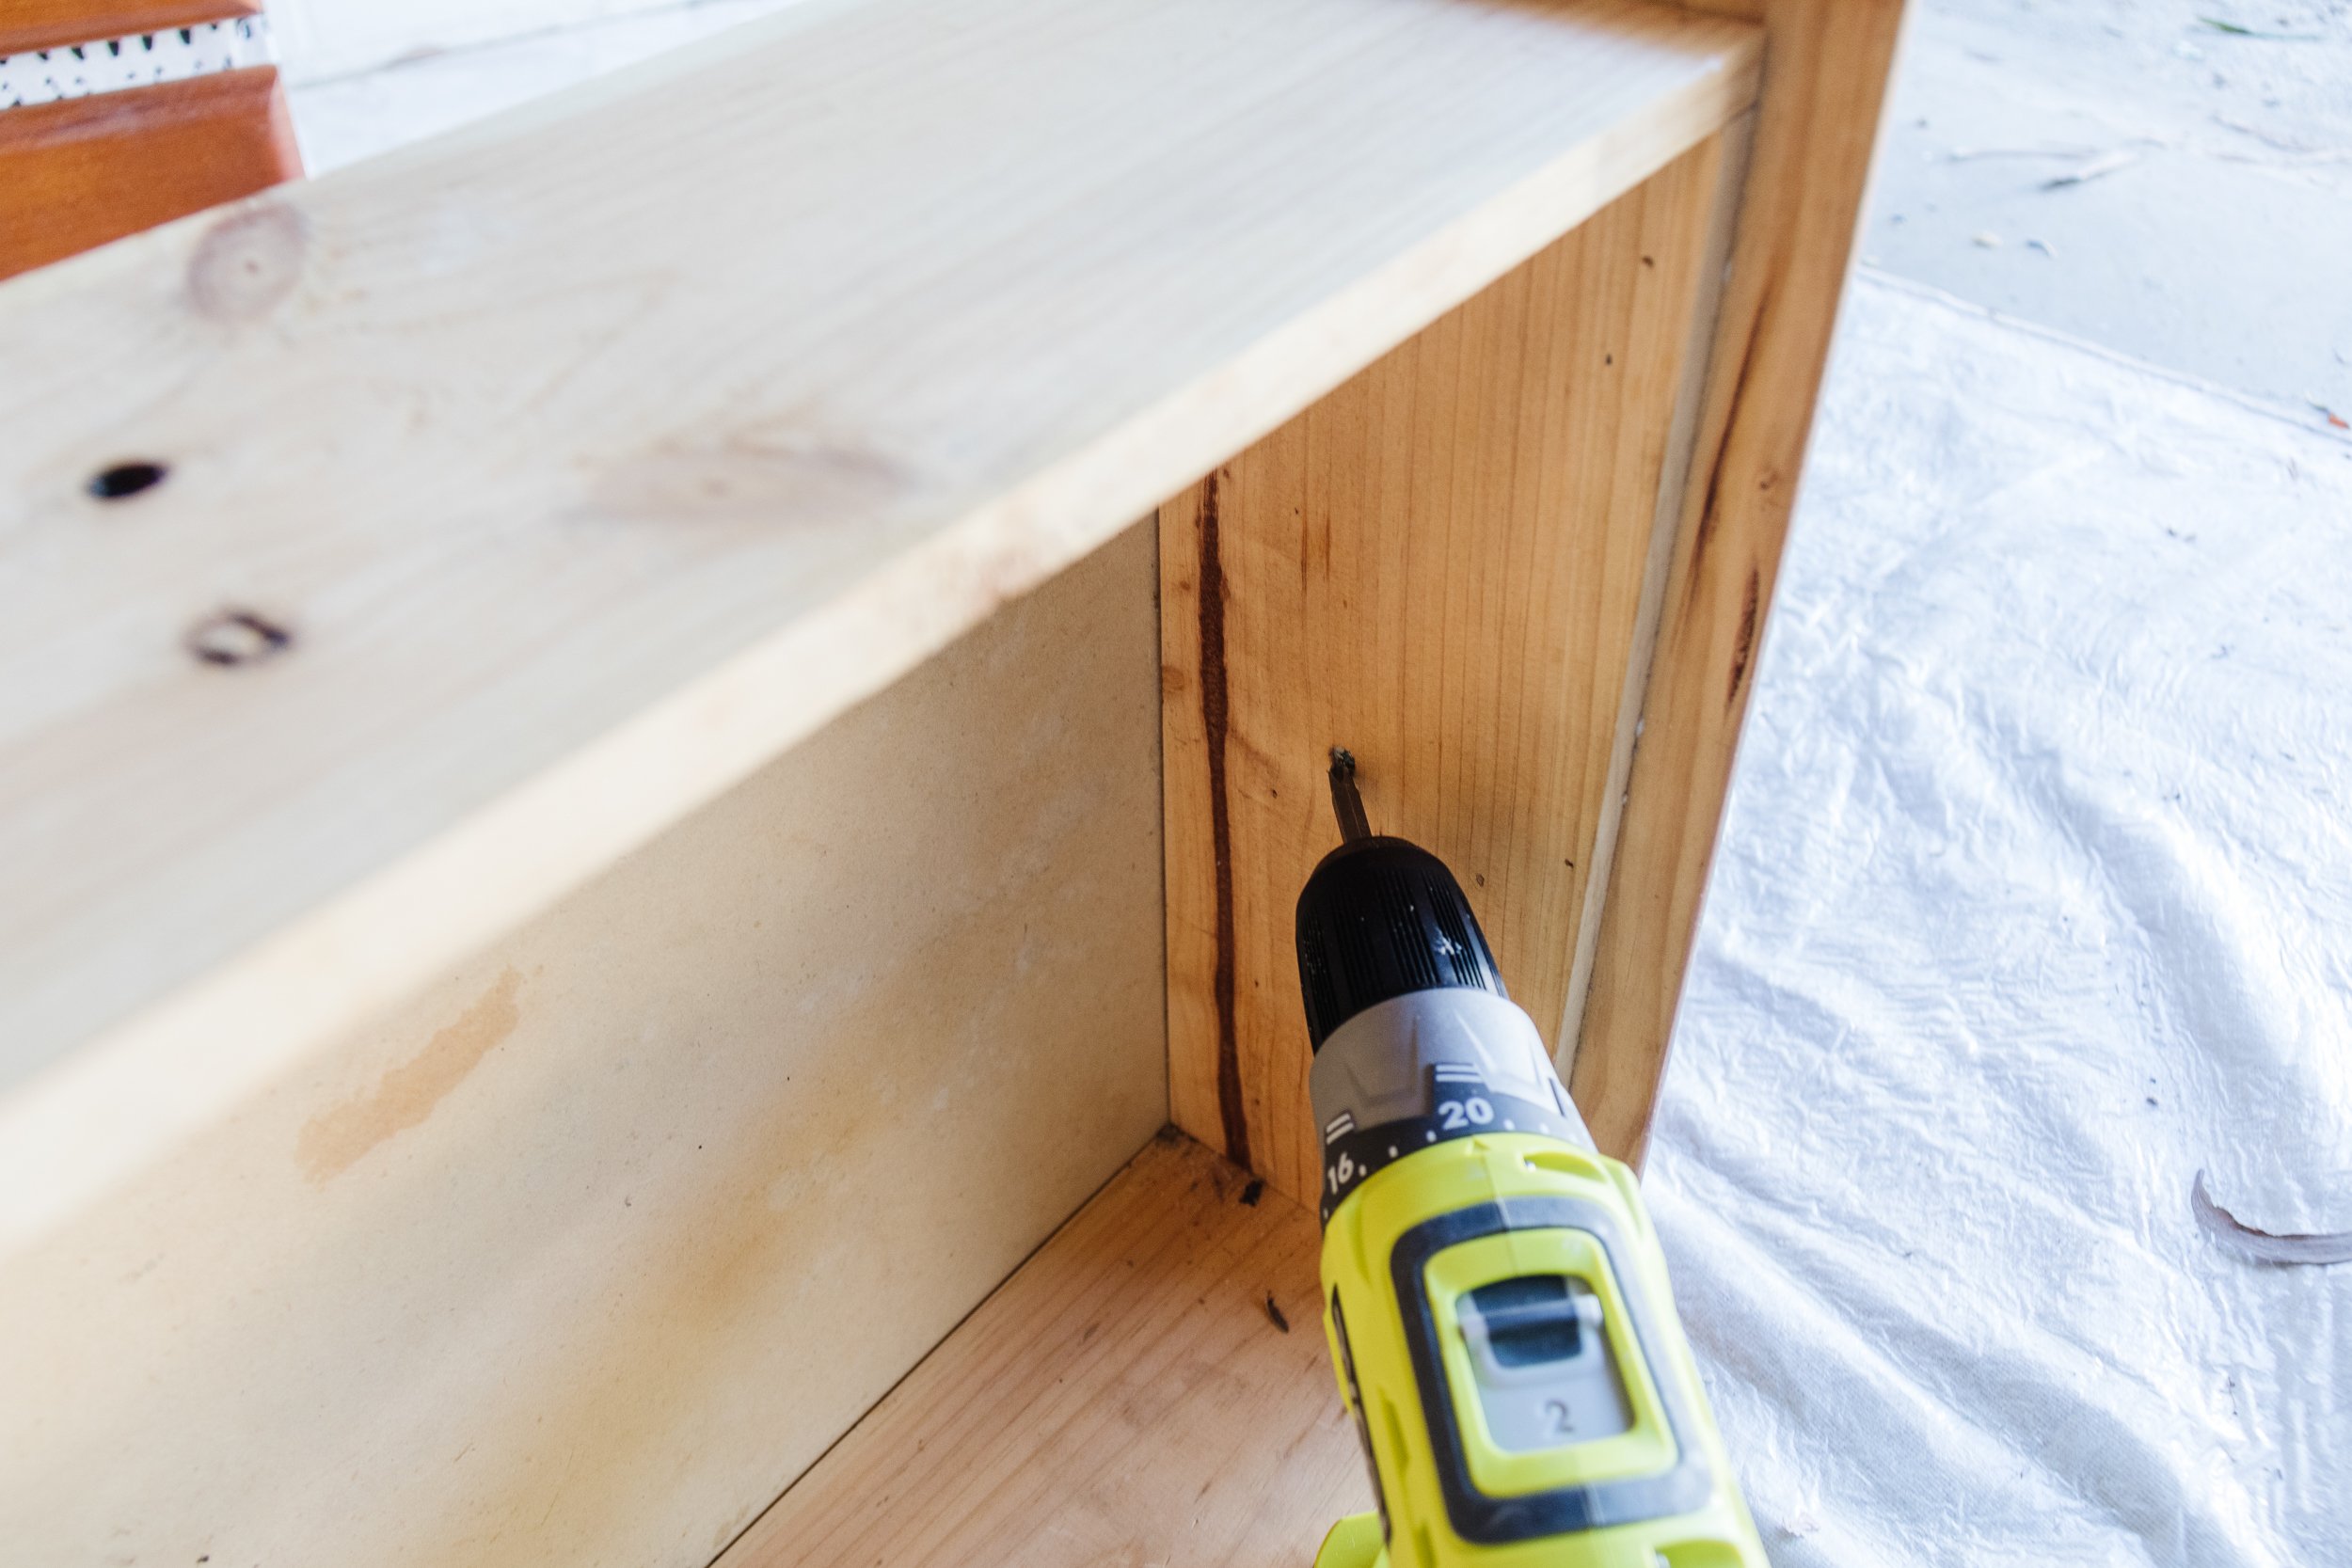
Step 8: It’s important each handle is positioned in the same place for every drawer, so lay the tall chest down (drawers facing up) and position the handles on each drawer. Using a ruler and pencil, lightly mark the fabric to ensure the position of each handle is lined up perfectly. Take each drawer out and using a drill and timber screws, screw each handle into the face of the drawer. Place all drawers back into the tall chest once all the handles have been screwed on.
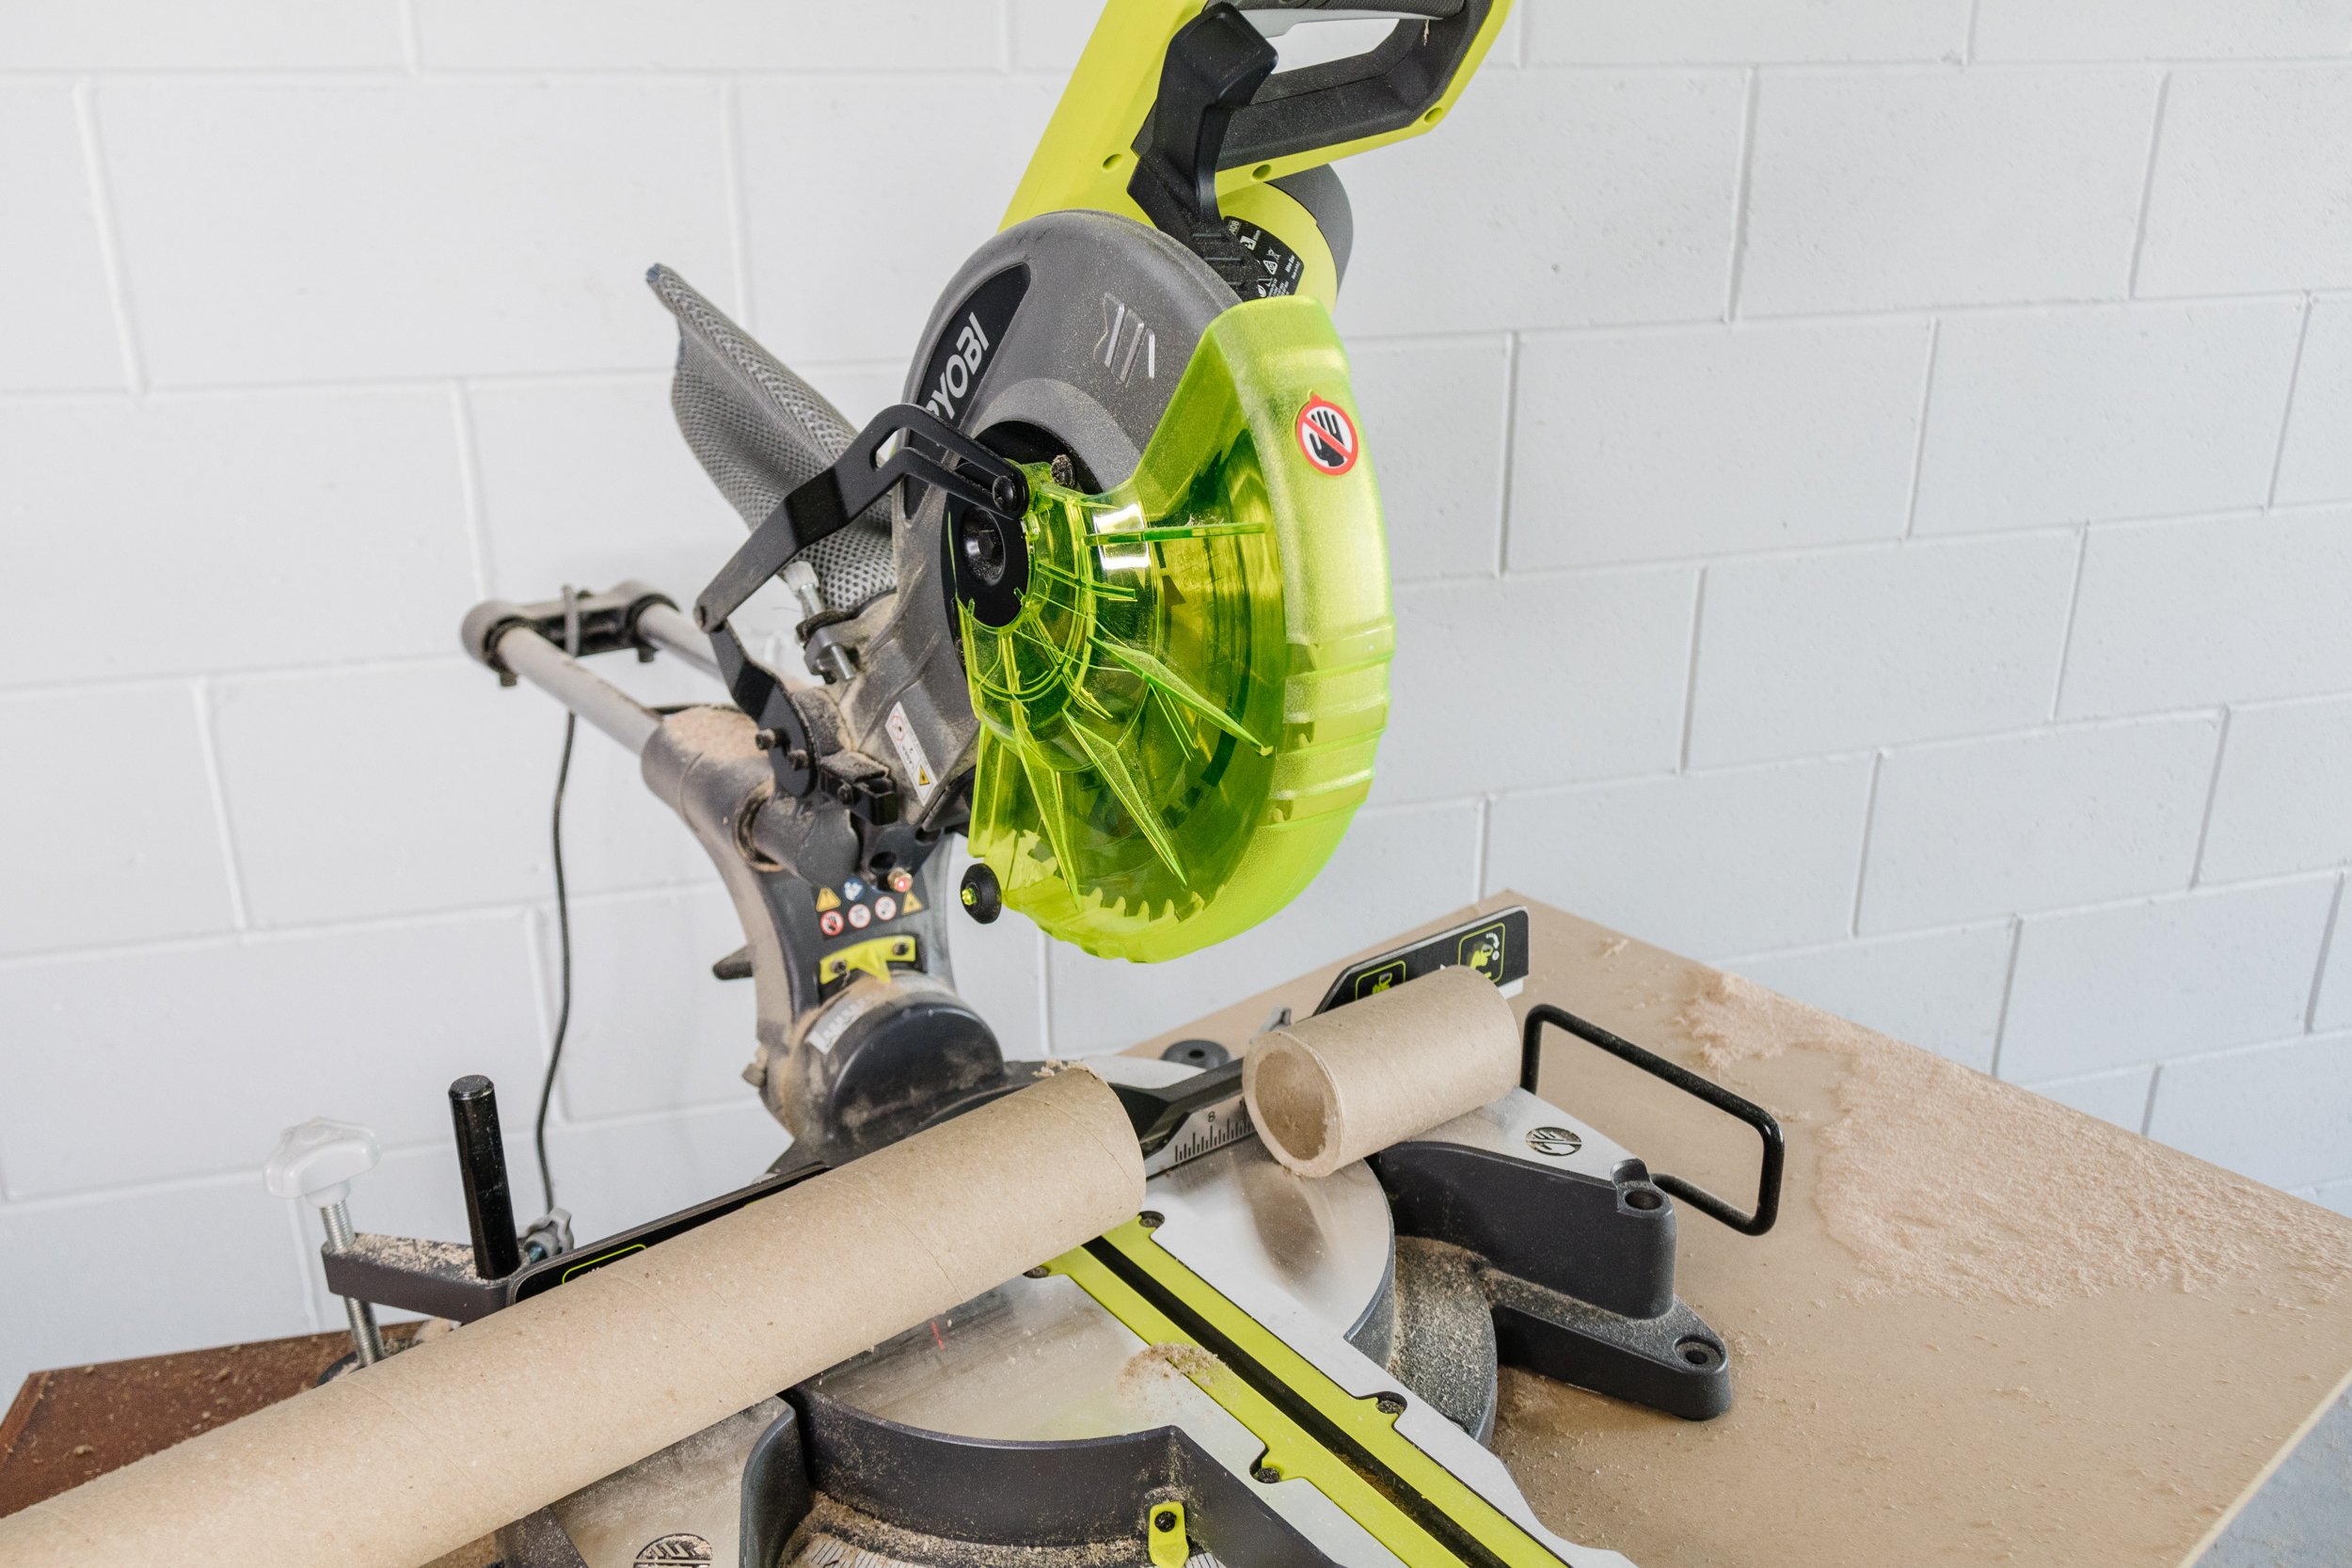
Step 9: It’s now time to install some furniture feet! This step is totally optional. If your piece of furniture already has feet, cover them in fabric and glue using the same steps as above. I had a thick cardboard tube (which came rolled up when we had a rug delivered to our house), which I covered in fabric and glue. I glued them onto the base of the tall chest using construction adhesive and secured them with L brackets and small timber screws.

Ta daaaa!
Isn’t it amazing what you can do with a bit of fabric and glue? Make It March is about celebrating all things creative, no matter your skills or ability; it’s about giving it ago, having fun and learning! This Upcycled Tall Chest (using fabric omg!) is perfect for anyone looking to make a statement piece in their space. And best of all? No special skills are required, you only need a few materials and if you make a mistake, it’s easily fixable! Hopefully this project has inspired you to get creative this month with Spotlight. Pop in store or visit their website for loads of DIY inspiration.
This project is in collaboration with Spotlight