How To: Make Your Own DIY Coloured Grout (for tiling!)
If you've been following along over on Instagram, then you'll know I have been busy working on my DIY Tiled Chubby Side Table using MDF sheets and PVC pipes! We really need a new side table in our living room and so I thought, why buy when I can DIY? I've been sharing the entire process over on Instagram, so make sure you join me and check out my "Chubby Tables" Instagram Highlight. Everyone has been so helpful and generous with their advice, votes, tips and opinions as I chose finishes, paint colours, tiles and grout colour - it's been a lot of fun!

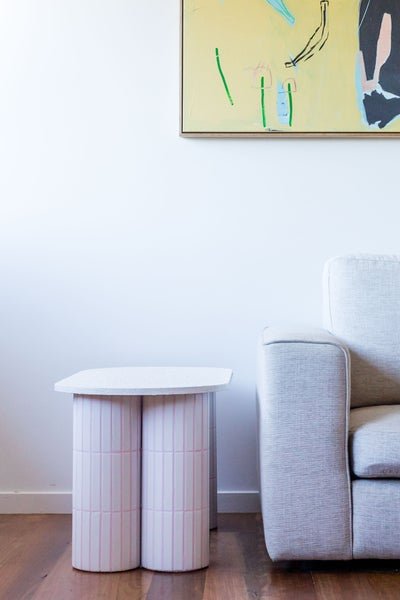
DIY Tiled Chubby Side Table
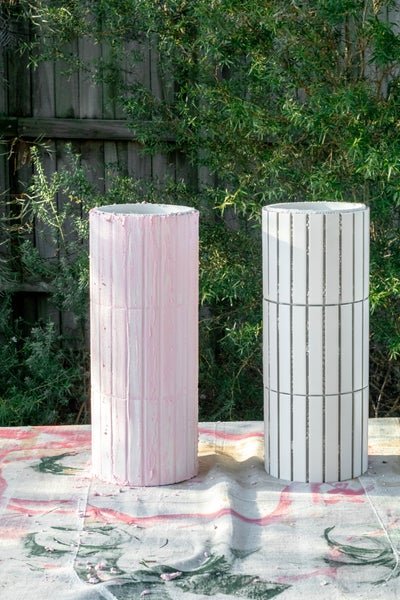
This Tiled Chubby Table has 4 wider PVC pipe legs and a racetrack tabletop, which I cut from a sheet of MDF using a jigsaw. I haven't stopped thinking about finishes for this table and I have been feeling really inspired by tiled console tables over the last few months. I've been seeing them everywhere for ages - tables, consoles, cubes, side tables but I am yet to find a side table with curved legs that have been tiled. I've been giving the curves of the PVC pipes a lot of thought and consideration, and since I have already used small square tiles for another DIY home decor project (Dusty's Ikea Kids Kitchen Makeover way back in March last year), I started thinking about tiling the PVC pipes. Crazy I know!

We gave our kitchen a mini reno last year, which involved retiling the whole back wall. I realised that using sheets of vertical finger tiles would be much easier to apply to the curved PVC pipes. But then I got thinking about taking this DIY a little further by using coloured grout! What then began was a big researching session online, and while I found a few options, I couldn't commit because I wanted to "try before I buy" and I couldn't find the colour I was looking for. Then a lovely follower on Instagram said that her dad was a tiler and that I could mix acrylic paint into white grout to make coloured grout. And here we are! The other day I set about testing grout with acrylic paint to see if I could make my own DIY Coloured Grout for tiling and here's what I got up to.
How To Make Your Own DIY Coloured Grout
Materials
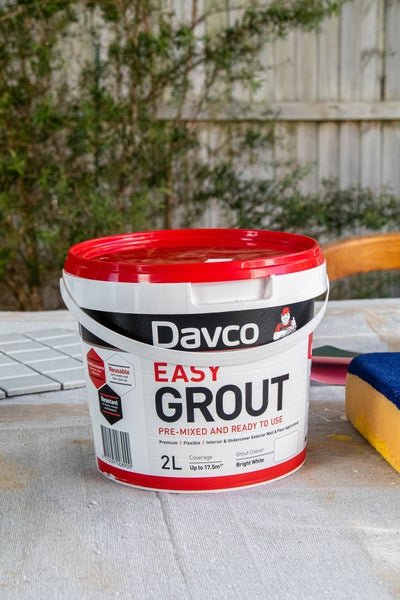
1 heaped cup of Davco Easy Grout in Bright White from Bunnings
1 Plastic container
1 Old spoon
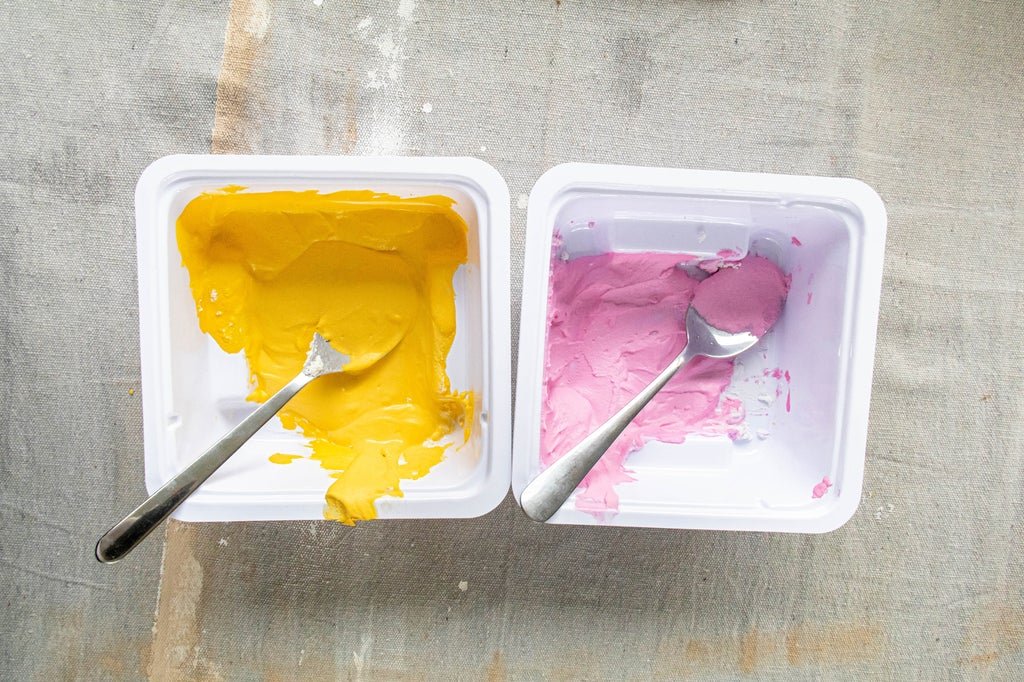
1 tablespoon acrylic paint, in your colour of choice
Steps
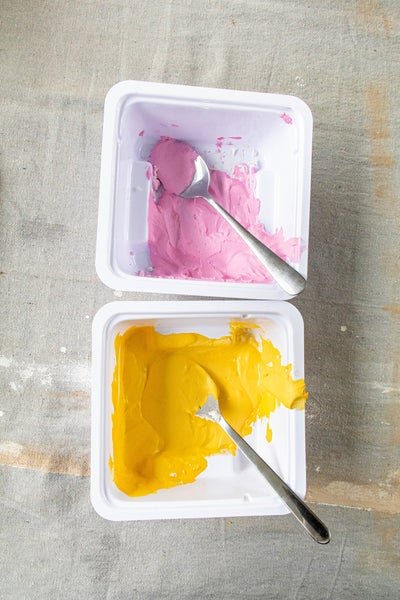
To begin with, mix 1 heaped cup of Davco Easy Grout in Bright White with 1/2 tbsp acrylic paint in one plastic container, and keep stirring until the colour has combined thoroughly.
You could add a little more paint if you like but don't add more than 1 tablespoon of acrylic paint. Be careful and make sure you don't add too much acrylic paint or the grout might not dry thoroughly. While I didn't experience this issue, I would still be careful.
And that's it!
How To Tile Using DIY Coloured Grout
Materials
An old drop sheet
A sheet of MDF from Bunnings or an old off cut of timber
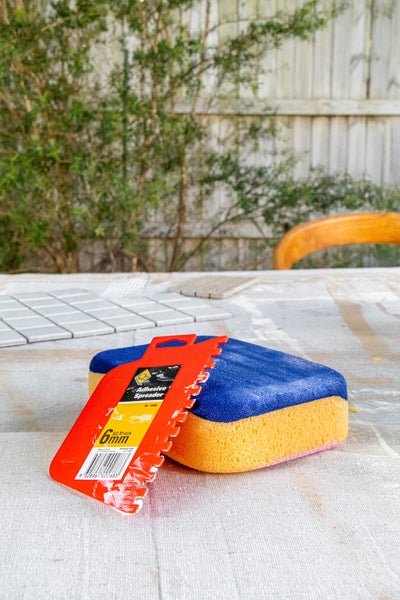
4mm Adhesive spreader from Bunnings (I used 6mm and felt it was just a touch too big for such a small surface area)
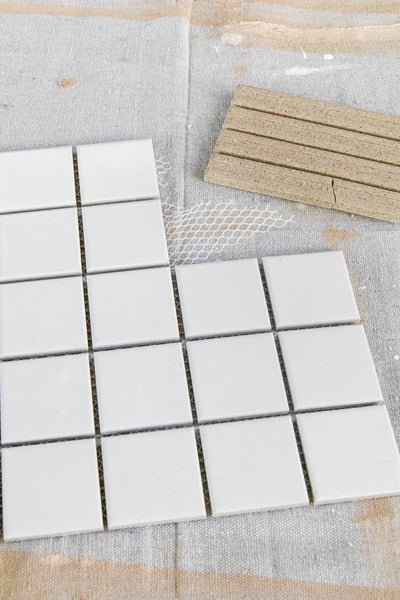
A sheet of tiles (or more) of your choice and these are the ones from Bunnings I used from Dusty's Ikea Kitchen Makeover last year
Disposable gloves
Steps
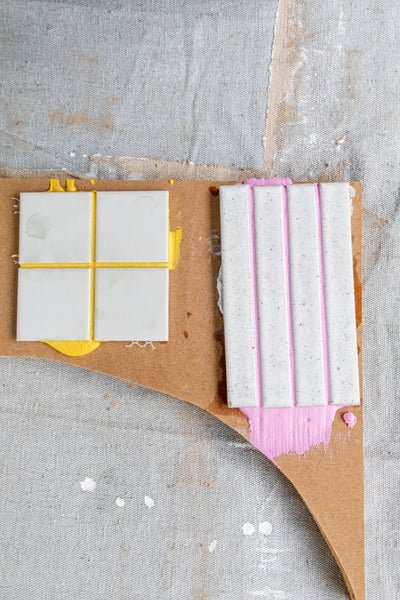
Clean the surface of the MDF sheet and the front and back of your tiles with a dry cloth.
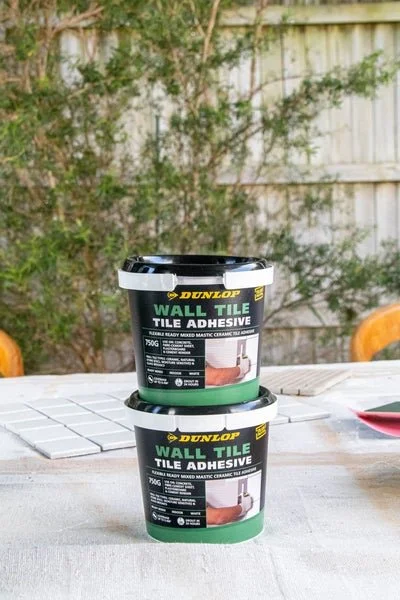
Apply a small amount of wall tile adhesive to the back of the tiles (or to the sheet of MDF) and firmly place the tile sheet onto the MDF sheet. You should wait at least 24 hours for the adhesive to properly dry before applying the coloured grout.
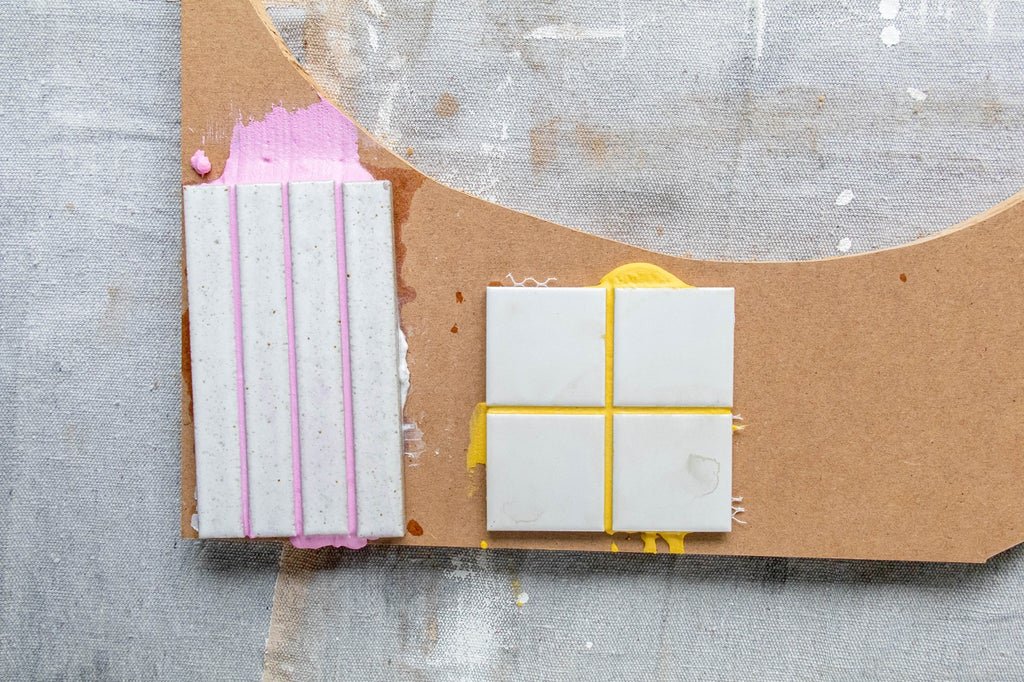
Apply the DIY Coloured Grout onto the tiles (with a spoon or wearing disposable gloves)
and push it in between the tiles. Don't worry if the tiles are covered in grout. Leave it to dry for 30 minutes.
Using a very wet tiling sponge, remove the excess coloured grout off the tiles but be careful not to remove too much of the grout in-between the tiles. Set aside to dry for at least 24 hours.
And that's it! The coloured grout turned out beautifully and there were no issues with the grout drying. Needless to say, I am hooked! I really love that the bright colours make the tiles pop.
Extra Tips
Be careful and make sure you don't add too much paint to the grout otherwise it might not dry properly! Or it may take a bit longer to dry completely. While I didn't experience this issue, I would still be careful.
Remember when adding coloured paint to white grout, the colour will become lighter.
If you want to use a darker paint colour and retain that colour as much as possible, I recommend using grey grout as the base.
If you are applying a sheet of tiles to a wall or the side of a piece of furniture, they may slip if you have used too much tile adhesive. If that happens, use masking tape to hold the tiles into position and just use a little less tile adhesive next time. You could look into getting wall tile adhesive as opposed to floor tile adhesive; the former is what I used.
For this project, all I need to do now is choose the finger tiles. I've used off cuts from our kitchen tiles for this test (which you can see with the pink coloured grout below) and I am hoping to use these again (I have to order them over the phone and they will get delivered from Melbourne). But I may pop into National Tiles this week to see what finger tiles they have in stock. I also need to think about how the finish of the tabletop for the DIY Tiled Chubby Side Table. A follower on Instagram suggested I render it, and another person suggested I use white grout. I think that would look incredible but I am worried it may detract from the tiled legs using my DIY Coloured Grout. I am thinking about painting the tabletop first and seeing what that looks like, and then making the final decision about rendering with white grout or not. Much to decide! Stay tuned because I am really going to need your help over on Instagram!