
DIY Ikea Hack: Kids Kitchen Renovation
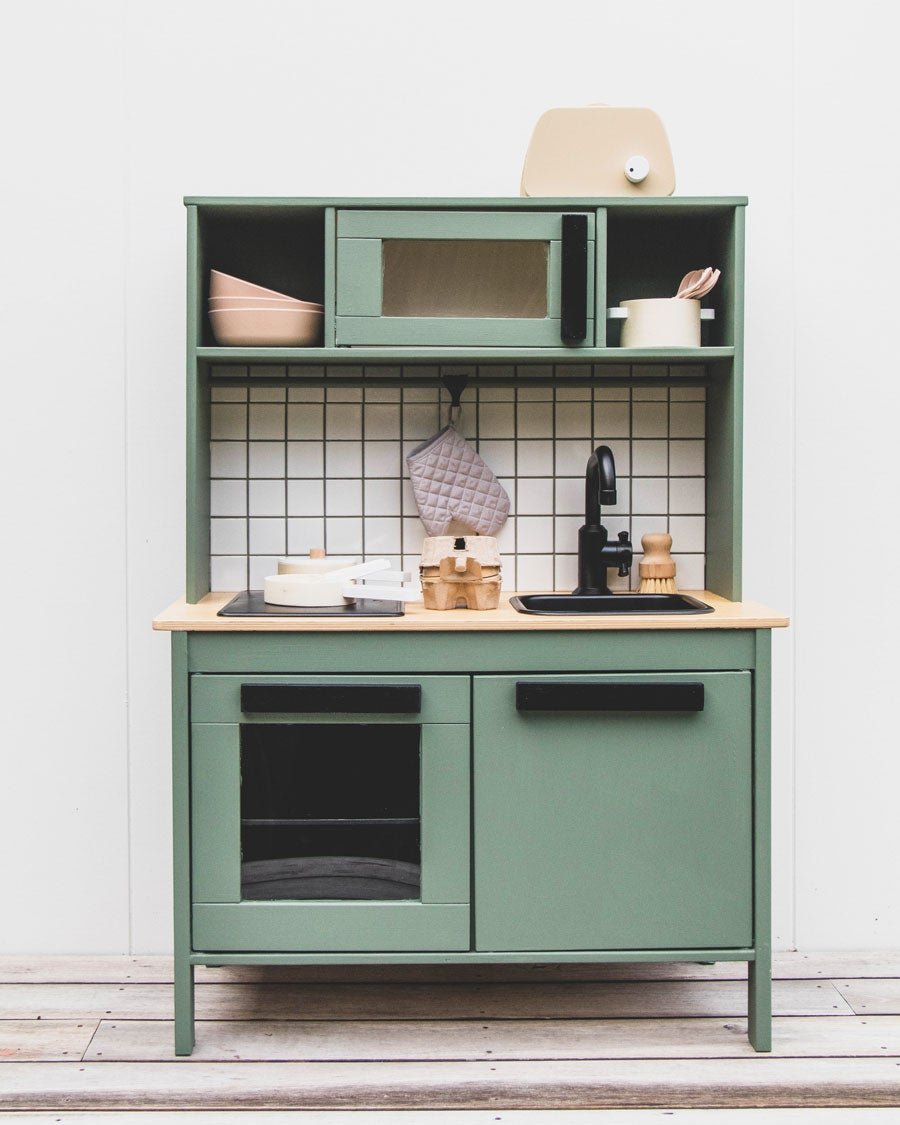
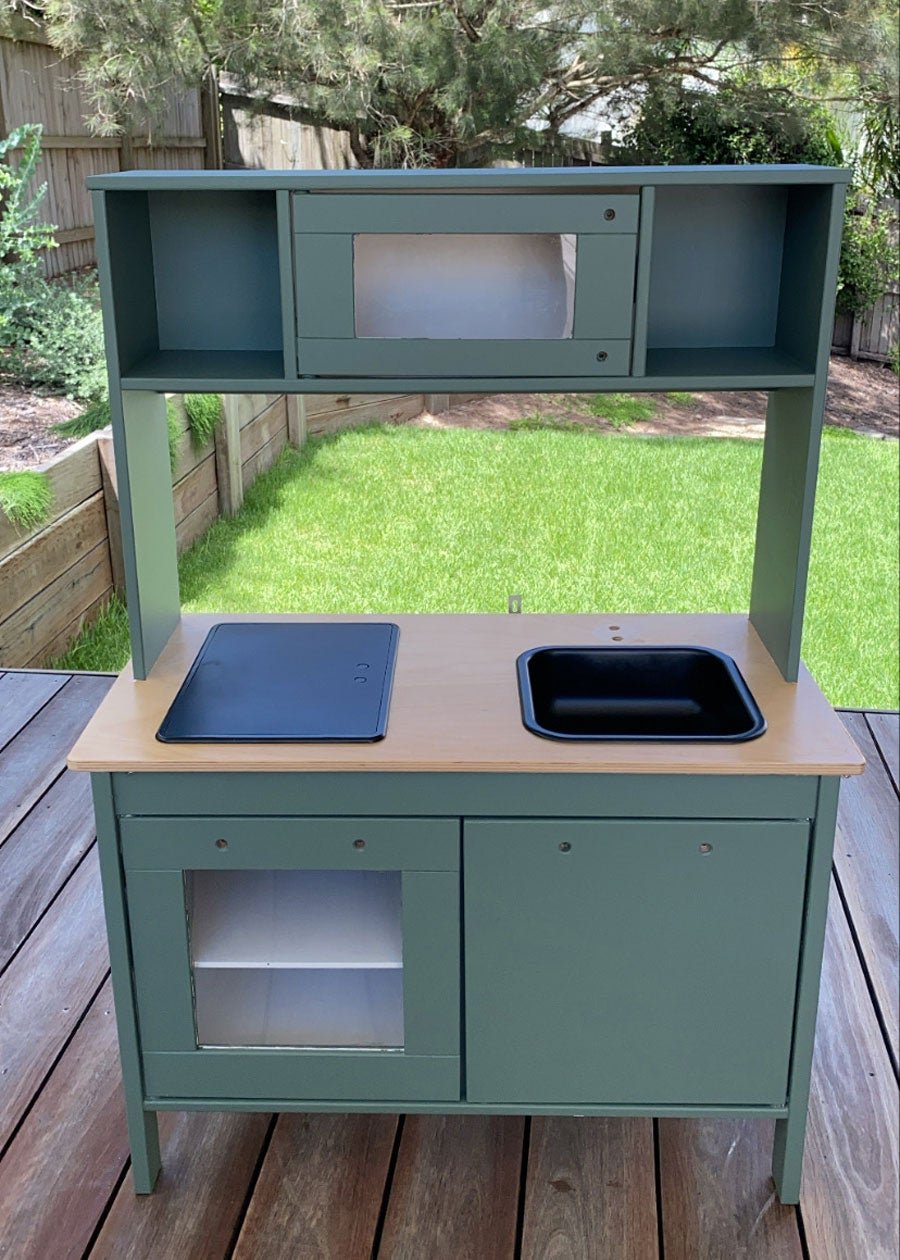
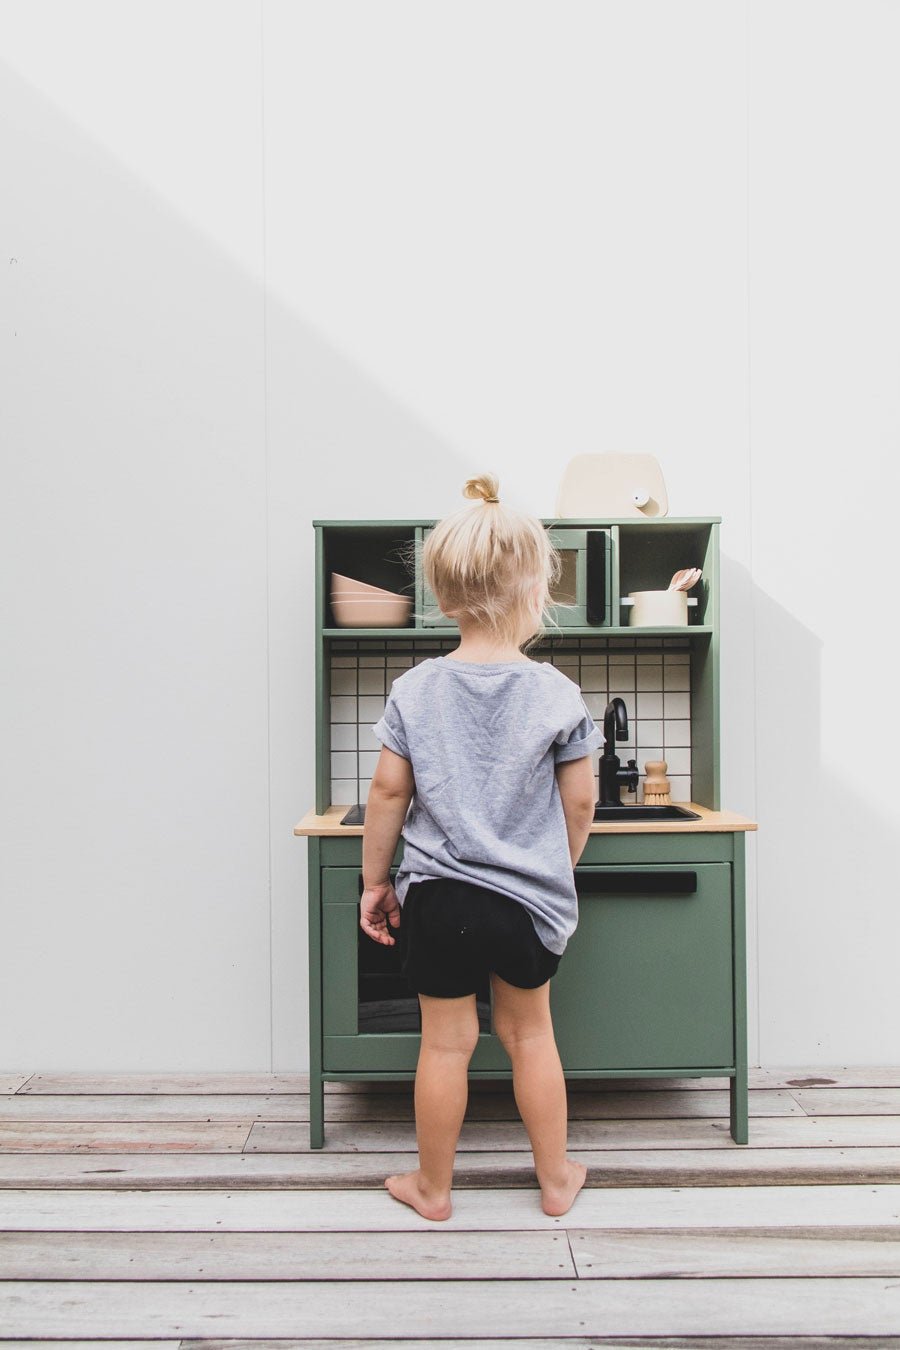
The big reveal is here! Dusty's Kitchen Renovation is complete and he is super stoked! And so am I! This was a true labour of love and we are all thrilled. Seeing Dusty's little face light up when he saw the kitchen, and watching him cook and use his imagination, brings me an overwhelming sense of joy and satisfaction. I can't believe I took this kitchen from zero to hero all by myself (with a little help from Jason of course). Thank you so much for all of your help choosing the paint colour, Rivergum by Resene. It turned out beautifully!
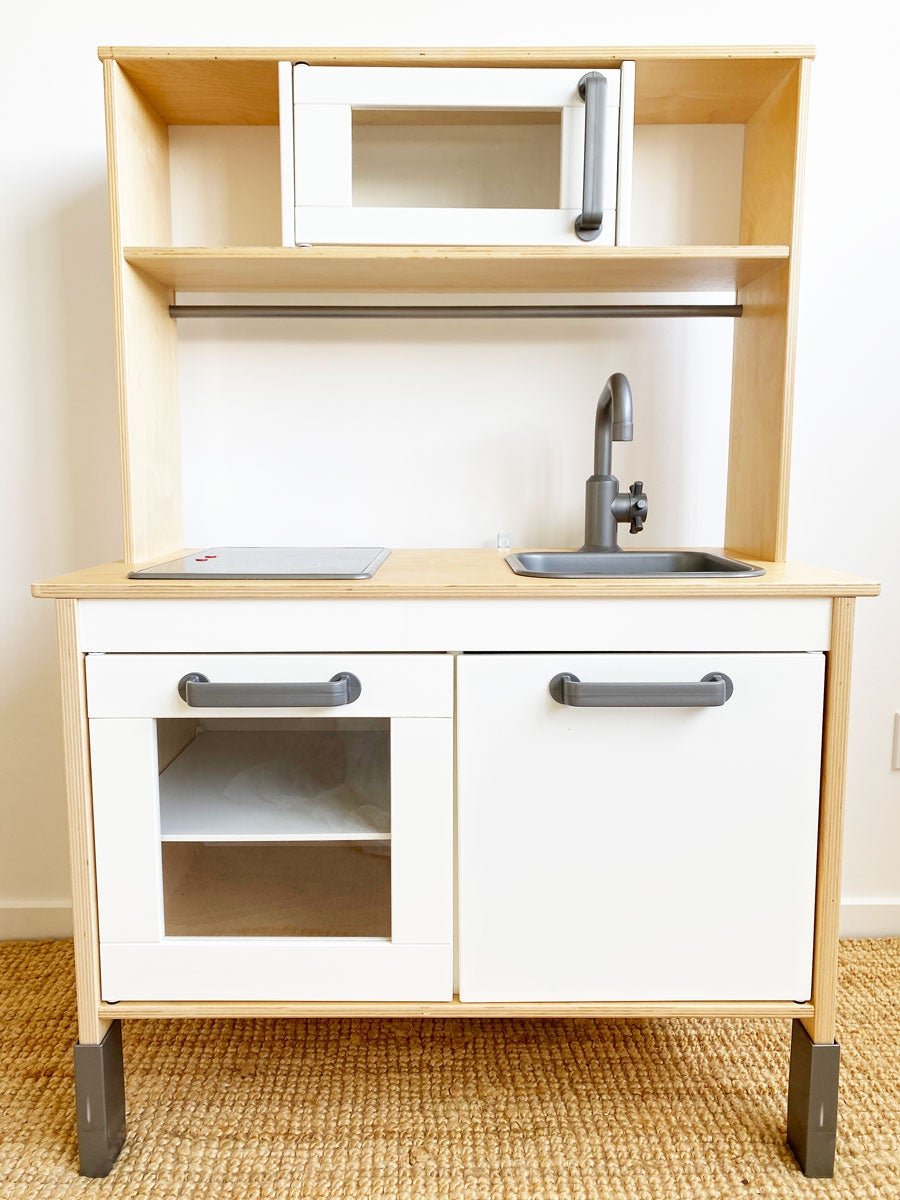
For those of you who are new to this project, about a month ago we were spending a rainy weekend at home, relaxing and doing a few jobs around the house; one of which was to tidy up Dusty's play room, it was a complete mess. I noticed the Play Kitchen we bought from IKEA for Dusty was looking super sad and neglected in the corner, and out of nowhere the idea to renovate it sprung to mind. What initially began as a simple paint job turned into a love project, which we've been sharing on our Instagram with you.
We've saved every step of the journey on our Instagram Highlights under "Kids Kitchen" so make sure you take a look at it. We were surprised by the reaction of our little community and many of you have been really invested in seeing the project come to life!
If you're looking for a project to sink your teeth into while social distancing at home, this project is definitely for you! In this Journal post, we have included all the steps and all the materials with links you'll need to inspire you to give your own Kids Kitchen the ultimate glow up. If I can do it, anyone can. Trust me. The tiling turned out to be oh so easy too! If you're feeling inspired to give your own Kids Kitchen a reno, make sure you share your progress with us! Now get ready, and read on to see how we gave Dusty's Kids Kitchen the big update.
Ps. If you giving your Ikea Kids Kitchen a glow up, remember to show and tag us onInstagram @smorkitchen #smorkitchen. We'd love to see it! And it would makes us incredibly happy!
DESIGN
The first thing I needed to do was choose what the kitchen would look like post renovation; this is more difficult than you think! I spent a bit of time looking at kitchens on Pinterest, deciding which sections of the kitchen I would paint, choosing a lead colour for the fixtures, and what tiles I would use for the back splash. In the end, I spoke to Jase and we decided to make it look fairly similar to our own kitchen. Honestly, we didn't even spend this much time on our own kitchen at home!
PAINT COLOUR
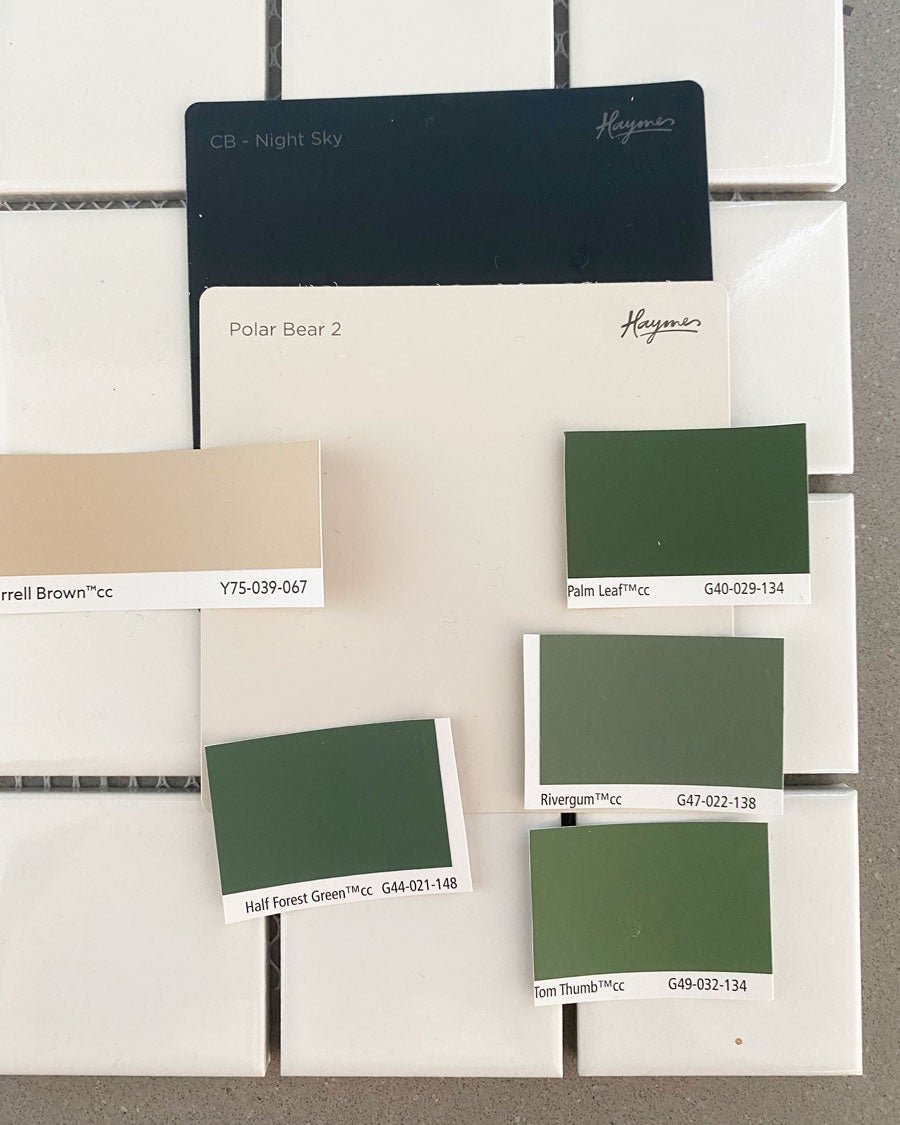
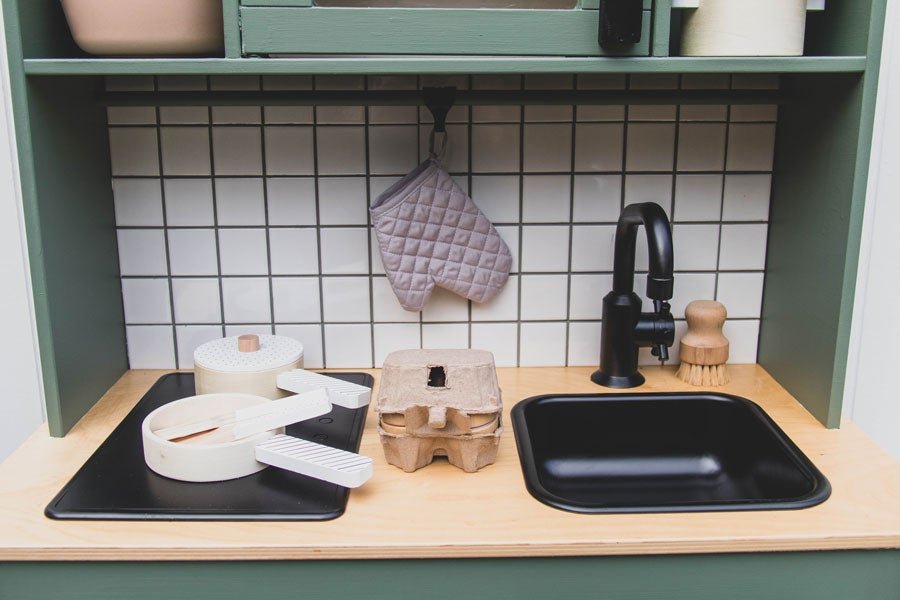
Once we "kind of" knew what the kitchen would end up looking like, we needed to choose the paint colour. I found this process quite challenging. Our style is very minimalist, and our kitchen at home has black matte cabinetry, concrete bench tops, Scandinavian white square tiles, rattan pendant lights, and cane stools which I love. Colours? Help! But I knew we had to give Dusty's kitchen some colour - he's kid after all! I must have visited our local paint shop in Noosaville at least three times choosing paint cards. We wanted the final colour to be fairly gender neutral and minimalist, but also fun and engaging for Dusty. Every time I went back to the paint shop, I gravitated towards green. It seemed like the best compromise between our own interior style, the colours in our garden and a fun colour for Dusty to enjoy. In the end we were stuck on two colours by Resene, Wafer and Rivergum. After removing the fixtures we did a patch test of each colour side by side, and asked everyone on our Instagram to vote for their preference. Jason loved Rivergum but I really liked Wafer. We were really confused! In the end 70% voted for Rivergum, so that's what we chose.

PAINTING
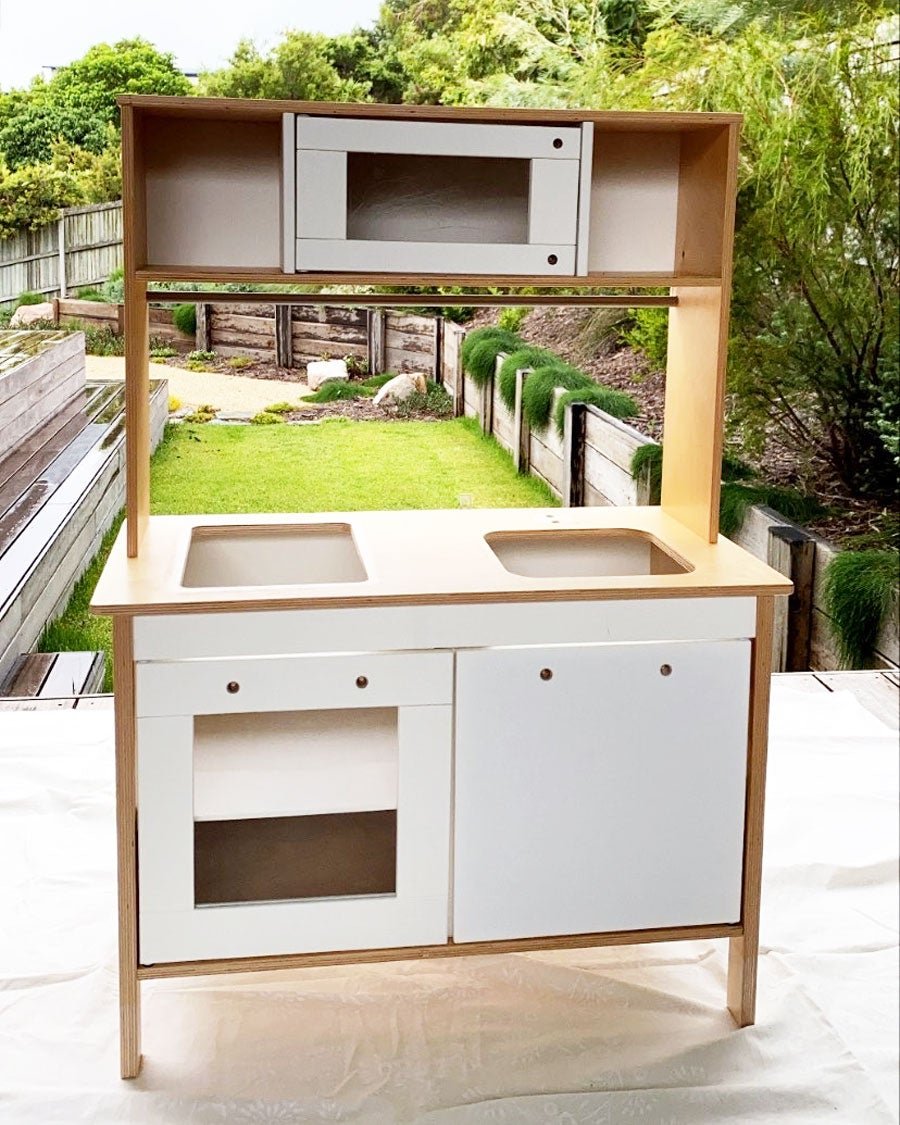
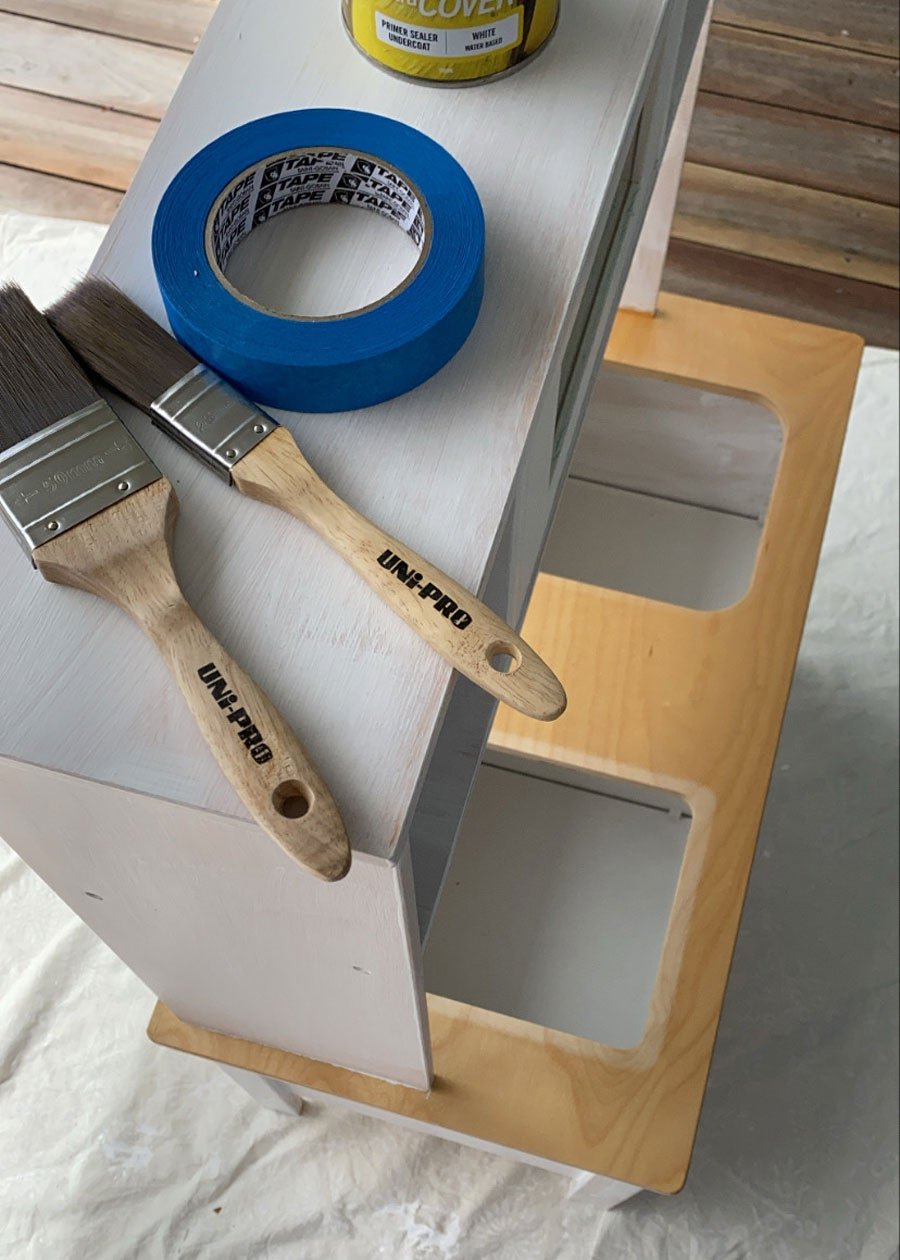
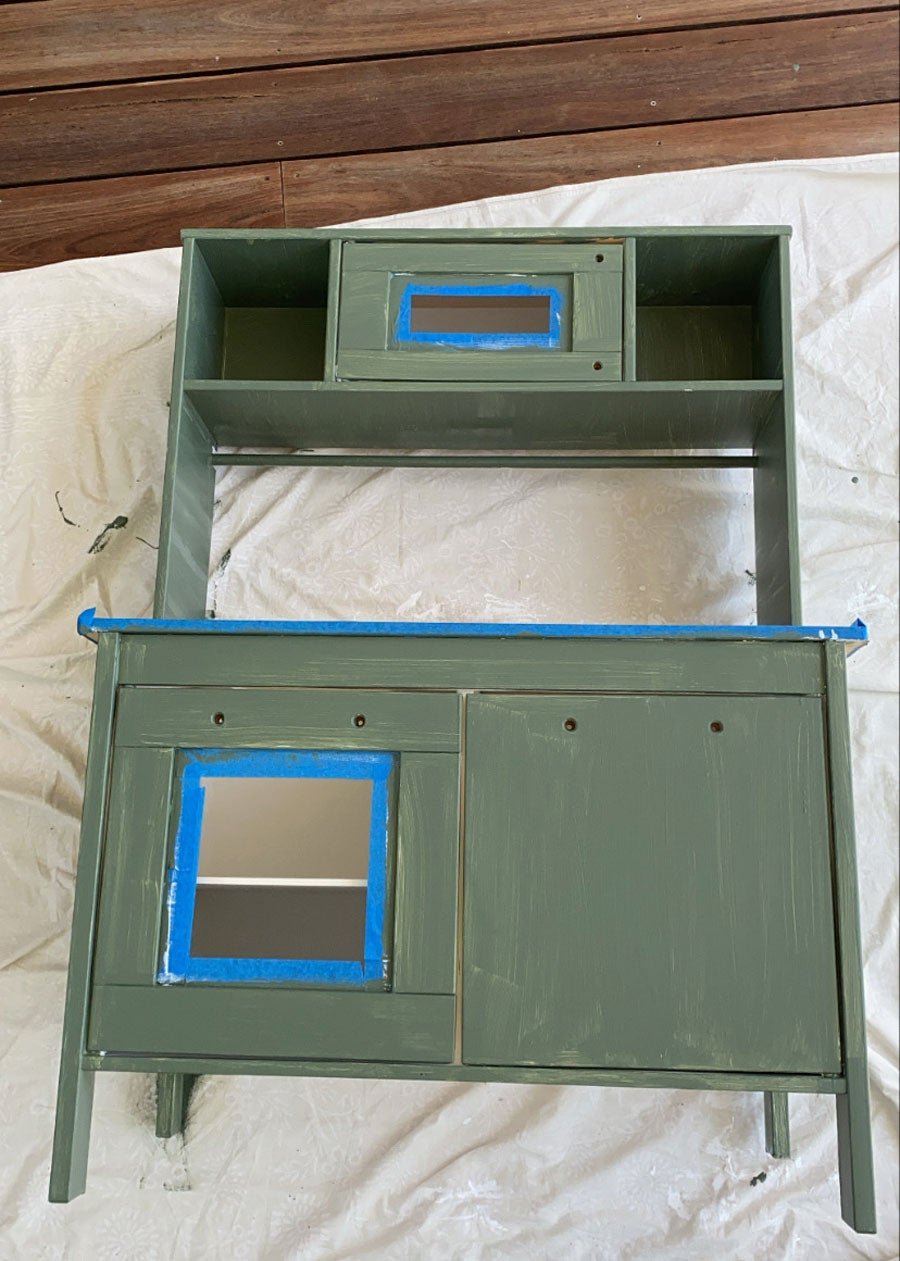
After removing the fixtures, it was time to paint the kitchen. This step was made slightly more difficult because the kitchen was already assembled. It may have been easier to paint the sections unassembled, but truthfully, I was too lazy to pull it apart. In the end, painting the assembled kitchen just took a little bit of extra time. To begin with, I wiped down the kitchen so it was dust free and clean. Using painter's tape (I have included a full list of supplies below with links) to ensure I didn't paint the bench top, I painted the top and bottom of the kitchen using Haymes Undercoat in White and left the timber bench top. I had considered painting the bench top as well, but I liked that the timber softened the overall look of the kitchen. Following this, I painted over the undercoat with Rivergum - this took three coats.
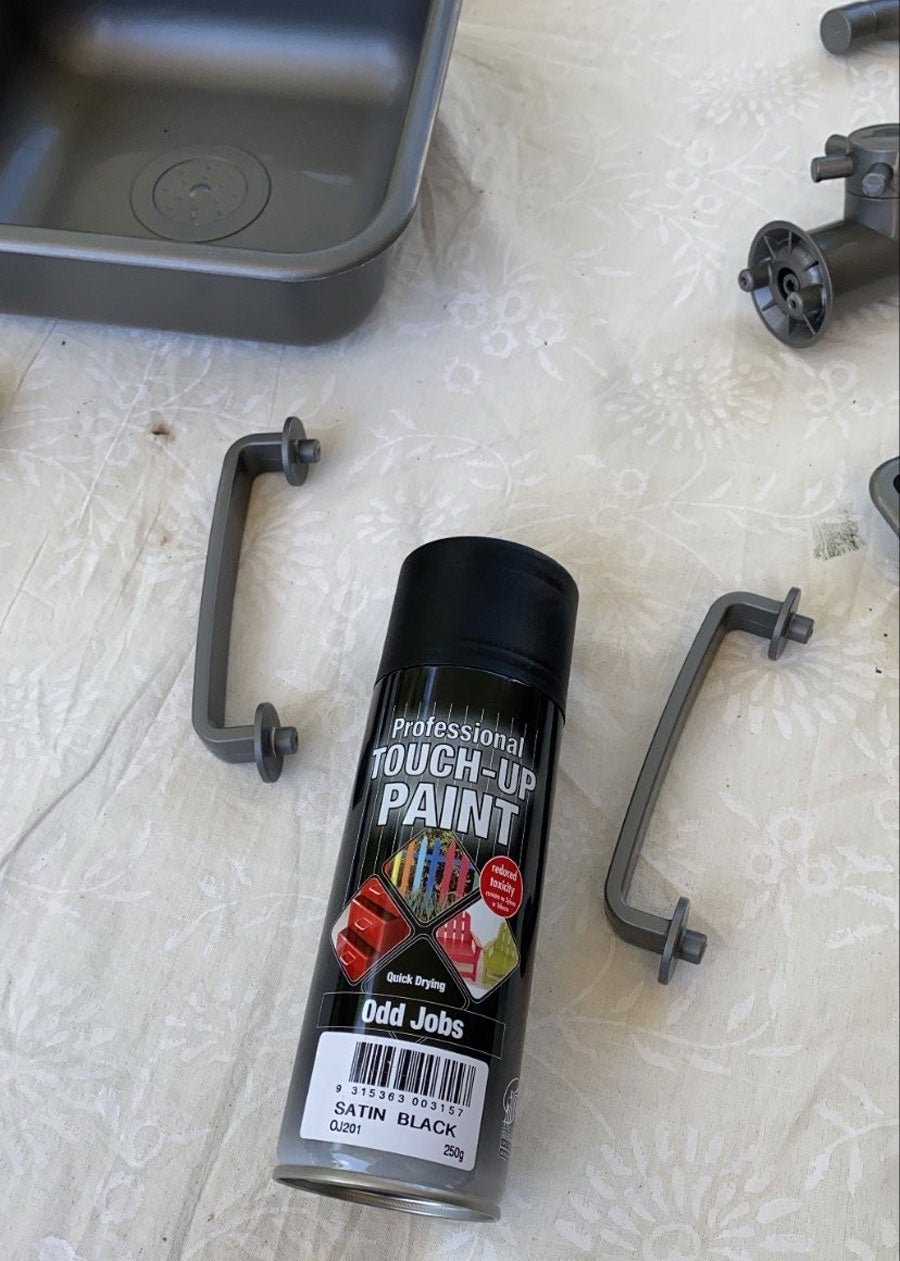
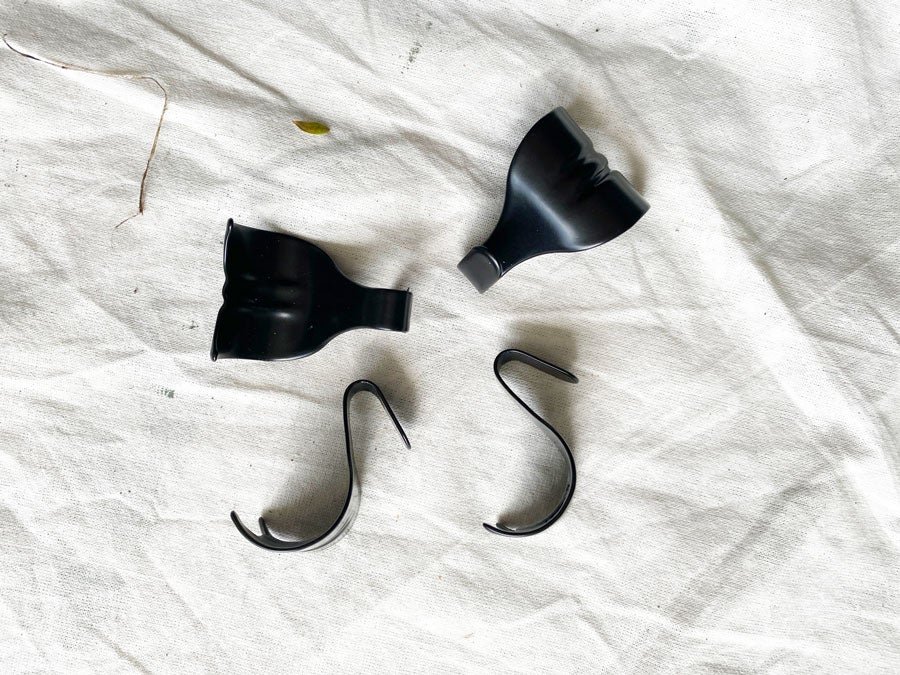
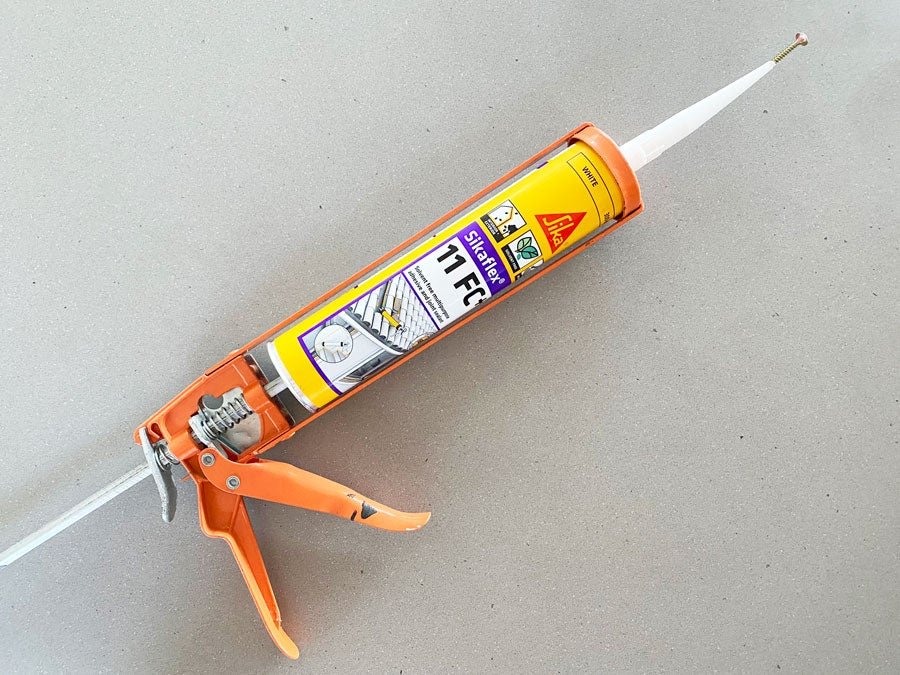
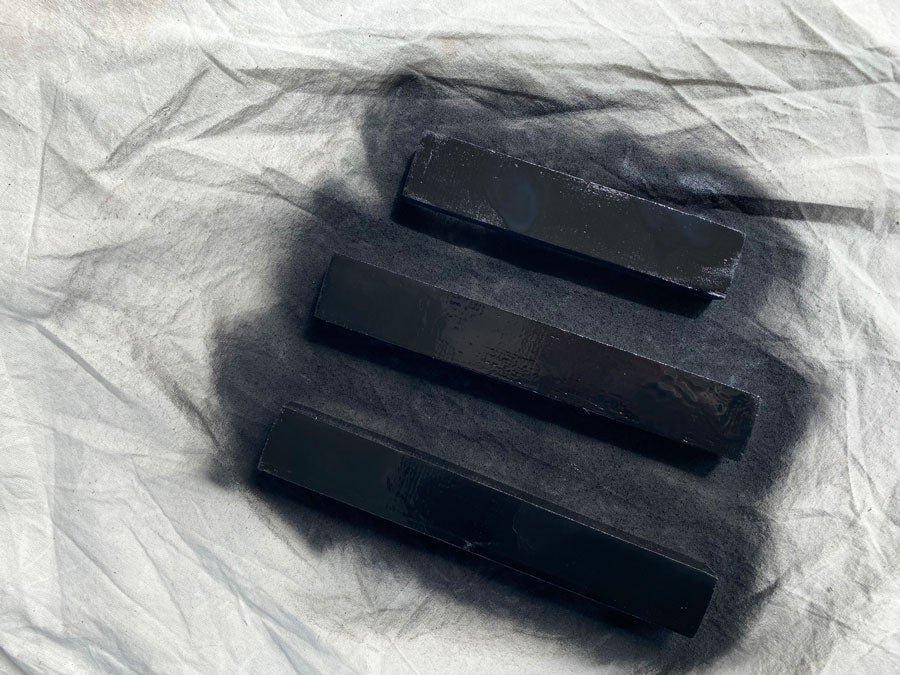
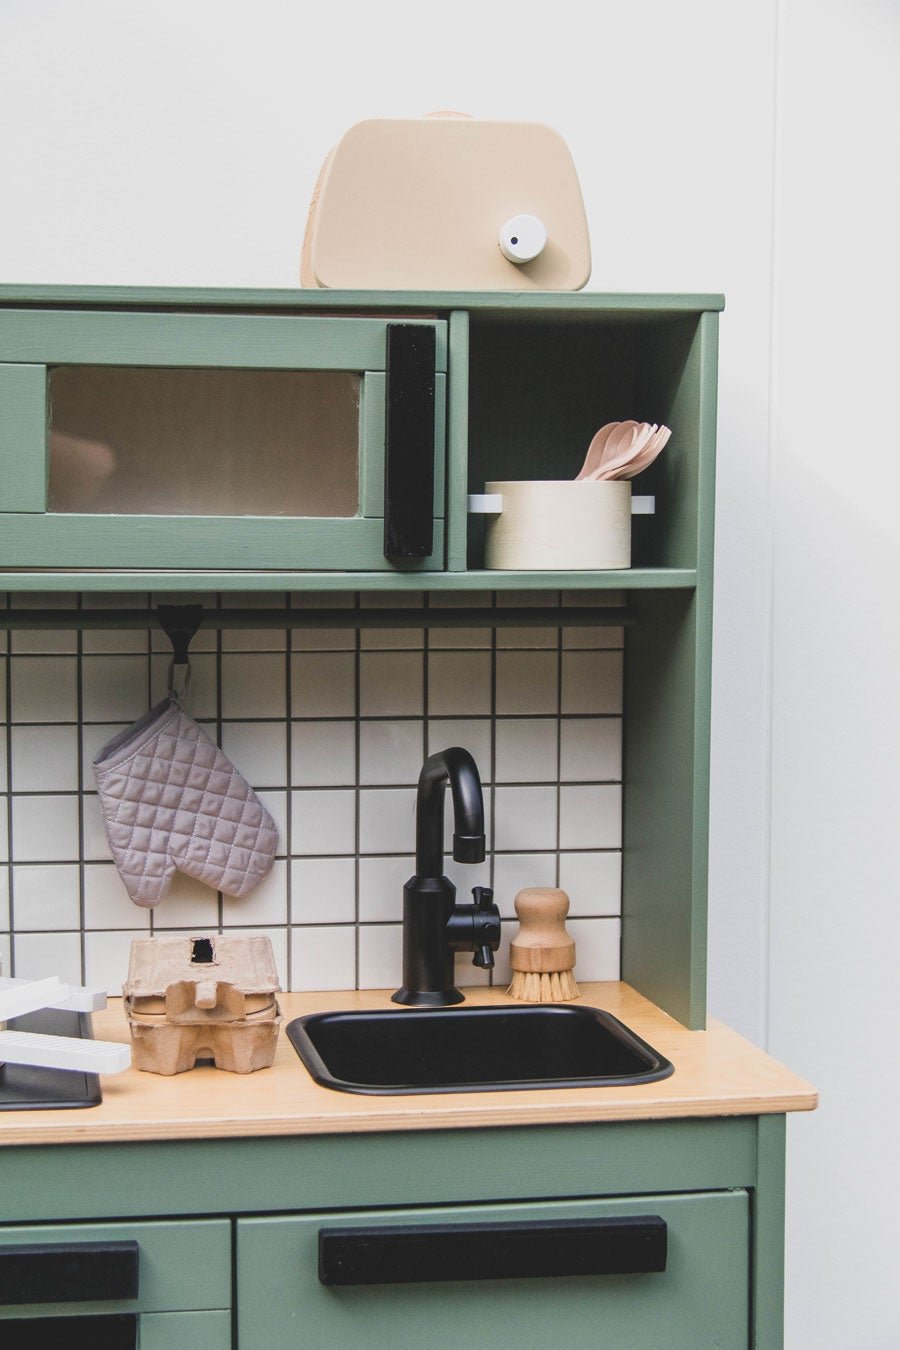
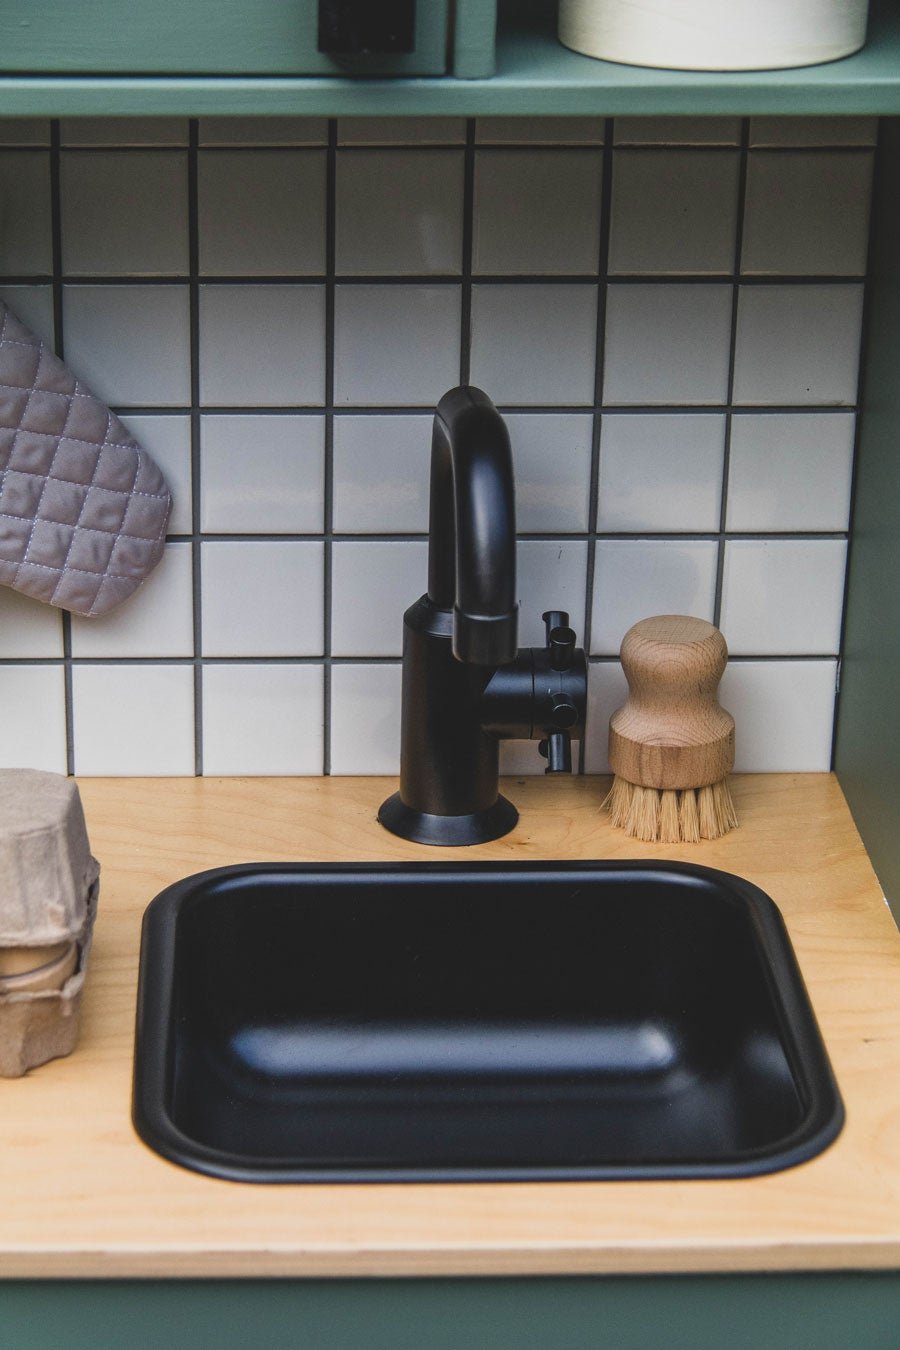
Next I needed to paint the fixtures; we used Professional Touch Up Spray Paint in Satin Black to do this. We didn't want the fixtures to be glossy, but you may. Don't paint - spray! It's much easier and looks very professional. At this stage, the final coat of Rivergum had completely dried so I removed the painter's tape. It felt good to do that! Then we added a simple black hook from Bunnings using Sikaflex 11 FC Multipurpose Adhesive to glue it onto the railing. I was going to make a small S hook using wire, but this hook was perfect!
Stepping back to look at the kitchen, I didn't love that the inside of the oven and microwave were white. It didn't look right, so I asked for everyone's opinion on Instagram about what we should do. In the end, we looked at our own oven and microwave - the inside of our oven is black, so we painted the inside of Dusty's oven black using the spray paint from the fixtures. The inside of our microwave is white, so we left the inside of Dusty's microwave white. It was these small decisions that kept popping up along the way that were quite unexpected, and sometimes confusing. So thankfully, we had everyone on our Instagram to help us out. Phew!
TILING
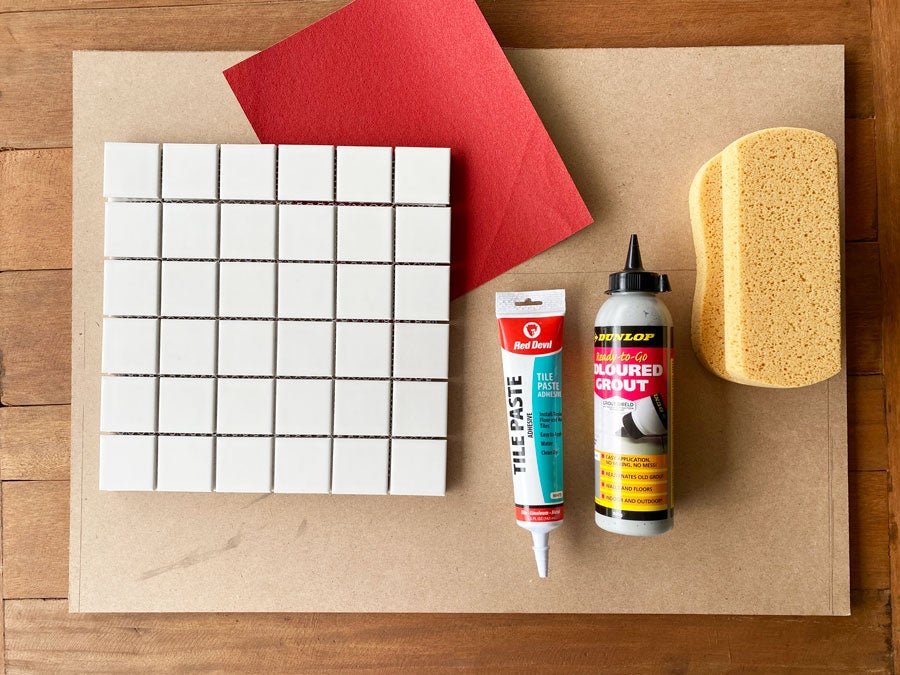
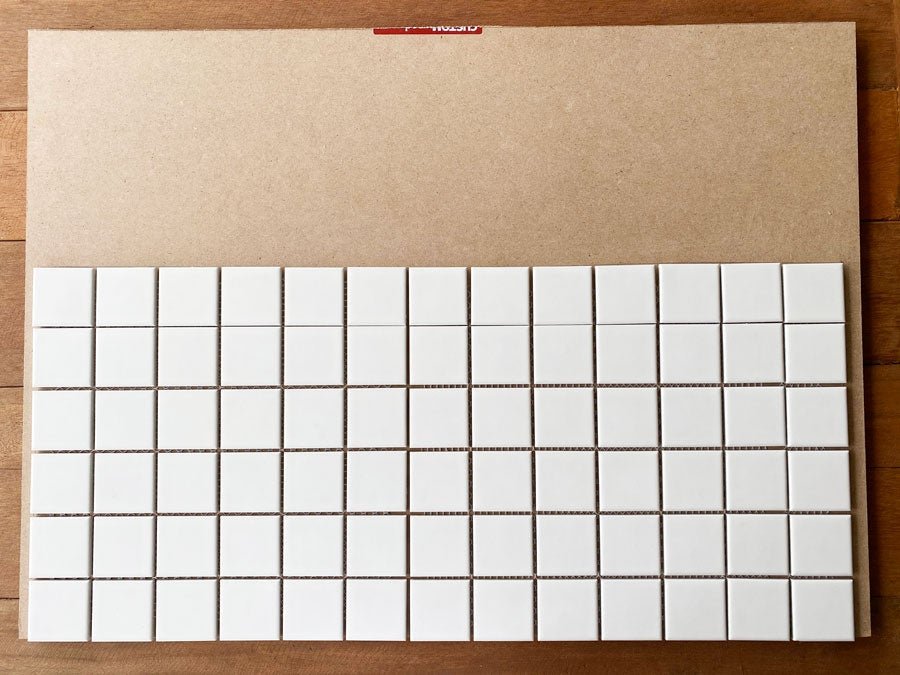
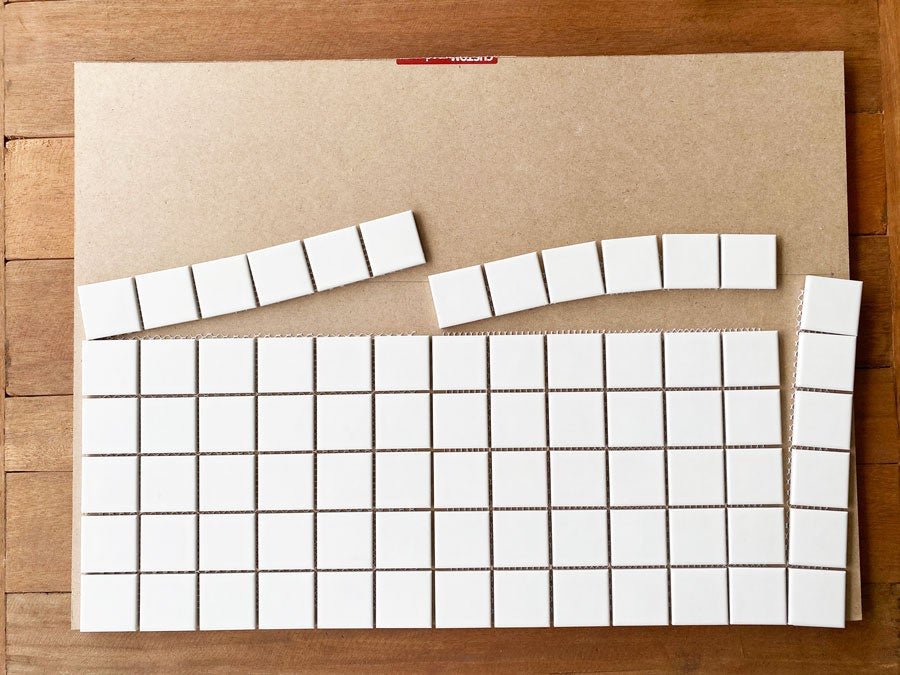
I knew I didn't want to stop at just giving Dusty's kitchen a paint reno, I had to give his kitchen the ultimate glow up - a tiled back splash. Obviously I am not a professional tiler, and if this was a job that was getting done to my own house, I would have called in the professionals. But I knew I was up to the challenge, even if it made me super nervous. In the end, we chose small white square tiles by Decor8 from Bunnings that came in a tile sheet and matched our own kitchen. I watched a few How To Tile tutorials on YouTube to get acquainted with the actual process of tiling, and went to Bunnings with a list of supplies. In the end I realised tiling the back splash wasn't going to be the big job I thought it would be and I wouldn't need all the tools the professionals use. From Bunnings, I bought a sheet of plywood panelling and got it cut to size. It ended up being 5cm too tall so Jason used a hand saw to chop off the excess at home, and I used our hand sander to tidy the edges.
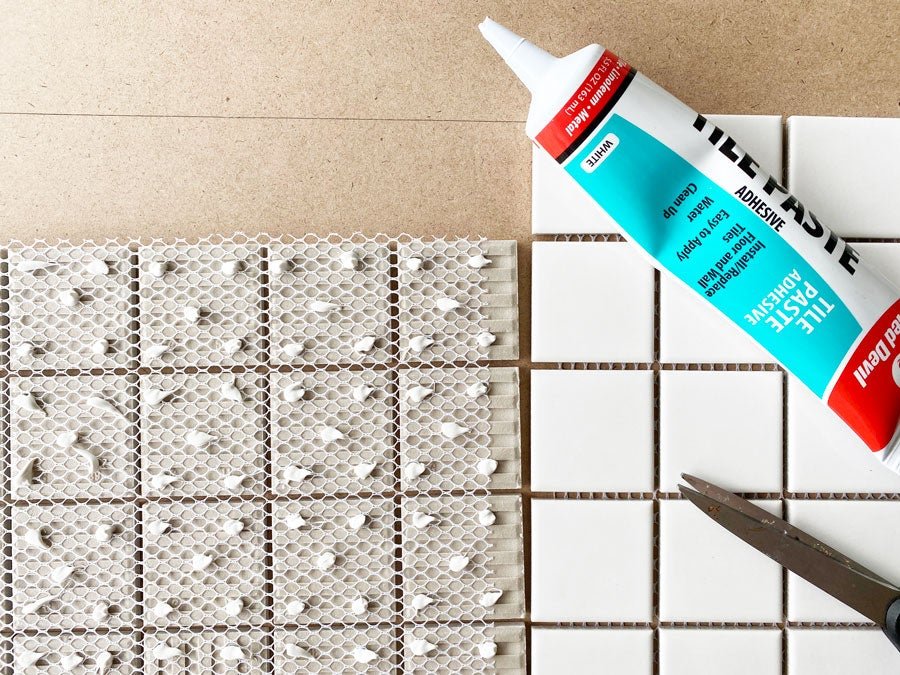
We bought a single sheet of medium course sandpaper to rough up the plywood and using a pen, traced where the tiles would need to fit. We used two full tile sheets and a couple of extra rows from the third tile sheet. By a stroke of luck, the tiles fit perfectly and we didn't need to get any of them cut. So happy! From here I dotted the corners and middle of each tile (on the back) using the Tile Paste Adhesive and positioned each tile sheet and extra rows in place. This adhesive sticks really quickly so if you need to manoeuvre the tile sheets, get it done fast. I let the adhesive dry overnight, then tackled the grouting. Initially I was looking at mixing dry grout with water and using various tiling tools, but by chance I discovered Dunlop Ready To Go Coloured Grout - so much easier!
Here are the steps to applying the grout.
Once the tile adhesive is dry, ensure the tiles and joints are clean.
Check the ease of cleaning from the face of the tile being used. The tiles we used were glossy, so I did a patch test and the dried grout came off easily. It might not be the case if your tiles are porous, like travertine.
Cut the tapered nozzle so that the opening of the nozzle is as wide as necessary for the joints where you'll be squeezing the grout into. Reseal the nozzle and holding the bottle upside down, shake for 15 seconds.
Squeeze grout out of bottle and apply the grout into the joints whilst holding the bottle at a 90° angle to the surface being grouted. After a bit of trial and error I found it easier to move the nozzle back and forth in a wave like motion. You'll see this action in the photos below. Or check out the Kids Kitchen Highlight on our Instagram.
Ensure that the grout has been compacted firmly into the joint using a grout float or sponge. We used our sponge and it was totally fine.
Repeat step 4 if you need more grout in the joints.
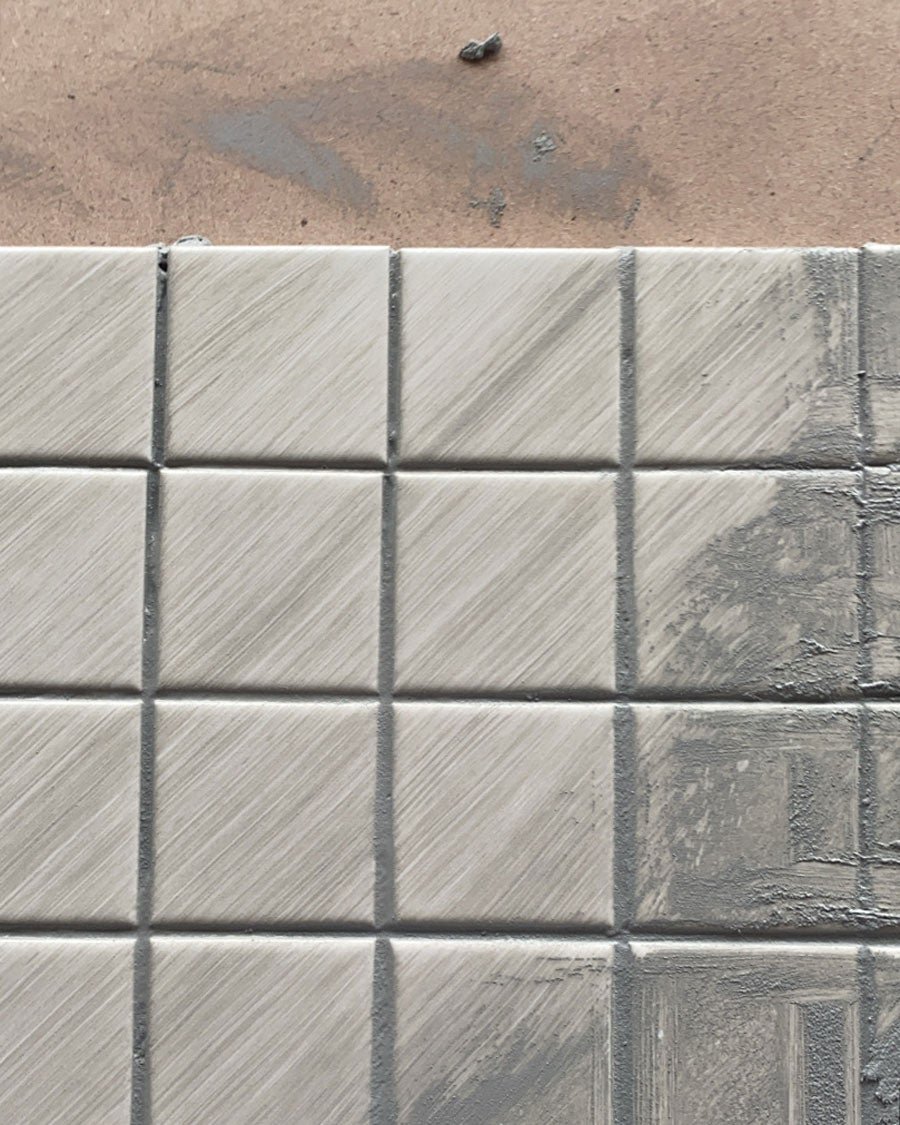
6. By this stage you may have excess grout in the joints. I discovered that running your finger down each joint line not only removed excess grout, but it also neatened the joint lines making the grout look more professional. Allow the grout to firm up in the joint for approximately 15 min.
7. By this stage, you'll probably have a fair bit of grout spread across the surface of the tiles. Remove excess grout from the surface of the tiles with a dense, damp, sponge working diagonally across the joint. It's really important you do this diagonally so you don't push the grout out from in between the joints. Trust me. Rinse the sponge frequently in clean water. Use a minimum amount of water when cleaning the tile surface and smoothing the joints so as to minimise water float shade variation and shrinkage.
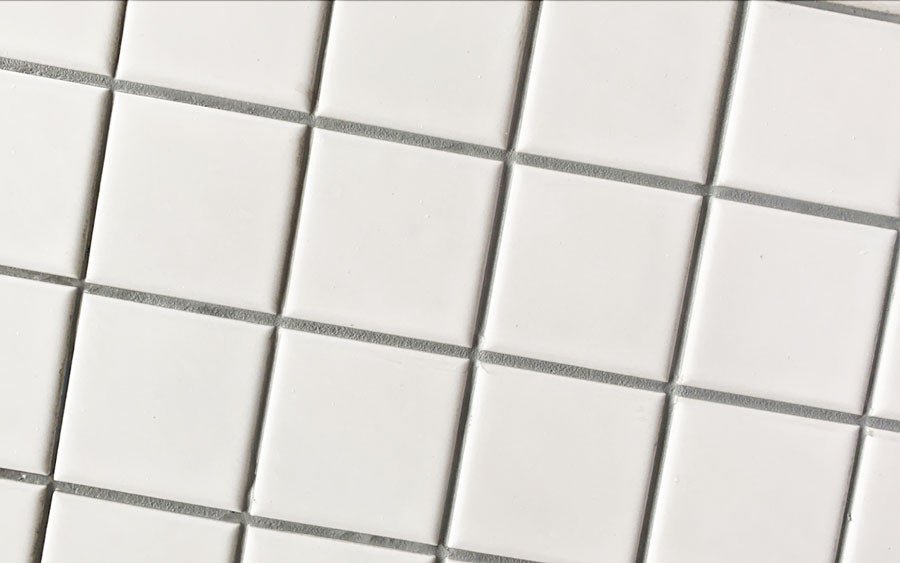
8. When the grout has sufficiently hardened in the tile joints and is touch dry (approximately 6 to 24 hrs) buff and polish the tile surface with a clean dry cloth. I waited until the next day to complete this step. It's a hugely satisfying feeling when all the grout is cleaned off the surface of the tiles!
9. One last tip - the weather can have an impact on drying time. If it's raining when you grout, bring the tiled plywood panel inside for drying.
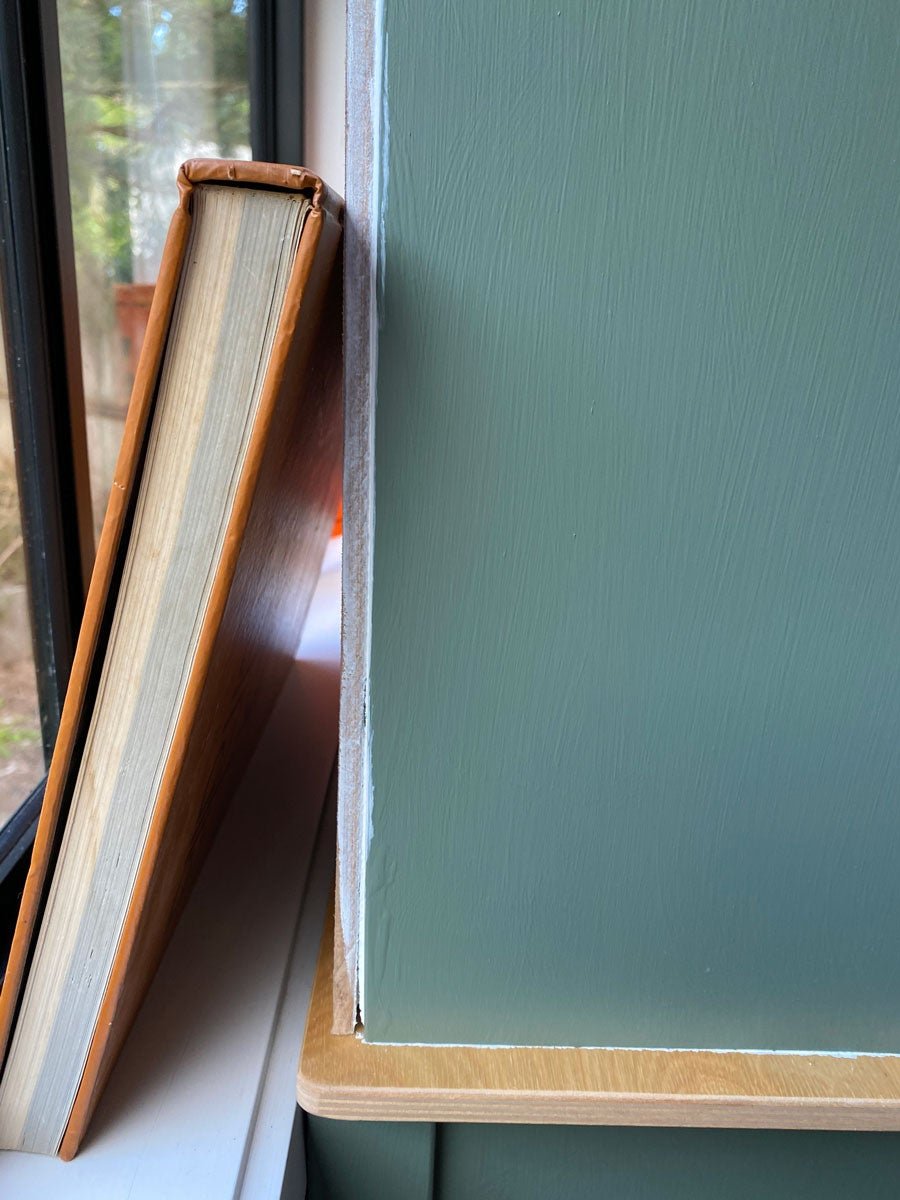
Once the grout is dry, the next step is to glue the board onto the back of the Kids Kitchen. We did this using Sikaflex 11 FC Multipurpose Adhesive from Bunnings. You will need a caulking gun as it's almost impossible to push the glue out of the bottle with your hands. If you have any builder mates, ask if you can borrow one of theirs - that's what we did. We simply glued around the edges of the marked plywood panel, pushed it up against the back of the Kids Kitchen, held it there for a couple of minutes with our hands (the adhesive sticks fast) then propped the kitchen up against a window with hardcover books pushed behind it for extra support. Very professional stuff, ha. You may notice some of the glue push out the sides, so grab an old rag and wipe the excess glue away. We let the glue dry overnight and noticed some of glue had dried on the sides of the kitchen, so I did a quick touch up with a couple of coats of Rivergum.

HANDLES
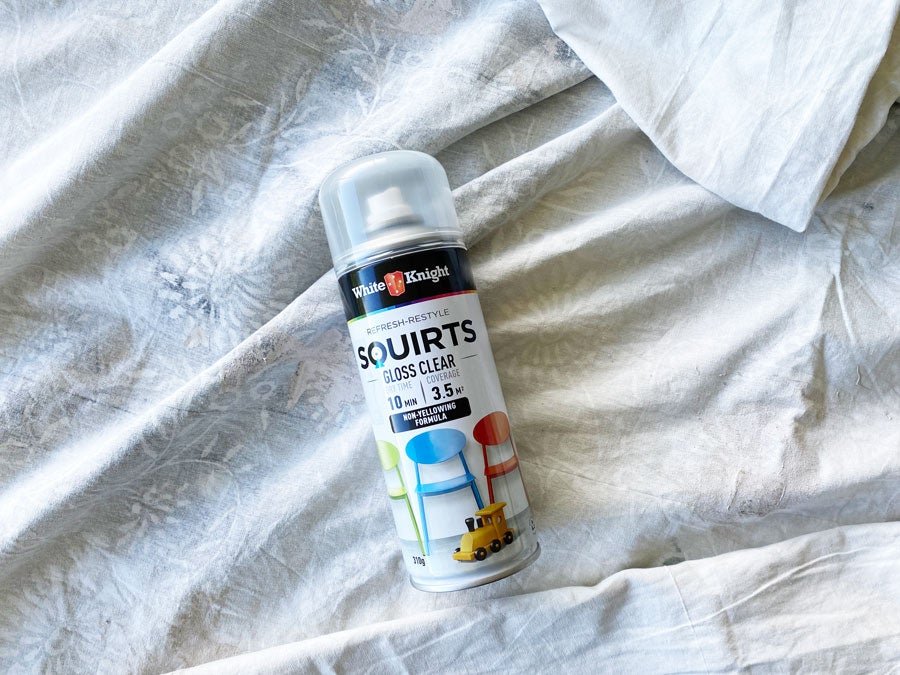
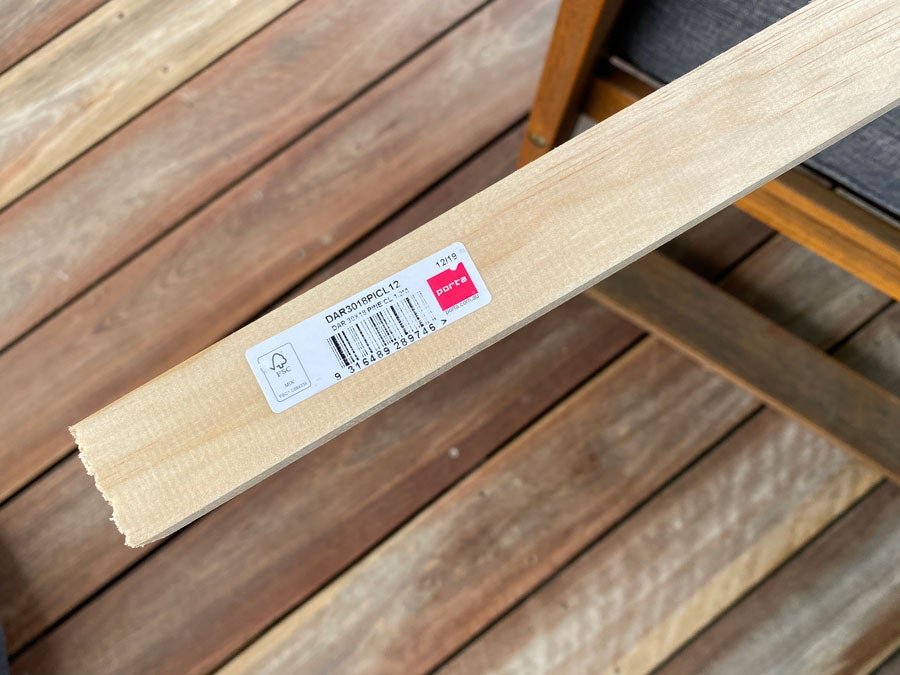
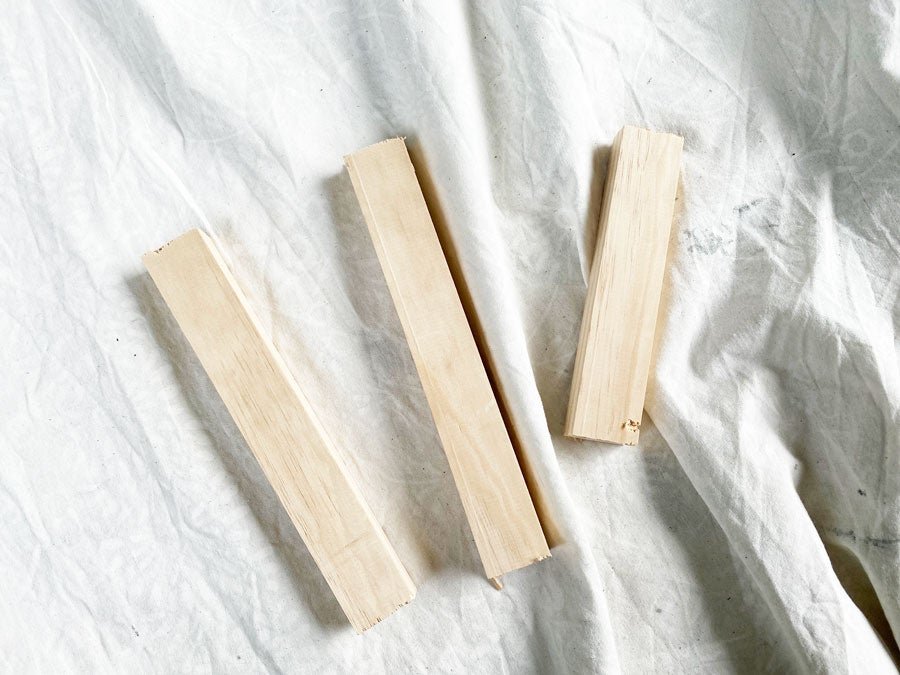
At this stage, Dusty's kitchen renovation was complete! But there was something missing. The handles had been bothering me throughout the project and I wanted to give them an extra glow up. I raced down to Bunnings and bought a narrow piece of pine timber. Using our handsaw, Jason cut the timber to size after I measured the length of the existing handles, and I used our hand sander to tidy up the edges. I painted the handles black using the same Professional Touch Up Spray Paint in Satin Black, but as the timber so was porous the black looked oddly matte, so I sprayed a White Knight Clear Gloss Spray Paint over the handles. Using the same Sikaflex 11 FC Multipurpose Adhesive for gluing the plywood panel to the back of the kitchen, I glued the handles on the doors. I felt like the kitchen instantly went from zero to hero with this quick upgrade. I didn't dare touch the handles until the following day and there were no issues - the doors can open and close easily. I was very satisfied to say the least!
STYLING
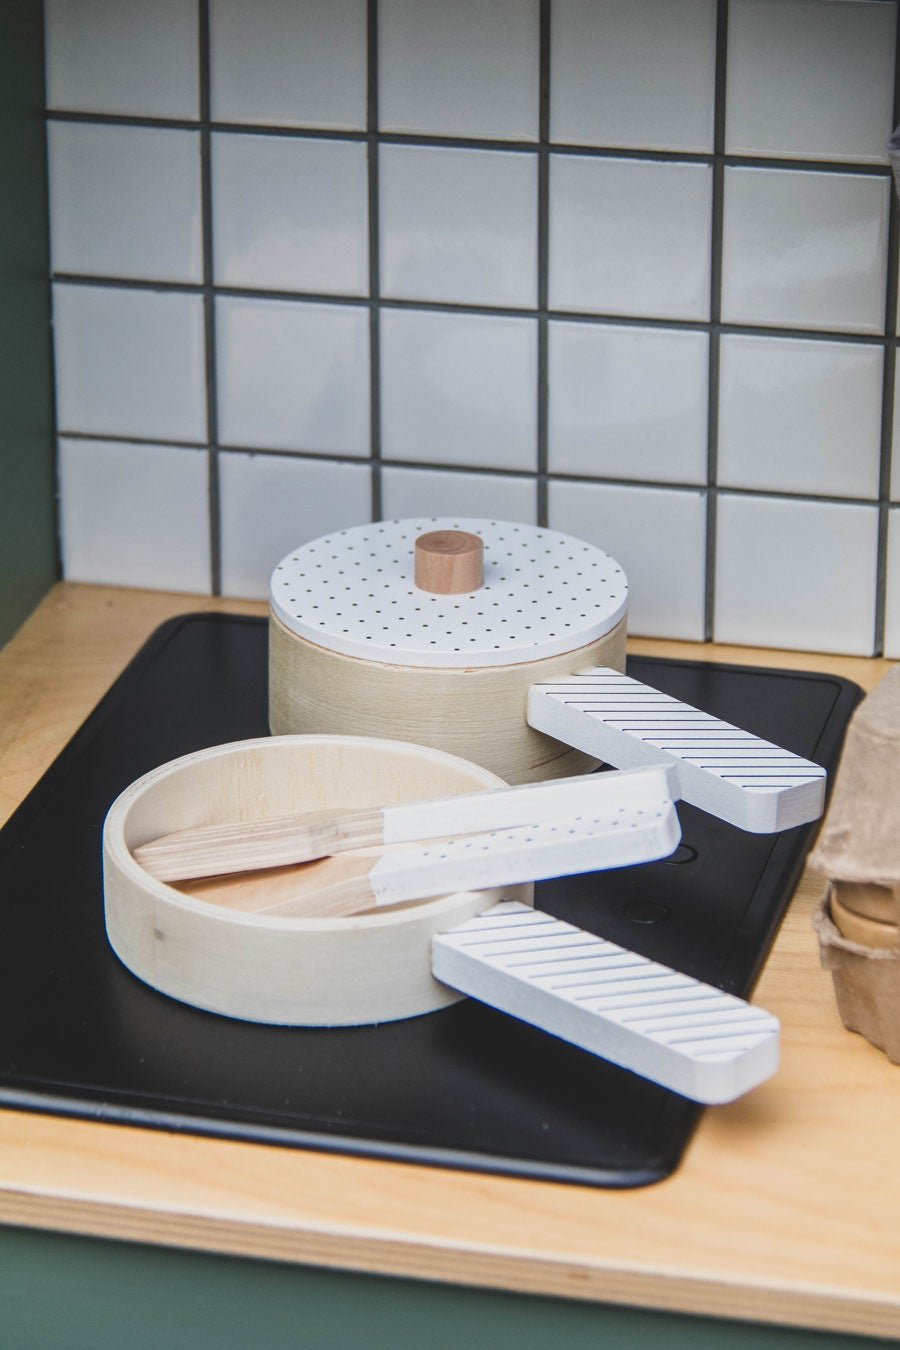
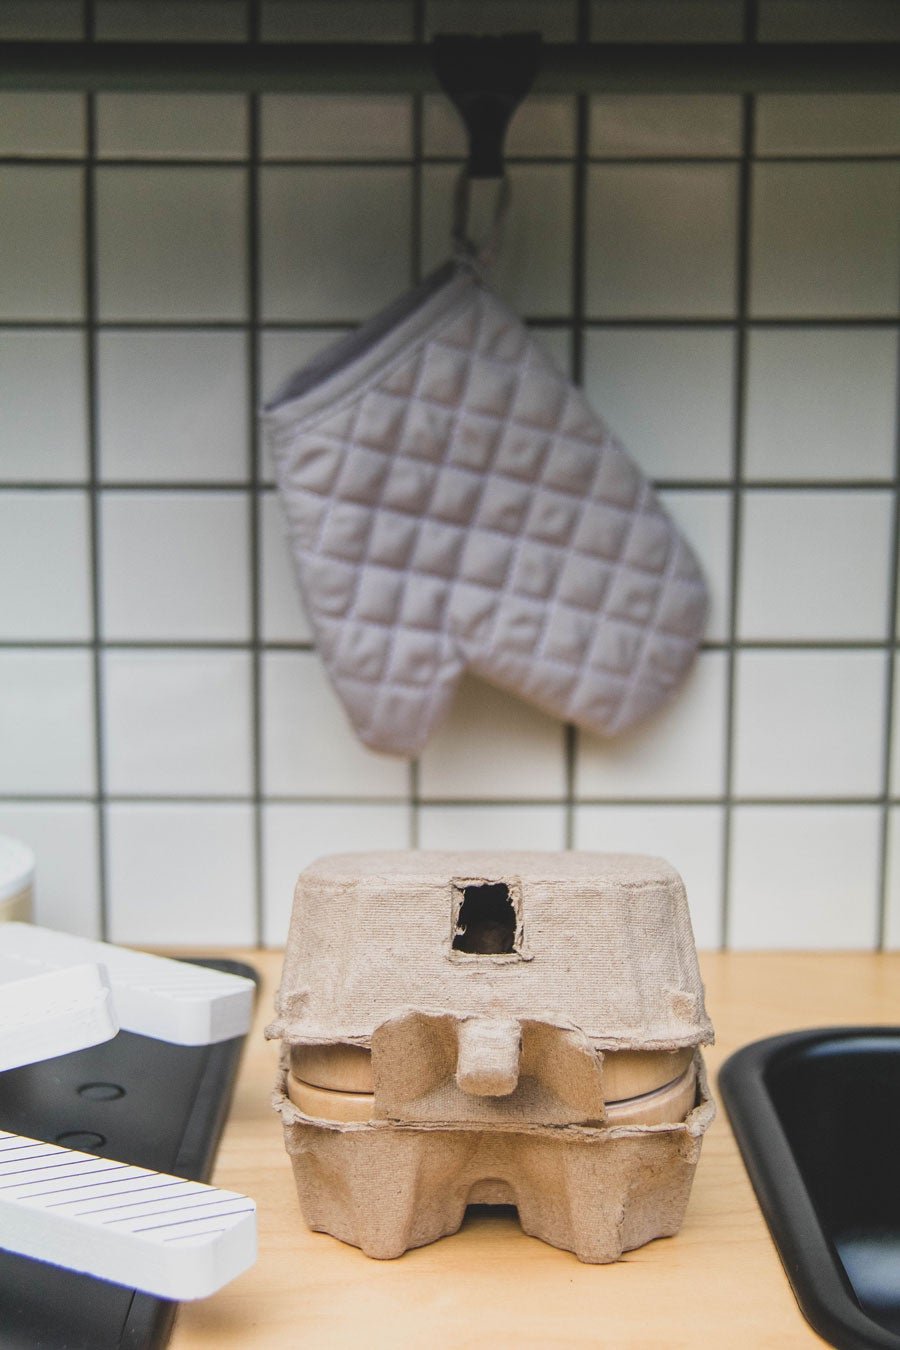
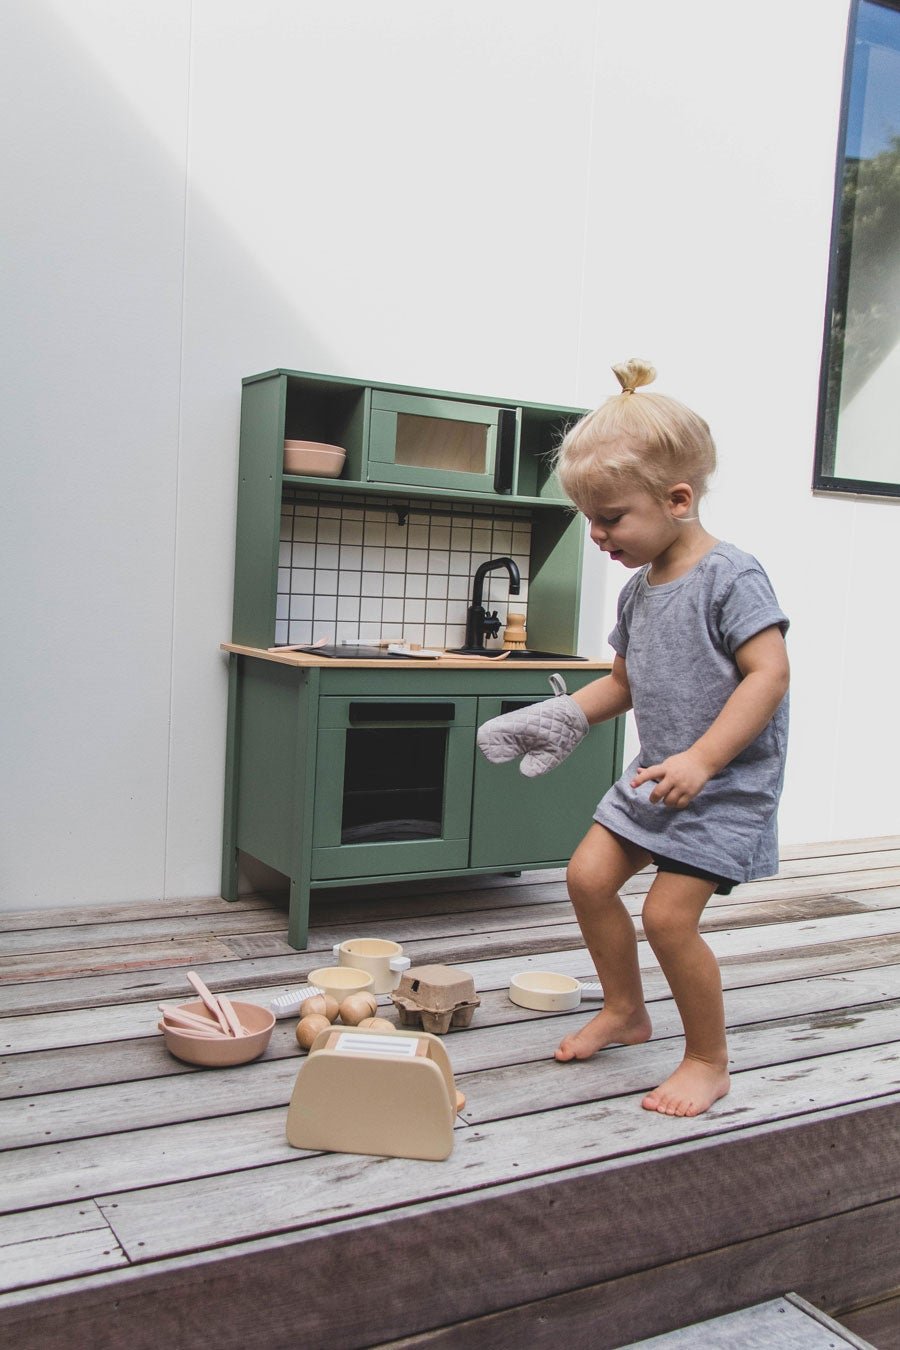
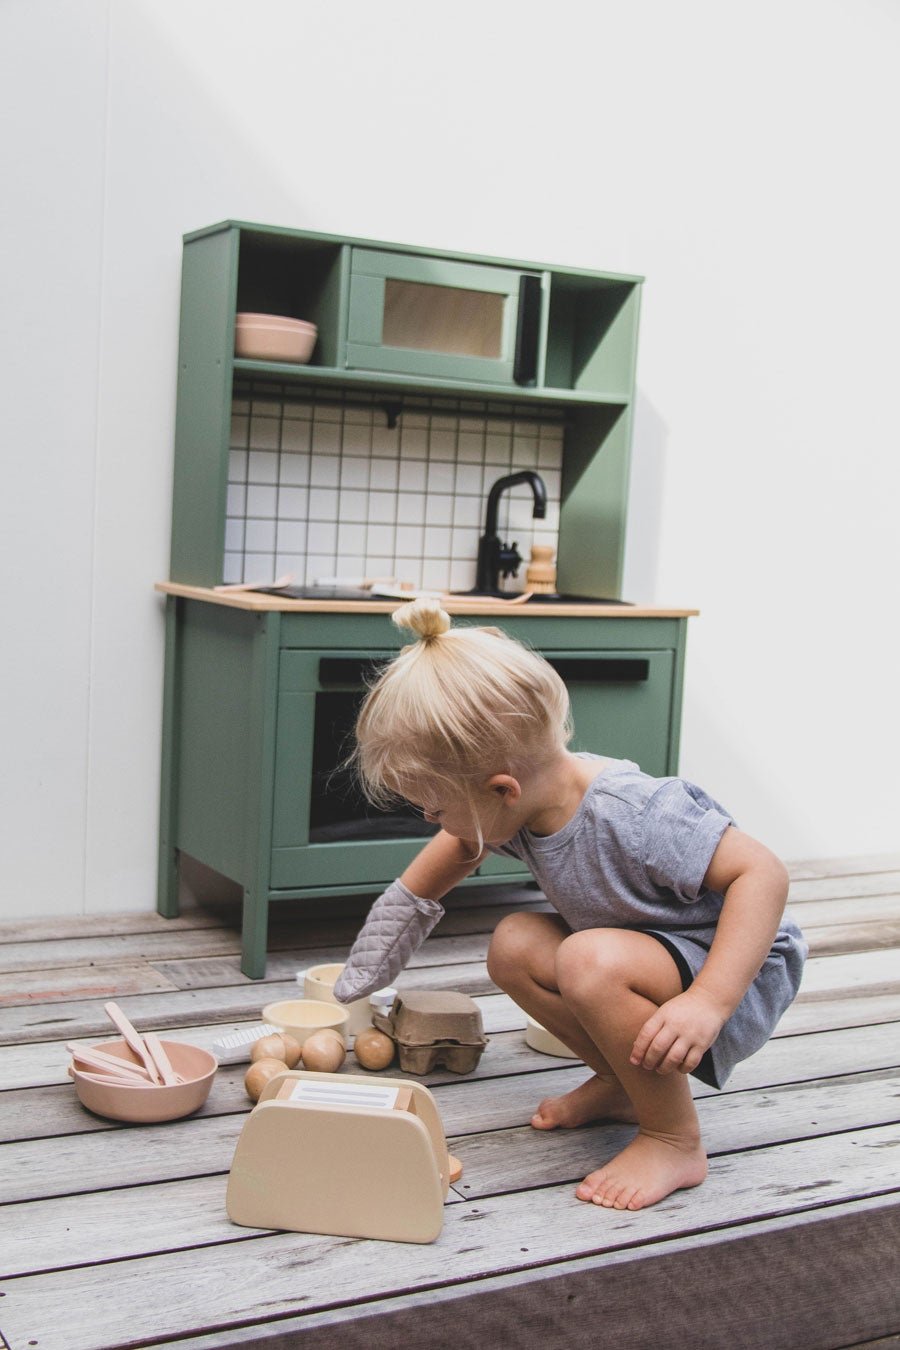
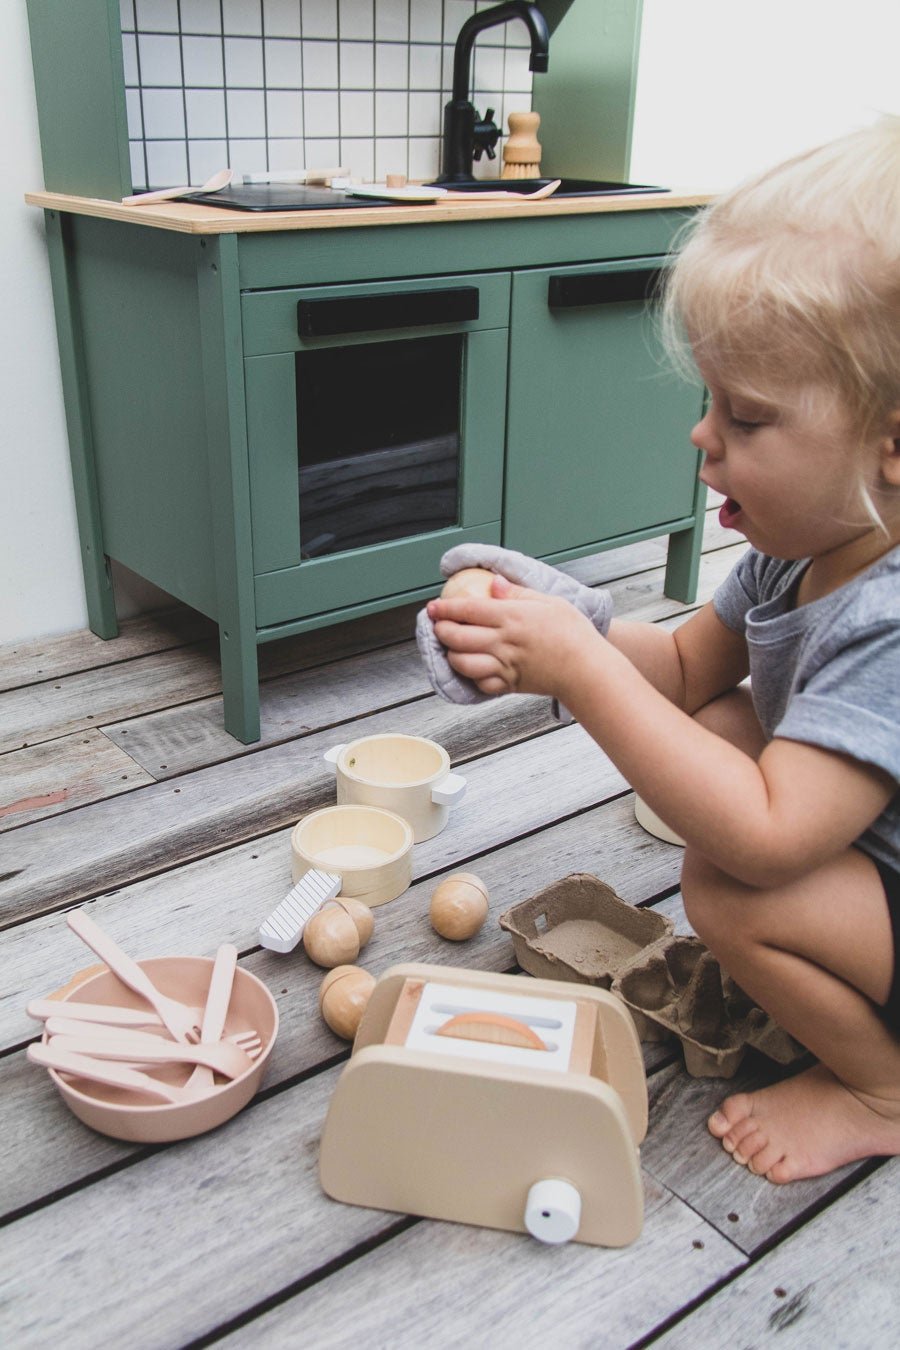
Now that the reno is finished, I knew it was essential to encourage Dusty's imagination by styling it with utensils and pretend food to let his imagination run wild. I (obviously) started with some products from our own online store, including our Bowl Set and Cutlery Set. You'll also see a scrubbing brush, which is a product coming soon to Smør Store! Kmart has some incredibly cute, wooden kitchen play accessories, including the:
Wooden Pots And Pans Set - just look at how CUTE that little oven mitt is!
Wooden Eggs Pack - only $5!
Wooden Toy Toaster - which I painted using a tin of paint sample I had for the kitchen, which didn't make the cut. It's Quarter Sorrell Brown by Karen Walker for Resene.
We also bought Dusty a Wooden Ice Cream Set, a Wooden Hamburger Playset and Wooden Cookies, which you can't see in the photos. Instead of showing him everything at once, we'll give him these extra pieces over the coming weeks to keep his imagination and interest alive. There are so many cute wooden kitchen toys from Kmart, and I've also got my eye on this Wooden Food Set, Wooden Tea & Coffee Set, Vegetables Cutting Set, and Wooden Crate Breakfast Set. Again, these are little things we'll look to buy throughout the year to keep him occupied!
And there you have it - our Kids Kitchen Renovation.

SUPPLIES
Rivergum by Resene from Paint Right
White Undercoat by Haymes from Paint Right
ScotchBlue Painter's Tape from Bunnings
UniPro Paint Brushes from Bunnings
Monarch Paint Brush from Bunnings (for cutting in the smaller areas)
Professional Touch Up Spray Paint in Satin Black from Home Hardware
3 x Decor8 White Square Tile Sheets from Bunnings
Plywood Panel from Bunnings
1 x Sheet Medium Course Sandpaper from Bunnings
Red Devil Tile Paste Adhesive from Bunnings (not online)
Dunlop Ready To Go Coloured Grout in Slate Grey from Bunnings
Tiling Sponge from Bunnings
Sikaflex 11 FC Multipurpose Adhesive from Bunnings
Caulking Gun from Bunnings
Pine Timber (1.2m 30 x 18) from Bunnings
White Knight Clear Gloss Spray Paint from Bunnings
Black Hooks from Bunnings


