How To Make A Floral Centrepiece
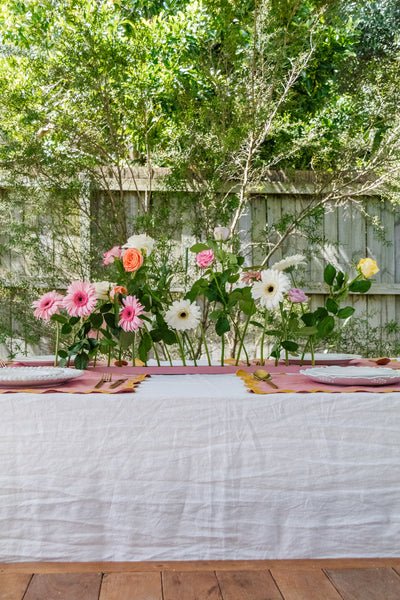
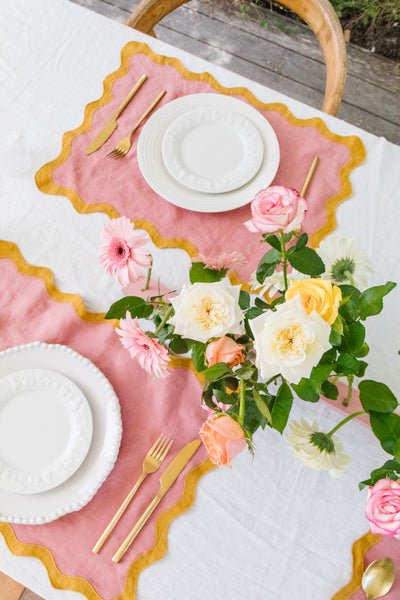
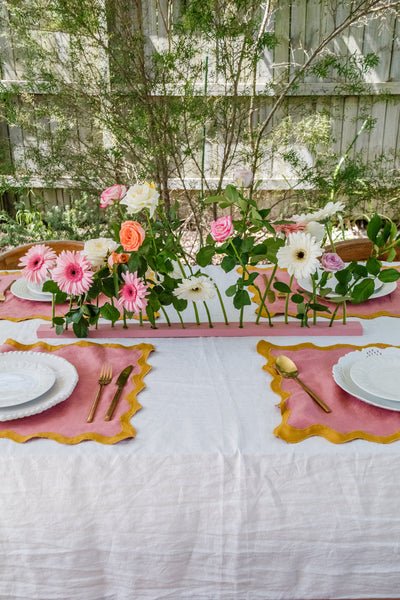
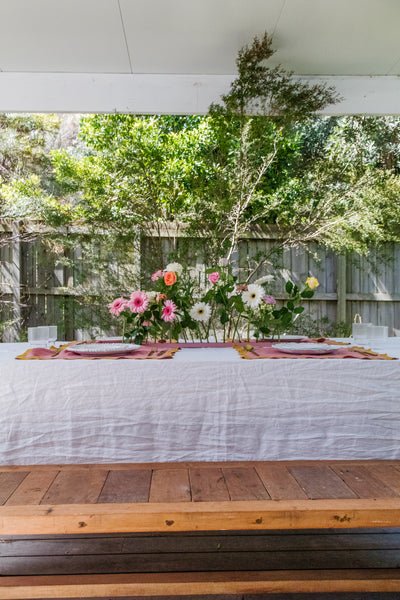
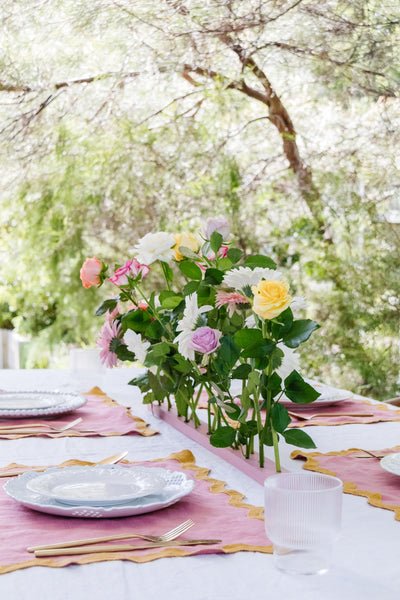
I had my friends over for summer lunch yesterday and (of course) I styled a beautiful tablescape; I just couldn't help myself. I used my beautiful white linen tablecloth from I Love Linen and coloured wavy placemats, and I mismatched plates with brass cutlery and striped glassware. When I took a step back I knew straight away something was missing - a gorgeous centrepiece to create that all important "wow" factor. I love creating centrepieces more than anyone I know, but I felt I had already used what I had at home over and over again. I wanted to create something fresh and new, and I remembered I had bought a bouquet of locally grown roses and gerberas the day before and that I had a pine plank left over from this project. And then I got an idea.
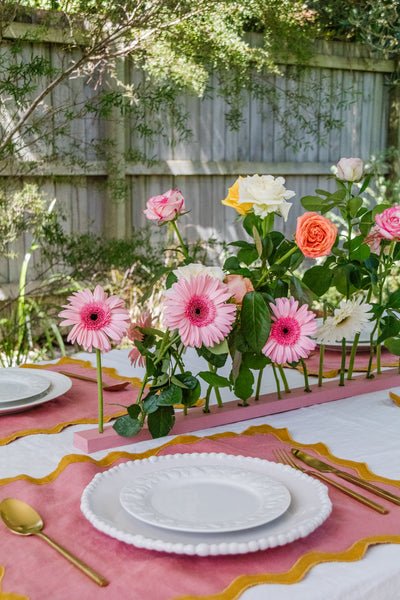
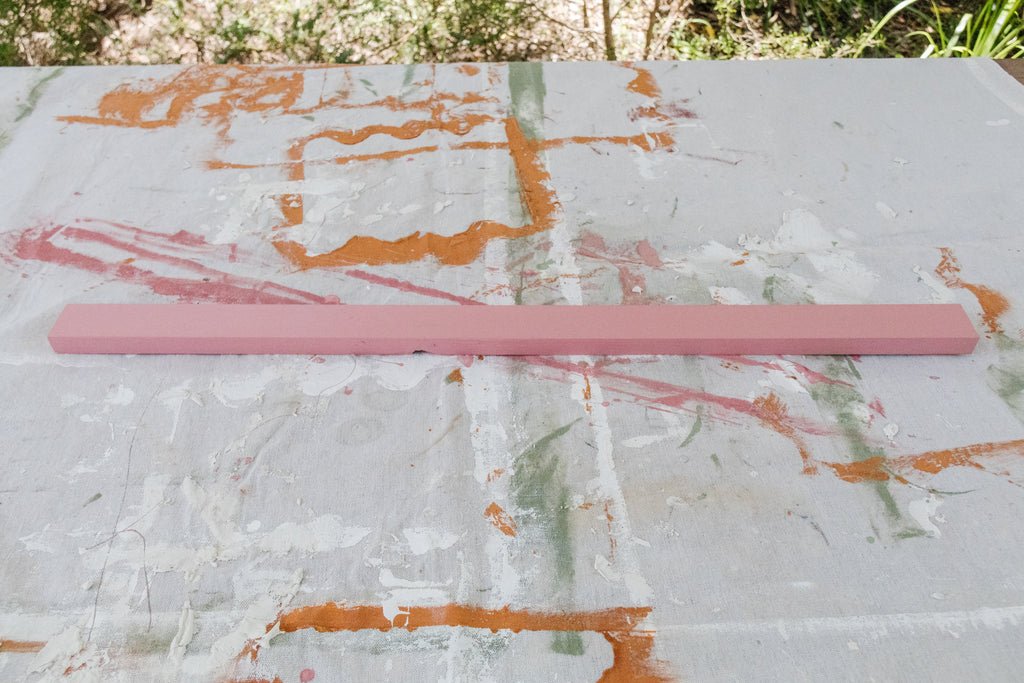
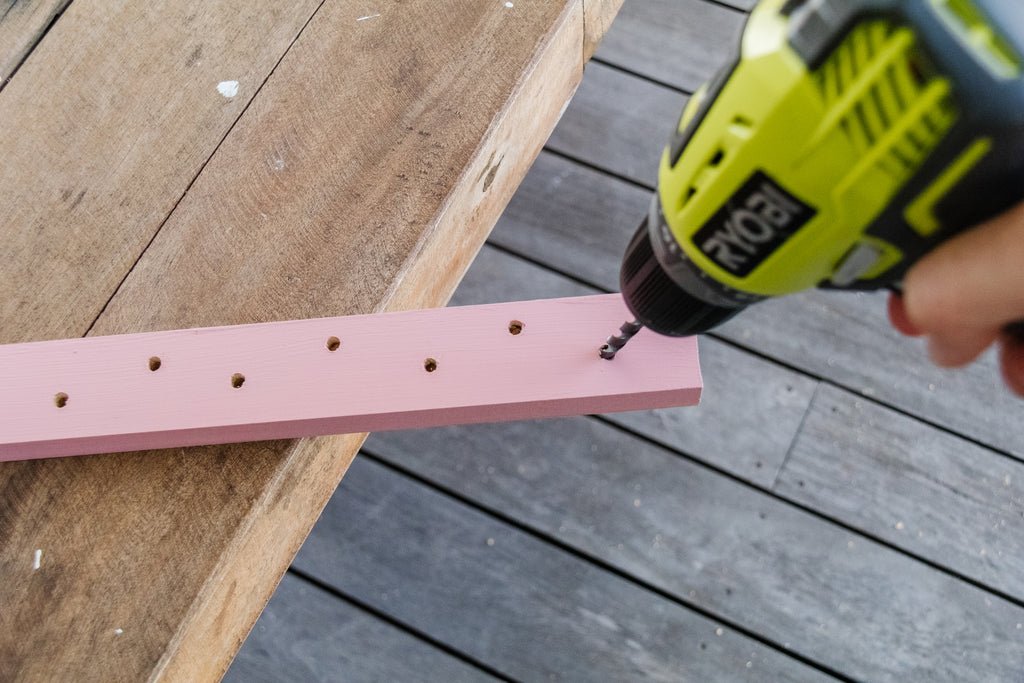
I quickly painted the plank using "tongue" by Dulux (which I got from Bunnings a few months ago), I drilled a few holes in it using my cherished Ryobi drill, and I stuck the bottom of each rose and gerbera stem into the holes to create a beautiful yet very simple floral centrepiece that was full of drama and colour. Sometimes those last minute, spur of the moment ideas are simply the best ones. There was no planning involved, just creative thinking on the spot. I love that I made this beautiful floral centrepiece using what I already had at home and a little elbow grease, it certainly had that "wow" factor I was hoping for. Read on to learn how to make this easy and oh so gorgeous floral centrepiece. And remember watch this video I created to see how it all came together. Happy making!

Materials
Drop sheet
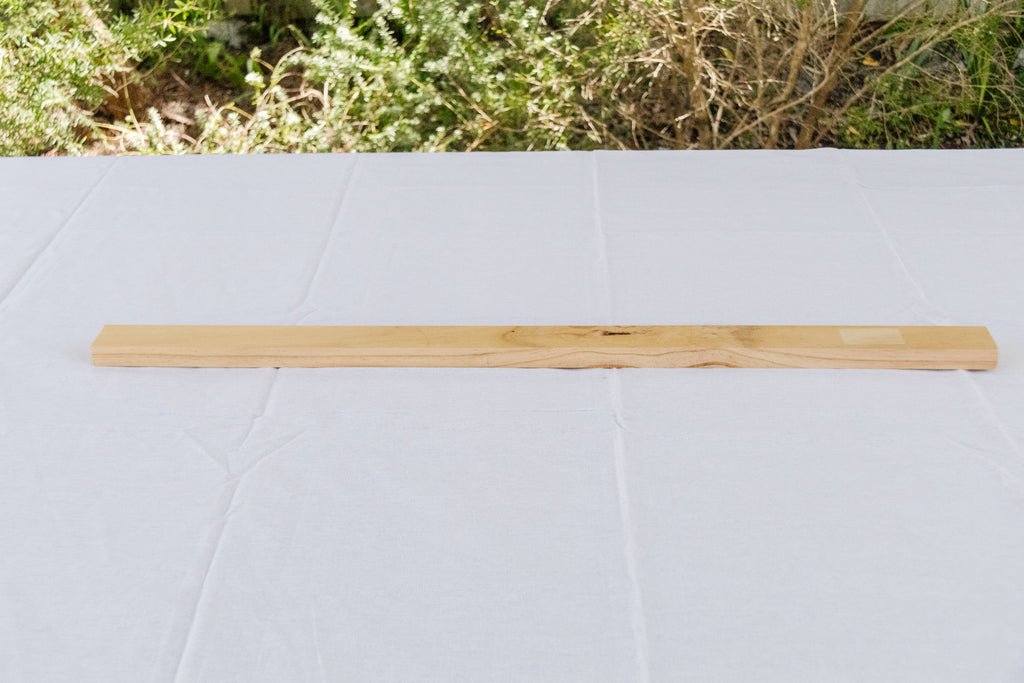
Plank of timber - I used pine
Paint - I used Tongue by Dulux
Paint brush
Ruler & pen
Flowers
Scissors
I also used a drill for this project.
How To Make An Easy Floral Centrepiece
Cover your work surface with a drop sheet or an old sheet that you don't mind getting paint on. Place the plank onto the drop sheet and paint it with two coats of paint.
Once the paint has dried, count the number of flowers/stems you have then divide that by the length of the timber to figure out the spacing between each flower. Using a ruler, mark out with a pen where you will drill holes for the flowers to stand. I decided to mark out the spots in a zigzag pattern to help stabilise the timber and so the flowers looked more organic.

Hold the timber down firmly onto your work surface and drill holes into the timber. You don't need to drill all the way through the timber. However, the more you drill through the timber, the sturdier the flowers/stems will stand. Paint one more coat as you'll no doubt have marked it with the drill. This is just that extra step that will make the finish look polished.
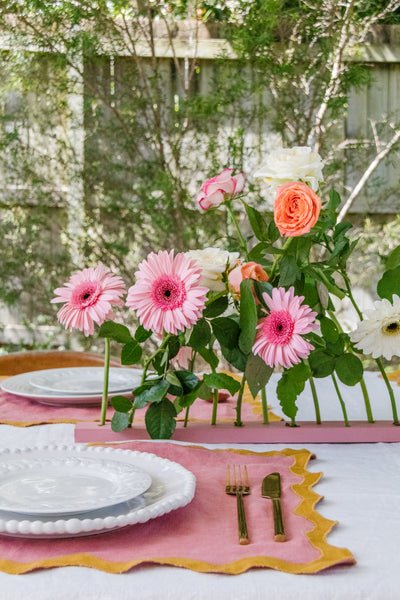
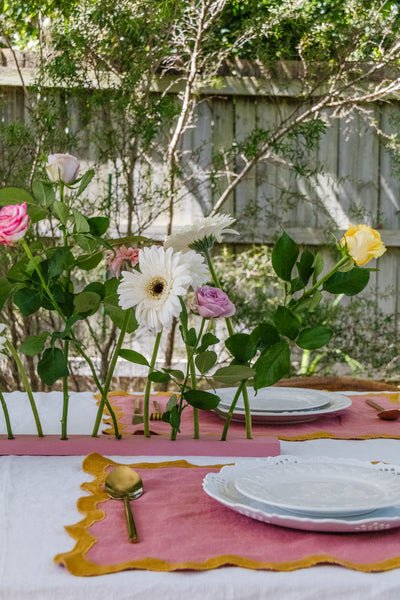
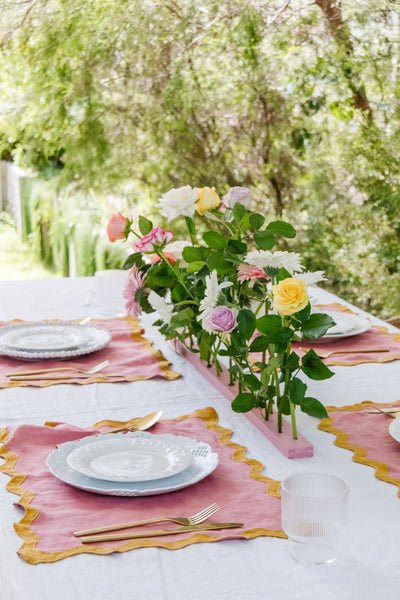
When you are ready, firmly push the bottom of each stem into the holes. You may need to cut the stems shorter so the flowers stand upright. I had two varieties of flowers so I made sure to alternate them to create more drama. Twist the flowers around accordingly to ensure the centrepiece is evenly weighted but also so the arrangement looks organic and almost wild, like they are popping out of the table.
Extra tip: Avoid placing these flowers in direct sunlight where possible. As they are cut and not sitting in water, they may wilt in direct sunlight. A little is ok, but not full direct sunlight.
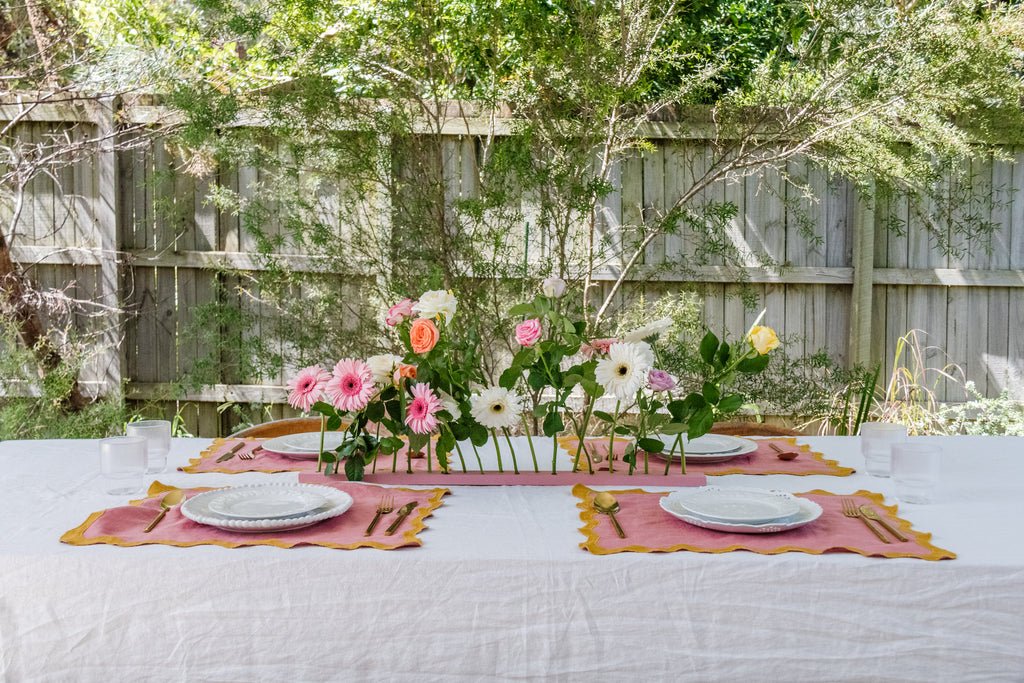
Ta daaaa! A very easy yet oh so beautiful floral centrepiece.
Honestly I cannot believe how simple this was to make but how stunning this floral centrepiece is. You can use any flowers you like or just one variety, and add greenery. You can keep the arrangement minimalist or wild and entangled, and you can keep the colours of the flowers the same or create drama with lots of different colours. I also discovered that twisting the flowers and playing with their natural angles ensured the centrepiece was evenly weighted. It also made the arrangement look organic and wild, like the flowers were growing out of the table. And I love how romantic the roses and gerberas look together!