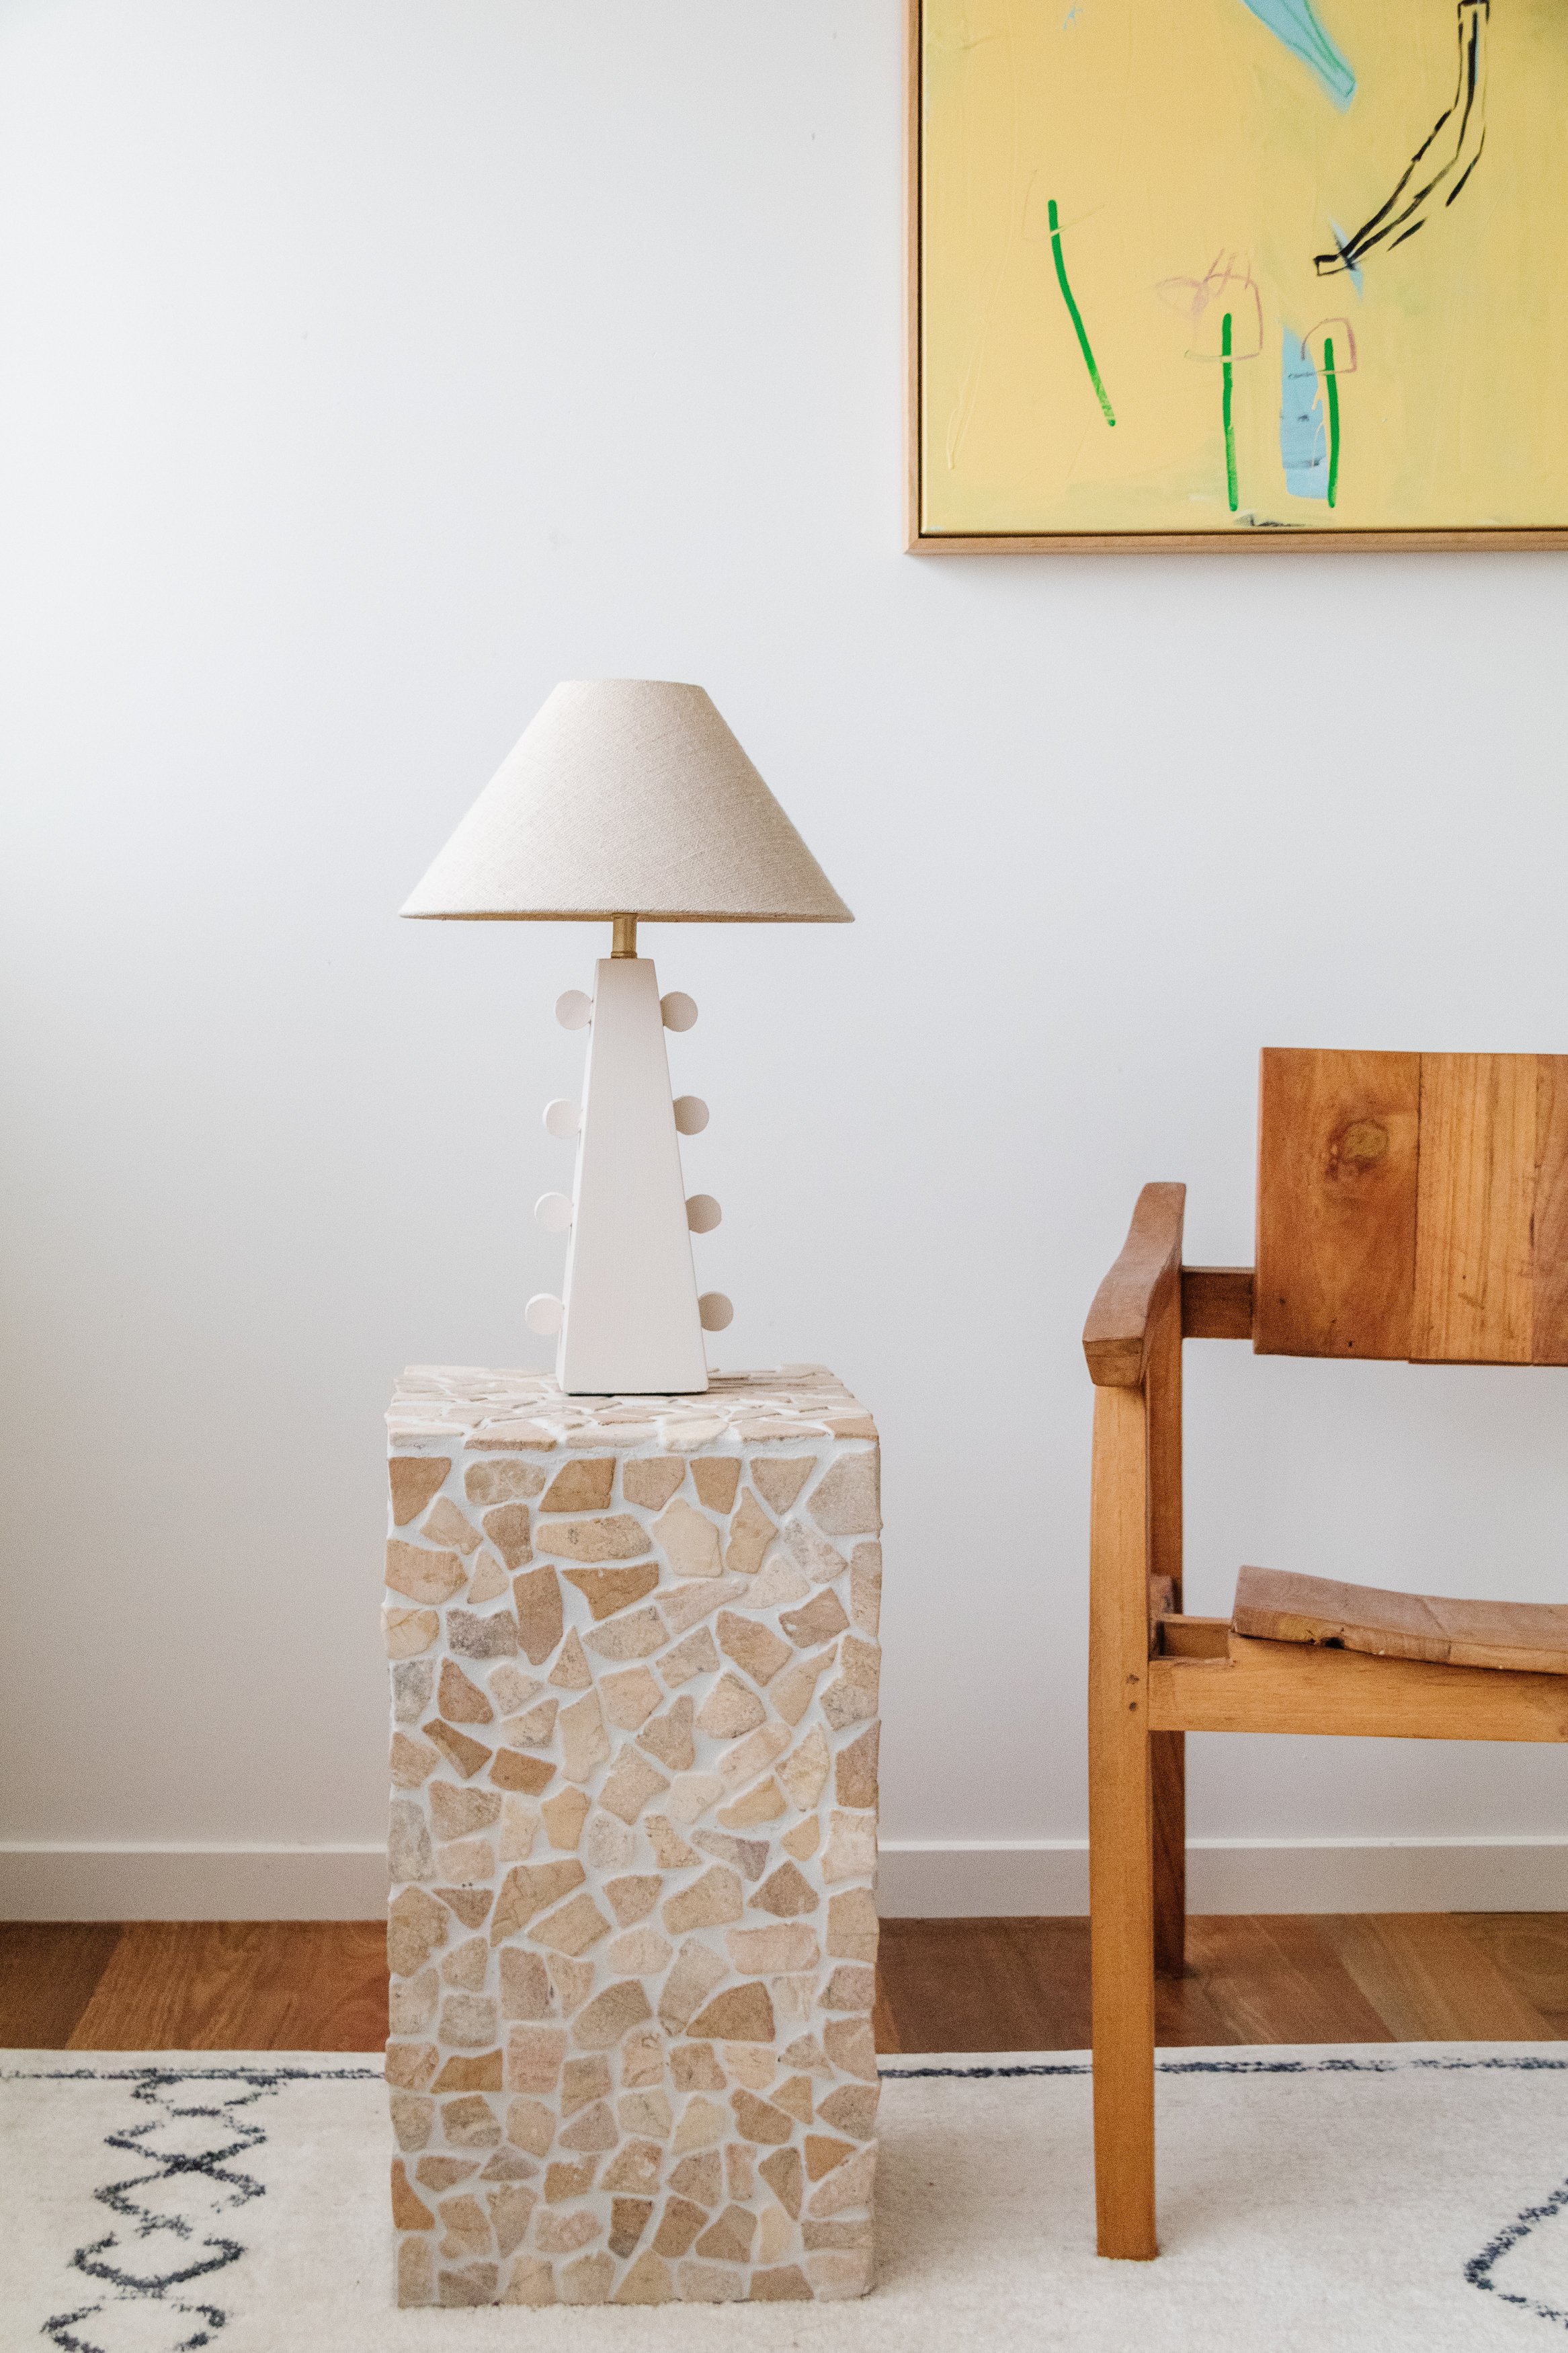
Upcycled Dowel Table Lamp
What do you do when you find an ugly secondhand table lamp? You upcycle it!
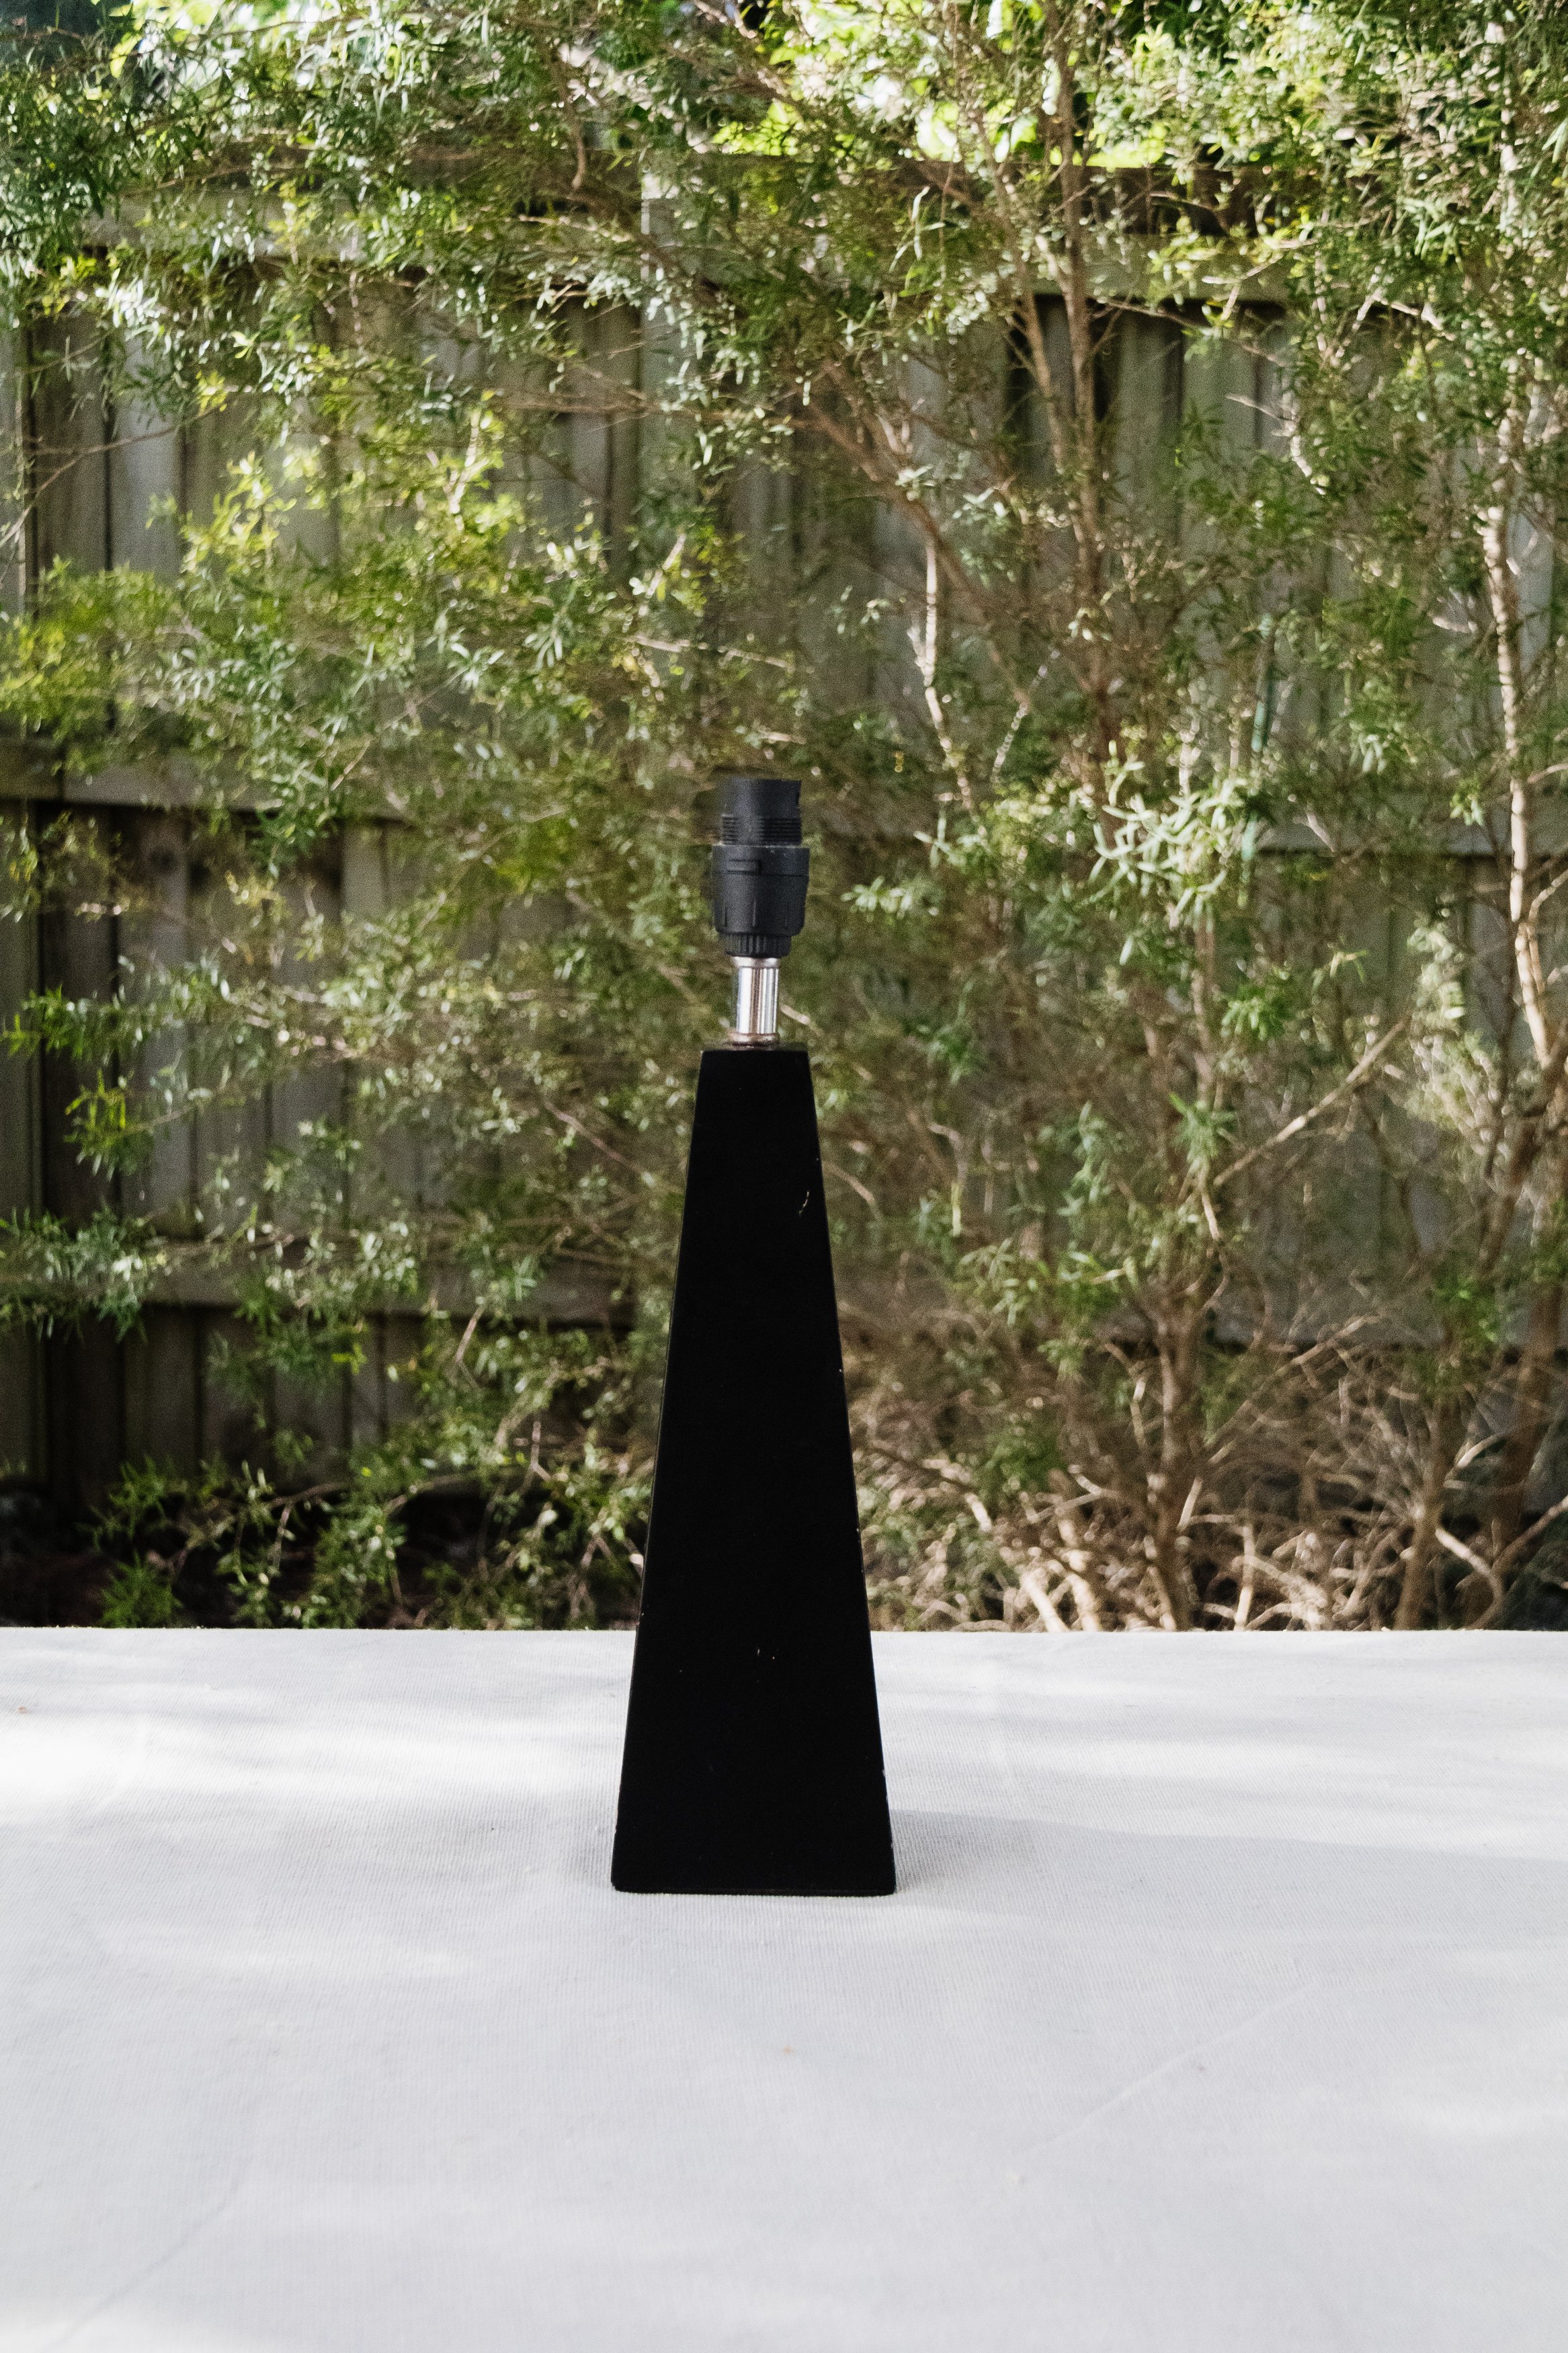
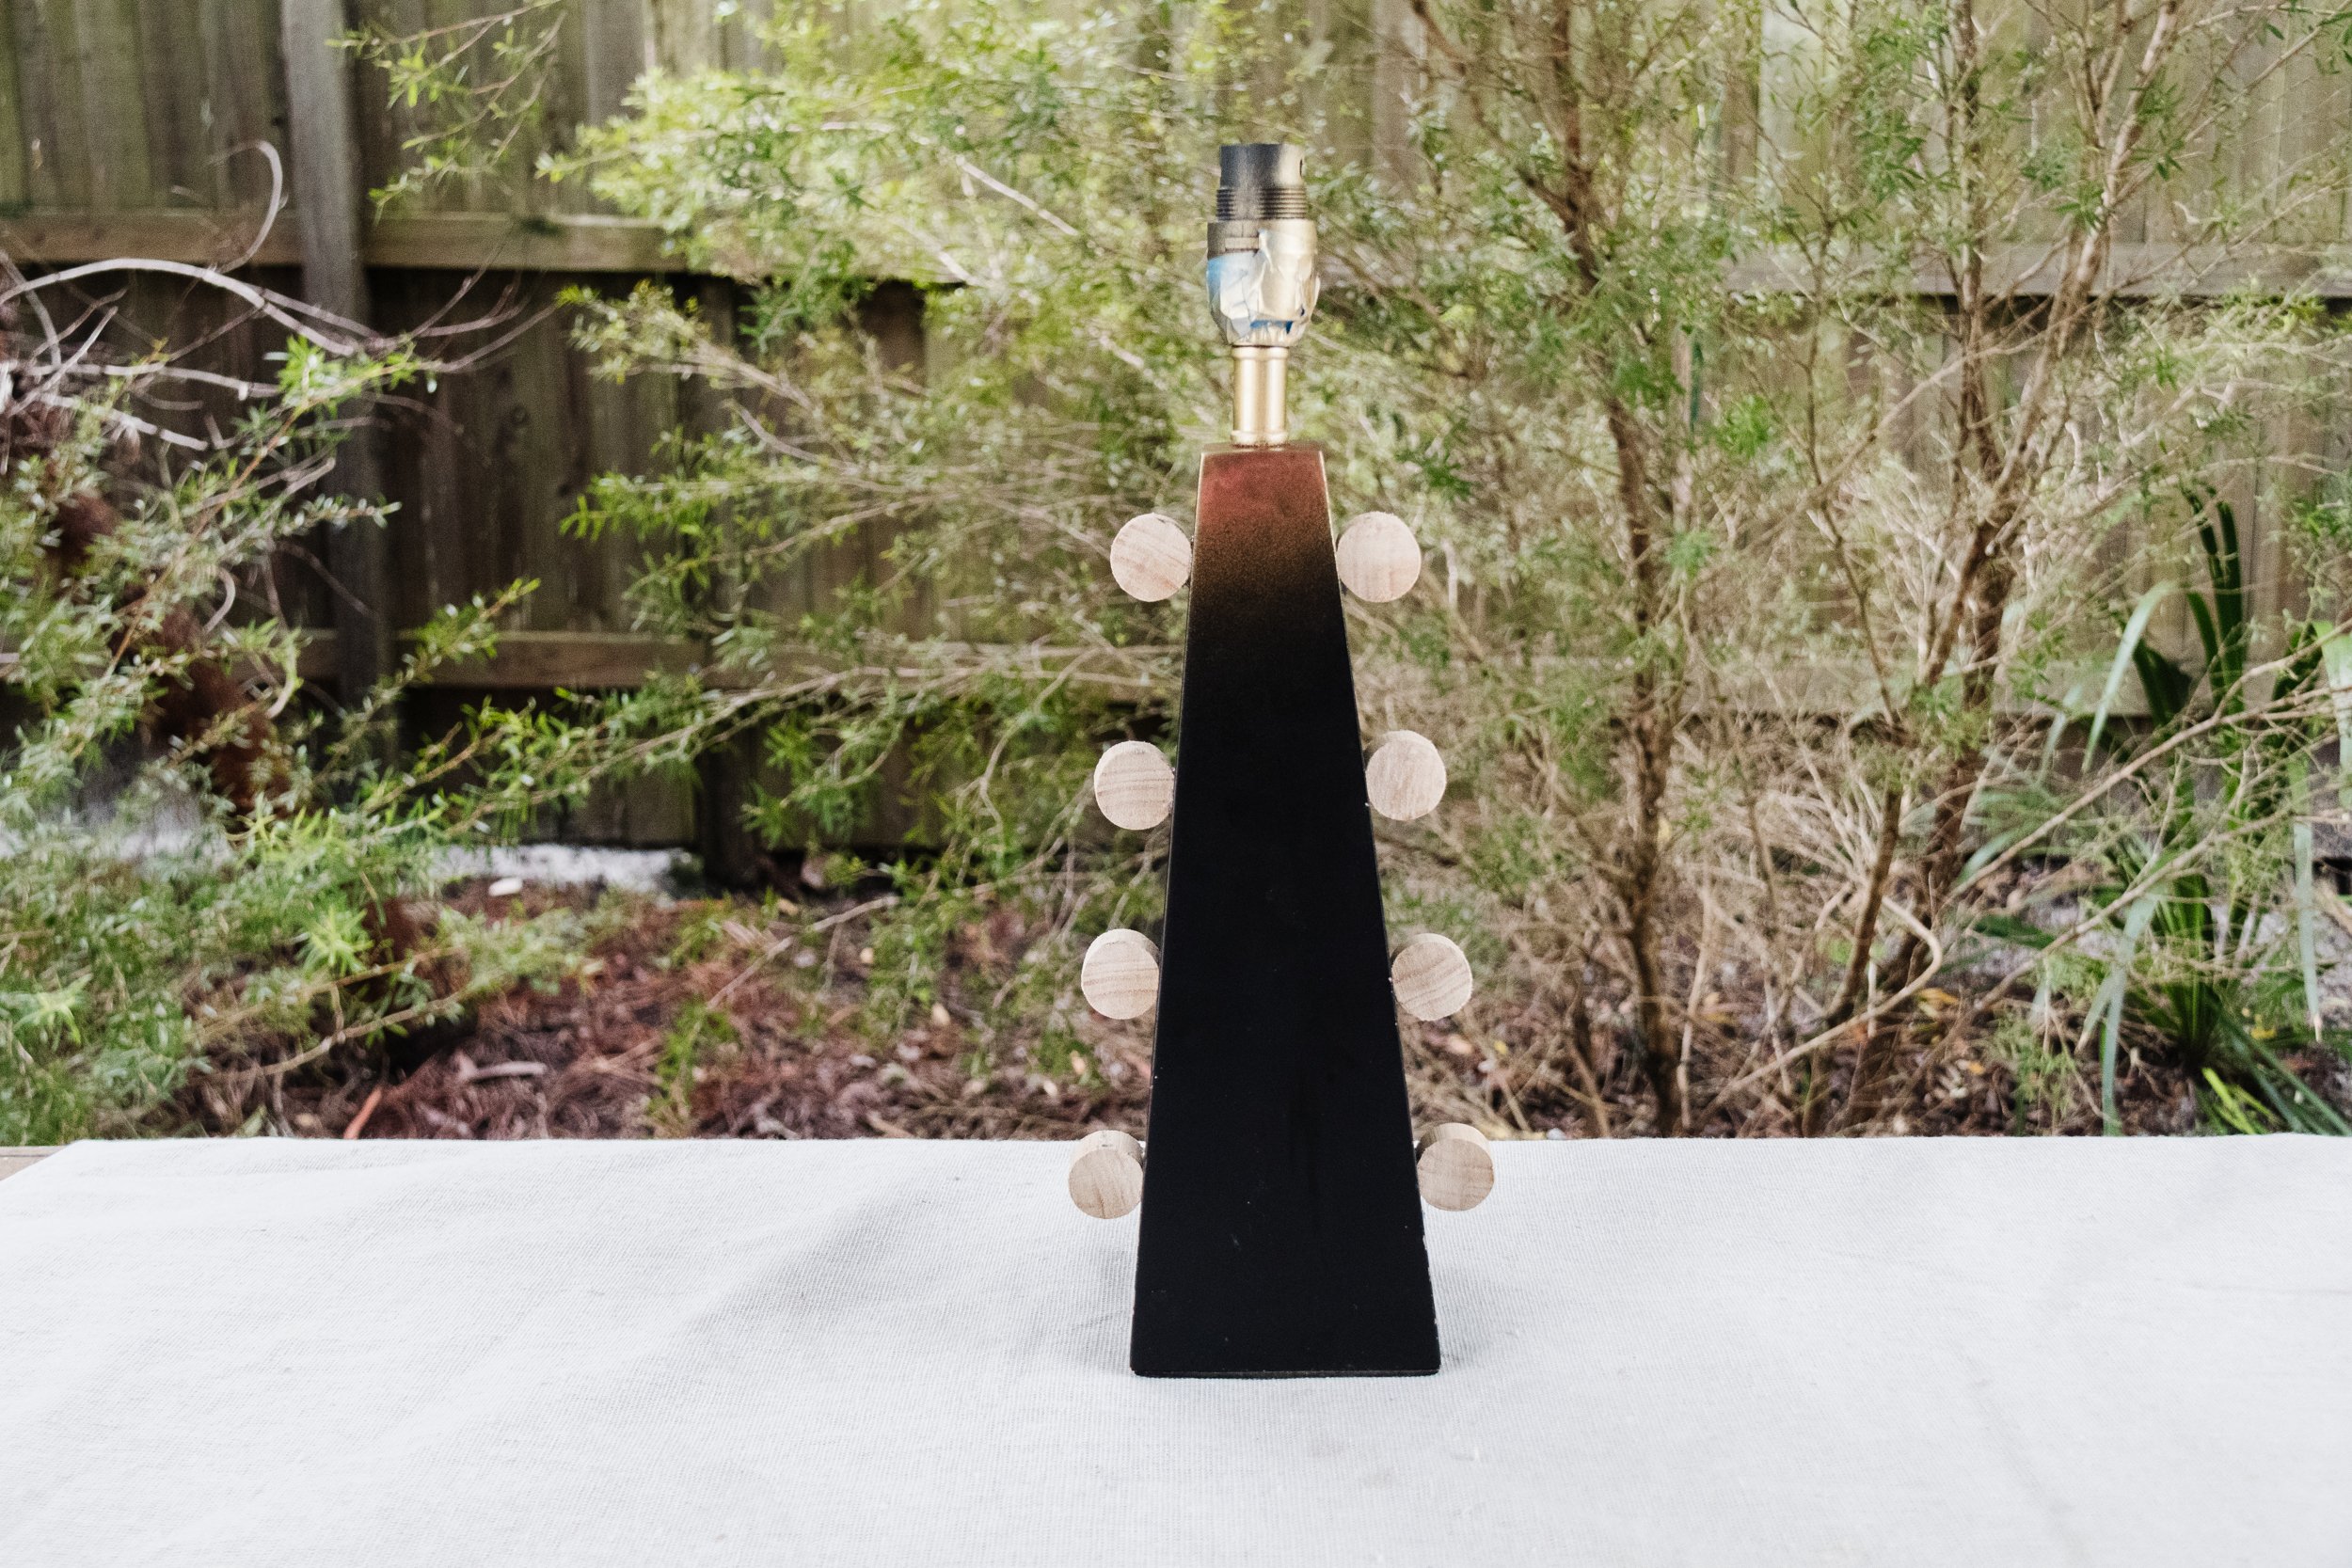
It seems I am having a bit of a lamp moment right now because I just can’t stop upcycling lamps - it’s an addiction and I am so here for it. I love giving secondhand lamps a glow up because it’s an affordable upcycling project to dive into, you don’t need to use a lot of materials, they don’t take a lot of time and you don’t need any DIY or upcycling skills. Plus, they have always been a favourite of mine because lamps make your home feel cosy and lived in, without breaking your budget. So let’s dive into another table lamp upcycle! I found this lamp base at the tip shop for $5 - it didn’t come with a shade but that’s ok as I have one at home I have been wanting to use for a project like this. For this upcycle I was inspired by the dowel coins I made for my DIY Picnic Tray Table glow up and I wanted to see if I could use these on a lamp upcycle. And as they say, the rest is history! This is hands down one of the easiest lamp upcycles to date. Read on to find out how I upcycled this lamp from drab to fab in just one day.
Before & After

Project Details
🕒 Project Time Estimate: 1 hour of making and at least 3 hours for the glue to set (and 24 hours to completely dry).
💰 Materials Cost: Under $30
👷♀️ Skill Level: Beginner to Intermediate DIYer (depending on your experience with a jigsaw)
⚒️ Tools: Table clamps and a jigsaw or hand saw

Materials
Lamp shade (preferably secondhand)
Lamp base (preferably secondhand)
Painters tape
Pen and measuring tape
Paint brush
For this project I used a detail sander, clamps and a jigsaw (go on, get one!). If you don’t have a jigsaw or don’t want to use one, you can use a handsaw but it will take a longer to cut the timber coins. If you are feeling intimidated or not confident enough to use a jigsaw, have a look at my How To Use a Jigsaw Guide here. It’ll make you feel empowered and confident to use one, promise!
Extra Tip: Honestly, any lamp base would look great for this project but some features that will help your upcycle look stunning are smooth finishes and avoid any raised textural patterns (you want the timber coins to be the hero). The base needs to have body and can be curved or straight.
How To
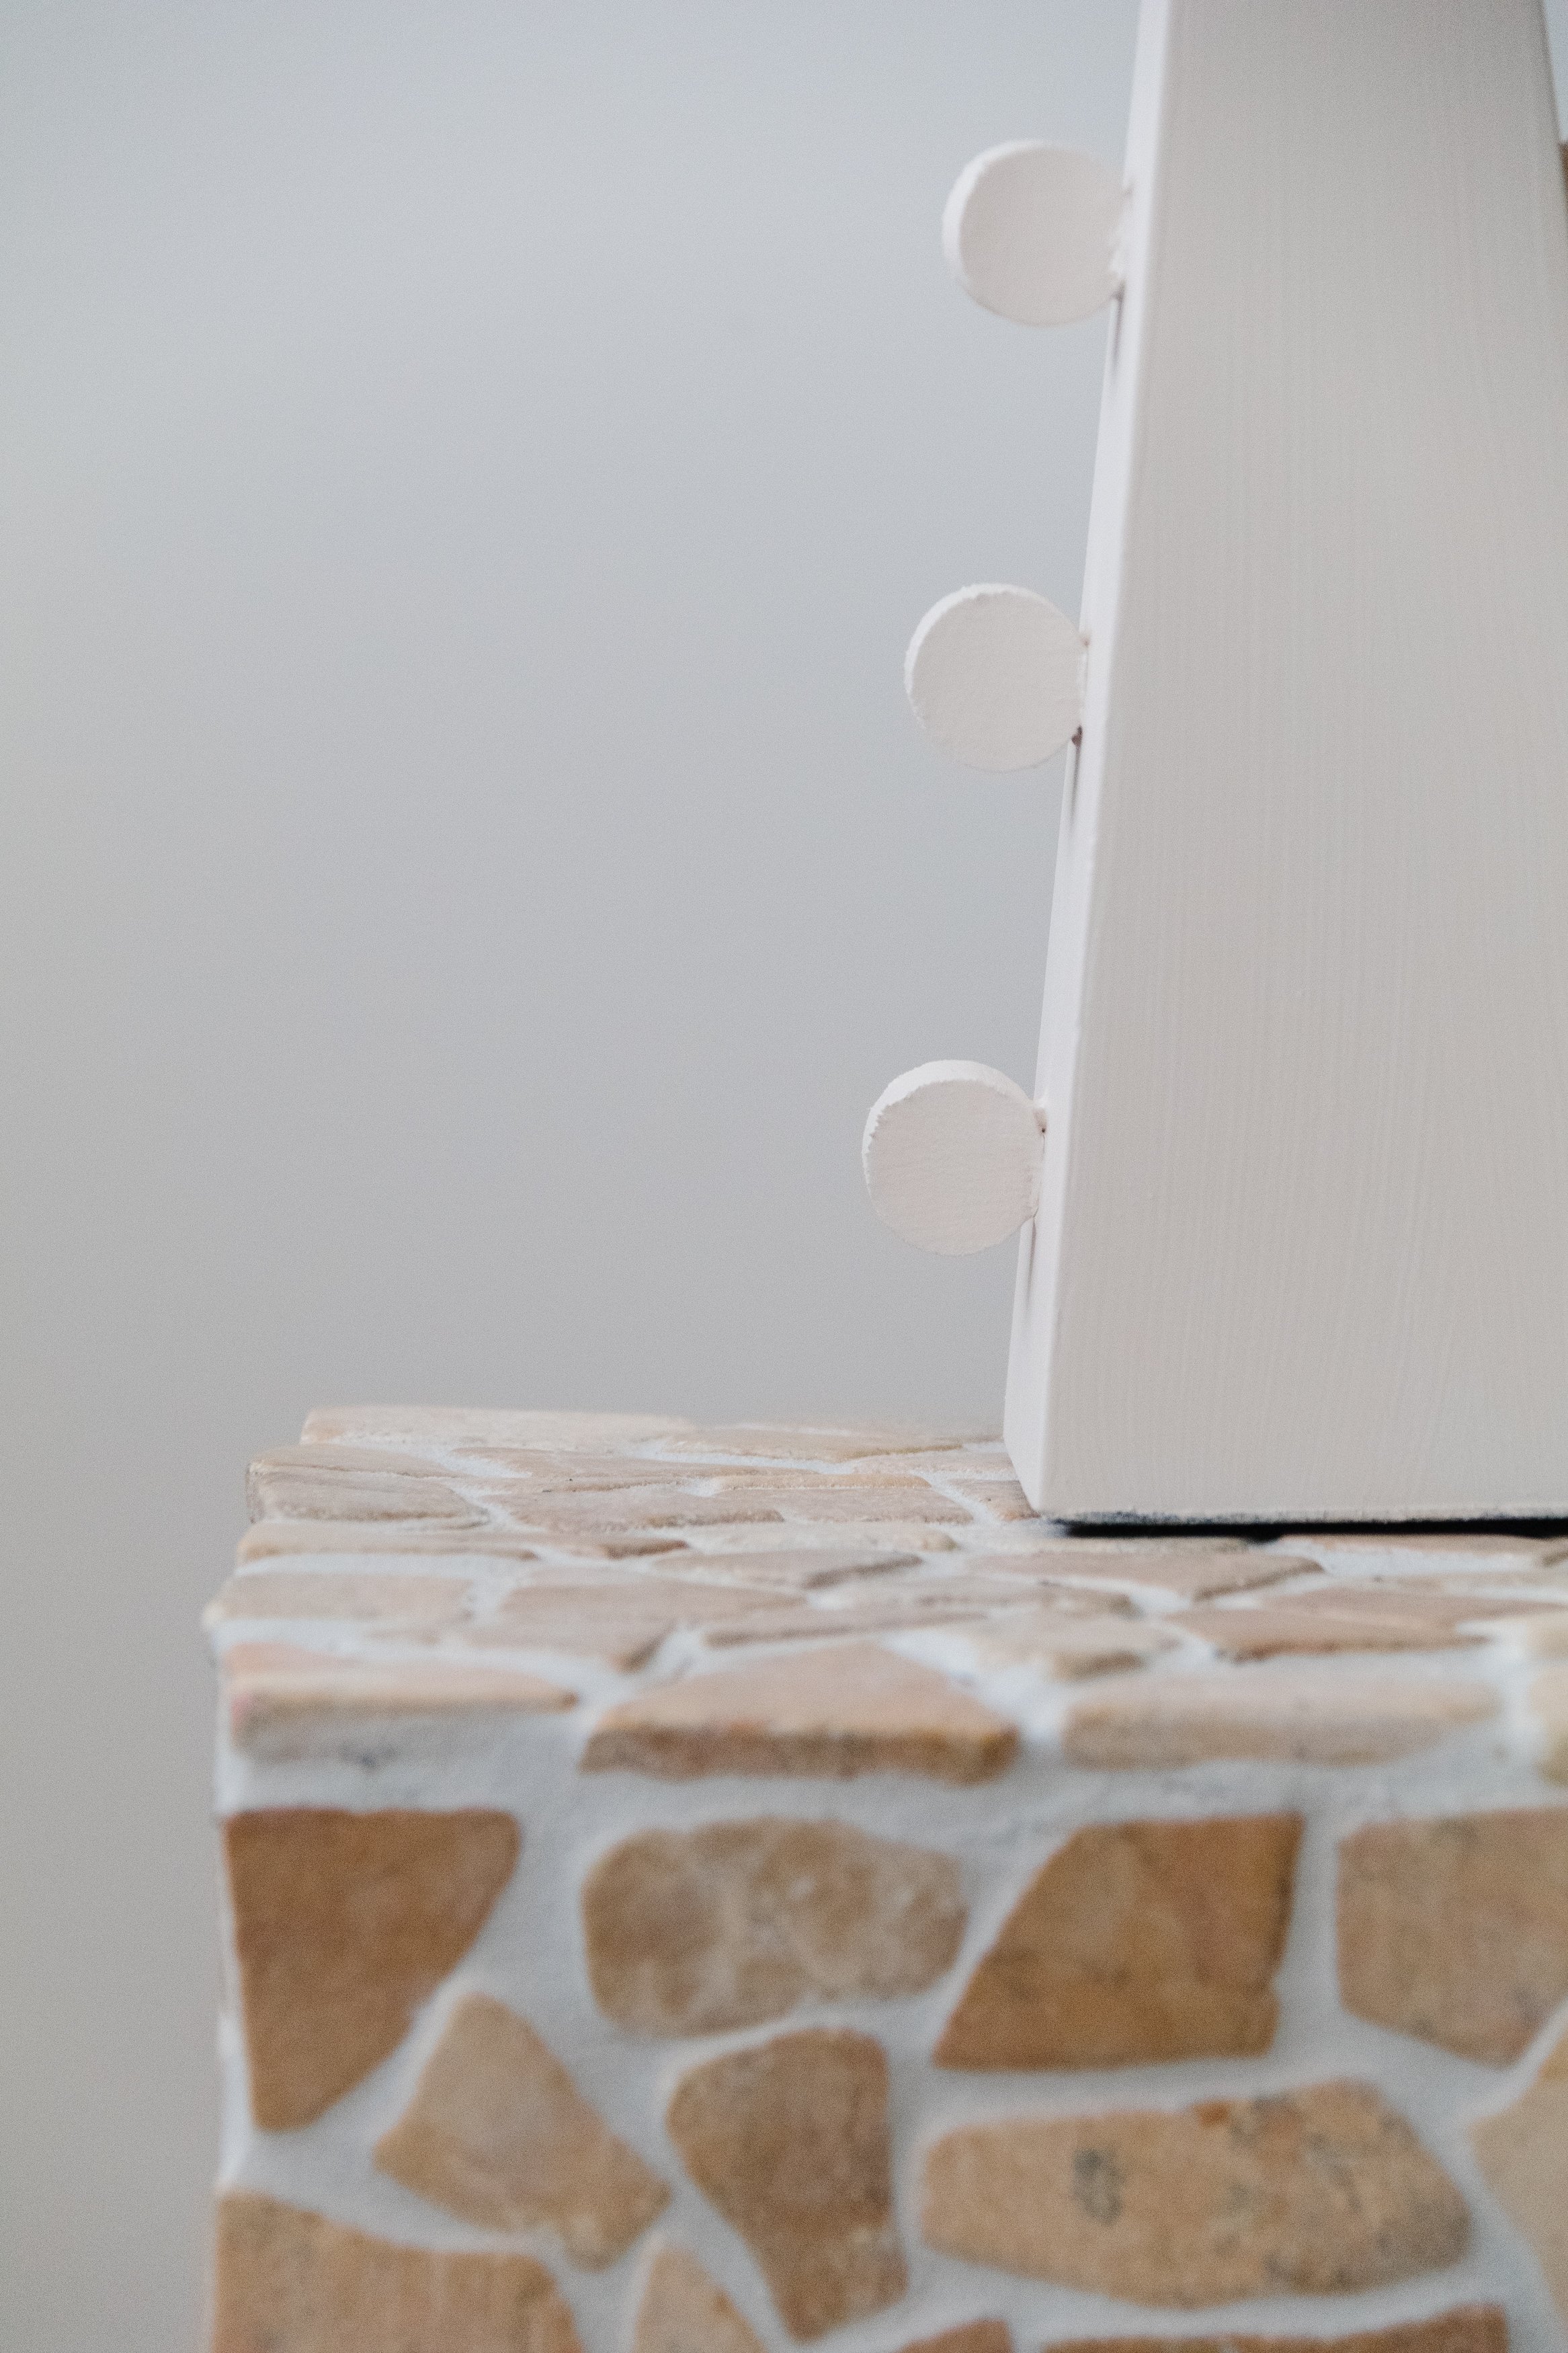
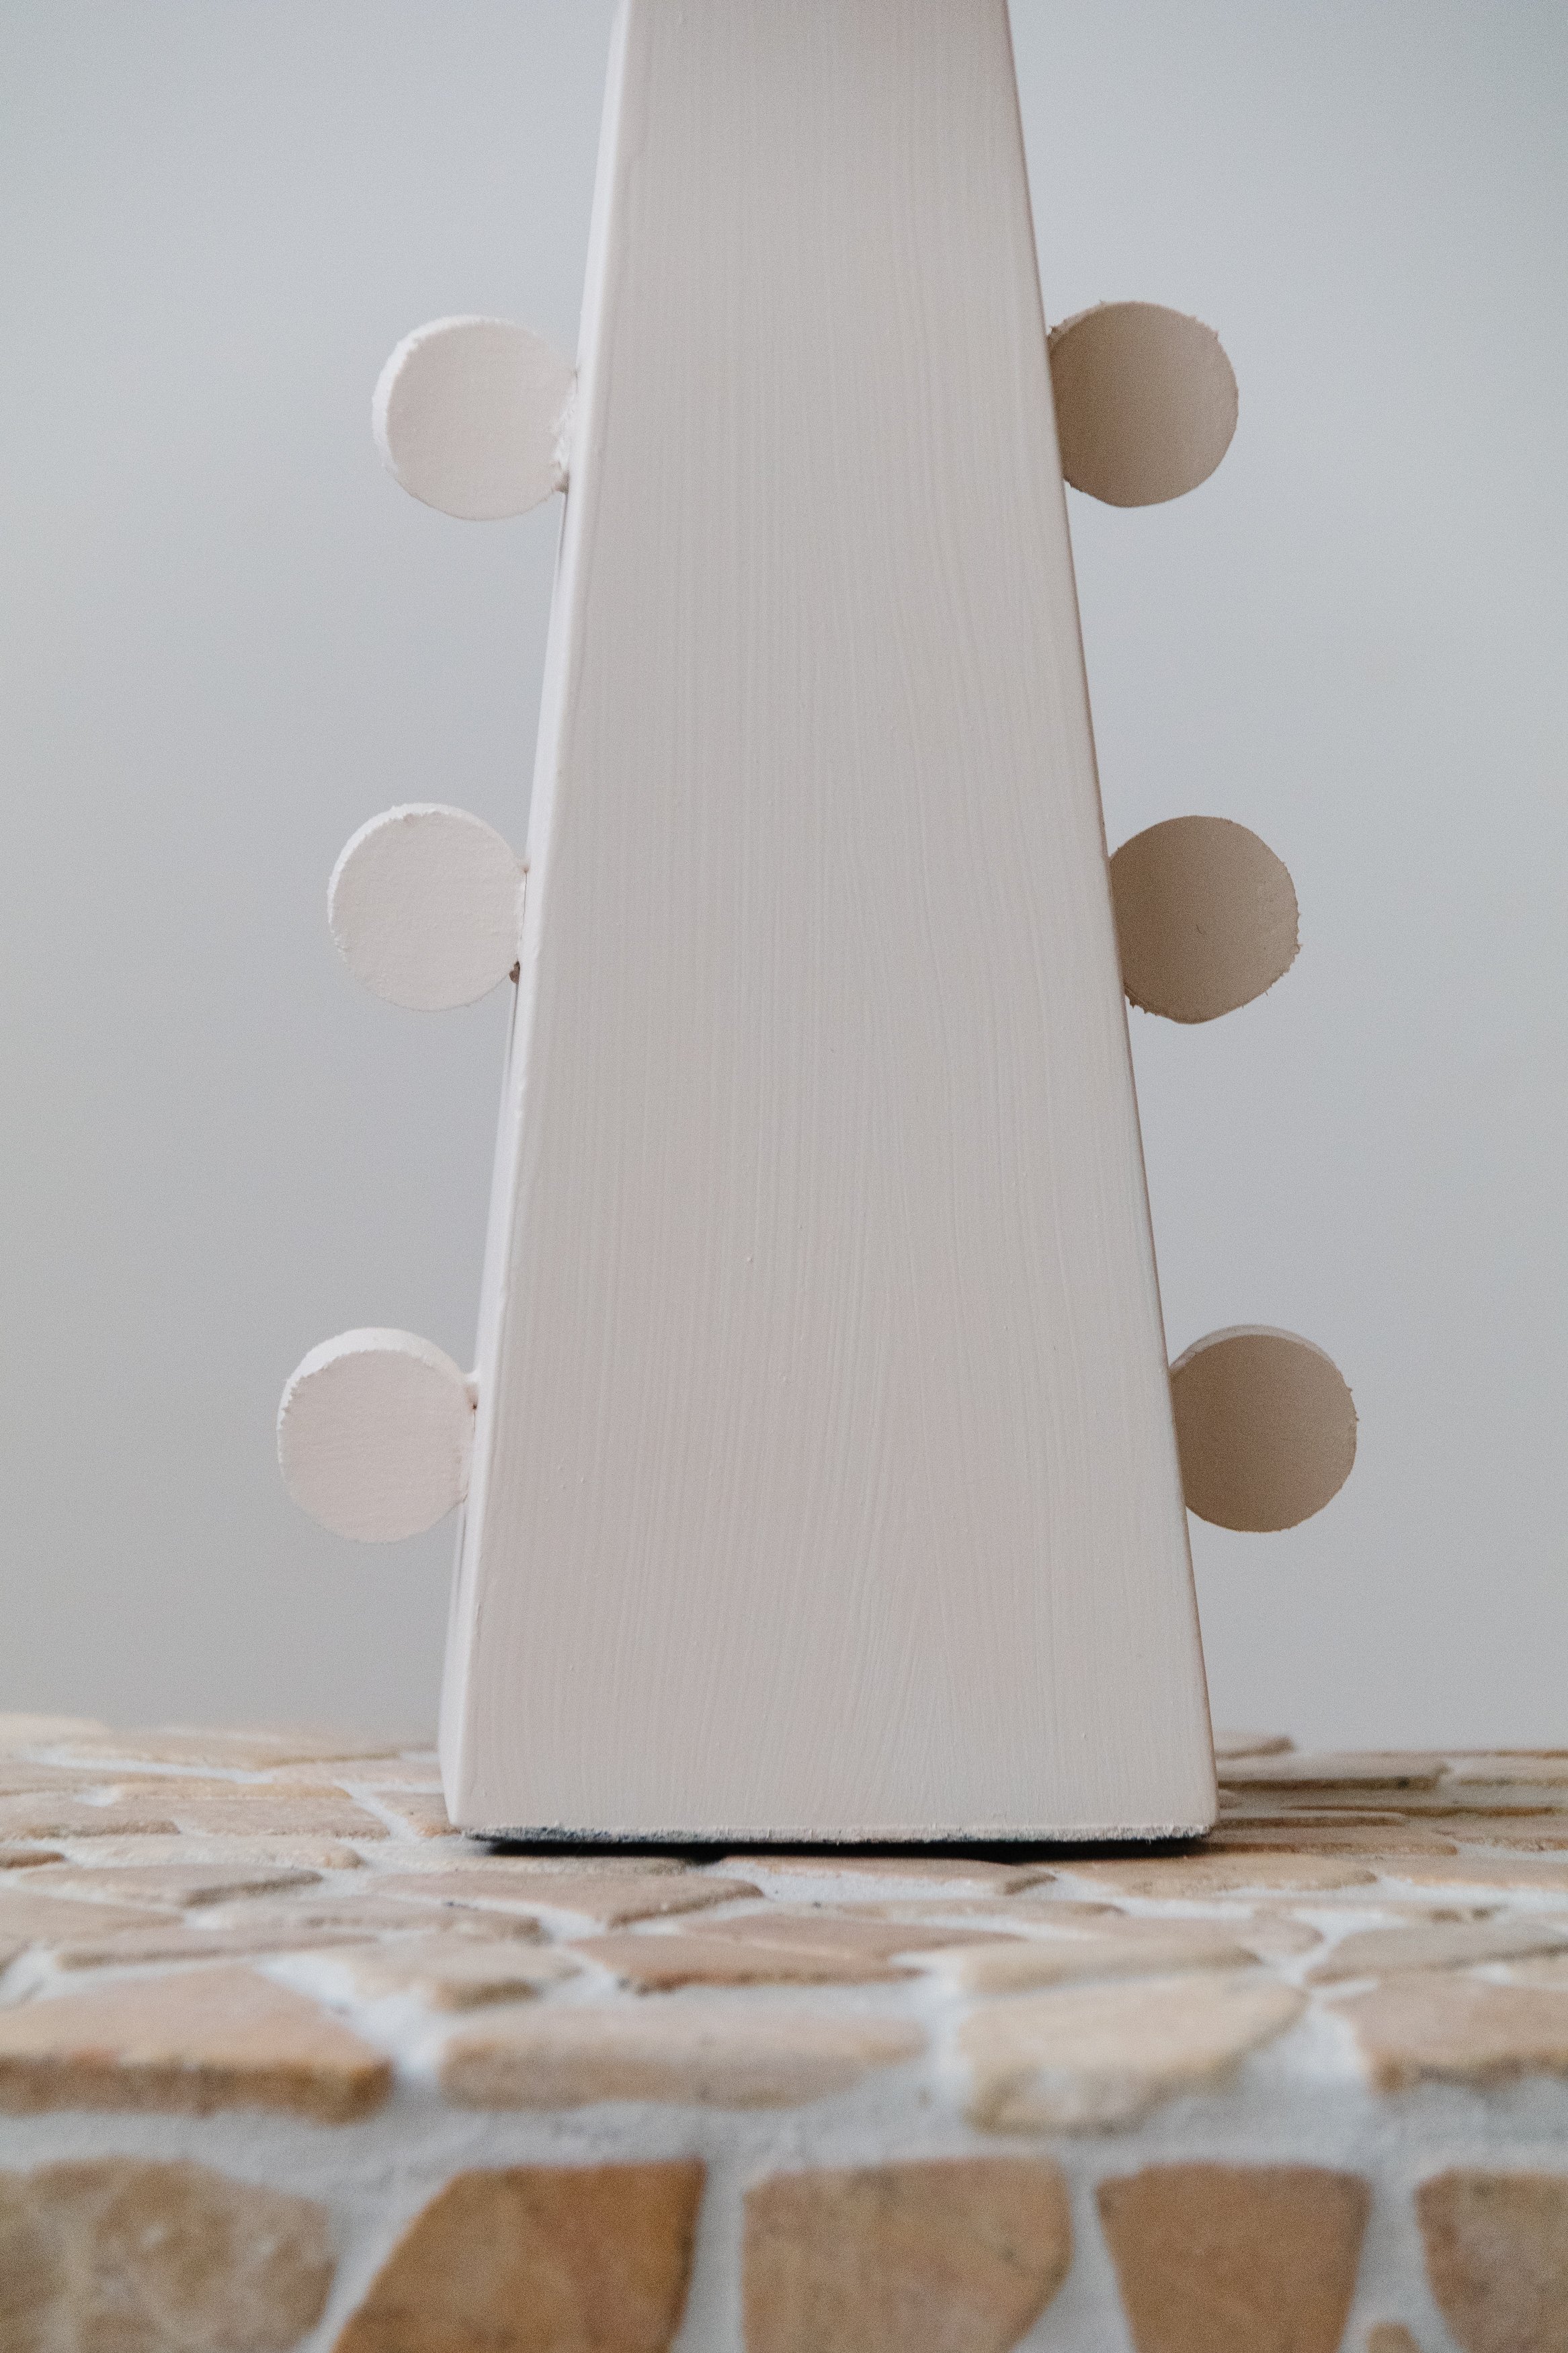
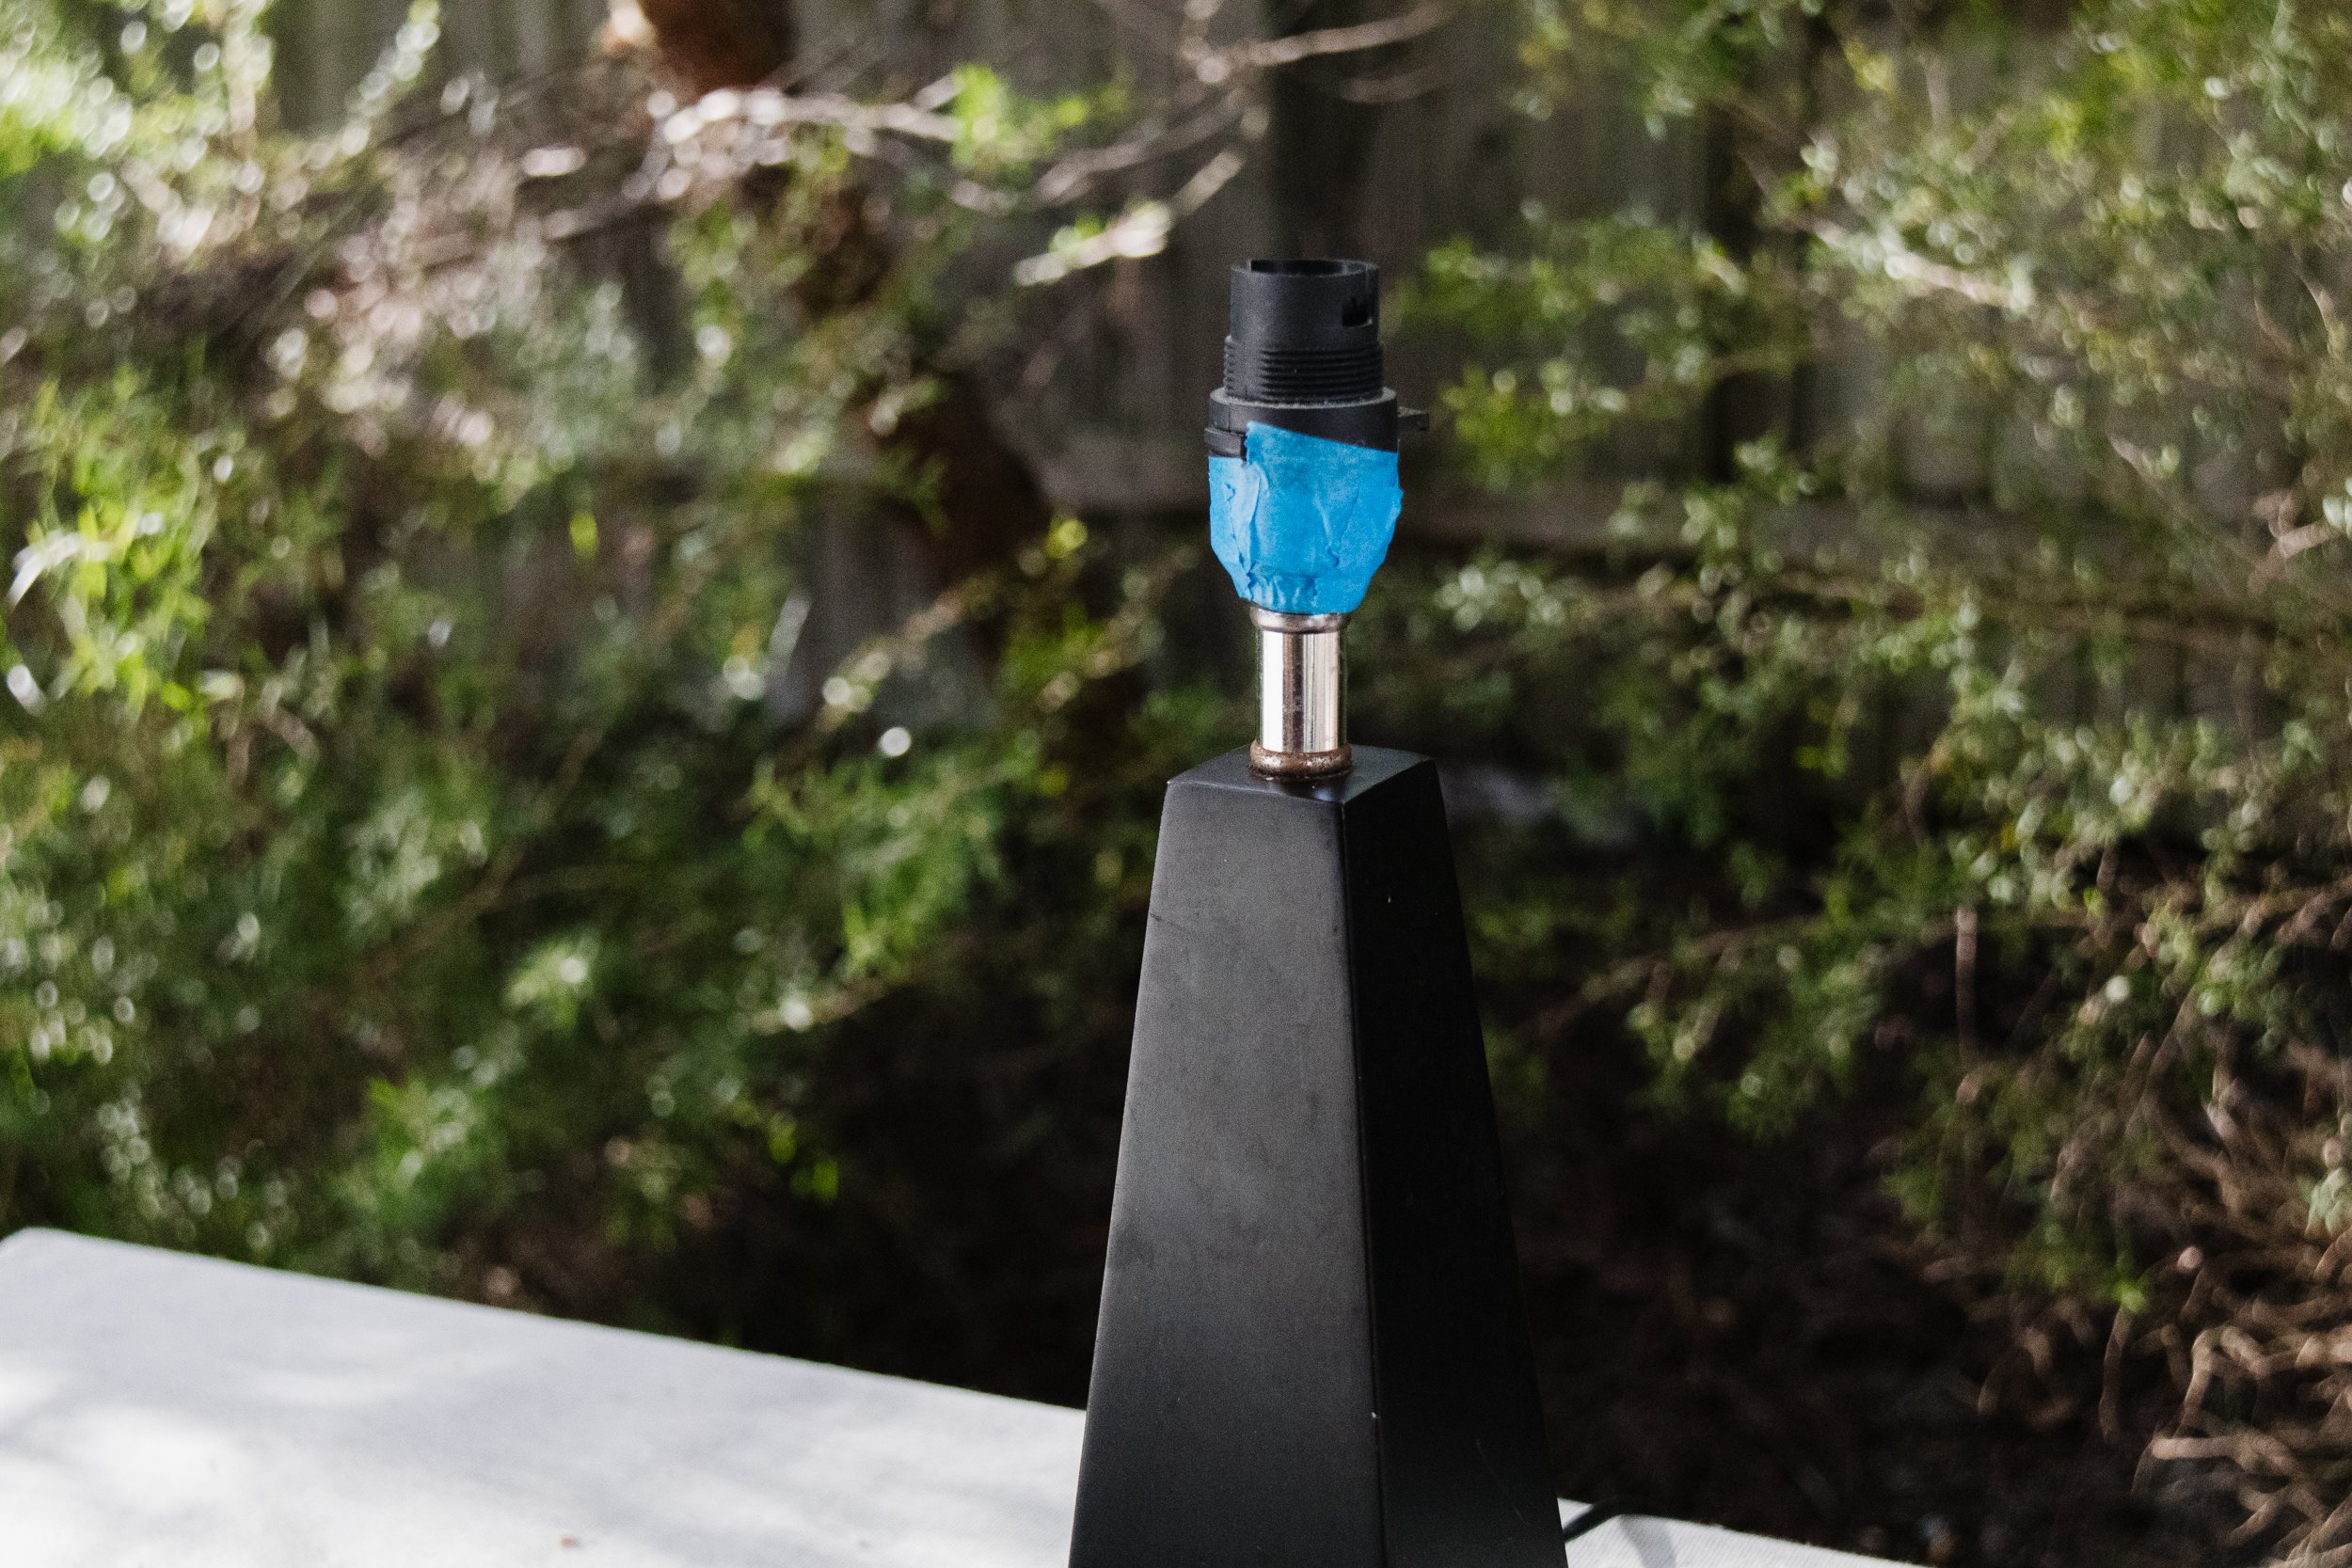
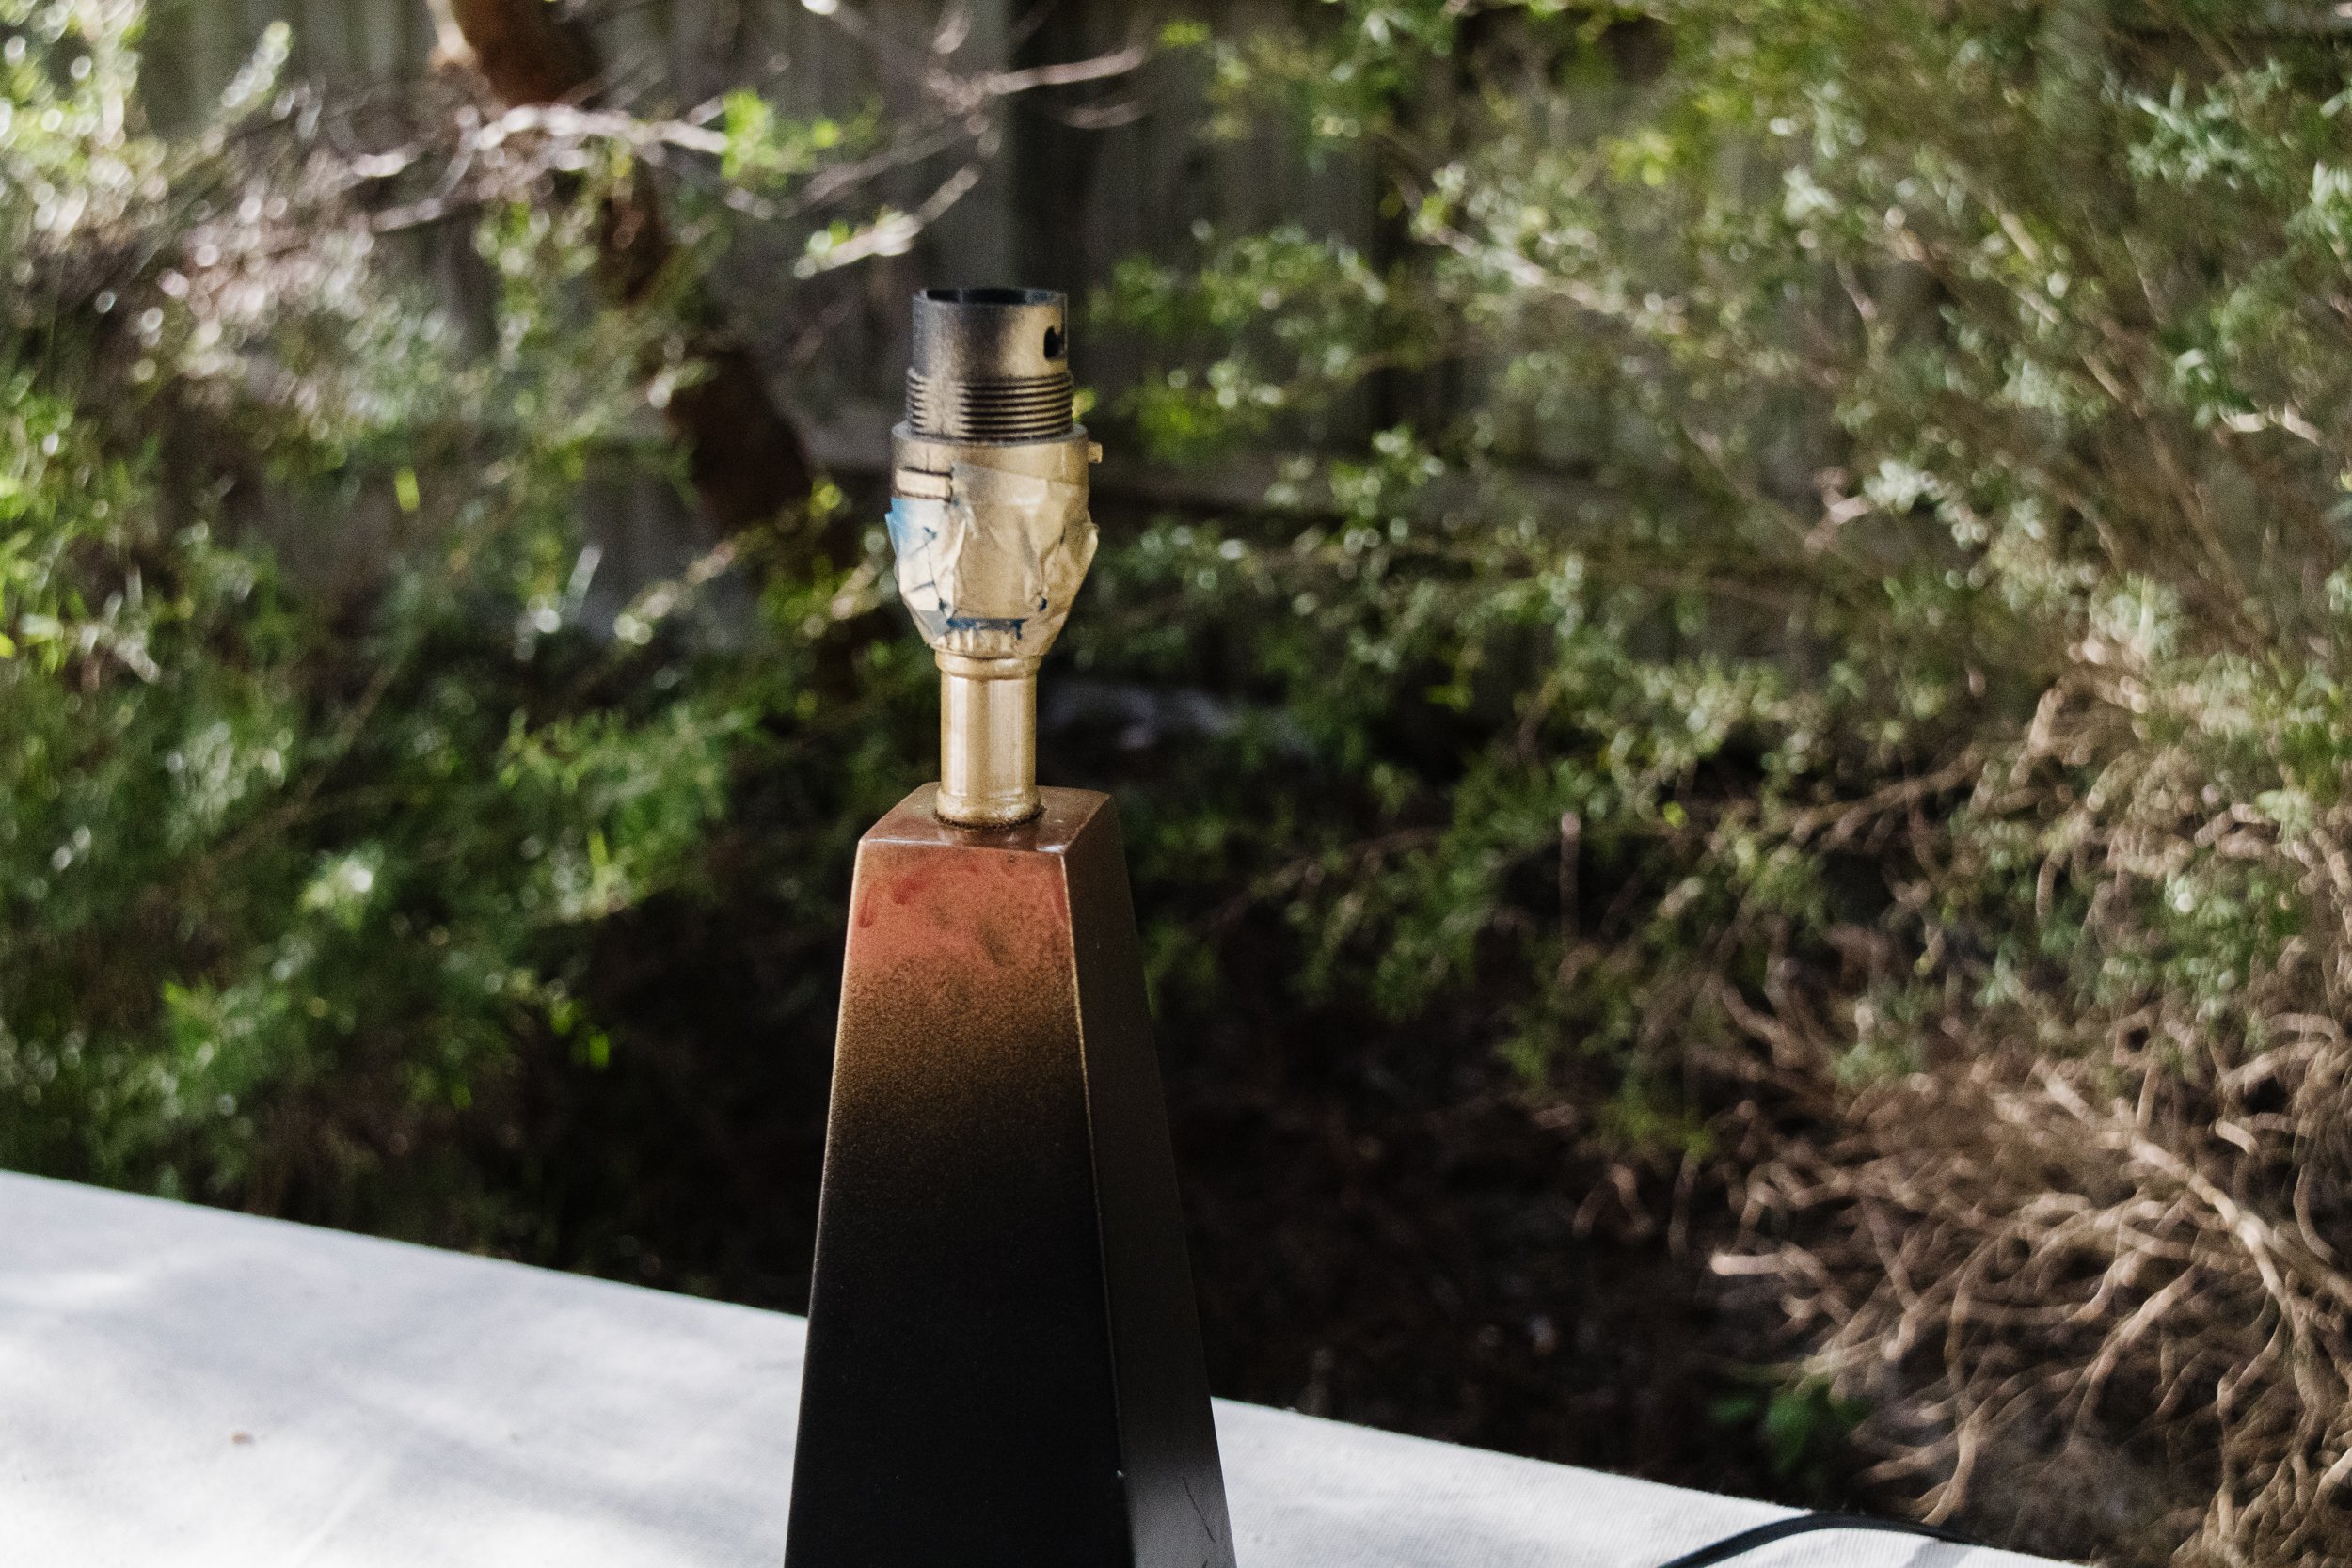
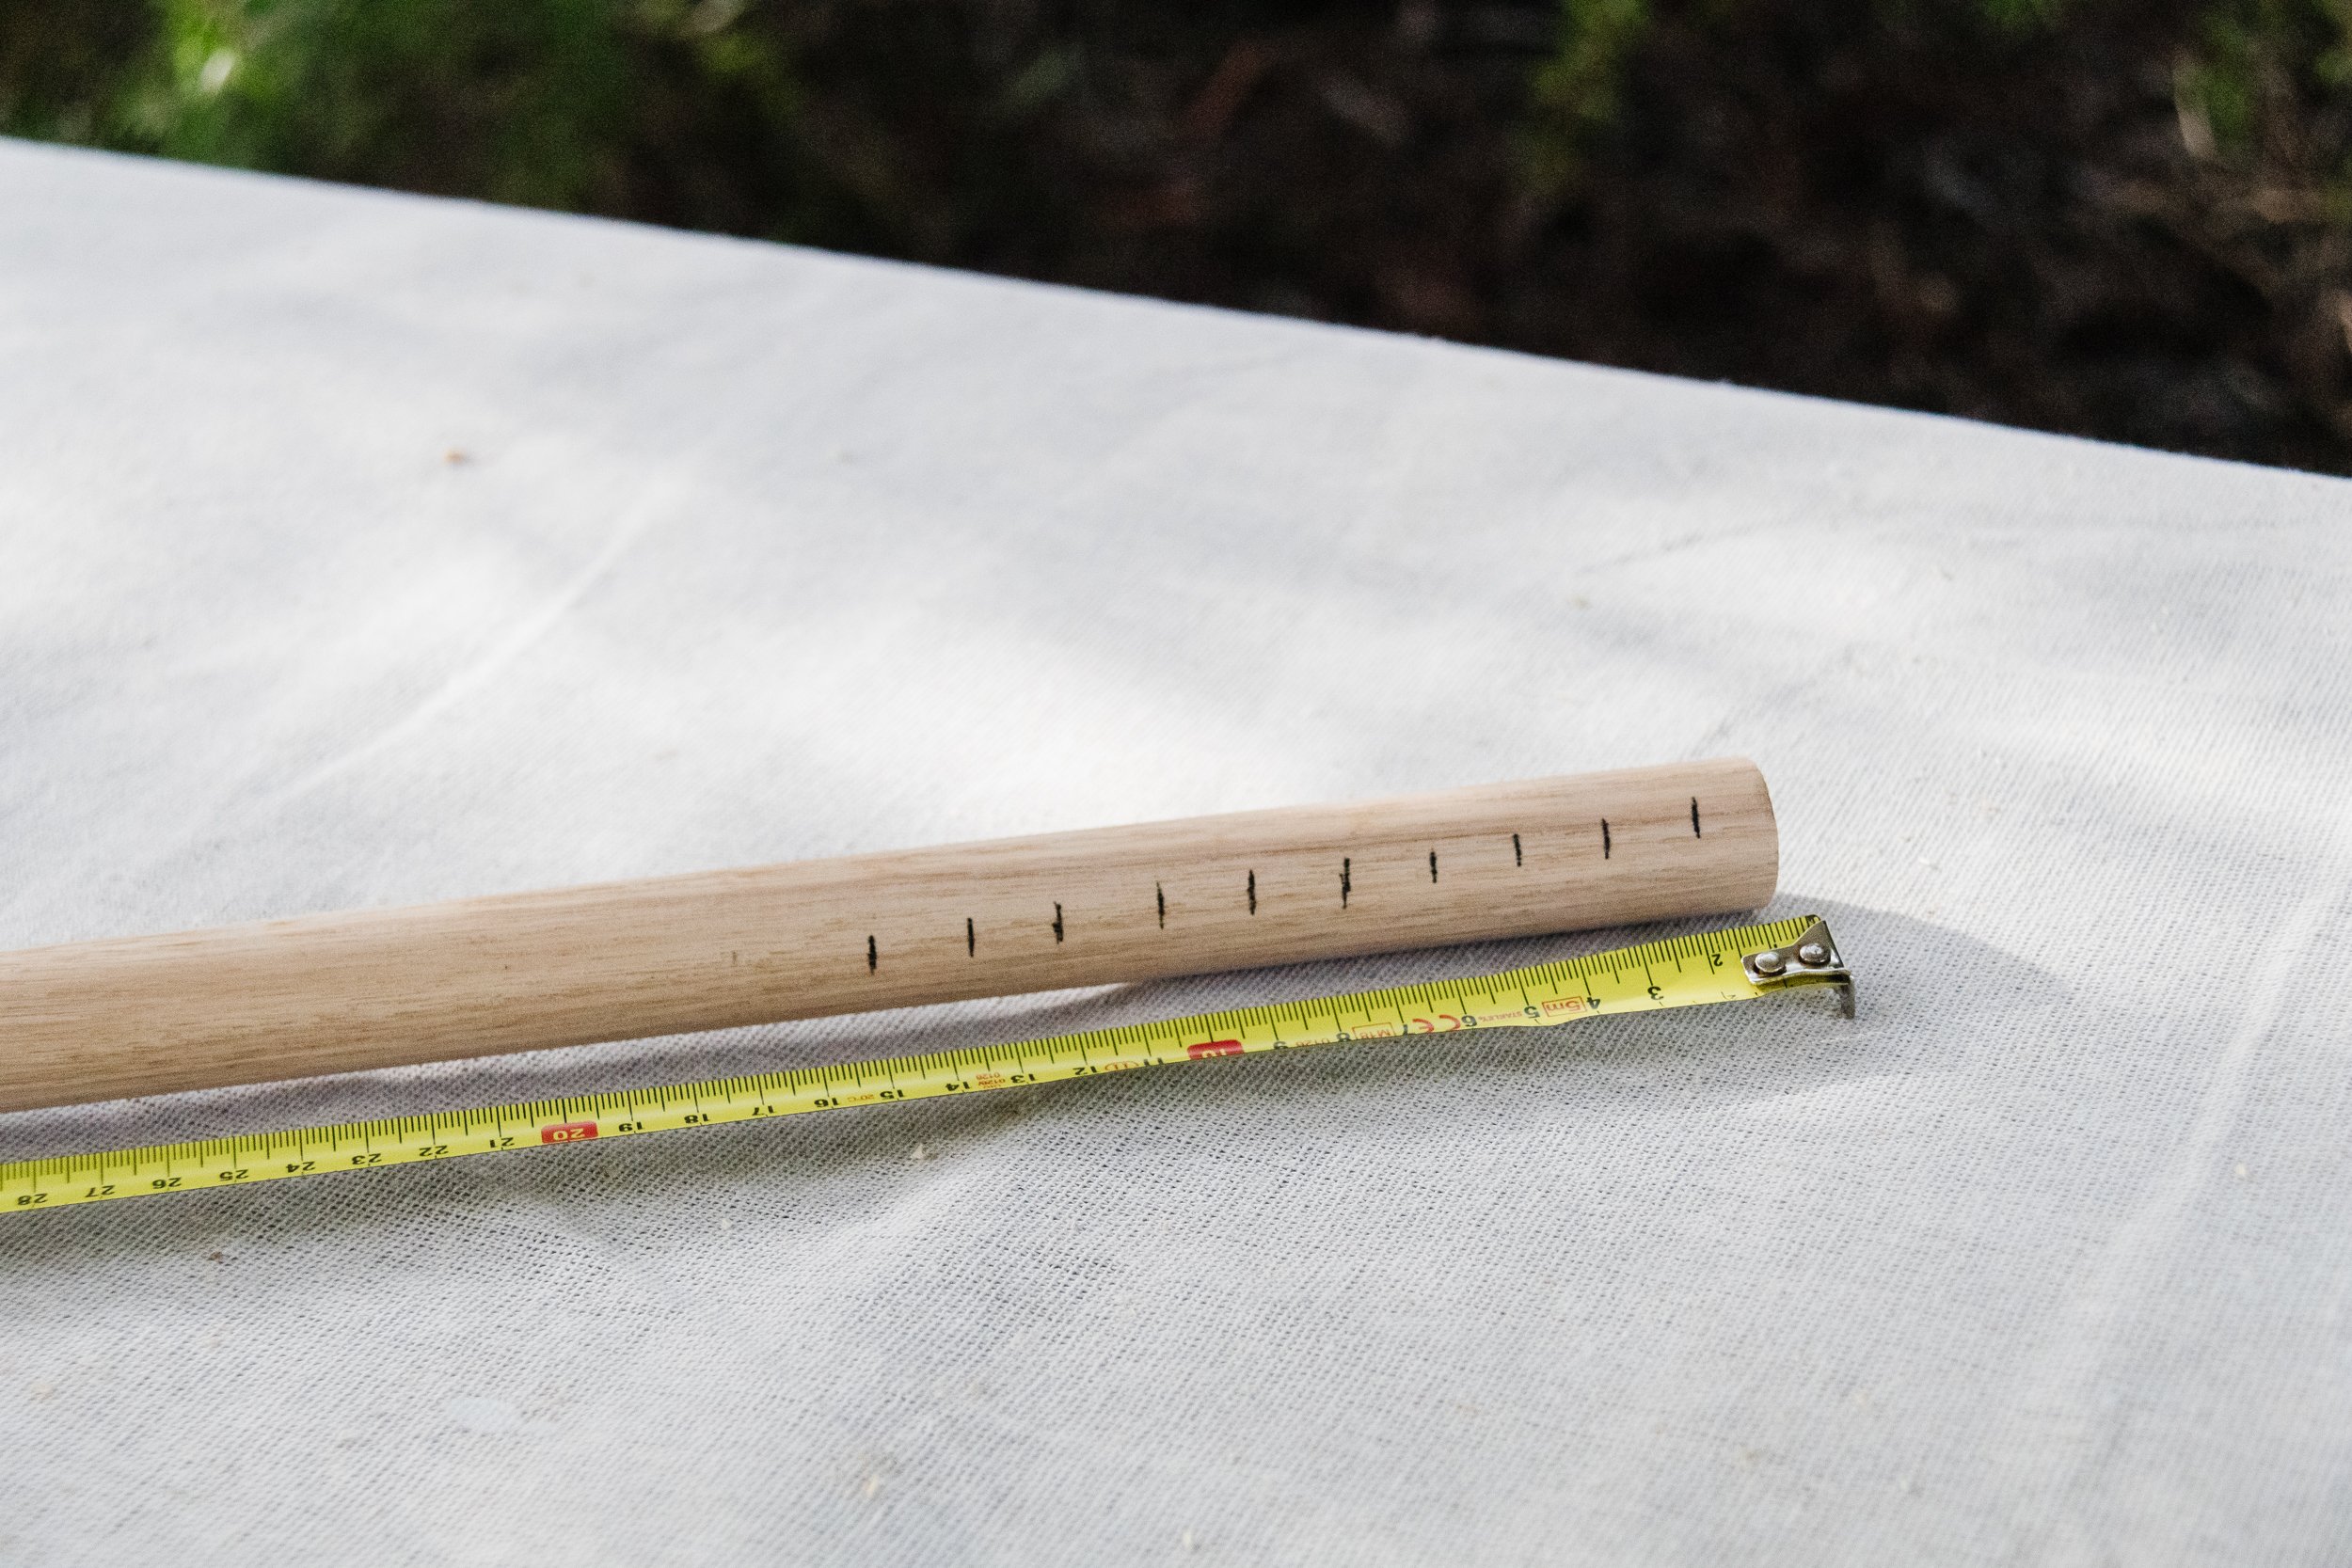
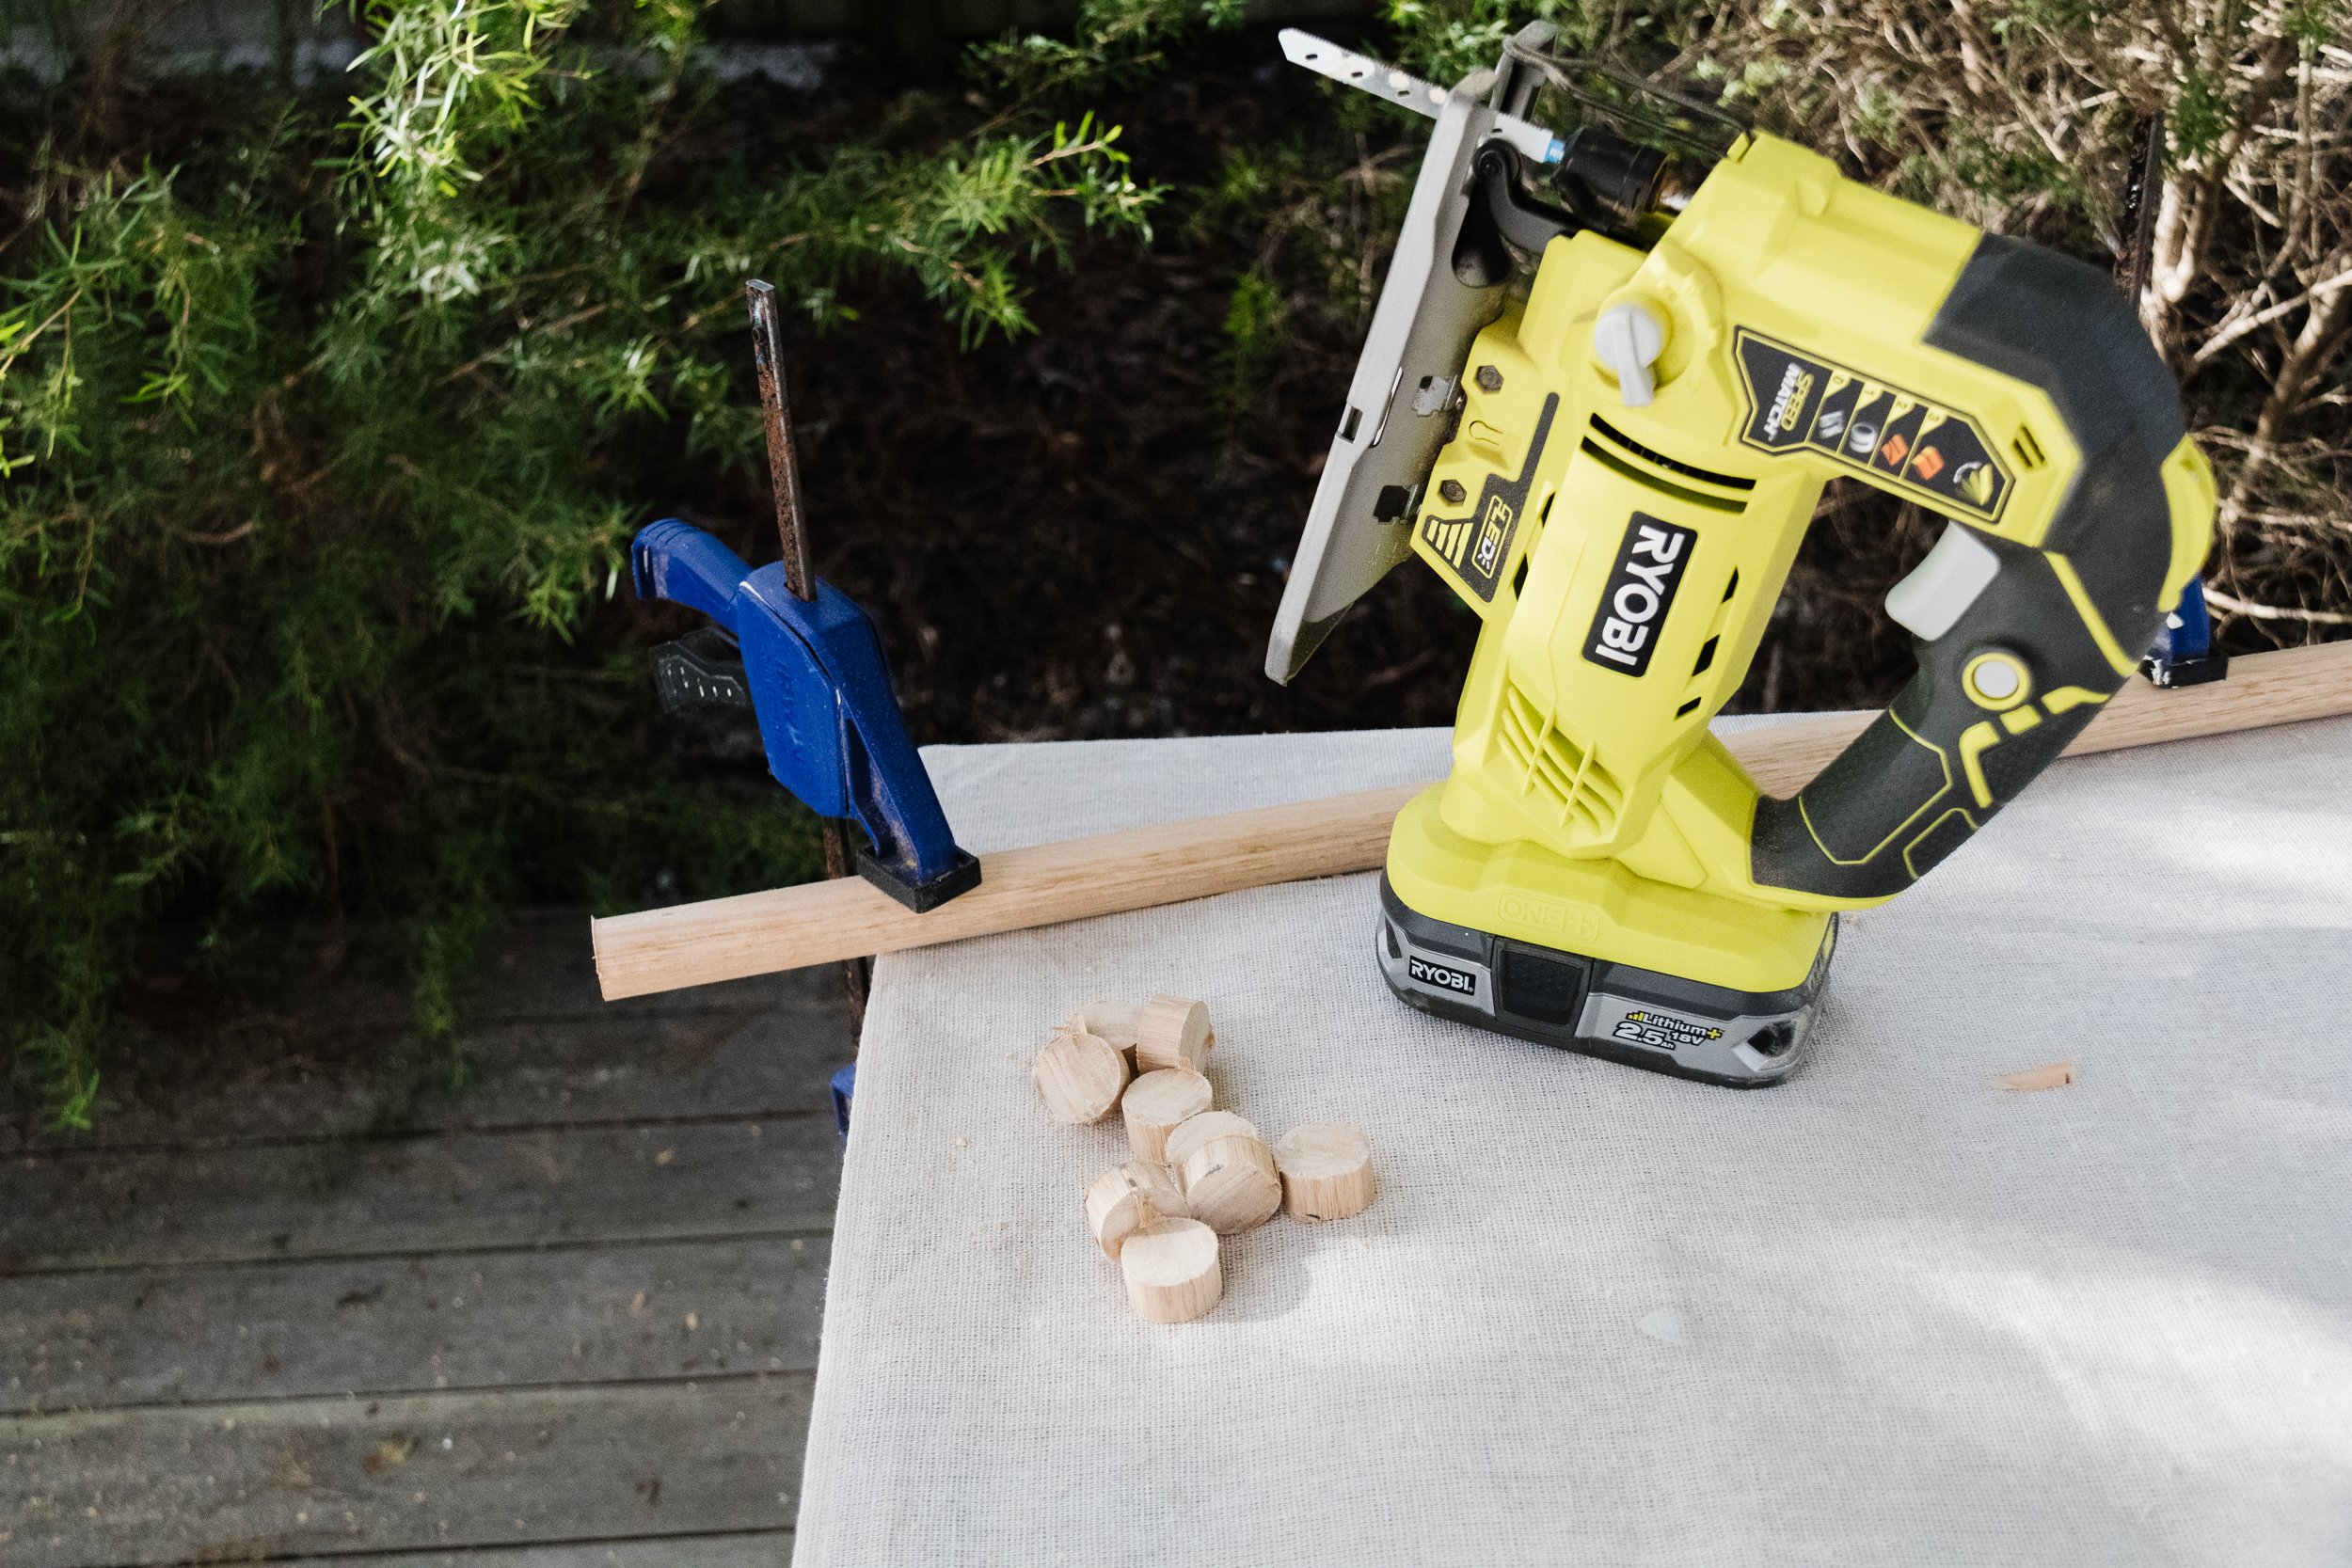
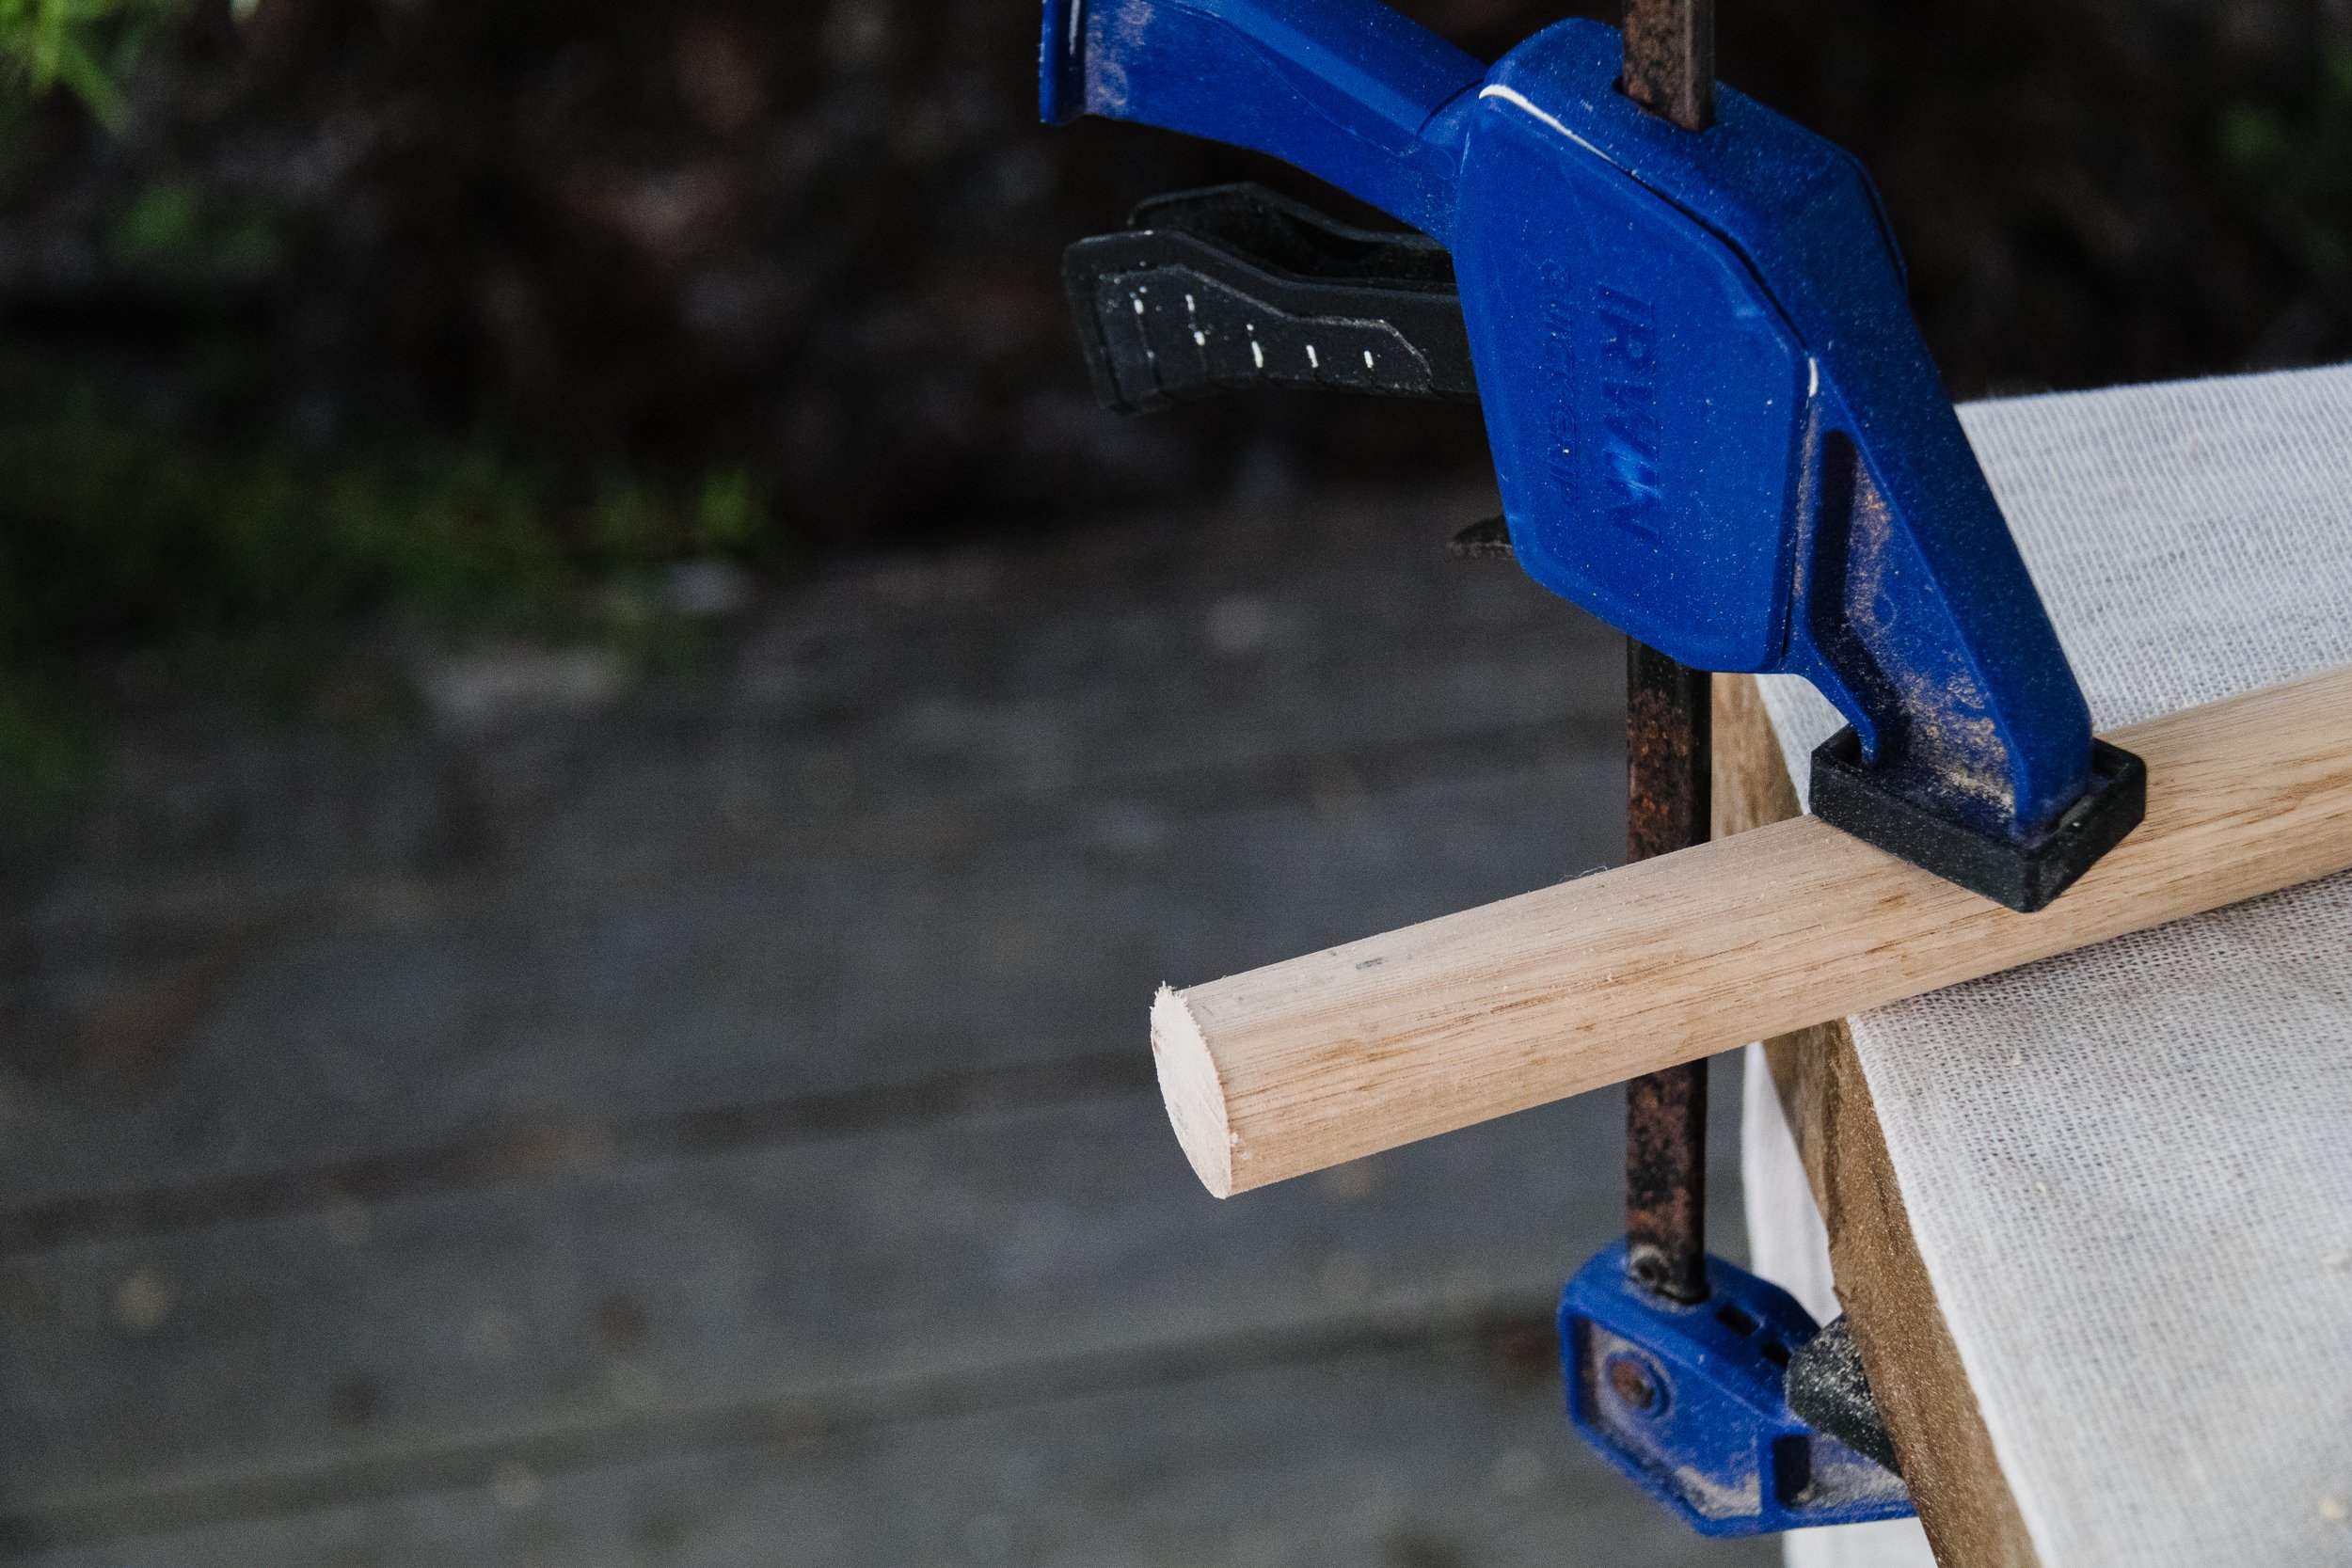
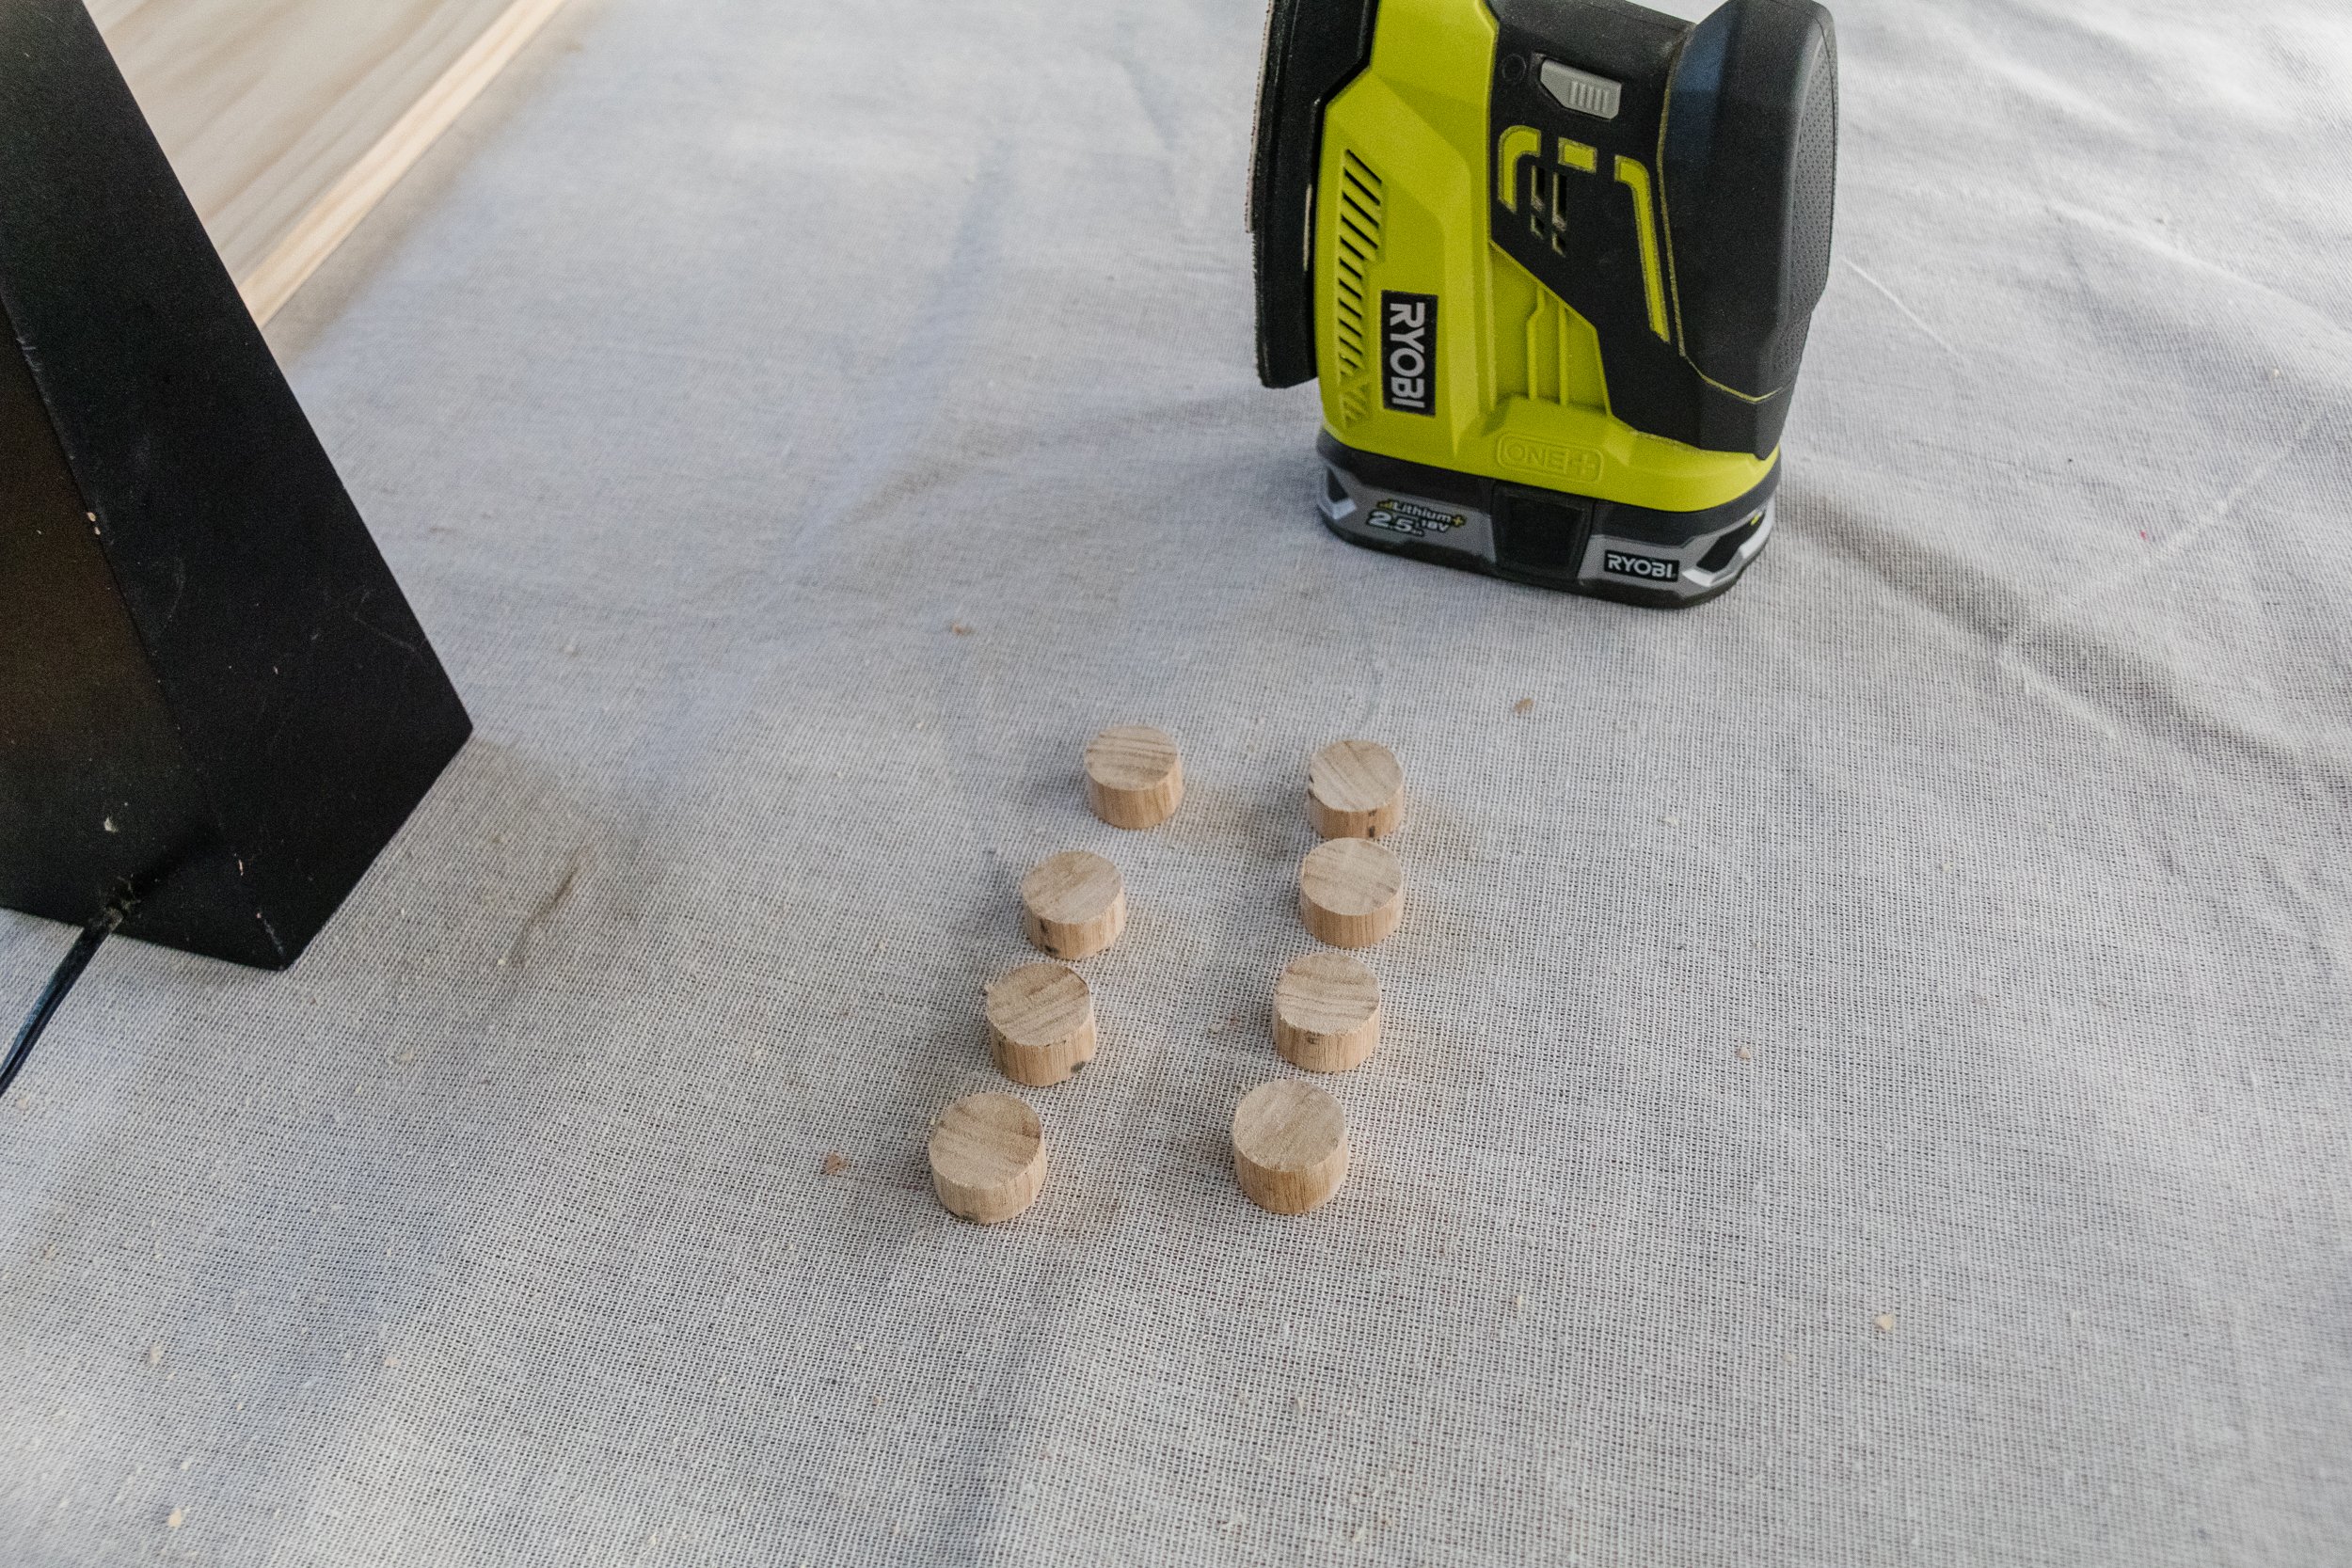
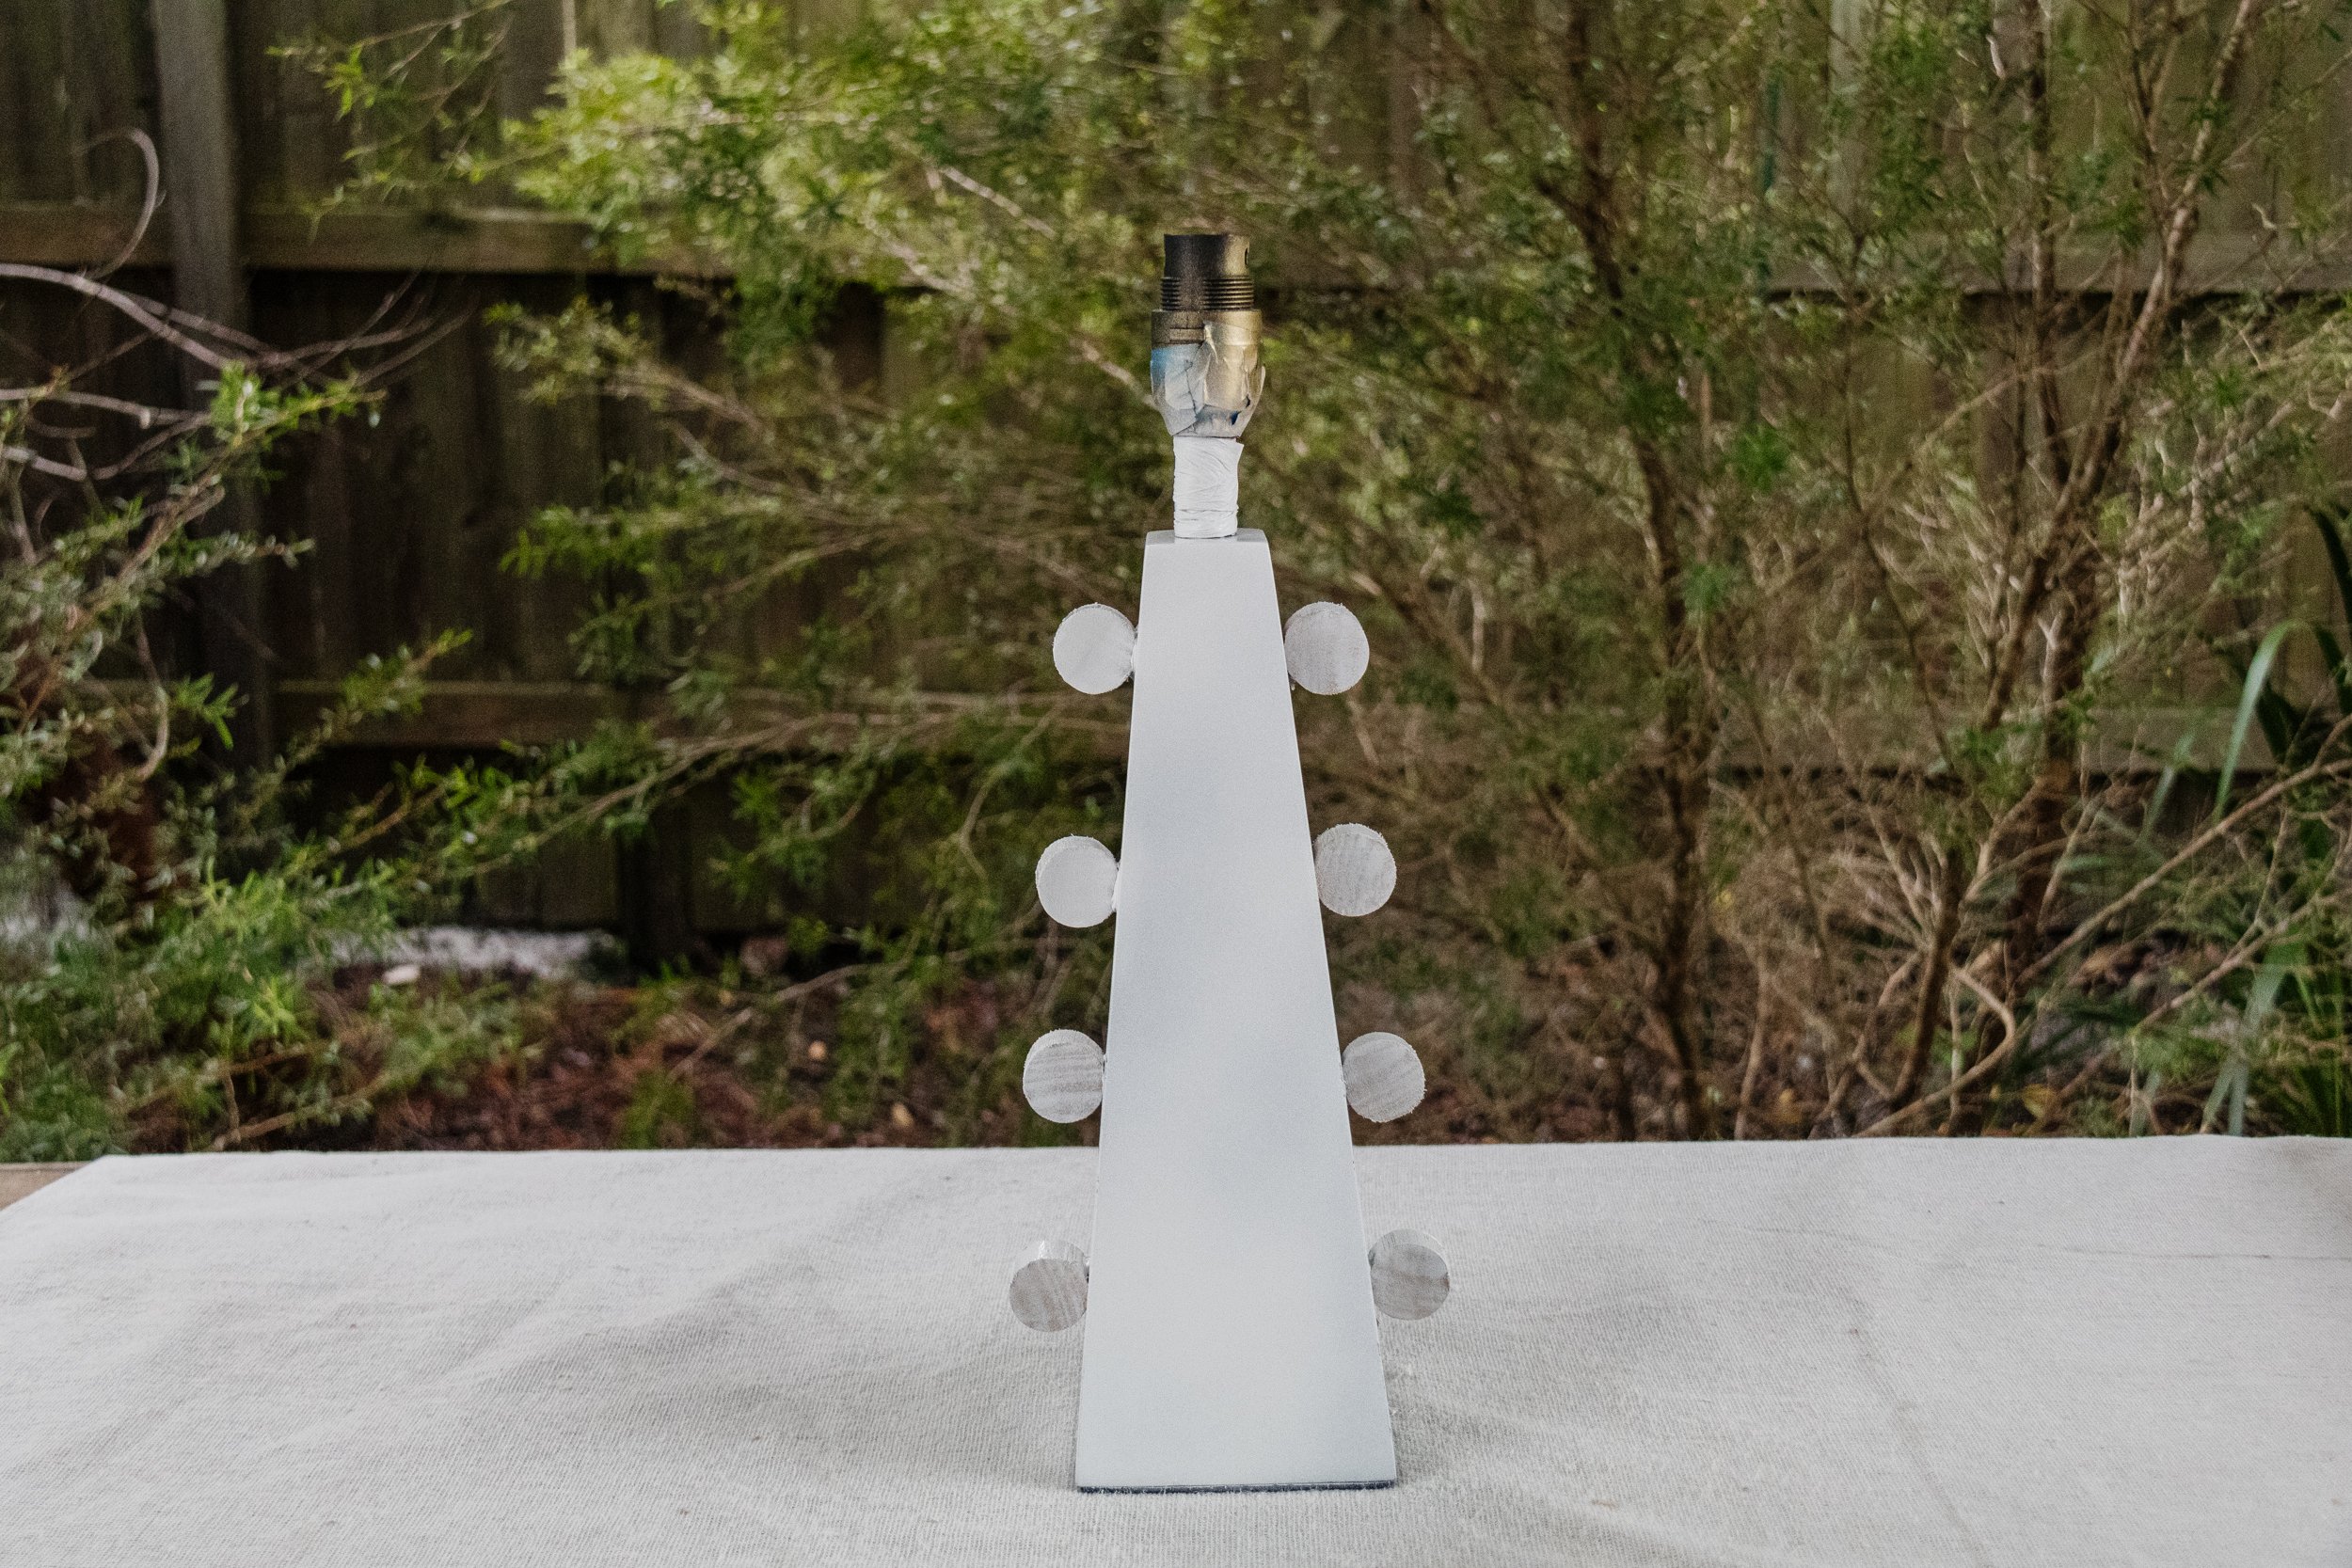
Start by cleaning the lamp base with a cloth then set it aside. Cover the light bulb component of the lamp with painters tape and spray the silver hardware with gold spray paint. While that’s drying, measure and mark 2cm along the dowel until you have enough timber coins to cut. Firmly secure the dowel to your work bench using clamps and cut the coins using a jigsaw or hand saw; I cut 8 dowel coins for this lamp.
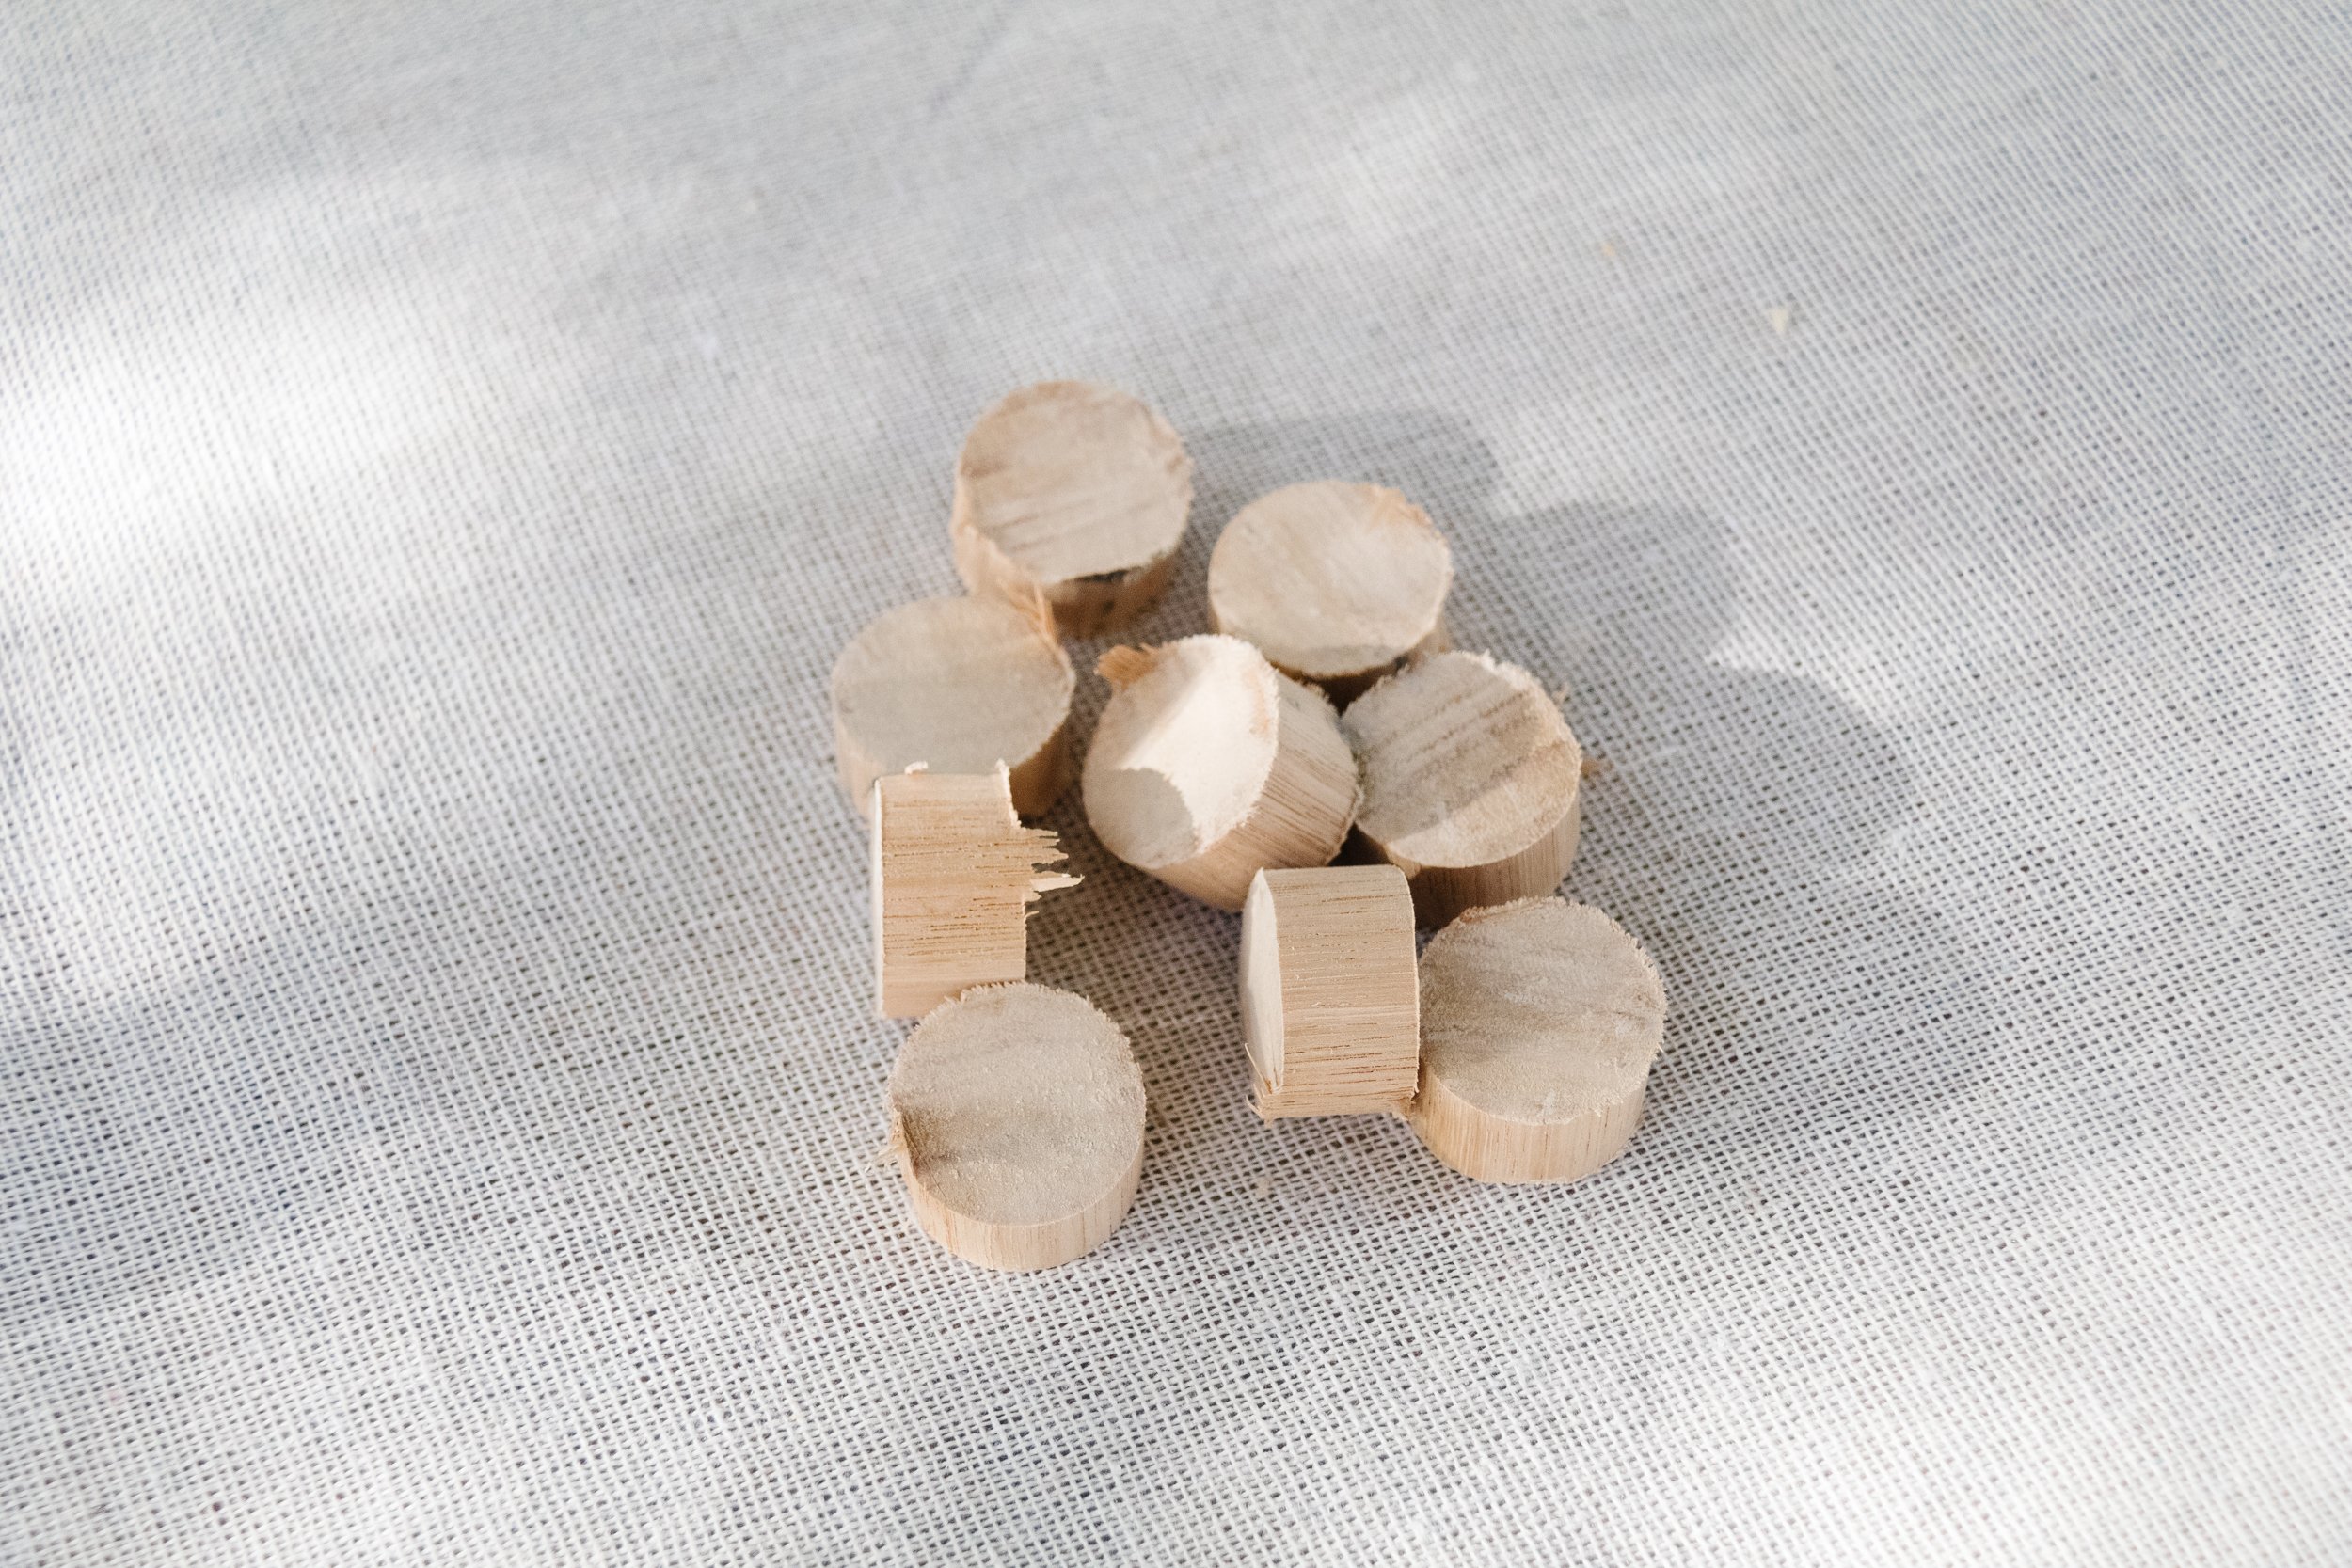
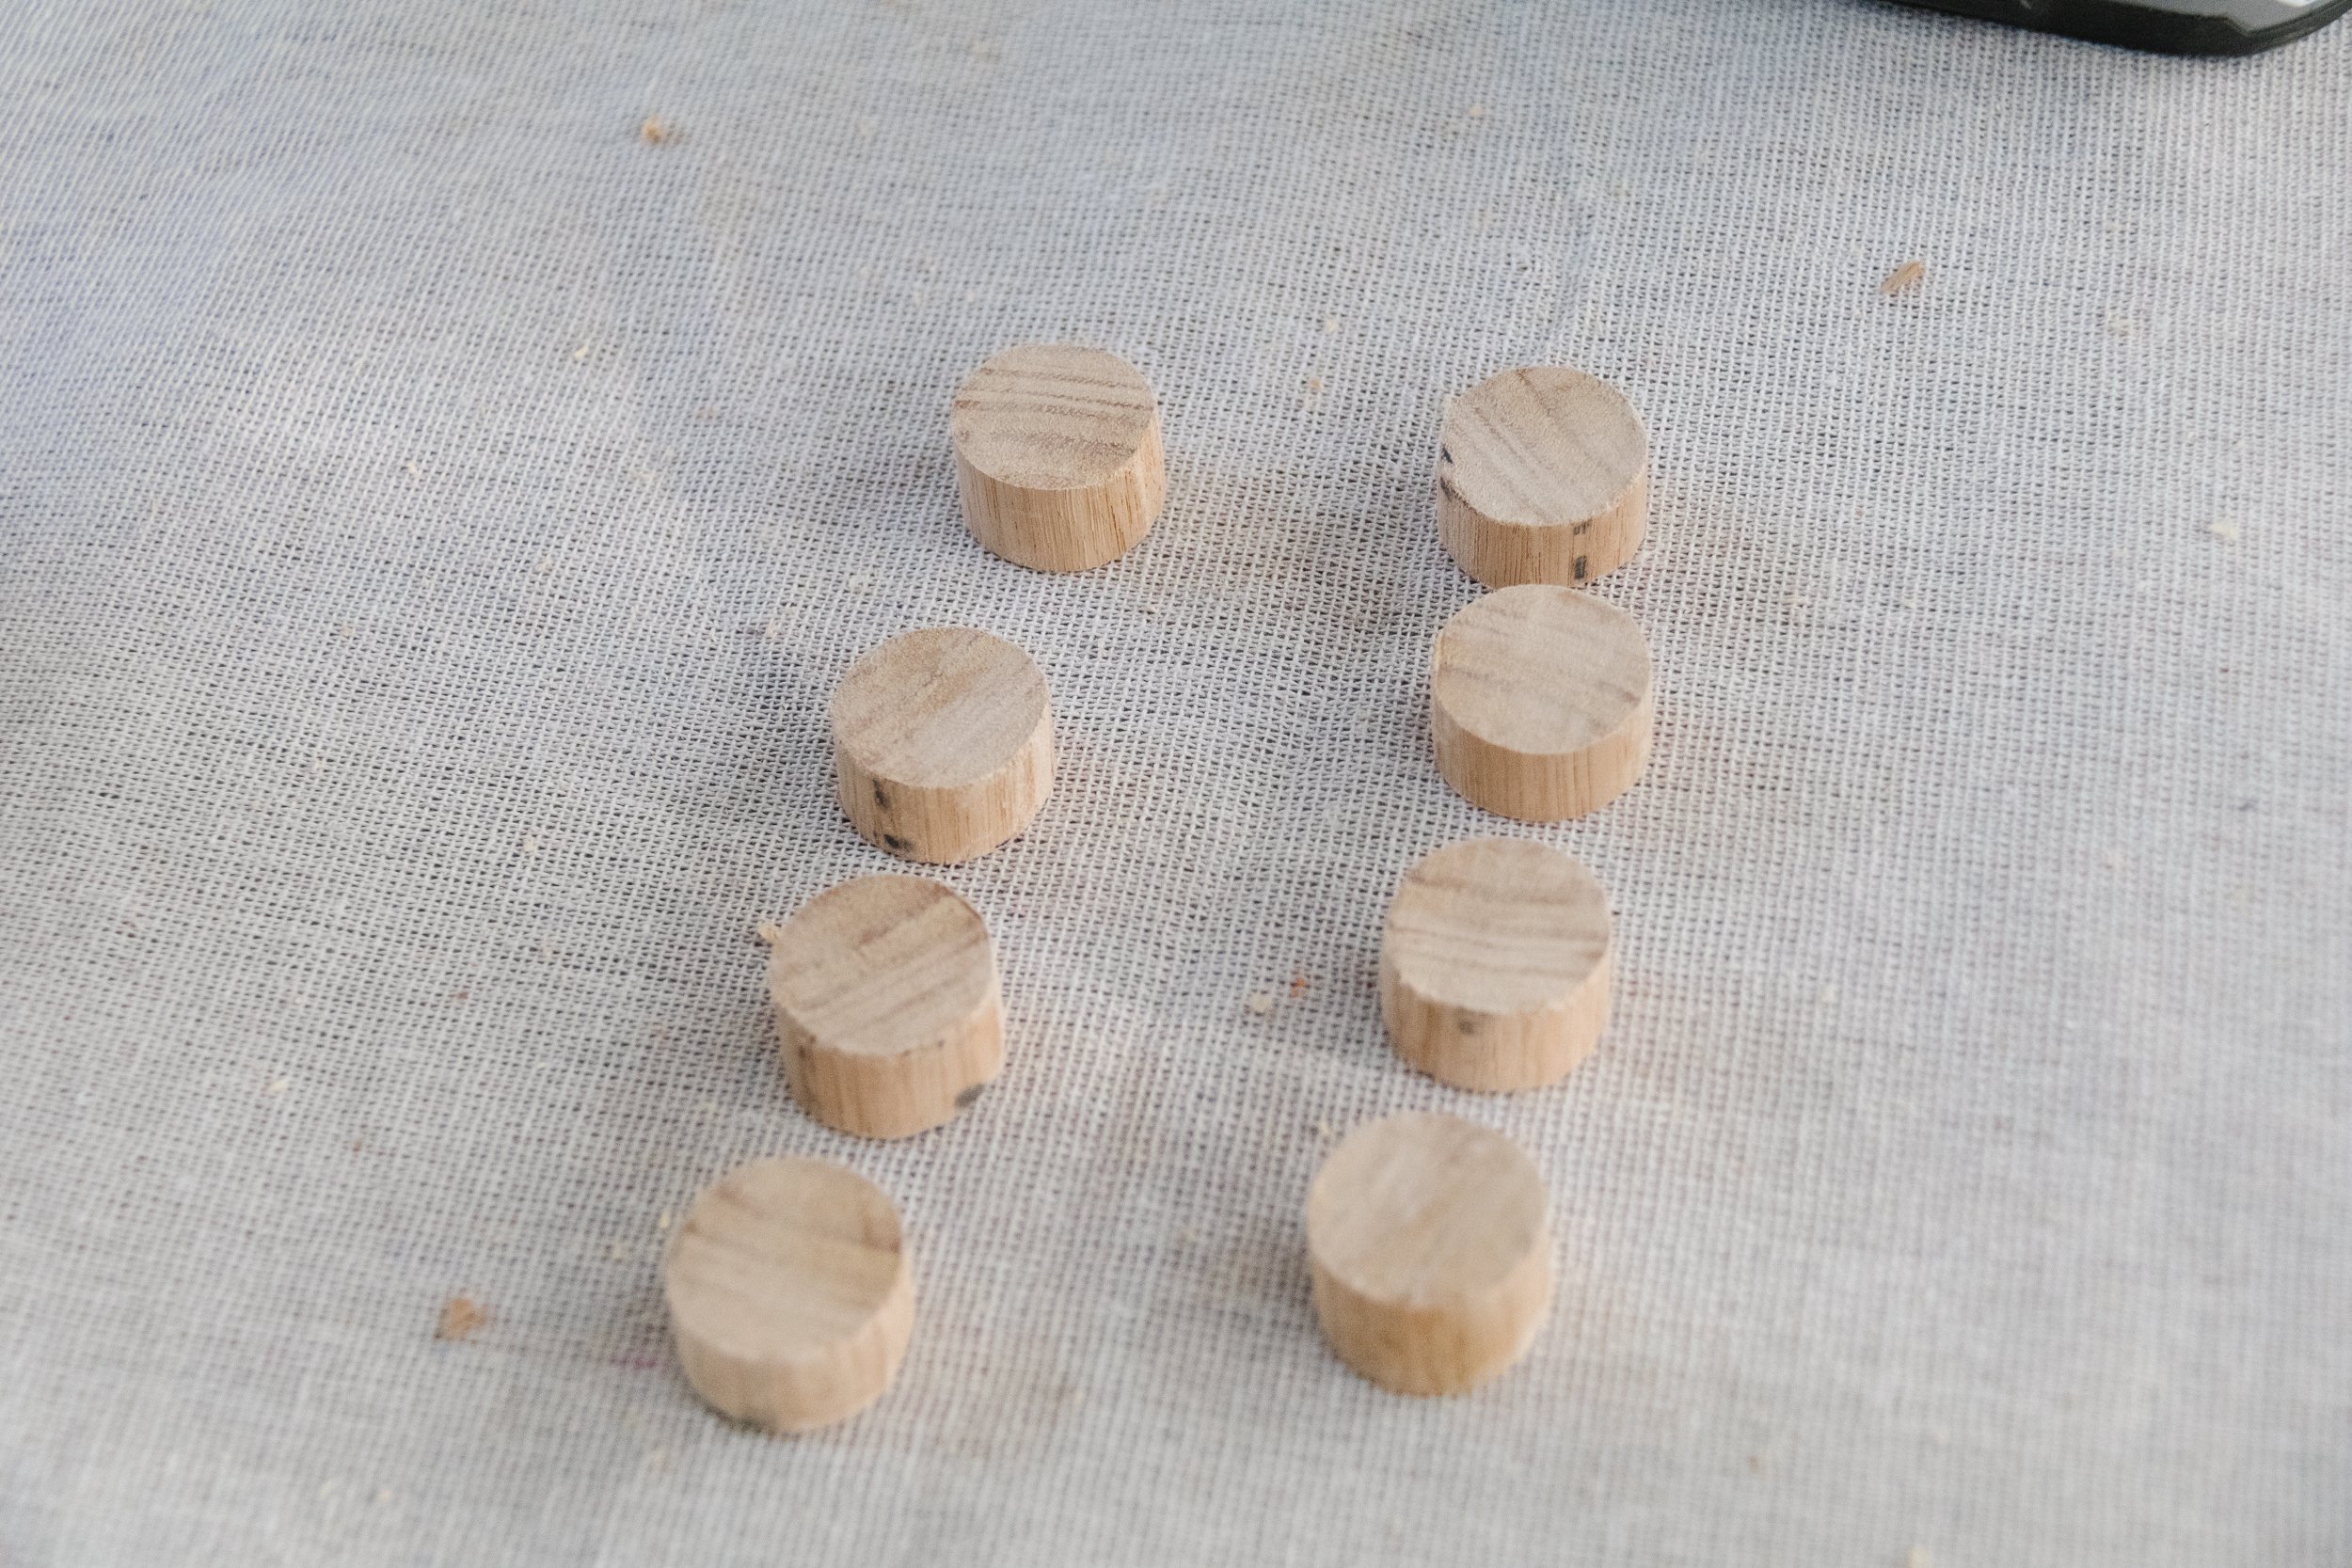
Smooth the edges of each dowel coin with a hand sander. Then, mark where you would like to glue the timber coins onto the sides of your lamp base, then glue the timber coins on the lamp base and use painters tape to keep them in place otherwise they will slip down as the glue cures.
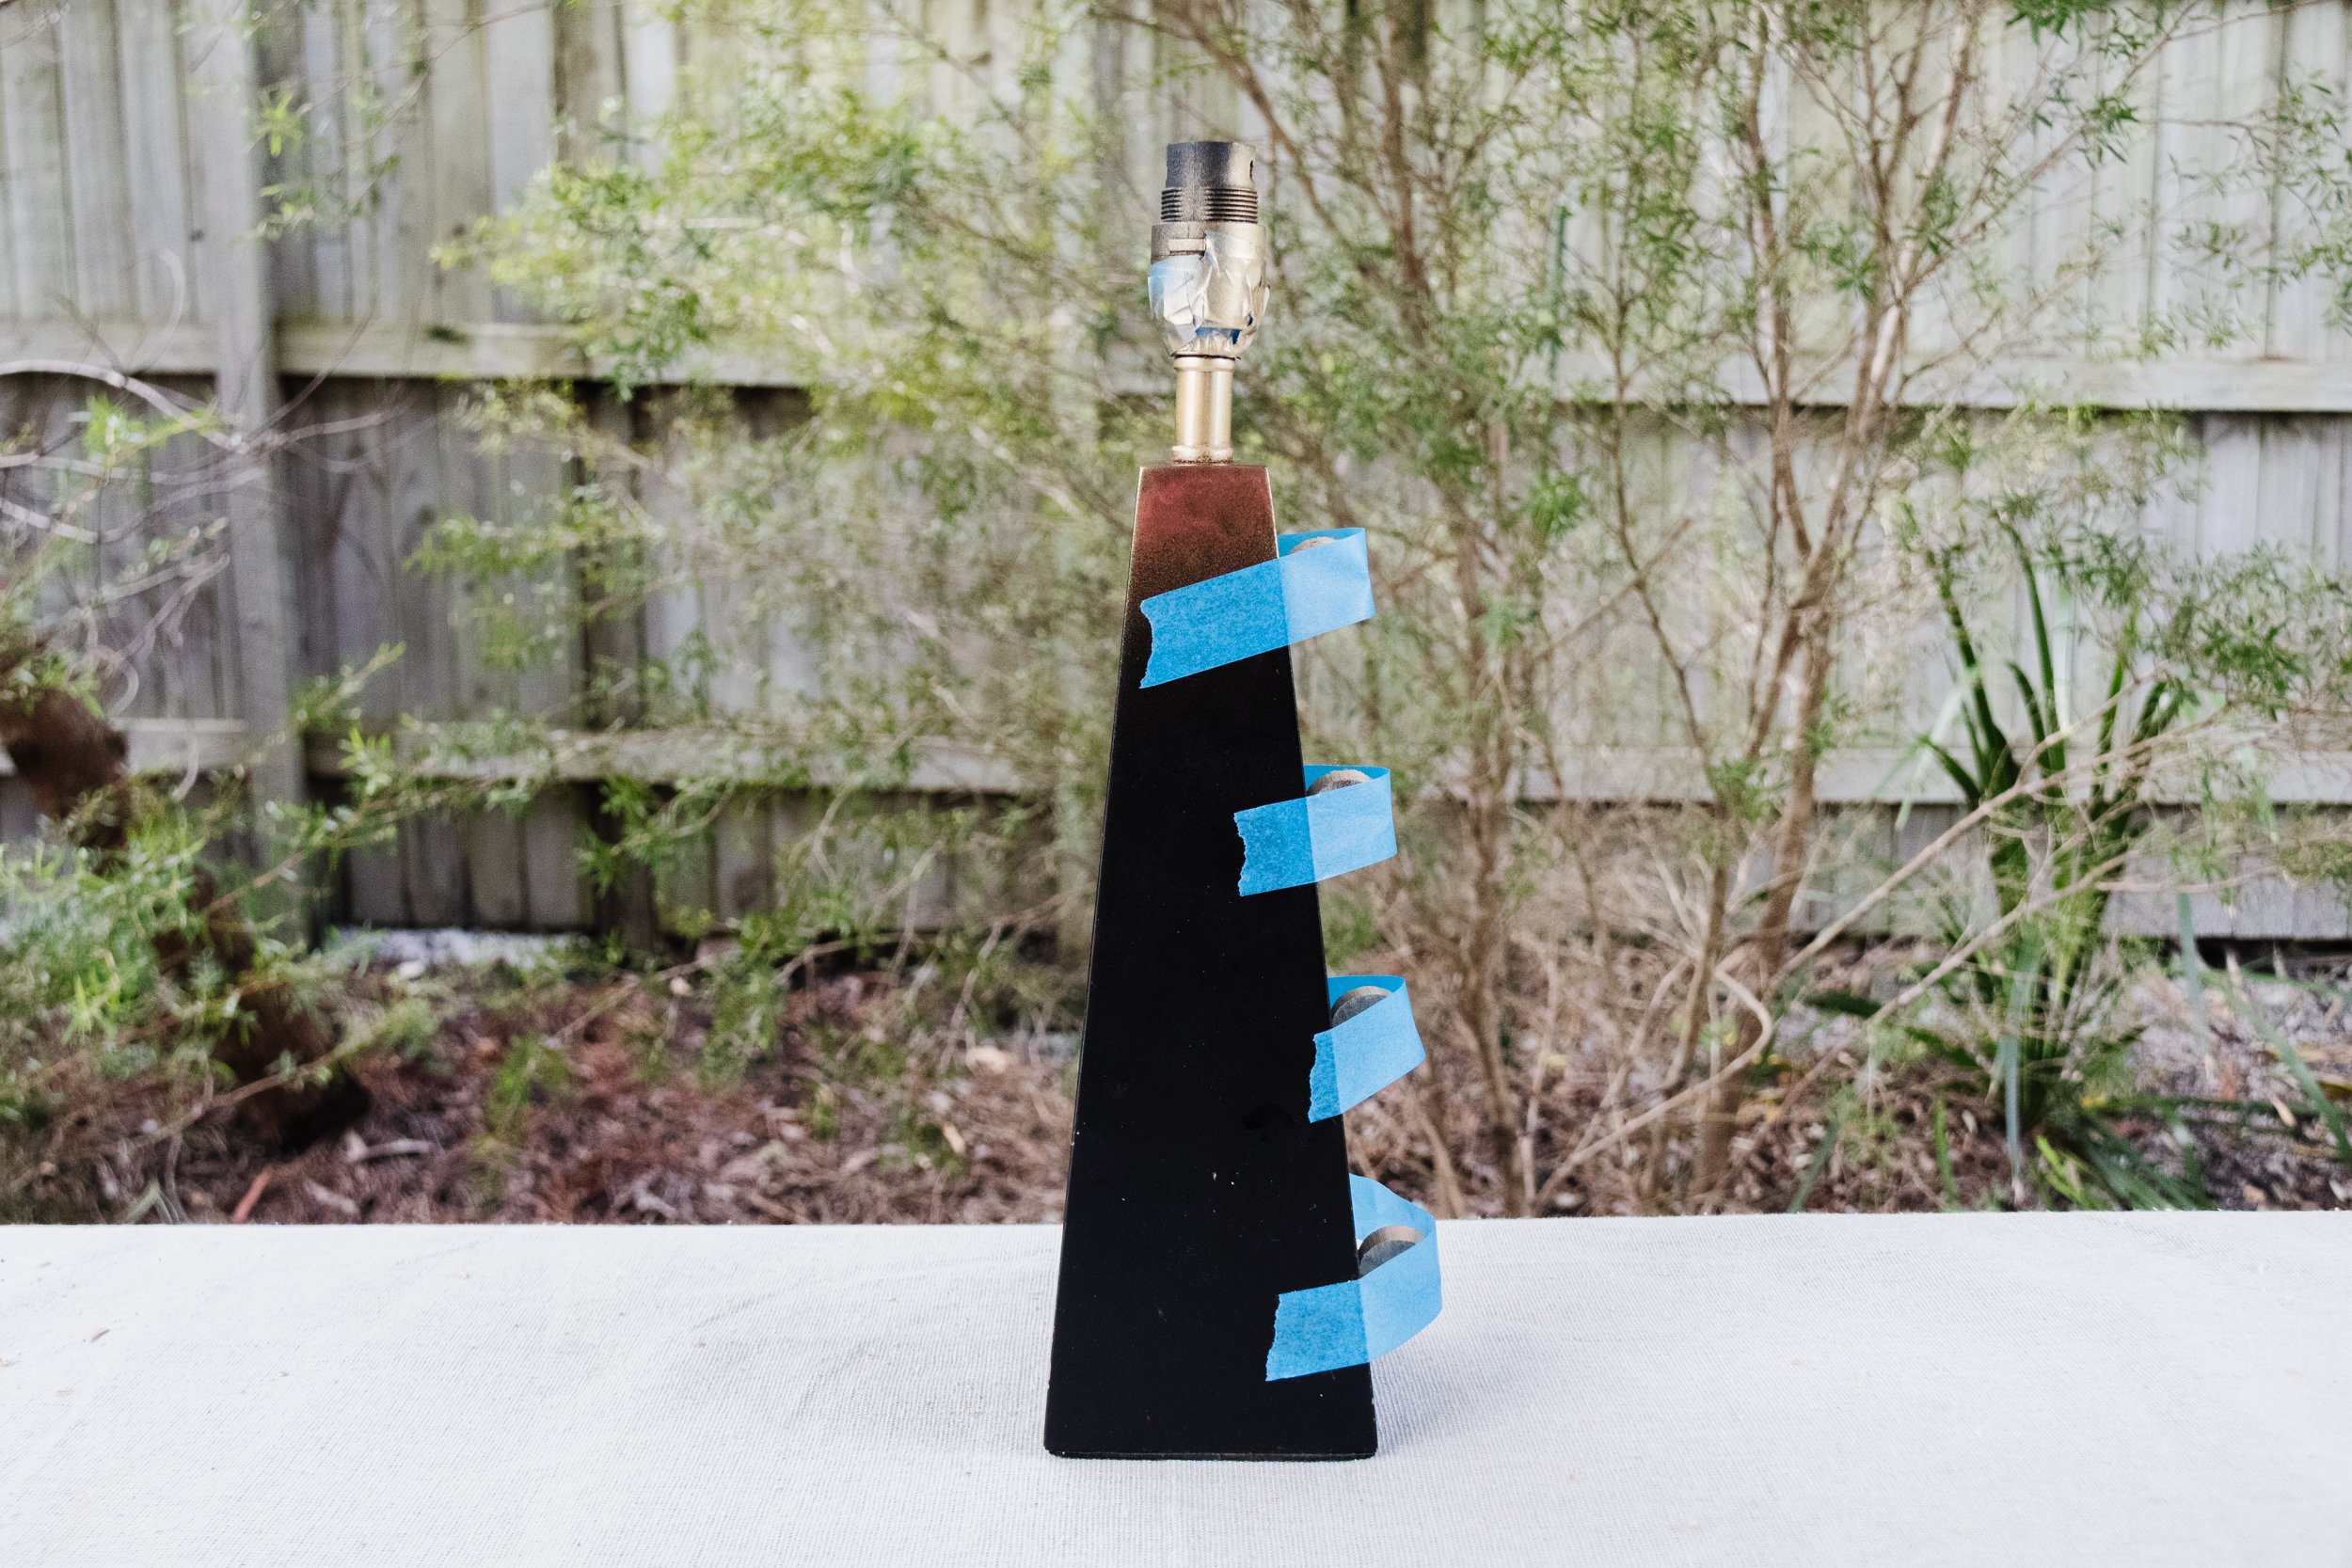
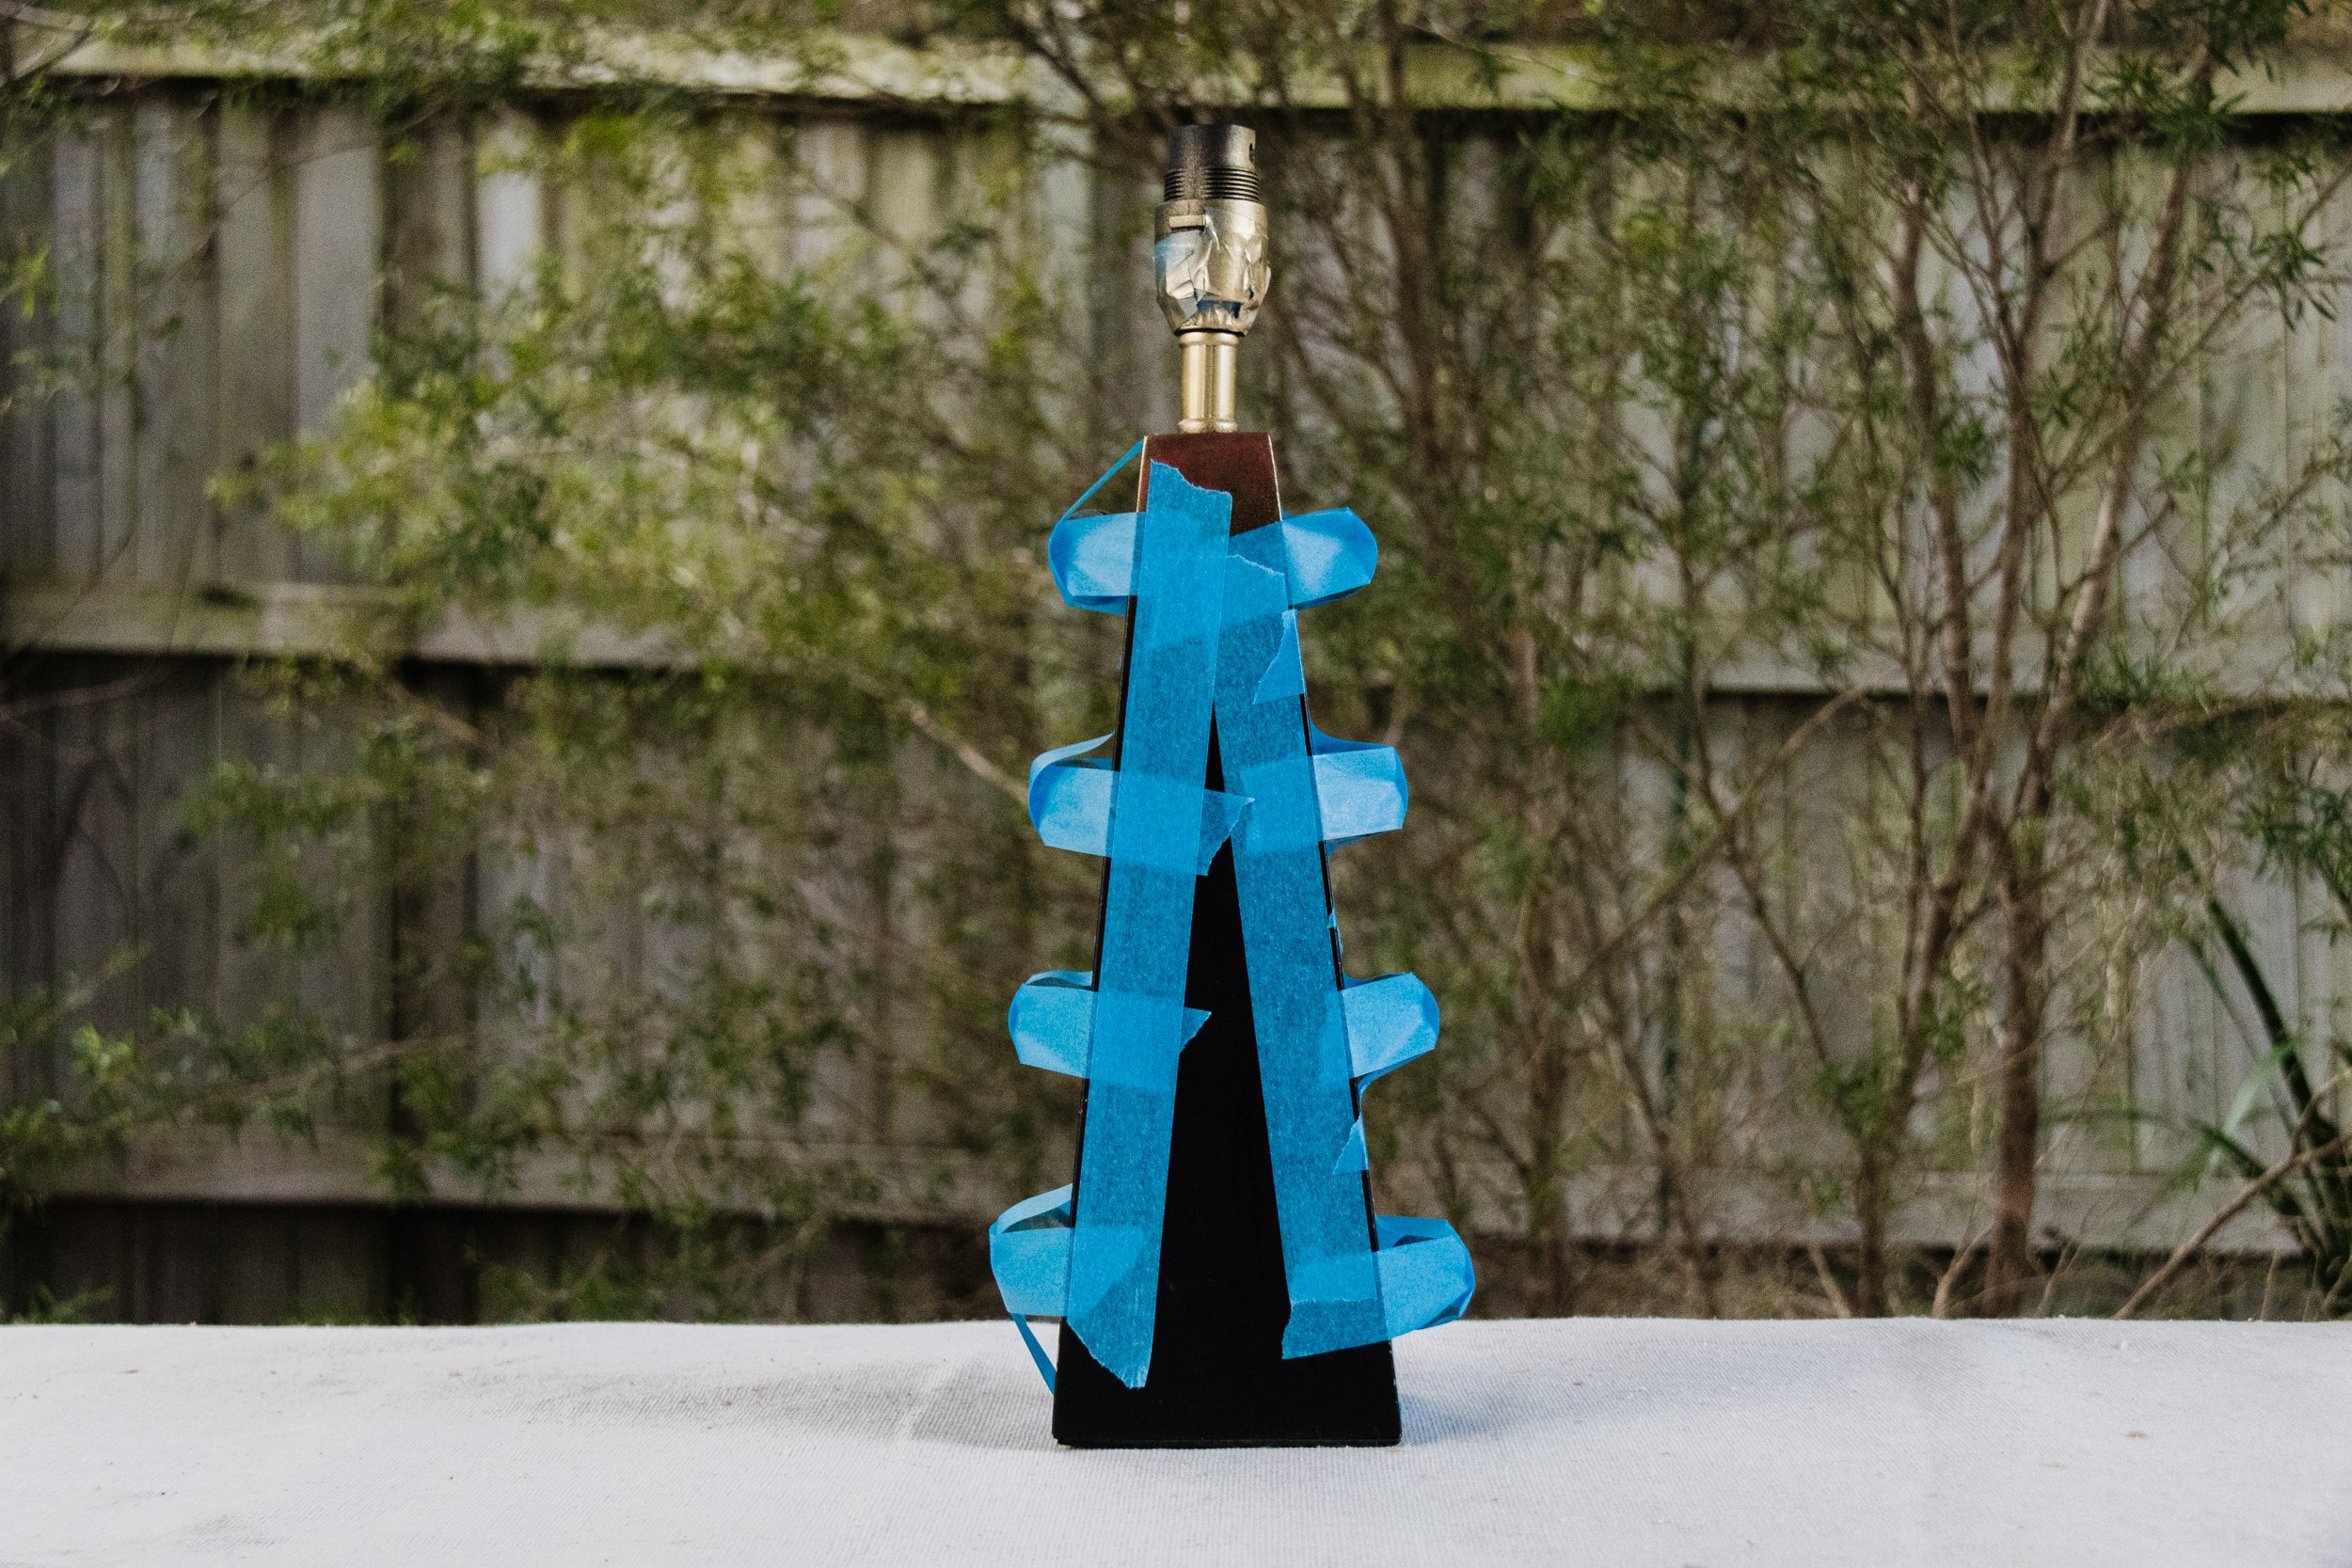
After 3 hours, carefully remove the painters tape. The glue will have cured by now but it won’t set properly for 24 hours so be careful when handling the base. It’s still safe to paint though, so let’s get that done. Spray one to two coats of primer spray paint and wait for each coat to dry completely before applying the next. When the spray paint is dry, paint the lamp base with two coats of paint. Make sure you get the bush into the small spaces in between the lamp base and timber coins. When the paint has dried, your lamp is finished! All you need to do now is add a light bulb, put a lamp shade on top and plug it into the wall.
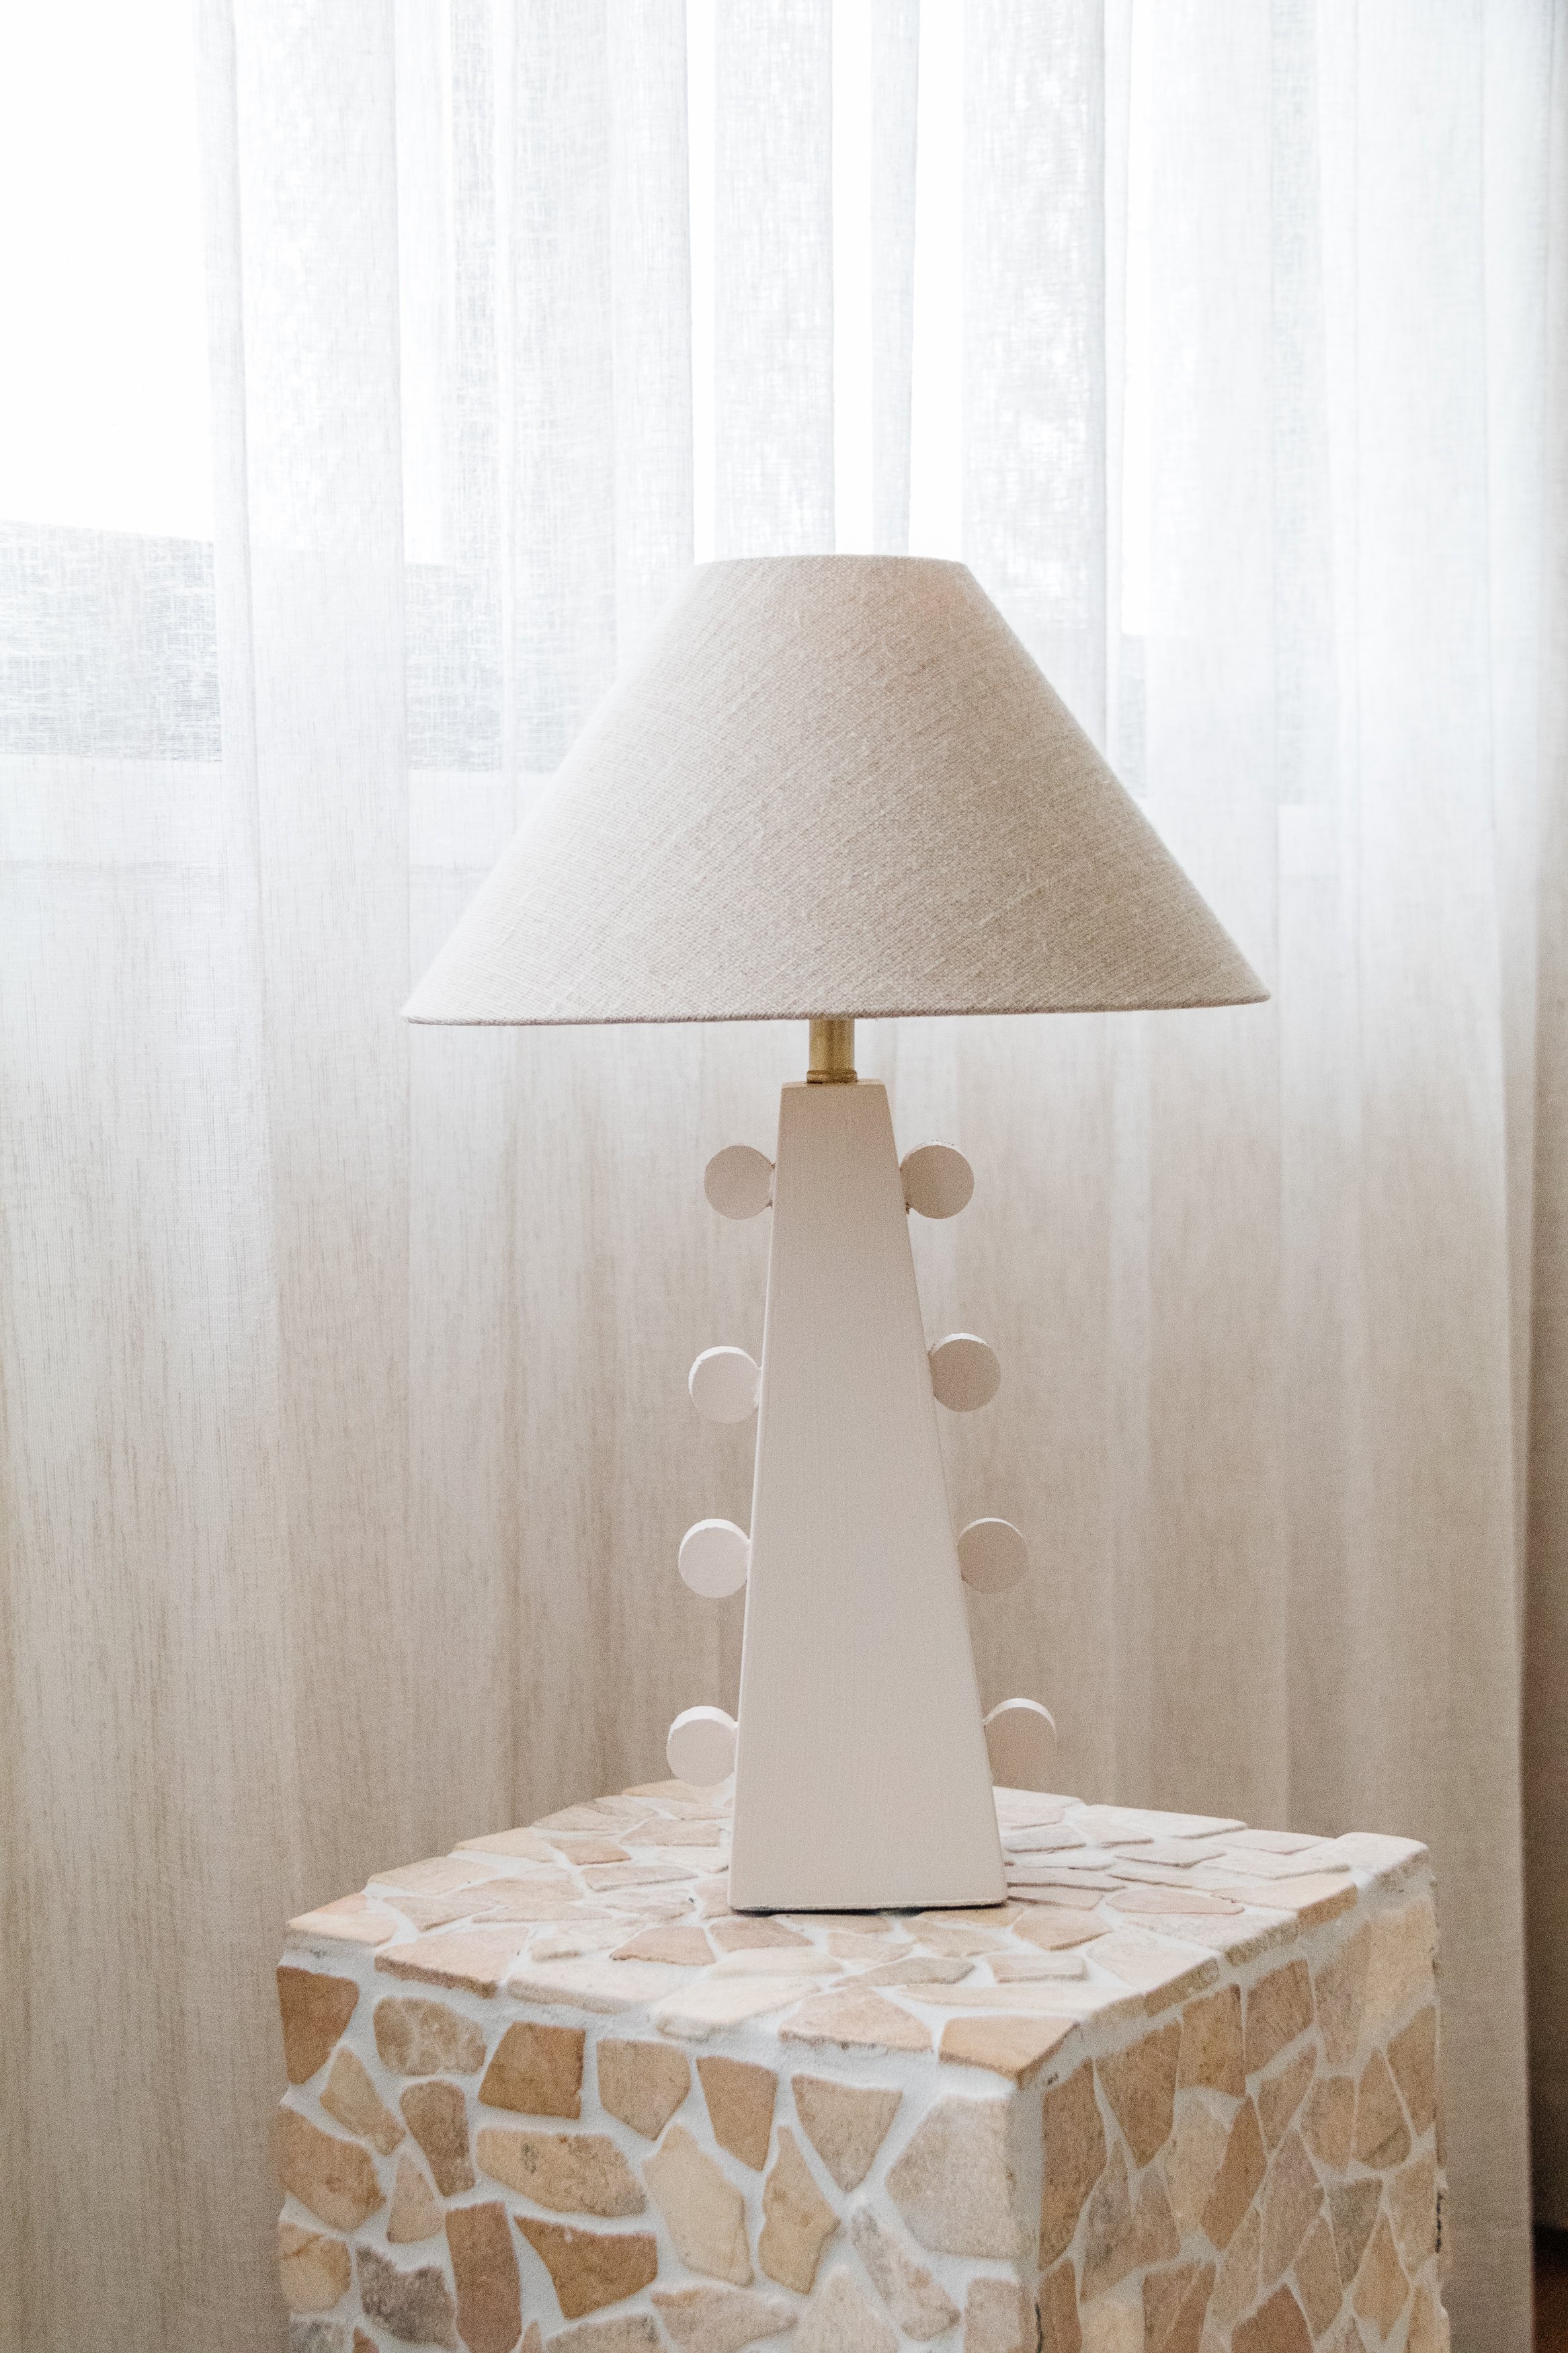
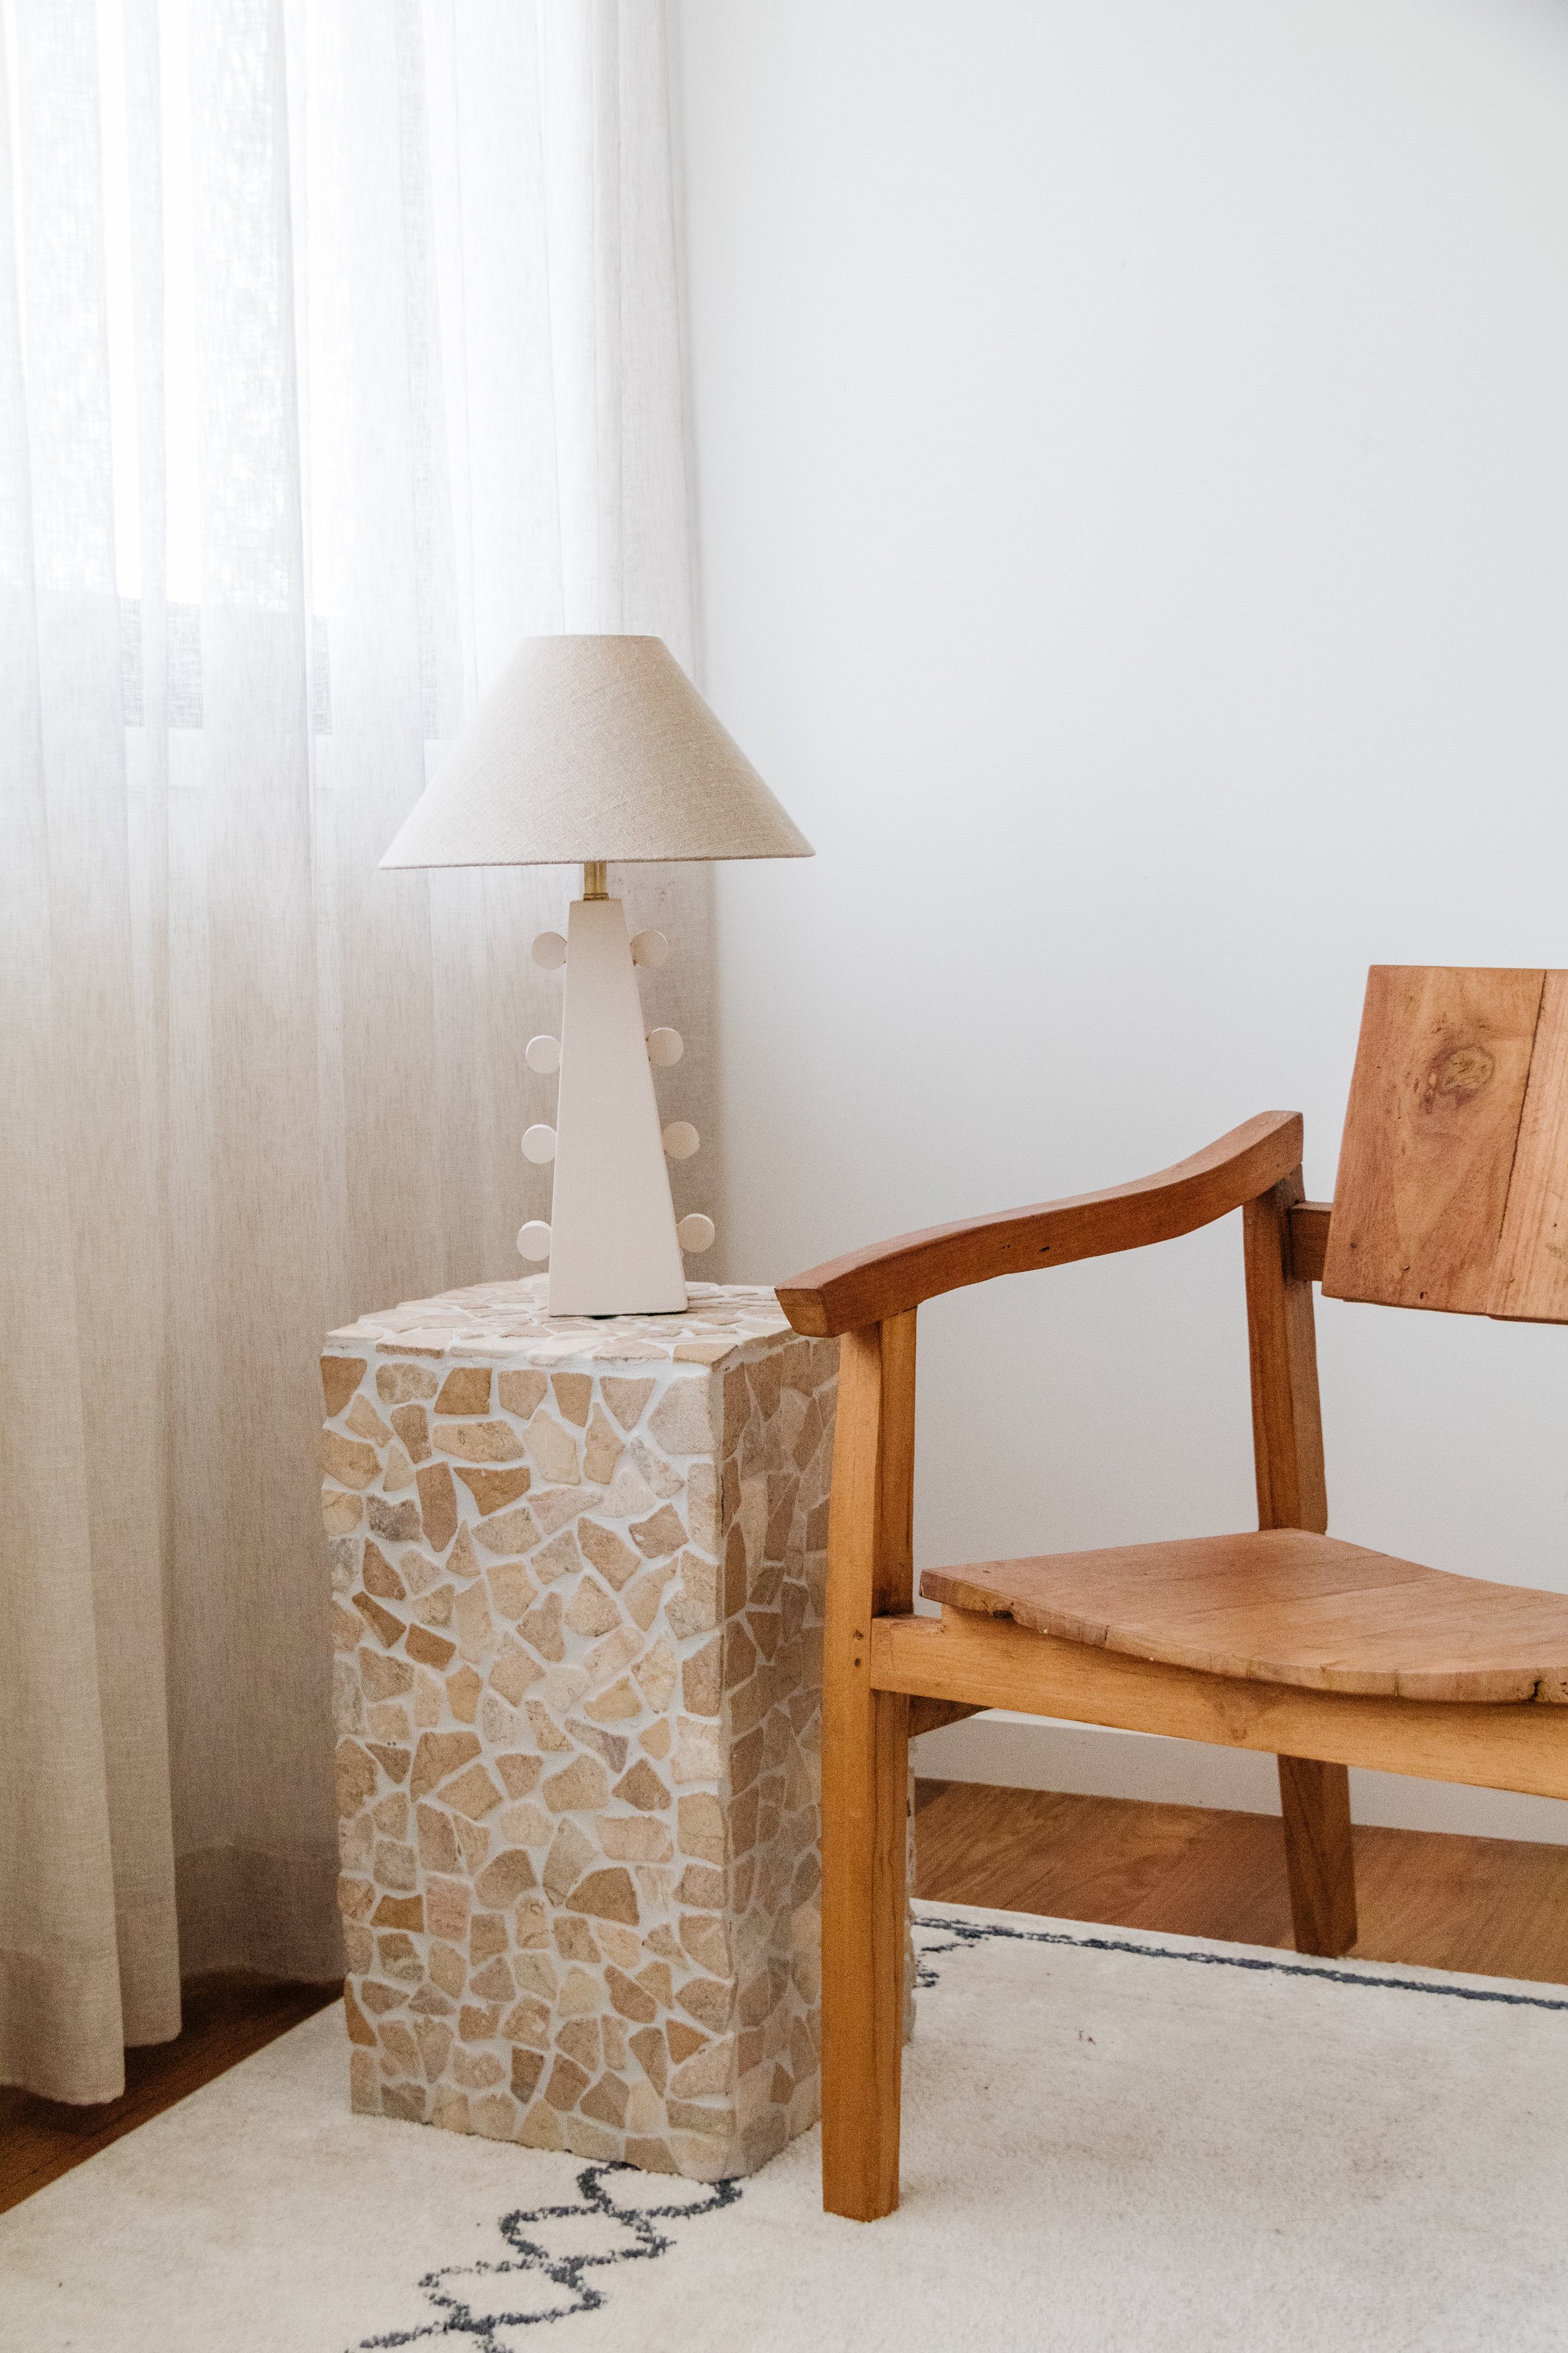
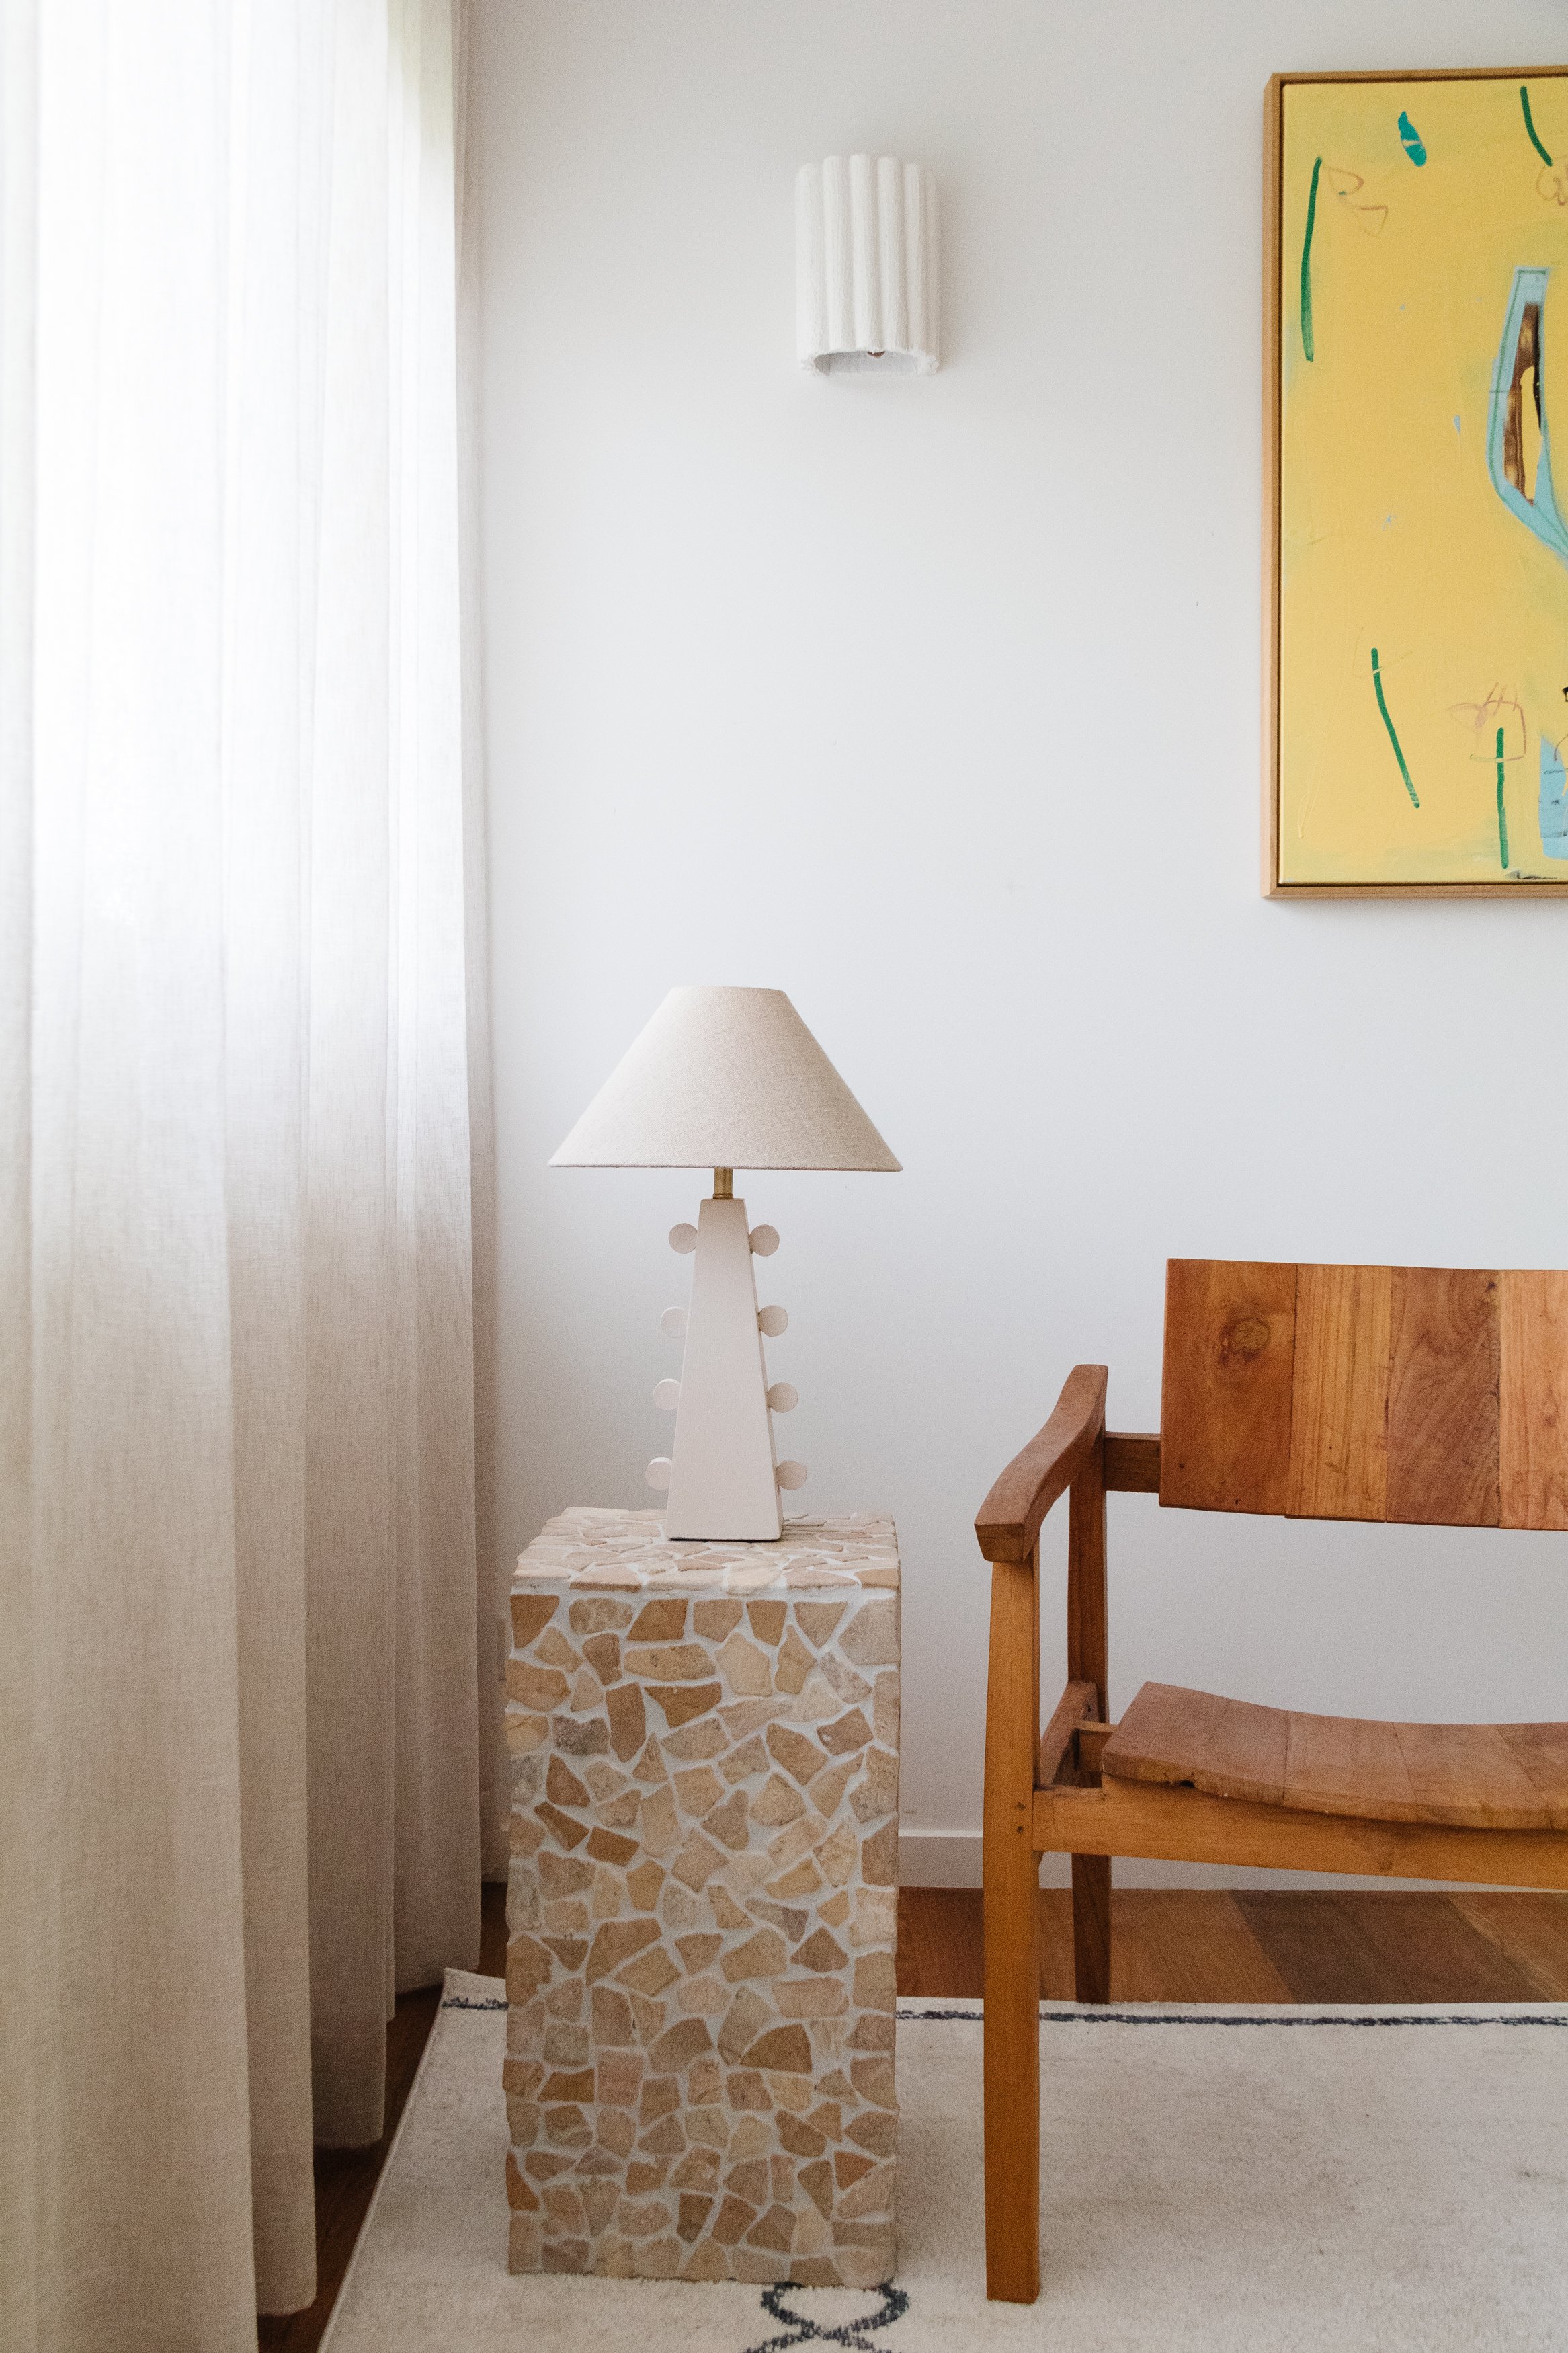
Ta daaaa! A table lamp that looks designer (which you in fact upcycled for under $30!)
Out of all the lamps I have upcycled in my time, I love this one so much because it doesn’t require a lot of materials, it’s quick and easy to make and it looks expensive. Nobody’s gonna know you upcycled this lamp for under $30 - ha! And can you imagine a floor lamp using this technique - stunning! I hope you feel inspired to give this upcycle a try; whether you use a lamp you already have at home or find a lamp base and shade when you go thrifting, I guarantee it’ll bring you so much joy and satisfaction. And there really is no greater feeling than making something yourself.