Upcycled Relief Art
I love being able to use materials I already have at home and upcycle them into something as beautiful as this.
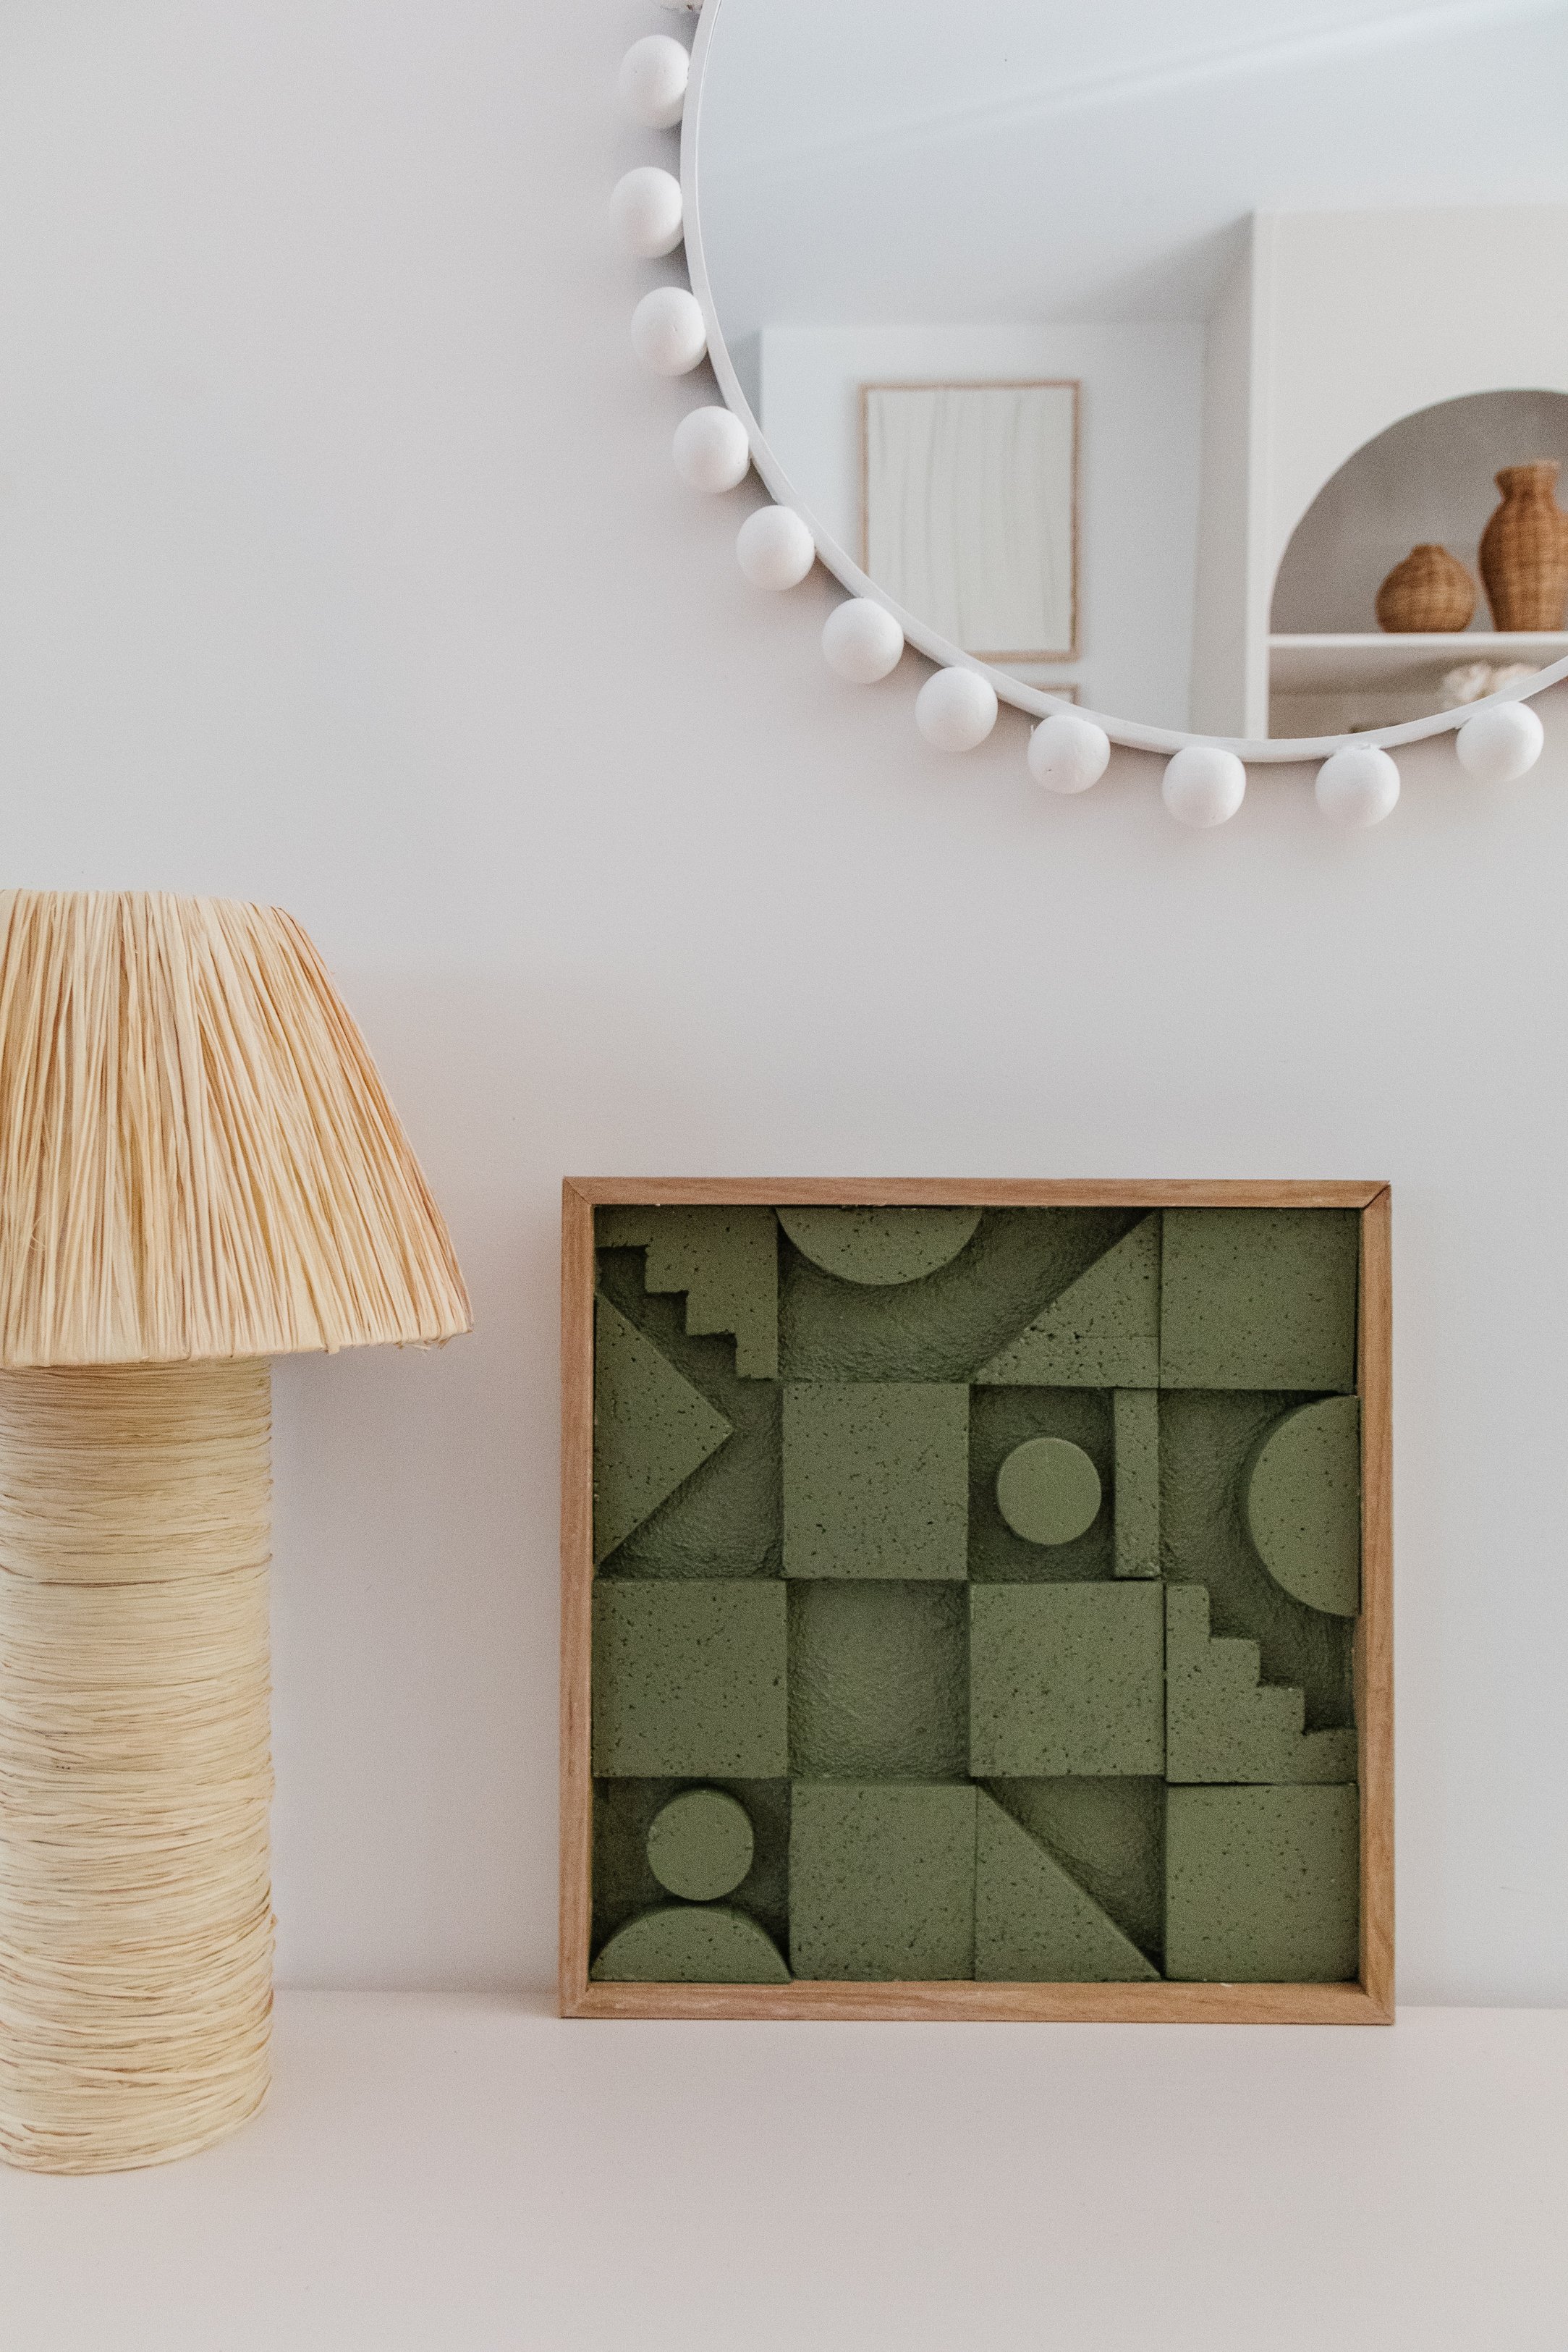
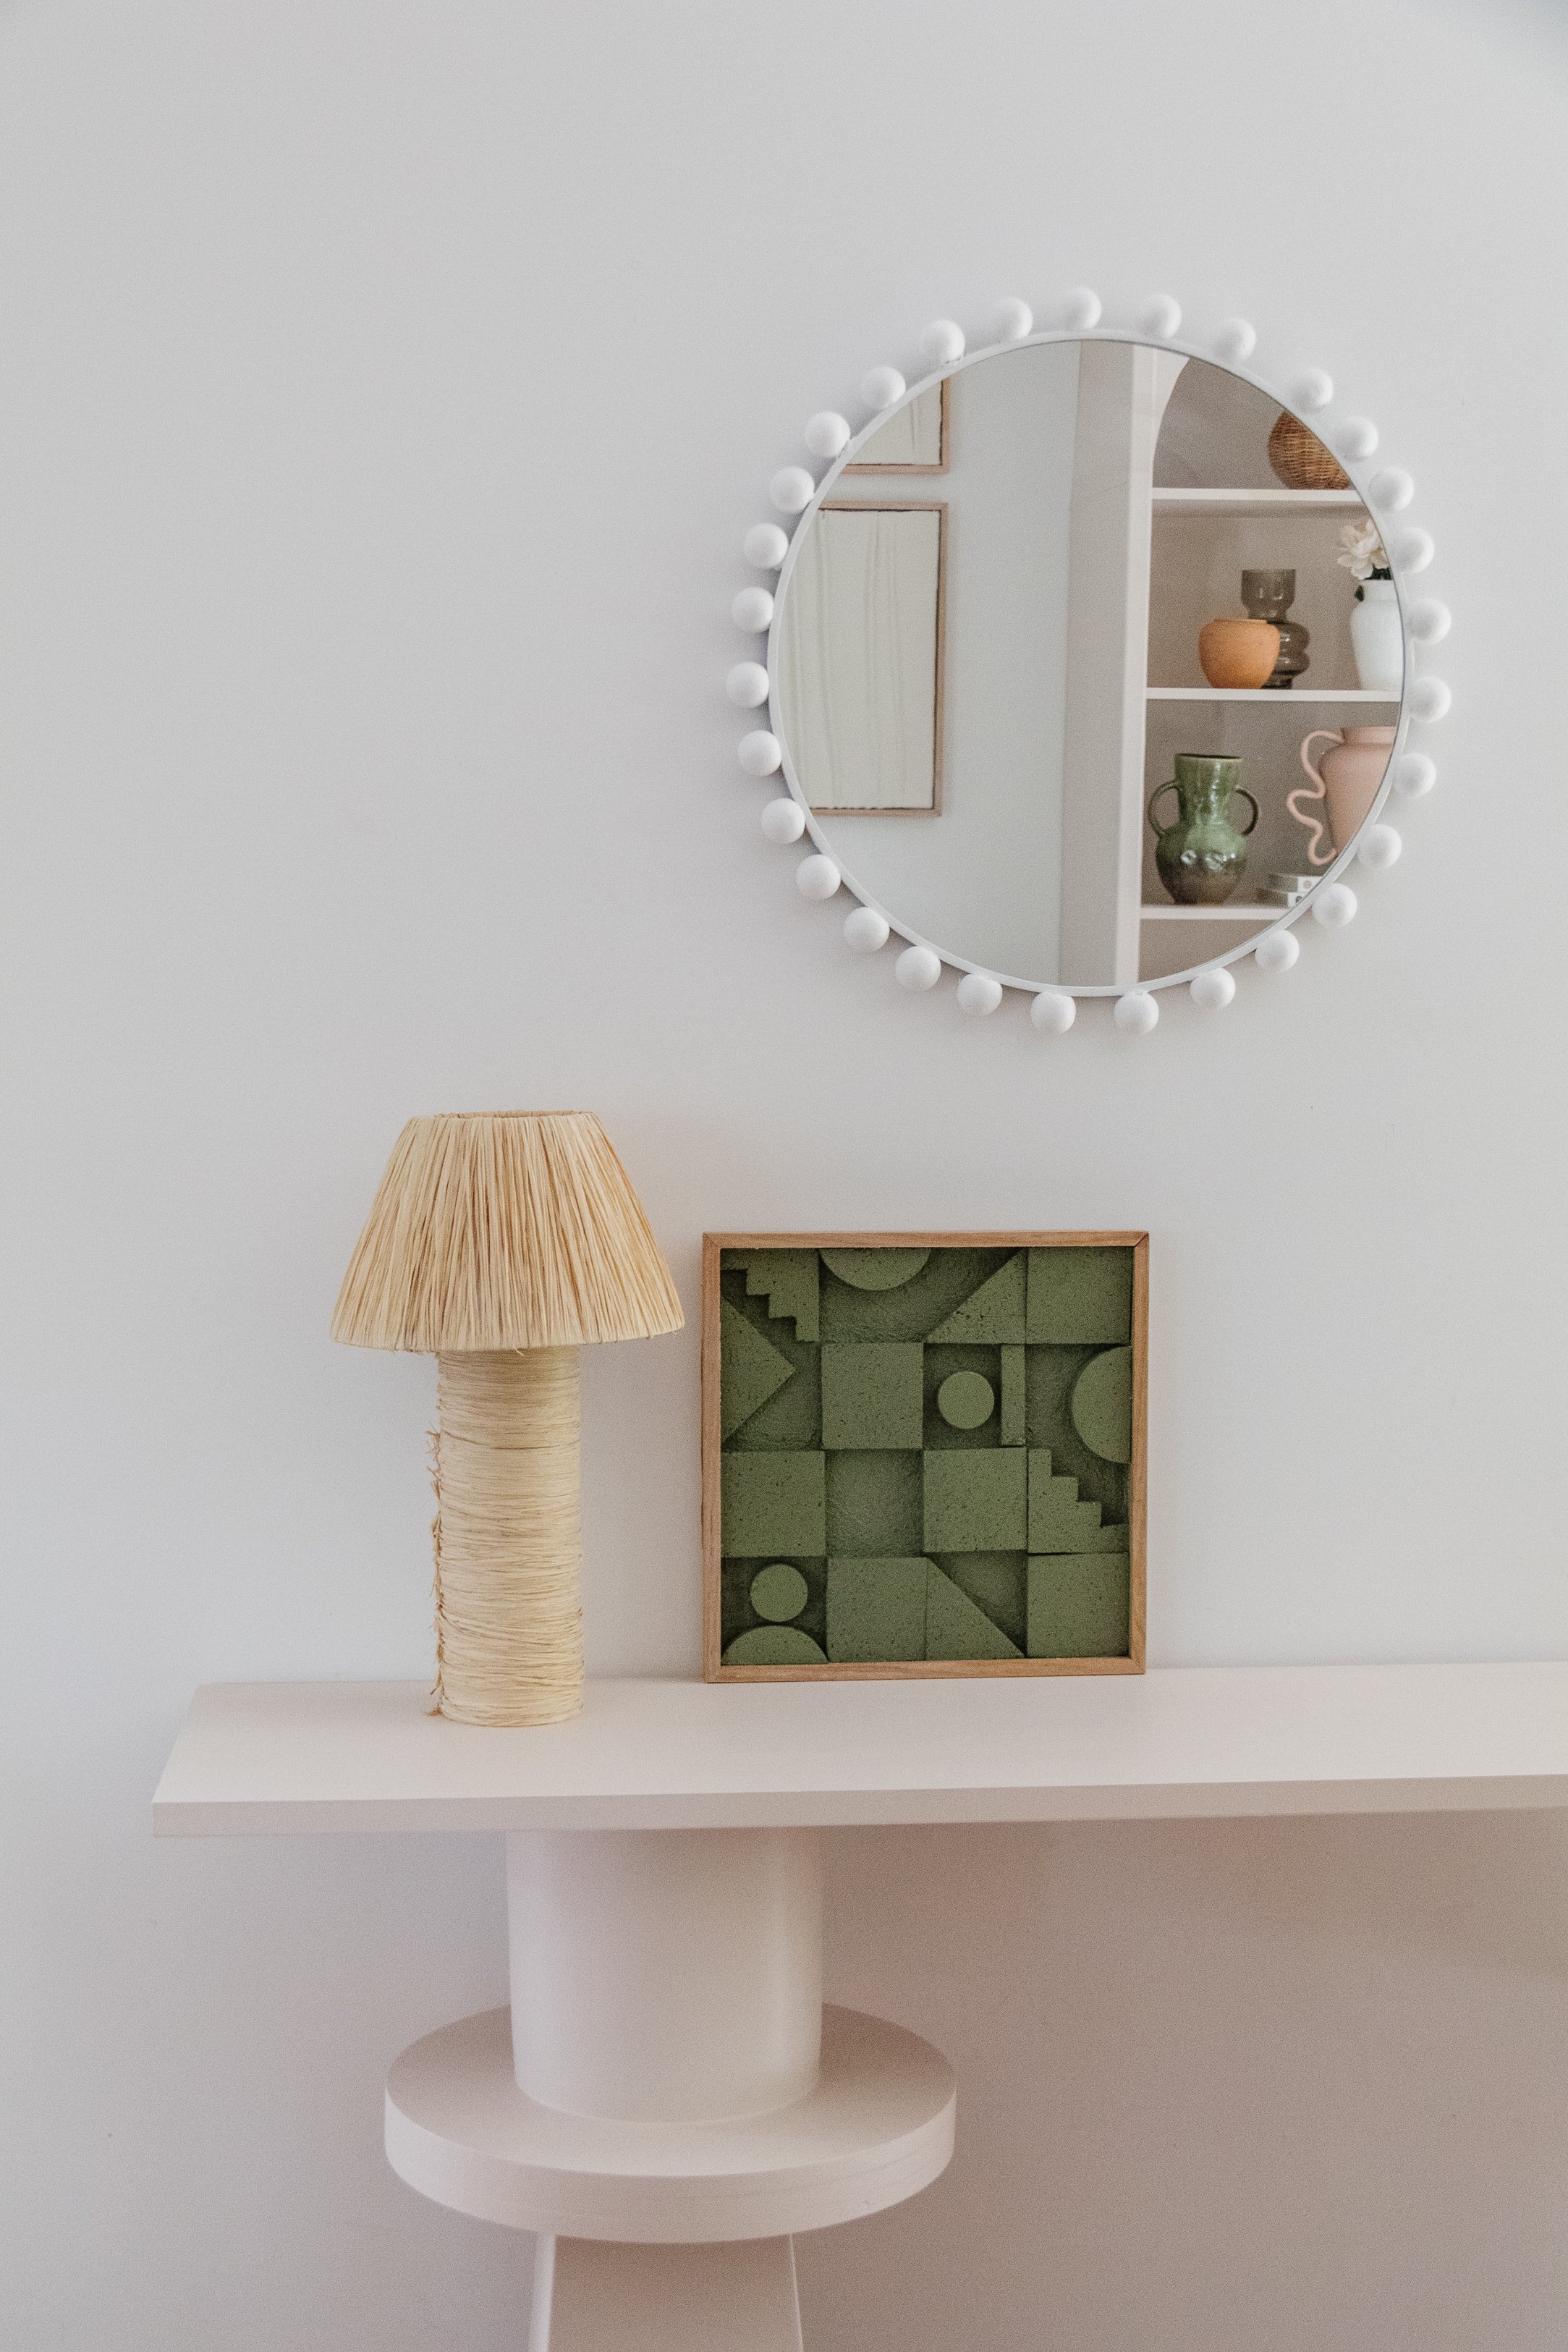
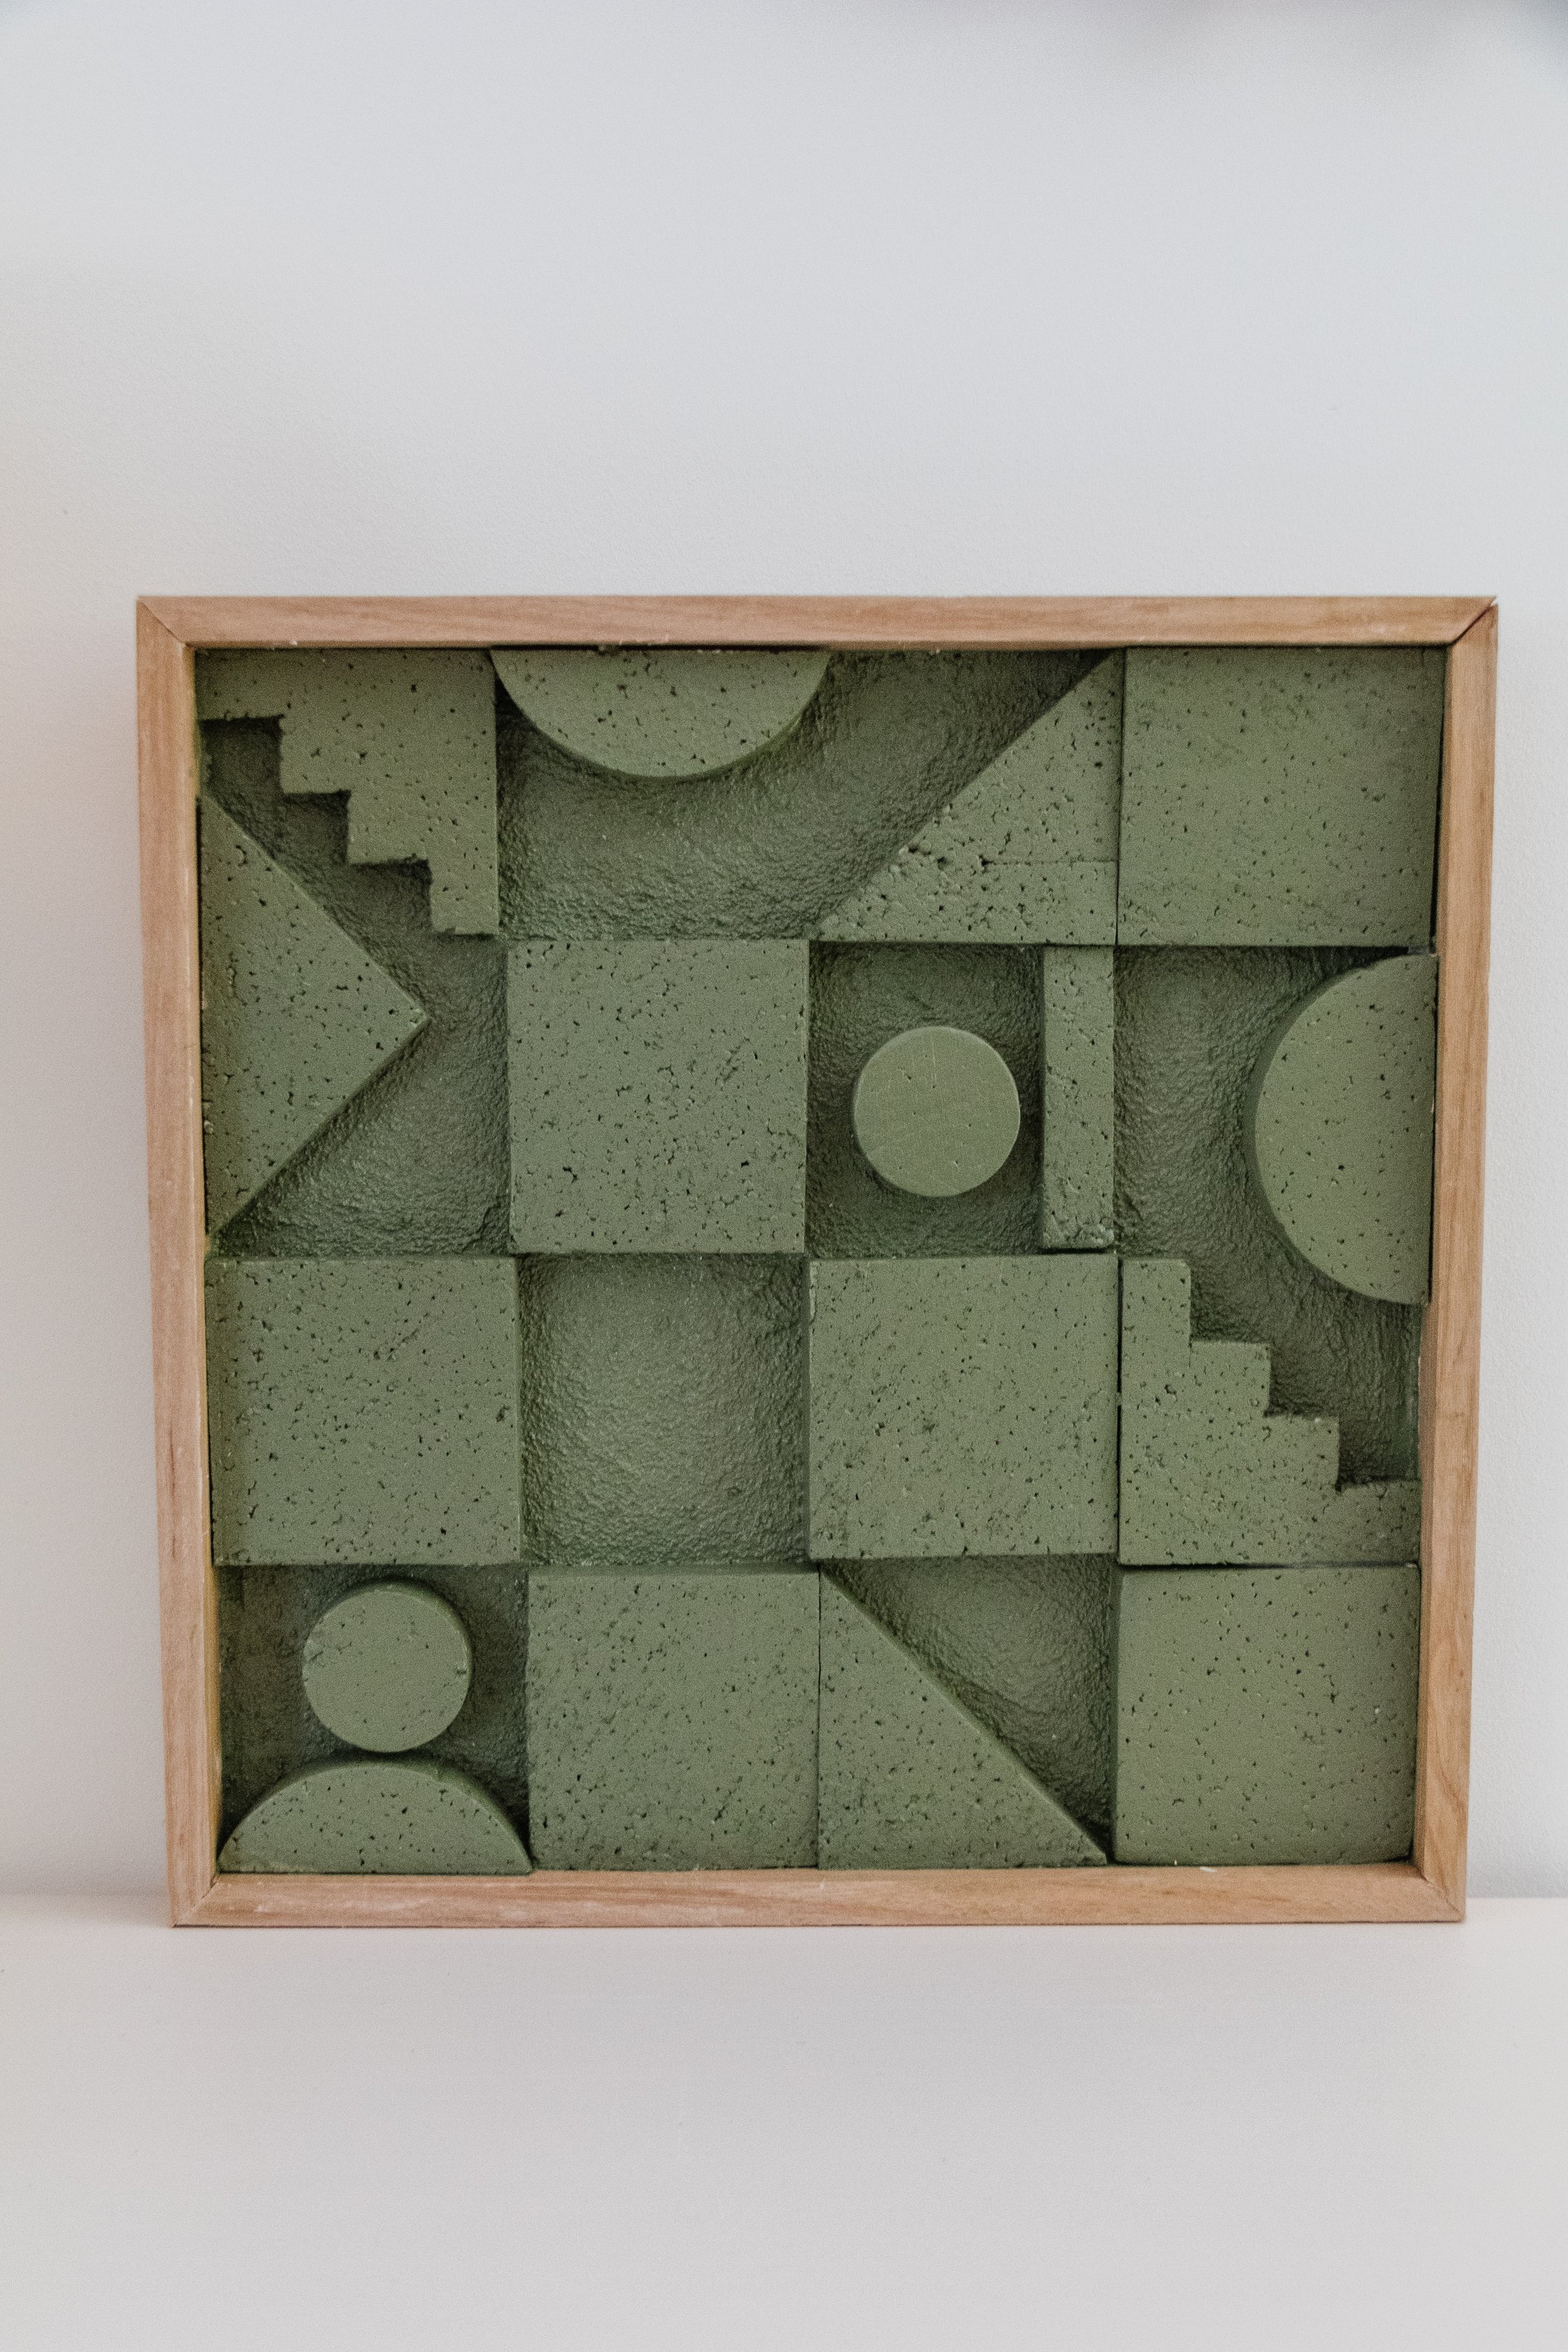
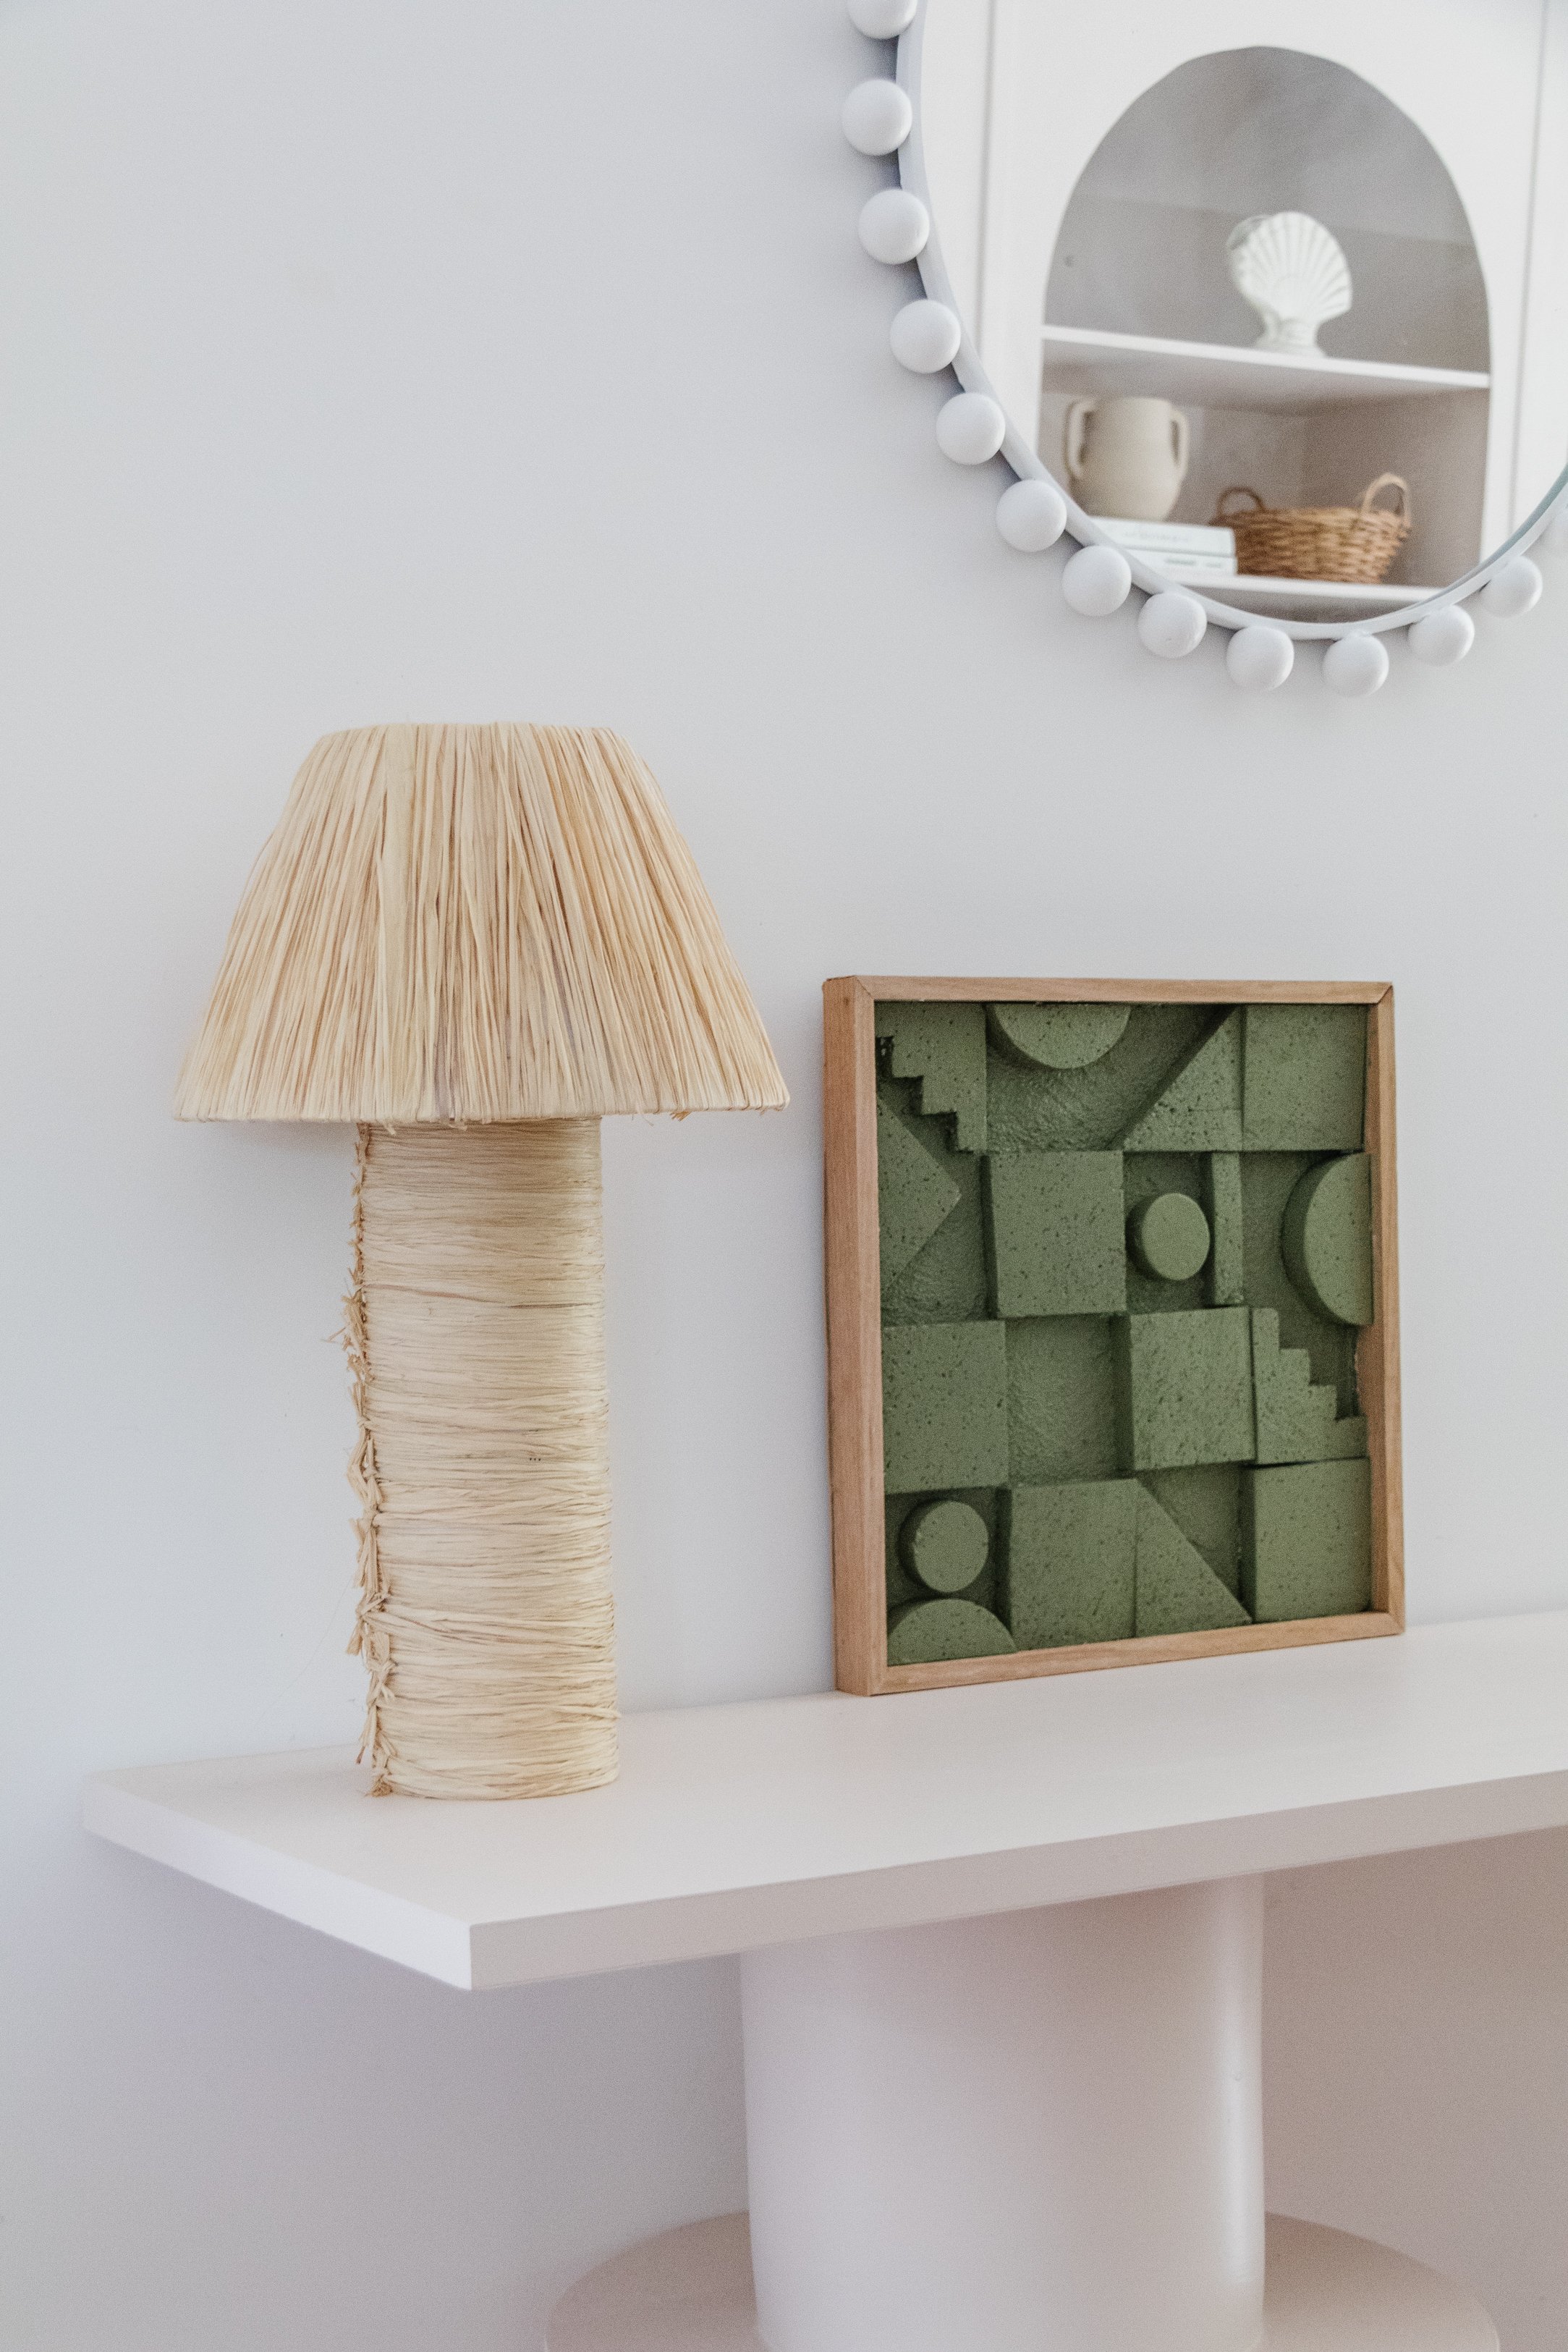
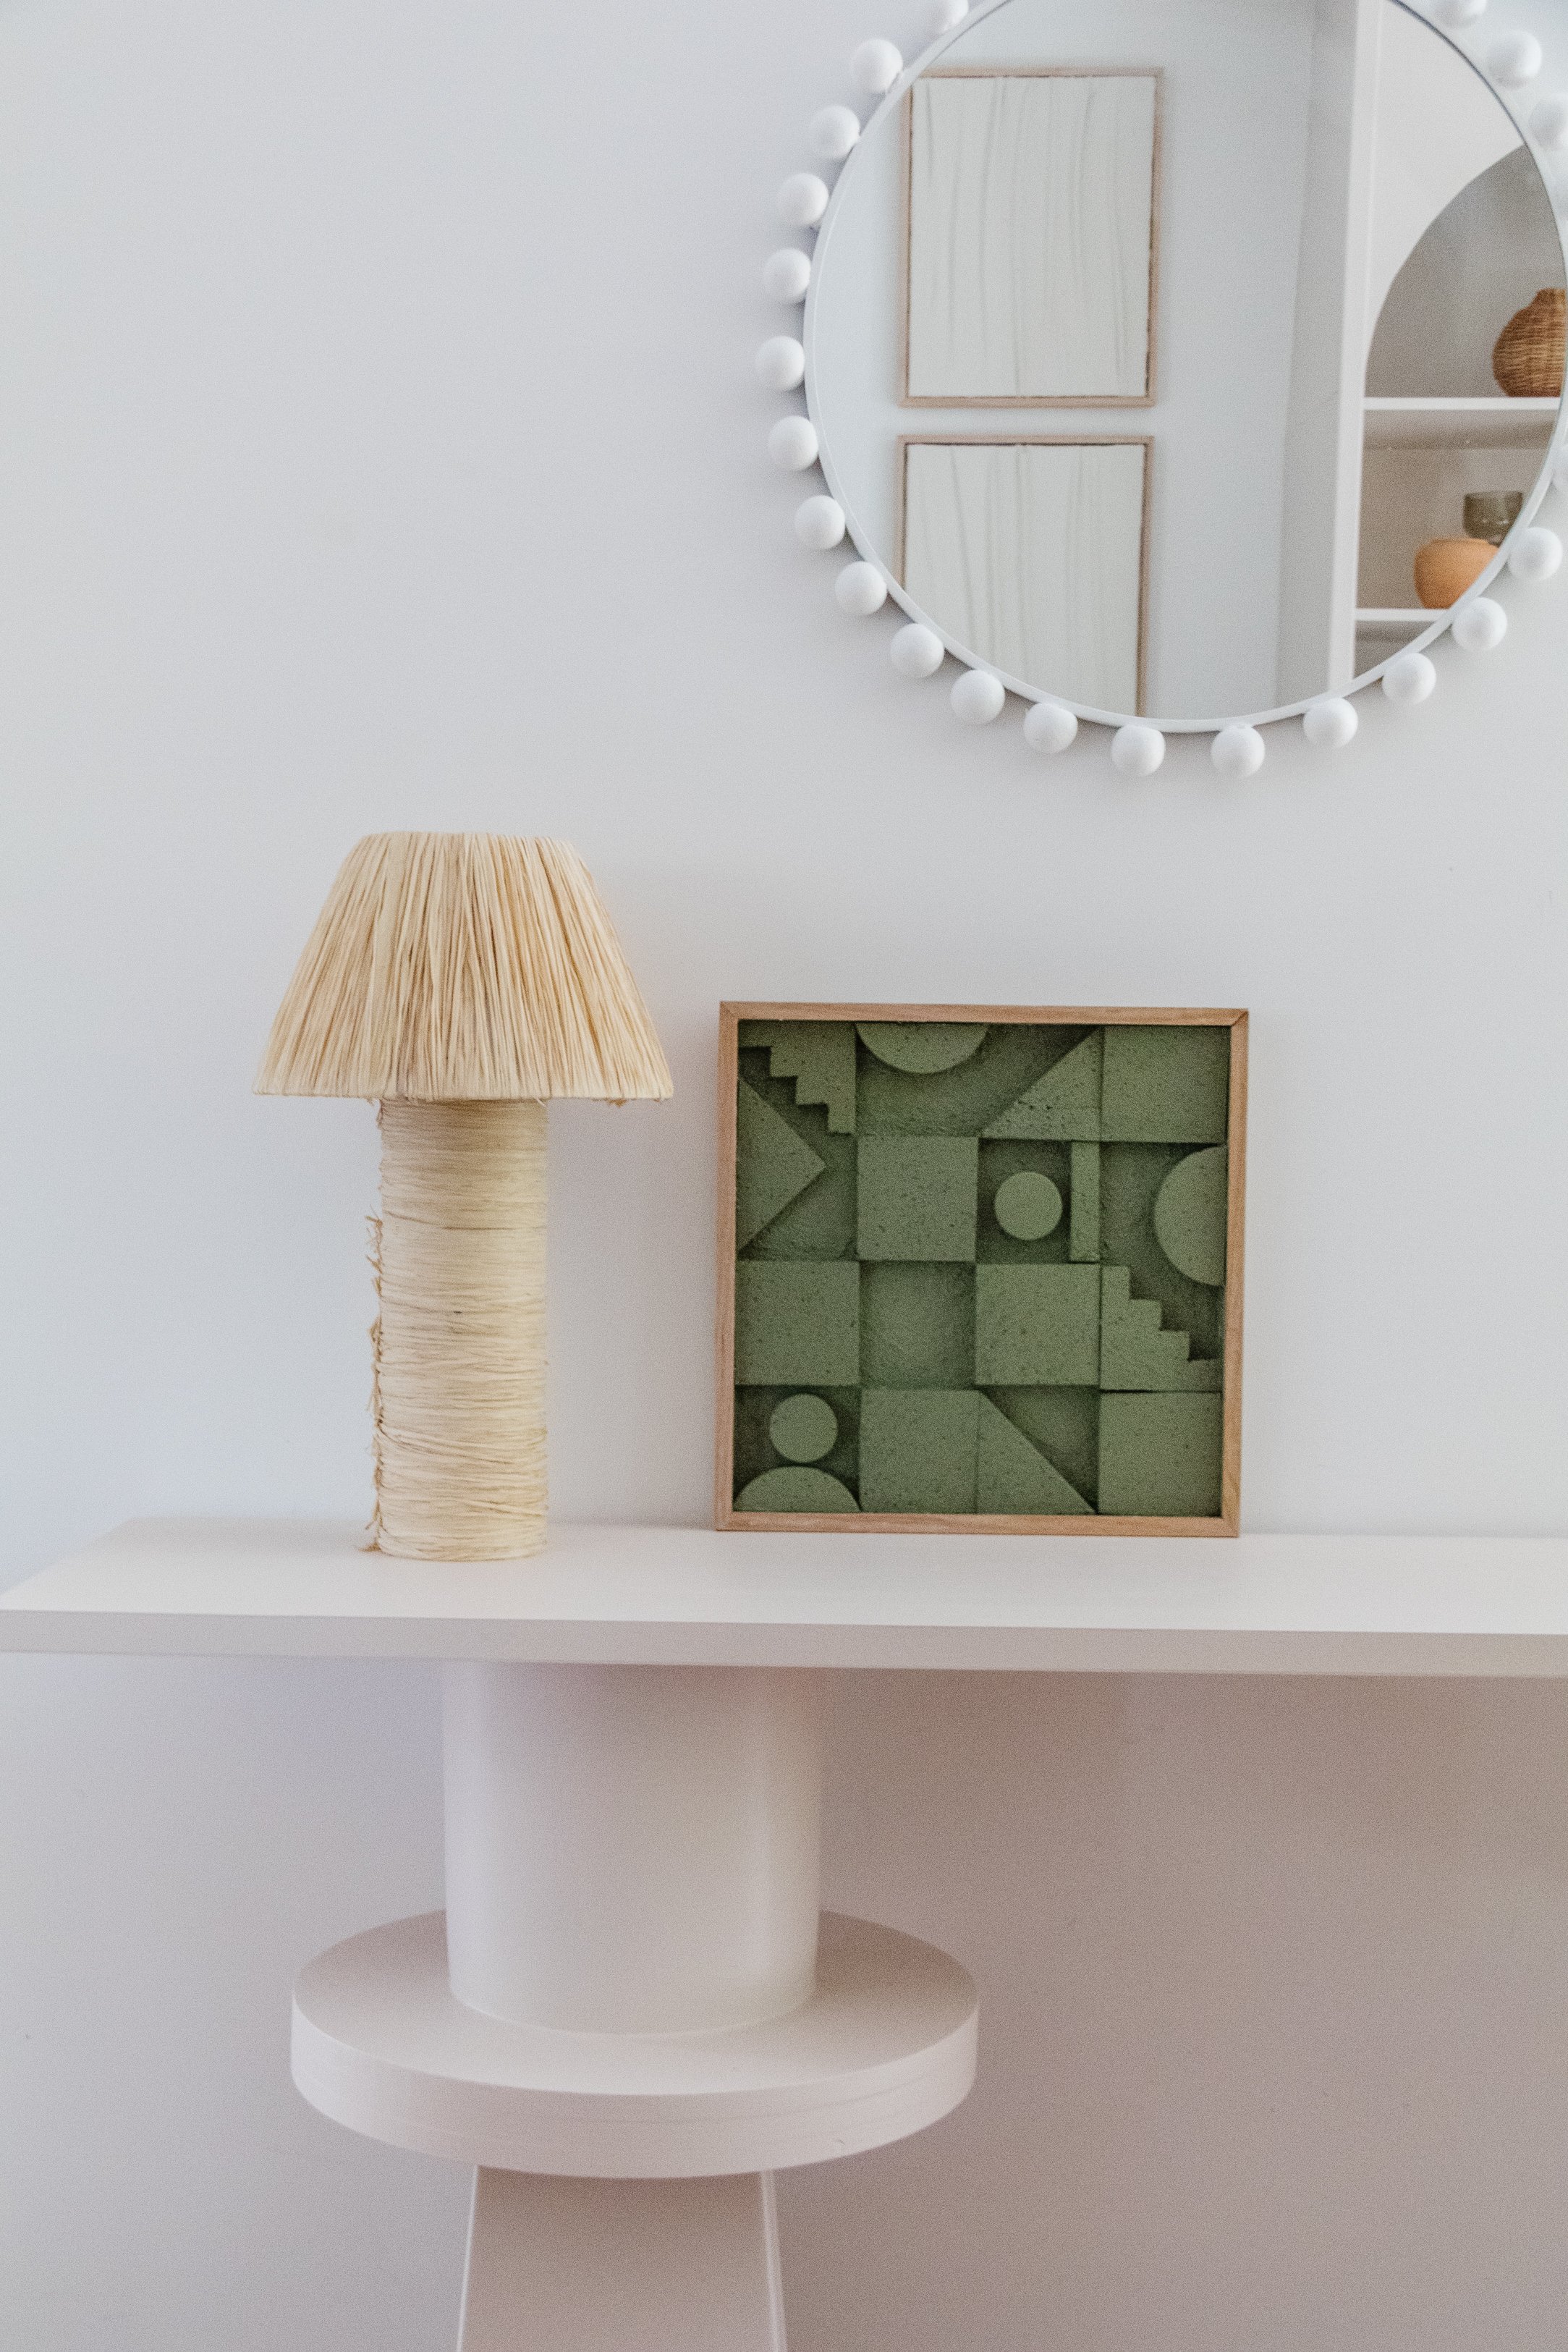
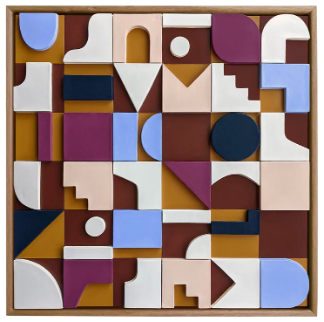
I fell in love with a piece of framed relief wall art by Olka Studio, so I began to look through my supplies to see if I could upcycle something inspired by it. I found an old piece of timber moulding, cardboard, texture paint, foam shapes - and an idea started forming. Using my Floating Timber Frame DIY, I could make a frame, use a piece of cardboard for the backing, cut shapes from the foam and use texture paint to create a beautiful textural detail. So, that’s what I did. And best of all? Because I had all the materials at home, this project didn’t cost me a cent! How good is that! Read on to learn how to make your own piece of textured relief art, and make your very own floating timber frame!
And to see how this Upcycled Textured Relief Art came together, make sure you check out this video!
Before & After


Project Details
🕒 Project Time Estimate: 2 hours, not including paint drying time
💰 Materials Cost: This project cost me $0 as I had everything at home, but if you needed all the materials, it would cost under $140
⚒️ Power Tools: None
👷♀️ Skill Level: Beginner DIYer
Materials
DIY Floating Timber Frame, head over here for the materials and tutorial
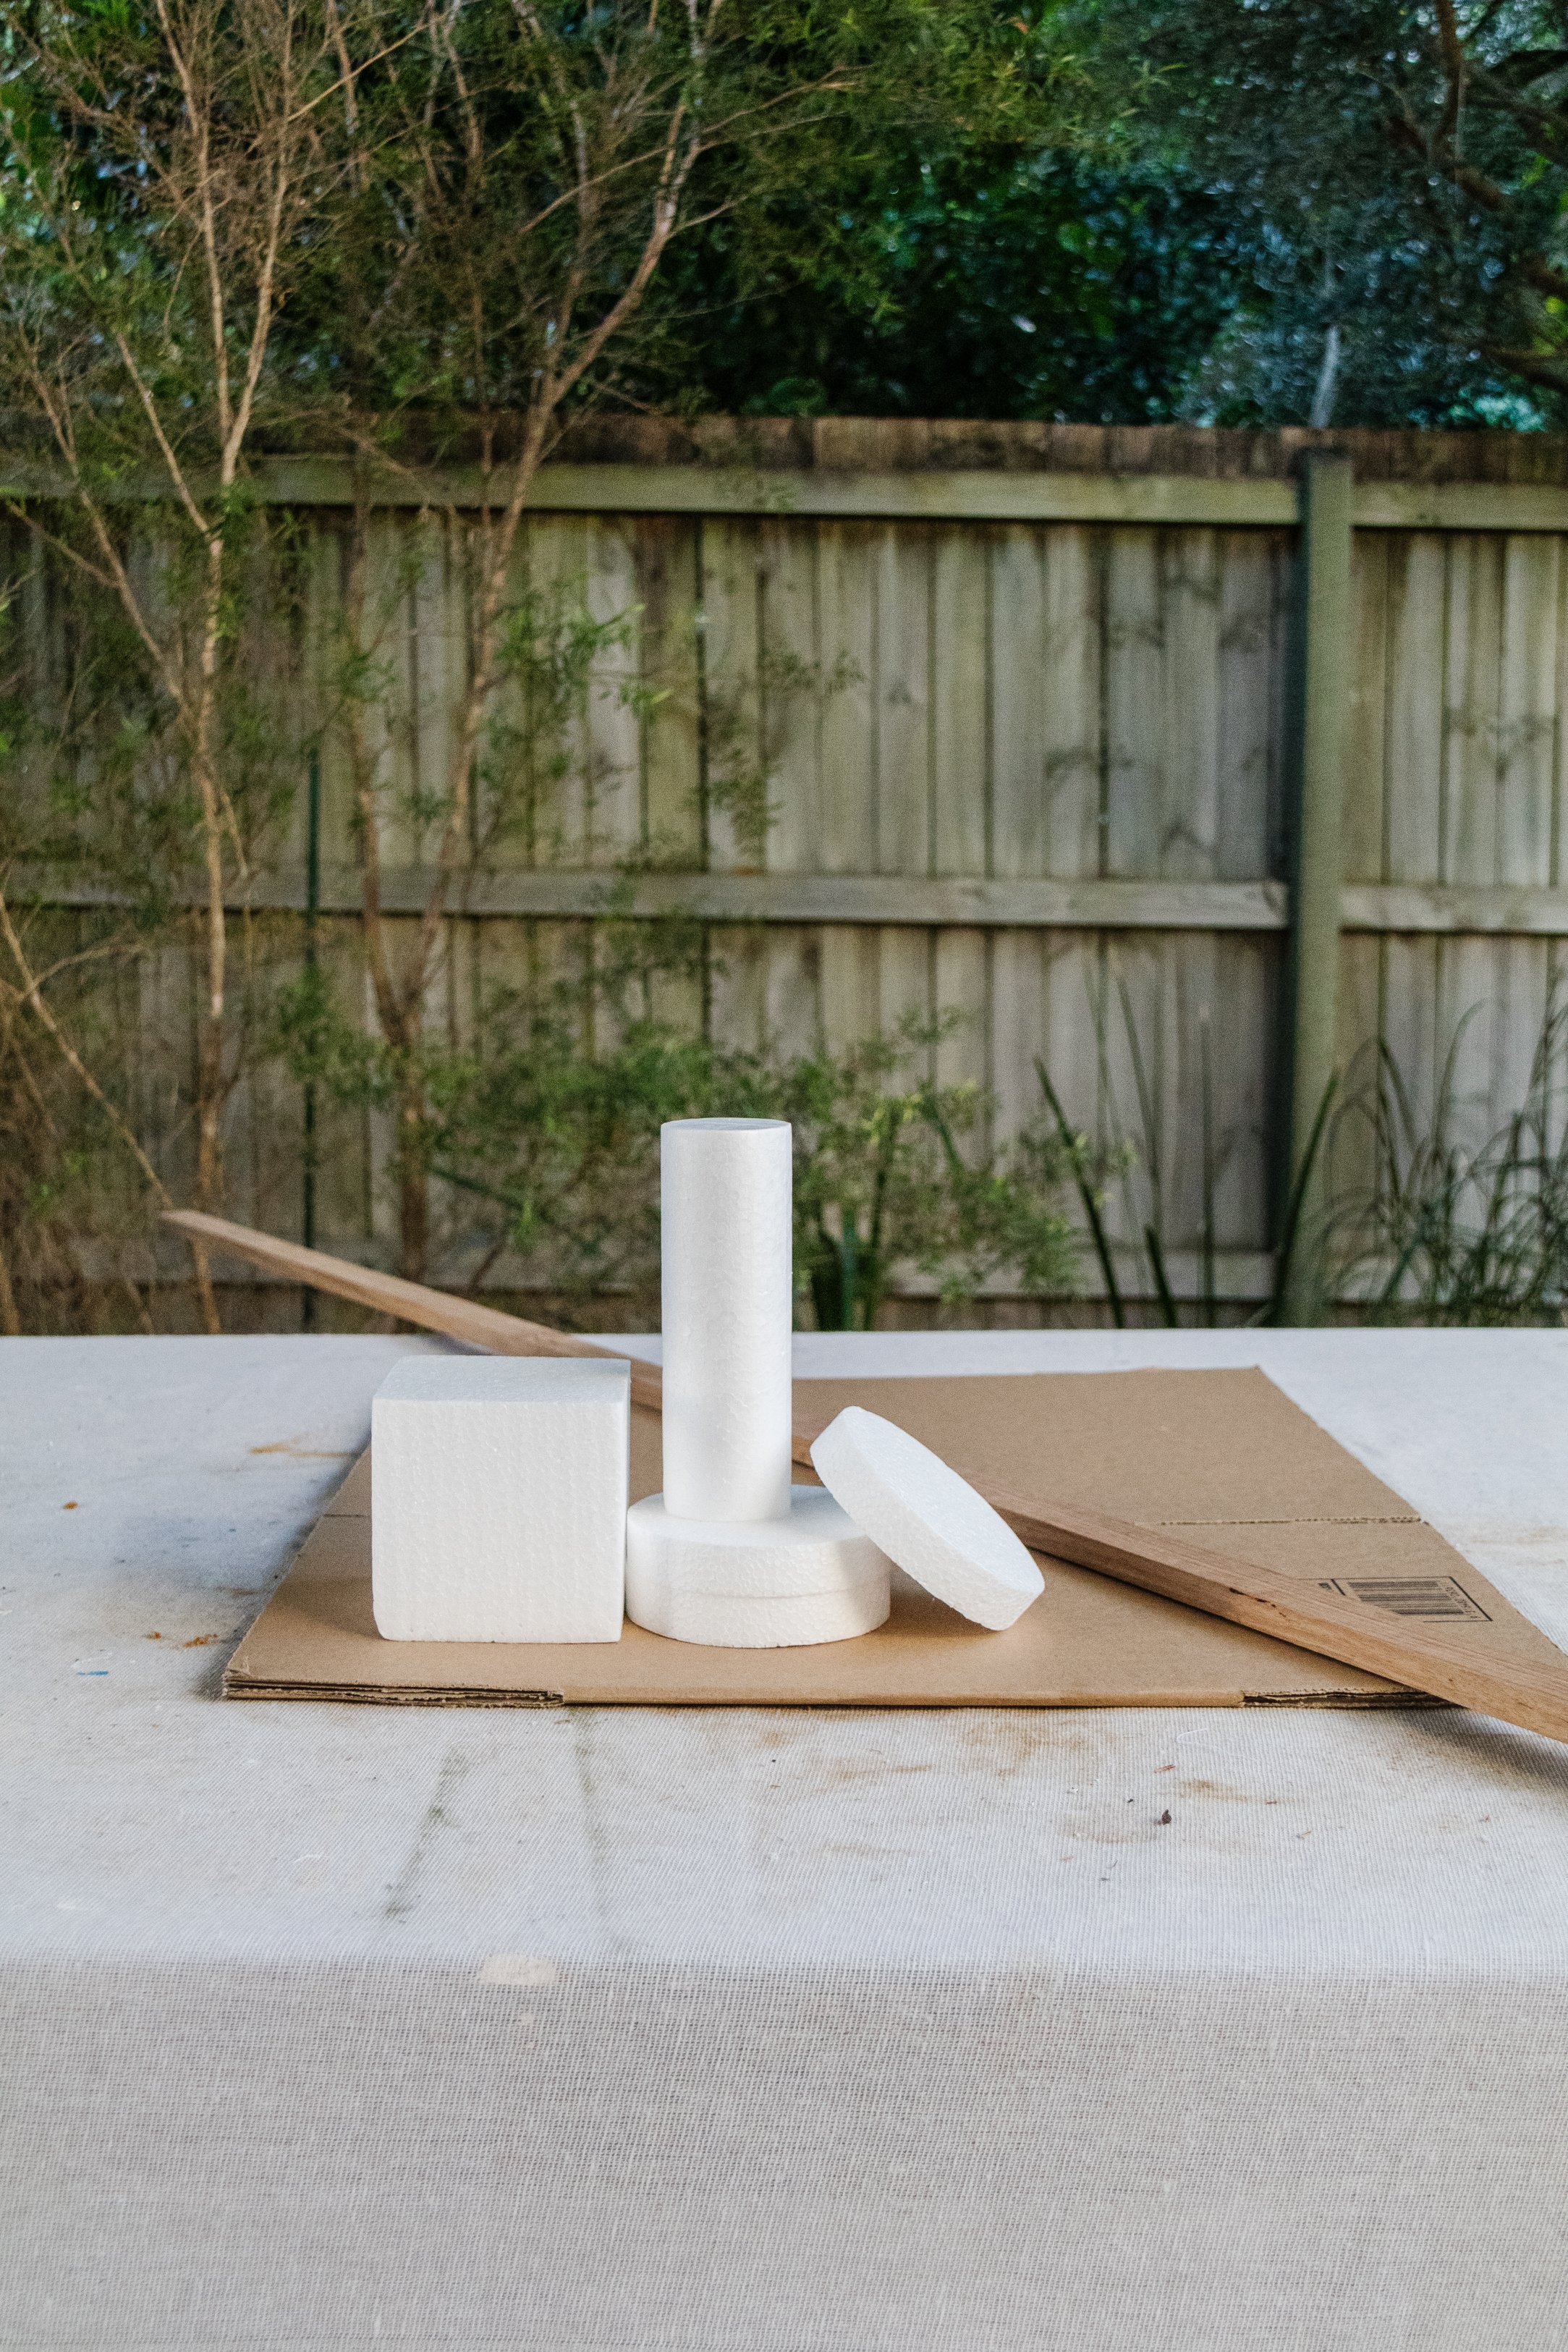
Piece of thick cardboard (from a cardboard box)
Scissors
Small paint brush - I think these are excellent for small projects like this
Foam polystyrene shapes from Lincraft and they have more in store, like the shapes I used for this upcycle
Sharp knife
Painters tape
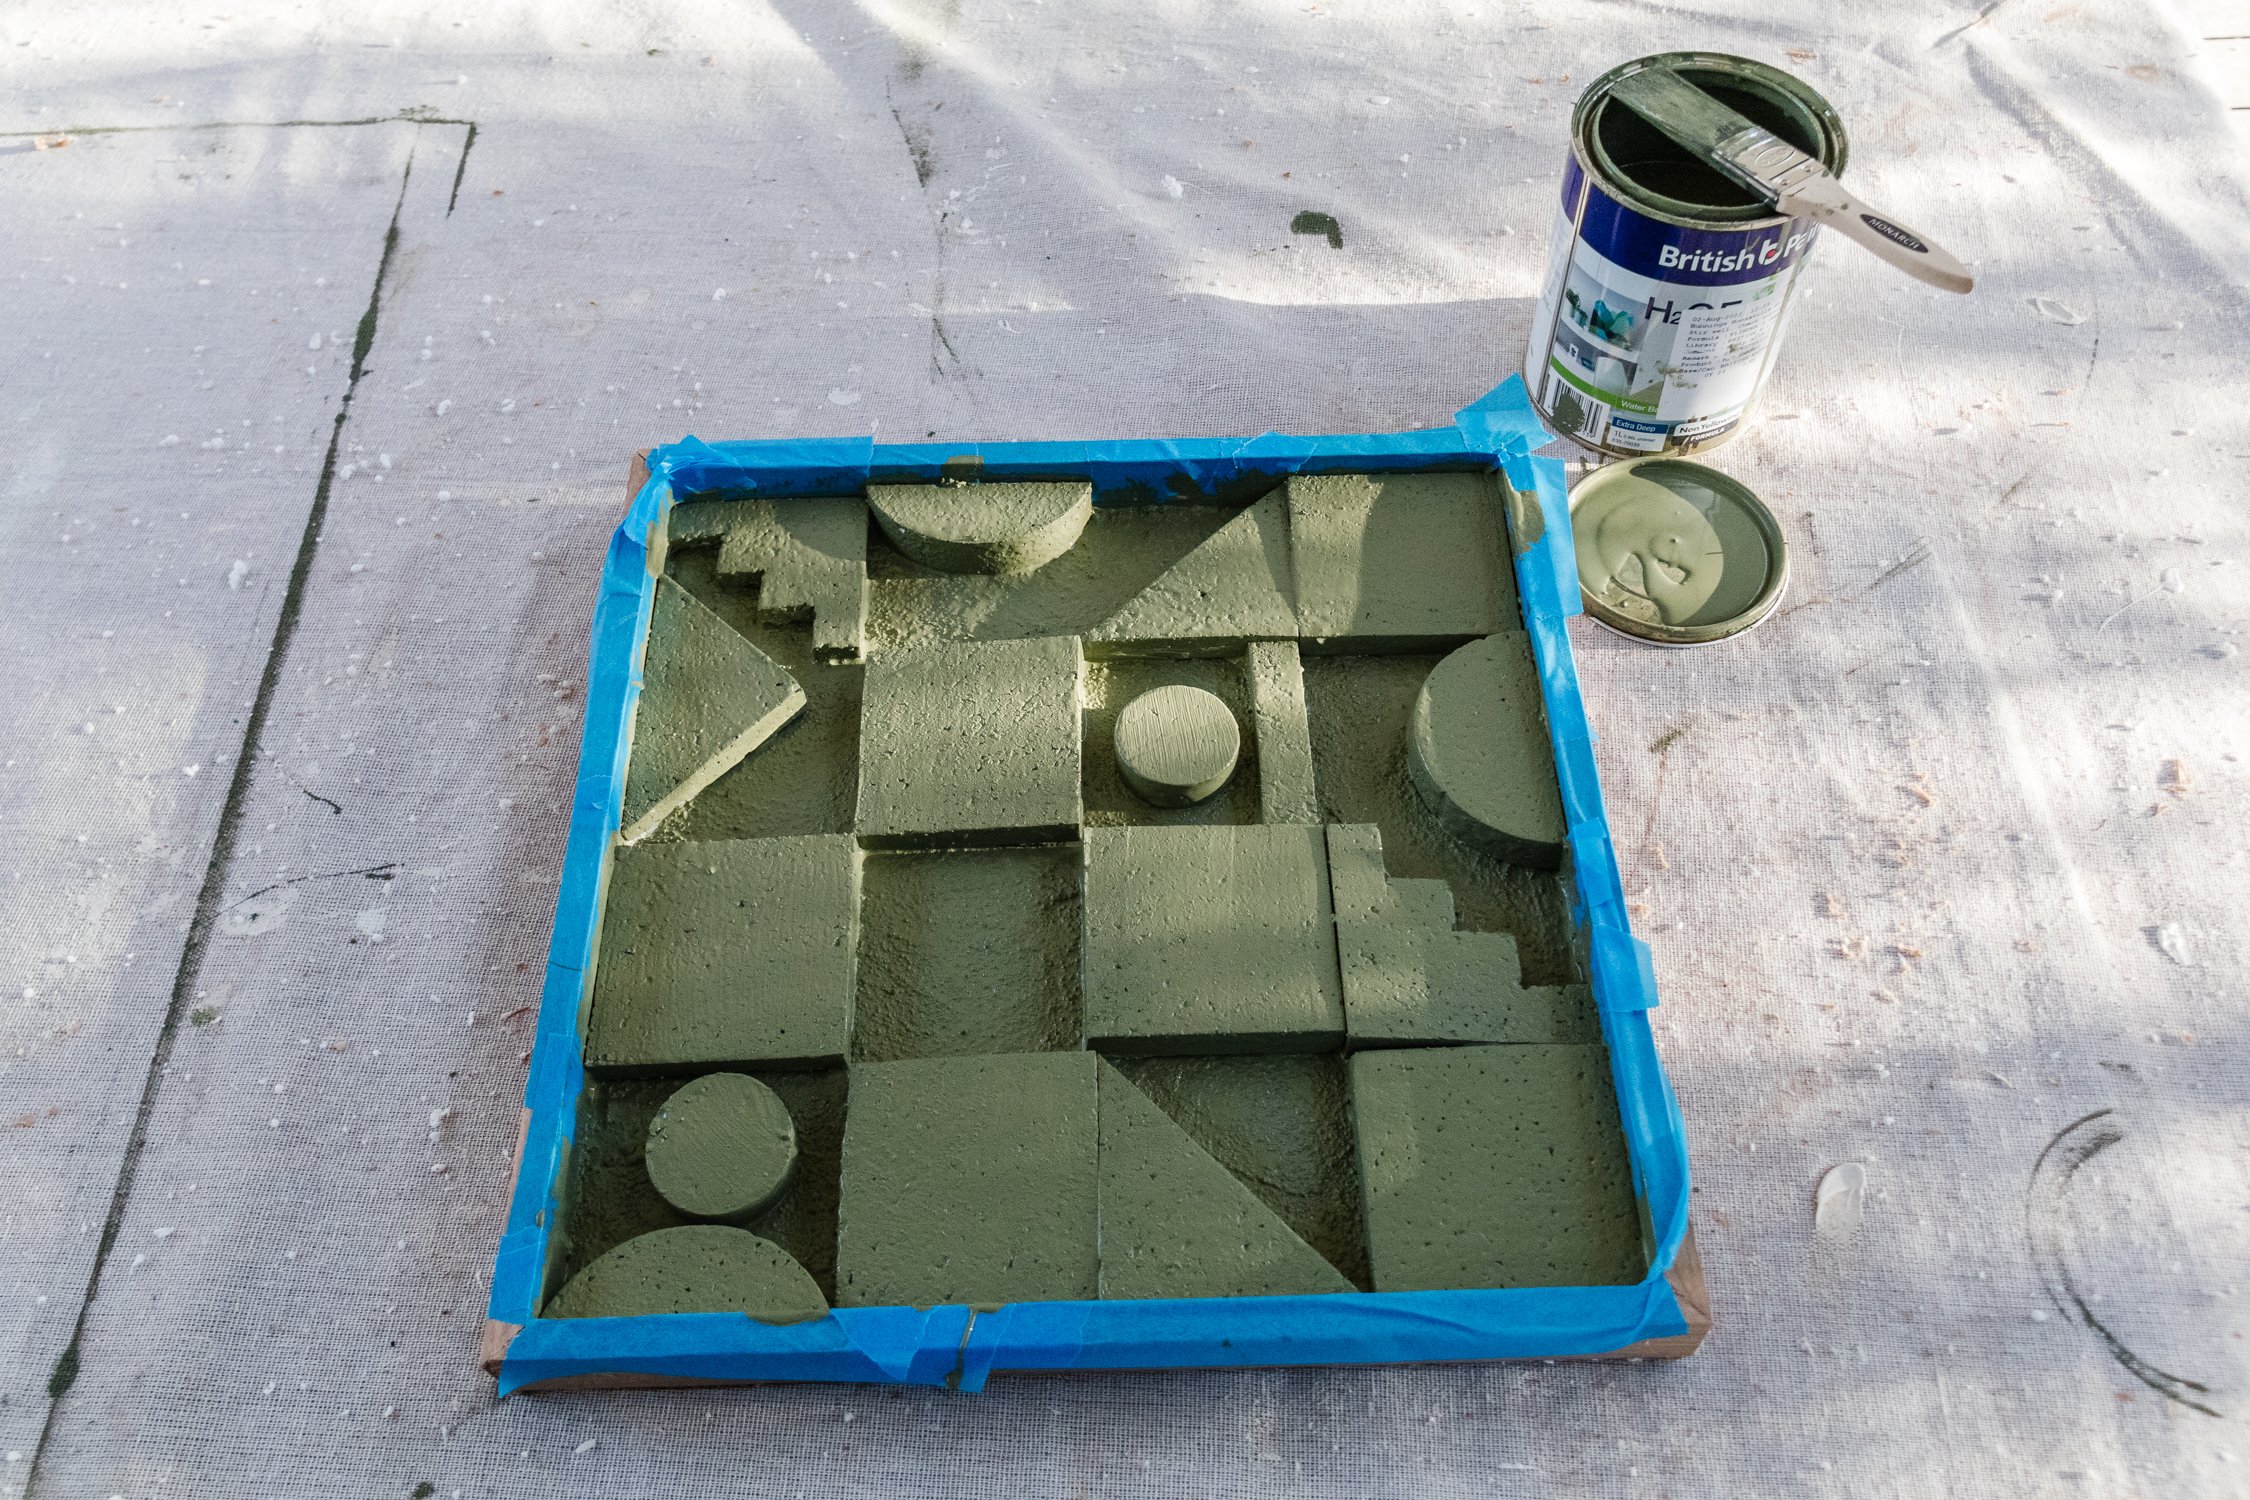
Paint in your colour of choice - I chose “Flinder’s Green” by Dulux
Optional: If you want to hang the art on the wall, you will need picture hanging velcro strips

How To
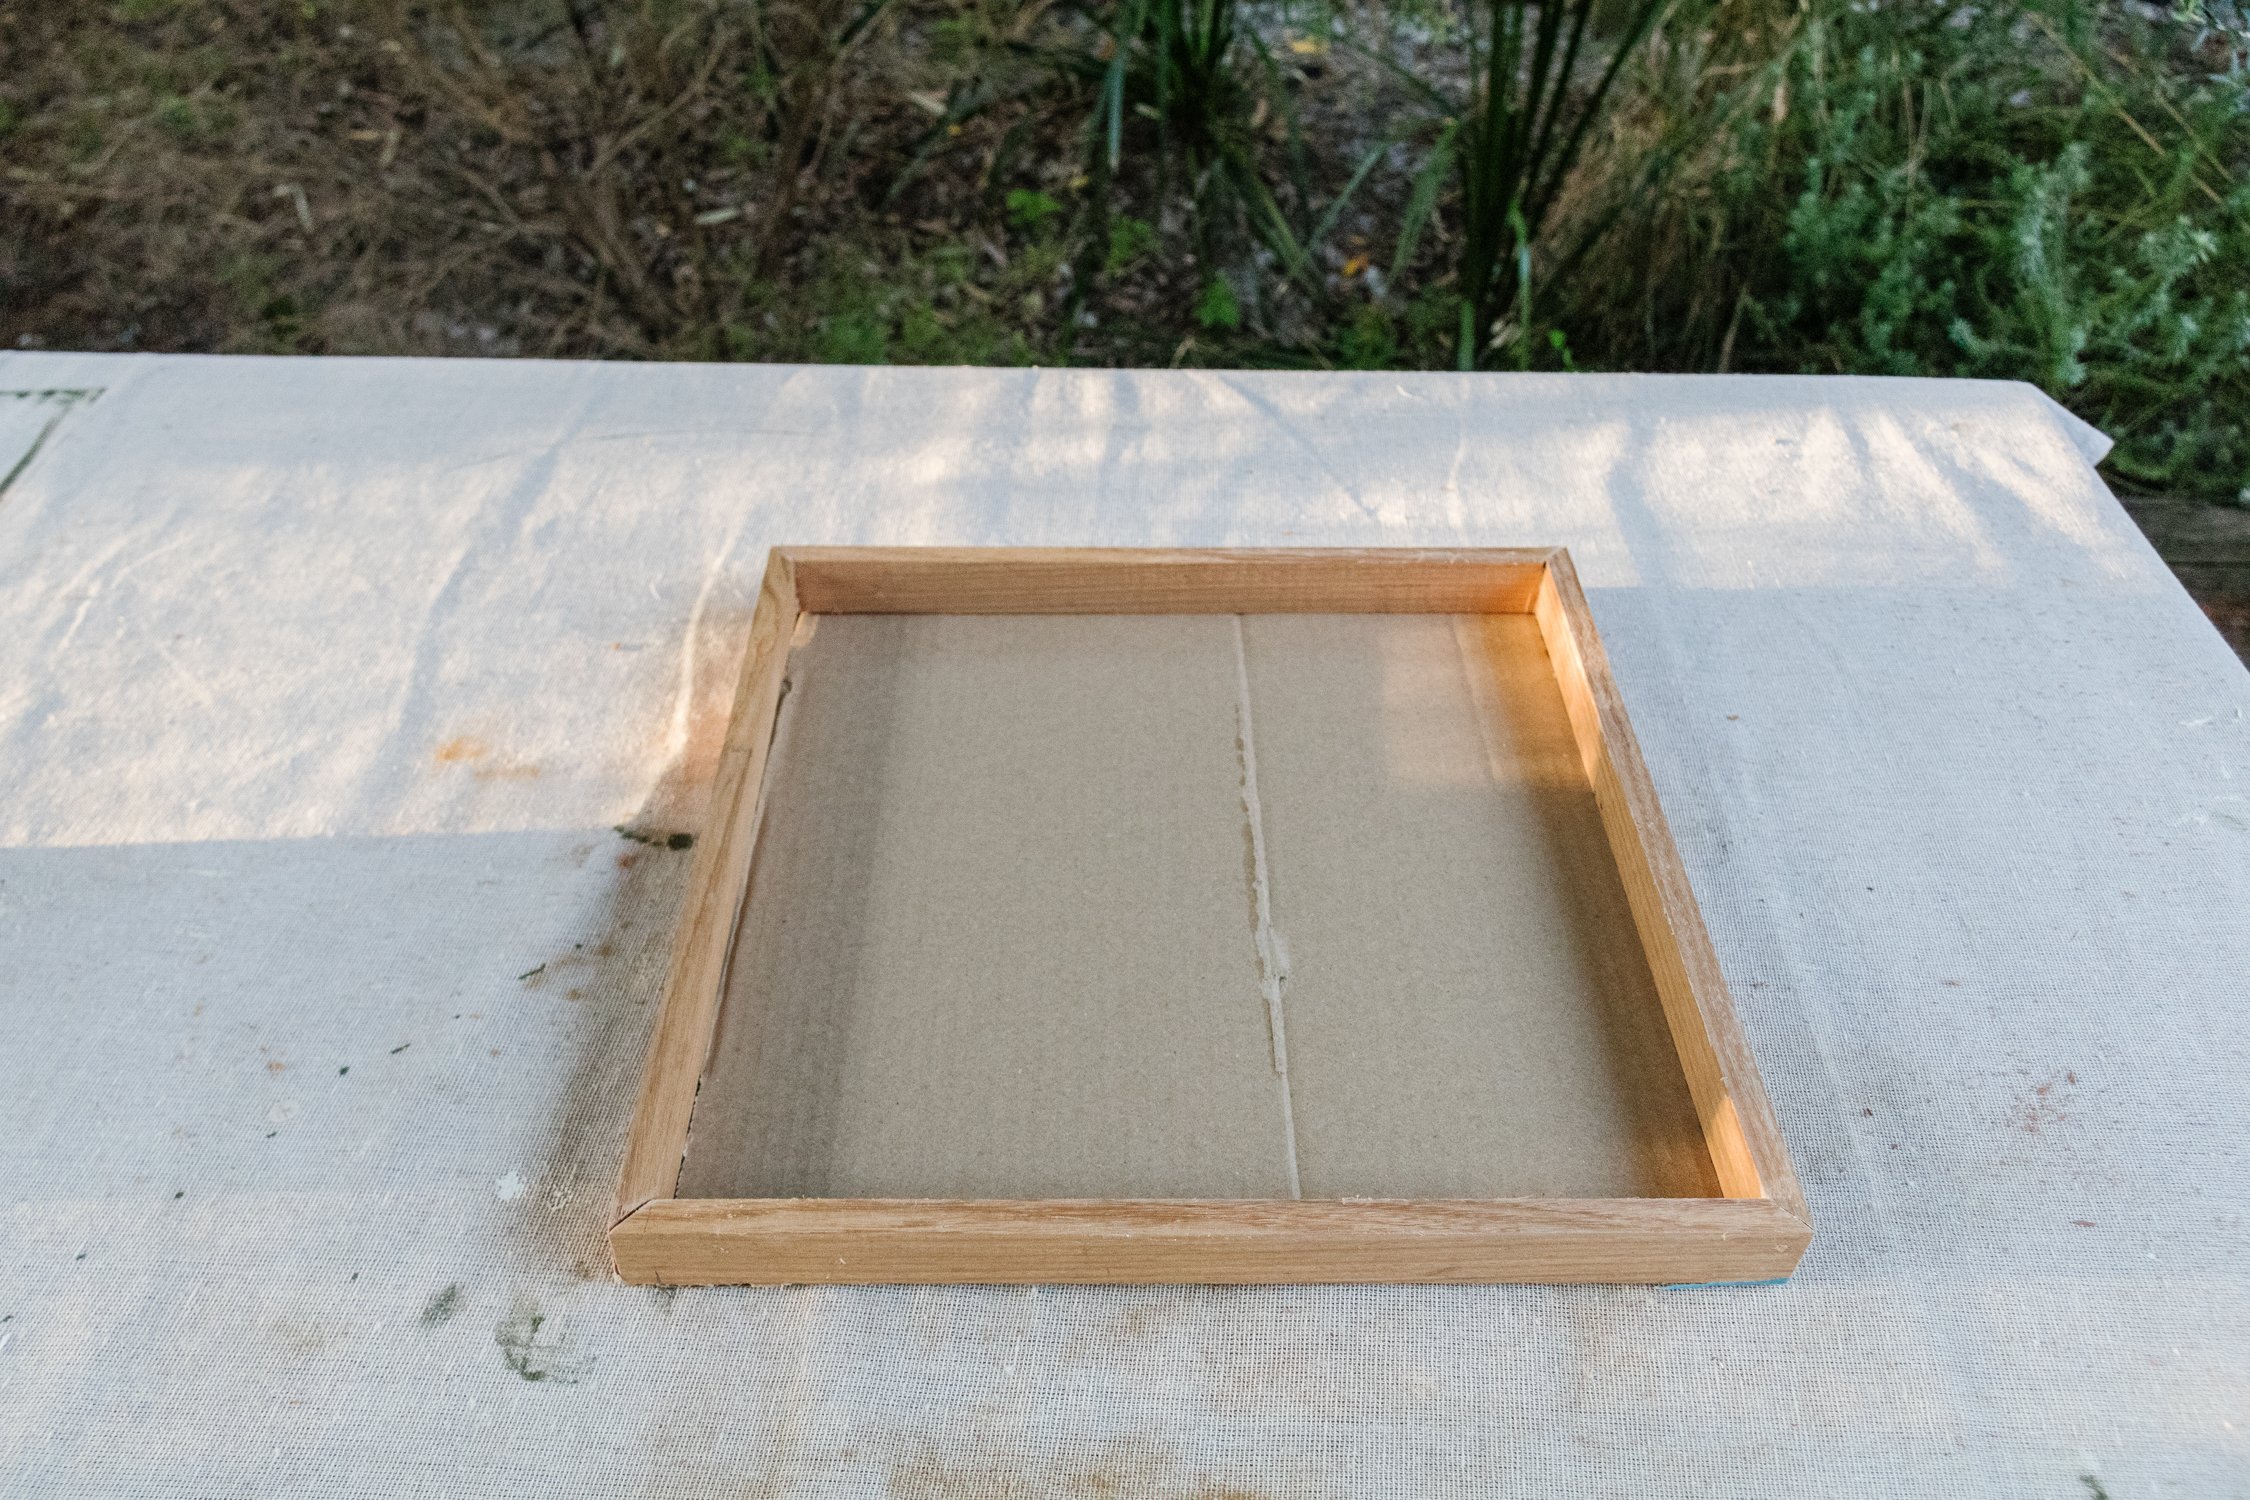
Start by making a square DIY Floating Timber Frame. I have included two different methods in my tutorial, the first using a mitre saw (which costs about $180), and the second using a tenon saw and mitre box (which costs around $30). You can make your floating frame any size you like! Just make sure it’s a square (this is very important) and you have enough cardboard for the backing.
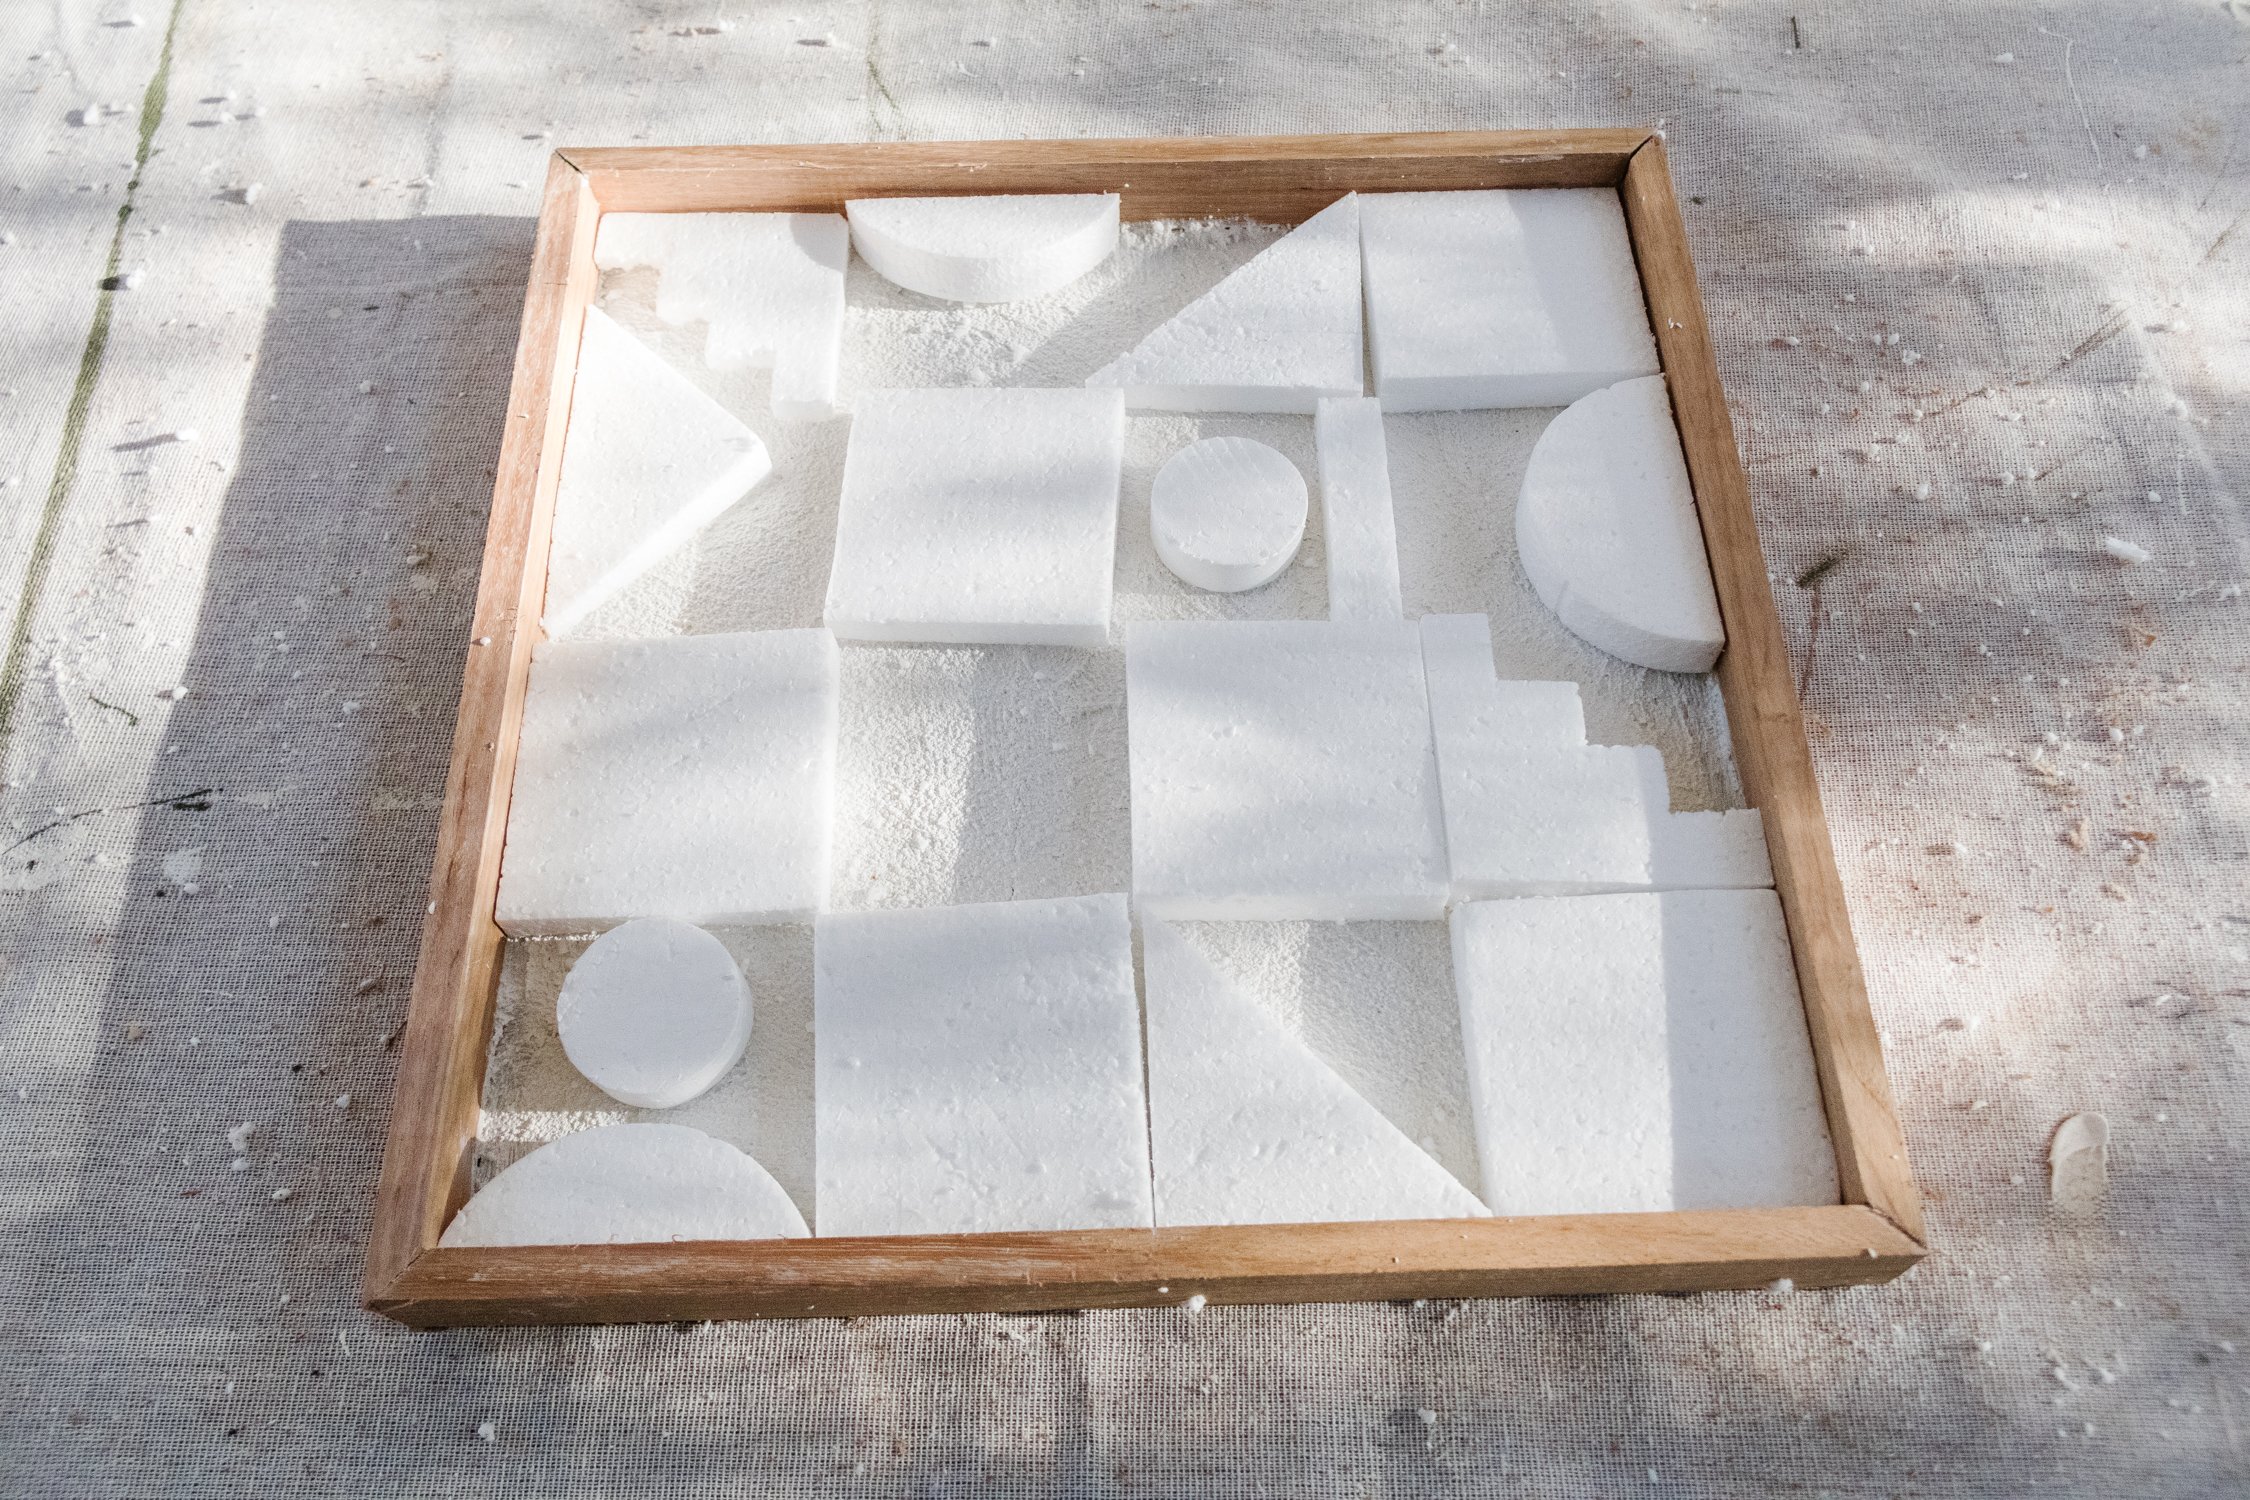
Speaking of which, cut the cardboard to size and use Selley’s Heavy Dusty Liquid Nails to glue the cardboard onto the back of the frame. Set aside to dry for 30 minutes. Flip the frame over and apply one thick coat of texture paint onto the inside cardboard and be careful not to get any on the frame. Set aside to dry for a few hours.
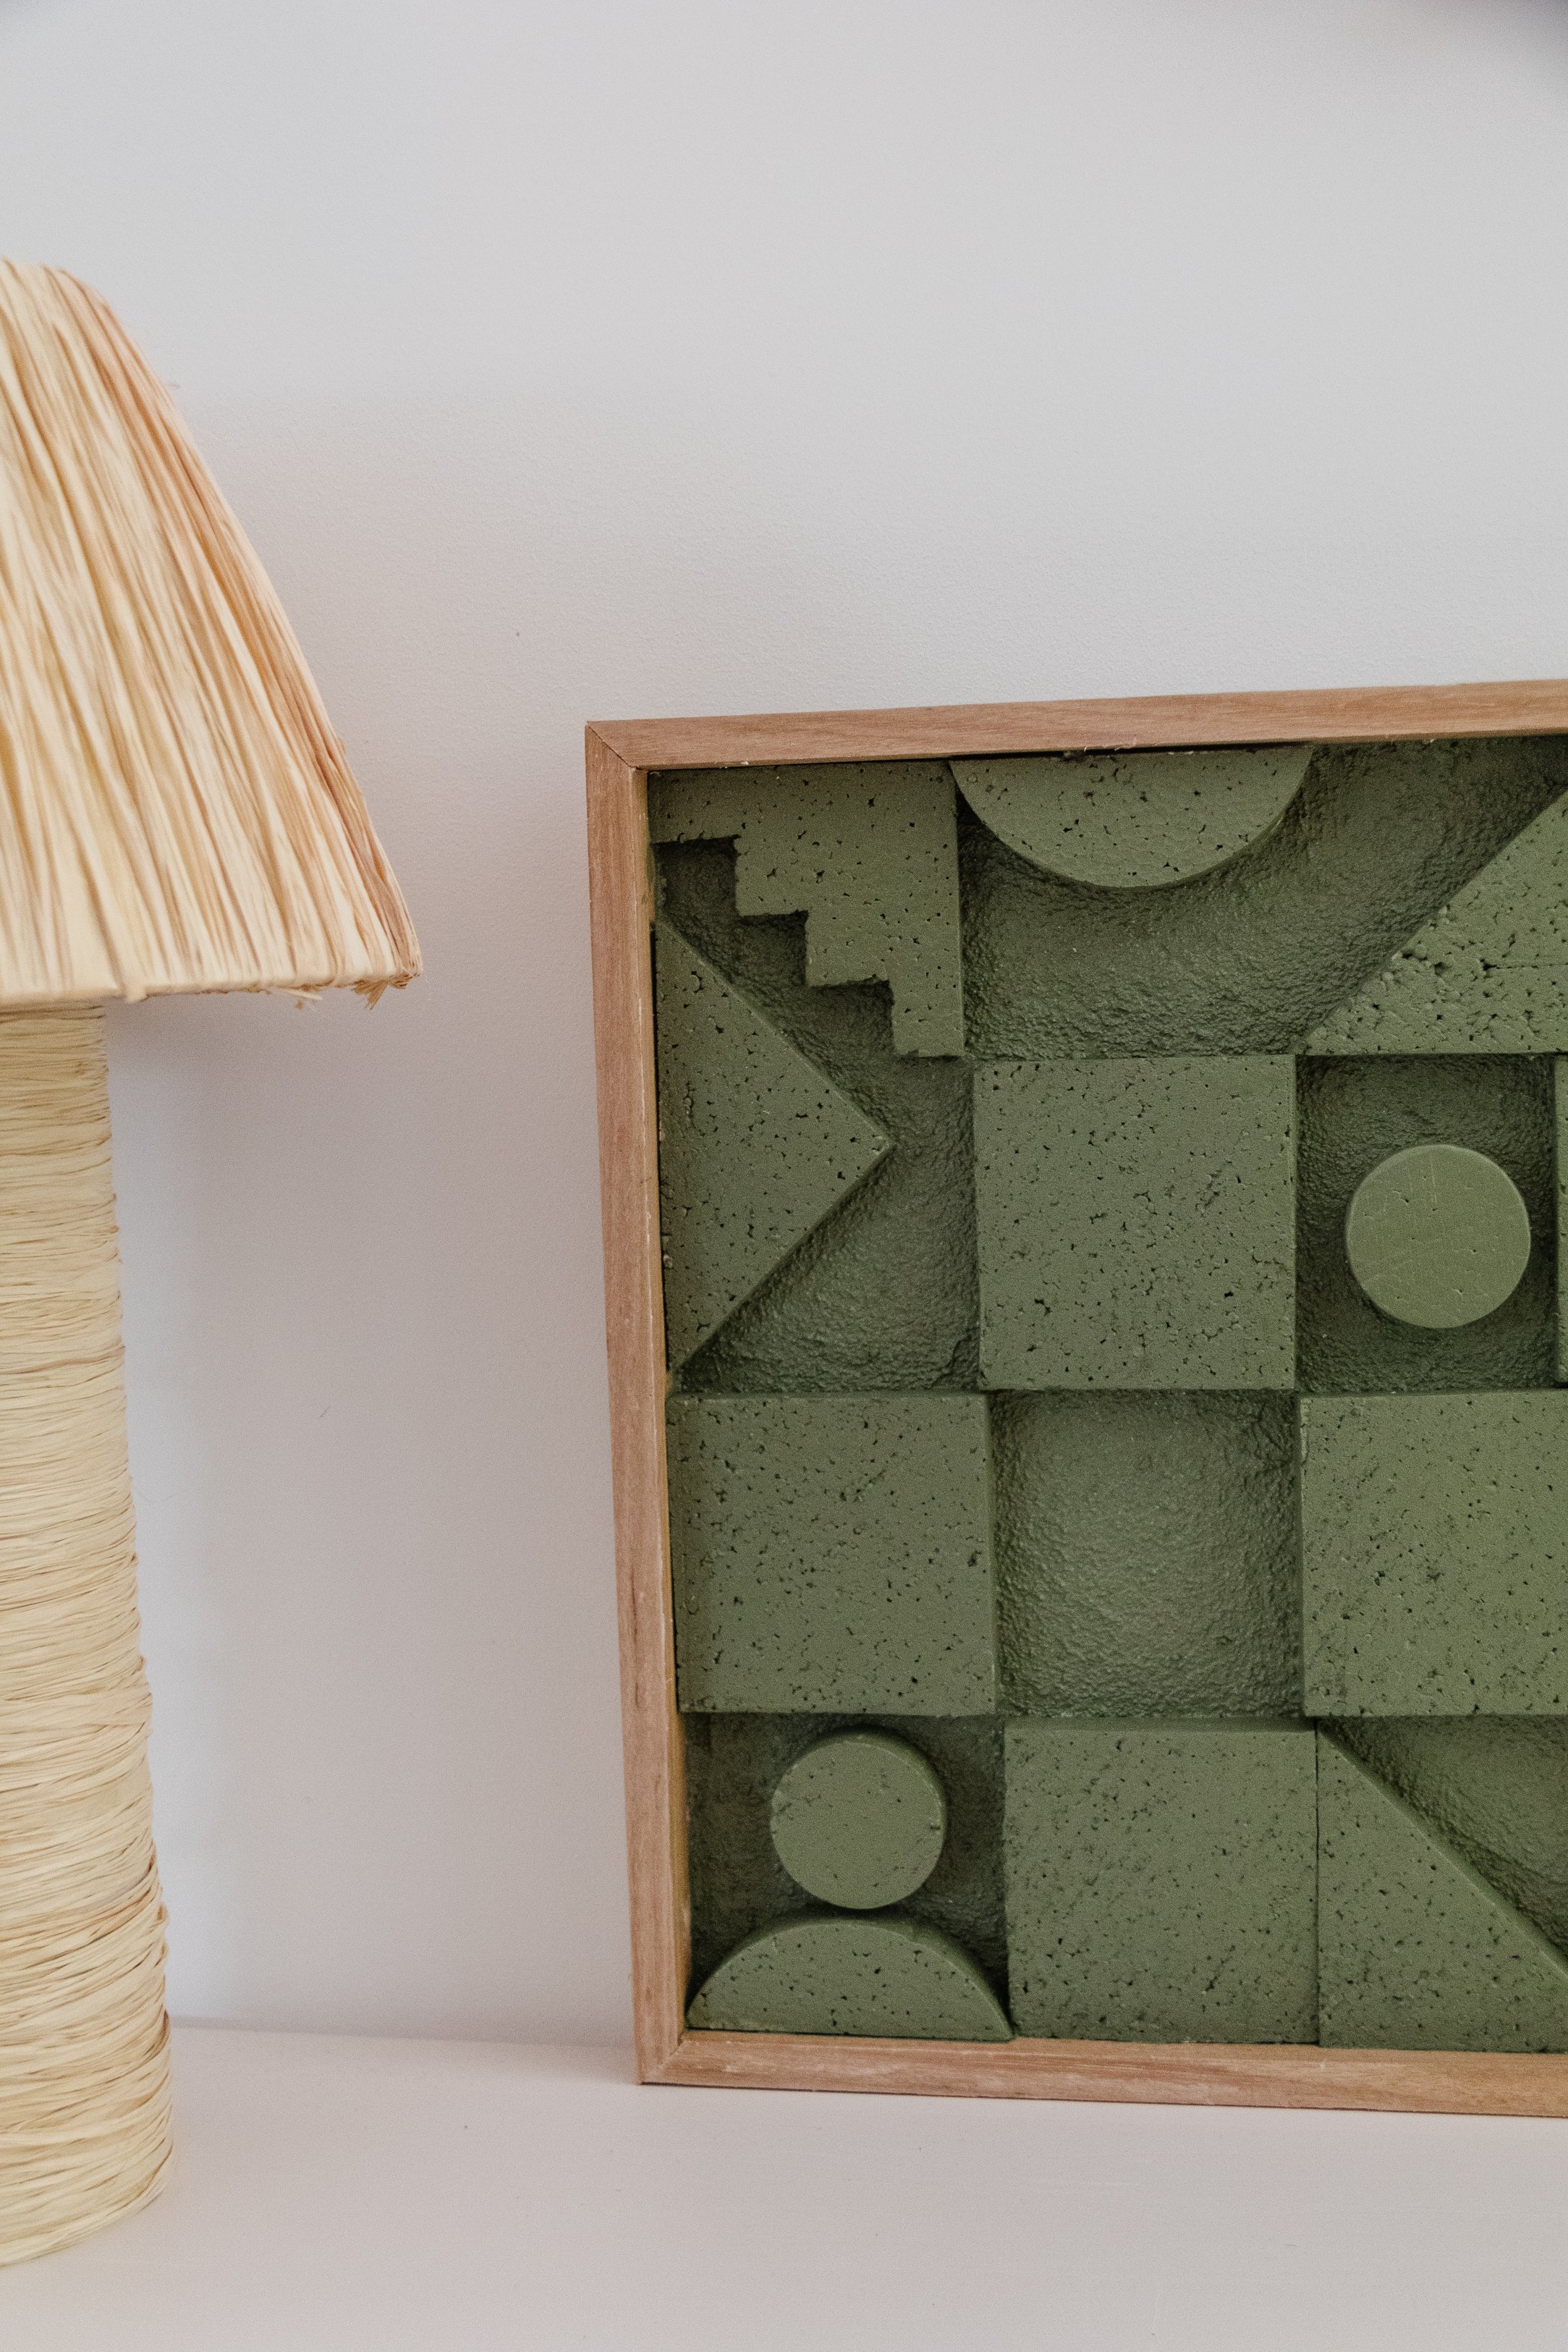
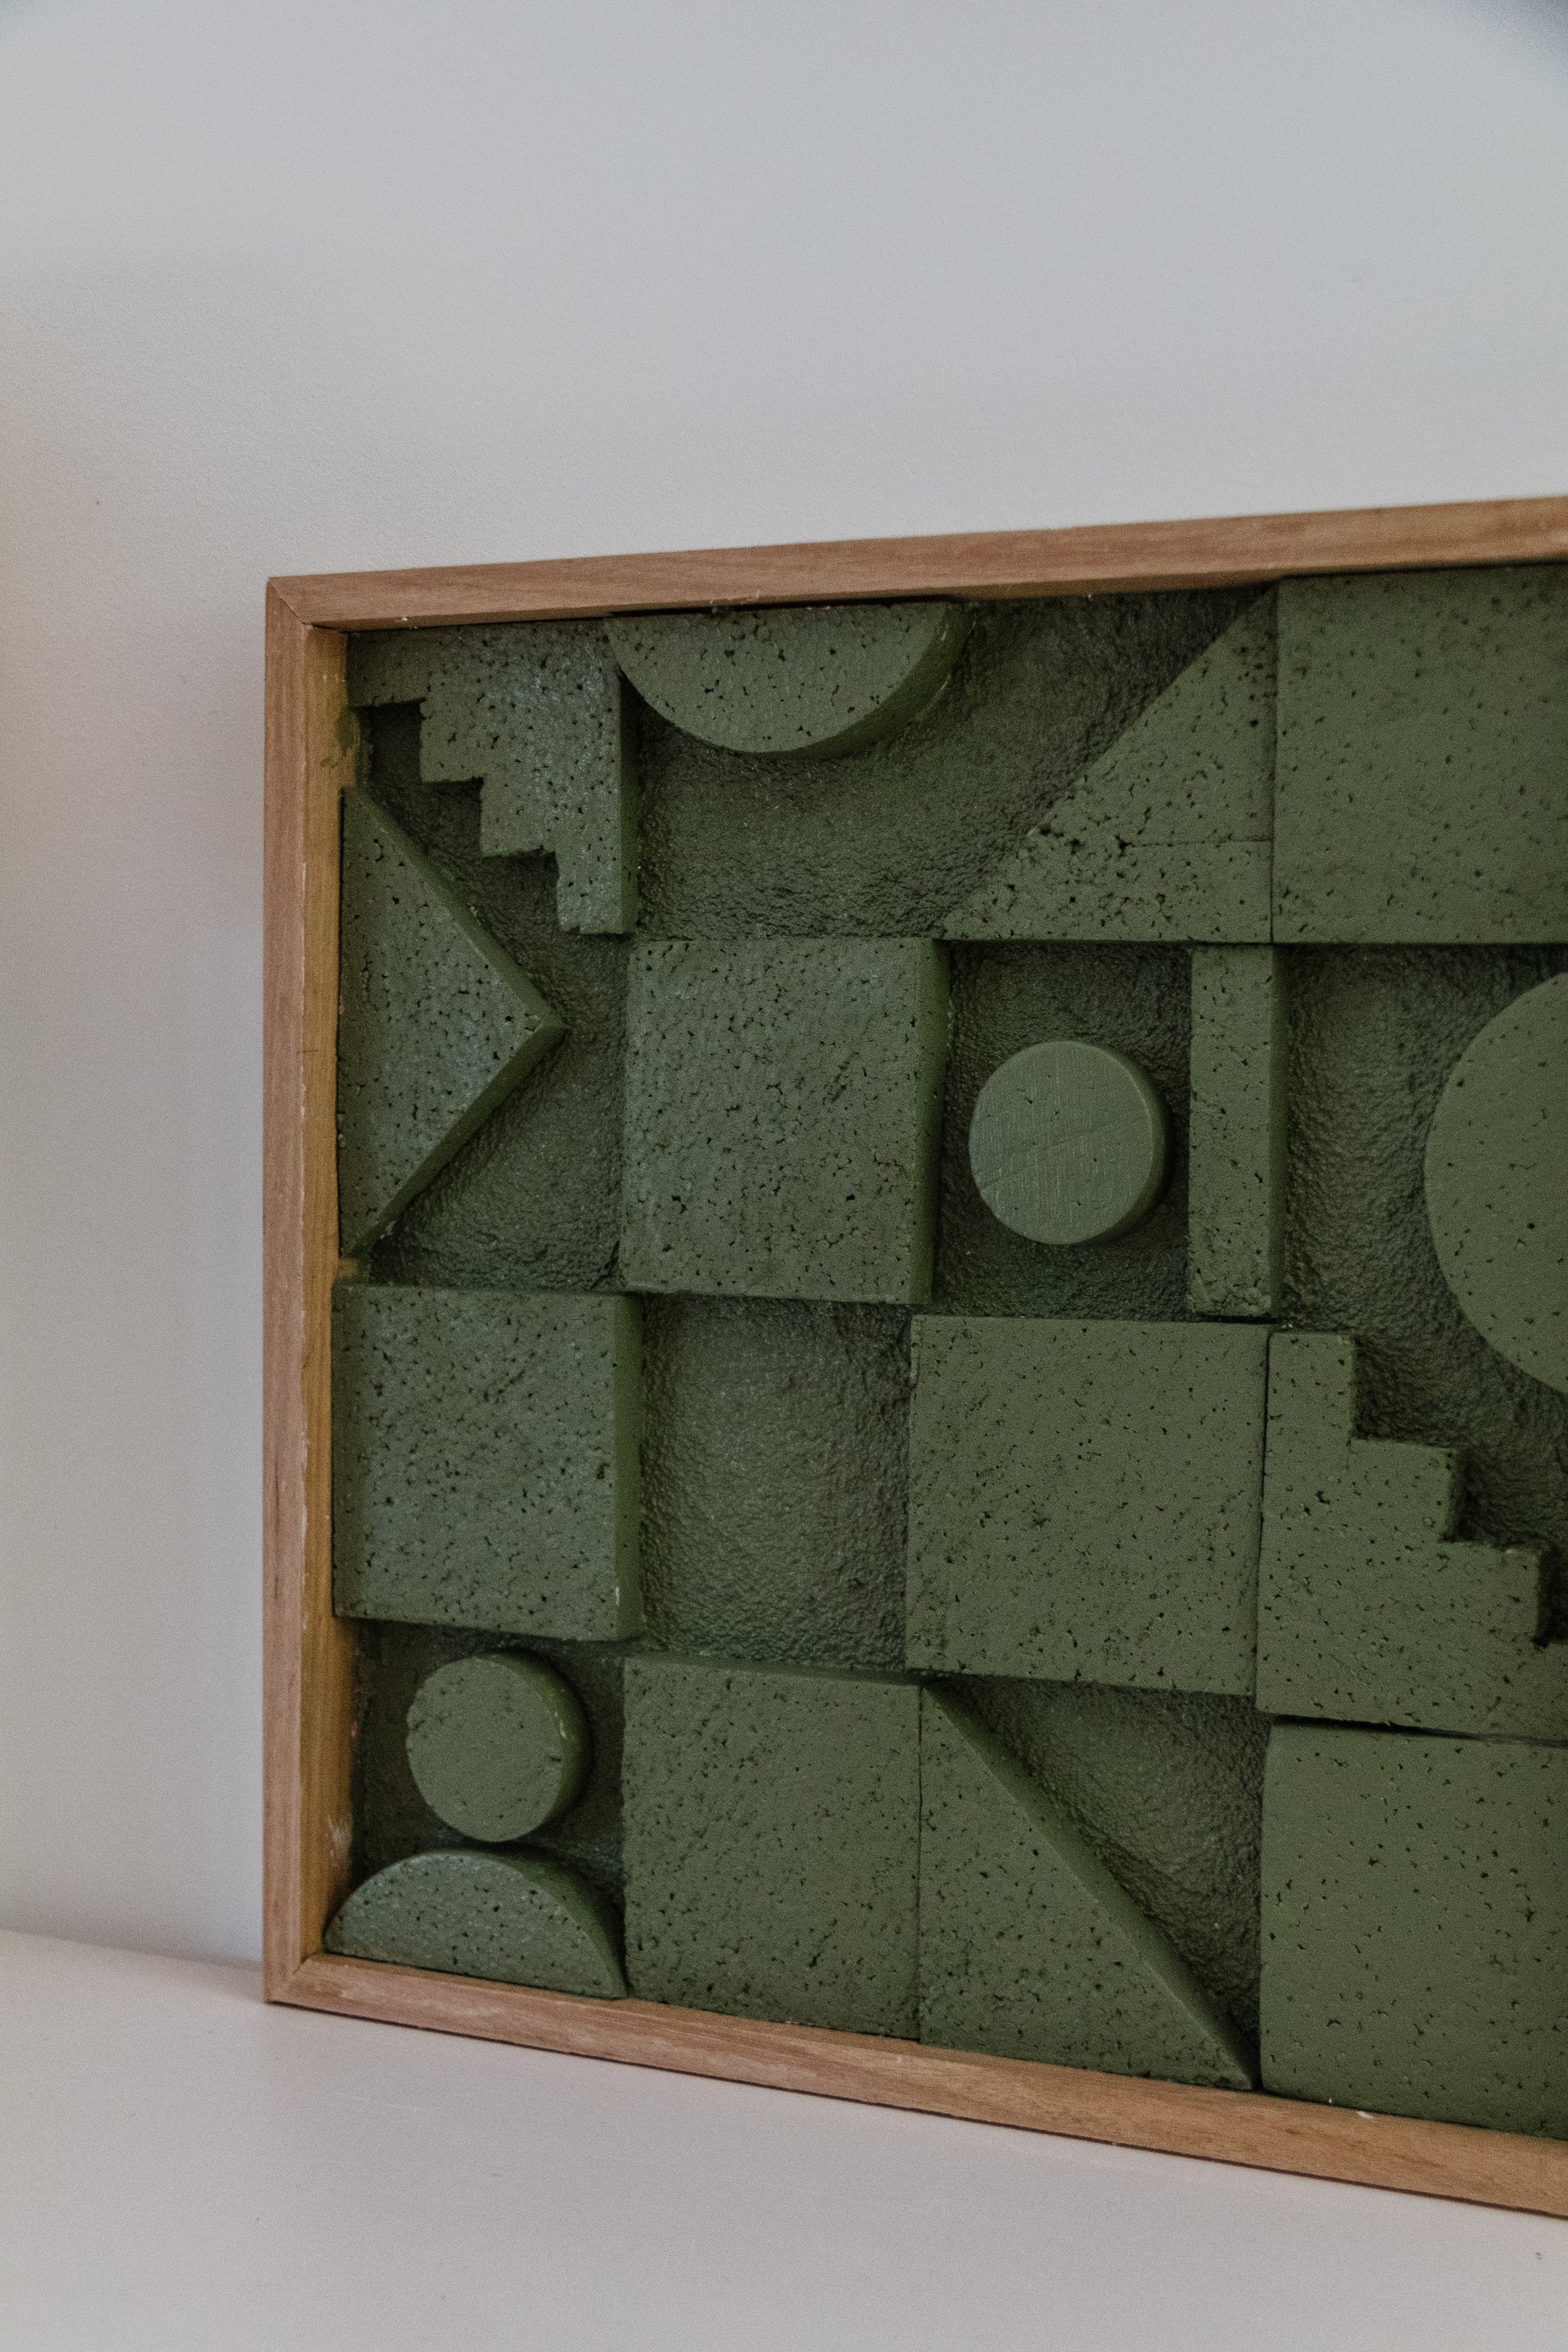
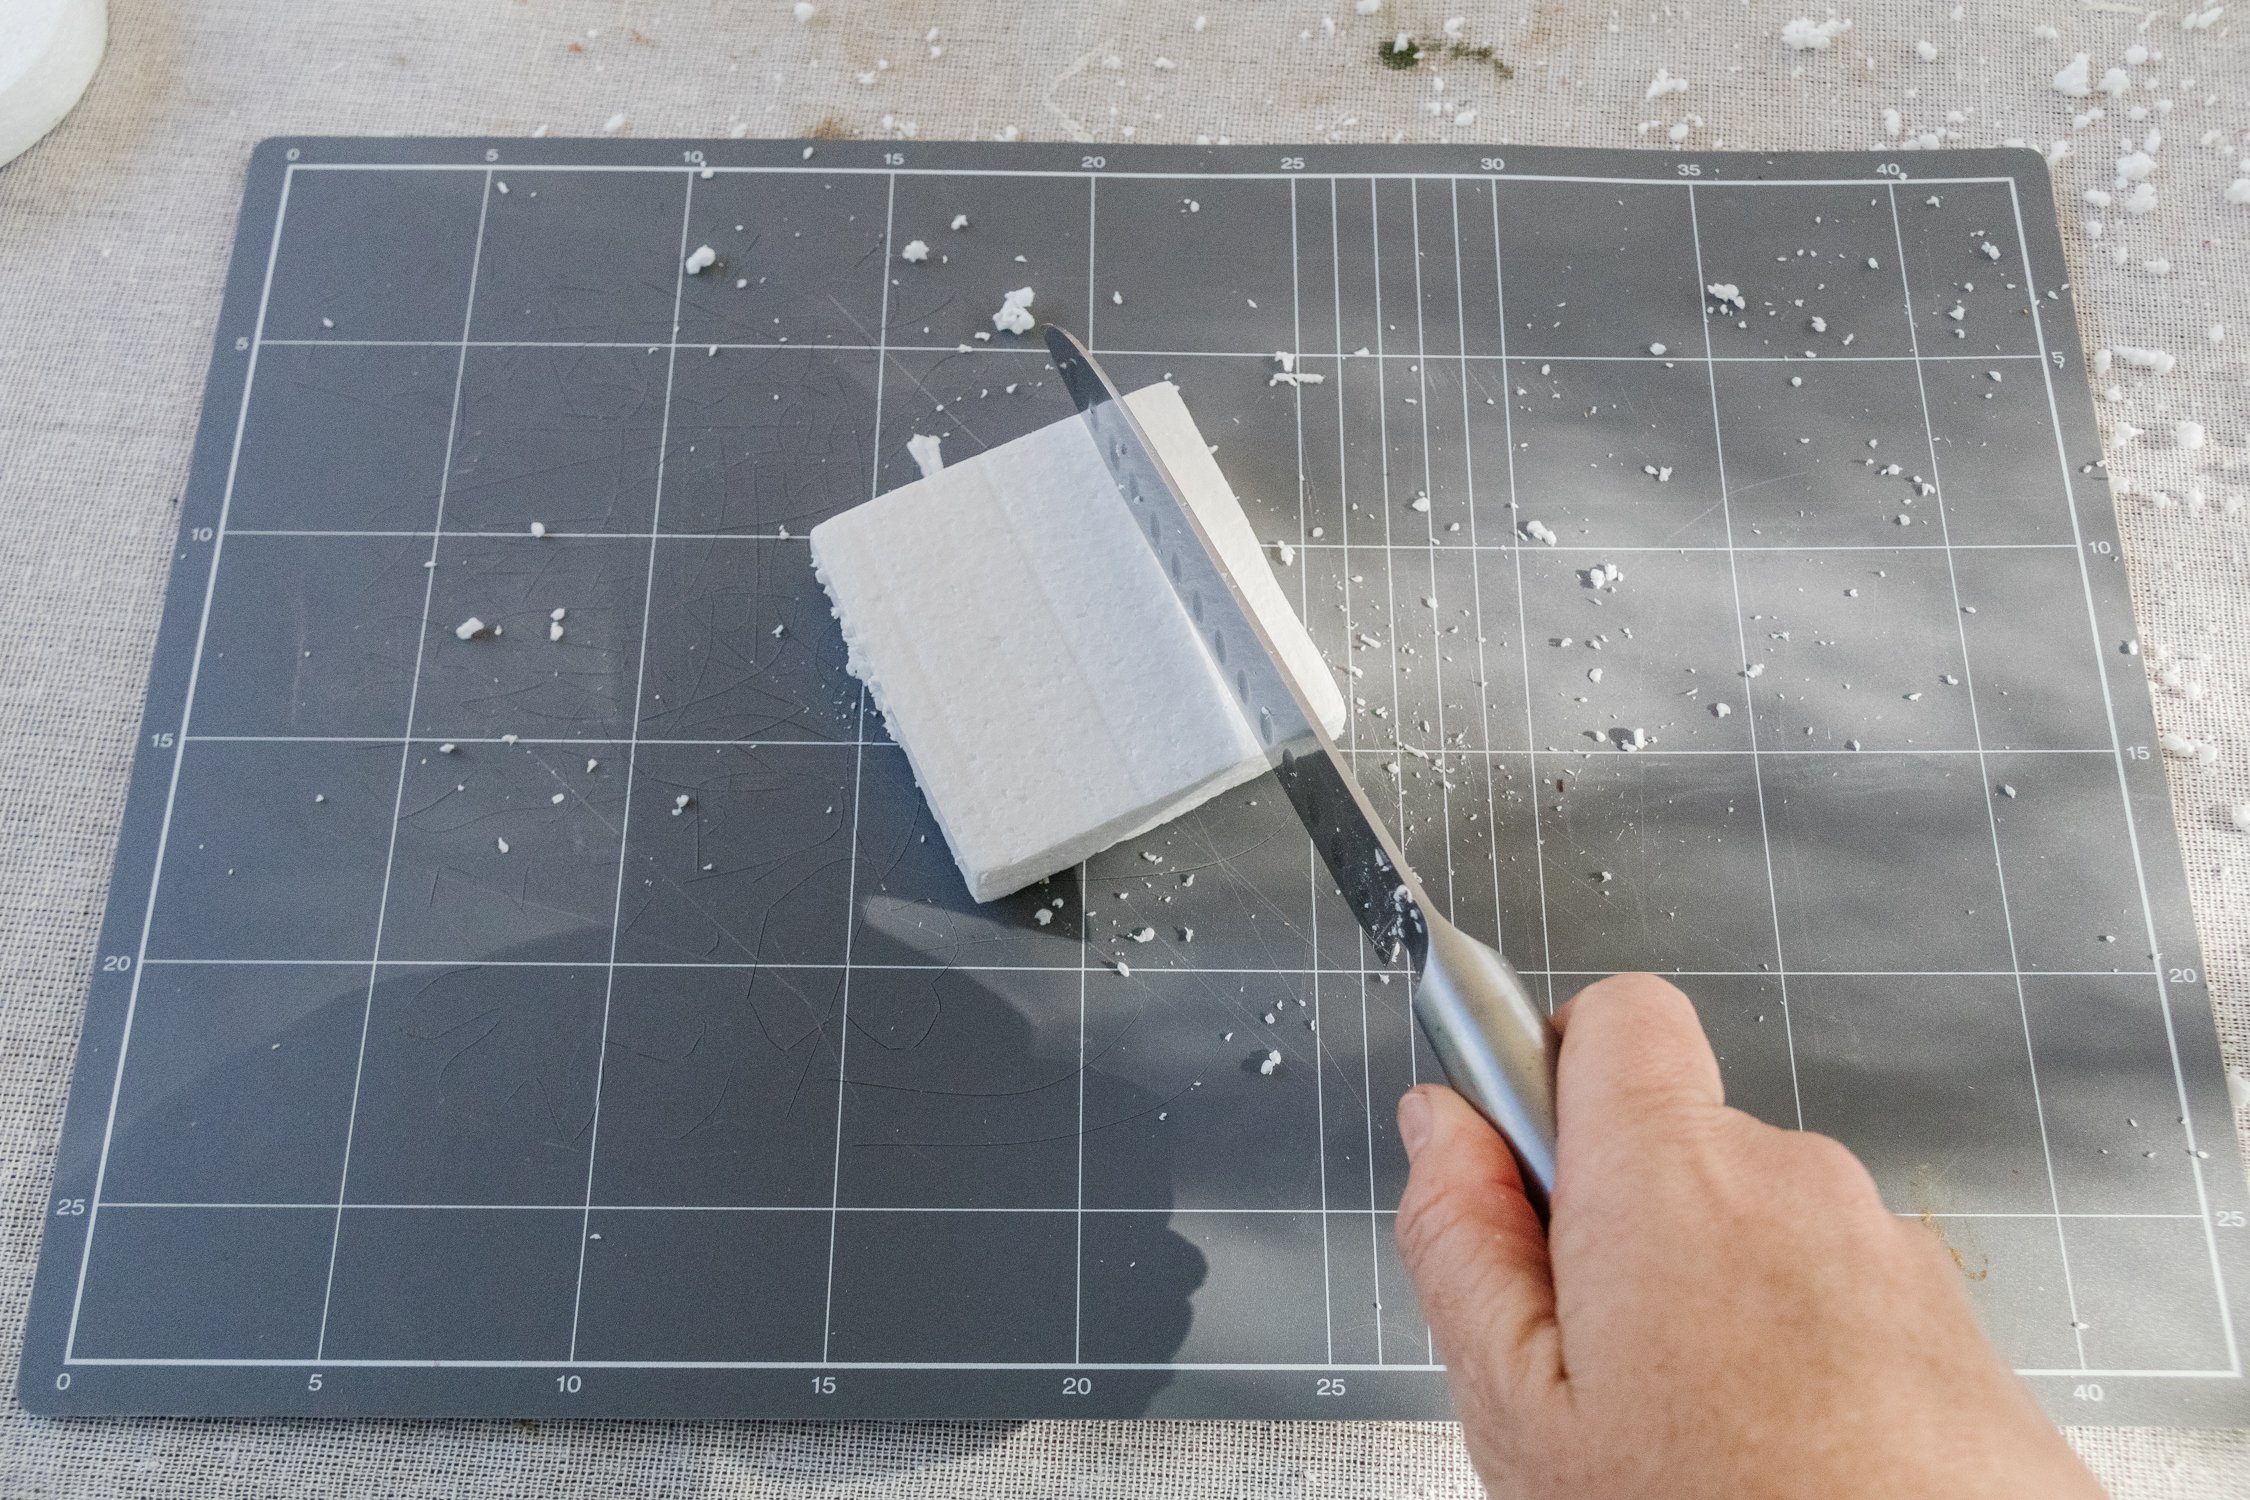
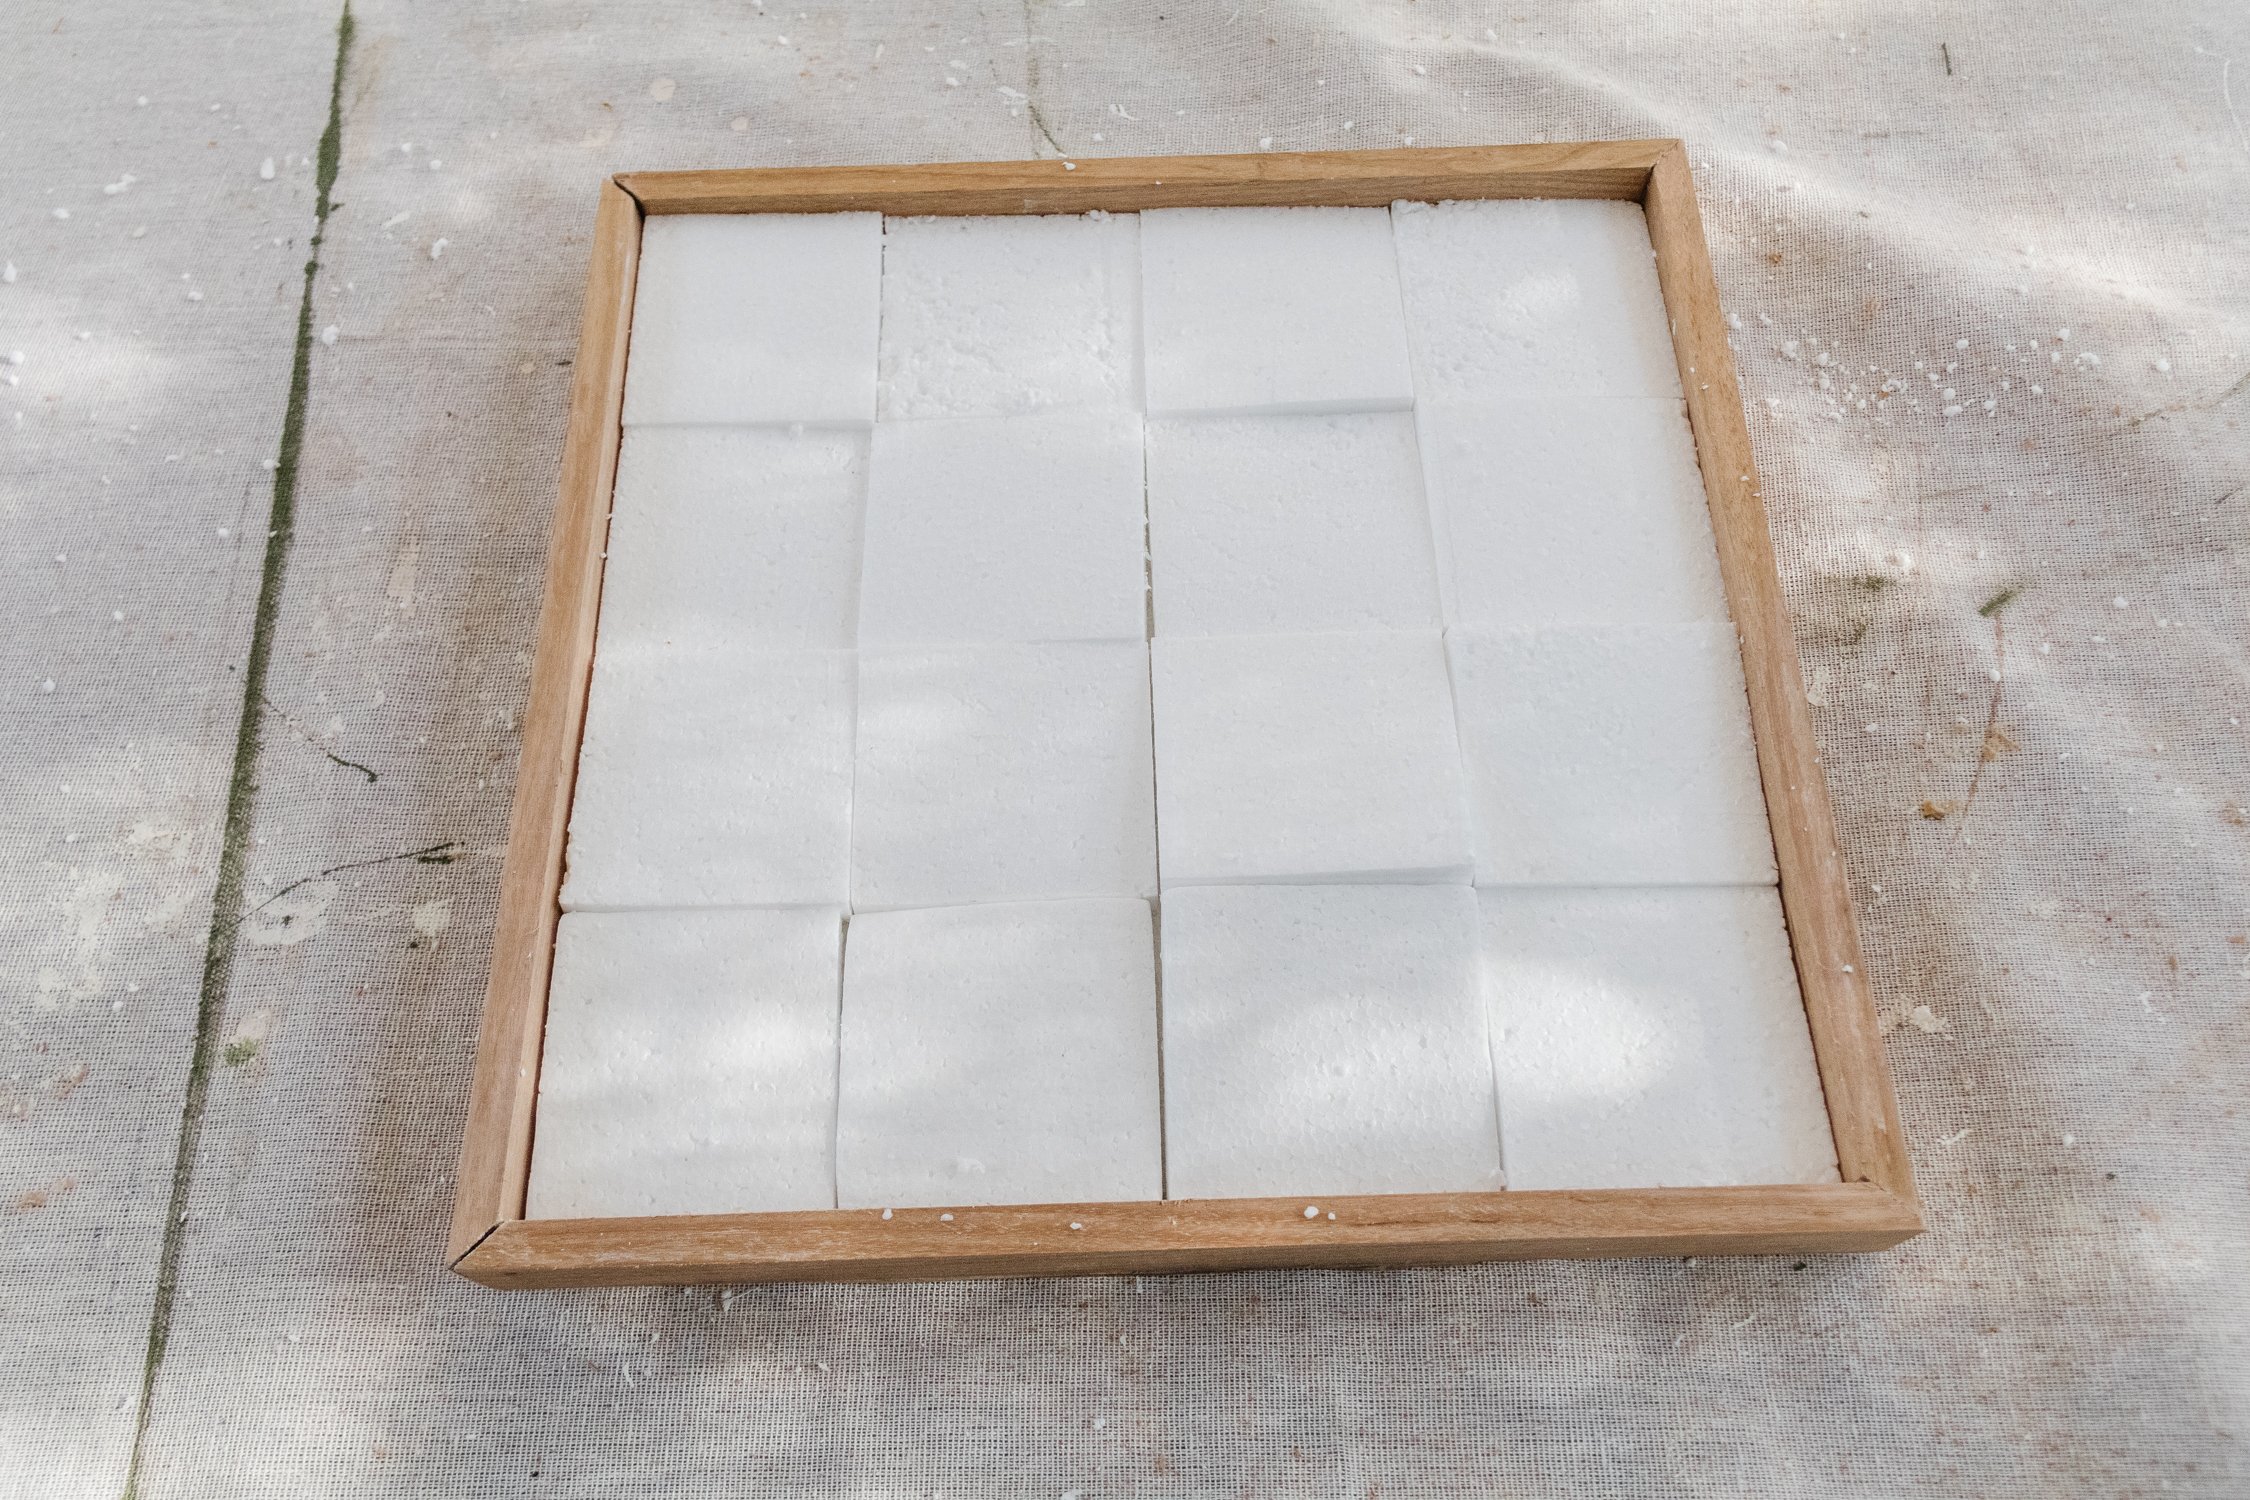
While the texture paint is drying, determine how many rows and columns of squares you would like by measure the width and length. I chose to have 4 x 4 rows/columns with 9cm x 9cm squares. Cut the squares as per your measurements using the foam polystyrene shapes and knife, and then cut the squares into various shapes. Feel free to leave one or more spots empty to create some negative space and get creative with your own shapes if you like. Play around with the shapes and ensure the positioning looks evenly weighted. When you are happy with the way the shapes look, glue the cut polystyrene shapes on top using Selley’s Hold Up glue (apply the glue to the back of each cut foam). Set aside to dry for 30 minutes.
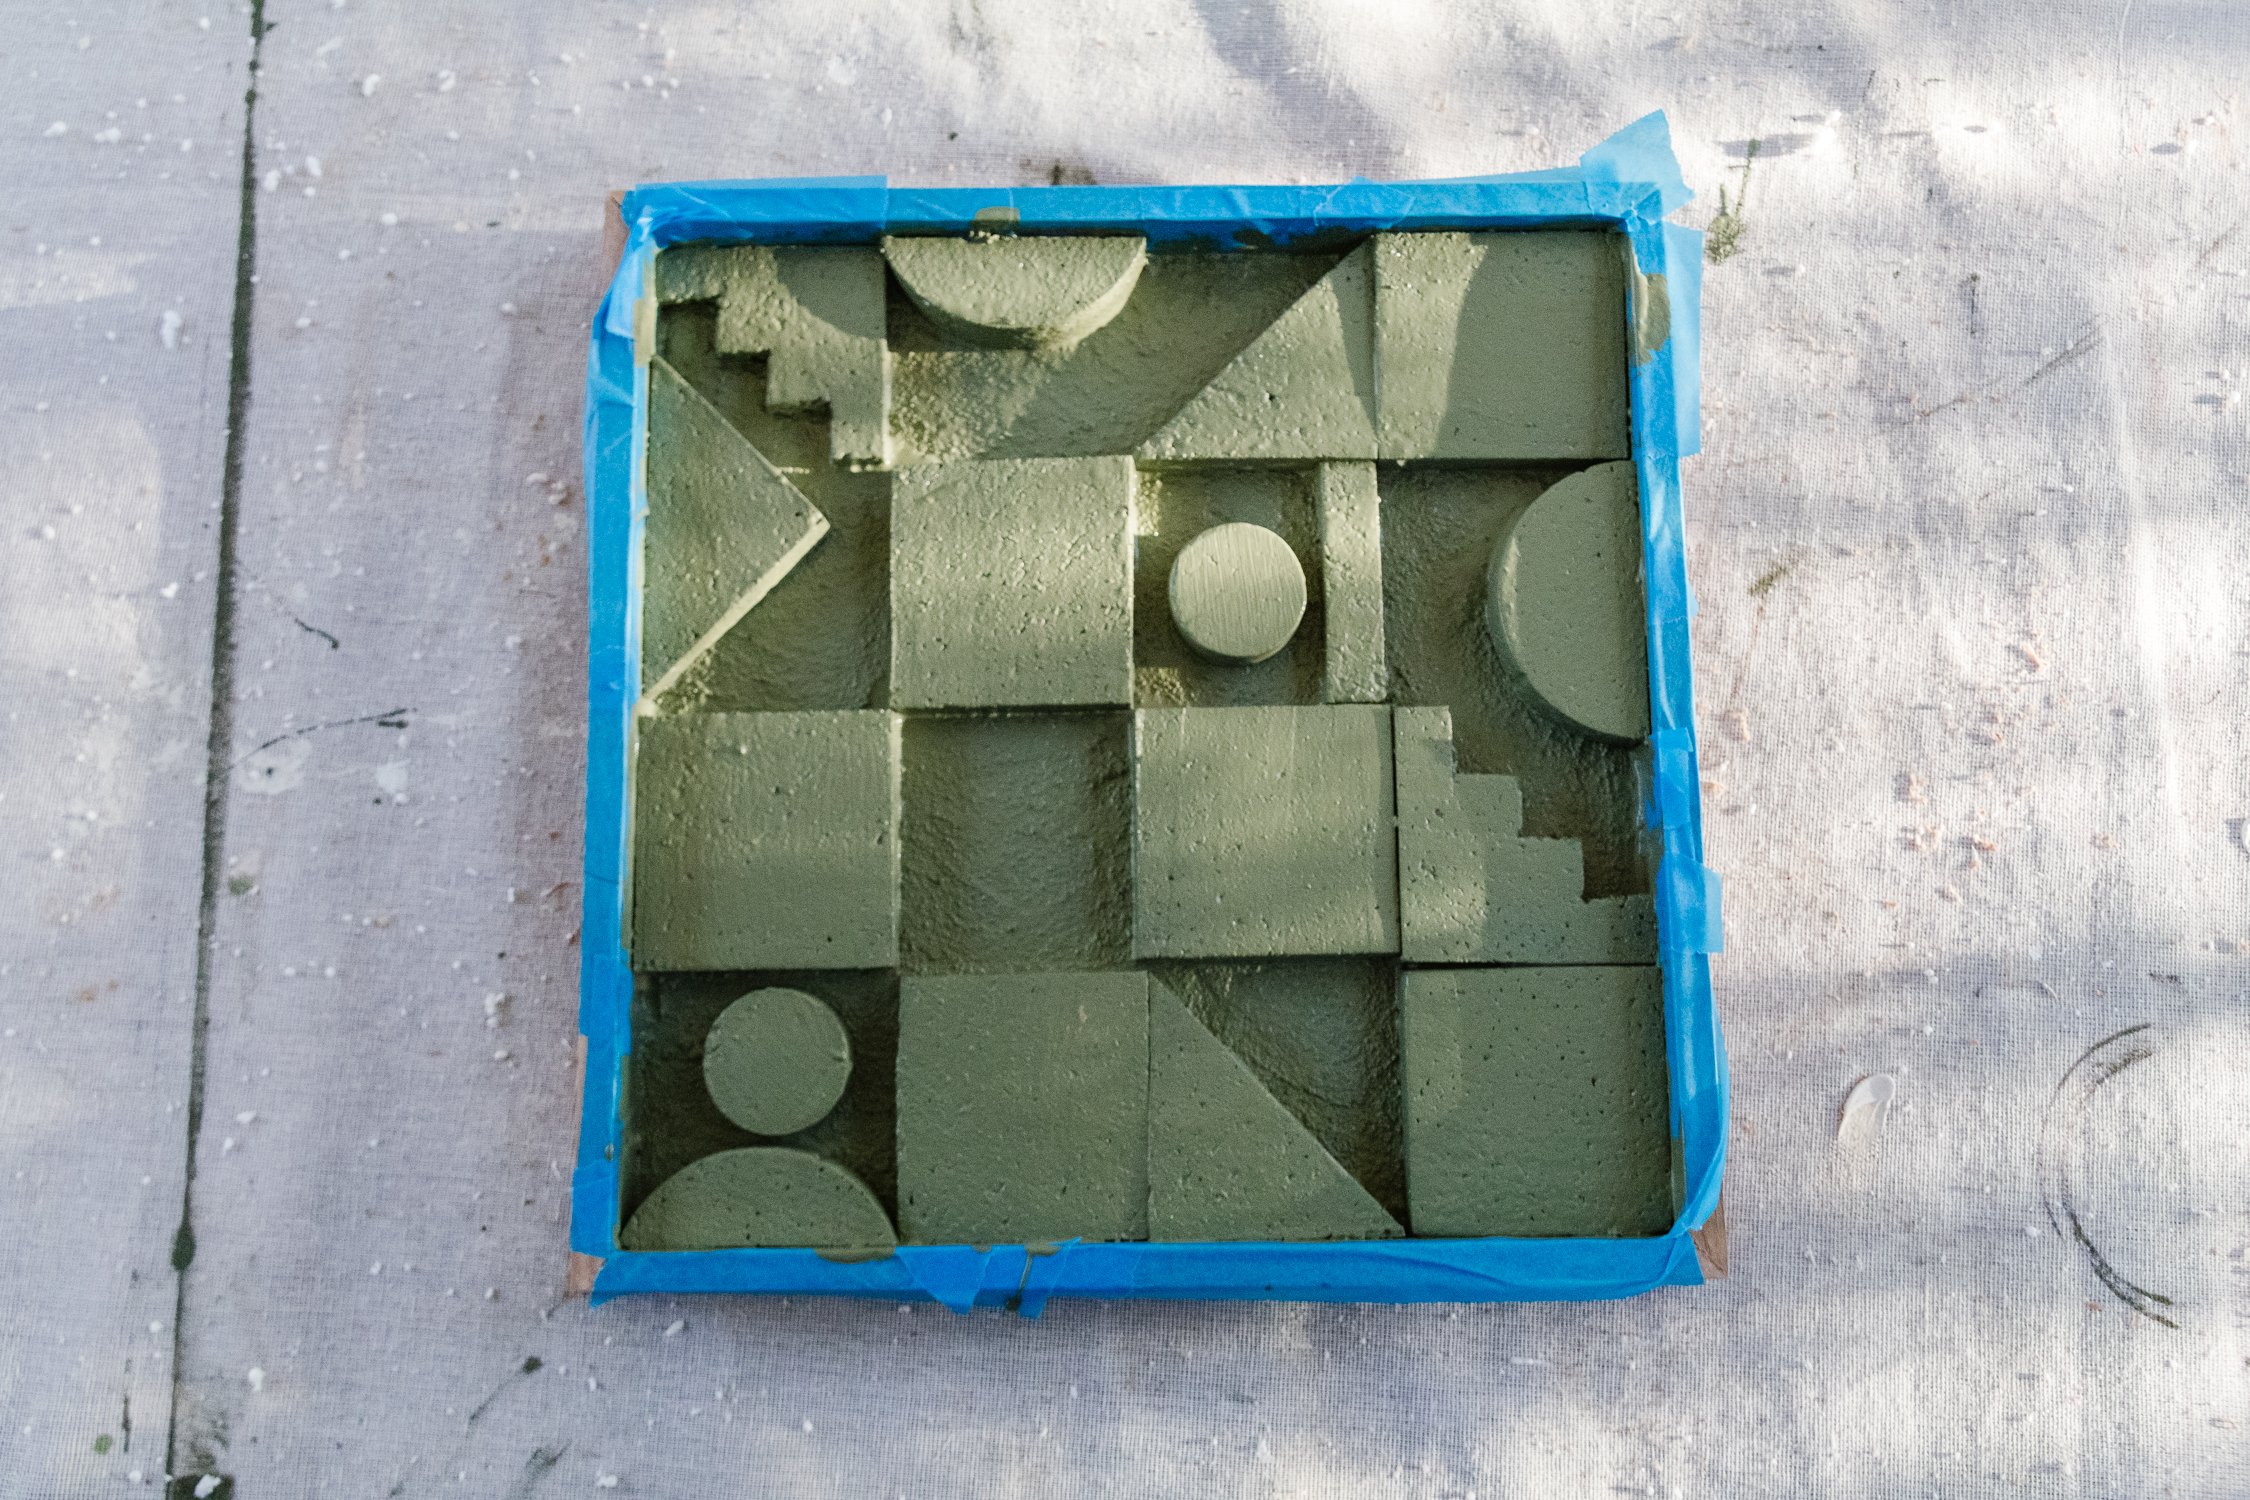
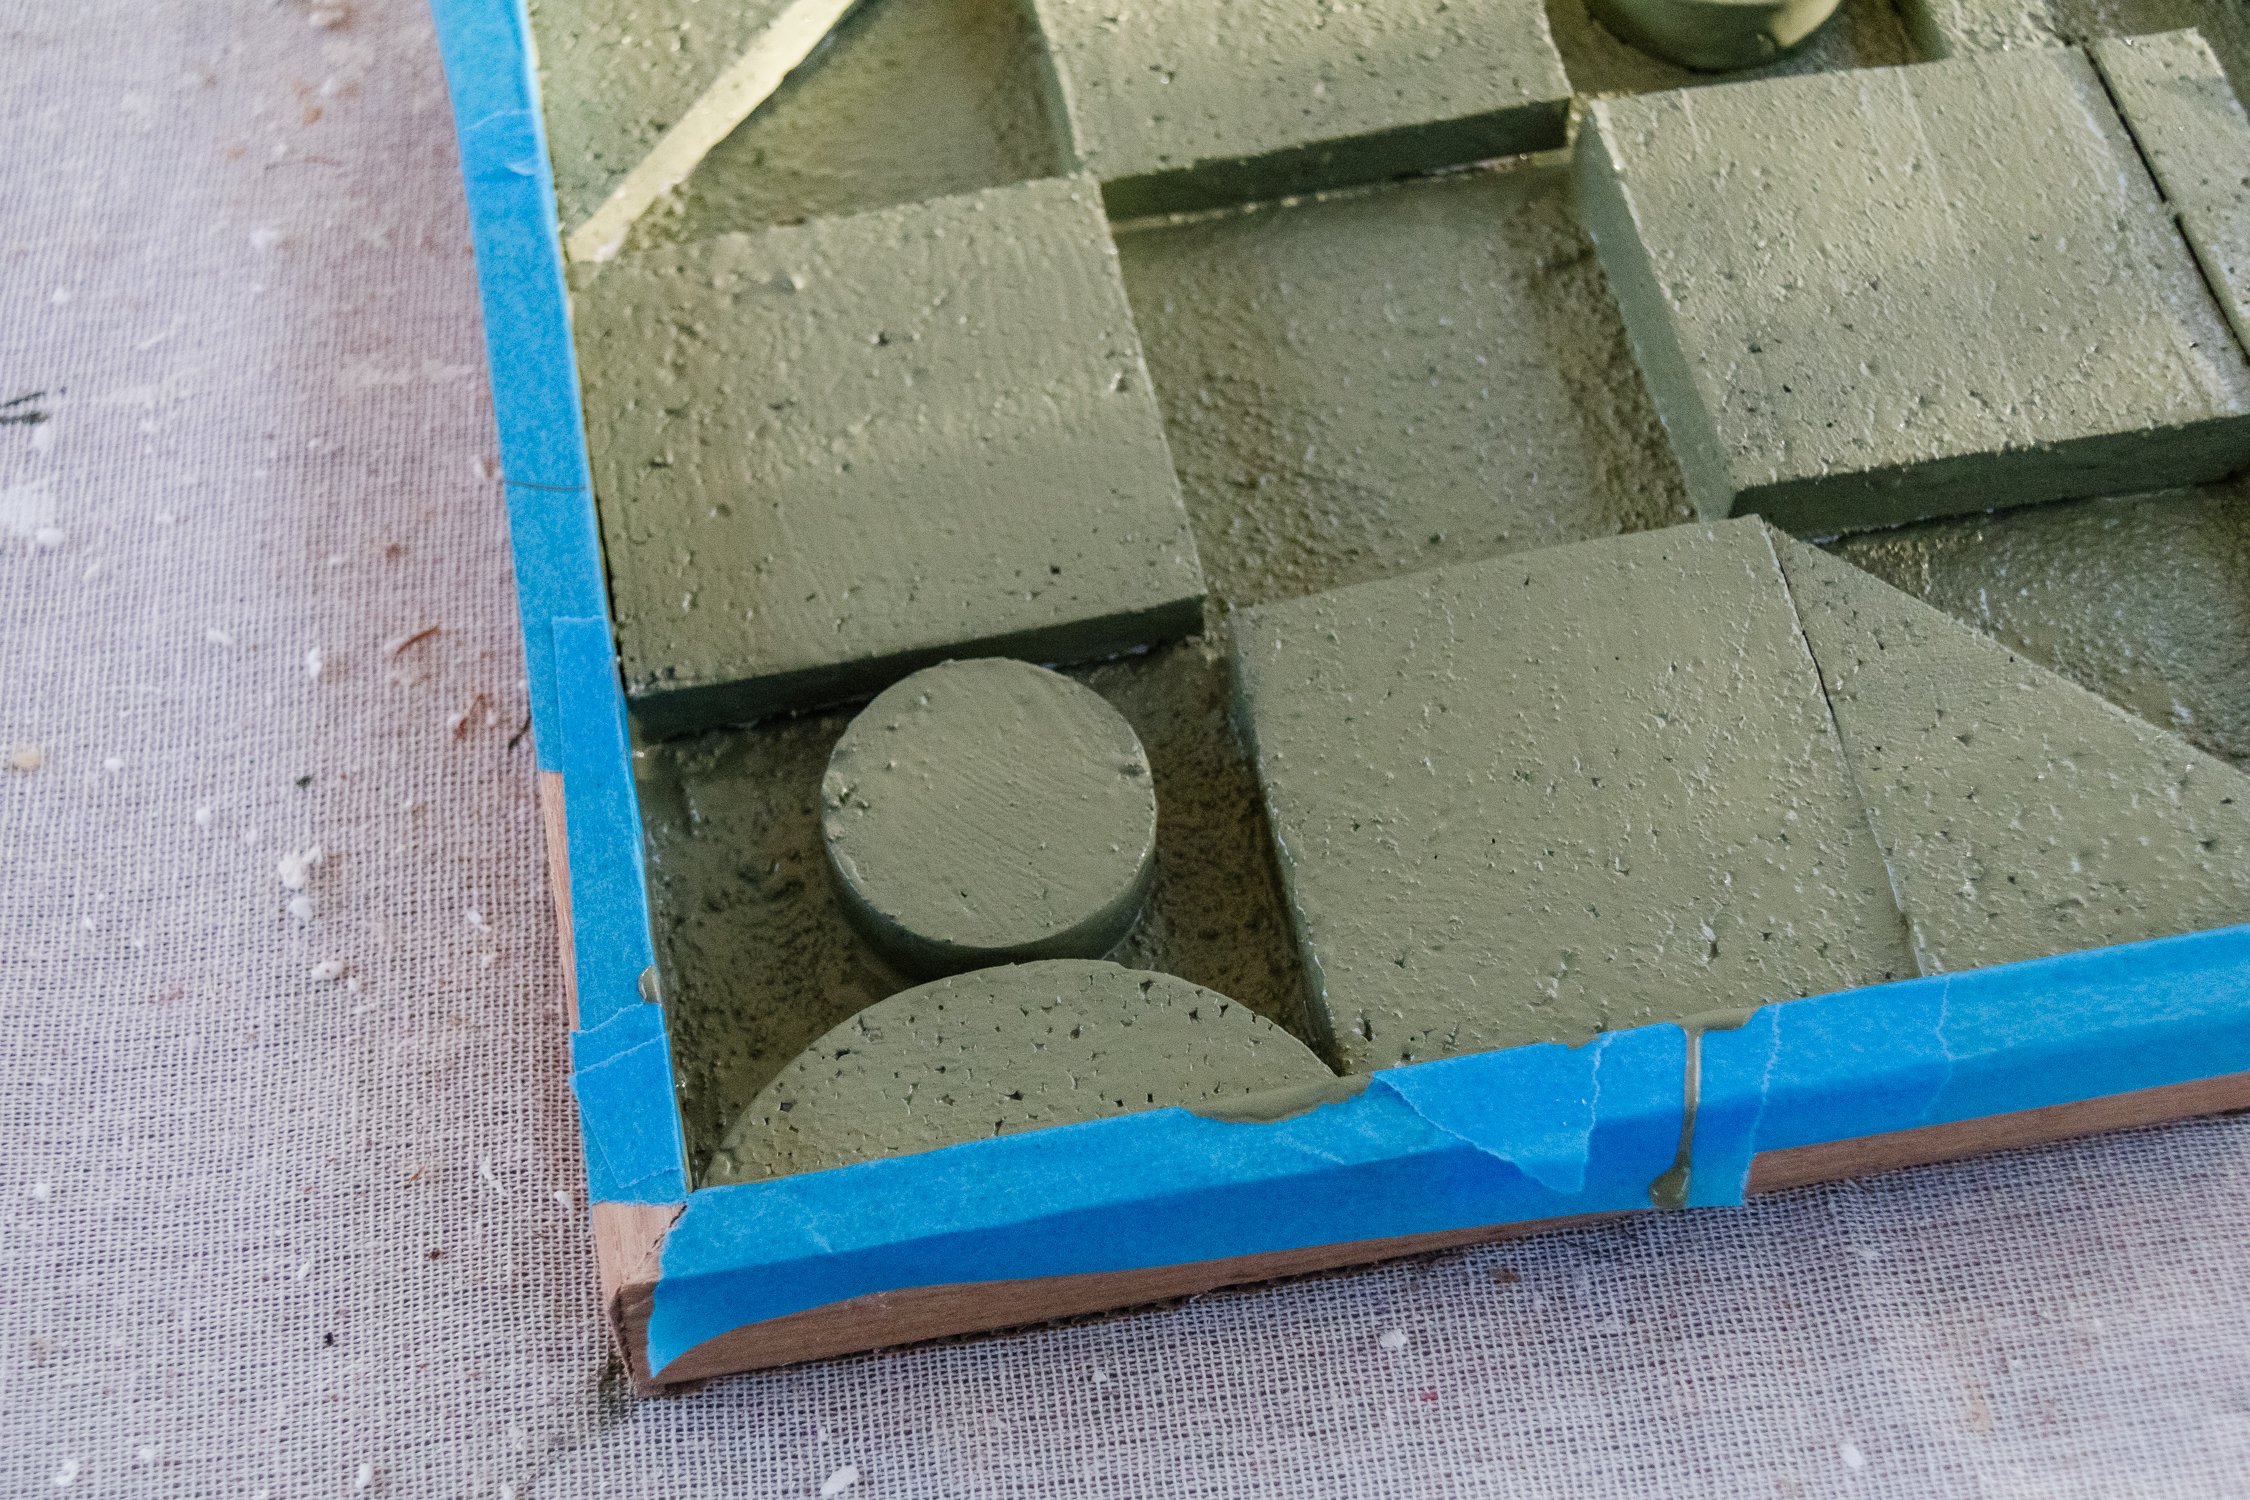
Apply painters tape around the inside edge of the frame so you don’t get any paint on the timber. Paint the relief art and set aside to dry. When the paint has dried, carefully flip the frame over. If you want to hang it on the wall, apply four double sided velcro strips onto the corners of the frame, peel the wall stickers off and position it on your wall. If you want to display it on a mantle, console table or shelf, you don’t need to worry about the picture hanging velcro strips.
Ta daaaa! Turning trash into treasure, what a moment!
I love being able to use materials I already have at home and upcycle them into something as beautiful as this Textured Relief Wall Art. It never ceases to amaze me what you can do with leftover materials! And make sure you check out Olka Studio and here too. Her work is absolutely beautiful and this project was inspired by her.