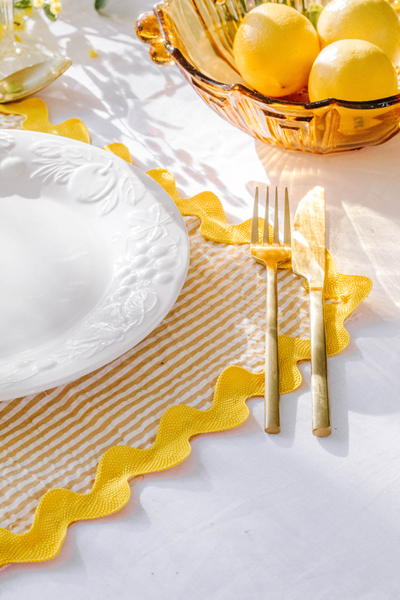
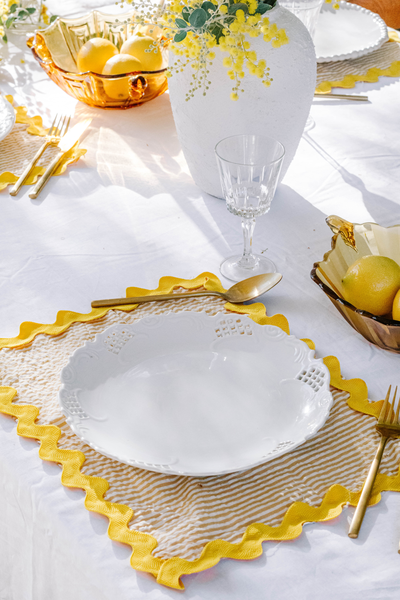
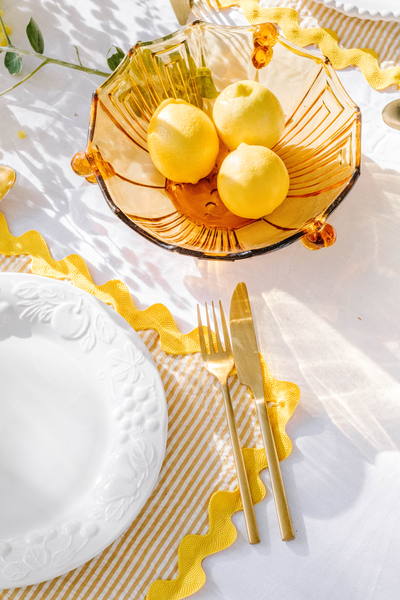
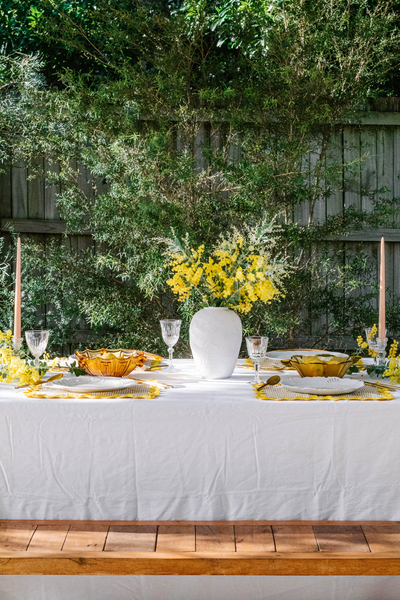
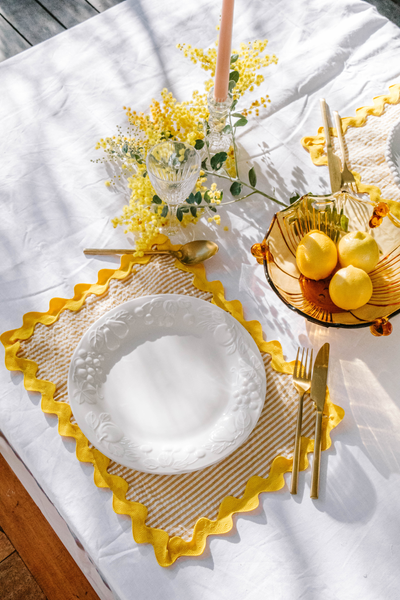
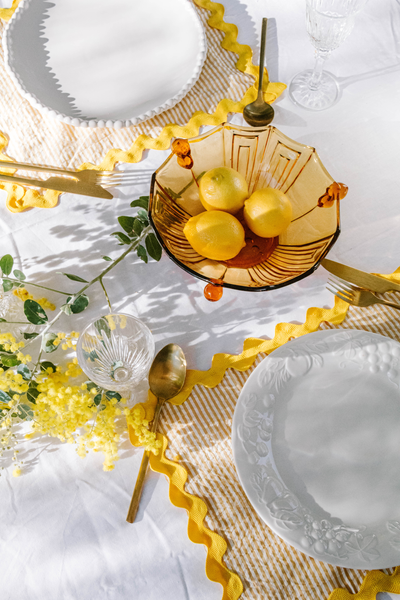
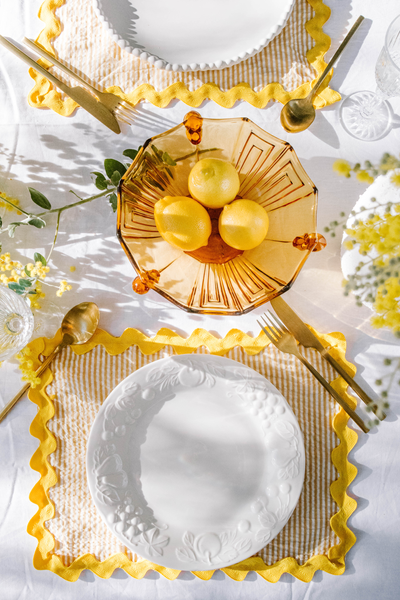
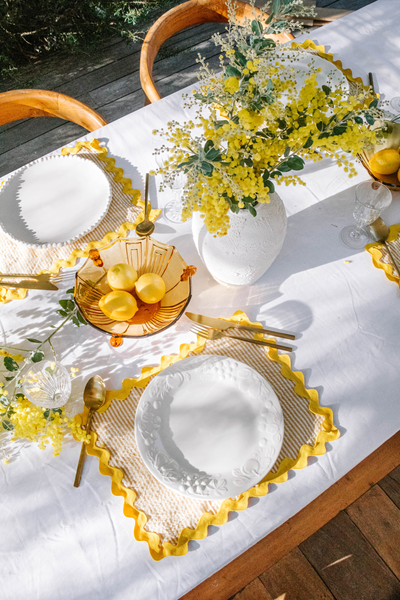
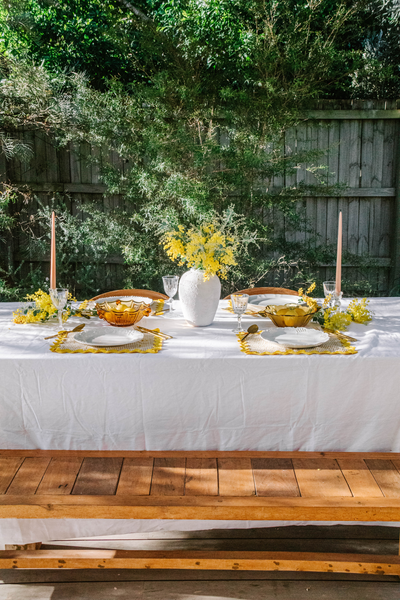
DIY Wavy Placemats
Coming to you with a new project for your home - the DIY Wavy Placemats. As you know, I love entertaining at home. The joy of gathering around a table with your loved ones is very special; it's these moments we'll look back on in years to come. And knowing that these memories will be created around a table, I've been looking to create beautiful home DIYs that elevate the everyday. Styling a beautiful table is about creating an experience that looks beautiful and feels comfortable, while using what you have at home, mixing old with new, making something and adding flowers and foraged greenery to make the table aesthetic truly cosy and comforting. I've been having a bit of a wavy moment (have you seen my DIY Wavy Chubby Side Table and my DIY Wavy Mirror yet?) and wanted to create my own DIY Wavy Placemats. Read on to learn how find out how I did it. I think you may even find a couple of surprises in here too... Hint: This project is so easy!

Materials
To make four Wavy Placemats, you will need the following:
1m x 1m cotton or linen fabric
Scissors
4 x 2m jumbo rick rack trim from Spotlight
Cotton thread
Sewing needle
Fabric glue from Spotlight.
You can use fabric glue instead of sewing the trim onto the fabric. If you do this, after 10 or so washes you will most likely need to re-glue the trim back onto the fabric. The choice is yours!
How To
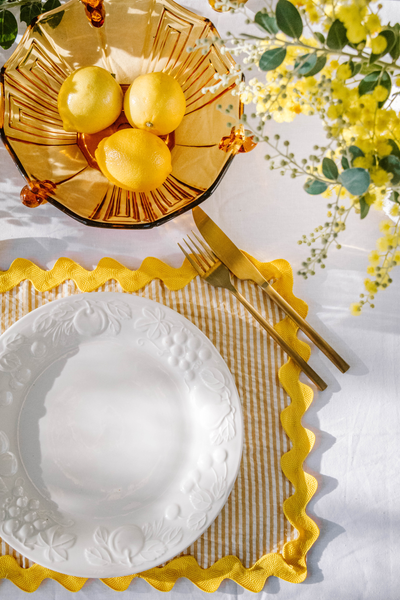
The first step is to cut your placemats to size. The measurements are 50cm width by 40cm height.
Place the jumbo rick rack trim around the edge of the placemat. Leave at least 3cm of rick rack trim hanging over the edge of one corner - this is so you can fold and either sew or glue the ends together and underneath the placement.
If you are using cotton thread, sew the trim onto the edges of the placemat by hand or with a sewing machine. Don't cut off the excess of rick rack trim.
If you are using fabric glue, work in sections by applying glue down one side of the placemat and firmly press the rick rack trim on top. Repeat until the rick rack trim is positioned around the four sides of the placemat. Set aside to dry. Don't cut off the excess of rick rack trim.
Fold the ends together and place them underneath the placement. Either sew or glue the ends underneath the placemat.
Tip: Watch how I made these DIY Wavy Placemats here.
And that's it!
These Wavy Placemats are a fun and easy DIY for your home, and they make your table look absolutely gorgeous! If you use the fabric glue or a sewing machine, it will be a lot faster to make the placemats compared to hand sewing. If you are hand sewing, take your time and listen to a podcast, or watch your favourite show on Netflix. The fabric and rick rack trim combinations are limitless! Next up? I've got some pink fabric and red rick rack trim, and I can't wait to make these. I hope you enjoy this project and if you make them, remember to show me over on Instagram. Send me a DM or tag me in your photos. I love seeing what you make!