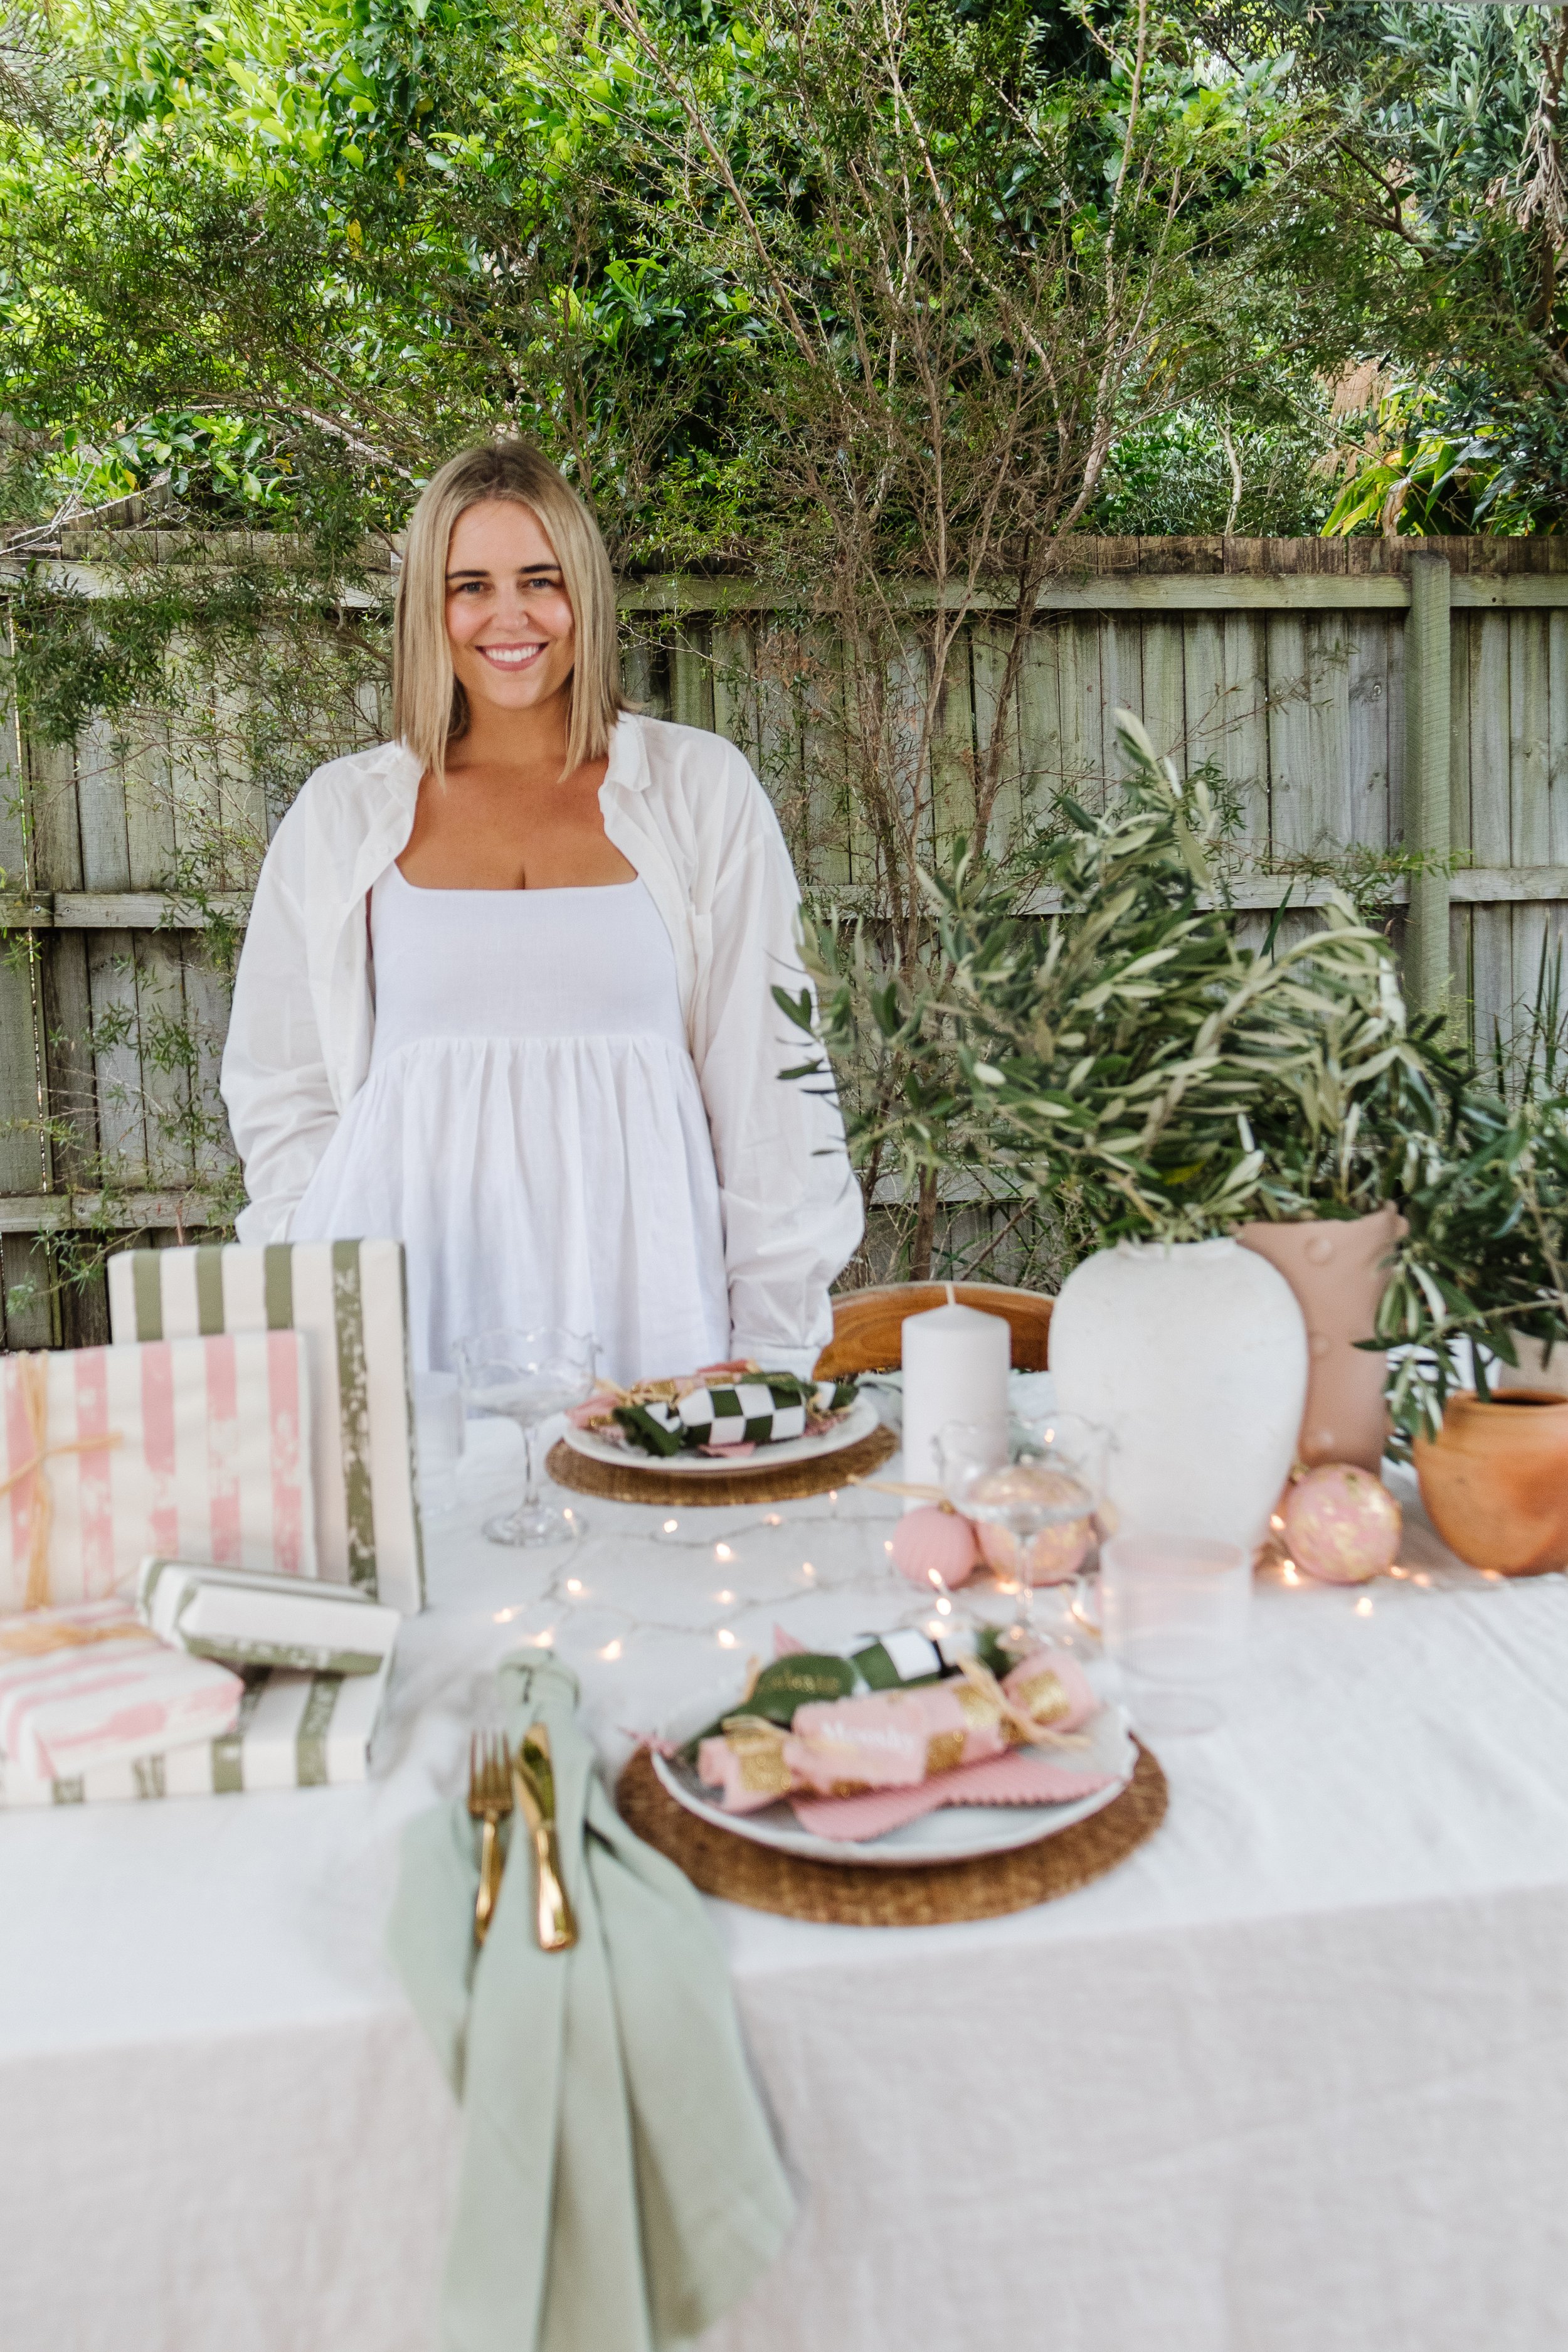
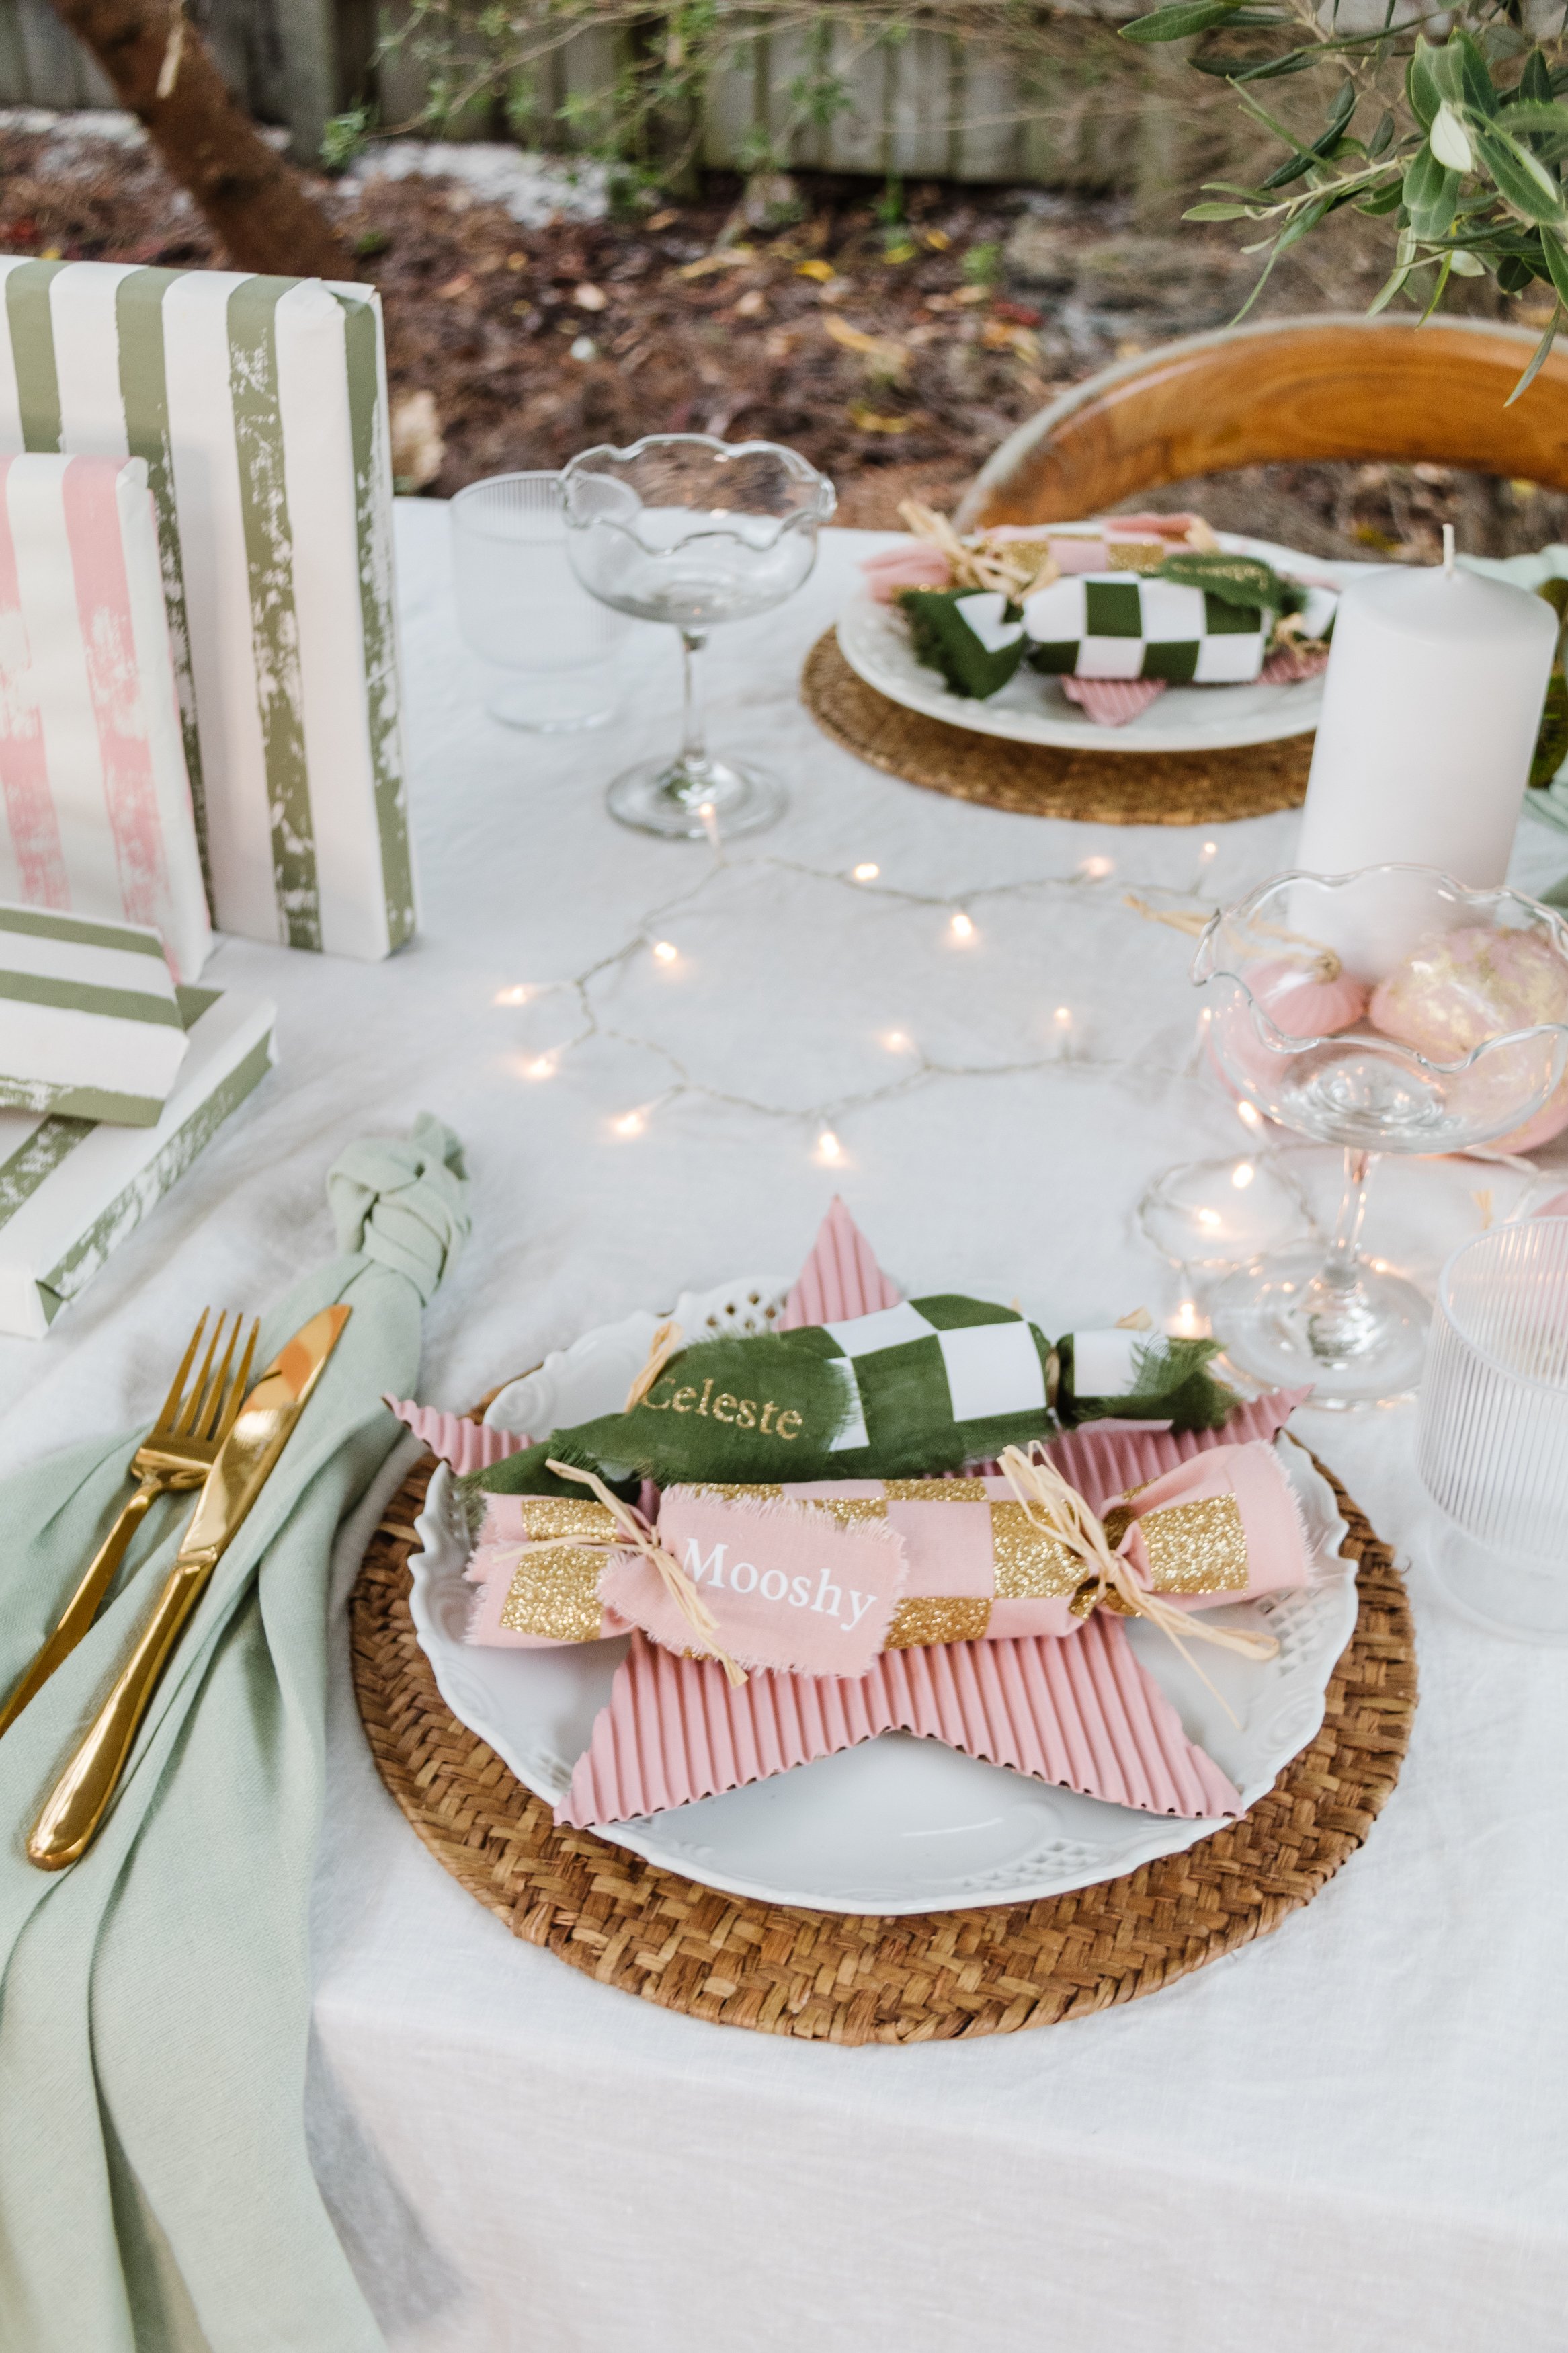
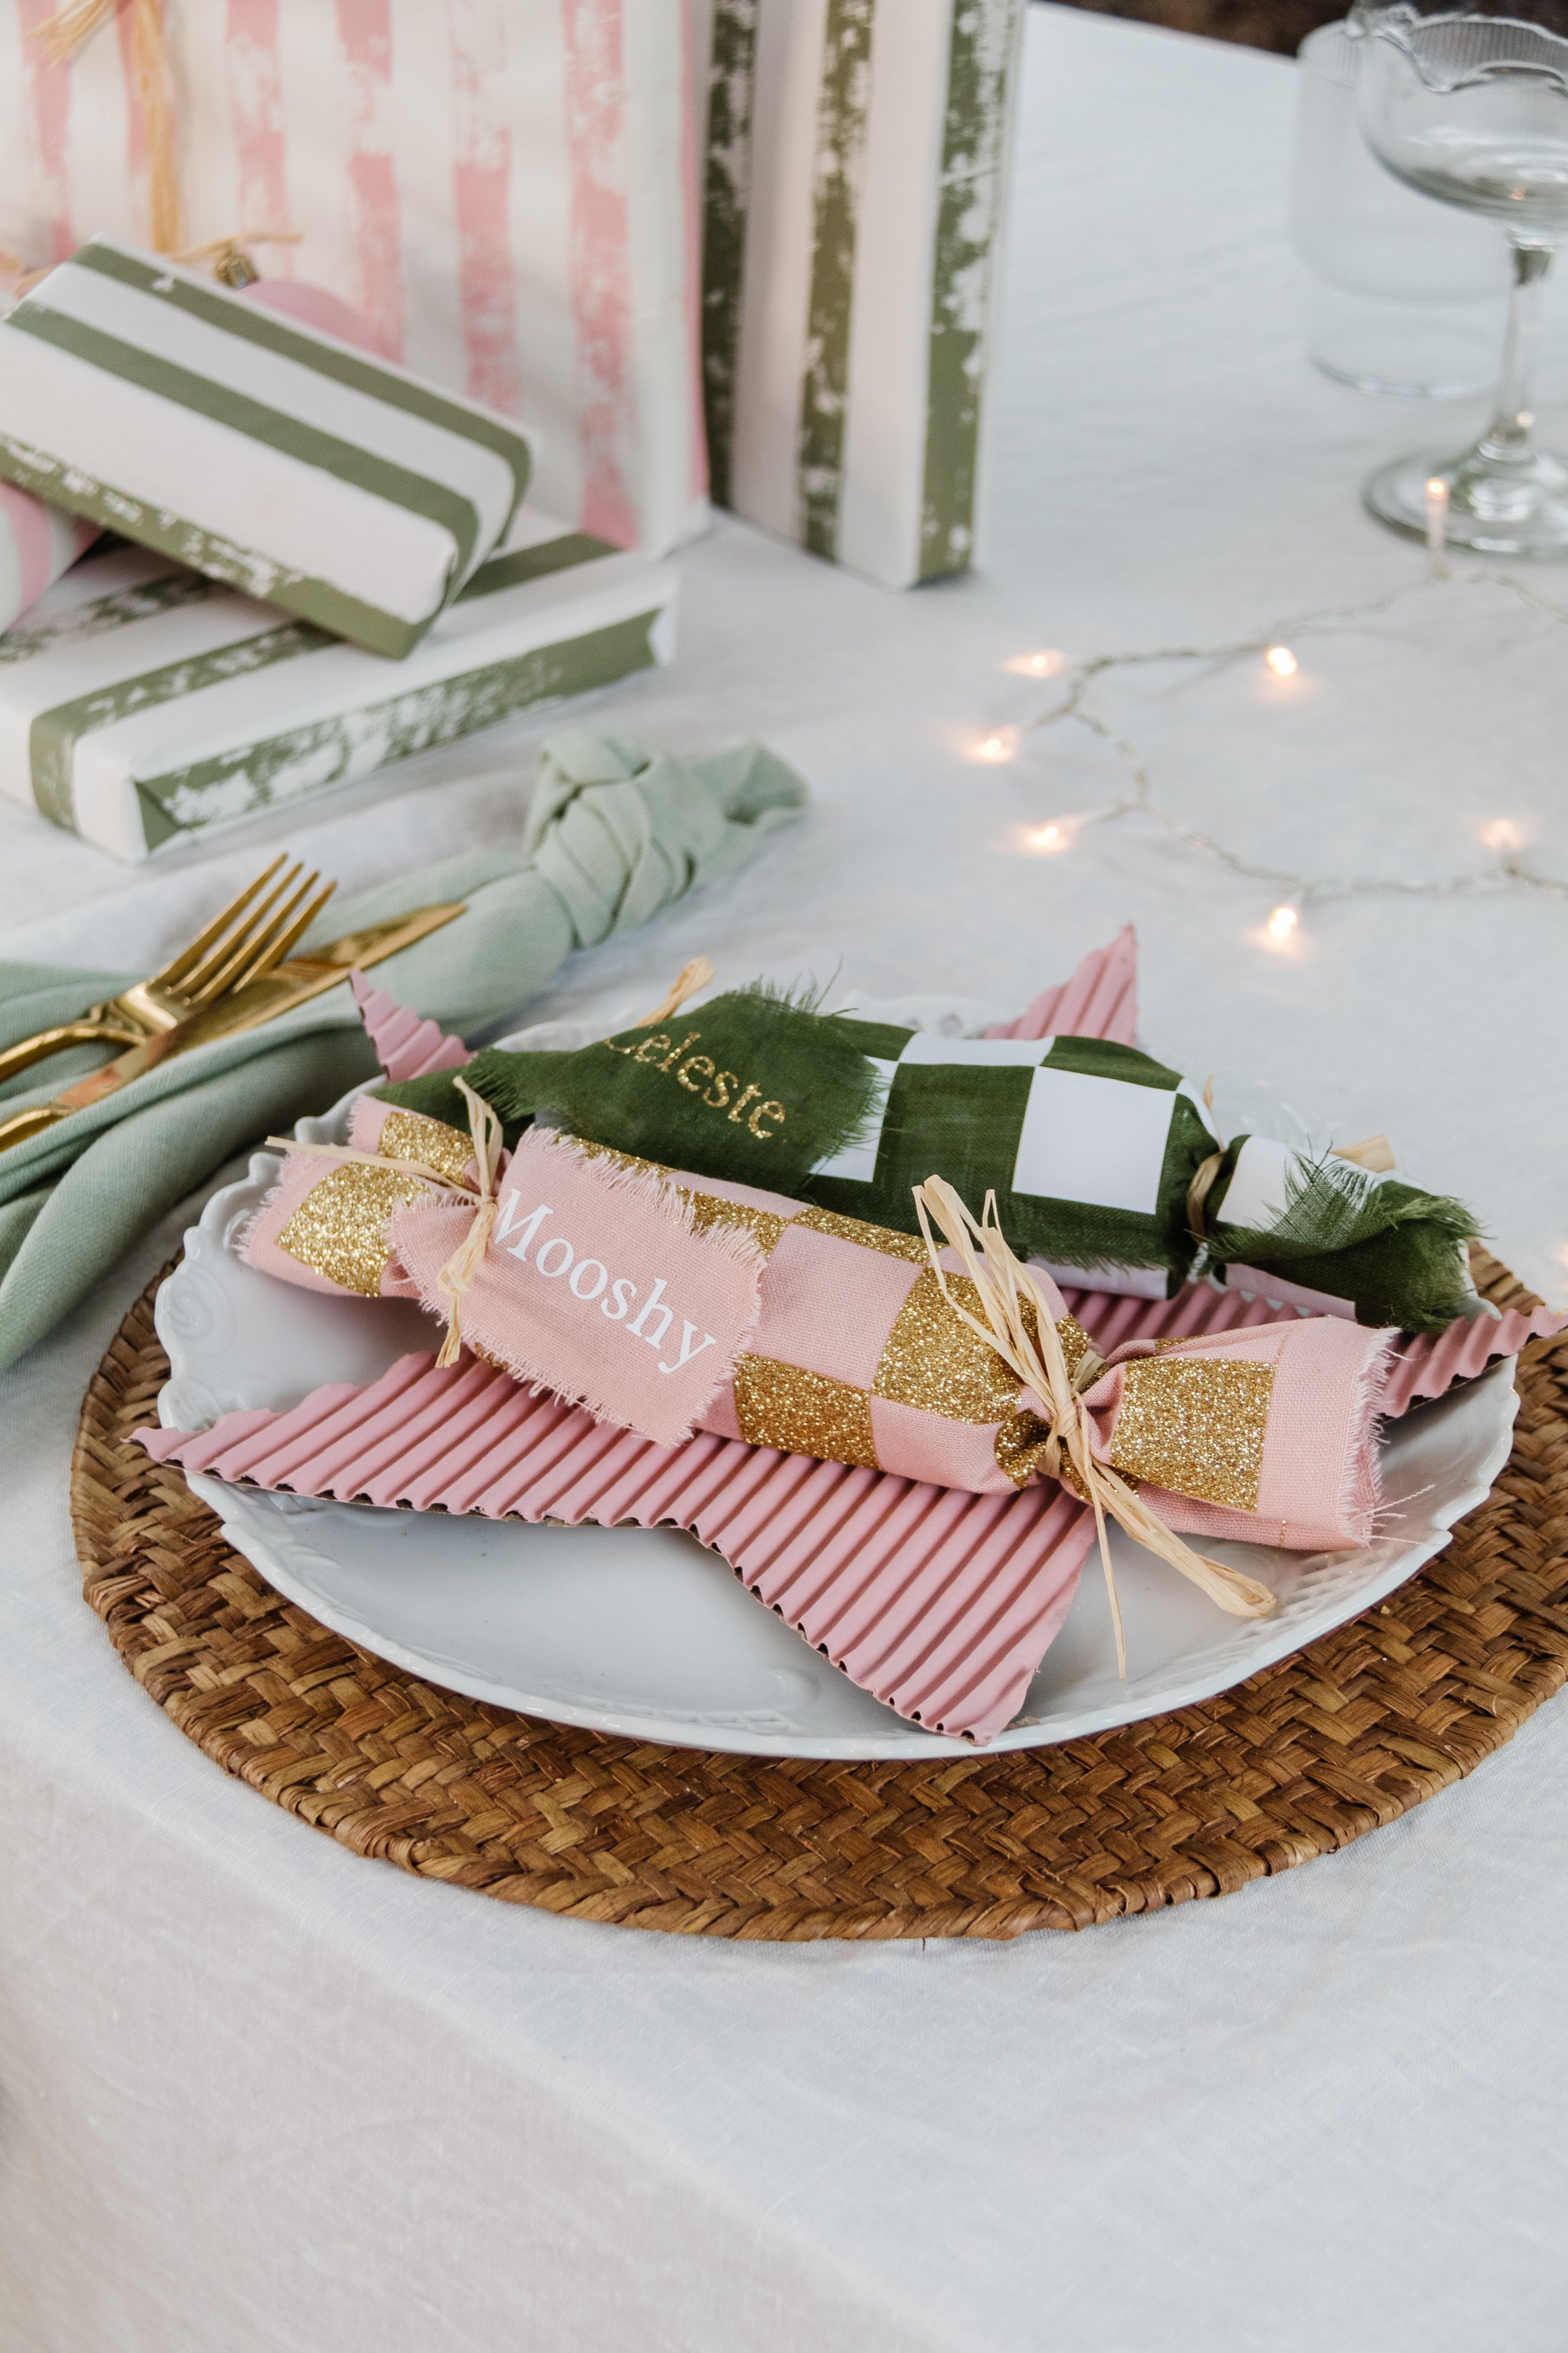
DIY Personalised Checker Fabric Bonbons
What do you do when you can’t find checker fabric to make bonbons? You make it!
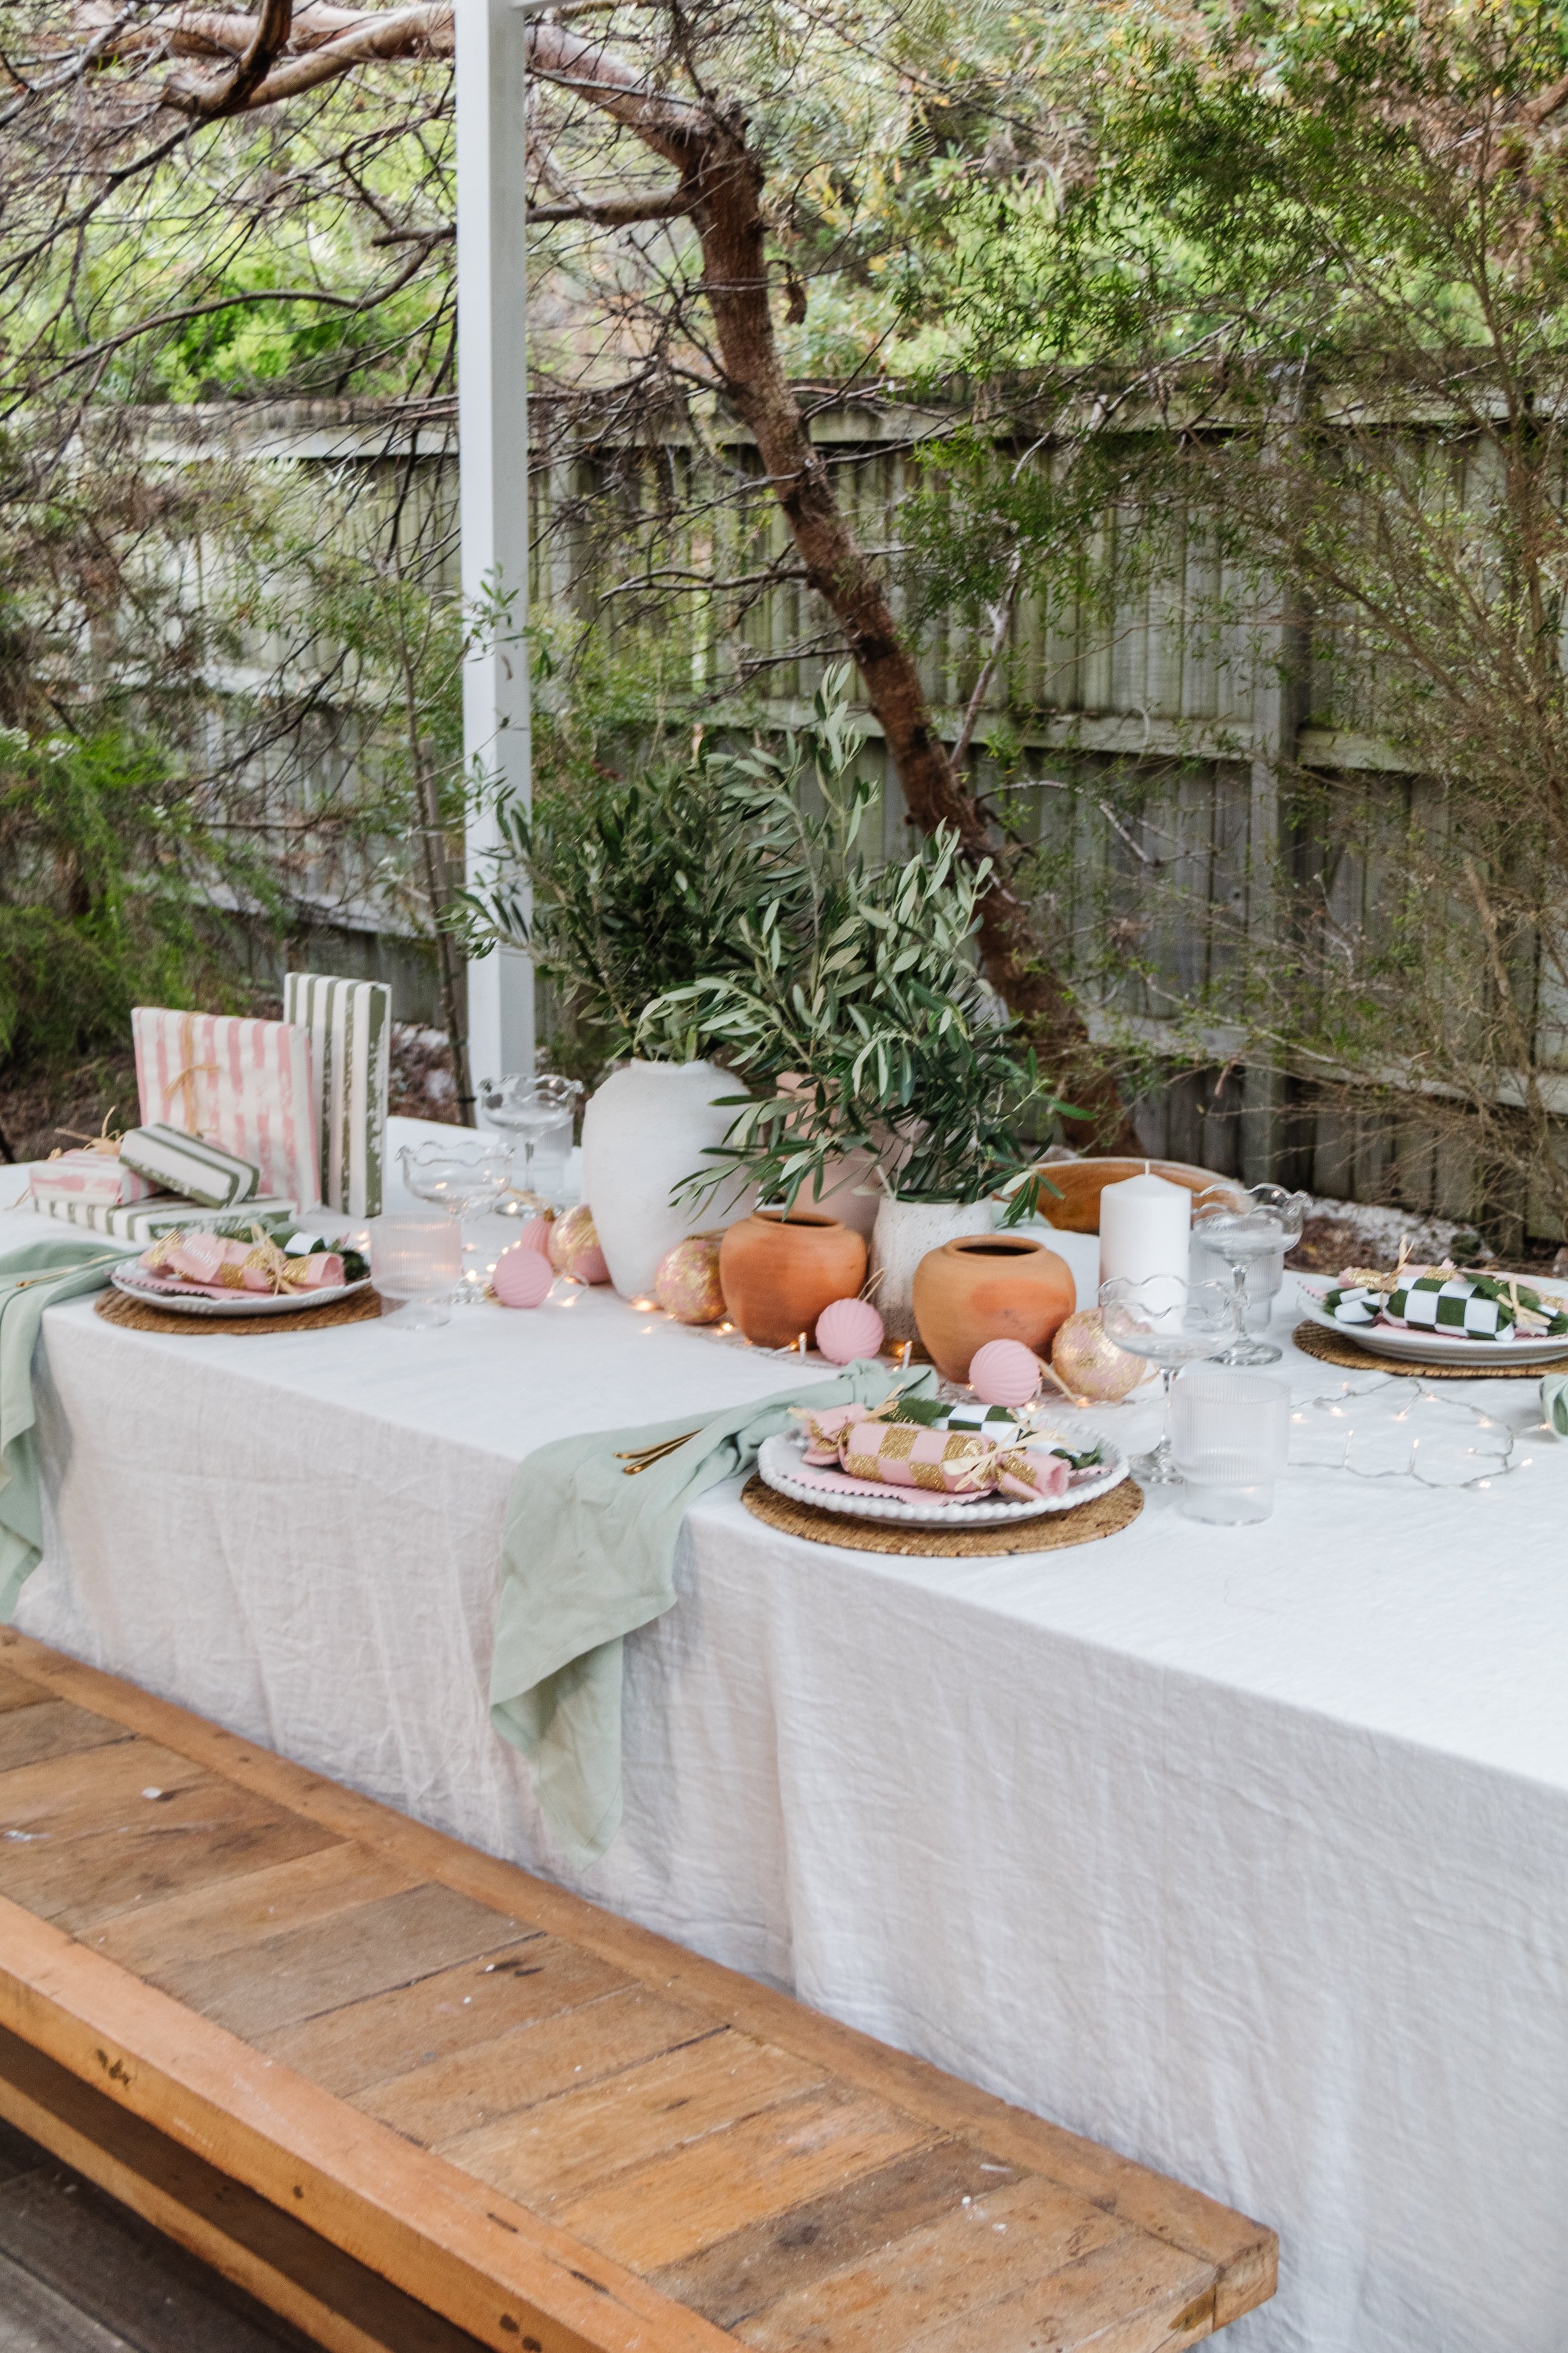
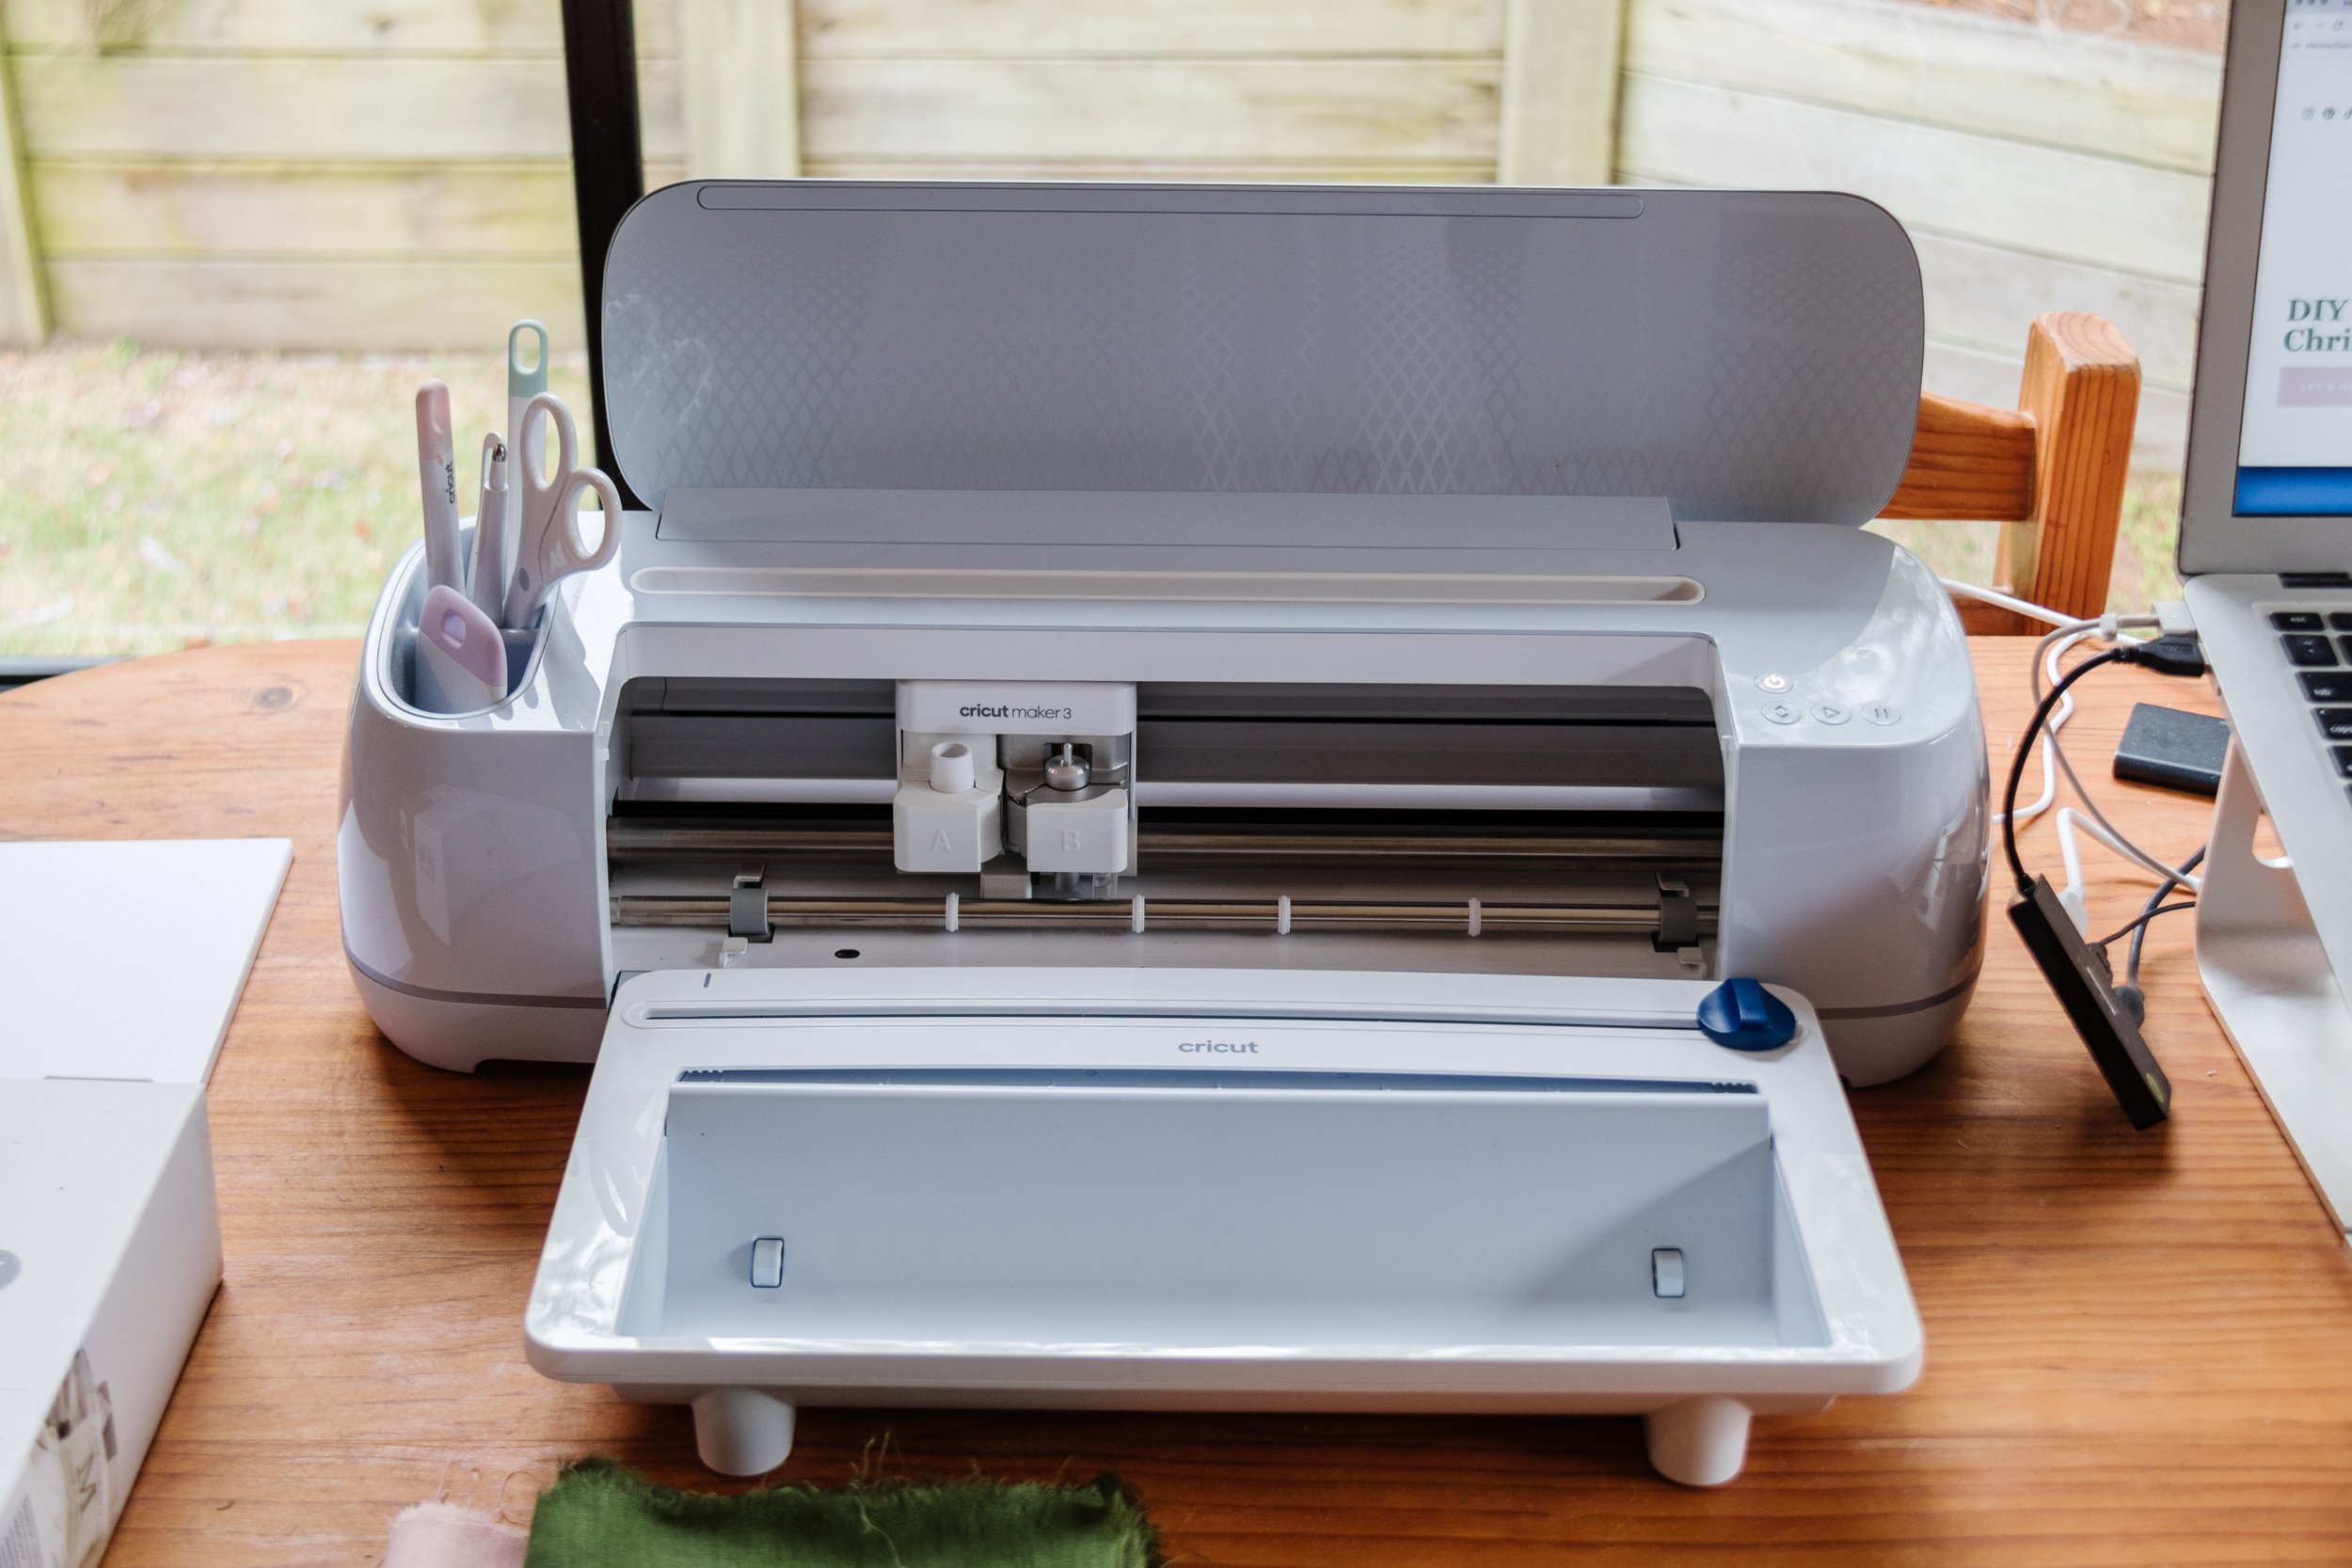
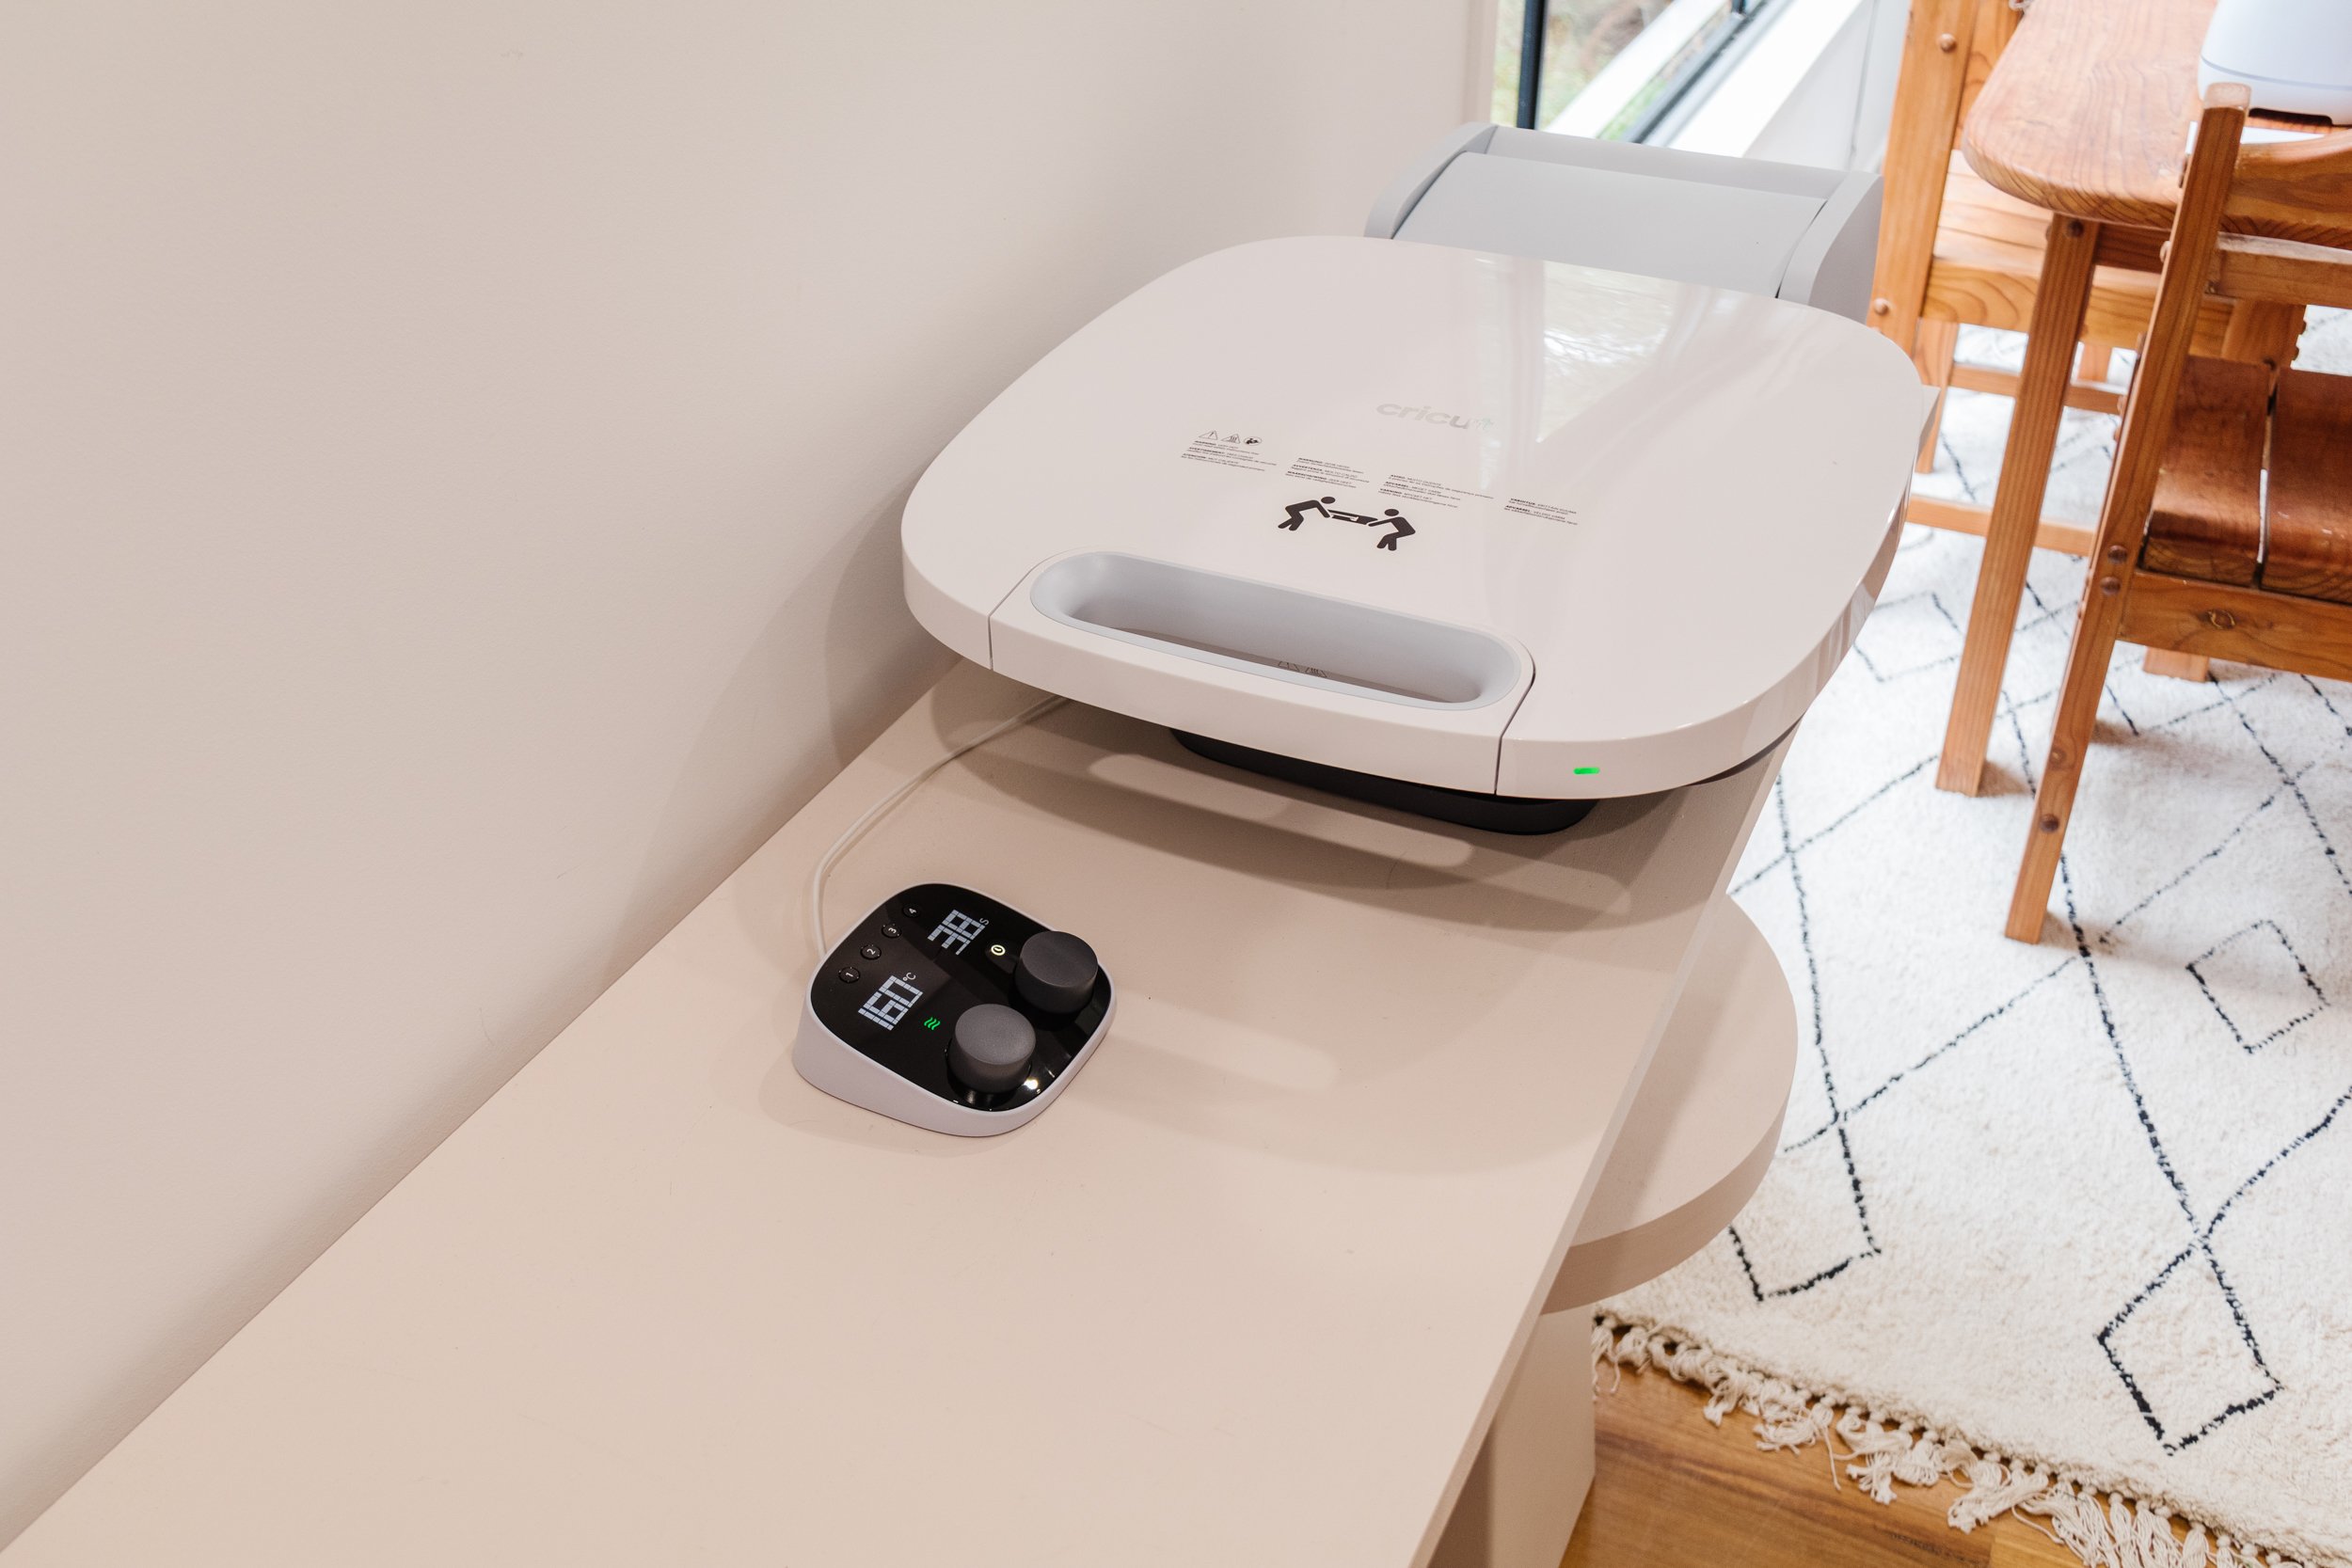
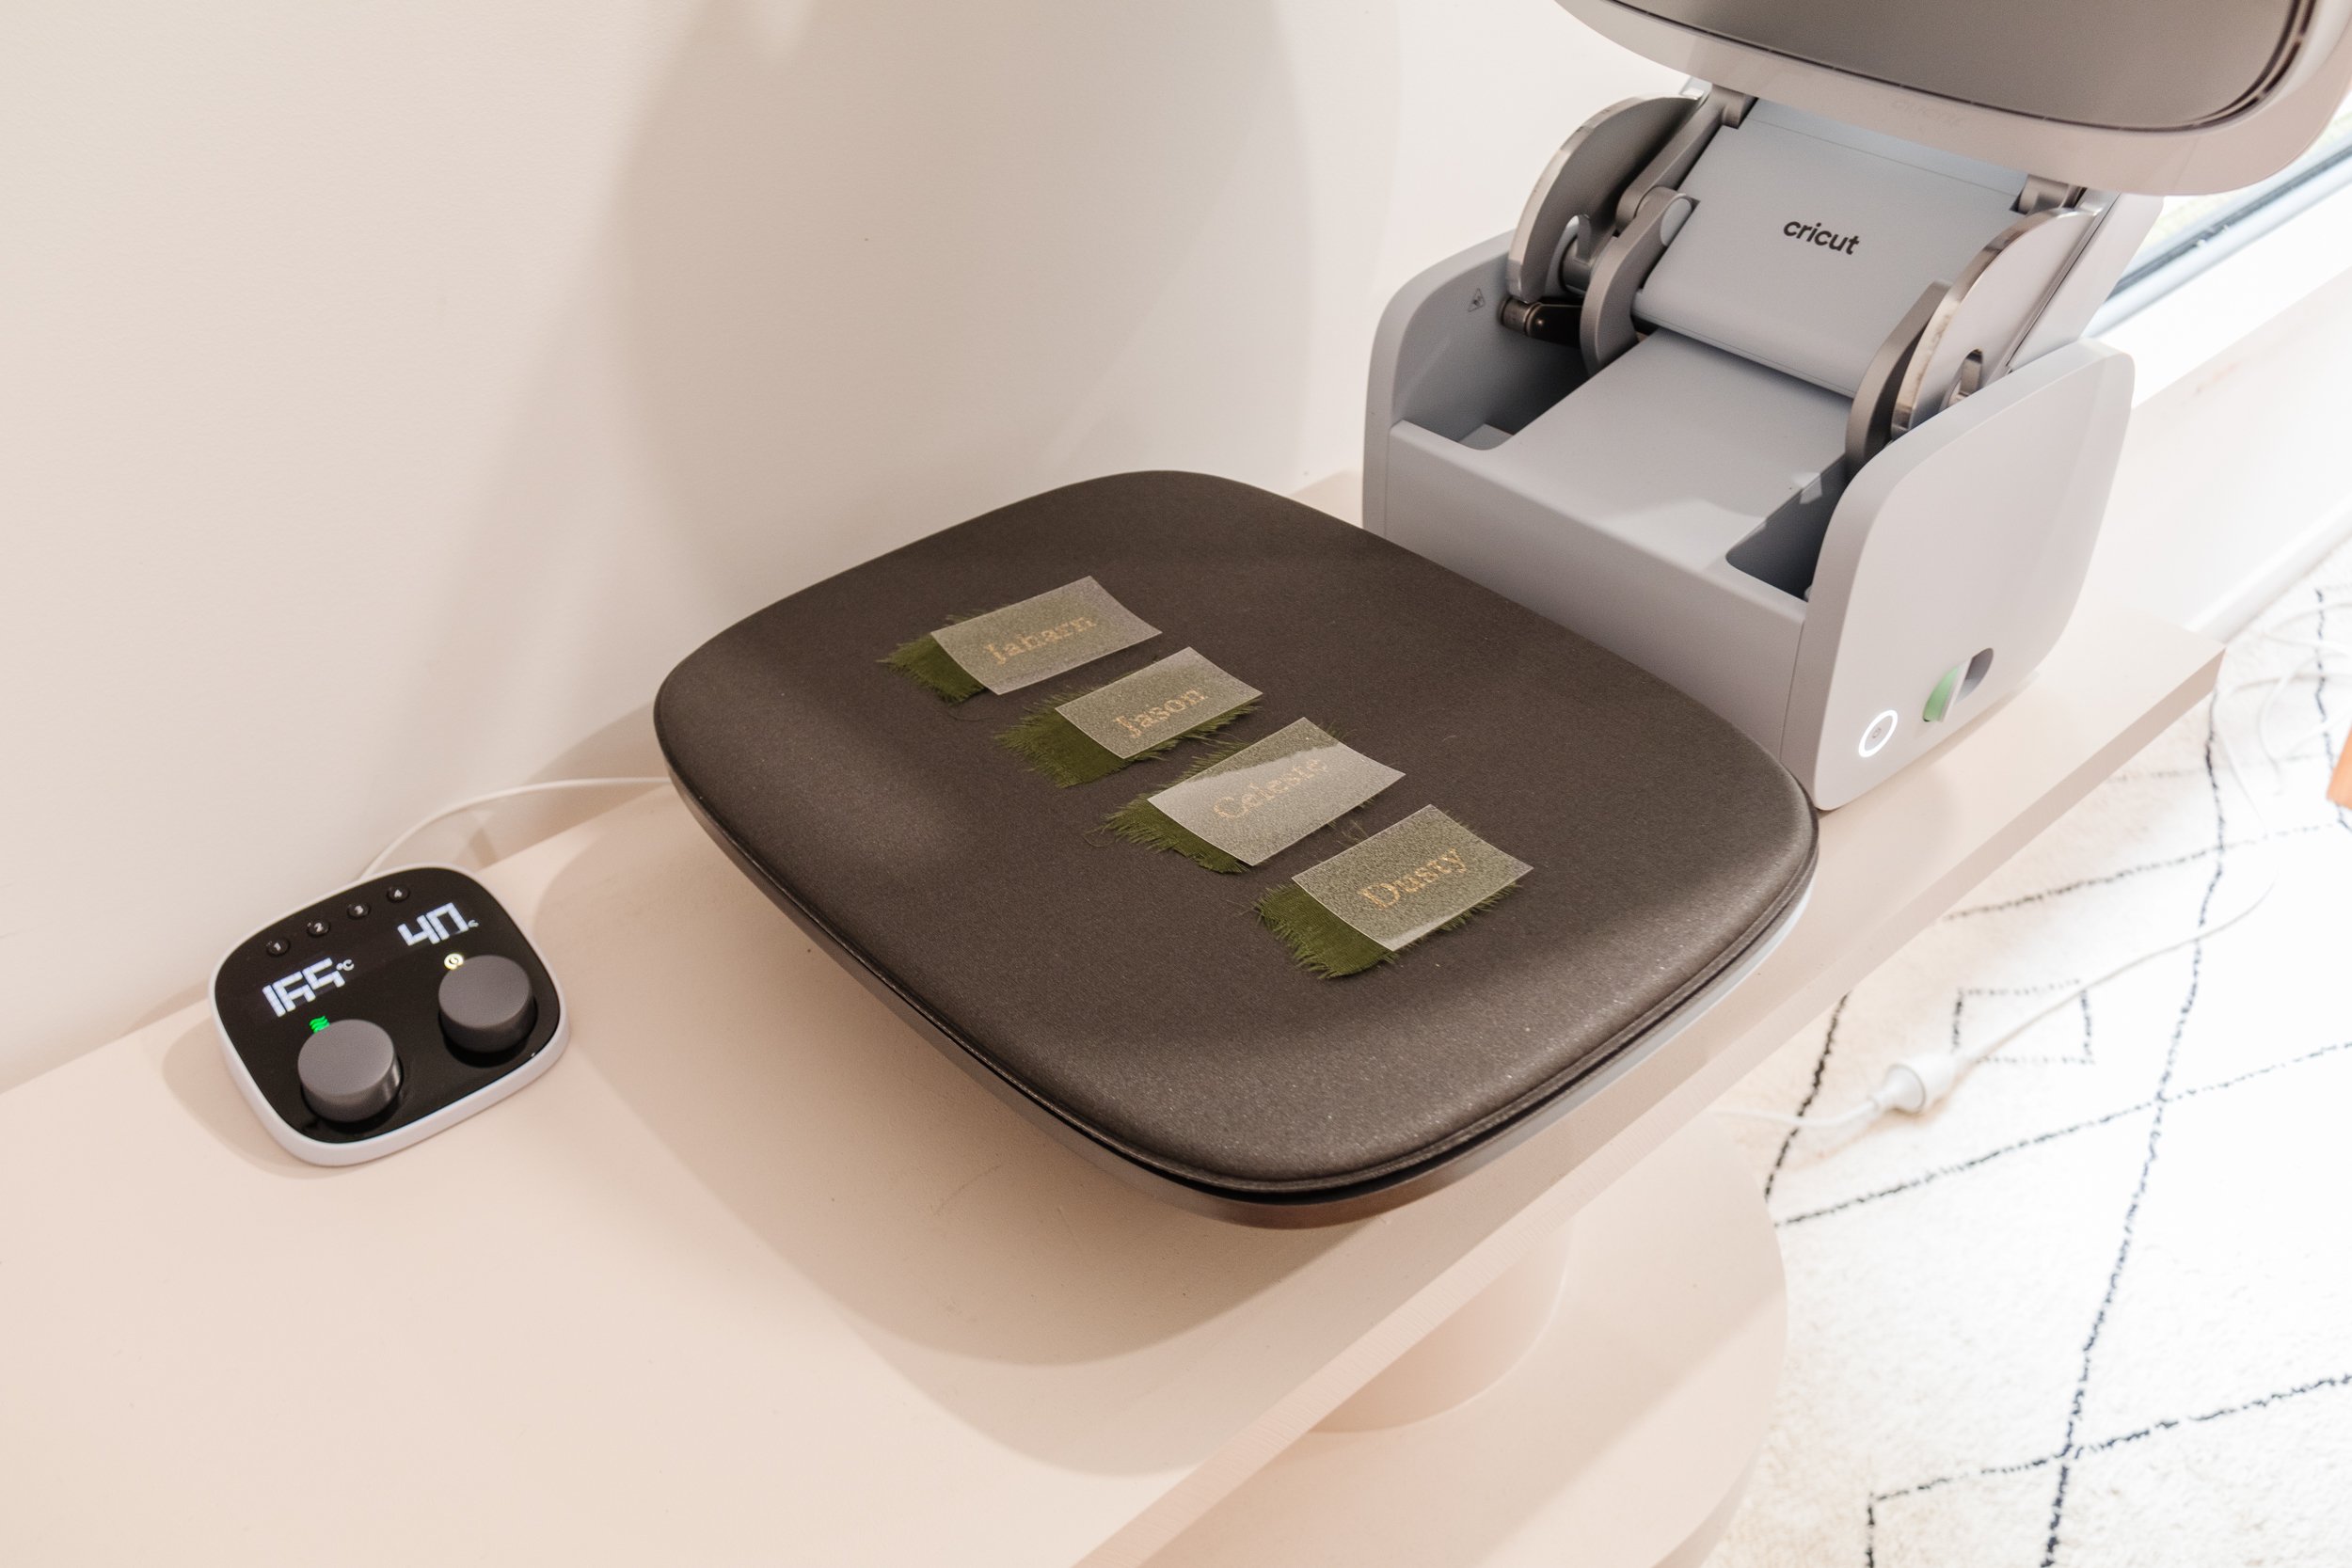
And that’s what I did thanks to my Cricut Maker 3 and the new Cricut Autopress! As you have probably guessed, I am a big fan of Christmas and every year I make fabric bonbons; they are my Christmas Day tablescape essential. For the last few weeks I have been on the hunt for checker fabric and even though it has been one of the biggest trends over the last couple of years, I was SO surprised when I couldn’t find any. I almost gave up on my idea, but that was until the new Cricut Autopress arrived on my front door!
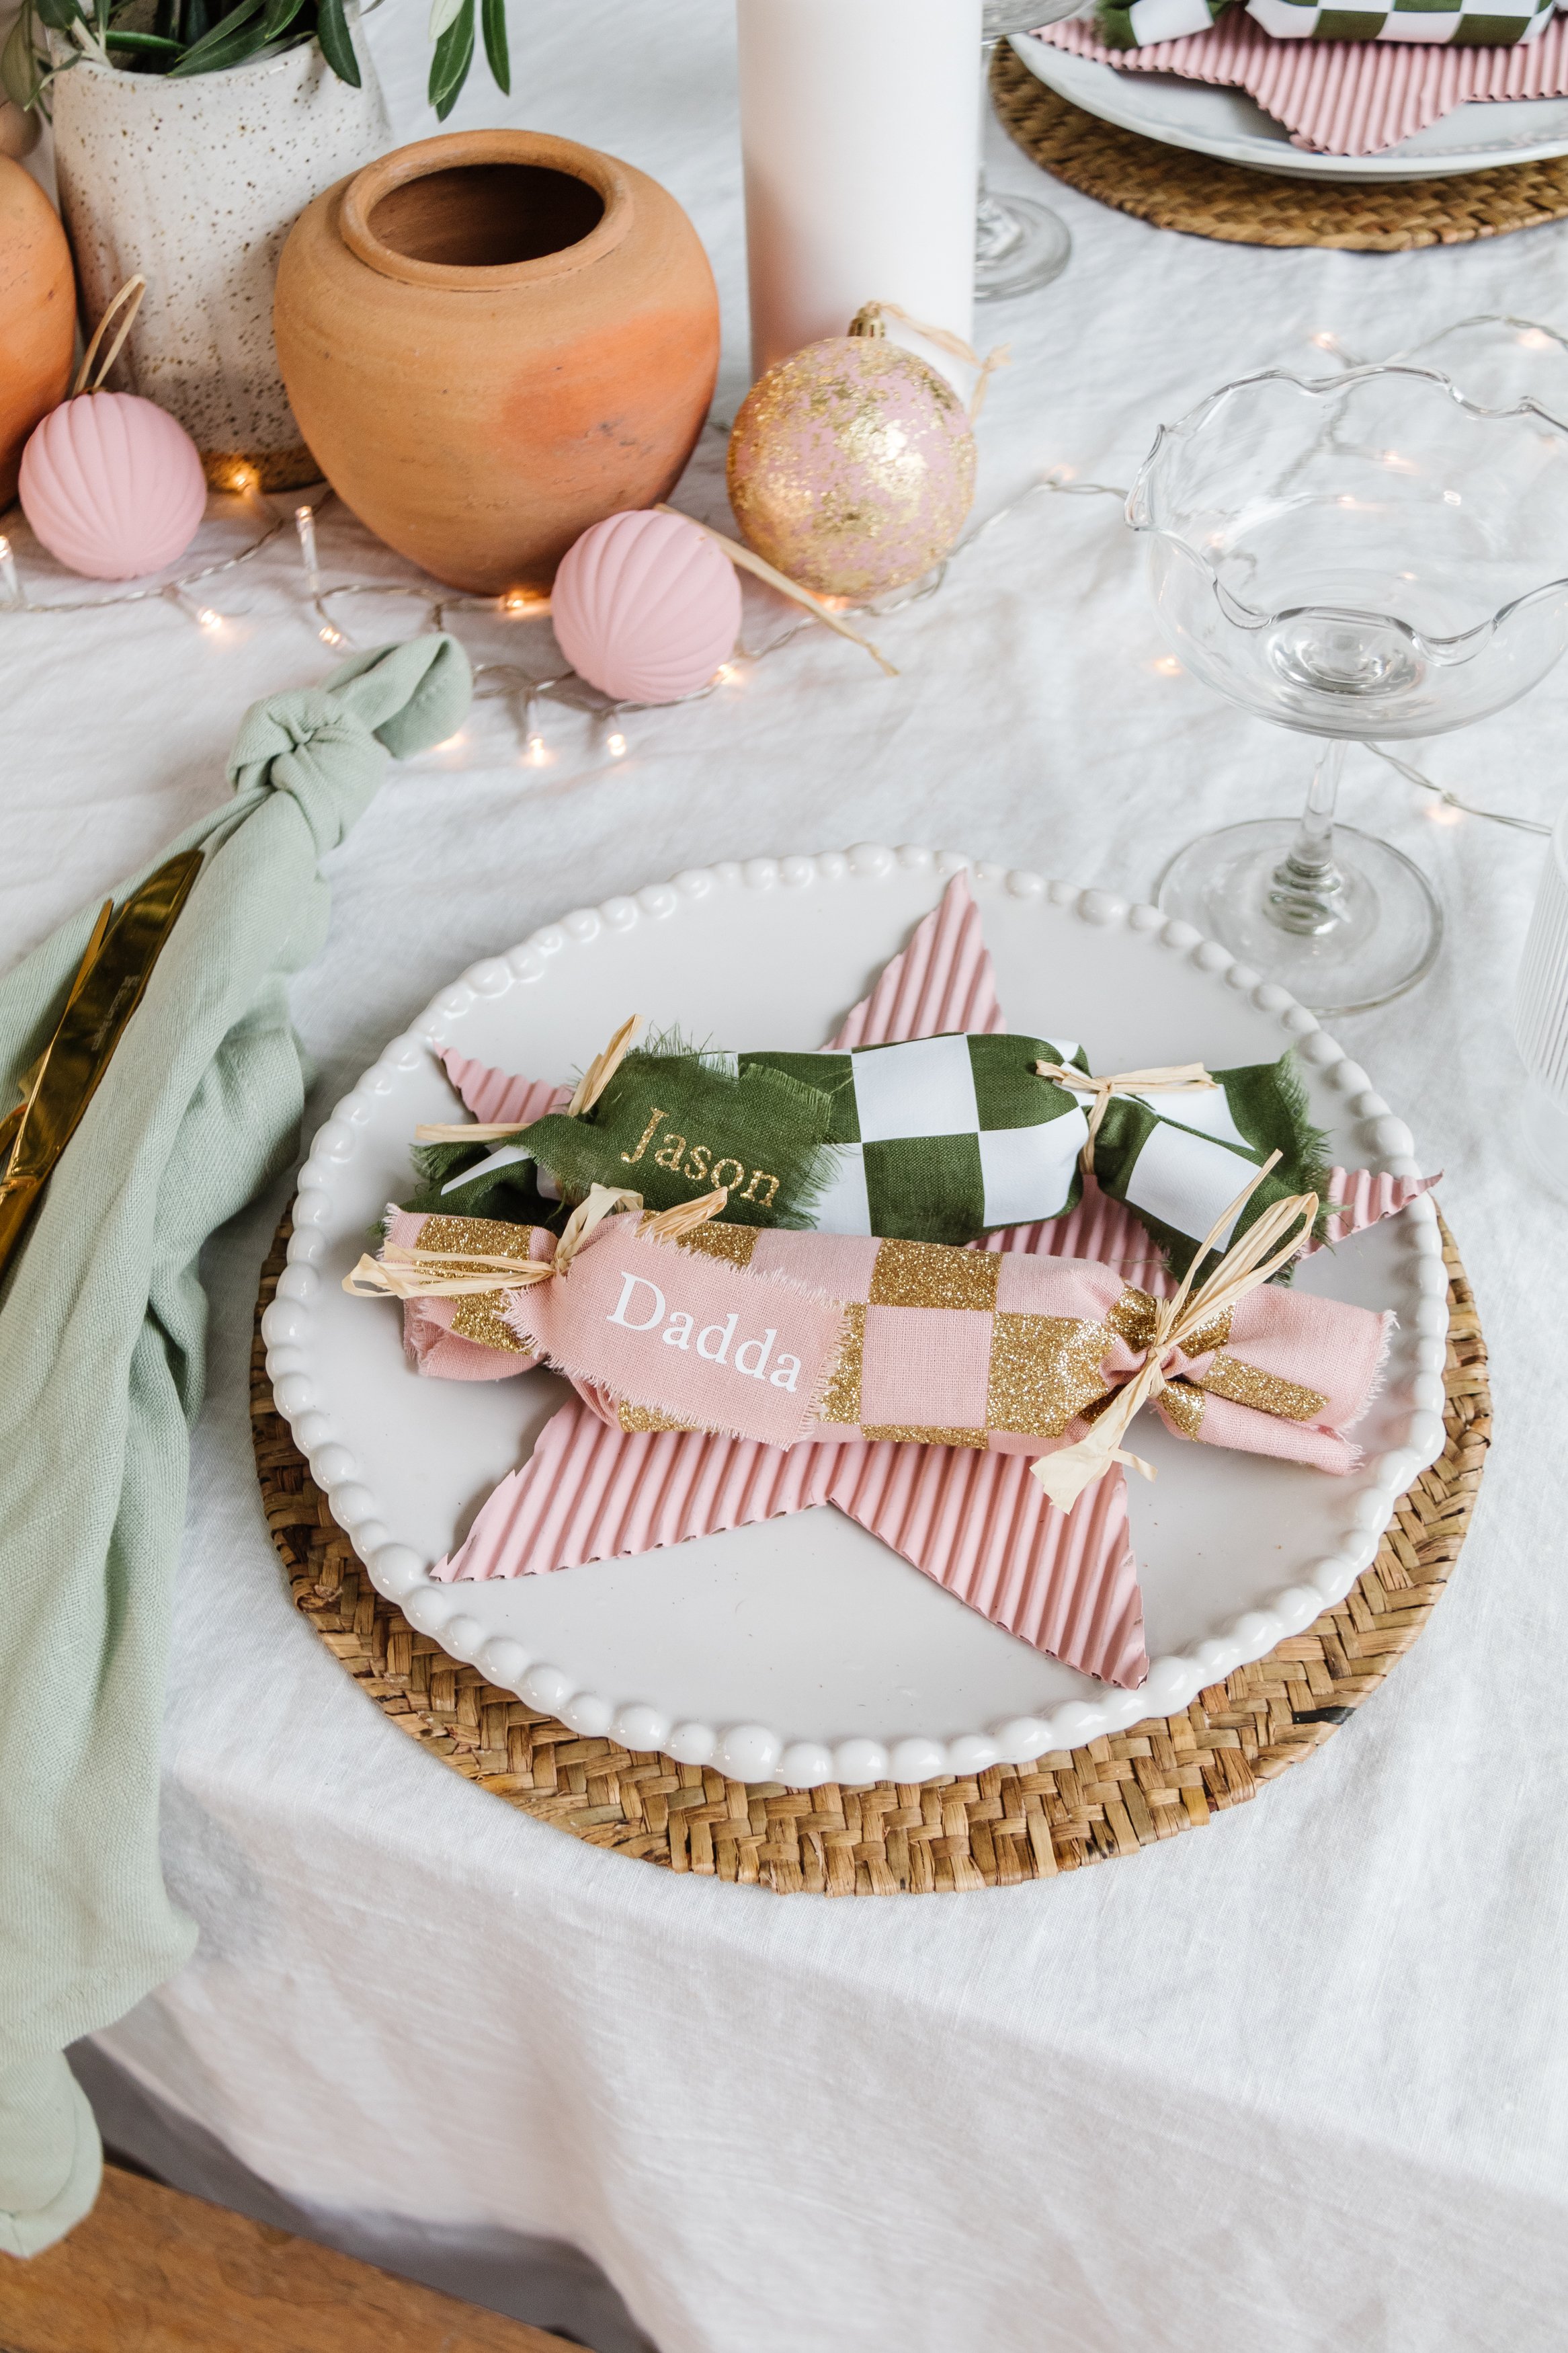
The Cricut Autopress is the biggest and most efficient product in the Cricut heat press range. It’s perfect for makers, creatives and small business owners who need to use a heat press to create batches of items, such as branded clothing, gifting and in my case, fabric bonbons! Straight away I knew this would be perfect to create checker fabric! I used leftover fabric from this project and got to work creating and weeding my checker design in the Cricut Design App, and then the Autopress did the rest! It was so easy! And to top it off, I wanted these checker bonbons to be even more meaningful and special, so I used some of the fabric scraps to make personalised name tags for Jason and the kids. It’s these little personalised touches that mean the most. Read on for the tutorial, including links to the products and materials I used. And I hope this project has inspired you to make your own personalised DIY Checker Fabric Bonbons this festive season!
And to see how these personalised DIY Checker Fabric Bonbons were made, check out this video!
DIY Personalised Checker Fabric Bonbons


Project Details
🕒 Project Time Estimate: 1 hour
💰 Materials Cost: $60 for the Smart Iron On
⚒️ Power Tools: None!
👷♀️ Skill Level: Beginner DIYer
In Australia, you can shop Cricut in a variety of stores including Officeworks, Spotlight and Big W.
Materials
Cotton or linen fabric
Scissors
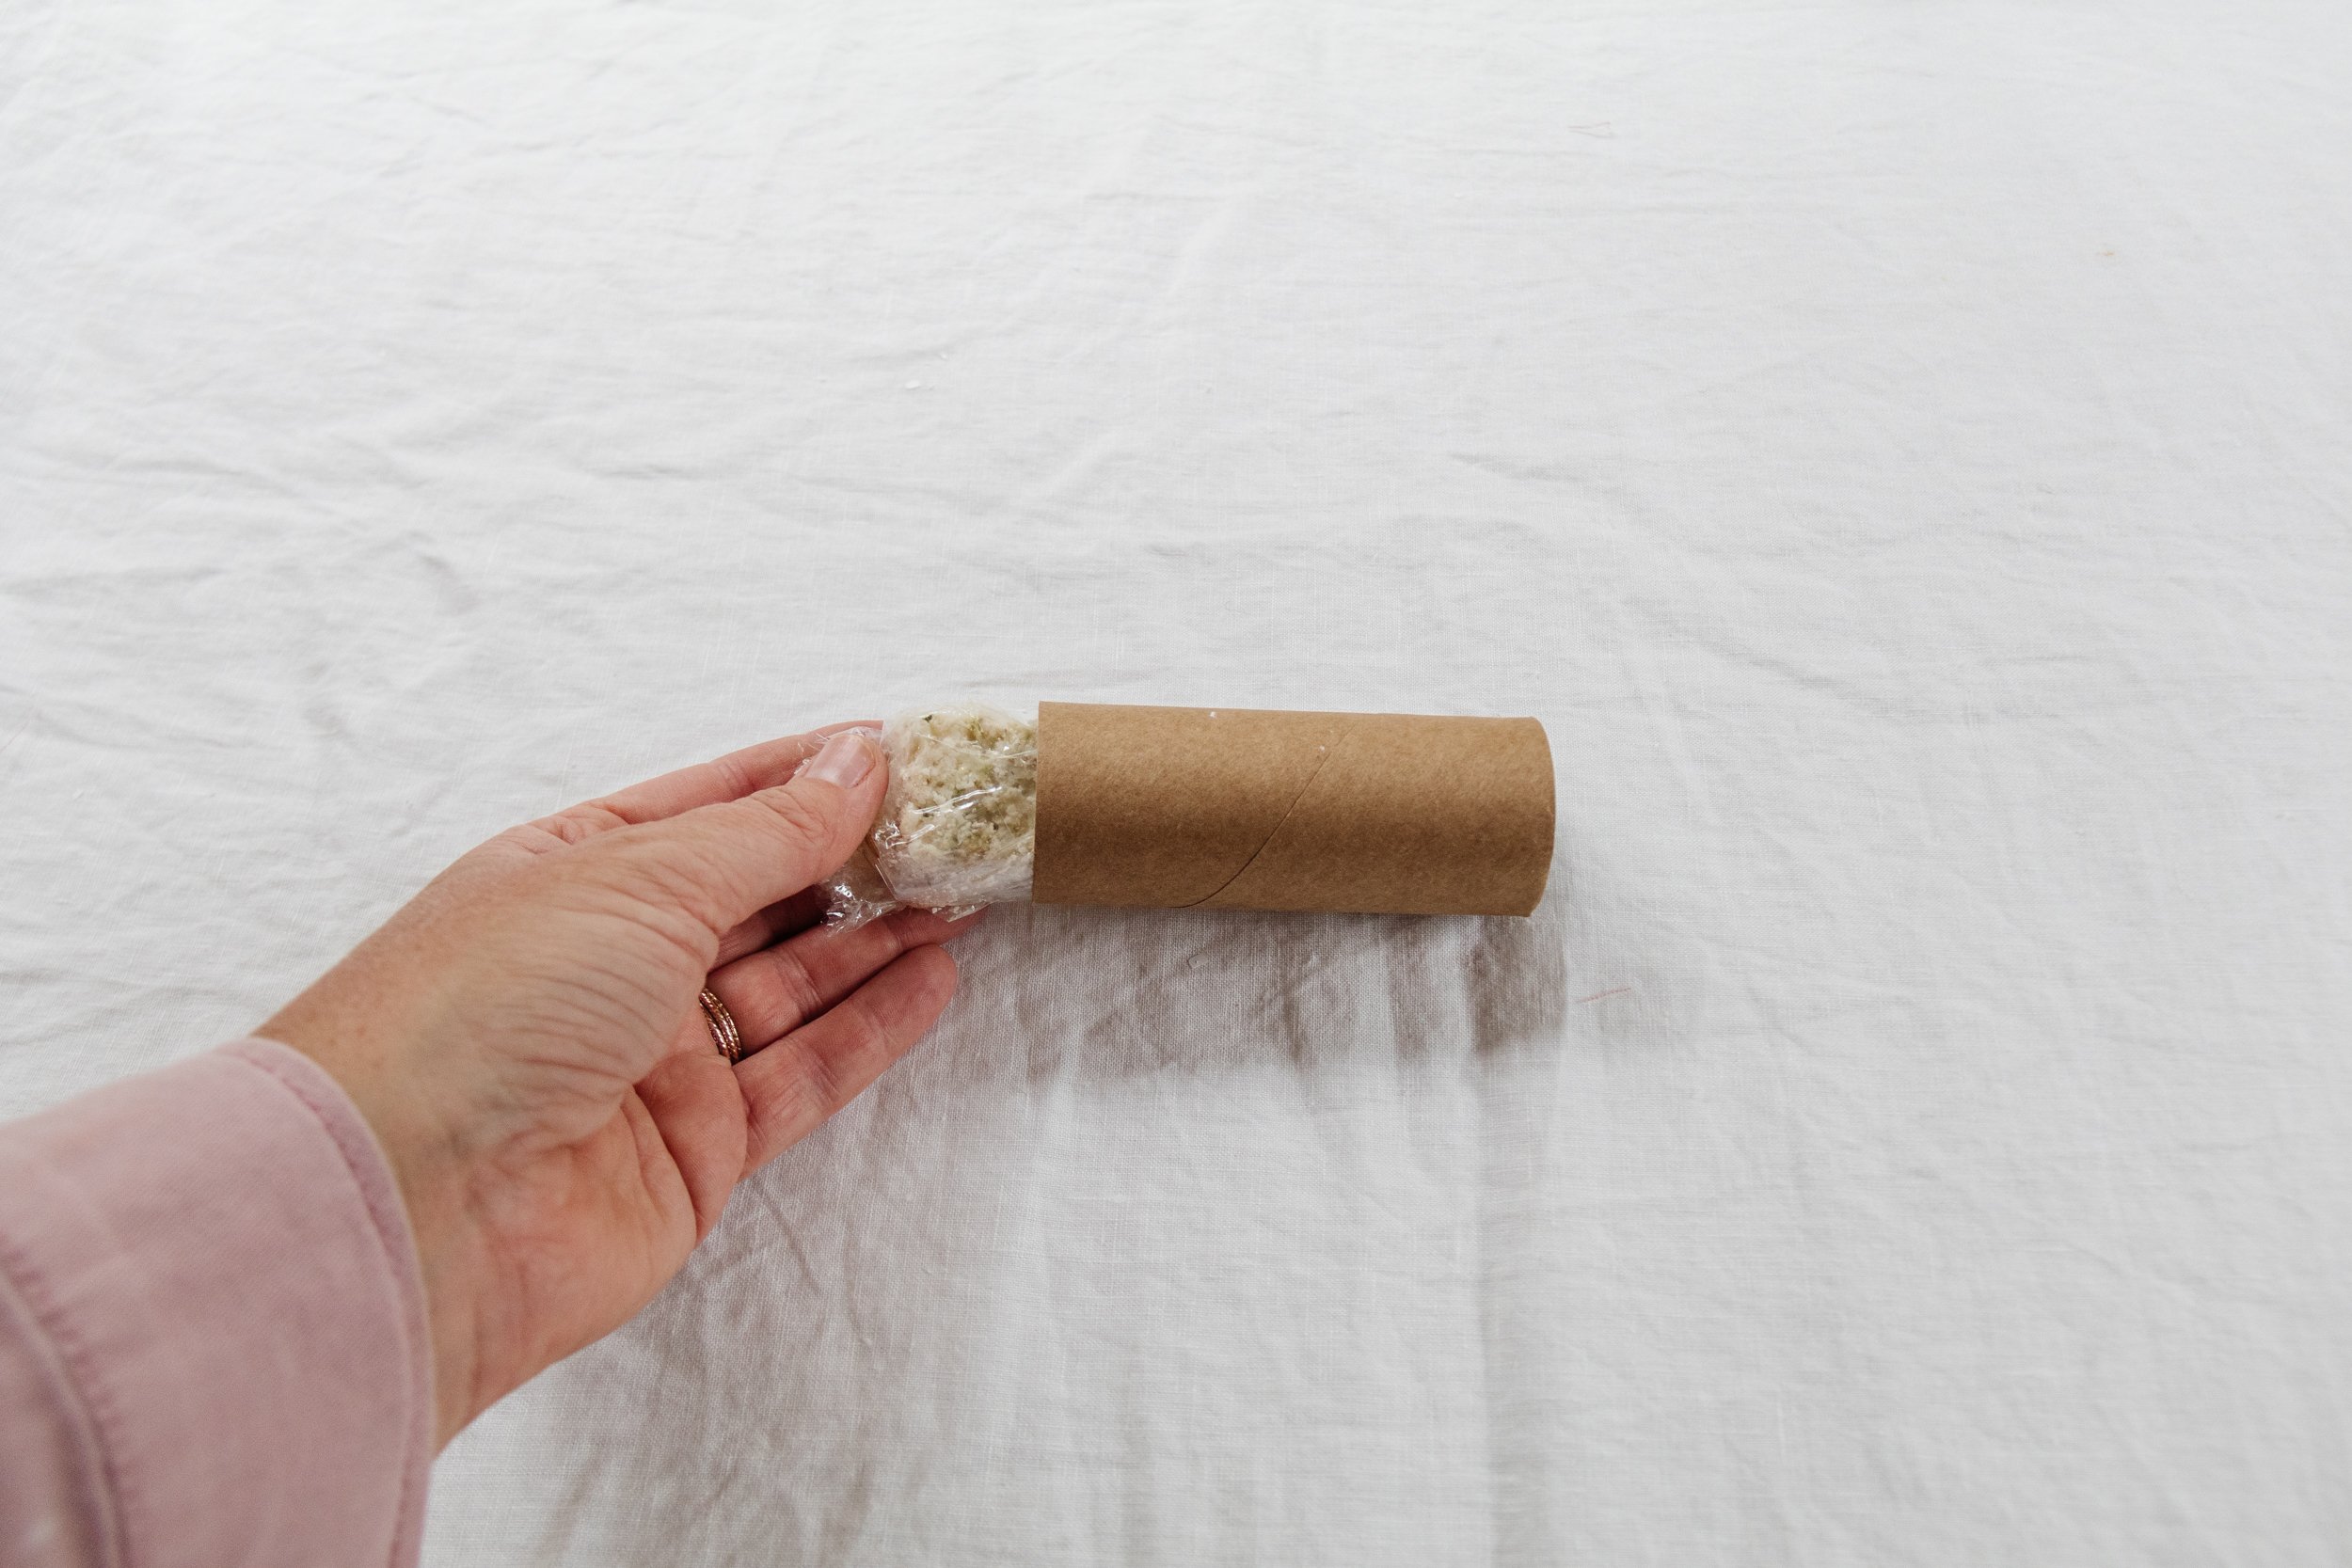
Sweet in a wrapper
Toilet rolls

How To
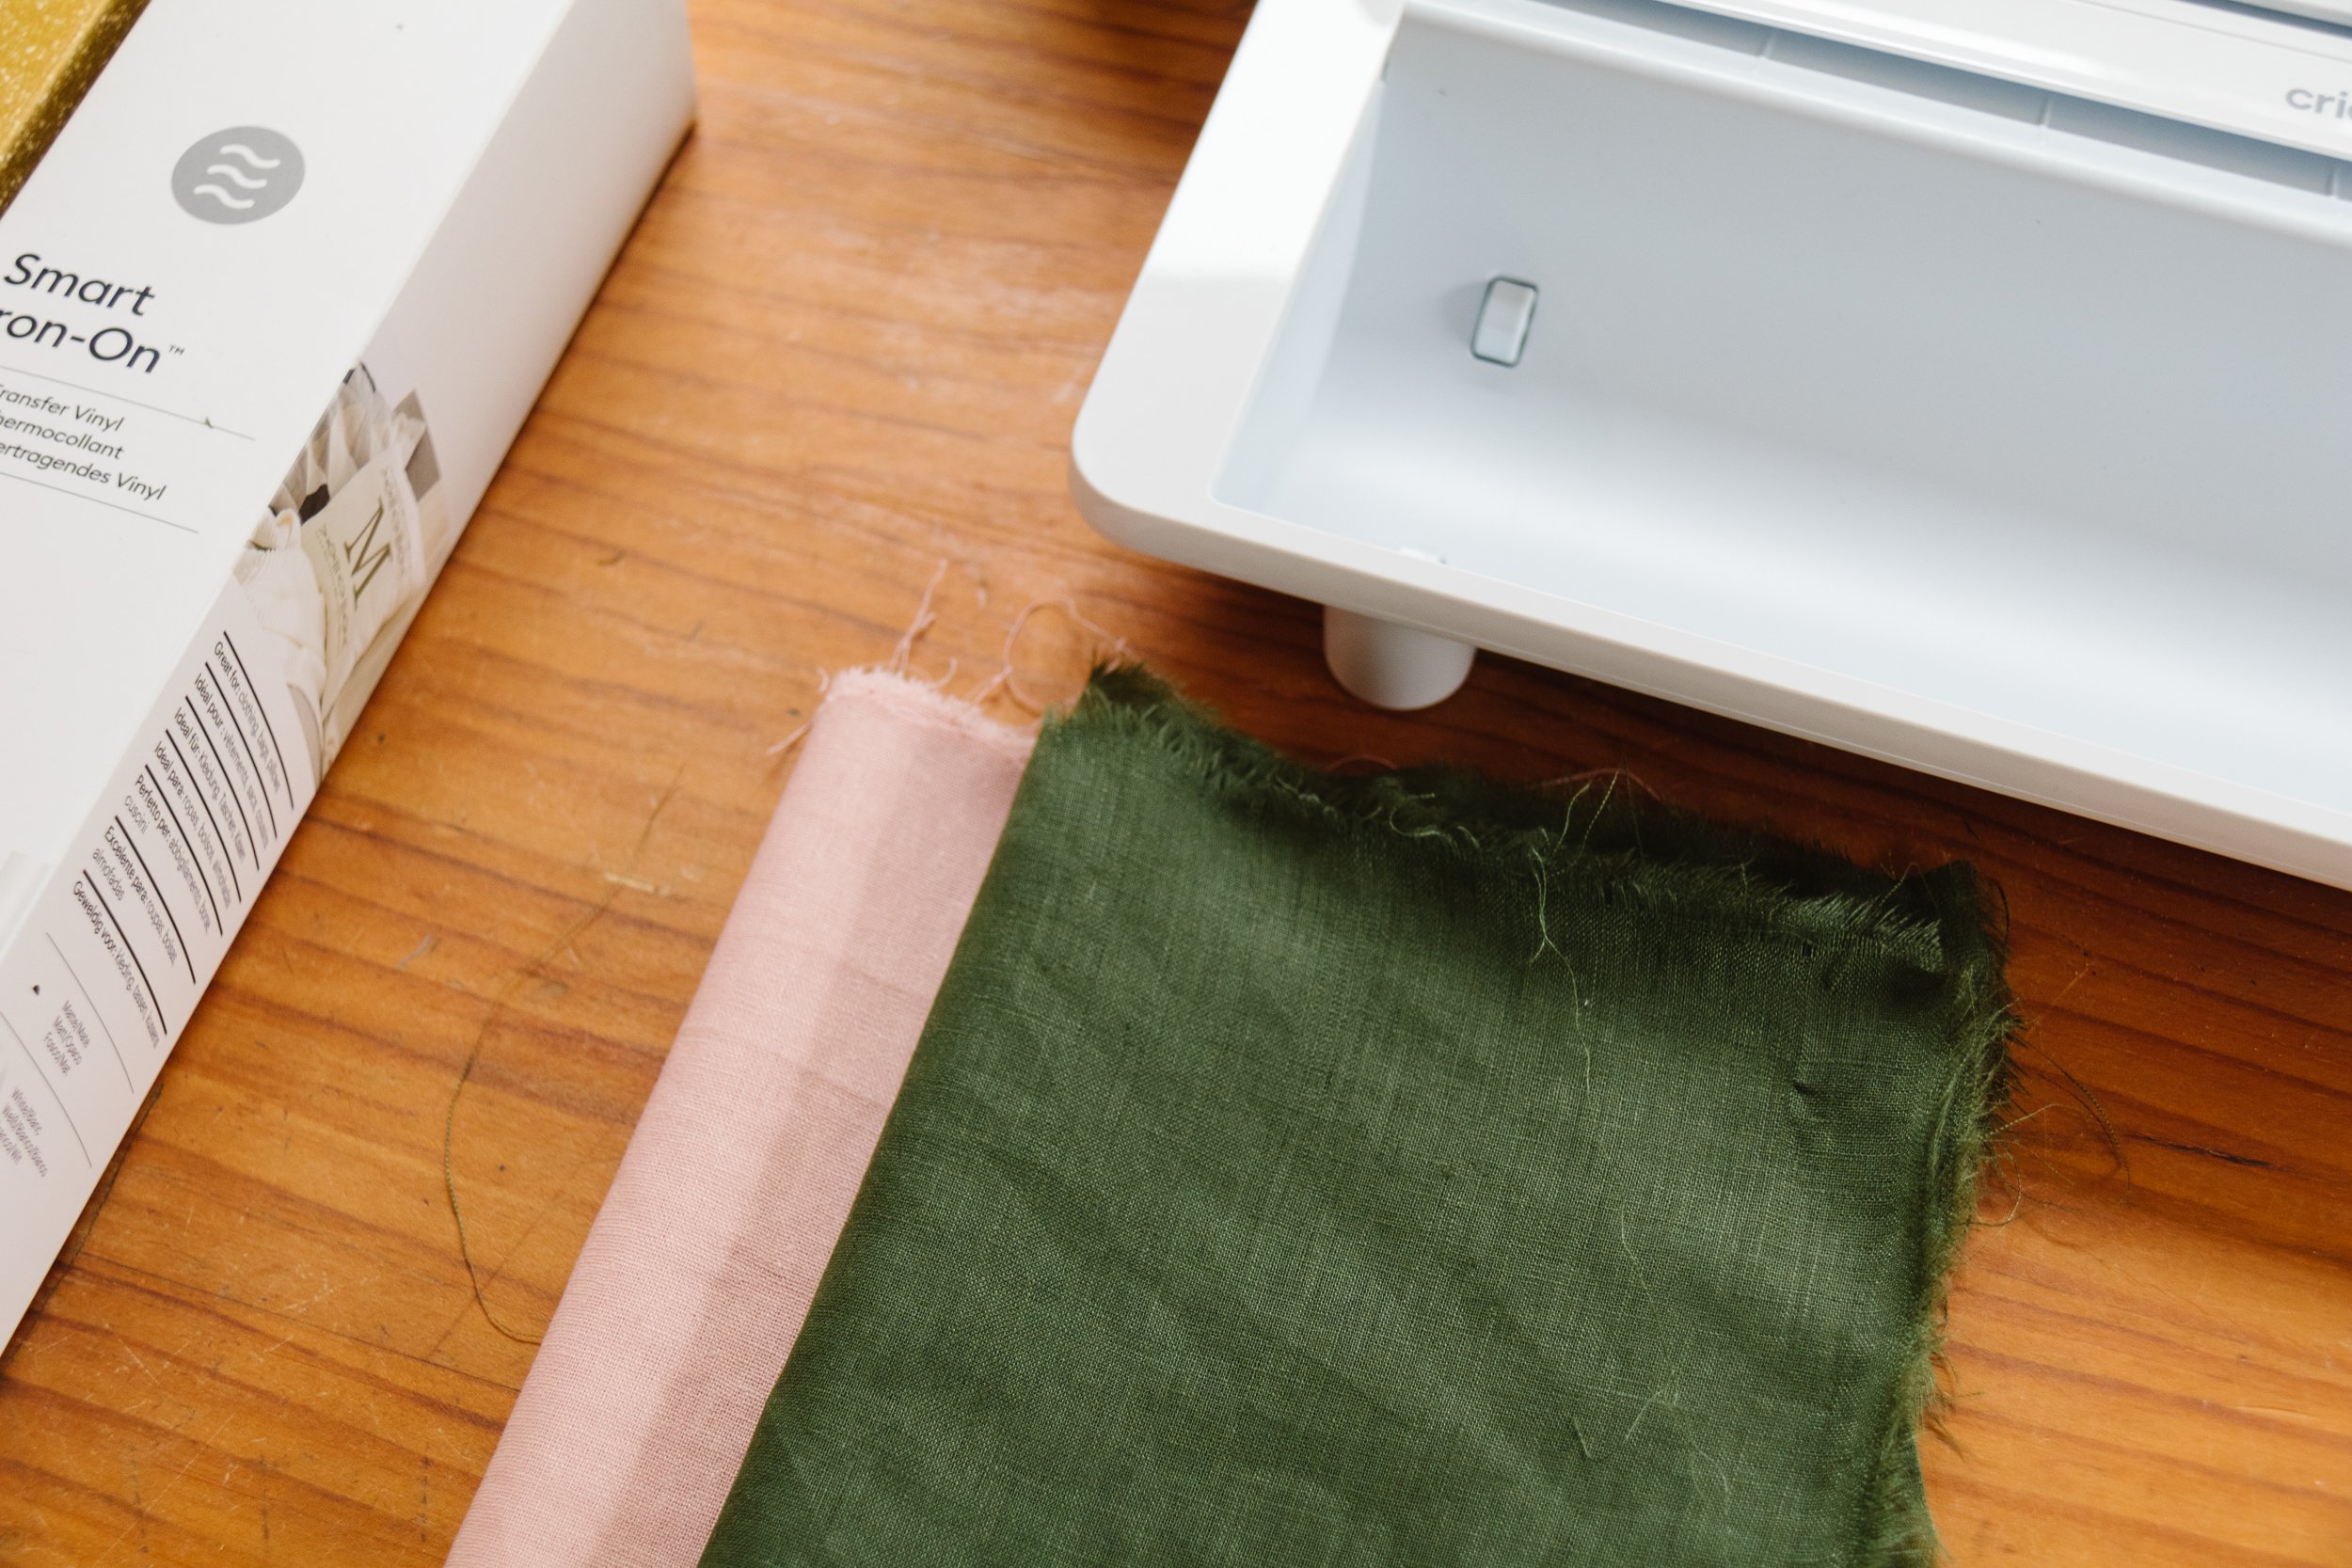
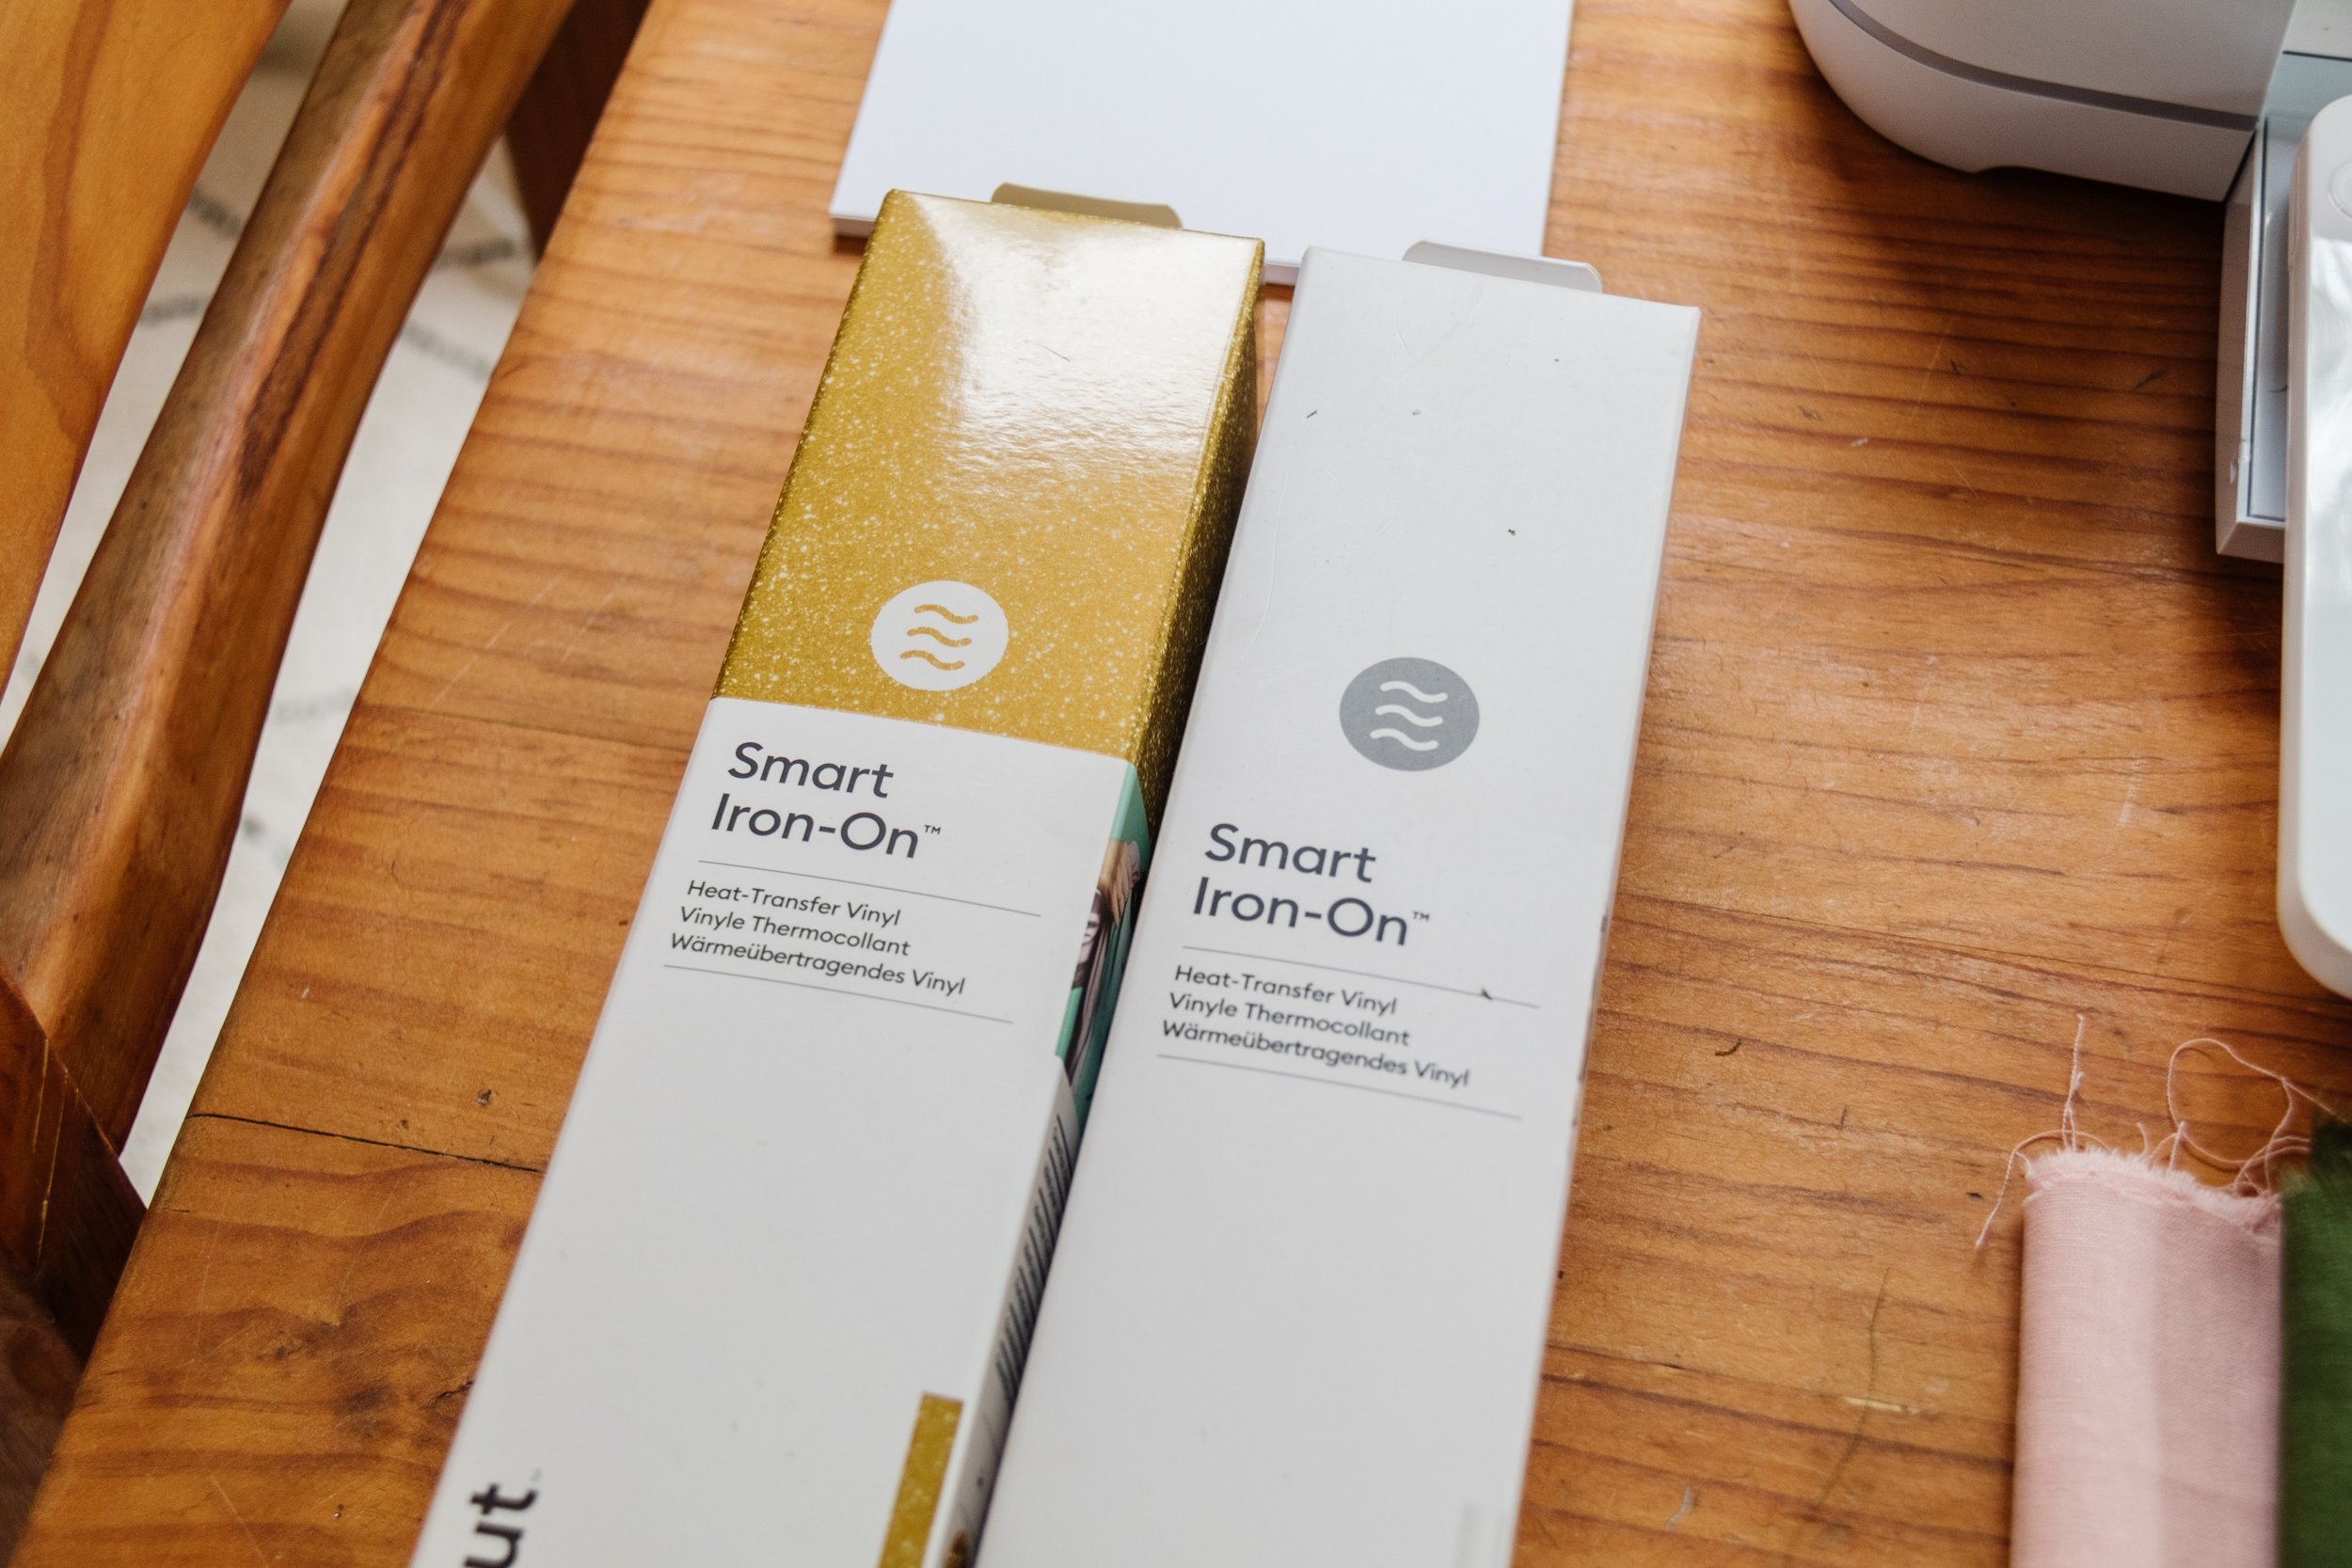
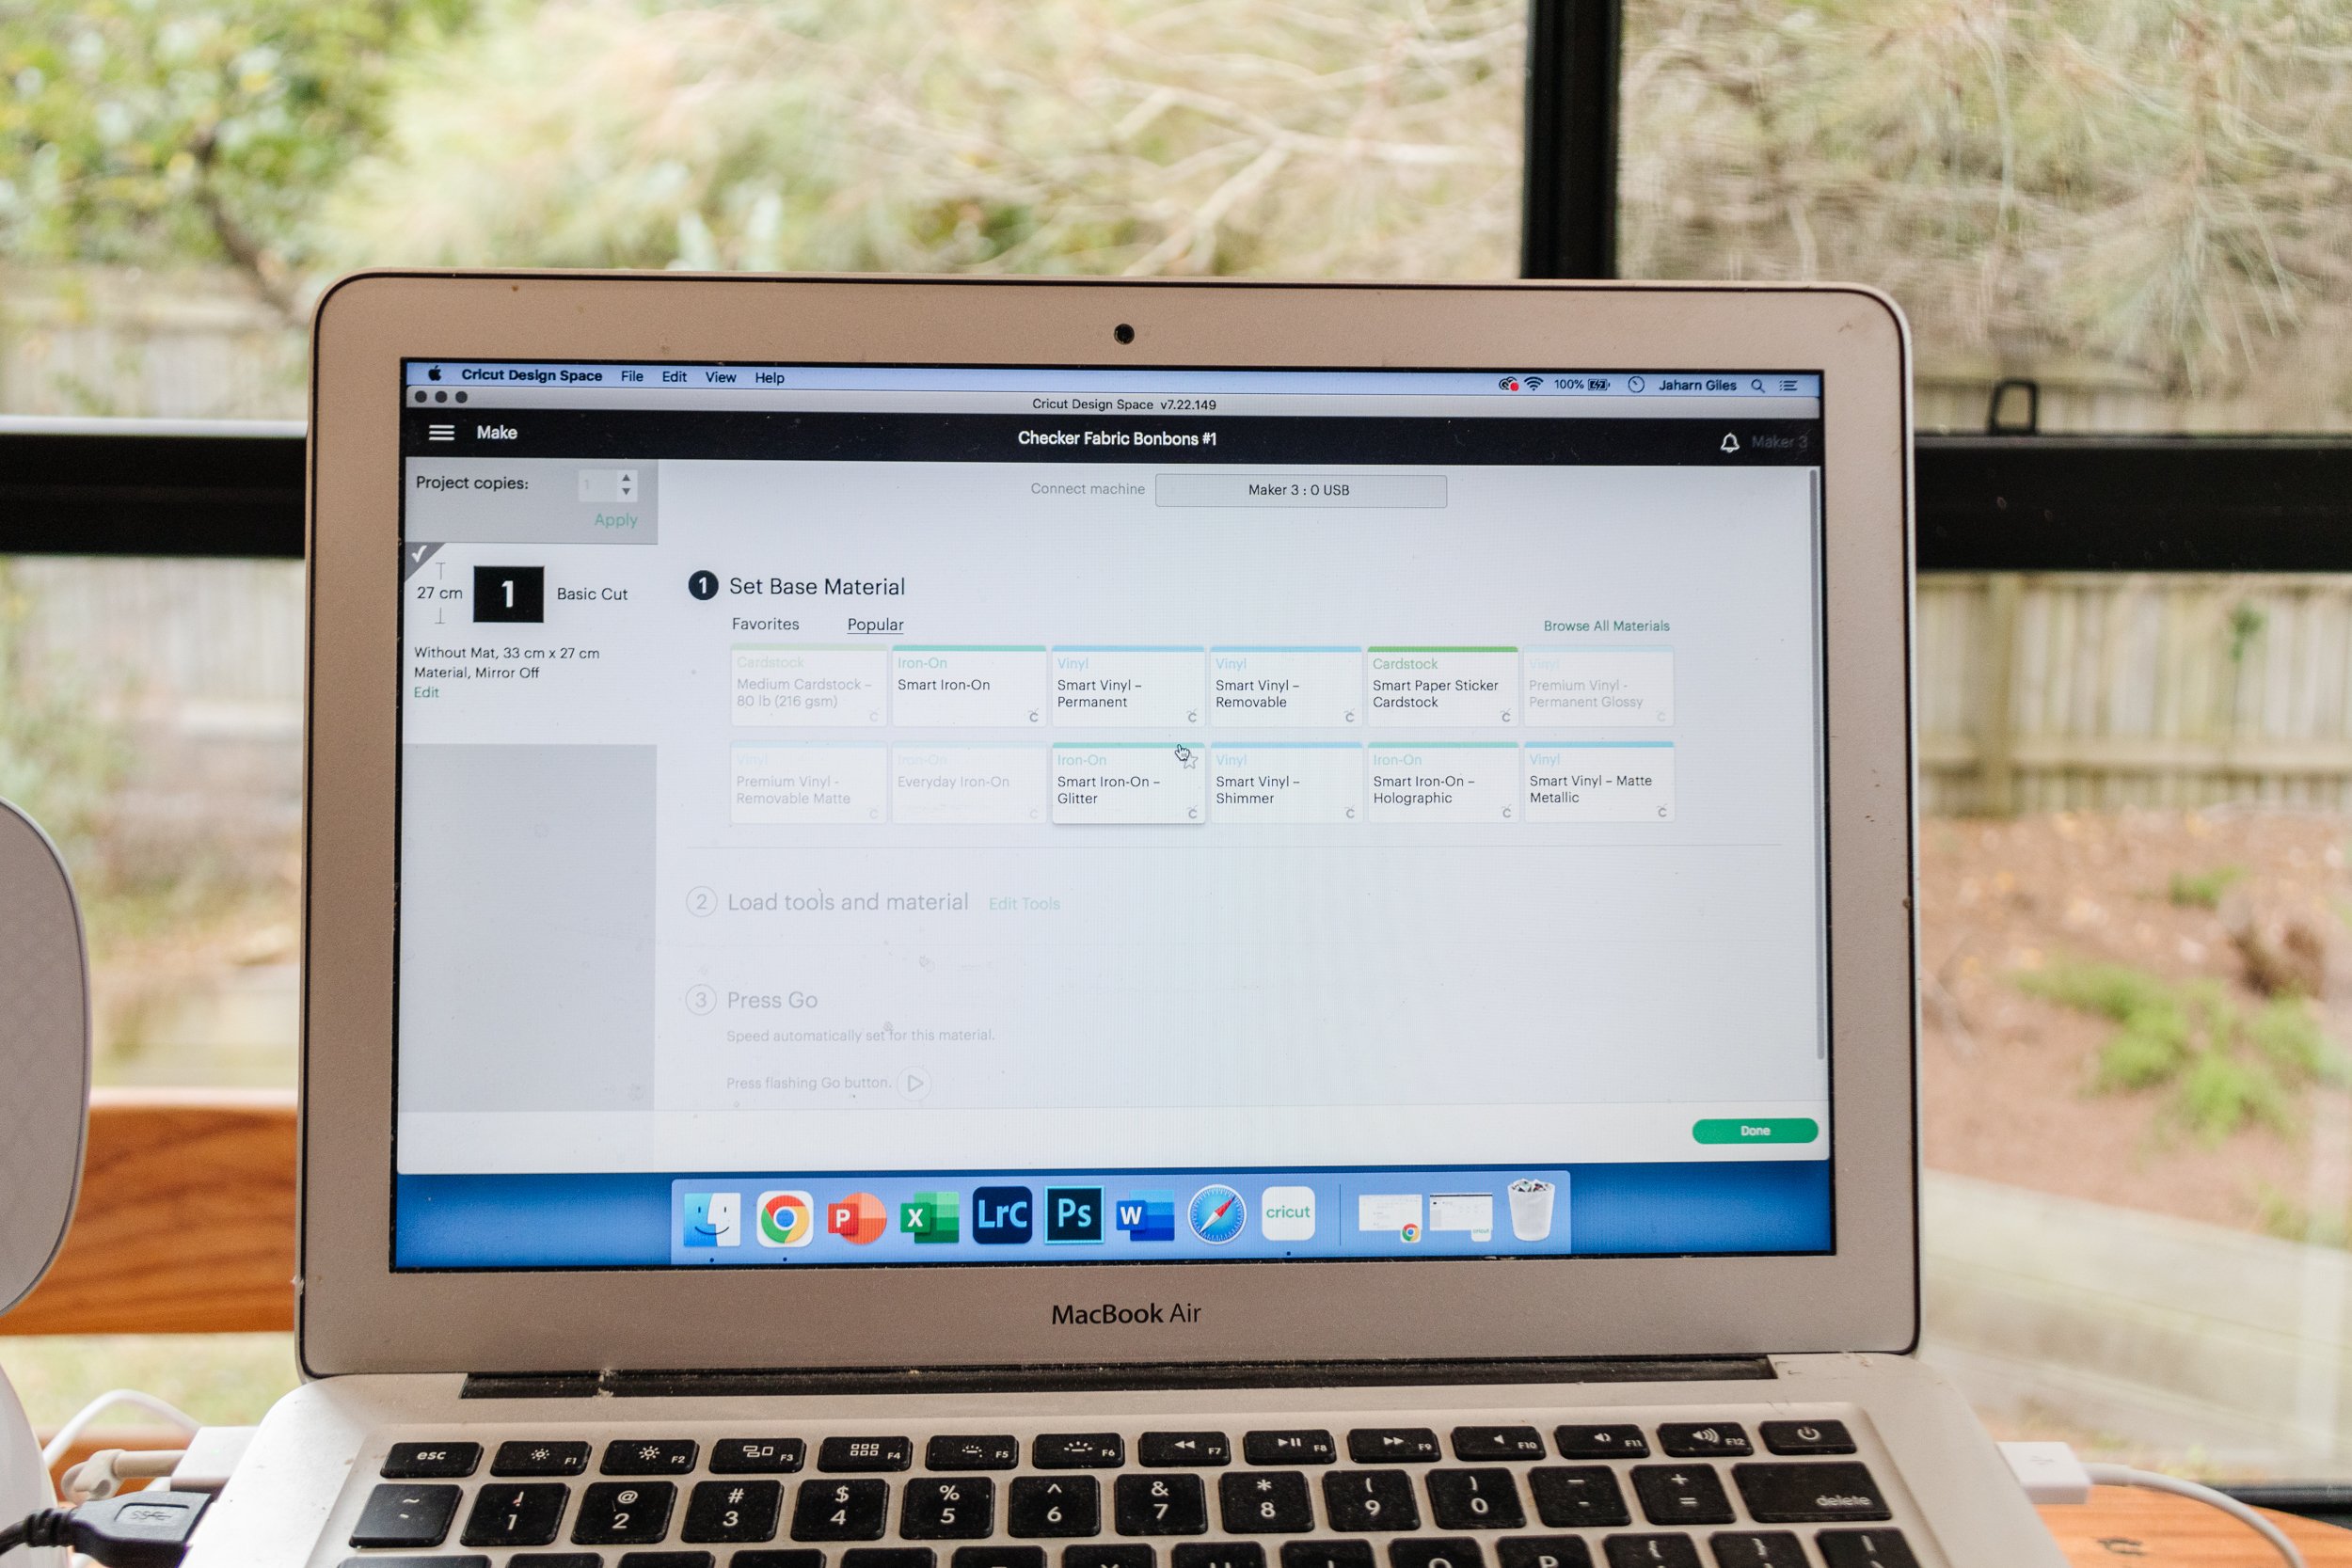
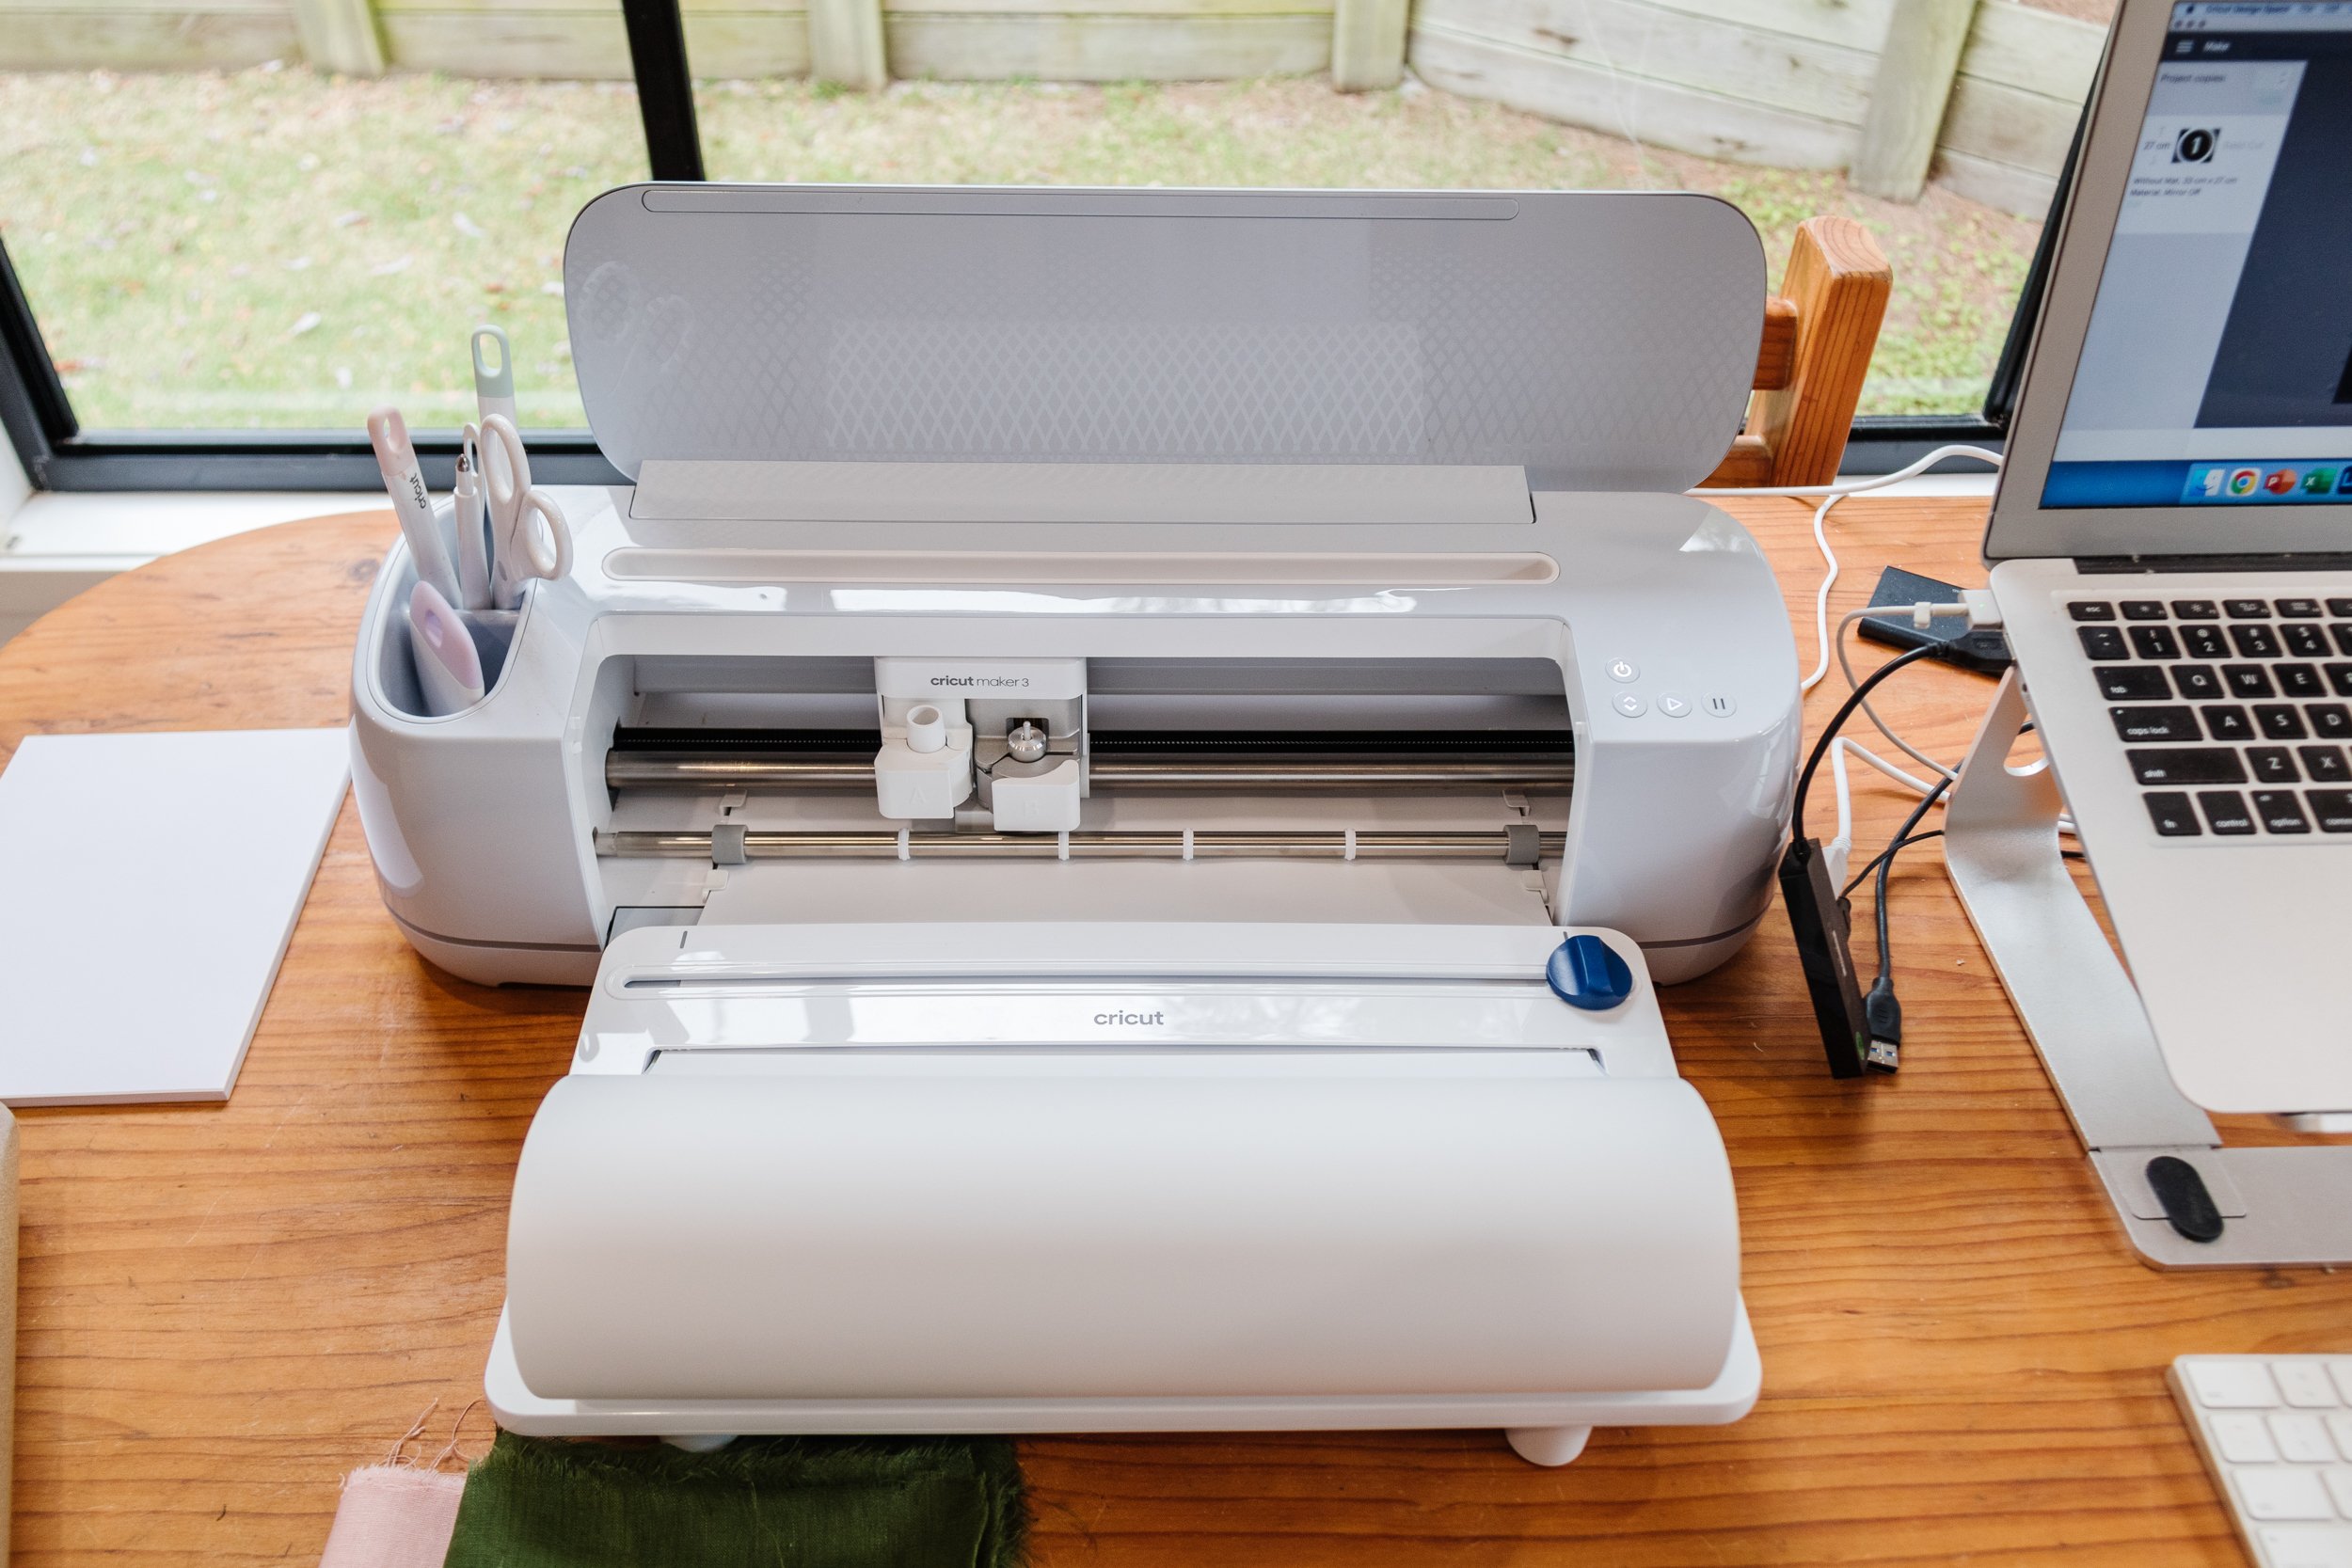
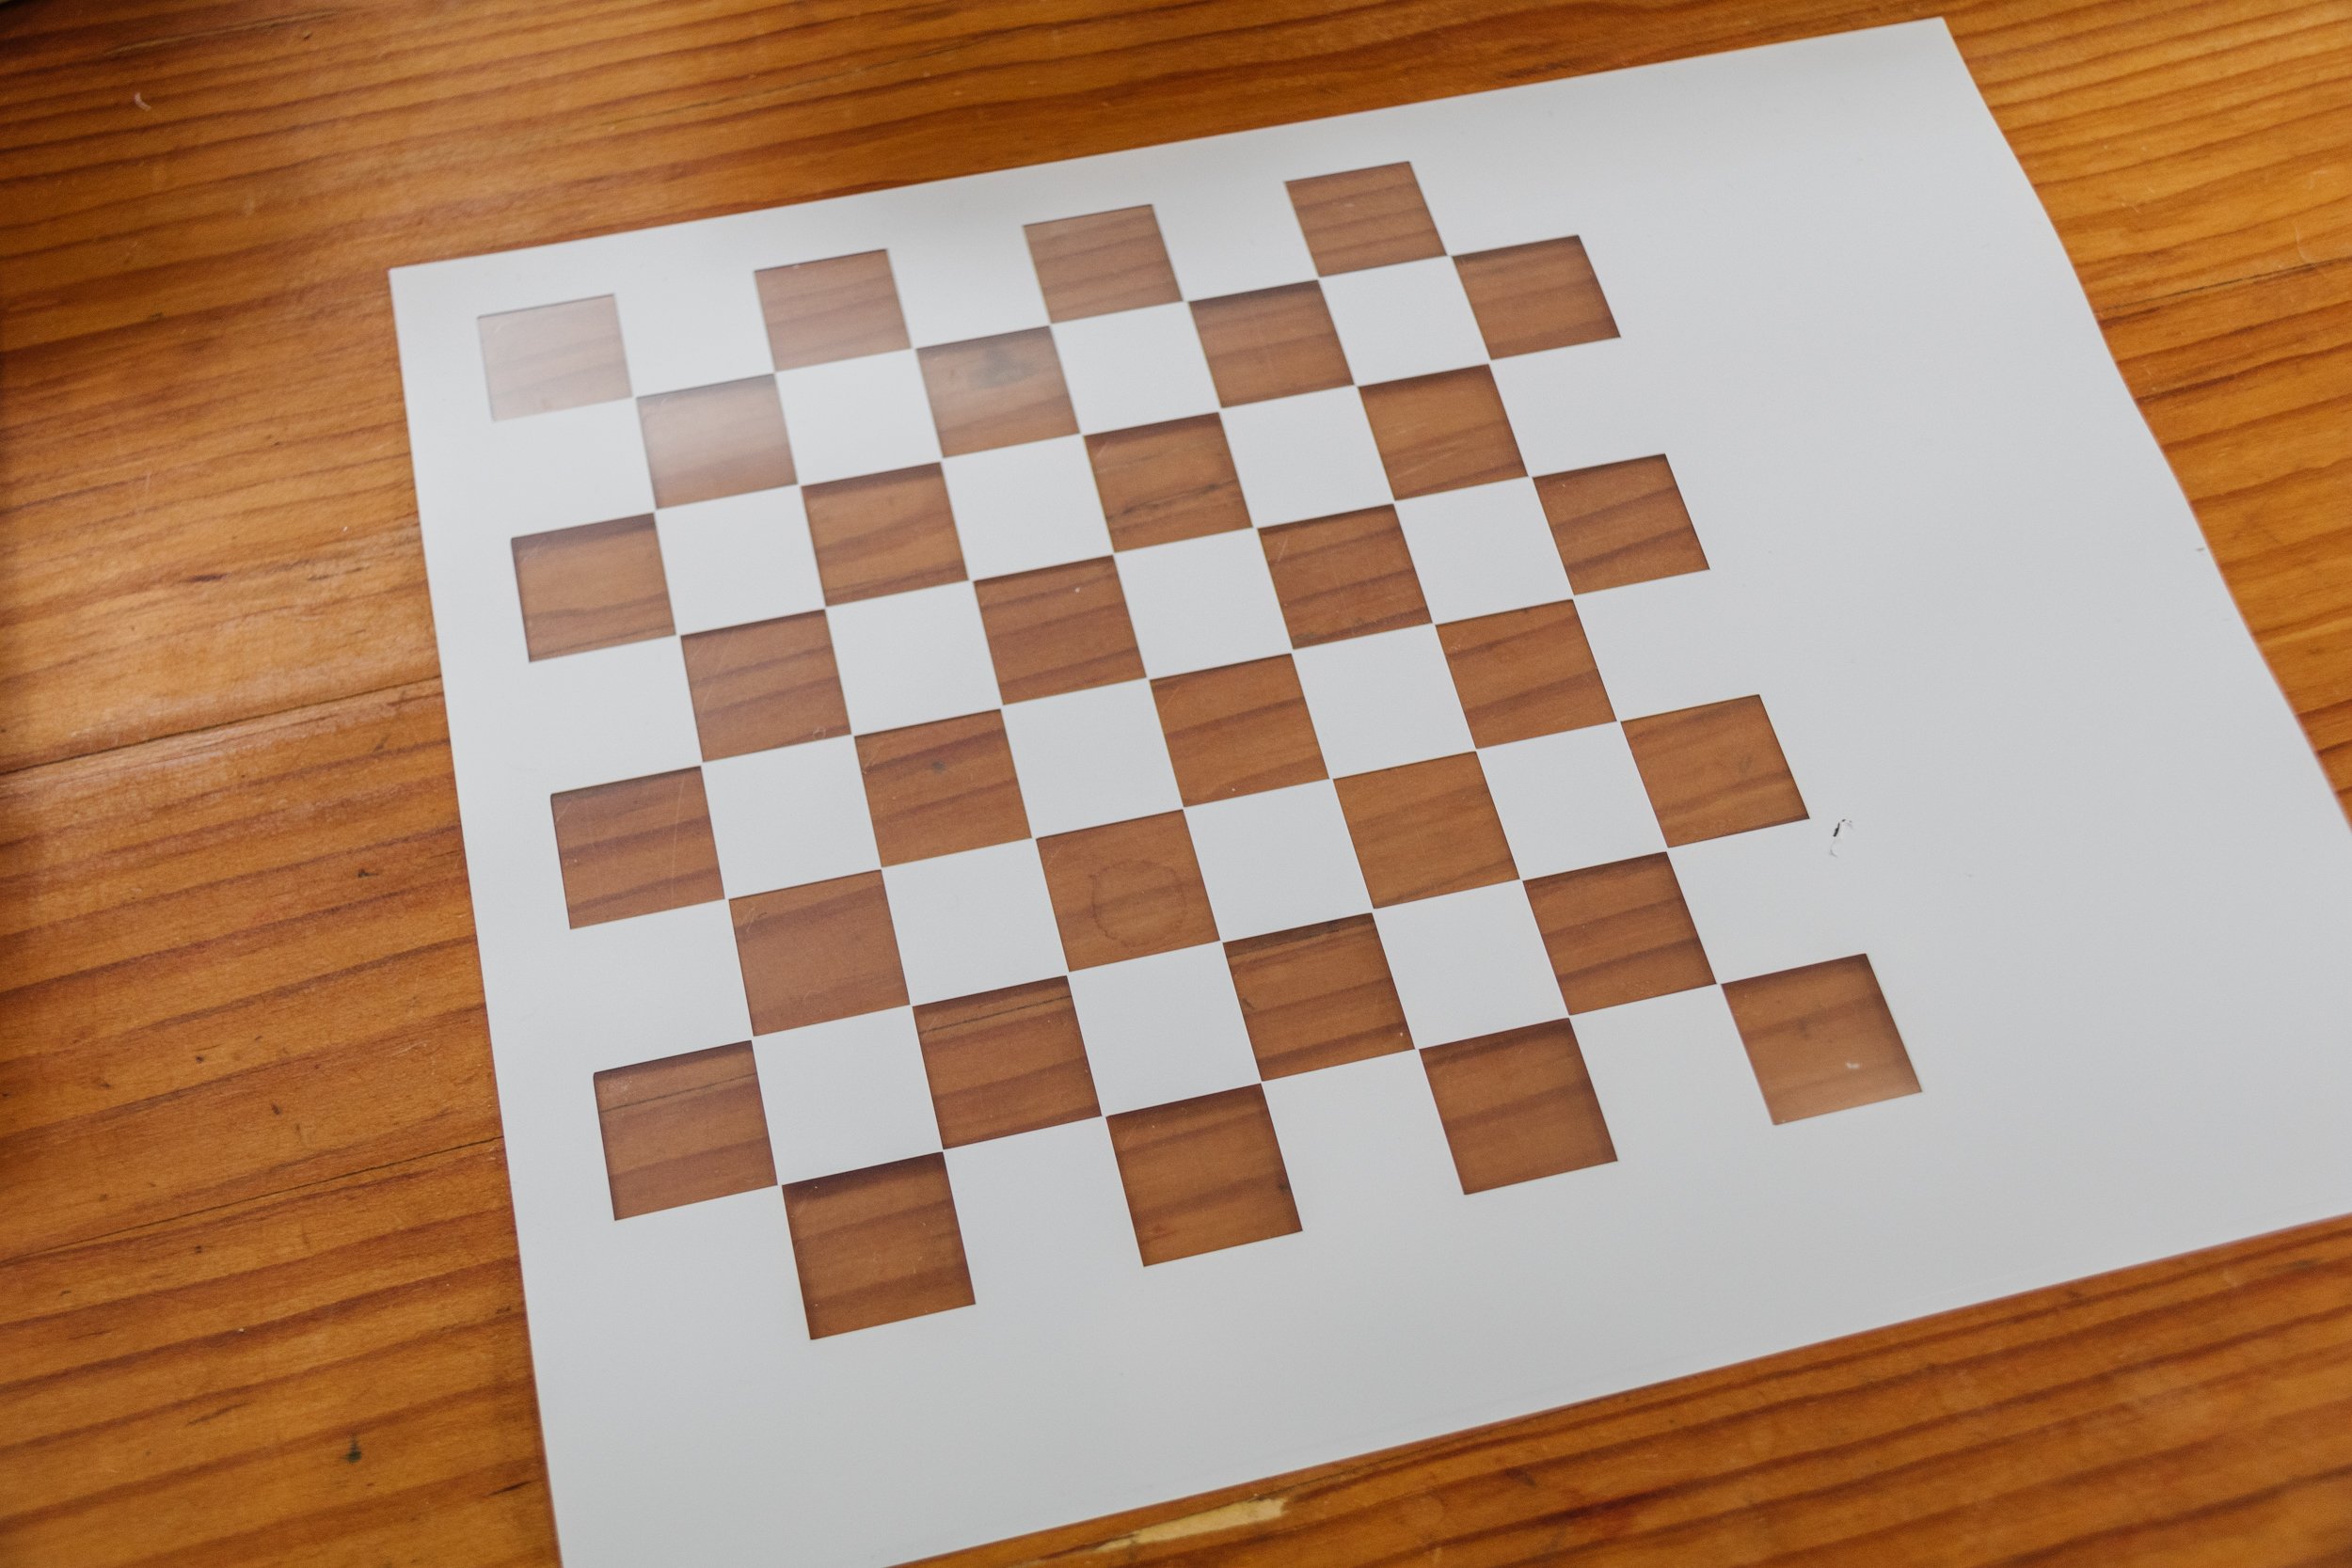
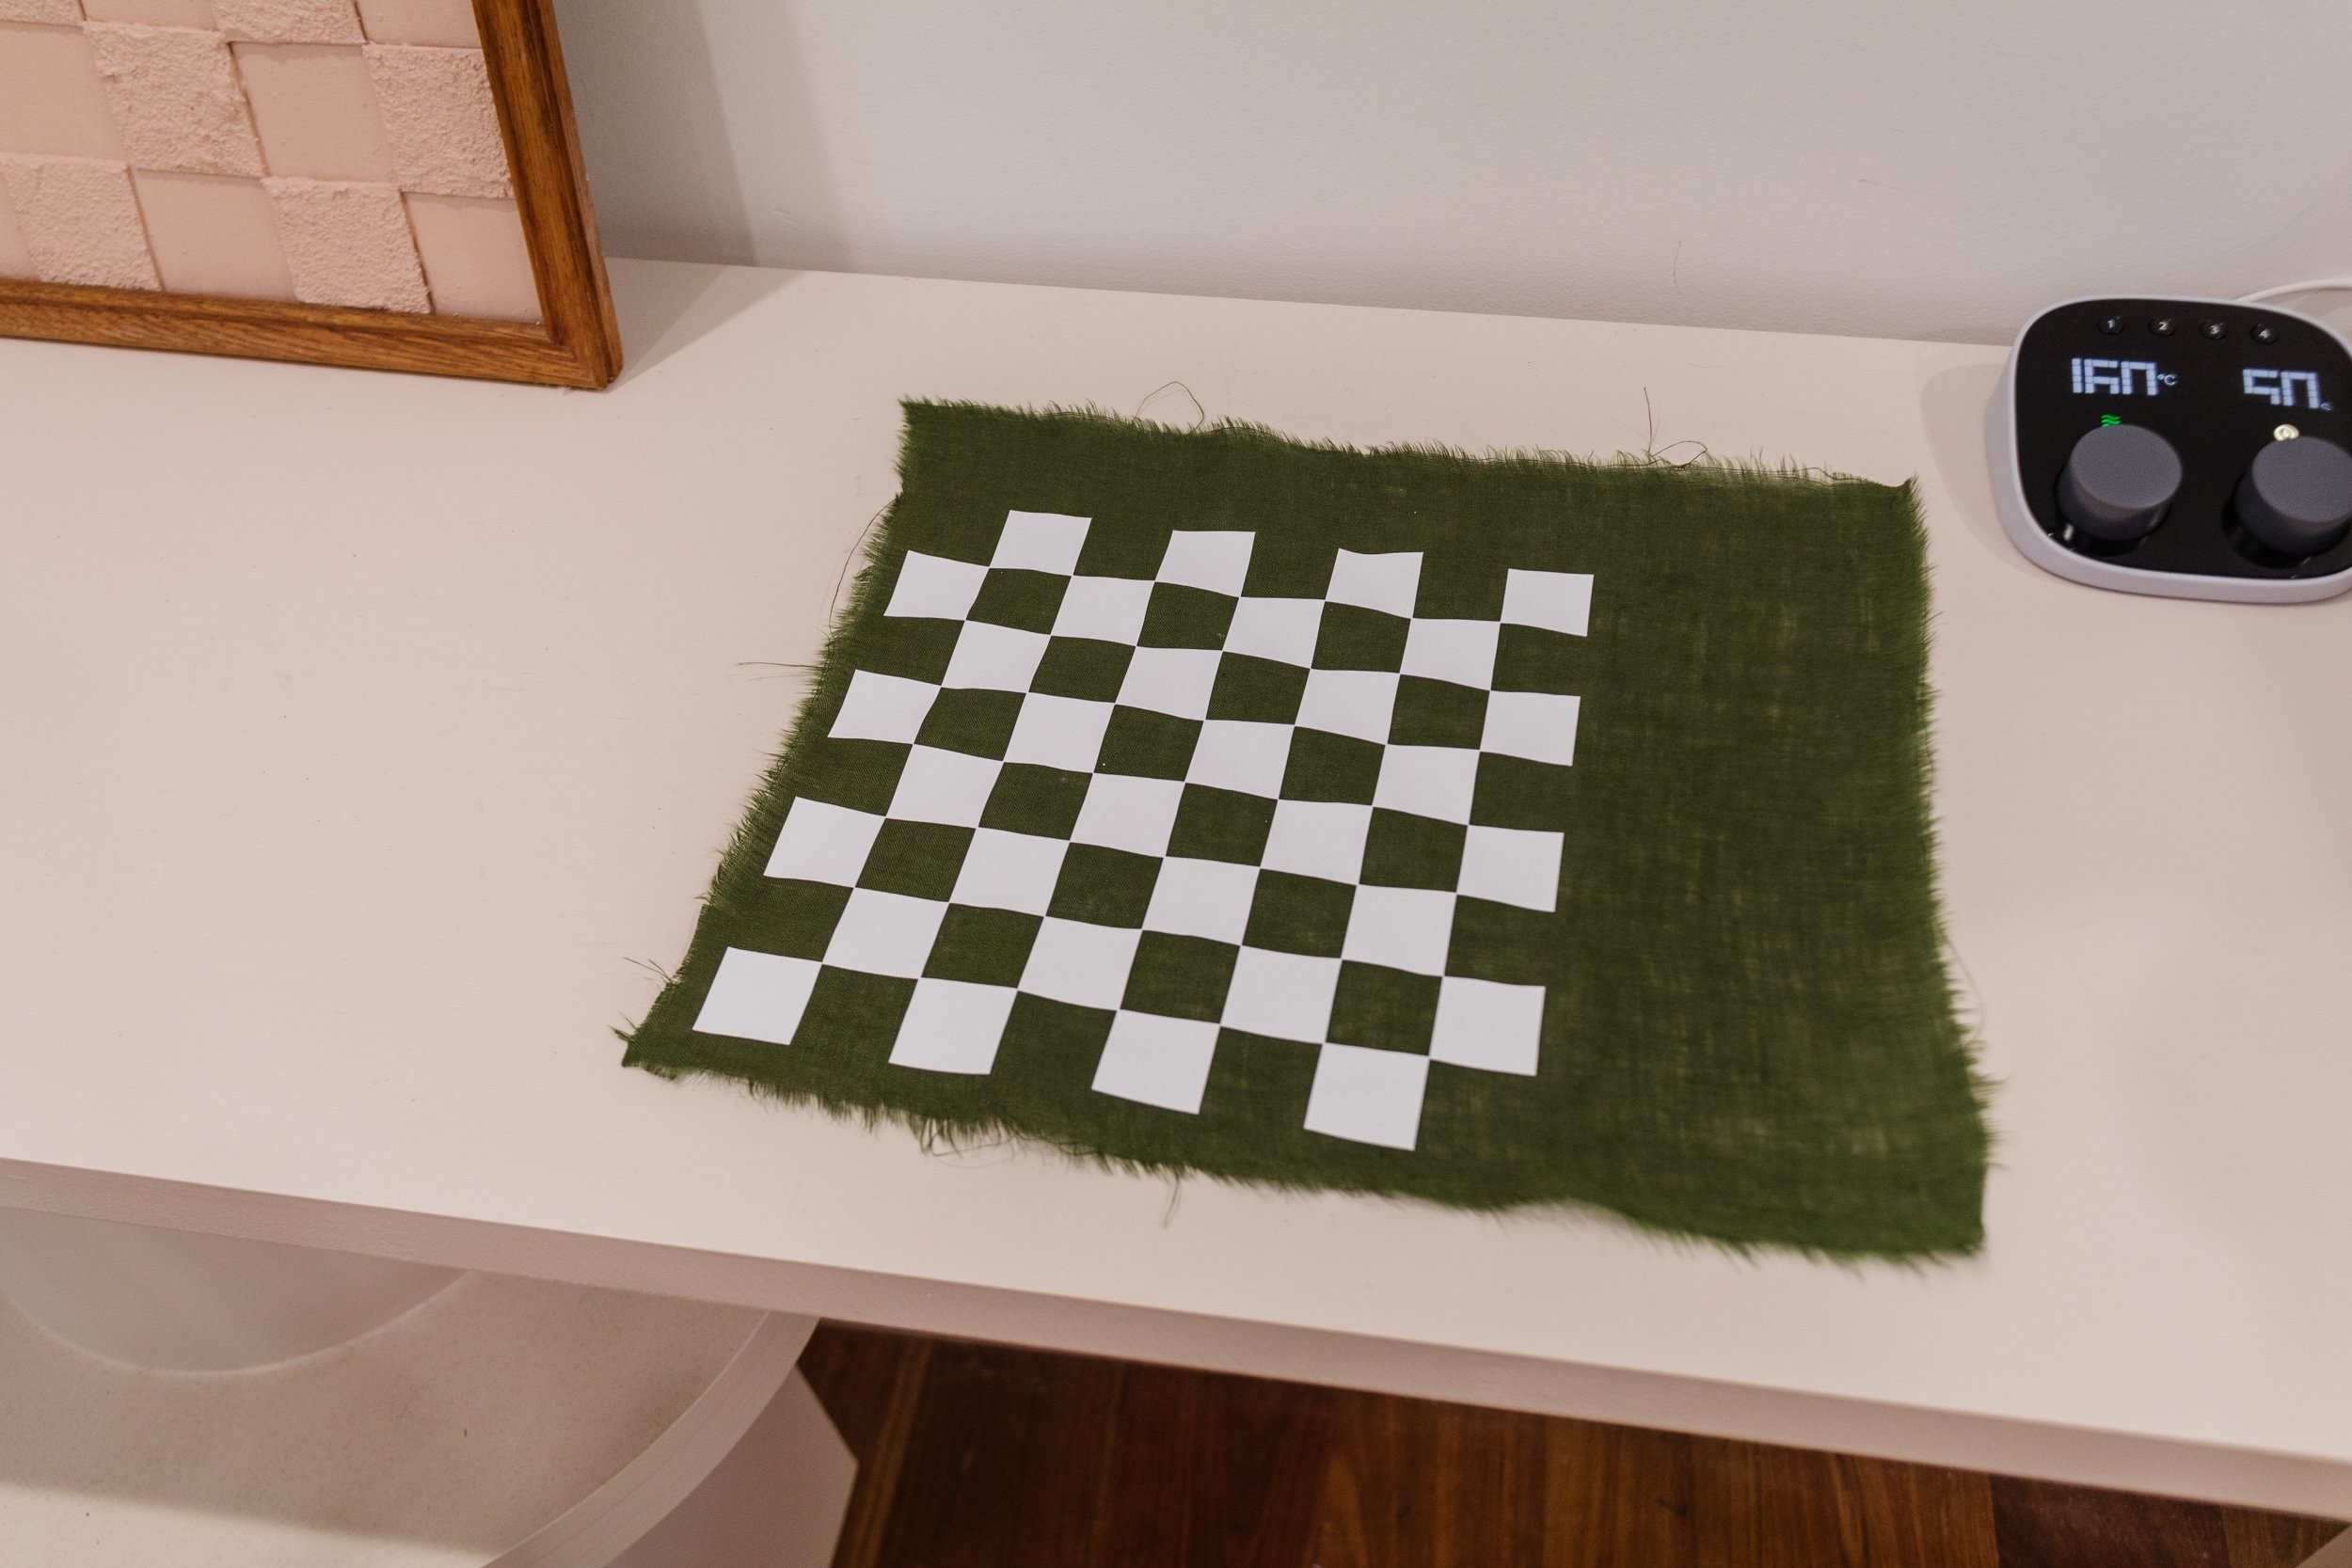
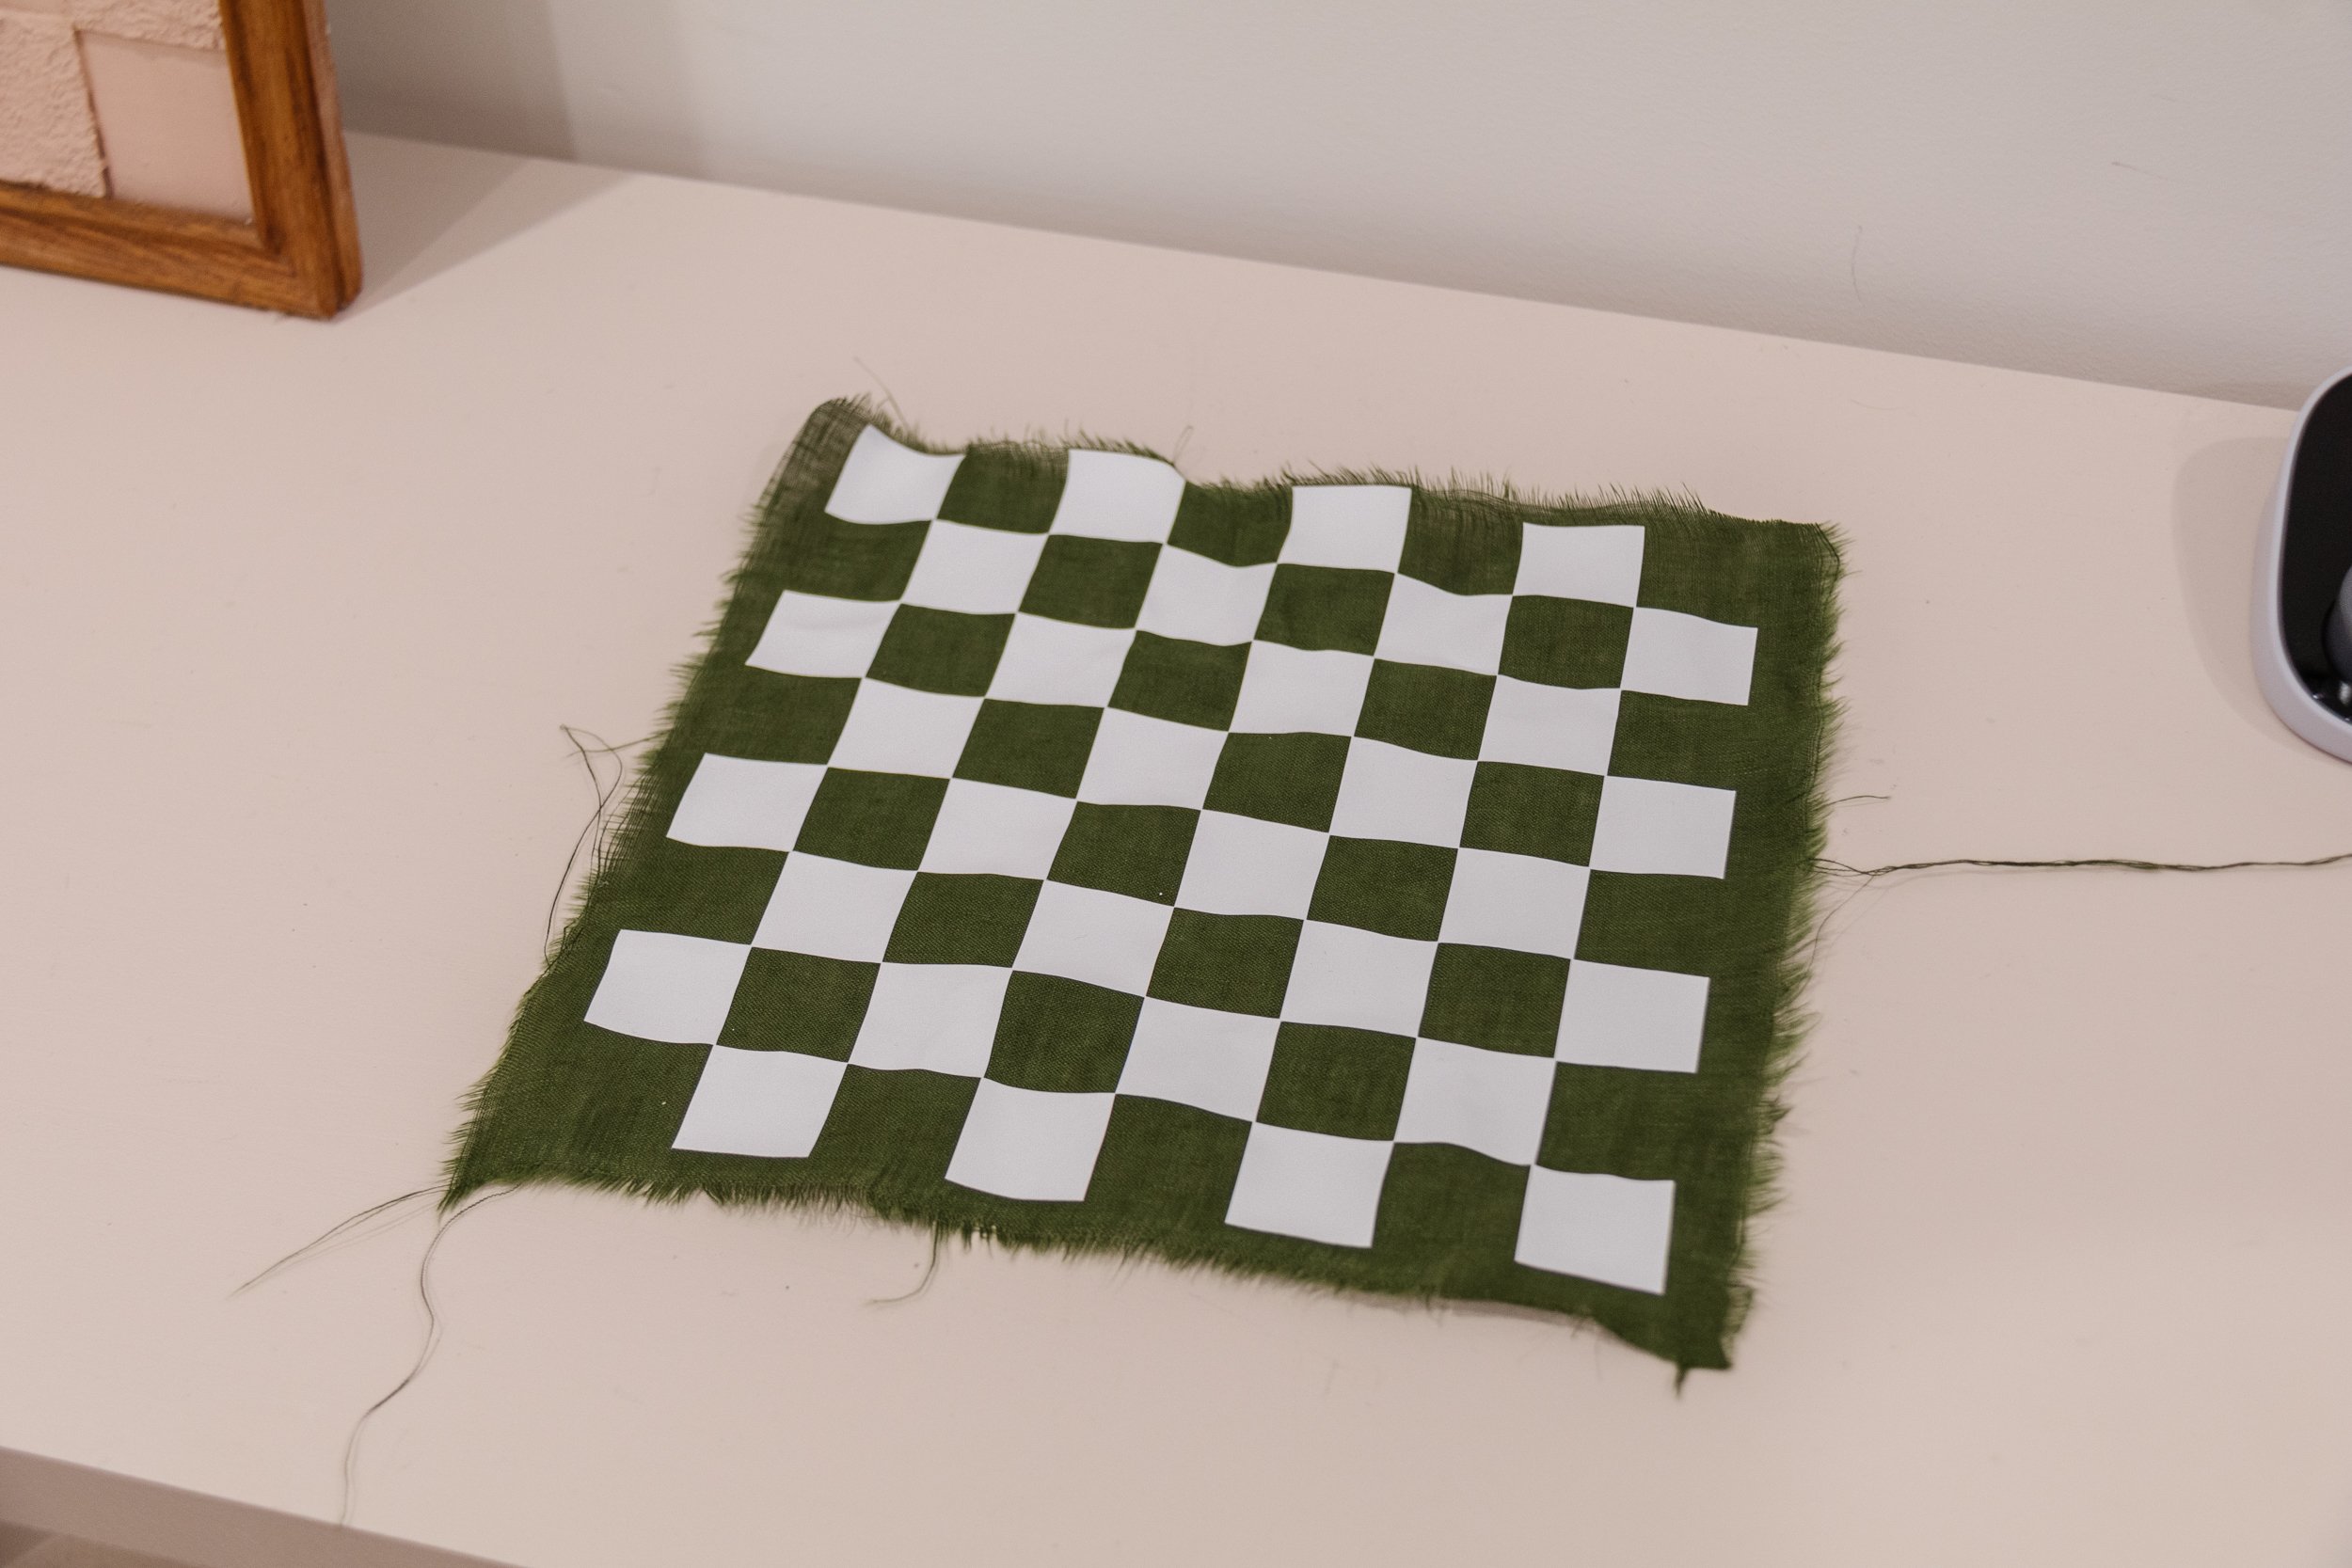
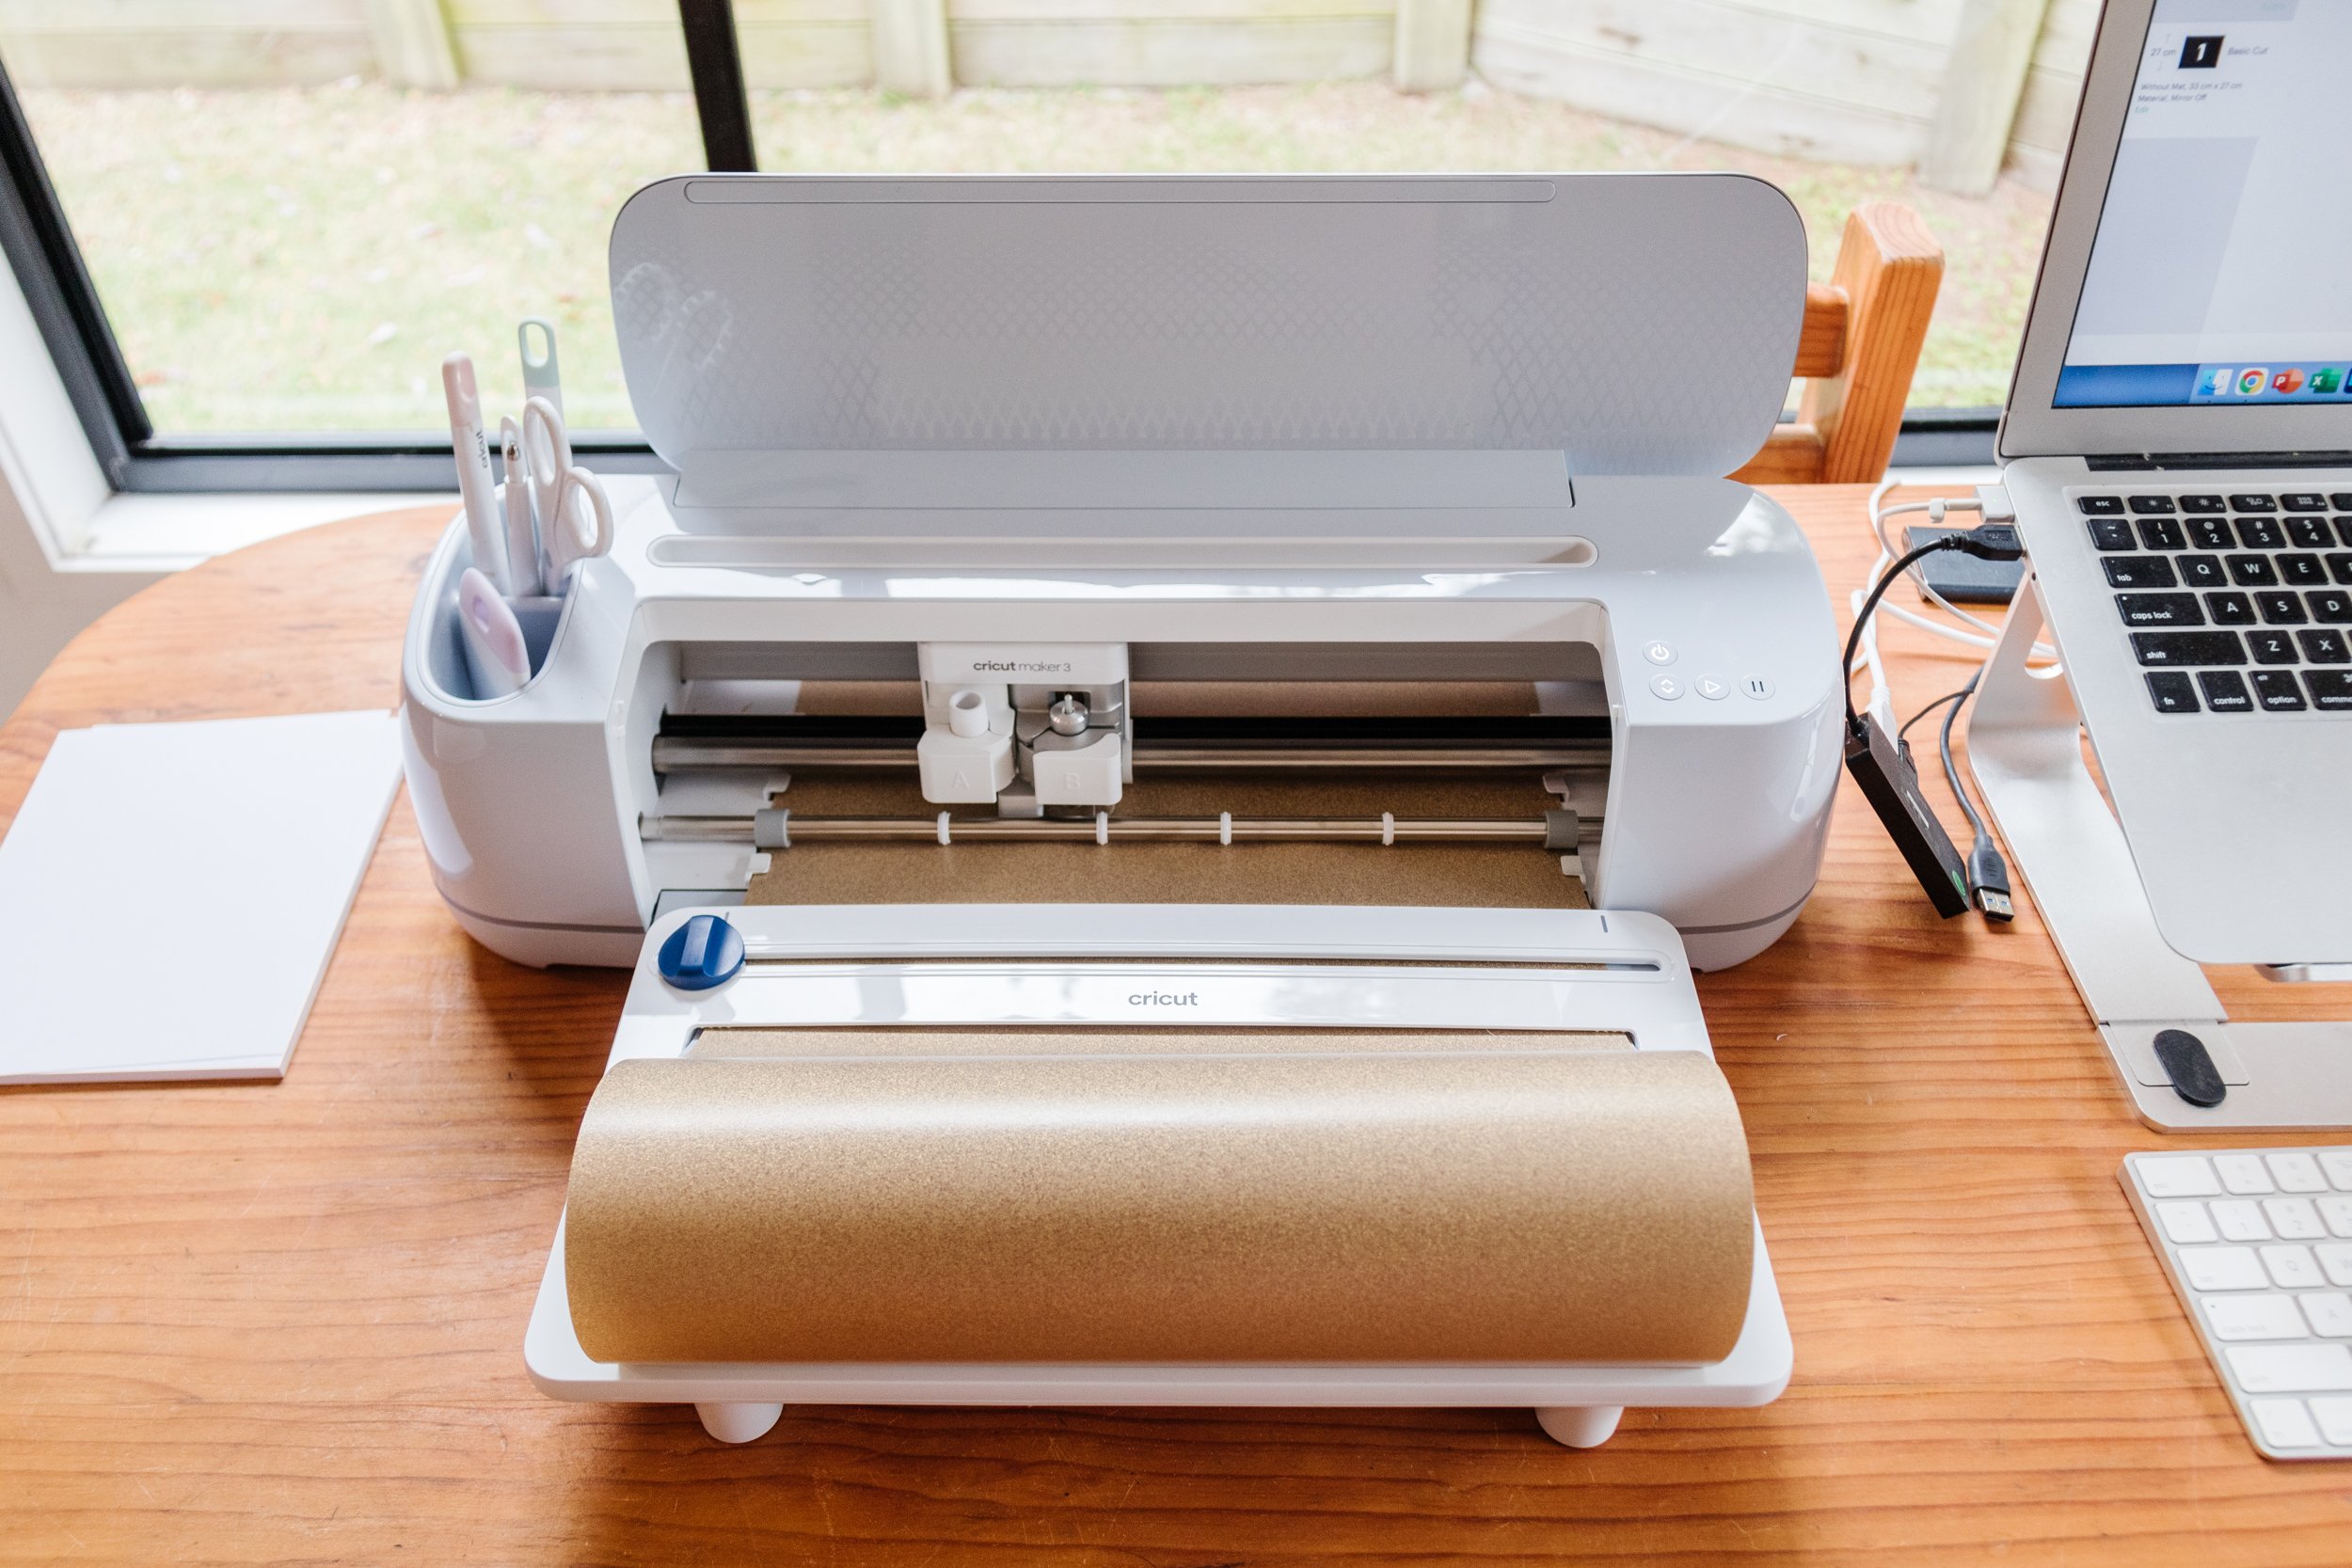
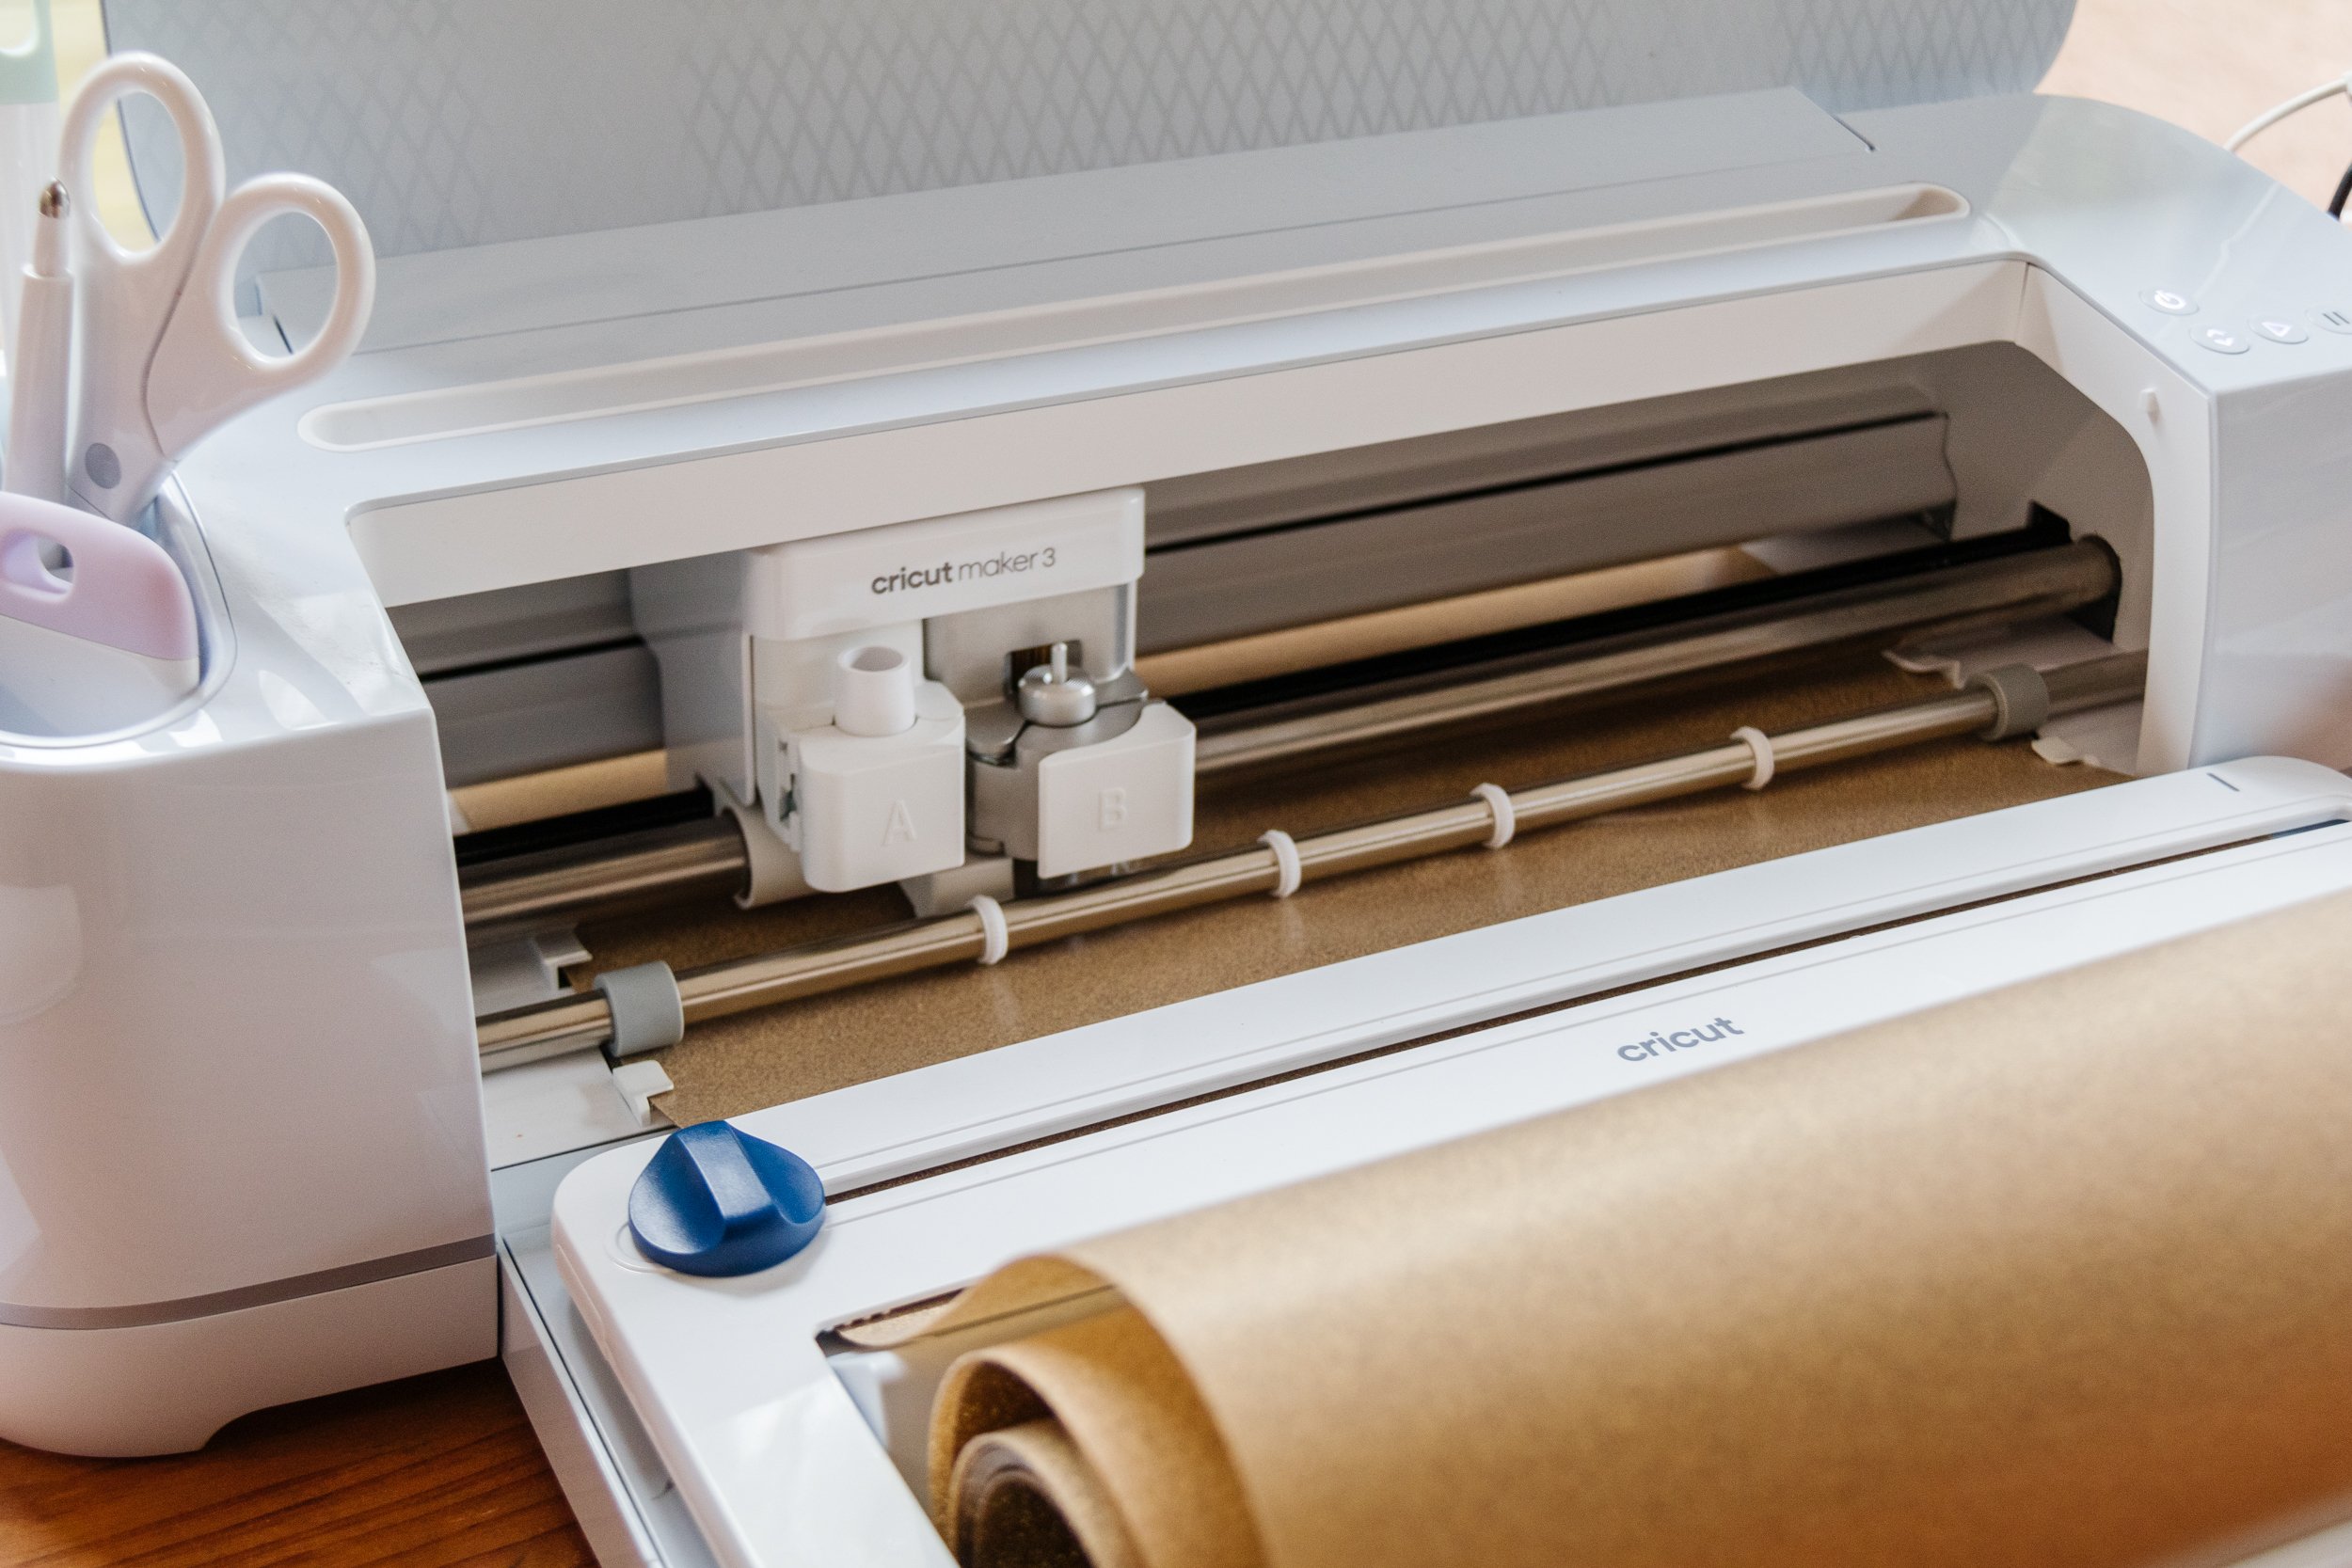
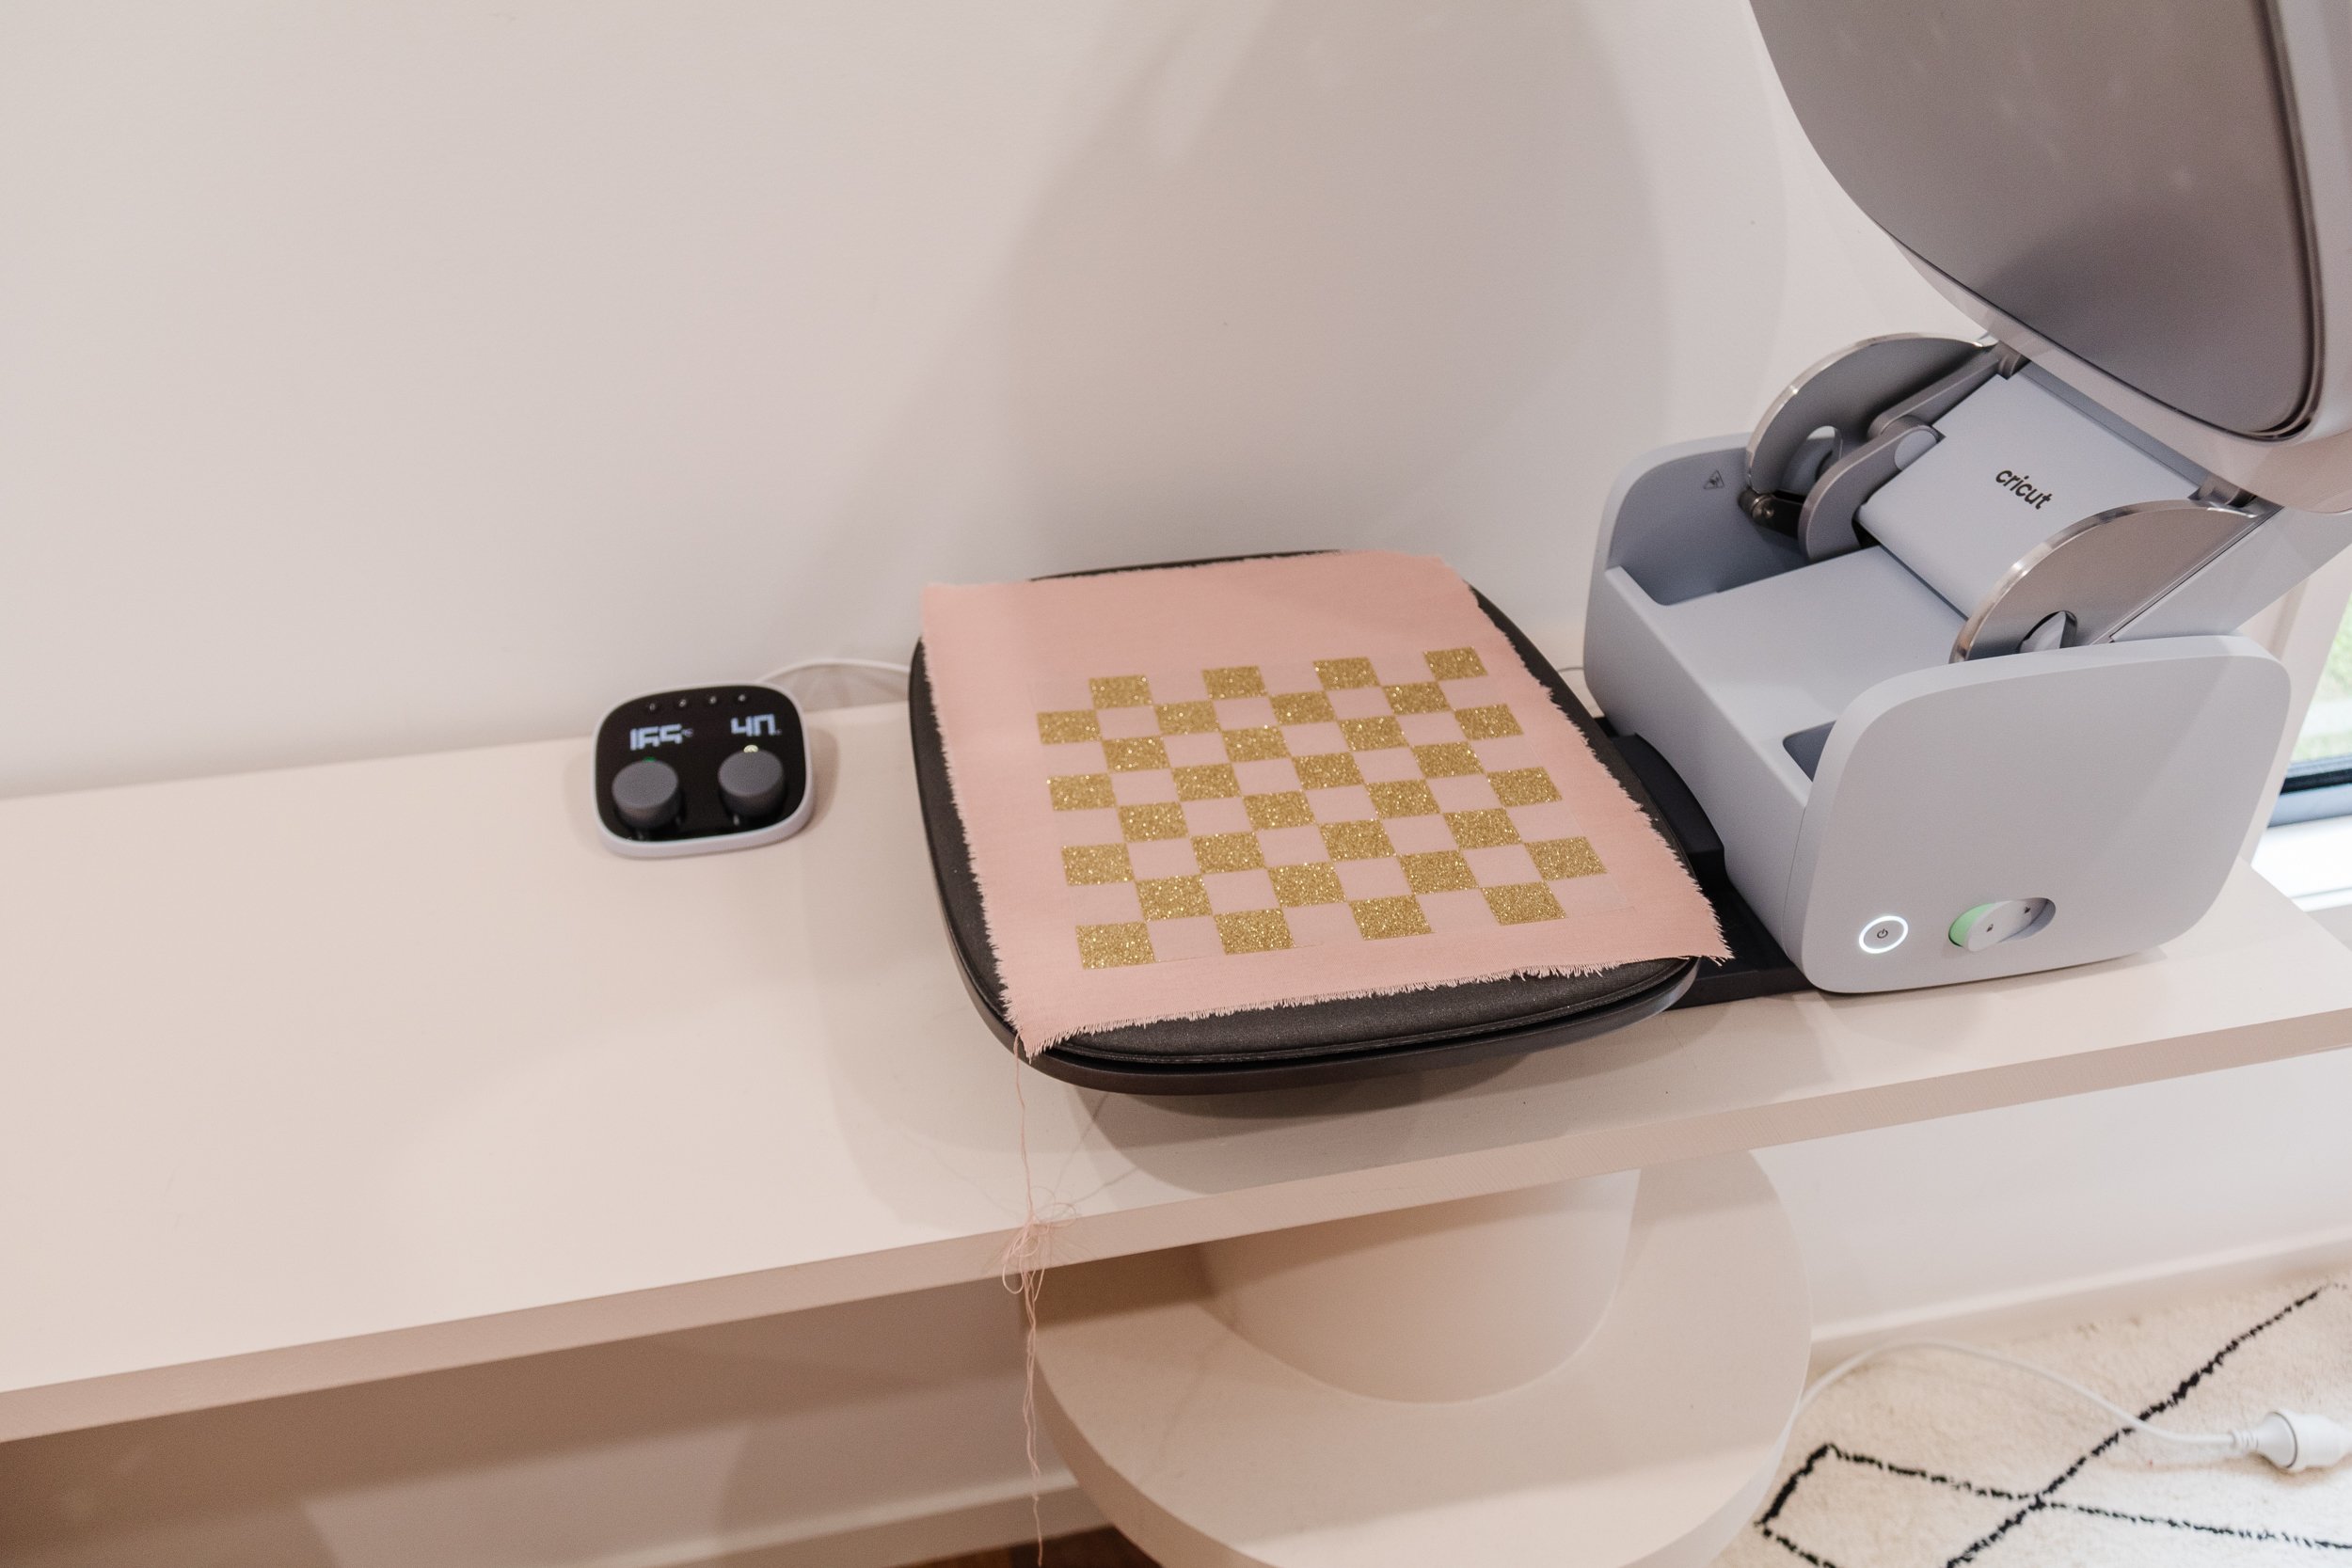
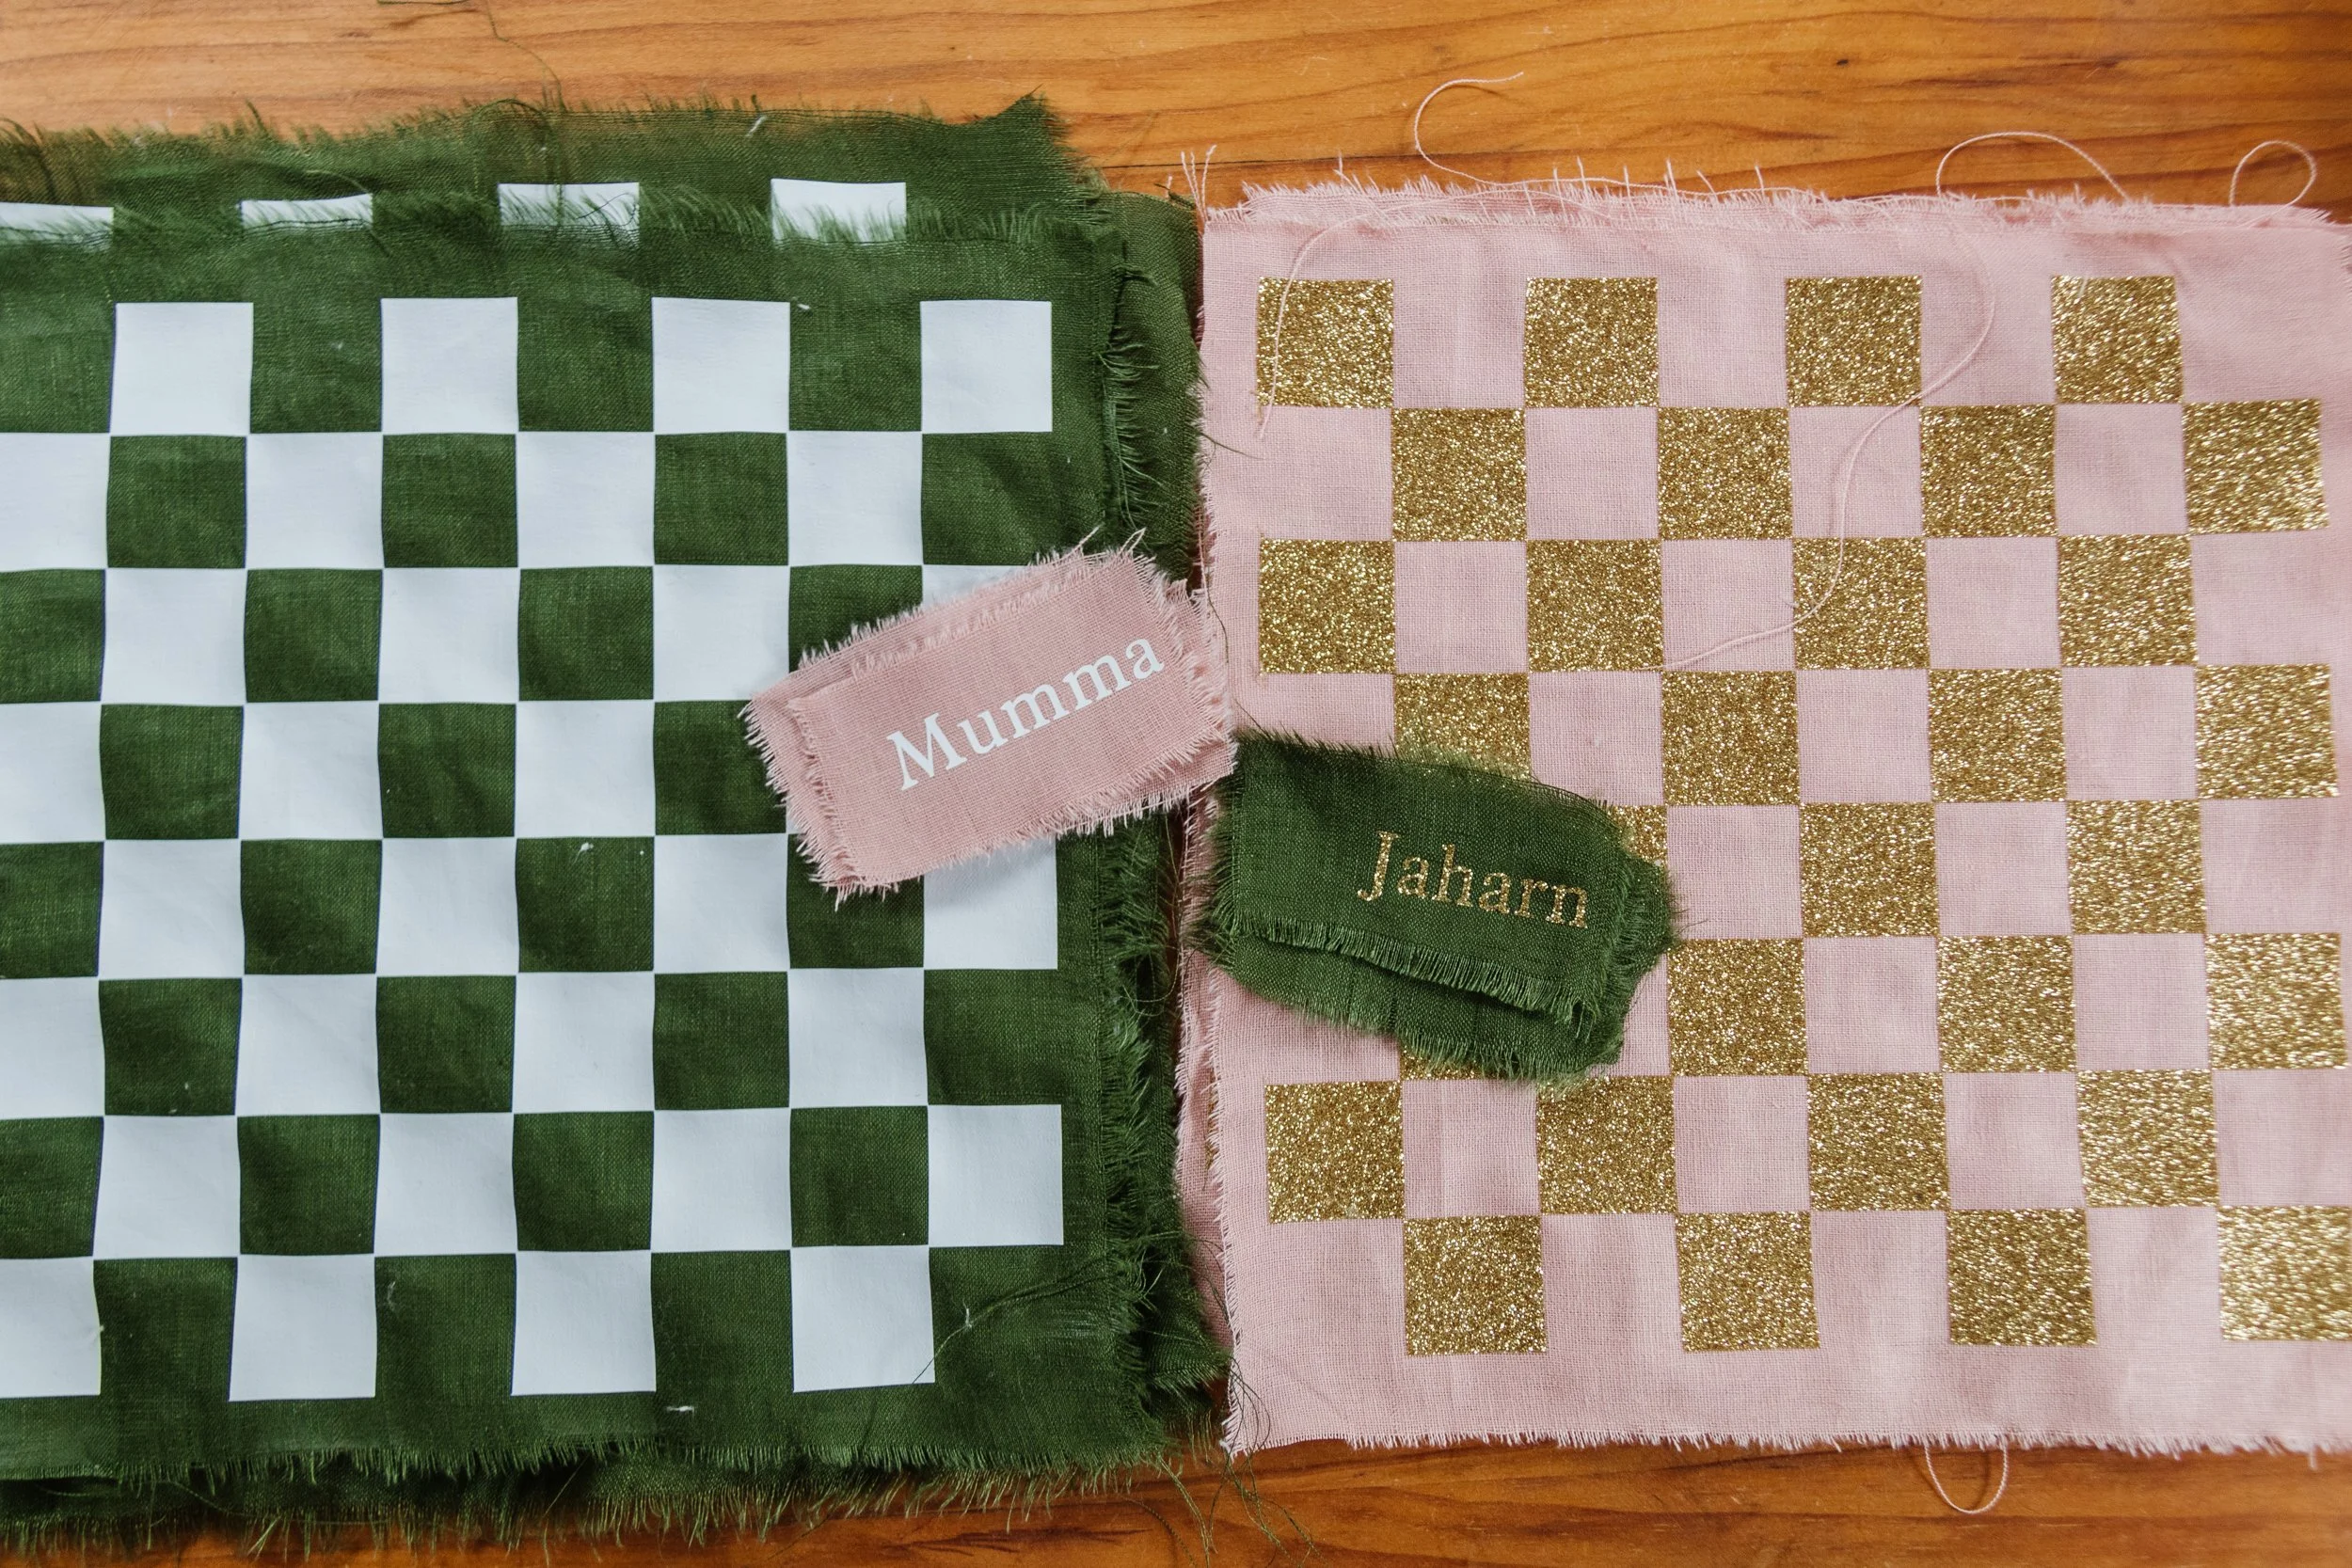
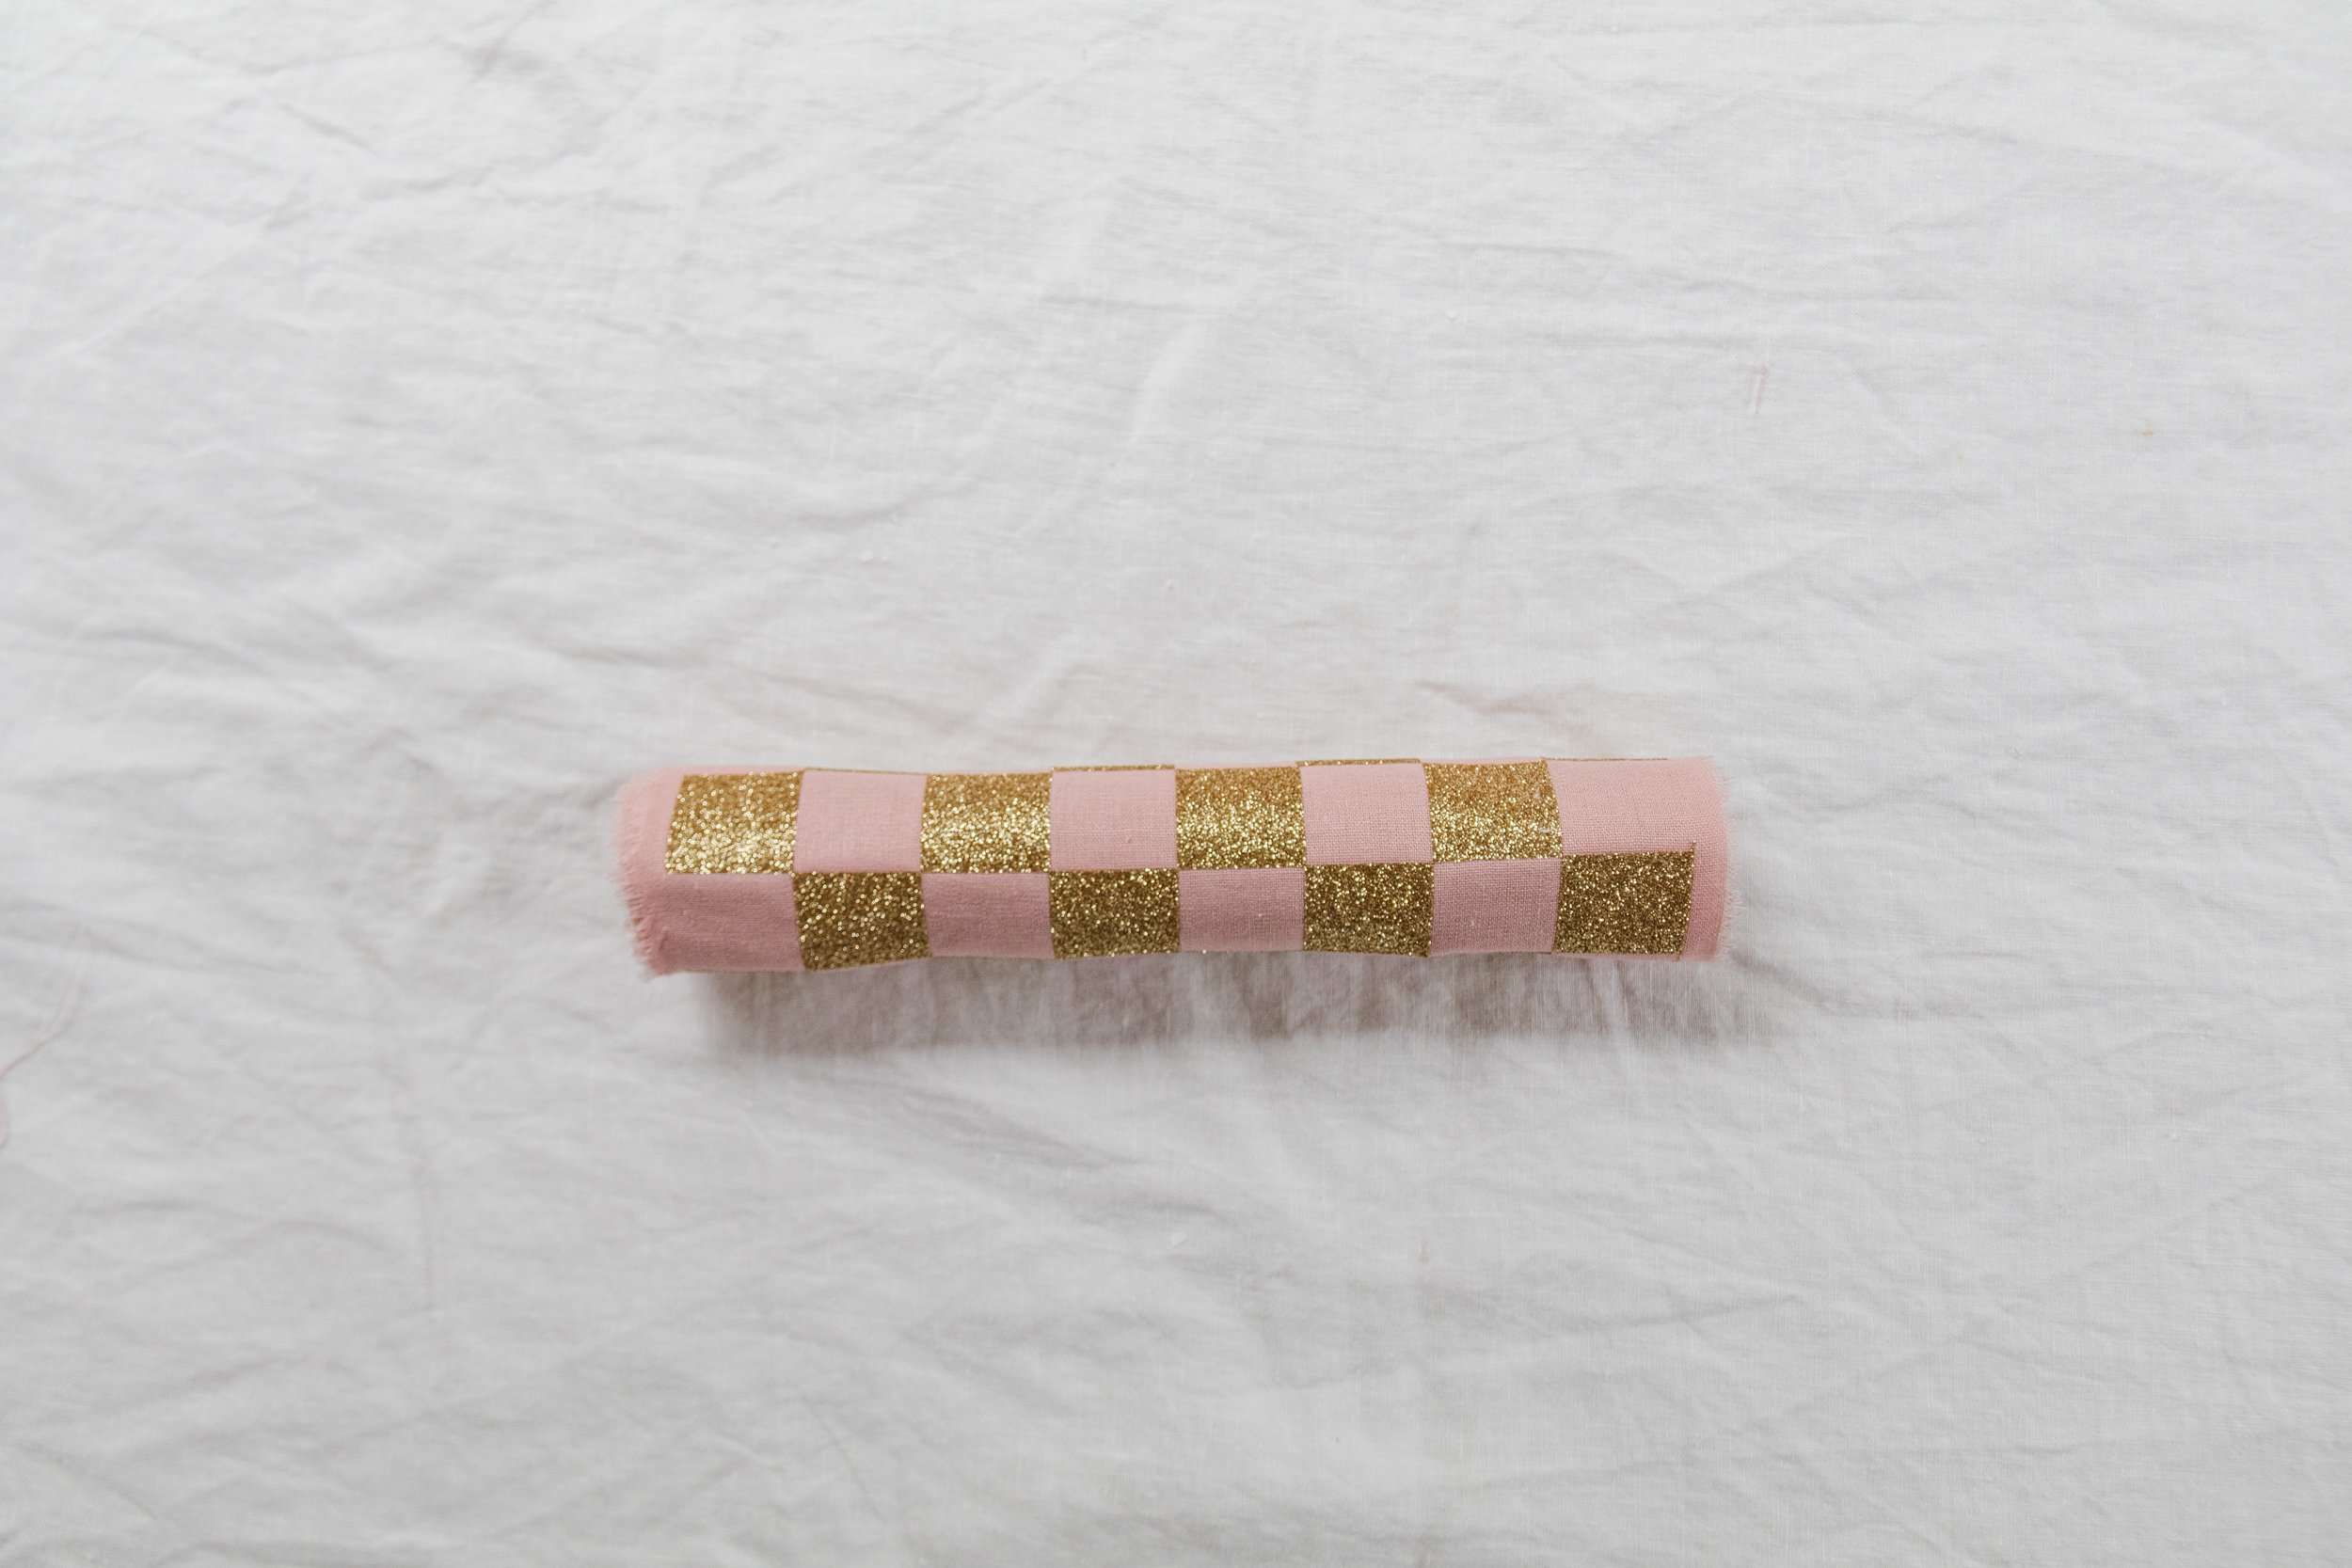
Step 1: To begin with, I started this project by opening the Cricut Design App and after searching for a checker design, I chose the “Chess Board” #MBD5D0BE design. From here I increased the size of the design to approximately 21cm x 21cm. When I was happy with my design, I loaded the Maker 3 with the Smart Iron On and followed the prompts until the Maker 3 started cutting my design. Also I just got the Cricut Roll Holder and it’s a game changer!
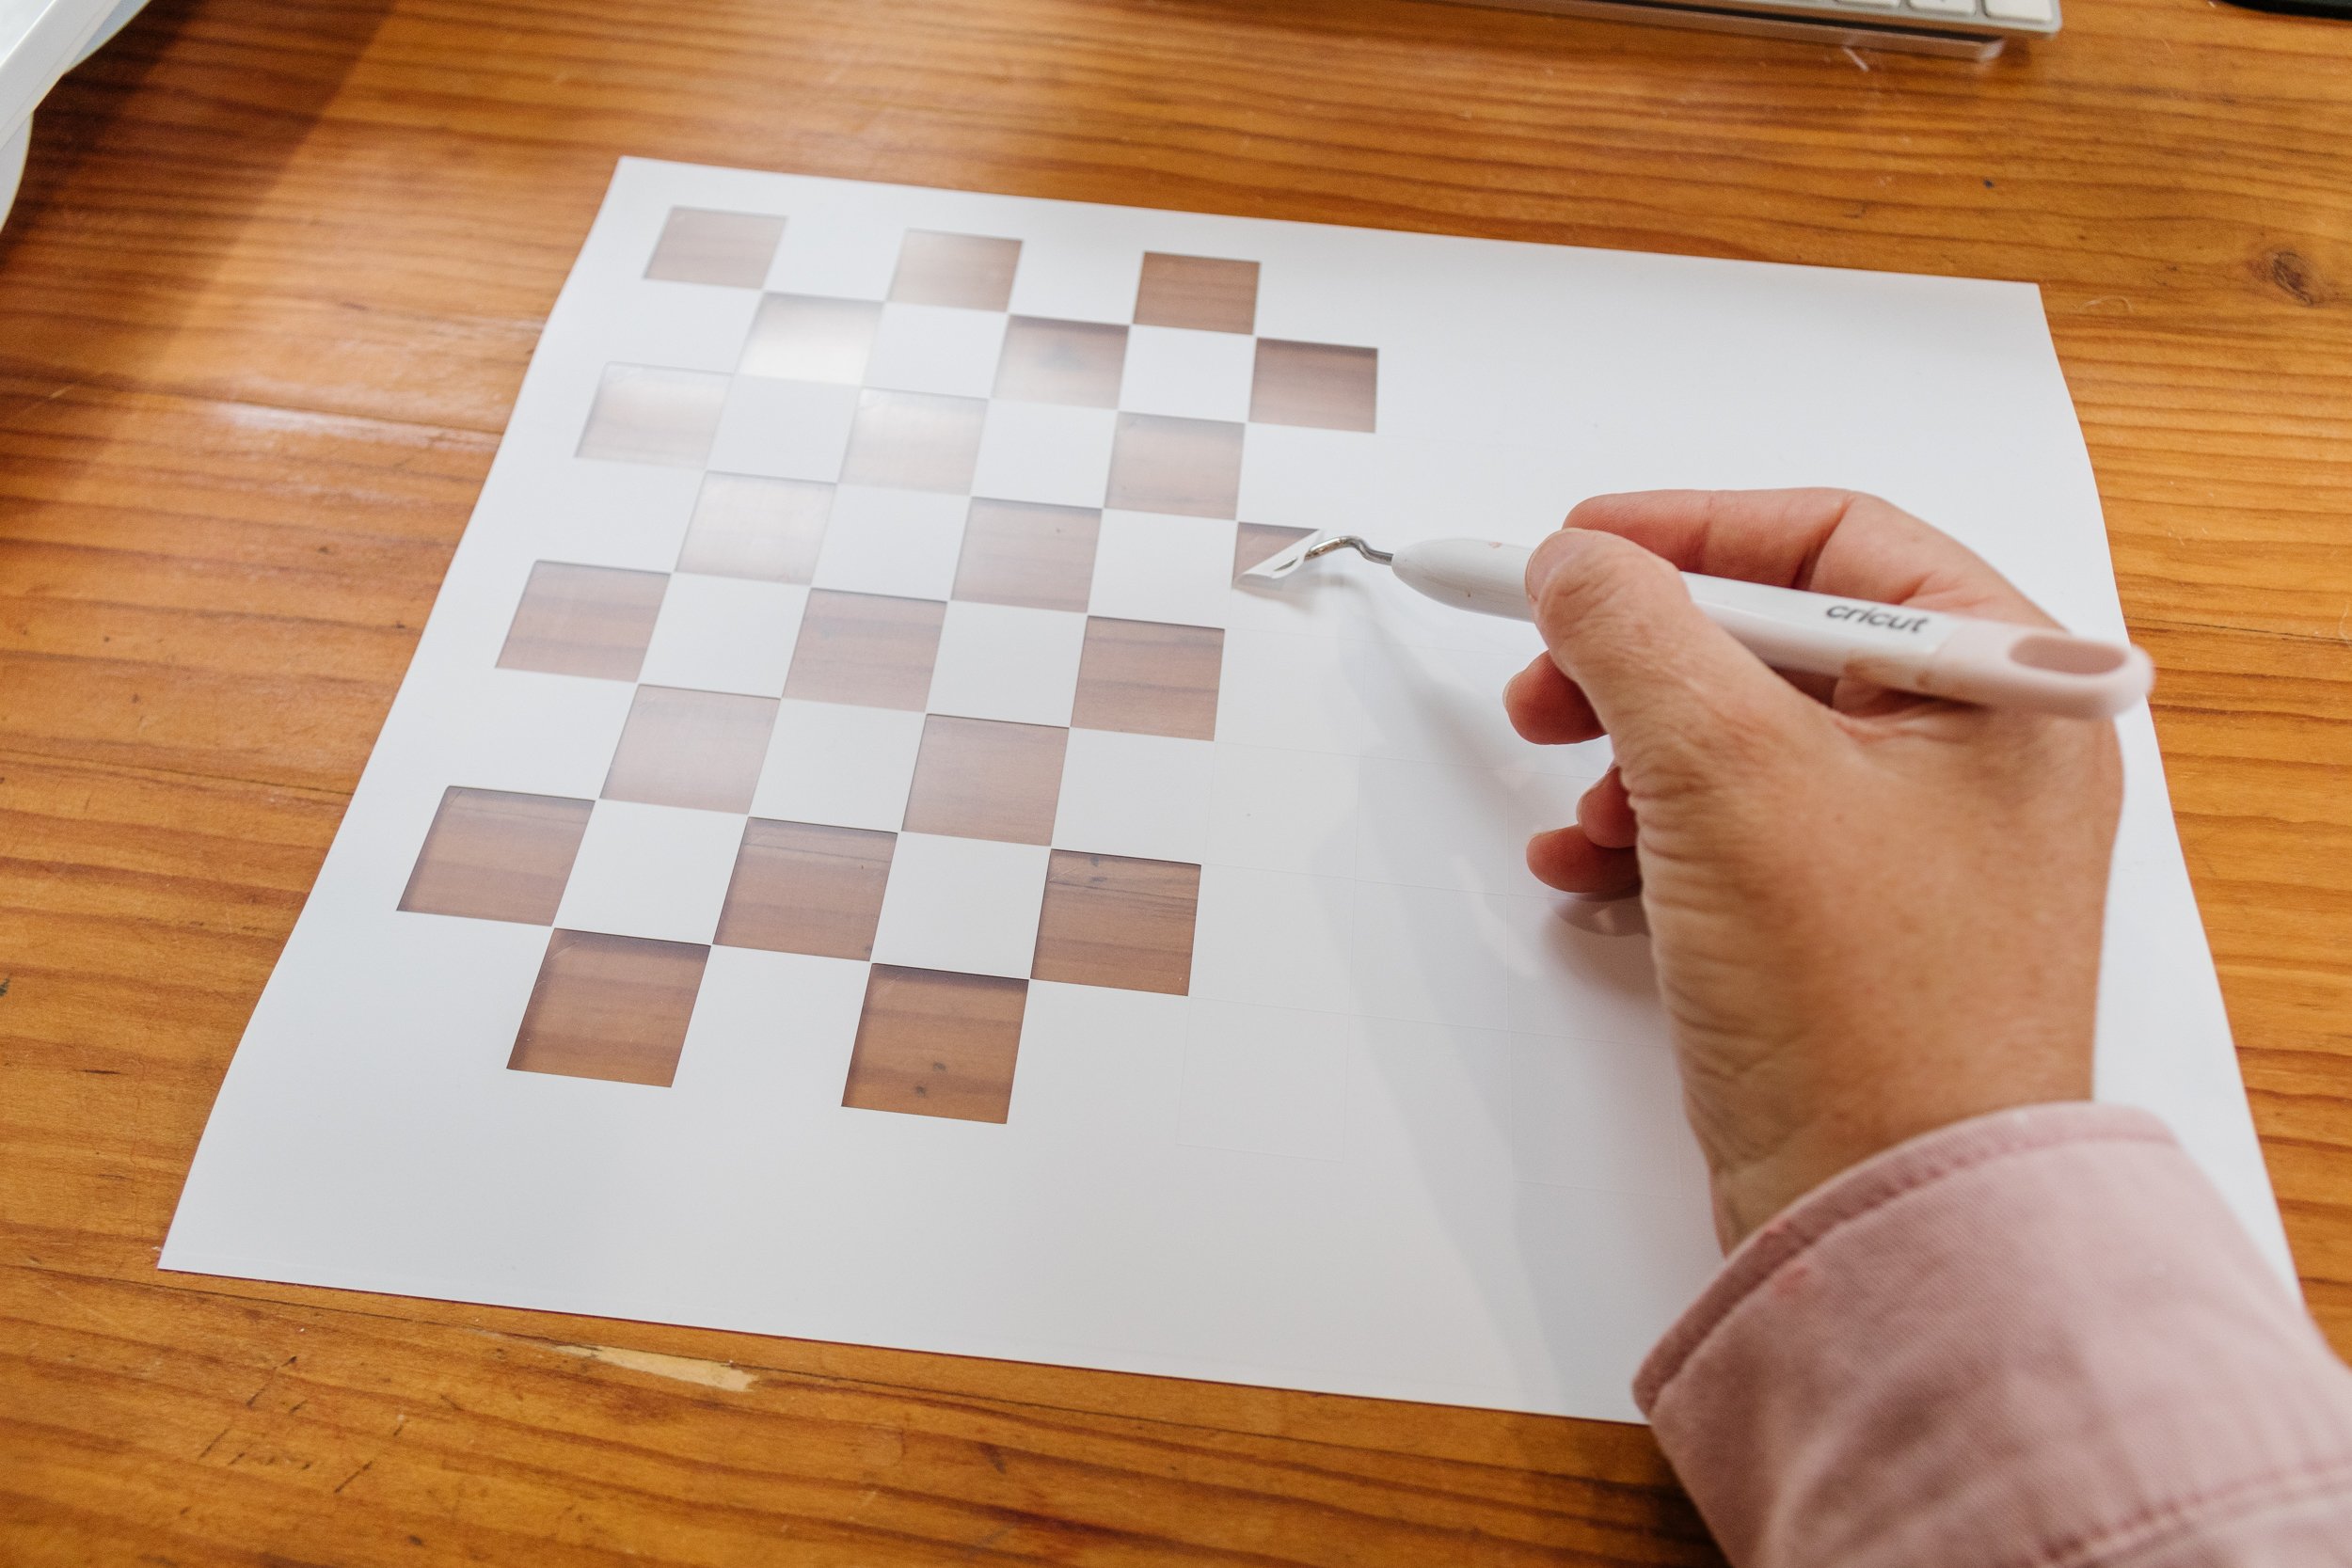
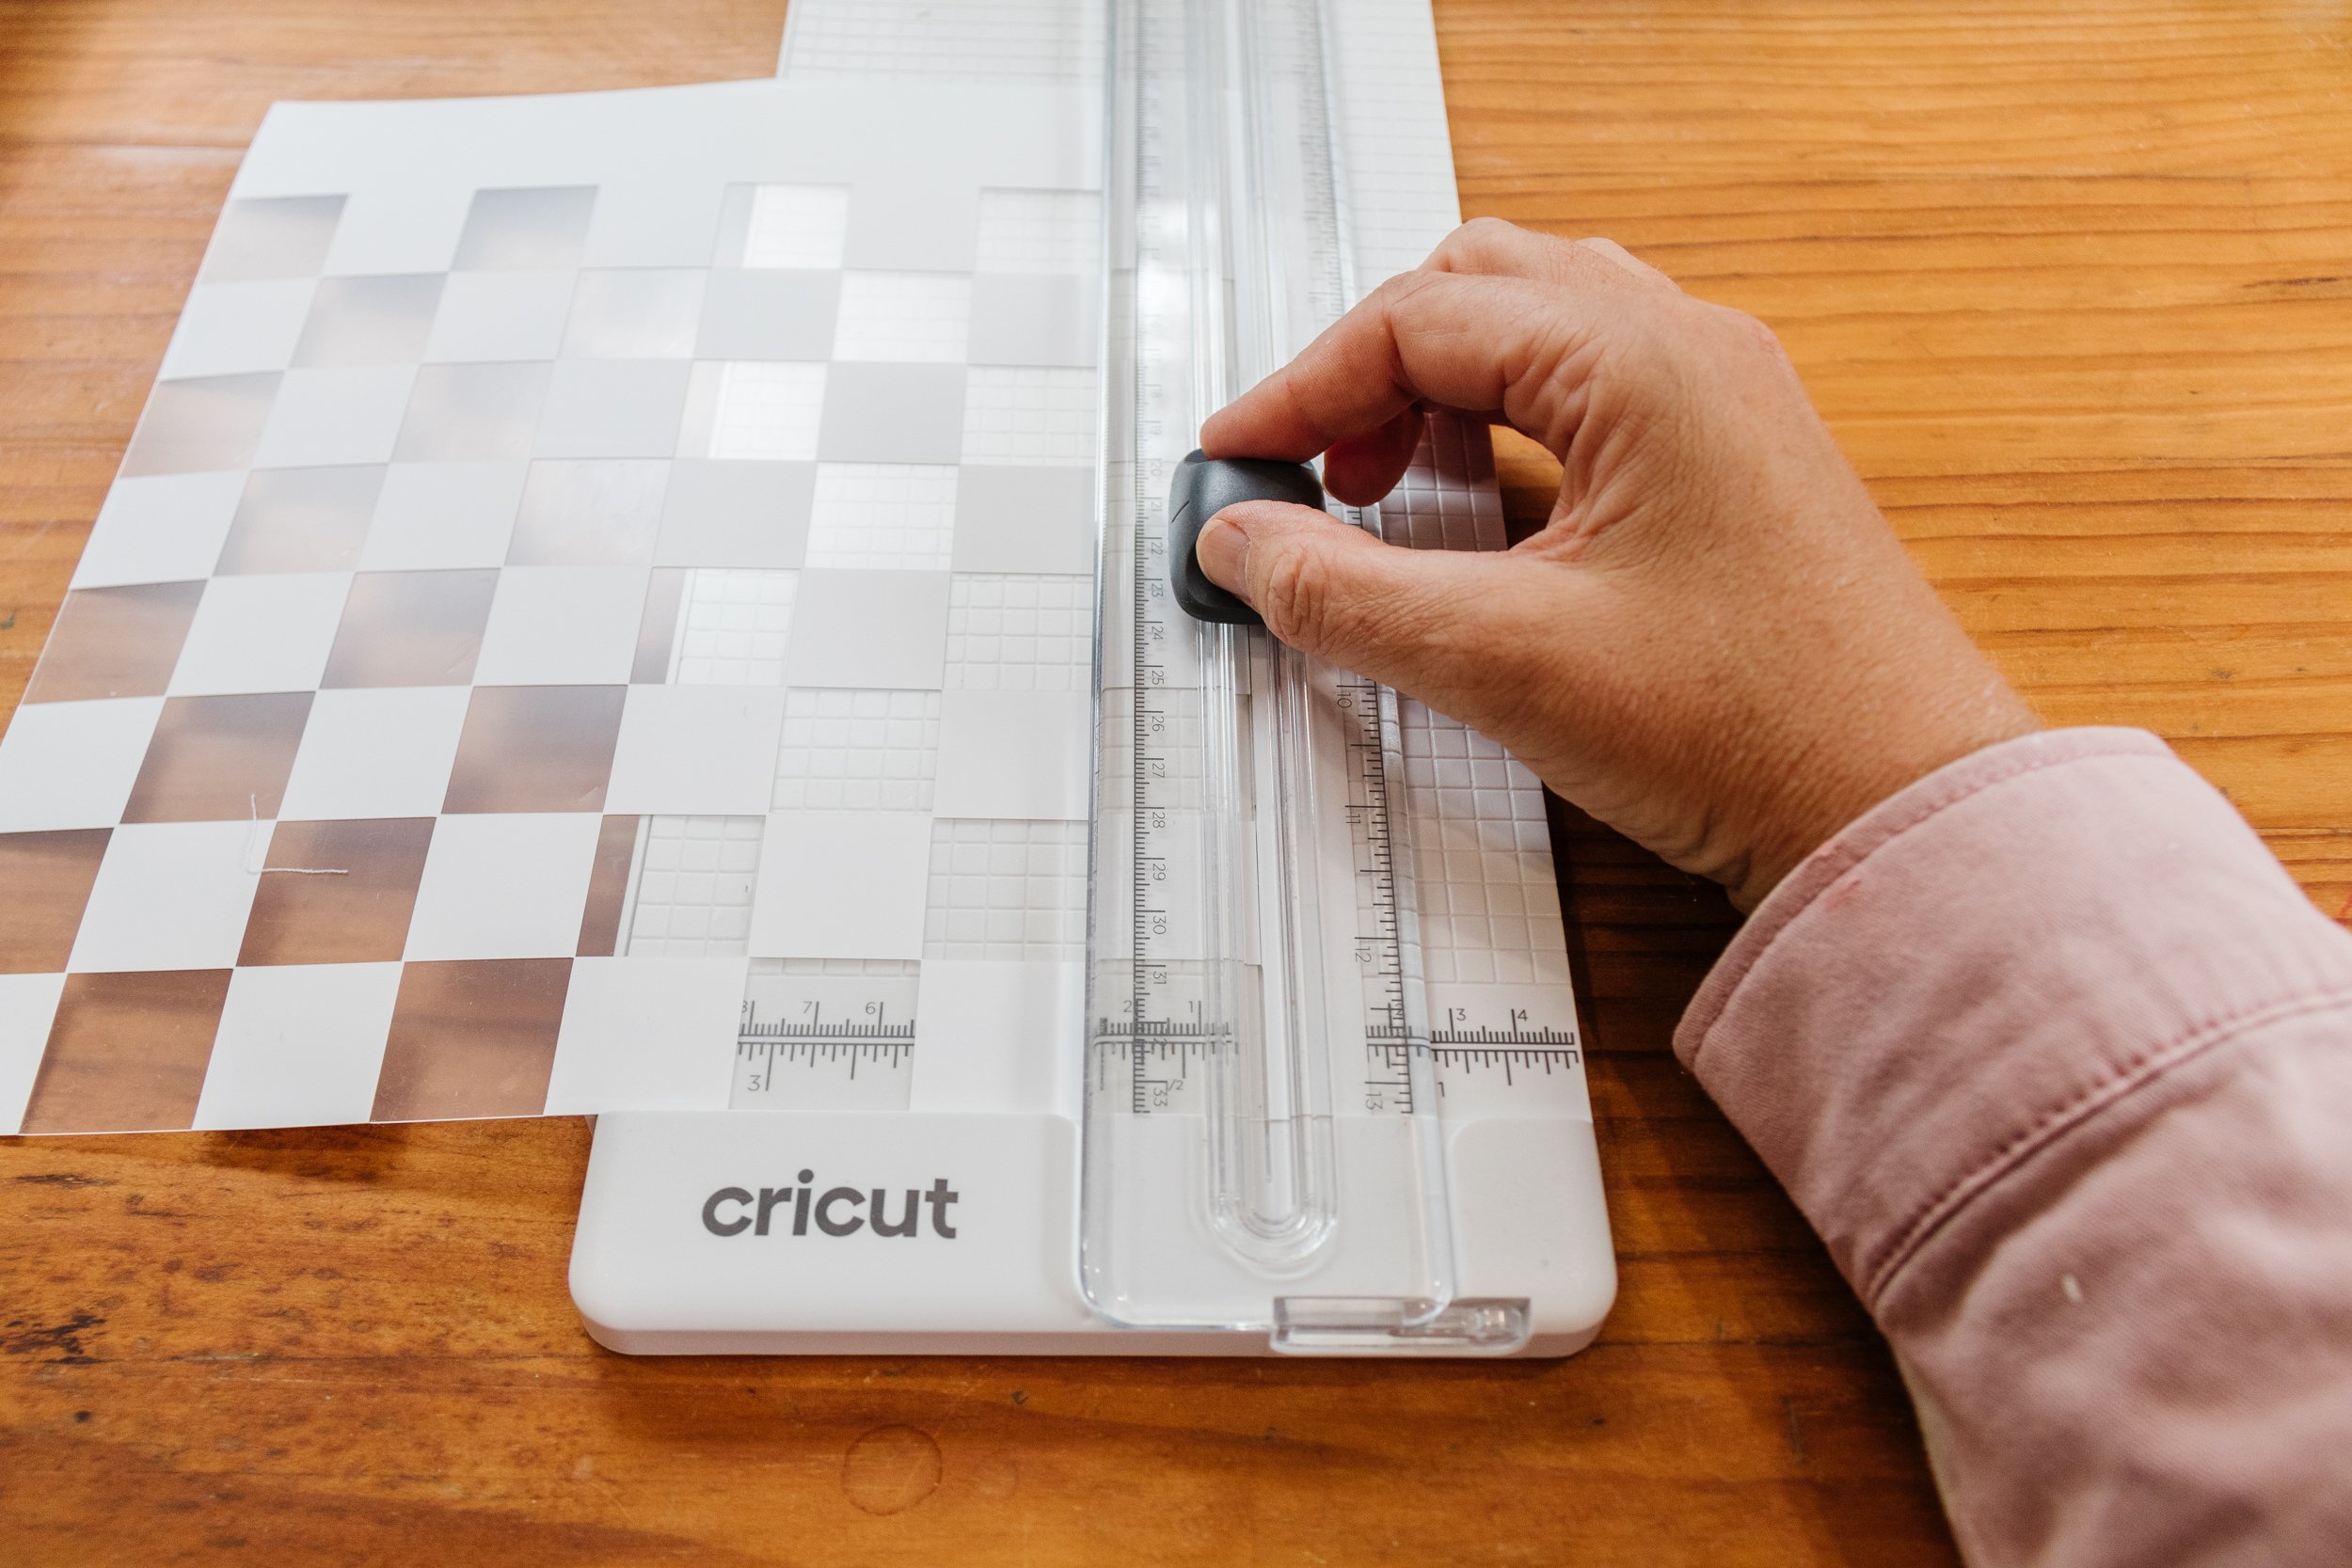
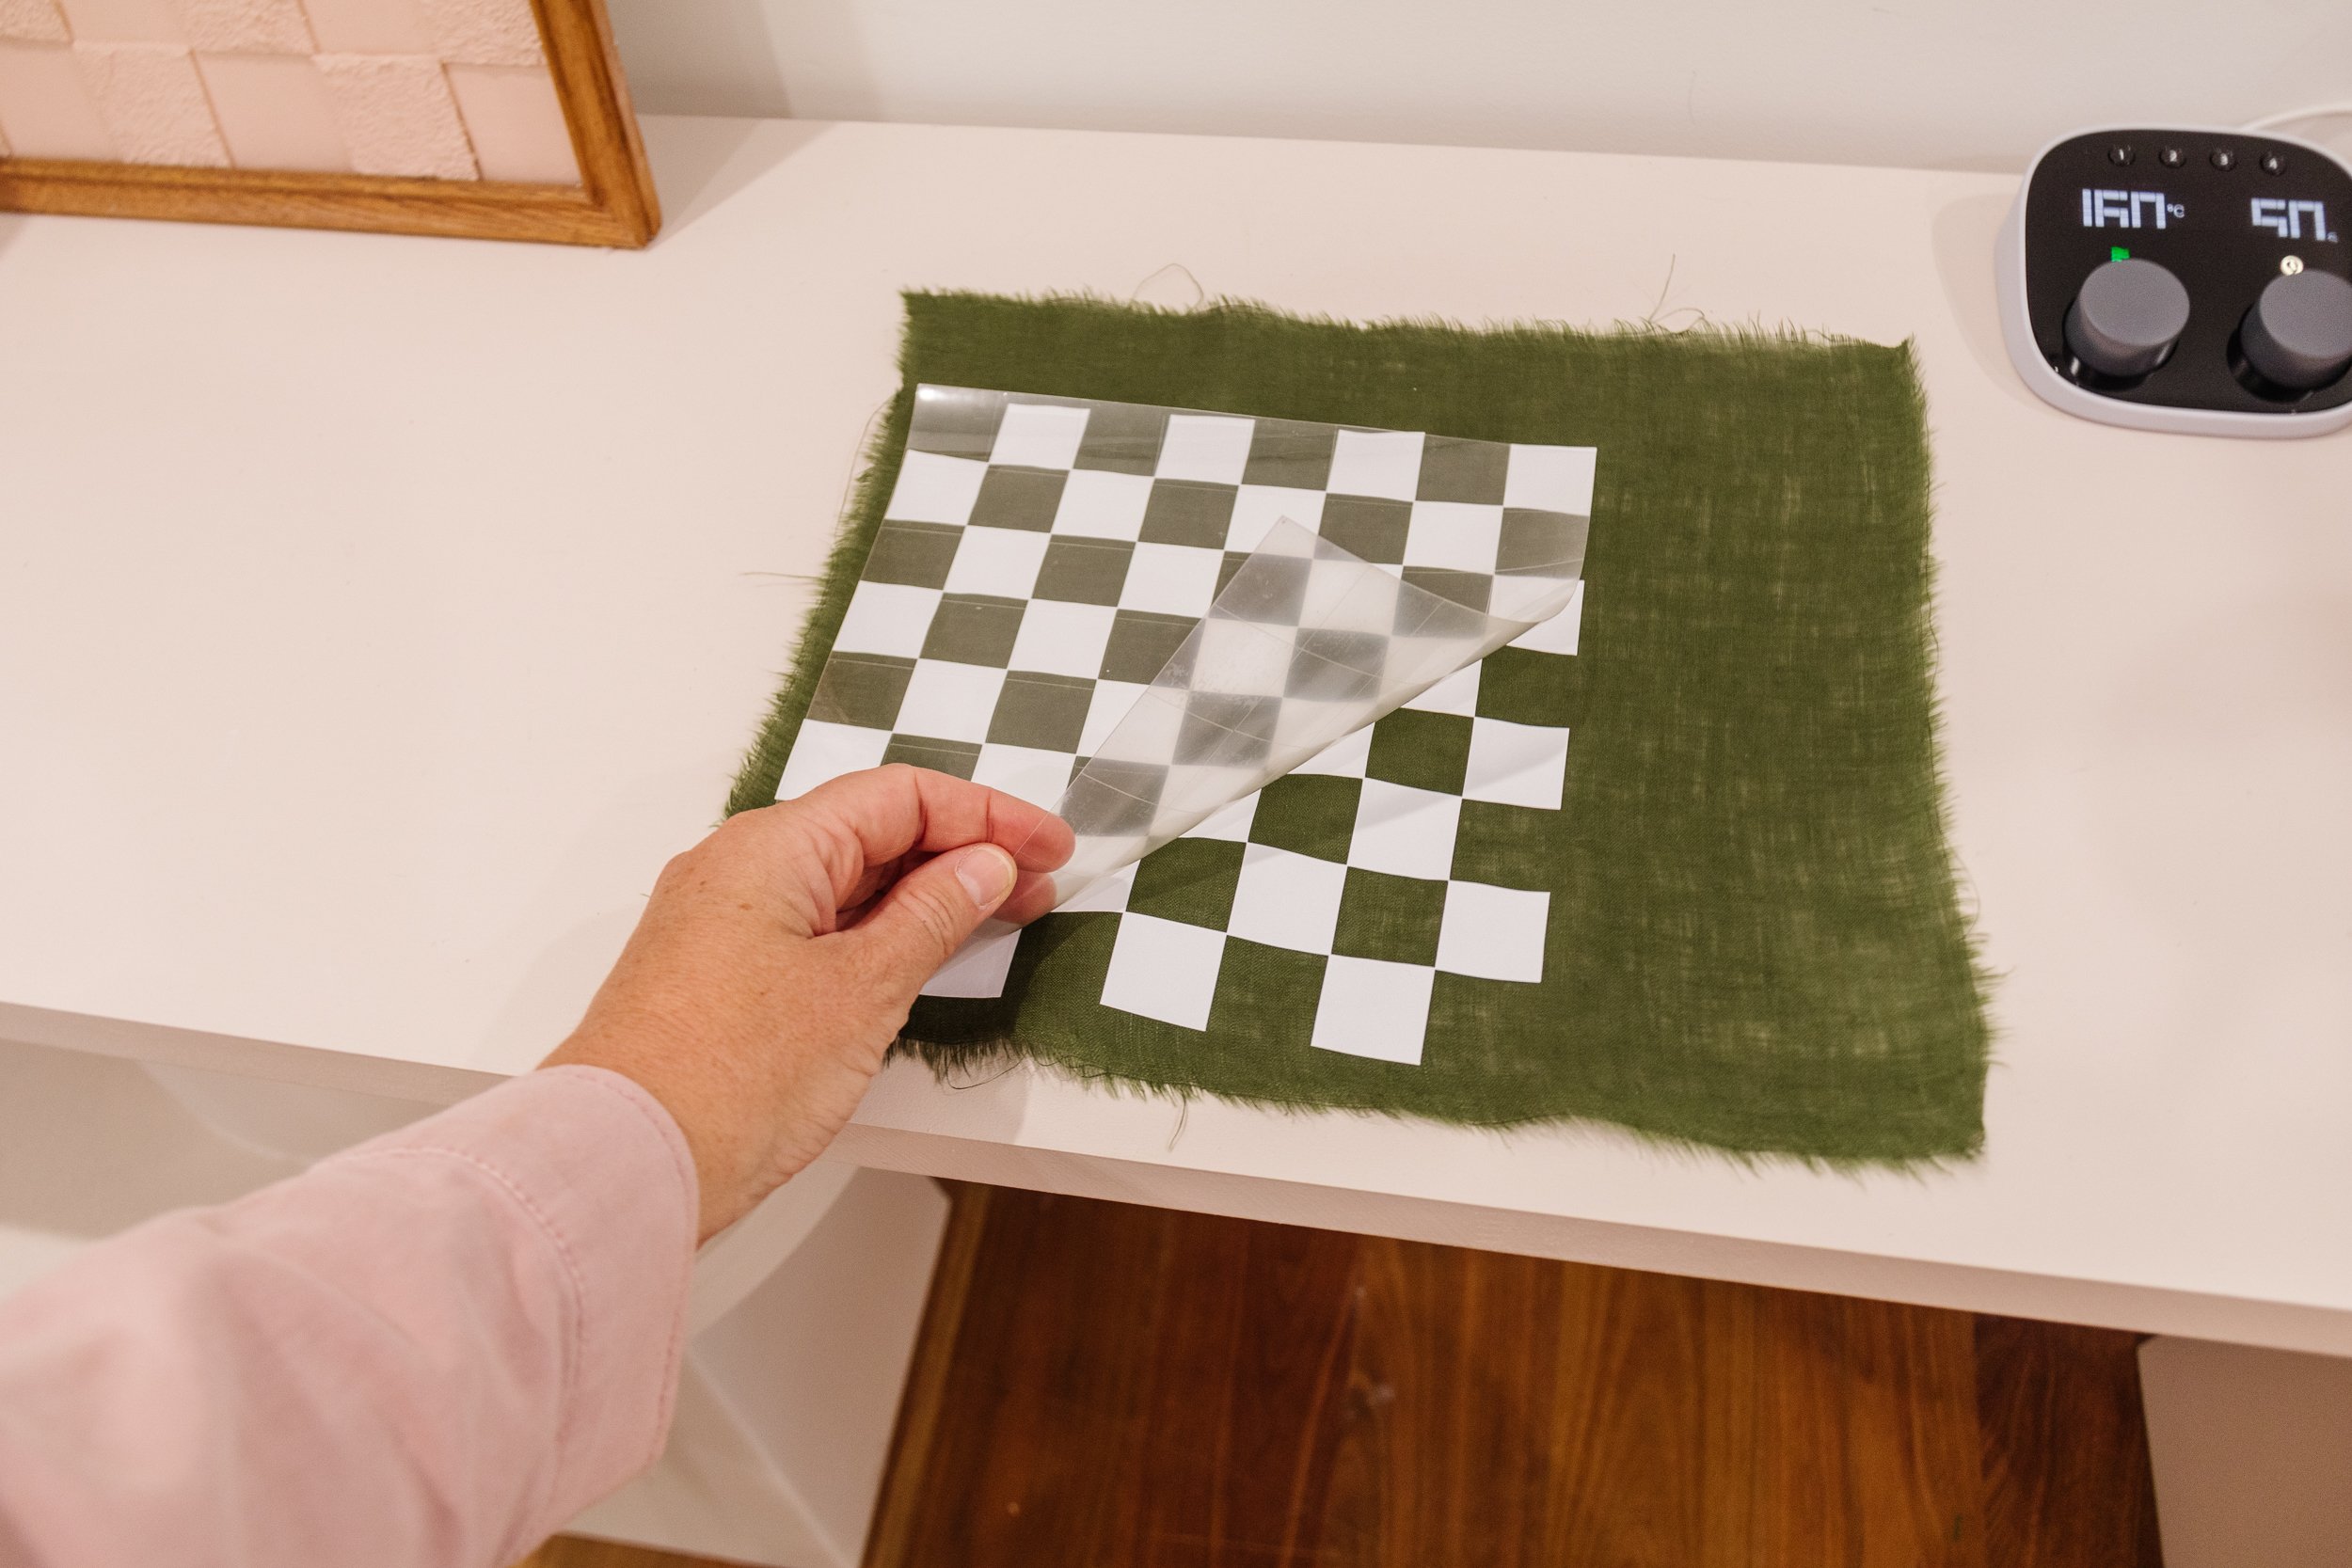
Step 2: Next I weeded the negative space from my checker design; I always find this step so relaxing. I was worried this would take ages, but it only took 2 minutes. So good! Then I trimmed off the edges using the Portable Trimmer.
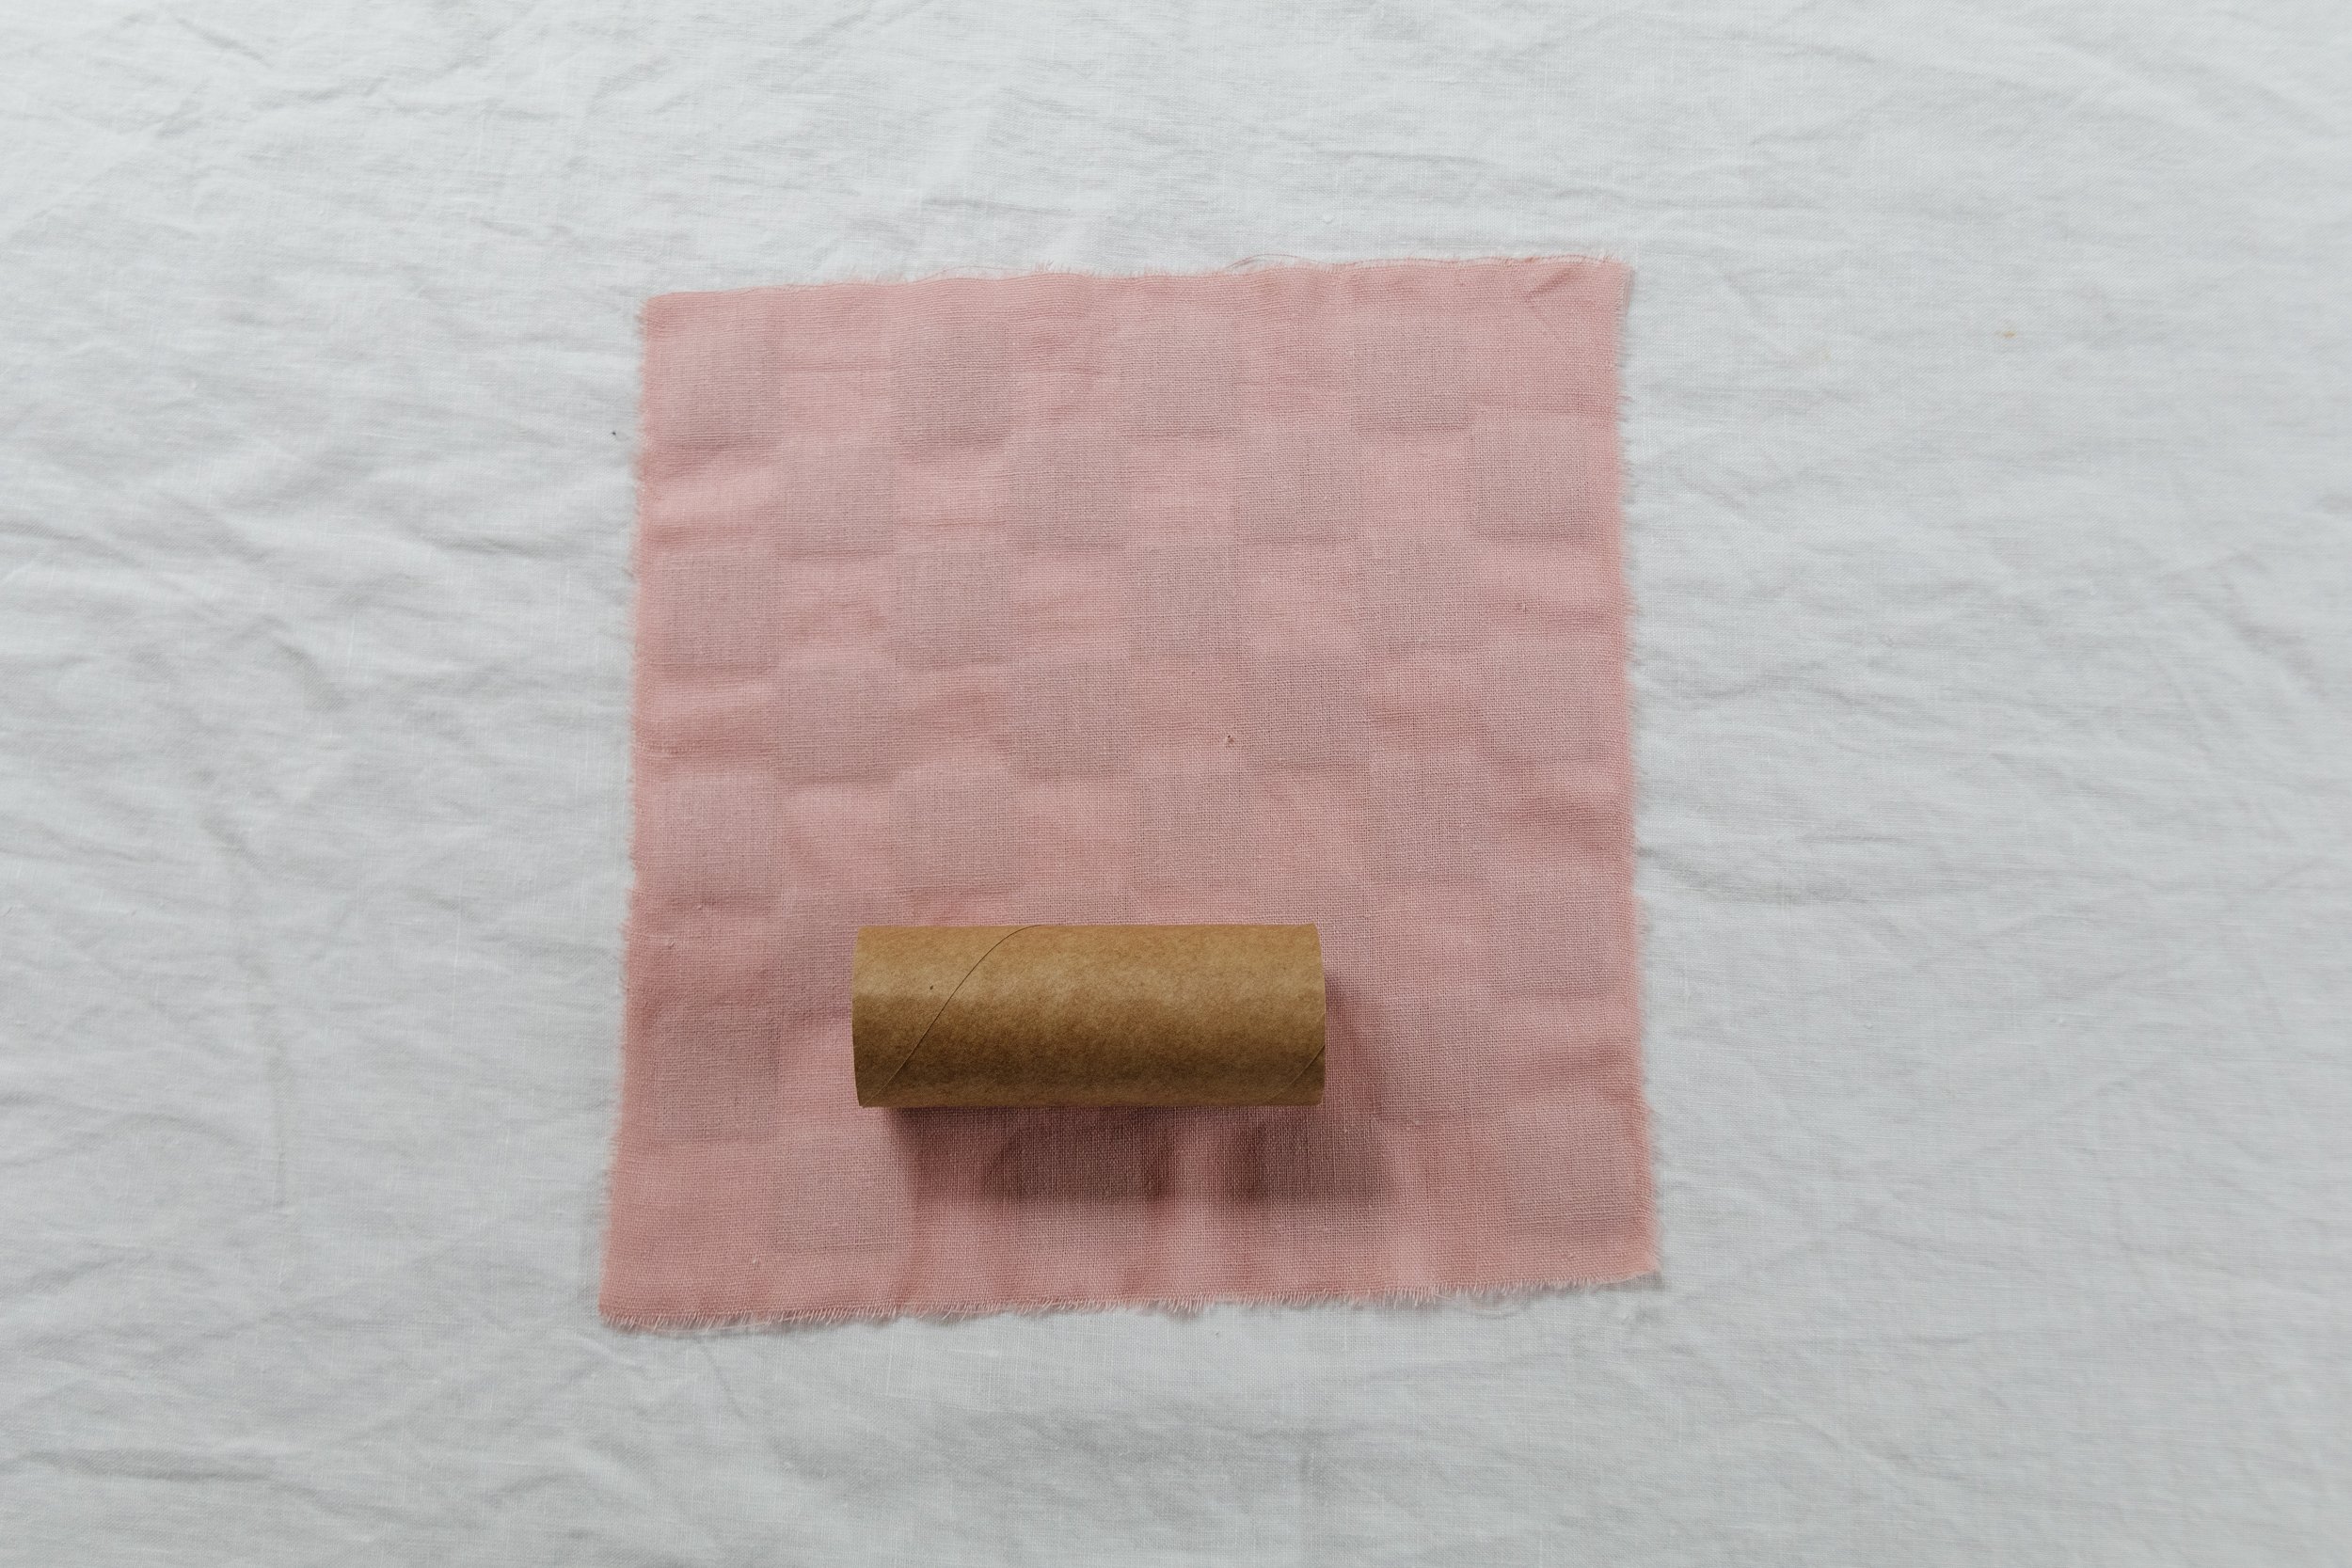
Step 3: Cut the fabric to 25cm x 25cm and cut out as many as you need; I made 8 bonbons. I love a raw edge so I make a small cut in the fabric on one side, then rip it using my hands. And repeat this for the other 3 sides. If you prefer a clean cut, you can use the Maker 3 to cut the fabric - so good!
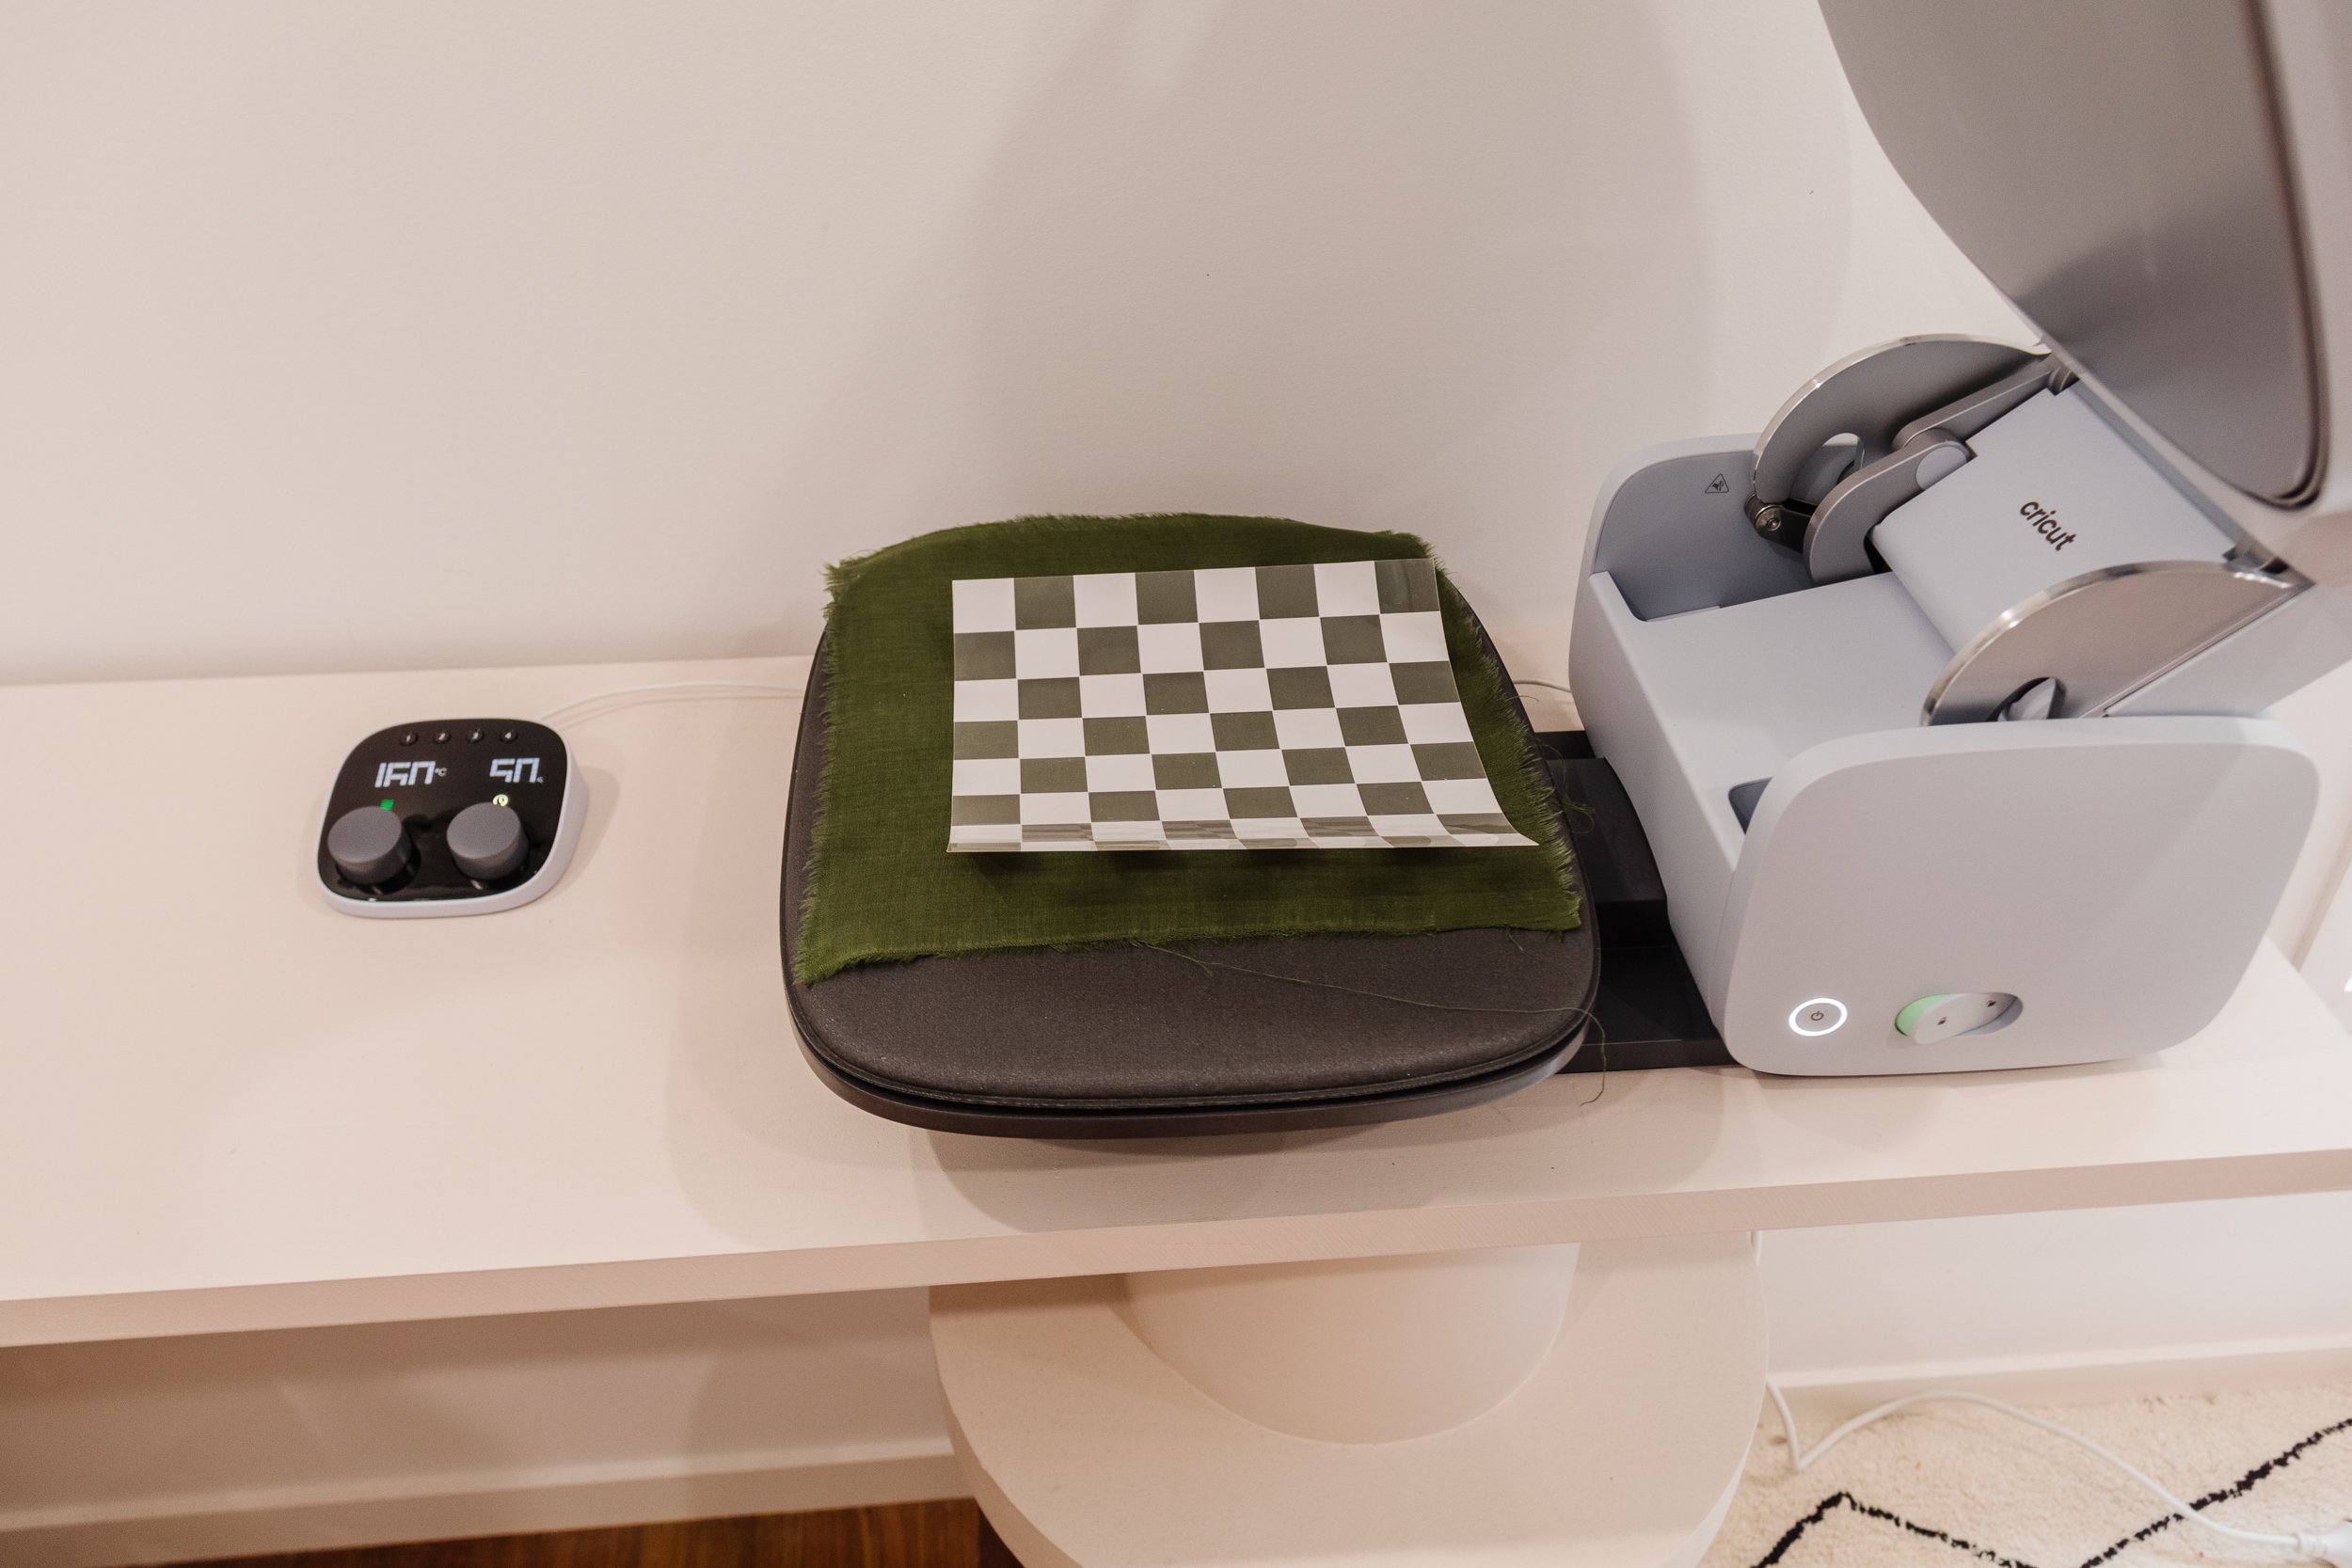
Story 4: I preheated my Cricut Autopress, which took about 5 minutes and it beeps when it’s ready.
Step 5: I got the temperature setting I needed for this project using Cricut’s Heat Guide. Following this I adjusted the temperature settings on the Control Pod to match the recommendation from the Heat Guide and waited for the Autopress to preheat to that setting; again, the Autopress will beep when it’s ready.
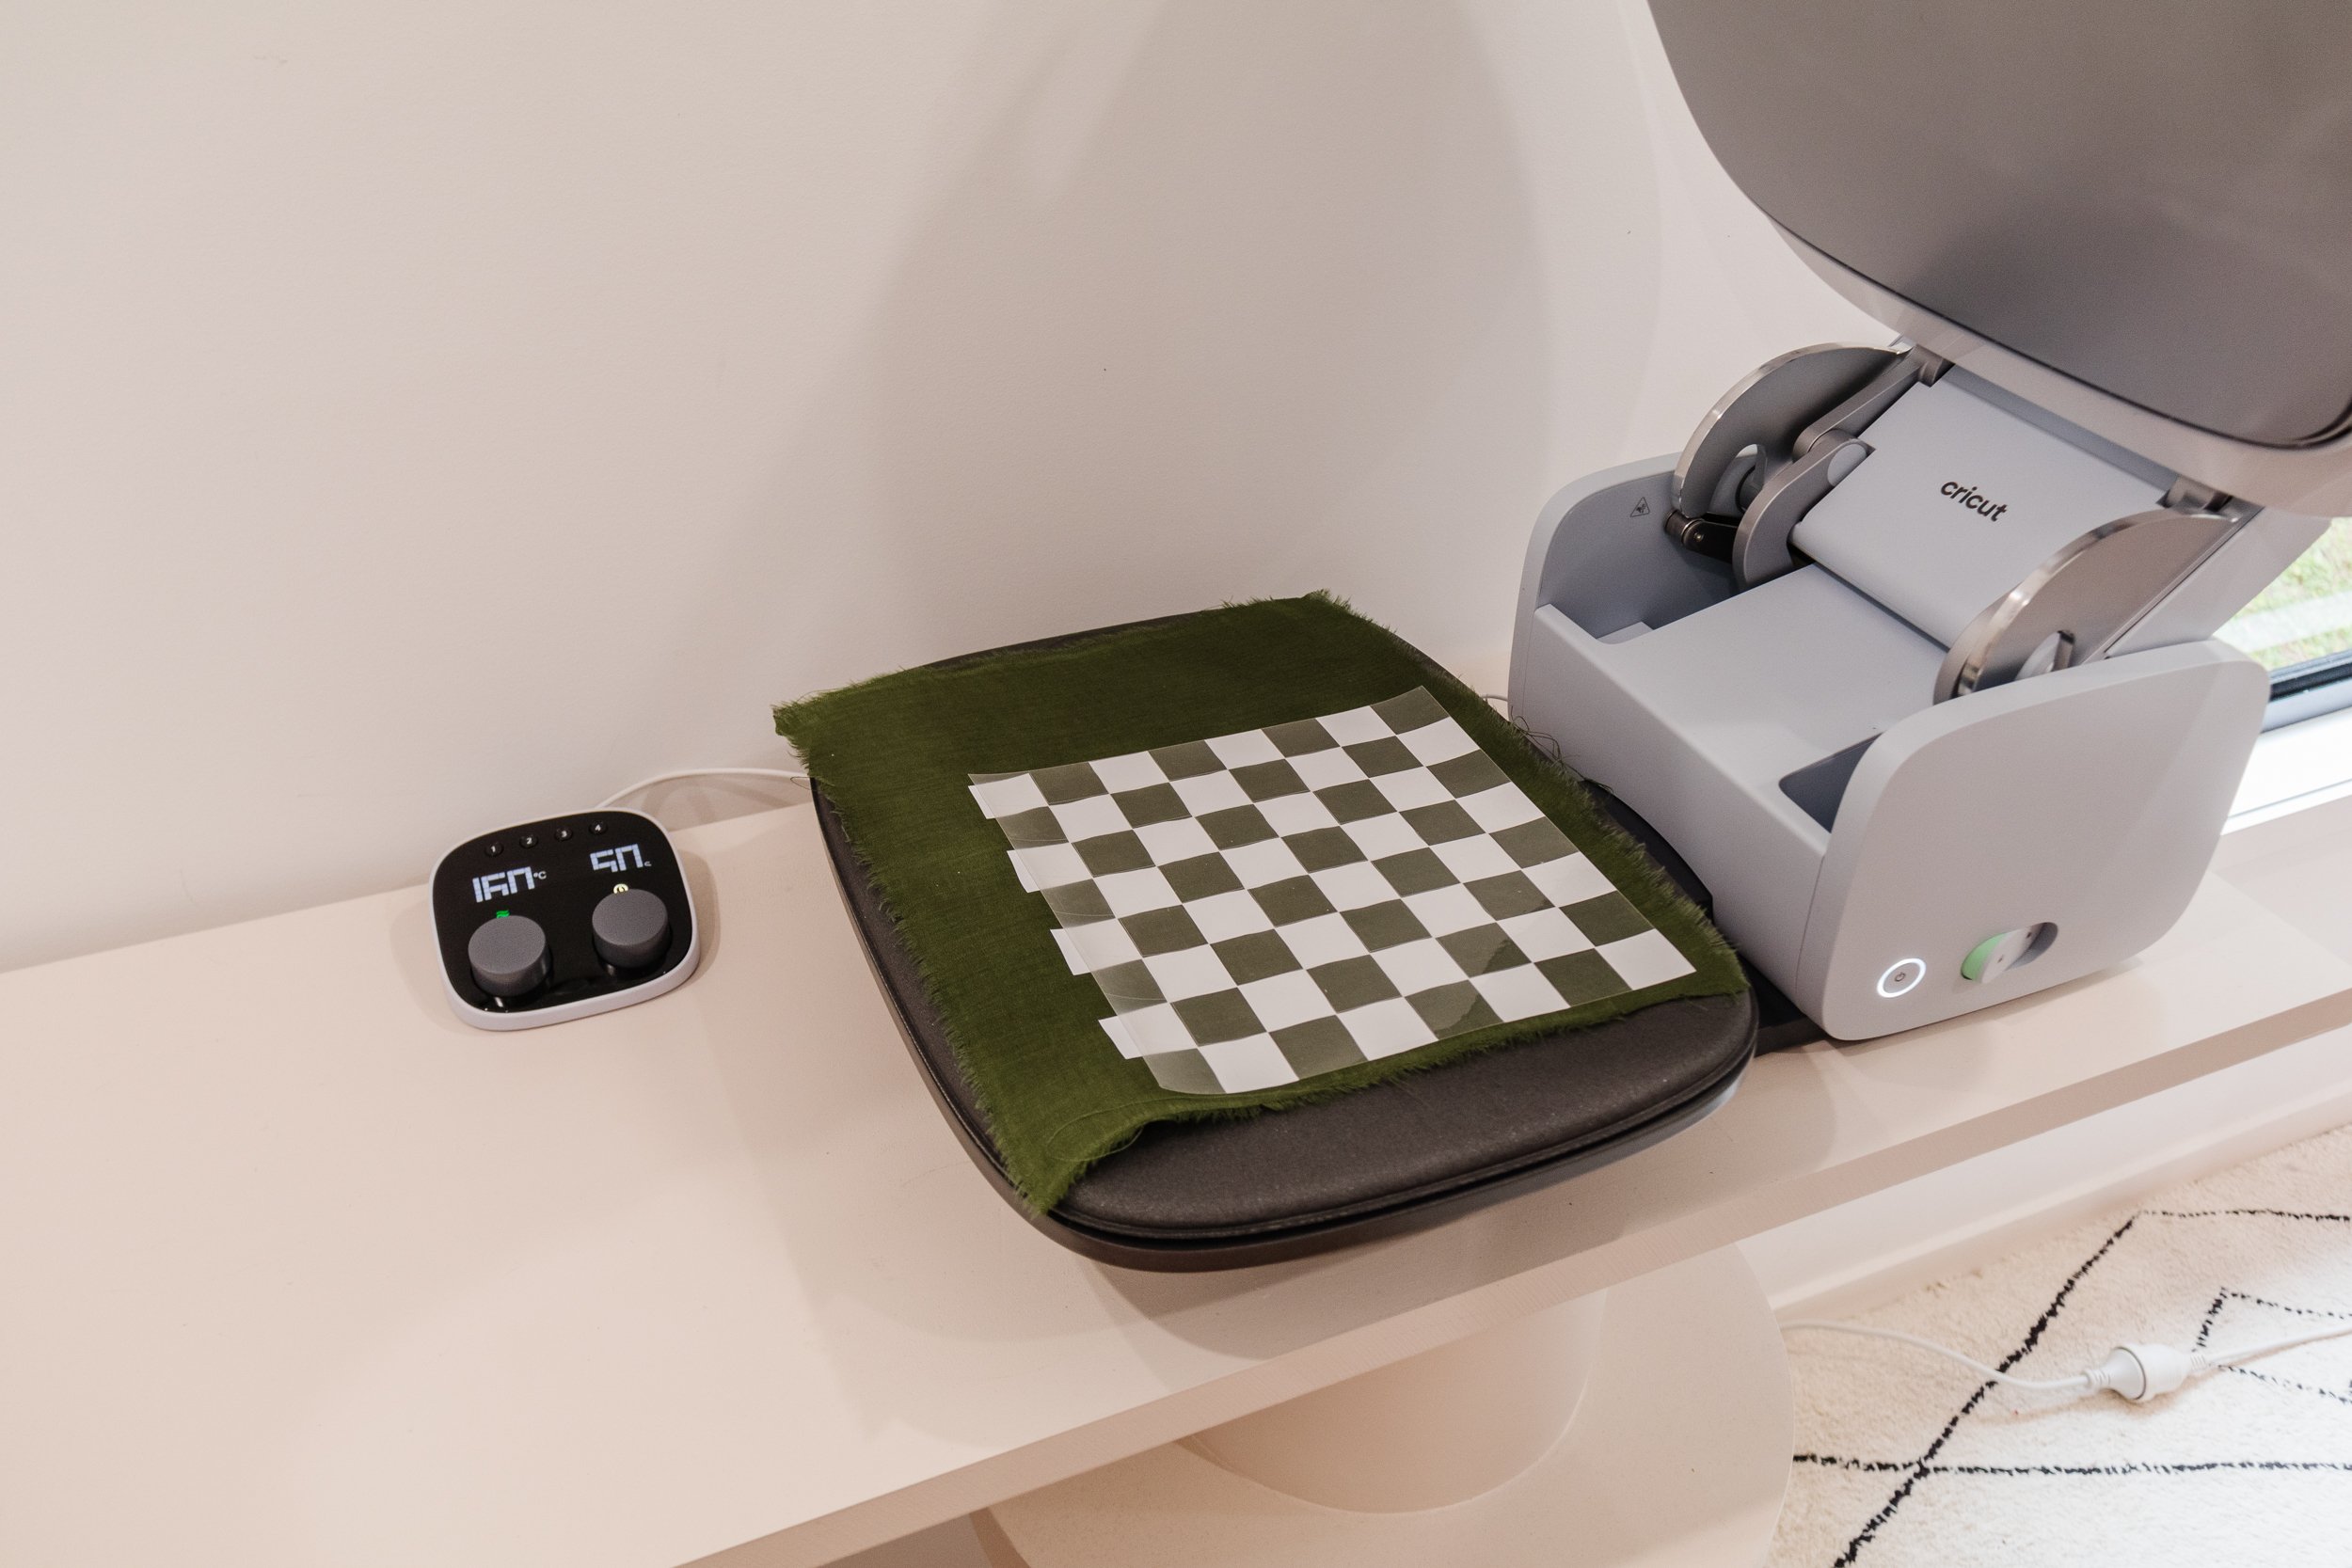
Step 5: Then I place the fabric onto the Pressing Mat and using two fingers I gently close the lid. The Autopress will start working its magic straight away and the Control Pod counts down the seconds until it has finished heating. When it has finished heating, the Autopress will beep and the lid will automatically pop open. This step ensures the fabric is nice and smooth for the checker Smart Iron On application and is free of moisture, which is better for the adhesion of the Smart Iron On.
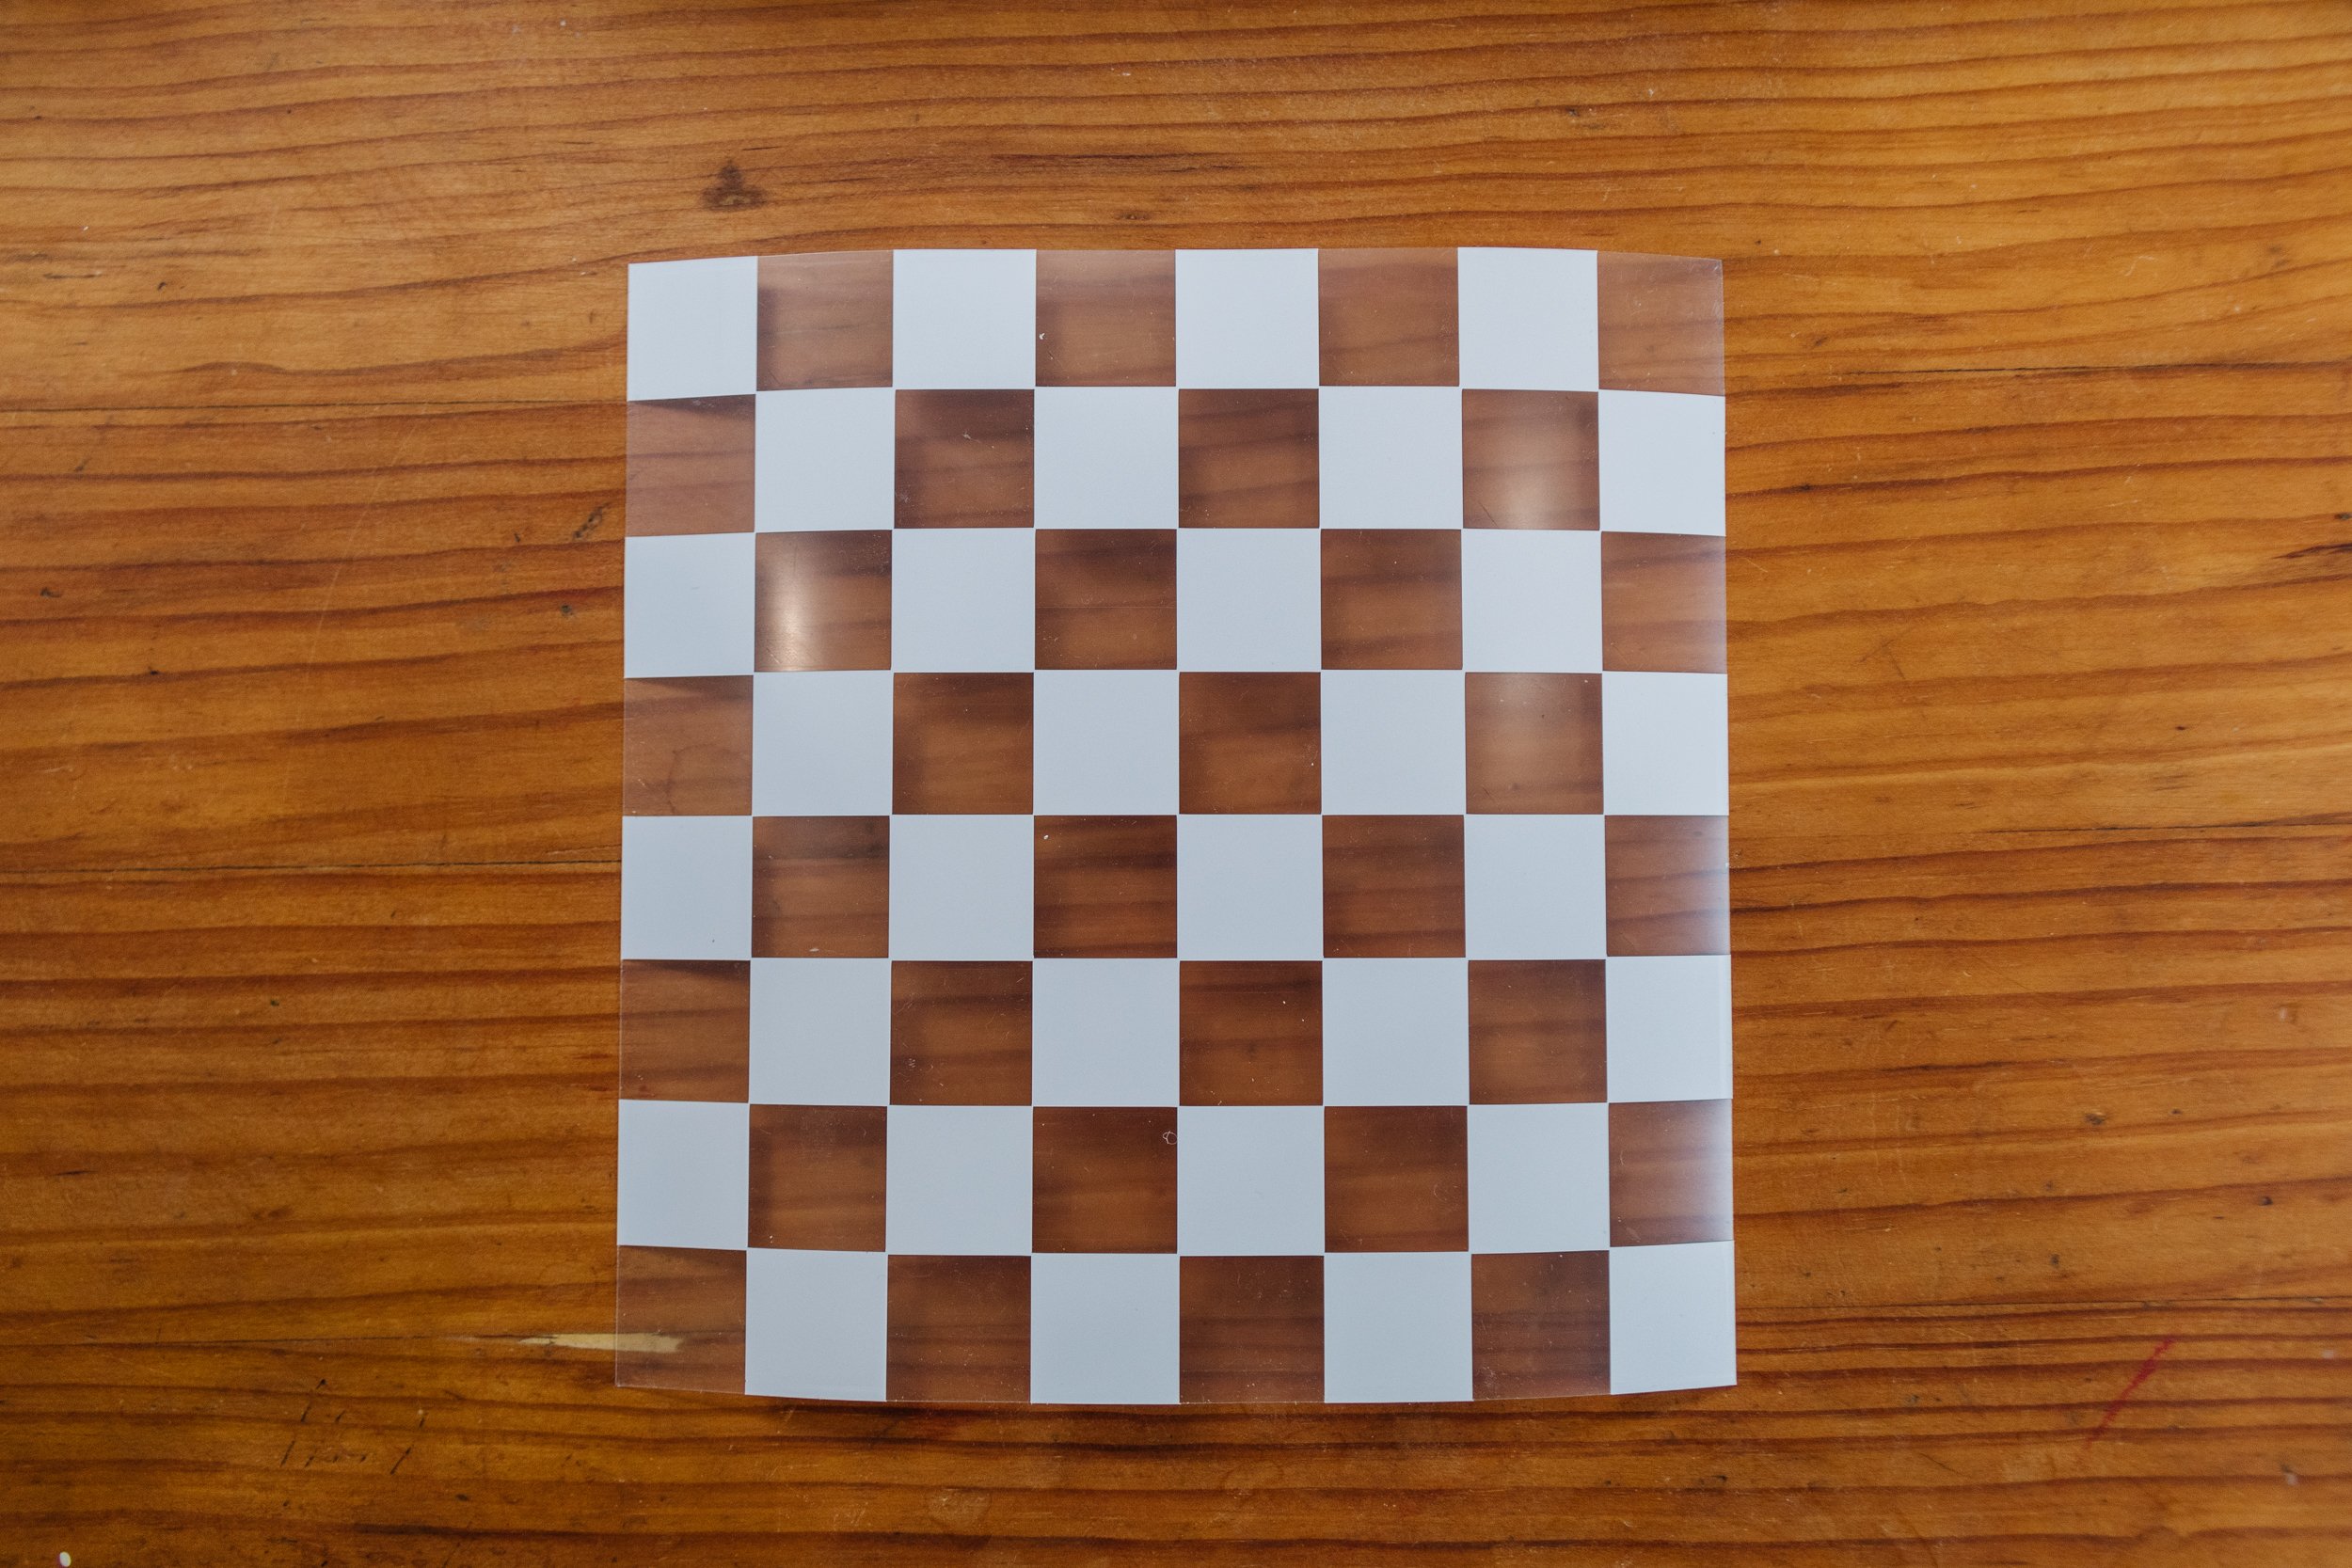
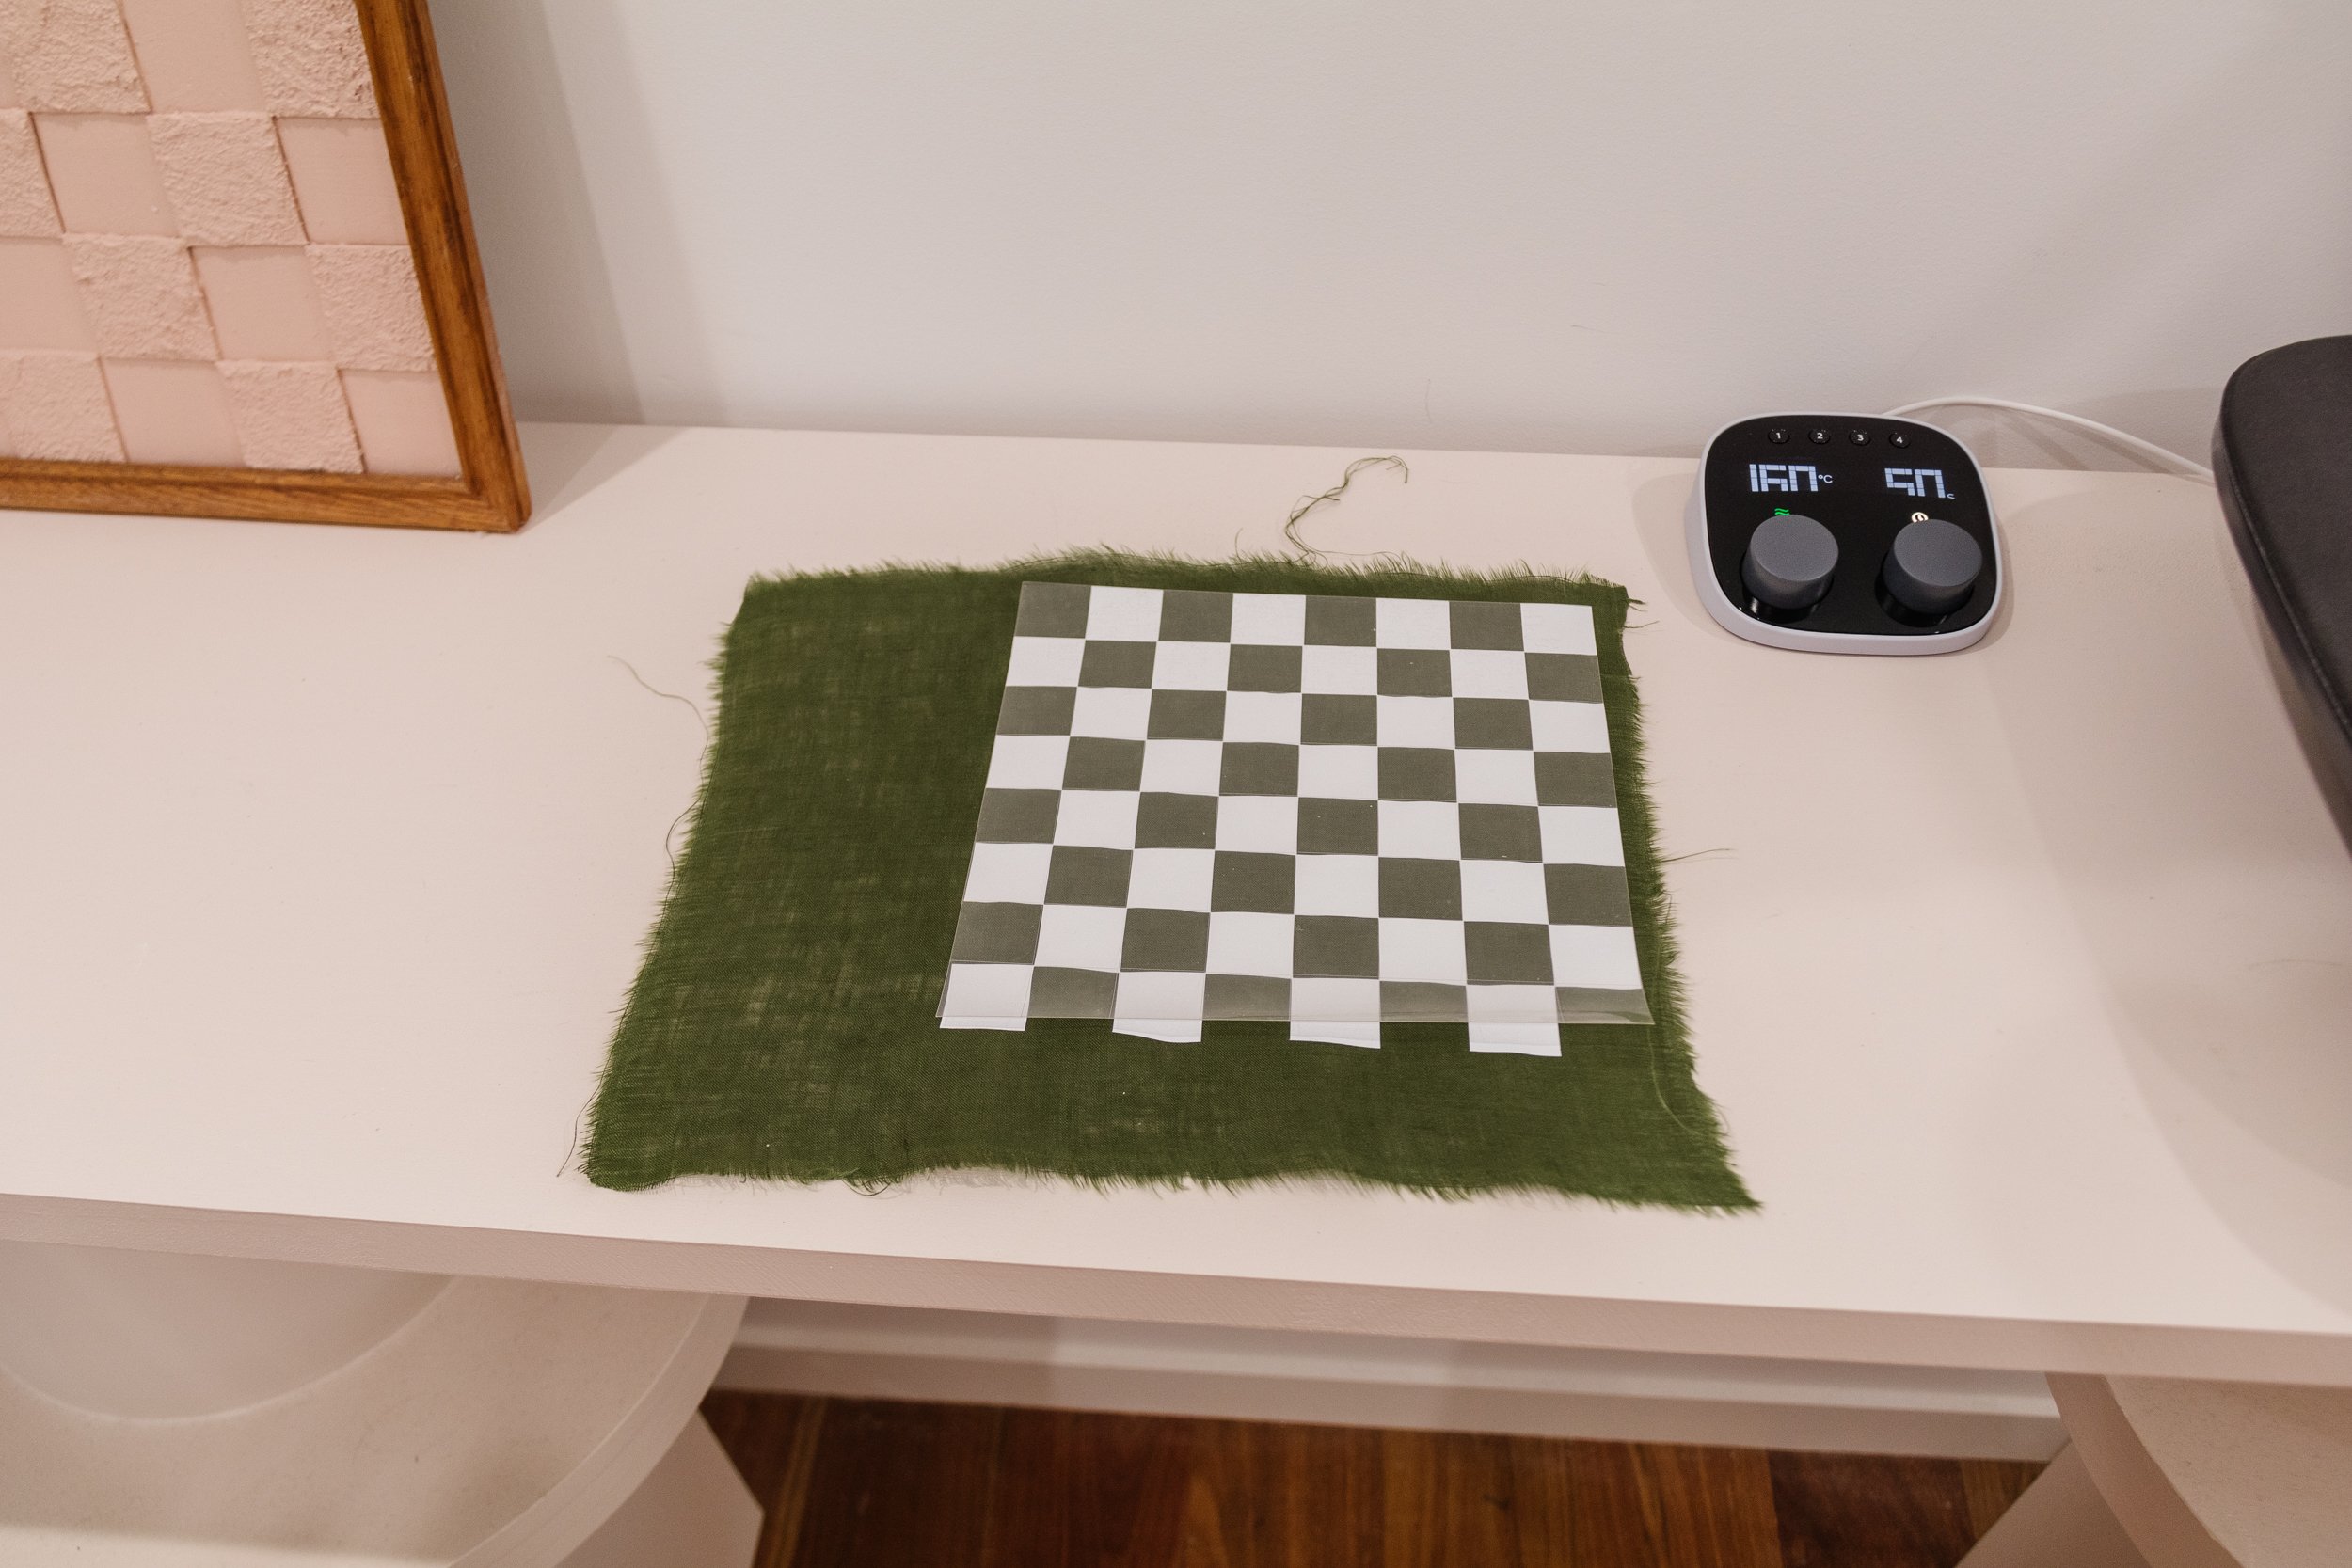
Step 6: Then I simply positioned my weeded checker design on top of the fabric (sticky side down/shiny side up), closed the lid and waited for the Autopress to finish its magic. The lid automatically opened (as before) when it was finished heating, and then I simply lifted the fabric off, set it aside to cool down, then peeled the carrier sheet off. And then I had my first piece of DIY Checker Fabric! Then I repeated steps 5 to 6 until I had made all the DIY Checker Fabric I needed.
Below are the settings I used:
Iron On Transfer in White on Linen (100% Cotton) = 155C for50 seconds
Iron on Transfer in Glitter on Linen (100% Cotton) = 165C for 40 seconds


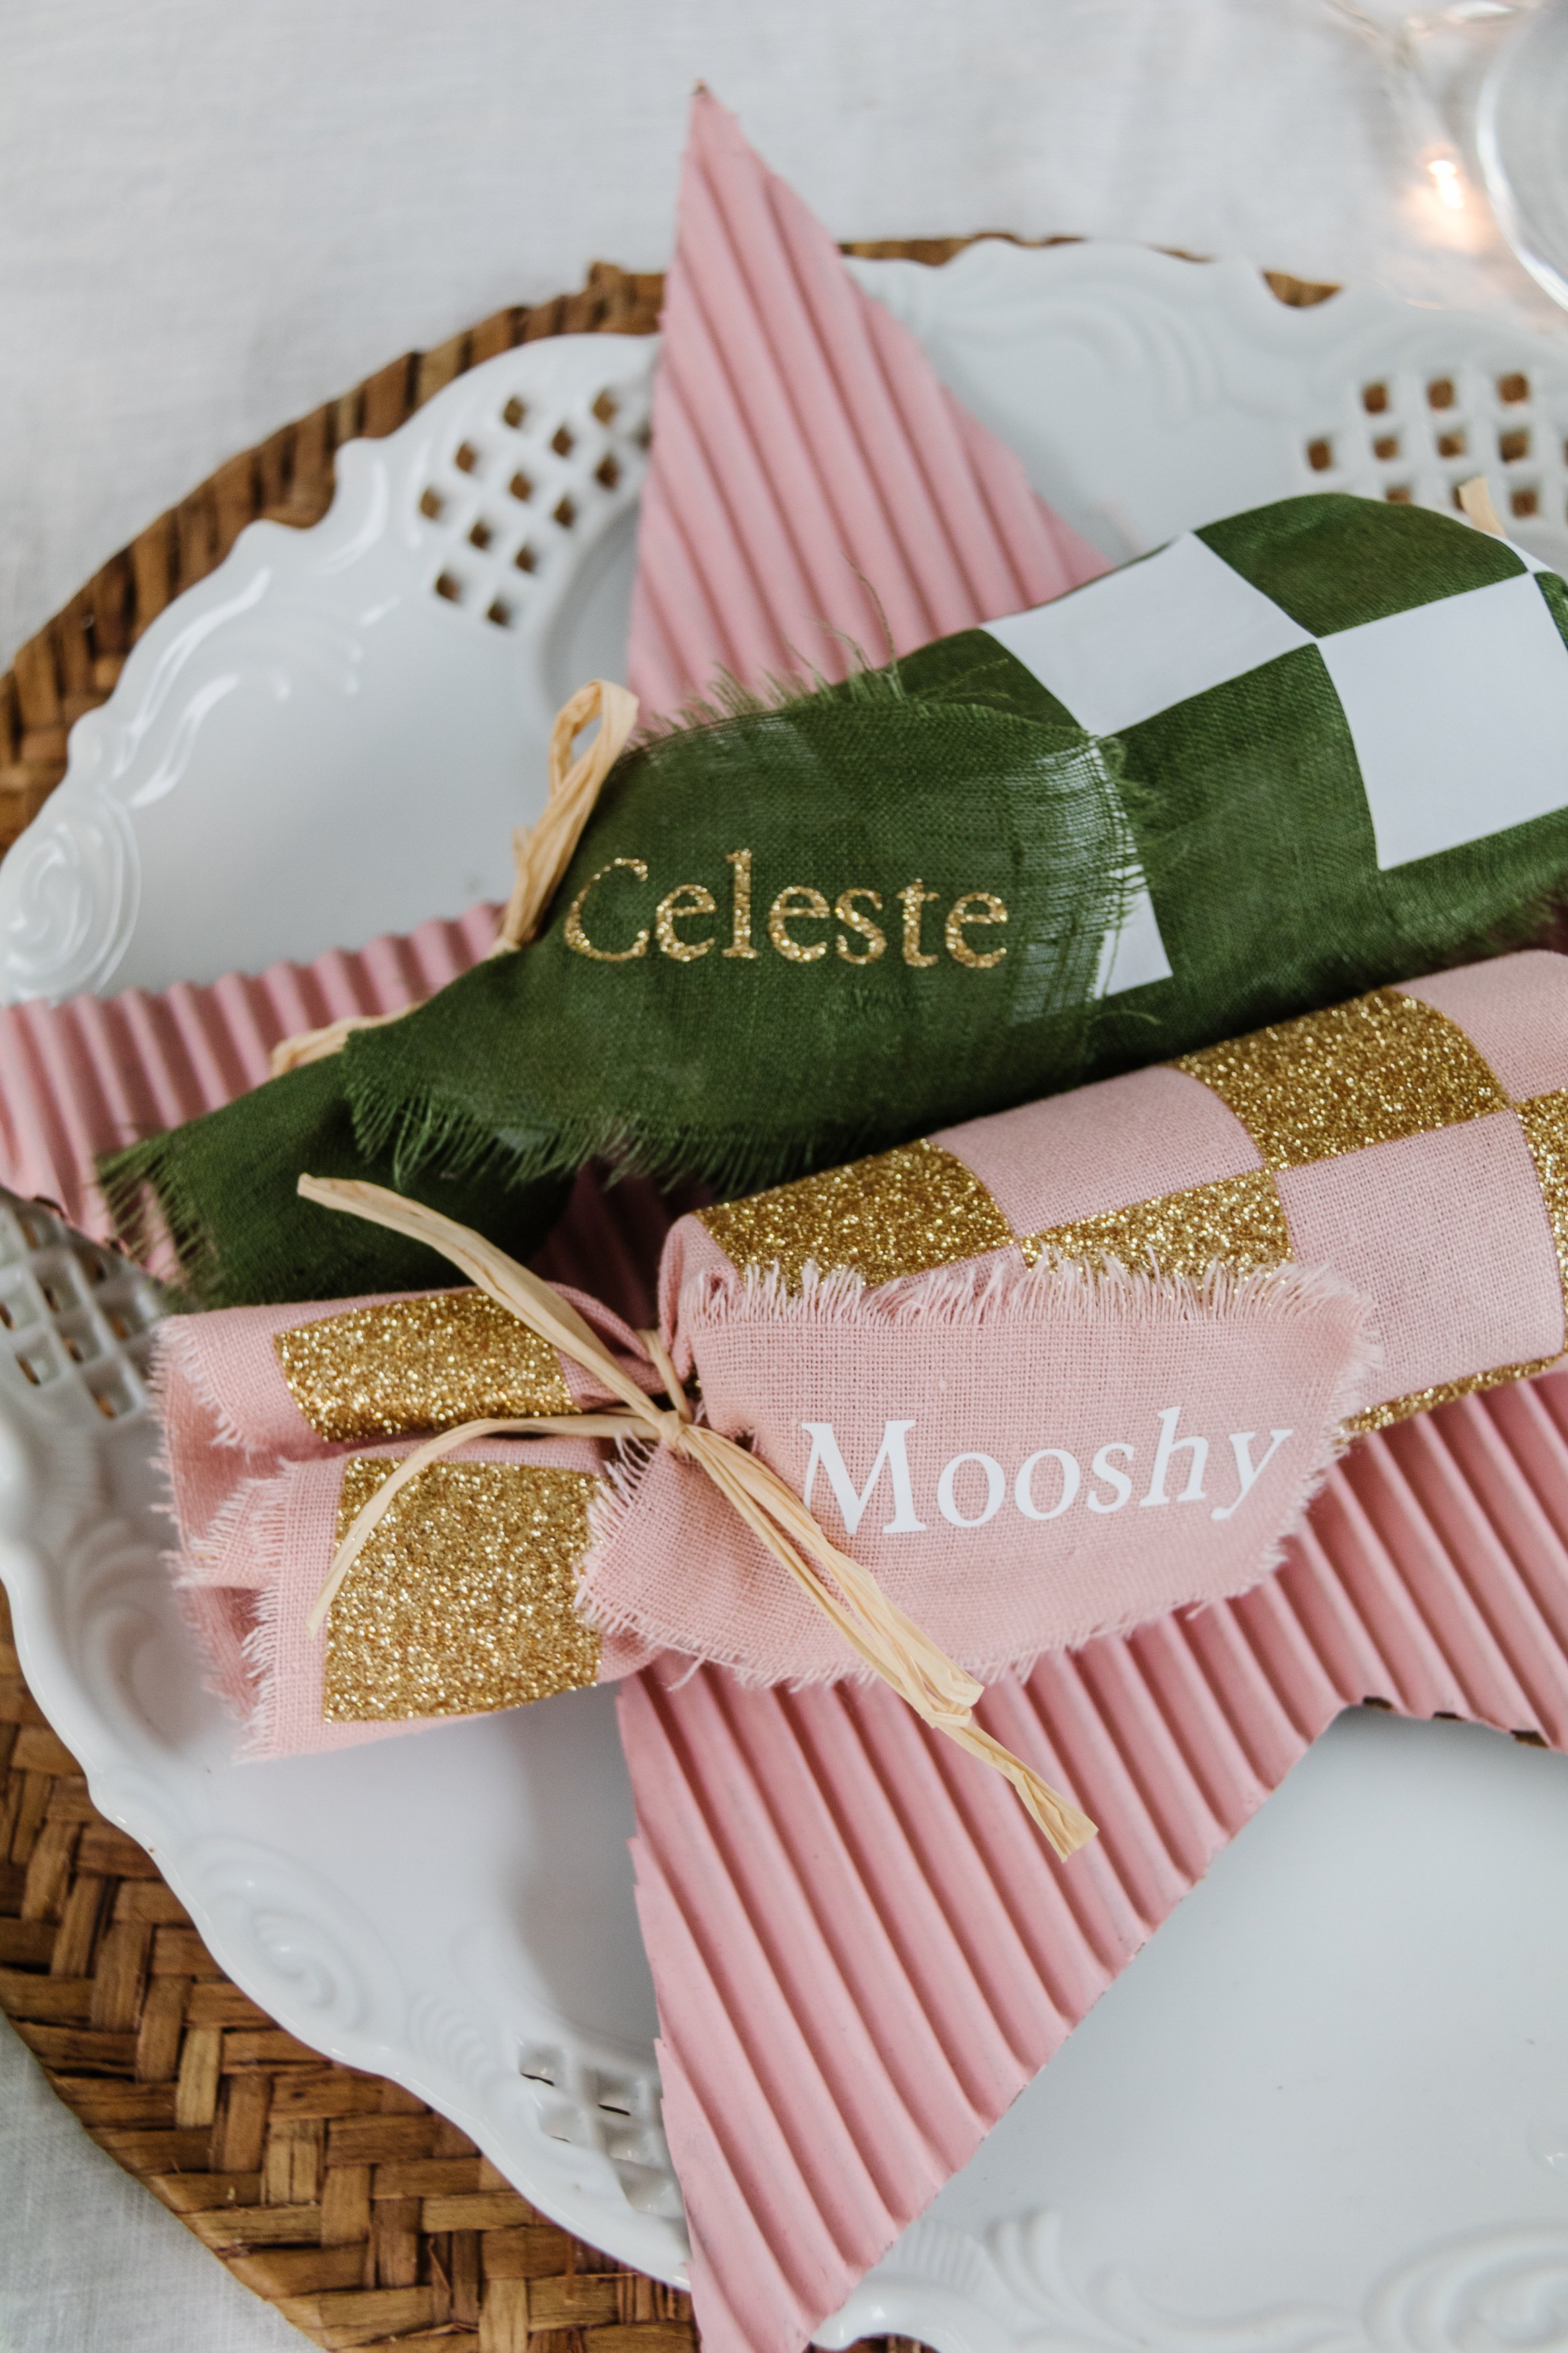
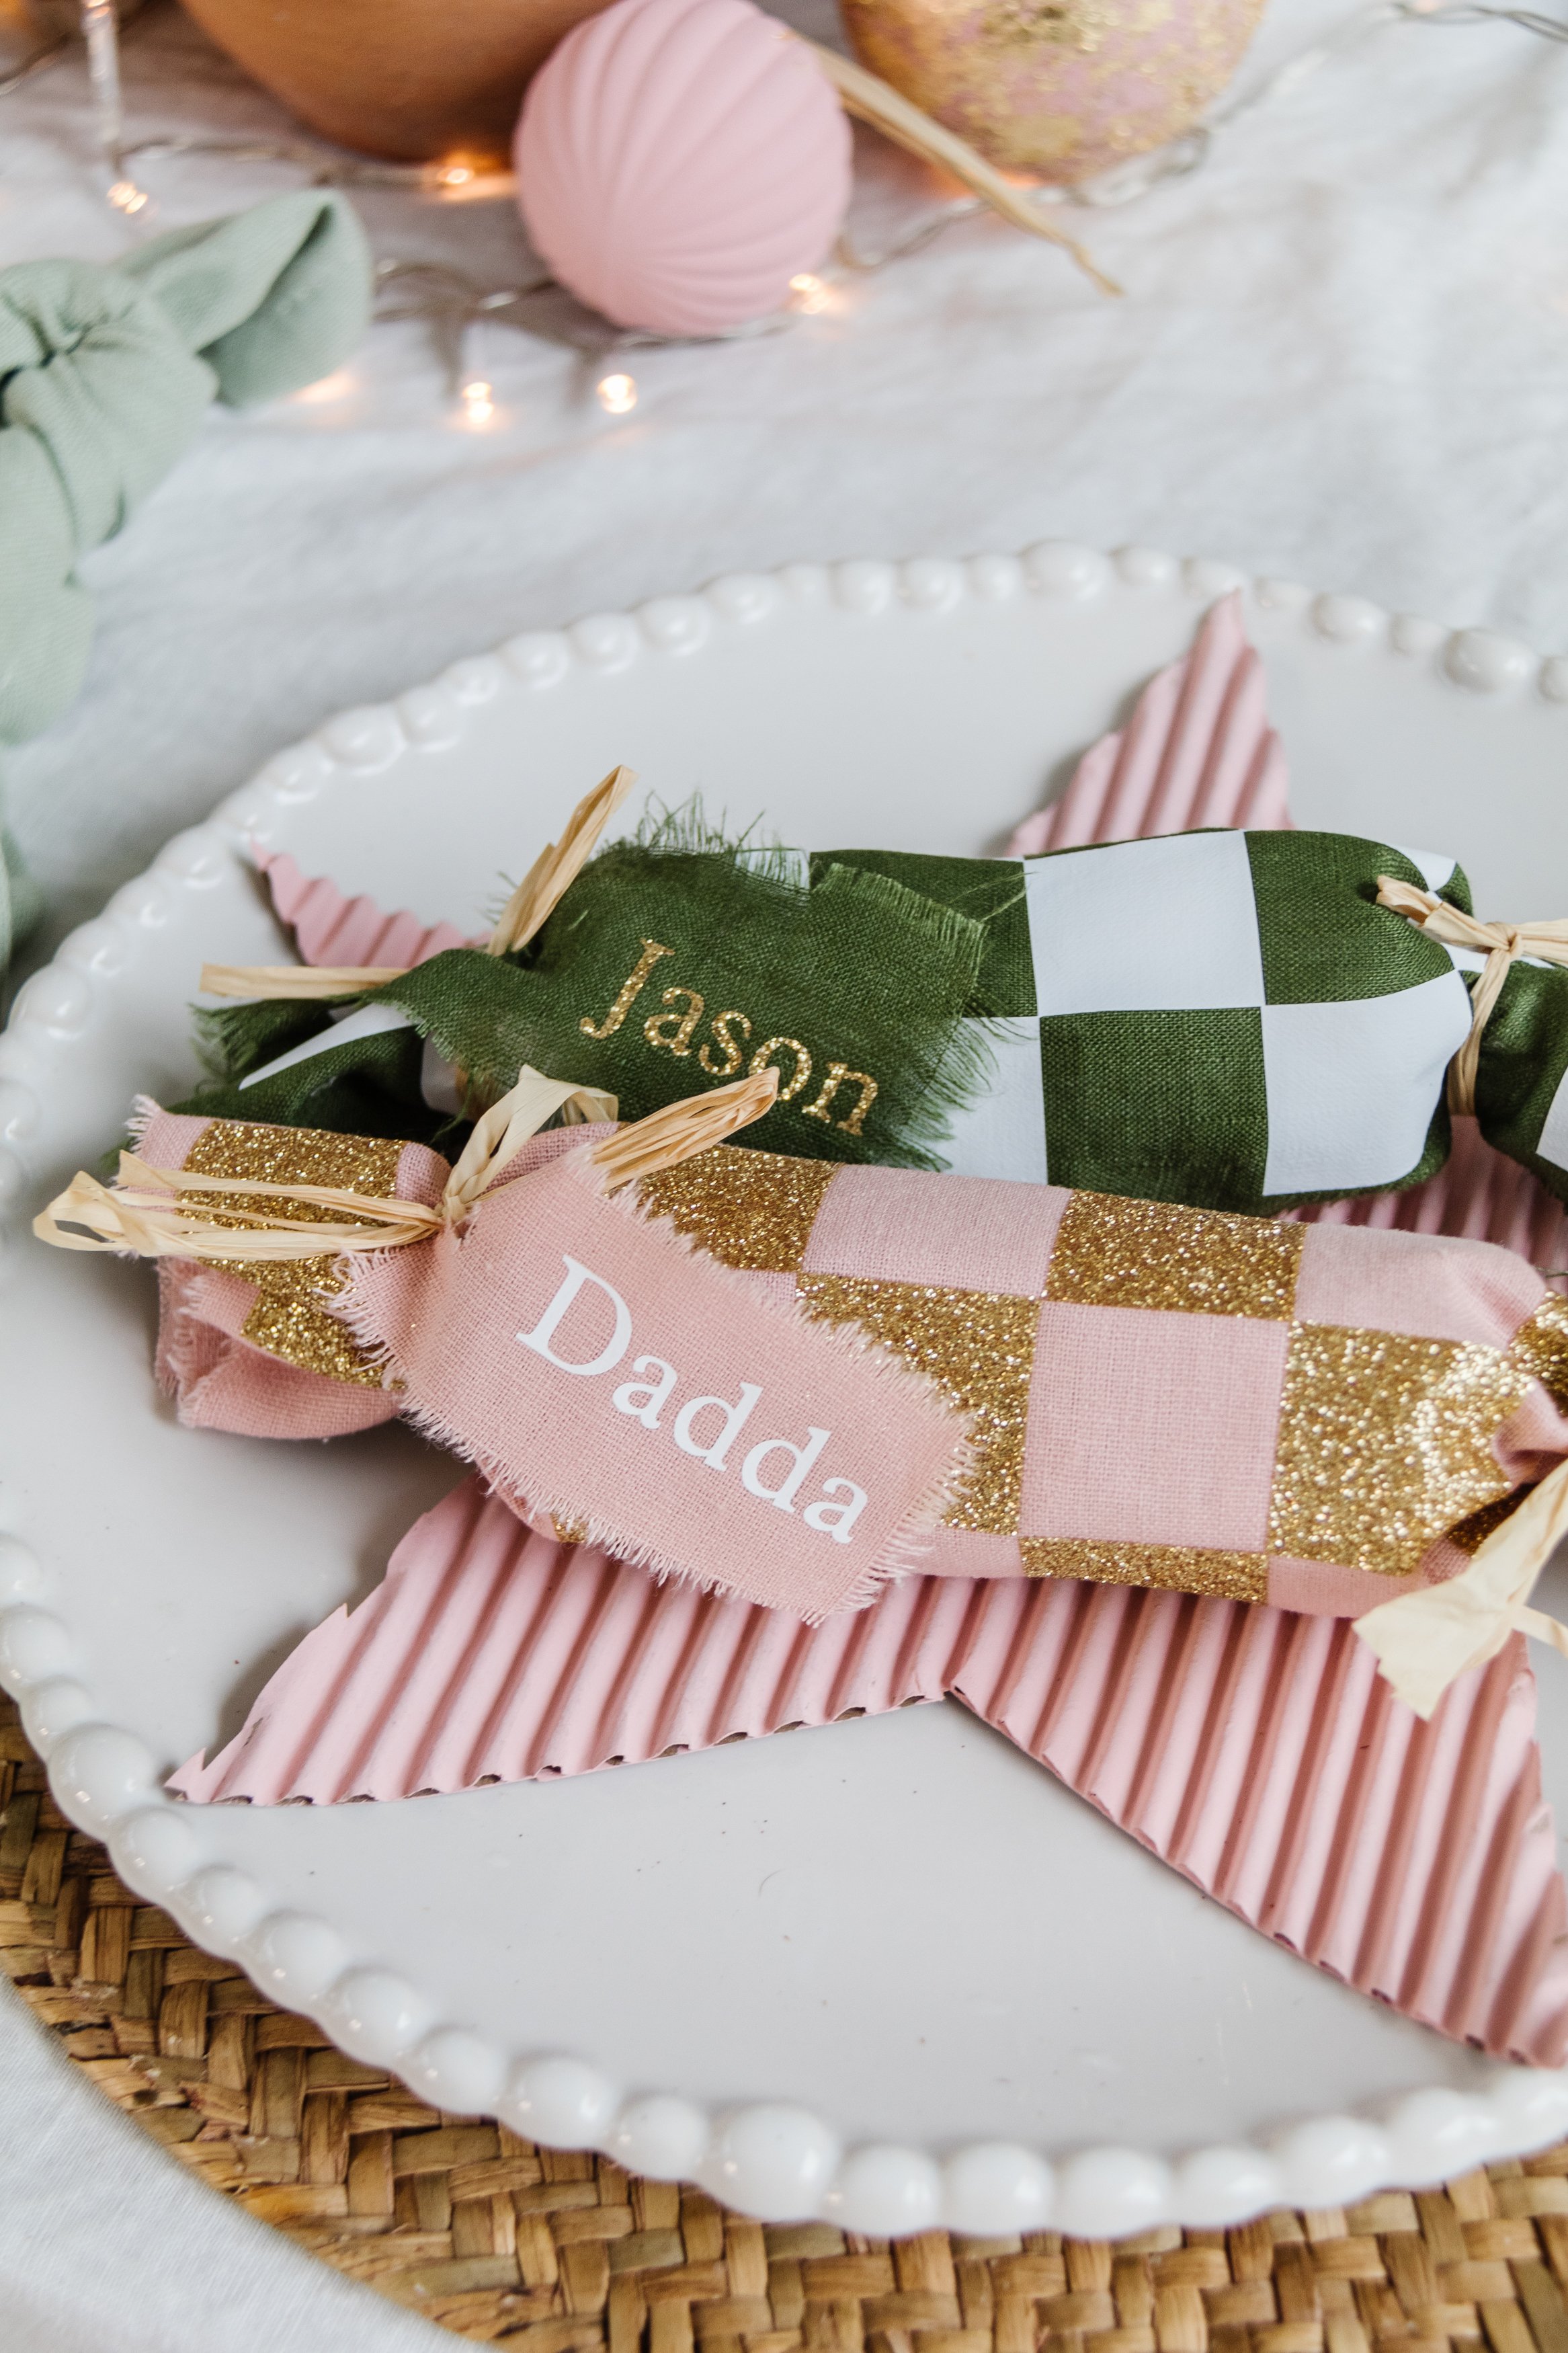
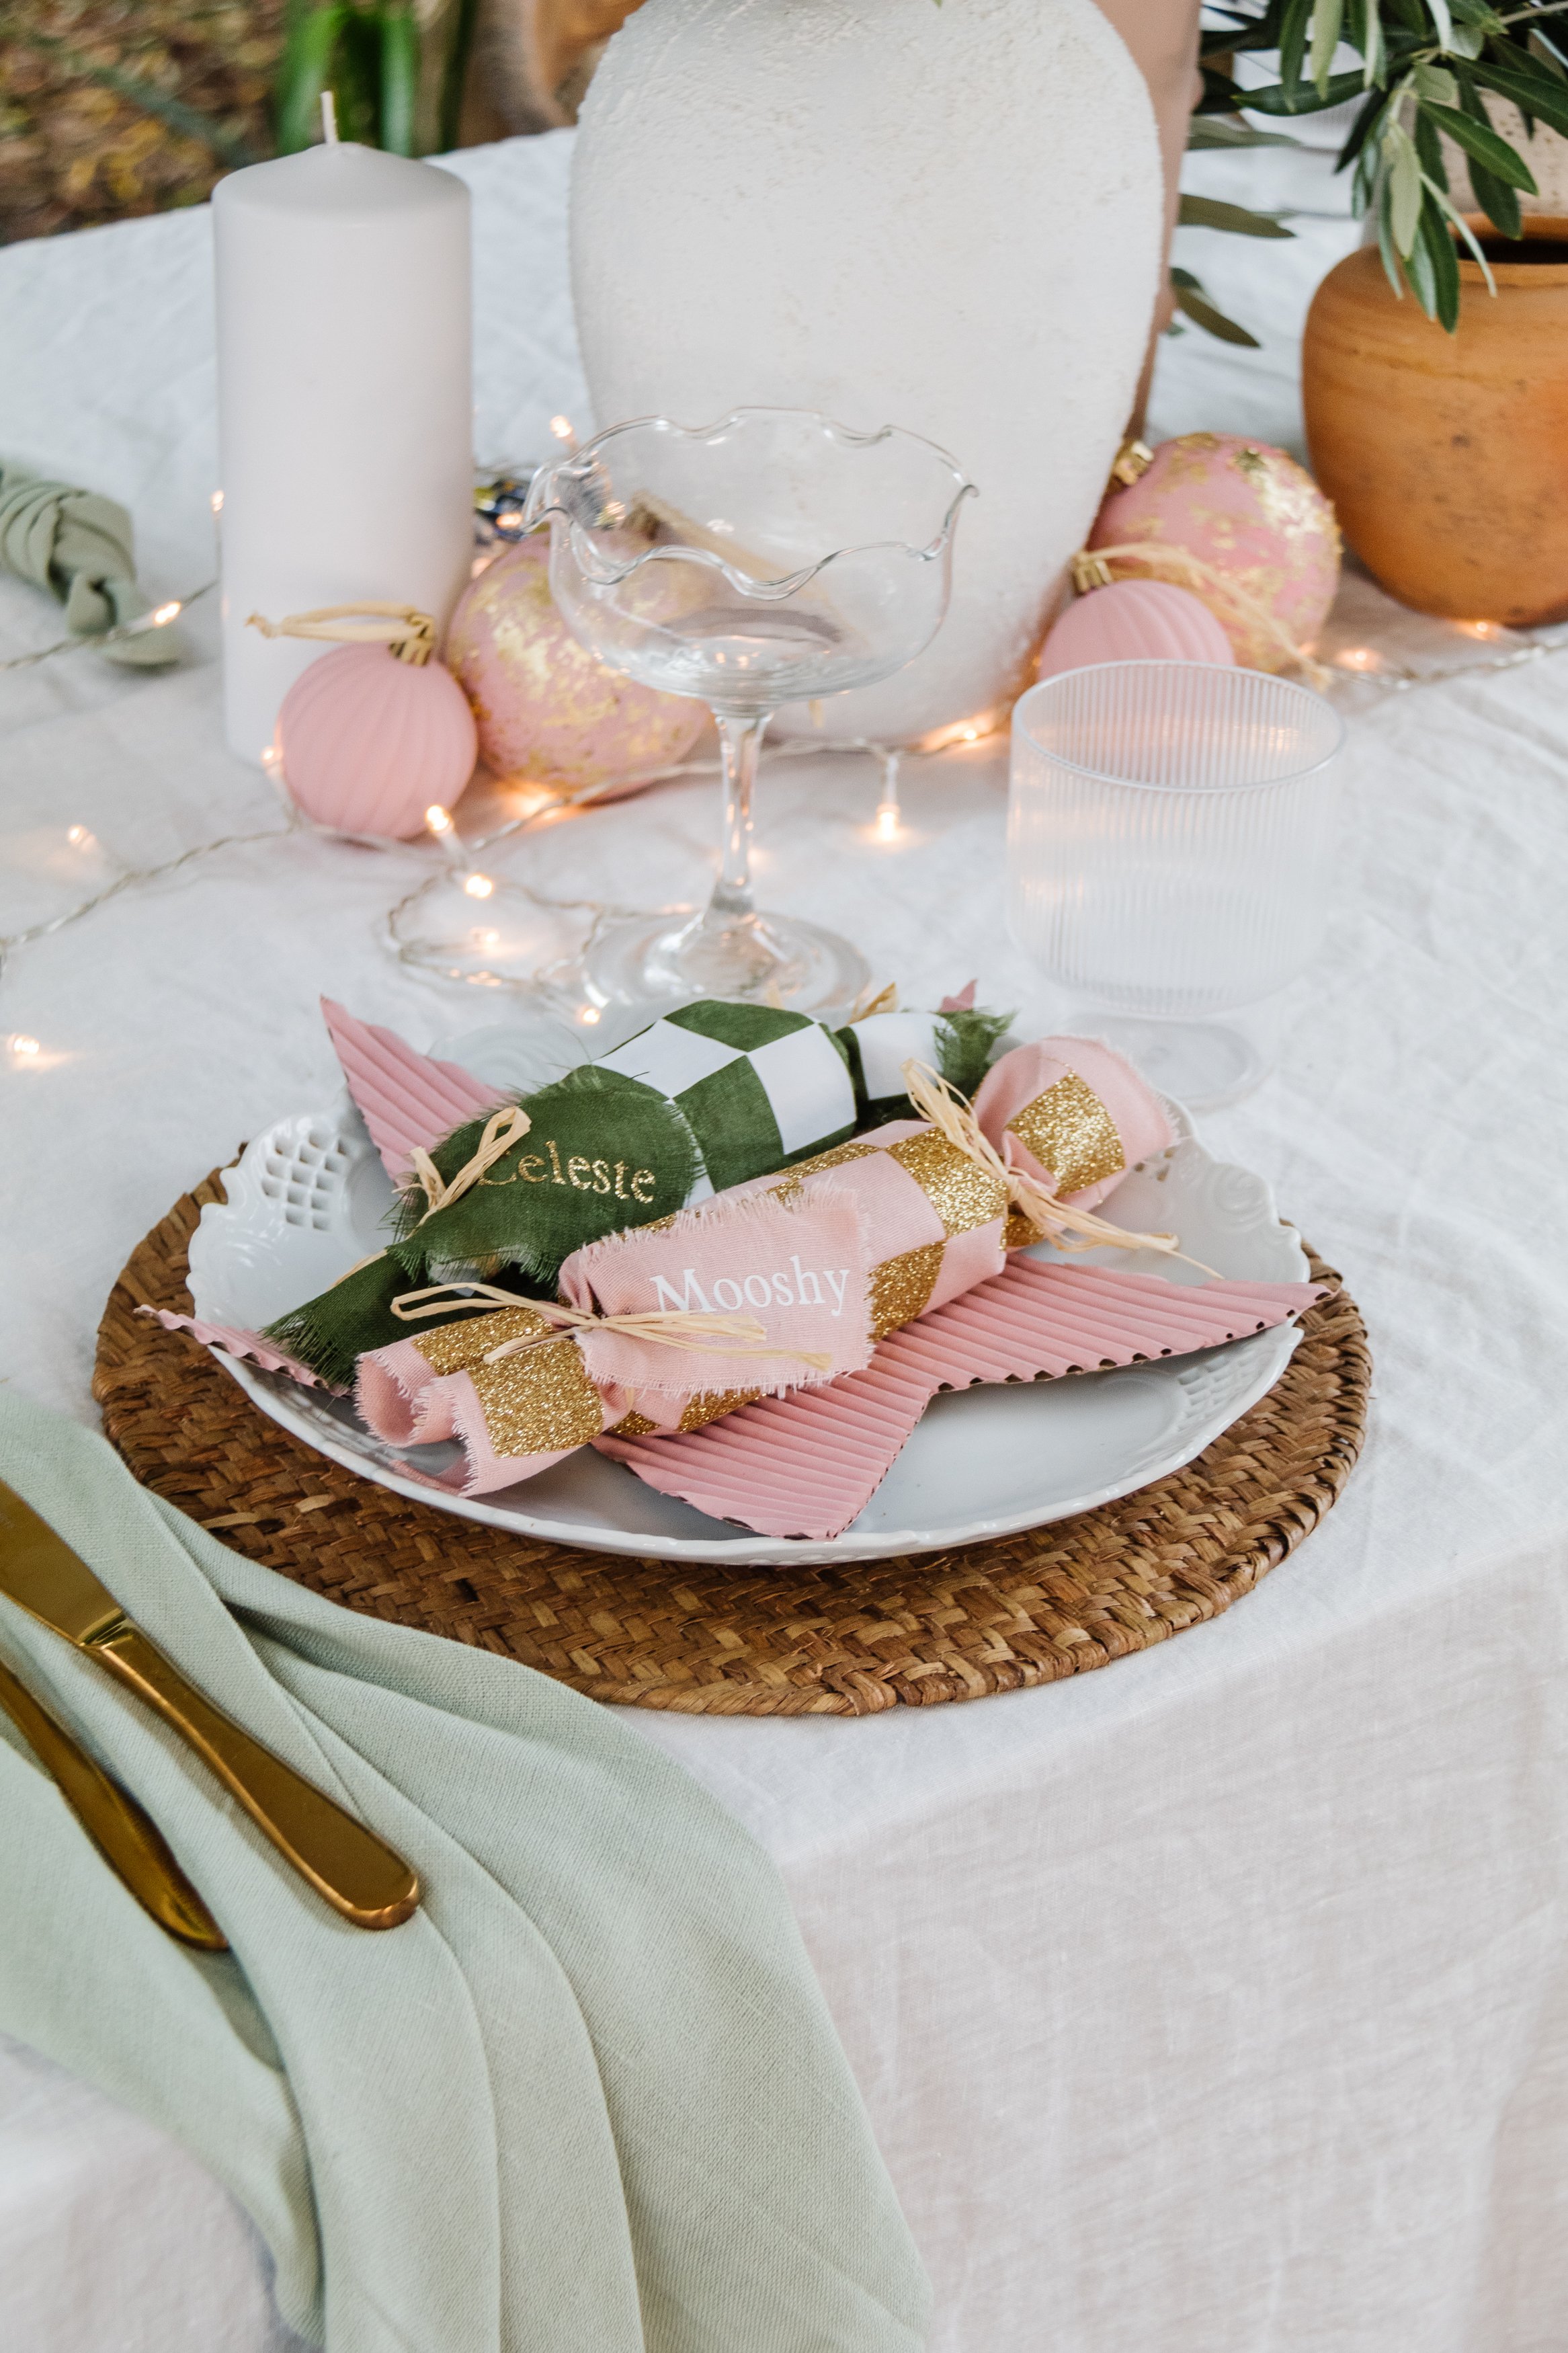
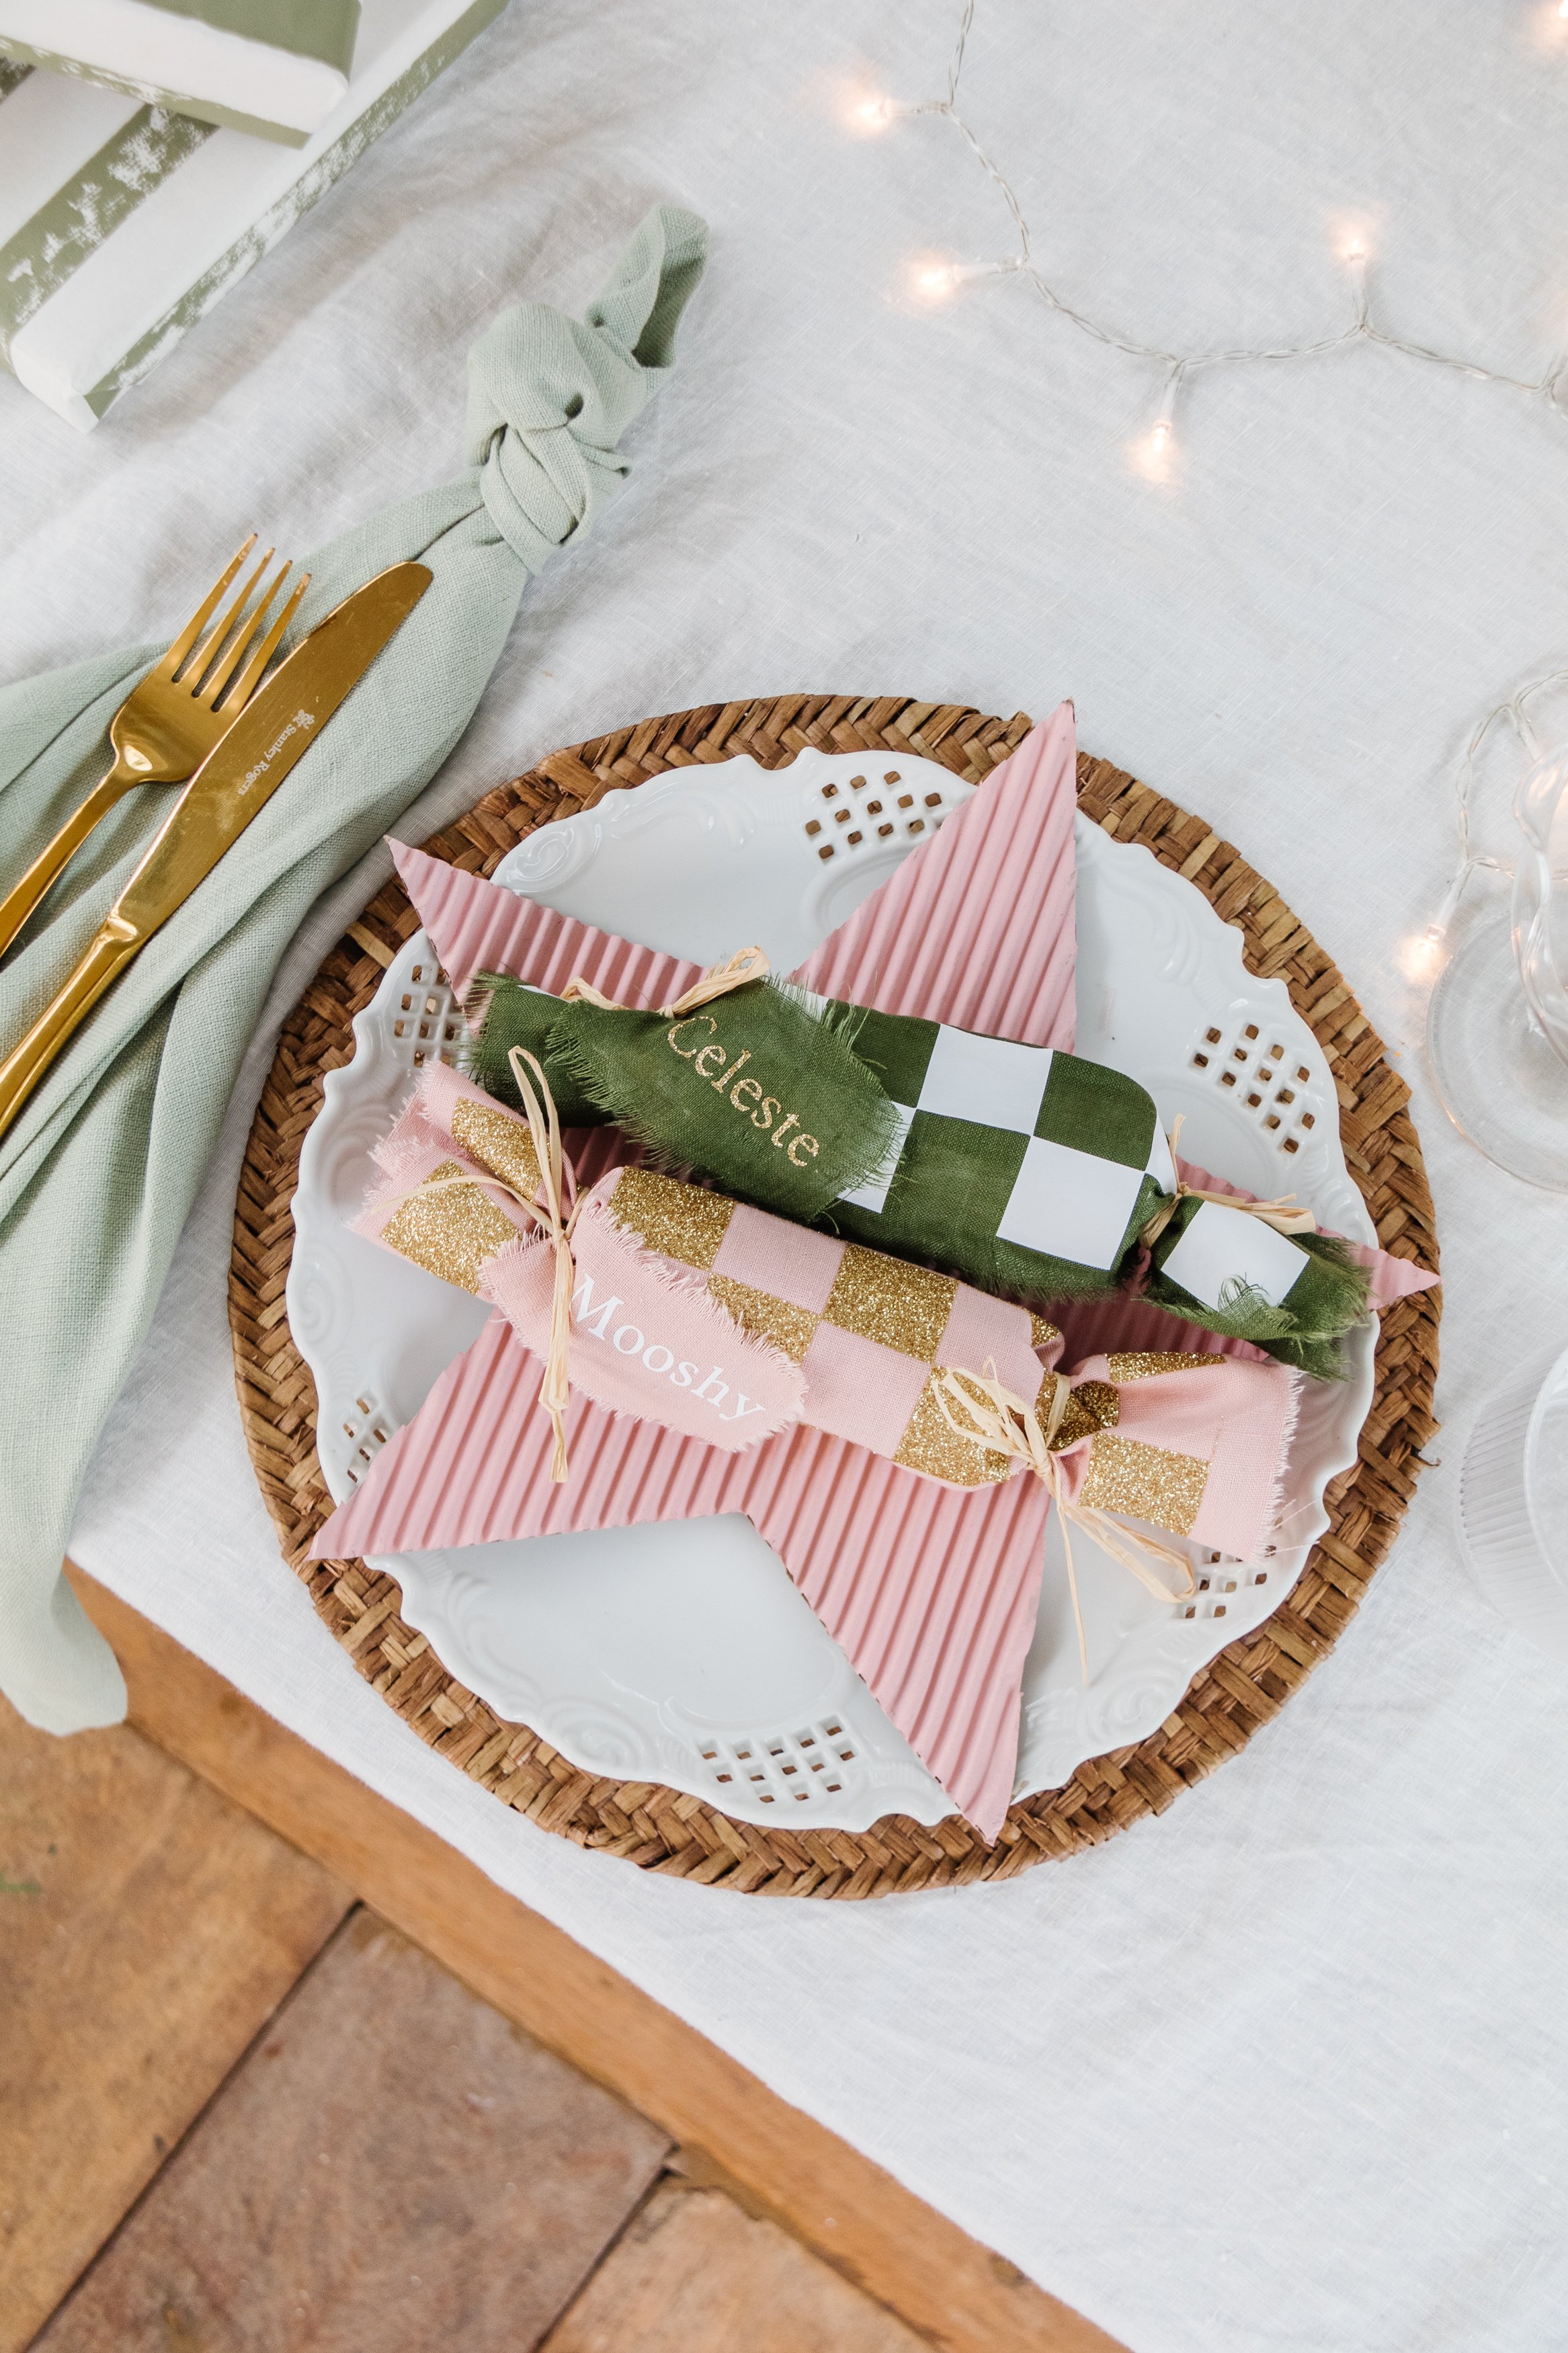
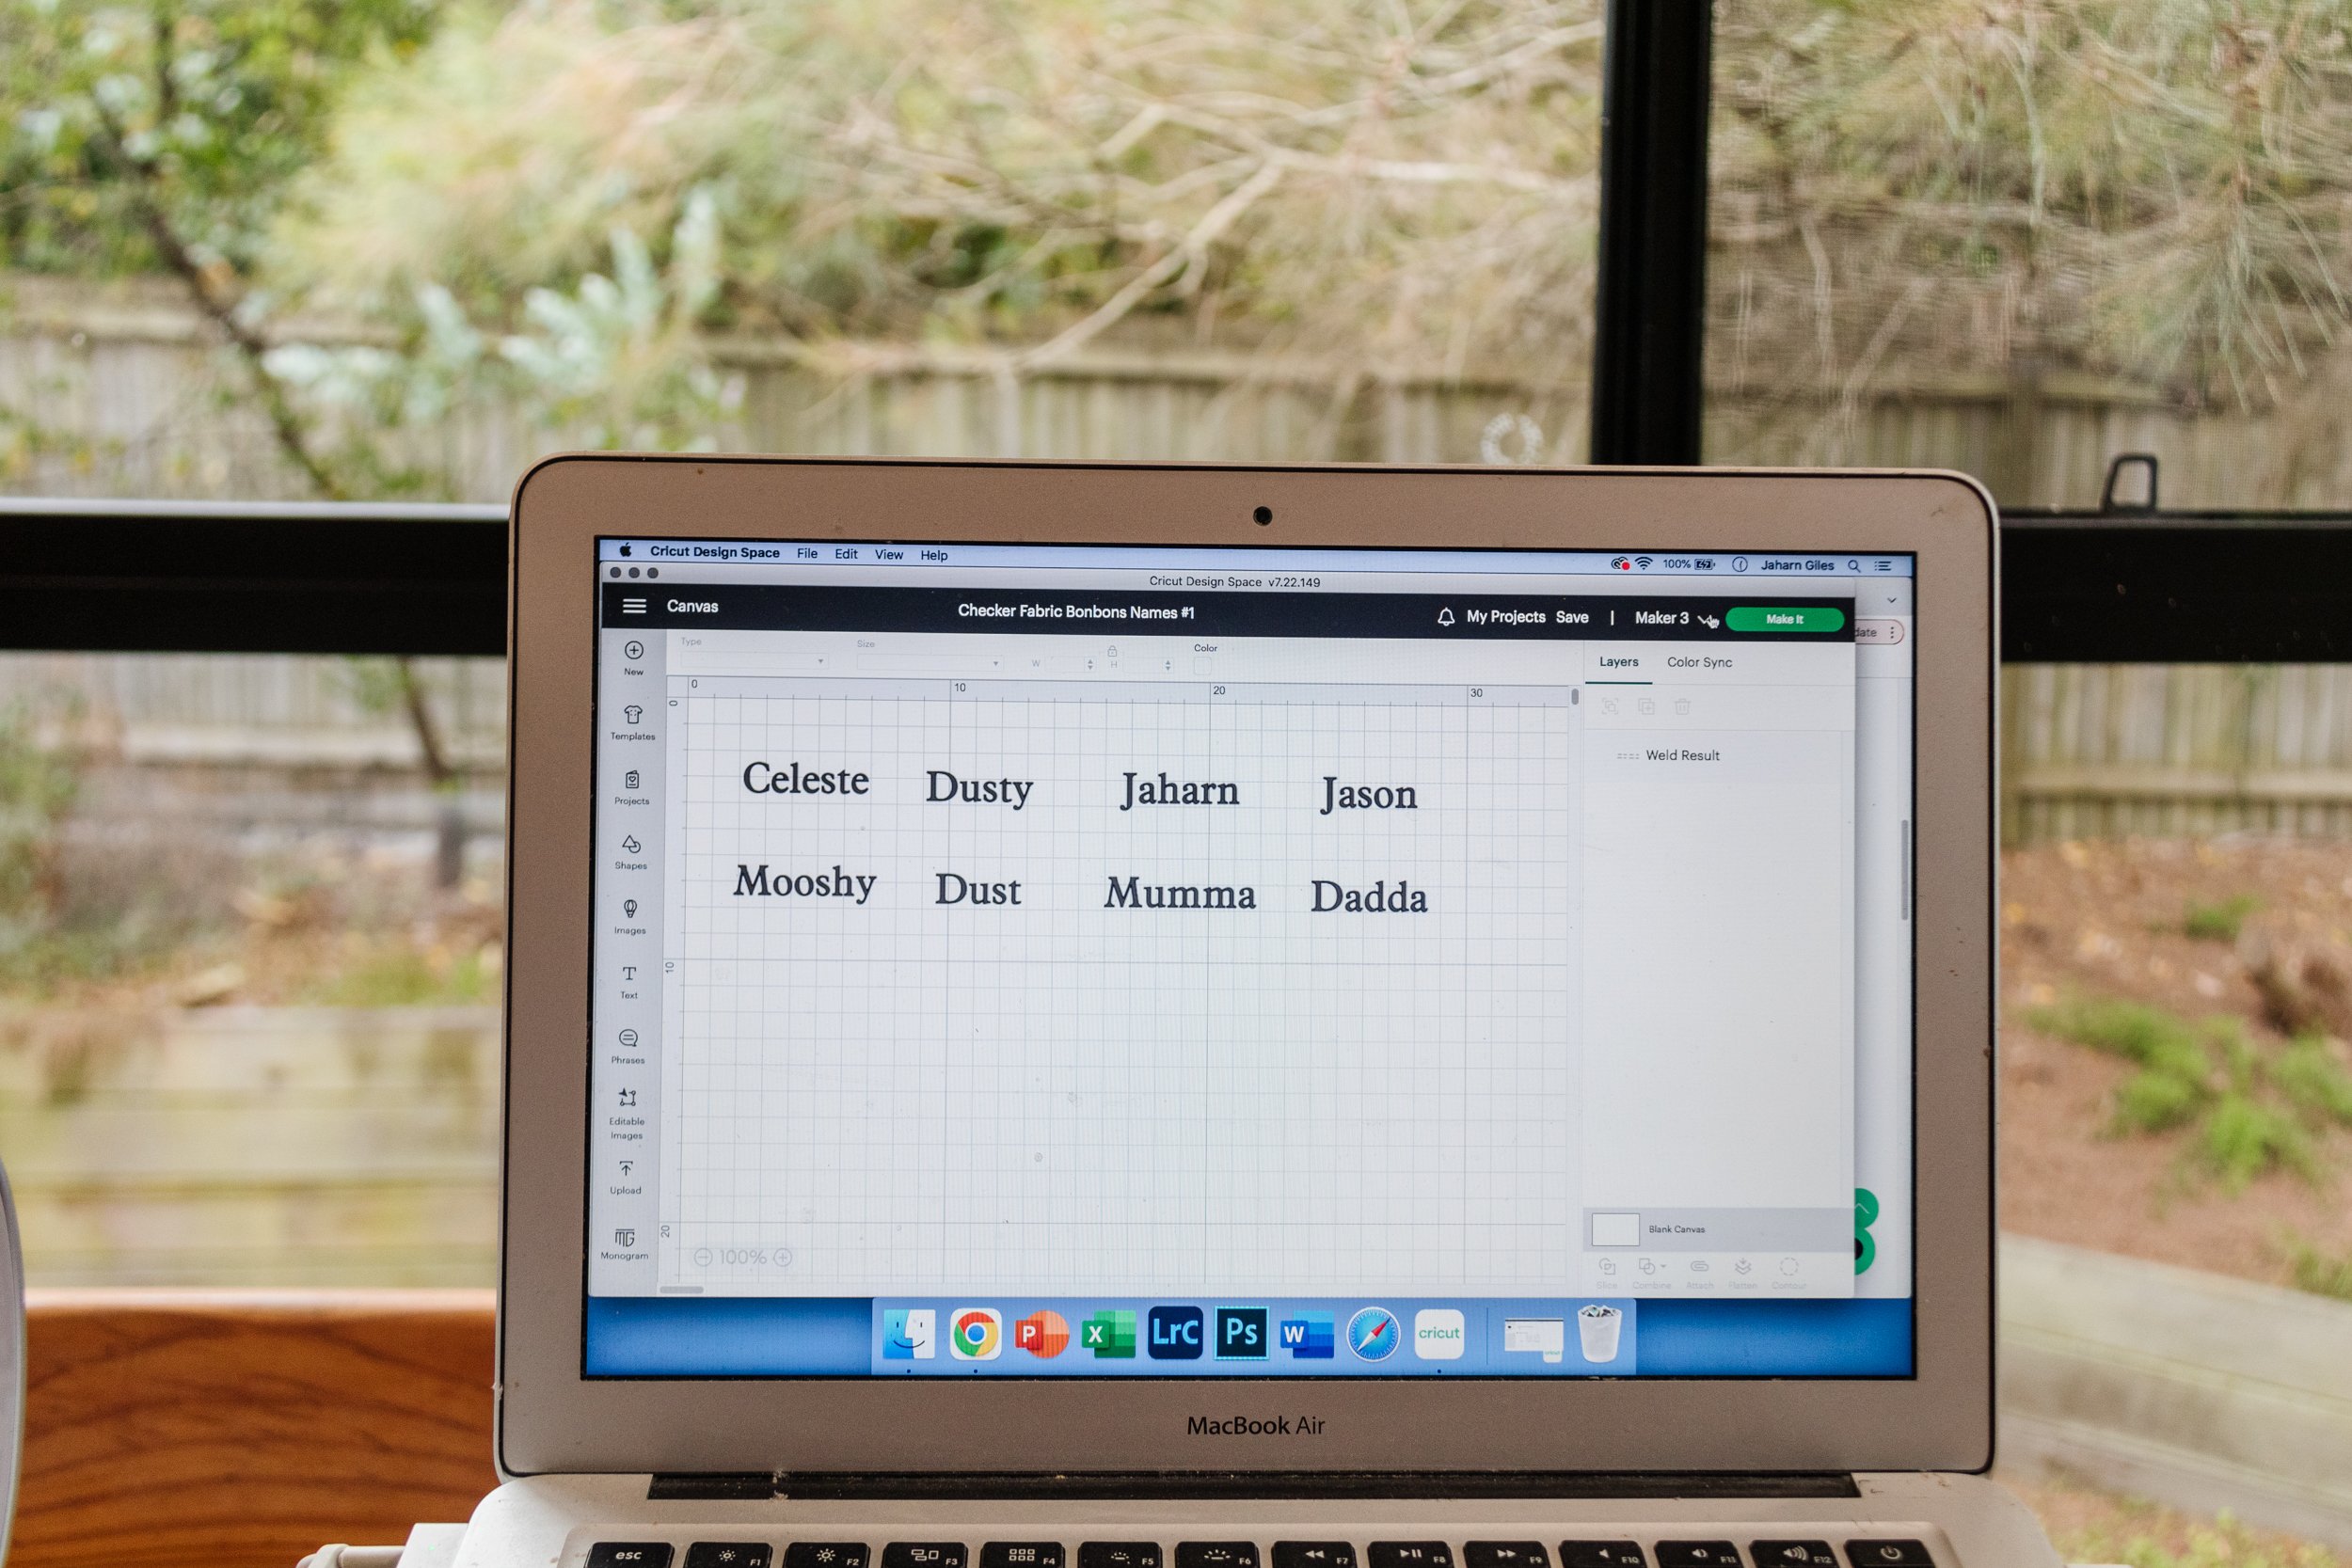
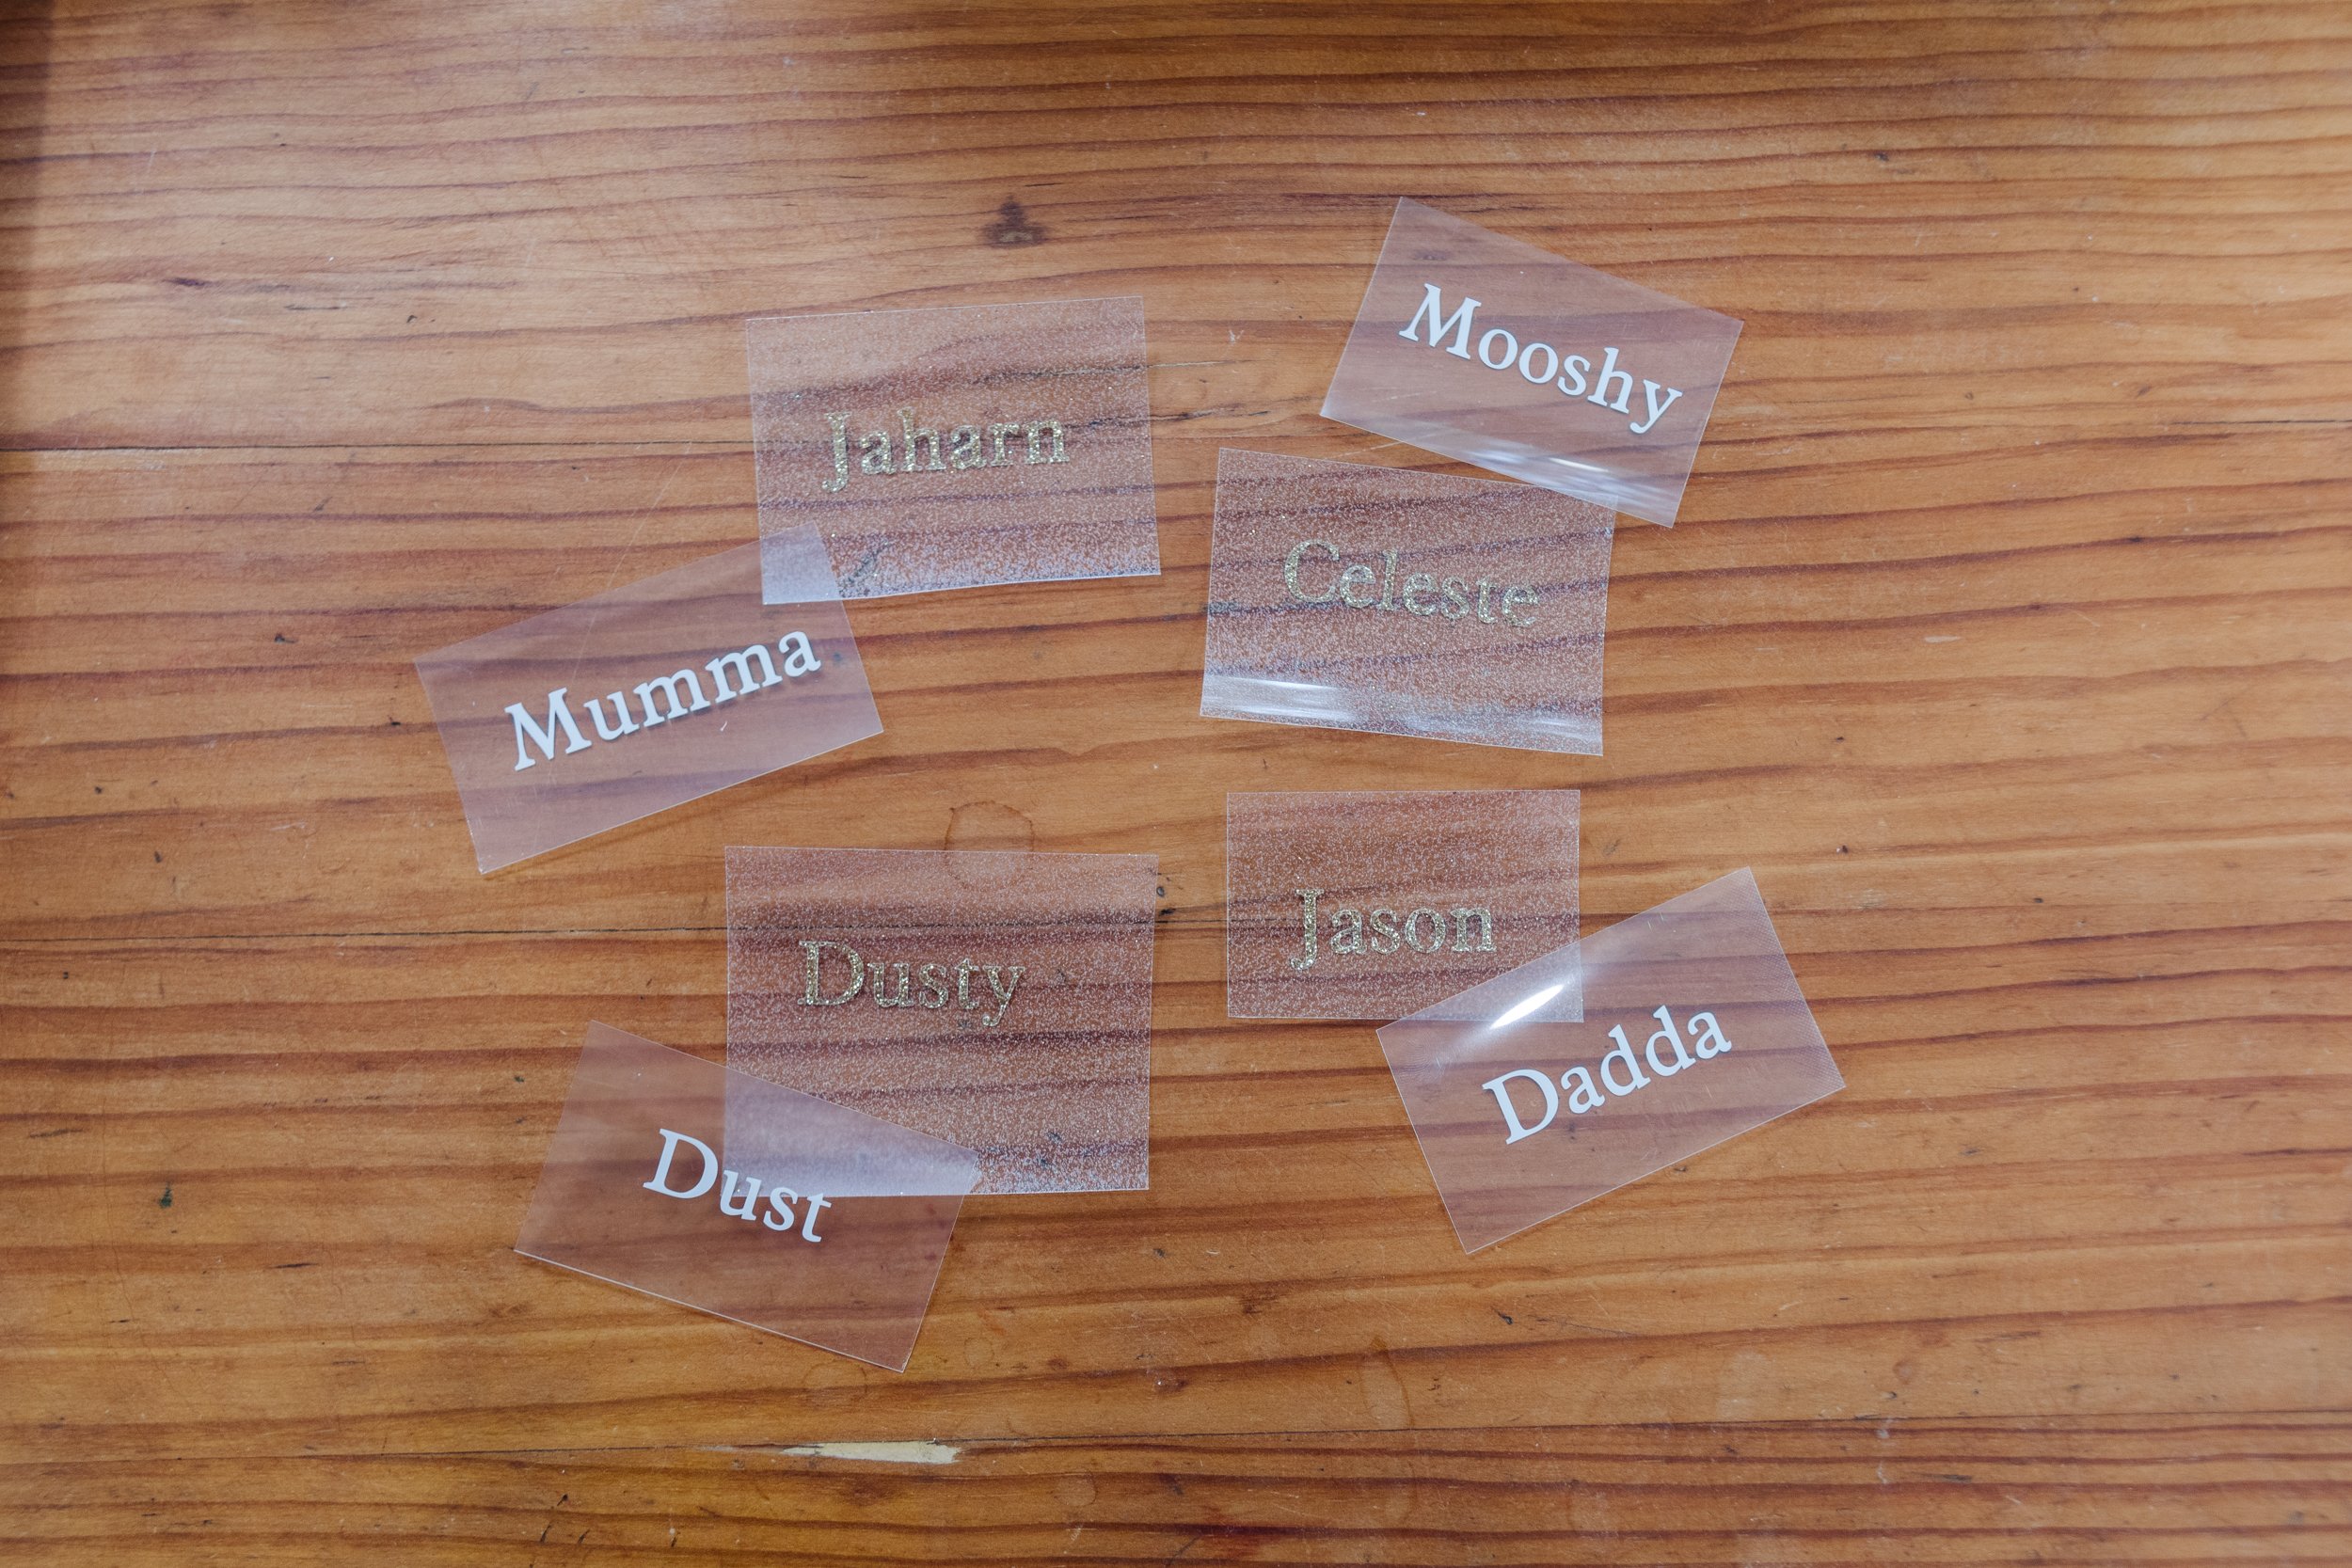
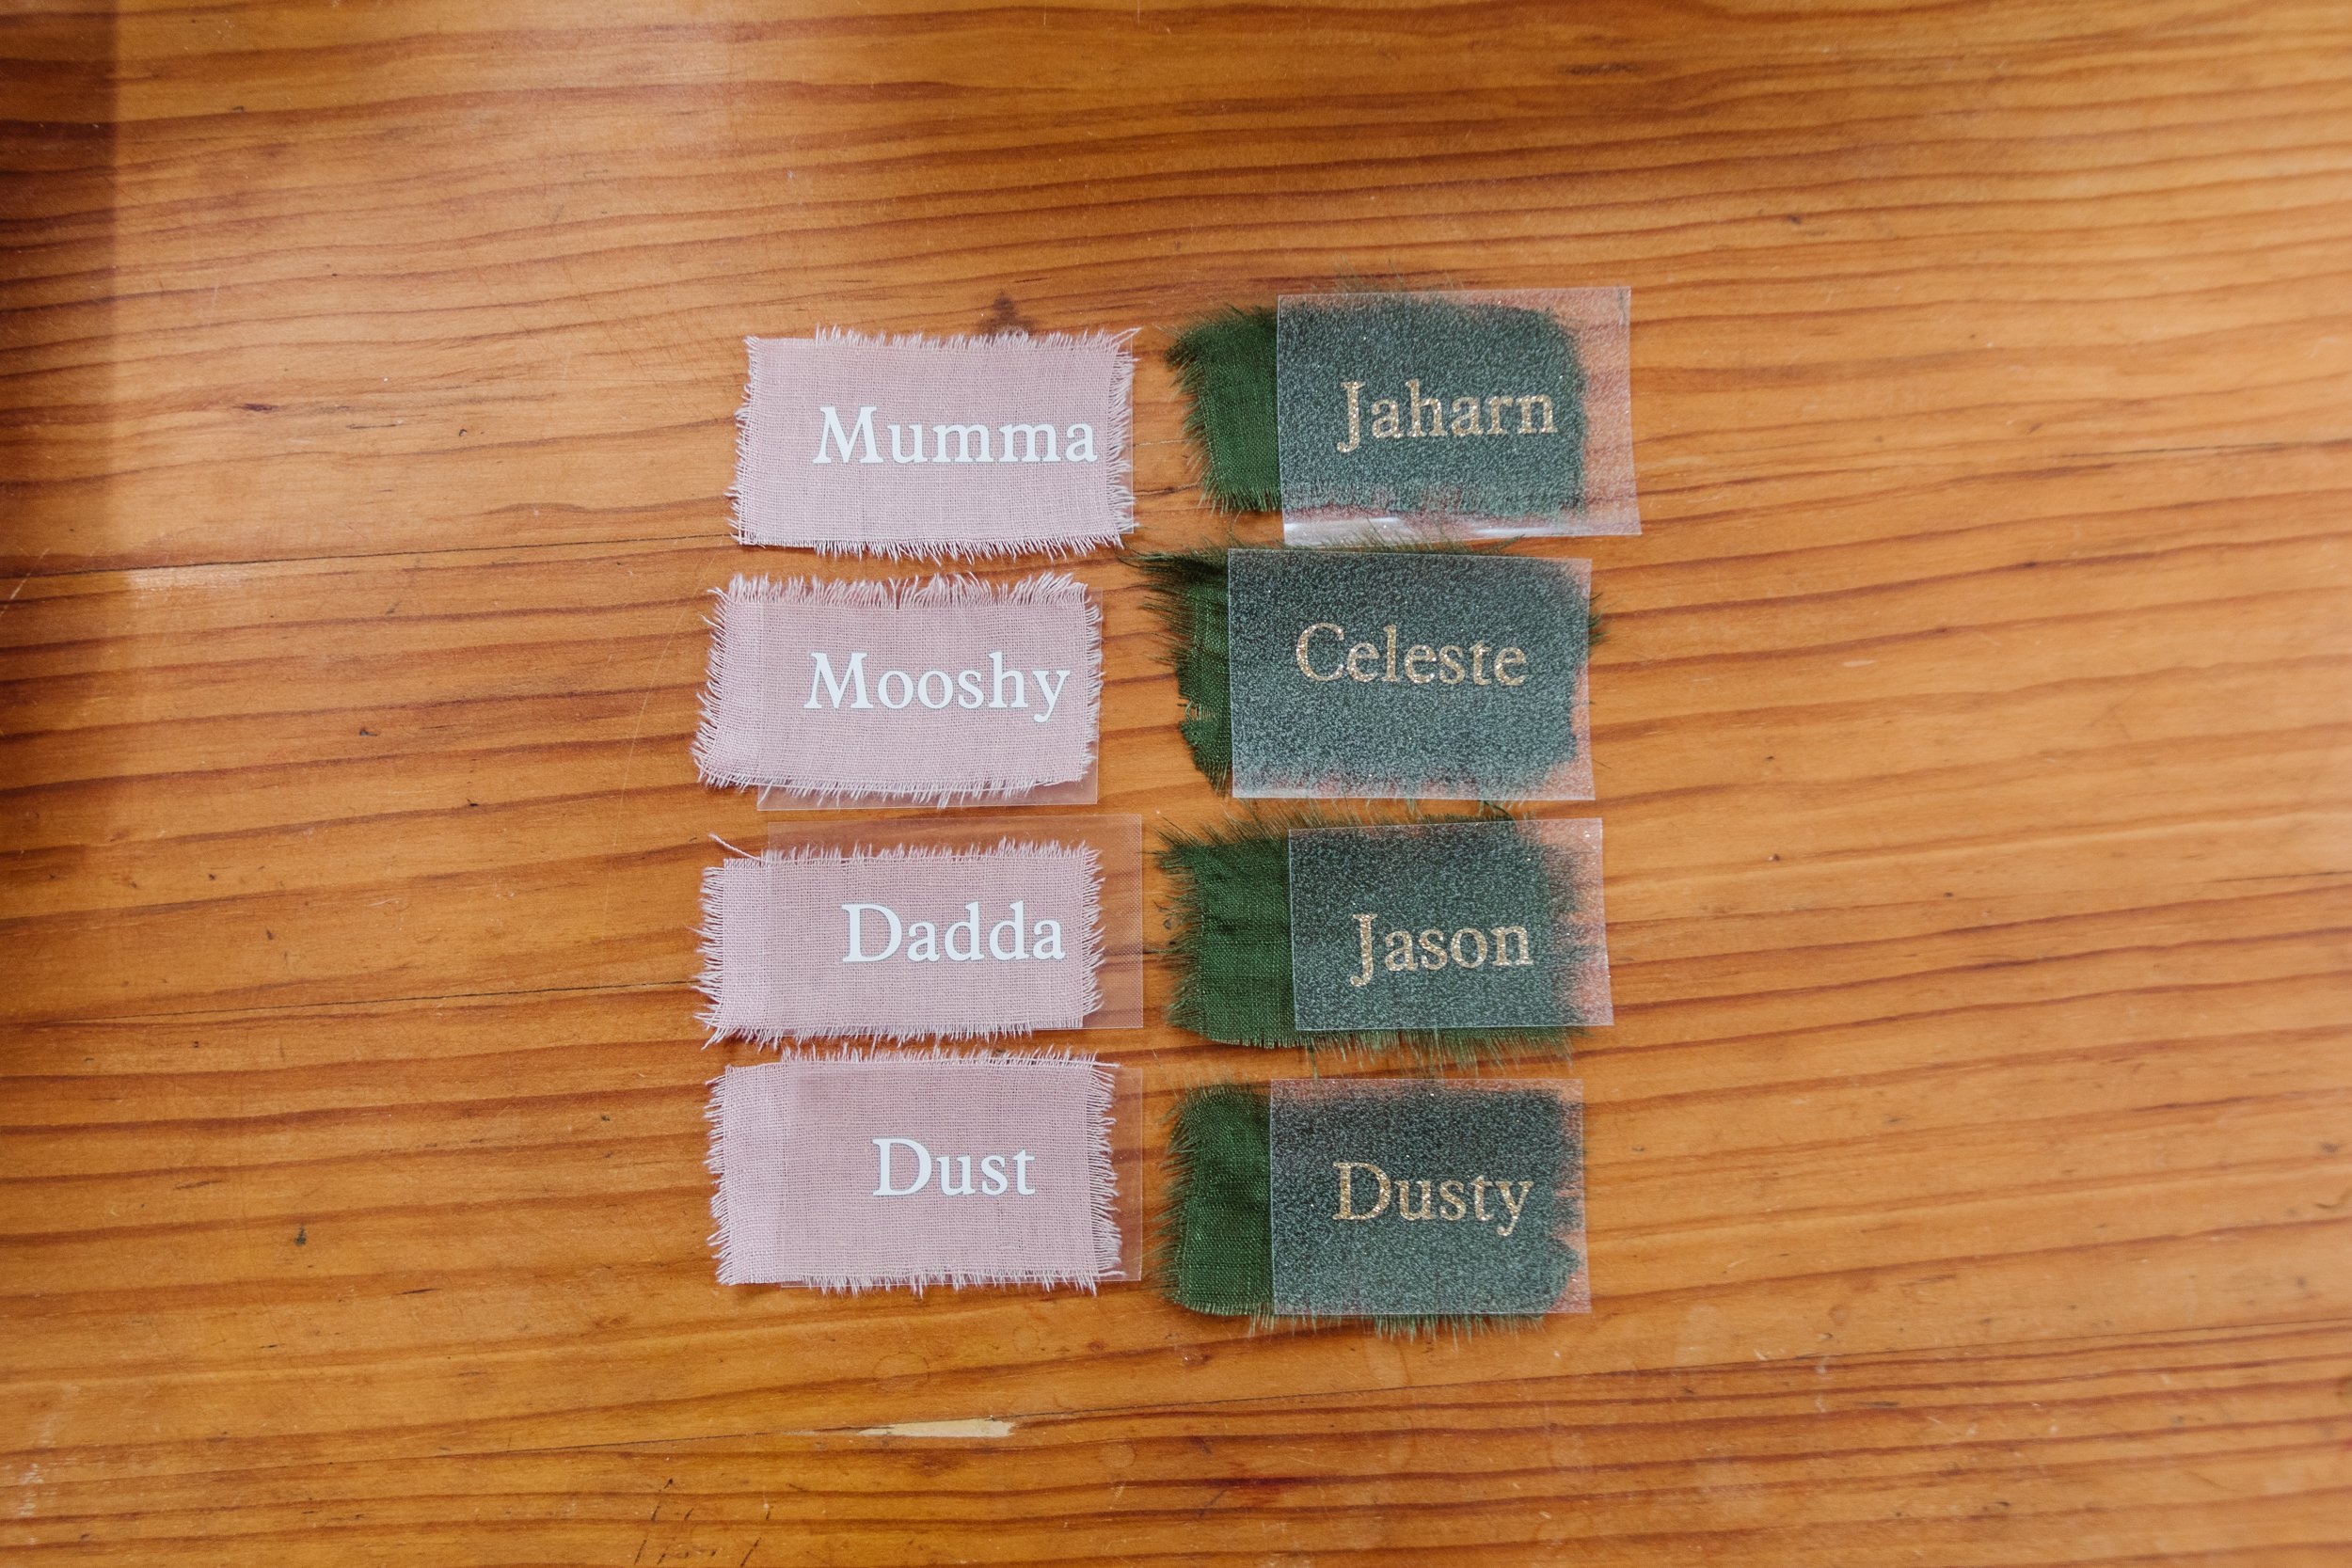
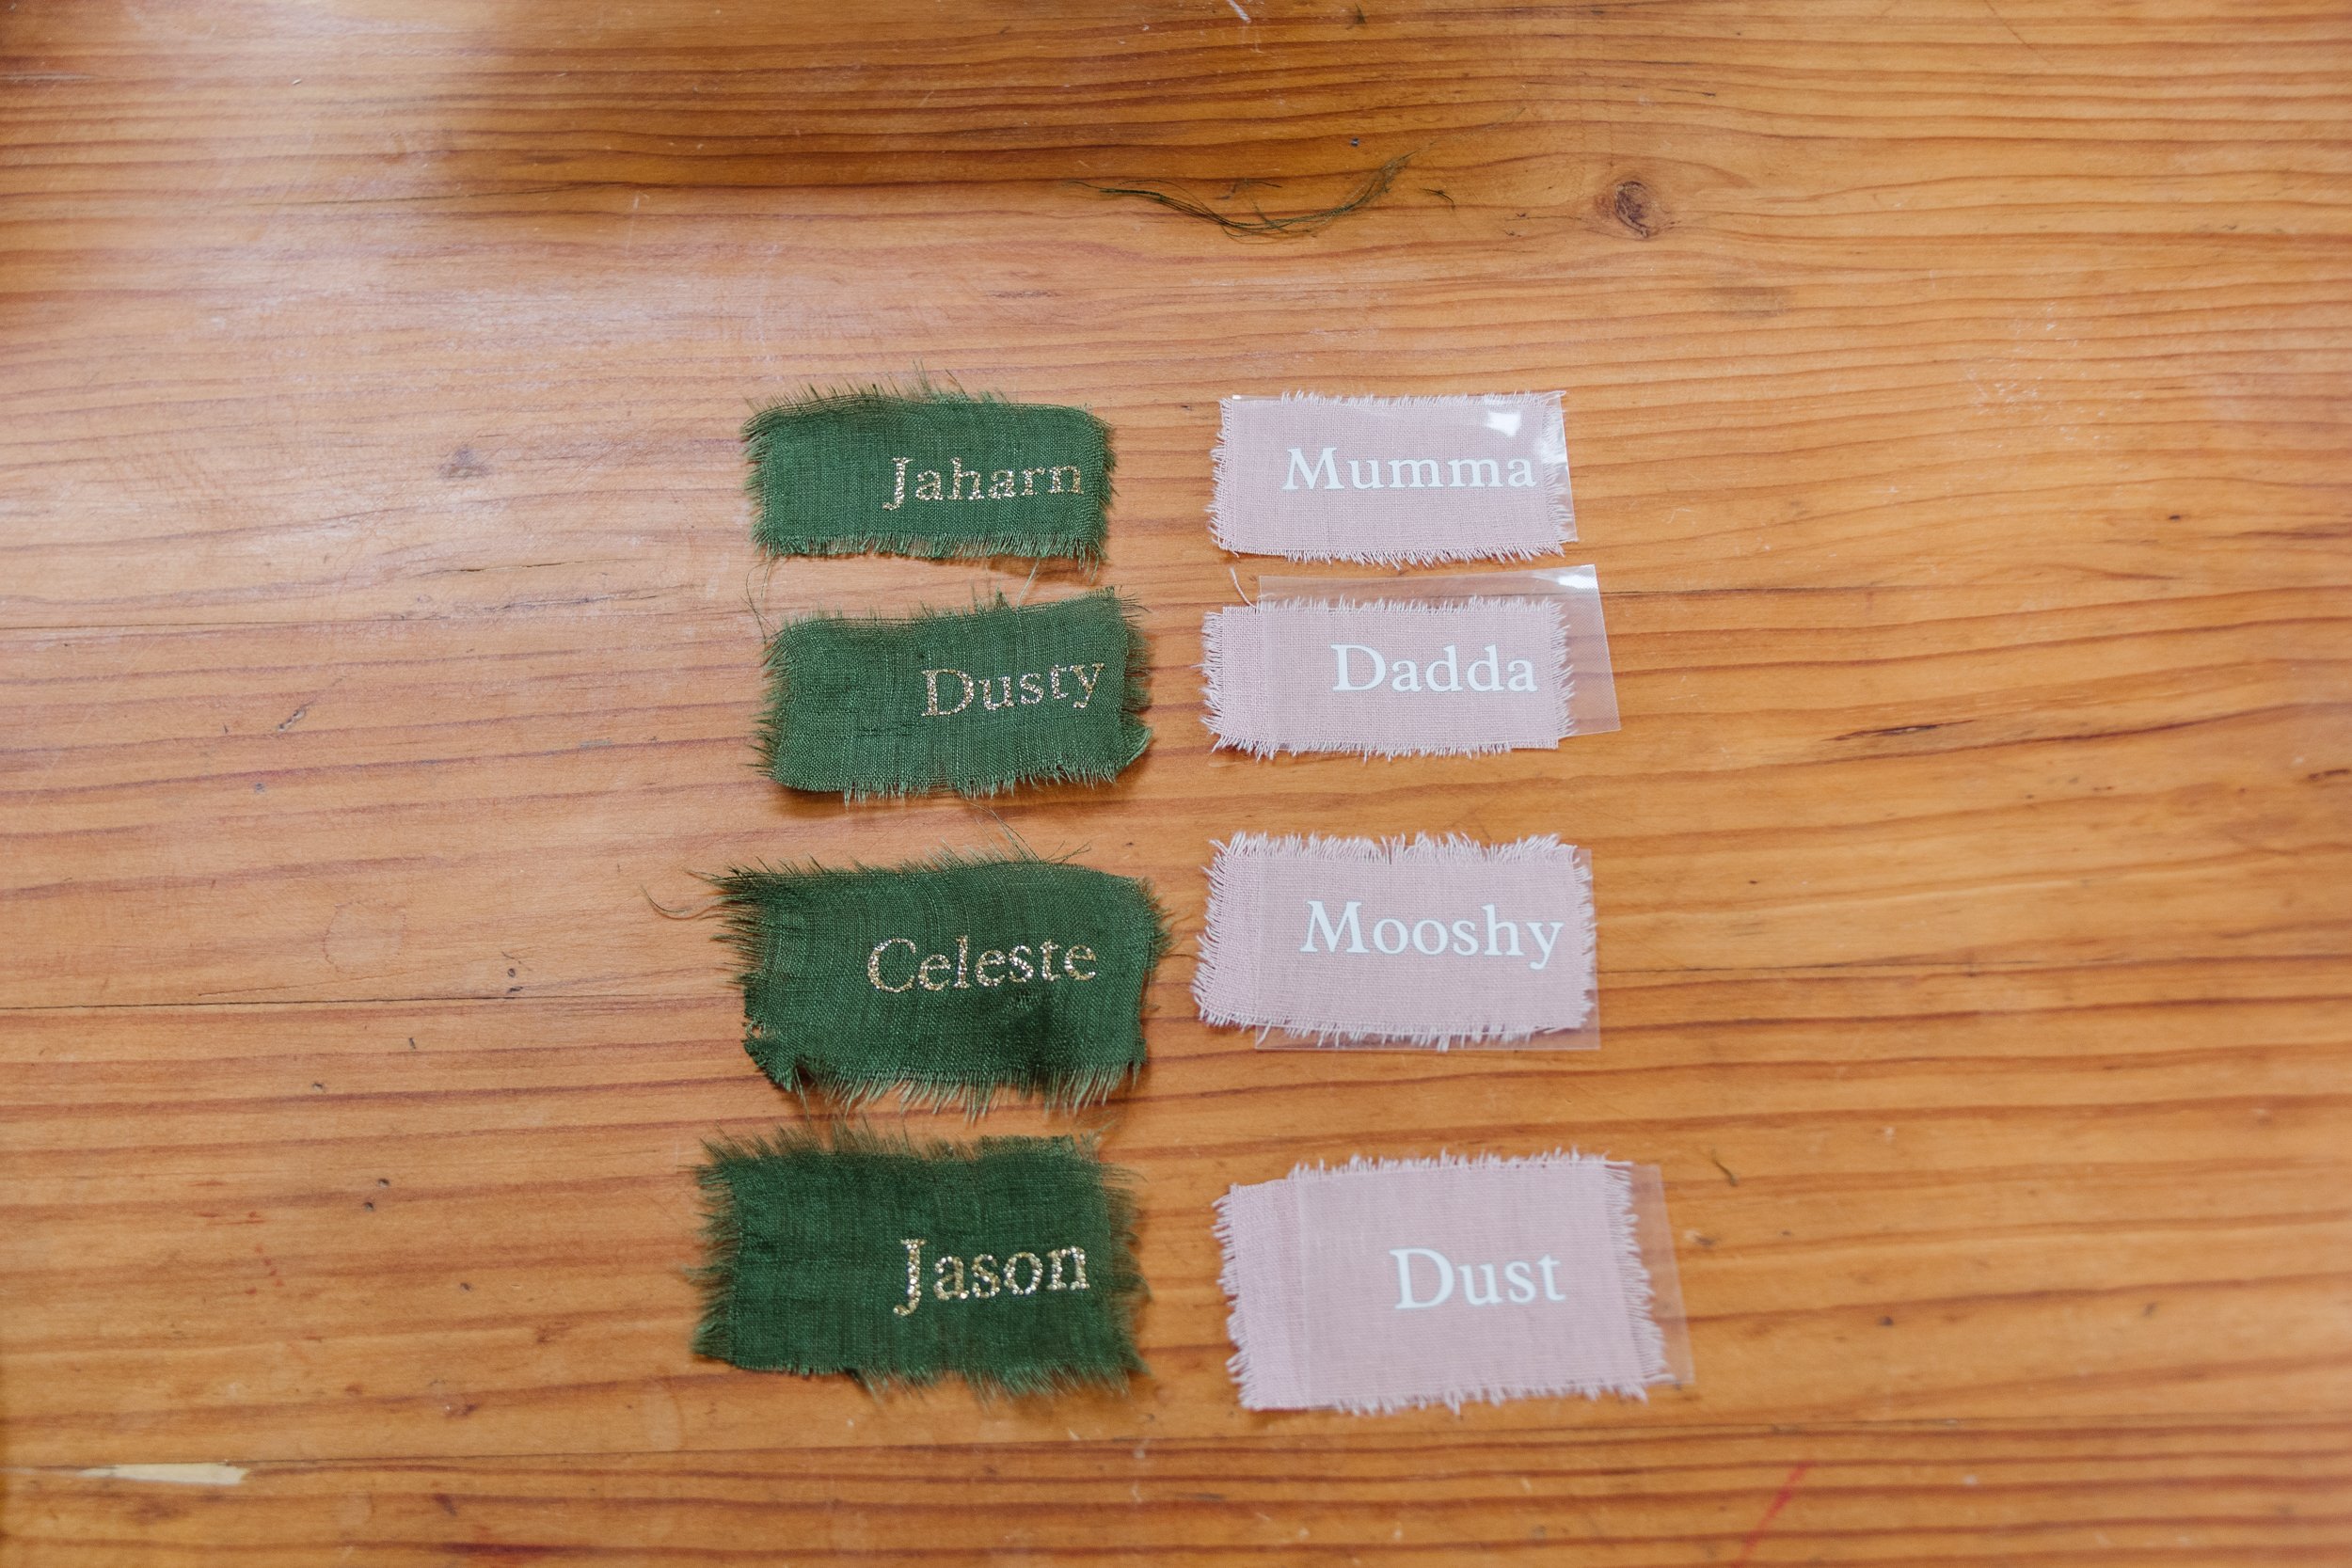
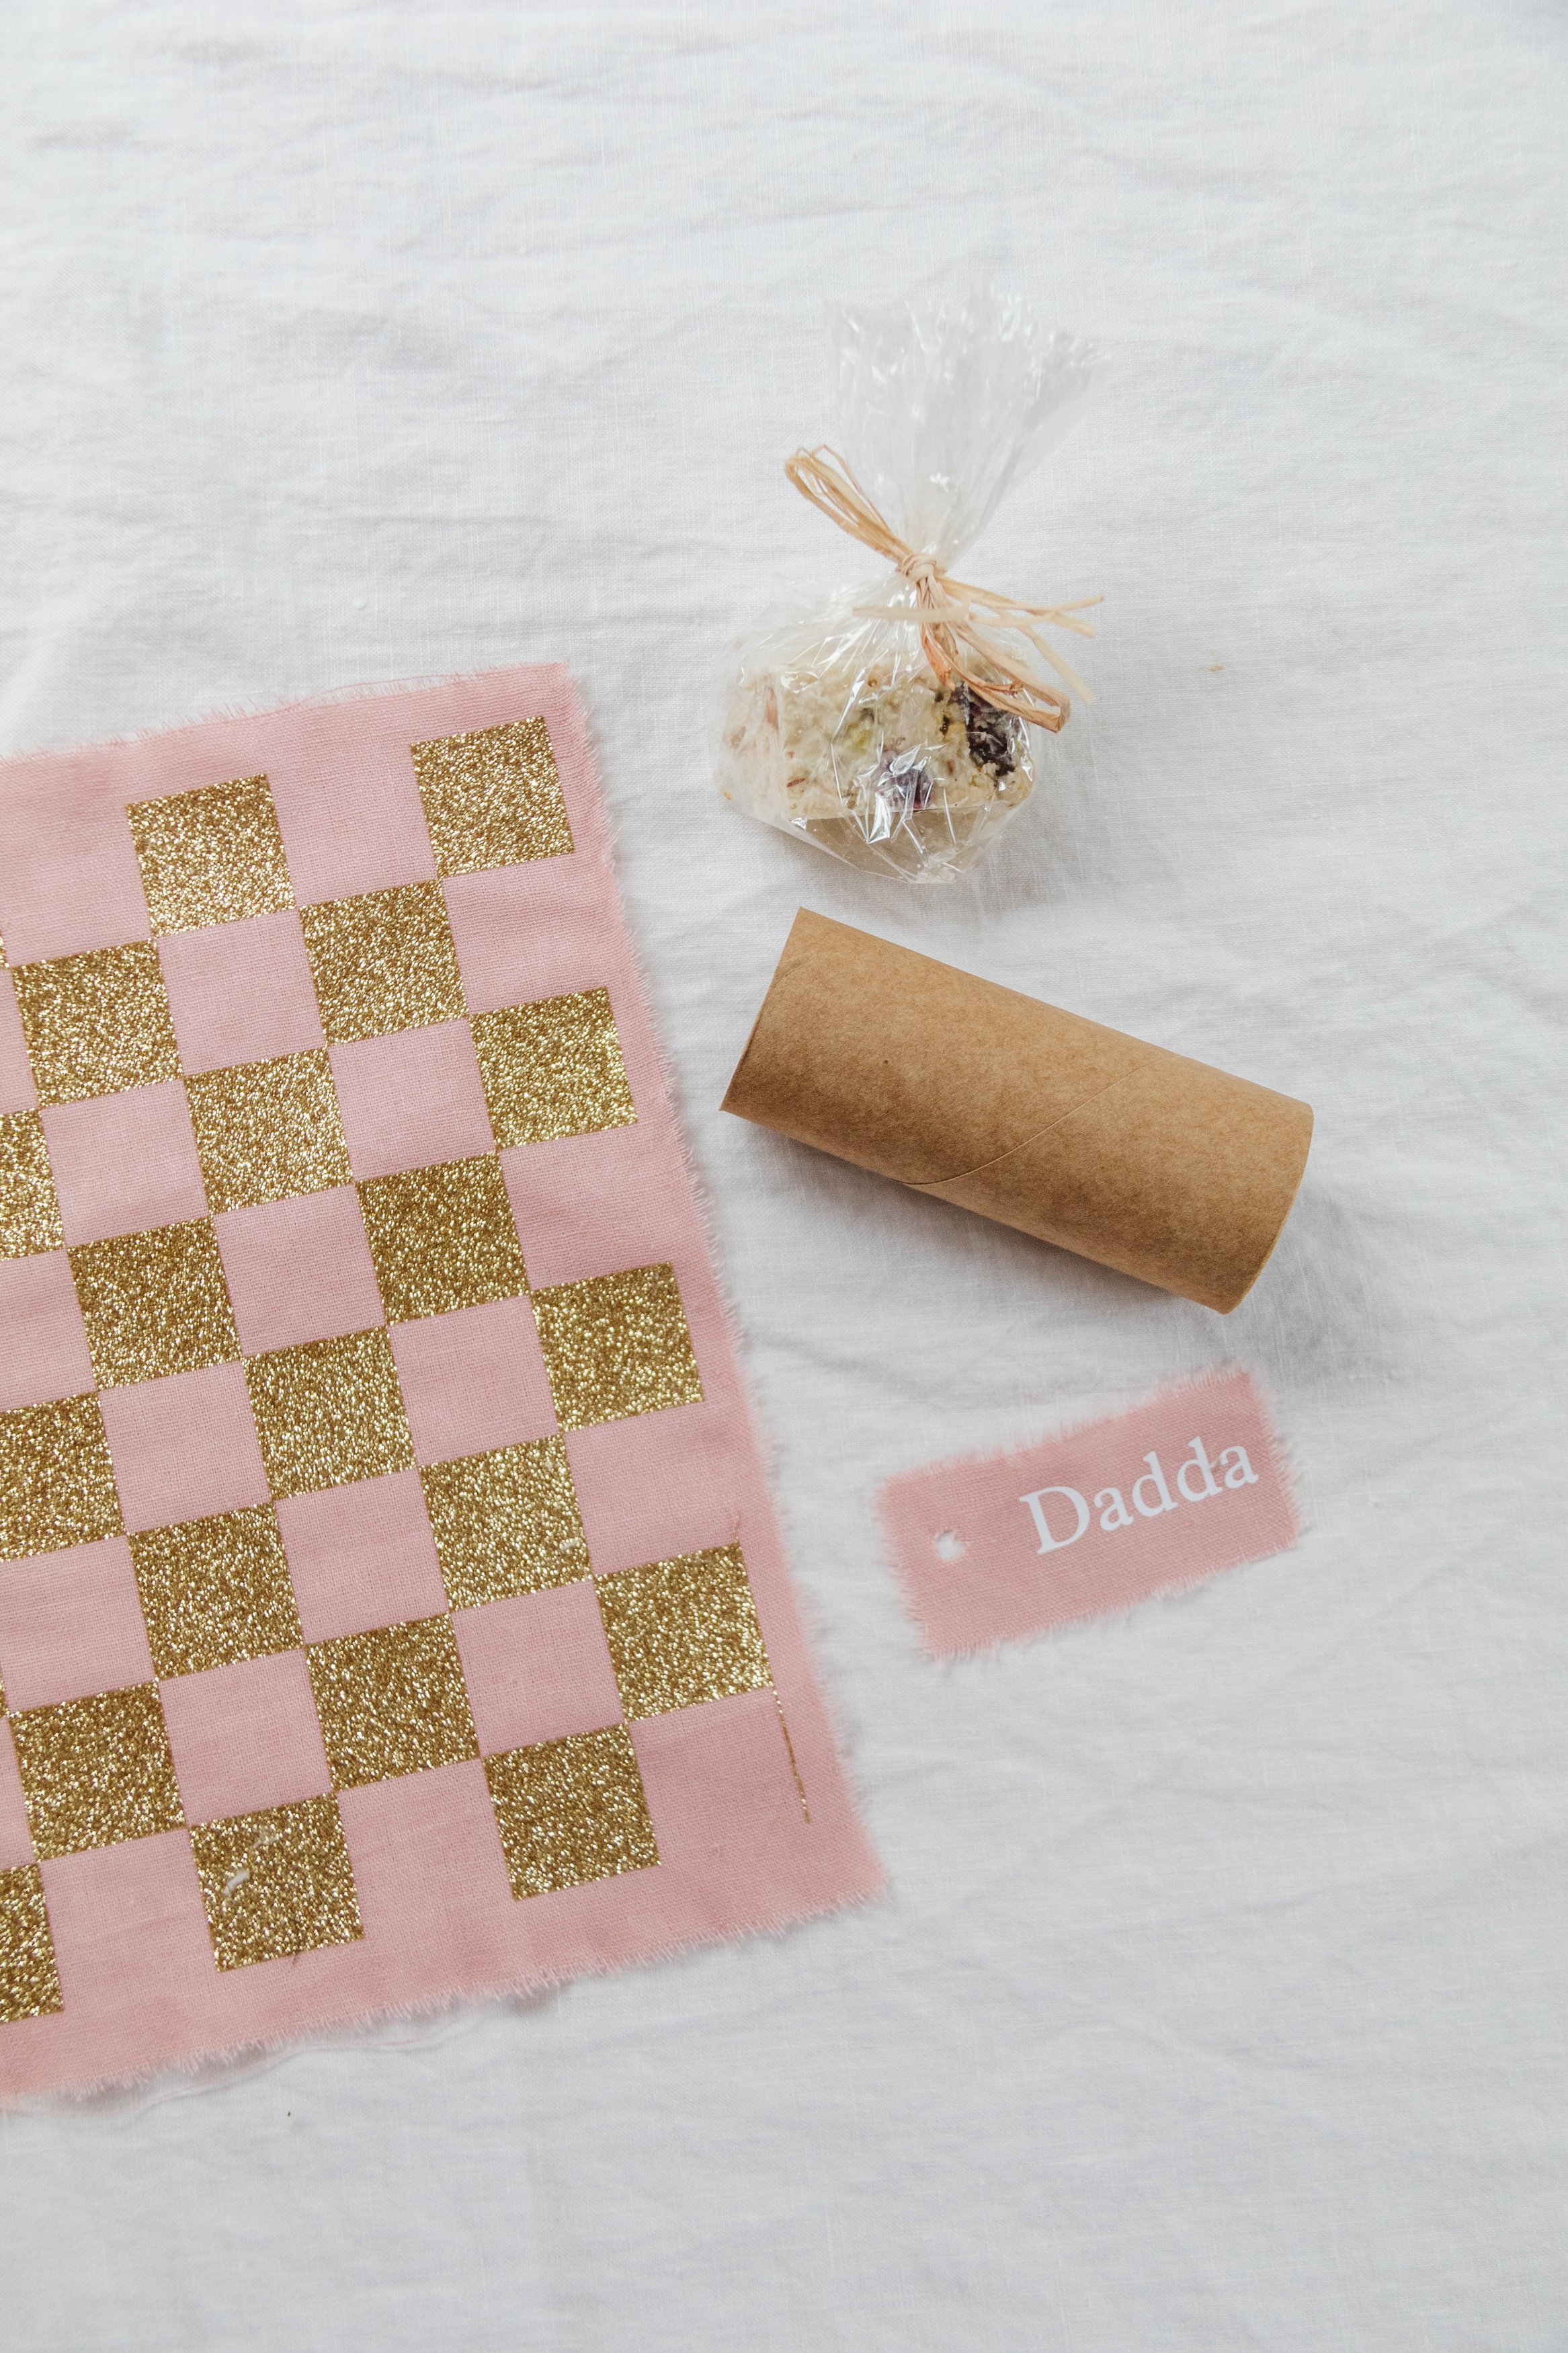
Step 7: To top it off, I wanted these checker fabric bonbons to be even more meaningful and special, so I used some of the leftover fabric scraps to make personalised name tags for Jason and the kids. I created a new design in the Cricut Design App with our names (and nicknames) using the “Aldine 721 BT” font. The names were approximately 5cm x 3cm. and I simply repeat the same process as I did with the checker fabric but I made sure to position the names to the right of each small piece of fabric, to allow for then I would be tying them onto the bonbons later on. Following this I made a small hole on the far right side of each name tag using a hole punch.

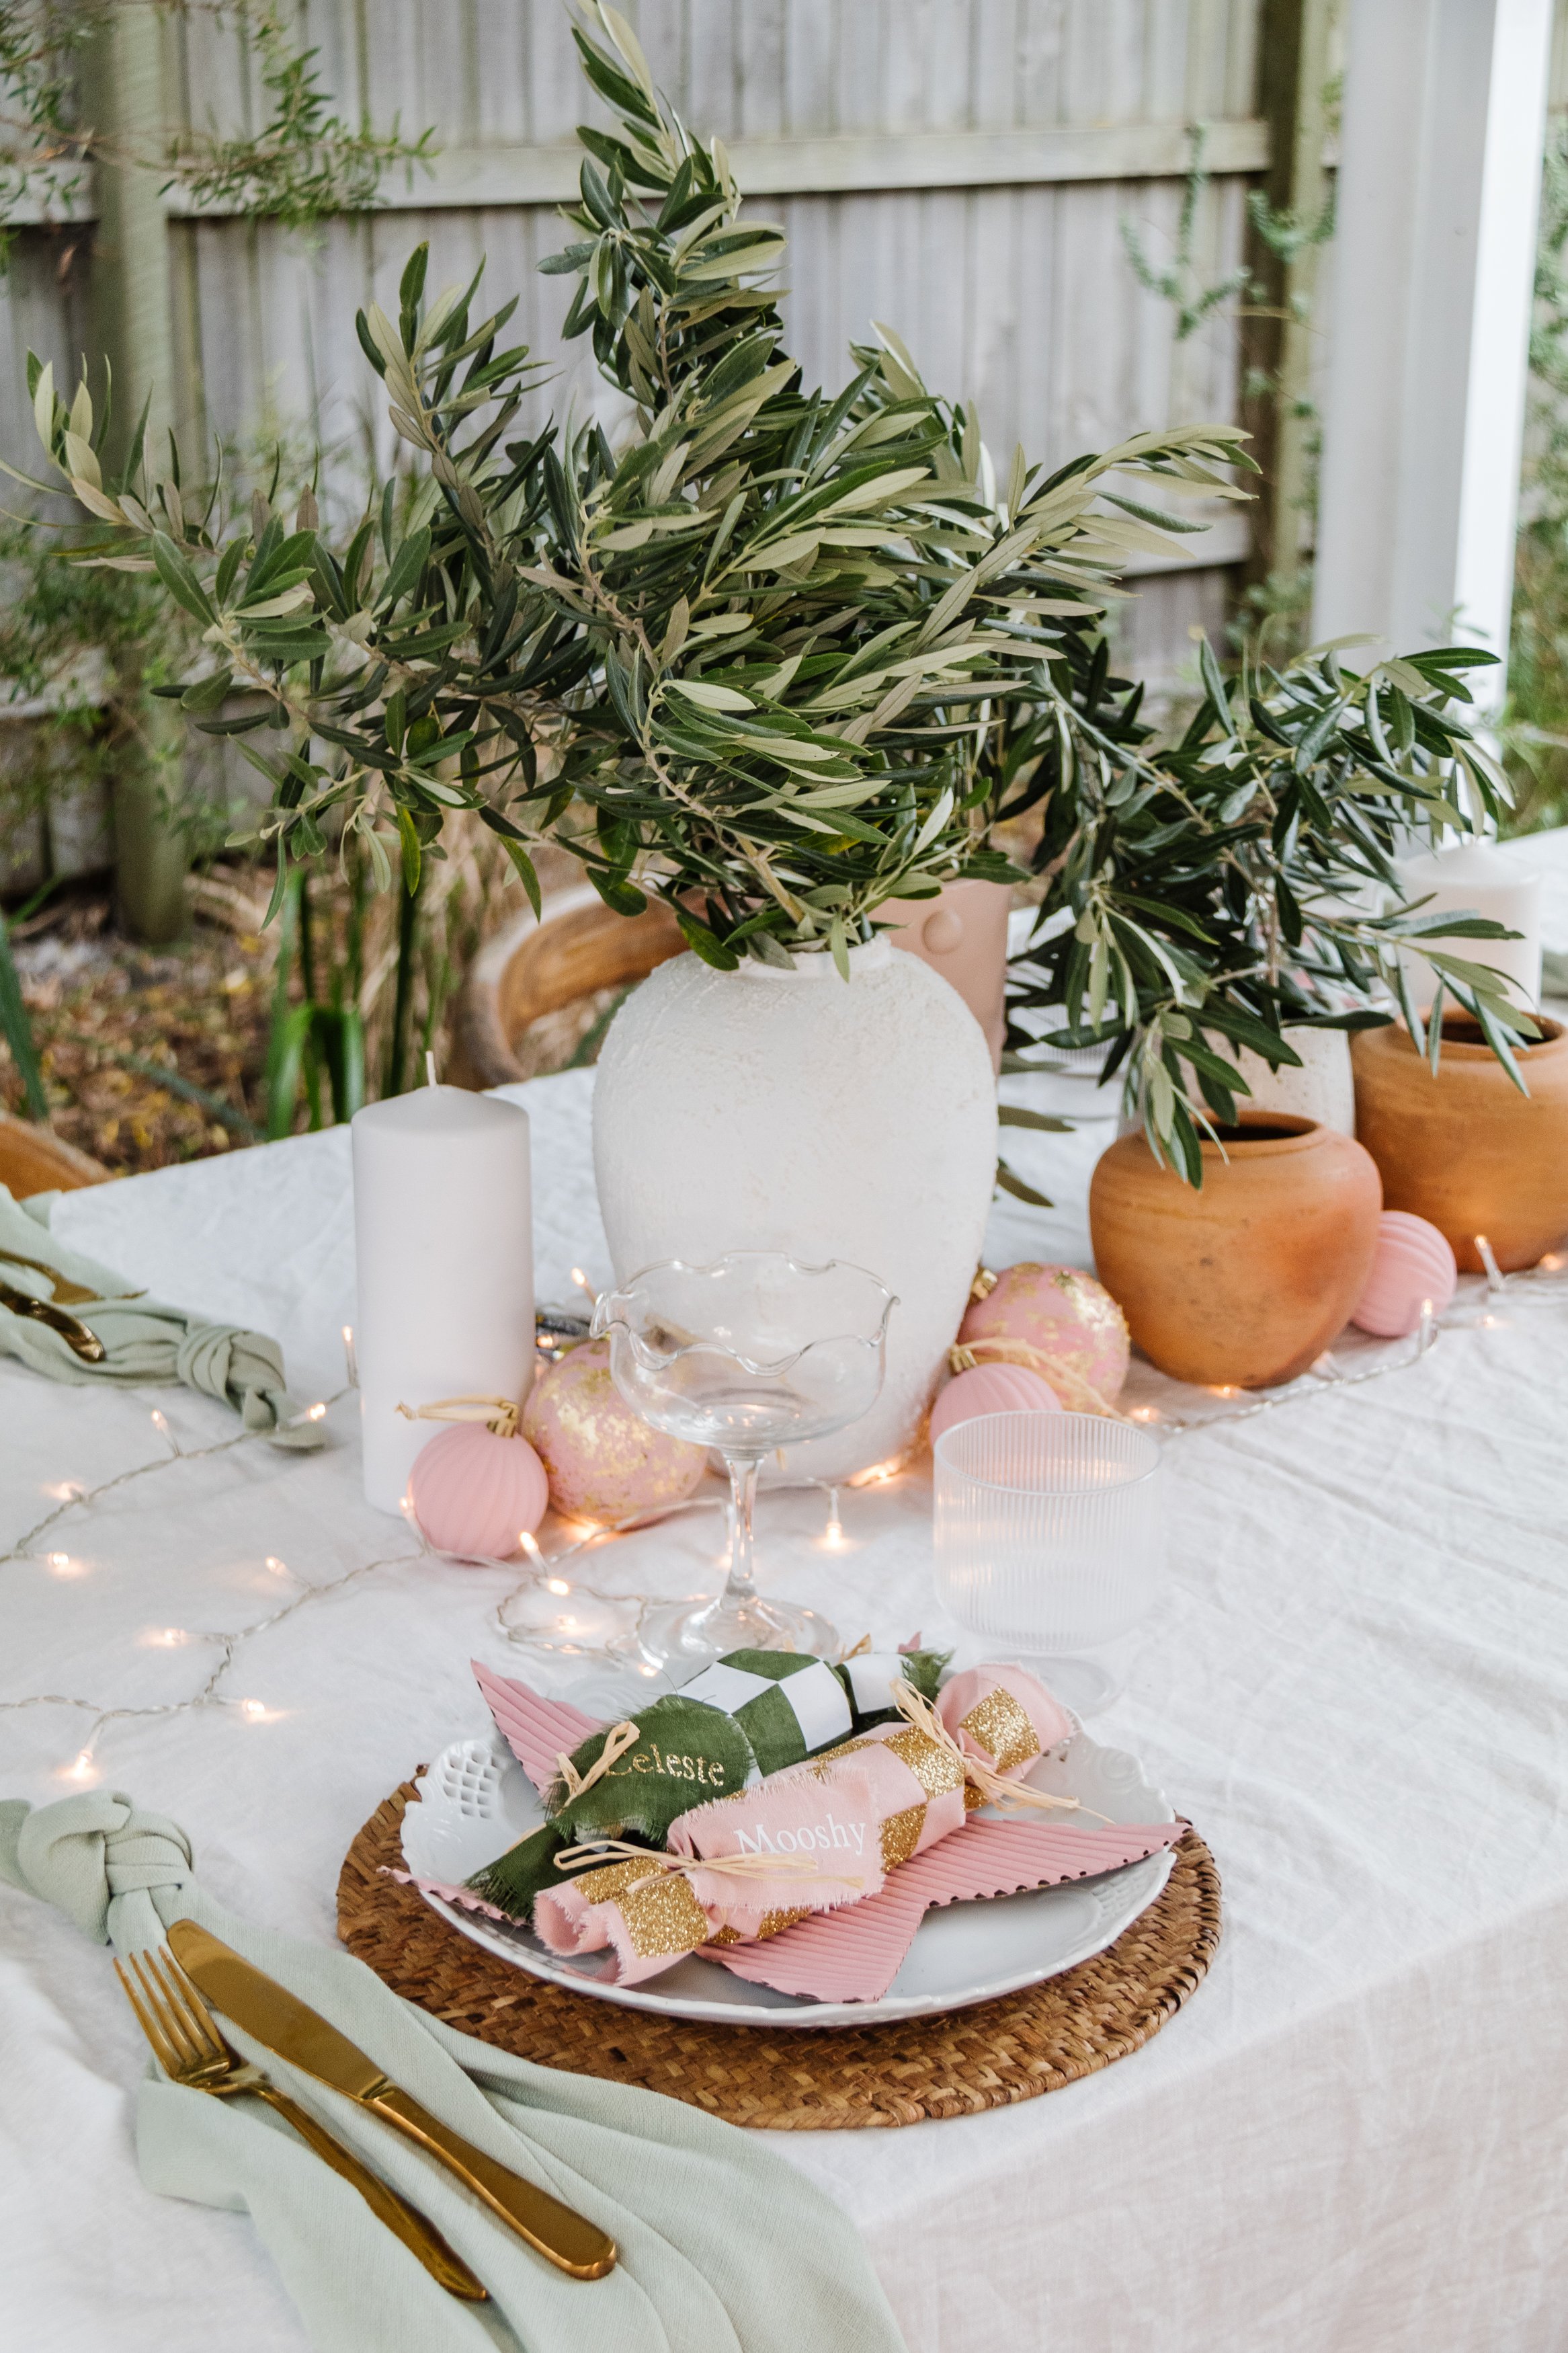
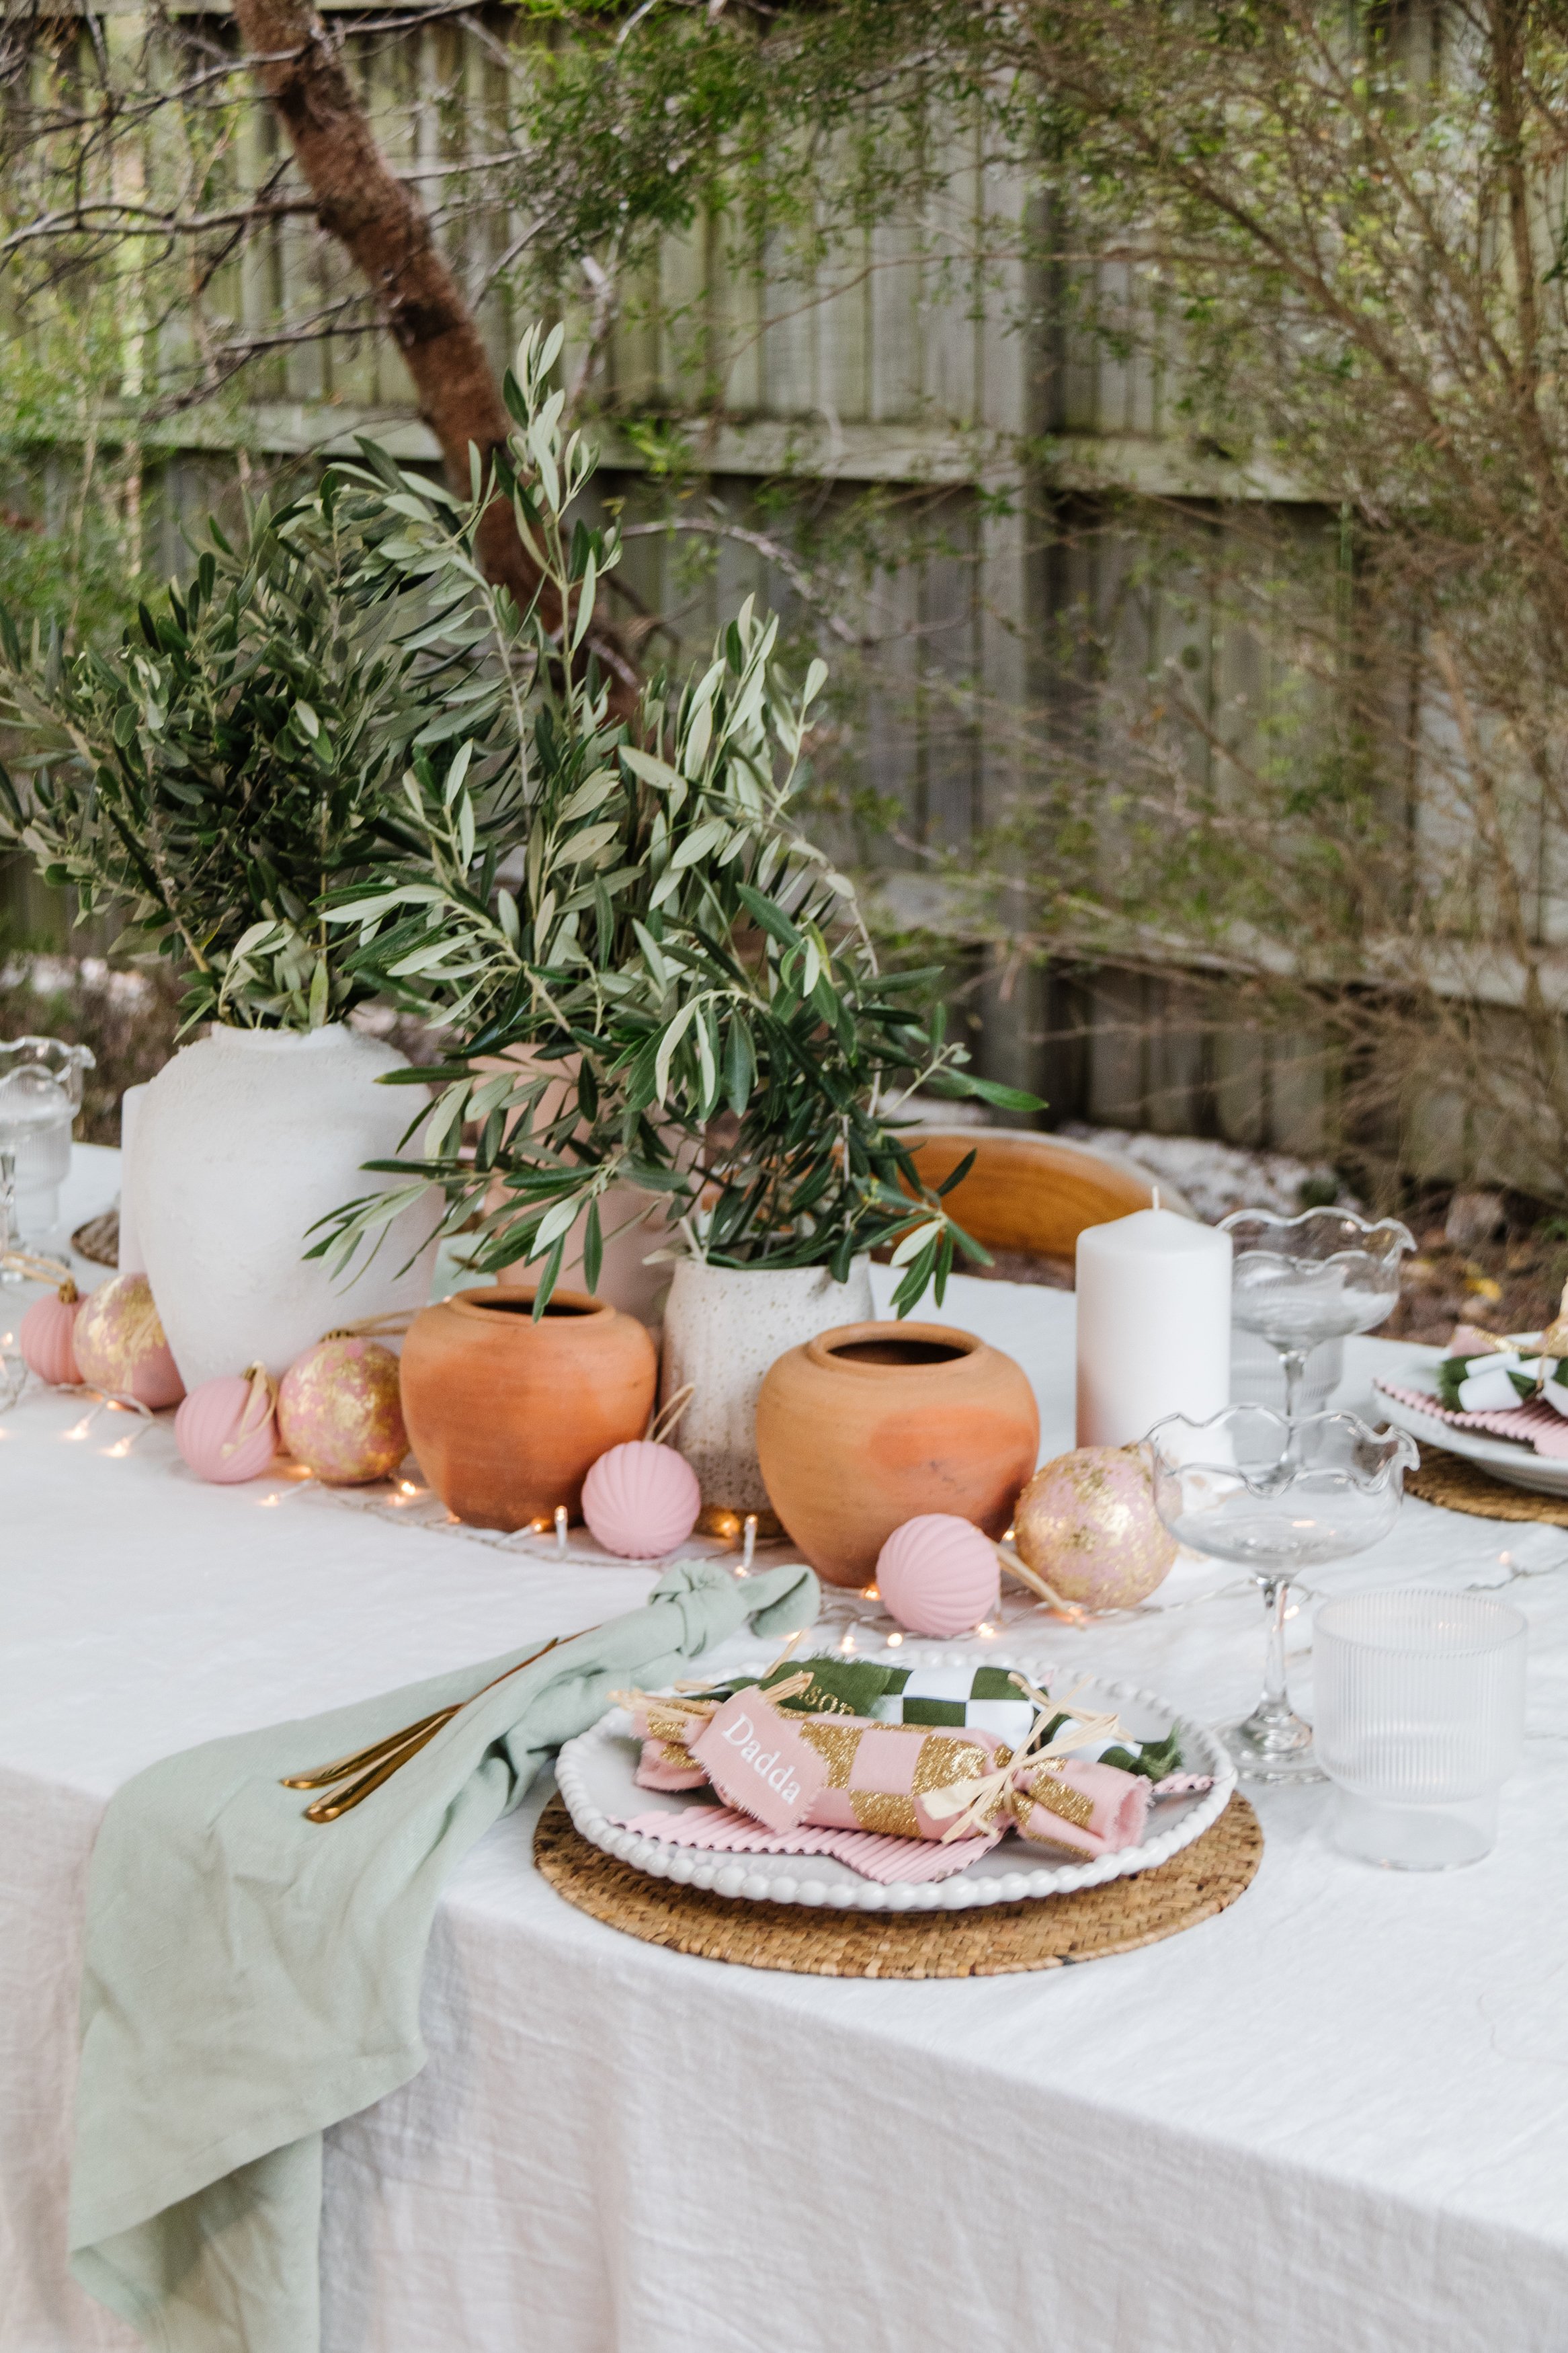
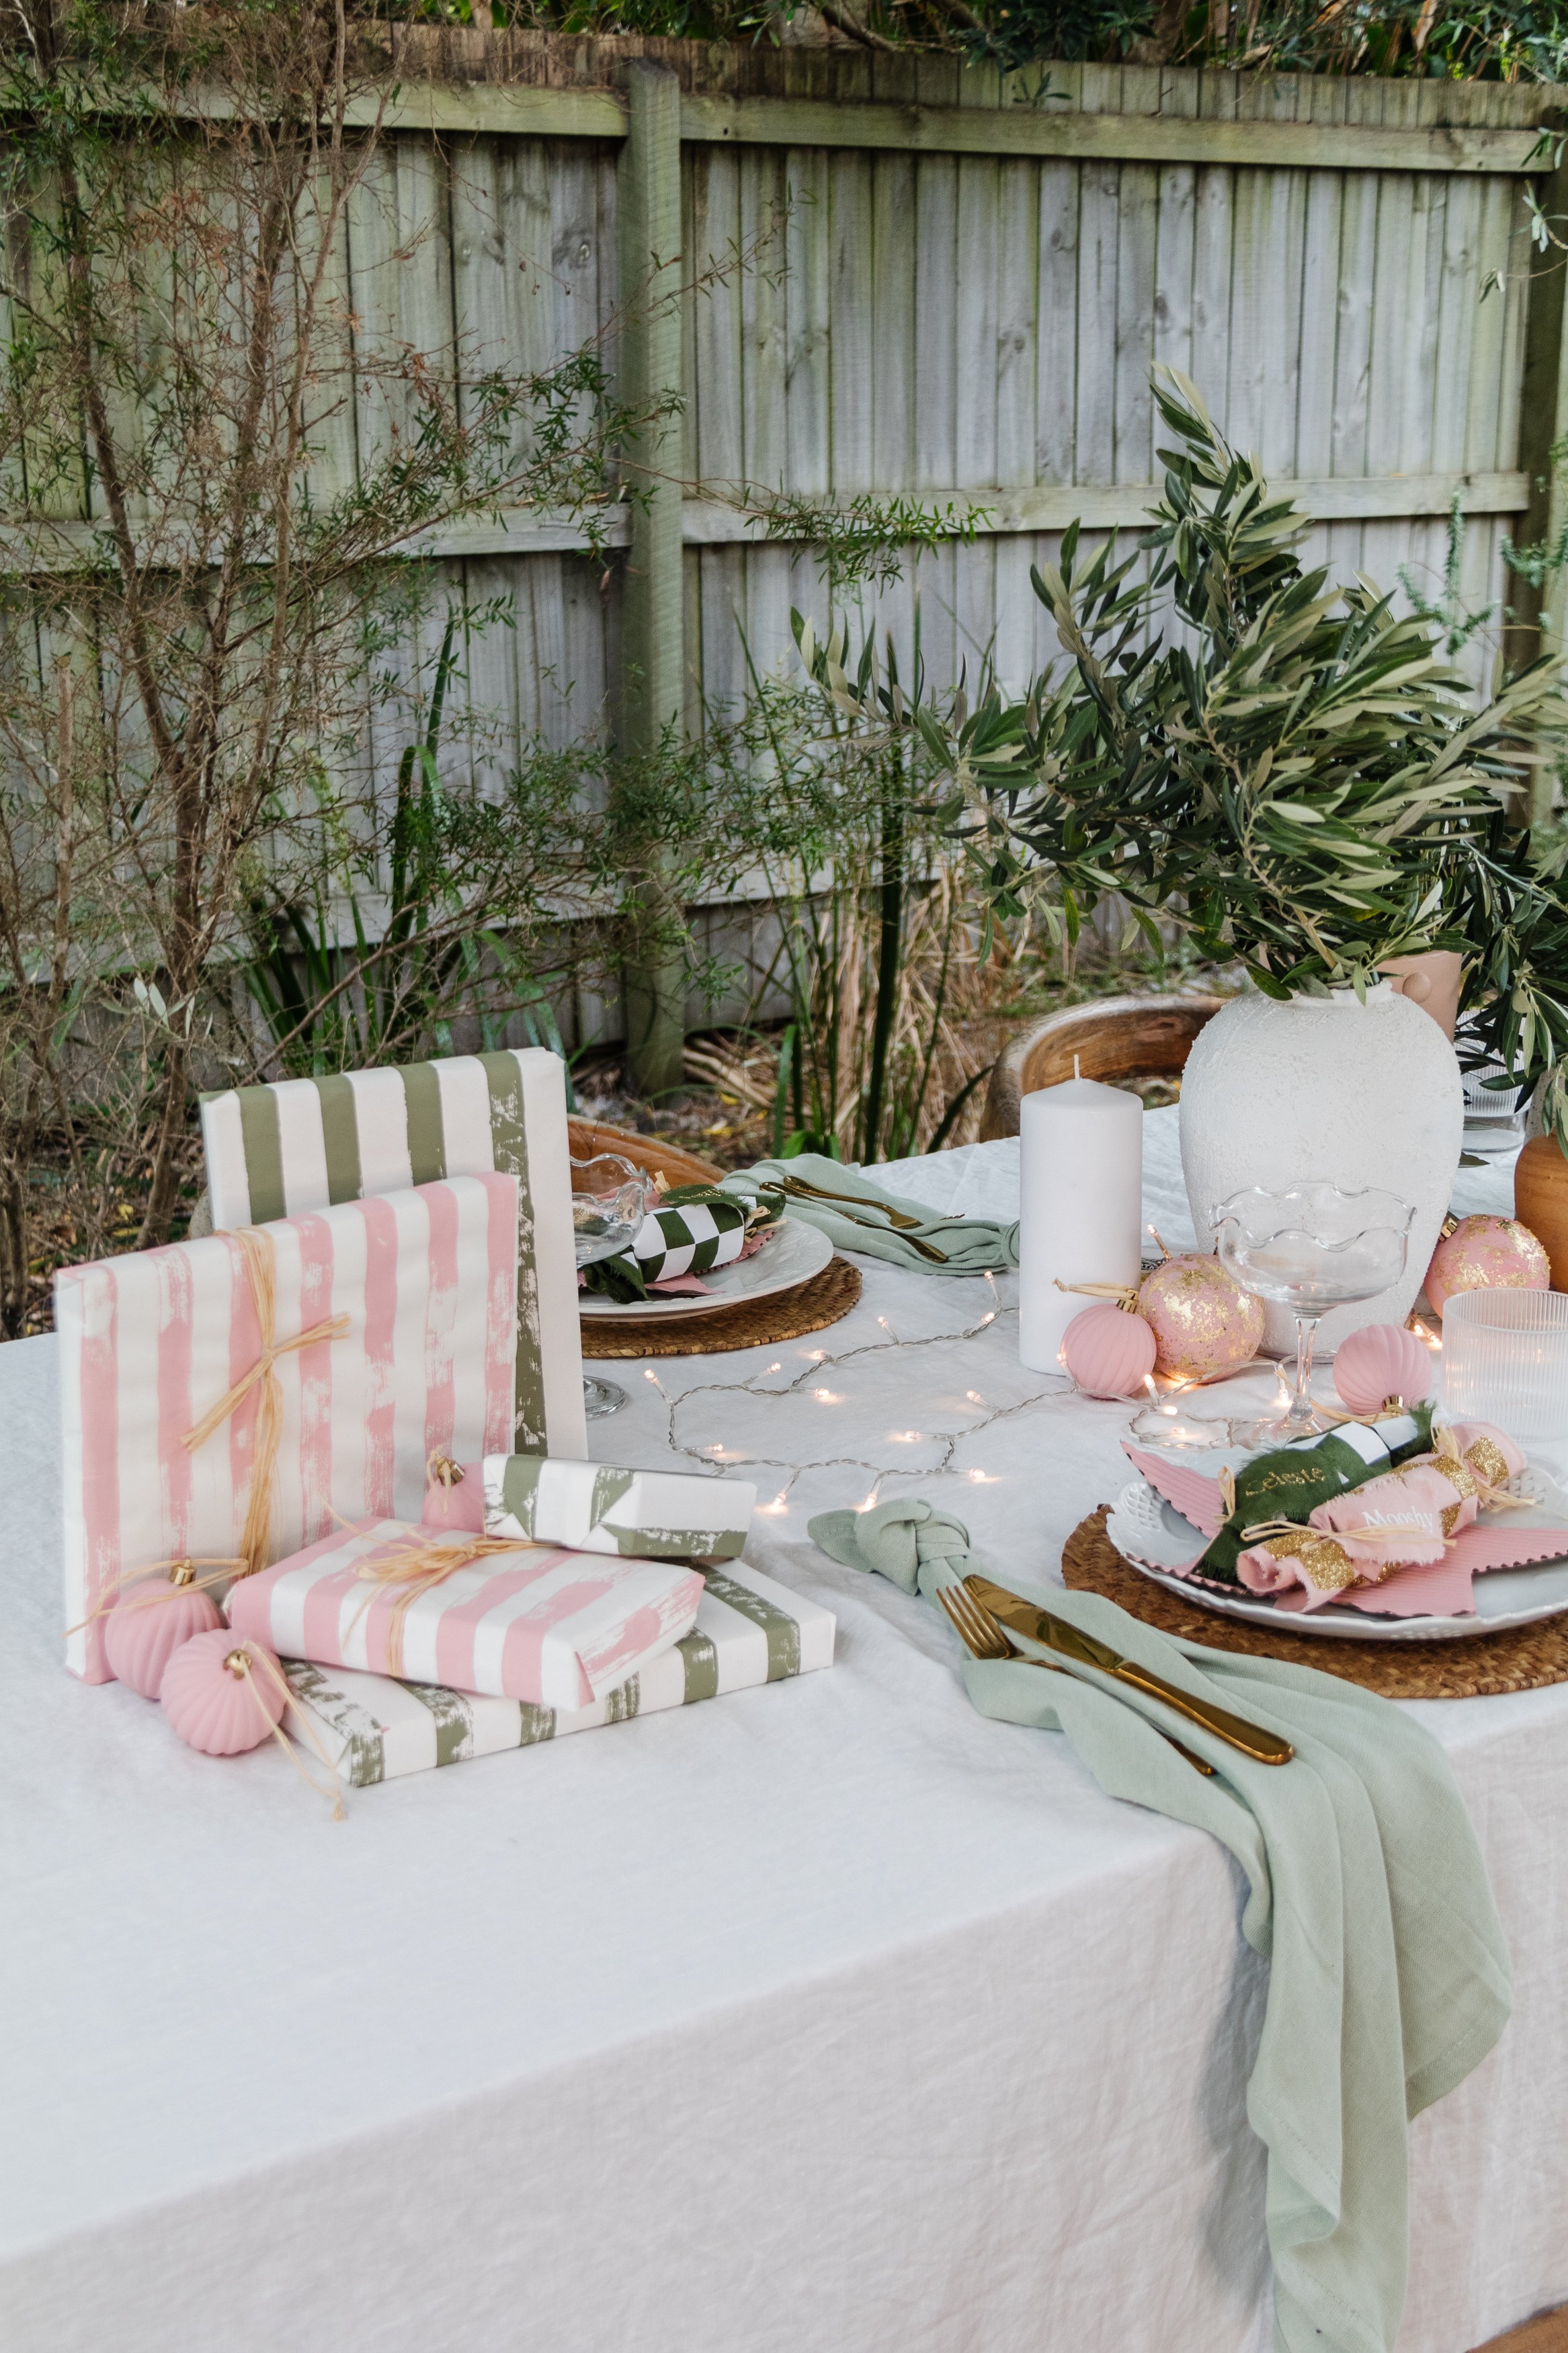
Step 8: To make the bonbon, I placed the fabric (checker side facing down) onto a flat a surface. I filled a toilet roll with a piece of White Christmas tightly wrapped up from a local cake shop (Fiona’s Fancies - and it’s amazing). I rolled the toilet roll in the fabric, tied it off with raffia and added a personalied name tag to each bonbon. And I did this until I had 8 personalised DIY Checker Fabric Bonbons.
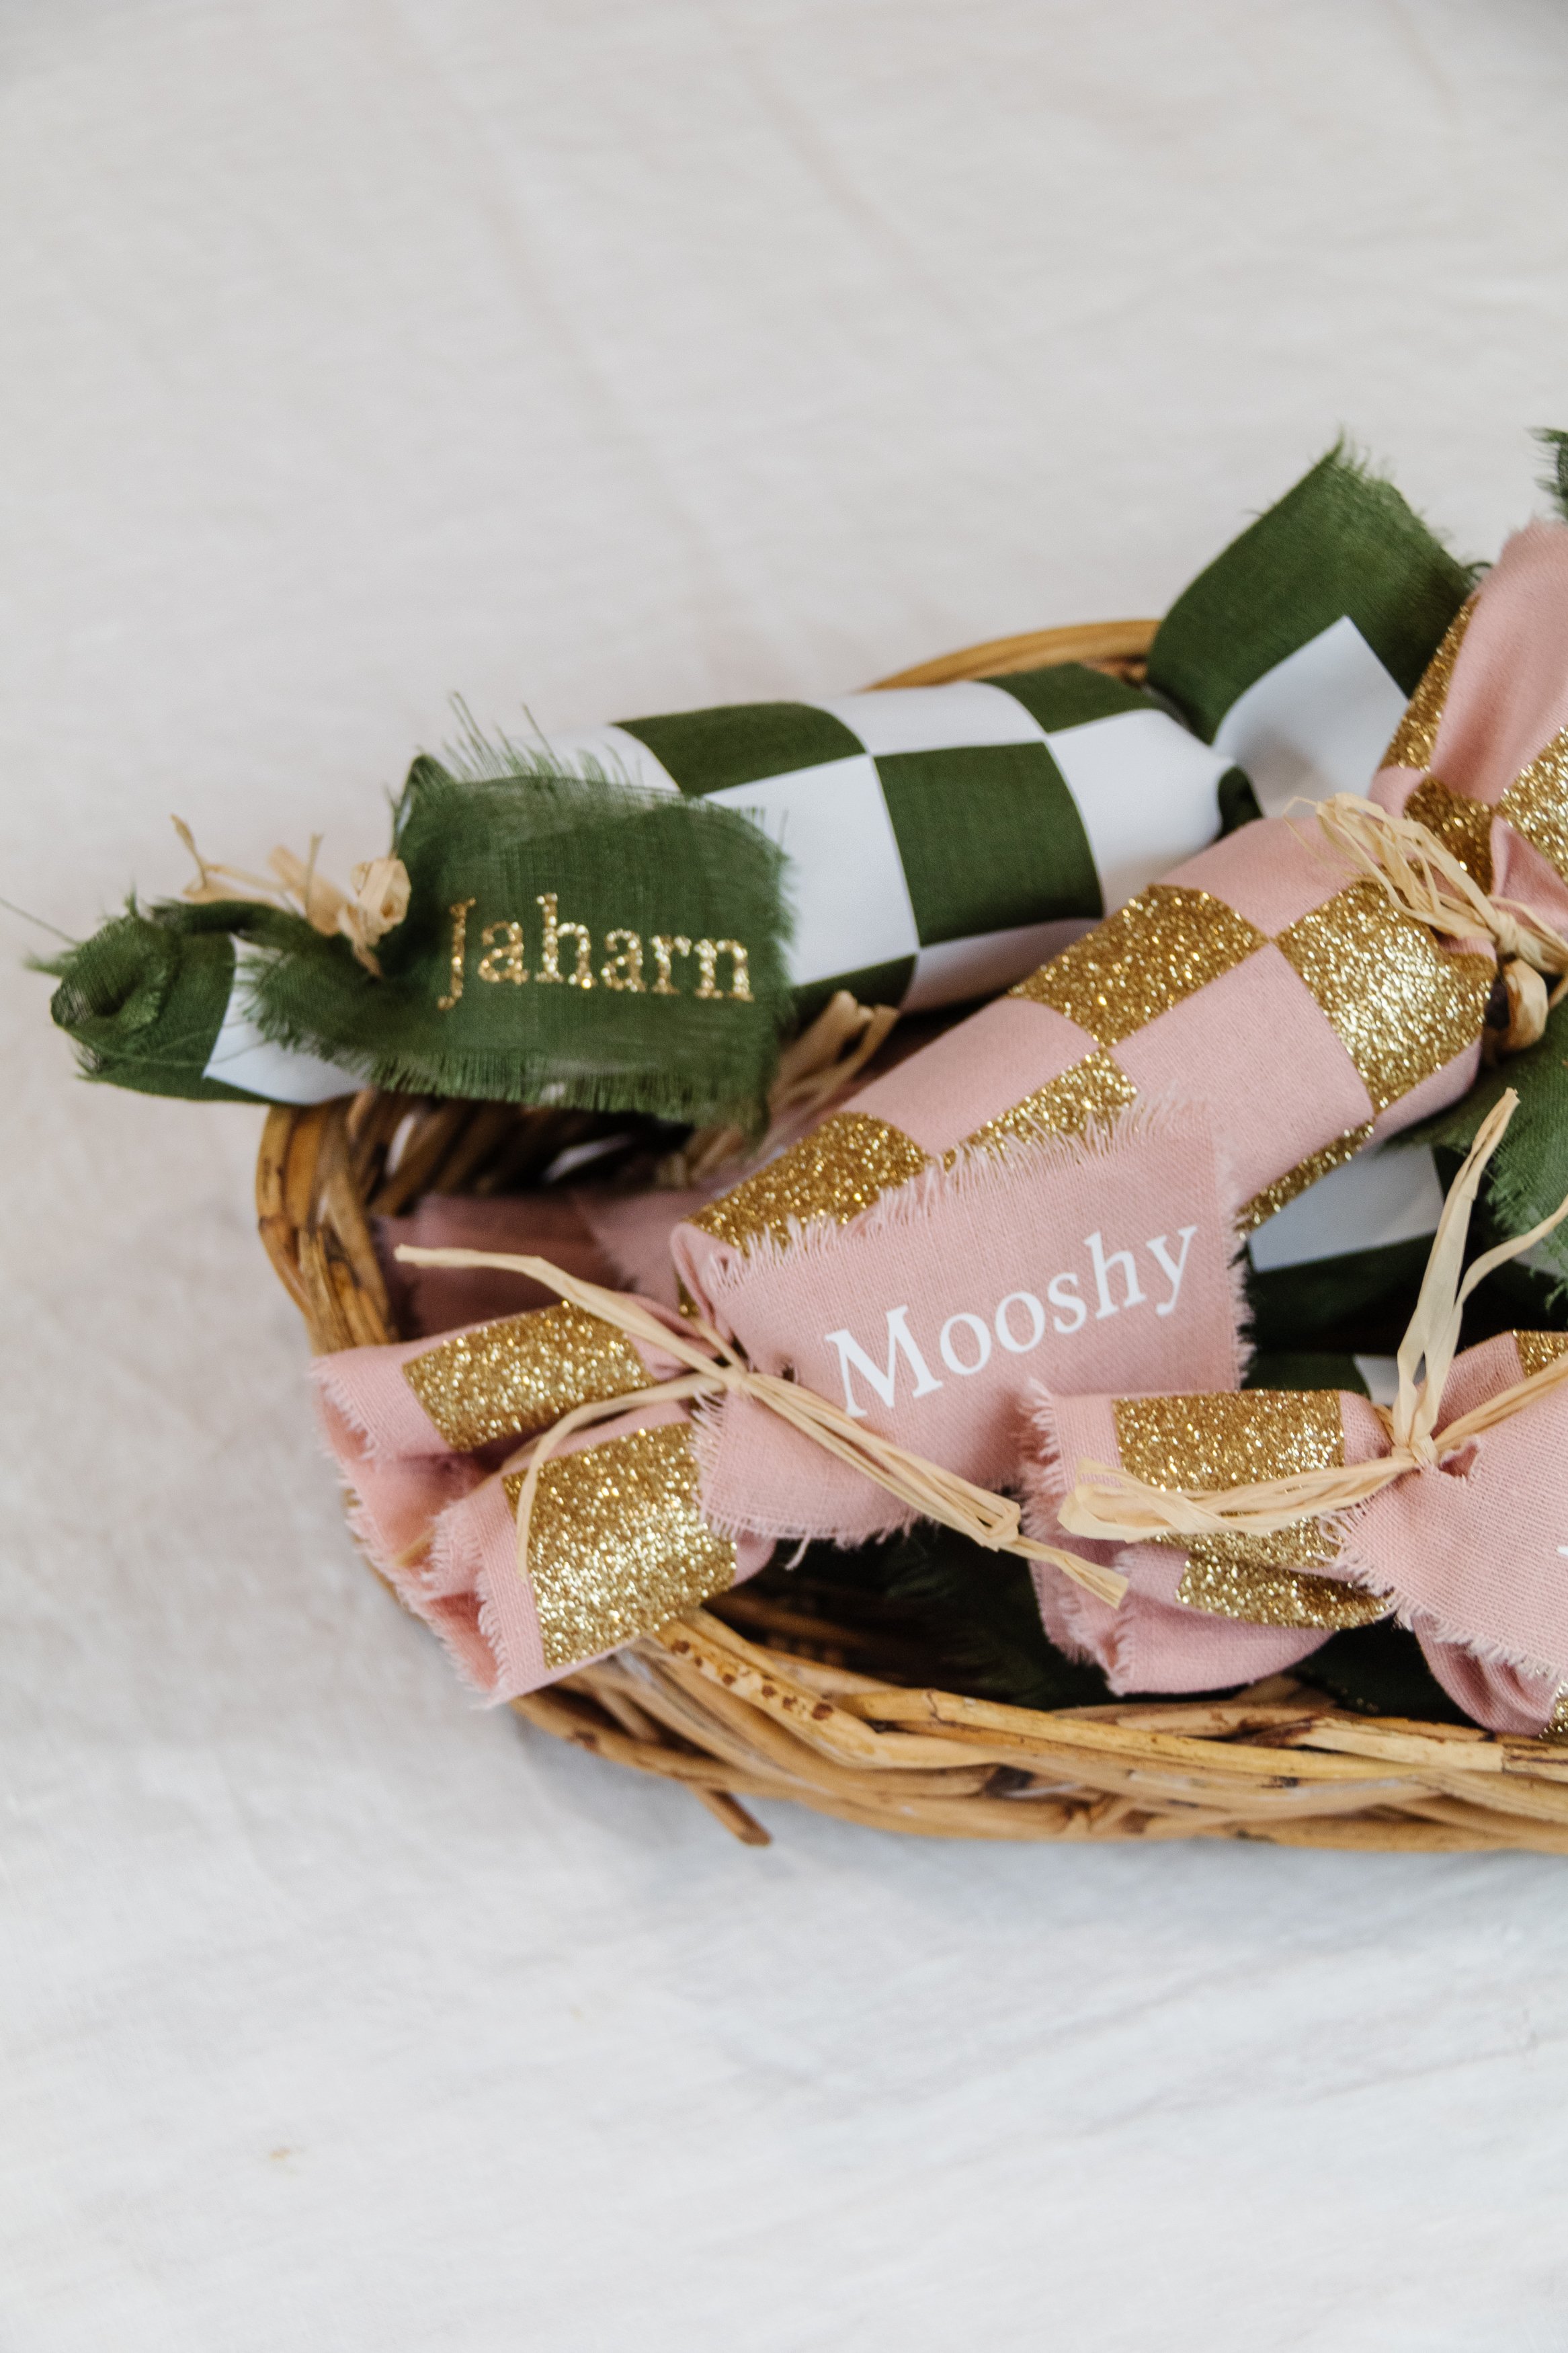
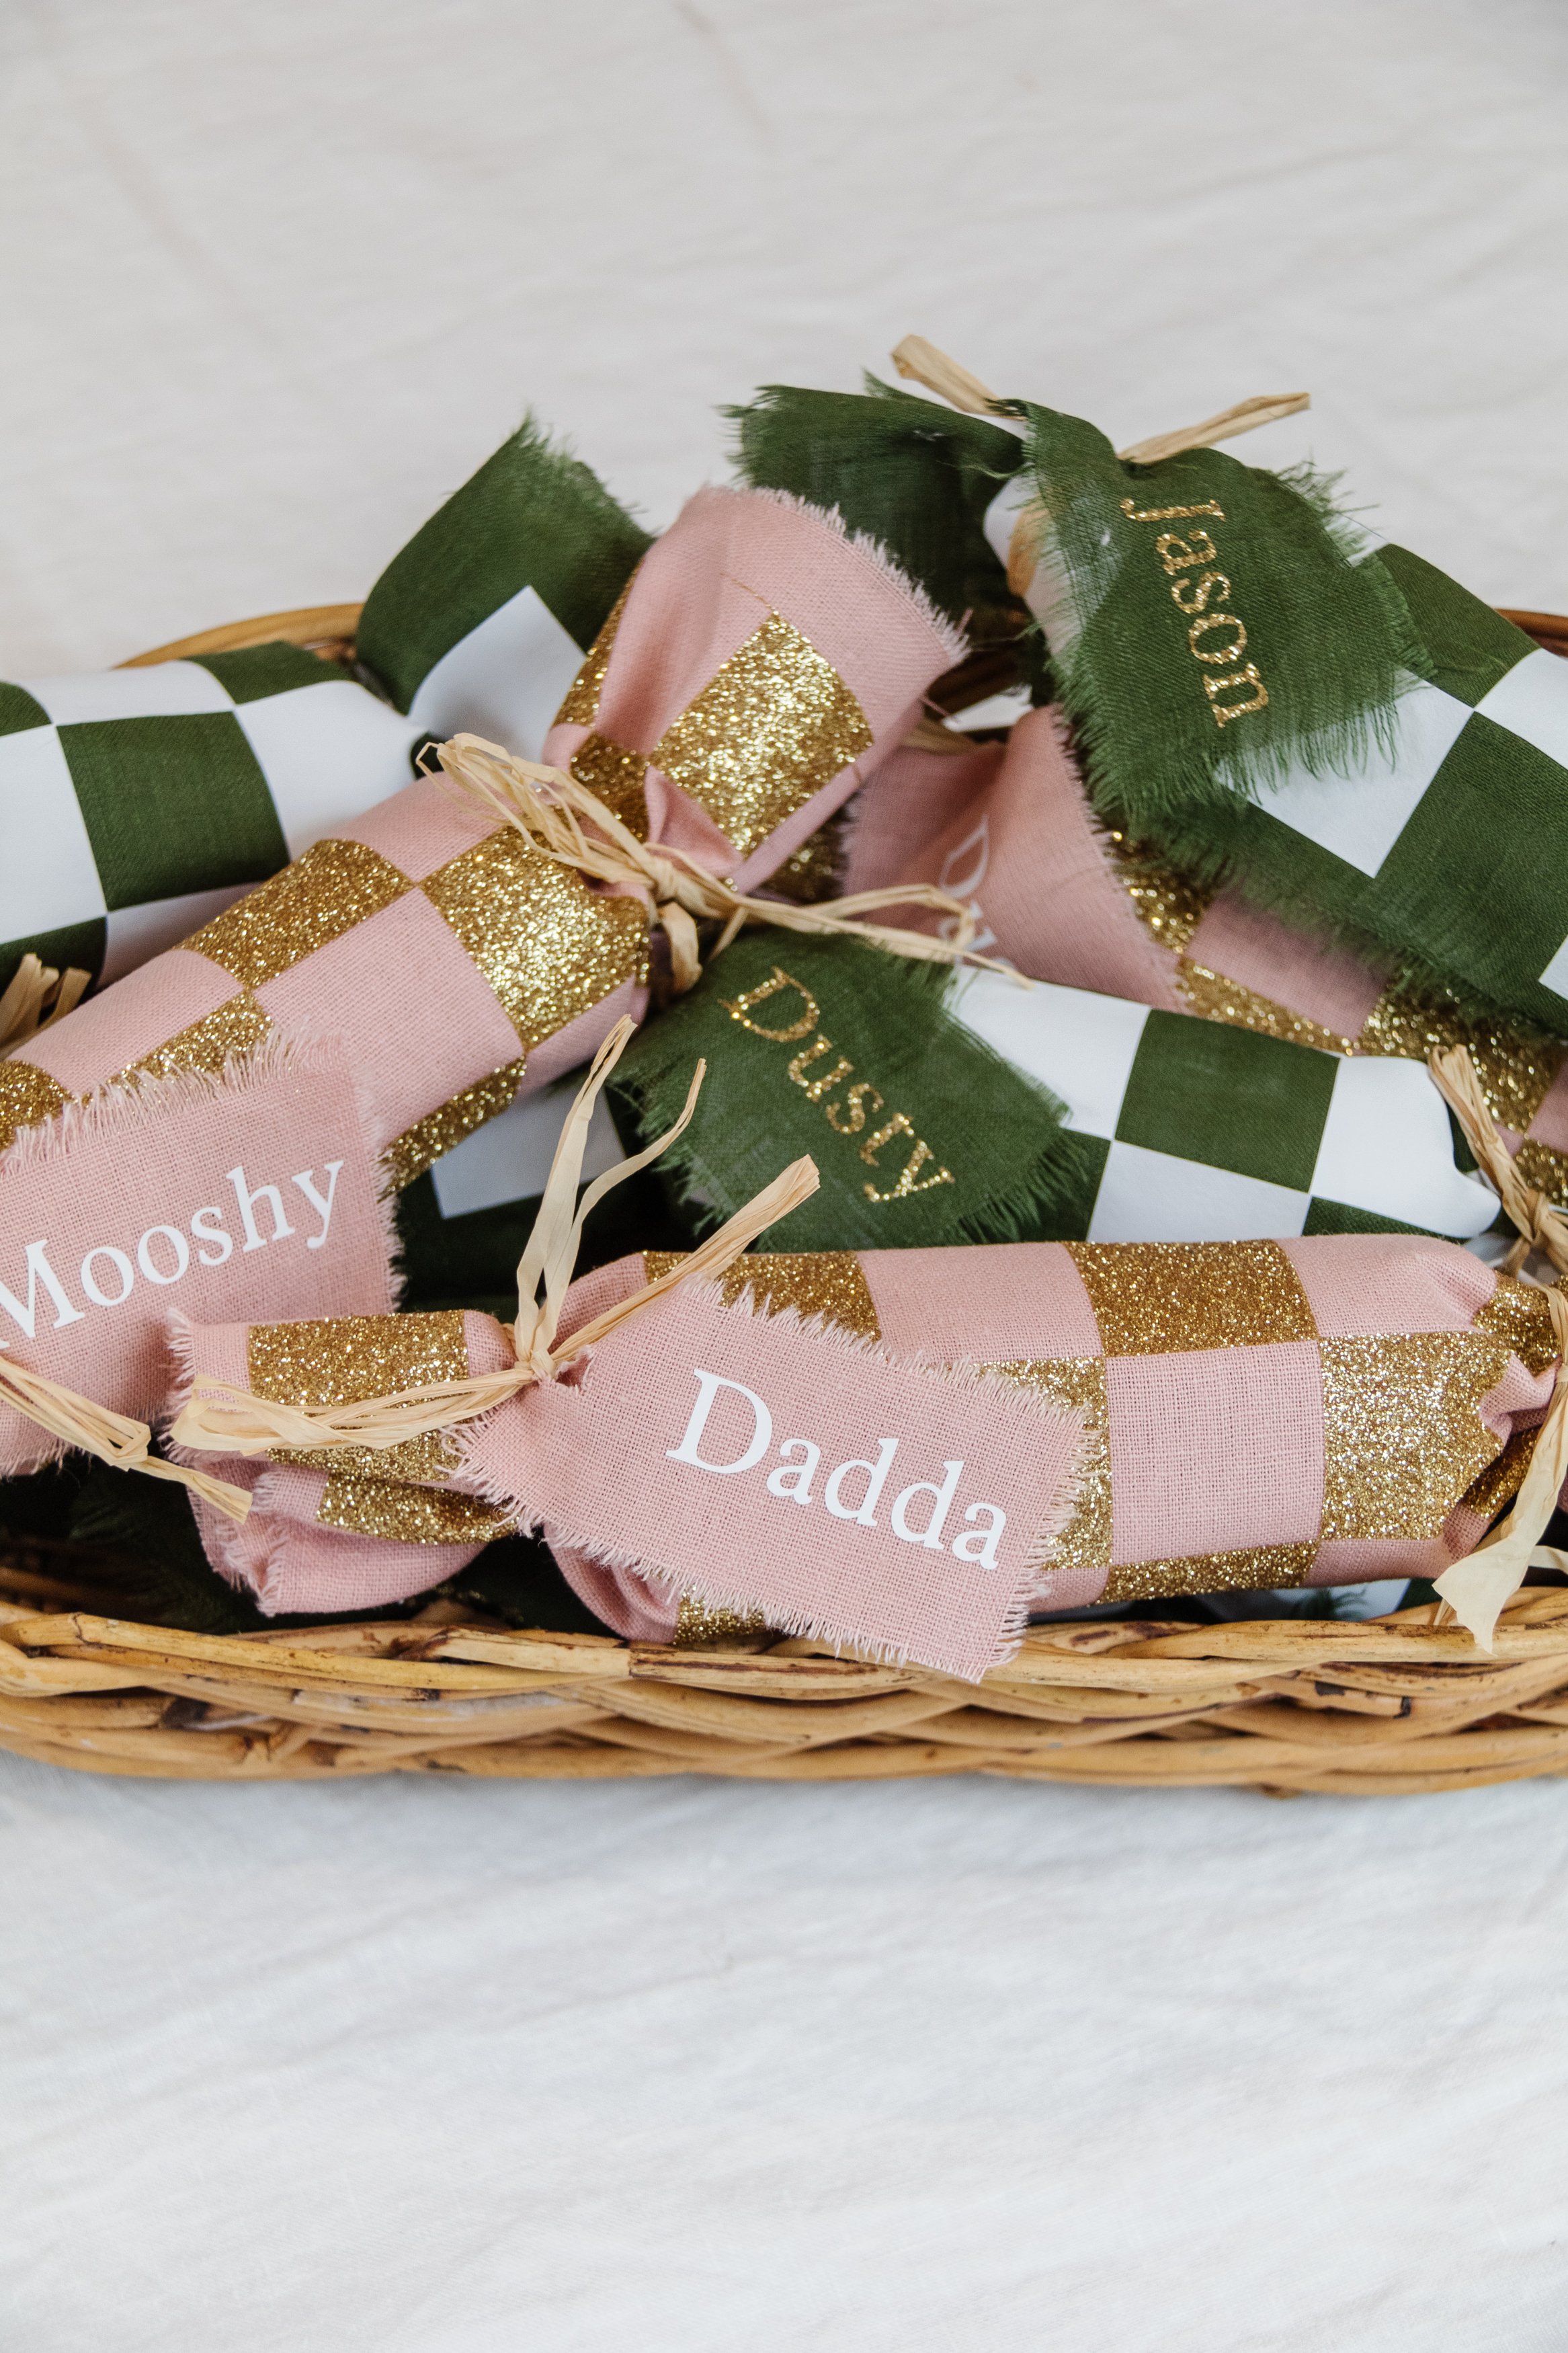
Ta daaaa!
Um, did I just hack how to make your own checker fabric? I think so! Honestly, I can’t believe how beautiful these bonbons look - mic drop! I am so happy with how they turned out. And making your own checker fabric is definitely not limited to small pieces of fabric. You could easily line up the checker design on a bigger piece of fabric and make a checker tablecloth, napkins, placemats - even clothes! I am so excited to experiment more with making my own checker fabric and using the Autopress for lots of other ideas I’ve already got on my “to make” list.
This project was in collaboration with Cricut Australia