Upcycled Sculptural Crown Chairs
Transform boring conference chairs using a few simple tools
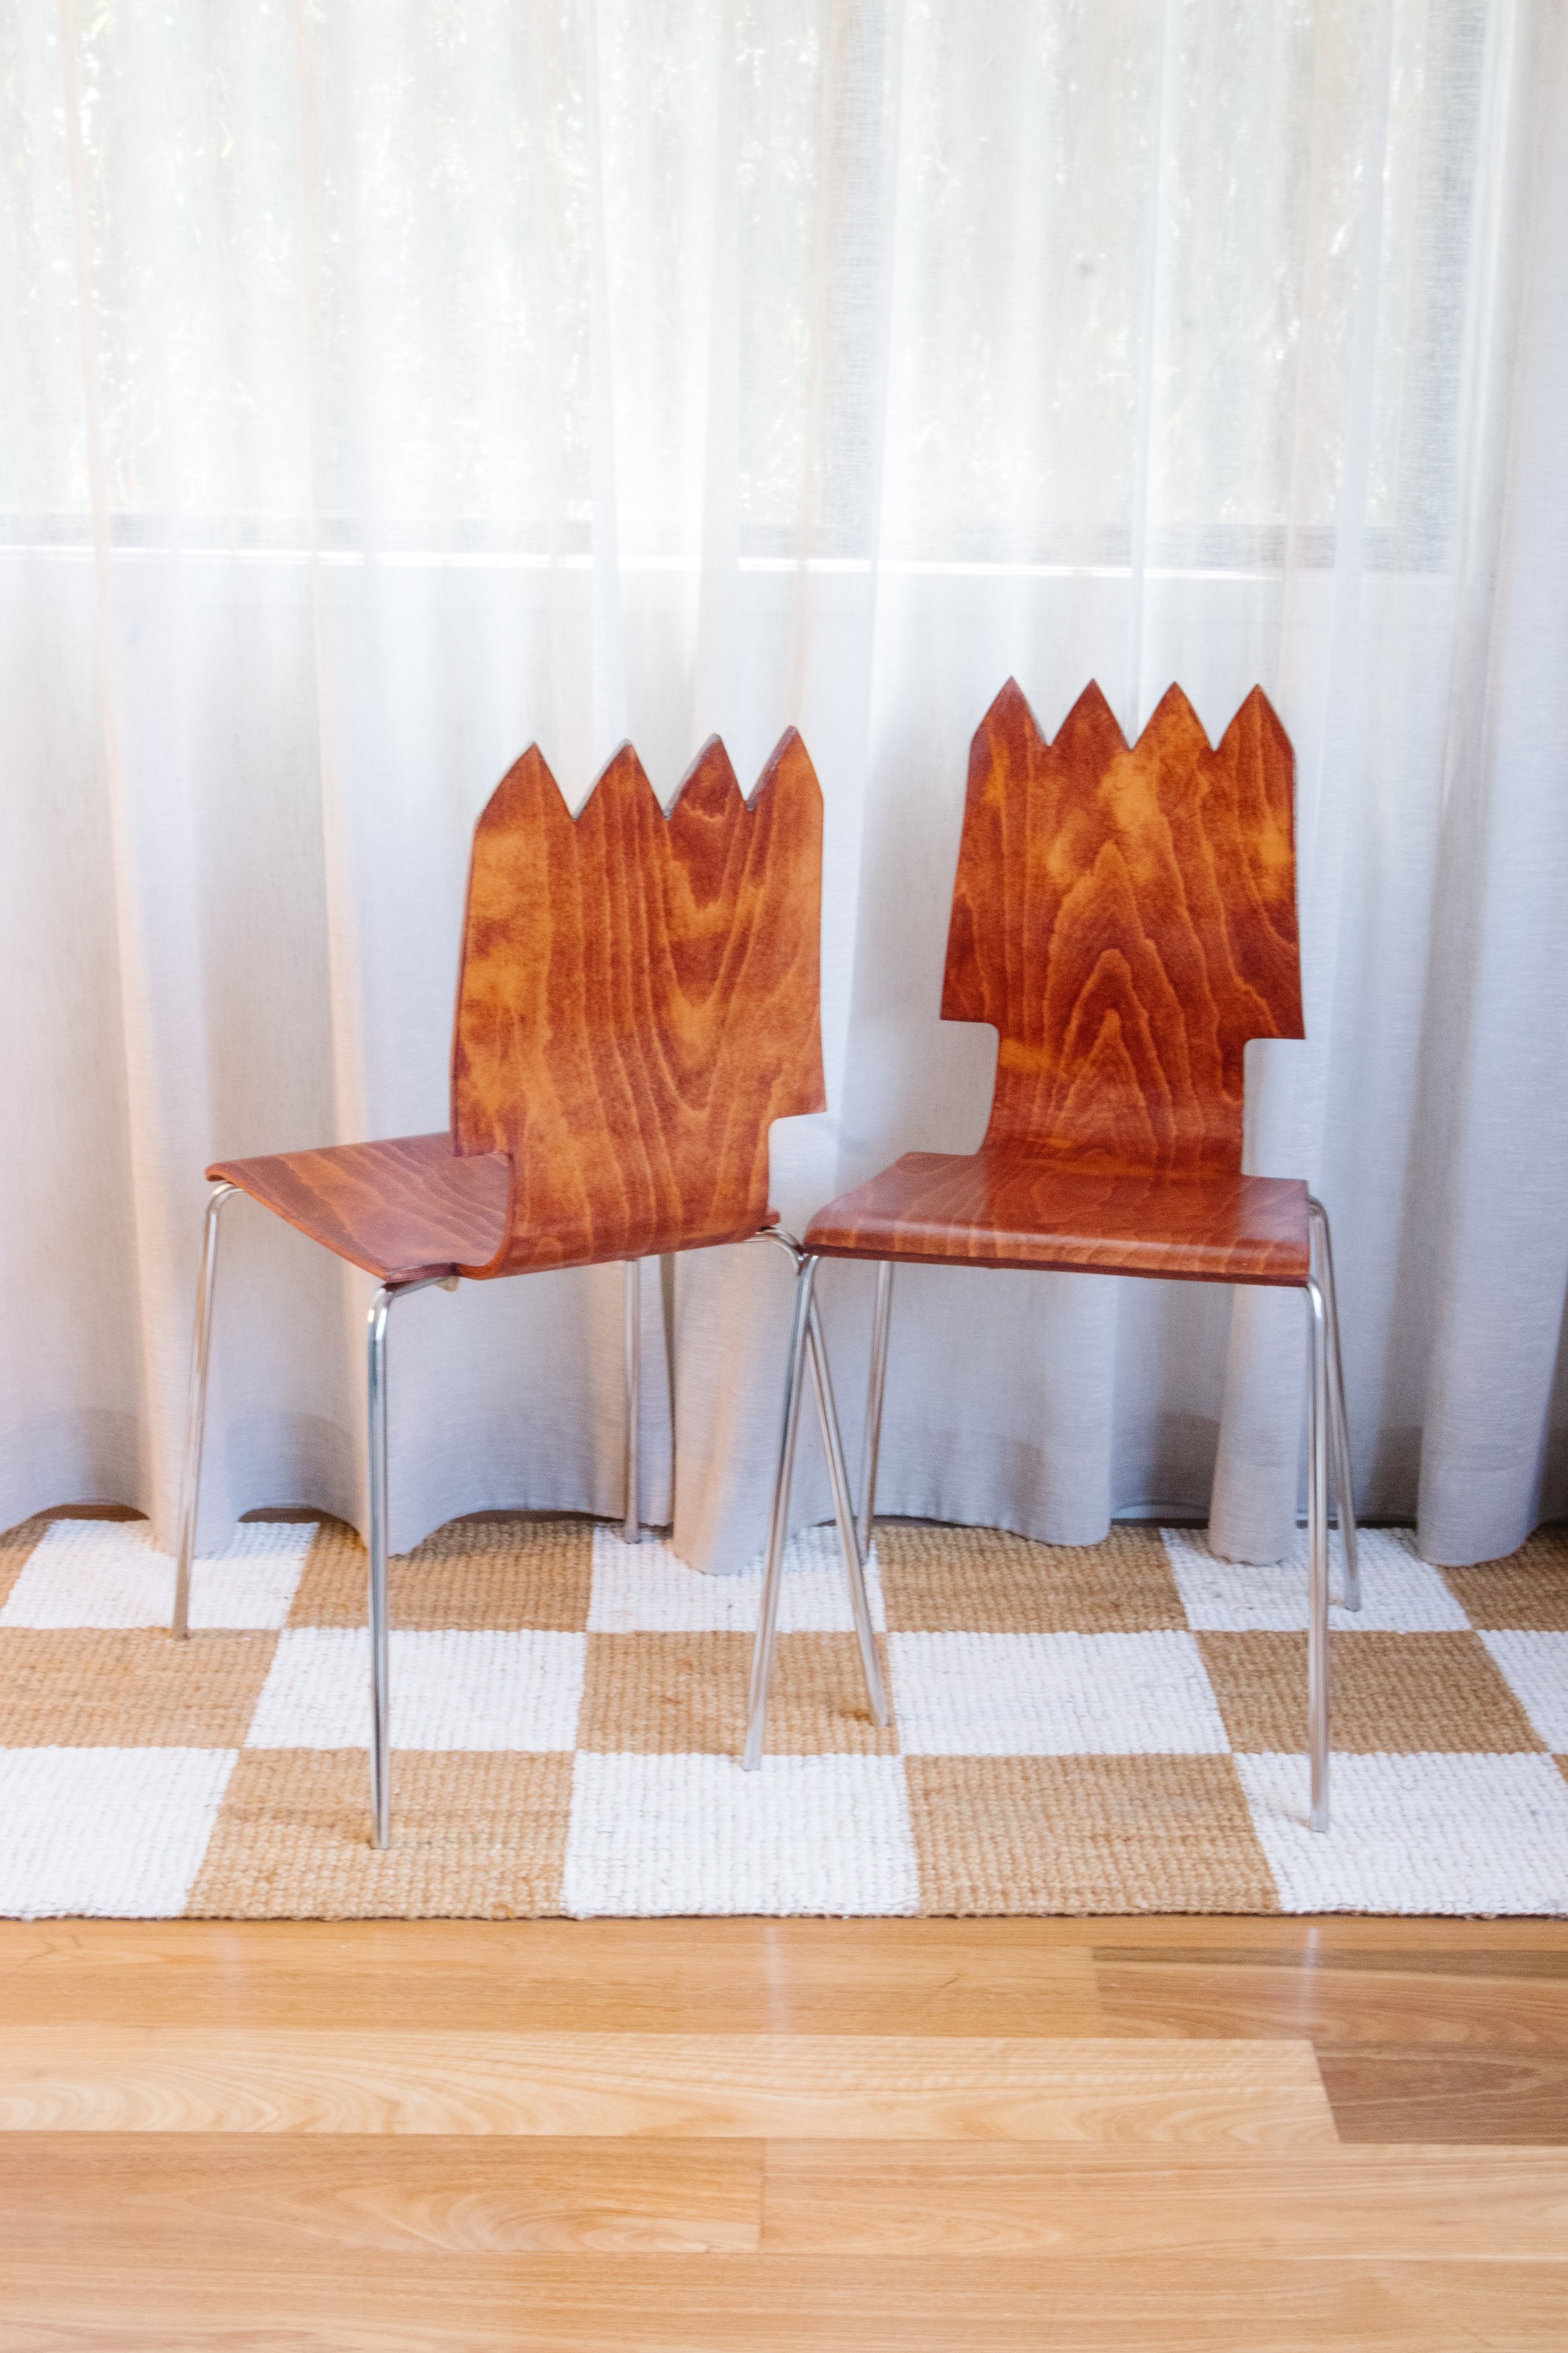
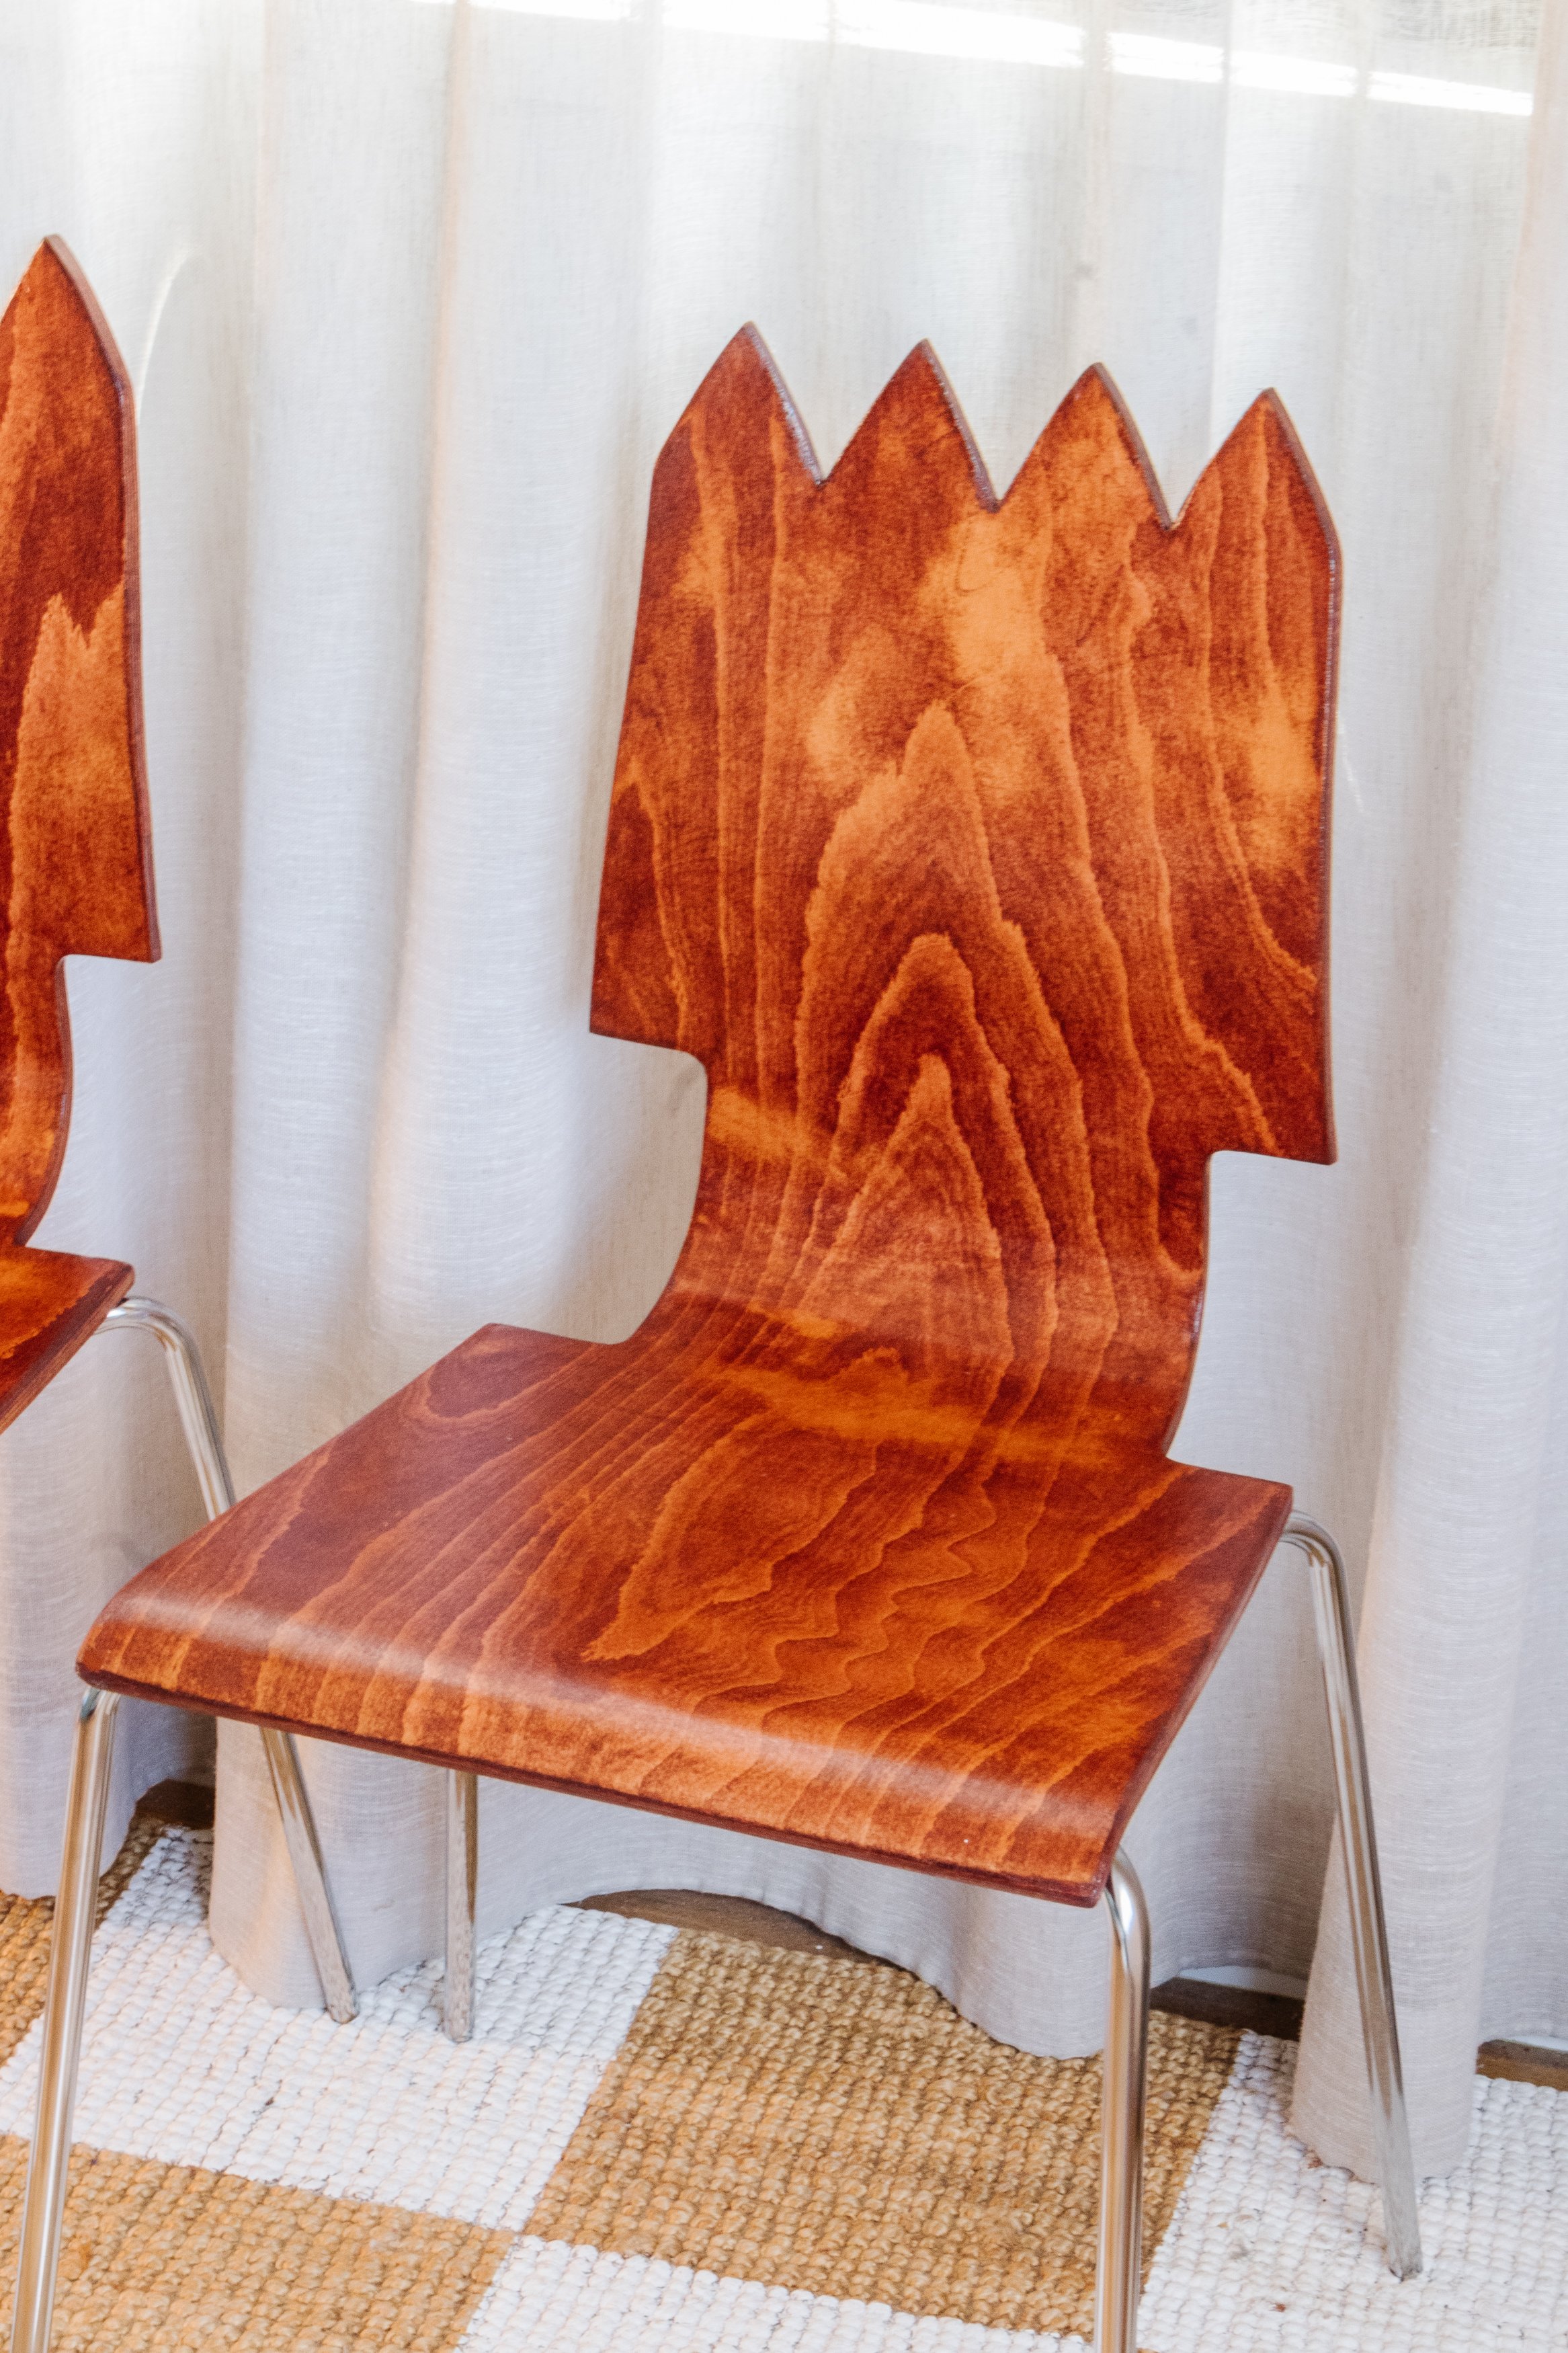
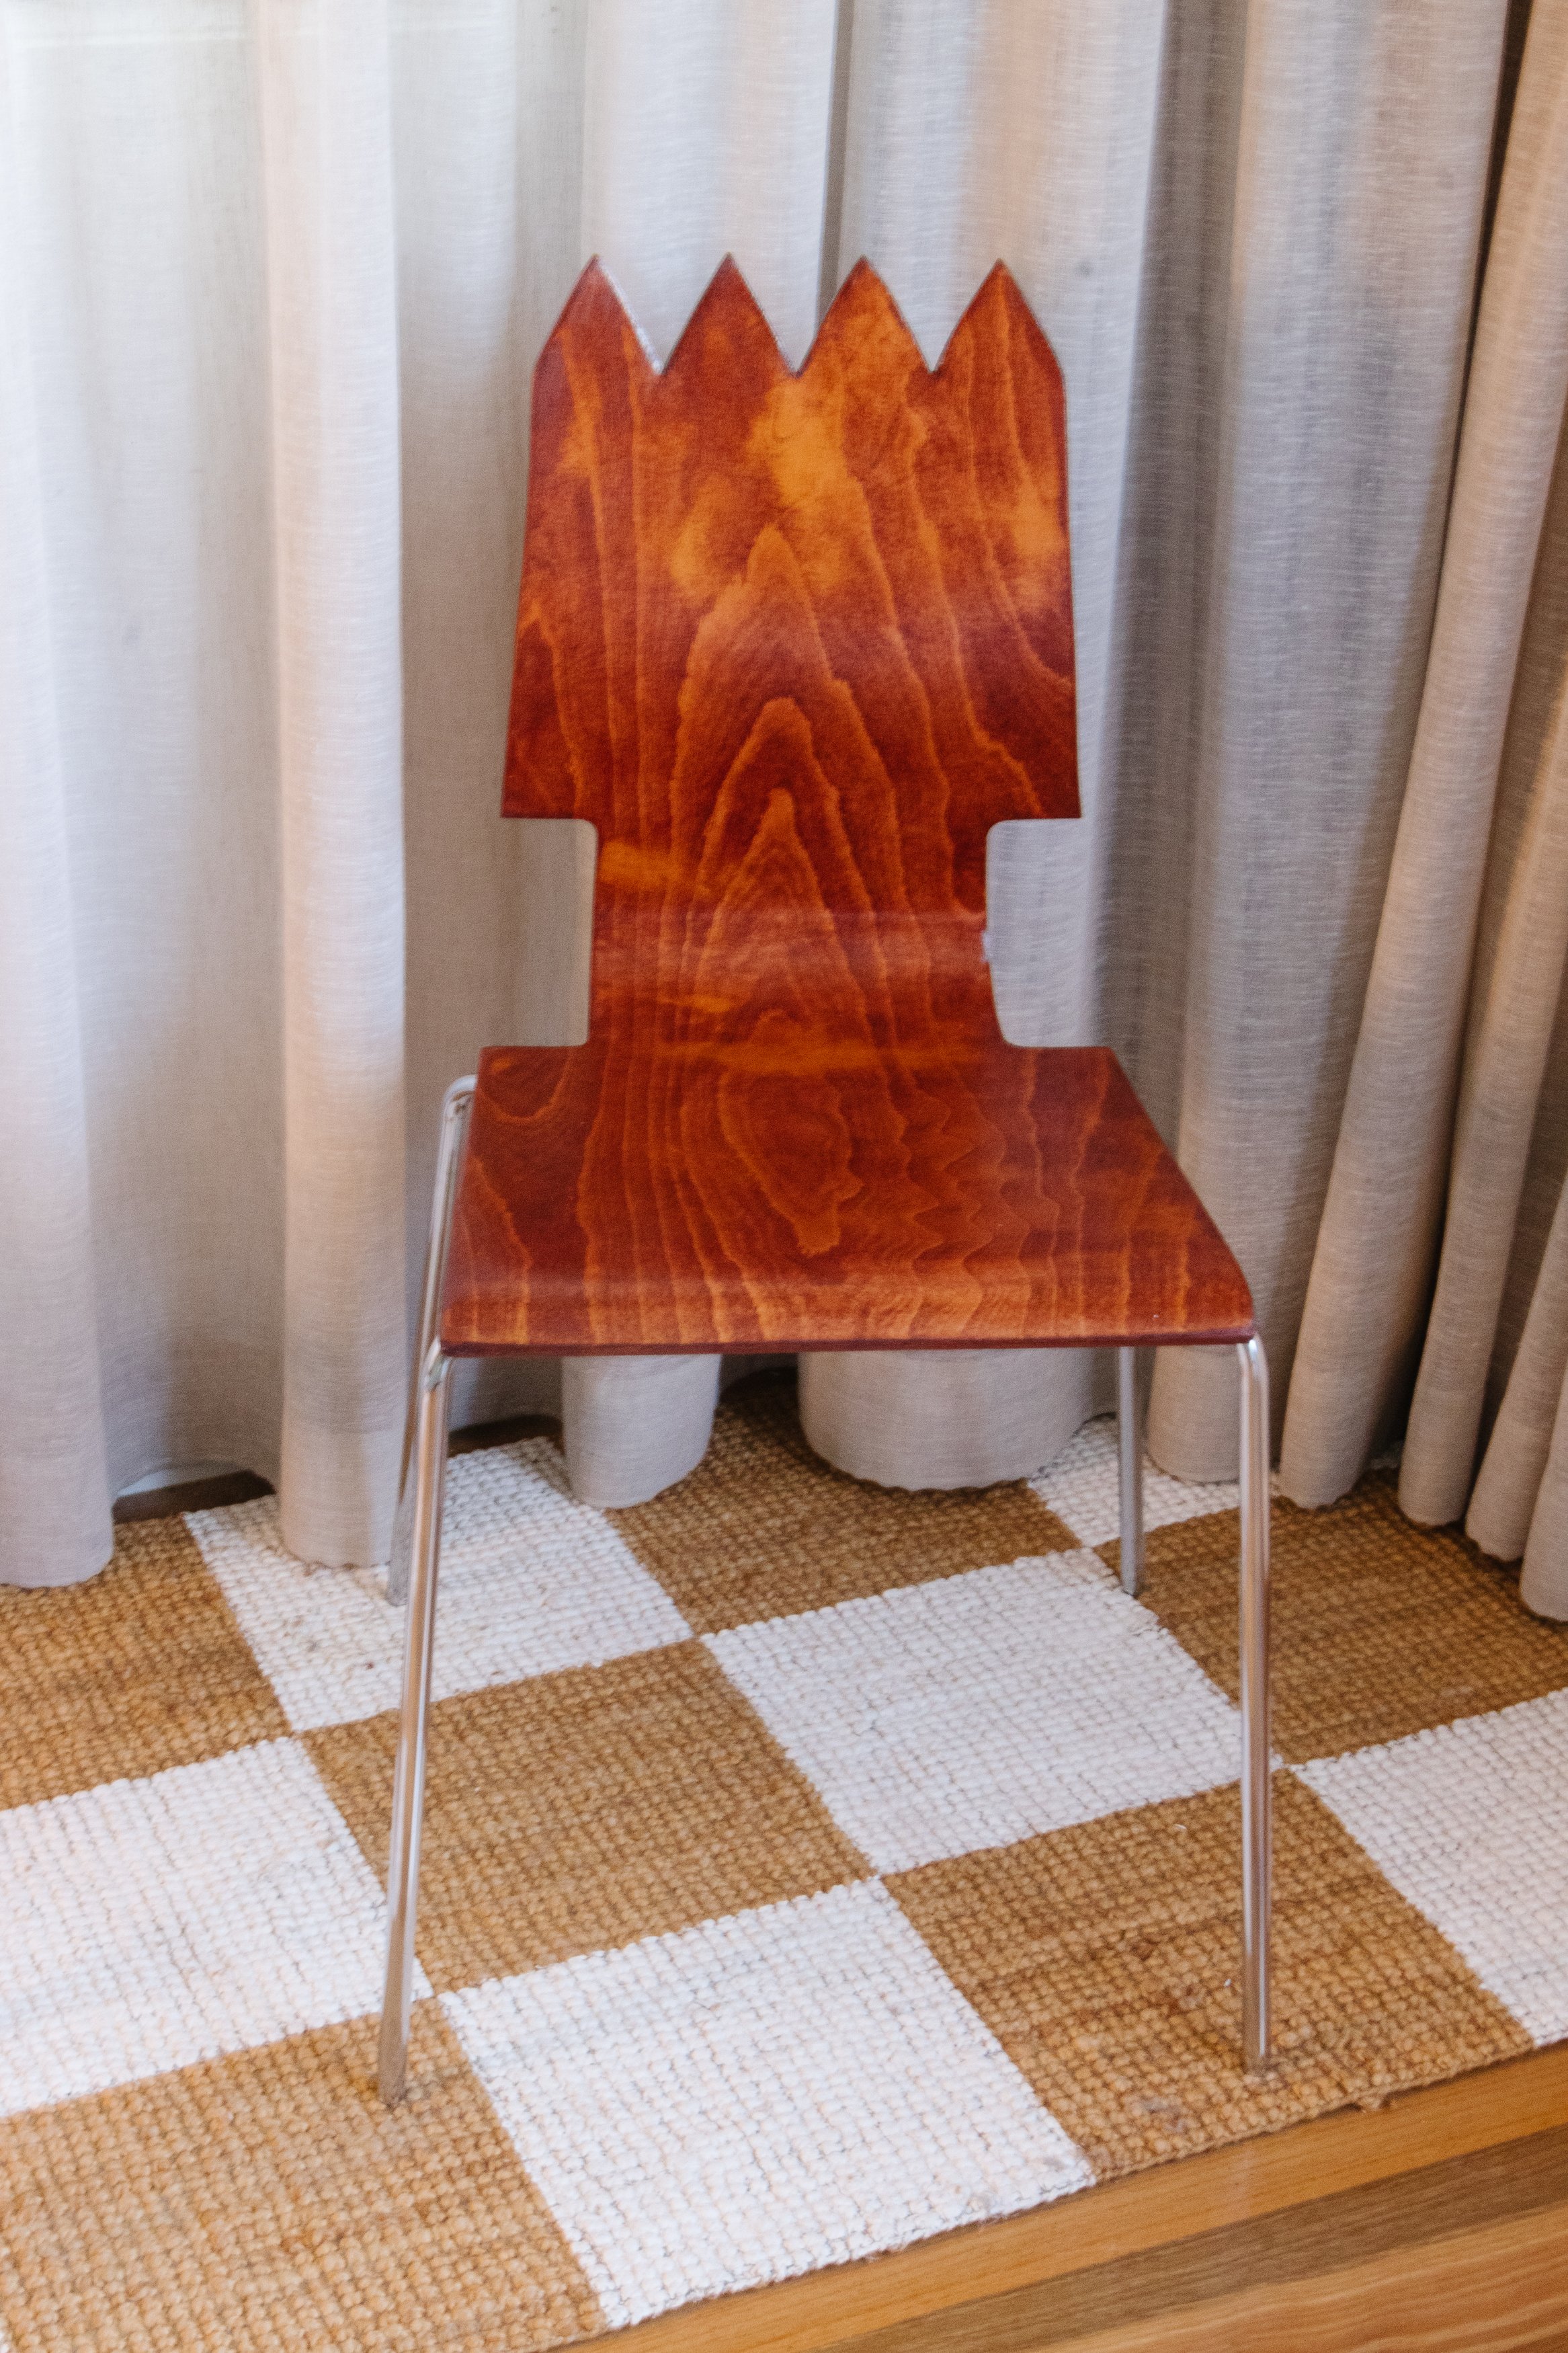
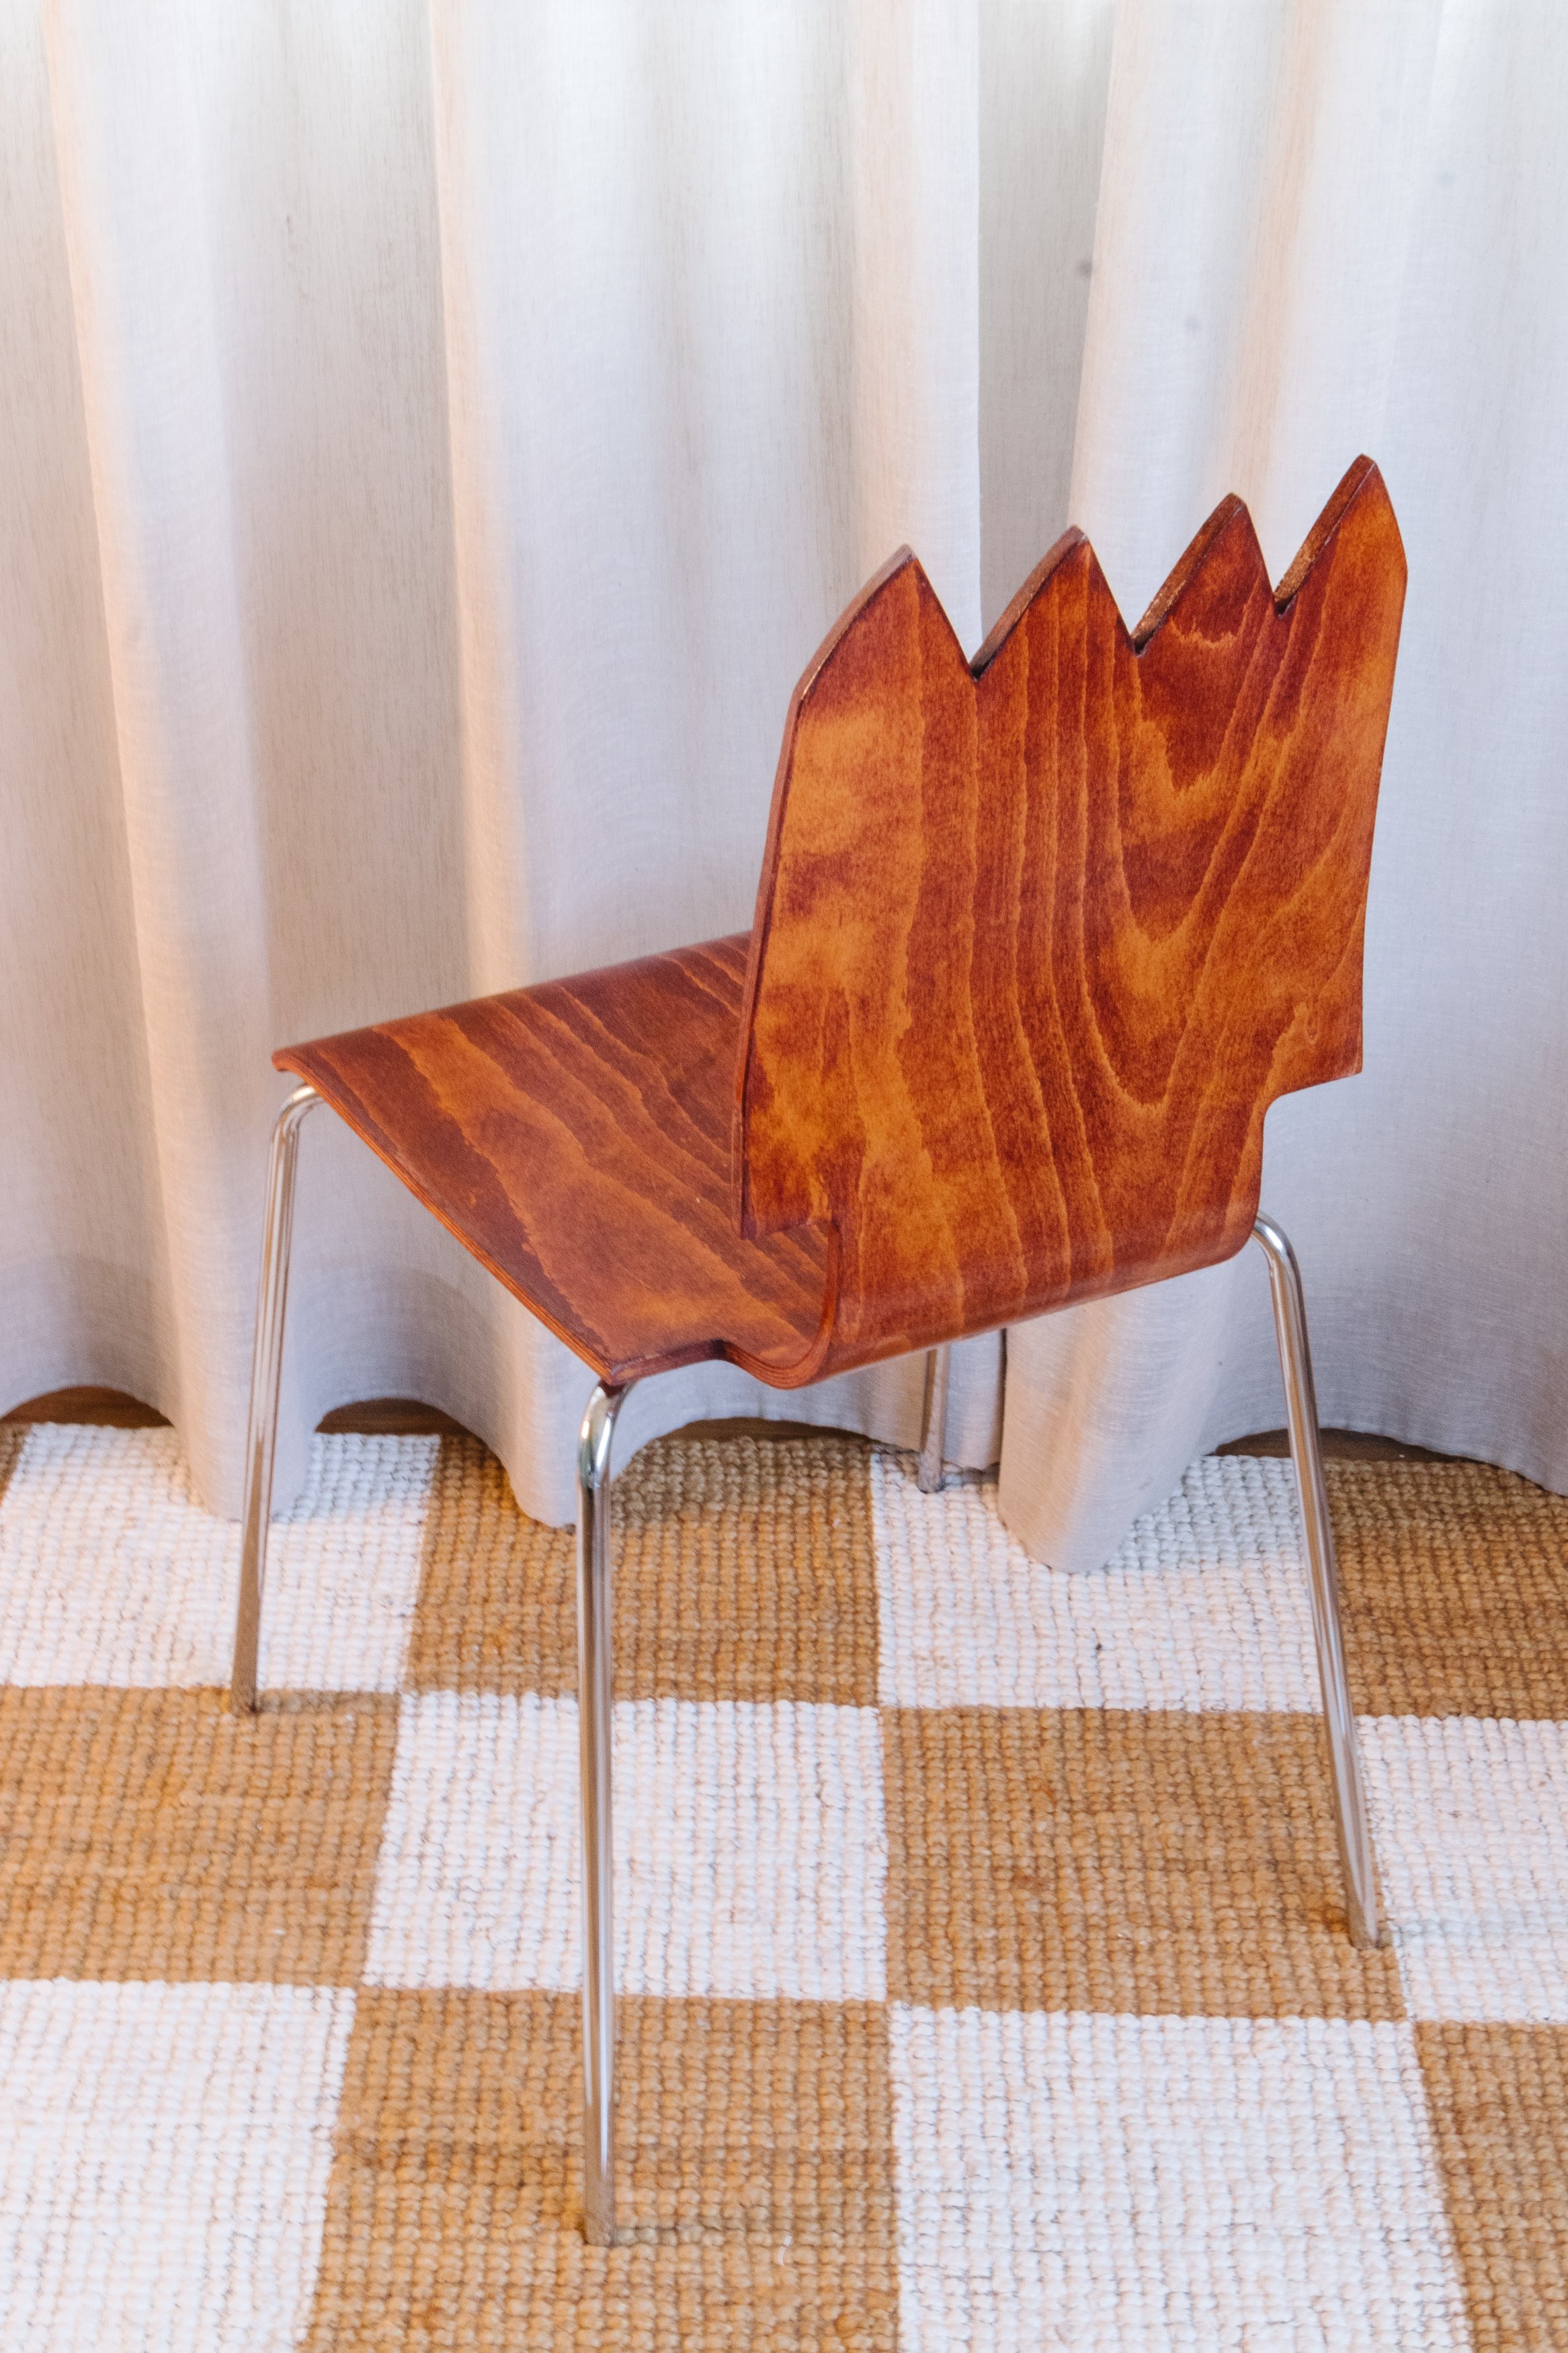
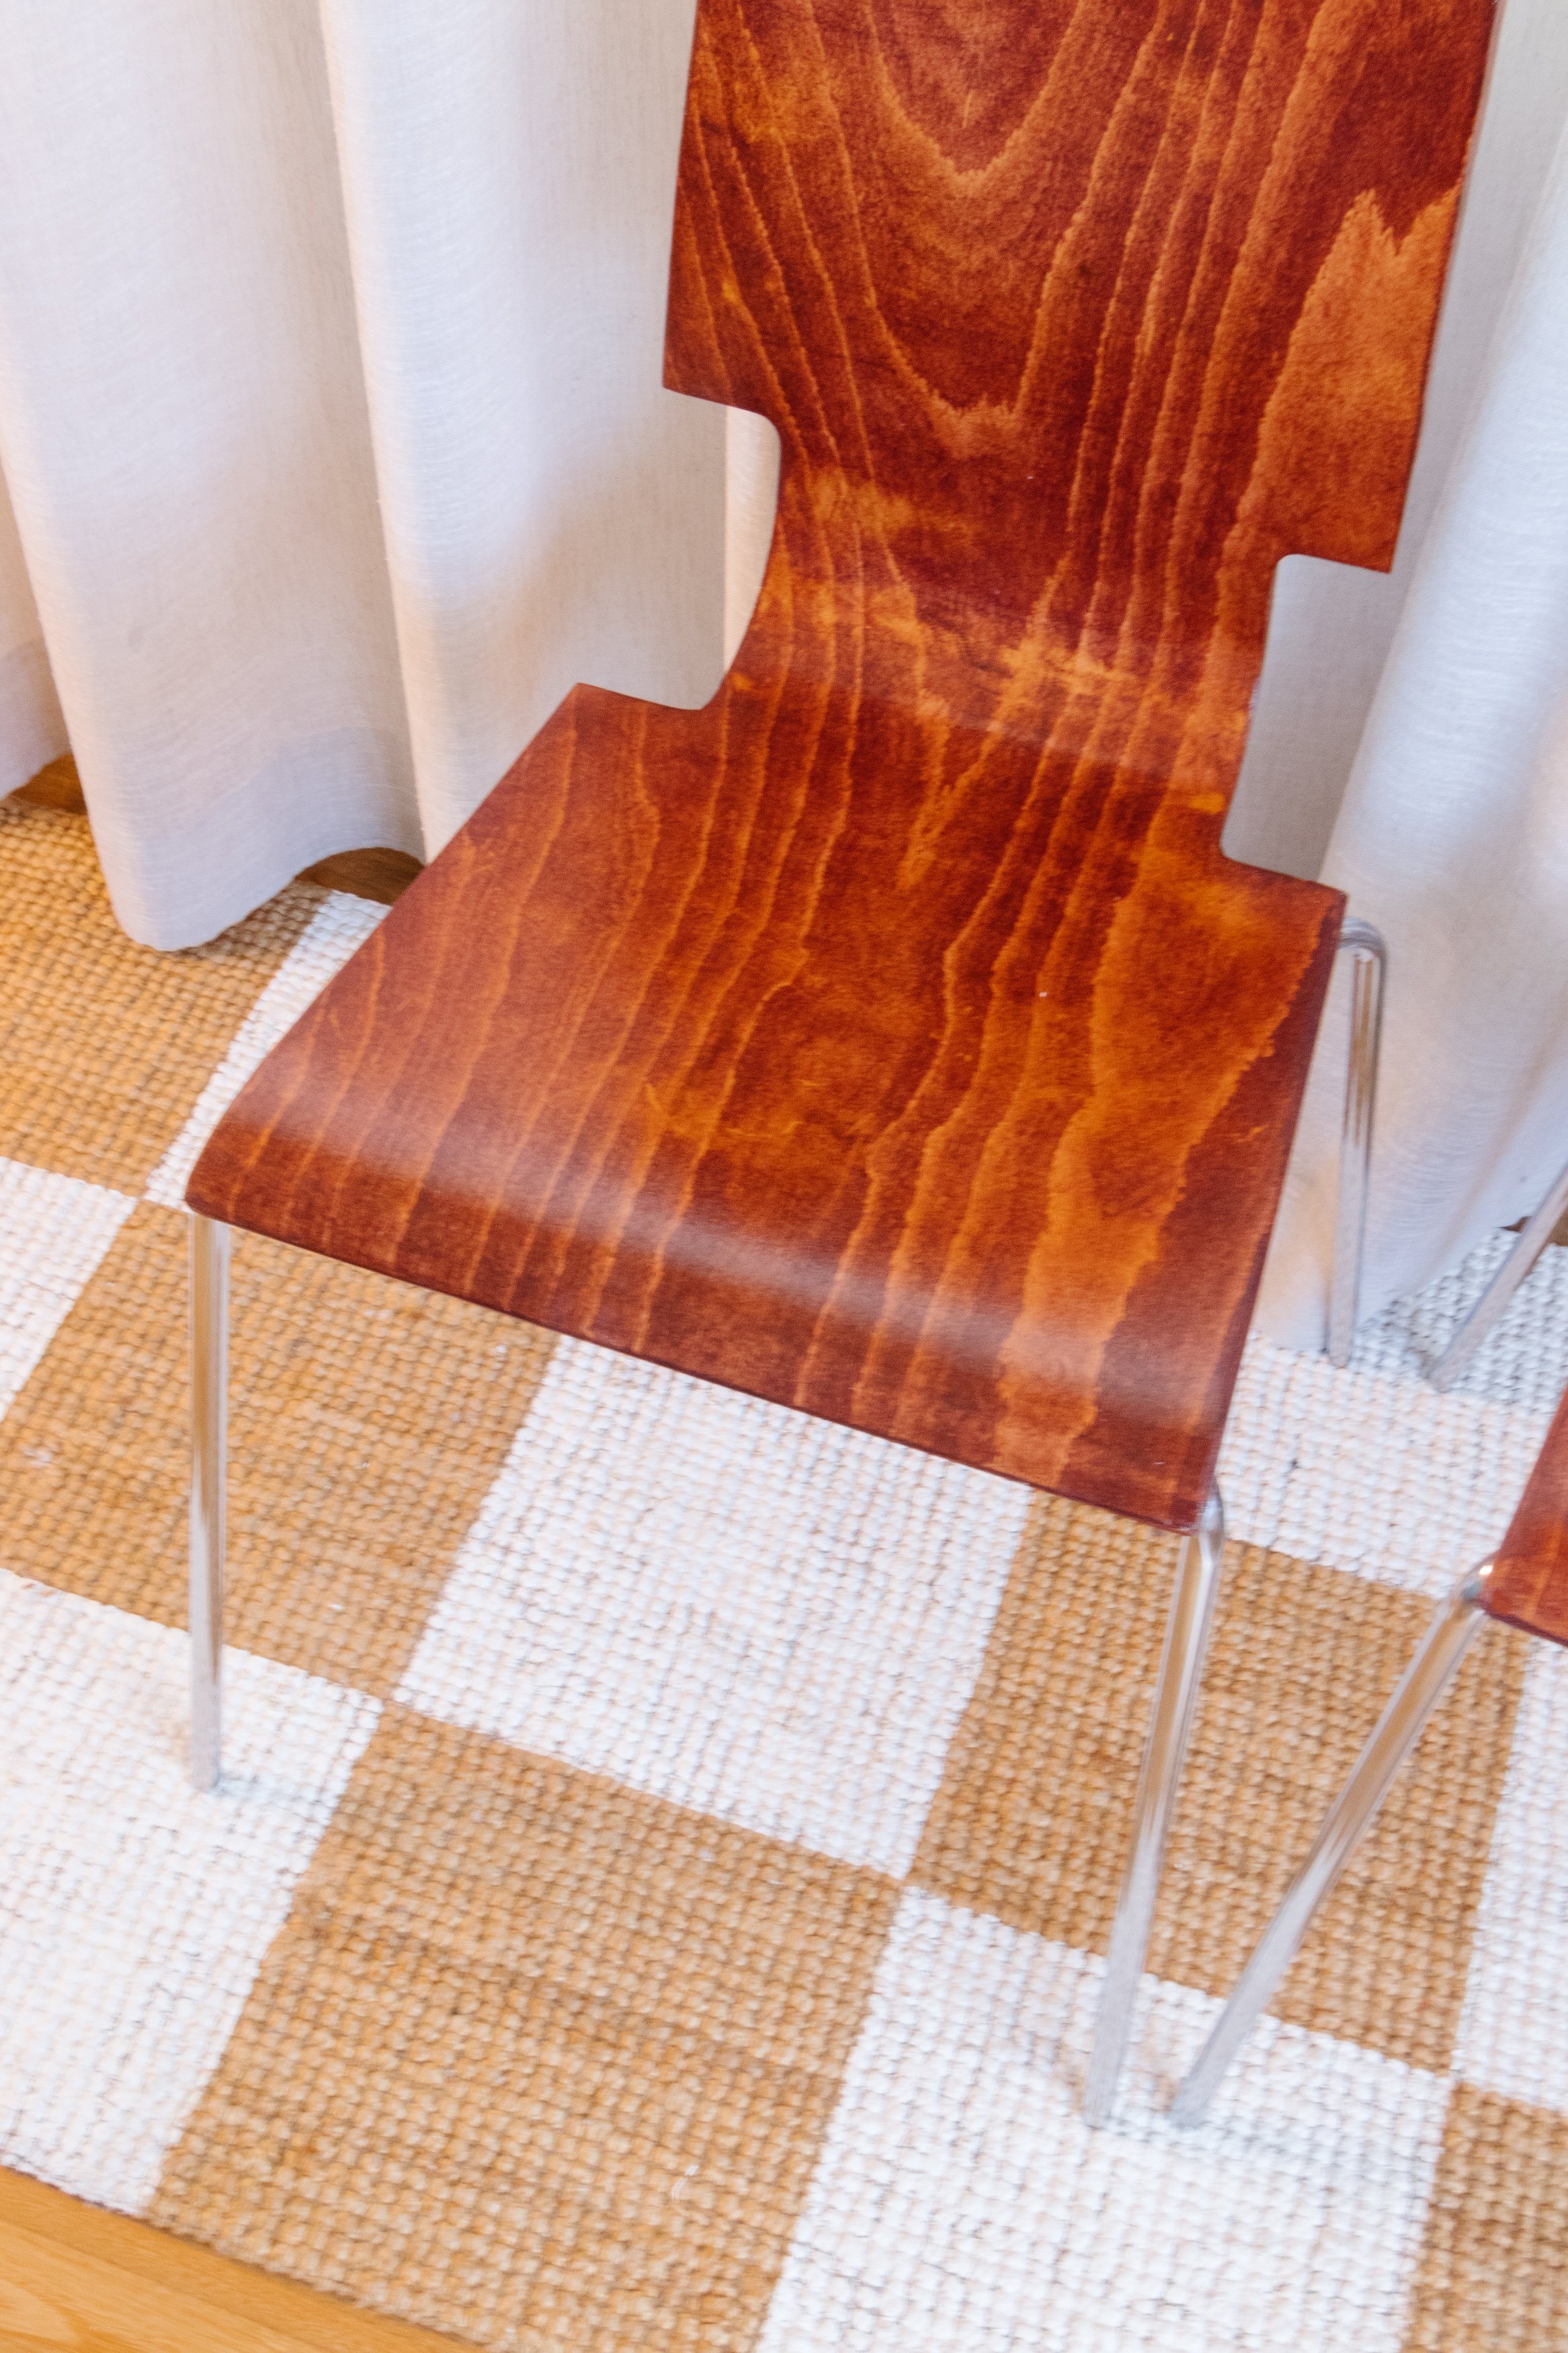
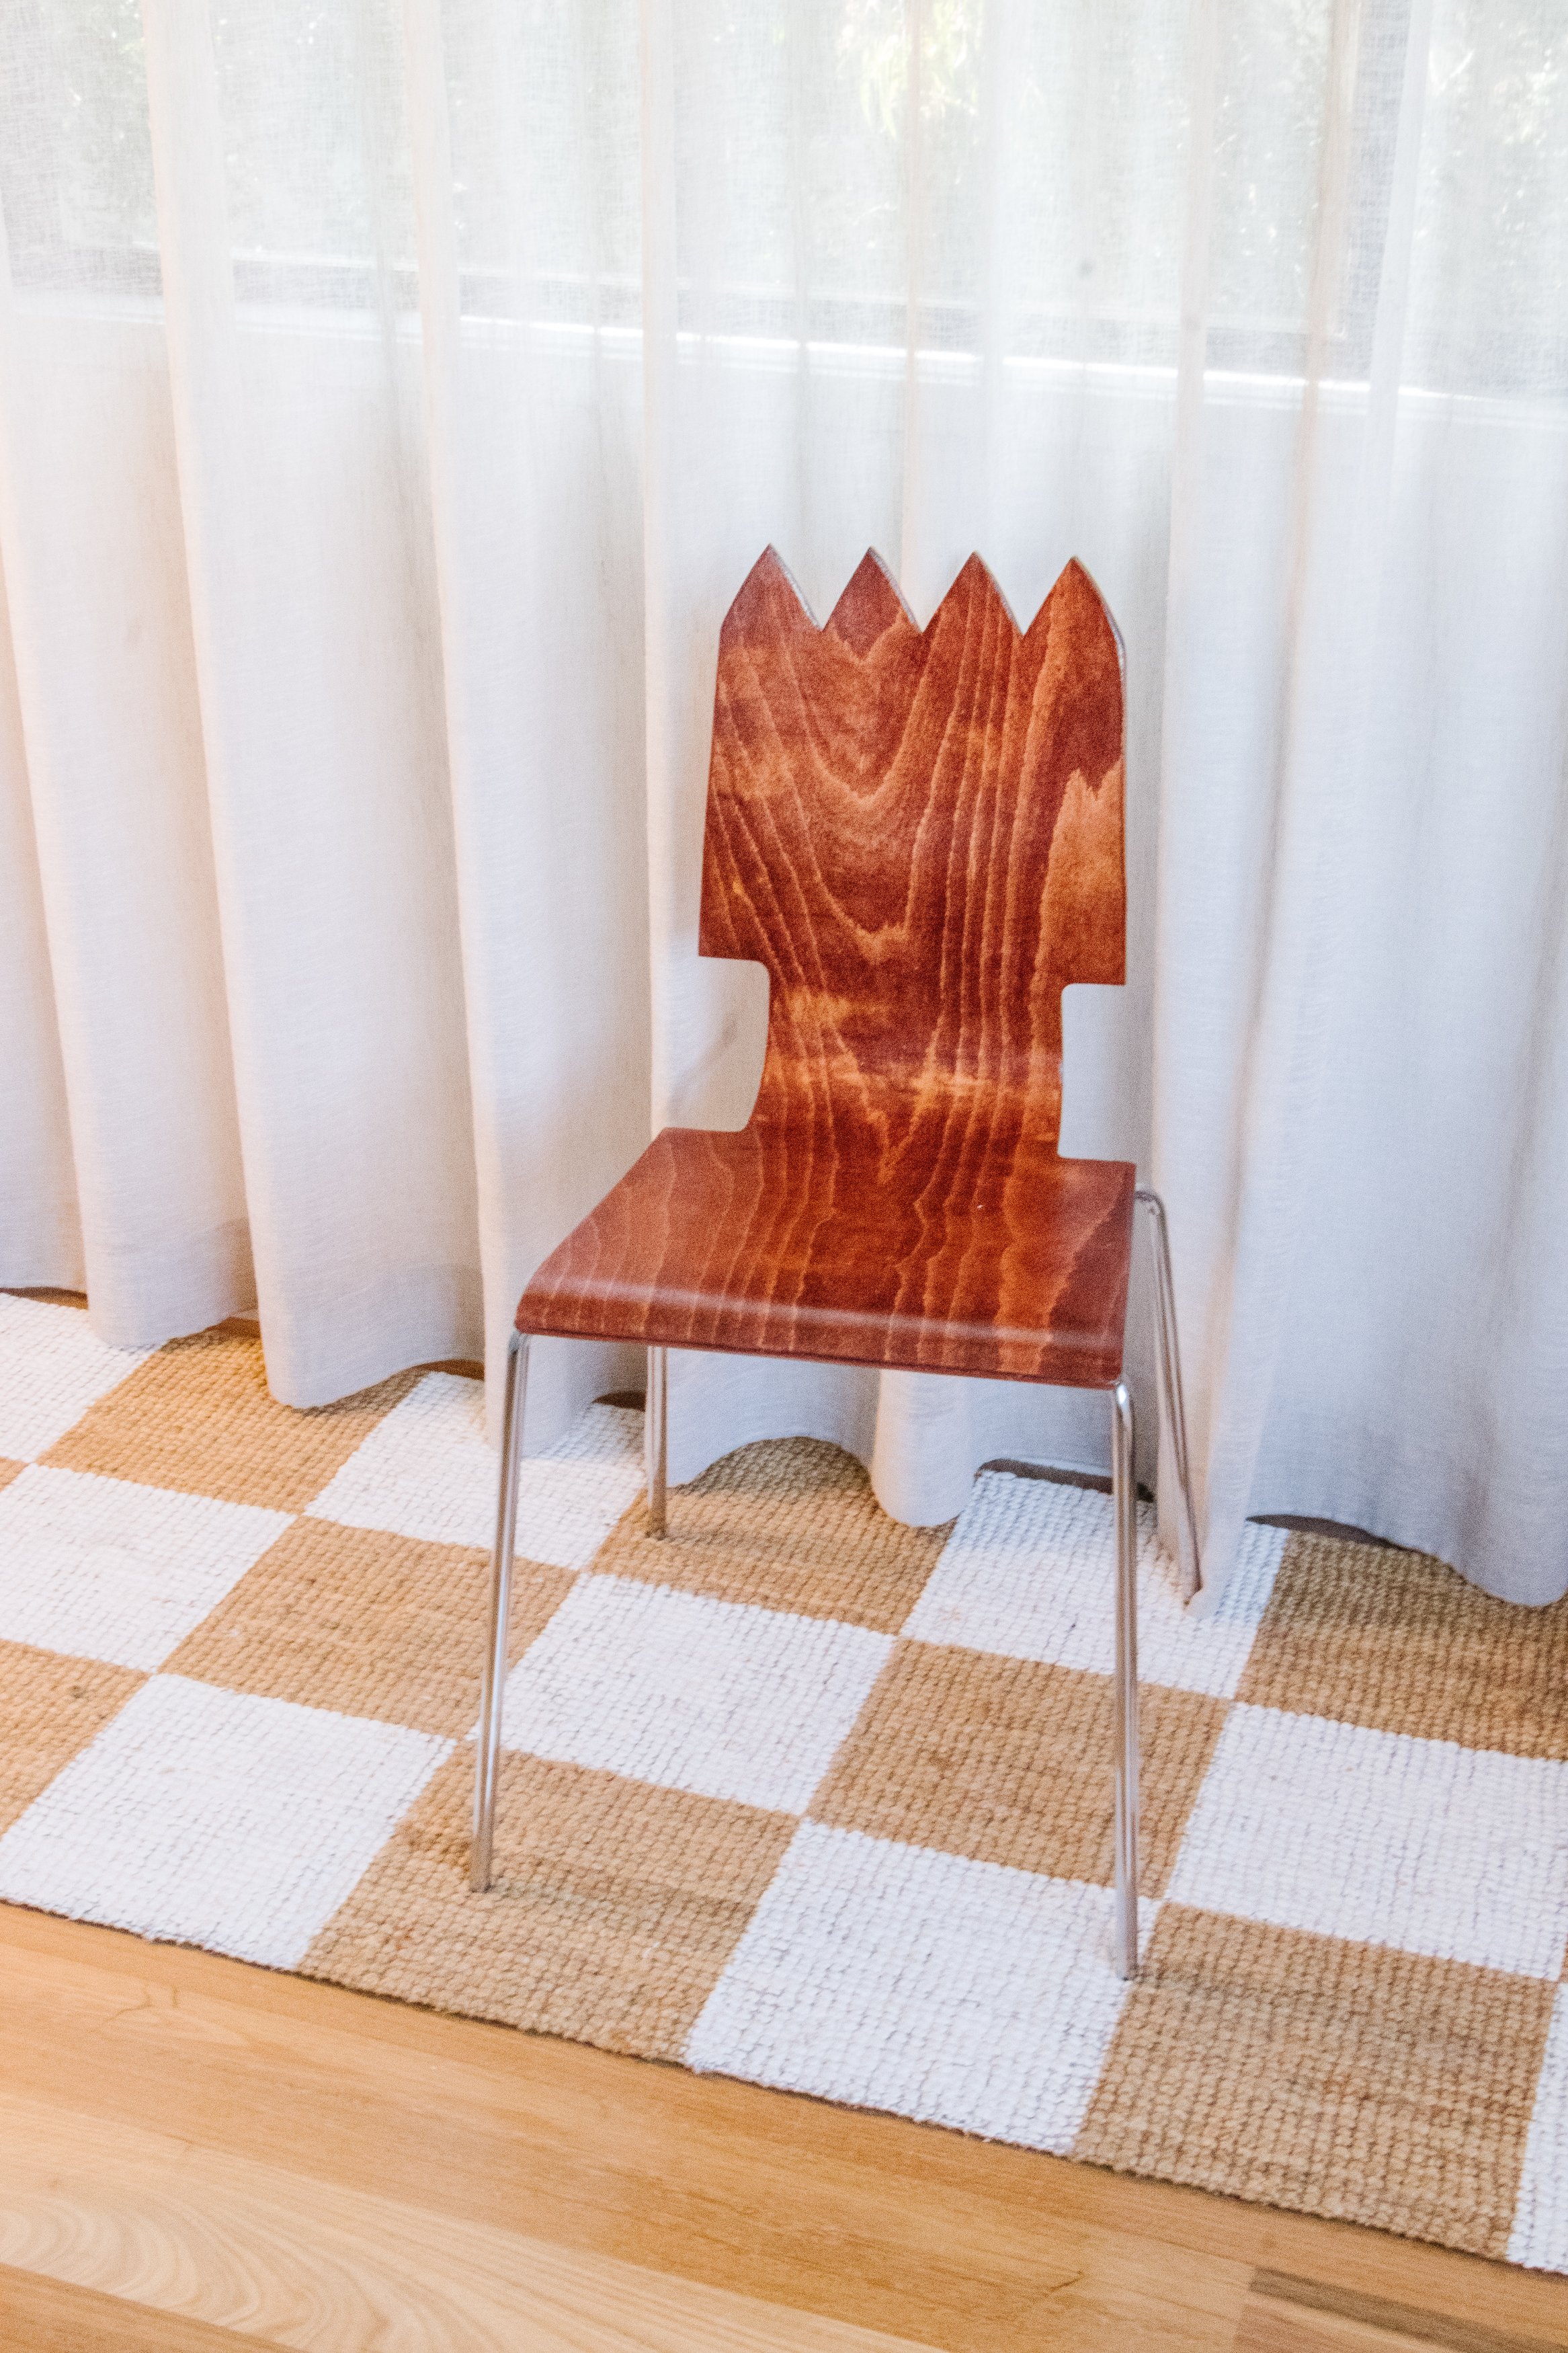
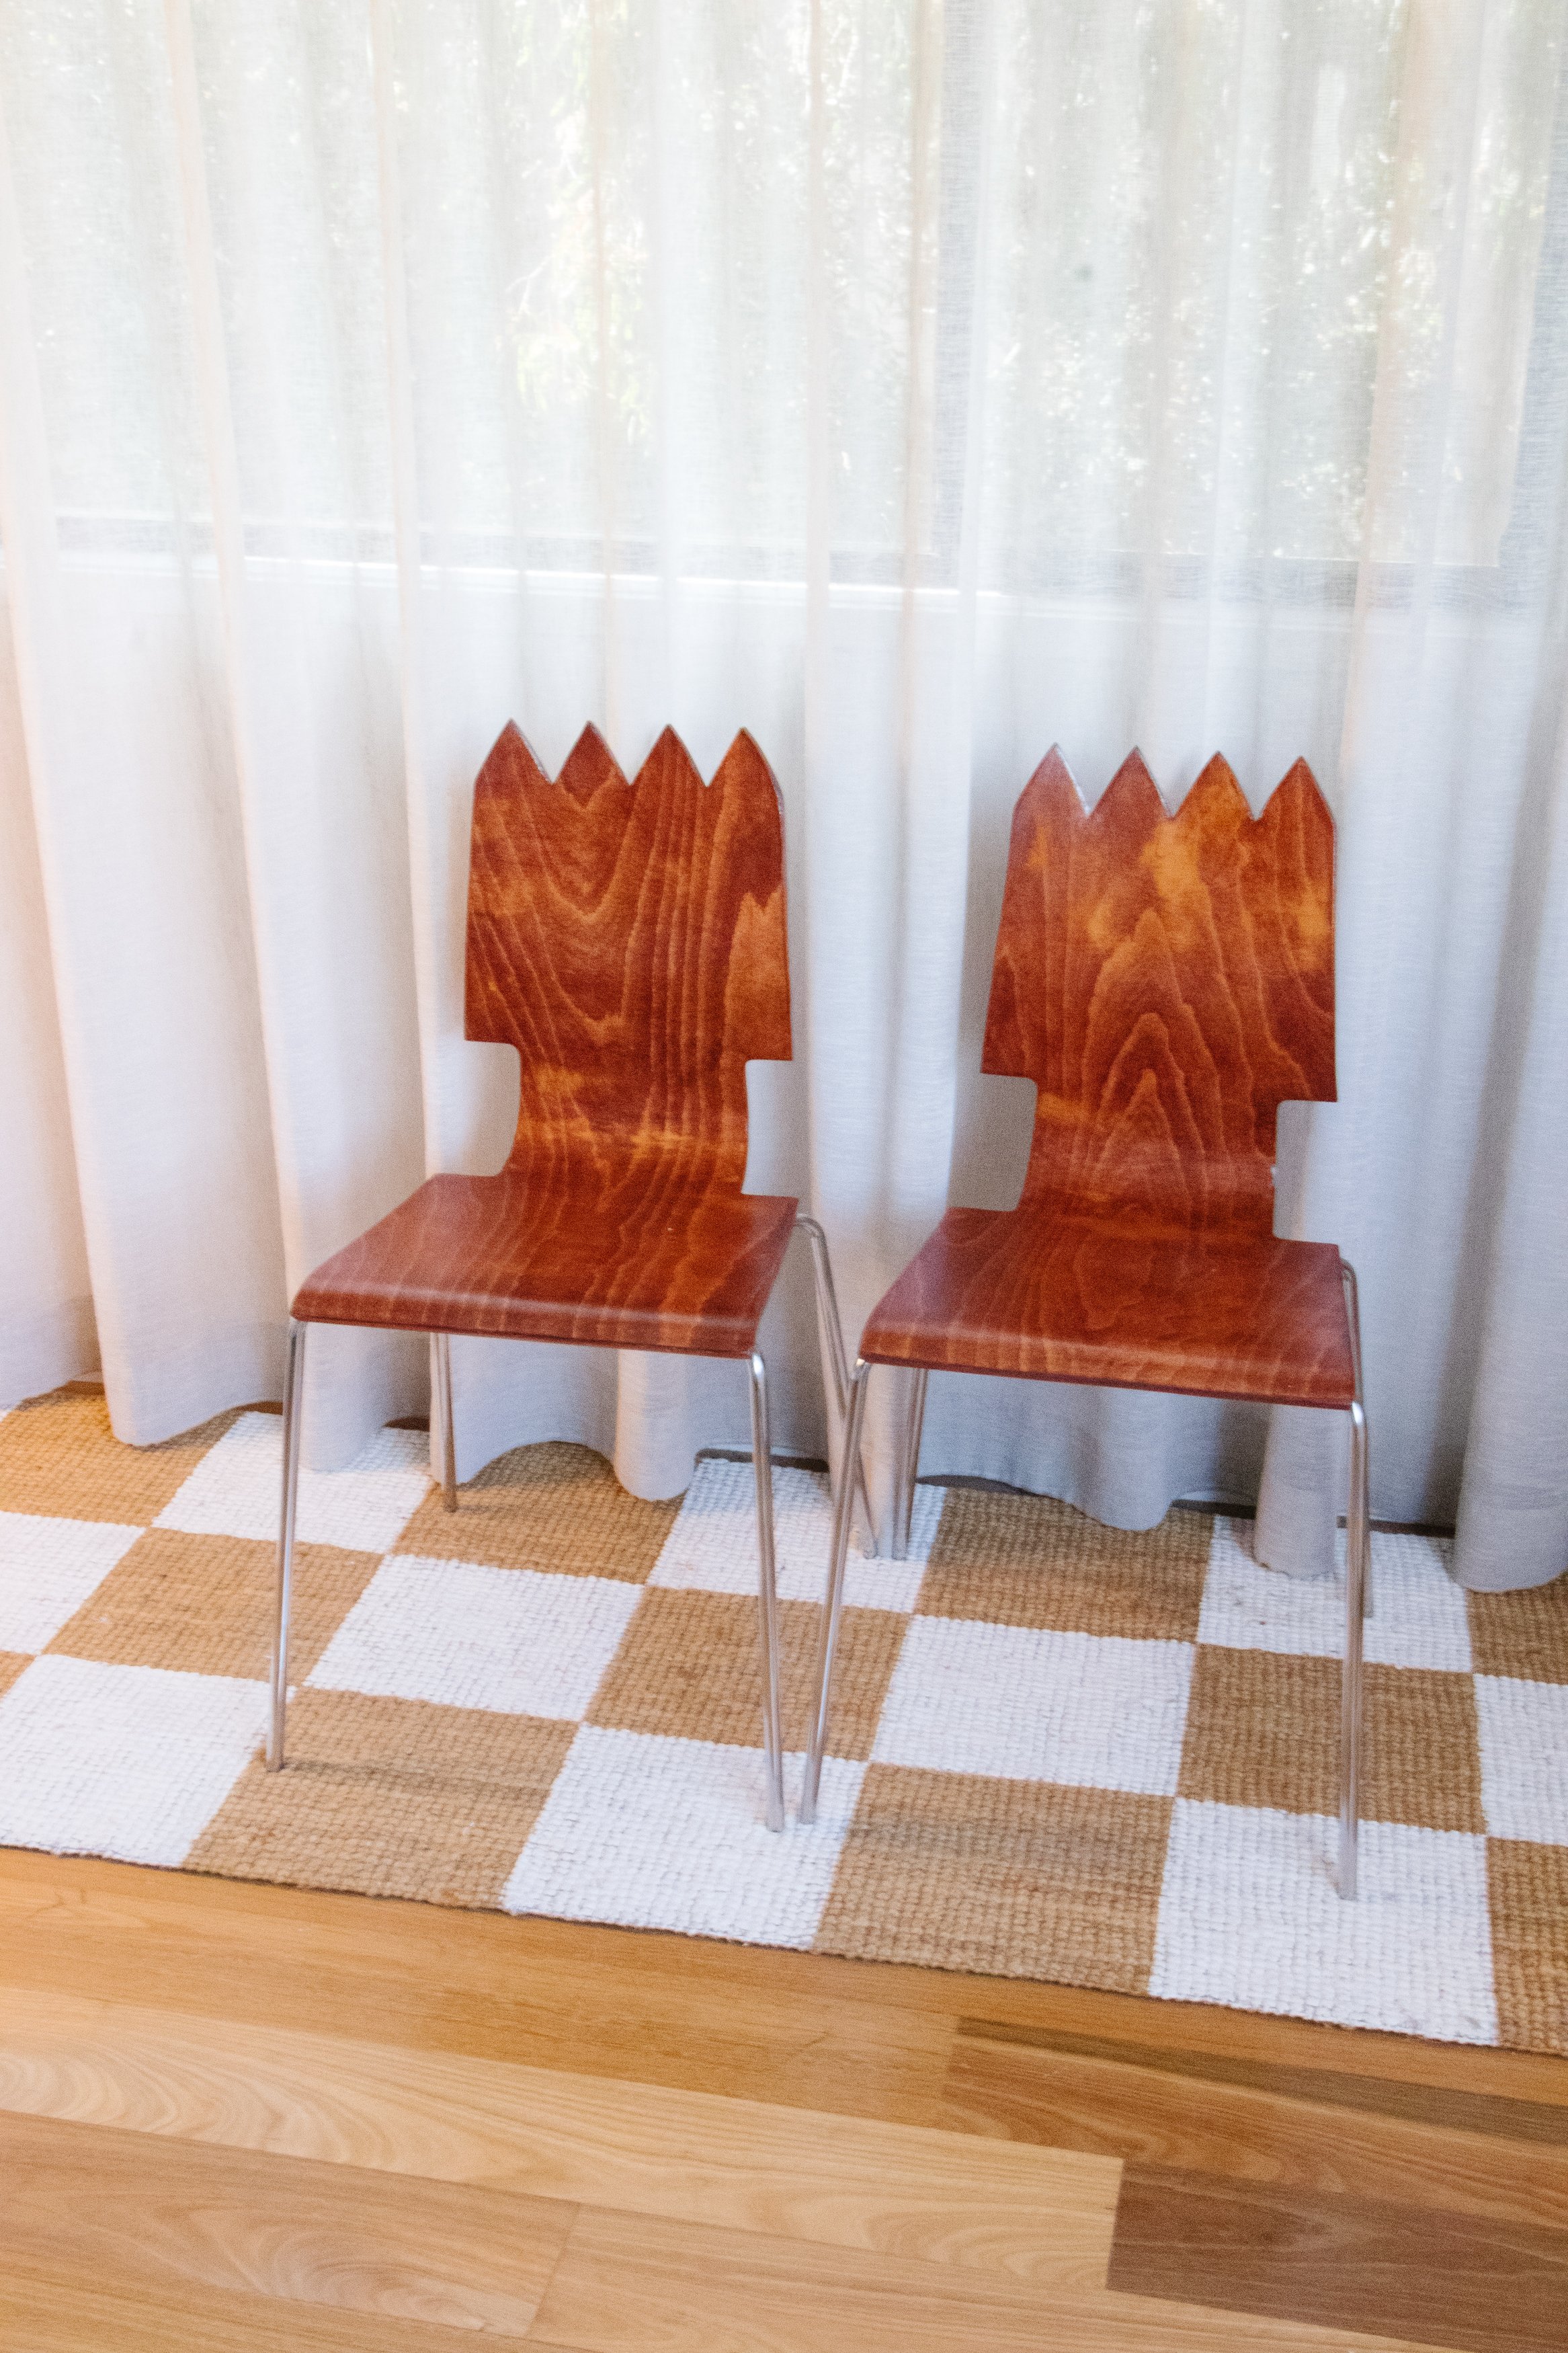
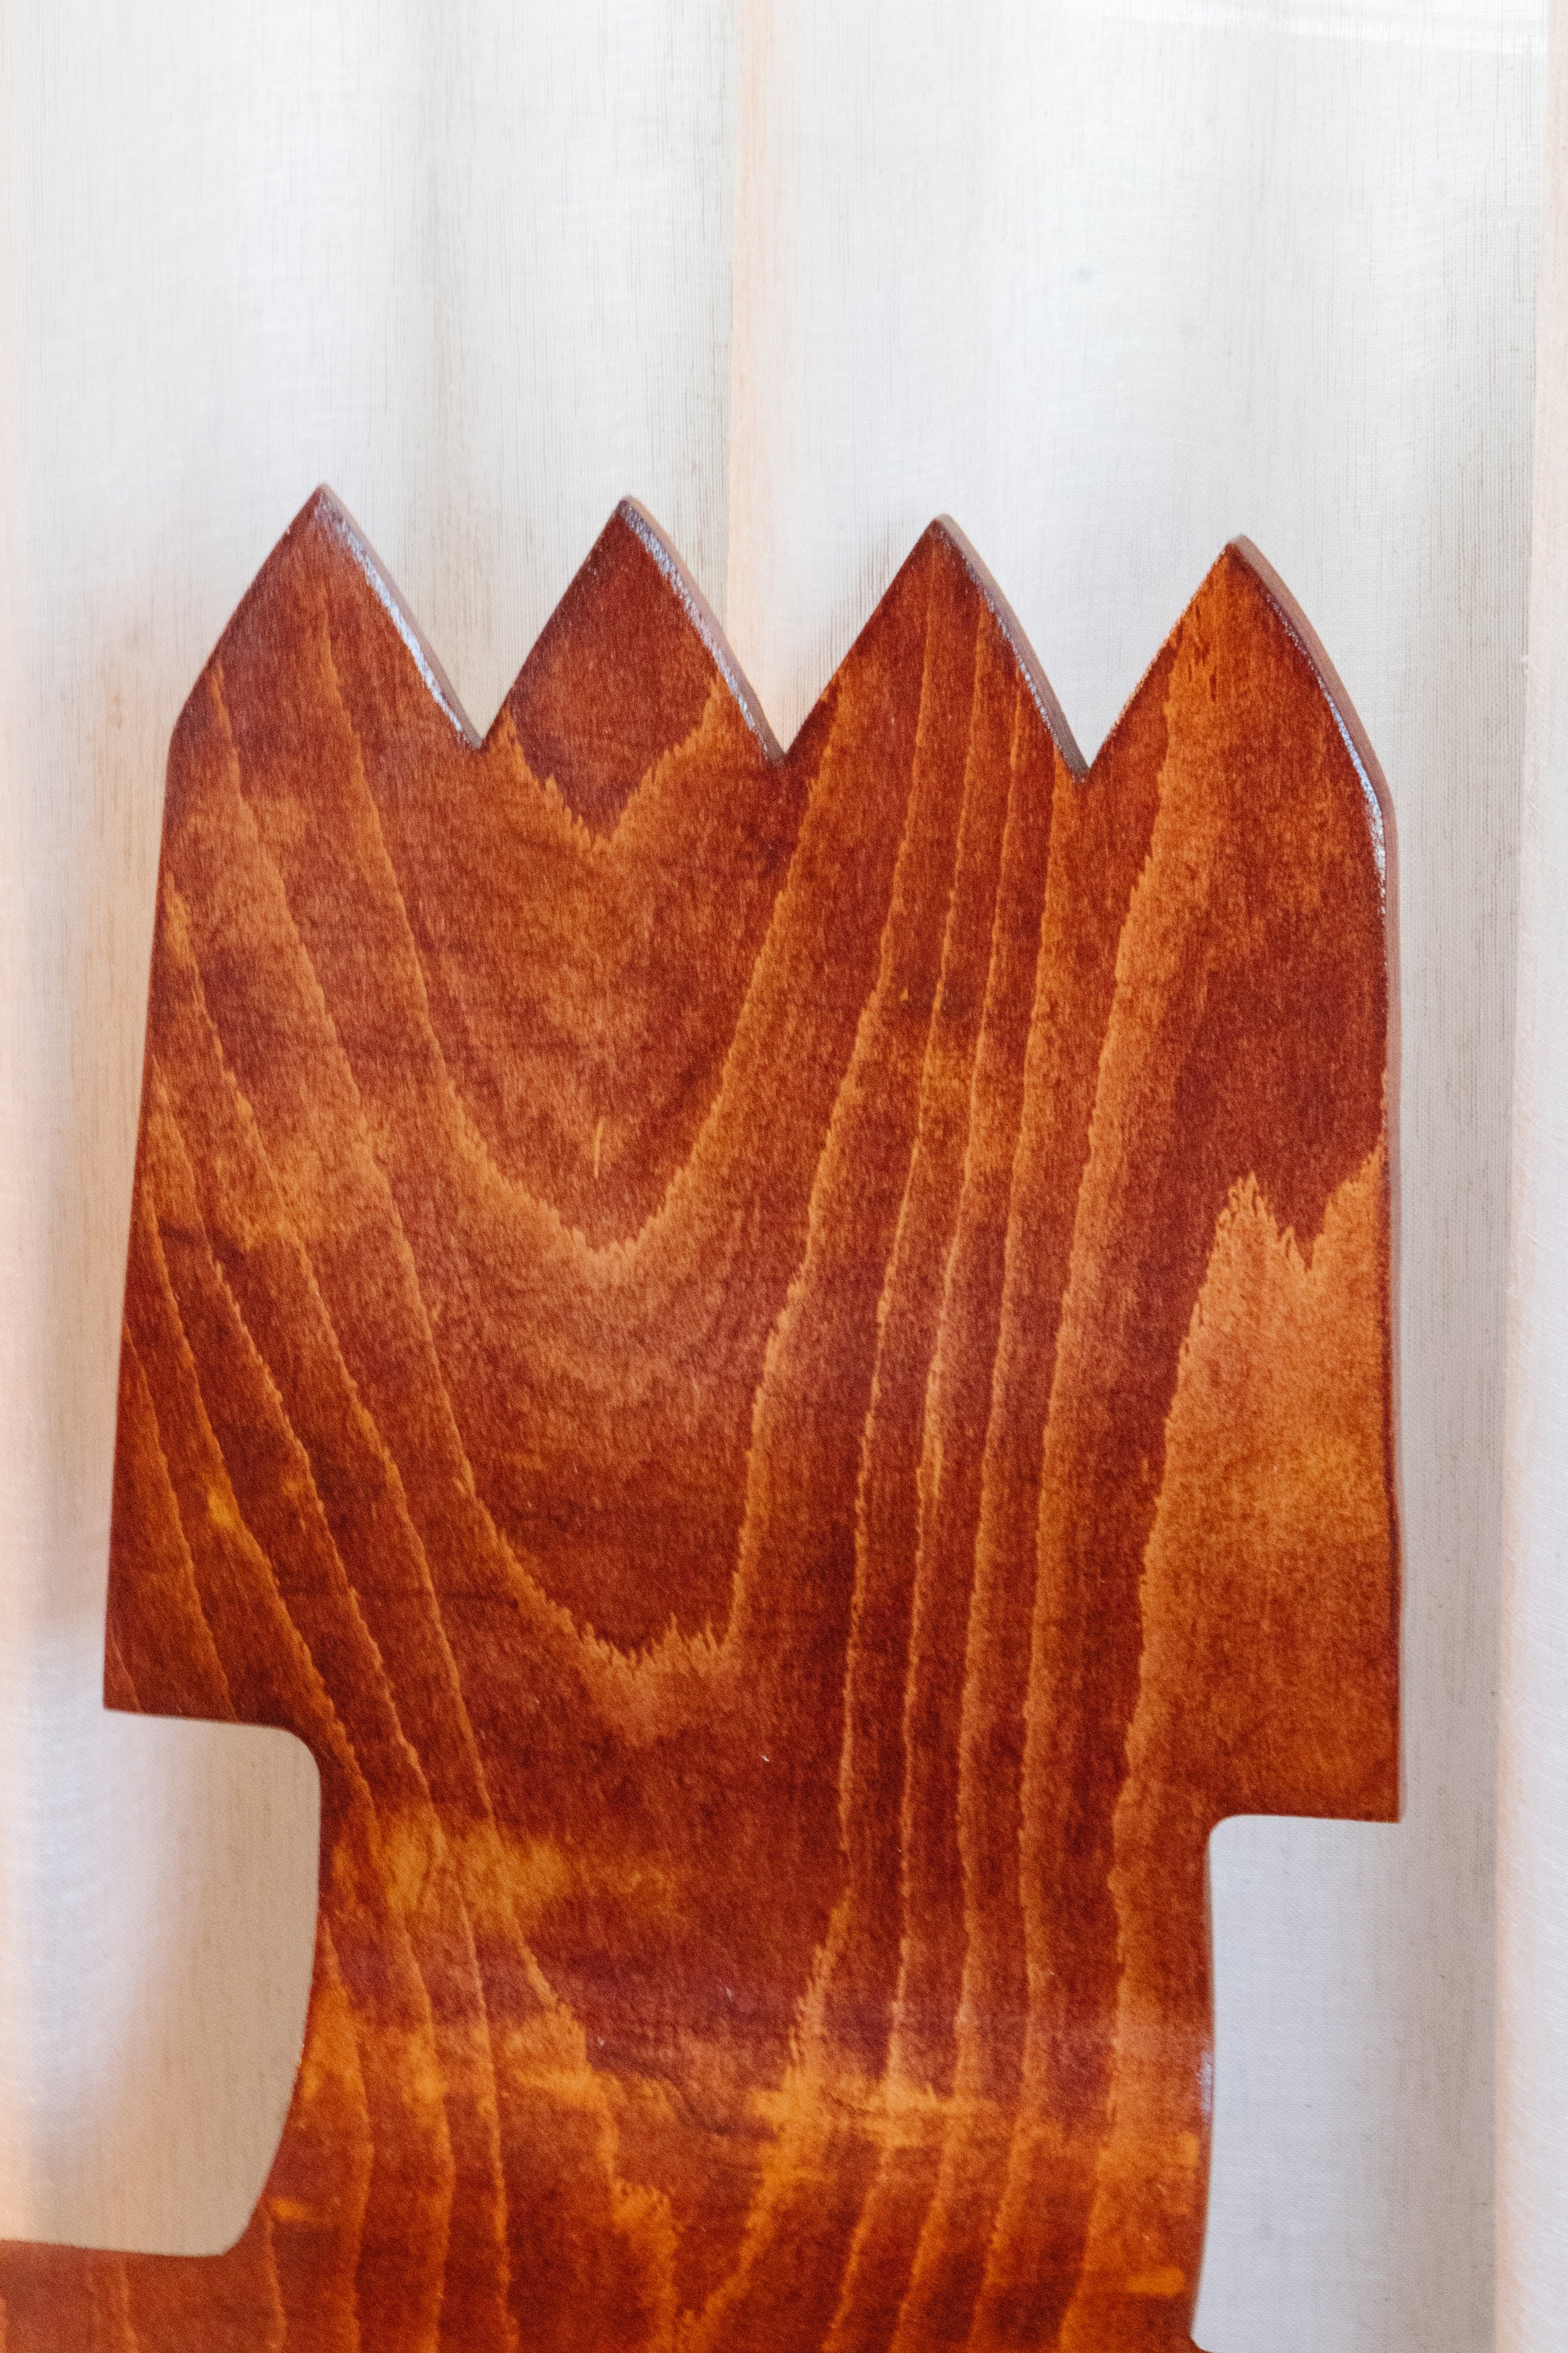
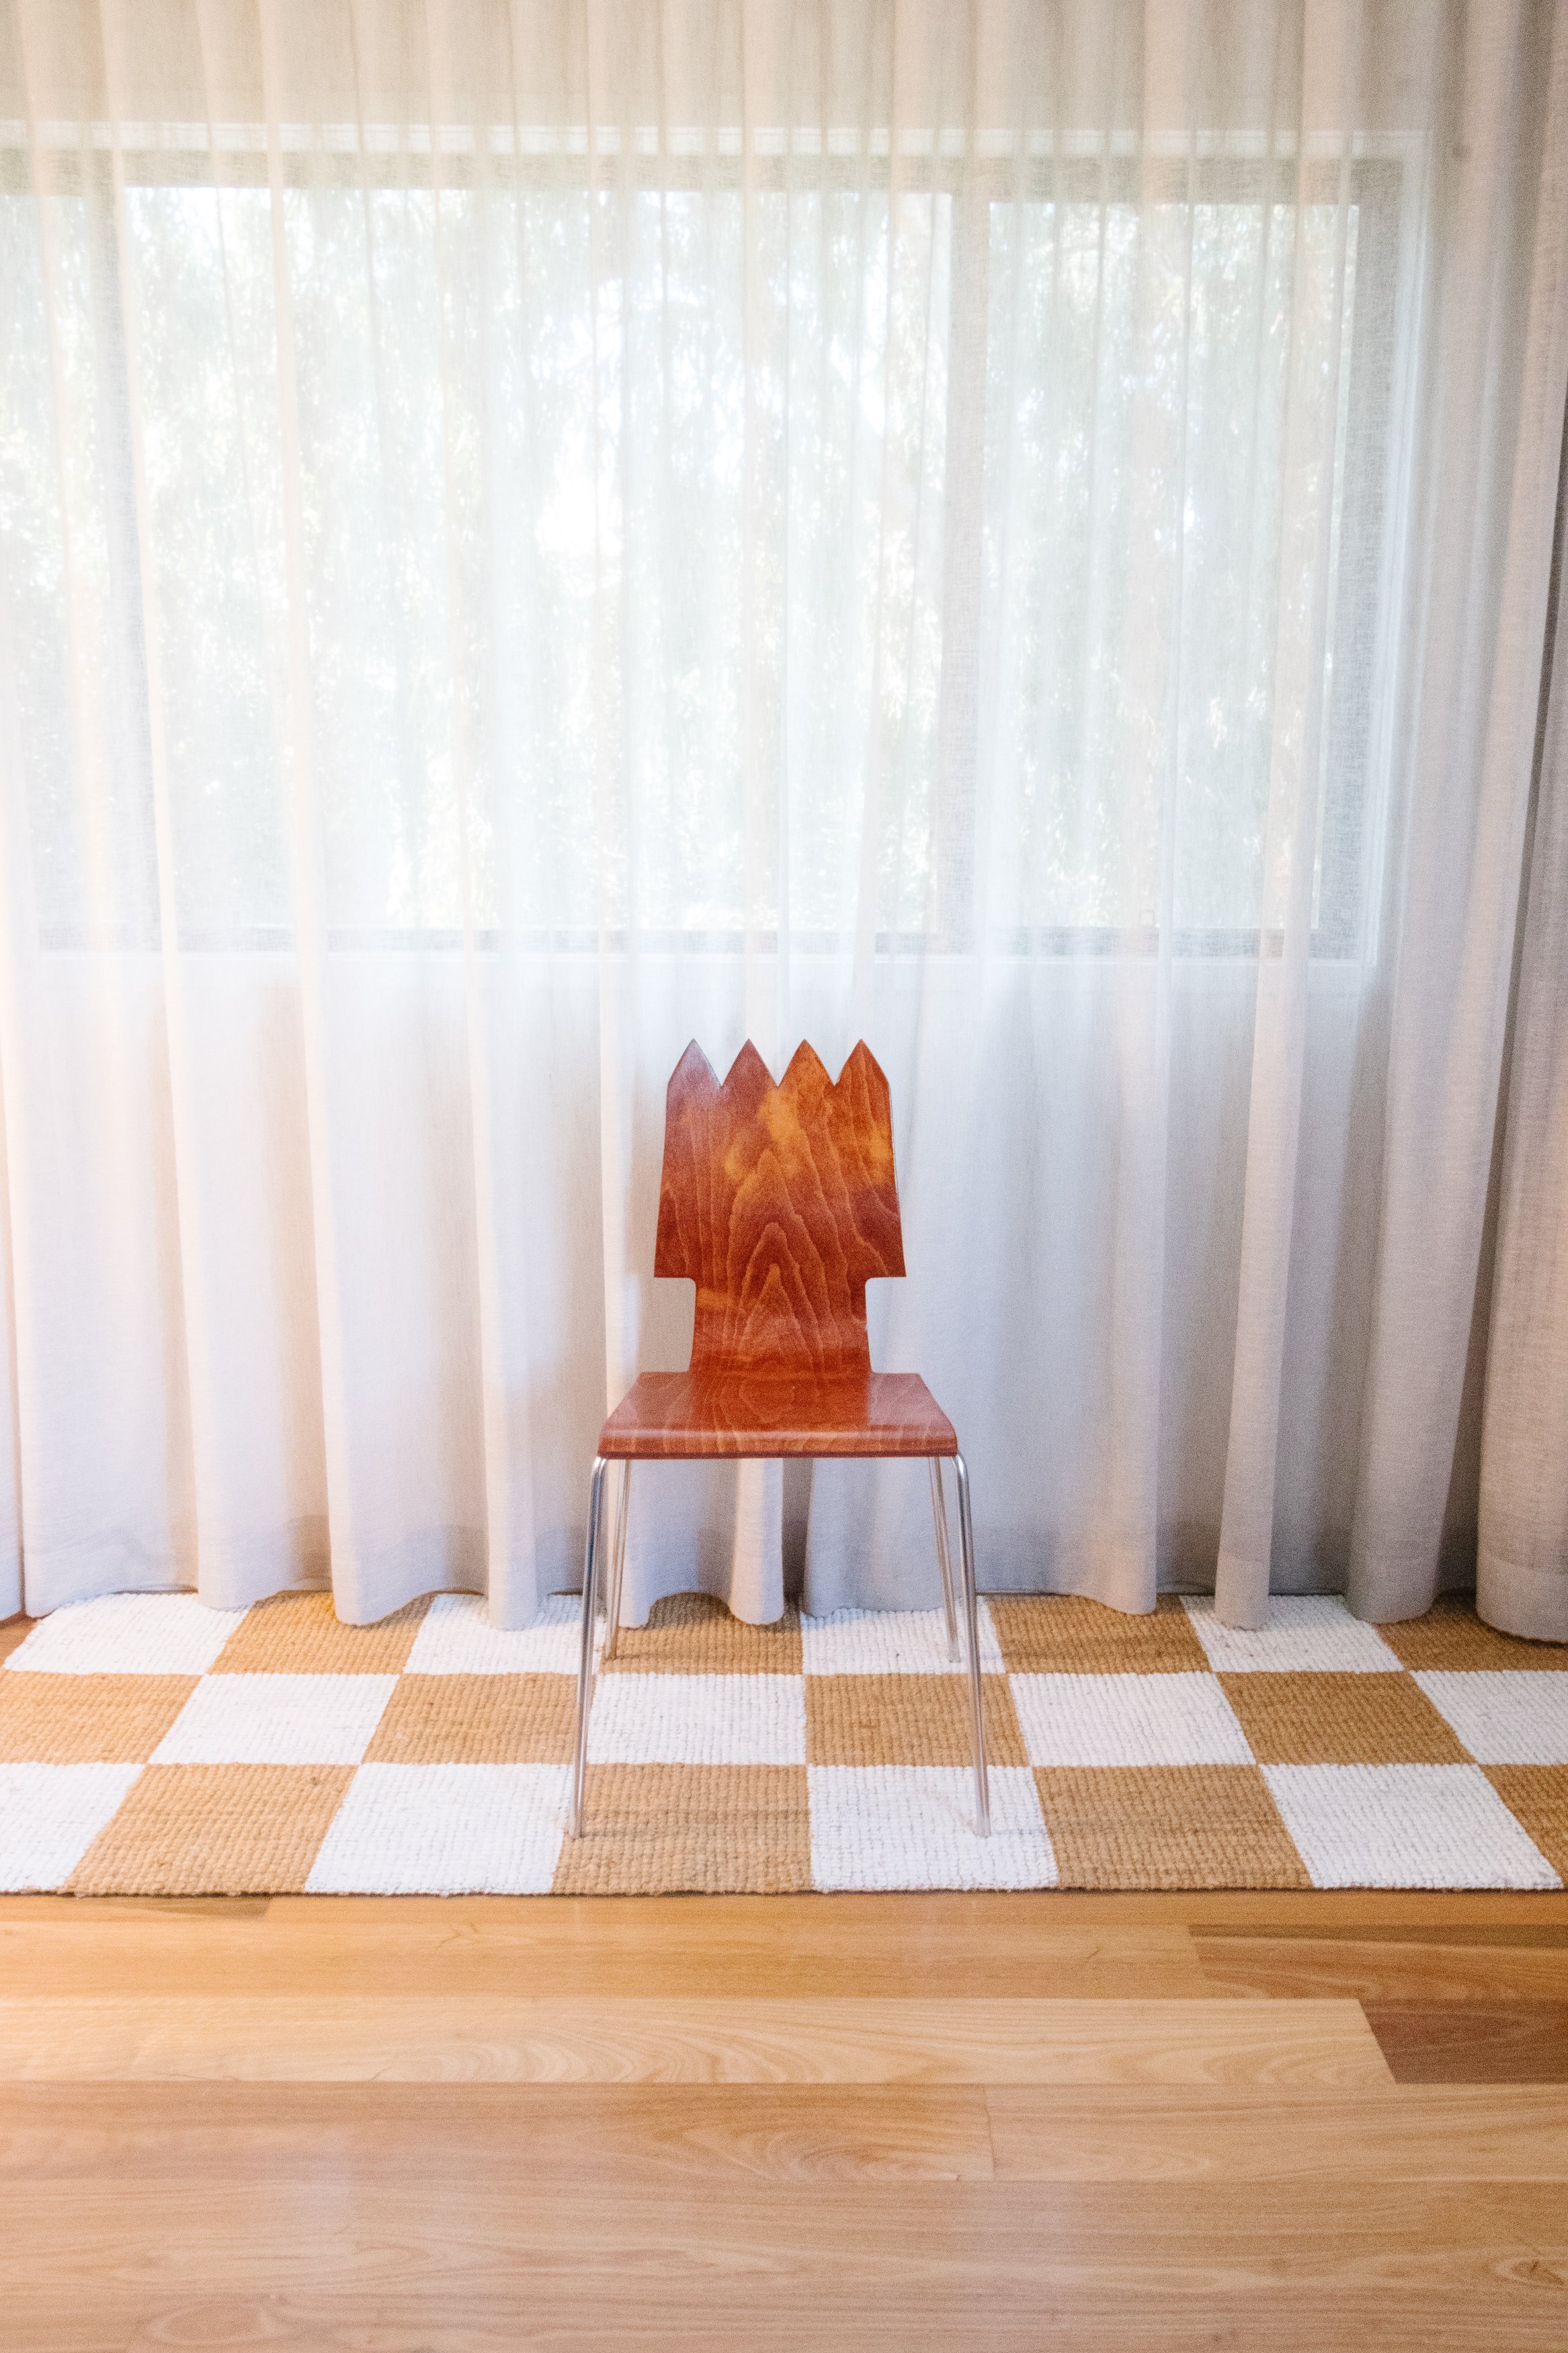
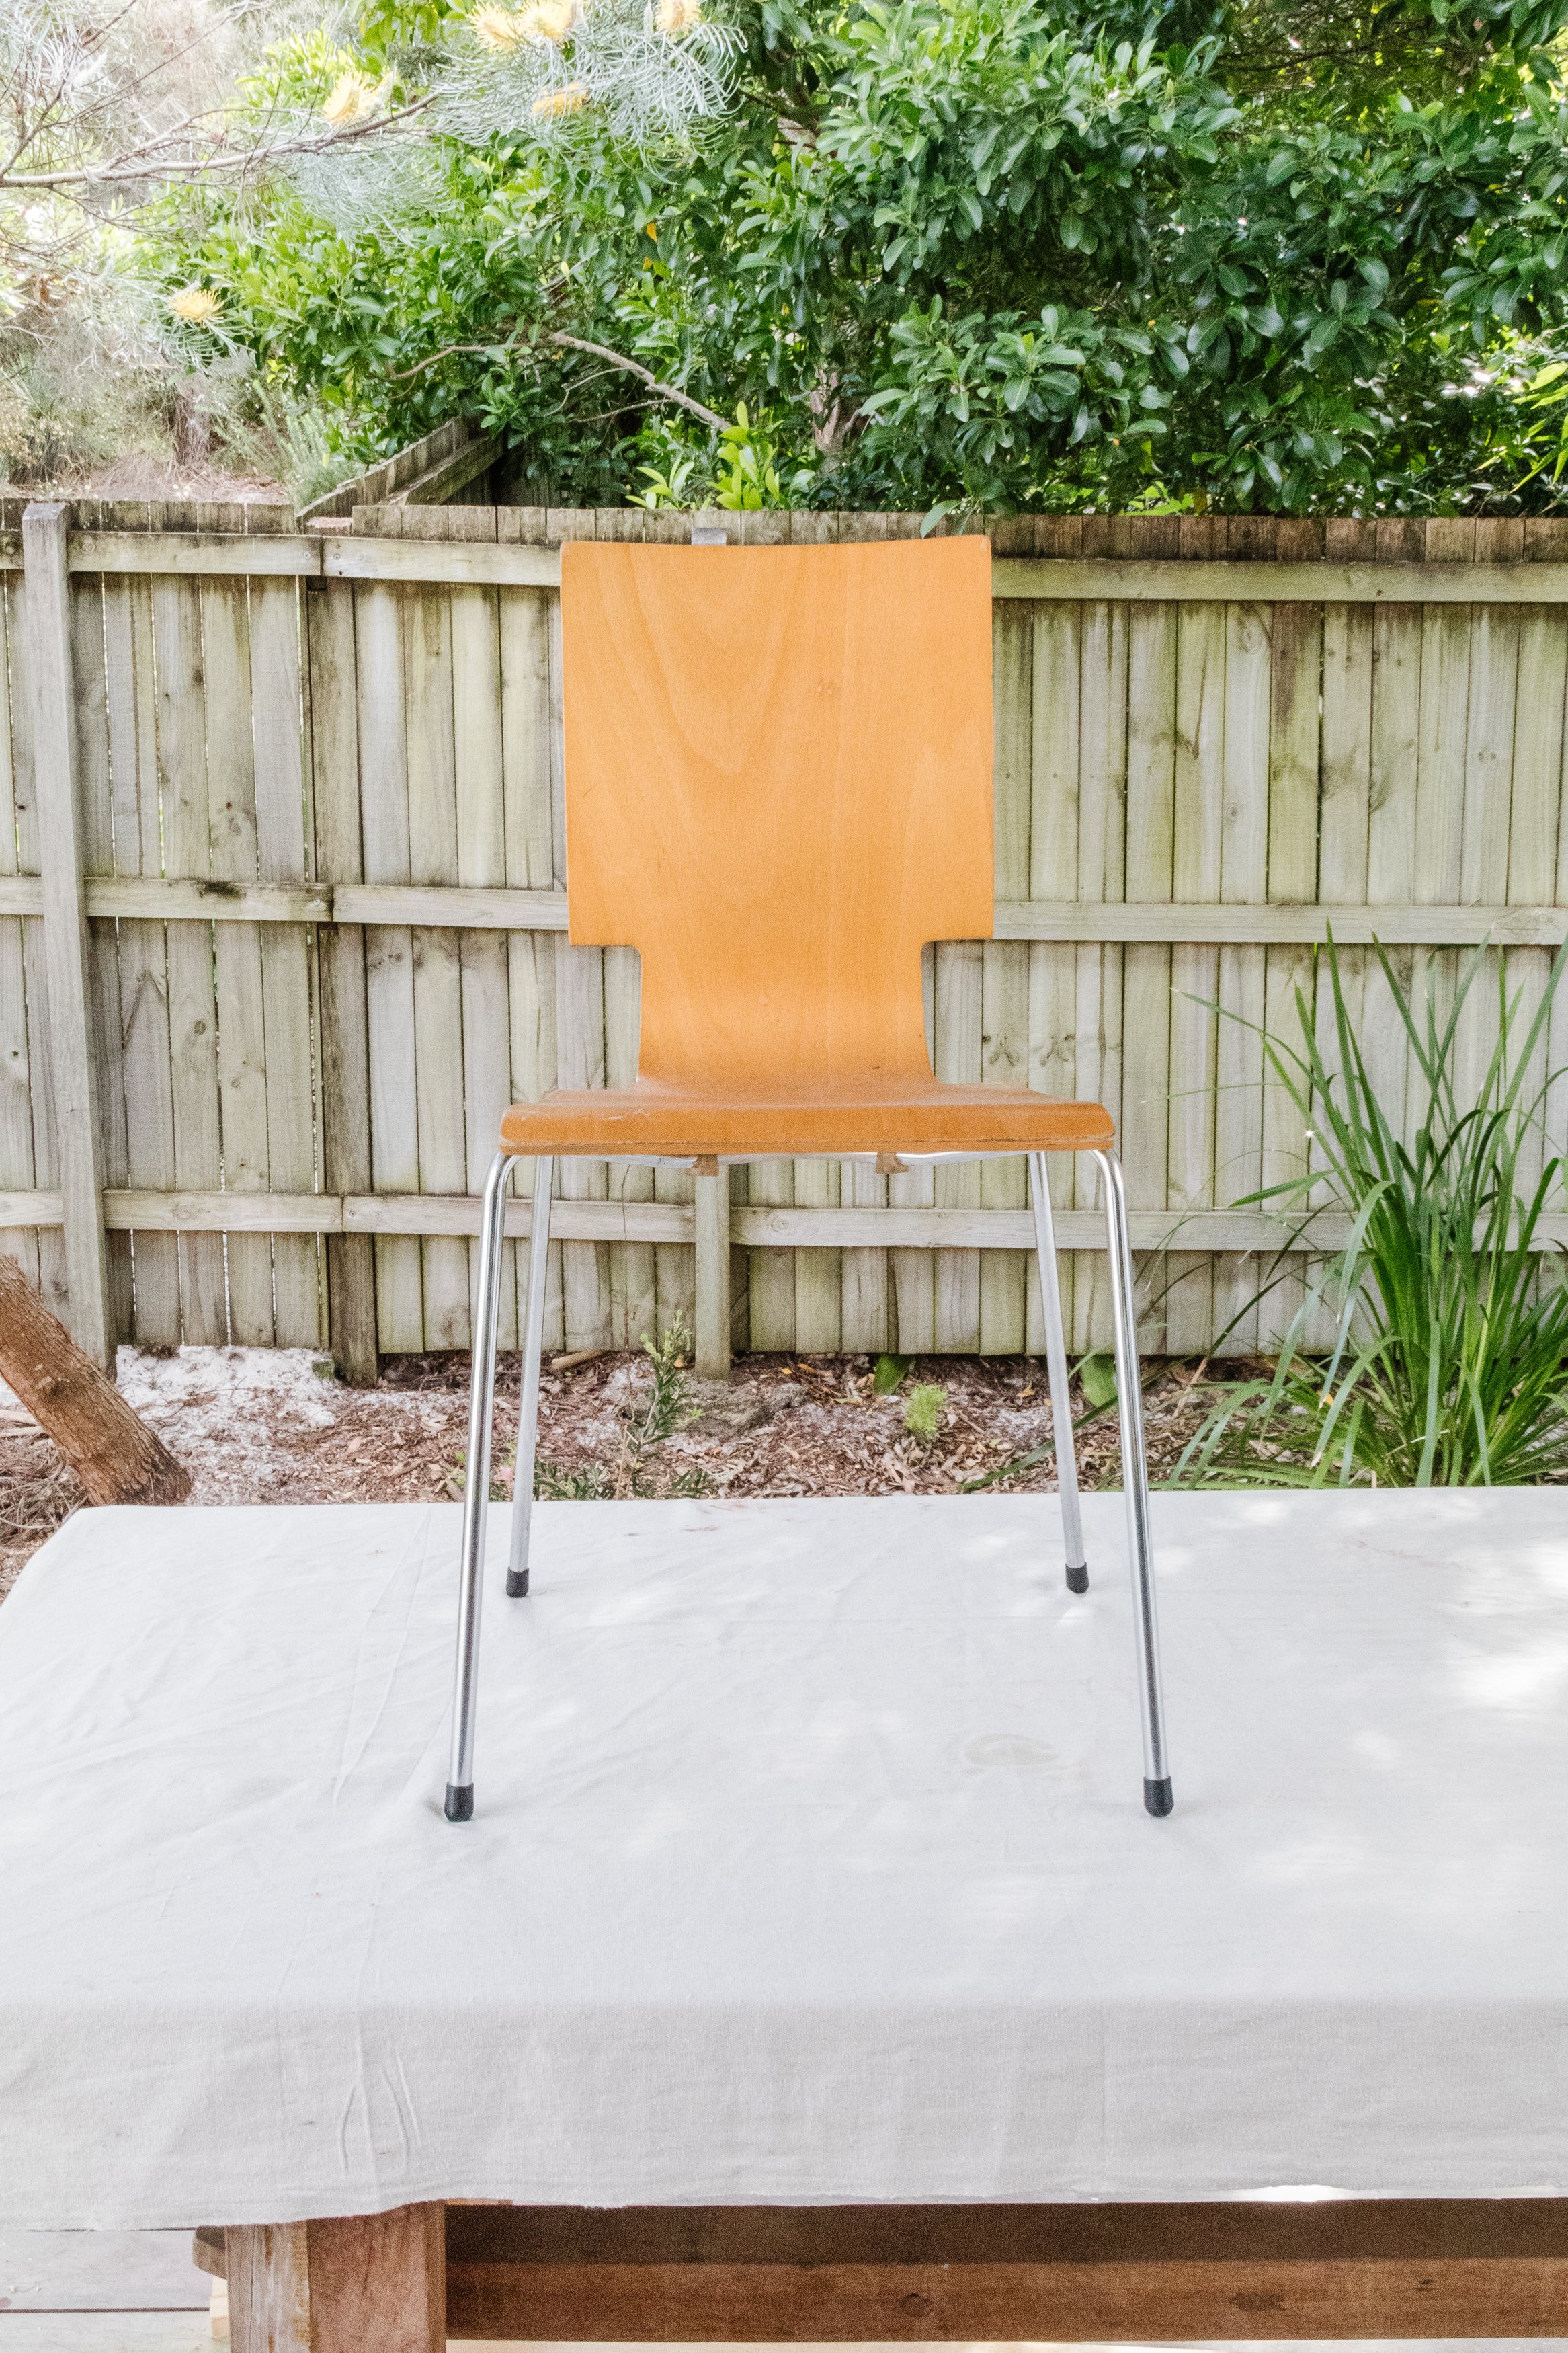
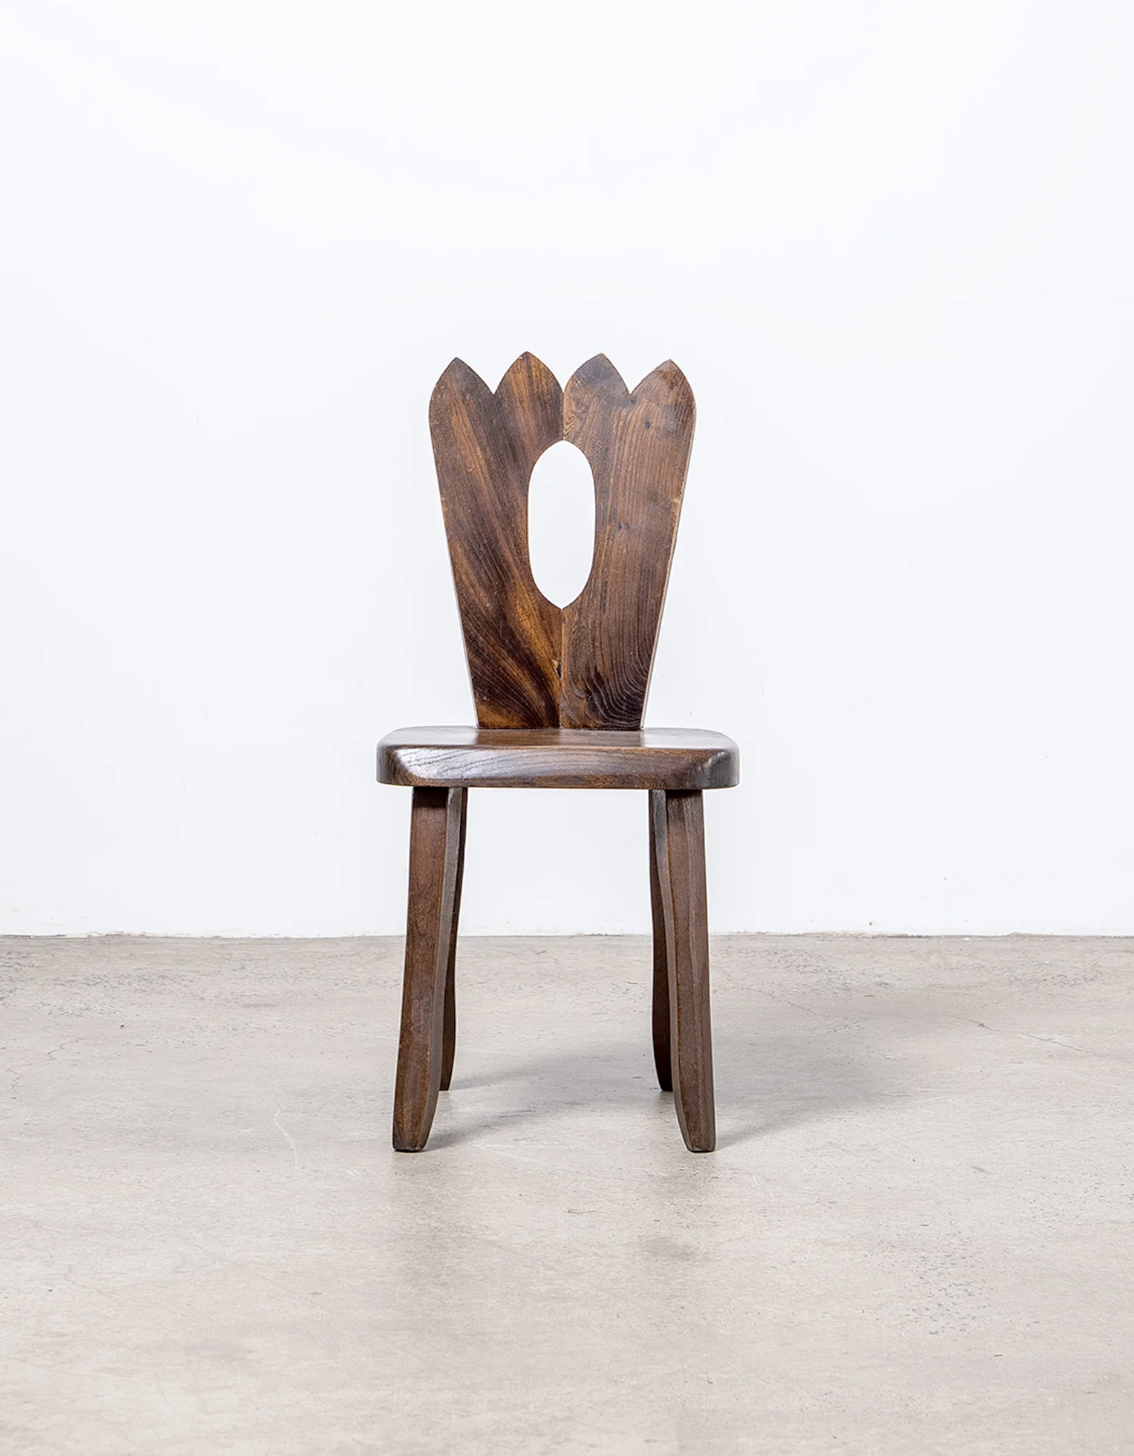
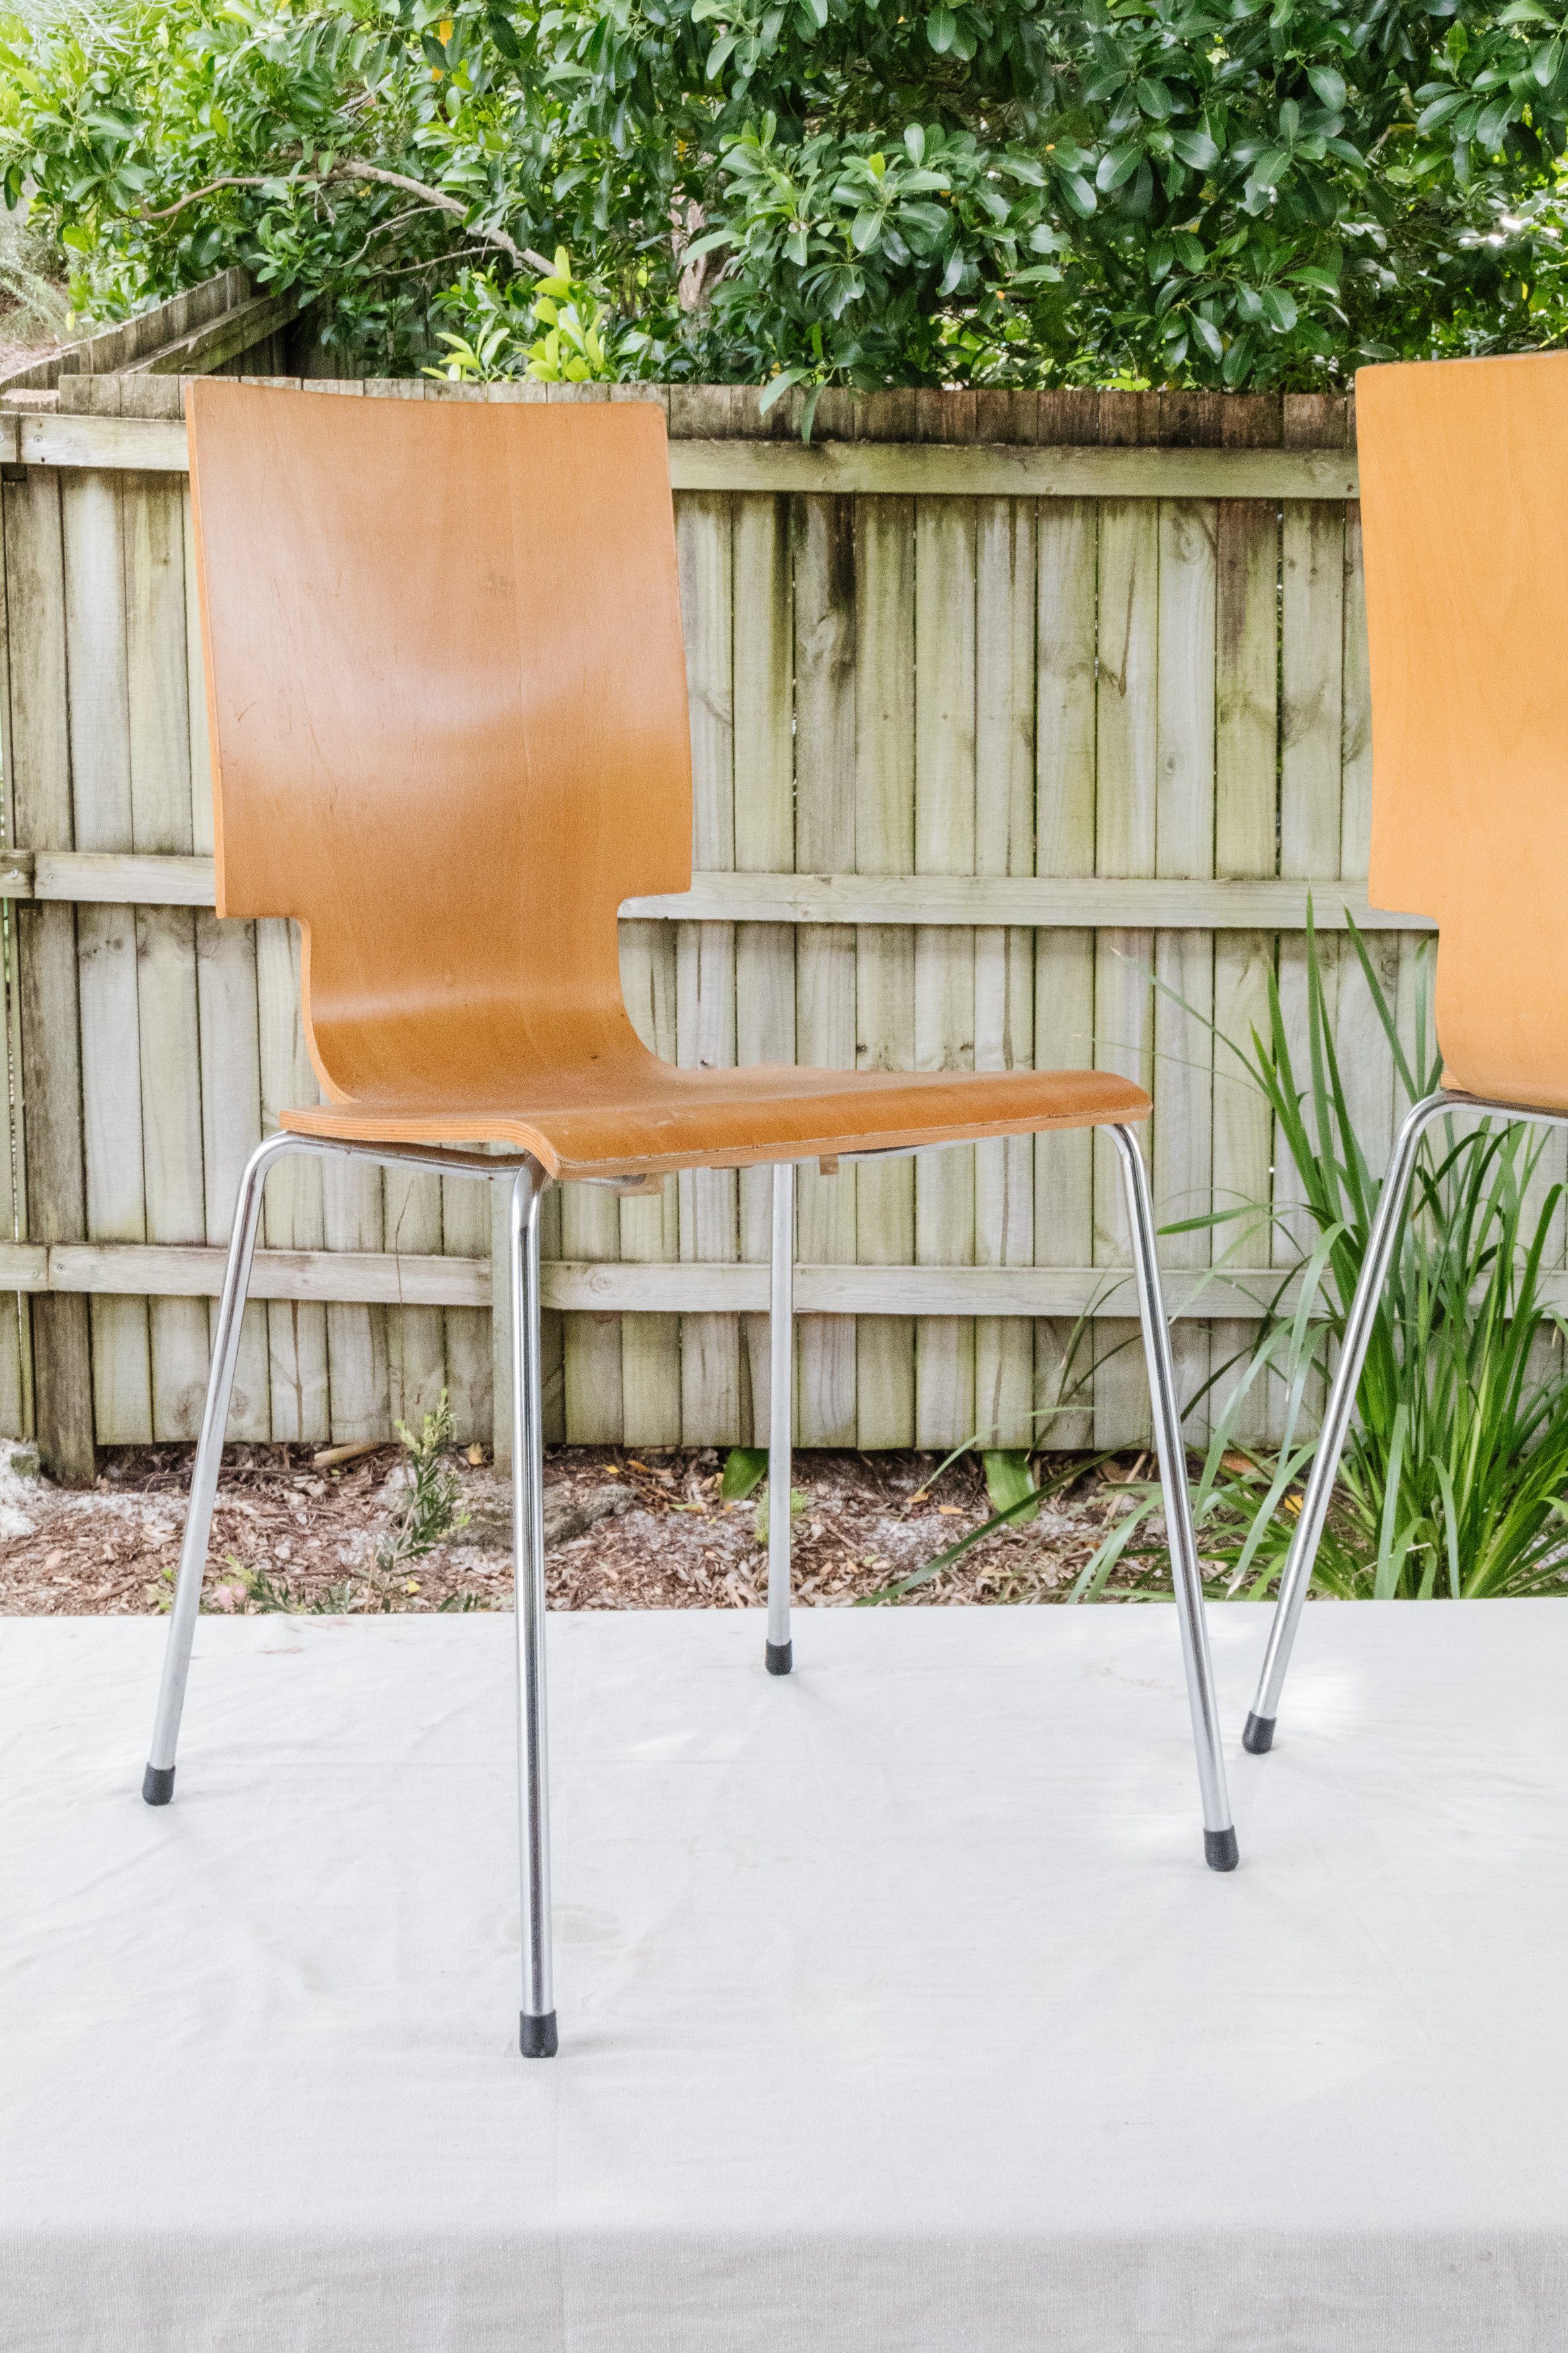
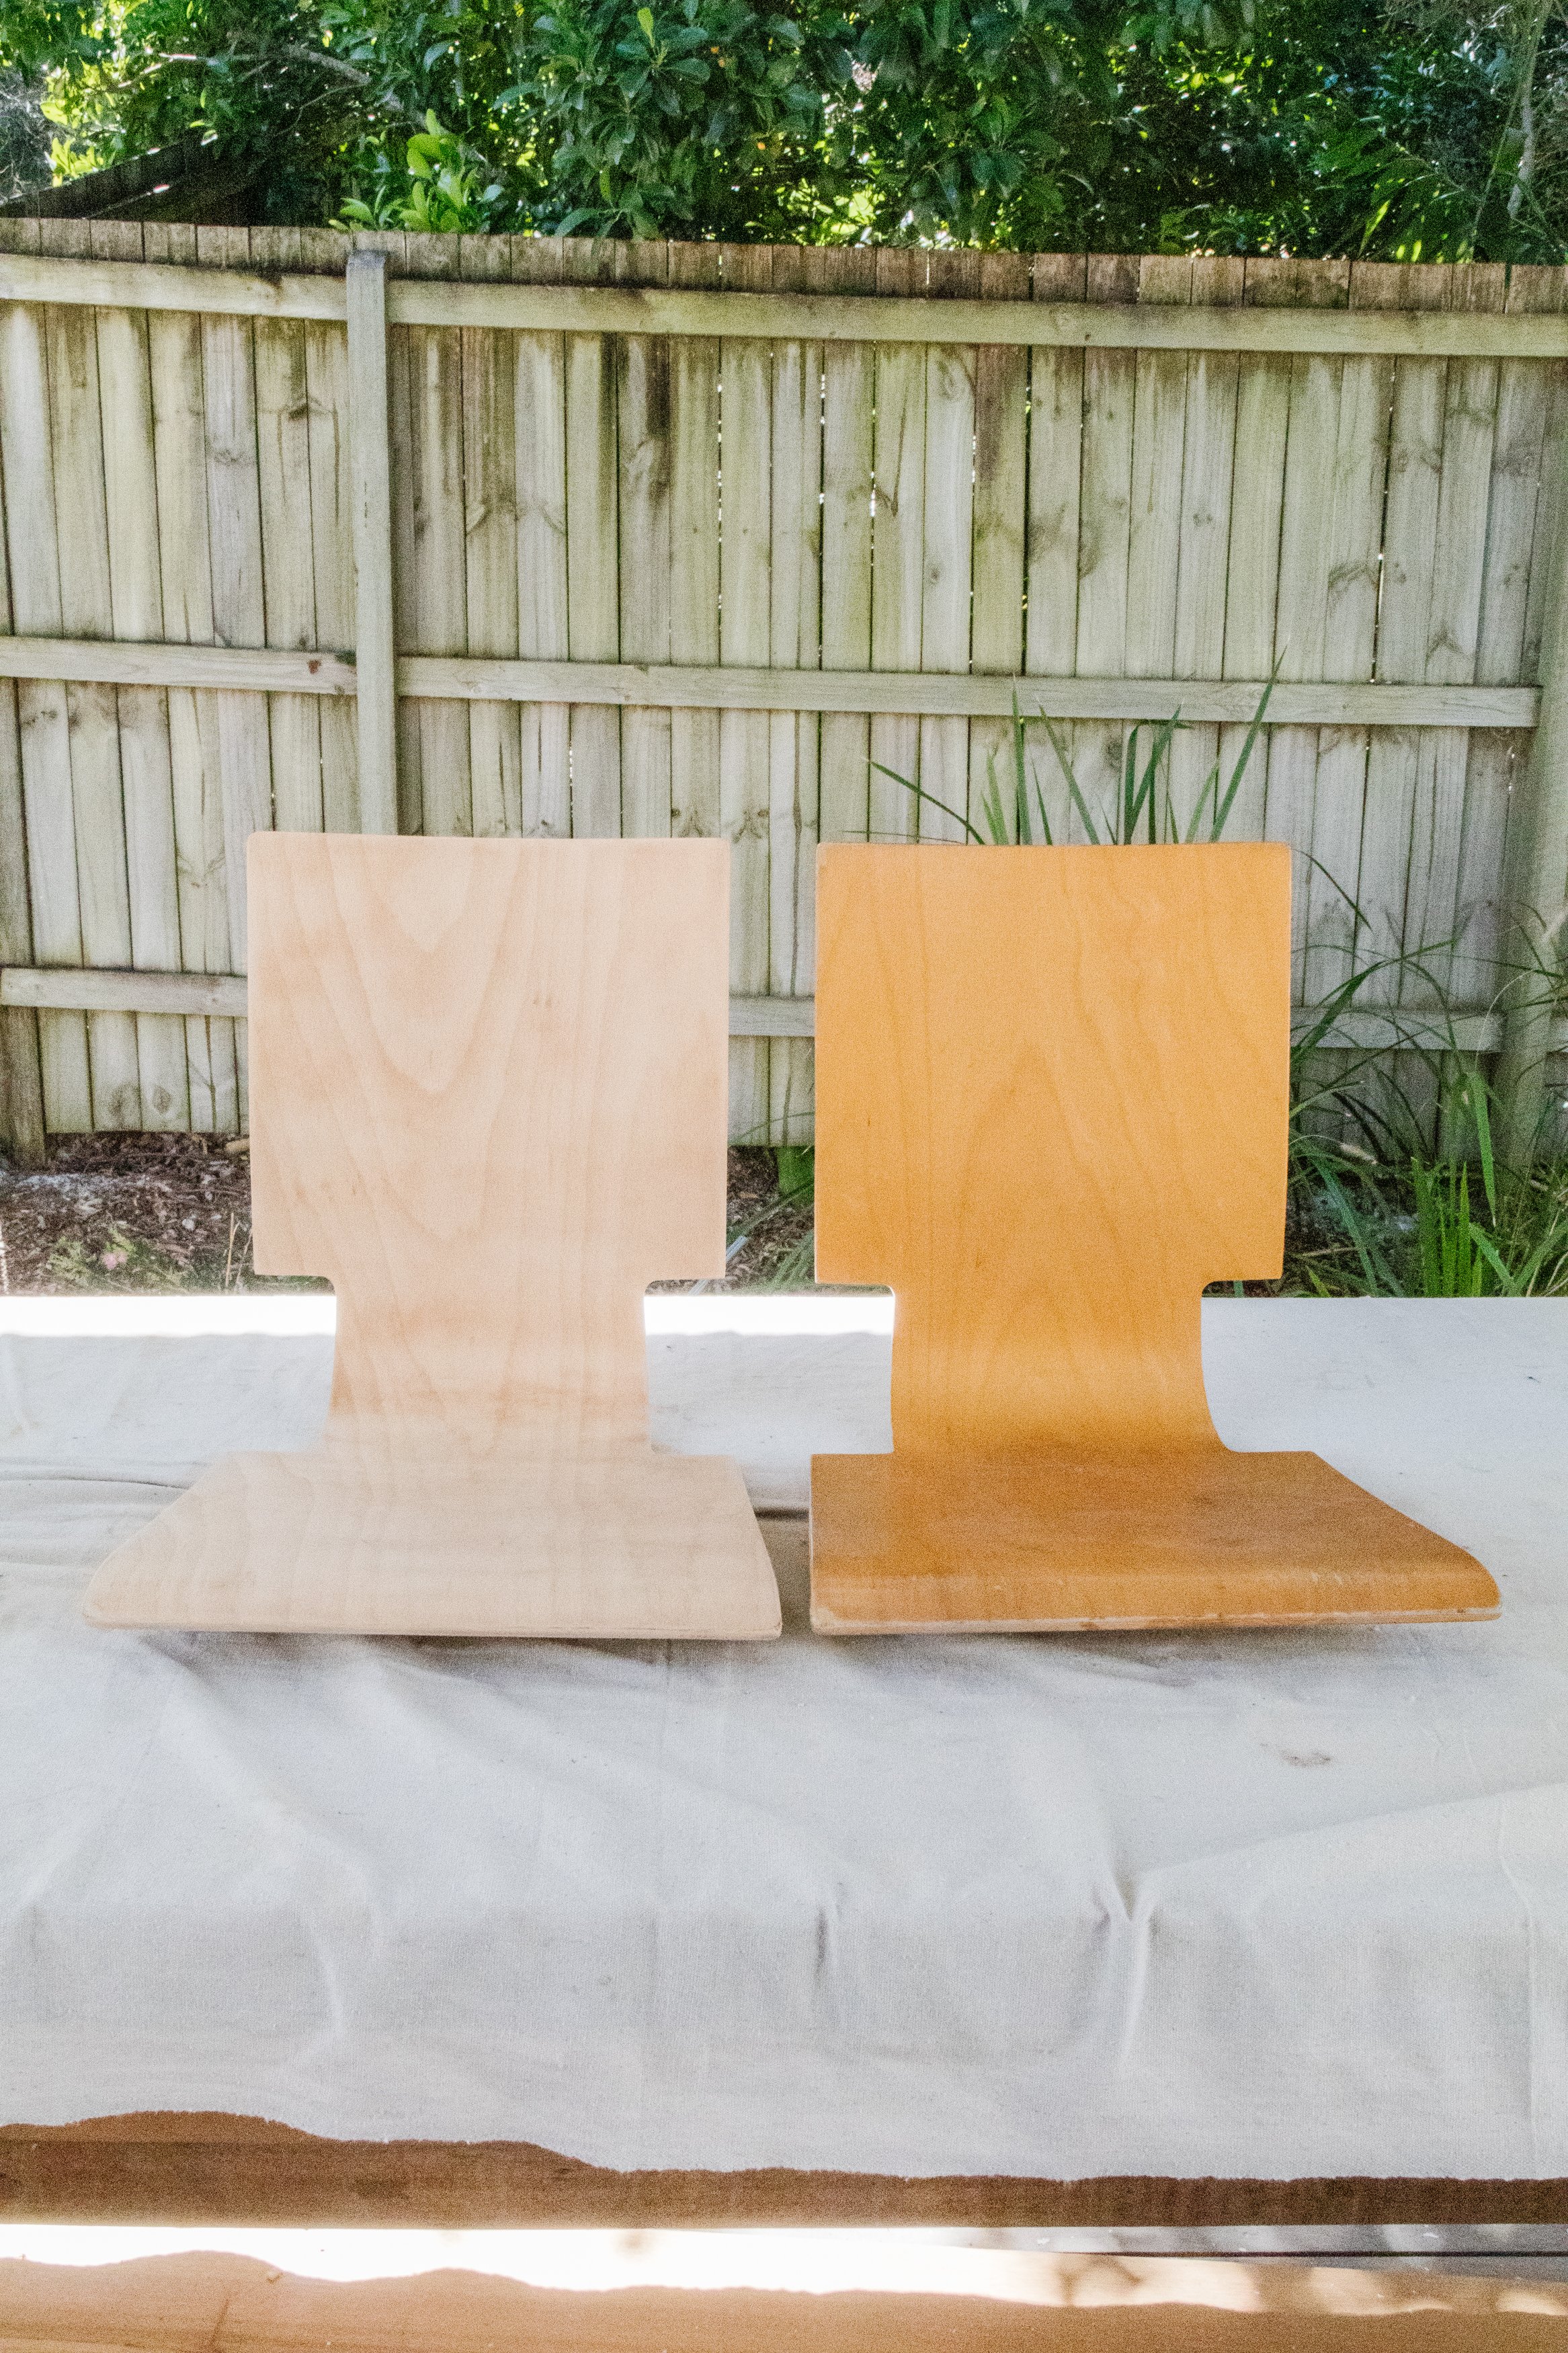
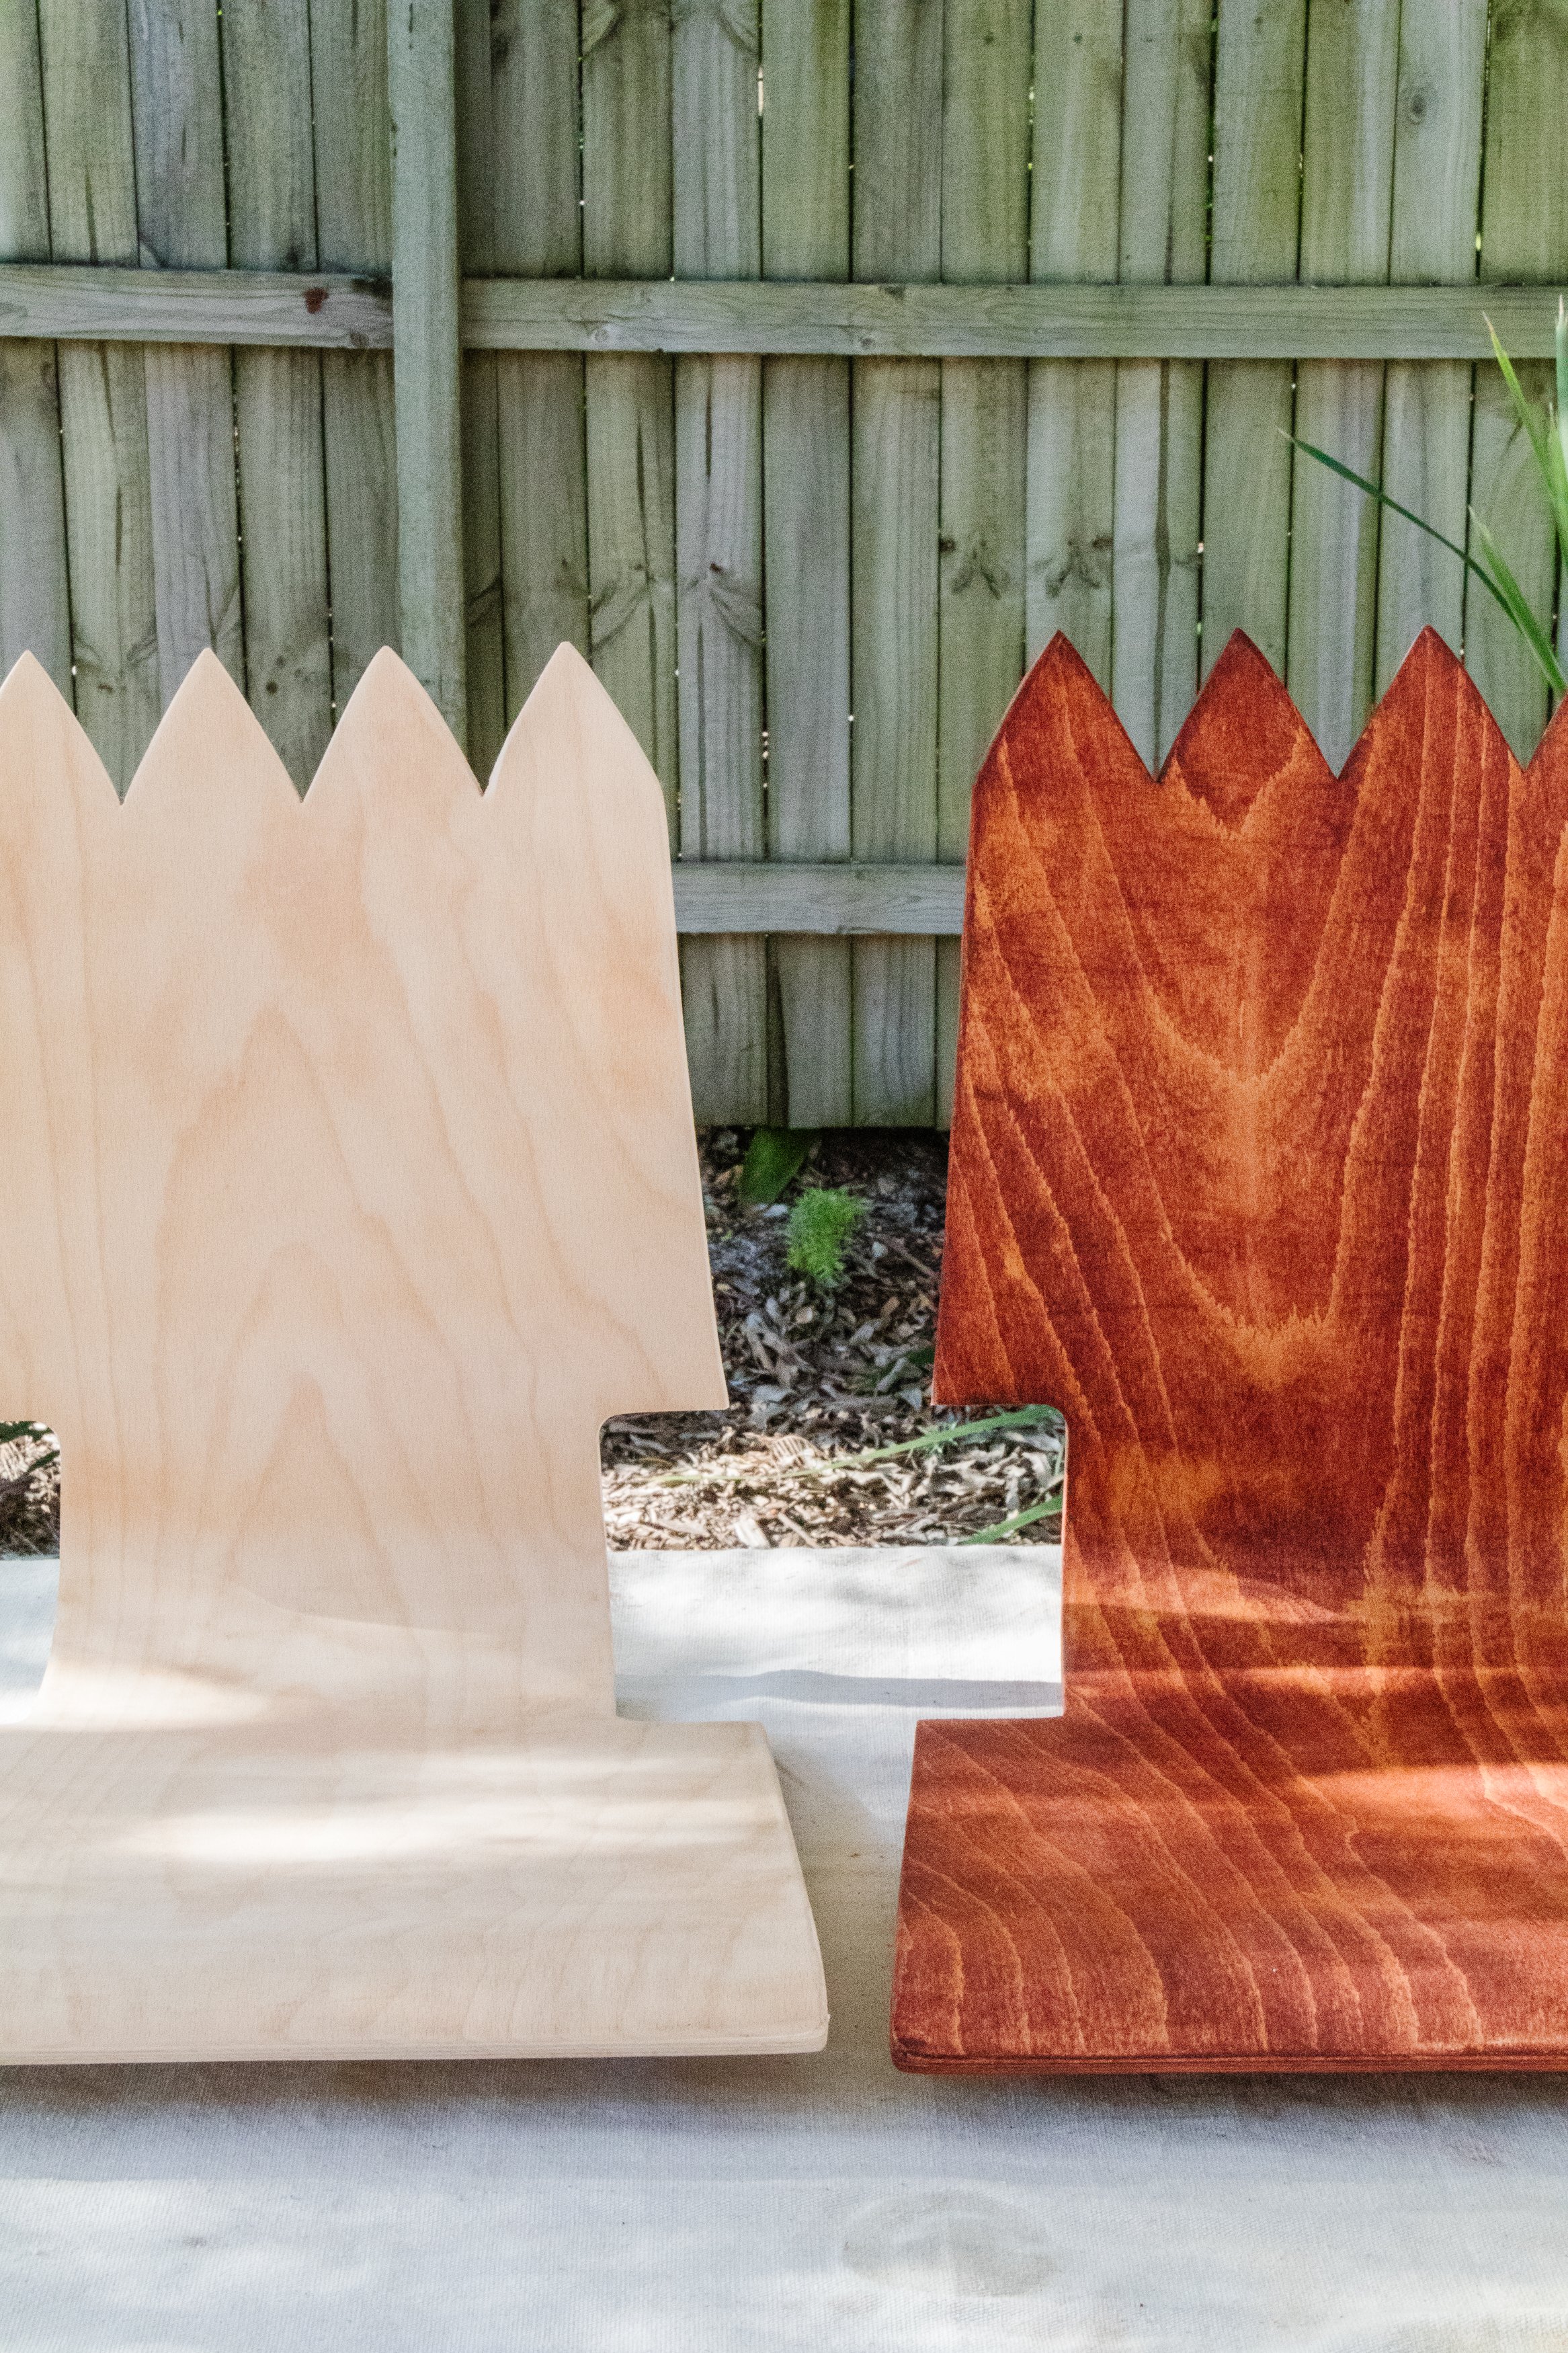
I found these boring conference room chairs at a recycle centre and thought they needed a bit of a glow up. I felt really inspired by the design of the 1950s Brutalist Crown Chair, so after discovering the seats had the most beautiful wood grain, I spent some time drawing a sculptural design directly onto the timber which I cut out using my jigsaw. To make the chairs more bespoke, I softened the timber edges using my sander and then I applied a custom stain and a glossy varnish to highlight the beautiful wood grain. I also removed the grime and rust from the chrome leg frames using aluminium foil and water. And that's it!
To see how this project come to life, watch this video.
Before & After


Project Details
♻️ Making: Upcycled Sculptural Chair
🕒 Project Time Estimate: 2 hours (not including stain and varnish drying time)
💰 Materials Cost: Under $30
🛠️ Skill Level: Beginner to Intermediate, depending if you’ve used a jigsaw before. If you haven’t used a jigsaw, feel free to read my free guide “Home DIY Series: How To Use A Jigsaw”.
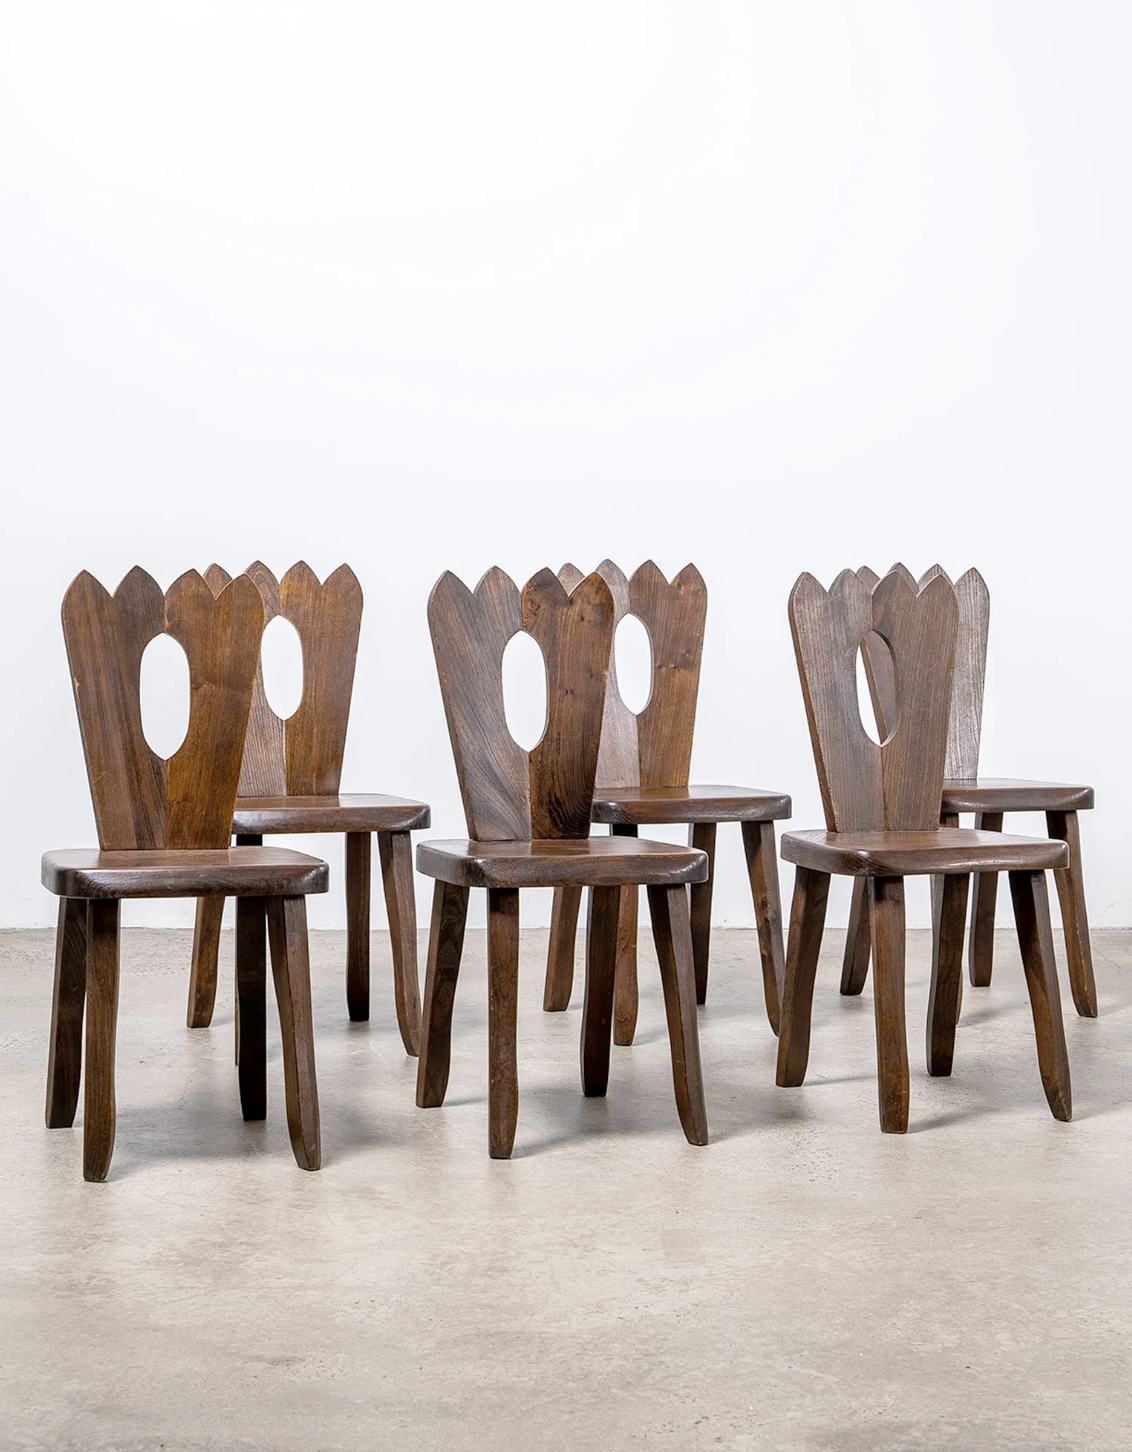
My Inspiration: 1950s Brutalist Crown Chair
Materials
Timber stain
Clear gloss varnish
Tools
Drill & bits
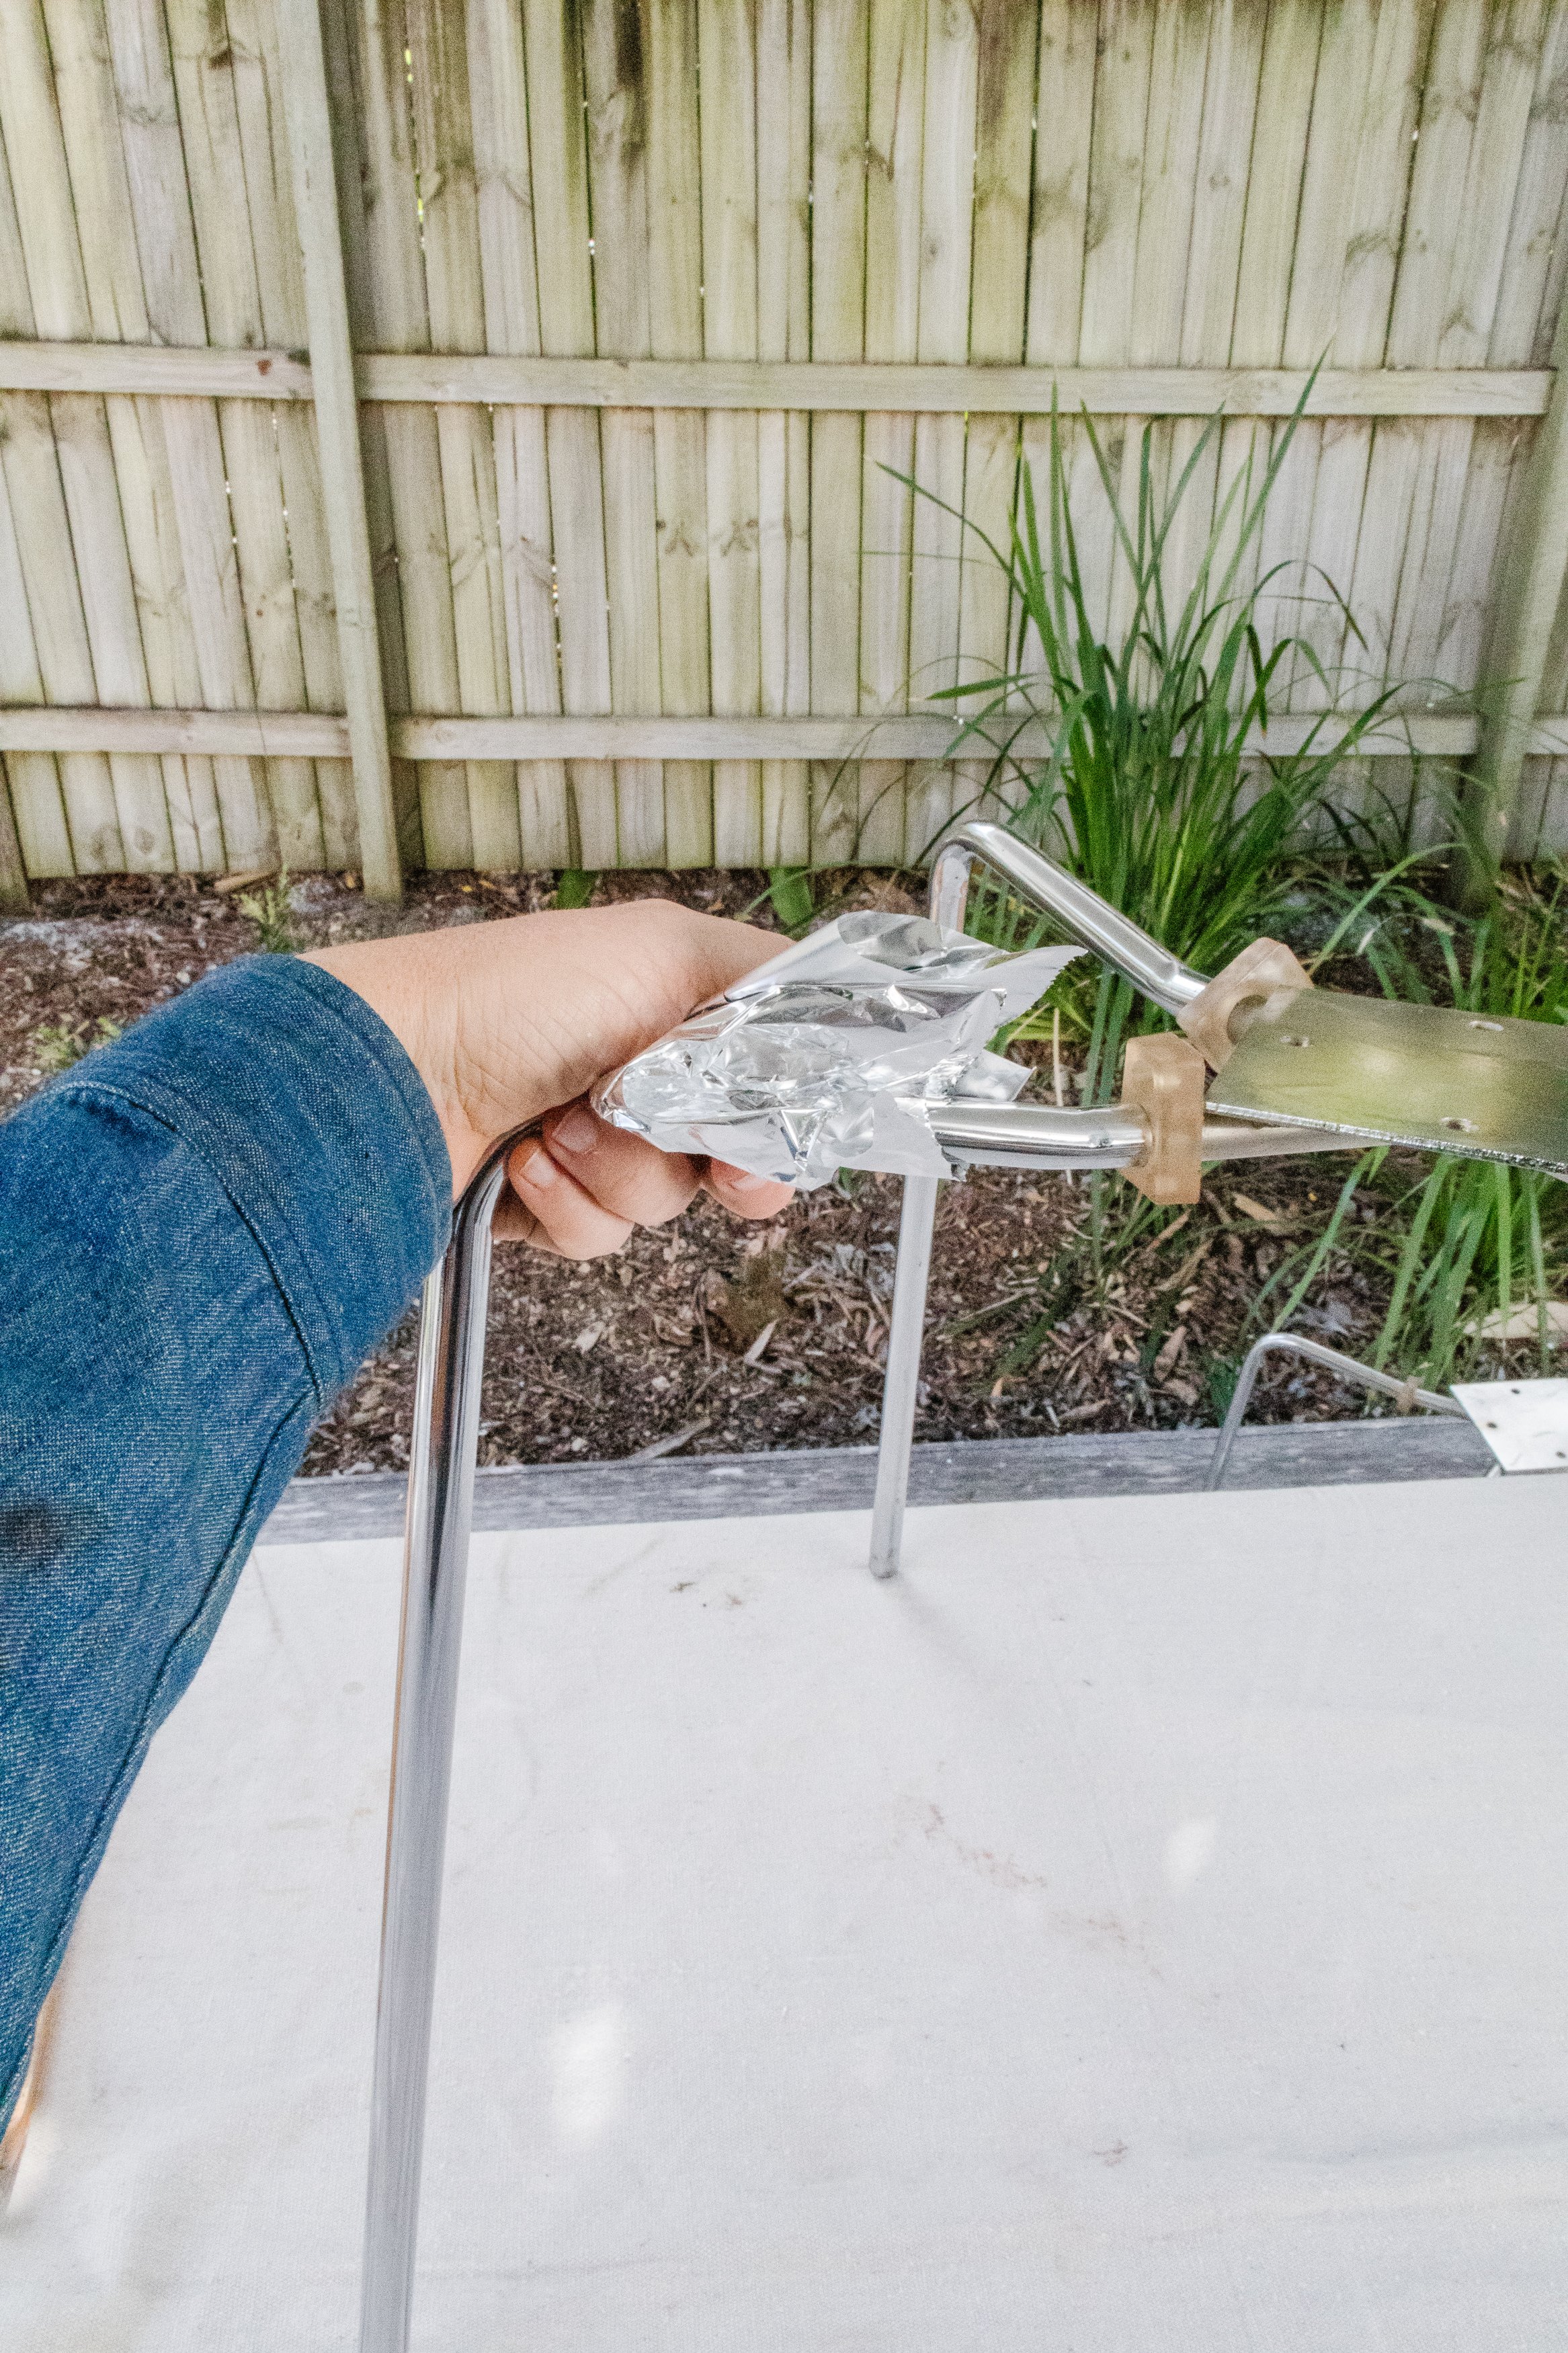
Aluminium foil
Bowl filled with water
2 x Microfibre cloths
Safety mask, safety glasses & ear plugs
Electric orbital sander
Pencil & ruler
Jigsaw
Clamps
Detail sander
Small paint brush
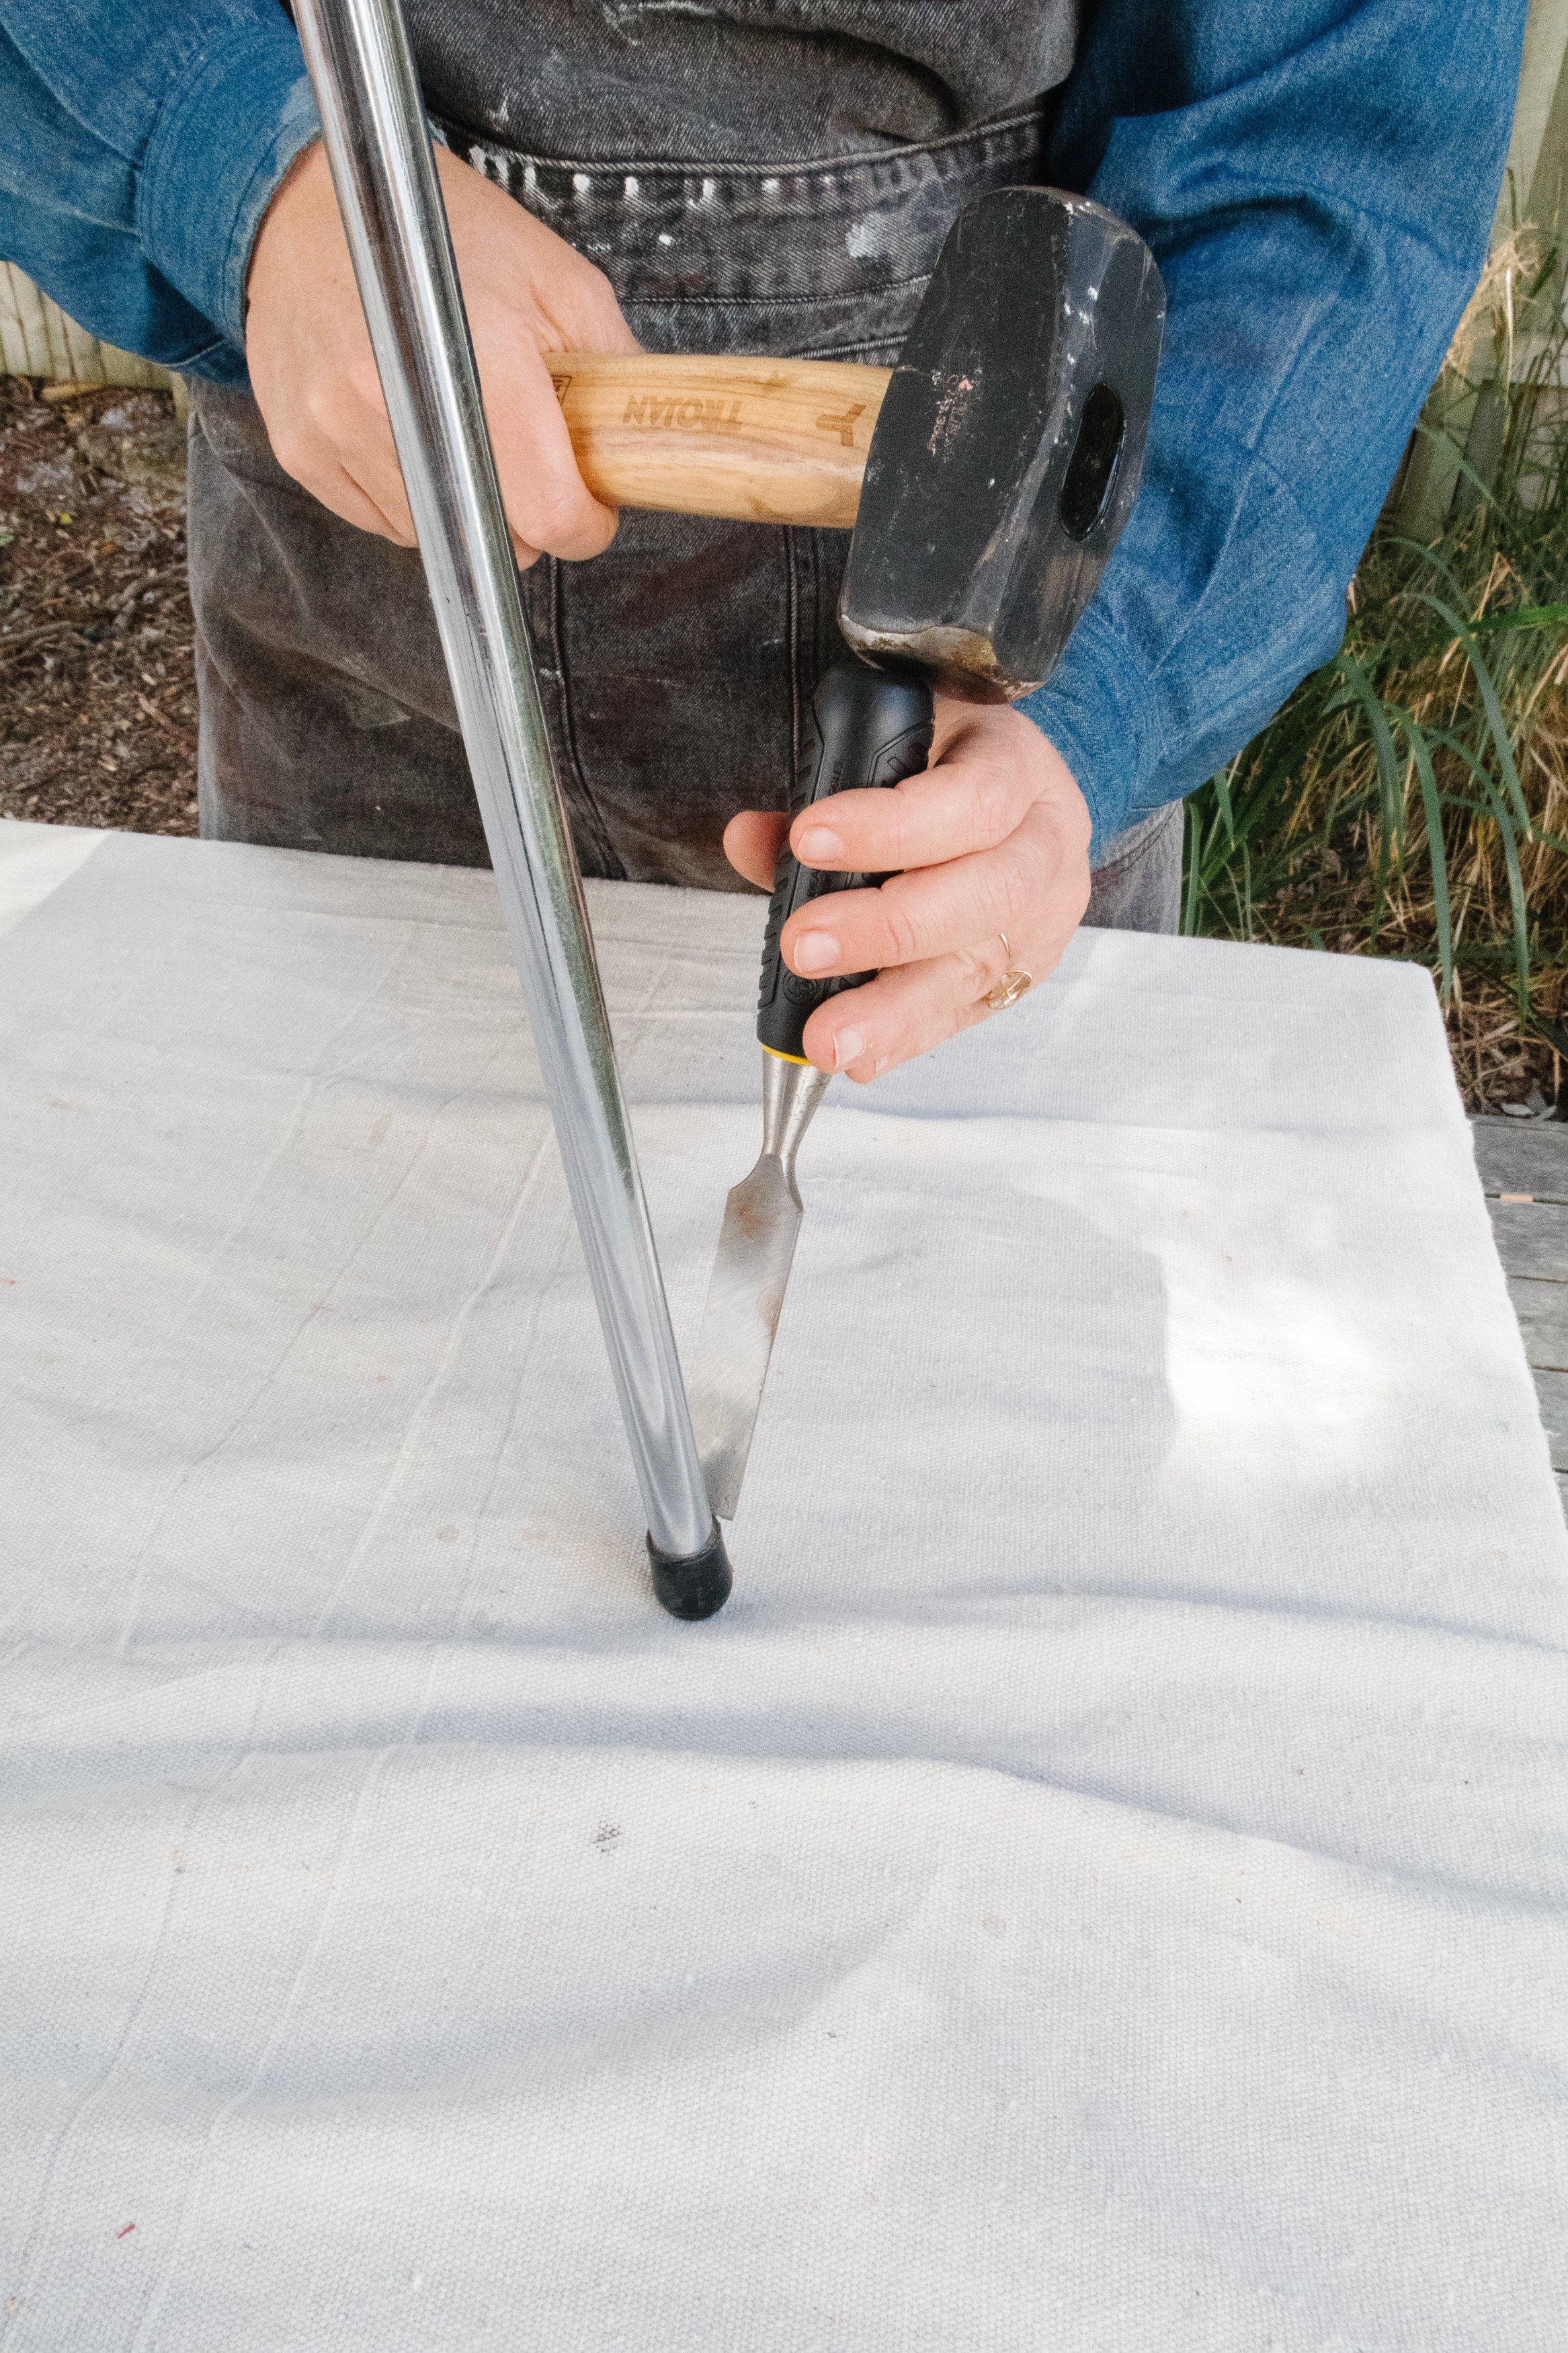
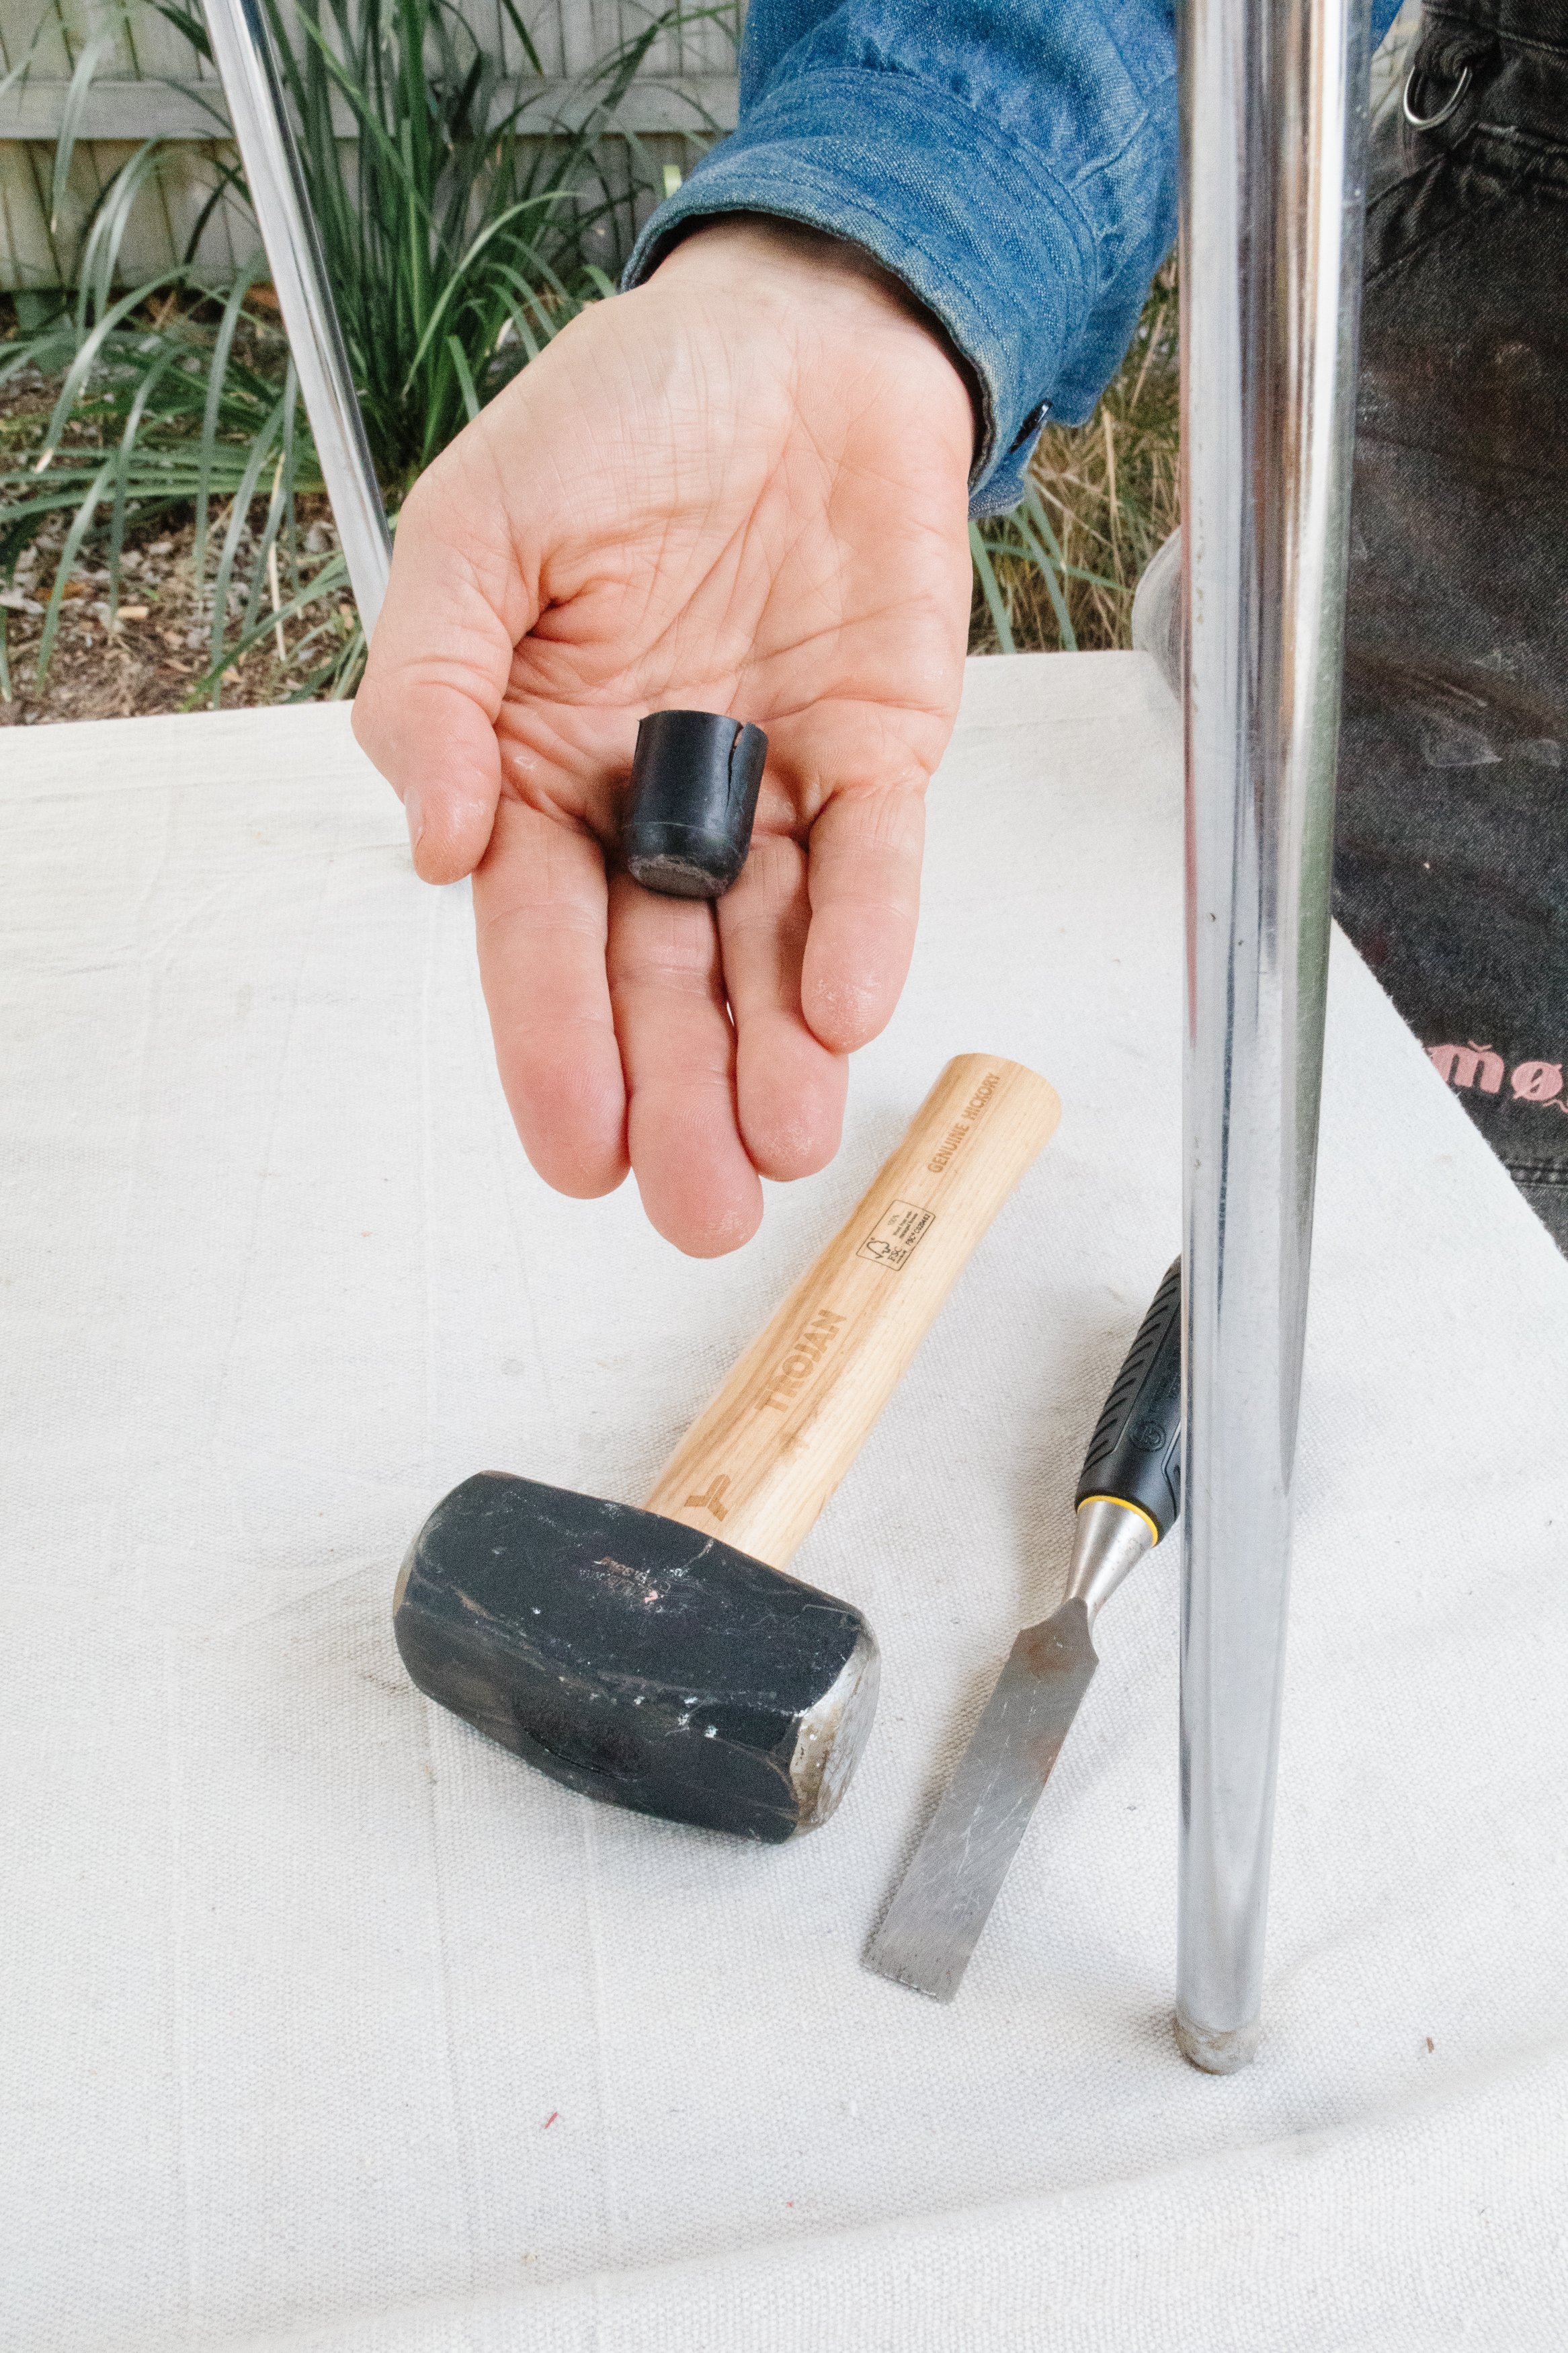
Optional: Hammer & chisel to remove rubber feet from the bottom of the legs

How To
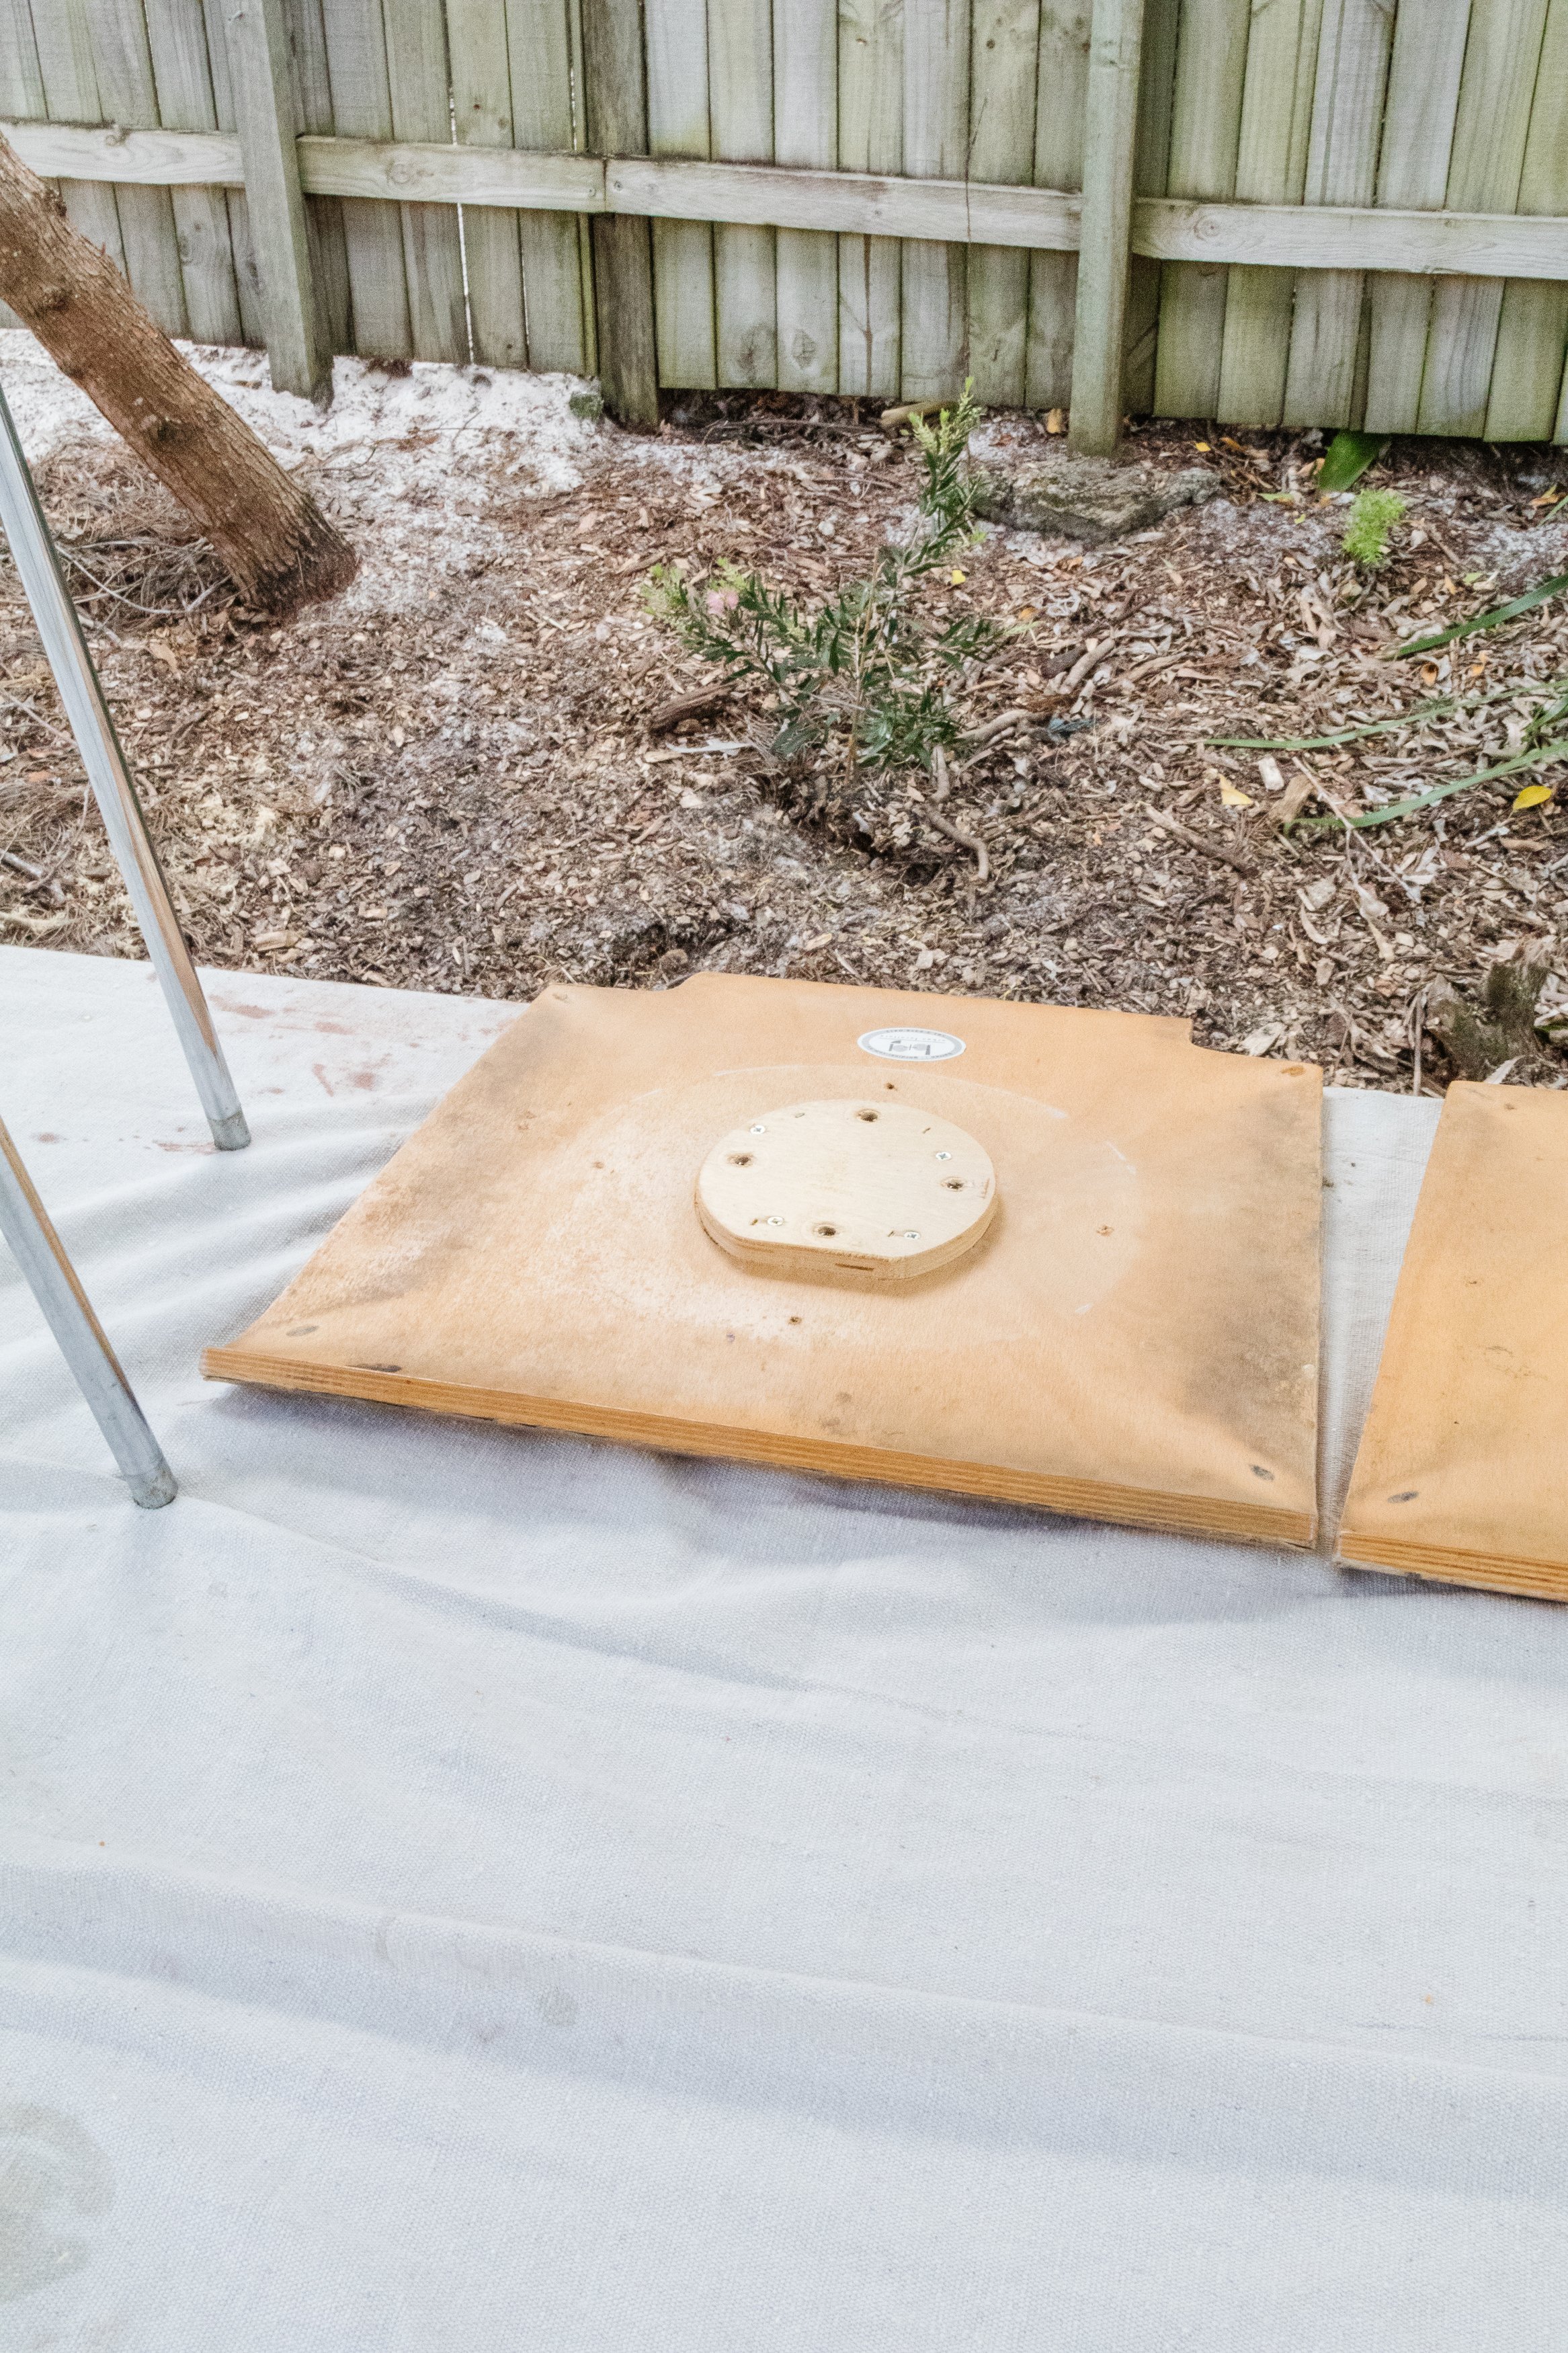
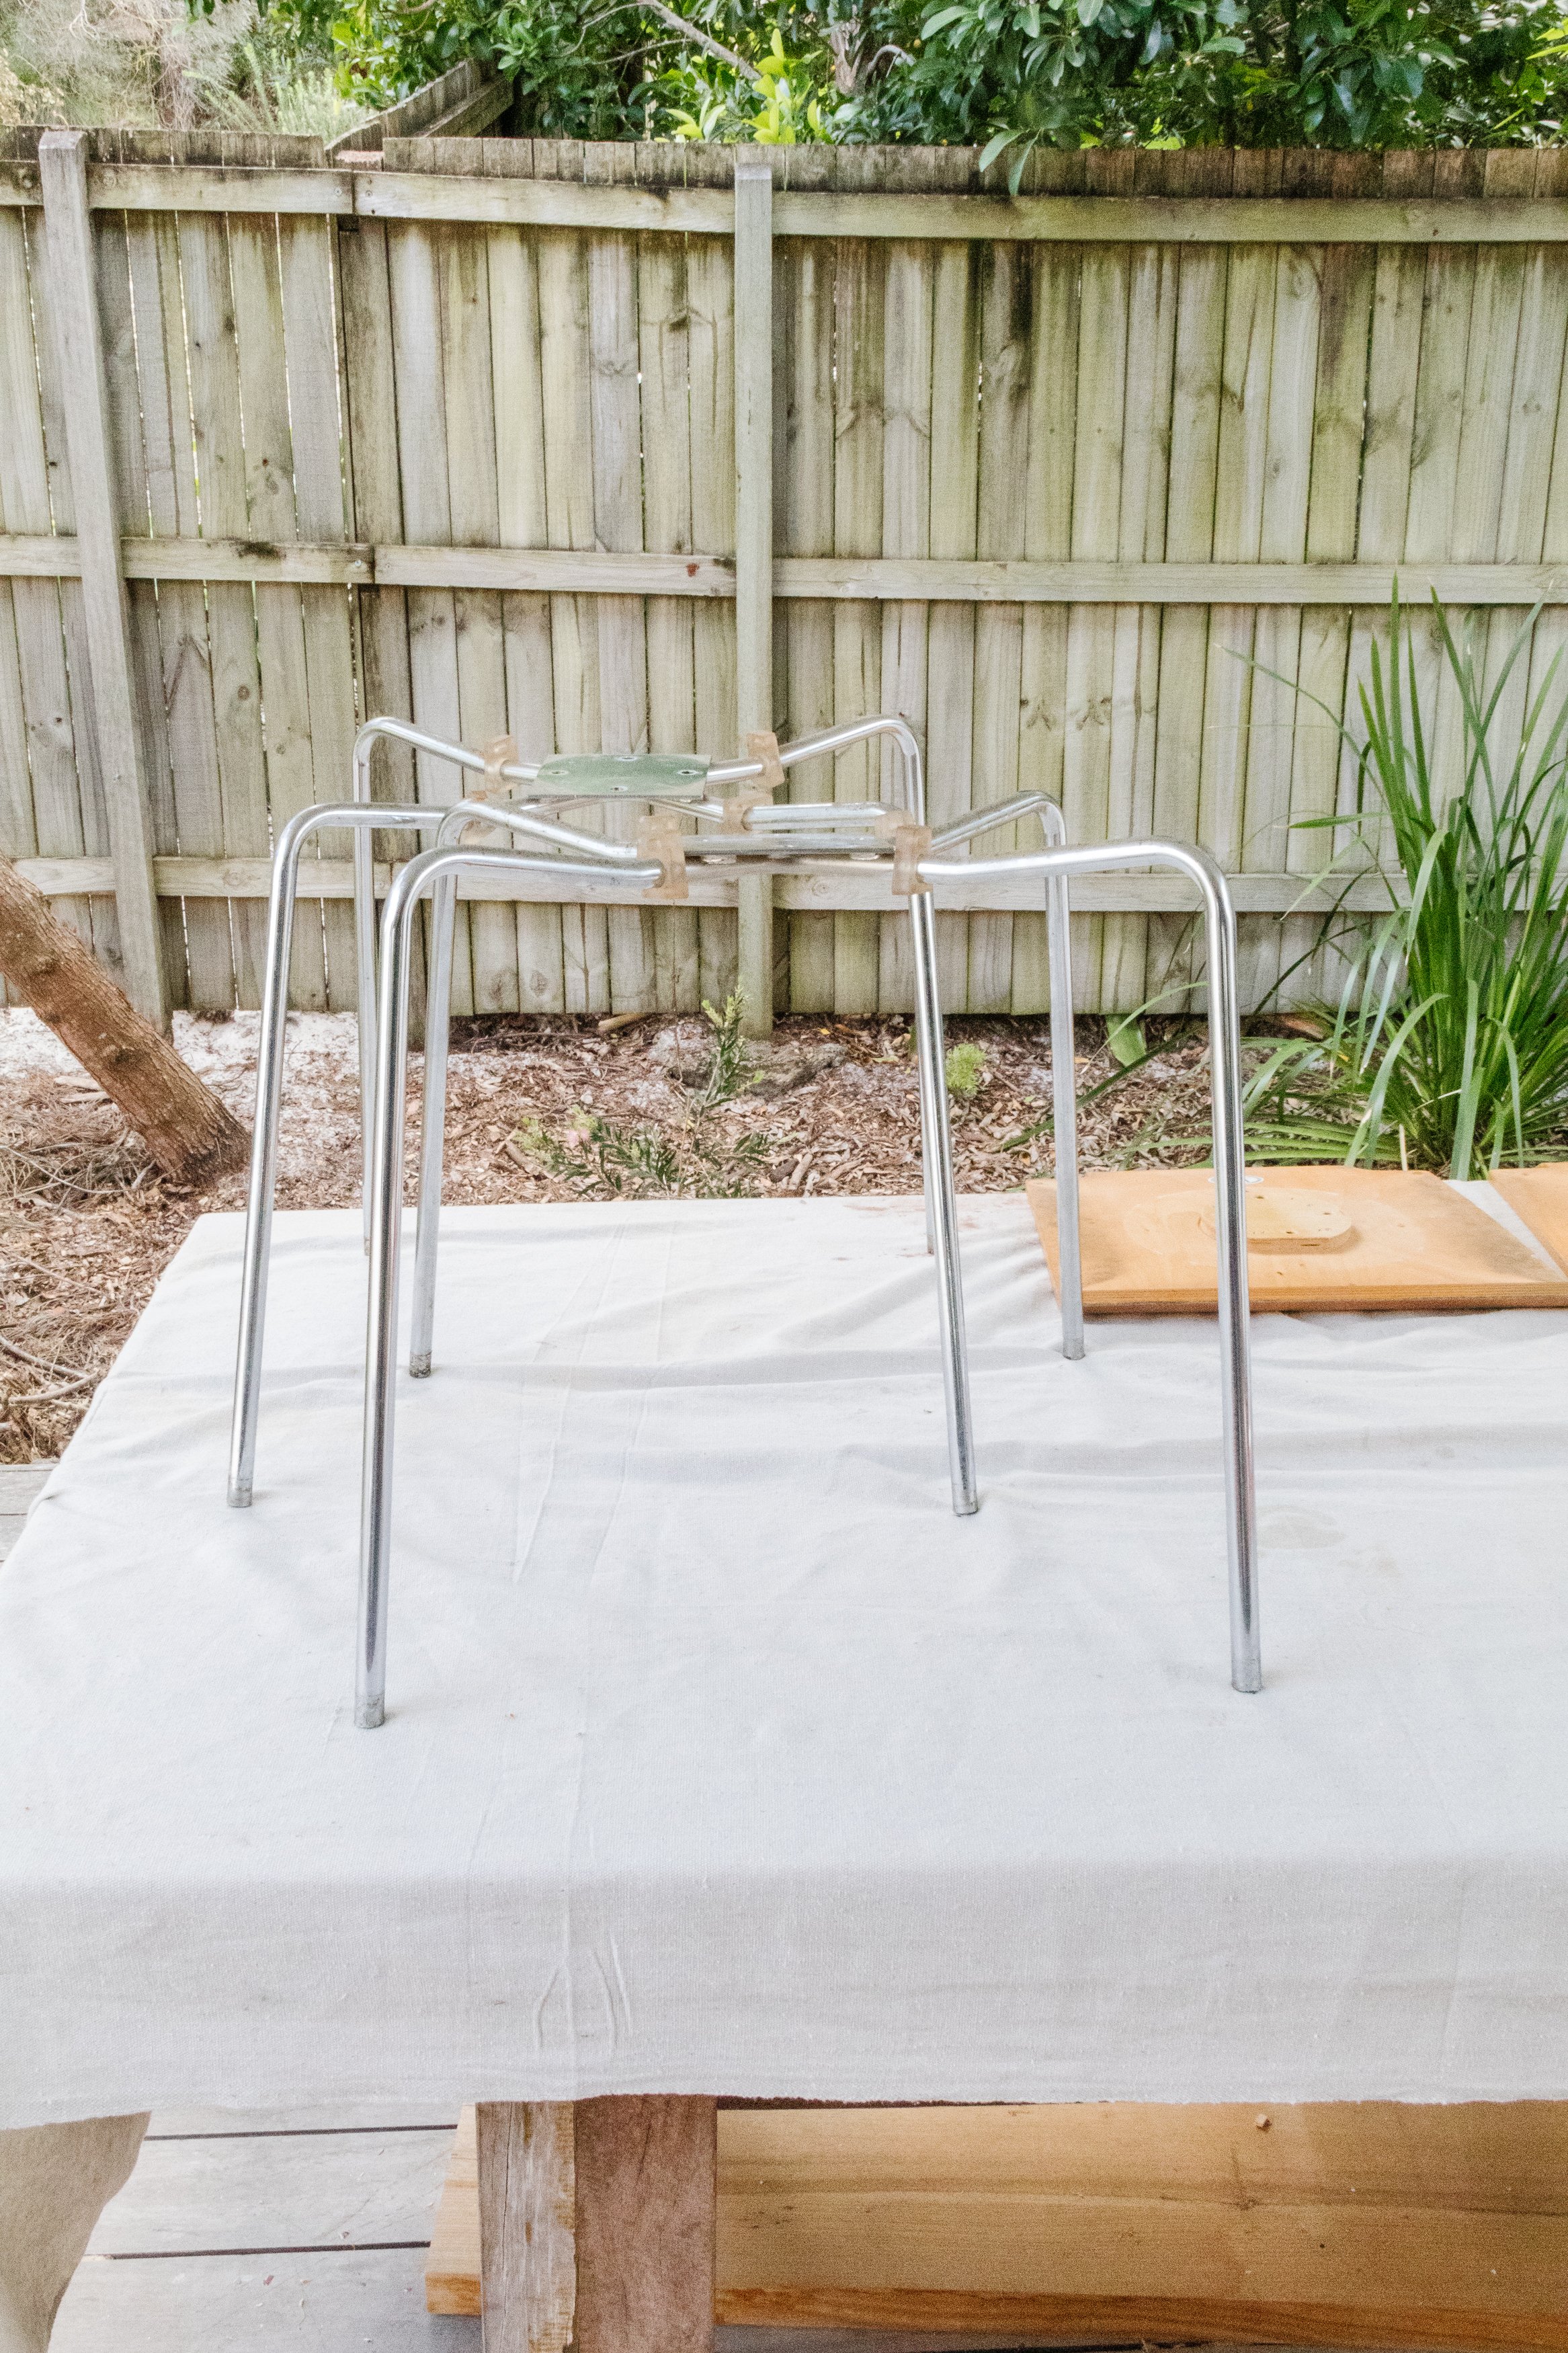
Step 1: To begin with I removed the chrome leg frames from the wooden seat using a drill and put the screws into a ziplock bag for safe keeping. Following this I removed the plastic protectors from the bottom of the chrome legs and then I removed the rust from the chrome using aluminium foil and water. To find out more about this step, make sure you use my method. After the rust had been removed and the chrome leg frames had been wiped down so they were nice and shiny, I set them aside to start working on the wooden seats.
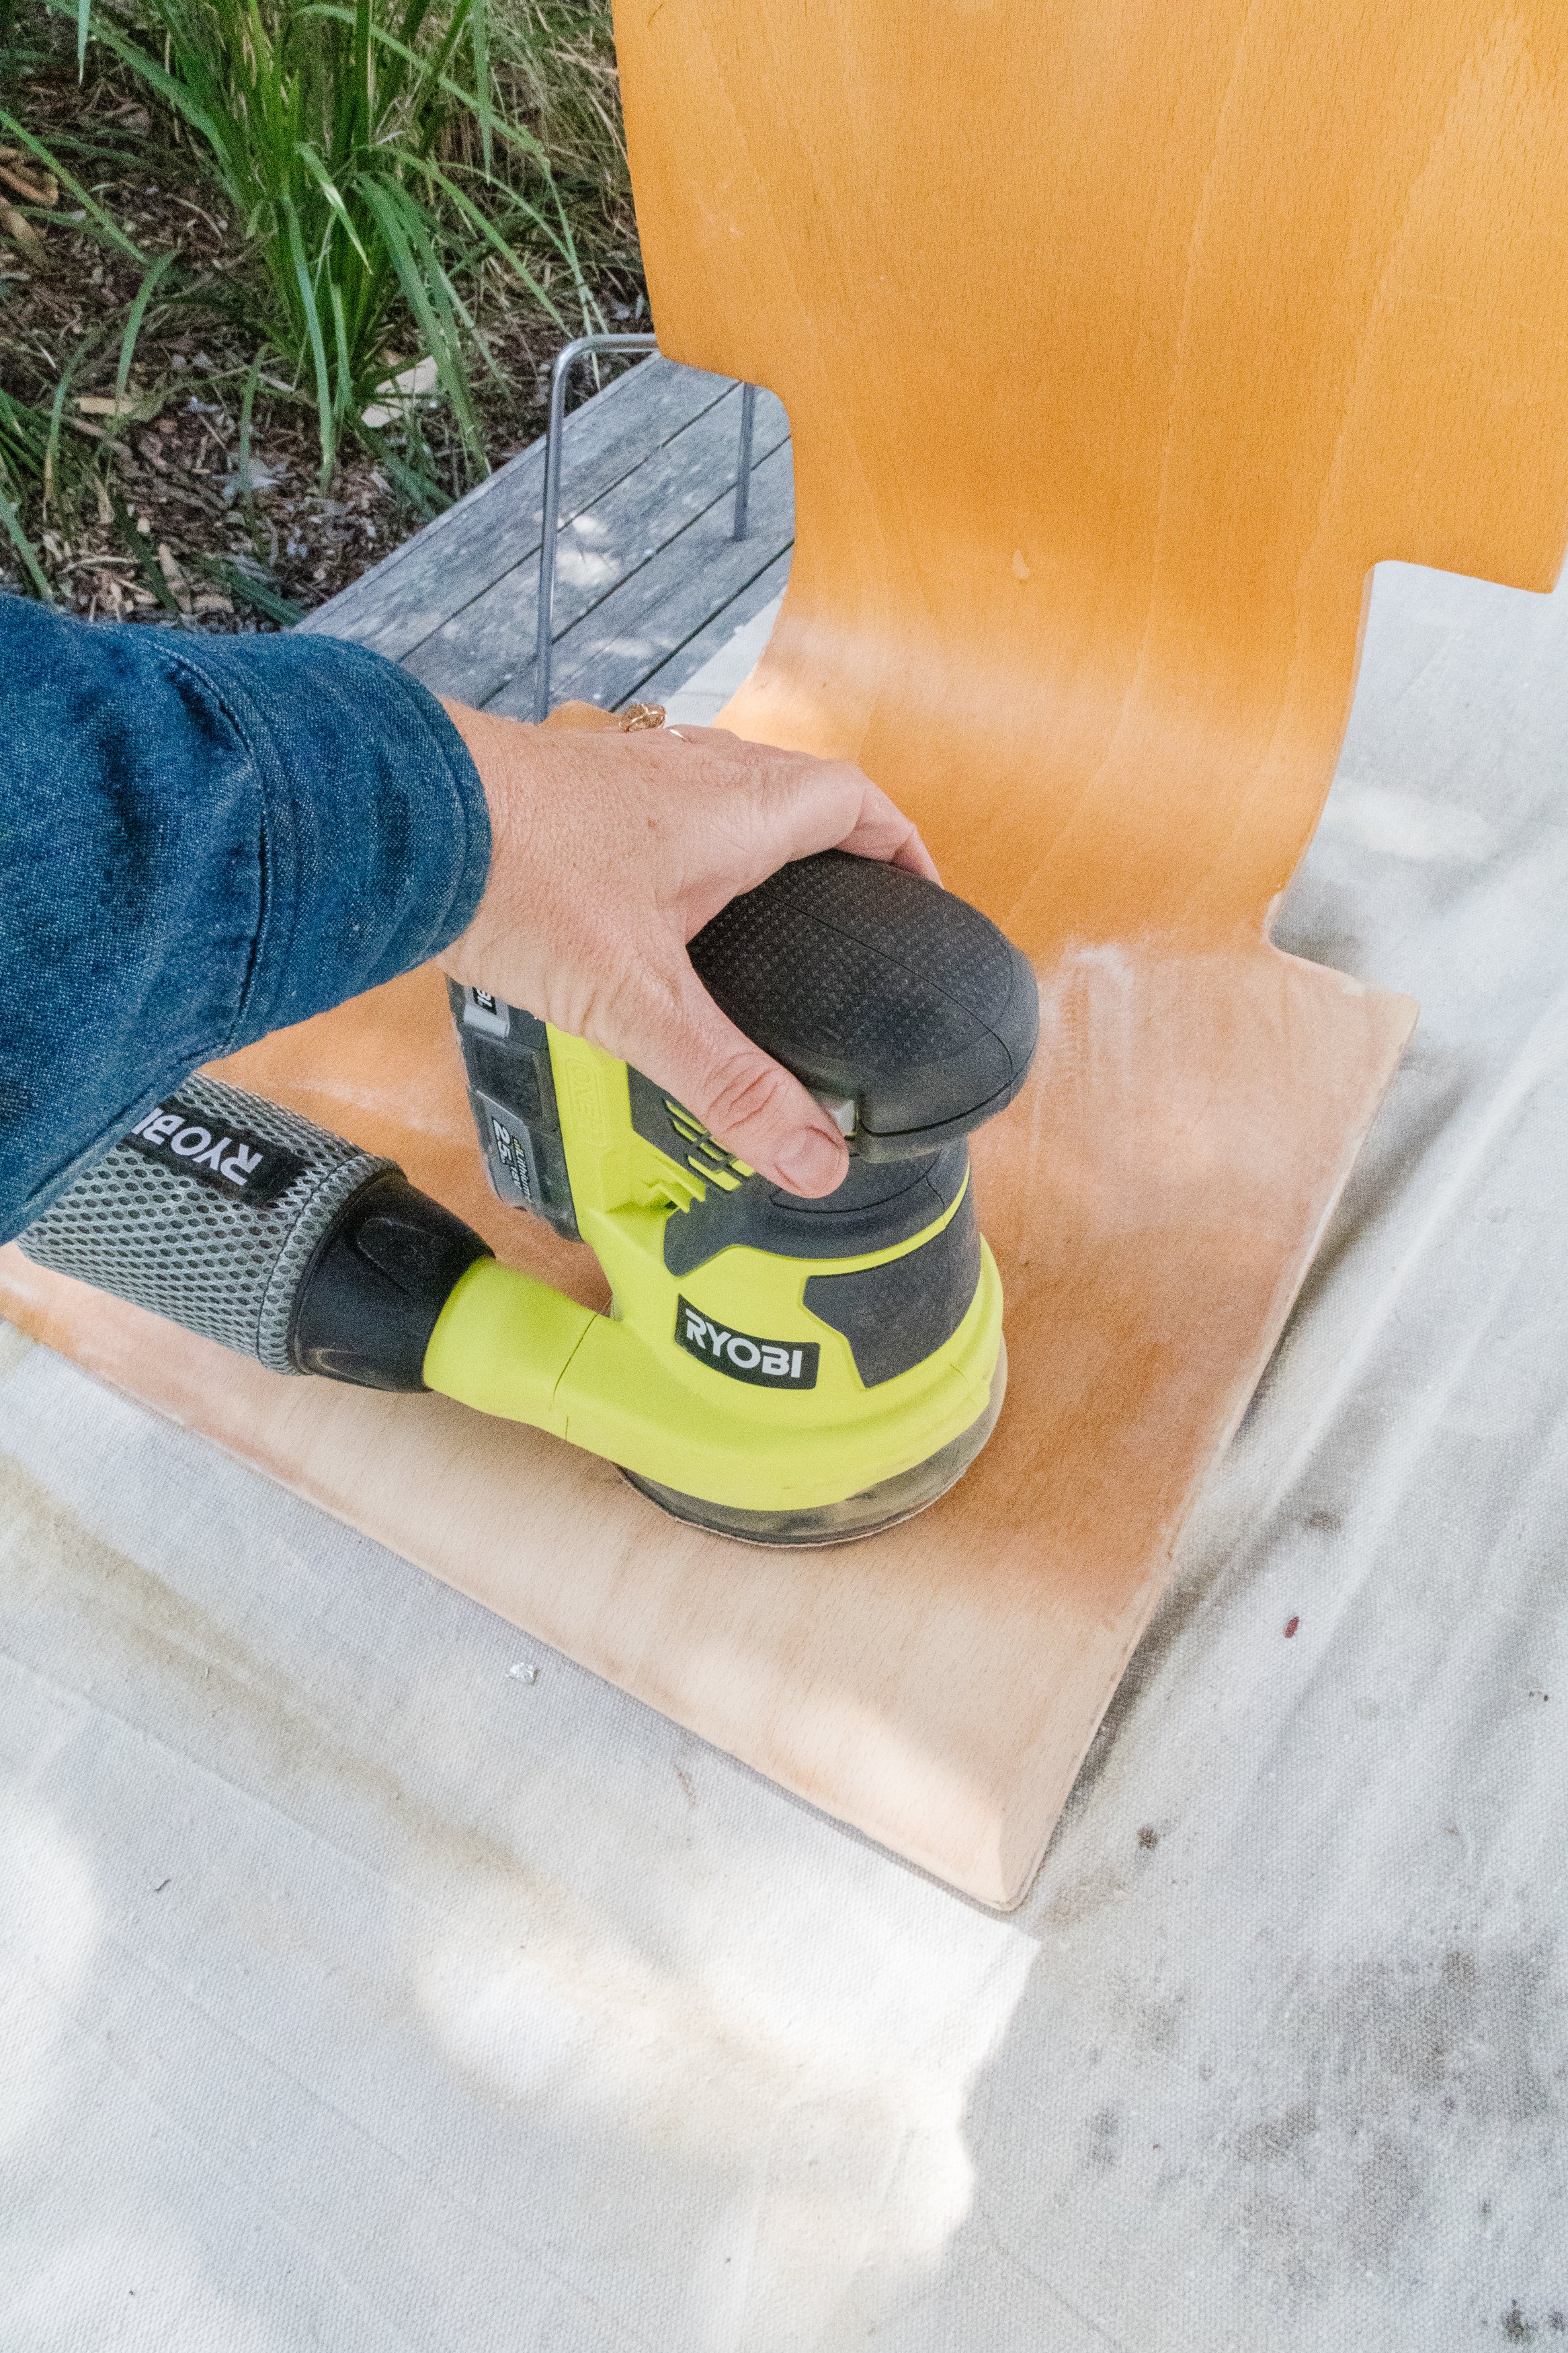
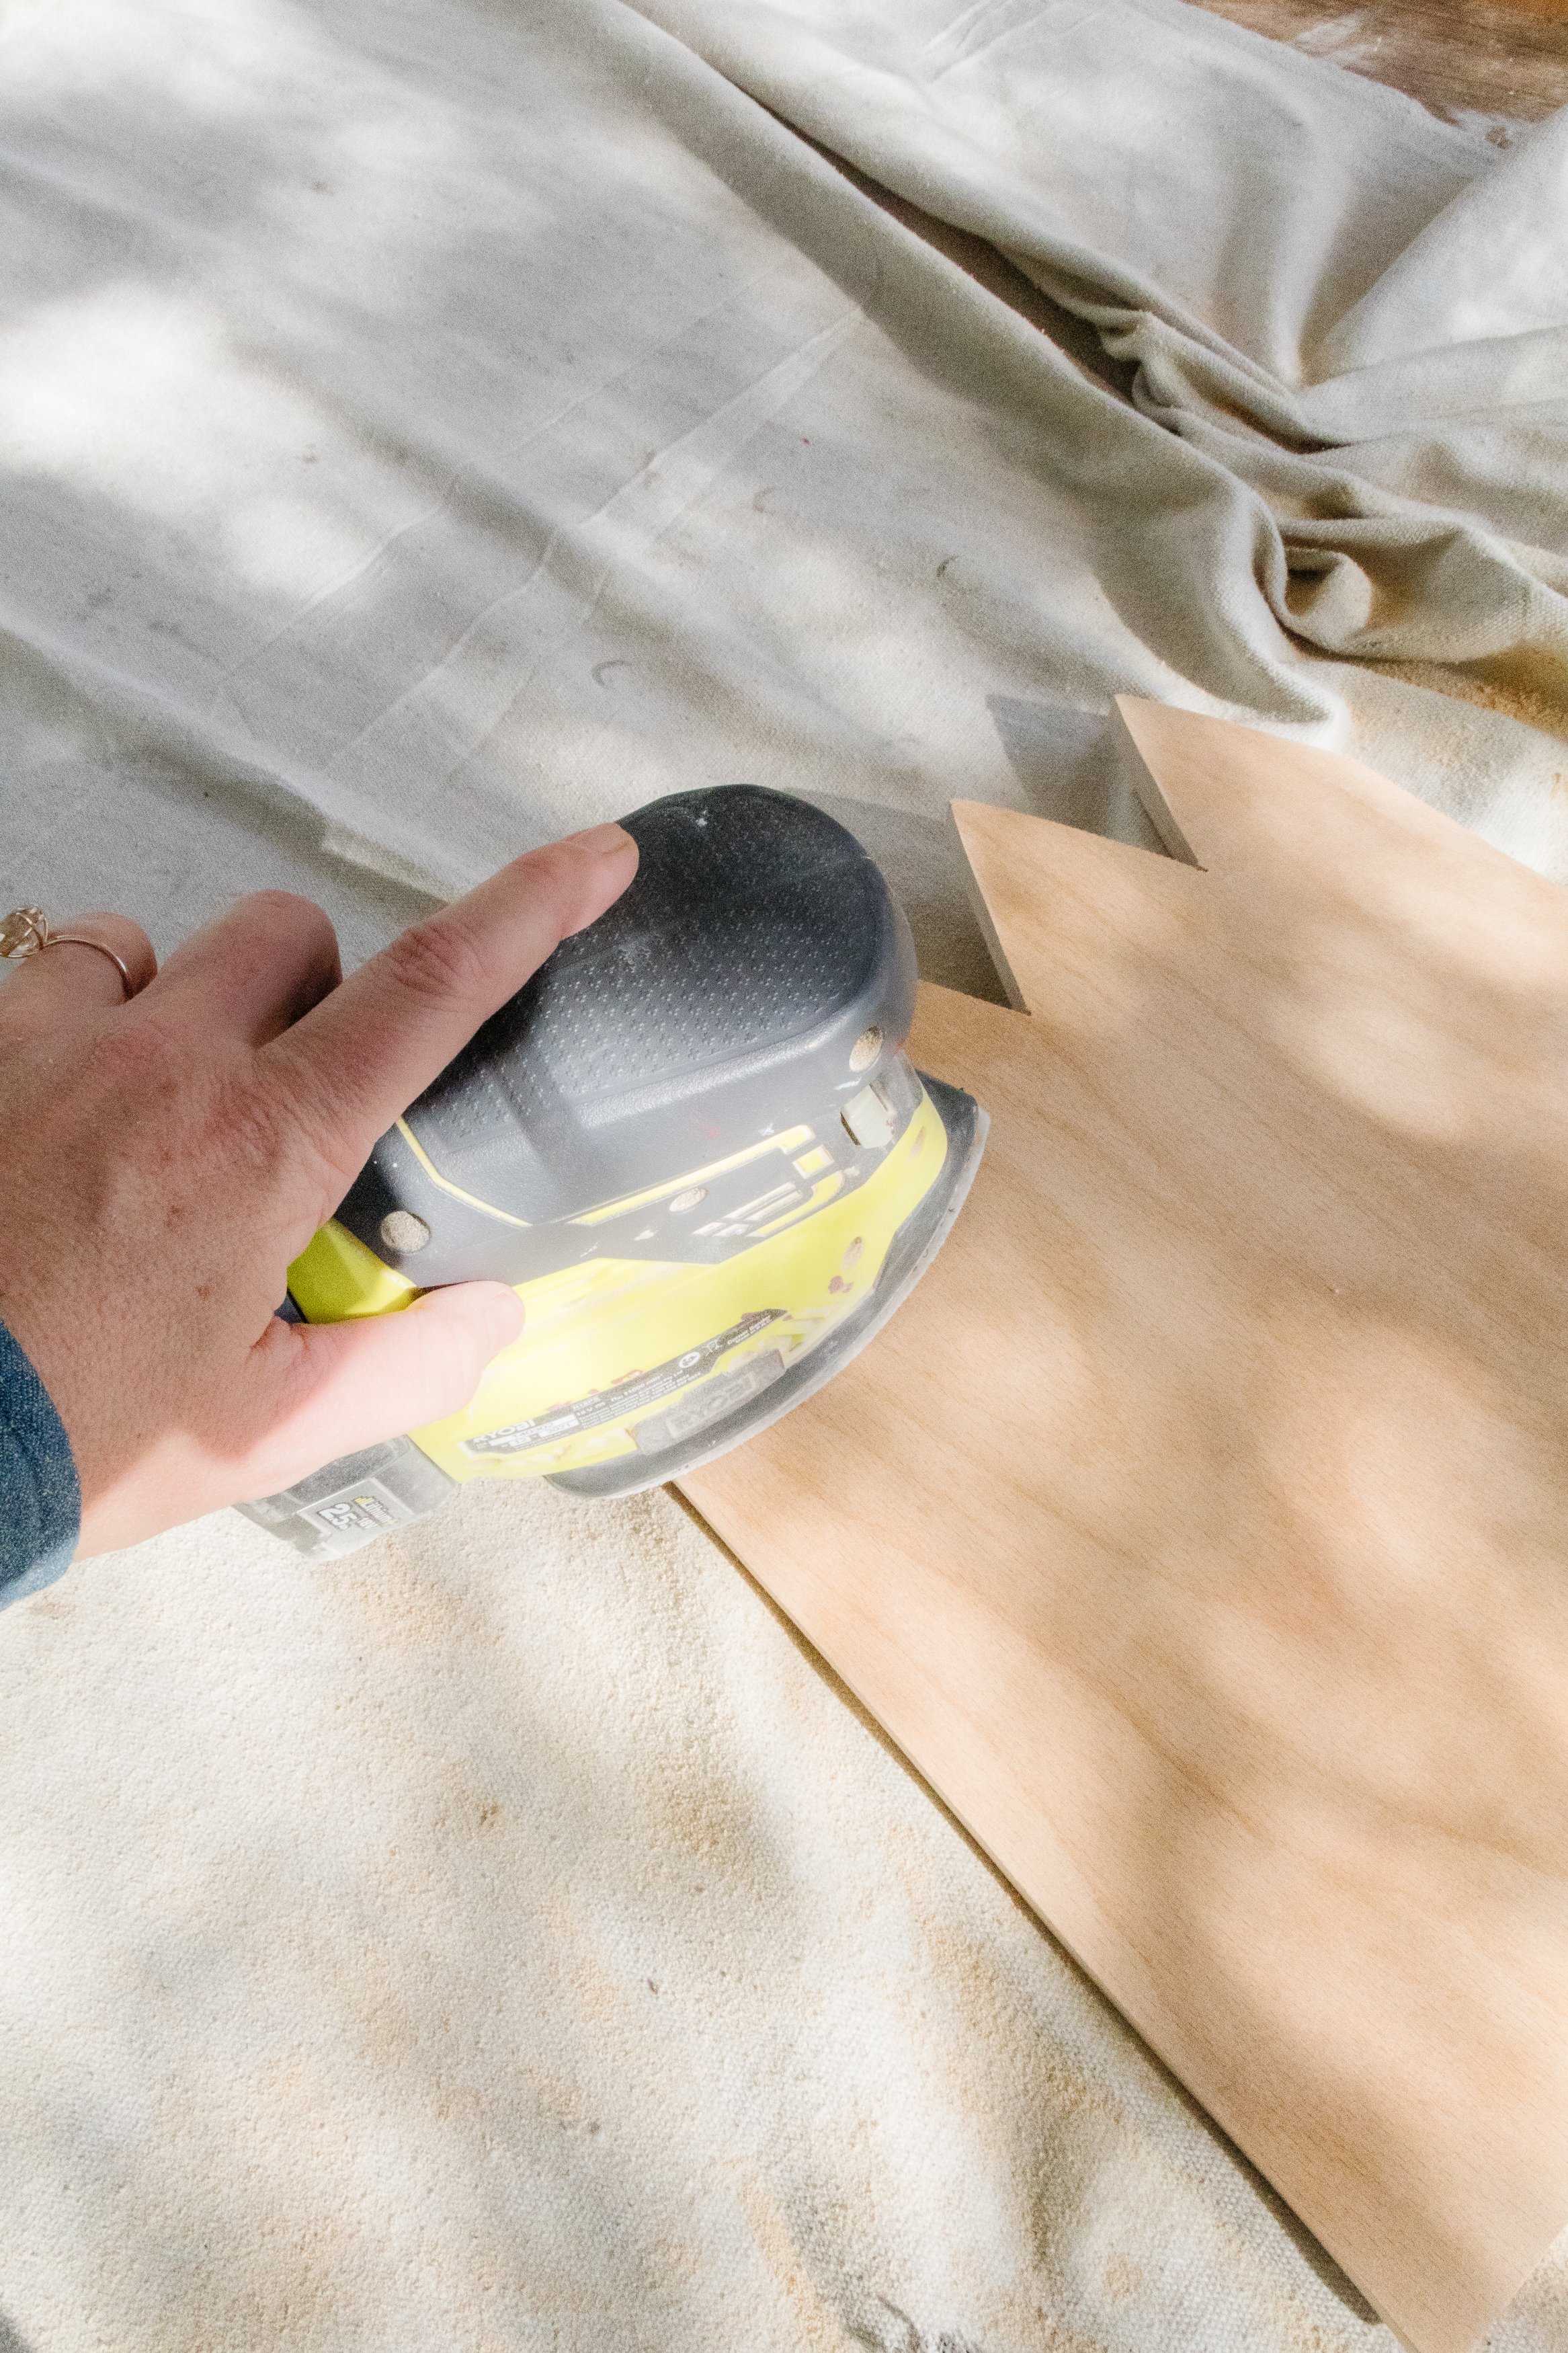
Step 2: I put on my safety mask, glasses and ear plugs, and removed the existing varnish from the wooden seats using my electric orbital sander. I did begin with my battery operated detail sander but it was clear very quickly that I needed a sander with more power. It took about 45 minutes to completely remove the varnish from both chairs, so I recommend listening to a good podcast while sanding.
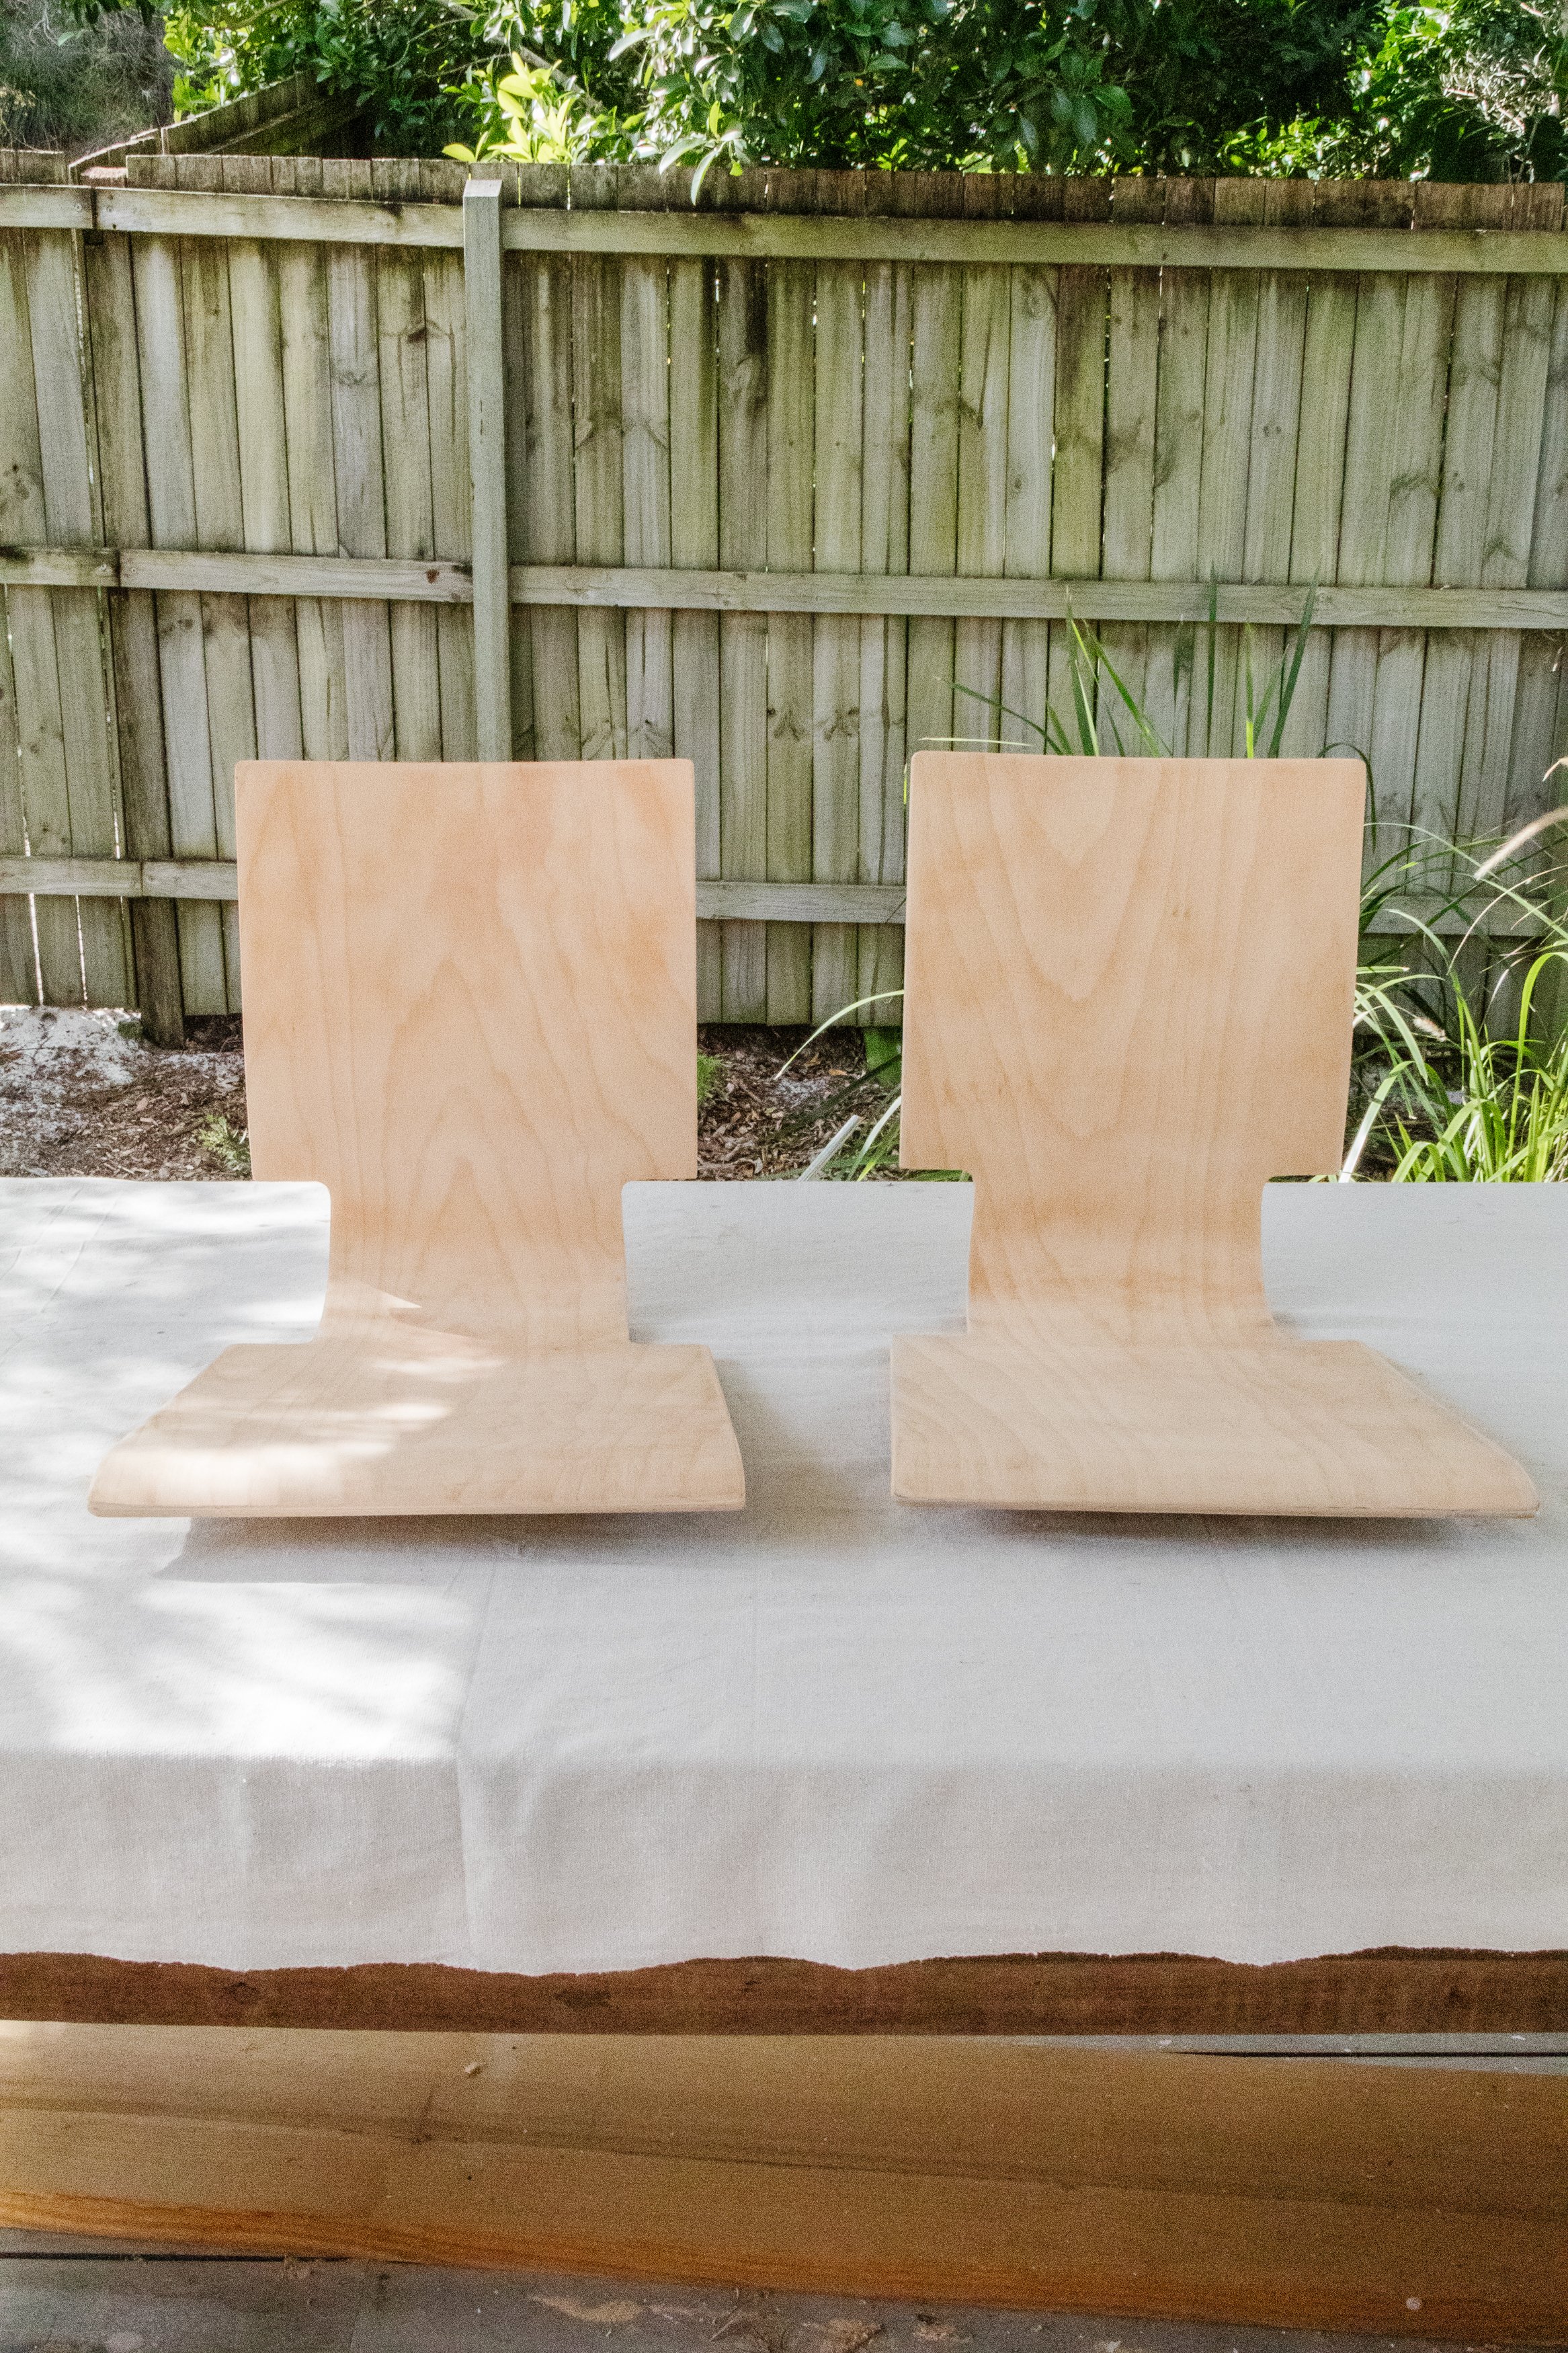
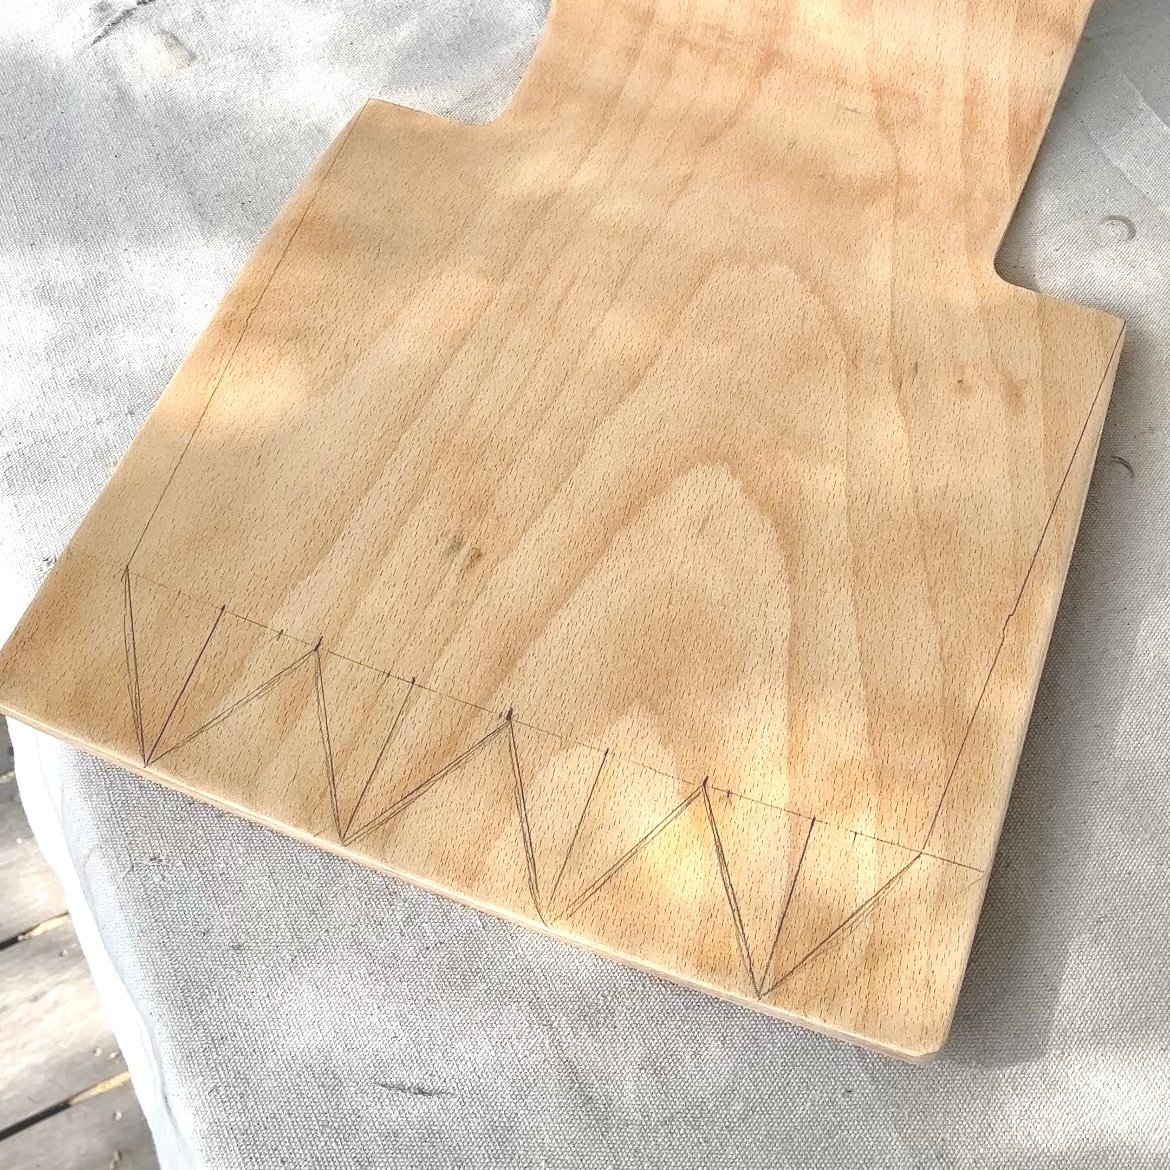
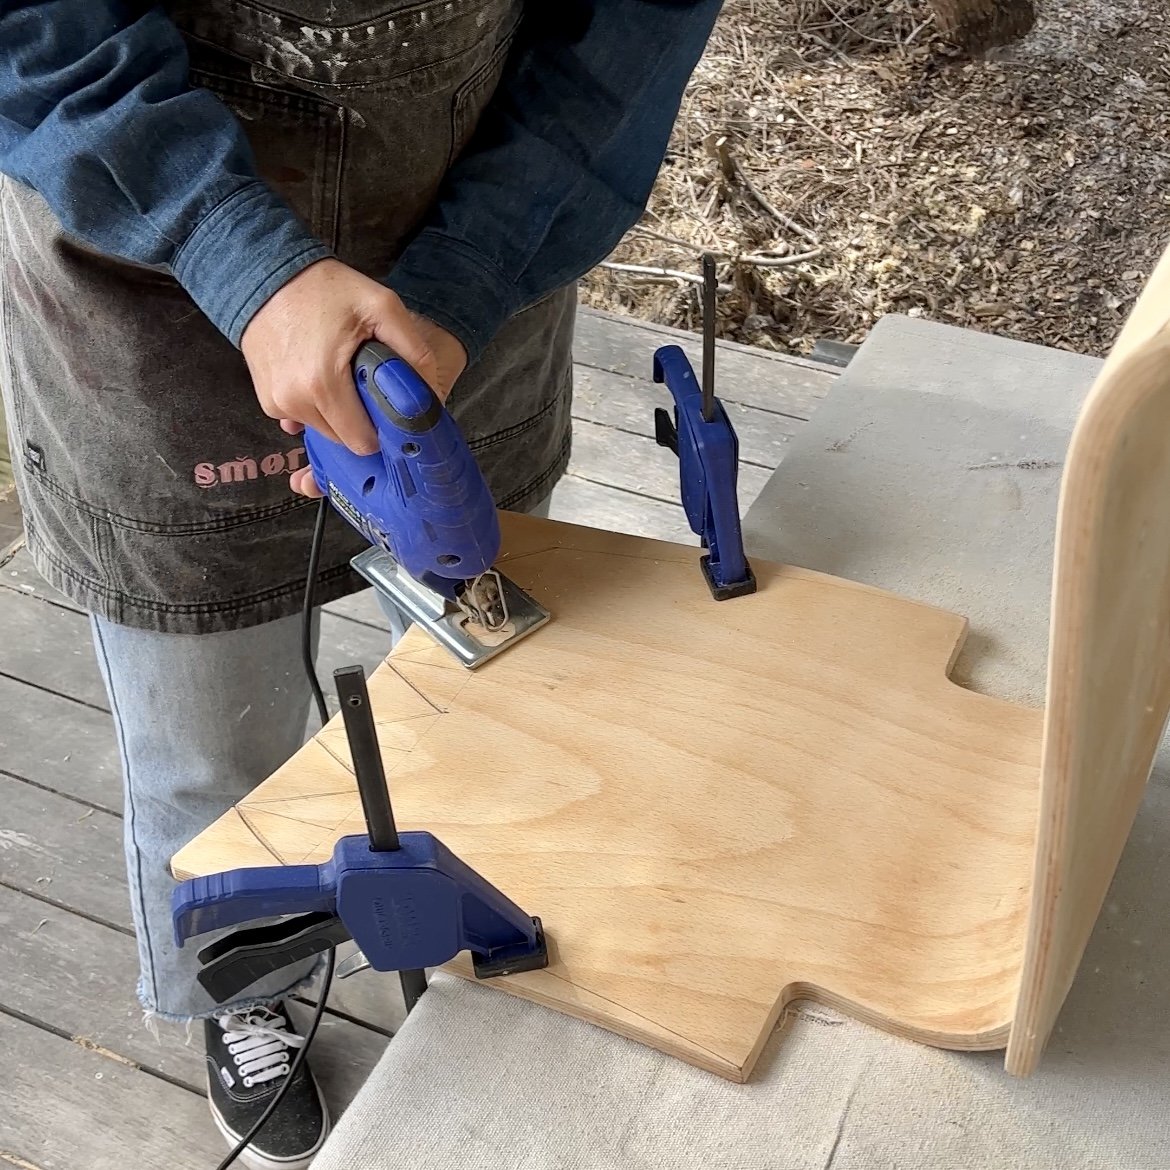
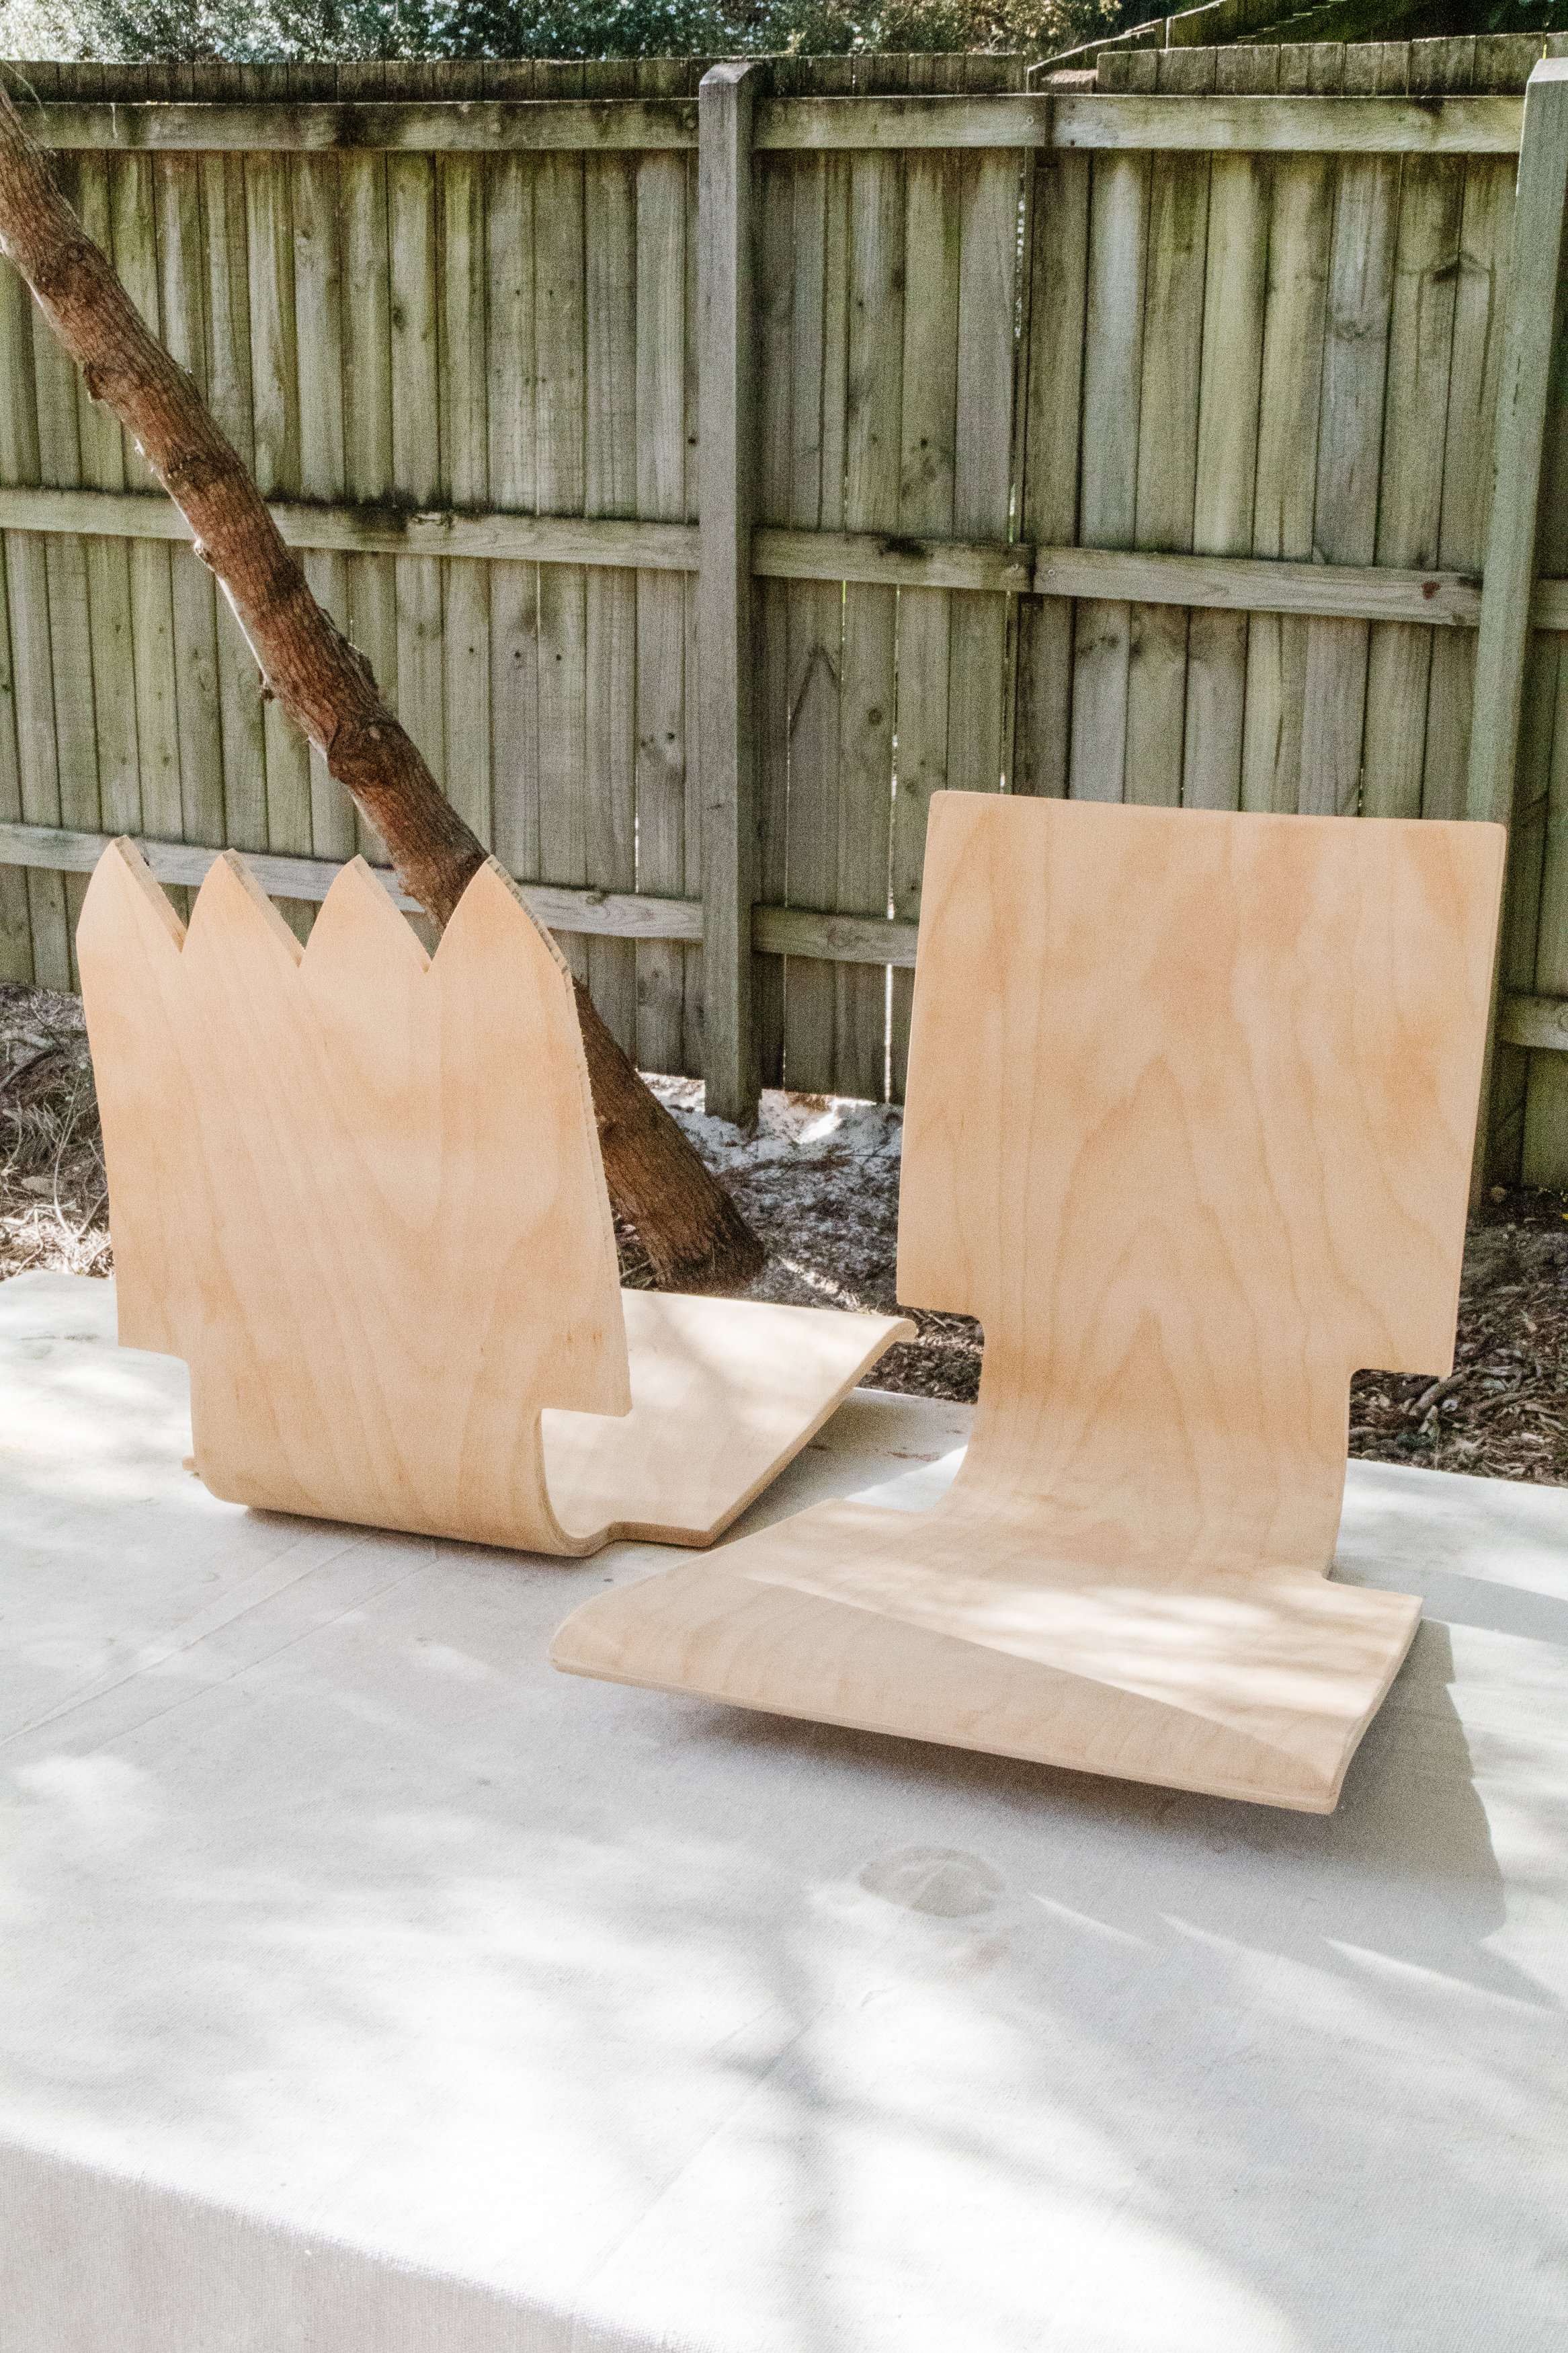
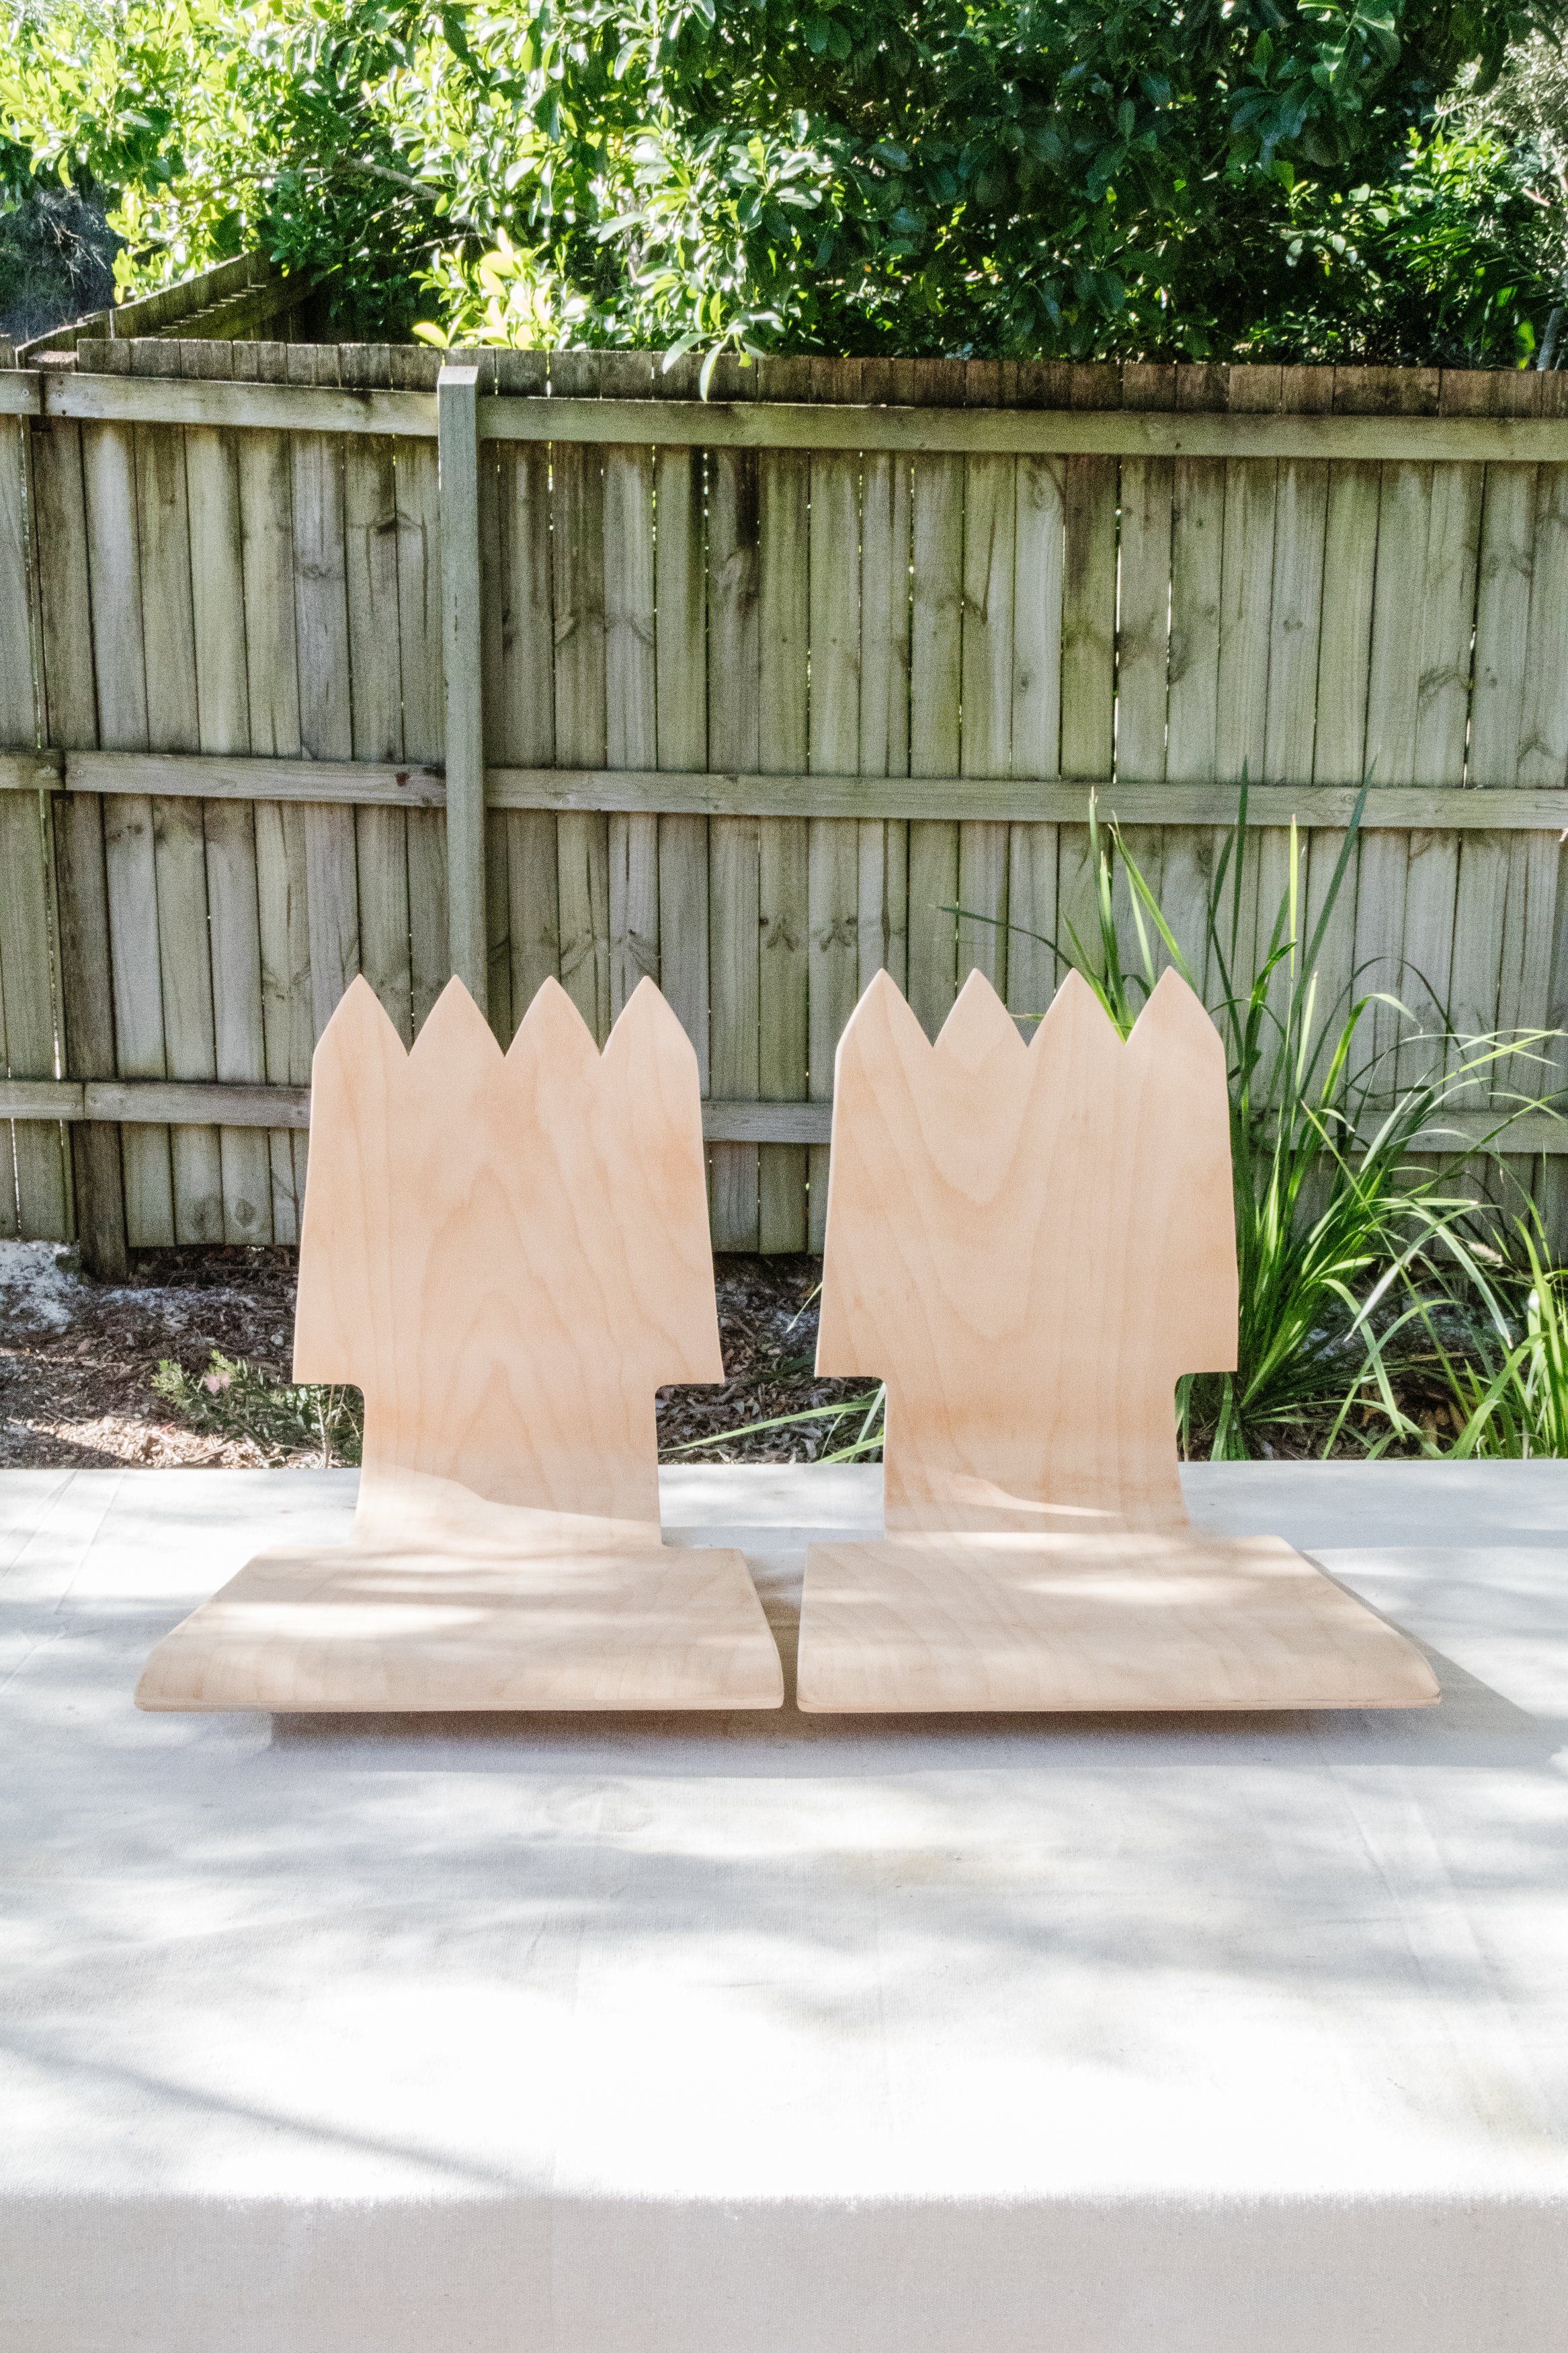
Step 3: Following this I used a pencil and ruler to draw my design for the sculptural element directly onto the top of the seats. After I was happy with the design I clamped the wooden seats to my work bench and cut the design out using my jigsaw. Again, I wore my safety mask, glasses and ear plugs for this step. After cutting the wooden seats, I softened the edges and sides where I made the cuts using my detail sander. Don’t skip this step because this is an important element of making the finished chairs look expensive and bespoke. Following this I wiped down the wooden seats to completely remove any residue and dust.

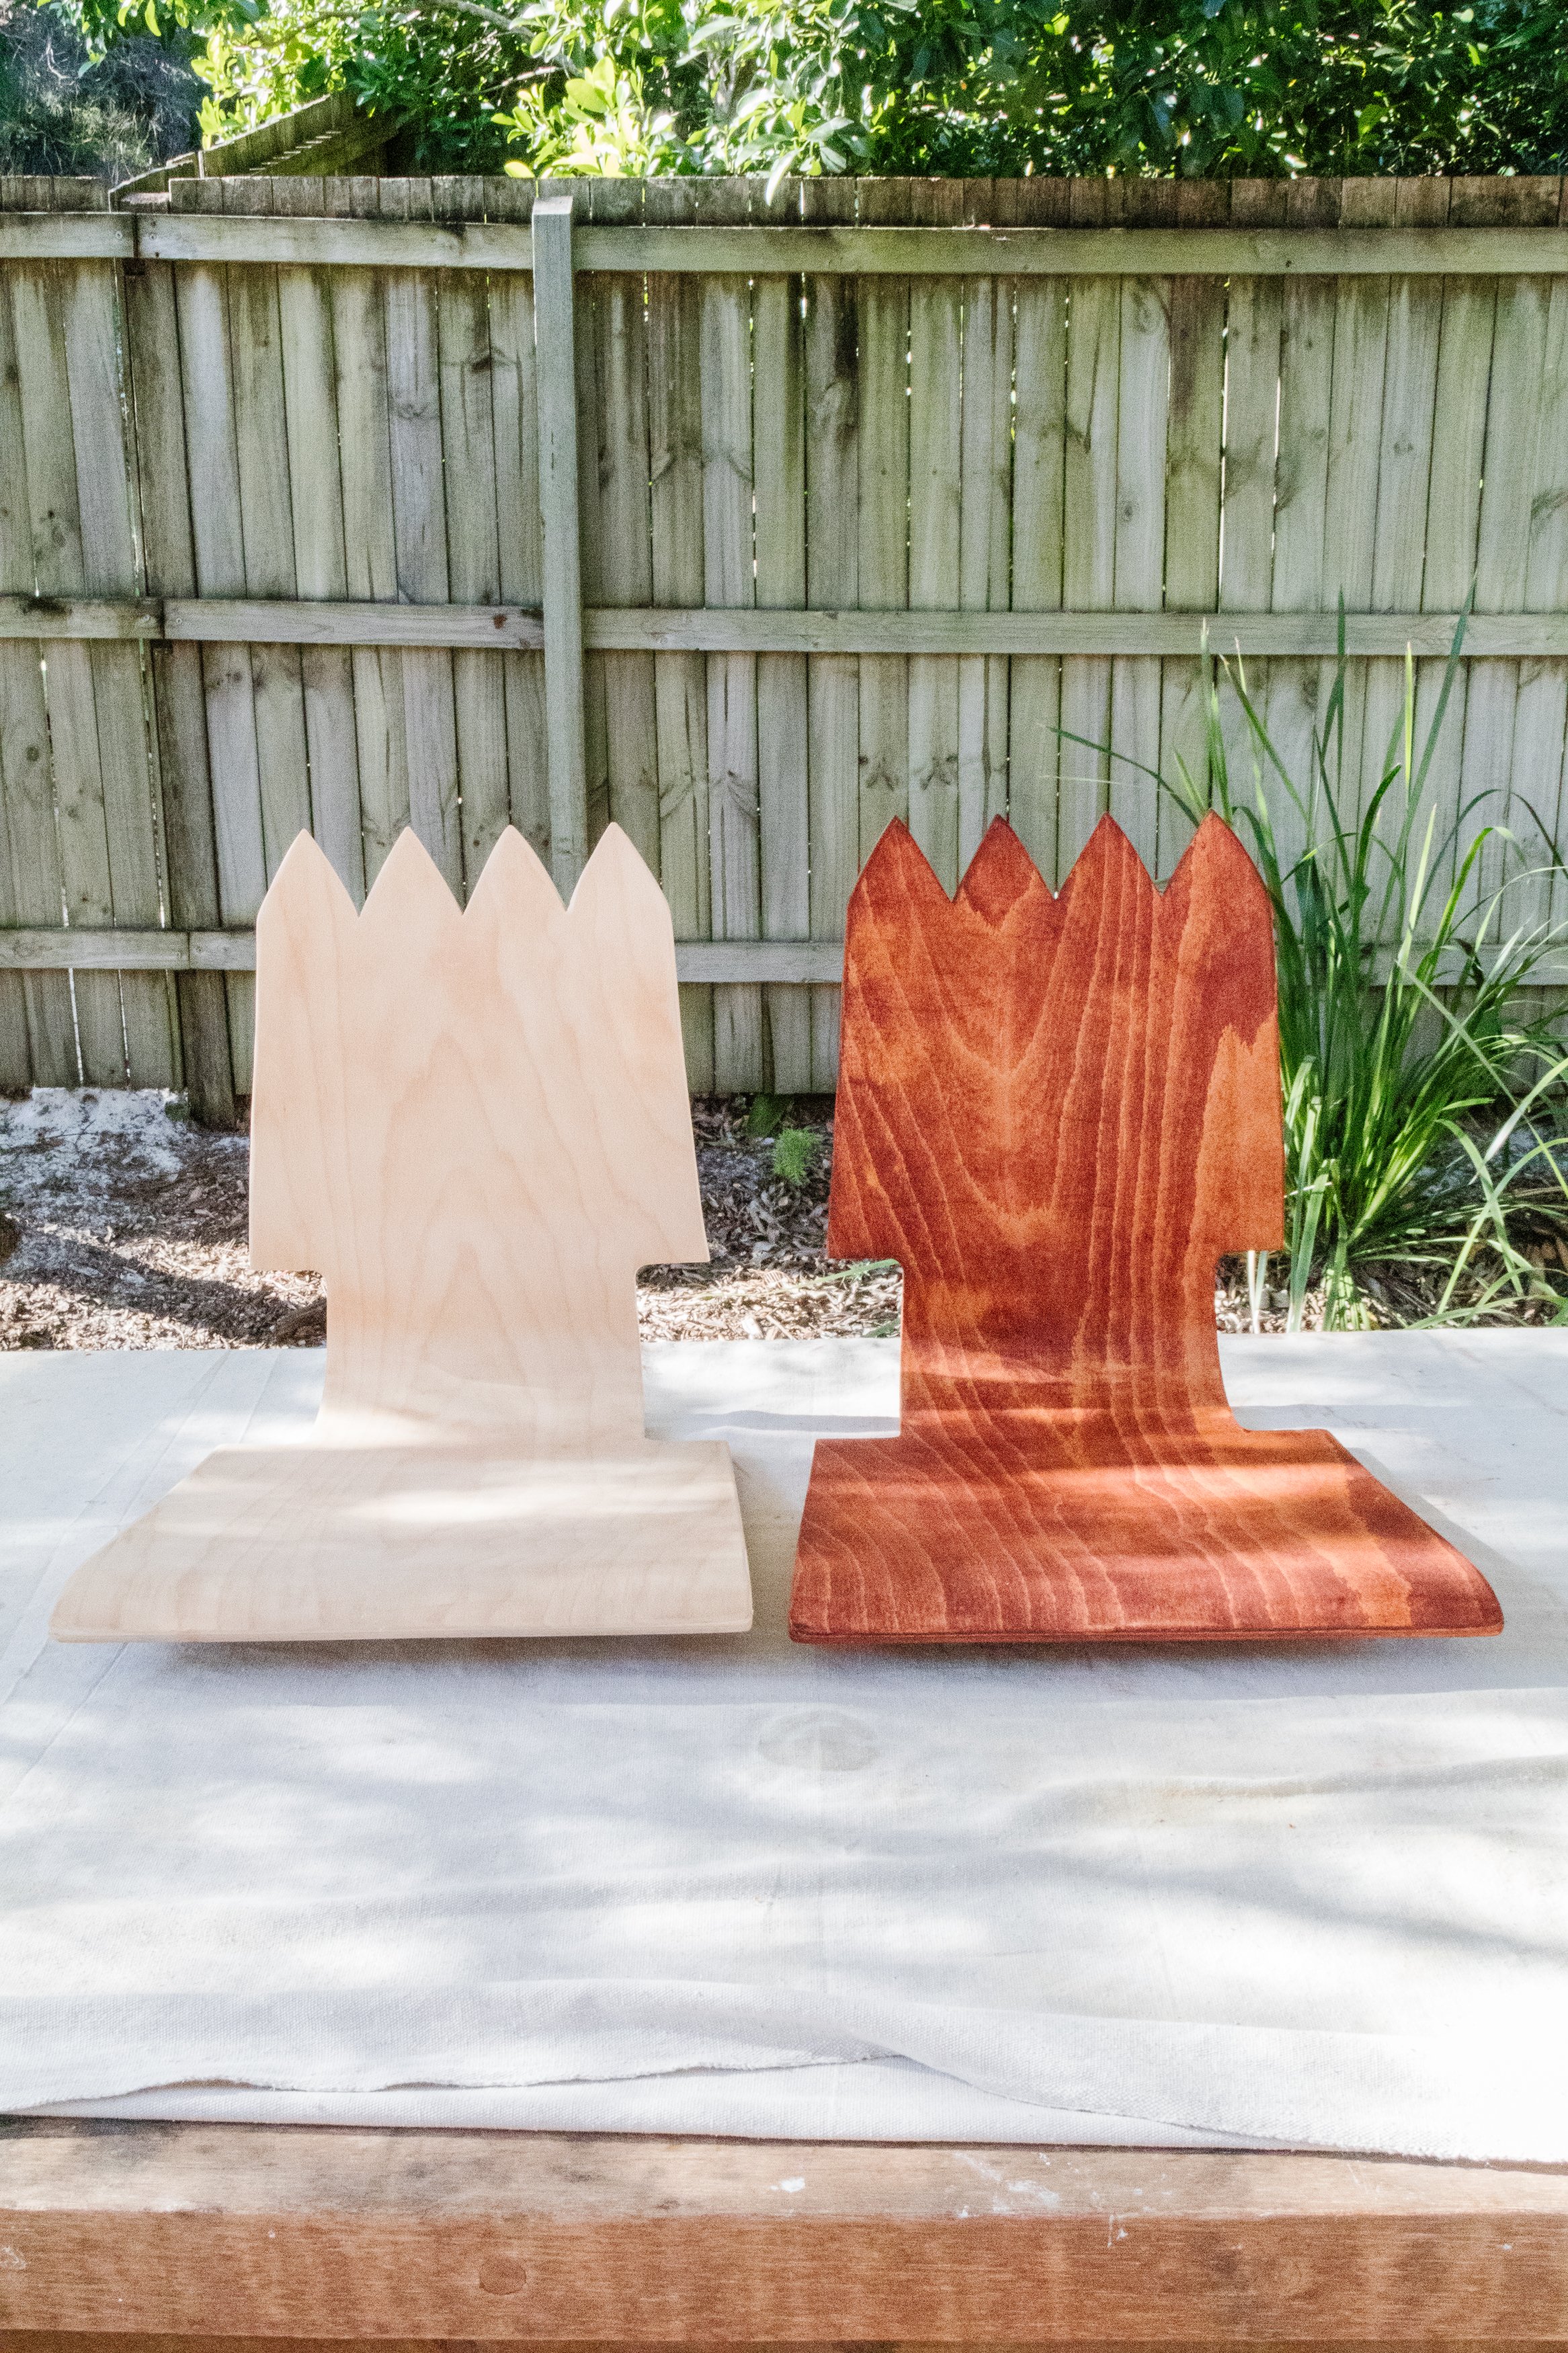
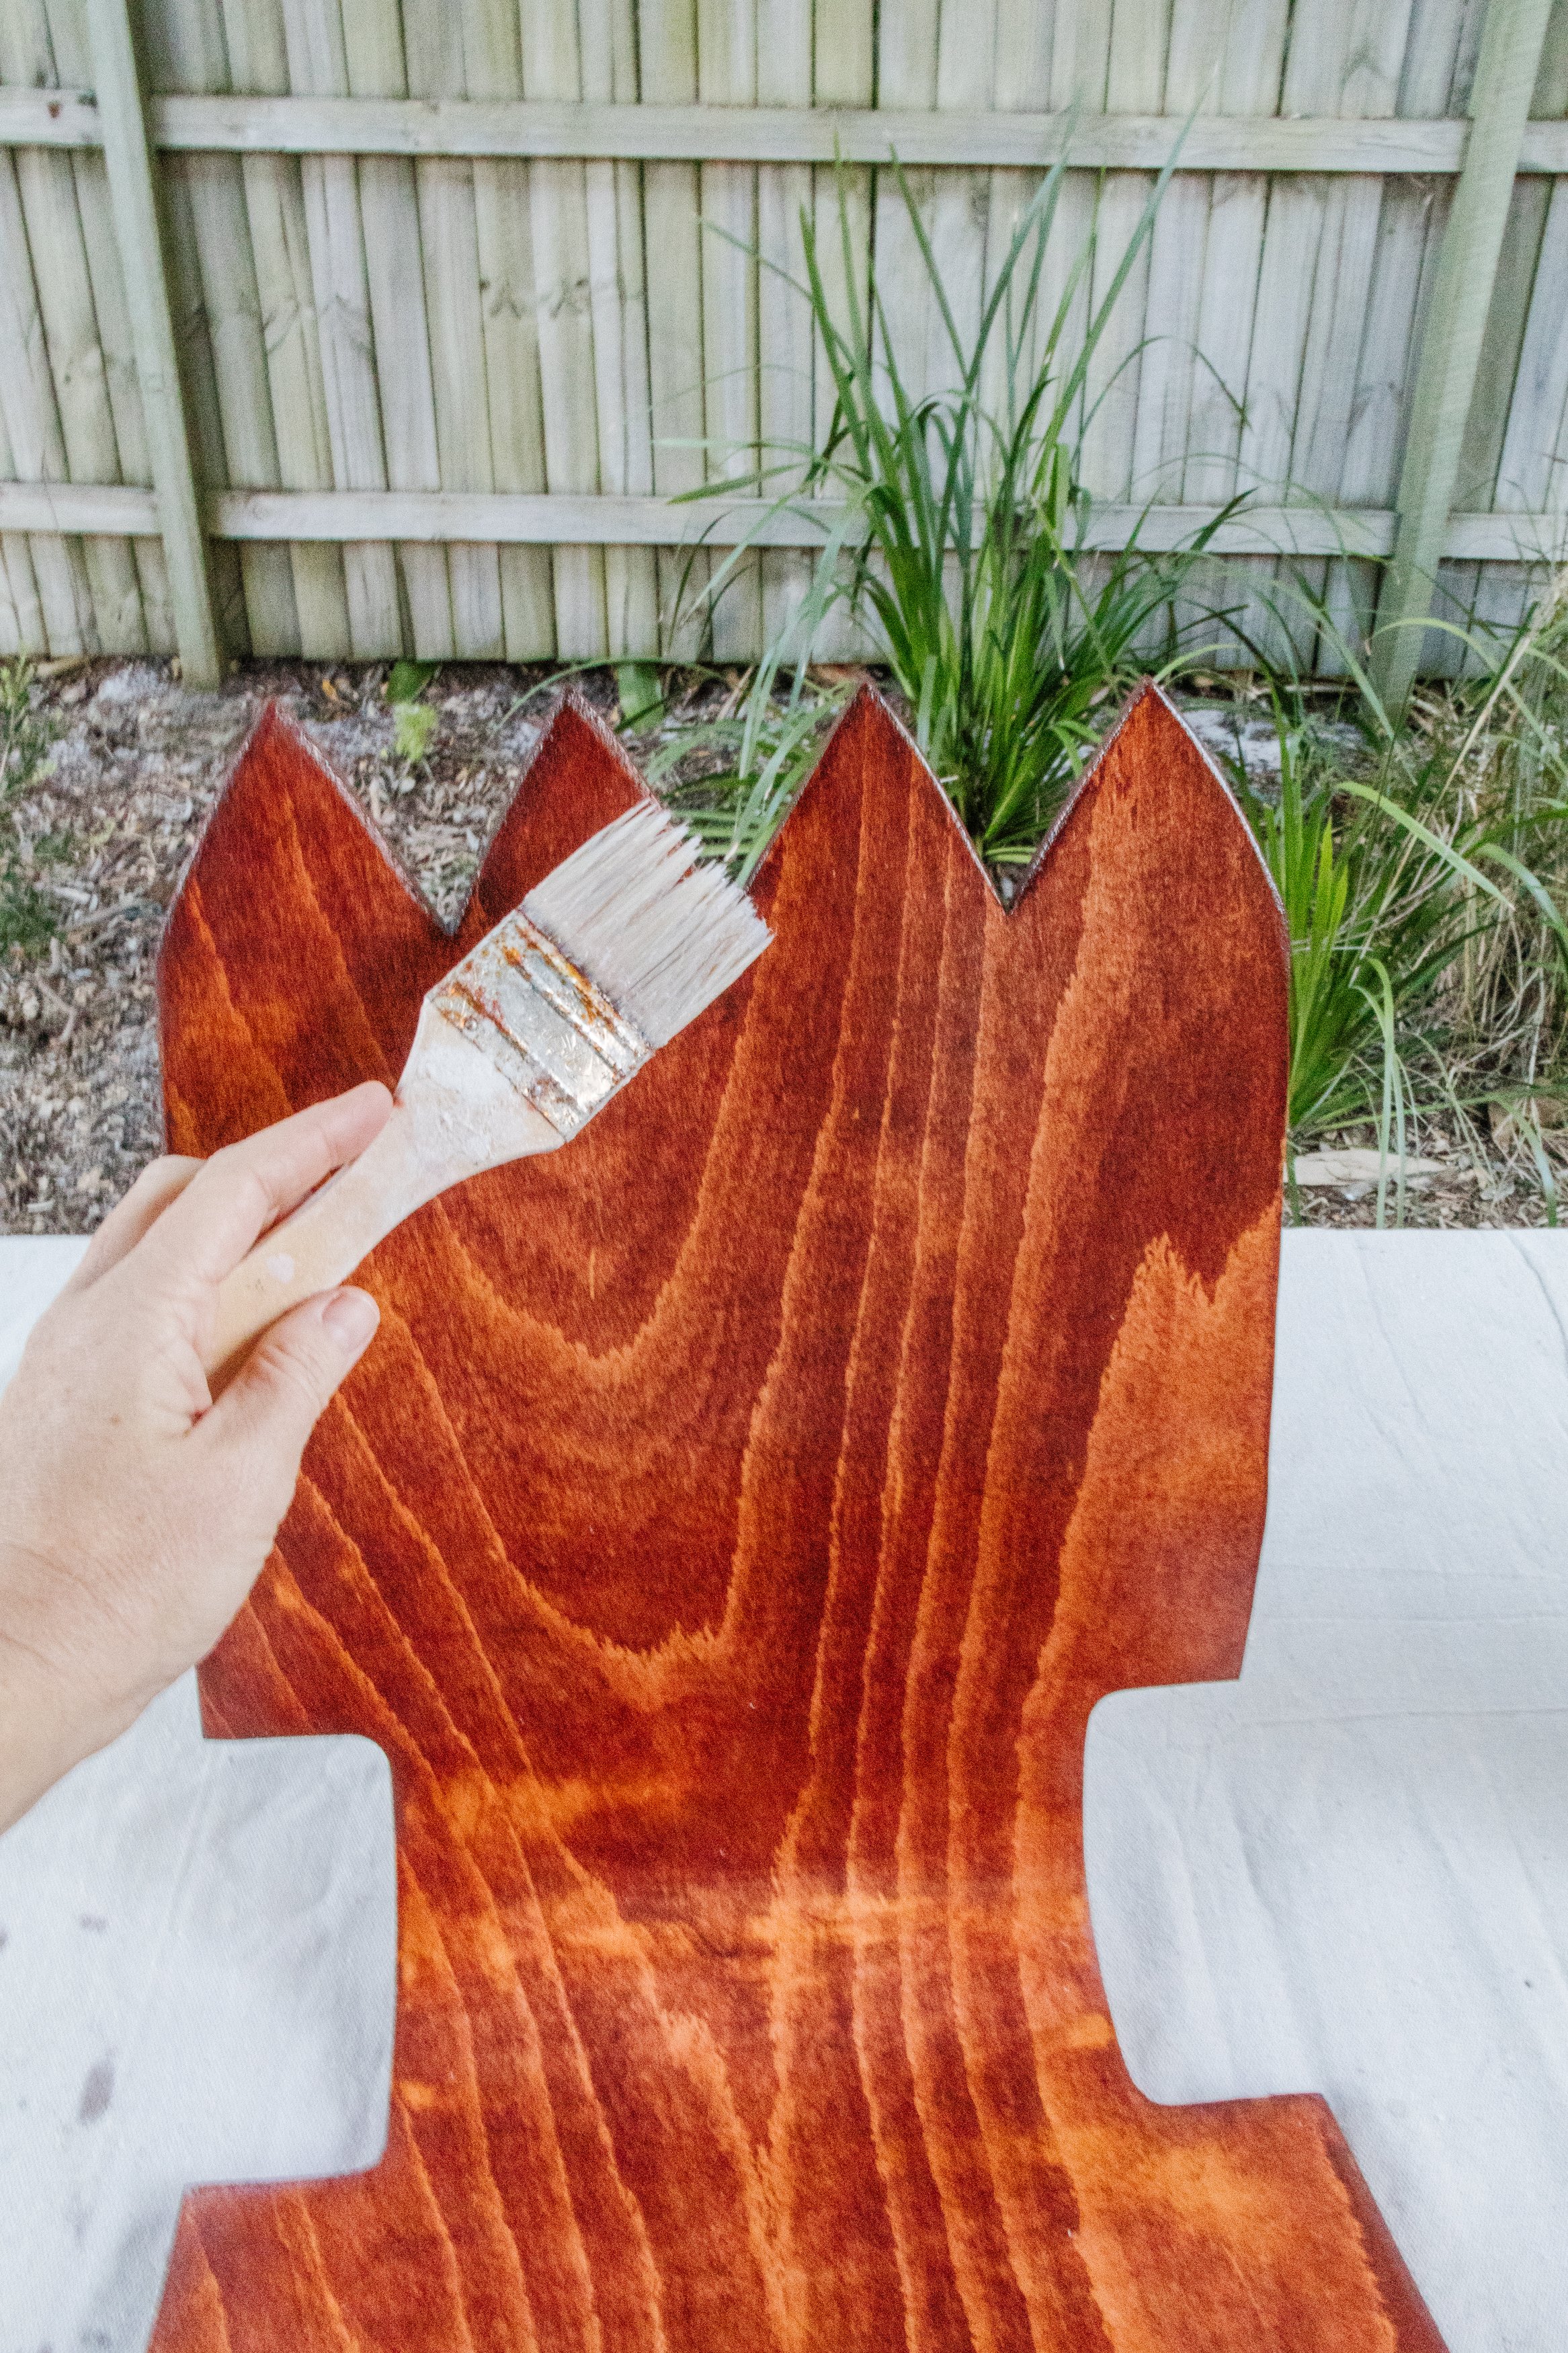
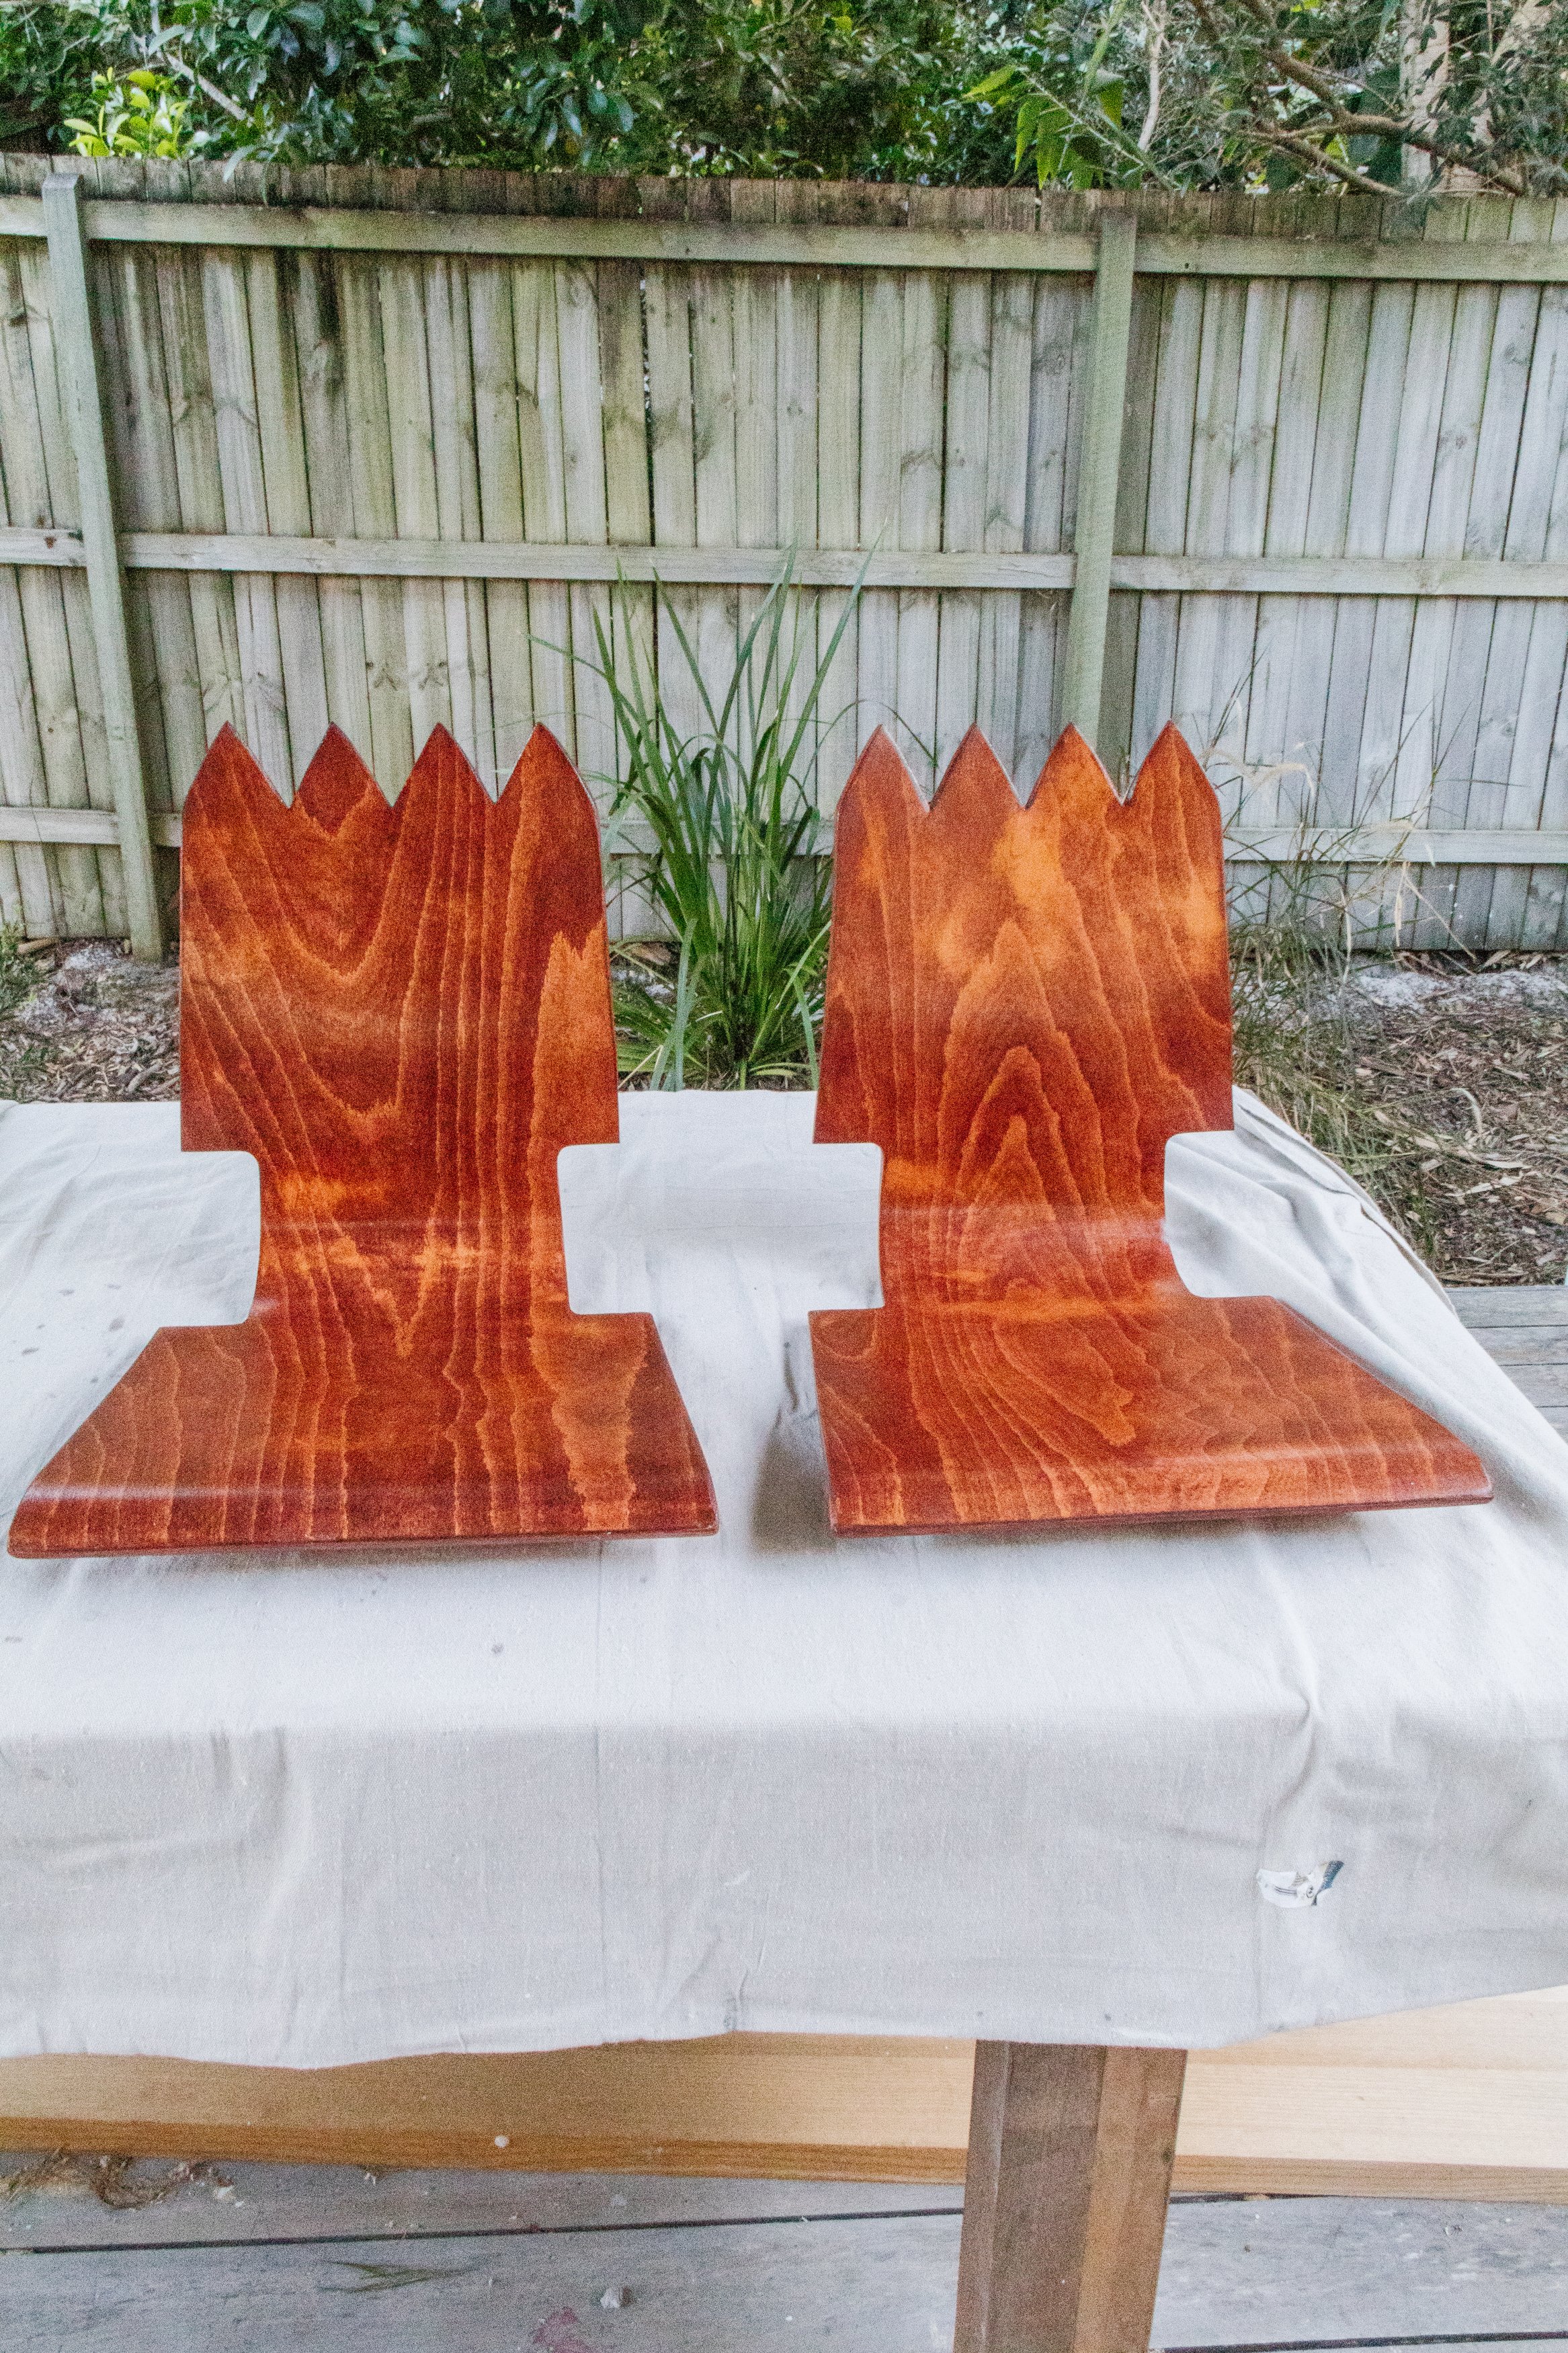
Step 4: I was so excited to cut the wooden seats because I’ve had this idea in my head for a few weeks now, but I knew this next step would be where I could finally see my vision come to life - staining the chairs. Using one of my custom stains and a microfibre cloth, I applied two coats of stain all over the wooden seats. I allowed the first coat dry naturally in the sun for about 30 minutes before applying the second coat. This is where the stunning wood grain came to life, which was hidden by the original varnish (why do people do that?!).
Step 5: Once the second stain coat dried, I went straight in and applied two coats of gloss varnish. You can use matt or satin if you like, however I think a gloss varnish brings out the depth of the stain and the wood grain more than any other finish. The varnish dried quickly in the sun so I only had to wait 30 minutes or so between coats.
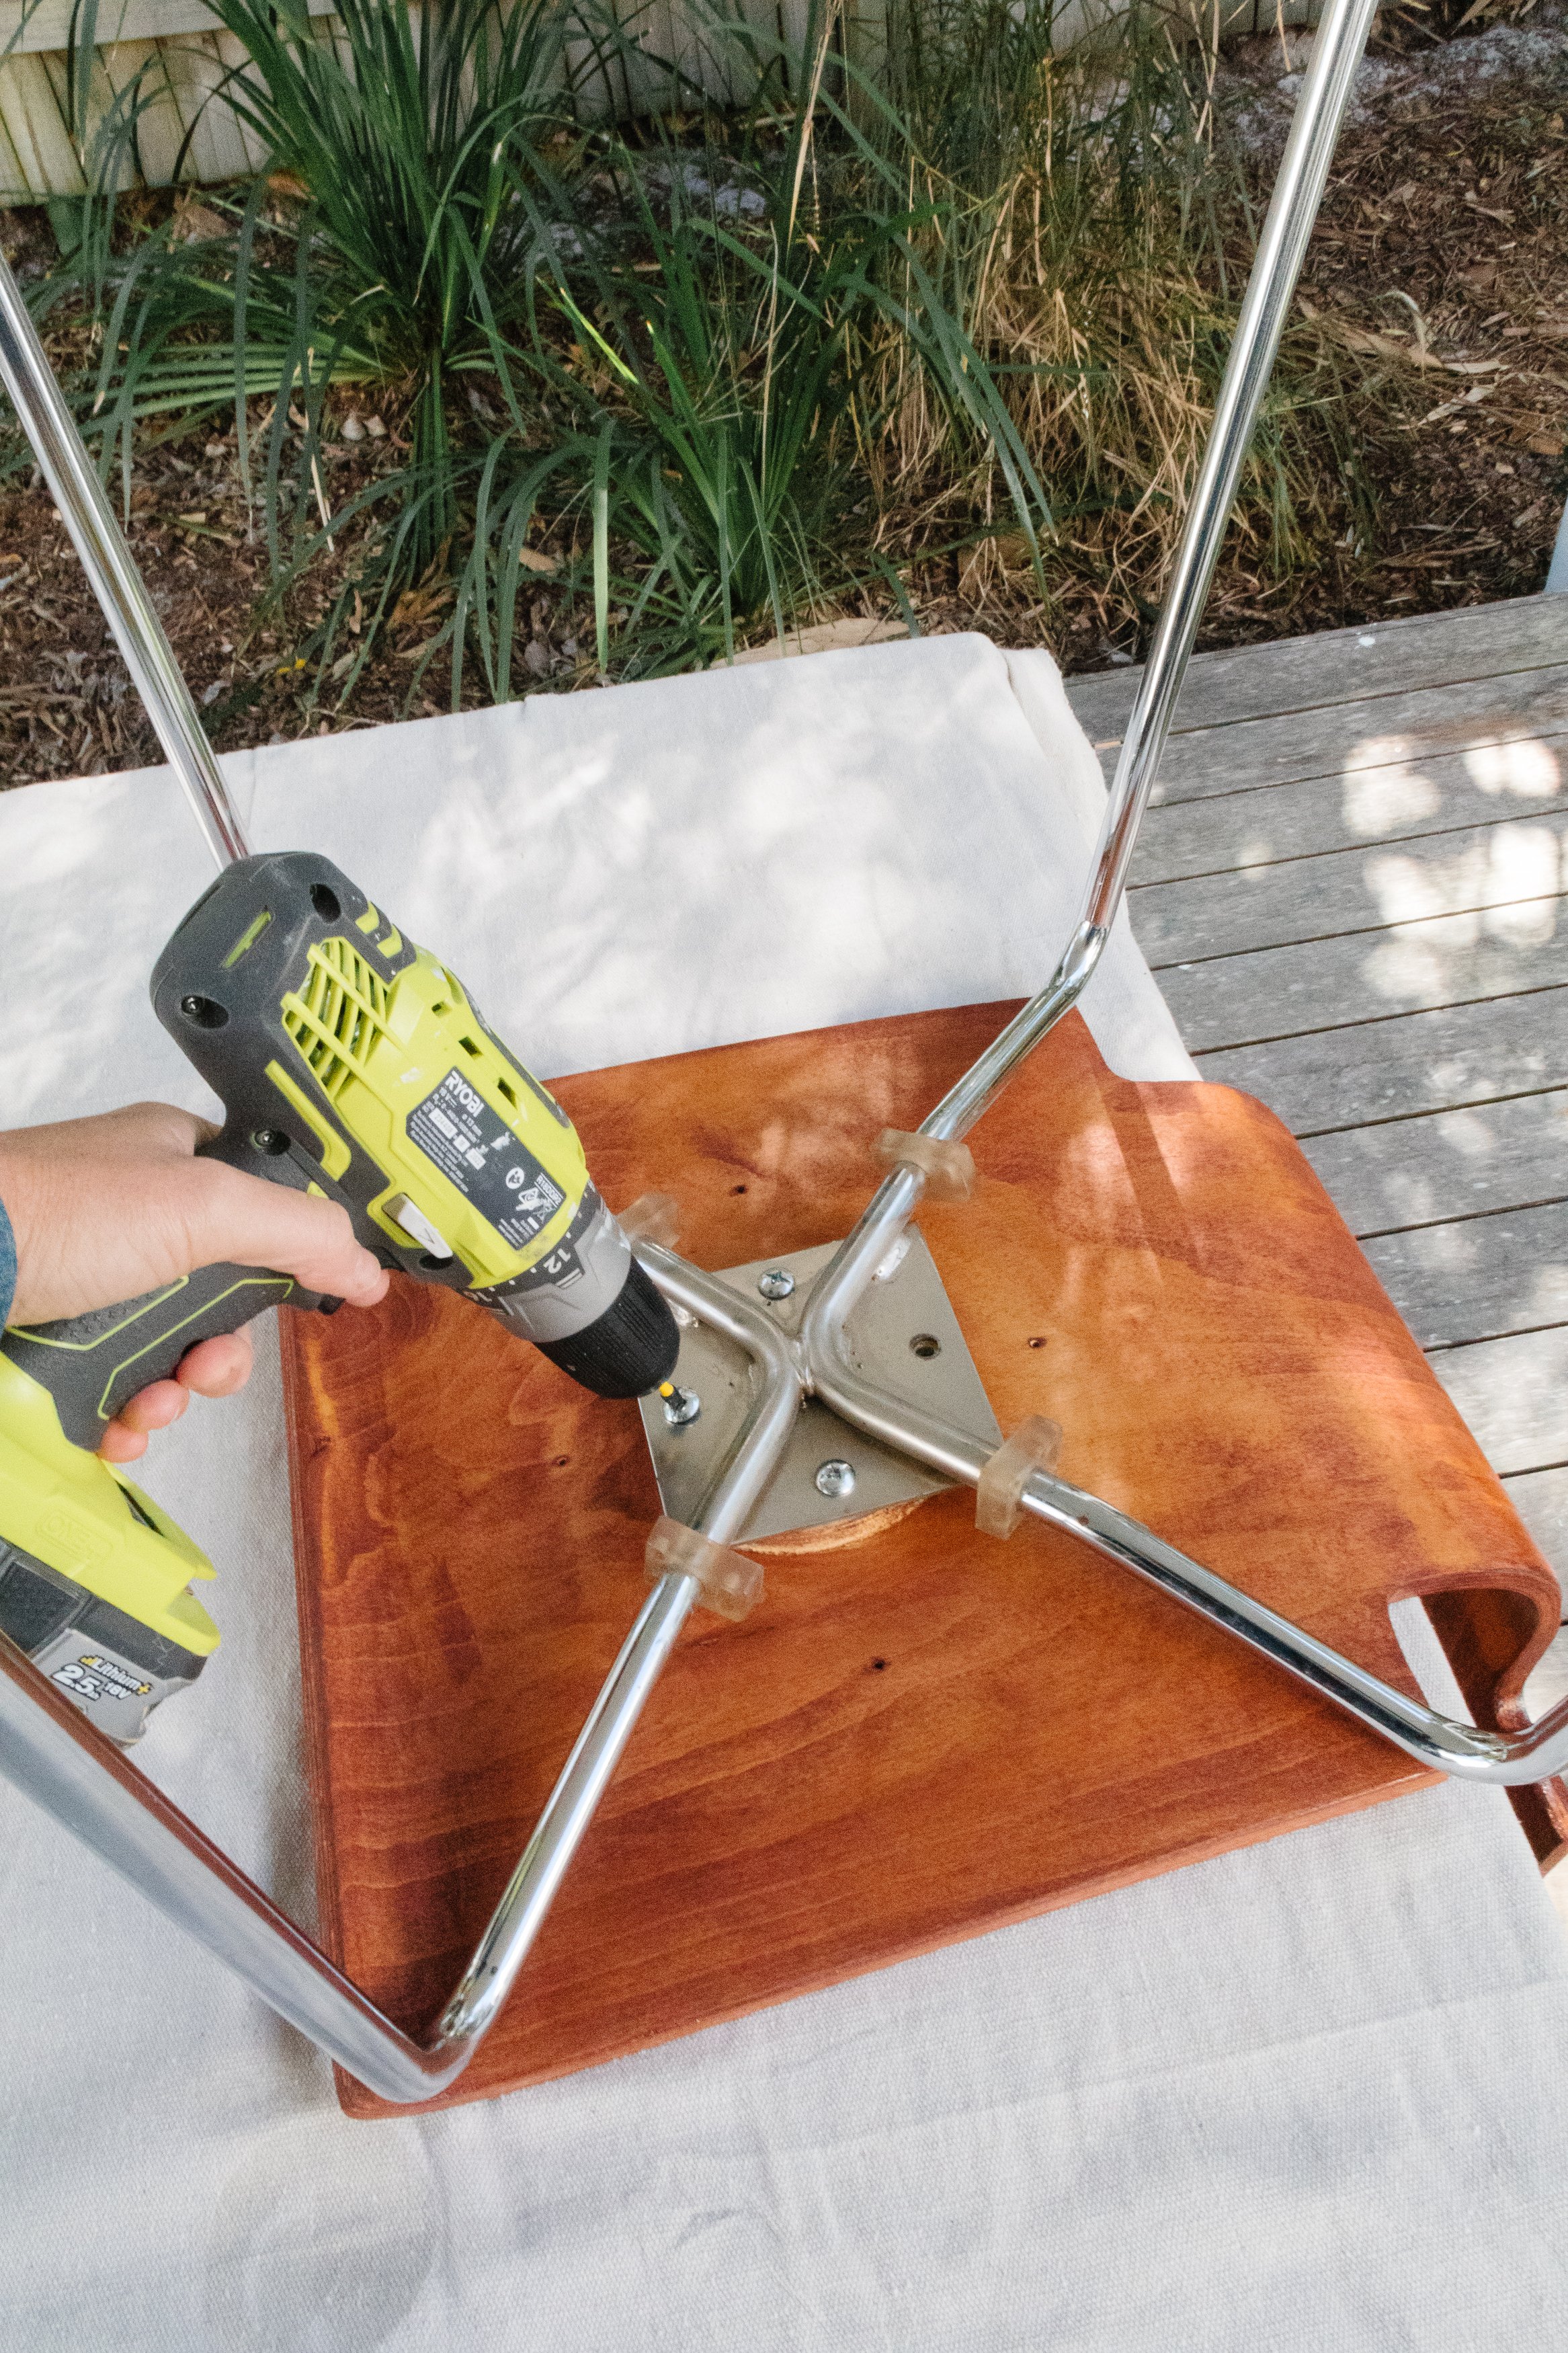
Step 6: When the varnish was completely dried, I installed the wooden seats back onto the chrome leg frames using my drill and the original screws. And that’s it!

Ta daaaa!
I am so in love with these sculptural chairs. I was really unsure if I would be able to cut the wood using my jigsaw, but after diving in and giving it a go I was pleasantly surprised. I know they're a little bit different and might not suit a lot of people, but that's what I love about them most. I love that they’re so unique and suit the style of our home. I’ve been tapping more and more into my own style lately, instead of following trends and it’s bringing me a lot of joy and satisfaction and I experiment with design. So, I hope you love this latest project as much as I do!